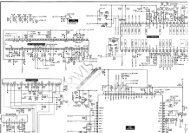
LCD TV SERVICE MANUAL - diagramas.diagram...
LCD TV SERVICE MANUAL - diagramas.diagram...
LCD TV SERVICE MANUAL - diagramas.diagram...

Create successful ePaper yourself
Turn your PDF publications into a flip-book with our unique Google optimized e-Paper software.
(1) Enter the adjustment mode of DDC<br />
- Set command delay time : 50ms<br />
- Enter the DDC adjustment mode at the same time heatrun<br />
mode when pushing the power on by power only key<br />
- Maintain the DDC adjustment mode with same condition<br />
of Heat-run (Maintain after AC off/on in status of Heat-run<br />
pattern display)<br />
(2) Release the DDC adjustment mode<br />
- Release the adjust mode after AC off/on or std-by off/on<br />
in status of finishing the Hear-run mode<br />
- Release the Adjust mode when receiving the aging off<br />
command(F3 00 00) from adjustment equipment<br />
- Need to transmit the aging off command to <strong>TV</strong> set after<br />
finishing the adjustment.<br />
- Check DDC adjust mode release by exit key and release<br />
DDC adjust mode<br />
(3) Enter the adjust mode of white balance<br />
- Enter the white balance adjustment mode with aging<br />
command(F3, 00, FF)<br />
* Luminance min value is 200cd/m 2 ≥ in the cool mode (For <strong>LCD</strong>)<br />
7-4. Adjustment of White Balance<br />
(for Manual adjustment)<br />
(1) Adjustment mode : Two modes (Cool and Warm)<br />
(Medium data is automatically calibrated by the Cool data)<br />
(2) Color analyzer(CA100+, CA210) should be used in the<br />
calibrated ch by CS-1000(<strong>LCD</strong> : CH9, PDP : CH10)<br />
(3) Operate the zero-calibration of the CA100+ or CA-210,<br />
then stick sensor to the module when adjusting.<br />
(4) For manual adjustment, it is also possible by the following<br />
sequence.<br />
1) Select white pattern of heat-run by pressing “POWER<br />
ON” key on remote control for adjustment then operate<br />
heat run longer than 15 minutes. (If not executed this<br />
step, the condition for W/B may be different.)<br />
2) Push “Exit” key.<br />
3) Change to the AV mode by remote control.(Push front-<br />
AV or Input key)<br />
4) Input external pattern(85% white pattern)<br />
5) Push the ADJ key two times (entering White Balance<br />
mode)<br />
6) Stick the sensor to the center of the screen and select<br />
each items (Red/Green/Blue Gain and Offset) using<br />
D/E(CH +/-) key on R/C.<br />
7) Adjust R/ G/ B Gain using F/G(VOL +/-) key on R/C.<br />
8) Adjust two modes (Cool and Warm)<br />
(Fix the one of R/G/B and change the others)<br />
9) When adjustment is completed, Exit adjustment mode<br />
using EXIT key on R/C.<br />
* CASE<br />
First adjust the coordinate far away from the target value(x, y).<br />
(1) x, y > target<br />
1) Decrease the R, G.<br />
(2) x, y < target<br />
1) First decrease the B gain,<br />
2) Decrease the one of the others.<br />
- In case of decreasing the x, decreasing the R : fix G<br />
- In case of decreasing the y, decreasing the G : fix R<br />
Copyright © 2008 LG Electronics. Inc. All right reserved.<br />
Only for training and service purposes<br />
- 12 -<br />
(3) x > target , y < target<br />
1) First decrease B, so make y a little more than the<br />
target.<br />
2) Adjust x value by decreasing the R<br />
(4) x < target , y > target<br />
1) First decrease B, so make x a little more than the<br />
target.<br />
2) Adjust x value by decreasing the G<br />
- Standard color coordinate and temperature when using the<br />
CA100+ or CA210 equipment<br />
Mode Color coordinate Temp ∆uv<br />
X Y<br />
Cool 0.276±0.002 0.283±0.002 11,000K 0.000<br />
Warm 0.313±0.002 0.329±0.002 6,500K 0.003<br />
** DDC Command set **<br />
Adjustment<br />
Aging On/Off<br />
Input select<br />
R GAIN<br />
G GAIN<br />
B GAIN<br />
R GAIN<br />
G GAIN<br />
B GAIN<br />
R GAIN<br />
G GAIN<br />
B GAIN<br />
CSM mode<br />
AUTO ADC<br />
EEPROM Read<br />
EEPROMWrite<br />
CMD(HEX)<br />
F3<br />
F4<br />
16<br />
18<br />
1A<br />
16<br />
18<br />
1A<br />
16<br />
18<br />
1A<br />
F2<br />
F1<br />
E7<br />
E8<br />
ADR<br />
00<br />
00<br />
00<br />
01<br />
02<br />
00<br />
00<br />
00<br />
00<br />
VALUE<br />
detail<br />
FF/00 FF : ON / OO : OFF<br />
0x10 : <strong>TV</strong><br />
0x20 : AV1<br />
0x21 : AV2<br />
0x40 : Component1<br />
0x41 : Component2<br />
0x60 : RGB<br />
0x90 : HDMI1<br />
0x91 : HDMI2<br />
00 - C0 GAIN adjustment<br />
00 - C0 CSM COOL<br />
00 - C0<br />
00 - C0 GAIN adjustment<br />
00 - C0 CSM NORMAL<br />
00 - C0<br />
00 - C0 GAIN adjustment<br />
00 - C0 CSM WARM<br />
00 - C0<br />
00 COOL<br />
01 NORMAL<br />
02 WARM<br />
0, 1, 2 0: Offset adjustment<br />
1: Gain adjustment<br />
2: Offset and Gain adjustment<br />
00 EEPROM read<br />
data EEPROM write<br />
LGE Internal Use Only