SOFTWARE INSTALLATION MANUAL - Commtech-Fastcom.com
SOFTWARE INSTALLATION MANUAL - Commtech-Fastcom.com
SOFTWARE INSTALLATION MANUAL - Commtech-Fastcom.com

You also want an ePaper? Increase the reach of your titles
YUMPU automatically turns print PDFs into web optimized ePapers that Google loves.
9011 E. 37 th STREET N.<br />
WICHITA, KANSAS 67226-2006<br />
(316) 636-1131<br />
FAX (316) 636-1163<br />
http://www.<strong>com</strong>mtech-fast<strong>com</strong>.<strong>com</strong>/<br />
COPYRIGHT © 2002, 2003, 2004, 2006, 2007, 2011<br />
All rights reserved, including those to reproduce this document or parts thereof in<br />
any form without permission in writing from <strong>Commtech</strong>, Inc.<br />
FASTCOM and SMART14 are trademarks of <strong>Commtech</strong>, Inc.<br />
IBM is a registered trademark of International Business Machines Corporation.<br />
Microsoft is a registered trademark of Microsoft Corporation.<br />
WINDOWS is a trademark of Microsoft Corporation.
REVISION NOTES<br />
REVISION PAGE NUMBER CHANGES MADE<br />
1.0 All Document created 11/21/2002<br />
1.1 1-3 Updated IRQ fix in 2K & XP; repaginated TOC<br />
1.2 1-3 Updated Windows XP and Windows 2000<br />
1.3 All Added <strong>Fast<strong>com</strong></strong>: 232/4-1M-PCI and<br />
Super<strong>Fast<strong>com</strong></strong>-232/4, reformatted text<br />
1.4 14-15 Changed to reflect new universal procedure for<br />
all Super<strong>Fast<strong>com</strong></strong> cards<br />
1.5 All Added page breaks to improve readability<br />
1.6 19-21 Added <strong>Fast<strong>com</strong></strong>: ESCC-PCI-335<br />
1.7 1-3 Added <strong>Fast<strong>com</strong></strong>: 422/4-PCI-335<br />
1.8 17-19, 23-24 Changed examples directory<br />
1.9 5-30 Changed wording of first step<br />
1.10 27-34 Added ESCC-PCMCIA installation instructions<br />
1.11<br />
Added links to the following manuals:<br />
3<br />
232/4-PCI-335<br />
3<br />
232/4-LPCI-335<br />
3<br />
422/2-PCI-335<br />
3<br />
422/2-LPCI-335<br />
26<br />
ESCC-LPCI-335<br />
1.12 34 Added links to the following manuals:<br />
Super<strong>Fast<strong>com</strong></strong>/1-104<br />
Super<strong>Fast<strong>com</strong></strong>/1-104-ET<br />
Super<strong>Fast<strong>com</strong></strong>/2-104<br />
Super<strong>Fast<strong>com</strong></strong>-cPCI<br />
Super<strong>Fast<strong>com</strong></strong>-cPCI-ET<br />
Super<strong>Fast<strong>com</strong></strong>-cPCI-RearI/O<br />
Super<strong>Fast<strong>com</strong></strong>-cPCI-RearI/O-ET<br />
1.13 6 Fixed numbering of Windows 2000 procedure<br />
1.14 31-34 Added GSCC installation procedure<br />
1.15 3 Added link to 232/8-PCI-335
Table of Contents<br />
<strong>Fast<strong>com</strong></strong>: Async-PCI-335 and Async-LPCI-335 Series Cards ......................... 1<br />
Windows XP ........................................................................................................................1<br />
Windows 2000 .....................................................................................................................2<br />
<strong>Fast<strong>com</strong></strong>: Async-PCI Series Cards .................................................................... 5<br />
Windows XP ........................................................................................................................5<br />
Windows 2000 .....................................................................................................................6<br />
Windows NT 4 .....................................................................................................................7<br />
Windows 95/98 ....................................................................................................................8<br />
Linux .................................................................................................................................. 10<br />
<strong>Fast<strong>com</strong></strong>: 232/4-1M-PCI..................................................................................... 13<br />
Windows XP ...................................................................................................................... 13<br />
Windows 2000 ................................................................................................................... 14<br />
Windows NT ...................................................................................................................... 15<br />
<strong>Fast<strong>com</strong></strong>: ESCC - PCI ........................................................................................ 17<br />
Windows XP ...................................................................................................................... 17<br />
Windows 2000 ................................................................................................................... 18<br />
Windows NT 4 ................................................................................................................... 19<br />
Windows 98 ....................................................................................................................... 20<br />
Windows 95 ....................................................................................................................... 21<br />
Linux .................................................................................................................................. 22<br />
<strong>Fast<strong>com</strong></strong>: ESCC-PCI-335 and ESCC-LPCI-335................................................ 23<br />
Windows XP ...................................................................................................................... 23<br />
Windows 2000 ................................................................................................................... 24<br />
Linux .................................................................................................................................. 25<br />
<strong>Fast<strong>com</strong></strong>: ESCC-PCMCIA.................................................................................. 27<br />
Windows XP ...................................................................................................................... 27<br />
Windows 2000 ................................................................................................................... 28<br />
Windows NT 4 ................................................................................................................... 29<br />
<strong>Fast<strong>com</strong></strong>: GSCC................................................................................................. 31<br />
Windows XP ...................................................................................................................... 31<br />
Windows 2000 ................................................................................................................... 32<br />
Linux .................................................................................................................................. 33<br />
Super<strong>Fast<strong>com</strong></strong> Series Cards ............................................................................ 35<br />
Windows XP ...................................................................................................................... 35<br />
Windows 2000 ................................................................................................................... 36<br />
Windows NT 4 ................................................................................................................... 37<br />
Linux .................................................................................................................................. 38
<strong>Fast<strong>com</strong></strong>: Async-PCI-335 and Async-LPCI-335 Series Cards<br />
Windows XP<br />
1. After installing the <strong>Fast<strong>com</strong></strong> Universal PCI board, start your <strong>com</strong>puter. The “Found New Hardware”<br />
wizard opens after login to Windows.<br />
(Skip to step 5 if you have already copied the software from the CD or the web)<br />
2. Before continuing, insert the <strong>Fast<strong>com</strong></strong> CD that was supplied with the board into your CD Rom drive. If<br />
the CD fails to start automatically, click on your START button and choose RUN, BROWSE to your CD-<br />
Rom drive, and select the file cdinstall.exe. Click Open, then OK.<br />
3. Click to accept the license agreement. At the <strong>Commtech</strong>, <strong>Fast<strong>com</strong></strong> menu screen, click the button to<br />
Copy Software. Locate the family of cards that corresponds to your card (<strong>Fast<strong>com</strong></strong> RS232/422 PCI-<br />
335) and click the Copy Disk button.<br />
4. Choose a directory to install to (default = C:\AsyncPCI335) and click OK. Files will be copied to the<br />
directory you specified, then click Exit, and click Exit again.<br />
5. Click Install from a list or a specified location. Click Next.<br />
6. Click Search for the best driver in these locations. Check “Include this location in the search.” Uncheck<br />
“Search removable media.” Click Browse and select the XP folder in the location you specified in step<br />
4. Click OK and then click Next.<br />
7. A message will appear about Windows Logo testing. Click Continue Anyway.<br />
8. Click Finish. The Found New Hardware message should indicate that it has found a Multifunction<br />
Device and that it is looking for the software for it.<br />
9. Click Install from a list or specified location. Click Next.<br />
10. Click Search for the best driver in these locations. Check “Include this location in the search.” Uncheck<br />
“Search removable media.” Click Browse and select the XP folder in the location you specified in step<br />
4. Click OK and then click Next.<br />
11. A message may appear about Windows Logo testing. Click Continue Anyway.<br />
12. Click Finish (if there are more ports on the board, number 8 – 12 will be repeated for each port).<br />
13. You may be asked to restart your PC.<br />
14. Now open your device manager: Right click on My Computer, choose Properties, choose the Hardware<br />
tab, and click the Device Manager button.<br />
15. Under the “Ports (COM & LPT)” heading, each of the Com ports that you just installed will be listed as<br />
<strong>Fast<strong>com</strong></strong> AsyncPCI Communications Port (COM#).<br />
16. If you want to change the COM port assignments, you can do so in the Device Manager. Right click on<br />
My Computer -> Properties -> Hardware -> Device Manager -> Ports. Double click on the one you<br />
want to change. Click the port settings tab and the advanced button. At the bottom of the Advanced<br />
Settings window is the Com Port Number; change this to be whatever you wish the port to be mapped<br />
to. Note, the Device Manager must be closed and re-opened, before it will display the new COM<br />
number.<br />
17. If you wish to change the settings of the <strong>Fast<strong>com</strong></strong> board, go to the Device Manager and open the<br />
properties page for the port you would like to change. Then click on the <strong>Fast<strong>com</strong></strong> AsyncPCI-335 Serial<br />
Settings tab. Here you will be able to adjust the <strong>Fast<strong>com</strong></strong> specific settings of the port. Refer to the<br />
hardware manual for detailed descriptions of the settings page.<br />
18. Please refer to the hardware manual for instructions on testing your installation.<br />
1
2 <strong>Fast<strong>com</strong></strong>: Async-PCI-335 and Async-LPCI-335 Series Cards<br />
Windows 2000<br />
1. After installing the <strong>Fast<strong>com</strong></strong> Universal PCI board, start your <strong>com</strong>puter. The “Found New Hardware”<br />
wizard opens after login to Windows.<br />
(Skip to step 5 if you have already copied the software from the CD or the web)<br />
2. Before continuing, insert the <strong>Fast<strong>com</strong></strong> CD that was supplied with the board into your CD Rom drive. If<br />
the CD fails to start automatically, click on your START button and choose RUN, BROWSE to your CD-<br />
Rom drive, and select the file cdinstall.exe. Click Open, then OK.<br />
3. Click to accept the license agreement. At the <strong>Commtech</strong>, <strong>Fast<strong>com</strong></strong> menu screen, click the button to<br />
Copy Software. Locate the family of cards that corresponds to your card (<strong>Fast<strong>com</strong></strong> RS232/422 PCI)<br />
and click the Copy Disk button.<br />
4. Choose a directory to install to (default=c:\fast<strong>com</strong>) and click OK. Files will be copied to the directory<br />
you specified, then click Exit, and click Exit again.<br />
5. From the “Found New Hardware” wizard, click Next to continue. This wizard will <strong>com</strong>plete the<br />
installation for this device: PCI Serial Port. Select "Search for a suitable driver for my device" and click<br />
Next.<br />
6. Put a checkmark in the box for "Specify a location" and clear the rest of the boxes, then click Next.<br />
7. Click the Browse button and locate the directory you specified above (default = c:\fast<strong>com</strong>) and double<br />
click the "w2k" directory. Click Open and OK.<br />
8. "Windows found a driver for this device" and the location where you just browsed should match. Click<br />
Next.<br />
9. Digital Signature Not Found, Click Yes.<br />
10. Completing the found new hardware wizard, click Finish.<br />
11. Another "Found New Hardware" windows will open, indicating it has found a "Multifunction Device,” this<br />
is the first <strong>com</strong>munication port on the board.<br />
12. From the “Found New Hardware” wizard, click Next to continue. This wizard will <strong>com</strong>plete the<br />
installation for this device: Multifunction Device. Select "Search for a suitable driver for my device" and<br />
click Next<br />
13. Put a checkmark in the box for "Specify a location" and clear the rest of the boxes, then click Next.<br />
14. Click the Browse button and locate the directory you specified above (default = c:\fast<strong>com</strong>) and double<br />
click the "w2k" directory. Click Open and OK.<br />
15. "Windows found a driver for this device" and the location where you just browsed should match. Click<br />
Next.<br />
16. Digital Signature Not Found, Click Yes.<br />
17. Completing the found new hardware wizard, click Finish.<br />
18. Several Hardware Wizard windows will open and close (one for each additional port on the board),<br />
automatically installing the software for the additional ports.<br />
19. Now open your device manager: Right click on My Computer, choose Properties, choose the hardware<br />
tab, and click the device manager button. Under Ports (COM & LPT) heading, each of the Com ports<br />
that you just installed will be listed as <strong>Fast<strong>com</strong></strong> AsyncPCI Communications Port (COM#).<br />
20. You may be asked to restart your <strong>com</strong>puter for the changes to take affect.<br />
21. If you want to change the COM port assignments, you can do so in the Device Manager. Right -click on<br />
My Computer -> Properties -> Hardware -> Device Manager -> Ports. Double click on the one you<br />
want to change. Click the port settings tab and the advanced button. At the bottom of the Advanced<br />
Settings window is the Com Port Number; change this to be whatever you wish the port to be mapped<br />
to.
<strong>Fast<strong>com</strong></strong>: Async-PCI-335 and Async-LPCI-335 Series Cards 3<br />
22. If you wish to change the settings of the <strong>Fast<strong>com</strong></strong> board, go to the Device Manager and open the<br />
properties page for the port you would like to change. Then click on the <strong>Fast<strong>com</strong></strong> AsyncPCI-335 Serial<br />
Settings tab. Here you will be able to adjust the <strong>Fast<strong>com</strong></strong> specific settings of the port. Refer to the<br />
hardware manual for detailed descriptions of the settings page.<br />
23. Please refer to the hardware manual for instructions on testing your installation.<br />
Return to Product Manual<br />
<strong>Fast<strong>com</strong></strong>: 232/4-PCI-335<br />
<strong>Fast<strong>com</strong></strong>: 232/4-LPCI-335<br />
<strong>Fast<strong>com</strong></strong>: 232/8-PCI-335<br />
<strong>Fast<strong>com</strong></strong>: 422/2-PCI-335<br />
<strong>Fast<strong>com</strong></strong>: 422/2-LPCI-335<br />
<strong>Fast<strong>com</strong></strong>: 422/4-PCI-335
4 <strong>Fast<strong>com</strong></strong>: Async-PCI-335 and Async-LPCI-335 Series Cards<br />
This page intentionally left blank.
<strong>Fast<strong>com</strong></strong>: Async-PCI Series Cards<br />
Windows XP<br />
1. After installing the <strong>Fast<strong>com</strong></strong>: PCI board, start your <strong>com</strong>puter. The “Found New Hardware” wizard opens<br />
after login to Windows. If you are installing more than one <strong>Fast<strong>com</strong></strong> board into a single PC, plug all of<br />
them into free PCI slots and install all of the boards at one time.<br />
(Skip to step 5 if you have already copied the software from the CD or the web)<br />
2. Before continuing, insert the <strong>Fast<strong>com</strong></strong> CD that was supplied with the board into your CD Rom drive. If the<br />
CD fails to start automatically, click on your START button and choose RUN, BROWSE to your CD-Rom<br />
drive, and select the file cdinstall.exe. Click Open, then OK.<br />
3. Click to accept the license agreement. At the <strong>Commtech</strong>, <strong>Fast<strong>com</strong></strong> menu screen, click the button to Copy<br />
Software. Locate the family of cards that corresponds to your card (<strong>Fast<strong>com</strong></strong> RS232/422 PCI) and click<br />
the Copy Disk button.<br />
4. Choose a directory to install to (default=c:\fast<strong>com</strong>) and click OK. Files will be copied to the directory you<br />
specified, then click Exit, and click Exit again.<br />
5. Click Install from a list or a specified location. Click Next.<br />
6. Click Search for the best driver in these locations. Check “Include this location in the search.” Uncheck<br />
“Search removable media.” Click Browse and select the XP folder in the location you specified in step 4.<br />
Click OK and then click Next.<br />
7. A message will appear about Windows Logo testing. Click Continue Anyway.<br />
8. Click Finish. The Found New Hardware message should indicate that it has found <strong>com</strong>munication ports<br />
and that it is installing the software for them.<br />
9. You may be asked to restart your PC.<br />
10. Now open your device manager: Right click on My Computer, choose Properties, choose the Hardware<br />
tab, and click the Device Manager button.<br />
11. Under the “Ports (COM & LPT)” heading, each of the Com ports that you just installed will be listed as<br />
<strong>Fast<strong>com</strong></strong> AsyncPCI Communications Port (COM#).<br />
12. If you want to change the COM port assignments, you can do so in the Device Manager. Right click on<br />
My Computer -> Properties -> Hardware -> Device Manager -> Ports. Double click on the one you want<br />
to change. Click the port settings tab and the advanced button. At the bottom of the Advanced Settings<br />
window is the Com Port Number; change this to be whatever you wish the port to be mapped to.<br />
13. If you wish to change the settings of the <strong>Fast<strong>com</strong></strong> board, go to the Device Manager and open the<br />
properties page for the port you would like to change. Then click on the <strong>Fast<strong>com</strong></strong> Serial Settings tab.<br />
Here you will be able to adjust the <strong>Fast<strong>com</strong></strong> specific settings of the port. Note that any change to the<br />
BaudTable will change all ports of a board; you cannot set multiple baud rates across the different ports<br />
of a single board. Refer to the hardware manual for more detailed descriptions of the settings page.<br />
14. Please refer to the hardware manual for instructions on testing your installation.<br />
5
6 <strong>Fast<strong>com</strong></strong>: Async-PCI Series Cards<br />
Windows 2000<br />
1. After installing the <strong>Fast<strong>com</strong></strong>: PCI board, start your <strong>com</strong>puter. The “Found New Hardware” wizard opens<br />
after login to Windows. If you are installing more than one <strong>Fast<strong>com</strong></strong> board into a single PC, plug all of<br />
them into free PCI slots and install all of the boards at one time.<br />
(Skip to step 5 if you have already copied the software from the CD or the web)<br />
2. Before continuing, insert the <strong>Fast<strong>com</strong></strong> CD that was supplied with the board into your CD Rom drive. If the<br />
CD fails to start automatically, click on your START button and choose RUN, BROWSE to your CD-Rom<br />
drive, and select the file cdinstall.exe. Click Open, then OK.<br />
3. Click to accept the license agreement. At the <strong>Commtech</strong>, <strong>Fast<strong>com</strong></strong> menu screen, click the button to Copy<br />
Software. Locate the family of cards that corresponds to your card (<strong>Fast<strong>com</strong></strong> RS232/422 PCI) and click<br />
the Copy Disk button.<br />
4. Choose a directory to install to (default=c:\fast<strong>com</strong>) and click OK. Files will be copied to the directory you<br />
specified, then click Exit, and click Exit again.<br />
5. From the “Found New Hardware” wizard, click Next to continue. This wizard will <strong>com</strong>plete the installation<br />
for this device: PCI Serial Port. Select "Search for a suitable driver for my device" and click Next.<br />
6. Put a checkmark in the box for "Specify a location" and clear the rest of the boxes, then click Next.<br />
7. Click the Browse button and locate the directory you specified above (default = c:\fast<strong>com</strong>) and double<br />
click the "w2k" directory. Click Open and OK.<br />
8. "Windows found a driver for this device" and the location where you just browsed should match. Click<br />
Next.<br />
9. Digital Signature Not Found, Click Yes.<br />
10. Completing the found new hardware wizard, click Finish.<br />
11. Several "Found New Hardware" windows will open and close automatically, indicating "Communication<br />
Port." You may be asked to restart your <strong>com</strong>puter after each port is installed. Do not do this! Instead<br />
wait until the last COM port is installed, and then restart your <strong>com</strong>puter.<br />
12. Now open your device manager: Right click on My Computer, choose Properties, choose the hardware<br />
tab, and click the device manager button. Under Ports (COM & LPT) heading, each of the Com ports that<br />
you just installed will be listed as <strong>Fast<strong>com</strong></strong> AsyncPCI Communications Port (COM#).<br />
13. You may be asked to restart your <strong>com</strong>puter for the changes to take affect.<br />
14. If you want to change the COM port assignments, you can do so in the Device Manager. Right -click on<br />
My Computer -> Properties -> Hardware -> Device Manager -> Ports. Double click on the one you want<br />
to change. Click the port settings tab and the advanced button. At the bottom of the Advanced Settings<br />
window is the Com Port Number; change this to be whatever you wish the port to be mapped to.<br />
15. If you wish to change the settings of the <strong>Fast<strong>com</strong></strong> board, go to the Device Manager and open the<br />
properties page for the port you would like to change. Then click on the <strong>Fast<strong>com</strong></strong> Serial Settings tab.<br />
Here you will be able to adjust the <strong>Fast<strong>com</strong></strong> specific settings of the port. Note that any change to the<br />
BaudTable will change all ports of a board; you cannot set multiple baud rates across the different ports<br />
of a single board. Refer to the hardware manual for more detailed descriptions of the settings page.<br />
16. Please refer to the hardware manual for instructions on testing your installation.
<strong>Fast<strong>com</strong></strong>: Async-PCI Series Cards 7<br />
Windows NT 4<br />
1. After installing the <strong>Fast<strong>com</strong></strong>: PCI board, start your <strong>com</strong>puter. Boot Windows NT and log on as the<br />
administrator. If you are installing more than one <strong>Fast<strong>com</strong></strong> board into a single PC, plug all of them into<br />
free PCI slots and install all of the boards at one time.<br />
(Skip to step 5 if you have already copied the software from the CD or the web)<br />
2. Before continuing, insert the <strong>Fast<strong>com</strong></strong> CD that was supplied with the board into your CD Rom drive. If<br />
the CD fails to start automatically, click on your START button and choose RUN, BROWSE to your CD-<br />
Rom drive, and select the file cdinstall.exe. Click Open, then OK.<br />
3. Click to accept the license agreement. At the <strong>Commtech</strong>, <strong>Fast<strong>com</strong></strong> menu screen, click the button to<br />
Copy Software. Locate the family of cards that corresponds to your card (<strong>Fast<strong>com</strong></strong> RS232/422 PCI)<br />
and click the Copy Disk button.<br />
4. Choose a directory to install to (default=c:\fast<strong>com</strong>) and click OK. Files will be copied to the directory<br />
you specified, then click Exit, and click Exit again.<br />
5. From the Start menu, select Run and type in c:\FASTCOM\nt\SERIALGT.EXE. Select OK. NT will<br />
return Init Error. Click OK.<br />
6. The <strong>Fast<strong>com</strong></strong>: Serial Settings window will display. Click the Install Driver button at the bottom.<br />
7. Each port for each board installed will be listed. The naming convention can be interpreted as follows:<br />
FC2328P_1_0 <strong>Fast<strong>com</strong></strong>: 232/8-PCI, board 1, port 1<br />
The board number will increment for each <strong>Fast<strong>com</strong></strong> board installed. The port number will restart at zero<br />
for each individual board.<br />
8. Select the first port (_0) for each board. Baud rate settings can be adjusted for the base channel only,<br />
except for CLOCK DIVISOR. Refer to the section in the hardware manual titled FASTCOM: SERIAL<br />
SETTINGS for a more detailed description of these settings.<br />
9. To the left of the CLOCK DIVISOR check box you can see the COM: number that is assigned to this<br />
port. These COM: numbers are assigned automatically when you install the driver, starting at COM: 5.<br />
If you already have COMs at 5 and above, you must change the COM numbers to something not used.<br />
10. You can manually change the COM: number to any unused number. Below the baud rate substitution<br />
table you will find a box labeled "COM:.” You can use this box to change the COM number of the port;<br />
it can be used to change each of the installed ports’ COM numbers.<br />
11. Make a note the Windows NT COM: port assignments that have been made. You must know these<br />
assignments to access the ports.<br />
12. When all changes have been made, select Exit. You will be reminded that you must reboot your PC for<br />
your changes to take effect. Your PC will not automatically reboot. This only applies to changes you<br />
have made to the default settings. It is not necessary to reboot if you have not made changes to the<br />
settings.<br />
13. Please refer to the hardware manual for instructions on testing your installation.
8 <strong>Fast<strong>com</strong></strong>: Async-PCI Series Cards<br />
Windows 95/98<br />
1. After installing the <strong>Fast<strong>com</strong></strong>: PCI board, start your <strong>com</strong>puter and boot Windows. If you are installing<br />
more than one <strong>Fast<strong>com</strong></strong> board into a single PC, plug all of them into free PCI slots and install all of the<br />
boards at one time.<br />
2. If the Hardware Wizard starts, you should use the drivers located in the 98 directory of the installed<br />
software. If the Hardware Wizard doesn’t start, you are using an older version of Windows 95; please<br />
use the drivers located in the 95 directory of the installed software.<br />
(Skip to step 8 if you have already copied the software from the CD or the web)<br />
3. If the hardware wizard started, click cancel so we can copy the software needed before we install.<br />
4. Insert the <strong>Fast<strong>com</strong></strong> CD that was supplied with the board into your CD-Rom drive. If the CD fails to start<br />
automatically, click on your START button and choose RUN, BROWSE to your CD-Rom drive, and<br />
select the file cdinstall.exe. Click Open, then OK.<br />
5. Click to accept the license agreement. At the <strong>Commtech</strong>, <strong>Fast<strong>com</strong></strong> menu screen, click the button to<br />
Copy Software. Locate the family of cards that corresponds to your card (<strong>Fast<strong>com</strong></strong> RS232/422 PCI)<br />
and click the Copy Disk button.<br />
6. Choose a directory to install to (default=c:\fast<strong>com</strong>) and click OK. Files will be copied to the directory<br />
you specified, then click Exit, and click Exit again.<br />
7. Restart the hardware wizard: right click on My Computer, go to properties, and select the Device<br />
Manager tab. Click Refresh. Users of 95 may need to select Start -> Settings -> Control Panel -> Add<br />
New Hardware to restart the wizard.<br />
8. Add New Hardware wizard will start and find a PCI Serial Controller. Click Next. Check “Specify a<br />
location;” uncheck all others. Click Browse and select the c:\fast<strong>com</strong>\95-98 directory (see step one to<br />
determine which one you should use). Click Next.<br />
9. It should find the updated <strong>Fast<strong>com</strong></strong>: PCI driver. Click Next. Make sure the location of the driver is the<br />
same directory you just pointed to (\fast<strong>com</strong>\95-98). Click Next. If it asks for the location of another file,<br />
point it to the same install directory and click OK.<br />
10. <strong>Fast<strong>com</strong></strong>: xxx PCI Windows finished installing the software. Click finish. Restart your PC.<br />
11. After Windows 95/98 finishes loading, select Run from the Start menu and type<br />
c:\<strong>Fast<strong>com</strong></strong>\98\SERIALGT.EXE Select OK.<br />
12. Adjust the settings as needed. Below the baud rate substitution table you will find a box labeled<br />
"COM:.” This box will be blank. To the left of the CLOCK DIVISOR check box you can see the COM:<br />
number that is assigned to this port. These COM: numbers are assigned automatically when you install<br />
the driver, starting at COM: 5. You can manually change the COM: number to any unused number.<br />
Refer to the section in the hardware manual titled FASTCOM: SERIAL SETTINGS for a more detailed<br />
description of these settings.<br />
13. The <strong>Fast<strong>com</strong></strong> PCI Drivers will keep track of all <strong>Fast<strong>com</strong></strong> PCI boards which you install, and will avoid<br />
COM: port assignment conflicts. These assignments may create conflicts with other COM: port<br />
assignments you have previously made. In order to check this, you will need to reboot the <strong>com</strong>puter,<br />
then open the Start menu, select Settings -> Control Panel -> System -> Device Manager -> Ports<br />
(COM & LPT). If you see conflicts, rerun c:\FASTCOM\98\SERIALGT.EXE and assign new COM: port<br />
numbers to the conflicting ports.<br />
14. Run SERIALGT.EXE again and verify your settings. Note the Windows 95/98 COM: port assignments<br />
that have been made.<br />
(Note: Any time you make changes in the serialgt.exe program, you will need to reboot your machine<br />
before they will take effect. If you do not make changes, you do not need to reboot.)
<strong>Fast<strong>com</strong></strong>: Async-PCI Series Cards 9<br />
15. Once you have assigned COM port numbers to each of the ports, selected the options you would like to<br />
use, and you do not see any conflicts, you are ready to use your new ports.<br />
16. Please refer to the hardware manual for instructions on testing your installation.
10 <strong>Fast<strong>com</strong></strong>: Async-PCI Series Cards<br />
Linux<br />
1. After installing the <strong>Fast<strong>com</strong></strong>: PCI board, start your <strong>com</strong>puter, boot Linux. Ignore any messages about<br />
found new hardware. If you are installing more than one <strong>Fast<strong>com</strong></strong> board into a single PC, plug all of<br />
them into free PCI slots and install all of the boards at one time.<br />
2. Use the tarball on the CD or download a new one from the web. Run "tar -xvzf fast<strong>com</strong>-pci-linux.tar.gz"<br />
(without quotes) to expand the file in the PWD.<br />
3. > cd fast<strong>com</strong>-pci-linux<br />
4. > cd fast<strong>com</strong>-pci-utils<br />
(These steps (5-9) only need to be executed once after initial download/install.)<br />
5. > ./config<br />
6. > make<br />
7. > make install<br />
8. > fast<strong>com</strong>_setup<br />
9. Select installed board from menu.<br />
a. Enter clock rate (us 1843200.0 for standard baud rates).<br />
b. May have additional settings depending on card installed.<br />
i. CTS disabled? Yes will disable CTS from the connector and always return true.<br />
ii. 485 mode enabled? Yes will enable 485 mode, no will disable 485 mode.<br />
iii. RX ECHO cancel enabled? Yes will disable the RX line during transmits. (Note there is a<br />
software echo that is enabled and disabled with stty)<br />
iv. Configure RTS as RS-485 driver Enable?<br />
1. Yes will control the 485 transmitter with the RTS line.<br />
2. No will control the 485 transmitter with the OUT1 line (facilitates automatic 485<br />
control using special feature of 16c850).<br />
c. Exit and save config from menu.<br />
(Steps 10 - 12 must be executed at each boot/reboot (as root).)<br />
10. > fast<strong>com</strong>_config (Note the values for IRQ and I/O).<br />
11. > setserial -b /dev/ttySxx port 0xyyyy irq zz autoconfig<br />
(Note: If your card supports 485 mode and you wish to enable 485, replace the autoconfig with "uart 16550")<br />
(Note: If your card is a four port or an eight-port card, include "fourport" in the setserial <strong>com</strong>mand enabling<br />
the interrupt status register.)<br />
(Note: xx is a number; address yyyy & zzz are reported to you by fast<strong>com</strong>_config)<br />
12. (Optional) > stty -F /dev/fast<strong>com</strong>1 ospeed 115200 ispeed 115200 parenb -hupcl –icrnl -icanon min 16 –<br />
echo<br />
Linux Examples:<br />
> fast<strong>com</strong>_config<br />
<strong>Fast<strong>com</strong></strong>: 422/2-PCI IRQ:10 I/O:0x6600<br />
> setserial -b /dev/ttyS3 port 0x6600 irq 10 autoconfig (the number used /dev/ttyS? is up to you)
<strong>Fast<strong>com</strong></strong>: Async-PCI Series Cards 11<br />
> setserial -b /dev/ttyS4 port 0x6608 irq 10 autoconfig (the number used /dev/ttyS? is up to you)<br />
or<br />
> setserial -b /dev/ttyS7 port 0x6600 irq 10 uart 16550 ^fourport (to enable 485 and ISR support).<br />
or a more <strong>com</strong>plex configuration for you control hounds out there:<br />
> fast<strong>com</strong>_config<br />
<strong>Fast<strong>com</strong></strong>: 422/4-PCI IRQ:4 I/O:xe8e0<br />
> setserial -b /dev/fast<strong>com</strong>1 port 0xe8e0 irq 4 uart 16550 fourport baud_base 115200<br />
> setserial -b /dev/fast<strong>com</strong>2 port 0xe8e8 irq 4 uart 16550 fourport baud_base 115200<br />
> setserial -b /dev/fast<strong>com</strong>3 port 0xe8f0 irq 4 uart 16550 fourport baud_base 115200<br />
> setserial -b /dev/fast<strong>com</strong>4 port 0xe8f8 irq 4 uart 16550 fourport baud_base 115200<br />
> stty -F /dev/fast<strong>com</strong>1 ospeed 115200 ispeed 115200 parenb -hupcl –icrnl -icanon min 16 –echo<br />
> stty -F /dev/fast<strong>com</strong>2 ospeed 115200 ispeed 115200 parenb -hupcl –icrnl -icanon min 16 –echo<br />
> stty -F /dev/fast<strong>com</strong>3 ospeed 115200 ispeed 115200 parenb -hupcl –icrnl -icanon min 16 –echo<br />
> stty -F /dev/fast<strong>com</strong>4 ospeed 115200 ispeed 115200 parenb -hupcl –icrnl -icanon min 16 –echo<br />
See the manual pages for stty and setserial for a more in-depth description of their options.<br />
Return to Product Manual<br />
<strong>Fast<strong>com</strong></strong>: 232/4-PCI<br />
<strong>Fast<strong>com</strong></strong>: 232/8-PCI<br />
<strong>Fast<strong>com</strong></strong>: IG232/2-PCI<br />
<strong>Fast<strong>com</strong></strong>: 422/2-PCI<br />
<strong>Fast<strong>com</strong></strong>: 422/4-PCI<br />
<strong>Fast<strong>com</strong></strong>: IG422/1-PCI
12 <strong>Fast<strong>com</strong></strong>: Async-PCI Series Cards<br />
This page intentionally left blank.
<strong>Fast<strong>com</strong></strong>: 232/4-1M-PCI<br />
Windows XP<br />
1. After installing the <strong>Fast<strong>com</strong></strong>: 232/4-1M into a PCI slot, start your <strong>com</strong>puter. The “Found New Hardware<br />
wizard opens after login to Windows. If you are installing more than one <strong>Fast<strong>com</strong></strong> board into a single<br />
PC, plug all of them into free PCI slots and install all of the boards at one time.<br />
(Skip to step 5 if you have already copied the software from the CD or the web)<br />
2. Before continuing, insert the <strong>Fast<strong>com</strong></strong> CD that was supplied with the board into your CD Rom drive. If<br />
the CD fails to start automatically, click on your START button and choose RUN, BROWSE to your CD-<br />
Rom drive, and select the file cdinstall.exe. Click Open, then OK.<br />
3. Click to accept the license agreement. At the <strong>Commtech</strong>, <strong>Fast<strong>com</strong></strong> menu screen, click the button to<br />
Copy Software. Locate the family of cards that corresponds to your card (<strong>Fast<strong>com</strong></strong>: 232/4-1M PCI) and<br />
click the Copy Disk button.<br />
4. Choose a directory to install to (default=c:\fc23241m) and click OK. Files will be copied to the directory<br />
you specified, then click Exit, and click Exit again.<br />
5. The Found New Hardware Wizard will appear indicating that it would like to install software for PCI<br />
Serial Port.<br />
6. Select Install from a list or specific location and click Next.<br />
7. Check the box next to Include this location in the search, and browse to the folder specified in step four<br />
above. Clear all other check boxes. Click Next.<br />
8. A window will open indicating that the <strong>Fast<strong>com</strong></strong> 232/4-1M has not passed Windows Logo testing. Click<br />
Continue Anyway.<br />
9. Completing the Found New Hardware Wizard, Click Finish.<br />
10. The Found New Hardware Wizard box will reappear indicating that it would like to install software for a<br />
Multifunction Device.<br />
11. Select Install from a list or specific location and click Next.<br />
12. Check the box next to Include this location in the search and browse to the xp folder found in the<br />
location specified above. Click Next.<br />
13. A window will open indicating that the <strong>Fast<strong>com</strong></strong> MegaBuad Communications Port has not passed<br />
Windows Logo testing. Click Continue Anyway.<br />
14. A Found New Hardware Wizard window will open up for each of the additional ports on your card. You<br />
may now use the Install the Software Automatically (Re<strong>com</strong>mended) button and click Next.<br />
15. A taskbar information window will open indicating that Your new hardware is installed and ready to use.<br />
16. You may be asked to reboot your machine. Your new <strong>Fast<strong>com</strong></strong> Ports are now ready for use.<br />
13
14 <strong>Fast<strong>com</strong></strong>: 232/4-1M-PCI<br />
Windows 2000<br />
1. After installing the <strong>Fast<strong>com</strong></strong>: <strong>Fast<strong>com</strong></strong>: 232/4-1M board into a PCI slot, start your <strong>com</strong>puter. The “Found<br />
New Hardware” wizard opens after login to Windows. If you are installing more than one <strong>Fast<strong>com</strong></strong> board<br />
into a single PC, plug all of them into free PCI slots and install all of the boards at one time.<br />
(Skip to step 5 if you have already copied the software from the CD or the web)<br />
2. Before continuing, insert the <strong>Fast<strong>com</strong></strong> CD that was supplied with the board into your CD Rom drive. If the<br />
CD fails to start automatically, click on your START button and choose RUN, BROWSE to your CD-Rom<br />
drive, and select the file cdinstall.exe. Click Open, then OK.<br />
3. Click to accept the license agreement. At the <strong>Commtech</strong>, <strong>Fast<strong>com</strong></strong> menu screen, click the button to Copy<br />
Software. Locate the family of cards that corresponds to your card (<strong>Fast<strong>com</strong></strong>: 232/4-1M) and click the<br />
Copy Disk button.<br />
4. Choose a directory to install to (default=c:\fc23241m) and click OK. Files will be copied to the directory<br />
you specified, then click Exit, and click Exit again.<br />
5. The Found New Hardware wizard windows will appear indicating that it is going to install a device driver<br />
for a hardware device PCI Serial Port. Click Next.<br />
6. Click Search for a suitable driver for my device (re<strong>com</strong>mended) and click Next.<br />
7. Put a checkmark next to Specify a location and clear all other boxes. Click Next.<br />
8. Click Browse and point to the location specified above in step 4. Click OK.<br />
9. Windows found a driver for this device: PATH\w2k\fastdev.inf. Click Next.<br />
10. A window stating that the Digital Signature Not Found for the <strong>Fast<strong>com</strong></strong> 232/4-1M. Click Yes.<br />
11. Completing the Found New Hardware Wizard. Click Finish.<br />
12. The Found New hardware Wizard will appear indicating that it is going to install a device driver for a<br />
hardware device: Multifunction Device. Click Next.<br />
13. Click Search for a suitable driver for my device (re<strong>com</strong>mended) and click Next.<br />
14. Put a checkmark next to Specify a location and clear all other boxes. Click Next.<br />
15. Click Browse and point to the w2k folder found in the directory specified in step 4 . Click OK.<br />
16. Windows found a driver for this device: PATH\w2k\fast<strong>com</strong>.inf. Click Next.<br />
17. Completing the Found New Hardware Wizard: <strong>Fast<strong>com</strong></strong> MegaBaud Communications Port. Click Finish.<br />
18. Windows will then automatically install the other three <strong>Fast<strong>com</strong></strong> MegaBaud Communications Ports on<br />
your machine.<br />
19. You may be asked to reboot your machine. Your new <strong>Fast<strong>com</strong></strong> Ports are now ready for use.
<strong>Fast<strong>com</strong></strong>: 232/4-1M-PCI 15<br />
Windows NT<br />
1. After installing the <strong>Fast<strong>com</strong></strong>: <strong>Fast<strong>com</strong></strong>: 232/4-1M board into a PCI slot, start your <strong>com</strong>puter. If you are<br />
installing more than one <strong>Fast<strong>com</strong></strong> board into a single PC, plug all of them into free PCI slots and install all<br />
of the boards at one time.<br />
(Skip to step 5 if you have already copied the software from the CD or the web)<br />
2. Before continuing, insert the <strong>Fast<strong>com</strong></strong> CD that was supplied with the board into your CD Rom drive. If the<br />
CD fails to start automatically, click on your START button and choose RUN, BROWSE to your CD-Rom<br />
drive, and select the file cdinstall.exe. Click Open, then OK.<br />
3. Click to accept the license agreement. At the <strong>Commtech</strong>, <strong>Fast<strong>com</strong></strong> menu screen, click the button to Copy<br />
Software. Locate the family of cards that corresponds to your card (<strong>Fast<strong>com</strong></strong>: 232/4-1M) and click the<br />
Copy Disk button.<br />
4. Choose a directory to install to (default=c:\fc23241m) and click OK. Files will be copied to the directory<br />
you specified, then click Exit, and click Exit again.<br />
5. Open a <strong>com</strong>mand prompt by selecting Run from the start menu and typing cmd and pressing OK.<br />
6. Browse to the nt folder found in the directory specified in step 4.<br />
7. Execute the application driverinstall.exe with a –i option<br />
“driverinstall.exe –i”<br />
8. The <strong>Fast<strong>com</strong></strong> MegaBaud Communications Ports are now installed and ready to use.<br />
9. You can use the megasetup.exe program to change the clock rate of the board to get non-standard baud<br />
rates. Just remember that the ClockRate = 16 X BaudRate.<br />
Example: If you want 1Mbps -> 1,000,000 * 16 = 16,000,000<br />
To get 1Mbps you set the clock rate to 16MHz.<br />
Return to Product Manual<br />
<strong>Fast<strong>com</strong></strong>: 232/4-1M-PCI
16 <strong>Fast<strong>com</strong></strong>: 232/4-1M-PCI<br />
This page intentionally left blank.
<strong>Fast<strong>com</strong></strong>: ESCC - PCI<br />
Windows XP<br />
1. After installing the <strong>Fast<strong>com</strong></strong>: ESCC-PCI board, start your <strong>com</strong>puter. The “Found New Hardware” wizard<br />
opens after login to Windows. If you are installing more than one <strong>Fast<strong>com</strong></strong> board into a single PC, plug<br />
all of them into free PCI slots and install all of the boards at one time.<br />
(Skip to step 5 if you have already copied the software from the CD or the web)<br />
2. Before continuing, insert the <strong>Fast<strong>com</strong></strong> CD that was supplied with the board into your CD Rom drive. If<br />
the CD fails to start automatically, click on your START button and choose RUN, BROWSE to your CD-<br />
Rom drive, and select the file cdinstall.exe. Click Open, then OK.<br />
3. Click to accept the license agreement. At the <strong>Commtech</strong>, <strong>Fast<strong>com</strong></strong> menu screen, click the button to<br />
Copy Software. Locate the family of cards that corresponds to your card (<strong>Fast<strong>com</strong></strong> ESCC PCI) and<br />
click the Copy Disk button.<br />
4. Choose a directory to install to (default=c:\esccp) and click OK. Files will be copied to the directory you<br />
specified, then click Exit, and click Exit again.<br />
5. The found new hardware wizard should say it has found a Simple Communications Controller. Click<br />
Next. The Install Hardware Device Drivers screen will appear. Click Install from a list or a specified<br />
location.<br />
6. Click Search for the best driver in these locations. Check “Include this location in the search.” Uncheck<br />
“Search removable media.” Click Browse and select the XP folder in the location you specified in step<br />
4. Click OK and then click Next.<br />
7. A message will appear about the software not passing Windows Logo testing. Click Continue Anyway.<br />
8. Click Finish. You should see a little message in the status bar telling you that new hardware installation<br />
was successful.<br />
9. Restart your PC. You can now use your card's new ports.<br />
10. Now that the driver is in place you can use any of the example programs from the c:\esccp\examples<br />
directory of the install files to test that your installation passed.<br />
11. Please refer to the hardware manual for instructions on testing your installation.<br />
17
18 <strong>Fast<strong>com</strong></strong>: ESCC-PCI<br />
Windows 2000<br />
1. After installing the <strong>Fast<strong>com</strong></strong>: ESCC-PCI board, start your <strong>com</strong>puter. The “Found New Hardware” wizard<br />
opens after login to Windows. If you are installing more than one <strong>Fast<strong>com</strong></strong> board into a single PC, plug<br />
all of them into free PCI slots and install all of the boards at one time.<br />
(Skip to step 5 if you have already copied the software from the CD or the web)<br />
2. Before continuing, insert the <strong>Fast<strong>com</strong></strong> CD that was supplied with the board into your CD Rom drive. If<br />
the CD fails to start automatically, click on your START button and choose RUN, BROWSE to your CD-<br />
Rom drive, and select the file cdinstall.exe. Click Open, then OK.<br />
3. Click to accept the license agreement. At the <strong>Commtech</strong>, <strong>Fast<strong>com</strong></strong> menu screen, click the button to<br />
Copy Software. Locate the family of cards that corresponds to your card (<strong>Fast<strong>com</strong></strong> ESCC PCI) and<br />
click the Copy Disk button.<br />
4. Choose a directory to install to (default=c:\esccp) and click OK. Files will be copied to the directory you<br />
specified, then click Exit, and click Exit again.<br />
5. The found new hardware wizard should say it has found a Simple Communications Controller. Click<br />
Next. The Install Hardware Device Drivers screen will appear. Select "search for a suitable driver" and<br />
Click Next.<br />
6. The Locate Driver Files screen will appear. Check "specify location" and uncheck all the other options.<br />
Click Next. Press the Browse button. Locate the files (fast<strong>com</strong>.inf and esccpdrv.sys, the fast<strong>com</strong>.inf<br />
will probably be the only one visible). Click OK.<br />
7. The Driver Files Search Results screen will appear. Be sure the path matches where you installed the<br />
files in step 4. Click Next.<br />
8. Digital Signature not found, click Yes.<br />
9. The Completing the Found New Hardware Wizard screen will appear. Click Finish.<br />
10. Restart PC. You can now use your card’s new ports.<br />
11. Now that the driver is in place you can use any of the example programs from the c:\esccp\examples<br />
directory of the install files to test that your installation passed.<br />
12. Please refer to the hardware manual for instructions on testing your installation.
<strong>Fast<strong>com</strong></strong>: ESCC-PCI 19<br />
Windows NT 4<br />
1. After installing the <strong>Fast<strong>com</strong></strong>: ESCC-PCI board, start your <strong>com</strong>puter. If you are installing more than one<br />
<strong>Fast<strong>com</strong></strong> board into a single PC, plug all of them into free PCI slots and install all of the boards at one<br />
time.<br />
(Skip to step 5 if you have already copied the software from the CD or the web)<br />
2. Before continuing, insert the <strong>Fast<strong>com</strong></strong> CD that was supplied with the board into your CD Rom drive. If<br />
the CD fails to start automatically, click on your START button and choose RUN, BROWSE to your CD-<br />
Rom drive, and select the file cdinstall.exe. Click Open, then OK.<br />
3. Click to accept the license agreement. At the <strong>Commtech</strong>, <strong>Fast<strong>com</strong></strong> menu screen, click the button to<br />
Copy Software. Locate the family of cards that corresponds to your card (<strong>Fast<strong>com</strong></strong> ESCC PCI) and<br />
click the Copy Disk button.<br />
4. Choose a directory to install to (default=c:\esccp) and click OK. Files will be copied to the directory you<br />
specified, then click Exit, and click Exit again.<br />
5. Locate the “nt” folder in the location you specified in the last step. Run the program ntinstall.exe. This<br />
utility is meant to make installation easier.<br />
6. Press the Install Driver button. You will see a message “Esccpdrv is stopped.”<br />
7. Click the button “Start esccpdrv.” The message will change to “Esccpdrv is started.”<br />
8. Click OK/Exit.<br />
9. You are ready to start using the card. You can use any of the example programs in the examples<br />
directory to test your installation.<br />
10. Please refer to the hardware manual for instructions on testing your installation.
20 <strong>Fast<strong>com</strong></strong>: ESCC-PCI<br />
Windows 98<br />
1. After installing the <strong>Fast<strong>com</strong></strong>: ESCC-PCI board, start your <strong>com</strong>puter. If you are installing more than one<br />
<strong>Fast<strong>com</strong></strong> board into a single PC, plug all of them into free PCI slots and install all of the boards at one<br />
time.<br />
(Skip to step 6 if you have already copied the software from the CD or the web)<br />
2. Click cancel on the hardware wizard. Insert the <strong>Fast<strong>com</strong></strong> CD that was supplied with the board into your<br />
CD Rom drive. If the CD fails to start automatically, click on your START button and choose RUN,<br />
BROWSE to your CD-Rom drive, and select the file cdinstall.exe. Click Open, then OK.<br />
3. Click to accept the license agreement. At the <strong>Commtech</strong>, <strong>Fast<strong>com</strong></strong> menu screen, click the button to<br />
Copy Software. Locate the family of cards that corresponds to your card (<strong>Fast<strong>com</strong></strong> ESCC PCI) and<br />
click the Copy Disk button.<br />
4. Choose a directory to install to (default=c:\esccp) and click OK. Files will be copied to the directory you<br />
specified, then click Exit, and click Exit again.<br />
5. Start the device manager by right clicking on My Computer and selecting the Devices Tab. Click<br />
Refresh to restart the Hardware Wizard.<br />
6. Hardware wizard will find a PCI Communication Device. Click Next. Click search for best driver. Click<br />
Next. Check Specify Location box and uncheck all the others. Click Browse and point it to the w98<br />
folder in the directory you specified in step 4. Click Next.<br />
7. Be sure the path listed matches what you just browsed to in the previous step and click next. If you get<br />
a message saying file not found, browse to the directory from step 4 and click OK. Otherwise, click<br />
Finish.<br />
8. Your new card is now installed and can be accessed using any of the example programs in the w95<br />
directory of the install path.<br />
9. Please refer to the hardware manual for instructions on testing your installation.
<strong>Fast<strong>com</strong></strong>: ESCC-PCI 21<br />
Windows 95<br />
1. After installing the <strong>Fast<strong>com</strong></strong>: ESCC-PCI board, start your <strong>com</strong>puter. If you are installing more than one<br />
<strong>Fast<strong>com</strong></strong> board into a single PC, plug all of them into free PCI slots and install all of the boards at one<br />
time. If you do not see a hardware wizard screen after reboot, continue with this setup. If you do see a<br />
hardware wizard, use the Windows 98 install.<br />
(Skip to step 5 if you have already copied the software from the CD or the web)<br />
2. Insert the <strong>Fast<strong>com</strong></strong> CD that was supplied with the board into your CD Rom drive. If the CD fails to start<br />
automatically, click on your START button and choose RUN, BROWSE to your CD-Rom drive, and<br />
select the file cdinstall.exe. Click Open, then OK.<br />
3. Click to accept the license agreement. At the <strong>Commtech</strong>, <strong>Fast<strong>com</strong></strong> menu screen, click the button to<br />
Copy Software. Locate the family of cards that corresponds to your card (<strong>Fast<strong>com</strong></strong> ESCC PCI) and<br />
click the Copy Disk button.<br />
4. Choose a directory to install to (default=c:\esccp) and click OK. Files will be copied to the directory you<br />
specified, then click Exit, and click Exit again.<br />
5. When you first boot up with the ESCC-PCI board in a PCI slot, win95 will indicate that a new PCI device<br />
is found; you should select the "Do not install a driver (Windows will not prompt you again)" option.<br />
6. Note also that W95 will keep track of the ports by which slot was used first so if you have multiple<br />
boards and rearrange them, the port numbers will be fixed by the order in which the slots were used,<br />
not the by the physical boards.<br />
7. To use the ports on the card, just put esccpdrv.vxd is somewhere in the path, or in the directory of the<br />
program that opens it. Then you can refer to the example programs in the w95 folder of the install<br />
directory.<br />
8. Please refer to the hardware manual for instructions on testing your installation.
22 <strong>Fast<strong>com</strong></strong>: ESCC-PCI<br />
Linux<br />
1. After installing the <strong>Fast<strong>com</strong></strong>: ESCC-PCI board, start your <strong>com</strong>puter, boot Linux. Ignore any messages<br />
about found new hardware. Login is root. If you are installing more than one <strong>Fast<strong>com</strong></strong> board into a<br />
single PC, plug all of them into free PCI slots and install all of the boards at one time.<br />
2. Use the tarball on the CD or download the most recent one from the web. Run "tar -xvzf escc-pcilinux.tar.gz<br />
" (without quotes) to expand the file in the PWD.<br />
3. > cd escc-pci-linux<br />
4. > make<br />
5. >. /mkdev.sh<br />
You then need to <strong>com</strong>pile the tools necessary to configure the board: esccclock & esccpsettings.<br />
6. > cd utils/esccclock<br />
7. > make<br />
8. Set the desired clock frequency first: >. /esccclock port frequency<br />
9. > cd /utils/esccpsettings<br />
10. >. /make<br />
11. Load the desired settings file (asyncset, bisyncset, hdlcset, or your own settings file) >. /esccpsettings<br />
port settingsFile<br />
12. If you copy these two executable files to a directory in your path and you run<br />
> insmod esccp.o at startup (followed by the two previous <strong>com</strong>mands), your ports will be available on<br />
every boot.<br />
13. You can look at the example programs tronly and reconly to see how to use the card in your programs.<br />
Return to Product Manual<br />
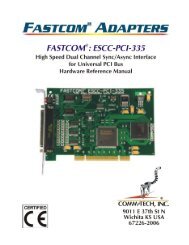
<strong>Fast<strong>com</strong></strong>: ESCC-PCI
<strong>Fast<strong>com</strong></strong>: ESCC-PCI-335 and ESCC-LPCI-335<br />
Windows XP<br />
1. After installing the <strong>Fast<strong>com</strong></strong>: ESCC-PCI-335 board into an empty 3.3V or 5V PCI slot, start your <strong>com</strong>puter.<br />
The “Found New Hardware” wizard opens after login to Windows. If you are installing more than one<br />
<strong>Fast<strong>com</strong></strong> board into a single PC, plug all of them into free PCI slots and install all of the boards at one<br />
time.<br />
(Skip to step 5 if you have already copied the software from the CD or the web)<br />
2. Before continuing, insert the <strong>Fast<strong>com</strong></strong> CD that was supplied with the board into your CD Rom drive. If the<br />
CD fails to start automatically, click on your START button and choose RUN, BROWSE to your CD-Rom<br />
drive, and select the file cdinstall.exe. Click Open, then OK.<br />
3. Click to accept the license agreement. At the <strong>Commtech</strong>, <strong>Fast<strong>com</strong></strong> menu screen, click the button to Copy<br />
Software. Locate the family of cards that corresponds to your card (<strong>Fast<strong>com</strong></strong>: ESCC-PCI-335) and click<br />
the Copy Disk button.<br />
4. Choose a directory to install to (default=c:\escc_pci_335) and click OK. Files will be copied to the<br />
directory you specified, then click Exit, and click Exit again.<br />
5. The found new hardware wizard should say it has found a Simple Communications Controller. Click<br />
Next. The Install Hardware Device Drivers screen will appear. Click Install from a list or a specified<br />
location.<br />
6. Click Search for the best driver in these locations. Check “Include this location in the search.” Uncheck<br />
“Search removable media.” Click Browse and select the XP folder in the location you specified in step 4.<br />
Click OK and then click Next.<br />
7. A message will appear about the software not passing Windows Logo testing. Click Continue Anyway.<br />
8. Click Finish. You should see a little message in the status bar telling you that new hardware installation<br />
was successful.<br />
9. Restart PC. You can now use your card’s new ports.<br />
10. Now that the driver is in place you can use any of the example programs from the c:\ escc_pci_335<br />
directory of the install files to test that your installation passed.<br />
11. Please refer to the hardware manual for instructions on testing your installation.<br />
23
24 <strong>Fast<strong>com</strong></strong>: ESCC-PCI-335 and ESCC-LPCI-335<br />
Windows 2000<br />
1. After installing the <strong>Fast<strong>com</strong></strong>: ESCC-PCI-335 board into an empty 3.3V or 5V PCI slot, start your <strong>com</strong>puter.<br />
The “Found New Hardware” wizard opens after login to Windows. If you are installing more than one<br />
<strong>Fast<strong>com</strong></strong> board into a single PC, plug all of them into free PCI slots and install all of the boards at one<br />
time.<br />
(Skip to step 5 if you have already copied the software from the CD or the web)<br />
2. Before continuing, insert the <strong>Fast<strong>com</strong></strong> CD that was supplied with the board into your CD Rom drive. If the<br />
CD fails to start automatically, click on your START button and choose RUN, BROWSE to your CD-Rom<br />
drive, and select the file cdinstall.exe. Click Open, then OK.<br />
3. Click to accept the license agreement. At the <strong>Commtech</strong>, <strong>Fast<strong>com</strong></strong> menu screen, click the button to Copy<br />
Software. Locate the family of cards that corresponds to your card (<strong>Fast<strong>com</strong></strong>: ESCC-PCI-335) and click<br />
the Copy Disk button.<br />
4. Choose a directory to install to (default=c:\escc_pci_335) and click OK. Files will be copied to the<br />
directory you specified, then click Exit, and click Exit again.<br />
5. The found new hardware wizard should say it has found a Simple Communications Controller. Click<br />
Next. The Install Hardware Device Drivers screen will appear. Select "search for a suitable driver" and<br />
Click Next.<br />
6. The Locate Driver Files screen will appear. Check "specify location" and uncheck all the other options.<br />
Click Next. Click Browse and select the w2k folder in the location you specified in step 4 and click Open.<br />
Click OK.<br />
7. The Driver Files Search Results screen will appear. Be sure the path matches where you installed the<br />
files in step 4. Click Next.<br />
8. Digital Signature not found, click Yes.<br />
9. The Completing the Found New Hardware Wizard screen will appear. Click Finish.<br />
10. Restart PC. You can now use your card’s new ports.<br />
11. Now that the driver is in place you can use any of the example programs from the c:\ escc_pci_335<br />
directory of the install files to test that your installation passed.<br />
12. Please refer to the hardware manual for instructions on testing your installation.
<strong>Fast<strong>com</strong></strong>: ESCC-PCI-335 and ESCC-LPCI-335 25<br />
Linux<br />
Note: Before attempting to <strong>com</strong>pile the driver for this device, you must have the your kernel source installed and<br />
create a link to the source directory at the location /usr/src/linux<br />
Example:<br />
cd /usr/src<br />
ln -s linux-2.4.18-6 linux<br />
The V3 hardware requires a longlong division that (on my machine anyway) coughs<br />
up a link error, you must add libgcc.a into the linker <strong>com</strong>mand line.<br />
the location of this file is likely to vary per distro. try:<br />
$ find / -name libgcc.a<br />
and take the output of this and change the Makefile line:<br />
LOADLIBS := /usr/lib/gcc-lib/i386-redhat-linux/2.96/libgcc.a<br />
line to reflect your location.<br />
(this is the location on my RH7.3 box, unless you are using RH 7.3 it is probably somewhere else)<br />
To build and install the ESCCP kernel module type:<br />
$ make<br />
$ ./mkdev.sh<br />
$ make tools<br />
the 'make' will <strong>com</strong>pile the driver module (esccp.o)<br />
the 'mkdev.sh' script will insmod the driver and create the device nodes (/dev/escc0,/dev/escc1)<br />
the 'make tools' will <strong>com</strong>pile the examples/utilities and place their binaries in utils/bin<br />
To install just 'mv' them to one of your PATH directories, or update your path to include this directory. The<br />
mkdev.sh script copies the driver module to (hopefully) the correct location (/lib/modules/xxx/char) but you must<br />
add the insmod or depmod line into an install script to get the driver to load at boot. Or you can just 'insmod<br />
esccp.o' prior to device usage.<br />
------------------<br />
-= ESCCP CLOCK =-<br />
This program sets the main clock generator for the Esccp board. Type:<br />
$ ./esccclock 0 [frequency]<br />
(this function only works on older (not V3) hardware.)<br />
use ./setclock 0 [frequency] for the new ESCC-PCI-335<br />
------------------<br />
-= ESCCP SETTINGS =-<br />
The esccpsettings program will setup the board. Look at the set files that are included in the directory of<br />
esccpsettings. Modify these files<br />
to your liking.<br />
------------------<br />
See the <strong>com</strong>ments in each example file source for their use/usage.
26 <strong>Fast<strong>com</strong></strong>: ESCC-PCI-335 and ESCC-LPCI-335<br />
Return to Product Manual<br />
<strong>Fast<strong>com</strong></strong>: ESCC-PCI-335<br />
<strong>Fast<strong>com</strong></strong>: ESCC-LPCI-335
<strong>Fast<strong>com</strong></strong>: ESCC-PCMCIA<br />
Windows XP<br />
1. After installing the <strong>Fast<strong>com</strong></strong>: ESCC-PCMCIA board into an empty Type II PCMCIA slot, start your<br />
<strong>com</strong>puter. The “Found New Hardware” wizard opens after login to Windows.<br />
(Skip to step 5 if you have already copied the software from the CD or the web)<br />
2. Before continuing, insert the <strong>Fast<strong>com</strong></strong> CD that was supplied with the board into your CD Rom drive. If the<br />
CD fails to start automatically, click on your START button and choose RUN, BROWSE to your CD-Rom<br />
drive, and select the file cdinstall.exe. Click Open, then OK.<br />
3. Click to accept the license agreement. At the <strong>Commtech</strong>, <strong>Fast<strong>com</strong></strong> menu screen, click the button to Copy<br />
Software. Locate the family of cards that corresponds to your card (<strong>Fast<strong>com</strong></strong> ESCC-PCMCIA) and click<br />
the Copy Disk button.<br />
4. Choose a directory to install to (default= C:\escc_pcmcia) and click OK. Files will be copied to the<br />
directory you specified, then click Exit, and click Exit again.<br />
5. The found new hardware wizard should say it has found a “<strong>Commtech</strong>_Inc. <strong>Fast<strong>com</strong></strong>:ESCC-PCMCIA.”<br />
Click Next. The Install Hardware Device Drivers screen will appear. Click Install from a list or a specified<br />
location.<br />
6. Click Search for the best driver in these locations. Check “Include this location in the search.” Uncheck<br />
“Search removable media.” Click Browse and select the XP folder in the location you specified in step 4.<br />
Click OK and then click Next.<br />
7. A message will appear about the software not passing Windows Logo testing. Click Continue Anyway.<br />
8. Click Finish. You should see a little message in the status bar telling you that new hardware installation<br />
was successful.<br />
9. You can now use your card's new ports.<br />
10. Now that the driver is in place you can use any of the example programs from the utils directory of the<br />
install files to test that your installation passed.<br />
11. Please refer to the hardware manual for instructions on testing your installation.<br />
27
28 <strong>Fast<strong>com</strong></strong>: ESCC-PCMCIA<br />
Windows 2000<br />
1. After installing the <strong>Fast<strong>com</strong></strong>: ESCC-PCMCIA board into an empty Type II PCMCIA slot, start your<br />
<strong>com</strong>puter. The “Found New Hardware” wizard opens after login to Windows.<br />
(Skip to step 5 if you have already copied the software from the CD or the web)<br />
2. Before continuing, insert the <strong>Fast<strong>com</strong></strong> CD that was supplied with the board into your CD Rom drive. If<br />
the CD fails to start automatically, click on your START button and choose RUN, BROWSE to your<br />
CD-Rom drive, and select the file cdinstall.exe. Click Open, then OK.<br />
3. Click to accept the license agreement. At the <strong>Commtech</strong>, <strong>Fast<strong>com</strong></strong> menu screen, click the button to<br />
Copy Software. Locate the family of cards that corresponds to your card (<strong>Fast<strong>com</strong></strong>: ESCC-PCMCIA)<br />
and click the Copy Disk button.<br />
4. Choose a directory to install to (default= C:\escc_pcmcia) and click OK. Files will be copied to the<br />
directory you specified, then click Exit, and click Exit again.<br />
5. The found new hardware wizard should say it has found a “<strong>Commtech</strong>_Inc. <strong>Fast<strong>com</strong></strong>:ESCC-<br />
PCMCIA”. Click Next. The Install Hardware Device Drivers screen will appear. Select "search for a<br />
suitable driver" and Click Next.<br />
6. The Locate Driver Files screen will appear. Check "specify location" and uncheck all the other<br />
options. Click Next. Click Browse and select the w2k folder in the location you specified in step 4.<br />
Click Open, then click OK.<br />
7. The Driver Files Search Results screen will appear. Be sure the path matches where you installed<br />
the files in step 4. Click Next.<br />
8. Digital Signature not found, click Yes.<br />
9. The Completing the Found New Hardware Wizard screen will appear. Click Finish.<br />
10. You can now use your card’s new ports.<br />
11. Now that the driver is in place you can use any of the example programs from the utils directory of the<br />
install files to test that your installation passed.<br />
12. Please refer to the hardware manual for instructions on testing your installation.
<strong>Fast<strong>com</strong></strong>: ESCC-PCMCIA 29<br />
Windows NT 4<br />
1. After installing the <strong>Fast<strong>com</strong></strong>: ESCC-PCMCIA board into an empty Type II PCMCIA slot, start your <strong>com</strong>puter<br />
and log in.<br />
(Skip to step 5 if you have already copied the software from the CD or the web)<br />
2. Before continuing, insert the <strong>Fast<strong>com</strong></strong> CD that was supplied with the board into your CD Rom drive. If the<br />
CD fails to start automatically, click on your START button and choose RUN, BROWSE to your CD-Rom<br />
drive, and select the file cdinstall.exe. Click Open, then OK.<br />
3. Click to accept the license agreement. At the <strong>Commtech</strong>, <strong>Fast<strong>com</strong></strong> menu screen, click the button to Copy<br />
Software. Locate the family of cards that corresponds to your card (<strong>Fast<strong>com</strong></strong>: ESCC-PCMCIA) and click the<br />
Copy Disk button.<br />
4. Choose a directory to install to (default=C:\escc_pcmcia) and click OK. Files will be copied to the directory<br />
you specified, then click Exit, and click Exit again.<br />
5. Locate the “nt” folder in the location you specified in the last step. Run the program “ntinstall.exe –i”. This<br />
utility is meant to make installation easier. You may need to open a <strong>com</strong>mand prompt and run the install<br />
program from there.<br />
6. If you do not see any error messages, you are ready to start using the card. You can use any of the<br />
example programs in the utils directory to test your installation.<br />
7. Please refer to the hardware manual for instructions on testing your installation.<br />
Return to Product Manual<br />
<strong>Fast<strong>com</strong></strong>: ESCC-PCMCIA
30 <strong>Fast<strong>com</strong></strong>: ESCC-PCMCIA<br />
This page intentionally left blank.
<strong>Fast<strong>com</strong></strong>: GSCC<br />
Windows XP<br />
1. After installing the <strong>Fast<strong>com</strong></strong>: GSCC board into an empty 3.3V or 5V PCI slot, start your <strong>com</strong>puter. The “Found<br />
New Hardware” wizard opens after login to Windows. If you are installing more than one <strong>Fast<strong>com</strong></strong> board into<br />
a single PC, plug all of them into free PCI slots and install all of the boards at one time.<br />
(Skip to step 5 if you have already copied the software from the CD or the web)<br />
2. Before continuing, insert the <strong>Fast<strong>com</strong></strong> CD that was supplied with the board into your CD Rom drive. If the CD<br />
fails to start automatically, click on your START button and choose RUN, BROWSE to your CD-Rom drive,<br />
and select the file cdinstall.exe. Click Open, then OK.<br />
3. Click to accept the license agreement. At the <strong>Commtech</strong>, <strong>Fast<strong>com</strong></strong> menu screen, click the button to Copy<br />
Software. Locate the family of cards that corresponds to your card (<strong>Fast<strong>com</strong></strong>: GSCC) and click the Copy Disk<br />
button.<br />
4. Choose a directory to install to (default=c:\gscc) and click OK. Files will be copied to the directory you<br />
specified, then click Exit, and click Exit again.<br />
5. The found new hardware wizard should say it has found a Simple Communications Controller. Click Next.<br />
The Install Hardware Device Drivers screen will appear. Click Install from a list or a specified location.<br />
6. Click Search for the best driver in these locations. Check “Include this location in the search.” Uncheck<br />
“Search removable media.” Click Browse and select the XP folder in the location you specified in step 4.<br />
Click OK and then click Next.<br />
7. A message will appear about the software not passing Windows Logo testing. Click Continue Anyway.<br />
8. Click Finish. You should see a little message in the status bar telling you that new hardware installation was<br />
successful.<br />
9. Restart PC. You can now use your card’s new ports.<br />
10. Now that the driver is in place you can use any of the example programs from the c:\gscc directory of the<br />
install files to test that your installation passed.<br />
11. Please refer to the hardware manual for instructions on testing your installation.<br />
31
32 <strong>Fast<strong>com</strong></strong>: GSCC<br />
Windows 2000<br />
1. After installing the <strong>Fast<strong>com</strong></strong>: GSCC board into an empty 3.3V or 5V PCI slot, start your <strong>com</strong>puter. The “Found<br />
New Hardware” wizard opens after login to Windows. If you are installing more than one <strong>Fast<strong>com</strong></strong> board into<br />
a single PC, plug all of them into free PCI slots and install all of the boards at one time.<br />
(Skip to step 5 if you have already copied the software from the CD or the web)<br />
2. Before continuing, insert the <strong>Fast<strong>com</strong></strong> CD that was supplied with the board into your CD Rom drive. If the CD<br />
fails to start automatically, click on your START button and choose RUN, BROWSE to your CD-Rom drive,<br />
and select the file cdinstall.exe. Click Open, then OK.<br />
3. Click to accept the license agreement. At the <strong>Commtech</strong>, <strong>Fast<strong>com</strong></strong> menu screen, click the button to Copy<br />
Software. Locate the family of cards that corresponds to your card (<strong>Fast<strong>com</strong></strong>: GSCC) and click the Copy Disk<br />
button.<br />
4. Choose a directory to install to (default=c:\gscc) and click OK. Files will be copied to the directory you<br />
specified, then click Exit, and click Exit again.<br />
5. The found new hardware wizard should say it has found a Simple Communications Controller. Click Next.<br />
The Install Hardware Device Drivers screen will appear. Select "search for a suitable driver" and Click Next.<br />
6. The Locate Driver Files screen will appear. Check "specify location" and uncheck all the other options. Click<br />
Next. Click Browse and select the w2k folder in the location you specified in step 4 and click Open. Click OK.<br />
7. The Driver Files Search Results screen will appear. Be sure the path matches where you installed the files in<br />
step 4. Click Next.<br />
8. Digital Signature not found, click Yes.<br />
9. The Completing the Found New Hardware Wizard screen will appear. Click Finish.<br />
10. Restart PC. You can now use your card’s new ports.<br />
11. Now that the driver is in place you can use any of the example programs from the c:\gscc directory of the<br />
install files to test that your installation passed.<br />
12. Please refer to the hardware manual for instructions on testing your installation.
<strong>Fast<strong>com</strong></strong>: GSCC 33<br />
Linux<br />
See the README file contained in the tar.gz driver file.<br />
Return to Product Manual<br />
<strong>Fast<strong>com</strong></strong>: GSCC
34 <strong>Fast<strong>com</strong></strong>: GSCC<br />
This page intentionally left blank.
Super<strong>Fast<strong>com</strong></strong> Series Cards<br />
Note 1: The difference between the 422 and 232 versions of this card has to do only with the specified interface.<br />
They each operate in the same way and utilize the same software. The only noticeable difference to the user will<br />
be that the 232 card will not operate at speeds greater than 1MBps.<br />
Note 2: These installation instructions apply to all of the boards in the Super<strong>Fast<strong>com</strong></strong> family of PC boards. This<br />
includes the PCI, PC/104-Plus, and CompactPCI versions of the card.<br />
Windows XP<br />
1. After installing the Super<strong>Fast<strong>com</strong></strong> board, start your <strong>com</strong>puter. The “Found New Hardware” wizard<br />
opens after login to Windows. If you are installing more than one board into a single PC, plug all of<br />
them into bus mastering PCI slots and run the installation for all Super<strong>Fast<strong>com</strong></strong> boards.<br />
(Skip to step 5 if you have already copied the software from the CD or the web)<br />
2. Before continuing, insert the <strong>Fast<strong>com</strong></strong> CD that was supplied with the board into your CD Rom drive. If<br />
the CD fails to start automatically, click on your START button and choose RUN, BROWSE to your CD-<br />
Rom drive, and select the file cdinstall.exe.<br />
3. Click Open, then OK and click to accept the license agreement. At the <strong>Commtech</strong>, <strong>Fast<strong>com</strong></strong> menu<br />
screen, click the button to Copy Software. Locate the family of cards that corresponds to your card<br />
(Super<strong>Fast<strong>com</strong></strong>) and click the Copy Disk button.<br />
4. Choose a directory to install to (default=c:\Super<strong>Fast<strong>com</strong></strong>) and click OK. Files will be copied to the<br />
directory you specified, then click Exit, and click Exit again.<br />
5. The found new hardware wizard should <strong>com</strong>e up after Windows boots. It will say it has found a<br />
Network Controller. Click Next.<br />
6. Choose Install from list or specific location (advanced) and click next.<br />
7. Choose Search for the best driver in these locations. Check only Include this location in the search.<br />
Click Browse and select the XP folder in the location you specified in step 4. Click OK and then click<br />
Next.<br />
8. Please select the best match for your hardware from the list below. Choose the type of<br />
SuperFASTCOM board that you are trying to install and click next.<br />
9. The software will install. The hardware wizard will indicate that it has <strong>com</strong>pleted the installation. Then<br />
click Finish.<br />
10. The board is now installed and ready for use. You must set the clock and the mode before you can use<br />
the ports. Use setclock.exe and sfcset.exe. (Note: PC/104 boards must use setfs6131clock.exe)<br />
11. You can modify the board’s settings from the Settings tab, which can be found in the Device manager<br />
under SFCSerialClass. Double click on your device and then click on the settings tab.<br />
12. Refer to the example programs in the xp directory to see how to use the card in your programs.<br />
13. Please refer to the hardware manual for instructions on testing your installation.<br />
35
36 Super<strong>Fast<strong>com</strong></strong> Series Cards<br />
Windows 2000<br />
1. After installing the Super<strong>Fast<strong>com</strong></strong>: board, start your <strong>com</strong>puter. The “Found New Hardware” wizard<br />
opens after login to Windows. If you are installing more than one board into a single PC, plug all of<br />
them into bus mastering PCI slots and run the installation for all Super<strong>Fast<strong>com</strong></strong> boards.<br />
(Skip to step 5 if you have already copied the software from the CD or the web)<br />
2. Before continuing, insert the <strong>Fast<strong>com</strong></strong> CD that was supplied with the board into your CD Rom drive. If<br />
the CD fails to start automatically, click on your START button and choose RUN, BROWSE to your CD-<br />
Rom drive, and select the file cdinstall.exe.<br />
3. Click Open, then OK and click to accept the license agreement. At the <strong>Commtech</strong>, <strong>Fast<strong>com</strong></strong> menu<br />
screen, click the button to Copy Software. Locate the family of cards that corresponds to your card<br />
(Super<strong>Fast<strong>com</strong></strong>) and click the Copy Disk button.<br />
4. Choose a directory to install to (default=c:\Super<strong>Fast<strong>com</strong></strong>) and click OK. Files will be copied to the<br />
directory you specified, then click Exit, and click Exit again.<br />
5. The found new hardware wizard should <strong>com</strong>e up after Windows boots. It will say it has found a<br />
Network Controller. Click Next.<br />
6. The Install Hardware Device Drivers screen will appear. Choose Display a list of the known drivers...<br />
and click Next.<br />
7. Click Have Disk. Click Browse and point to the location specified in step 4 and click OK, OK.<br />
8. Choose the type of SuperFASTCOM board that you are trying to install and click next.<br />
9. Start Device Driver Installation... Click Next.<br />
10. The software will install. The hardware wizard will indicate that it has <strong>com</strong>pleted the installation. Then<br />
click Finish.<br />
11. The board is now installed and ready for use. You must set the clock and the mode before you can use<br />
the ports. Use setclock.exe and sfcset.exe. (Note: PC/104 boards must use setfs6131clock.exe)<br />
12. You can modify the boards settings from the Settings tab which can be found in the Device manager,<br />
under SFCSerialClass. Double click on your device and then click on the settings tab.<br />
13. Refer to the example programs in the w2k directory to see how to use the card in your programs.<br />
14. Please refer to the hardware manual for instructions on testing your installation.
Super<strong>Fast<strong>com</strong></strong> Series Cards 37<br />
Windows NT 4<br />
1. After installing the Super<strong>Fast<strong>com</strong></strong>: PCI board, start your <strong>com</strong>puter. If you are installing more than one<br />
board into a single PC, plug all of them into bus mastering PCI slots and run the installation for all<br />
Super<strong>Fast<strong>com</strong></strong> boards.<br />
(Skip to step 5 if you have already copied the software from the CD or the web)<br />
2. Before continuing, insert the <strong>Fast<strong>com</strong></strong> CD that was supplied with the board into your CD Rom drive. If<br />
the CD fails to start automatically, click on your START button and choose RUN, BROWSE to your CD-<br />
Rom drive, and select the file cdinstall.exe.<br />
3. Click Open, then OK and click to accept the license agreement. At the <strong>Commtech</strong>, <strong>Fast<strong>com</strong></strong> menu<br />
screen, click the button to Copy Software. Locate the family of cards that corresponds to your card<br />
(Super<strong>Fast<strong>com</strong></strong>) and click the Copy Disk button.<br />
4. Choose a directory to install to (default=c:\Super<strong>Fast<strong>com</strong></strong>) and click OK. Files will be copied to the<br />
directory you specified, then click Exit, and click Exit again.<br />
5. Open a <strong>com</strong>mand prompt and change to the install directory (c:\Super<strong>Fast<strong>com</strong></strong>\nt).<br />
6. Run: sfcinstall -i<br />
7. Run: setclock port frequency (global for all ports)<br />
8. Run: sfcset port settingFile (local for each port)<br />
9. The board is now installed and ready for use. You must set the clock and the mode before you can use<br />
the ports. Use setclock.exe and sfcset.exe. (Note: PC/104 boards must use setfs6131clock.exe)<br />
10. Refer to the example programs in the nt directory to see how to use the card in your programs.<br />
11. Please refer to the hardware manual for instructions on testing your installation.
38 Super<strong>Fast<strong>com</strong></strong> Series Cards<br />
Linux<br />
1. After installing the Super<strong>Fast<strong>com</strong></strong>: PCI board, start your <strong>com</strong>puter, boot Linux. Ignore any messages<br />
about found new hardware. Login is root. If you are installing more than one board into a single PC,<br />
plug all of them into bus mastering PCI slots and run the installation for all Super<strong>Fast<strong>com</strong></strong> boards.<br />
2. Use the tar ball on the CD or download the most recent one from the web. Run "tar -xvzf sfc7.tar.gz"<br />
(without quotes) to expand the file in the PWD.<br />
3. > cd sfc<br />
4. > make<br />
5. > make install<br />
6. > make tools //this should <strong>com</strong>pile several pgms into the /sfc/util directory.<br />
7. Before the card will function properly, you must set the clock generator (. /util/setclock) and set the<br />
mode registers (. /util/sfcset).<br />
8. You can then begin using the card. Take a look at some of the programs in the /sfc/util directory to get<br />
an idea of how to use the card’s ports in your programs.<br />
Return to Product Manual<br />
Super<strong>Fast<strong>com</strong></strong><br />
Super<strong>Fast<strong>com</strong></strong>: 232/4-PCI<br />
Super<strong>Fast<strong>com</strong></strong>/1-104<br />
Super<strong>Fast<strong>com</strong></strong>/1-104-ET<br />
Super<strong>Fast<strong>com</strong></strong>/2-104<br />
Super<strong>Fast<strong>com</strong></strong>/2-104-ET<br />
Super<strong>Fast<strong>com</strong></strong>-cPCI<br />
Super<strong>Fast<strong>com</strong></strong>-cPCI-ET