DAB/FM Stereo Radio - TEAC Europe GmbH
DAB/FM Stereo Radio - TEAC Europe GmbH
DAB/FM Stereo Radio - TEAC Europe GmbH

Create successful ePaper yourself
Turn your PDF publications into a flip-book with our unique Google optimized e-Paper software.
Z<br />
9A09899200<br />
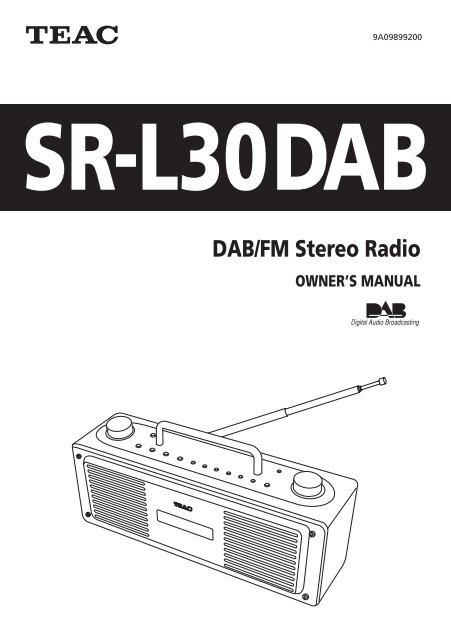
SR-L30<strong>DAB</strong><br />
<strong>DAB</strong>/<strong>FM</strong> <strong>Stereo</strong> <strong>Radio</strong><br />
OWNER’S MANUAL
IMPORTANT (for U.K.Customers)<br />
DO NOT cut off the mains plug from this<br />
equipment. If the plug fitted is not suitable for<br />
the power points in your home or the cable is<br />
too short to reach a power point, then obtain<br />
an appropriate safety approved extension lead<br />
or consult your dealer.<br />
If nonetheless the mains plug is cut off,<br />
remove the fuse and dispose of the plug<br />
immediately, to avoid a possible shock hazard<br />
by inadvertent connection to the mains<br />
supply.<br />
If this product is not provided with a mains<br />
plug, or one has to be fitted, then follow the<br />
instructions given below:<br />
IMPORTANT. DO NOT make any connection<br />
to the larger terminal which is marked with<br />
the letter E or by the safety earth symbol| or<br />
coloured GREEN or GREEN-and-YELLOW.<br />
The wires in the mains lead on this product<br />
are coloured in accordance with the following<br />
code:<br />
BLUE : NEUTRAL<br />
BROWN : LIVE<br />
As these colours may not correspond with the<br />
coloured markings identifying the terminals in<br />
your plug proceed as follows:<br />
The wire which is coloured BLUE must be<br />
connected to the terminal which is marked<br />
with the letter N or coloured BLACK.<br />
The wire which is coloured BROWN must be<br />
connected to the terminal which is marked<br />
with the letter L or coloured RED.<br />
When replacing the fuse only a correctly rated<br />
approved type should be used and be sure to<br />
re-fit the fuse cover.<br />
IF IN DOUBT — CONSULT A COMPETENT<br />
ELECTRICIAN.<br />
2<br />
Contents<br />
Thank you for choosing <strong>TEAC</strong>. Read this<br />
manual carefully to get the best<br />
performance from this unit.<br />
Contents. . . . . . . . . . . . . . . . . . . . . . . . . . . 2<br />
Before Use . . . . . . . . . . . . . . . . . . . . . . . . . 3<br />
Connection . . . . . . . . . . . . . . . . . . . . . . . . . 4<br />
Names of Each Control . . . . . . . . . . . . . . . . 6<br />
Setting up your <strong>DAB</strong> Tuner . . . . . . . . . . . . . 8<br />
Auto Tuning . . . . . . . . . . . . . . . . . . . . . . . . 8<br />
Using the Channel List . . . . . . . . . . . . . . . . 9<br />
Using Function Control . . . . . . . . . . . . . . . 10<br />
Station order . . . . . . . . . . . . . . . . . . . . 10<br />
Signal error rate . . . . . . . . . . . . . . . . . . 11<br />
Preset tune . . . . . . . . . . . . . . . . . . . . . . 12<br />
DRC value . . . . . . . . . . . . . . . . . . . . . . 13<br />
Manual tune. . . . . . . . . . . . . . . . . . . . . 14<br />
Software version. . . . . . . . . . . . . . . . . . 15<br />
Changing Display Settings. . . . . . . . . . . . . 16<br />
Listening to <strong>FM</strong> Stations . . . . . . . . . . . . . . 17<br />
Preset Tuning . . . . . . . . . . . . . . . . . . . . . . 18<br />
About <strong>DAB</strong> . . . . . . . . . . . . . . . . . . . . . . . . 20<br />
Specifications . . . . . . . . . . . . . . . . . . . . . . 21<br />
Factory Reset. . . . . . . . . . . . . . . . . . . . . . . 21<br />
Troubleshooting . . . . . . . . . . . . . . . . . . . . 22
Read this before operation<br />
< As the unit may become warm during<br />
operation, always leave sufficient space<br />
around the unit for ventilation.<br />
< Do not use any AC adaptors other than<br />
the one included with this unit to avoid<br />
fire, electric shock, etc. Be sure to connect<br />
the AC adaptor to an AC outlet which<br />
supplies correct voltage.<br />
< Choose the installation location of your<br />
unit carefully. Avoid placing it in direct<br />
sunlight or close to a source of heat. Also<br />
avoid locations subject to vibrations and<br />
excessive dust, heat, cold or moisture.<br />
< Do not place the unit on the amplifier or<br />
the receiver.<br />
< Do not open the cabinet as this might<br />
result in damage to the circuitry or<br />
electrical shock. If a foreign object should<br />
get into the unit, contact your dealer or<br />
service company.<br />
< When removing the AC adaptor from the<br />
wall outlet, never yank the cord.<br />
< Do not attempt to clean the unit with<br />
chemical solvents as this might damage<br />
the finish. Use a clean, dry cloth.<br />
< Keep this manual in a safe place for<br />
future reference.<br />
Before Use<br />
Beware of condensation<br />
When the unit is moved from a cold to a<br />
warm place, or used after a sudden<br />
temperature change, there is a danger of<br />
condensation; vapor in the air could<br />
condense on the internal mechanism,<br />
making correct operation impossible. To<br />
prevent this, or if this occurs, leave the unit<br />
for one or two hours with the power turned<br />
on. Then the unit will stabilize at the<br />
temperature of its surroundings.<br />
Maintenance<br />
If the surface of the unit gets dirty, wipe<br />
with a soft cloth or use diluted neutral<br />
cleaning liquid. Be sure to remove any fluid<br />
completely. Do not use thinner, benzine or<br />
alcohol as they may damage the surface of<br />
the unit.<br />
CAUTION<br />
The product shall not be exposed to<br />
dripping or splashing and that no object<br />
filled with liquids, such as vases, shall be<br />
placed on the product.<br />
Do not install this equipment in a confined<br />
space such as a book case or similar unit.<br />
3
4<br />
Connection<br />
CAUTION<br />
< Turn off the power of all the equipment before making connections.<br />
< Read instructions of each component you intend to use with this unit.<br />
< Be sure to insert each plug securely. To prevent hum and noise, do not bundle the<br />
connection cords.<br />
D<br />
RCA cable<br />
A<br />
AUDIO IN<br />
cassette tape deck,<br />
amplifier, etc.<br />
E<br />
B<br />
optical digital cable<br />
DIGITAL IN<br />
CD-R, MD, etc.<br />
C<br />
AC outlet
A<br />
AUDIO OUT jack<br />
B<br />
C<br />
D<br />
E<br />
Analogue 2-channel audio signal is output from this jack.<br />
Connect the component with RCA pin cable.<br />
AUDIO OUT (SR-L30<strong>DAB</strong>) w AUDIO IN (cassette tape deck, amplifier, etc.)<br />
Make sure to connect :<br />
white plug w white jack (L: left)<br />
red plug w red jack (R: right)<br />
DIGITAL OUT terminal<br />
<strong>DAB</strong>’s digital audio signal is output from this terminal. If you want to record<br />
digitally, or decode the signal using an external digital decoder, connect the<br />
component with an optical cable.<br />
DIGITAL OUT (SR-L30<strong>DAB</strong>) w DIGITAL IN (decoder, CD-R, MD, etc.)<br />
< When inserting the plug of the optical cable, the protective shutter of the<br />
terminal will open and you should hear it click into position when fully<br />
inserted. Be careful that you do not force the plug, because this could result<br />
in damage to the protective shutter, the cable, or the unit itself.<br />
DC IN<br />
Connect the provided AC adaptor to this jack. After all other connections are<br />
complete, connect the AC adaptor’s plug to the AC wall socket.<br />
< Do not use any AC adaptors other than the one included with this unit to<br />
avoid fire, electric shock, etc. Be sure to connect the adaptor to an AC outlet<br />
which supplies correct voltage.<br />
PHONES<br />
For private listening, insert the headphones plug into this jack, and adjust the<br />
volume using the VOLUME buttons.<br />
<strong>DAB</strong>/<strong>FM</strong> Indoor Antenna<br />
Strech the telescopic antenna and point it towards the direction which gives<br />
the best reception.<br />
< You can check the <strong>DAB</strong> signal strength. Tune in a <strong>DAB</strong> station and press the<br />
SELECT button once to display the signal strength.<br />
5
6<br />
J I<br />
A<br />
POWER switch<br />
Names of Each Control<br />
A B C D E F<br />
Press this switch to turn the unit on or off (standby).<br />
H G<br />
The equipment draws nominal non-operating power from the AC<br />
outlet with its POWER switch in the OFF position.<br />
B AUTO TUNING button<br />
Press this button to activate auto location of all available <strong>DAB</strong> services.<br />
Press once for UK services or, hold for longer than 2 seconds to activate<br />
international search.<br />
C FUNCTION/<strong>FM</strong> MODE button<br />
In <strong>DAB</strong> mode, activates features such as station order, manual tune, DRC<br />
value, SW version indication, signal error rate. It is also possible to ‘tidy’<br />
the station list to remove stations which are in the memory but have no<br />
service provided.<br />
In <strong>FM</strong> mode, pressing this button alternates between stereo mode and<br />
mono mode.
D<br />
INFO button<br />
In <strong>DAB</strong> mode, this button is used to change the text content on the<br />
second line of the display, to show DLS (Dynamic Label Segment, info text<br />
supplied by each radio station), Programme type (classification given by<br />
the radio sation ie: Pop music or Rock), Multiplex name (name of<br />
multiplex broadcaster), Time & date, Bitrate, or Channel and frequency.<br />
E Numeric buttons<br />
F<br />
Use these buttons (1-6) to select the desired preset channel.<br />
MEMORY button<br />
Press this button to store the station. Up to 40 stations (<strong>DAB</strong>:10, <strong>FM</strong>:30)<br />
can be stored in preset memories.<br />
G TUNING knob<br />
Turn this knob to tune in a station.<br />
H SELECT button<br />
I<br />
J<br />
Use this button to enter your selection.<br />
Press once to show signal stength, press again to remove signal strength<br />
display.<br />
BAND button<br />
Press this button to select the band (<strong>FM</strong> or <strong>DAB</strong>).<br />
VOLUME knob<br />
Turn this knob to adjust the volume.<br />
7
8<br />
Setting up your <strong>DAB</strong> Tuner<br />
The first time you turn on the unit, it will<br />
scan for <strong>DAB</strong> channels and build a channel<br />
list.<br />
Press the POWER switch to turn the unit<br />
on.<br />
The following screen will display for 2<br />
seconds.<br />
The unit will scan for broadcast services in<br />
the local area and add them to the channel<br />
list as they are found. The scan should take<br />
about 10 seconds.<br />
As channels are added to the channel list the<br />
number of channels found is displayed.<br />
After broadcast services have been found the<br />
channels are listed in alphanumeric order.<br />
> If no broadcast services are found, please<br />
reorient the antenna.<br />
Auto Tuning<br />
If you move the unit to a new area or you<br />
want to check to see if there are new<br />
channels available in your area, you can scan<br />
to find new channels automatically.<br />
Press the AUTO TUNING button.<br />
The unit will scan for any new channels and<br />
add the channels found to the channel list.<br />
> Press and hold the AUTO TUNING button<br />
for longer than 2 seconds to activate<br />
international search.
1 3 2<br />
Follow the steps below to tune in and listen<br />
to the channels found by the unit.<br />
1 Select <strong>DAB</strong> by pressing the BAND<br />
button.<br />
2 Turn the TUNING knob to the left or<br />
right to scroll through the channels in<br />
the channel list.<br />
The present channel is displayed on the<br />
first line and the changing list is displayed<br />
on the second line.<br />
3 When you have found a channel that<br />
you want to listen to, press the<br />
SELECT button once.<br />
Using the Channel List<br />
The channel is tuned in and channel<br />
information is displayed.<br />
v<br />
< To display the signal strength of a<br />
channel, press the SELECT button again.<br />
Press the SELECT button once again to<br />
cancel the signal strength display.<br />
< Channels are displayed in alphanumeric<br />
order in the channel list, with numbers<br />
coming first. So, stations such as 6 Music<br />
from the BBC will be listed early in the<br />
list.<br />
< If a channel is no longer broadcasting or<br />
the unit is moved out of the area of a<br />
broadcast channel, the unit will no longer<br />
be able to tune in the channel. If the<br />
channel cannot be tuned in a question<br />
mark (?) is displayed in front of the<br />
channel name. If you select this channel<br />
to tune in by pressing the SELECT button,<br />
‘No stations Available’ is displayed.<br />
< You can remove a channel that is no<br />
longer available from the channel list. See<br />
Tidy station, page 11.<br />
9
10<br />
FUNCTION/<br />
<strong>FM</strong> MODE<br />
In <strong>DAB</strong> mode, use function control to set<br />
system options. There are 6 options in the<br />
function control.<br />
Station order<br />
Use station order to set the order in which<br />
stations are listed. There are four orders:<br />
Favourite, Alphanumeric, Active and Tidy.<br />
1 While listening to a <strong>DAB</strong> broadcast<br />
press the FUNCTION/<strong>FM</strong> MODE<br />
button.<br />
2 Turn the TUNING knob until ‘Station<br />
order’ is displayed in the second line<br />
of the display.<br />
Using Function Control 1<br />
SELECT<br />
TUNING<br />
3 Press the SELECT button.<br />
The current option is displayed in the first<br />
line of the display.<br />
4 Turn the TUNING knob until the<br />
desired option is displayed in the<br />
second line of the display.
Fav Station (Favourite station)<br />
As you tune in stations and listen to them<br />
the unit will memorize the top ten<br />
stations you listen to and list them at the<br />
top of the channel list. A Favourite station<br />
in the channel list has ‘ ’ displayed after<br />
the station name on the first line of the<br />
display.<br />
Alphanumeric<br />
This is the default order. Channels are<br />
listed by name with numbers first and<br />
then alphabetically by letters in the<br />
channel name.<br />
Active station<br />
This option will list active stations at the<br />
top of the channel list and channels that<br />
are in the list but have no service in your<br />
area to be listed last in the channel list.<br />
Tidy station<br />
This option will list active stations and<br />
remove any channels that are in the list<br />
but have no service in your area from the<br />
channel list.<br />
-> preset<br />
This option takes your top ten Favourite<br />
channels and assigns them to preset<br />
numbers 1 - 10.<br />
This option is only available after ‘Fav<br />
Station’ option has been turned on. See<br />
above.<br />
5 Press the SELECT button.<br />
Sig error rate<br />
(Signal error rate)<br />
This option shows the digital bit error rate<br />
(0-99) of the currently tuned channel. This is<br />
for information only and no adjustment is<br />
available. The lower the figure the better the<br />
quality of the received broadcast.<br />
1 While listening to a <strong>DAB</strong> broadcast<br />
press the FUNCTION/<strong>FM</strong> MODE<br />
button.<br />
2 Turn the TUNING knob until ‘Sig error<br />
rate’ is displayed in the second line of<br />
the display.<br />
The digital bit error rate of the current<br />
tuned channel is displayed.<br />
11
Preset tune<br />
Use this option to select the <strong>DAB</strong> preset<br />
station.<br />
This option won’t work when no station is<br />
stored in memory. See page 18 to store<br />
stations.<br />
1 While listening to a <strong>DAB</strong> broadcast<br />
press the FUNCTION/<strong>FM</strong> MODE<br />
button.<br />
2 Turn the TUNING knob until ‘Preset<br />
tune’ is displayed in the second line<br />
of the display.<br />
3 Press the SELECT button.<br />
12<br />
The currently tuned station is displayed.<br />
Using Function Control 2<br />
4 Turn the TUNING knob until the<br />
desired preset station is displayed.<br />
5 Press the SELECT button to select the<br />
preset station.<br />
< If the station is not broadcasting, ‘Empty’<br />
is displayed.<br />
< If the station is available, ‘Memory’ is<br />
displayed.
DRC value<br />
This option sets the Dynamic Range Control<br />
(DRC) value to be applied to received<br />
broadcasts. DRC is used to reduce the range<br />
between high and low volumes of audio and<br />
is sometimes applied at the broadcast<br />
source. Pop music may have a high value of<br />
DRC applied, appropriate for constantly high<br />
listening levels, while classical music<br />
broadcasts may have no DRC applied to<br />
allow the listener to hear the full dynamic<br />
range of the source volume.<br />
There are three values of DRC you can apply.<br />
0 :None<br />
1/2: Medium<br />
1 :Maximum<br />
1 While listening to a <strong>DAB</strong> broadcast<br />
press the FUNCTION/<strong>FM</strong> MODE<br />
button.<br />
2 Turn the TUNING knob until ‘DRC<br />
value’ is displayed in the second line<br />
of the display.<br />
3 Press the SELECT button.<br />
4 Turn the TUNING knob until the<br />
desired level of DRC is displayed in<br />
the second line of the display.<br />
5<br />
Press the SELECT button.<br />
13
Manual tune<br />
This option allows you to manually tune in a<br />
channel and view a continuously updated<br />
display of the strength of the signal. This<br />
may be useful when adjusting or positioning<br />
an antenna for better reception.<br />
1 While listening to a <strong>DAB</strong> broadcast<br />
press the FUNCTION/<strong>FM</strong> MODE<br />
button.<br />
2 Turn the TUNING knob until ‘Manual<br />
tune’ is displayed in the second line<br />
of the display.<br />
14<br />
Using Function Control 3<br />
FUNCTION/<br />
<strong>FM</strong> MODE<br />
SELECT<br />
TUNING<br />
3 Press the SELECT button.<br />
‘Manual tune’ is displayed on the first line<br />
of the display.<br />
4 Turn the TUNING knob to scroll<br />
through the channel list.
5 Press the SELECT button when the<br />
channel you wish to tune in is<br />
displayed in the second line of the<br />
display.<br />
6<br />
The signal strength indicator is displayed.<br />
While viewing the indicator,<br />
reposition the antenna until the best<br />
reception is indicated.<br />
7 Press the SELECT button to cancel<br />
Manual tune and resume normal<br />
reception.<br />
Sw version (Software version)<br />
This option shows the version number of the<br />
installed software. This is for information<br />
only and no adjustment is available.<br />
1 While listening to a <strong>DAB</strong> broadcast<br />
press the FUNCTION/<strong>FM</strong> MODE<br />
button.<br />
2 Turn the TUNING knob until the<br />
version number and ‘Sw version’ are<br />
displayed.<br />
15
You can choose the type of information<br />
displayed in the second line of the display<br />
while listening to a <strong>DAB</strong> channel.<br />
Each time the INFO button is pressed,<br />
the information is displayed as follows.<br />
16<br />
DLS<br />
Programme type<br />
Multiplex name<br />
Date and time<br />
Bitrate mode<br />
Channel and frequency<br />
DLS<br />
The Dynamic Label Segment (DLS) is the<br />
scrolling text label supplied by the radio<br />
station. It may be information on music titles<br />
or details regarding the programme or<br />
station.<br />
Changing Display Settings<br />
Programme type<br />
This is a description of the type of broadcast<br />
supplied by the radio station such as Pop,<br />
Rock or Classical music.<br />
Multiplex name<br />
This displays the name of the Mulitplex that<br />
is broadcasting the programme.<br />
Date and time<br />
This displays the current date and time,<br />
which is supplied by the radio station and<br />
should always be accurate.<br />
Bitrate mode<br />
This displays the bitrate of the current<br />
playing broadcast.<br />
Channel and frequency<br />
This displays the channel and frequency of<br />
the current playing broadcast.
1 2 3<br />
1 Select <strong>FM</strong> by pressing the BAND<br />
button.<br />
2 Select ‘Manual tune’ or ‘Auto tune’ by<br />
pressing the SELECT button.<br />
Manual tune Auto tune<br />
Preset tune<br />
3 Select the station you want to listen<br />
to.<br />
Manual tuning mode<br />
Turn the TUNING knob until the station<br />
you want to listen to is found.<br />
The frequency changes by a fixed step (50<br />
kHz).<br />
Auto tuning mode<br />
Turn the TUNING knob slightly to begin<br />
auto tuning. When a station is found, the<br />
tuning process stops automatically.<br />
Turn the TUNING knob again to stop the<br />
auto tuning.<br />
< ‘STEREO’ is displayed when a stereo<br />
broadcast is tuned in.<br />
Listening to <strong>FM</strong> Stations<br />
FUNCTION/<strong>FM</strong> MODE Button<br />
Pressing this button switches between <strong>Stereo</strong><br />
mode and Mono mode.<br />
<strong>Stereo</strong><br />
<strong>FM</strong> stereo broadcasts are received in<br />
stereo and the STEREO appears on the<br />
display.<br />
Mono<br />
To compensate for weak <strong>FM</strong> stereo<br />
reception, select this mode. Reception<br />
will now be monaural, reducing<br />
unwanted noise.<br />
17
Manual Memory Presetting<br />
You can store up to 10 <strong>DAB</strong> stations and 30<br />
<strong>FM</strong> stations.<br />
1 Select <strong>DAB</strong> or <strong>FM</strong> by pressing the<br />
BAND button.<br />
2<br />
18<br />
1<br />
3<br />
5<br />
4<br />
Tune the station you would like to<br />
store.<br />
3 Press the MEMORY button briefly.<br />
Preset Tuning<br />
4 Select the preset you would like to<br />
use for this station using the TUNING<br />
knob or the numeric buttons (1-6).<br />
5 Within 4 seconds, press the MEMORY<br />
button.<br />
< If you don’t press the memory button<br />
within 4 seconds after selecting the<br />
channel, the selection will be canceled.<br />
To store more stations, repeat steps 1 to<br />
5 .
Preset Auto (<strong>FM</strong> only)<br />
1 2<br />
1 Select <strong>FM</strong> by pressing the BAND<br />
button.<br />
2 Press the MEMORY button for more<br />
than 3 seconds.<br />
Up to 30 of the best received <strong>FM</strong> stations<br />
in your area will be stored automatically.<br />
How to select <strong>DAB</strong> preset<br />
stations<br />
See ‘Preset tune’ of page 12.<br />
How to select <strong>FM</strong> preset<br />
stations<br />
1 3<br />
2 3<br />
1 Select <strong>FM</strong> by pressing the BAND<br />
button.<br />
2 Select ‘Preset tune’ by pressing the<br />
SELECT button.<br />
3 Select a preset channel<br />
Turn the TUNING knob until the desired<br />
preset station is found.<br />
< Preset stations stored from 1 to 6 can also<br />
be selected using the numeric buttons.<br />
19
20<br />
About <strong>DAB</strong><br />
With this unit you can receive and listen to Digital Audio Broadcast (<strong>DAB</strong>)<br />
programmes. <strong>DAB</strong> uses digital, not analogue signals, resulting in near CDquality<br />
audio with virtually interference-free reception. Along with superior<br />
quality audio, <strong>DAB</strong> can also deliver additional audio channels and text. In the<br />
future, computer data and images are also possible.<br />
Digital radio is broadcast as groups of data called ensembles or multiplexes.<br />
Each multiplex can contain a number of stations (services) and each station<br />
contains a primary service and can contain secondary services as illustrated in<br />
the following diagram.<br />
<strong>DAB</strong> SIGNAL<br />
BBC<br />
National<br />
<strong>DAB</strong> 1<br />
BBC <strong>Radio</strong> 4<br />
Parliament<br />
1<br />
2<br />
1 2 3 4+<br />
MULTIPLEX<br />
PRIMARY<br />
SERVICES<br />
SECONDARY<br />
SERVICES<br />
Each multiplex is transmitted in a set frequency range and received by this<br />
unit for decoding. You can receive multiplexes broadcast in the 174–240<br />
MHz frequency band and store the services in each multiplex for you to<br />
access. The number of multiplexes you receive depend on your location.<br />
Channels used in the UK are in the range 10A to 12D.<br />
Multiplexes and stations have labels (names) that are used to identify them.<br />
Instead of needing to know the particular frequency of your favourite<br />
broadcast, you can simply select the station name. Secondary services and<br />
additional data such as text or multiplex info are also available.<br />
3+
Factory Reset<br />
To clear the station list and<br />
memory<br />
To clear the station list and memory, it is<br />
possible to operate a factory reset function.<br />
To do this hold down the FUNCTION/<strong>FM</strong><br />
MODE button for a period longer than 4<br />
seconds, ‘Factory reset...’ appears on the<br />
display.<br />
<strong>FM</strong> Tuner<br />
Specifications<br />
Tuning range . . . . . . . . . 87.50 - 108.00 MHz<br />
(50 kHz steps)<br />
Signal-to-Noise ratio . . . . . . . . 65 dB (Mono)<br />
60 dB (<strong>Stereo</strong>)<br />
<strong>DAB</strong> Tuner<br />
Tunig range . . . Band 3, 174 MHz - 240 MHz<br />
Input . . . . . . . . . . . . . . . . Telescopic antenna<br />
Max signal . . . . . . . . . . . . . . . . . –3 dBm typ<br />
Sensitivity . . . . . . . . . . . . . . . . . –96 dBm typ<br />
Adjacent Channel Rejection . . . . . . 35 dB typ<br />
Digital output . . . . . 24 bit/48 kHz resolution<br />
Speaker System Section<br />
Unit . . . . . . . . . . . . . . . . . . . 7.5 cm Cone x 2<br />
Connectors<br />
Optical digital output x 1<br />
Analogue audio output (RCA) x 1<br />
Headphone out (3.5 mm stereo mini jack) x 1<br />
General<br />
Output Power . . . . . . . . . . . . . . . 2 W + 2 W<br />
Power requirements . . . . . . . . . . . . DC +12V<br />
Dimensions (W x H x D). . 310 x 146 x 95 mm<br />
Weight . . . . . . . . . . . . . . . . . . . . . . . . 2.0 kg<br />
Operating temperature . . . . . . . . 0 ˚C - 50 ˚C<br />
Accessories<br />
AC adaptor x 1<br />
• Design and specifications are subject to<br />
change without notice.<br />
• Illustrations may differ slightly from<br />
production models.<br />
21
22<br />
Troubleshooting<br />
In case of any trouble with this unit, please take the time to look through<br />
this chart and see if you can solve the problem yourself before you call your<br />
dealer or a <strong>TEAC</strong> service centre.<br />
No sound.<br />
e Check the connection to the AC wall outlet.<br />
Cannot listen to any station, or signal is too weak.<br />
e Tune in the station properly.<br />
e Transmitting station is too far away.<br />
e Install the antenna again after locating the best reception position.<br />
Noise is excessive.<br />
e Poor location and/or direction of the antenna.<br />
e Transmitting station is too far away.<br />
e If a TV is near the unit, turn it off.<br />
Though the <strong>FM</strong> broadcast is stereo, it sounds monaural.<br />
e Press the FUNCTION/<strong>FM</strong> MODE button.<br />
All the preset stations are erased.<br />
e If the power supply is interrupted for 15 days or longer, the setting kept<br />
in memory (such as preset stations) are erased. When this happens, the<br />
internal battery that is used to retain settings in memory is exhausted<br />
and must be recharged by having the unit connected to power for at<br />
least 3 days.<br />
<strong>DAB</strong> tuner<br />
‘NO stations Available’ appears on the display.<br />
e Ensure that <strong>DAB</strong> coverage exists in your area.
Cannot access secondary services.<br />
e At the time of publishing not many secondary services are available, this<br />
will increase as more <strong>DAB</strong> stations start broadcasting. If a secondary<br />
service station is available, the secondary indicator >> will be displayed<br />
next to the station name.<br />
Display goes out or displayed ‘service off air’.<br />
e This may occur if a broadcaster changes the label of a service or<br />
removes a label whilst you are listening to it. The SR-L30<strong>DAB</strong> will try to<br />
retune to this station, or alternatively follow the procedure for auto tune<br />
on page 8.<br />
Cannot listen to the selected station.<br />
e Ensure you have pressed the SELECT button when you want to listen to<br />
your selection. The station you are currently listening to will be displayed<br />
on the first line of the display, as you scroll through the station order list<br />
the second line will show other station options. Press the SELECT button<br />
to activate your selection.<br />
A burbling sound is heard on some stations.<br />
e <strong>DAB</strong> like other digital media is good at producing quality audio from a<br />
low level signal, however if this signal level is too low a ‘burbling’ sound<br />
can sometimes be heard. To reduce this, try repositioning your antenna<br />
to gain maximum signal strength.<br />
If normal operation cannot be recovered, unplug the power cord<br />
from the outlet and plug it in again. This resets the internal microcomputer<br />
which can be disturbed during electrical storms, power<br />
interruptions, et cetera.<br />
23
Z<br />
<strong>TEAC</strong> CORPORATION 3-7-3, Nakacho, Musashino-shi, Tokyo 180-8550, Japan Phone: (0422) 52-5081<br />
<strong>TEAC</strong> AMERICA, INC. 7733 Telegraph Road, Montebello, California 90640 Phone: (323) 726-0303<br />
<strong>TEAC</strong> CANADA LTD. 5939 Wallace Street, Mississauga, Ontario L4Z 1Z8, Canada Phone: (905) 890-8008<br />
<strong>TEAC</strong> MEXICO, S.A. De C.V Campesinos N°184, Colonia Granjas Esmeralda, Delegacion Iztapalapa, CP 09810, México DF<br />
Phone: (525) 581-5500<br />
<strong>TEAC</strong> UK LIMITED 5 Marlin House, Croxley Business Park, Watford, Hertfordshire, WD18 8TE, U.K. Phone: 01923-819699<br />
<strong>TEAC</strong> DEUTSCHLAND <strong>GmbH</strong> Bahnstrasse 12, 65205 Wiesbaden-Erbenheim, Germany Phone: 0611-71580<br />
<strong>TEAC</strong> FRANCE S.A. 17, Rue Alexis-de-Tocqueville, CE 005 92182 Antony Cedex, France Phone: (1) 42.37.01.02<br />
<strong>TEAC</strong> ITALIANA S.p.A. Via C. Cantù 11, 20092 Cinisello Balsamo, Milano, Italy Phone: 02-66010500<br />
<strong>TEAC</strong> AUSTRALIA PTY., LTD. 106 Bay Street, Port Melbourne, Victoria 3207, Australia Phone: (03) 9644-2442<br />
A.B.N. 80 005 408 462<br />
This appliance has a serial number located on the rear panel. Please record<br />
the model number and serial number and retain them for your records.<br />
Model number Serial number<br />
1003 . MA-0843A