OWNER'S MANUAL Micro Hi-Fi System - TEAC Europe GmbH
OWNER'S MANUAL Micro Hi-Fi System - TEAC Europe GmbH
OWNER'S MANUAL Micro Hi-Fi System - TEAC Europe GmbH

Create successful ePaper yourself
Turn your PDF publications into a flip-book with our unique Google optimized e-Paper software.
Z<br />
9A10300100<br />
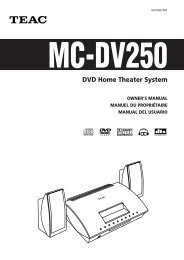
MC-DX25<br />
<strong>Micro</strong> <strong>Hi</strong>-<strong>Fi</strong> <strong>System</strong><br />
OWNER’S <strong>MANUAL</strong>
2<br />
Contents Before Use<br />
Thank you for choosing <strong>TEAC</strong>. Read this manual carefully<br />
to get the best performance from this unit.<br />
Before Use . . . . . . . . . . . . . . . . . . . . . . . . . . . . . . . . . . . . . . . . 2<br />
Discs . . . . . . . . . . . . . . . . . . . . . . . . . . . . . . . . . . . . . . . . . . . . . 3<br />
Connection. . . . . . . . . . . . . . . . . . . . . . . . . . . . . . . . . . . . . . . . 4<br />
Wall Mounting . . . . . . . . . . . . . . . . . . . . . . . . . . . . . . . . . . . . . 5<br />
Names of Each Control . . . . . . . . . . . . . . . . . . . . . . . . . . . . . . . 6<br />
Remote Control Unit. . . . . . . . . . . . . . . . . . . . . . . . . . . . . . . . . 7<br />
Basic Operation. . . . . . . . . . . . . . . . . . . . . . . . . . . . . . . . . . . . . 8<br />
Listening to CD/MP3 . . . . . . . . . . . . . . . . . . . . . . . . . . . . . . . . . 9<br />
Search Mode (MP3 only) . . . . . . . . . . . . . . . . . . . . . . . . . . . . . 11<br />
Programmed Playback. . . . . . . . . . . . . . . . . . . . . . . . . . . . . . . 12<br />
Repeat Playback . . . . . . . . . . . . . . . . . . . . . . . . . . . . . . . . . . . 14<br />
Shuffle Playback . . . . . . . . . . . . . . . . . . . . . . . . . . . . . . . . . . . 14<br />
Listening to the Radio . . . . . . . . . . . . . . . . . . . . . . . . . . . . . . . 15<br />
Preset Tuning . . . . . . . . . . . . . . . . . . . . . . . . . . . . . . . . . . . . . 16<br />
RDS . . . . . . . . . . . . . . . . . . . . . . . . . . . . . . . . . . . . . . . . . . . . 17<br />
RDS (PTY Search) . . . . . . . . . . . . . . . . . . . . . . . . . . . . . . . . . . 18<br />
Setting the Clock . . . . . . . . . . . . . . . . . . . . . . . . . . . . . . . . . . 19<br />
Setting the Timer . . . . . . . . . . . . . . . . . . . . . . . . . . . . . . . . . . 20<br />
Troubleshooting . . . . . . . . . . . . . . . . . . . . . . . . . . . . . . . . . . . 22<br />
Specifications . . . . . . . . . . . . . . . . . . . . . . . . . . . . . . . . . . . . . 23<br />
VARING: APPARATEN INNEHÅLLER LASER KOMPONENT MED<br />
STRÅLNING ÖVERSTIGANDE KLASS 1.<br />
‘ADVARSEL: USYNLIG LASERSTRÅLING VED ÅBNING NAR<br />
SIKKERHEDSAFBRYDERE ER UDE AF FUNKTION. UNDGÅ<br />
UDSAETTELSE FOR STRÅLING’<br />
‘VAROITUS! SUOJAKOTELOA EI SAA AVATA. LAITE SISÄLTÄÄ<br />
LASERDIODIN. JOKA LÄHETTÄ (NÄKYMÄTÖNTÄ) SILMILLE<br />
VAARALLISTA LASERSÄTEILYÄ’.<br />
ADVARSEL: USYNLIG LASERBESTRÅLING NÅR DENNE DELEN ER<br />
ÅPEN OG SIKKERHETSSPERREN ER UTKOBLET UNNGÅ<br />
UTSETTELSE FOR STRÅLING.<br />
trademark of New Transducers Ltd.<br />
Read this before operation<br />
< As the unit may become warm during operation, always leave<br />
sufficient space around the unit for ventilation.<br />
< The voltage supplied to the unit should match the voltage as<br />
printed on the rear panel of the supplied subwoofer. If you<br />
are in any doubt regarding this matter, consult an electrician.<br />
< Choose the installation location of your unit carefully. Avoid<br />
placing it in direct sunlight or close to a source of heat. Also<br />
avoid locations subject to vibrations and excessive dust, heat,<br />
cold or moisture.<br />
< Do not place the unit on an amplifier/receiver or any other<br />
electronic device that generates heat.<br />
< Do not open the sealed cabinet as this might result in damage<br />
to the circuitry or electrical shock. If a foreign object should<br />
get inside the unit, contact your dealer or service agency.<br />
< When removing the power plug from the wall outlet, always<br />
pull directly on the plug, never yank the cord.<br />
< To keep the laser pickup clean, do not touch it, and always<br />
close the CD door.<br />
< Do not attempt to clean the unit with chemical solvents as<br />
this might damage the finish. Use a clean, dry cloth.<br />
< Keep this manual in a safe place for future reference.<br />
DO NOT MOVE THE UNIT DURING PLAYBACK<br />
During playback, the disc rotates at high speed. Do NOT lift or<br />
move the unit during playback. Doing so may damage the<br />
disc or the laser assembly.<br />
WHEN MOVING THIS UNIT<br />
When relocating or packing the unit for moving, be sure to<br />
remove the disc. Moving this unit with the disc loaded may<br />
result in damage to this unit.<br />
CAUTION<br />
Do not expose this unit to liquids of any kind. Keep any<br />
objects containing liquids such as vases, water glasses, potted<br />
plants, et cetera off the top of this unit.<br />
Do not install this equipment in a confined space such as a<br />
bookcase or similar unit.
Discs that can be played on this unit:<br />
• Commercial audio CD’s bearing the ‘Compact Disc Digital<br />
Audio’ logo:<br />
• Properly finalized CD-R and CD-RW discs<br />
Note:<br />
< Depending on the quality of the disc and/or the condition of<br />
the recording, some CD-R discs may not be playable.<br />
< Copy-protected discs and other discs which do not conform<br />
to the CD standard may not play back correctly in this player.<br />
If you use such discs in this unit, <strong>TEAC</strong> Corporation and its<br />
subsidiaries cannot be responsible for any consequences or<br />
guarantee the quality of reproduction. If you experience<br />
problems with such non-standard discs, you should contact<br />
the producers of the disc.<br />
< Always load the disc with the label side facing you. (Compact<br />
discs can be played or recorded only on one side.)<br />
< To remove a disc from its storage case, press down on the<br />
center of the case and lift the disc out, holding it carefully by<br />
the edges.<br />
How to remove the disc How to hold the disc<br />
< Should the disc become dirty, wipe the surface radially with a<br />
soft, dry cloth. Never clean the disc using a circular motion.<br />
< Never use such chemicals as record sprays, antistatic sprays or<br />
fluid, benzene or thinner to clean the discs. Such chemicals<br />
will do irreparable damage to the disc’s plastic surface.<br />
< Discs should be returned to their cases after use to avoid dust<br />
and scratches that could cause the laser pickup to ‘skip.’<br />
< Do not expose discs to direct sunlight or high humidity and<br />
temperature for extended periods. Long exposure to high<br />
temperatures will warp the disc.<br />
< CD-R discs are more sensitive to the effects of heat and<br />
ultraviolet rays than ordinary CDs. It is important that they are<br />
not stored in a location where direct sunlight will fall on them<br />
and which is away from sources of heat such as radiators or<br />
heat-generating electrical devices.<br />
Discs<br />
< Printable CD-R discs aren’t recommended, as the label side<br />
might be sticky and damage the unit.<br />
< Do not stick papers or protective sheets on the discs and do<br />
not use any protective coating spray.<br />
< Use a soft oil-based felt-tipped pen to write the information<br />
on the label side. Never use a ball-point or hard-tipped pen,<br />
as this may cause damage to the recorded side.<br />
< Never use a stabilizer. Using commercially available CD<br />
stabilizers with this unit will damage the mechanisms and<br />
cause them to malfunction.<br />
< Do not use irregular shape CDs (octagonal, heart-shape, etc.).<br />
CDs of this sort can damage the unit.<br />
< If you are in any doubt as to the care and handling of a CD-<br />
R/CD-RW disc, read the precautions supplied with the disc, or<br />
contact the disc manufacturer directly.<br />
MP3 compatibility<br />
< <strong>Fi</strong>le names of MP3 should be alphanumeric characters. This<br />
unit cannot display symbols and full-size or 2 bytes-wide<br />
characters (such as Japanese, Chinese, etc.) correctly. Also, be<br />
sure to use the file extension ‘.mp3’.<br />
< The disc must be finalized in order to play.<br />
< The CD-ROM must be ISO 9660 compatible.<br />
< When more than 200 files or folders are recorded on the disc,<br />
the unit might not be able to play it correctly.<br />
< Mono or stereo MPEG-1 Audio Layer 3 format, 44.1 or<br />
48 kHz, fixed bit-rate.<br />
< Audio encoded at 128 Kbps should sound close to regular<br />
audio CD quality. Although this player will play lower bit-rate<br />
MP3 tracks, the sound quality becomes noticeably worse at<br />
lower bit-rates.<br />
3
4<br />
CAUTION<br />
A<br />
MAIN UNIT<br />
Connection<br />
SPEAKER (R) SPEAKER (L)<br />
AM loop antenna<br />
G<br />
Turn off the power of all the equipment before making<br />
connections.<br />
Read instructions of each component you intend to use with<br />
this unit.<br />
< Be sure to insert each plug securely. To prevent hum and<br />
noise, do not bundle the connection cords with the power<br />
cord.<br />
Position the antenna for the best sound.<br />
If you want, you can hook the AM antenna on a wall as<br />
shown below:<br />
C<br />
SUBWOOFER<br />
E<br />
A<br />
B<br />
B<br />
F<br />
FM antenna<br />
While in FM mode, tune in an FM station and extend the<br />
lead to find the best position for reception. This antenna<br />
may need to be repositioned if you move your unit to a new<br />
location.<br />
FM Outdoor Antenna<br />
In an area where FM signals are weak, it will be necessary to<br />
use a 75-ohm unbalanced-type outdoor FM antenna using<br />
an optional (not supplied) matching transformer connected<br />
to an external antenna. Generally, a 3-element antenna will<br />
be sufficient; if you live in an area where the FM signals are<br />
particularly weak, it may be necessary to use one with 5 or<br />
more elements.<br />
Outdoor FM Antenna (75Ω)
C<br />
D<br />
E<br />
F<br />
G<br />
Subwoofer<br />
Make the connection between the ‘TO SUBWOOFER’ and<br />
‘FROM MAIN’ sockets using the supplied cable.<br />
AUX IN<br />
You can connect a DVD player, VCR etc. to this unit.<br />
Connect the component with RCA pin cords.<br />
Make sure to connect the white plug to the white jacks<br />
(Left) and the red plug to the red jacks (Right).<br />
DVD, TV, etc.<br />
LINE OUT<br />
R L<br />
SPEAKERS<br />
Connect the left speaker’s plug to L, and the right speaker’s<br />
plug to R.<br />
< When using speakers other than those supplied with the<br />
system, the impedance should be 3 ohms or more.<br />
< Do not connect anything other than speakers to these<br />
terminals.<br />
AC Power Cord<br />
Plug this AC power cord into an AC wall socket.<br />
Power Switch<br />
Use this switch to turn the system on or off.<br />
The main unit is powered via the subwoofer. You need to<br />
first turn this switch on.<br />
Wall Mounting<br />
You can mount the main unit and/or the left and right speakers<br />
on a wall.<br />
Precautions<br />
< Be aware that the length of the cables are approximately 3 m.<br />
Do not attempt to mount the main unit and the speakers too<br />
far from the subwoofer.<br />
< Drill holes into solid wall support, such as wooden frame or<br />
concrete wall.<br />
< <strong>TEAC</strong> supplies these brackets as a convenience to the product<br />
owner. Consult your local building codes and exercise all<br />
necessary caution when mounting these brackets. If you are<br />
unsure how to use the supplied brackets, consult with a local<br />
tradesmen or building supply expert.<br />
To hook on the wall<br />
1 Use the supplied template to determine drilling points.<br />
2 Secure the brackets on the wall using the supplied screws.<br />
< As a convenience, a set of tapered plastic anchors is supplied.<br />
If you chose to use these anchors, drill a pilot hole using<br />
either a 6mm drill bit then tap the anchor into the pilot hole.<br />
Only use these anchors if they are appropriate for the<br />
materials onto which the unit is to be mounted. Consult your<br />
local hardware store if you are uncertain.<br />
Note:<br />
Before going on, make connections between the main unit<br />
and the speakers by referring to page 4-5.<br />
3 Hang the main unit and/or the speakers to the mounting<br />
tabs.<br />
2<br />
Main Unit<br />
3<br />
2<br />
Speaker<br />
3<br />
5
6<br />
Names of Each Control<br />
A POWER<br />
F REPEAT/PTY<br />
Press this switch to turn the unit on or off (standby).<br />
The main unit is powered via the subwoofer. You need to first<br />
turn on the subwoofer.<br />
The equipment draws a nominal amount of power from the<br />
AC outlet even with its POWER switch in the OFF position.<br />
B FUNCTION<br />
Use this button to select a source (CD, AUX or TUNER).<br />
C FM/AM<br />
Use this button to select AM or FM.<br />
D Remote Sensor<br />
When operating the remote control unit, point it towards the<br />
remote sensor.<br />
E MEMORY/CLOCK SET<br />
In CD mode, use this button to program tracks.<br />
In TUNER mode, use this button to store preset channels into<br />
memory.<br />
This button is also used for clock adjustment.<br />
In CD mode, use this button for repeat playback.<br />
In FM TUNER mode, use this button to start PTY search.<br />
G STEREO/MONO/MP3<br />
In FM TUNER mode, use this button to select stereo or<br />
monaural.<br />
During playback of a MP3 disc, use this button to search track<br />
name.<br />
During playback of CD, use this button to switch the ESP<br />
function on or off.<br />
H SKIP (.//) / TUNING<br />
I<br />
In CD mode, momentarily press this button to skip tracks.<br />
Hold down this button to search for a part of a track.<br />
In TUNER mode, momentarily press this button to tune in<br />
stations.<br />
In Standby mode, these buttons are used to set or adjust the<br />
clock and the timer.<br />
STOP (H)<br />
Use this button to stop playback of CD/MP3.
J<br />
PLAY/PAUSE (y/J)<br />
Use this button to start or pause playback of CD/MP3.<br />
K CD door<br />
L<br />
Display<br />
M VOLUME<br />
Press the up ‘+’ or the down ‘–’ button to adjust the volume.<br />
N OPEN/CLOSE<br />
Use this button to open and close the CD door.<br />
O TIMER<br />
Use this button together with the SKIP buttons to set the<br />
timer.<br />
P BASS<br />
Use these buttons to adjust the bass sound up or down.<br />
Q TREBLE<br />
Use these buttons to adjust the treble sounds up and down.<br />
R MP3 FOLDER/PRESET<br />
In TUNER mode, use this button to select preset stations.<br />
During playback of a MP3 disc, use this button to select a<br />
folder in the disc.<br />
S SLEEP<br />
T<br />
Use this button to set sleep timer.<br />
SHUFFLE/RDS<br />
Use this button for shuffle playback.<br />
In FM TUNER mode, use this button to select an RDS mode.<br />
U MUTING<br />
Use this button to mute the sound.<br />
Note:<br />
To simplify explanations, instructions refer to names of<br />
buttons and controls on the front panel, making no mention<br />
of the use of remote control unit.<br />
Remote Control Unit<br />
The provided Remote Control Unit allows the unit to be operated<br />
from a distance.<br />
When operating the remote control unit, point it towards the<br />
remote sensor on the front panel of the unit.<br />
< Even if the remote control unit is operated within the effective<br />
range, remote control operation may be impossible if there<br />
are any obstacles between the unit and the remote control.<br />
< If the remote control unit is operated near other products<br />
which generate infrared rays, or if other remote control<br />
devices using infrared rays are used near the unit, it may<br />
operate incorrectly. Conversely, the other products may also<br />
operate incorrectly.<br />
Battery Installation<br />
1<br />
2<br />
3<br />
1 Remove the battery compartment cover.<br />
2 Put in the lithium battery (CR2032, 3V).<br />
3 Close the cover.<br />
Battery Replacement<br />
If the distance required between the remote control unit and<br />
main unit decreases, the battery is exhausted. In this case,<br />
replace the battery with a new one.<br />
Precautions concerning batteries<br />
< Do not heat or disassemble batteries and never dispose of old<br />
batteries by throwing them in a fire.<br />
7
8<br />
1 Turn on the subwoofer.<br />
2 Press the POWER switch on the main unit.<br />
3 Select a source by pressing the FUNCTION button.<br />
4 Play the source and adjust the volume using the<br />
VOLUME buttons.<br />
Muting<br />
To mute the sound temporarily, press the MUTING button.<br />
Press the MUTING button again to restore the sound.<br />
< While muting is engaged, the VOLUME level indicators blink.<br />
Basic Operation<br />
Headphones<br />
For private listening, insert the headphones plug into the<br />
PHONES jack, and adjust the volume using the VOLUME<br />
buttons. The sound from the speakers is cut off while the<br />
headphone jack is inserted.<br />
Sleep Timer<br />
Repeatedly pressing the SLEEP button permits setting an<br />
interval (from 90 down to 10 minutes) after which you want<br />
the unit to automatically turn off and shift into Standby<br />
mode.<br />
Each press of the SLEEP button changes the time indication by<br />
10 minutes.<br />
90 80<br />
Off<br />
………10
3<br />
1<br />
1 Press the FUNCTION button to select ‘CD’.<br />
2 Press the OPEN/CLOSE button.<br />
3<br />
Listening to CD/MP3 (1)<br />
2 4<br />
Put a disc onto the center spindle of the player with the<br />
label side facing you.<br />
Press the disc onto the spindle until a slight ‘click’ is heard<br />
indicating the disc is mounted correctly.<br />
< Never put more than one disc in the mechanism at a time.<br />
< Ensure that the disc is correctly mounted on the spindle and<br />
locked in place.<br />
5<br />
4 Press the OPEN/CLOSE button to close the CD door.<br />
< It takes a few seconds for the unit to load the disc. No<br />
buttons will work during loading. Wait until the total number<br />
of the tracks and the total play time of the disc are displayed.<br />
< When no disc is loaded in the CD player, ‘NO DISC’ is<br />
displayed.<br />
When a CD is loaded<br />
total tracks<br />
When a MP3 disc is loaded<br />
total tracks<br />
total playing time<br />
total number of folders<br />
5 Press the Play/Pause button (y/J) to start playback.<br />
Playback starts from the first track of the disc.<br />
< MP3 tracks recorded out of folders are automatically put in<br />
the ‘ROOT’ folder,.and playback starts from the first track of<br />
the ROOT folder.<br />
< When the playback of all the tracks has finished, the unit<br />
stops automatically.<br />
9
10<br />
MP3<br />
To suspend playback temporarily<br />
(pause mode)<br />
Press the Play/Pause button (G/J) during playback. Playback<br />
stops at the current position. To resume playback, press the<br />
Play/Pause button (G/J) again.<br />
To stop playback<br />
Press the Stop button (H) to stop playback.<br />
To skip to the next or a previous track<br />
During playback, press the skip button (. or/ )<br />
repeatedly until the desired track is found. The selected track<br />
will be played from the beginning.<br />
In the stop mode, press the skip button (. or/ )<br />
repeatedly until the track you want to listen to is found. Press<br />
the Play/Pause button (G/J) to start playback from the<br />
selected track.<br />
< When the . button is pressed during playback, the track<br />
being played will be played from the beginning. To return to<br />
the beginning of the previous track, press the . button<br />
twice.<br />
< During programmed playback, the next or previous track in<br />
the program is played.<br />
Listening to CD/MP3 (2)<br />
Search for a part of a track<br />
During playback, hold down the skip button (.or/) and<br />
release it when the part you want to listen to is found.<br />
ESP (Electronic Shock Protection)<br />
The ESP stores the music in the buffer to prevent sound from<br />
skipping.<br />
During playback of a CD, press the MP3 button to turn the<br />
ESP on or off. When you turn the ESP on, ‘40 SEC (40<br />
seconds)’ briefly appears, and the (ESP) indicator lights on the<br />
display.<br />
< The (ESP) indicator blinks while the unit is filling the buffer.<br />
< When the unit is on the stable place and free from<br />
mechanical shocks, you can turn this function off.<br />
< During playback of MP3, this function is always ON.<br />
To display the MP3 information<br />
During playback of MP3 disc, press the MP3 button for more<br />
than 1 second. The information about the current track is<br />
displayed as follows:<br />
FILE (folder name)wTITLE (*)wARTIST (*)wALBUM (*)<br />
*: track information<br />
Press the MP3 button for more than 1 second again to cancel<br />
the MP3 information mode.<br />
Skip to the next folder (MP3)<br />
Press the MP3 FOLDER button to skip to next folder.
MP3<br />
Search for a name of track<br />
You can select the track by searching for its name.<br />
1 Press the MP3 button once.<br />
An alphabet (initial letter of a track name) and a track name<br />
are displayed.<br />
Track name<br />
Initial letter of track name<br />
Track number<br />
< To cancel the search mode, press the STOP button (H).<br />
2 Select the initial letter of the track you want to listen to<br />
by pressing the SKIP button (. or /).<br />
3 Press and hold the SKIP button (. or /).<br />
Search Mode (MP3 only)<br />
4 Press the PLAY/PAUSE button (G/J).<br />
Search for a track in a folder<br />
1 Press the MP3 button twice.<br />
2<br />
Playback starts from the selected track.<br />
The name of folder is displayed.<br />
Press the SKIP button (. or /) to find the folder<br />
that the track you want to listen to is included.<br />
3 Press and hold the SKIP button (. or /).<br />
Then you can select the track in the folder by pressing the<br />
SKIP button (. or /).<br />
< MP3 tracks recorded out of folders are in the ‘ROOT’ folder.<br />
4 Press the PLAY/PAUSE button (G/J) to start playback.<br />
Playback starts from the selected track.<br />
< If you skip step 3 , playback will start from the first track in<br />
the selected folder.<br />
11
12<br />
FUNCTION<br />
MEMORY/<br />
CLOCK SET<br />
Up to 64 tracks can be programmed in the desired order.<br />
Shuffle and Repeat functions don’t work during programmed<br />
playback.<br />
1 Press the FUNCTION button to select ‘CD’.<br />
2 Press the MEMORY button.<br />
‘MEMORY’ lights up in the display.<br />
< To cancel the program mode, press the Stop button (H).<br />
3<br />
Press the Skip button (.or/) repeatedly to select a<br />
folder of a MP3 disc, then press the MEMORY button.<br />
< MP3 tracks recorded out of folders are in the ‘01’ (ROOT)<br />
folder.<br />
< Skip this step when playing a CD.<br />
Programmed Playback<br />
4<br />
Press the Skip button (.or/) repeatedly to select a<br />
track, then press the MEMORY button.<br />
The track is programmed, and ‘P-02’ is displayed.<br />
< Repeat steps 3 and 4 to program more tracks.<br />
< You can program up to 64 tracks.<br />
5 When the selection of track numbers is completed,<br />
press the Play/Pause button (G/J) to start program<br />
playback.<br />
< When the playback of all the programmed tracks has finished,<br />
or if one of the following buttons is pressed, the MEMORY<br />
indicator will go off and the program mode will be cancelled:<br />
STOP, FUNCTION, POWER<br />
The program is retained in memory until the OPEN/CLOSE<br />
button is pressed or the power is interrupted. You can return<br />
to the programmed playback by pressing the MEMORY<br />
button and the Play/Pause button (G/J). (If another source<br />
was selected, select the CD mode by pressing the FUNCTION<br />
button beforehand.)
MEMORY/<br />
CLOCK SET<br />
To check the programmed order<br />
In the stop mode, press the MEMORY button repeatedly. The<br />
track number and program number will be shown on the<br />
display.<br />
To add a track to the end of the program<br />
In the stop mode, press the MEMORY button repeatedly until<br />
‘00’ appears on the display. Select a track number using the<br />
Skip button (.or/) and then press the MEMORY<br />
button. The track is added to the end of the program.<br />
To overwrite the program<br />
In the stop mode, press the MEMORY button repeatedly until<br />
the program number to be changed appears on the display.<br />
Select a new track number using the Skip button (.or/)<br />
and then press the MEMORY button.<br />
To clear program<br />
To clear the programmed contents, press the MEMORY and<br />
the STOP button (H) in the stop mode.<br />
< If the OPEN/CLOSE button is pressed, the programmed<br />
contents will also be cleared.<br />
< If the unit is disconnected from the power supply, the<br />
programmed contents will be cleared.<br />
13
14<br />
Every time the REPEAT button is pressed, the mode is<br />
changed as follows:<br />
When a CD is loaded.<br />
< If one of the following buttons is pressed, repeat mode will<br />
be canceled:<br />
STOP, FUNCTION, OPEN/CLOSE, POWER<br />
Repeat one track<br />
Press the REPEAT button once during playback. ‘REPEAT’<br />
lights.<br />
The track being played will be played repeatedly. If you press<br />
the Skip button (.or/) and select another track, the<br />
track you selected will be played repeatedly.<br />
It is also possible to select a track to be repeated in the stop<br />
mode. Press the REPEAT button, select a track using the Skip<br />
button (.or/), and then press the Play/Pause button<br />
(G/J) to start playback.<br />
Repeat all the tracks<br />
Repeat Playback<br />
When a MP3 disc is loaded.<br />
REPEAT REPEAT ALL<br />
(off)<br />
REPEAT REPEAT ALL<br />
(off)<br />
REPEAT ALBUM<br />
All the tracks will be played repeatedly.<br />
Press the REPEAT button twice. ‘REPEAT ALL’ lights.<br />
During programmed playback, programmed tracks will be<br />
played repeatedly.<br />
Repeat all the tracks in the folder (MP3)<br />
All the tracks in the folder will be played repeatedly.<br />
Press the REPEAT button three times. ‘REPEAT ALBUM’ lights.<br />
Shuffle Playback<br />
The tracks can be played randomly. Press the SHUFFLE button<br />
during playback or when in the stop mode. ‘SHUFFLE’ will<br />
then light up in the display.<br />
< If you press the / button during shuffle playback, next<br />
track will be randomly selected and played. If you press the<br />
. button, the currently played track will be played from<br />
the beginning. A track cannot be replayed during shuffle<br />
playback.<br />
< Shuffle playback doesn’t work during programmed playback.<br />
< If one of the following buttons is pressed, shuffle mode will<br />
be cancelled:<br />
SHUFFLE, STOP, FUNCTION, POWER, OPEN/CLOSE
1 Press the FUNCTION button to select ‘TUNER’.<br />
2 Press the FM/AM button to select a band.<br />
3 Select the station you want to listen to (auto selection).<br />
Hold down the TUNING Up or Down button until the<br />
frequency display begins to change. When a station is tuned<br />
in, the tuning process will stop automatically.<br />
< Press the Up or Down button to stop the auto selection.<br />
Selecting stations which cannot be tuned automatically<br />
(manual selection)<br />
When the Up or Down button is pressed momentarily, the<br />
frequency changes by a fixed step.<br />
Press the Up or Down button repeatedly until the station you<br />
want to listen to is found.<br />
1<br />
2<br />
Listening to the Radio<br />
3<br />
STEREO/MONO<br />
STEREO/MONO button<br />
Pressing this button alternates between STEREO mode and<br />
MONO mode.<br />
STEREO<br />
FM stereo broadcasts are received in stereo and the ‘STEREO’<br />
indicator will light.<br />
MONO<br />
In weak FM stereo reception areas, select this mode.<br />
Reception will now be forced to monaural, reducing<br />
unwanted noise.<br />
If the reception is poor<br />
Reposition the AM or FM antenna for the best possible<br />
reception. It may also be necessary to connect an external<br />
antenna in extremely weak reception areas (see page 4).<br />
15
16<br />
MEMORY<br />
You can store FM and AM stations into preset channels 1 to 10<br />
respectively.<br />
If the power switch of the subwoofer turned off, the<br />
settings kept in memory (clock, preset stations, timer<br />
setting) will be erased.<br />
1<br />
Tune in a station you want to listen to (see steps 1 to<br />
3 of page 15).<br />
2 Press the MEMORY button.<br />
Preset Tuning<br />
TUNING<br />
3<br />
Within 5 seconds, select a preset channel to store the<br />
station using the TUNING buttons.<br />
preset channel<br />
4 Within 5 seconds, press the MEMORY button.<br />
The station is stored and the MEMORY indicator goes off.<br />
To store more stations, repeat steps 1 to 4 .
How to select preset stations<br />
1 Press the FM/AM button to select a band.<br />
2 Press the PRESET button repeatedly until the desired<br />
preset station is found.<br />
The Radio Data <strong>System</strong> (RDS) is a broadcasting service which<br />
allows stations to send additional information along with the<br />
regular radio programme signal.<br />
RDS works on the FM waveband in <strong>Europe</strong> only.<br />
1<br />
Tune in an FM RDS station (see steps 1<br />
15).<br />
to 3 of page<br />
The RDS indicator lights, and the Programme Service name<br />
(station’s name) appears on the display.<br />
2 Press the RDS button.<br />
RDS<br />
Each time the RDS button is pressed, the RDS mode is<br />
changed as follows:<br />
PS (Programme Service name)<br />
When you select PS, the frequency will be displayed for 3<br />
seconds, and then PS (station’s name) will be displayed. If<br />
there is no PS data, ‘NO PS’ will be displayed.<br />
PTY (Programme Type)<br />
When you select PTY, the programme type will be displayed.<br />
If there is no PTY data, ‘NO PTY’ will be displayed.<br />
RT (Radio Text)<br />
When you select RT, the news of stations composed of up<br />
to 64 symbols will be displayed. If there is no RT data, ‘NO<br />
RT’ will be displayed.<br />
17
18<br />
A station can be searched by this function.<br />
1 Select FM by pressing the FM/AM button.<br />
2 Press the PTY button.<br />
3<br />
1<br />
2 4<br />
‘PTY SEL’ blinks on the display.<br />
Within 10 seconds, select the desired PTY programme<br />
using the SKIP buttons.<br />
You can select from 29 kinds.<br />
4 Press the PTY button.<br />
Searching will start.<br />
< When the programme that you have selected is found,<br />
searching will stop and the programme type will be displayed.<br />
< If the same program type is not found during PTY Search, it<br />
will stop at the beginning frequency.<br />
< If you want to stop searching, press the PTY button.<br />
3<br />
RDS (PTY Search)<br />
NEWS : brief announcements, events, public opinion,<br />
reports, actual situations.<br />
AFFAIRS : a kind of suggestion including practical<br />
announcements other than news, documents,<br />
discussion, analysis and so on.<br />
INFO : daily information or reference such as weather<br />
forecast, consumer guide, medical assistance and<br />
so on.<br />
SPORT : sports related programs.<br />
EDUCATE : educational and cultural information.<br />
DRAMA : all kinds of radio concert and serial drama.<br />
CULTURE : all aspects of national or local culture including<br />
religious events, philosophy, social science,<br />
language, theatre, and so on.<br />
SCIENCE : programs on natural science and technology<br />
VARIED : popular programs such as quiz, entertainment,<br />
private interview, comedy, satire and so on.<br />
POP M : program on commercial, practical and popular<br />
songs, and sale volume of discs, etc.<br />
ROCK M : practical modern music generally composed and<br />
played by young musicians.<br />
M O R M : popular music usually lasting for less than 5<br />
minutes.<br />
LIGHT M : classical music, instrumental music, chorus, and<br />
light music favored by non-professionals.<br />
CLASSICS : orchestra including great operas, symphony,<br />
chamber music and so on.<br />
OTHER M : other music styles(Rhythm & Blues, Reggae, etc.)<br />
WEATHER : weather reports, forecast<br />
FINANCE : financial reports, commerce, trading<br />
CHILDREN : children’s programs<br />
SOCIAL A : social affairs<br />
RELIGION : religious programs<br />
PHONE IN : program in which the public expresses its view by<br />
phone.<br />
TRAVEL : travel reports<br />
LEISURE : programs concerning recreational activities<br />
JAZZ : jazz music<br />
COUNTRY : country music<br />
NATIONAL : national music<br />
OLDIES : music from the so-called golden of popular music<br />
FOLK M : folk music<br />
DOCUMENT : documentaries
POWER<br />
MEMORY/<br />
CLOCK SET<br />
If the power switch of the subwoofer turned off, the<br />
settings kept in memory (clock, preset stations, timer<br />
setting) will be erased.<br />
1 If the unit is on, press the POWER switch to turn it off.<br />
2<br />
Press and hold down the CLOCK SET button.<br />
‘12 HOUR’ or ‘24 HOUR’ blinks. If you want to change the<br />
hour mode, press the .or/ button.<br />
3 Press the CLOCK SET button once more.<br />
The ‘hour’ value blinks.<br />
Setting the Clock<br />
4 Press the SKIP button (.//) to set the current<br />
hour.<br />
5 Press the CLOCK SET button.<br />
The ‘minute’ value blinks.<br />
6 Press the SKIP button (.//) to set the current<br />
minute.<br />
7 Press the CLOCK SET button.<br />
The clock starts.<br />
19
20<br />
Adjust the clock before setting the timer.<br />
If the power switch of the subwoofer turned off, the<br />
settings kept in memory (clock, preset stations, timer<br />
setting) will be erased.<br />
1 Press and hold the TIMER button until ‘TIMER’ and ‘ON’<br />
indicators appear on the display.<br />
The ‘hour’ value starts flashing.<br />
< When no button is pressed for 10 seconds, the timer setting<br />
mode will be cancelled.<br />
2 Press the SKIP button (.//) to set the start time<br />
(hour), and then press the TIMER button.<br />
The ‘minutes’ value starts<br />
flashing.<br />
Timer<br />
3 Press the SKIP button (.//) to set the start time<br />
(minute), and then press the TIMER button.<br />
‘TIMER’ and ‘OFF’ indiactors<br />
appear on the display and the<br />
‘hour’ value starts flashing.<br />
4 Press the SKIP button (.//) to set the stop time<br />
(hour), and then press the TIMER button.<br />
The ‘minutes’ value starts<br />
flashing.<br />
5 Press the SKIP button (.//) to set the stop time<br />
(minute), and then press the TIMER button.<br />
6<br />
Press the SKIP button (.//) to select a source (CD<br />
or TUNER), and then press the TIMER button.
7 Press the SKIP button (.//) to set the volume, and<br />
then press the TIMER button.<br />
Setting the timer is now completed and the timer is turned on.<br />
Your timer setting is displayed one by one, and the TIMER<br />
indicator lights on the display.<br />
8 Prepare the source.<br />
When the source is set to ‘CD’, set a CD.<br />
When the source is set to ‘TUNER’, tune in a station.<br />
9 Press the POWER button to turn the unit off (standby).<br />
The clock and the TIMER indicator are displayed.<br />
The unit will turn on and off at the specified time every day.<br />
Don’t forget to turn the unit off (standby), or the timer<br />
won’t work.<br />
To turn on or off the timer<br />
When you don’t use the timer, press the TIMER button to<br />
turn it off. (The TIMER indicator disappears from the display.)<br />
Press the TIMER button again to turn it on.<br />
< When the timer is turned on, the timer settings are displayed<br />
one by one, and the TIMER indicator lights on the display.<br />
21
22<br />
If you have problems with your system, look through this chart<br />
and see if you can solve the problem yourself before calling your<br />
dealer or <strong>TEAC</strong> service center.<br />
General<br />
No power<br />
e Check the connection to the AC power supply. Check and<br />
make sure the AC source is not a switched outlet and that,<br />
if it is, the switch is turned on. Make sure there is power to<br />
the AC outlet by plugging another item such as a lamp or<br />
fan into the outlet.<br />
No sound from speakers.<br />
e Select the source by pressing the FUNCTION button.<br />
e Check the connection to the speakers.<br />
e Adjust the volume.<br />
e Pull out the headphone’s plug from the PHONES jack.<br />
eIf the VOLUME level indicator is blinking, press the MUTING<br />
button.<br />
The sound is noisy.<br />
e The unit is too close to a TV or similar appliances. Install the<br />
unit apart from them, or turn them off.<br />
Remote control doesn’t work.<br />
e Press the POWER switch to turn the unit on.<br />
e When the battery has run out, put in a new one.<br />
e Use remote control unit within the range (5 m) and point at<br />
the front panel.<br />
e Clear obstacles between the remote control unit and the<br />
main unit.<br />
e If a strong light is near the unit, turn it off.<br />
CD Player<br />
Cannot play.<br />
e Load a disc with the playback side facing away.<br />
e If the disc is dirty, clean the surface of the disc.<br />
e A blank disc has been loaded. Load a prerecorded disc.<br />
e Depending on the disc, etc. it may not be possible to play<br />
back CD-R/RW discs. Try again with another disc.<br />
e You cannot play back unfinalized CD-R/RW discs. <strong>Fi</strong>nalize<br />
such a disc in a CD recorder and try again.<br />
Sound skips.<br />
e Place the unit on a stable place to avoid vibration and shock.<br />
e If the disc is dirty, clean the surface of the disc.<br />
e Don’t use scratched, damaged or warped discs.<br />
Troubleshooting<br />
Tuner<br />
Cannot listen to any station, or signal is too weak.<br />
e Tune in the station properly.<br />
e Rotate the FM or AM antenna for the best reception<br />
position.<br />
Though the broadcast is stereo, it sounds monaural.<br />
e Press the STEREO/MONO button.<br />
If normal operation cannot be recovered, unplug the<br />
power cord from the outlet and plug it again.<br />
If the power switch of the subwoofer turned off, the<br />
settings kept in memory (clock, preset stations, timer<br />
setting) will be erased.<br />
Beware of condensation<br />
When the unit (or a disc) is moved from a cold to a warm<br />
place, or used after a sudden temperature change, there is a<br />
danger of condensation; vapor in the air could condense on<br />
the internal mechanism, making correct operation erratic or<br />
impossible. To prevent this, or if this occurs, leave the unit for<br />
one or two hours with the power turned on. The unit will<br />
stabilize at the temperature of its surroundings.<br />
Maintenance<br />
If the surface of the unit gets dirty, wipe with a soft cloth or<br />
use diluted mild liquid soap. Never spray liquid directly on this<br />
unit. Apply your cleaner to your cleaning cloth and wipe<br />
gently. Be sure to remove any excess completely. Do not use<br />
thinner, benzene or alcohol as they may damage the surface<br />
of the unit. Allow the surface of the unit to dry completely<br />
before using.
AMPLIFIER section<br />
Output Power (L+R) . . . . . . . . . . . . . . . . . . . . . . . 5 W + 5 W<br />
Output Power (Subwoofer) . . . . . . . . . . . . . . . . . . . . . . 15 W<br />
Input Sensitivity. . . . . . . . . . . . . . . . . . . . . . . . . . . . . 300 mV<br />
Frequency Response. . . . . . . . . . . . . . . . . . . 50 to 20,000 Hz<br />
TUNER Section (FM)<br />
Frequency Range . . . . . . . . . . . . . . . . . 87.50 to 108.00 MHz<br />
Sensitivity (S/N30dB). . . . . . . . . . . . . . . . . . . . . . . . . 20 dBµV<br />
TUNER Section (AM)<br />
Frequency Range. . . . . . . . . . . . . . . . . . . . . 522 to 1620 kHz<br />
Sensitivity (S/N20dB). . . . . . . . . . . . . . . . . . . . . . . 54 dBµV/m<br />
CD PLAYER Section<br />
Frequency Response . . . . . . . . . . . . . 20 to 20,000 Hz (±1 dB)<br />
Signal-to-Noise Ratio . . . . . . . . . . . . . . . . . . . . . . . . . . 55 dB<br />
Wow and Flutter . . . . . . . . . . . . . . . . . . . . . . . Unmeasurable<br />
SPEAKER<br />
Type . . . . . . . . . . . . . . . . . . . . . . . . . . . . . Full range flat type<br />
Impedance. . . . . . . . . . . . . . . . . . . . . . . . . . . . . . . . . 4 ohms<br />
SUBWOOFER<br />
Impedance. . . . . . . . . . . . . . . . . . . . . . . . . . . . . . . . . 8 ohms<br />
GENERAL<br />
Power Requirements . . . . . . . . . . . . . . . . . . 230 V AC, 50 Hz<br />
Power Consumption . . . . . . 80 W (standby: less than 1.4 W)<br />
Dimension ( W x H x D )<br />
Main Unit . . . . . . . . . . . . . . . . . . . . . . 160 x 226 x 86 mm<br />
L & R Speakers . . . . . . . . . . . . . . . . . . 140 x 226 x 61 mm<br />
Subwoofer. . . . . . . . . . . . . . . . . . . . . 160 x 234 x 330 mm<br />
Weight<br />
Main Unit . . . . . . . . . . . . . . . . . . . . . . . . . . . . . . . 1.15 kg<br />
L & R Speakers . . . . . . . . . . . . . . . . . . . . . . . . 0.6 kg each<br />
Subwoofer . . . . . . . . . . . . . . . . . . . . . . . . . . . . . . . 5.4 kg<br />
Specifications<br />
Standard Accessories<br />
Remote Control Unit (RC-970) x 1<br />
Subwoofer Cable x 1<br />
Speaker Cable x 2<br />
FM Antenna x 1<br />
AM Antenna x 1<br />
Battery for Remote Control x 1<br />
Wall Mount Adaptor x 3<br />
Wall Mount Screw x 10<br />
Tapered Plastic Wall Anchor x 10<br />
Template for Wall Mounting x 1<br />
Owner’s Manual x 1<br />
Warranty Card x 1<br />
< Design and specifications are subject to change without<br />
notice.<br />
< Weight and dimensions are approximate.<br />
< Illustrations may differ slightly from production models.<br />
23
This appliance has a serial number located on the rear panel. Please record<br />
the model number and serial number and retain them for your records.<br />
Model number Serial number<br />
Z<br />
<strong>TEAC</strong> CORPORATION 3-7-3, Nakacho, Musashino-shi, Tokyo 180-8550, Japan Phone: (0422) 52-5081<br />
<strong>TEAC</strong> AMERICA, INC. 7733 Telegraph Road, Montebello, California 90640 Phone: (323) 726-0303<br />
<strong>TEAC</strong> CANADA LTD. 5939 Wallace Street, Mississauga, Ontario L4Z 1Z8, Canada Phone: (905) 890-8008<br />
<strong>TEAC</strong> MEXICO, S.A. De C.V Campesinos N°184, Colonia Granjas Esmeralda, Delegacion Iztapalapa, CP 09810, México DF Phone: (525) 581-5500<br />
<strong>TEAC</strong> UK LIMITED 5 Marlin House, Croxley Business Park, Watford, Hertfordshire, WD18 8TE, U.K. Phone: 01923-819699<br />
<strong>TEAC</strong> EUROPE <strong>GmbH</strong> Bahnstrasse 12, 65205 Wiesbaden-Erbenheim, Germany Phone: 0611-71580<br />
<strong>TEAC</strong> ITALIANA S.p.A. Via C. Cantù 11, 20092 Cinisello Balsamo, Milano, Italy Phone: 02-66010500<br />
<strong>TEAC</strong> AUSTRALIA PTY., LTD. 280 William Street, Melbourne VIC 3000, Australia Phone: (03) 9672-2400<br />
A.B.N. 80 005 408 462<br />
0405 . MA-0972A