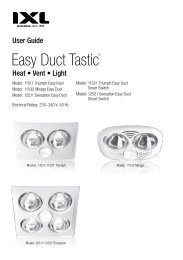
User Guide Heat • Vent • Light - IXL
User Guide Heat • Vent • Light - IXL
User Guide Heat • Vent • Light - IXL

You also want an ePaper? Increase the reach of your titles
YUMPU automatically turns print PDFs into web optimized ePapers that Google loves.
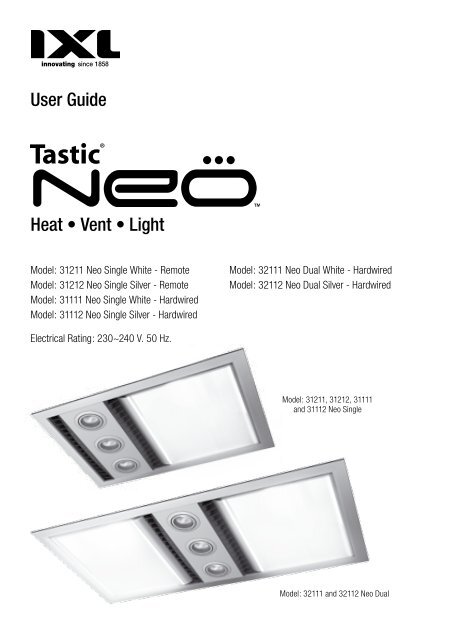
<strong>User</strong> <strong>Guide</strong><br />
<strong>Heat</strong> <strong>•</strong> <strong>Vent</strong> <strong>•</strong> <strong>Light</strong><br />
Model: 31211 Neo Single White - Remote<br />
Model: 31212 Neo Single Silver - Remote<br />
Model: 31111 Neo Single White - Hardwired<br />
Model: 31112 Neo Single Silver - Hardwired<br />
Electrical Rating: 230~240 V. 50 Hz.<br />
Model: 32111 Neo Dual White - Hardwired<br />
Model: 32112 Neo Dual Silver - Hardwired<br />
Model: 31211, 31212, 31111<br />
and 31112 Neo Single<br />
Model: 32111 and 32112 Neo Dual
Welcome<br />
Thank you for buying this <strong>IXL</strong> Tastic Neo. Even if you have used a Tastic before, there are very good<br />
reasons to read this user guide before using this one:<br />
<strong>•</strong> You and your family, property and home will be safe from harm.<br />
<strong>•</strong> You will learn how this appliance may differ from others.<br />
<strong>•</strong> By using the Tastic Neo fully and properly, you will get maximum life and value from it.<br />
<strong>•</strong> Our warranty depends on you using the Tastic Neo according to this user guide.<br />
It will only take you a few minutes, so please read on!<br />
Contents<br />
Tastic Neo Range ..........................................................Pg 3-4<br />
Safety ............................................................................Pg 5-6<br />
How it Works .................................................................... Pg 6<br />
<strong>Vent</strong>ilation Requirements ................................................ Pg 7<br />
Clearances ....................................................................... Pg 7<br />
Overview .......................................................................... Pg 8<br />
Electrical Requirements .................................................. Pg 9<br />
Wiring Diagrams ........................................................ Pg 9-12<br />
Installation ................................................................Pg 12-16<br />
Smart Switch Operation ................................................ Pg 17<br />
<strong>Heat</strong> Lamp Replacement ..........................................Pg 18-19<br />
CFL Replacement ........................................................... Pg 20<br />
Replacement Lamps ...................................................... Pg 21<br />
Cleaning & Maintenance ............................................... Pg 21<br />
Frequently Asked Questions (FAQ) ...........................Pg 22-23<br />
Products ......................................................................... Pg 24<br />
Record Your Model ........................................................ Pg 25<br />
Warranties .................................................................Pg 26-27<br />
2
®<br />
Tastic<br />
Model: 31211 Neo Single – White<br />
Model: 31112 Neo Single – Silver<br />
Tastic Neo Range<br />
31211 Neo Single – White<br />
1 x 800 W Tungsten Halogen <strong>Heat</strong> Lamps<br />
3 x 9 W CFL Downlights<br />
Remote Control<br />
Cutout Template Supplied<br />
170 mm Ducted Blower, 346 m³/hr or 96 l/s<br />
31212 Neo Single – Silver<br />
1 x 800 W Tungsten Halogen <strong>Heat</strong> Lamps<br />
3 x 9 W CFL Downlights<br />
Remote Control<br />
Cutout Template Supplied<br />
170 mm Ducted Blower, 346 m³/hr or 96 l/s<br />
31111 Neo Single – White<br />
1 x 800 W Tungsten Halogen <strong>Heat</strong> Lamps<br />
3 x 9 W CFL Downlights<br />
Hardwired<br />
Cutout Template Supplied<br />
170 mm Ducted Blower, 346 m³/hr or 96 l/s<br />
31112 Neo Single – Silver<br />
1 x 800 W Tungsten Halogen <strong>Heat</strong> Lamps<br />
3 x 9 W CFL Downlights<br />
Hardwired<br />
Cutout Template Supplied<br />
170 mm Ducted Blower, 346 m³/hr or 96 l/s
®<br />
Tastic<br />
4<br />
Model: 32111 Neo Dual - White<br />
Model: 32112 Neo Dual - Silver<br />
Tastic Neo Range<br />
32111 Neo Dual – White<br />
2 x 800 W Tungsten Halogen <strong>Heat</strong> Lamps<br />
3 x 9 W CFL Downlights<br />
Hardwired<br />
Cutout Template Supplied<br />
170 mm Ducted Blower, 346 m³/hr or 96 l/s<br />
32112 Neo Dual – Silver<br />
2 x 800 W Tungsten Halogen <strong>Heat</strong> Lamps<br />
3 x 9 W CFL Downlights<br />
Hardwired<br />
Cutout Template Supplied<br />
170 mm Ducted Blower, 346 m³/hr or 96 l/s
®<br />
Tastic<br />
Safety<br />
Do not allow insulation material to rest against the sides or top<br />
of the Tastic Neo unit when installed. This Tastic unit must be<br />
installed horizontally in the ceiling. There is no IP rating on any<br />
<strong>IXL</strong> Tastic Neo.<br />
NOTE: This product must be installed by a qualified installer.<br />
Read through these instructions completely before commencing installation.<br />
The tungsten halogen lamps heat by direct radiation rather than by heating the air in the room, so the<br />
Tastic should be located directly over where drying off occurs.<br />
Locate the Tastic in accordance with the requirements of the current Australian/New Zealand Wiring<br />
Rules AS/NZS 3000 relating to damp situations.<br />
In some installations this may mean that no part of the Tastic may be located directly above any part of<br />
a bath or shower recess or enclosure.<br />
For unenclosed showers refer to Wiring Rules conditions.<br />
Switches and other controls must not be located where they can be touched by a person in the bath<br />
or shower.<br />
NOTE: Tastic products must only be installed horizontally in ceiling.<br />
<strong>•</strong> Do not look directly into heat lamps when in use.<br />
<strong>•</strong> Tastic products are not tanning lamps.<br />
<strong>•</strong> Make sure the lamps have cooled and power is off to the Tastic before removing lamps for replacement.<br />
<strong>•</strong> Do not operate this appliance without the fascia or glass panels in position.<br />
<strong>•</strong> This appliance is not intended for use by persons (including children) with reduced physical, sensory<br />
or mental capabilities, or lack of experience and knowledge, unless they have been given supervision<br />
or instruction concerning use of the appliance by a person responsible for their safety.<br />
<strong>•</strong> Young children should be supervised to ensure they do not play with the appliance.<br />
<strong>•</strong> This appliance must be mounted with the lowest point at least 2.3 metres from the floor.<br />
<strong>•</strong> If the supply cord is damaged, it should be replaced by the <strong>IXL</strong> Appliances or its service agent or a<br />
similarly qualified person in order to avoid a hazard.<br />
<strong>•</strong> This appliance must not be mounted immediately below a socket outlet.<br />
WARNING: Curtains or combustible material may ignite if in contact with the heater.<br />
SAFETY FEATURES<br />
Thermal switch:<br />
When Tastic Neo works in FAN OFF mode and the temperature inside the unit reaches 55°C, the<br />
thermal switch will switch on the fan automatically. When the temperature drops, the thermal switch<br />
will switch off the fan.
®<br />
Tastic<br />
6<br />
Safety<br />
Over-temperature switch (PTCR) (Hardwired Tastic Neo):<br />
When for any reason the temperature inside the unit reaches 80°C, the PTCR will cut off power to the<br />
Tastic Neo. The PTCR can be reset by turning off power to the unit at the isolating switch and allowing to<br />
cool for 10-15 minutes. In such a case the Service Centre should be called as this is not normal operation.<br />
Thermal fuse: (Remote Tastic Neo only)<br />
When for any reason the temperature inside the unit reaches 93°C, the thermal fuse will cut off power<br />
to the Tastic Neo. In such a case the Service Centre should be called to replace the thermal fuse.<br />
How it Works<br />
The <strong>IXL</strong> Tastic Neo range has been designed to exacting standards to give you many years of trouble-free<br />
operation. To ensure you get the most from your Tastic there are a few simple points to keep in mind.<br />
HEAT LAMPS<br />
The <strong>IXL</strong> Tastic Neo uses 800W tungsten halogen heat lamps in conjunction with reflective elements,<br />
for a more efficient dispersion of radiant heat. The tungsten halogen lamps provide instantaneous<br />
heat, and are designed to heat you and not your bathroom - that’s the efficient way infra red heat<br />
works. To get the full benefit of Tastic’s tungsten halogen warmth, stand directly under the heat lamps.<br />
<strong>IXL</strong>’s exclusive halogen lamps have been designed specifically for this application, and concentrate<br />
their heat for maximum effectiveness.<br />
Make sure you have the Tastic model that suits your bathroom ceiling height. This Tastic is<br />
manufactured to offer peak performance with bathroom ceiling heights up to 2.4 m.<br />
VENTILATION<br />
To ensure optimum performance of the exhaust fan, it is essential that there is adequate air flow into<br />
your bathroom to help the Tastic’s efficient exhaust fan to remove steam while you shower, venting<br />
directly outside. Your Tastic works by drawing steam-laden air from the room, and as with all exhaust<br />
fans it is essential that sufficient air inlets are provided. Ensure adequate inlets exist through windows,<br />
vents or under the door. Air flow path from inlet to fan should ideally pass over the steam source.<br />
CENTRE LIGHTS<br />
The 3 compact fluorescent centre lights in Tastic Neo models are designed to provide directional<br />
lighting in your bathroom. For specific tasks like shaving or putting make-up on, you may need extra<br />
lighting to suit your individual needs.<br />
The heat lamps can also be used to provide additional bright illumination for your bathroom. <strong>Light</strong>er<br />
coloured walls and decor also help brighten your bathroom by reflecting more light.
®<br />
Tastic<br />
Fig. 1: Ideal placement of Tastic.<br />
Sufficient air inlets into room are required<br />
Fig. 2a: Minimum blower clearances<br />
C<br />
D<br />
A<br />
E<br />
B<br />
Fig. 2b: Minimum clearances for installation<br />
Toggle bolts<br />
20mm<br />
Fig. 2c: Minimum clearances for installation<br />
F<br />
<strong>Vent</strong>ilation Requirements<br />
For maximum efficiency and fan performance there<br />
are a few key points to keep in mind when installing<br />
your Tastic.<br />
Sufficient air inlet into room<br />
Steam will only be removed if there is sufficient flow<br />
of air through the room. Ensure generous inlets exist<br />
through windows, vents or under the door. Air flow<br />
path from inlet to fan should ideally pass over the<br />
steam sources (see Fig. 1).<br />
Bathrooms which have high ceilings, are larger than<br />
average, or have an open shower may all require<br />
additional ventilation. We recommend that you visit<br />
our website for further details and suggestions on<br />
effectively ventilating your bathroom.<br />
Clearances<br />
This appliance must be mounted so that the lowest<br />
point is at least 2.3 m above the floor. The Tastic<br />
body and ducted blower is designed to fit a ceiling<br />
cavity or between – floor space with a minimum<br />
height of 230 mm. The Tastic may be installed<br />
between joists using the supplied toggle bolts<br />
(Fig. 2c). Ensure that the outlet of the Tastic is<br />
directed towards the outer wall. If the desired<br />
orientation of the Tastic unit directs the ducting<br />
across ceiling joists ensure that the closest ceiling<br />
joist is not within 200 mm of the Tastic outlet.<br />
Figure 2a<br />
A: 215 mm B: 15 mm min. clearance above unit<br />
Figure 2b<br />
C: 15 mm D: 166 mm E: 35 mm F: 200 mm min.<br />
Figure 2c<br />
20 mm min. clearance is required near all joists
®<br />
Tastic<br />
8<br />
Tastic Neo Models: 31111, 31112, 32111 & 32112<br />
Transition<br />
Fig. 3: Layout of Tastic Neo Single and Dual.<br />
Tastic Neo Models: 31211 and 31212<br />
Transition<br />
Flexible support<br />
Tastic unit<br />
Wall switch (supplied)<br />
Isolating wall switch (not supplied)<br />
Flexible support<br />
Tastic unit<br />
Smart Switch remote<br />
Isolating wall switch (not supplied)<br />
Fig. 4: Layout of Tastic Neo Smart Switch Single.<br />
Overview<br />
Ducted blower<br />
Ducted blower<br />
Eaves<br />
lining<br />
Ducting<br />
Air outlet grille<br />
positioned in eaves lining<br />
Eaves<br />
lining<br />
Ducting<br />
Air outlet grille<br />
positioned in eaves lining<br />
Exterior<br />
of home<br />
Exterior<br />
of home
®<br />
Tastic<br />
31211 & 31212: 3.5A 50Hz<br />
For wiring connection see<br />
additional information<br />
Figs. 10 & 12.<br />
Electrical Requirements<br />
Tastic Neo units are fitted with CFL centre lamps. To ensure<br />
correct operation and to prolong the life of the CFLs please wire as<br />
per the following wiring diagrams for the appropriate model.<br />
See the wiring diagrams on the following pages for supply requirements and maximum loadings for each<br />
model. Tastics may be connected to a lighting or power circuit if loading permits. These models are for<br />
wired-in installation and wiring must be carried out by a registered electrician. *Switches and a wall plate<br />
are provided with the hardwired Tastic Neo’s. A remote control is provided with the Smart Switch models.<br />
Do not use this product with any solid state speed control or commercial dimming device.<br />
NOTE: The Permanent Active Connection must be provided on the hardwired models so the unit can<br />
function as it was designed to do so.<br />
* Number of switches depends on your Tastic model.<br />
Fig. 5: Wiring diagram for models 31211 and 31212.<br />
Wiring Diagrams<br />
93°C<br />
55°C
®<br />
Tastic<br />
10<br />
31111 & 31112: 3.6A 50Hz<br />
For wiring<br />
connection<br />
see<br />
additional<br />
information<br />
Figs. 9 & 11.<br />
Fig. 6: Wiring diagram for model 31111 and 31112.<br />
32111 & 32112: 6.8A 50Hz<br />
For wiring<br />
connection<br />
see<br />
additional<br />
information<br />
Figs. 9 & 11.<br />
Fig. 7: Wiring diagram for model 32111 and 32112.<br />
Wiring Diagrams
®<br />
Tastic<br />
Fig. 8: Hardwired<br />
Fig. 9: Smart Switch<br />
Wiring – Aust & NZ<br />
Hardwired models 31111, 31112, 32111 & 32112:<br />
A local isolating switch (not supplied) must be<br />
incorporated in the fixed wiring to the appliance to<br />
allow disconnection of supply during maintenance.<br />
This isolating switch should be located in close<br />
proximity to the Tastic and must be installed in<br />
accordance with applicable Wiring Codes.<br />
Smart Switch models 31211 & 31212: Switch the<br />
power outlet for the Control Unit with a wall switch (not<br />
supplied) as per Fig. 9. Do not mount the power outlet<br />
for the Control Unit more than 200 mm from the Tastic.<br />
In both versions the wall switch should be located in<br />
accordance with Wiring Rules AS/NZS 3000. It must<br />
not be installed where it can be reached from the bath<br />
recess or enclosure (see AS/NZS 3000 Section 7).
®<br />
Tastic<br />
Fig. 10: Hardwired<br />
Fig. 11: Smart Switch<br />
* This isolating switch must be double-pole<br />
type with minimum 3 mm contact gap.<br />
Fig. 12: Use template to mark position of Tastic<br />
12<br />
Wiring – UK & Eire<br />
Hardwired models 31111, 31112, 32111 & 32112:<br />
The wall switch should be located in accordance with<br />
the applicable Wiring Rules and it must not be installed<br />
where it can be reached from the bath or shower<br />
recess or enclosure.<br />
Smart Switch models 31211 & 31212: Supply<br />
should be connected to the Tastic 3-core power lead<br />
as per the diagram below. The plug fitted to the power<br />
cord is to be cut off and the wires stripped to allow<br />
connection. See Fig. 10.<br />
A local isolating switch (not supplied) must be<br />
incorporated in the fixed wiring to the appliance to<br />
allow disconnection of supply during maintenance.<br />
This isolating switch should be located in close<br />
proximity to the Tastic and must be installed in<br />
accordance with applicable Wiring Codes.<br />
The colours of the wires in the Tastic 3-core lead<br />
may not correspond to those in the fixed wiring.<br />
The designation of poles for the Tastic power leads<br />
are as follows:<br />
Tastic Wire Colour Connect to<br />
Supply Pole<br />
Brown Live<br />
Blue Neutral<br />
Green / Yellow Earth<br />
Installation<br />
The Tastic may be installed between joists using the<br />
supplied toggle bolts, clearances for the two vertical<br />
sides must be maintained as per Fig. 2c on page 7.<br />
IMPORTANT: Joists, beams and rafters shall not be<br />
cut or notched to install the appliance.
®<br />
Tastic<br />
Fig. 13: Straight ducting<br />
Fig. 14: Gradual bends,<br />
ducting stretched straight<br />
Fig. 15: Tightly compressed bends<br />
Performance<br />
100%<br />
Performance<br />
100%<br />
Performance<br />
100%<br />
Installation<br />
Depending on your model, the Tastic has a weight<br />
of 5 – 9 kg (see below). If adequate support is not<br />
available for the Tastic, it may be necessary to provide<br />
extra strengthening.<br />
Neo Single – approx 5 kg<br />
Neo Dual – approx 9 kg<br />
If ceiling battens have been cut to install this<br />
product then ensure that the cut ceiling battens are<br />
adequately secured to rafters.<br />
NOTE: This product must be installed by a qualified<br />
installer. Ensure power is off to location of Tastic.<br />
Cut out hole for Tastic body<br />
1. After determining the location of components<br />
according to the directions, mark out and cut<br />
aperture in ceiling for Tastic NEO unit using<br />
the template supplied with the Tastic. Trim the<br />
template to the outside of the black outline<br />
allowing for the four rectangular notches.<br />
2. Unscrew terminal cover on Hardwired models.<br />
Ducting<br />
1. These products have been designed to suit 150<br />
mm dia. ducting. Determine the length of ducting<br />
required ensuring that the length is as short as<br />
possible. Refer to Fig’s 13-15 to attain optimum<br />
performance.<br />
2. Tape a length of ducting 1 m long (max) between<br />
the blower inlet and the Transition. Tape remaining<br />
length of ducting to exit of blower.
®<br />
Tastic<br />
Fig. 16<br />
Fig. 17<br />
Fig. 18<br />
14<br />
Blower<br />
power<br />
lead<br />
Interconnecting power cord<br />
Fig. 19<br />
Power<br />
cable<br />
Installation<br />
Installing the Ducted Blower<br />
NOTE: The transition is assembled to the main body<br />
before the main body has been snapped into place in<br />
the ceiling.<br />
1. Feed ducting and blower through hole in ceiling.<br />
While feeding ducting into ceiling direct it towards<br />
the installation position of the outlet grille. Position<br />
blower so that the short length of ducting is<br />
stretched out and Transition piece along with<br />
stripped or terminated wire is sitting next to the<br />
hole as per Fig. 16.<br />
2. Make the necessary electrical connections.<br />
Smart switch models: Connect ducted blower<br />
power cord into interconnecting socket provided<br />
and connect power cord to socket outlet.<br />
Hardwired models: Connect ducted blower<br />
power cord to terminal block as per wiring<br />
diagram and connect wall switch to terminal<br />
block as per circuit diagram.<br />
Final Assembly<br />
1. Clip transition to the body, ensuring that the<br />
ducting taped to the transition is not dislodged.<br />
Position the Tastic body into the aperture, so<br />
that the plastic end supports are resting on the<br />
plaster. As the Tastic is raised into ceiling, ensure<br />
electrical cables do not rest over Tastic. Place the<br />
four toggle bolts through the recesses cut into<br />
the plaster, (Fig.17) and tighten the bolts. This will<br />
raise the Tastic body flush to the ceiling (Fig. 18).<br />
2. Bring fascia assembly up to the Tastic body. (Fig.<br />
19) Connect the earthing wire to the fascia and<br />
connect the IR sensor lead(Smart Switch models).<br />
3. Clip fascia into the Tastic body.<br />
4. Using care, fit the tubular heat lamps into the<br />
lamp holders. Be careful not to touch the glass<br />
surface as oils from skin can shorten the life of<br />
the glass lamp. A clean soft cloth or tissue is<br />
recommended. Ensure that the white reflective
®<br />
Tastic<br />
Fig. 20<br />
Fig. 21<br />
Fig. 22<br />
Fig. 24<br />
1 2<br />
6 G screws x 2<br />
Smart Switch<br />
LIGHT<br />
HEAT<br />
FAN<br />
ALLOFF<br />
Fig. 23<br />
3<br />
Installation<br />
layer on the tubular heat lamp is on the upper side<br />
of the lamp, ie lamp is pointing downwards.<br />
5. Clip the downlight mounts into the fascia.<br />
6. Fit the glass sheets to the heat lamp reflector<br />
bodies Fig. 20.<br />
7. Ensure that the dip switches in the hand set are<br />
correctly set for your local ventilation requirements<br />
Fig. 26-27 (pages 16-17).<br />
8. Turn on the power at the isolating switch and<br />
check operation of the Tastic.<br />
Installing the Grille<br />
1. Cut a hole 160 mm in diameter in eaves or outer<br />
wall. Feed ducting out through this hole and tape<br />
to the Grille baseplate.<br />
2. Feed the ducting back through the hole so that the<br />
Grille base is against the eaves or outer wall.<br />
3. Fix Grille base with four 6 G screws and snap fit<br />
the Grille louvres over the Grille base as shown in<br />
Fig. 21.<br />
Mounting the Smart Switch Remote<br />
Remote Cradle<br />
1. Select a suitable position for the Easy Duct Smart<br />
Switch Remote cradle.<br />
2. Check that the sensor will receive signals from the<br />
remote in the location you have selected.<br />
3. At the position selected for the cradle to be<br />
mounted, mark the positions of the two screw<br />
holes. If mounting into plasterboard or masonry<br />
you may require specific wall plugs or masonry<br />
anchors (not included) to provide suitable support<br />
for the cradle and remote.<br />
4. Screw the cradle to the wall using 2 of 6 G screws<br />
(not supplied) and tighten screws (Fig. 22)<br />
5. Swing the top of the handset into the cradle (Fig.<br />
23 - 24.)<br />
6. Check the operation of all Tastic functions.<br />
Smart Switch<br />
LIGHT<br />
HEAT<br />
FAN<br />
ALLOFF<br />
Smart Switch<br />
LIGHT<br />
HEAT<br />
FAN<br />
ALLOFF
®<br />
Tastic<br />
Fig. 25<br />
Fig. 26<br />
16<br />
7<br />
2<br />
4<br />
ON<br />
1 2<br />
8<br />
1<br />
3<br />
5<br />
6<br />
Installation<br />
The Smart Switch system<br />
and functions<br />
All functions are controlled by the Smart Switch<br />
(Fig. 25), a battery powered wall mounted remote unit<br />
that sends an Infra red (IR) signal to a receiver mounted<br />
in the Tastic Neo fascia. Subsequent signals go to the<br />
Control Unit mounted on the top of the Tastic Unit.<br />
NOTE: While the heat lamps are turned ON, the centre<br />
lamps are turned OFF.<br />
1. Switch the centre light ON or OFF.<br />
2. Switch heat lamp ON.<br />
3. Switch heat lamp OFF.<br />
4. Pressing this button once will switch ON the FAN.<br />
5. Switches the FAN OFF.<br />
6. Switches ALL functions OFF.<br />
7. IR transmitter.<br />
8. Transmitter indicator.<br />
Remote dip switch settings<br />
The factory preset of the Dip Switches is for Europe<br />
(20 min fan run-on), all other country/regions are to<br />
reset dip switches as per local ventilation requirements.<br />
Recommended settings as per details shown in<br />
Figs. 26 & 27.<br />
NOTE: The Smart Switch handset is not water resistant.<br />
Do not immerse the Smart Switch in water or allow water<br />
to splash on the Smart Switch.<br />
Initial Power Up<br />
Upon initial connection to mains voltage, the centre<br />
lights will be switched on automatically for a minimum<br />
of 2 mins.
®<br />
Tastic<br />
Fig. 27<br />
ON<br />
1 2<br />
Smart Switch Operation<br />
40 Minute Delay Off<br />
This Tastic has a power saving feature which will<br />
automatically switch off all functions except the centre<br />
lights approximately 40 minutes after the last signal is<br />
received from the IR remote handset, provided the last<br />
signal was one of the following button operations:<br />
FAN +, FAN -, HEAT + and HEAT -.<br />
20 Minute Auto Run-on Fan<br />
(Required in European Countries)<br />
This Tastic includes an automatic run-on for the fan.<br />
Each time the fan is switched on, it will run for a<br />
minimum of 20 minutes. If you switch the fan OFF<br />
during this time, the fan will run-on for the remainder<br />
of the 20 minutes. If you switch the fan OFF after the<br />
fan has run for at least 20 minutes, the fan will stop.<br />
See Fig. 26 for handset switch settings.<br />
Replacement Batteries<br />
Smart Switch – 4 x AAA / 1.5 V / UM-4 batteries<br />
<strong>IXL</strong> Cat. No. 626655<br />
Batteries supplied with the Smart Switch are not<br />
covered by the manufacturer’s warranty.<br />
NOTE: All four batteries should be replaced together<br />
when necessary – do not use old batteries with<br />
new batteries.
®<br />
Tastic<br />
Parts<br />
18<br />
Socket<br />
Reflector<br />
<strong>Heat</strong> Lamp<br />
Filament<br />
<strong>Heat</strong> Lamp Replacement<br />
Preparing<br />
Turn the heat lamp off and let it cool for at least 5 minutes. For extra safety, switch the power off at<br />
the isolating switch.<br />
Position a sturdy ladder of sufficient height to let you safely and comfortably reach the Tastic Neo.<br />
Ask someone to hold the ladder if you can.<br />
Removing Glass Shield<br />
With one hand, gently press the glass shield (at a point close to the air inlet) 2 mm towards the ceiling<br />
and carefully slide it towards the air inlet.<br />
Hold your other hand below the other end of the shield to catch it when it drops.<br />
If the shield chips, cracks or breaks, do not use the heat lamp without it. Replace it with <strong>IXL</strong> Tastic ®<br />
Neo Tempered Glass Shield Part 12200, not normal household glass.<br />
Removing Old <strong>Heat</strong> Lamp<br />
A spring-loaded socket holds each end of the heat lamp.<br />
Gently grasp the heat lamp and push it towards one socket.<br />
When it is free of the other socket, carefully pull the heat lamp down towards you.<br />
The heat lamp is not recyclable. Dispose of it like a normal incandescent light globe (i.e. unbroken,<br />
with your general waste, wrapped in any paper or cloth you used).
®<br />
Tastic<br />
Socket<br />
<strong>Heat</strong> Lamp<br />
Air Inlet<br />
Shield<br />
<strong>Heat</strong> Lamp Replacement<br />
Fitting New <strong>Heat</strong> Lamp<br />
Natural skin oils and salts damage new halogen lamps and shorten their life. Only handle a new heat<br />
lamp with soft, dry, clean, lint-free cloth or paper. You can wear gloves, cover your fingers or wrap the<br />
heat lamp until it is installed (so long as you remove all cloth or paper when finished).<br />
If your skin touches a new heat lamp, wipe it gently it with alcohol-moistened cloth or paper.<br />
The heat lamp is half coated with a white reflector. When you grasp the heat lamp, face the back<br />
of the reflector to the ceiling (so you can see the heat lamp’s filament). Not doing this will<br />
reduce performance.<br />
Fit one end of the heat lamp into a socket and gently push it away from the other socket.<br />
When there is enough room, fit the other end of the heat lamp into its socket.<br />
Gently rotate the heat lamp to ensure it is correctly seated (i.e. it looks like the old one did<br />
before you removed it).<br />
Replace the shield by reversing the directions for removing it.<br />
Switch the power on and test the heat lamp.
®<br />
Tastic<br />
Fig. 28<br />
Fig. 29<br />
Fig. 30<br />
Fig. 31<br />
20<br />
CFL Replacement<br />
Step 1 – Figure 28<br />
Tilt the lamp ring.<br />
Step 2 – Figure 29<br />
Grip the lamp ring and pull lamp fitting away<br />
from fascia.<br />
Step 3 – Figure 30<br />
Twist the lamp holder to separate from the lamp.<br />
Step 4 – Figure 31<br />
Remove the lamp from the lamp ring.<br />
Step 5<br />
Reverse the steps above to re-fit the lamp.
®<br />
Tastic<br />
Replacement Lamps<br />
NOTE: Replacement with any other lamps other than those listed below may cause damage to the<br />
Tastic Neo and void the warranty.<br />
<strong>Heat</strong> Lamps<br />
The <strong>IXL</strong> Tastic lamps have been specially developed for best performance.<br />
R7s, 258mm long, 800W max. <strong>IXL</strong> Cat No. 11380<br />
NOTE: Replace only with genuine <strong>IXL</strong> approved infra red halogen heat lamps.<br />
<strong>Light</strong> Bulb<br />
GU10 9W CFL Cat No. 12250<br />
<strong>Light</strong> bulb is not covered by manufacturer’s warranty.<br />
NOTE: These lamps can be replaced with Halogen lamps, 50W maximum.<br />
Cleaning & Maintenance<br />
WARNING: Always make sure the unit is turned off and allow all bulbs to cool before cleaning.<br />
Maintenance of the Tastic Neo is required to ensure the quality of the product and functions<br />
are maintained.<br />
It is recommended that the Tastic Neo body, fascia and globes be checked and cleaned every 2 years.<br />
To clean the fascia and air inlet use a damp cloth with liquid glass cleaner.<br />
Cleaning and maintenance will help to preserve the life-span and performance of the Tastic Neo.
®<br />
Tastic<br />
22<br />
FAQ<br />
Service<br />
NOTE: Do not remove the Tastic Neo from the ceiling. Your Tastic Neo will be serviced in your home.<br />
If service is required, please contact <strong>IXL</strong>’s Service Centre on 1300 727 421.<br />
Frequently asked questions<br />
Q – Will my Tastic Neo heat my bathroom?<br />
A – No your Tastic Neo is designed to provide infra red radiant heat to warm the body while drying,<br />
when standing directly underneath. It is not designed as a room heater.<br />
Q – Can I install my Tastic Neo directly above a shower recess?<br />
A – For safety reasons it is not recommended to install above shower recess. Please refer to the<br />
current Australian/New Zealand Wiring Rules AS/NZS 3000 relating to damp situations for<br />
further details.<br />
Q – What is the maximum recommended light globe wattage that I can install in my Tastic?<br />
A – 50W Halogen GU10 downlights can be installed in a Tastic Neo.<br />
Q – What will happen if I leave my heat lamps on without fan operation?<br />
A – The fan will commence operation automatically to keep the unit operating at a safe temperature.<br />
When the unit has cooled sufficiently the fan will switch off automatically.<br />
Q – Why is my Tastic Neo making noise?<br />
A – All Tastics create some noise due to the rapid movement of air through the Tastic.<br />
Q – Can I retro fit a remote control to my existing hardwired Tastic Neo?<br />
A – No, unfortunately this is not possible.<br />
Q – Can the installer rotate the <strong>IXL</strong> wall switch mechanisms?<br />
A – Yes, the wall switches can be rotated by a qualified electrical trades person.<br />
Q – Can my installer use an alternative wall switch mechanism other than the one supplied with my<br />
<strong>IXL</strong> product?<br />
A – Yes, your authorised installer can use an alternative switch mechanism.
®<br />
Tastic<br />
FAQ<br />
Q – My Tastic unit’s extraction fan doesn’t seem to be removing all the moisture and steam from<br />
my bathroom?<br />
A – There are a number of factors that will influence the exhaust fan’s performance. Firstly you can<br />
improve your cross ventilation via an open door or window; refer to page 7 of the instructions for<br />
details on improving the room’s air flow.<br />
If you live in a traditionally cooler climate, in the winter months during hot showers, you may<br />
notice that there is more moisture and condensation build up. If this is the case, you may wish to<br />
improve your natural ventilation or invest in an additional exhaust fan.<br />
Bathrooms which have high ceilings, are larger than average, or have an open shower may all<br />
require additional ventilation. We recommend that you visit our website for further details and<br />
suggestions on effectively ventilating your bathroom.
®<br />
Tastic<br />
24<br />
Products<br />
<strong>IXL</strong> Range: Tastic and <strong>Vent</strong>ilation<br />
Within the <strong>IXL</strong> Tastic and ventilation range there are a number of products and optional accessories<br />
available, these include:<br />
<strong>•</strong> Tastic 3 in 1: <strong>Heat</strong>, <strong>Light</strong> and Fan<br />
<strong>•</strong> Tastic 2 in 1: <strong>Light</strong> and Fan<br />
<strong>•</strong> Ducted Tastics<br />
<strong>•</strong> <strong>Vent</strong>ilation Fans<br />
<strong>•</strong> <strong>Vent</strong>ilation and <strong>Light</strong> Units<br />
<strong>•</strong> Eco Tastics<br />
<strong>•</strong> Remote controlled Tastics (Smart Switch)<br />
<strong>•</strong> Easy Duct Thermal Transfer System<br />
<strong>•</strong> Tastic Neo<br />
<strong>IXL</strong> Range: Accessories<br />
<strong>•</strong> Genuine <strong>IXL</strong> <strong>Heat</strong> Lamps<br />
<strong>•</strong> Centre Globes<br />
<strong>•</strong> In line Ducting<br />
<strong>•</strong> Grilles and Fascias<br />
For more information or help, please contact Sampford <strong>IXL</strong> on 1300 727 421 or visit the website at<br />
www.sampfordixl.com.au
®<br />
Tastic<br />
Record Your Model<br />
RECORD THE DETAILS OF YOUR MODEL AND KEEP THE FOLLOWING INFORMATION<br />
DO NOT SEND THIS TO <strong>IXL</strong>.<br />
Installed By ............................................................................<br />
Suburb ................................................................................<br />
Date of Purchase........................................................................<br />
Model No................................... . . . . . .Serial No ..............................
®<br />
Tastic<br />
26<br />
Warranty<br />
This Warranty against defects for your newly purchased Tastic product is proudly prepared by<br />
Sampford <strong>IXL</strong> Pty Ltd of 421 Smith Street, Fitzroy, VIC 3065, phone 1300 727 421.<br />
1. Sampford <strong>IXL</strong> Tastic products come with guarantees that do not exclude the following<br />
consumer entitlements under the Australian Consumer Law:<br />
a. replacement or refund for a major failure and compensation for any other reasonably<br />
foreseeable loss or damage; and<br />
b. to have the goods repaired or replaced if goods fail to be of acceptable quality and the<br />
failure does not amount to a major failure.<br />
2. Sampford <strong>IXL</strong> warrants that your product and related supply will be free from defects in<br />
materials and workmanship during the warranty term. Your warranty term is five years with a<br />
two year heat lamp replacement warranty, commencing from the date of purchase. Sampford<br />
<strong>IXL</strong> acknowledges this product requires professional installation and product removal is<br />
hazardous to consumers, accordingly any necessary inspections and services will be carried<br />
out on site. You should not attempt de-installation.<br />
3. Subject to Point 1, Sampford <strong>IXL</strong> will repair any defects in materials and workmanship during<br />
the warranty term and if the product is deemed irreparable provide a replacement of an<br />
equivalent current model where the balance of the warranty period from the original date of<br />
purchase will take effect.<br />
4. To the fullest extent permitted by law and subject always to Point 1, Sampford <strong>IXL</strong> will not<br />
be liable for:<br />
a. any loss or damage arising from loss of use, loss of profits or revenue; or<br />
b. for any indirect or consequential loss or damage resulting from any breach of this<br />
warranty against defects.<br />
5. Defective Sampford <strong>IXL</strong> Tastic products may be repaired using refurbished parts or if<br />
required, completely replaced by a refurbished product of the same type.<br />
Limitations to Your <strong>IXL</strong> Warranty<br />
6. Subject to Point 1, this Warranty:<br />
a. will only be provided to the original purchaser where the original purchase was made<br />
from a Sampford <strong>IXL</strong> Authorised Dealer or Reseller and proof of such purchase can be<br />
presented at the time of service;<br />
b. only applies to Sampford <strong>IXL</strong> Tastic products purchased in Australia from a Sampford <strong>IXL</strong><br />
Authorised Dealer or Reseller and installed by a qualified person where a Certificate of<br />
Compliance in accordance with State/Territory laws is provided;<br />
c. will not apply where the defect in or failure of the product is attributable to misuse,<br />
abuse, accident or non-observation of the manufacturer’s instructions. This product<br />
must be used in accordance with the manufacturer’s instructions;<br />
d. will not cover faults due to normal wear and tear with reasonable use nor consumable<br />
components such as globes, filters, glass items, etc;
®<br />
Tastic<br />
Warranty<br />
e. will not cover any damages or problems caused to this product by natural forces eg. storm,<br />
fire, flood, and earthquake; or by intrusion or accumulation (or both) of foreign matters<br />
eg. dust, soil, and moisture. Sampford <strong>IXL</strong> recommends that you take out appropriate<br />
insurances to protect your product to this end;<br />
f. will not apply if this product is installed in a mobile dwelling eg. caravan or boat;<br />
g. will not apply if this product is removed from the location where it was first installed;<br />
h. is immediately void if the serial or model number label is removed or defaced;<br />
i. is immediately void if the product is serviced or repaired by a unauthorised/unqualified<br />
personnel;<br />
j. covers use of this product for domestic use only;<br />
k. will not be restarted or extended upon repair or replacement of the product or a part.<br />
How to make a Claim under Your <strong>IXL</strong> Warranty<br />
7. To make a claim under this Warranty you will need to:<br />
a. contact Sampford <strong>IXL</strong> service department on 1300 727 421 or<br />
aftersalesservice@sampfordixl.com.au to provide details and register your claim enabling<br />
a Sampford <strong>IXL</strong> assessment;<br />
b. submit proof of purchase with your claim eg. tax invoice or purchase receipt;<br />
c. where a property has been constructed by a builder/developer and it is fitted with <strong>IXL</strong><br />
products, please submit proof of purchase by way of the certificate of occupancy,<br />
with your claim.<br />
8. Sampford <strong>IXL</strong> will contact you to make arrangements for service on site.<br />
9. Subject to Point 1, you will be responsible for any costs relating to the provision of your product<br />
to a Sampford <strong>IXL</strong> Authorised Service Dealer.<br />
10. Subject to Point 1, in the event you live more than 50 km from a Sampford <strong>IXL</strong> Authorised<br />
Service Dealer you may be subject to travel or transport costs to facilitate the repairing or<br />
replacement of your <strong>IXL</strong> product.<br />
11. Sampford <strong>IXL</strong> and its Authorised Service Dealers reserve the right to seek reimbursement of<br />
any costs incurred by them should your <strong>IXL</strong> product be found to be in good working order.<br />
Privacy<br />
The privacy of your personal information has always been important to us. To learn more about<br />
how we collect, keep and use your personal information, please obtain a copy of our privacy<br />
statement by visiting our website at www.sampfordixl.com.au or by contacting us via email on<br />
info@sampfordixl.com.au or by telephone on 1300 727 421.
For comments, questions or warranty matters:<br />
Sampford <strong>IXL</strong> Pty Ltd<br />
Service Department<br />
421 Smith St<br />
Fitzroy Victoria 3065 Australia<br />
Phone: 1300 727 421<br />
Fax: 1300 727 425<br />
aftersalesservice@sampfordixl.com.au<br />
info@sampfordixl.com.au<br />
www.sampfordixl.com.au<br />
IN HOME<br />
WARRANTY<br />
Approved by the appropriate<br />
electrical supply authorities.<br />
Part number 611024_B.