

TM 9-2320-289-10.pdf
TM 9-2320-289-10.pdf
TM 9-2320-289-10.pdf

Create successful ePaper yourself
Turn your PDF publications into a flip-book with our unique Google optimized e-Paper software.
<strong>TM</strong> 9-<strong>2320</strong>-<strong>289</strong>-10<br />
ARMY <strong>TM</strong> 9-<strong>2320</strong>-<strong>289</strong>-10<br />
AIR FORCE TO 36A12-1A-2081<br />
MARINE CORPS <strong>TM</strong> <strong>2320</strong>-10/1<br />
Supersedes Copy Dated April 1983<br />
See Page i For Details<br />
4 JULY 1986
CHANGE<br />
No. 5<br />
<strong>TM</strong> 9-<strong>2320</strong>-<strong>289</strong>-10<br />
TO 36A12-1A-2081<br />
<strong>TM</strong> <strong>2320</strong>-1011<br />
C 5<br />
DEPAR<strong>TM</strong>ENT OF THE ARMY, THE AIR FORCE,<br />
AND HEADQUARTERS, MARINE CORPS<br />
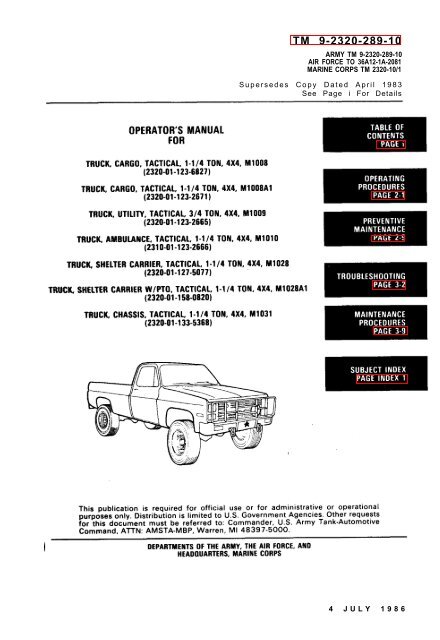
OPERATOR’S MANUAL<br />
FOR<br />
TRUCK, CARGO, TACTICAL, 1-1/4 TON,<br />
(<strong>2320</strong>-01-123-6827)<br />
Washington, D.C., 1 May 1992<br />
4X4, M1008<br />
TRUCK, CARGO, TACTICAL, 1-1/4 TON, 4X4, M1008A1<br />
(<strong>2320</strong>-01-123-2671)<br />
TRUCK, UTILITY, TACTICAL, 3/4 TON, 4X4, M1009<br />
(<strong>2320</strong>-01-123-2665)<br />
TRUCK, AMBULANCE, TACTICAL, 1-1 /4 TON, 4X4, M1010<br />
(2310-01-123-2666)<br />
TRUCK, SHELTER CARRIER, TACTICAL, 1-1 /4 TON, 4X4, M1028<br />
(<strong>2320</strong>-01-127-5077)<br />
TRUCK, SHELTER CARRIER W/PTO, TACTICAL, 1 -1/4 TON, 4X4, M1028A1<br />
(<strong>2320</strong>-01-158-0820)<br />
TRUCK, SHELTER CARRIER W/PTO, TACTICAL 1 -1/4 TON, 4X4, M1028A2<br />
(<strong>2320</strong>-01-295-0822)<br />
TRUCK, SHELTER CARRIER, TACTICAL, 1 -1/4 TON, 4X4, M1028A3<br />
(<strong>2320</strong>-01-325-1937)<br />
TRUCK, CHASSIS, TACTICAL, 1-1 /4 TON, 4X4, M1031<br />
(<strong>2320</strong>-01-133-5368)<br />
<strong>TM</strong> 9-<strong>2320</strong>-<strong>289</strong>-10, dated 4 July 1986, is changed as follows:<br />
1. The manual title is changed to read as shown above.<br />
2. Remove old pages and insert new pages.<br />
3. New or changed material is indicated by a vertical bar in the margin of the page<br />
and by a vertical bar adjacent to the TA number.<br />
Remove Pages Insert Pages<br />
i through iiil(iv blank) i through iiil(iv blank)<br />
1-1 through 1-4 1-1 through 1-4<br />
1-7 and 1-8<br />
1-7 and 1-8<br />
1-12.1/(1-12.2blank)<br />
1-12.1 and 1-12.3/(1-12.4blank)<br />
1-19 and 1-20 1-19 and 1-20<br />
2-19 and 2-20 2-19 and 2-20<br />
Distribution authorized to U.S. Government agencies for administrative end operational<br />
purpose only. Other requests for this document will be referred to: Commander, U.S. Army<br />
Tank-Automotive Command, ATTN: AMSTA-MB, Warren, MI 48397-5000.<br />
Destromy by any method that will prevent disclosure of contents or reconstruction of the document.<br />
1
2-23 and 2-24<br />
2-29 and 2-30<br />
2-53 and 2-54<br />
2-57 and 2-58<br />
2-63 and 2-64<br />
2-81 and 2-82<br />
2-89 and 2-90<br />
3-5 and 3-6<br />
3-11 and 3-11.0/(3-11.1 blank)<br />
3-13 through 3-15/ (3-16 blank)<br />
B-31 (B-4 blank)<br />
C-1 and C-2<br />
Insert Pages (Con’t)<br />
2-23 and 2-24<br />
2-29 and 2-30<br />
2-53 and 2-54<br />
2-57 and 2-58<br />
2-63 and 2-64<br />
2-81 and 2-82<br />
2-89 and 2-90<br />
3-5 and 3-6<br />
3-11 and 3-11.0 /(3-11.1 blank)<br />
3-13 through 3-15/(3-16 blank)<br />
B-3/(B-4 blank)<br />
C-1 and C-2<br />
4. File this change sheet in front of the publication for reference purposes.<br />
By Order of the Secretary of the Army:<br />
MILTON H. HAMILTON<br />
Administrative Assistant to the<br />
Secretary of the Army<br />
02692<br />
By Choler of the Secretary of the Air Force:<br />
CHARLES C. MCDONALD<br />
General, United States Air Force<br />
Commander, Air Force Logistics Command<br />
By Order of the Marine Corps:<br />
Distribution:<br />
GORDON R. SULLIVAN<br />
General, United States Army<br />
Chief of Staff<br />
MERRILL A. McPEAK<br />
General, United States Air Force<br />
Chief of Staff<br />
H.E. REESE<br />
Deputy for Support<br />
Marine Corps Research, Development and<br />
Acquisition Command<br />
To be distributed in accordance with DA Form 12-38-E (Block 0369) Operator mainte-<br />
nance requirements for <strong>TM</strong>9-<strong>2320</strong>-<strong>289</strong>-10.<br />
.
WARNING<br />
EXHAUST GASES CAN KILLI<br />
1. DO NOT operate truck engine in enclosed area.<br />
2. DO NOT idle truck engine with cab windows closed.<br />
3. DO NOT drive truck with inspection plates or cover plates removed<br />
4. BE ALERT at all times for exhaust odors.<br />
5. BE ALERT for exhaust poisoning symptoms. They are:<br />
Headache<br />
Dizziness<br />
Sleepiness<br />
Loss of Muscular Control<br />
6. If you see a person with exhaust poisoning symptoms:<br />
Remove person from area.<br />
Expose to open air.<br />
Whem leaving the truck:<br />
Keep person warm.<br />
Do not permit person to move.<br />
Administer artificial respiration, if necessary. ”<br />
Immediately notify medical personnel.<br />
WARNING<br />
PARKING<br />
<strong>TM</strong> 9-<strong>2320</strong>-<strong>289</strong>-10<br />
DO NOT use transmission as a substitute for parking brake. ALWAYS engage parking brake<br />
when parking truck.<br />
If transfer case control lever is in “N” (Neutral), transfer case is disengaged and shifting<br />
transmission gearshift lever to “P”( Park) WILL NOT stop the truck from moving.<br />
Turn ignition key to LOCK Remove key.<br />
Failure to follow this warning can result in injury to personnel or equipment damage.<br />
For First Aid . refer to FM 21-11.<br />
Warning a
<strong>TM</strong> 9-<strong>2320</strong>-<strong>289</strong>-10<br />
WARNING<br />
EXHAUST PIPE AND MUFFLER<br />
l DO NOT park or idle truck over combustible materials such as grass or leaves, if tactical situation<br />
permits. They could ignite from the heat of the exhaust system and start a fire. Failure to follow<br />
this warning can result in injury to personnel or equipment damage.<br />
l DO NOT touch hot exhaust pipes or muffler with bare hands. Severe injury can result.<br />
l If the tailgate and/or tailgate window is required to be opened while moving or towing, extreme caution is<br />
required. Exhaust fumes may enter resulting in injury or death to personnel.<br />
WARNING<br />
DIESEL FUEL HANDLING<br />
DO NOT SMOKE OR PERMIT ANY OPEN FLAME IN AREA OF TRUCK WHILE. YOU ARE SERVICING<br />
DIESEL FUEL SYSTEM. Be sure hose nozzle is grounded against filler tube during refueling to prevent<br />
static electricity. Failure to follow this warning can result in injury to personnel or equipment damage.<br />
WARNING<br />
BATTERIES<br />
Remove all jewelry such as rings, dog tags, bracelets, etc. If jewelry contacts battery terminal, a direct<br />
short will result, causing instant heating of tools, severe injury to personnel, ordamageto equipment.<br />
WARNING<br />
CLEANING AGENTS<br />
DO NOT SMOKE when using cleaning solvent. NEVER USE IT NEAR AN OPEN FLAME. Be sure there<br />
is a fire extinguisher nearby and use cleaning solvent only in well-ventilated places. Flash point<br />
of solvent is 138°F (60 0<br />
C).<br />
USE CAUTION when using cleaning solvents. Cleaning solvents evaporate quickly and can irritate<br />
exposed skin if solvents contact skin. In cold weather, contact of exposed skin with cleaning<br />
solvents can cause frostbite.<br />
WARNING<br />
GAS-PARTICULATE FILTER UNIT<br />
Under extreme cold conditions, danger of frostbite exists. Put on protective mask, but DO NOT<br />
connect air duct to mask until heater has been on for 15 minutes.<br />
Warning b<br />
Change 1
TECHNICAL MANUAL<br />
<strong>TM</strong> 9-<strong>2320</strong>-<strong>289</strong>-10<br />
*<strong>TM</strong> 9-<strong>2320</strong>-<strong>289</strong>-10<br />
DEPAR<strong>TM</strong>ENTS OF THE ARMY, THE AIR FORCE,<br />
AND HEADQUARTERS, MARINE CORPS<br />
Washington, D.C. 4 July 1986<br />
OPERATOR’S MANUAL<br />
FOR<br />
TRUCK, CARGO, TACTICAL, 1-1 /4 TON, 4X4, Ml 008<br />
(<strong>2320</strong>-01-123-6827)<br />
TRUCK, CARGO, TACTICAL, 1-1 /4 TON, 4X4, M1008A1<br />
(<strong>2320</strong>-01-123-2671)<br />
TRUCK, UTILITY, TACTICAL, 3/4 TON, 4X4, M1009<br />
(<strong>2320</strong>-01-123-2665)<br />
TRUCK AMBULANCE, TACTICAL, 1-1 /4 TON, 4X4, M1010<br />
(2310-01-123-2666)<br />
TRUCK, SHELTER CARRIER, TACTICAL, 1-1 /4 TON, 4X4, M1028<br />
(<strong>2320</strong>-01-127-5077)<br />
TRUCK SHELTER CARRIER W/PTO, TACTICAL, 1-1/4 TON, 4X4, M1028A1<br />
(<strong>2320</strong>-01-158-0820)<br />
TRUCK, SHELTER CARRIER W/PTO, TACTICAL,1-1/4 TON, 4X4, M1028A2<br />
(<strong>2320</strong>-01-295-0822)<br />
TRUCK, SHELTER CARRIER, TACTICAL, 1-1/4 TON, 4X4, M1028A3<br />
(<strong>2320</strong>-01 -325-1937)<br />
TRUCK, CHASSIS, TACTICAL, 1-1 /4 TON, 4X4, M1031<br />
(<strong>2320</strong>-01-133-5368)<br />
REPORTING ERRORS ANO RECOMMENDING IMPROVEMENTS<br />
(Army) You can improve this manual. If you find any mistakes or if you know of a way to improve<br />
the procedures, please let us know. Mail your letter, DA Form 2028 (Recommended Changes<br />
to Publications and Blank Forms), or DA Form 2028-2, located in the back of this manual, direct<br />
to Commander, U.S. Army Tank-Automotive Command, ATTN: AMSTA-MB, Warren, Ml<br />
48397-5000. (Marine Corps) Submit NAVMC 10772 to the Commanding General , Marine<br />
Corps Logistic Base (Code 850), Albany, GA 31704. A reply will be furnished to you.<br />
TABLE OF CONTENTS<br />
How To Use This Manual . . . . . . . . . . . . . . . . . . . . . . . . . . . . . . . . . . . . . . . iii<br />
CHAPTER 1 INTRODUCTION . . . . . . . . . . . . . . . . . . . . . . . . . . . . . . . . . . . . . . . . . . . . . . . . . . 1-1<br />
Section I General Information . . . . . . . . . . . . . . . . . . . . . . . . . . . . . . . . . . . . . . . . . . 1-1<br />
Section II Equipment Description . . . . . . . . . . . . . . . . . . . . . . . . . . . . . . . . . . . . . . . . 1-3<br />
Section Ill Technical Principles of Operation . . . . . . . . . . . . . . . . . . . . . . . . . . . . . . . 1-13<br />
*This publication supersedes <strong>TM</strong> 9-<strong>2320</strong>-<strong>289</strong>-10 dated April 1983.<br />
Page<br />
Change 5 i
<strong>TM</strong> 9-<strong>2320</strong>-<strong>289</strong>-10<br />
TABLE OF CONTENTS - Continued<br />
CHAPTER 2 OPERATING PROCEDURES . . . . . . . . . . . . . . . . . . . . . . . . . . . . . . . . . . . . . . . . . 2-1<br />
Section I Description and Use of Controls and lndicators . . . . . . . . . . . . . . . . . . . . 2-1<br />
Section II Preventive Maintenance Checks and Services (PMCS) . . . . . . . . . . . . . . 2-5<br />
Section Ill Operate Under Usual Conditions . . . . . . . . . . . . . . . . . . . . . . . . . . . . . 2-53<br />
Section IV Operate Ambulance Peculiar Components . . . . . . . . . . . . .2-65<br />
Section V Operate Auxiliary Equipment . . . . . . . . ...2-80<br />
Section Vl Operate Under Unusual Conditions . . . . . . . . . . . . . . ...2-86<br />
CHAPTER 3 MAINTENANCE INSTRUCTIONS . . . . . . . . . . . . . . . . . . . . . . . . . . . . . . . . . . . . . . . 3-1<br />
Section I Lubrication . . . . . . . . . . . . . 3-1<br />
Section II Troubleshooting . . . . . . . . . . . . . . . . . . . . . . . . 3-2<br />
SectionIII Maintanance Procedures . . . .. . . . . . . . . . .. .. . . . . . . . . . . . . . . . . . . . . . . . . . . . . . . . . . . . . . . . . 3-9 ..<br />
Section lV Maintenance Under Unusual Conditions . . . . . . . . . . . . . . . . . . . . . . . . 3-14<br />
APPENDIX A REFERENCES . . . . . . . . . . . . . . . . . . . . . . . . . . . . . . . . . . . . . . . . . . . . . . . . . . . A-1<br />
APPENDIX B COMPONENTS OF END ITEM AND BASIC ISSUE ITEMS LISTS . . . . . . . . . . . . . . . . . . . B-1<br />
APPENDIX C ADDITIONAL AUTHORIZATION LIST . . . . . . . . . . . . . . . . . . . . . . . . . . . . . . . . . . . . C-1<br />
APPENDIX D EXPENOABLE/OURABLESUPPLIESANO MATERIALS LIST . . . . . . . . . . . . . . . . . . . . . . D-1<br />
APPENDIX E STOWAGE ANO SIGN GUIDE FOR COMPONENTS OF END ITEM, BASIC<br />
ISSUE ITEMS, AND APPLICABLE ADDITIONAL AUTHORIZATION ITEMS . . . . E-1<br />
ii Change 3<br />
Page<br />
Index 1
HOW TO USE THIS MANUAL<br />
<strong>TM</strong> 9-<strong>2320</strong>-<strong>289</strong>-10<br />
This manual Is designed to help operate and maintain the M1008, M1008A1, M1009, M1010,<br />
M1028, M1028A1, M1028A2, M1028A3, and M1031 trucks. Listed below are special features which<br />
trove been Included to make it easier to locate and to use the Information You need.<br />
A table of contents is provided, giving e quick reference to chapters snd sections that<br />
will be used often.<br />
l Warnings, subject headings, procedure steps and certain other kinds of information are<br />
highlighted in bold print as a visual aid.<br />
All capital letters are used to emphasize statements of particular importance.<br />
FOLLOW THESE GUIDELINES WHEN YOU USE THIS MANUAL<br />
Read all warnings, cautions, and notes.<br />
Within a chapter or section, headings are used to help group the material and to assist<br />
you in quickly finding tasks.<br />
The operator should read through this manual and become familiar with the contents<br />
before attempting to operate the truck.<br />
Technical instructions will include metric units in addition to nonmetric units.<br />
Change 5 iii/(iv blank)
1-1. SCOPE<br />
CHAPTER 1<br />
INTRODUCTION<br />
Section I. GENERAL INFORMATION<br />
<strong>TM</strong> 9-<strong>2320</strong>-<strong>289</strong>-10<br />
This manual is for your use In operating, troubleshooting, and malntaining the Ml 008,<br />
M1008A1, M1010, M1028, M1028A1, M1028A2, M1028A3, and M1031 1-1/4 ton trucks and the<br />
M1009 3/4 ton truck. It also provides instructions for trucks equipped with special purpose kits.<br />
1-2. MAINTENANCE FORMS AND RECORDS<br />
Department of the Army forms and procedures used for equipment maintenance will be those<br />
prescribed by DA Pam 738-750, the Army Maintenance Management System (TAMMS).<br />
1-3. REPORTING EQUIPMENT IMPROVEMENT RECOMMENDATIONS (EIRs)<br />
If your Commercial Utility Cargo Vehicle (CUCV) Series truck needs improvement, let us know.<br />
Send us an EIR. You, the user, are the only one who can tell us what you don’t like about your<br />
equipment. Let us know why you don’t like the design or performance. Put it on an SF 368 (Quality<br />
Deficiency Report). Mail it to us at Commander, U.S. Army Tank-Automotive Command, ATTN:<br />
AMSTA-QRT, Warren, Ml 48397-5000. We’ll send you a reply.<br />
1-4. WARMNING INFORMATION<br />
The M1008, M1008A1, M1009, M1010, M1028, M1028A1, M1028A2, M1028A3, and M1031<br />
truck are under warranty by the Chevrolet Motor Division of the General Motors Corporation In<br />
accordance with TB 9-2300-295-15/24.<br />
1-5. ABBREVIATIONS<br />
Listed below are explanations of abbreviations used on the truck data service plates, and<br />
throughout this manual. “<br />
A . . . . . . . . . . . . . . . . . . . . . . . . . . . . . . . . . . . After (PMCS)<br />
AAL . . . . . . . . . . . . . . . . . . . . . . . . . . . . . . . . Additional Authorization List<br />
B . . . . . . . . . . . . . . . . . . . . . . . . . . . . . . . . . . . Before (PMCS)<br />
Bli . . . . . . . . . . . . . . . . . . . . . . . . . . . . . . . . . . Basic Issue Items<br />
C . . . . . . . . . . . . . . . . . . . . . . . . . . . . . . . . . . . Centigrade or Celsius<br />
C . . . . . . . . . . . . . . . . . . . . . . . . . . . . . . . . . . . operator/crew (maintenance level)<br />
cm . . . . . . . . . . . . . . . . . . . . . . . . . . . . . . . . . centimeter<br />
COED . . . . . . . . . . . . . . . . . . . . . . . . . . . . . . . . Components of End Item<br />
CTA . . . . . . . . . . . . . . . . . . . . . . . . . . . . . . . . Common Table of Allowances<br />
D . . . . . . . . . . . . . . . . . . . . . . . . . . . . . . . . . . . Drive (on transmission gearshift lever)<br />
D . . . . . . . . . . . . . . . . . . . . . . . . . . . . . . . . . . . During (PMCS)<br />
DA . . . . . . . . . . . . . . . . . . . . . . . . . . . . . . . . . Department of the Army<br />
EIR . . . . . . . . . . . . . . . . . . . . . . . . . . . . . . . . . Equipment Improvement Recommendation<br />
F . . . . . . . . . . . . . . . . . . . . . . . . . . . . . . . . . . . Fahrenheit<br />
GAWR . . . . . . . . . . . . . . . . . . . . . . . . . . . . . . Gross Axle Weight Rating<br />
GVWR . . . . . . . . . . . . . . . . . . . . . . . . . . . . . . Gross Vehicle Weight Rating<br />
JTA . . . . . . . . . . . . . . . . . . . . . . . . . . . . . . . . Joint Table of Allowance<br />
kg . . . . . . . . . . . . . . . . . . . . . . . . . . . . . . . . . . kilogram<br />
km . . . . . . . . . . . . . . . . . . . . . . . . . . . . . . . . . kilometer<br />
kPa . . . . . . . . . . . . . . . . . . . . . . . . . . . . . . . . . kilopascal<br />
kph . . . . . . . . . . . . . . . . . . . . . . . . . . . . . . . . kilometers per hour<br />
I . . . . . . . . . . . . . . . . . . . . . . . . . . . . . . . . . . . . liter<br />
m . . . . . . . . . . . . . . . . . . . . . . . . . . . . . . . . . meter<br />
M . . . . . . . . . . . . . . . . . . . . . . . . . . . . . . . . . Monthly (PMCS)<br />
mm . . . . . . . . . . . . . . . . . . . . . . . . . . . . . . . . . millimeter<br />
N . . . . . . . . . . . . . . . . . . . . . . . . . . . . . . . . . . Neutral (on transmission gearshift lever)<br />
Change 5 1-1
<strong>TM</strong> 9-<strong>2320</strong>-<strong>289</strong>-10<br />
1-2<br />
National Stock Number<br />
Park (on transmission gearshift lever)<br />
Preventive Maintenance Checks and Services<br />
Reverse (on transmission gearshift lever)<br />
Transfer Case<br />
Table of Distribution and Allowances<br />
Table of Organizational EauiDment/Modified Table of<br />
Organizational Equipment”<br />
U.S. Army Tank-Automotive Command<br />
Weekly (PMCS)
1-6.<br />
Section Il. EQUIPMENT DESCRIPTION<br />
EQUIPMENT CHARACTERlS,CAS, CAPABILITIES, ANO FEATURES<br />
<strong>TM</strong> 9-<strong>2320</strong>-<strong>289</strong>-10<br />
a. The trucks in this series are commercial trucks suitable for use on all types of roads and<br />
highways, in all types of weather. The trucks are further designed for infrequent off-road operations.<br />
b. The trucks are capable of occasional hardbottom fording to a depth of 20 inches(51 cm)<br />
at 5 mph (8 kph) for not more than approximately 3 minutas without stalling the engine, causing<br />
permanent damage to components, or requiring immediate maintenance.<br />
c. Features of the truck series include:<br />
(1)<br />
(2)<br />
(3)<br />
(4)<br />
(5)<br />
(6)<br />
(7)<br />
automatic transmission with three forward and one reverse spaeds<br />
379 cubic inch (6.2 liter) diesel V-8 engine<br />
manually activated transfer case for four-wheel drive operations<br />
hydraulically activated, power assisted front disc and rear drum service brakes<br />
NATO sIave cable receptacle for slave starting<br />
1 2/28 volt electrical system<br />
winterization kit available for each model<br />
d. Cargo Truck, The M1008, M1008A1, M1028, M1028A1, M1028A2, and M1028A3<br />
1-1/4 ton, 4X4, cargo trucks are. fight commercial trucks designed to provide standard tactical mobility<br />
and to carry cargo or passengers, All models have a tow pintle at the rear bumper to permit<br />
towing of trailer or aircraft. The M1008 can be equipped with a troop aeat kit for eight personnel.<br />
The M1008A1 Includes a 100 amp/28 v communlcations kit. The M1028 is equipped to accept a<br />
100 amp/28 v electrical system and S250 communications shelter and a communication kit. The<br />
M1028A1 ls equipped wfth a New Process 205 Transfer Case which allows for the addition of a power<br />
take-off (PTO) unit. The M1028A2 is an M1028A1 that hae been converted to rear dual wheel conflguration.<br />
The M1028A3 is an M1028 whkh has been converted to rear dual wheel shelter carrier<br />
configuratlon and is equipped with a New Process 208 Transfer Case.<br />
Change 5 1-3
<strong>TM</strong> 9-<strong>2320</strong>-<strong>289</strong>-10<br />
e. Utility Truck. The M1009 is a 3/4 ton truck that has an enclosed body and can be used<br />
for command and control purposes.<br />
M1009<br />
f. Ambulance. The M1010 Ambulance is designed to carry four litter or eight ambulatory<br />
patients with both upper litters in place; or two litter and four ambulatory patients with one upper<br />
litter in place, It is equipped with a 200 amp/28 v electrical system, which supports a gas-particulate<br />
filter system, a patient compartment air conditioner, and a fuel fired patient compartment heater.<br />
1-4<br />
M1010<br />
TA466565
<strong>TM</strong> 9-<strong>2320</strong>-<strong>289</strong>-10<br />
g. Chassis Truck. The M1031 is a chassis and cab combination, which was designed for<br />
the mounting of special bodies that might be required.<br />
TA466566<br />
1-5
<strong>TM</strong> 9-<strong>2320</strong>-<strong>289</strong>-10<br />
1-7. LOCATION AND DESCRIPTION OF MAJOR COMPONENTS<br />
a. External Components.<br />
1-6<br />
1.<br />
2.<br />
3.<br />
4.<br />
5.<br />
6.<br />
7.<br />
8.<br />
9.<br />
Tailgate.<br />
M1008<br />
Tailgate Latch Releasa. Releases tailgate latch, allowing tailgate to be lowered.<br />
Trailer Electrical Coupling. Trailer lights cable to be hooked here during trailer<br />
towing.<br />
TOW Pintle. Used to tow trailers or aircraft.<br />
Stoplights/Taillights.<br />
Slave Recaptacle. Used to start truck with another vehicle having a 28 volt starting<br />
system.<br />
Weight Classification Marker.<br />
Blackout Drive Light. Used during hours of limited visibility when service lights<br />
cannot be used.<br />
Brush Guard. Protects radiator from damage,<br />
10. Tow Hooks. Used to tow truck short distances.<br />
11. Service Lights.<br />
12. Locking Hubs. Used to prepare truck for four-wheel drive operation,<br />
13. Sida Markers.<br />
TA466567
1.<br />
2.<br />
3.<br />
4.<br />
5.<br />
6.<br />
7.<br />
8.<br />
9.<br />
10.<br />
11.<br />
12.<br />
M1010<br />
Air Exhaust Vent. Allows air to leave patient compartment.<br />
<strong>TM</strong> 9-<strong>2320</strong>-<strong>289</strong>-10<br />
Floodlights. One on each side of ambulance body. Can be adjusted to meet mission<br />
requirements.<br />
Air Conditioner. Provides climate control of patient compartment during hot weather.<br />
Spotlight. Spotlight can be directed as desired from inside cab by twisting and<br />
rotating handle.<br />
Medical Corps Symbol.<br />
Red Cross Symbol. Removable; one on each side and on top, and two on rear doors.<br />
Patient Assist Boom Bracket. To secure boom to other side of doors.<br />
Patient Assist Boom. Used to assist in lifting patients into upper litter berths.<br />
Access Steps. Foldout patient compartment steps allow personnel to easily enter and<br />
exit patient compartment.<br />
Fuel Fillar Cap.<br />
Heater Air Inlet. Allows air to enter for personnel heater.<br />
Heater Access Door. Allows access to personnel heater for maintenance.<br />
TA466568<br />
1-7
<strong>TM</strong> 9-<strong>2320</strong>-<strong>289</strong>-10<br />
1.<br />
2.<br />
3.<br />
1.<br />
2.<br />
3.<br />
Tailgate Window.<br />
M1009<br />
Tailgate Latch Release.Located on inside, just below window. Releases tailgate latch<br />
allowing tailgate to be lowered.<br />
Tailgate Window Crank. Raises and lowers window in utility tailgate.<br />
Flared Rear Fender.<br />
Rear Fender Side Markar.<br />
Offset Front Wheel Hub.<br />
4. Dual Rear Wheels.<br />
1-8 Change 5<br />
M1028A2 AND M1028A3<br />
TA466569
. Internal Components.<br />
1.<br />
2.<br />
3.<br />
4.<br />
5.<br />
6.<br />
7.<br />
8.<br />
M1010 Ambulance Patient Compartment<br />
Air Exheust Vents. Allow air to leave patient compartment.<br />
<strong>TM</strong> 9-<strong>2320</strong>-<strong>289</strong>-10<br />
Focus Lights. Provide direct light for specific applications; for medical use.<br />
Domelight. Provides overhead light for working within<br />
compartment.<br />
ambulance<br />
Rear Door Hold Open. Holds patient compartment doors in open position.<br />
Heater Outlet. Allows warm air from heater to enter patient compartment.<br />
Patient Compartment Front Door. Allows access to cab of truck.<br />
Lower Litter Berths.<br />
Upper Litter Berths.<br />
patient<br />
TA466570<br />
1-9
<strong>TM</strong> 9-<strong>2320</strong>-<strong>289</strong>-10<br />
1-10<br />
1.<br />
2.<br />
3.<br />
4.<br />
5.<br />
6.<br />
M1010 Ambulance Patient Compartment<br />
Gas-Particulate Filter Unit (G PFU). Pumps and filters sir from patient compartment.<br />
Gas-Particulate Filter Air Outlet. Connects to protective mask and delivers heated<br />
and filtered air to wearer of mask,<br />
Air Conditional Controls. Regulate air flow through air conditioner unit and control<br />
temperature.<br />
Gas-Particulate Filter Unit Heater. Heats air from gas-particulate filter unit during<br />
cold weather. There are five heaters in truck; three in patient compartment and two<br />
in cab.<br />
Upper Litter Berth Support. Supports upper litter berth,<br />
Gs-Particulate Filter Canisters. Provide a second filter for air passing through filter<br />
unit.
1-8. DIFFERENCES BETWEEN MOOELS<br />
a. 6.2 Liter Diesel Engine<br />
b. Automatic Transmission<br />
c. Model 208 Transfer Case (T/C)<br />
d. Model 205 Transfer Case (T/C)<br />
e. 100 amp/28 volt<br />
Electrical System<br />
f. 200 amp/28 volt<br />
Electrical System<br />
g. Troop Seat Kit<br />
h. Communications Kit<br />
i. Slave Receptacle<br />
j. Tow Pintle<br />
k. Cargo Tie-downs<br />
1. Shelter Tie-downs<br />
m. Air Conditioner<br />
n. Gas-Particulate Filter System<br />
o. Locking Differential<br />
p. No-Spin Differential<br />
q. Cargo Cover Kit<br />
r. Rear Passenger Seating<br />
s. Spotlight<br />
t. Floodlights<br />
1-9. TABULATEO OATA<br />
M1008<br />
x<br />
x<br />
x<br />
x<br />
x<br />
x<br />
x<br />
x<br />
x<br />
x<br />
R1008A1<br />
x<br />
x<br />
x<br />
x<br />
x<br />
x<br />
x<br />
x<br />
x<br />
x<br />
x<br />
M1009<br />
x<br />
x<br />
x<br />
x<br />
x<br />
x<br />
x<br />
x<br />
x<br />
M1010<br />
x<br />
x<br />
x<br />
x<br />
x<br />
x<br />
x<br />
x<br />
x<br />
x<br />
x<br />
M1028<br />
x<br />
x<br />
x<br />
x<br />
x<br />
x<br />
x<br />
x<br />
x<br />
<strong>TM</strong> 9-<strong>2320</strong>-<strong>289</strong>-10<br />
M1028A1<br />
Basic information you will need to know about the trucks is contained in Table 1-1.<br />
DATA<br />
Make<br />
Weight:<br />
Curb<br />
Payload/<br />
Passengers<br />
GVWR<br />
GAWR<br />
(front)<br />
GAWR<br />
(rear)<br />
Wheelbase<br />
Track<br />
[front)<br />
Track<br />
[rear)<br />
M 1008<br />
M1008A1<br />
Chevrolet<br />
5900 lb<br />
(2679 kg)<br />
2900 lb<br />
(1317 kg)<br />
8800 lb<br />
(3995 kg)<br />
4500 lb<br />
(2043 kg)<br />
7000 lb<br />
(3178 kg)<br />
131.5in<br />
(334 cm)<br />
67.8 in<br />
(172 cm)<br />
65.8 in<br />
(167 cm)<br />
Table 1-1. Tabulated Data<br />
M1009<br />
Chevrolet<br />
5200 lb<br />
(2361 kg)<br />
1200 lb<br />
(545 kg)<br />
6400 lb<br />
(2906 kg)<br />
3600 lb<br />
(1634 kg)<br />
3750 lb<br />
(1703 kg)<br />
106.5 in<br />
(27 1 cm)<br />
68 in<br />
(173 cm)<br />
65 in<br />
(165 cm)<br />
M1010<br />
Chevrolet<br />
7370 lb<br />
(3346 kg)<br />
2080 lb<br />
(944 kg)<br />
9450 lb<br />
(4290 kg)<br />
4500 lb<br />
(2043 kg)<br />
7000 lb<br />
(3178 kg)<br />
131.5in<br />
(334 cm)<br />
67.8 in<br />
(172 cm)<br />
65.8 in<br />
(167 cm)<br />
M1028<br />
MA1028A1<br />
Chevrolet<br />
5800 lb<br />
(2633 kg)<br />
3600 lb<br />
(1634 kg)<br />
9400 lb<br />
(4268 kg)<br />
4500 lb<br />
(2043 kg)<br />
7500 lb<br />
(3405 kg)<br />
131.5 in<br />
(334 cm)<br />
67.8 in<br />
(172 cm)<br />
65.8 in<br />
(167 cm)<br />
x<br />
x<br />
x<br />
x<br />
x<br />
x<br />
x<br />
x<br />
x<br />
M1031<br />
M1031<br />
x<br />
x<br />
x<br />
x<br />
x<br />
x<br />
x<br />
Chevrolet<br />
5250 lb<br />
(2384 kg)<br />
3950 lb<br />
(1793 kg)<br />
9200 lb max<br />
(4177 kg)<br />
4500 lb<br />
(2043 kg)<br />
7500 lb<br />
[3405 kg)<br />
131.5in<br />
(334 cm)<br />
67.8 in<br />
[172 cm)<br />
65.8 in<br />
[167 cm)<br />
1-11
<strong>TM</strong> 9-<strong>2320</strong>-<strong>289</strong>-10<br />
DATA<br />
~Conitinued)<br />
Ground<br />
Clearance<br />
(to T/C skid<br />
plate @ GVWR<br />
Rear Axle<br />
@ GVWR<br />
Front Axle<br />
@ GVWR<br />
Height<br />
[overall)<br />
@ Curb<br />
Length<br />
[overall)<br />
Width<br />
[overall)<br />
Engine:<br />
Type<br />
No. of<br />
Cylinders<br />
Piston<br />
Displacement<br />
Horsepower<br />
Fuel<br />
Allowable<br />
Speeds:<br />
Capacity:<br />
Fuel Tank<br />
Tires:<br />
Size<br />
Inflation<br />
Pressures:<br />
Maximum<br />
Load Capacity:<br />
1-12<br />
Front<br />
Rear<br />
M1008<br />
M1008A1<br />
10.7 in<br />
(27.2 cm)<br />
7.8 in<br />
(19.8 cm)<br />
8.6 in<br />
(21.8 cm)<br />
75.9 in<br />
(192.8 cm)<br />
220.7 in<br />
(560.6 cm)<br />
81.2in<br />
(206.2 cm)<br />
V-type<br />
8<br />
379 cu in<br />
(6.2 1)<br />
135 bhp at<br />
3600 rpm<br />
Diesel<br />
Table 1-1. Tabulated Data - Continued<br />
M1009<br />
9.6 in<br />
(24.4 cm)<br />
8.2 in<br />
(20.8 cm)<br />
8.4 in<br />
(21.3 cm)<br />
74.9 in<br />
(1 90.2 cm)<br />
191.8in<br />
(487.1 cm)<br />
79.6 in<br />
(202 cm)<br />
V-type<br />
8<br />
379 cu in<br />
(6.2 1)<br />
135 bhp at<br />
3600 rpm<br />
Diesel<br />
MODEL<br />
M1010<br />
10.5 in<br />
(26.7 cm)<br />
7.7 in<br />
(19,6 cm)<br />
8.6 in<br />
(21.8 cm)<br />
101.6 in<br />
(258 cm)<br />
227.7 in<br />
(578.4 cm)<br />
81.2in<br />
(206.2 cm)<br />
V-t ype<br />
8<br />
379 cu in<br />
(6.2 1)<br />
135 bhp at<br />
3600 rpm<br />
Diesel<br />
M1028<br />
M1028A1<br />
10.5 in<br />
(26.7 cm)<br />
7,7 in<br />
(19.6 cm)<br />
8.6 in<br />
(21.8 cm)<br />
107,1 in.<br />
(272 cm)<br />
220,7 in<br />
(560.6 cm)<br />
81.2in<br />
(206.2 cm)<br />
V-type<br />
8<br />
379 cu in<br />
(6.2 1)<br />
135 bhp at<br />
3600 rpm<br />
Diesel<br />
M1031<br />
10.5 in<br />
(26,7 cm)<br />
7,7 in<br />
(19.6 cm)<br />
8.6 in<br />
(21.8 cm)<br />
76.3 in<br />
(193.8 cm)<br />
212.9 in<br />
(504.8 cm)<br />
81.2in<br />
(206.2 cm)<br />
V-type<br />
8<br />
379 cu in<br />
(6.2 1)<br />
135 bhp at<br />
3600 rpm<br />
Diesel<br />
(SEE PARAGRAPH 1-13. TECHNICAL PRINCIPLES OF OPERATION)<br />
20 gal<br />
(75.7 1)<br />
LT235/<br />
85 R-16E<br />
4500 lb<br />
(2043 kg)<br />
6084 lb<br />
(2762 kg)<br />
27 gal<br />
(102.2 1)<br />
10 R15LT<br />
3520 lb<br />
(1598 kg)<br />
3520 lb<br />
(1598 kg)<br />
(SEE<br />
20 gal<br />
(75.7 1)<br />
LT235/<br />
85 R-16E<br />
PMCS, TABLE 2-1)<br />
4500 lb<br />
(2043 kg)<br />
6084 lb<br />
(2762 kg)<br />
20 gal<br />
(75.71)<br />
LT235/<br />
85 R-16E<br />
4500 lb<br />
(2043 kg)<br />
6084 lb<br />
(2762 kg)<br />
With the S-250 shelter installed. Height will vary with different shelters and loading.<br />
20 gal<br />
(75.7 1)<br />
LT235/<br />
85 R-16E<br />
4500 lb<br />
(2043 kg)<br />
6084 lb<br />
(2762 kg)
1-9.1. DIFFERENCES BETWEEN MODELS<br />
a.<br />
b.<br />
c.<br />
d.<br />
e.<br />
f . 200 amp/28 volt Electrical System<br />
9.<br />
h.<br />
i.<br />
J.<br />
k.<br />
1.<br />
m.<br />
6.2 Liter Diesel Engine<br />
Automatic Transmission<br />
Model 208 Transfer Case (T/C)<br />
Model 205 Transfer Case (T/C)<br />
100 amp/28 volt Electrical System<br />
Troop Seat Kit<br />
Communications Kit<br />
Slave Receptacle<br />
Tow Pintle<br />
Cargo Tie-downs<br />
Shelter Tie-downs<br />
Air Conditioner<br />
n. Gas-Particulate Filter System<br />
o. Locking Differential<br />
p. No-Spki Differential<br />
q. Cargo Cover Kit<br />
r. Rear Passenger Seating<br />
8, Spotlight<br />
t. Floodlights<br />
1-9.2. TABULATED DATA<br />
DATA<br />
Make:<br />
Weights:<br />
Curb<br />
Payload/Pasaengers<br />
QVWR<br />
GAWR (front)<br />
GAWR (rear)<br />
Table 1-1.1 Tabulated Data<br />
M1028A2<br />
M1028A3<br />
Chevrolet<br />
6120 lb<br />
(2778 kg)<br />
3940 lb<br />
(1789 kg)<br />
10120 lb max<br />
(4594 kg)<br />
3900 lb<br />
(1770 kg)<br />
6220 lb<br />
(2824 kg)<br />
DATA<br />
Wheelbase<br />
Track (front)<br />
Track (rear)<br />
Ground Clearance<br />
(to T/C skid plate<br />
@GVWR)<br />
Rear Axle @ GVWR<br />
Front Axle @ GVWR<br />
M1028A2<br />
x<br />
x<br />
x<br />
x<br />
x<br />
x<br />
x<br />
x<br />
x<br />
x<br />
<strong>TM</strong> 9-<strong>2320</strong>-<strong>289</strong>-10<br />
—<br />
M1028A3<br />
x<br />
x<br />
x<br />
x<br />
x<br />
x<br />
x<br />
x<br />
x<br />
x<br />
M1028A2<br />
M1028A3<br />
131.5 in<br />
(334 cm)<br />
67.8 in<br />
(172 cm)<br />
75.8 In<br />
(193 cm)<br />
10.7 in<br />
(27.2 cm)<br />
7.7 in<br />
(19.6 cm)<br />
8.6 in<br />
(21 .8)<br />
Change 5 1-12.1
1-9.2. TABULATED DATA<br />
DATA<br />
Height (overall) @Curb<br />
Length (overall)<br />
Width (overall)<br />
Engine:<br />
Type<br />
No. of Cylinders<br />
Piston Displacement<br />
Horsepower<br />
Fuel<br />
Table 1-1.1 Tabulated Data - Continued<br />
M1028A2<br />
M1028A3<br />
107,1 in l<br />
(272 cm)<br />
220.7 in<br />
(560.6 cm)<br />
95.8 in<br />
(243.3 cm)<br />
V-type<br />
8<br />
379 cu in<br />
(6.2 1)<br />
135 bhp at<br />
3600 rpm<br />
Diesel<br />
DATA<br />
Allowable Speeds:<br />
Capacity:<br />
Tires:<br />
Fuel Tank<br />
Size<br />
Inflation Pressures<br />
Maximum Load Capacity:<br />
Front<br />
Rear<br />
M1028A2<br />
M1028A3 I<br />
(See Para- 1<br />
graph” 1-13. )<br />
20 gal<br />
(75,7 1)<br />
LT235/85R-16E<br />
(See PMCS,<br />
Table 2-1 )<br />
4500 lb<br />
(2043 kg)<br />
7500 lb<br />
(3405 kg)<br />
* With the S-250 shelter installed. Height will vary with different shelters and loading,<br />
a.<br />
b.<br />
c.<br />
d.<br />
e.<br />
—<br />
Operational Day<br />
Usage<br />
(1) Trips per Day<br />
(2) Miles (km) per Trip<br />
(3) Miles (km) per Day<br />
Road Usage<br />
(1) Paved Roads<br />
(2) Secondary Roads<br />
(3) Trails<br />
(4) Cross-country<br />
Night Operations<br />
Speed<br />
(1) Day<br />
(a) Paved Road<br />
(b) Secondary Road<br />
1-12.2 Change 5<br />
Table 1-1.2 Mission Profiles<br />
Ml 009<br />
20 hours<br />
4<br />
25 ml<br />
(40 km)<br />
99 ml<br />
(160 km)<br />
20%<br />
50%<br />
15%<br />
15%<br />
25%<br />
37 mph<br />
(60 kph)<br />
25 mph<br />
(40 kph)<br />
M1008, M1008A1<br />
M1028, M1028A1 ,<br />
M1028A2, M1028A3<br />
M1031<br />
20 hours<br />
5<br />
16 ml<br />
(25 km)<br />
78 ml<br />
(125 km)<br />
20%<br />
50%<br />
15%<br />
15%<br />
25%<br />
37 mph<br />
(60 kph)<br />
25 mph<br />
(40 kph)<br />
M1010<br />
20 hours<br />
6<br />
16 ml<br />
(25 km)<br />
93 ml<br />
(150 km)<br />
20%<br />
50%<br />
15%<br />
15%<br />
25%<br />
50 mph<br />
(80 kph)<br />
19 mph<br />
(30 kph)
(c) Trails<br />
(d) Cross-country<br />
(2) Night (with headlights)<br />
(a) Paved Road<br />
(b) Secondary Road<br />
(c) Trails<br />
(d) Cross-country<br />
(3) Night (blackout )<br />
(a) Paved Road<br />
(b) Secondary Road<br />
(c) Trails<br />
(d) Cross-country<br />
f. Fording Depth<br />
Table 1-1.2 Mission Profiles - Continued<br />
Ml 009<br />
16 mph<br />
(25 kph)<br />
6 mph<br />
(10 kph)<br />
25 mph<br />
(40 kph)<br />
25 mph<br />
(40 kph)<br />
5 mph<br />
(8 kph)<br />
5 mph<br />
(8 kph)<br />
10 mph<br />
(16 kph)<br />
10 mph<br />
(16 kph)<br />
4 mph<br />
(6 kph)<br />
2.5 mph<br />
(4 kph)<br />
16in<br />
(40 cm)<br />
M1008, M1008A1<br />
M1028, M1028A1,<br />
M1028A2, M1028A3<br />
M1031<br />
16 mph<br />
(25 kph)<br />
6 mph<br />
(10 kph)<br />
25 mph<br />
(40 kph)<br />
25 mph<br />
(40 kph)<br />
5 mph<br />
(8 kph)<br />
5 mph<br />
(8 kph)<br />
10 mph<br />
(16 kph)<br />
10 mph<br />
(16 kph)<br />
4 mph<br />
(6 kph)<br />
2.5 mph<br />
(4 kph)<br />
16in<br />
(40 cm)<br />
<strong>TM</strong> 9-<strong>2320</strong>-<strong>289</strong>-10<br />
M1010<br />
16 mph<br />
(20 kph)<br />
6 mph<br />
(10 kph)<br />
25 mph<br />
(40 kph)<br />
25 mph<br />
(40 kph)<br />
5 mph<br />
(8 kph)<br />
5 mph<br />
(8 kph)<br />
10 mph<br />
(16 kph)<br />
10 mph<br />
(16 kph)<br />
4 mph<br />
(6 kph)<br />
2.5 mph<br />
(4 kph)<br />
16in<br />
(40 cm)<br />
Change 5 1-12.3 /(1-12.4 blank)
1-10. ENGINE<br />
Section III. TECHNICAL PRINCIPLES OF OPERATION<br />
<strong>TM</strong> 9-<strong>2320</strong>-<strong>289</strong>-10<br />
a. The CUCV Series of trucks are powered by a V-8 diesel engine which has a displacement<br />
of 6.2 liters. This engine is similar to a V-8 gasoline engine in many ways, but major differences occur<br />
in cylinder heads, combustion chambers, fuel distribution system, air intake manifold, and method<br />
of ignition.<br />
(1)<br />
(2)<br />
(3)<br />
Fuel Distribution: There is no carburetor on a diesel engine. Instead, fuel is injected<br />
under high pressure through nozzles into the combustion chamber at correct timing<br />
intervals.<br />
Ignition. Ignition of fuel occurs because of heat developed in combustion chamber.<br />
As a result, no spark plugs or high voltage ignition system is required. For cold starts,<br />
glow plugs heat up combustion chamber.<br />
Air Intake Manifold. Air intake manifold is always open to atmospheric pressure. As<br />
a result, the engine does not develop a vacuum supply. Therefore, the engine drives<br />
a vacuum pump which supplies shift signals to the automatic transmission.<br />
b. The lower engine (case, crankshaft, camshaft, bearings, rods, pistons, and wrist pins) is<br />
similar to a gasoline engine, but is of a heavy-duty design because of greater stresses developed<br />
in a diesel engine.<br />
c. Here are some driving tips that will help you maintain good engine performance:<br />
(1)<br />
(2)<br />
(3)<br />
(4)<br />
(5)<br />
(6)<br />
(7)<br />
(8)<br />
(9)<br />
(lo)<br />
1-11. FUEL SYSTEM<br />
DO NOT make full-throttle starts and hard stops.<br />
Take it easy when engine is cold. Maximum performance is reached at normal<br />
operating temperatures.<br />
DO NOT hold truck on an uphill grade with accelerator pedal. Use the regular brakes<br />
to hold truck.<br />
DO NOT use starter aids such as ether or gasoline in air intake system. Such aids can<br />
cause immediate engine damage.<br />
Pumping accelerator pedal before or during cranking will not help start engine.<br />
When engine is cold, let it Idle for a few seconds before driving; this will allow proper<br />
oil pressure to build up. (Increased operating noise and light exhaust smoke are normal<br />
when engine is cold.)<br />
If oil pressure light comes on while operating truck, IMMEDIATELY SHUT DOWN<br />
ENGINE. Continued operation of engine while it is not being properly lubricated will<br />
cause serious damage.<br />
DO NOT use diesel fuel which has been contaminated with engine oils.<br />
Maintain a minimum of 1/4 tank of fuel when temperatures are below 20 0<br />
F.<br />
DO NOT run engine at idle for extended periods of time; damage can occur to engine.<br />
a. A combination of low pressure and high pressure pumping systems moves fuel from the<br />
fuel tank to the engine.<br />
b. Fuel is pumped from the fuel tank by a low pressure pump which moves fuel toward the<br />
fuel filter that separates water and contaminants from the fuel. From the fuel filter, fuel is drawn<br />
into the high pressure injection pump which meters and pressurizes fuel and sends it through high<br />
pressure fuel lines into the injection nozzle located in the engine’s precombustion chamber.<br />
1-13
<strong>TM</strong> 9-<strong>2320</strong>-<strong>289</strong>-10<br />
1-12. TRANSMISSION<br />
a. All CUCVtrucks have an automatic transmission with three forward and one reverse speeds.<br />
The transmission provides the driver with a selection of vehicle speeds while holding engine speeds<br />
within effective torque range. It also allows disengaging and reversing flow of power from engine<br />
to wheels. Automatic shifting schedules are controlled by a vacuum modulator that allows for smooth<br />
shifts by “sensing” engine load changes.<br />
b. The transmission gearshift lever(l), located on the steering column, provides the following<br />
selections on the gearshift indicator (2):<br />
1-14<br />
(1) “P” (Park). Transmission locked; truck will not move.<br />
(2) “R” (Reverse). Puts truck in reverse for backing operations.<br />
(3) “N” (Neutral). Transmission mechanism disengaged; truck wheels can move by<br />
coasting but truck is not in gear.<br />
(4) “D” (Drive). For normal driving with light to moderate speeds; automatic downshift<br />
at speeds under 35 mph (56 kph) by depressing accelerator about halfway to the floor;<br />
forced downshift at speeds above 35 mph (56 kph) by depressing pedal all the way<br />
to the floor.<br />
(5) “2.” For hill climbing or engine braking to slow truck when going down a steep hill.<br />
Gearshift lever maybe shifted from “D” to “2” and from “2”to “D” under most driving<br />
conditions.<br />
(6) “1” For maximum engine braking when driving down very steep hills or when<br />
maximum performance is required to climb a very steep hill or drive through deep<br />
snow or mud. You may shift into “l” at any speed, but the transmission will not lock<br />
in “l” until your truck’s speed is below 40 mph (64 kph).<br />
c. Here are some driving tips which will help protect the transmission from damage:<br />
(1) DO NOT coast downhill in “N” (Neutral).<br />
(2) NEVER shift transmission gearshift lever to “P” (Park) or “N” (Neutral) while truck is<br />
in motion.<br />
TA466572
(3)<br />
(4)<br />
(5)<br />
(6)<br />
(7)<br />
(8)<br />
1-13. TRANSFER CASE<br />
<strong>TM</strong> 9-<strong>2320</strong>-<strong>289</strong>-10<br />
DO NOT race engine when shifting from “P” (Park) or “N” (Neutral) into another gear<br />
range.<br />
DO NOT shift between forward ranges and “R” (Reverse) while operating engine at<br />
high speed or heavy throttle.<br />
DO NOT force transmission gearshift lever.<br />
DO NOT operate transmission at or near “stall condition” for more than 10 seconds<br />
at a time. (“’Stall condition” is when the engine is running at high speed while the<br />
transmission is in a driving range and drive wheels aren’t moving, such as when the<br />
truck is stuck in deep sand, mud, deep snow, or when truck is against a fixed barrier.)<br />
DO NOT shift transmission gearshift lever to “P” (Park) on a hill before setting parking<br />
brake. This puts force on the transmission and makes it difficult to shift the<br />
transmission gearshift lever out of “P” (Park). Make sure the transfer case is in gear.<br />
When preparing to drive, DO NOT release parking brake until transmission gearshift<br />
.lever<br />
is shifted out of (Park) position.<br />
a. All trucks, except the M1028A1, M1028A2, and M1031, are equipped with a New Process<br />
Model 208 transfer case. The M1028A1, M1028A2, and M1031 are equipped with New Process<br />
Model 205 transfer case which is designed to accommodate installation of a power take-off unit.<br />
(A power take-off unit uses engine power to run equipment.)<br />
b. The transfer case transmits engine power to front axle for four-wheel drive operation.<br />
Four-wheel drive is used to provide additional traction and lower gearing for use in off-road<br />
operations and to provide low speed pulling power in unusual conditions.<br />
c. The four transfer case control lever positions are:<br />
(1) “N” (Neutral). In this position, both front and rear axles are not engaged. Power from<br />
engine will not turn wheels.<br />
(2) “2H” (Two-wheel Drive High Range). This position is used for normal, two-wheel<br />
driving on dry, primary and secondary roads at normal highway driving speeds.<br />
(3) “4L” (Four-wheel Drive Low Range). This position is used for driving under unusual<br />
conditions in LOW speed ranges.<br />
(4) “4H” (Four-wheel Drive High Range). This position is used for driving under unusual<br />
conditions in HIGH speed ranges.<br />
M1028A1, M1028A2, and M1031 All Other<br />
Change 3<br />
TA466573<br />
1-15
<strong>TM</strong> 9-<strong>2320</strong>-<strong>289</strong>-10<br />
d. Four-wheel drive ranges of transfer case should be used only when greater traction and<br />
power are required in off-road operations. Thus, transfer case control lever can be left in “2H” most<br />
of the time.<br />
e. Here are some driving tips which will help protect transfer case from damage:<br />
(1) DO NOT use “4L” or “4H” transfer case ranges on dry, hard-surfaced roads, or<br />
premature wear or excessive damage to transfer case and/or tires may result.<br />
(2) DO<br />
the<br />
Trans Gear<br />
NOT complete transfer case shift before ensuring that both locking hubs are in<br />
same position.<br />
(3) DO NOT use tools to assist in turning locking hubs,<br />
(4) DO NOT exceed the following maximum speeds when transfer case gears are<br />
engaged:<br />
Transfer Case Transfer Case Transfer Case<br />
In Two-high (“2 H”) In Four-low (“4L”) In Four-high (“4H”)<br />
1 25 mph (40.2 kph) 14 mph (22.5 kph) 25 mph (40.2 kph)<br />
2 35 mph (56.3 kph) 23 mph (37,0 kph) 35 mph (56.3 kph)<br />
Drive 55 mph (88.5 kph) 35 mph (56.3 kph) 55 mph (88.5 kph)<br />
Reverse 9 mph (24.5 kph) 6 mph ( 9.6 kph) 9 mph (14,5 kph)<br />
(5)<br />
(6)<br />
The truck’s speedometer does not indicate reverse speeds. You must estimate your<br />
speed and use good judgement when driving in reverse.<br />
The ideal gear to use for backing operations is the “2H” position. However, if the truck<br />
is in “4L” or “4H” and becomes mired in deep mud or snow, shifting to “2H”’ at this<br />
time will dig the truck in deeper. Leave truck in four-wheel “drive position, but take<br />
care not to exceed “4L” or “4H” speed limits.<br />
1-14. ELECTRICAL SYSTEM<br />
1-16<br />
a. The CUCV electrical system consists of the following major components:<br />
(1) Battery System. Consists of two 12 volt batteries in series which supply 24 volts to<br />
starting, charging, and glow plug systems, and 12 volts to wiring and lighting system.<br />
(2) Charging System. Consists of two alternators, voltage regulators, and instrument<br />
panel indicators.<br />
(3) Starting System. Includes ignition switch, starter relay, solenoid, and starter motor,<br />
Transmission gearshift lever is mechanically linked to the ignition. The starter safety<br />
ignition switch is designed such that the truck will only start when the transmission<br />
gearshift lever is shifted to either “P” (Park) or “N” (Neutral) position,
<strong>TM</strong> 9-<strong>2320</strong>-<strong>289</strong>-10<br />
(4) Glow Plug System. Consists of 8 glow plugs (one for each cylinder) which are used<br />
to preheat combustion chamber for easier starting. There is a WAIT (glow plug<br />
indicator) light (1) on the control panel which lights up to tell you that the glow plugs<br />
are in the process of warming the combustion chamber. When combustion chambers<br />
are warmed to starting temperatures, the WAIT light will go out.<br />
(5) Wiring and Lighting System. Includes wiring harnesses, fuses, sockets, and lamps.<br />
b. Here are some important tips about the electrical system that will help you properly operate<br />
the truck:<br />
(1)<br />
(2)<br />
(3)<br />
(4)<br />
(5)<br />
(6)<br />
(7)<br />
(8)<br />
(9)<br />
(lo)<br />
1-15. BRAKE SYSTEM<br />
If you leave ignition in ‘“ON,” but do not start engine, the glow plugs will continue to<br />
operate and could drain batteries.<br />
If engine is warm, the WAIT light (1) may not come on, or it may go on and off a few<br />
times during cranking or after starting. This is normal.<br />
If WAIT light (1) stays on, fails to go out, or comes back on after engine is warmed<br />
UP, there may be a system malfunction and you should immediately notify your<br />
supervisor.<br />
If generator lights do not go out within a few seconds, press accelerator and let engine<br />
return to idle; lights should go out. If not, notify your supervisor.<br />
The light switch controls headlights, taillights, parking lights, and blackout lights.<br />
Windshield wipers will not work when ignition switch is off.<br />
The service lights/blackout toggle switch on instrument panel must be in “SERVICE<br />
LIGHTS” position, otherwise brake lights, hazard warning lights, and turn signals on<br />
truck will not work.<br />
Turn signals do not work when hazard warning flasher is on.<br />
If service brake pedal is depressed, hazard warning flasher will not flash.<br />
Hazard warning flasher will work with ignition turned on or off.<br />
a. The CUCV braking system uses hydraulically activated, power assisted front disc and rear<br />
drum service brakes. Fluid for service brakes is contained in the master cylinder. The master cylinder<br />
operates through hydraulic energy supplied by the power steering pump and power booster.<br />
TA466574<br />
1-17
<strong>TM</strong> 9-<strong>2320</strong>-<strong>289</strong>-10<br />
b. The following is important safety information about the CUCV’S brake system:<br />
(1)<br />
(2)<br />
(3)<br />
(4)<br />
1-16. STEERING SYSTEM<br />
If power assist is lost, brakes normally can be applied with power assist at least two<br />
times using reserve power. Without power assist, the truck can still be stopped by<br />
depressing much harder on service brake pedal, but stopping distance will be longer.<br />
Do not pump service brakes when brake power assist has been lost. Pumping brakes<br />
will use up reserve fluid.<br />
Riding brake by resting your foot on service brake pedal can cause overheating of<br />
brakes. This can cause unnecessary brake wear, as well as waste fuel.<br />
To prevent premature brake wear, make sure parking brake is fully released. The<br />
parking brake warning light is designed to stay on if parking brake is not fully released<br />
and ignition key is in “ON” position.<br />
The steering system includes steering wheel and column, steering gear, and steering linkage.<br />
Steering is power assisted by fluid that is pumped by the power steering pump, which sends fluid<br />
first to the power booster unit of the brake system. From there, fluid goes to the steering gear.<br />
1-17. AMBULANCE PECULIAR COMPONENTS<br />
The CUCV M 1010 Ambulance contains a number of components which are not found on the<br />
other trucks. Some of these components include:<br />
a. Gas-Particulate Filter Unit (GPFU). The GPFU provides the ambulance with clean, filtered,<br />
breathable air that is free of chemical agents and is heated to a comfortable temperature. Air is<br />
channeled to seven hookups (4), six of which can be used simultaneously. Two of the hookups are<br />
in the cab; the remainder are in the patient compartment. The GPFU is designed to function with<br />
M25 Series protective masks. The filter unit and masks WILL NOT protect against carbon monoxide,<br />
1-18<br />
TA466575
<strong>TM</strong> 9-<strong>2320</strong>-<strong>289</strong>-10<br />
b. Air Conditioning Unit The air conditioning unit (5) cools end ventilates the ambulance<br />
patient compartment. It is mounted on the front wall of the patient compartment, and is designed<br />
to provide a section between cooling and recirculating inside air and cooling outside air. The inside<br />
air section is used when maximum cooling is required under conditions of high temperature and<br />
humidity. The outside air is used for most air conditioning situations and for vent mode. Fan speed<br />
end temperature may be varied as required.<br />
c. Personnal Heater. Because the heater in the cab is not sufficient to heat the patient<br />
compartment, e personnel heater is provided within the patiant compartment. It produces heat by<br />
burning a mixture of fuel and air in a stainless steel heat exchanger and burner assembly. The heater<br />
is designed to bum fuel from the trucks fuel tank. It can be manually controlled from a control unit<br />
(6) located at the base of the lower litter berth on the right side of the patient compartment.<br />
d. Domelight and Focus Lights. There is a fluorescent domelight (2) over the canter aisle of<br />
the patient compartment to provide light for medical purposes. When the service lights/blackout<br />
toggle switch the ‘“BLACKOUT” position and the rear doors or door between the cab and patient<br />
compartment is open. the domelight goes off and a blackout light (3) comes on. When more light<br />
is needed, four focus lights (1) (two on each wall) can be used. The lights can be pulled from thair<br />
wall mounts and mounted in any of six mounting blocks, or they can be hand held if needed.<br />
1-18. TRUCK LOADING<br />
a. Proper loading of the truck is governed by weight limits and load distribution. The trucks<br />
era rated in tame of Gross Vehicle Weight Rating (GVWR) and Gross Axle Weight Rating (GAWR).<br />
These ratings are beead upon the weekest component in the suspension system (axles, springs, tires,<br />
or wheels.<br />
(1) Gross Vehicle Weight Rating (GVWR). The Gross Vehicle Waight Rating (GVWR) is<br />
the maximum allowable loaded weight of the truck, driver, passenger(s), and payload,<br />
measured in pounds. Tha rating takes into account the capabilities of the engine,<br />
trarsmission, frame, springs, brakes, axles, and tires.<br />
(2) Gross Axle Welght Rating (GAWR). The maximum load that can be put on front and<br />
rear axles.<br />
b. A certification Iabel, located on the trailing edge of the operator’s left-hand door, specifies<br />
these ratings and shows the maximum waight that the front axle can carry (front GAWR) and tha<br />
maximum weight that the rear axle can carry (rear GAWR).<br />
C. The example below shows a fully loaded truck, tha maximum GVWR (1), tha front GAWR<br />
(3), and the back GAWR (2).<br />
Curb weight equals the weight of the truck without driver, passenger or cargo, but includes fuel and coolant.<br />
EXAMPLE ONLY<br />
TA466576<br />
Change 5 1-19
<strong>TM</strong> 9-<strong>2320</strong>-<strong>289</strong>-10<br />
d. Follow these guidelines for proper truck loading:<br />
WARNING<br />
This vehicle has been designed to operate safely and effciently within the limits<br />
specified in this <strong>TM</strong>. Operation beyond these limits is prohibited IAW 70-1<br />
without written approval from the Commander, U.S. Army Tank-Automotive<br />
Command, ATTN: AMSTA-CM-S, Warren MI 48397-5000.<br />
DO NOT EXCEED GVWR and GAWR. overloading in of truck<br />
control and personnel injury, either by causing component failure or by affecting<br />
the truck’s handling. In addition overloading can cause serious damage to<br />
the truck’s suspension system.<br />
(1) NEVER exceed GVWR and GAWR.<br />
(2) The cargo load should be placed on both sides of the centerline marked on the<br />
shipping plate as equally as possible.<br />
(3) Always put load to the front of the cargo box first.<br />
(4) Ensure that the tires on your truck are properly inflated for the load which you are<br />
carrying.<br />
1-19. WINTERIZATION KIT<br />
a. CUCV trucks operating under arctic conditions will be equipped with winterization<br />
equipment. This equipment consists of an engine coolant and oil heater, a personnel heater (for<br />
ambulance and those trucks with an enclosed cargo area), and a battery and passenger compartment<br />
heater.<br />
b. The 24 v personnel heater is installed on the right front corner of the cargo area floor. (In<br />
the ambulance, this heater is located under the rear of the right bench.) This is the same multifuel<br />
combustion type heater described in the ambulance section above.<br />
c. The battery and passenger compartment heater is located under the hood on the right<br />
fender. This heater is the same type as the personnel heater.<br />
d. The engine coolant heater, located under the hood on the left fender, is designed to preheat<br />
diesel engines for starting at temperatures down to -65 0<br />
F. It operates on 24 volts and burns liquid<br />
fuel. It has a built-in pump to circulate the heated coolant in the engine’s coolant system.<br />
1-20. DUAL WHEEL CONFIGURATION<br />
a. M1028A2 and M1028A3 are shelter carriers that have been converted to dual rear wheels.<br />
This provides greater load carrying capability and increased stability.<br />
b. M1028A2 and M1028A3 axles are heavier and dual wheels spread loads more evenly.<br />
1-20 Change 5
CHAPTER 2<br />
OPERATING PROCEDURES<br />
<strong>TM</strong> 9-<strong>2320</strong>-<strong>289</strong>-10<br />
Section I. DESCRIPTION AND USE OF CONTROLS AND<br />
2-1. INTRODUCTION<br />
INDICATORS<br />
The information and illustrations in this chapter provide the basic instructions you will need<br />
in order to properly operate the truck. Before operating the truck, make sure you know the location<br />
and operation of all controls and instruments. A thorough review of this section is the best way to<br />
do this. Get into the cab of the truck and identify each control and instrument as you come upon<br />
it in this section.<br />
2-2. CONTROLS ANO INDICATORS<br />
The figures below show the truck’s instrument panel. Very often the lights and gages indicate<br />
that something is wrong long before you realize it. Know them before you operate the truck.<br />
TA466577<br />
2-1
<strong>TM</strong> 9-<strong>2320</strong>-<strong>289</strong>-10<br />
2-2<br />
1. GEN 1 and GEN 2 Lights. On all models except the M1010 Ambulance, generator lights<br />
come on when ignition key is in the “ON” position, but before engine isstarted. After engine<br />
starts, lights should go out and remain out. If either or both lights remain on after engine<br />
starts, press accelerator and let engine return to idle. If lights remain on or come on during<br />
operation of truck, IMMEDIATELY SHUT DOWN ENGINE and notify your supervisor. M1010<br />
Ambulance has no generator warning lights.<br />
2. Four-wheel Drive Indicator Light. Indicates when transfer is in "4L" or "4H" position. Light<br />
will remain on until the transfer case control lever is shifted to either "N" (Neutral) or "H."<br />
3. Oil Pressure Light. Indicates lack of oil pressure being delivered to parts of engine<br />
requiring lubrication.<br />
4. Engine Coolant Temperature Light. Indicates that overheating exists when light comes<br />
on. If overheating is indicated, operator shall take action by following steps in Troubleshooting,<br />
Table 3-1. Make a practice of observing this light and others while driving, especially<br />
in hot weather and when truck has a heavy load.<br />
5. Speedometer. Indicates truck’s speed in miles per hour (mph) and kilometers per hour (kph).<br />
6. Headlight High Beam Indicator Light. Indicates when headlights are on high beam.<br />
7. WAIT (Glow Plug Indicator) Light. Indicates when glow plug system is operating. For<br />
further information, refer to paragraph 1-14.<br />
8. WATER-IN-FUEL Indicator Light. Indicates when there is water in fuel system. When water<br />
is present in fuel system, drain it. (See paragraph 3-7)<br />
9. Seat Belt Indicator Light. Lights up during start-up (for about 4 to 8 seconds). If operator<br />
is not wearing a seat belt, buzzer will sound for 4 to 8 seconds.<br />
10. Fuel Gage. Indicates amount of fuel in fuel tank.<br />
11. Door Ajar Indicator Light (M1010 Ambulance Only). Indicates that back doors of patient<br />
compartment are not latched closed. Make a practice of observing this light when driving.<br />
12. Voltmeter. Indicates electrical system voltage when engine is running. When voltmeter<br />
indicator is in green zone, charging system is operating correctly. When indicator is in<br />
yellow zone or left-hand red zone, system is not charging. When indicator is in right-hand<br />
red zone, system is overcharging.<br />
TA466578
13.<br />
14.<br />
15.<br />
16.<br />
17.<br />
18.<br />
19.<br />
20.<br />
21.<br />
22.<br />
23.<br />
24.<br />
25.<br />
<strong>TM</strong> 9-<strong>2320</strong>-<strong>289</strong>-10<br />
Heater/Defroster Controls. Selects heater or defroster mode, controls temperature of<br />
heater and defroster, and controls speed of fan.<br />
Gas-Particulate Filter Unit Controls (M1010 Ambulance Only). "ON" and "OFF" controls<br />
for gas-particulate filter unit in patient compartment. (See paragraph 2-25 for details on<br />
unit)<br />
Floodlight Controls (M1010 Ambulance Only). "ON" and "OFF" controls for two<br />
floodlights which are mounted on the outside of ambulance.<br />
Accelerator Padal Depress pedal to increase engine speed.<br />
Brake System Warning Light. Indicates if there is a malfunction in brake system. It also<br />
stays on when parking brake is set or not fully released and ignition key is in "ON" position.<br />
It comes on briefly during engine start-up so that you can check that bulb is working. If<br />
light does not come on when starting or when parking brake is set, system should be<br />
repaired.<br />
Turn Signal Indicators. When turn signal lever is pushed up, right light flashes. When turn<br />
signal lever is pushed down, left light flashes. When hazard warning button is pushed, both<br />
lights flash.<br />
Hazard Warning Flasher. Push in on button to turn on hazard warning flasher. Pull out<br />
button to turn off hazard warning flashers.<br />
Low Coolant Warning Light. Lights up during start-up of engine to serve as a bulb check.<br />
If light does not go out after engine starts or it comes on while driving, check radiator<br />
coolant level.<br />
Light Switch. A pullout knob that turns on service lights, blackout markers, and blackout<br />
drive light when switches (22) and (24) are in appropriate positions. It also controls<br />
brightness of instrument panel lights. Brightness can be changed by turning knob<br />
clockwise or counterclockwise.<br />
Servica Lights/Blackout Toggle Switch. This toggle switch must be moved to “SERVICE<br />
LIGHTS ON” before brake lights, hazard warning lights, or horn will operate. It must also<br />
be used in conjunction with light switch (21) to turn on service lights or blackout markers.<br />
Refer to paragraph 2-15 for operating instructions. Service lights/blackout toggle switch<br />
should remain in "OFF" position when truck is not in use.<br />
Braka Release Handle. When pulled out, it releases parking brake.<br />
Blackout Drive Switch. This toggle switch must be moved to "BLACKOUT DRIVE LIGHT<br />
ON” and released for blackout drive to work. This is a self-centering toggle and will not<br />
stay in “ON” position. Refer to paragraph 2-15 for operating instructions.<br />
Service Brake Pedal. Depress pedal to apply service brakes to stop truck.<br />
26. Parking Brake Pedal. Depress pedal to set parking brake.<br />
27. Hood Handle. Pull this handle to release hood so that it can be opened.<br />
2-3. PREPARATION FOR USE<br />
a. All newly received trucks must be road tested to check their operation and general<br />
condition. This test can be performed during your normal duties. The test must be long enough to<br />
allow complete observation of trucks operating condition.<br />
b. While operating truck, observe instrument panel lights and gages for any indication of faulty<br />
truck operations. Stop truck and discontinue test if any serious trouble develops. Pay special<br />
attention during road test to oil pressure and engine coolant temperature lights, WATER-IN-FUEL<br />
indicator, and low coolant warning light. If you see any indication of faulty operation, IMMEDIATELY<br />
SHUT DOWN ENGINE. Notify your supervisor and DO NOT attempt to operate truck any further.<br />
2-3
<strong>TM</strong> 9-<strong>2320</strong>-<strong>289</strong>-10<br />
WARNING<br />
NEVER remove radiator cap when engine is hot. This is a pressurized cooling<br />
system and escaping steam or hot water can cause serious burns.<br />
c. Stop at least twice in first 25 miles (40km) to check for leaking coolant, oil, fuel, or audible<br />
exhaust noise. Discontinue test driving if you find any of these troubles.<br />
d. Report any controls that are hard to operate or instruments that give irregular readings.<br />
Be alert for unusual noises or vibrations.<br />
2-4<br />
e. After completing or discontinuing driving test, report any problems to your supervisor,
Section II. PREVENTIVE<br />
2-4. GENERAL<br />
MAINTENANCE<br />
(PMCS)<br />
<strong>TM</strong> 9-<strong>2320</strong>-<strong>289</strong>-10<br />
CHECKS AND SERVICES<br />
Preventive Maintenance Checks and Services (PMCS) means systematic caring, inspecting,<br />
and servicing of equipment to keep it in good condition and to prevent breakdowns. As the truck's<br />
operator, your mission is to:<br />
a. Be sure to perform your PMCS each time you operate the truck. Always do your PMCS in<br />
the same order, so it gets to be a habit. Once you’ve had some practice, you’ll quickly spot anything<br />
wrong.<br />
b. Do your BEFORE (B) PMCS just before you operate the truck. Pay attention to WARNINGS,<br />
CAUTIONS, and NOTES.<br />
c. Do your DURING (D) PMCS while you operate the truck. During operation means to monitor<br />
the truck and its related components while it is actually being operated. Pay attention to WARNINGS,<br />
CAUTIONS, and NOTES.<br />
d. Do your AFTER (A) PMCS right after operating the truck. Pay attention to WARNINGS,<br />
CAUTIONS, and NOTES.<br />
e. Do your WEEKLY (W) PMCS once a week.<br />
f. Do your MONTHLY (M) PMCS once a month.<br />
g. Use DA Form 2404 (Equipment Inspection and Maintenance Worksheet) to record any<br />
faults that you discover before, during, or after operation, unless you can fix them. You DO NOT need<br />
to record faults that you fix.<br />
h. Be prepared to assist organizational maintenance when they lubricate the truck. Perform<br />
any other services when required by organizational maintenance.<br />
2-5. PMCS PROCEDURES<br />
a. Your Preventive Maintenance Checks and Services, Table 2-1, lists inspections and care<br />
required to keep your truck in good operating condition. It is set up so you can make your BEFORE<br />
(B) OPERATION checks as you walk around the truck.<br />
b. The "INTERVAL" column of Table 2-1 tells you when to do a certain check or service.<br />
c. The "PROCEDURE" column of Table 2-1 tells you how to do required checks and services.<br />
Carefully follow these instructions. If you do not have tools, or if the procedure tells you to, notify<br />
your supervisor.<br />
NOTE<br />
Terms "ready/available" and "mission capable" refer to sama status: Equipment<br />
is on hsnd and ready to parform its combat missions. (Sac DA Pam 738-750)<br />
d. The “EQUIPMENT IS NOT READY/AVAILABLE IF:" column in Table 2-1 tells you when your<br />
truck is nonmission capable and why the truck cannot be used.<br />
e. If the truck does not perform as required, refer to Chapter 3, Section II, Troubleshooting.<br />
f. If anything looks wrong and you can’t fix it, write it on your DA Form 2404. IMMEDIATELY,<br />
report it to your supervisor.<br />
2-5
<strong>TM</strong> 9-<strong>2320</strong>-<strong>289</strong>-10<br />
g. When you do your PMCS, you will always need a rag or two. Following are checks that<br />
are common to the entire truck:<br />
(1) Keep It Clean. Dirt, grease, oil, and debris only get in the way and may cover up a<br />
serious problem. Clean as you work and as needed, Use dry cleaning solvent (SD-2)<br />
on all metal surfaces. Use soap and water when you clean rubber or plastic material,<br />
Upholstery can be cleaned with soap and water and a clean, damp cloth,<br />
(2)<br />
(3)<br />
(4)<br />
(5)<br />
(6)<br />
Rust and Corrosion. Check truck body and frame for rust and corrosion. If any bare<br />
metal or corrosion exists, clean, and apply a thin coat of oil. Report it to your supervisor.<br />
Bolts, Nuts, and Screws. Check them all for obvious looseness, missing, bent, or<br />
broken condition. You can’t try them all with a tool, but look for chipped paint, bare<br />
metal, or rust around bolt heads. If you find a bolt, nut, or screw you think is loose,<br />
tighten it or report it to your supervisor.<br />
Welds. Look for loose or chipped paint, rust, or gaps where parts are welded together,<br />
If you find a bad weld, report it to your supervisor,<br />
Electric Wires and Connectors. Look for cracked, frayed, or broken insulation, bare<br />
wires, and loose or broken connectors. Tighten loose connectors. Report any<br />
damaged wires to your supervisor.<br />
Hoses and Fluid Lines. Look for wear, damage, and leaks, and make sure clamps and<br />
fittings are tight. Wet spots show leaks, but a stain around a fitting or connector can<br />
also mean a leak. If a leak comes from a loose fitting or connector, tighten it, If<br />
something is broken or worn out, report it to your supervisor.<br />
h. When you check for “operating condition,” you look at the component to see if it’s<br />
serviceable.<br />
2-6. CLEANING AGENTS<br />
2-6<br />
a<br />
WARNING<br />
DO NOT use diesel fuel, gasoline, or benzene (benzol) for cleaning.<br />
DO NOT SMOKE when using cleaning solvent. NEVER USE IT NEAR AN OPEN<br />
FLAME. Be sure there is a fire extinguisher nearby and use cleaning solvent<br />
only in well-ventilated places. Flash point of solvent is 138 0<br />
F (60 0<br />
C).<br />
USE CAUTION when using cleaning solvents. Cleaning solvents evaporate<br />
quickly and can irritata axposed skin if solvents contact skin. In cold weather,<br />
contact of exposad skin with cleaning solvents can cause frostbite.<br />
CAUTION<br />
When cleaning undarhood areas, angina must be COLD (same temperature as<br />
outside air). DO NOT point water or steam directly at any electrical connection.<br />
DO NOT point water stream directly at radiator fins. DO NOT use high pressura<br />
water supply systam. Damage to engine, electrical system, and other components<br />
may result.<br />
NOTE<br />
Only use those authorized cleaning solvents or agents listed in Appendix D.<br />
Cleaning Underhood Areas.<br />
(1) When using water to clean the engine compartment, always cover alternators and<br />
air cleaner inlet using waterproof material. For M1010 only, also cover air conditioner<br />
compressor. Use water pressure and volume similar to a standard household type<br />
water supply system (45-70psi, 6.5-10.2 kPa).
<strong>TM</strong> 9-<strong>2320</strong>-<strong>289</strong>-10<br />
(2) After cleaning, allow engine to air dry. Do not use compressed air to dry engine. Do<br />
not run engine to decrease drying time.<br />
(3) Remove all component covers before starting engine.<br />
b. Treating Mildewed Areas. Canvas that has mildewed can be cleaned by scrubbing with<br />
a dry brush. If it is necessary to use water to remove dirt, it should not be used until mildew has<br />
been removed. After removing mildew, examine fabric. Look for evidence of deterioration. If canvas<br />
has deteriorated, it should be replaced.<br />
CAUTION<br />
Keep cleaning solvents, gasoline, and lubricants away from rubber or soft plastic<br />
parts. They will deteriorate material.<br />
c. Cleaning Rust or Grease. When cleaning grease buildup or rusty places, use a cleaning<br />
solvent. Then apply a thin coat of light oil to affected area.<br />
2-7. LEAKAGE DEFINITIONS FOR OPERATOR PMCS<br />
It is necessary for you to know how fluid leakage affects the status of the truck. Following<br />
are type/classes of leakage an operator needs to know to be able to determine the status of the<br />
truck. Learn these leakage definitions and remember - when in doubt, notify your supervisor.<br />
CAUTION<br />
Equipment operation is allowable with minor leakages (Class I or II). Of course,<br />
consideration must be given to fluid capacity in the item/system being<br />
checked/inspected. When in doubt, notify your suPervisor.<br />
When operating with Class I or II leaks, continue to check fluid levels as<br />
required in your PMCS.<br />
Class Ill leaks should be reported immediately to your supervisor.<br />
a. CLASS I - Seepage of fluid (as indicated by wetness or discoloration) not great enough<br />
to form drops.<br />
b. CLASS II - Leakage of fluid great enough to form drops but not enough to cause drops<br />
to drip from item being checked/inspected.<br />
c. CLASS III - Leakage of fluid great enough to form drops that fall from item being<br />
checked/inspected.<br />
2-7
<strong>TM</strong> 9-<strong>2320</strong>-<strong>289</strong>-10<br />
Table 2-1. Preventive Maintenance Checks and Services for Model CUCV<br />
Item<br />
No.<br />
Interval<br />
Location<br />
Item to<br />
ChecK<br />
Crewmember<br />
Procedure<br />
I I Service I<br />
2-8 Change 4<br />
WARNING<br />
Always Remember The<br />
WARNINGS, CAUTIONS And<br />
NOTES Before Operating<br />
This Vehicle And Prior to<br />
PMCS.<br />
Perform all PMCS checks if:<br />
a. You are the assigned<br />
driver but have not operated<br />
the vehicle since the<br />
last weekly inspection.<br />
b. You are operating the<br />
vehicle for the first time.<br />
c. See separate manuals<br />
for Smoke Generator, Tow<br />
Launcher and Radios.<br />
Not Fully Mission<br />
Capable If:
Table 2-1. Preventive Maintenance Checks and Services Model CUCV<br />
Item Interval<br />
No.<br />
Location<br />
Item to<br />
Check/<br />
Service<br />
1 Before Left Front, NOTE<br />
<strong>TM</strong> 9-<strong>2320</strong>-<strong>289</strong>-10<br />
Crewmember Not Fully Mission<br />
Procedure Capable If:<br />
Side Exte- If leakage is detected, further<br />
rior investigation is needed to determine<br />
the location and cause<br />
of the leak.<br />
2 Before Left Side WARNING<br />
a. Check underneath vehi- a. Class Ill leak of<br />
cle for evidence of fluid oil, fuel or coolant.<br />
leakage.<br />
b. Visually check left side b. Any damage that<br />
of vehicle for obvious dam- will prevent operaage<br />
that would impair op- tion.<br />
eration.<br />
Tires Operating a vehicle with a<br />
tire in an under-inflated condition<br />
or with a questionable<br />
defect, may lead to prema-<br />
ture tire failure and may<br />
cause equipment damage,<br />
injury or death to personnel.<br />
Visually check tire for presence Tire missing, deflated<br />
and under-inflation, or unserviceable.<br />
Change 4 2-9
<strong>TM</strong> 9-<strong>2320</strong>-<strong>289</strong>-10<br />
2-10<br />
Table 2-1. Preventive Maintenance Checks and Services for Model CUCV<br />
Interval<br />
Before<br />
Before<br />
Before<br />
Before<br />
Change 4<br />
Location<br />
Item to<br />
Check/<br />
Service<br />
Rear Exterior<br />
Right<br />
Front and<br />
Side Exte<br />
rior<br />
Right Side<br />
Tires<br />
Front<br />
‘ DRIVER<br />
Crewmember<br />
Procedure<br />
Check rear of vehicle for obvious<br />
damage that would impair<br />
operation.<br />
NOTE<br />
If leakage is detected, further<br />
investigation is needed to determine<br />
the location and cause<br />
of the leak.<br />
Check right side of vehicle for<br />
obvious damage that would impair<br />
operation.<br />
Visually check tires for presence<br />
and under-inflation.<br />
NOTE<br />
If leakage is detected, investigation<br />
is needed to determine<br />
the location and cause of the<br />
leak.<br />
a. Check body for visual damage<br />
that would impair operation<br />
of the vehicle.<br />
b. Look under vehicle for evidence<br />
of fluid leakage.<br />
Not Fully Mission<br />
Capable If:<br />
Any damage that<br />
will prevent operation.<br />
Any damage that<br />
will prevent operation.<br />
Tire missing, deflated<br />
or unserviceable.<br />
a. Any damage that<br />
will prevent operation.<br />
b. Class Ill leak of<br />
oil, fuel or coolant.
Table 2-1. Preventive Maintenance Checks and Services Model CUCV<br />
Item Interval<br />
No.<br />
Location<br />
Item to<br />
Check<br />
Service<br />
7 Before Seat Belts NOTE<br />
<strong>TM</strong> 9-<strong>2320</strong>-<strong>289</strong>-10<br />
Crewmember Not Fully Mission<br />
Procedure Capable If:<br />
and Seats Vehicle operation with inoperative<br />
seat belts may violate AR<br />
385-55.<br />
a. Check all seat belts for security,<br />
damage and completeness.<br />
NOTE<br />
The seat back lock on M1009<br />
vehicles does not activate unless<br />
vehicle is at a 30 degree<br />
incline.<br />
b. Check operation of seat ad- b. Seat adjustment<br />
justing mechanism. lock broken or missing.<br />
8 Before Fire Extin- a. Check for missing or dam- a. Fire extinguisher<br />
guisher aged fire extinguisher. missing or damaged.<br />
Change 4 2-11
<strong>TM</strong> 9-<strong>2320</strong>-<strong>289</strong>-10<br />
2-12<br />
Table 2-1. Preventive Maintenance Checks and Services for Model CUCV<br />
Item<br />
No.<br />
Interval<br />
Location<br />
Item to<br />
Check/<br />
Service<br />
Crewmember<br />
Procedure<br />
Not Fully Mission<br />
Capable If:<br />
DRIVER<br />
8 Before Fire Extin- b. Check gage for proper pres-<br />
guisher<br />
Continued<br />
sure of about 150 psi (1034<br />
kPa).<br />
c. Check for damaged or missing<br />
seal.<br />
b. Pressure gage<br />
needle in recharge<br />
area.<br />
C. Seal broken or<br />
missing.<br />
9 Before Gear Shif - a. Check transmission shift a. Lever inoperter<br />
lever operation. With key in able or binds be-<br />
‘ON” position, move shift tween range<br />
lever from “P” to “1” then detents.<br />
back to “P”. Lever should<br />
move freely through all range<br />
detents.<br />
Change 4<br />
b. Check transfer shift lever b. Lever inoperoperation.<br />
With transmission able or binds bein<br />
“N” shift transfer lever tween range<br />
through all range positions. detents.<br />
Lever should move freely<br />
through all range positions.
Table 2-1. Preventive Maintenance Checks and Services Model CUCV<br />
Item Interval<br />
No.<br />
Location<br />
Item to<br />
Check<br />
Service<br />
DRIVER<br />
<strong>TM</strong> 9-<strong>2320</strong>-<strong>289</strong>-10<br />
Crewmember Not Fully Mission<br />
Procedure Capable If:<br />
10 Before Instrument WARNING<br />
Panel<br />
If gages, instruments, or in-<br />
strument lights are not operating<br />
as described in these<br />
checks, IMMEDIATELY shut<br />
off engine and notify supervisor<br />
or unit maintenance<br />
personnel. Continued opera-<br />
tion of vehicle may result in<br />
personnel injury or damage<br />
to equipment.<br />
NOTE<br />
If engine is warm, WAIT light<br />
may not come on. During<br />
cranking or after starting, light<br />
may goon and off a few times.<br />
a. Check WAIT light. Turn a. WAIT light<br />
truck ignition key to the does not come on<br />
“ON” position. Light should when engine is<br />
come on if engine is cold. cold, or WAIT light<br />
Light will go off when engine stays on conis<br />
ready to be started.<br />
tinously.<br />
b. Check generator lights b. One or both<br />
(all except M1010). Lights lights remain on<br />
should come on when key is after engine has<br />
in “ON” position and go off<br />
after engine has started.<br />
started.<br />
c. Check engine oil light. c. Light does not<br />
Light should come on when flash during start<br />
key is in “ON” position and up, or remains on<br />
go off after engine is run- after engine is running.<br />
ning.<br />
Change 4 2-13
<strong>TM</strong> 9-<strong>2320</strong>-<strong>289</strong>-10<br />
Table 2-1. Preventive Maintenance Checks and Services for Model CUCV<br />
Location<br />
Item<br />
No.<br />
Interval<br />
Item to<br />
Check/<br />
Service<br />
Crewmember<br />
Procedure<br />
Not Fully Mission<br />
Capable If:<br />
2-14<br />
DRIVER<br />
10 Before Instrument d. Start engine and watch d. Engine will not<br />
Panel lights and gages. start.<br />
Change 4<br />
Continued<br />
e. Check door ajar light<br />
(M1010 only). Light on indicates<br />
patient compartment<br />
doors not securely latched.<br />
f. Check operation of “ON”<br />
“OFF” gas particulate filter<br />
unit switch (M1010 only).<br />
g. Check engine coolant<br />
temperature light. Light<br />
should flash momentarily<br />
during start up.<br />
g. Light does not<br />
flash during start<br />
up or remains on<br />
when engine is<br />
running.<br />
h. Check low coolant warn- h. Light does not<br />
ing light. Light should flash flash during start<br />
momentarily during start up or remains on<br />
up. when engine is<br />
i. Check water-in-fuel light. running.<br />
Light should flash momentarily<br />
during start up. Drain<br />
water from fuel filter immediately<br />
if light stays on.<br />
j. Check voltmeter.<br />
k. Check 4-wheel drive in-<br />
dicator light. With transmission<br />
in N, shift transfer to 4H<br />
and then to 4L. Light should<br />
come on with shifter in<br />
these positions. Light<br />
should go off when shifter is<br />
moved out of 4H or 4L.<br />
j. Voltmeter inoperative<br />
or stays in<br />
the red or yellow.
Table 2-1. Preventive Maintenance Checks and Services Model CUCV<br />
Item Interval<br />
No.<br />
Location<br />
Item to<br />
Check/<br />
Service<br />
DRIVER<br />
<strong>TM</strong> 9-<strong>2320</strong>-<strong>289</strong>-10<br />
Crewmember Not Fully Mission<br />
Procedure Capable If:<br />
11 Before Steering Check steering wheel for op- Steering wheel inop.<br />
eration. With engine running, erable or binds.<br />
turn steering wheel from left to<br />
right. Steering wheel should<br />
move freely.<br />
12 Before Brake a. Check brake system a. Light does not<br />
System warning light. Light should come on before<br />
come on when key is in start up. Light re-<br />
“ON” position.<br />
mains on after<br />
NOTE<br />
parking brake is<br />
released.<br />
Engine must be warmed up and<br />
idling, transmission in “D”<br />
(drive), transfer in “2N” (two<br />
wheel drive) and parking brake<br />
released to perform the following<br />
check.<br />
b. Check parking brake.<br />
Parking brake fully applied,<br />
transmission in D or R,<br />
transfer in 2H or 4H, truck<br />
should not move.<br />
b. Parking brake<br />
inoperable or un-<br />
able to hold truck.<br />
Change 4 2-15
<strong>TM</strong> 9-<strong>2320</strong>-<strong>289</strong>-10<br />
Table 2-1. Preventive Maintenance Checks and Services for Model CUCV<br />
Item<br />
No.<br />
Interval<br />
Location<br />
Item to<br />
Check/<br />
Service<br />
Crewmember<br />
Procedure<br />
Not Fully Mission<br />
Capable If:<br />
DRIVER<br />
12 Before Brake NOTE<br />
System<br />
Pedal should travel 1 to 1-1/2<br />
Continued<br />
inch before brakes take hold.<br />
After brakes take hold pedal<br />
may exceed the 1 to 1-1/2 inch<br />
travel. This is normal.<br />
2-16<br />
Change 4<br />
c. Check brake pedal c. Brakes will not<br />
travel. With truck at idle,<br />
transfer in 2H, transmission<br />
in D, allow truck to move forward.<br />
As truck moves,<br />
slowly depress brake pedal.<br />
stop truck.
Table 2-1. Preventive Maintenance Checks and Services Model CUCV<br />
<strong>TM</strong> 9-<strong>2320</strong>-<strong>289</strong>-10<br />
Item<br />
No.<br />
Interval<br />
Location<br />
Item to<br />
Check<br />
Service<br />
Crewember<br />
Procedure<br />
Not Fully Mission<br />
Capable If:<br />
DRIVER<br />
13 During Controls Monitor all gages and warning Warning light lights<br />
and lndi- Iights during operation. or gage drops below<br />
caters<br />
normal reading.<br />
14 During Brakes Check brakes for pulling, grab- Brakes pull or grab.<br />
bing.<br />
15 During Steering Be alert for excessive sway, Handling is unstable.<br />
leaning to one side, or unstable<br />
handling.<br />
16 During Power Be alert for unusual noises or Unusual noise or vi-<br />
Train vibrations from transmission, bration detected.<br />
transfer, differentials, propeller<br />
shafts, axle shafts, or wheels.<br />
Change 4 2-17
<strong>TM</strong> 9-<strong>2320</strong>-<strong>289</strong>-10<br />
Table 2-1. Preventive Maintenance Checks and Services for Model CUCV<br />
Location<br />
Item<br />
No.<br />
Interval<br />
Item to<br />
Check<br />
Service<br />
Crewmember<br />
Procedure<br />
Not Fully Mission<br />
Capable If:<br />
DRIVER<br />
17 After Under NOTE<br />
2-18 Change 4<br />
Hood<br />
Transmission fluid level should<br />
be checked with engine running,<br />
parking brake set, transmission<br />
shift lever in “P” and vehicle<br />
on level ground, Fluid<br />
level should read between<br />
“ADD” and “FULL” on the dipstick.<br />
Check transmission fluid level.<br />
If level is below “ADD”, add sufficient<br />
fluid to bring the level between<br />
“ADD” and “FULL” mark.<br />
NOTE<br />
After completing transmission<br />
fluid level check, turn off engine.<br />
If leakage if detected, further<br />
investigation is needed to determine<br />
the location and cause<br />
of the leak.
Table 2-1. Preventive Maintenance Checks and Services Model CUCV<br />
<strong>TM</strong> 9-<strong>2320</strong>-<strong>289</strong>-10<br />
Item<br />
No.<br />
Interval<br />
Location<br />
Item to<br />
Check/<br />
Service<br />
Crewmember<br />
Procedure<br />
Not Fully Mission<br />
Capable If:<br />
DRIVER<br />
18 After Left Front, a. Check underneath vehi- a. Any brake fluid<br />
Sie Exte- cle for evidence of fluid leakage, Class Ill<br />
rior leakage. engine, transmission,<br />
transfer, differential<br />
oil, coolant,<br />
fuel, or power<br />
steering fluid leak.<br />
b. Visually check left side b. Any damage that<br />
of vehicle for obvious dam- will prevent operaage<br />
that would impair op- tion.<br />
eration.<br />
19 After Left Side Visually check tires and wheels Tire unserviceable or<br />
Tires for inflation, cuts, gouges, one or more lug nuts<br />
bulges, serviceability and pres- missing.<br />
ence of lug nuts.<br />
20 After Mirror<br />
NOTE<br />
Vehicle operation with damaged<br />
or missing outside rearview<br />
mirrors may violate AR<br />
385-55 (M1010, M1028,<br />
M1028A1 , M1028A2, and<br />
M1028A3 only).<br />
Check presence, cracks and<br />
serviceability of mirror operation.<br />
Change 5 2-19
<strong>TM</strong> 9-<strong>2320</strong>-<strong>289</strong>-10<br />
Table 2-1. Preventive Maintenance Checks and Services for Model CUCV<br />
Item Interval<br />
No.<br />
Location<br />
Item to<br />
Check<br />
Service<br />
DRIVER<br />
Crewmember<br />
Procedure<br />
21 After Rear Ex- NOTE<br />
2-20<br />
Change 4<br />
terior<br />
If leakage is detected, further<br />
investigation is needed to determine<br />
the location and cause<br />
of the leak.<br />
Not Fully Mission<br />
Capable If:<br />
a. Check underneath vehi- a. Any brake<br />
cle for evidence of fluid fluid leakage,<br />
leakage.<br />
Class Ill engine,<br />
transmission,<br />
transfer, differential<br />
oil, power<br />
steering fluid,<br />
coolant or fuel.<br />
b. Visually check rear of<br />
vehicle for obvious damage<br />
that would impair operation.<br />
(M1010 Only)<br />
b. Any damage<br />
that will prevent<br />
operation.<br />
c. Check operation of rear c. Rear door handoors,<br />
handles and latching dies and latching<br />
mechanisms. Check for mechanisms do<br />
loose or missing compo- not operate propnents.<br />
Doors should not erly or missing.<br />
bind and should close securely<br />
when latched shut.
Table 2-1. Preventive Maintenance Checks and Services Model CUCV<br />
Item Interval<br />
No.<br />
Location<br />
Item to<br />
Check/<br />
Service<br />
DRIVER<br />
<strong>TM</strong> 9-<strong>2320</strong>-<strong>289</strong>-10<br />
Crewmember Not Fully Mission<br />
Procedure Capable If:<br />
22 After Right Side Visually check tires and wheels Tire unserviceable<br />
Tires for inflation, cuts, gouges, or one or more lug<br />
bulges, serviceability and pres- nuts missing.<br />
ence of lug nuts.<br />
23 After Spare Tire Visually check spare for cuts, Tire unserviceable<br />
gouges, cracks, or bulges. Re- or flat.<br />
move all penetrating objects.<br />
24 After Mirror NOTE<br />
25 After Right<br />
Front,<br />
Vehicle operation with damaged<br />
or missing outside rearview<br />
mirrors may violate AR<br />
385-55.<br />
Check presence, cracks and<br />
serviceability of mirror.<br />
NOTE<br />
If leakage is detected, further<br />
Side Exte- investigation is needed to derior<br />
termine the location and cause<br />
of the leak.<br />
a. Check underneath vehi- a. Any brake fluid<br />
cle for evidence of fluid leakage, Class Ill<br />
leakage. engine, transmission,<br />
transfer, differential<br />
oil, coolant<br />
or fuel, Class II<br />
power<br />
fluid.<br />
steering<br />
b. Visually check right side b. Any damage that<br />
of vehicle for obvious dam- will prevent operaage<br />
that would impair op- tion.<br />
eration.<br />
Change 4 2-21
<strong>TM</strong> 9-<strong>2320</strong>-<strong>289</strong>-10<br />
2-22<br />
Table 2-1. Preventive Maintenance Checks and Services for Model CUCV<br />
Interval<br />
After<br />
Change 4<br />
Location<br />
— —<br />
Item to<br />
Check/<br />
Service<br />
Engine Oil<br />
Level<br />
DRIVER<br />
Crewmember<br />
Procedure<br />
CAUTION<br />
Do not permit dirt, dust or<br />
grit to enter engine oil dipstick<br />
tube. Internal engine<br />
damage will result if engine<br />
oil becomes contaminated.<br />
Do not overfill engine crankcase.<br />
Damage to engine will<br />
result.<br />
Check engine oil level. Level<br />
should be between “ADD” and<br />
“FULL’. If level is below “ADD”,<br />
add oil to bring level between<br />
the ADD and FULL marks.<br />
Not Fully Mission<br />
Capable If:
Table 2-1. Preventive Maintenance Checks and Services Model CUCV<br />
<strong>TM</strong> 9-<strong>2320</strong>-<strong>289</strong>-10<br />
Change 5 2-23
<strong>TM</strong> 9-<strong>2320</strong>-<strong>289</strong>-10<br />
Table 2-1. Preventive Maintenance Checks and Services for Model CUCV<br />
2-24 Change 5
Table 2-1. Preventive Maintenance Checks and Services Model CUCV<br />
<strong>TM</strong> 9-<strong>2320</strong>-<strong>289</strong>-10<br />
Change 4 2-25
<strong>TM</strong> 9-<strong>2320</strong>-<strong>289</strong>-10<br />
Table 2-1. Preventive Maintenance Checks and Services for Model CUCV<br />
Location<br />
Item<br />
No.<br />
Interval<br />
Item to<br />
Check/<br />
Service<br />
Crewmember<br />
Procedure<br />
Not Fully Mission<br />
Capable If:<br />
DRIVER<br />
30 After Lights NOTE<br />
Vehicle operation with damaged<br />
or inoperable headlights<br />
may violate AR 385-55.<br />
Check for presence and operation<br />
of service drive, turn signal,<br />
tail/stop light, blackout<br />
marker, blackout drive and side<br />
marker lights.<br />
DRIVER<br />
31 After Horns NOTE<br />
Operation of vehicles with inoperative<br />
horn may violate AR<br />
385-55.<br />
Check operation of horns if tactical<br />
situation permits.<br />
DRIVER<br />
32 After Wind- NOTE<br />
shield and Operation of vehicles with<br />
Wipers damaged windshield may violate<br />
AR 385-55.<br />
2-26 Change 4<br />
a. Check windshield for dam- a. Windshield is<br />
age that would impair opera- cracked sufficiently to<br />
tor’s vision.<br />
impair operator’s vision.<br />
NOTE<br />
Vehicle operation with inoperative<br />
wipers may violate AR<br />
385-55.<br />
b. Check windshield wiper and<br />
blade for presence and damage.
Table 2-1. Preventive Maintenance Checks and Services Model CUCV<br />
<strong>TM</strong> 9-<strong>2320</strong>-<strong>289</strong>-10<br />
Item<br />
No.<br />
Interval<br />
Location<br />
Item to<br />
Check<br />
Service<br />
Crewmember<br />
Procedure<br />
Not Fully Mission<br />
Capable If:<br />
33 Weekly Tires, WARNING<br />
Hubs and Operating a vehicle with a<br />
Wheels<br />
tire in an under-inflated condition<br />
or with a questionable<br />
defect, may lead to premature<br />
tire failure and may<br />
cause equipment damage,<br />
injury or death to personnel.<br />
WEAR INDICATORS<br />
a. Check tire tread depth a. Tire tread<br />
and wear. Check for any depth is 1/8 inch<br />
cuts, cracks, gouges or (3.17 mm) or less<br />
bulges. Check for valve or tread is worn to<br />
stem cap. height of tread<br />
wear indicator.<br />
Any cut, gouge or<br />
crack that extends<br />
to cord<br />
body or any<br />
bulges.<br />
Change 4 2-27
<strong>TM</strong> 9-<strong>2320</strong>-<strong>289</strong>-10<br />
2- 28<br />
Table 2-1. Preventive Maintenance Checks and Services for Model CUCV<br />
Change 4
Table 2-1. Preventive Maintenance Checks and Services Model CUCV<br />
Item interval<br />
No.<br />
Location<br />
Item to<br />
Check/<br />
Service<br />
33 weekly Tires,<br />
<strong>TM</strong> 9-<strong>2320</strong>-<strong>289</strong>-10<br />
Crewmember Not Fully Mission<br />
Procedure Capable If:<br />
NOTE<br />
Hubs and Maximum tire pressure for all<br />
Wheels trucks except M1009, must not<br />
exceed 80 psi or (552kPa).<br />
Continued Maximum tire pressure for<br />
Ml 009 must not exceed 35 psi<br />
or (241 kPa).<br />
Gage tire for correct air pressure<br />
using the chart below. Adjust<br />
pressures as necessary.<br />
Front Rear Spare<br />
M1008 45 psi (310 kPa) 65 psi (448 kPa) 65 psi (448 kPa)<br />
M1008A1 45 psi (310 kPa) 65 psi (448 kPa) 65 psi (448 kPa)<br />
M1009 35 psi (241 kPa) 35 psi (241 kPa) 35 psi (276 kPa)<br />
M1010 45 psi (310 kPa) 80 psi (552 kPa) 80 psi (552 kPa)<br />
M1028 45 psi (310 kPa) *65 psi (448 kPa) 80 psi (552 kPa)<br />
M1028A1 45 psi (310 kPa) *65 psi (448 kPa) 80 psi (552 kPa)<br />
M1028A1 45 psi (310 kPa) 45 psi (310 kPa) 45 psi (310 kPa)<br />
M1028A3 45 psi (310 kPa) 45 psi (310 kPa) 45 psi (310 kPa)<br />
M1030 45 psi (310 kPa) 65 psi (448 kPa) 80 psi (552 kPa)<br />
‘Rear tire pressure with shelter loaded is 80 psi (552 kPa)<br />
Change 5 2-29
<strong>TM</strong> 9-<strong>2320</strong>-<strong>289</strong>-10<br />
Table 2-1. Preventive Maintenance Checks and Services for Model CUCV<br />
Item<br />
No.<br />
Interval<br />
Location<br />
Item to<br />
Check/<br />
Service<br />
Crewmember<br />
Procedure<br />
Not Fully Mission<br />
Capable If:<br />
DRIVER<br />
34 Weekly Doors and CAUTION<br />
Windows Do not open or close M1009<br />
tailgate unless window is in<br />
full open (lowered) position.<br />
Opening or closing tailgate<br />
with window partly open may<br />
cause breakage of window.<br />
About 1/4 inch (.7 cm) of<br />
glass may remain exposed in<br />
full open position.<br />
a. Check operation of cab door<br />
and window.<br />
b. Inspect all doors and win- b. Any rusted<br />
dews for indication of rust or through condition,<br />
cracks and/or breaks.<br />
cracks or breaks that<br />
would effect vehicle<br />
operation.<br />
35 Weekly Tailgate Check tailgate for rust-through Any rusted through<br />
condition and/or damage and if condition or damage<br />
tailgate latches securely. that effects vehicle<br />
operation.<br />
2-30<br />
Change 4
Table 2-1. Preventive Maintenance Checks and Services Model CUCV<br />
<strong>TM</strong> 9-<strong>2320</strong>-<strong>289</strong>-10<br />
Item<br />
No.<br />
Interval<br />
Location<br />
Item to<br />
Check/<br />
Service<br />
Crewrmember<br />
Procedure<br />
Not Fully Mission<br />
Capable If:<br />
DRIVER<br />
36 Weekly Exhaust Check exhaust system for Cracked or rusted<br />
System cracks, rusted through condi- through pipes or muftion<br />
of pipes, muffler, or loose fler.<br />
clamps or hangers.<br />
37 Weekly Shock Ab- Visually inspect shock absorb- Class Ill leaks or<br />
sorbers ers for leaks, damage and se- damage is evident.<br />
curity of mounting.<br />
38 Weekly Cargo (M1008/M1008A1 w/cargo kit<br />
Cover or M1008/M1008A1, M1009 w/<br />
winterization kit)<br />
a. Check turn buttons and<br />
screws securing canvas for<br />
security of mounting.<br />
b. Check canvas components<br />
for rips and tears.<br />
Change 4 2-31
<strong>TM</strong> 9-<strong>2320</strong>-<strong>289</strong>-10<br />
Table 2-1. Preventive Maintenance Checks and Services for Model CUCV<br />
2-32 Change 4
Table 2-1. Preventive Maintenance Checks and Services Model CUCV<br />
<strong>TM</strong> 9-<strong>2320</strong>-<strong>289</strong>-10<br />
Change 4 2-33
<strong>TM</strong> 9-<strong>2320</strong>-<strong>289</strong>-10<br />
2-34<br />
Table 2-1. Preventive Maintenance Checks and Services for Model CUCV<br />
Change 4
Table 2-1. Preventive Maintenance Checks and Services Model CUCV<br />
<strong>TM</strong> 9-<strong>2320</strong>-<strong>289</strong>-10<br />
C h a n g e 4 2-35
<strong>TM</strong> 9-<strong>2320</strong>-<strong>289</strong>-10<br />
2 - 3 6<br />
Table 2-1. Preventive Maintenance Checks and Services for Model CUCV<br />
Change 4
Table 2-1. Preventive Maintenance Checks and Services Model CUCV<br />
<strong>TM</strong> 9-<strong>2320</strong>-<strong>289</strong>-10<br />
Change 4 2-37
<strong>TM</strong> 9-<strong>2320</strong>-<strong>289</strong>-10<br />
2-38<br />
Table 2-1. Preventive Maintenance Checks and Services for Model CUCV<br />
Change 4
Table 2-1. Preventive Maintenance Checks and Services Model CUCV<br />
<strong>TM</strong> 9-<strong>2320</strong>-<strong>289</strong>-10<br />
Change 4 2-39
<strong>TM</strong> 9-<strong>2320</strong>-<strong>289</strong>-10<br />
Table 2-1. Preventive Maintenance Checks and Services for Model CUCV<br />
2-40 Change 4
Table 2-1. Preventive Maintenance Checks and Services Model CUCV<br />
<strong>TM</strong> 9-<strong>2320</strong>-<strong>289</strong>-10<br />
Change 4 2-41
<strong>TM</strong> 9-<strong>2320</strong>-<strong>289</strong>-10<br />
2-42<br />
Table 2-1. Preventive Maintenance Checks and Services for Model CUCV<br />
Change 4
Table 2-1. Preventive Maintenance Checks and Services Model CUCV<br />
<strong>TM</strong> 9-<strong>2320</strong>-<strong>289</strong>-10<br />
Change 4 2-43
<strong>TM</strong> 9-<strong>2320</strong>-<strong>289</strong>-10<br />
Table 2-1. Preventive Maintenance Checks and Services for Model CUCV<br />
2 - 4 4 C h a n g e 4
Table 2-1. Preventive Maintenance Checks and Services Model CUCV<br />
<strong>TM</strong> 9-<strong>2320</strong>-<strong>289</strong>-10<br />
Location<br />
Item<br />
No.<br />
Interval<br />
Item to<br />
Check<br />
Service<br />
Crewmembe<br />
Procedure<br />
Not Fully Mission<br />
Capable If:<br />
52 Weekly Tow a. Visually check pintle<br />
Pintle, hook for looseness, dam-<br />
Hooks,<br />
aged locking mechanism,<br />
and presence of cotter pin<br />
Electrical<br />
Connector<br />
(all except<br />
M1031).<br />
M1010 and<br />
and Step<br />
b. Check presence and<br />
condition of tow hooks (all<br />
except M1010 and M1031).<br />
c. Check trailer electrical<br />
connector for damage (all<br />
except M1010 and M1031).<br />
d. Check condition and operation<br />
of rear step (1010<br />
only).<br />
2-45
<strong>TM</strong> 9-<strong>2320</strong>-<strong>289</strong>-10<br />
Table 2-1. Preventive Maintenance Checks and Services for Model CUCV<br />
2-46 Change 4
Table 2-1. Preventive Maintenance Checks and Services Model CUCV<br />
<strong>TM</strong> 9-<strong>2320</strong>-<strong>289</strong>-10<br />
C h a n g e 4 2-47
<strong>TM</strong> 9-<strong>2320</strong>-<strong>289</strong>-10<br />
2-48<br />
Table 2-1. Preventive Maintenance Checks and Services for Model CUCV
Table 2-1. Preventive Maintenance Checks and Services Model CUCV<br />
<strong>TM</strong> 9-<strong>2320</strong>-<strong>289</strong>-10<br />
U.S. GOVERNMENT PRINTING OFFICE: 1992 – 643-025/40163 2-49/2-50 blank)<br />
Note: Pages 2-51 and 2-52 have been deleted.
2-51<br />
Table 2-1<br />
<strong>TM</strong> 9-<strong>2320</strong>-<strong>289</strong>-10
2 - 5 2<br />
Table 2-1.<br />
<strong>TM</strong> 9-<strong>2320</strong>-<strong>289</strong>-10
2-8.<br />
Section Ill. OPERATE UNDER USUAL<br />
e. Insert key into starter ignition switch (1) and turn key to “RUN.”<br />
NOTE<br />
CONDITIONS<br />
DO NOT turn key to “START” position until WAIT light goes out.<br />
f. When WAIT light goes out<br />
<strong>TM</strong> 9-<strong>2320</strong>-<strong>289</strong>-10<br />
(1) If temperature is more than 32 0<br />
F (0 0<br />
C), press accelerator pedal halfway to floor<br />
and hold.<br />
(2) If temperature is less than 32 0<br />
F (0 0<br />
C), press accelerator pedal to floor and hold.<br />
NOTE<br />
If engine doaa not start after cranking shout 10 to 15 seconds, release ignition<br />
key. Wait five seconds, then attempt to atart engine again. If engine fails to atart,<br />
refer to Troubleshooting, Table 3-1 and notify your supervisor. DO NOT tow or<br />
push start truck.<br />
g. Turn key in ignition switch to “START.” When engine starts, release key and allow it to<br />
return to “RUN” position.<br />
h. Move service lights/blackout toggle switch to “ON” position.<br />
TA466606<br />
Change 5 2-53
<strong>TM</strong> 9-<strong>2320</strong>-<strong>289</strong>-10<br />
2-9.<br />
PARAGRAPH 2-8<br />
(1) Voltmeter should show slight charge<br />
(2) Oil pressure, engine coolant temperature, WAIT, low coolant, and generator lights<br />
should be Out.<br />
c. Shift transfer case control lever to appropriate range (“2H” for normal driving conditions).<br />
d. Shift transmission gearshift lever to desired forward gear (“D” (Drive) for most normal<br />
driving conditions).<br />
e. Release parking brake<br />
(1) Depress service brake pedal<br />
(2) Release parking brake by pulling on the T-handle brake release<br />
f. Release service brake pedal.<br />
g. Depress accelerator pedal gradually to move the truck.<br />
2-10. STOP TRUCK<br />
a Rclease accelerator pedal.<br />
b. Depress and hold service brake pedal to bring truck to a complete stop.<br />
2-11. DRIvE TRUCK IN REVERSE<br />
NOTE<br />
The truck’s speedometer does not indicate reverse speeds. You must estimate<br />
YOUr speed and use good judgement when driving in reverse.<br />
a. Bring truck to a complete stop.<br />
b. Keeping your foot on service brake pedal, shift transmission gearshift lever to “R” (Reverse),<br />
c. Re!ease service brake pedal and gradually depress accelerator pedal.<br />
2-12 DRIVE TRUCK IN FOUR-WHEEL DRiVE<br />
2-54<br />
a. Shift from Two-wheel Drive to Four-wheel Drive.<br />
CAUTION<br />
Both locking hubs must be in same position before completing transfer case shift<br />
or damage to drive train components can occur.<br />
(a) Stop truck and set parking brake,<br />
(b) Shift transmission gearshift lever to “P” (Park).
NOTE<br />
<strong>TM</strong> 9-<strong>2320</strong>-<strong>289</strong>-10<br />
If hubs do not turn freely, drive the truck backward or forward a few feet and<br />
try again.<br />
(c) Turn each locking hub knob (1) clockwise until it stops and pointer (2)<br />
on the hub dial is lined Up with the word “LOCK,”<br />
(2) Shift Transfer Case from “2H” to “4H.”<br />
(a) Shift transmission gearshift lever to “D” (Drive) or appropriate forward<br />
gear (reverse may be selected if absolutely necessary).<br />
(b) Release parking brake.<br />
(c) Drive truck forward, within speeds specified in paragraph 1-13.<br />
(d) Momentarily release accelerator, then firmly but not forcefully, shift<br />
transfer case control lever to “4H,” according to the pattern indicated<br />
on transfer case control lever.<br />
NOTE<br />
If it is not possible to move truck to shift transfer case, it can be shifted by shifting<br />
transmission gearshift lever to “N” (Neutral) then shifting transfer case control<br />
Iever firmly but not forcefully. If shifting the transfer case is difficult, it may be<br />
necessary to temporarily shift the transmission gearshift lever to “D” (Drive) then<br />
back to “N” (Neutral) and try again to shift transfer case.<br />
(3) Shift Transfer Case from “2H” or “4H” to “4L.”<br />
(a) Stop truck and set parking brake.<br />
(b) Shift transmission gearshift lever to “N” (Neutral),<br />
(c) Release parking brake.<br />
(d) Shift transfer case control lever firmly, but not forcefully, to “4L.”<br />
TA466607<br />
2-55
<strong>TM</strong> 9-<strong>2320</strong>-<strong>289</strong>-10<br />
b. Return to Two-wheel Drive from Four-wheel Drive.<br />
(1) Return to “2H” from “4H.”<br />
(a) Shift transmission gearshift lever to “D” (Drive) or appropriate forward gear<br />
(b) With truck in motion, momentarily release accelerator and, firmly but not<br />
forcefully, shift transfer case control lever according to pattern indicated on<br />
lever.<br />
(2) Return to “2H” or “4H” from “4L.”<br />
(a) Stop truck and set parking brake<br />
(b) Shift transmission gearshift lever to “N” (Neutral)<br />
(c) Shift transfer case control lever to “2H”’ or “4H” according to pattern indicated<br />
on lever.<br />
(3) Unlock Locking Hubs.<br />
(a) Ensure that transfer case has been returned to the “2H” position<br />
(b) Set parking brake<br />
(c) Shift transmission gearshift lever to “P” (Park)<br />
(d) Turn each locking hub knob counterclockwise until it stops and pointer on dial<br />
is lined up with the word “FREE.”<br />
2-13. PARK TRUCK AND SHUT DOWN ENGINE<br />
NOTE<br />
DO NOT shift transmission gearshift lever to “P” (Park) on a hill before setting<br />
parking brake. This puts force on the transmission and makes it difficult to shift<br />
the transmission gearshift lever out of “P” (Park). Make sure the transfer case<br />
is in gear.<br />
a. Bring truck to a complete stop.<br />
b. Set parking brake by depressing service brake pedal with your right foot, and holding it<br />
while setting parking brake with your left foot.<br />
2-56<br />
c.<br />
d.<br />
e.<br />
f.<br />
WARNING<br />
If transfer case control lever is in “N” (Neutral), transfer case is disengaged and<br />
shifting the transmission gearshift lever to “P” (Park) WILL NOT stop the truck<br />
from moving.<br />
Ensure that transfer case is in gear.<br />
Shift transmission gearshift lever to “P” (Park).<br />
Move all switches to the “OFF” position.<br />
Turn key in ignition to “LOCK” and remove key.
2-13.1 TOWING WITH M1009<br />
WARNING<br />
<strong>TM</strong> 9-<strong>2320</strong>-<strong>289</strong>-10<br />
If the tailgate and/or tailgate window is required to be opened while moving or<br />
towing, extreme caution is required. Exhauat fumes may enter resulting in injury or<br />
death to personnel.<br />
NOTE<br />
Although not recommended, if your M1009 requires the tailgate and/or tailgate<br />
window to be open while moving or towing, the following procedure is required.<br />
a. Close the door windows.<br />
NOTE<br />
Use either the heating or cooling system as environment permits.<br />
b. Set the fan to intermediate or high speed (see para 2-20c).<br />
c Set upper control lever to any position except “OFF’ (see para 2-20a).<br />
d. Open both outside air vents fully (see para 2-22).<br />
Change 1 2-56.1/(2-56.2 Blank)
2-14. TOW A TRAILER/AIRCRAFT<br />
a.<br />
b.<br />
c.<br />
Towing Capacities of CUCV Models.<br />
(1)<br />
(2)<br />
<strong>TM</strong> 9-<strong>2320</strong>-<strong>289</strong>-10<br />
M1009. Equipped to tow M416 Series 1/4 ton trailers with maximum towed load<br />
of 1200 pounds for both cross-country and highway travel. Load on tongue should<br />
not exceed 100 pounds.<br />
FA1008, M1008A1, M1028, M1028A1, M1028A2, and M1028A3, Equipped to tow<br />
M101 Series 3/4 ton trailers with maximum towed load of 3100 Ibs. Load on tongue<br />
should not exceed 300 Ibs.<br />
Guidelines for Towing Aircraft Which Exceed Maximum Towed Load Weight.<br />
(1) Speed will not exceed 5 mph.<br />
(2) Truck will be operated with transmission in low range (“ 1”) and transfer case in “2H.”<br />
(3) Gross load will not exceed 10,000 pounds for M1009, 15,000 pounds for M1008,<br />
M1008A1, M1028, M1028A1, M1028A2, and M1028A3.<br />
(4) Tongue load will not exceed 100 pounds for M 1009, and 300 pounds for M1008,<br />
M1008A1, M1028, M1028A1, M1028A2, and M1028A3.<br />
(5) Operation will be on a level, hard surface.<br />
Guidelines for Towing a Trailer on Hills.<br />
(1) When going up or down long, steep hills, downshift transmission to lower gear range<br />
and reduce truck speed to 45 mph (72 kph) or below.<br />
(2) if you must park truck with loaded trailer on a hill, follow these steps:<br />
(c) When trailer wheel chocks (1) are in place, slowly release service brakes until<br />
chocks take up the load of trailer.<br />
TA466608<br />
Change 5 2-57
<strong>TM</strong> 9-<strong>2320</strong>-<strong>289</strong>-10<br />
(d) Set parking brake.<br />
CAUTION<br />
DO NOT shift transmission gearshift lever to “P” (Park) until the trailer wheels<br />
are chocked and the parking brake is set or it may ba hard to shift out of “P”<br />
(Park).<br />
(e) Shift transmission gearshift lever to “P” (Park).<br />
(3) When starting from a parked position on a steep hill, follow these steps:<br />
2-15. OPERATE LIGHTS<br />
(a) Start engine in “P” (Park).<br />
(b) Apply service brakes and hold down brake pedal.<br />
(c) Shift transmission gearshift lever into gear and release parking brake<br />
(d) Drive truck slightly uphill and remove chocks before driving away.<br />
a. Service Lights.<br />
NOTE<br />
Headlights, horn, turn signals, and hazard warning flasher will not operate unless<br />
service lights/blackout toggle switch is set to “SERVICE LIGHTS ON.”<br />
(1) On. Pull out and move service lights/blackout toggle switch to “SERVICE LIGHTS ON,”<br />
then pull out headlight switch to turn on headlights as necessary.<br />
(2) Off. Pull out and move service lights/blackout toggle switch to “ALL OFF,” then push<br />
in on headlight switch.<br />
b. Blackout Drive Lights.<br />
(1) On. Pull out and move service lights/blackout toggle switch to “BLACKOUTON,’’then<br />
pull out and push up, and release blackout drive light toggle switch to “BLACKOUT<br />
DRIVE LIGHT ON.” Left toggle switch will return to center position when released.<br />
(2) Off. Pull out and move service lights/blackout toggle switch to “ALL OFF.”<br />
c. Blackout Markers.<br />
(1) On. Pull out and move service lights/blackout toggle switch to “BLACKOUT ON.”<br />
(2) Off. Pull out and move service lights/blackout toggle switch to “ALL OFF.”<br />
2-16. OPERATE HEADLIGHT DIMMER SWITCH<br />
a. Pull out and move service lights/blackout toggle switch to “SERVICE LIGHTS ON” and turn<br />
on headlights.<br />
2-58
2-17.<br />
b. Turn on high beams.<br />
(1) With headlights on, pull turn signal control lever (1) toward you.<br />
(2) Ensure that high beam indicator comes on.<br />
c. Return to low beams.<br />
(1) Pull turn signal control lever toward you.<br />
(2) Ensure that high beam indicator goes out.<br />
OPERATE TURN SIGNAL INDICATOR<br />
NOTE<br />
<strong>TM</strong> 9-<strong>2320</strong>-<strong>289</strong>-10<br />
Turn signal indicator will not oparate unless service lights/blackout toggle<br />
switch is set to “SERVICE LIGHTS ON.”<br />
Turn signal indicator will automatically turn itself off once turn ia completed.<br />
s. To indicate a left-hand turn. oush turn signal control lever down. Ensure that left turn<br />
. .<br />
indicator on dashboard is flashing.<br />
b. To indicate a right-hand turn, push turn signal control lever up. Ensure that right turn<br />
indicator on dashboard is flashing.<br />
TA466609<br />
2-59
<strong>TM</strong> 9-<strong>2320</strong>-<strong>289</strong>-10<br />
2-18. OPERATE WINDSHIELD WIPER/WASHER<br />
NOTE<br />
Windshield wipers ara electric and will not operate if ignition switch is off.<br />
a. To turn wipers on, twist knob (1) on end of turn signal control lever (3) toward front of truck<br />
to “LO” (4) for normal wiper speed or “HI” (5) for a more rapid wiper speed.<br />
b. To turn off wipers, twist knob (1) toward rear of truck to “OFF” (6).<br />
c. If a light mist requires only one wipe by wipers, this can be done by twisting knob (1)toward<br />
the rear of the truck to “MIST” (7).<br />
d. To operate windshield washer, push thumb plate (2) toward front of truck. Windshield<br />
wipers will automatically come on.<br />
2-19. OPERATE HORN<br />
2-60<br />
NOTE<br />
Horn will not operate unless service lights/blackout toggle switch is set to<br />
“SERVICE LIGHTS ON.”<br />
Depress centerpiece (1) of steering wheel to sound horn.<br />
TA466610
2-20. OPERATE HEATER/ DEFROSTER<br />
a. Operate Uppar Lever (2).<br />
NOTE<br />
Always keep air path under seat clear of objects.<br />
<strong>TM</strong> 9-<strong>2320</strong>-<strong>289</strong>-10<br />
(19 With lever (2) in “OFF” (1) position, unheated air comes out of heater outlet.<br />
(2) With lever in “HEATER” (3) position, heated air flows from heater outlet.<br />
(3) With lever in “’DEF”’ (4) position, heated air flows to defroster outlets.<br />
b. Operate Lower Lever (5).<br />
(1) Move lever (5) from left to right to regulate heat.<br />
(2) Full right position provides the most heat.<br />
c. Operate Fan (6).<br />
(1) Move fan lever (6) from “OFF” through notches to “HI” position to turn on fan motor<br />
and regulate force of air.<br />
(2) Move fan lever (6) to “OFF” position to turn off fan motor.<br />
TA466611<br />
2-61
<strong>TM</strong> 9-<strong>2320</strong>-<strong>289</strong>-10<br />
d. Operate Heatar/Dafrostar Under Winter Snow and Icy Conditions.<br />
(1) Clear snow and ice from hood and air inlet in front of windshield.<br />
(2) Run fan (6) on “HI” for a few moments before driving off to clear intake ducts of snow<br />
and moisture.<br />
2-21. OPERATE HAZARO WARNING FLASHER<br />
NOTE<br />
Hazard warning lights will not work unless service lights/blackout toggle switch<br />
is set to “SERVICE LIGHTS ON.”<br />
a. To turn hazard warning flashers on, push in on button located on steering column just<br />
behind steering wheel.<br />
b. To turn hazard warning flashers off, pull out button on steering column<br />
2-22. OPERATE AIR VENTS<br />
2-62<br />
a. Knobs (1) to operate air vents are located under the instrument panel on each side of cab.<br />
b. To open vents, pull knobs (1) toward you; to close vents, push knobs in.<br />
TA466612
2-23. OPERATION TAILGATE (M1009)<br />
CAUTION<br />
<strong>TM</strong> 9-<strong>2320</strong>-<strong>289</strong>-10<br />
Tai!gate window must be completely lowered before tailgate can be opened<br />
or window glass may break. When window glass is completely lowered, approximately<br />
1/4 Inch (.7 cm) of glass will remain exposed.<br />
Glass does not seat completely in door. DO NOT drop heavy objects on<br />
glass or glass may break.<br />
a. Lower Taitgate Window.<br />
Unlock tailgate using ignition key.<br />
PuN out window regulator handle (1) at end indicated by the arrows.<br />
Turn handle (1) counterclockwise until desired position is reached, then rotate handle<br />
clockwise to a horizontal position and snap into place.<br />
CAUTION<br />
DO NOT attempt to toad large or heavy items into open window of truck. Window<br />
does all the way down into tailgate, so part of glass ia exposed end mey<br />
break<br />
b. Open Tailgate.<br />
(1) Completely lower window, as described above.<br />
(2) Lift release handle located on the inside of tailgate just below window.<br />
(3) Pull tailgate open.<br />
c. Close Tailgate. into position and close firmly.<br />
d. Rasie Window.<br />
PuN out window regulator handle (1) at end indicated by arrows.<br />
Tum handle (1) clockwise to raise window.<br />
When desired window height is reached, lock tailgate with key, rotate handle (1)<br />
counterclockwise) and snap into place.<br />
TA466613<br />
Change 5 2-63
<strong>TM</strong> 9-<strong>2320</strong>-<strong>289</strong>-10<br />
2-24. OPERATE WEAPONS MOUNT (ALL EXCEPT M1010)<br />
2-64<br />
NOTE<br />
Single mounts are located behind seat on ail trucks except Ml 009. M1009 has<br />
a double mount behind driver’s seat.<br />
a. Move latch (1) at top of mount to either side.<br />
b. Place weapon stock in boot (2) on floor and push barrel of weapon into top portion<br />
c. Move latch (1) to hold barrel of weapon in place.<br />
All Except M1009 and M1010<br />
TA466614
Section IV. OPERATE AMBULANCE<br />
2-25. OPERATE GAS-PARTICULATE FILTER SYSTEM (M1010)<br />
NOTE<br />
<strong>TM</strong> 9-<strong>2320</strong>-<strong>289</strong>-10<br />
PECULIAR COMPONENTS<br />
There ere seven hookup positions for the gas-particulate filter system, six of<br />
which may be used at the same time. Five ara in the patient compartment, two<br />
in the cab.<br />
The GPFU is designed to operate with the M25 Series protective mask.<br />
a. Put on protective mask, clear, and seal it.<br />
b. Put on helmet.<br />
NOTE<br />
Spring clip (1) must be removed for air filter assembly to function.<br />
c. Remove spring clip (1) from intake opening of gas-particulate filter unit.<br />
TA466615<br />
2-65
<strong>TM</strong> 9-<strong>2320</strong>-<strong>289</strong>-10<br />
CAUTION<br />
Frequently observe voltmeter (4) during GPFU operation. if<br />
yellow zone, start angine and recharge battaries.<br />
d. Turn GPFU switch (6) to “ON. ”<br />
WARNING<br />
needle (5) falls into<br />
Under extreme cold conditions, danger of frostbite exists. Put on protective mask,<br />
but DO NOT connect air duct to mask until heater has been on for 15 minutes.<br />
e. Remove air duct hose breakaway socket (3) from mounting (2),<br />
f. Connect air duct hose breakaway socket (3) to protective mask cannister.<br />
2-66<br />
TA466616
o<br />
on.<br />
9.<br />
h.<br />
<strong>TM</strong> 9-<strong>2320</strong>-<strong>289</strong>-10<br />
If air is too cold, turn M3 heater control knob (8) clockwise until indicator light (7) comes<br />
Turn M13 heater control knob (8) counterclockwise for more normal air temperature.<br />
i. When M3 heater is no longer required, turn heater control knob (8) counterclockwise until<br />
it stops, to turn off heater.<br />
(3).<br />
j. When no longer required, remove protective mask and stow air duct hose breakaway socket<br />
k. Push GPFU switch (4) to “OFF.”<br />
2-26. OPERATE AIR CONDITIONER (M1O1O)<br />
NOTE<br />
l For maximum efficiency, close all windowa<br />
minutes of operation of tha air conditioner.<br />
and vents after the firat few<br />
e “OUTSIDE-A/C NORMAL OR VENT” setting passes outside air through air<br />
conditioning outlet. It ia the position moat used.<br />
l “lNSIDE-A/C MAX setting recirculate cool eir from inaide the truck.<br />
a. Move air selection lever (3) from “CLOSED-OFF” to either “lNSIDE-A/C MAX” or “OUTSlDE-<br />
A/C NORMAL OR VENT.”<br />
TA466617<br />
2-67
<strong>TM</strong> 9-<strong>2320</strong>-<strong>289</strong>-10<br />
b. Move “VENT-A/C” toggle switch (2) to “VENT” for circulation of outside air or “A/C” for<br />
circulation of cooled air.<br />
c. Move fan switch (4) to any desired setting from “LO” to “HI, ” as required.<br />
d. Move “A/C-COLD” knob (1) clockwise for colder temperature setting,<br />
e. Move “A/C-COLD” knob (1) counterclockwise for warmer temperature setting<br />
f. When air conditioner operation is no longer required, move air selection lever (3) to<br />
“CLOSED-OFF.”<br />
g. Move fan switch (4) to “LO.”<br />
2-27. OPERATE PATlENT COMPAR<strong>TM</strong>ENT HEATER (M1010)<br />
2-68<br />
a. Start Heater.<br />
(1) Move blend air door lever (1) to “HOT” position,<br />
TA466618
.<br />
(2) Move fresh air door lever (5) to “OPEN” position,<br />
(3) Move HI-LO toggle switch (4) to either “HI” or “LO.”<br />
(4) Hold run-start switch (3) down to “START’<br />
comes on.<br />
<strong>TM</strong> 9-<strong>2320</strong>-<strong>289</strong>-10<br />
(5) When personnel heater light (2) comes on, move run-start switch (3) to “RUN. ”<br />
Operate Heater.<br />
position until personnel heater light (2)<br />
(1) Adjust outlet temperature by moving HI-LO toggle switch (4) to either “HI” or “LO”<br />
position.<br />
(2) Move blend air door lever (1) to any position from “HOT” to “COLD.”<br />
(3) Move tab (7) counterclockwise to open fresh air vent (6) in side wall of patient<br />
compartment as desired.<br />
c. Stop Heater.<br />
(1) Move run-start switch (3) to “OFF.”<br />
(2) Move blend air door lever (1) to “HOT.”<br />
(3) When personnel heater light (2) goes out, move fresh air door lever (5) to “CLOSED.”<br />
TA466619<br />
2-69
<strong>TM</strong> 9-<strong>2320</strong>-<strong>289</strong>-10<br />
2-28. OPERATE LITTER BERTHS (M1010)<br />
2-70<br />
a. Three-four Attendant Litter Berth Loading.<br />
NOTE<br />
Prior to loading e litter patient, litter securing streps must be used to secure<br />
patient to the litter. For more information, see FM 8-35.<br />
Attendant’s seat should be stowed forward with seat down to prevent<br />
interference with upper litter berth.<br />
(1) Raise front of one upper litter berth (1).<br />
(2) Place: support pins in holes in forward litter support bracket (5).<br />
(3) Lift litter and place front stirrups of litter on black groove (4) of inclined litter berth<br />
(1).<br />
(4) Slide litter into position onupper litter berth (1).<br />
TA466620
(5)<br />
(6)<br />
(7)<br />
(8)<br />
(9)<br />
(lo)<br />
(11)<br />
Pull out telescopic berth support rod (8).<br />
<strong>TM</strong> 9-<strong>2320</strong>-<strong>289</strong>-10<br />
Raise end of berth (1) so that berth supports can be attached.<br />
Rotate pivot wall bracket (2).<br />
Push spring clip in ceiling to release hanging bracket (3).<br />
Lower the litter berth (1) into brackets (2 and 3).<br />
Move locking tabs (14) down.<br />
Slide sleeves 13) down over tabs 14) to lock bracket (3) into place.<br />
(12) To load lower litter berth (6), lift litter and place front stirrups of litter on black groove<br />
(7) of lower berth.<br />
(13) Slide litter completely forward.<br />
TA466621<br />
2-71
<strong>TM</strong> 9-<strong>2320</strong>-<strong>289</strong>-10<br />
2-72<br />
b. Two Attendant Loading Method, Using Patient Assist System.<br />
(1) Raise front of one upper litter berth (l).<br />
(2) Place support pins in holes in forward litter support bracket (5).<br />
(3) Push spring clip in ceiling.<br />
(4) Pull hanging bracket (3) toward side of truck and down from ceiling, and unfold,<br />
(5) Remove patient assist boom (18) from stowage area.<br />
NOTE<br />
patient assist boom (18) can be mounted on either side of tha truck to load<br />
patients.<br />
(6) Mount patient assist boom (18) over rear door on either side of truck.<br />
TA466622
NOTE<br />
<strong>TM</strong> 9-<strong>2320</strong>-<strong>289</strong>-10<br />
When hooking up block and tackle (17) to boom, ensure locking lever is toward<br />
the direction of pull end thet ropes ere not twisted.<br />
(7) Hook block and tackle (17) to patient assist boom (18).<br />
NOTE<br />
The canvas portion of sling can come off the metal eye support for ease of<br />
positioning under patient.<br />
(8) Position litter with patient’s chest under hook (20) of block and tackle (17) with<br />
patient’s head away from truck.<br />
(9) Slide sling under litter at patient’s chest.<br />
(10) Reassemble sling.<br />
(11) Hook top of sling to hook (20) of block and tackle (17).<br />
WARNING<br />
Attendant pulling on rope (19) should wear gloves or aerioua rope burna may<br />
result.<br />
(12) One attendant must steady litter while other attendant pulls on rope (19) to raise litter.<br />
(13) To lock block and tackle (17), pull straight out to side.<br />
(14) To release block and tackle (17), pull straight down on rope.<br />
(15)<br />
(16)<br />
(17)<br />
NOTE<br />
Top Iitter berth must be Ioaded first.<br />
Guide litter onto litter berth (1) and push litter up berth as far as possible.<br />
One attendant must get into patient compartment to unhook block and tackle (17)<br />
and remove sling.<br />
Both attendants must push litter the rest of the way onto litter berth (1).<br />
TA466623<br />
2-73
<strong>TM</strong> 9-<strong>2320</strong>-<strong>289</strong>-10<br />
2 - 7 4<br />
(18) Hook block and tackle (17) to telescopic berth support rod (8)<br />
(19) Pull on rope (19) to raise litter berth (1),<br />
TA466624
(20) Secure litter berth (1) with brackets (2 and 3).<br />
(21) Swing locking tab (14) down.<br />
(22) Put sleeve (13) over tab (14) to hold bracket (3) in place<br />
<strong>TM</strong> 9-<strong>2320</strong>-<strong>289</strong>-10<br />
(23) Use block and tackle (17) to assist in placing patient in bottom litter berth in similar<br />
fashion.<br />
c. Litter Tie-down,<br />
(1) Attach tie-down (9) to metal loop (16) in litter berth (1).<br />
(2) Loosen hold-down (11) and strap (15), then relock<br />
(3) Place metal arc end (10) of hold-down (11) over handle of litter and pull strap (15)<br />
tight.<br />
(4) Press latch (12) down onto strap (15). Litter is now secure,<br />
(5) To release, pull up on strap (1 5).<br />
TA466625<br />
2-75
<strong>TM</strong> 9-<strong>2320</strong>-<strong>289</strong>-10<br />
2-29. OPERATE ATTENOANT’S SEAT<br />
out.<br />
2-76<br />
a.<br />
b.<br />
WARNING<br />
Use extreme caution. To prevent injury, be sure tha seat (2) is locked while the<br />
truck is in motion.<br />
Lower seat (2) by pushing back on seat with palm of hand and pulling retainer (3) up and<br />
Push seat (2) down.<br />
NOTE<br />
For ease of movemant, attendant should sit facing diract front.<br />
c. Sit down on seat (2).<br />
d. Raise or lower seat (2) as needed so that both feet are flat on floor.<br />
e. To raise or lower seat (2), firmly grasp seat and press rearmost pedal (5) at base of seat.<br />
f. Pull up or push down to desired height,<br />
g. Buckle seat belt (1).<br />
h. To move seat (2) forward or backward along track, press frontmost pedal (4) at base of seat.<br />
i. Push with feet.<br />
TA466626
2-30. OPERATE ACCESS STEPS<br />
2-31.<br />
a.<br />
b.<br />
c.<br />
d.<br />
e.<br />
Push locking lever (2) on right side of access steps (1).<br />
Lift and pull out, then push down on steps (1).<br />
Fold steps (1) out of frame.<br />
To atow steps, fold steps (1) into frame.<br />
Lift up and push steps (1) under frame until locking lever (2) engages.<br />
OPERATE FOCUS LIGHTS<br />
a. To remove focus light (1) from mounting block (2), pull light out.<br />
b. To mount focus light (1), press light into center of mounting block (2).<br />
c. To turn on focus light (1), move small switch at back of light.<br />
<strong>TM</strong> 9-<strong>2320</strong>-<strong>289</strong>-10<br />
d. TO turn off focus light (1), move small switch at back of light in opposite direction.<br />
TA466627<br />
2-77
<strong>TM</strong> 9-<strong>2320</strong>-<strong>289</strong>-10<br />
2-32. OPERATE DOMELIGHT<br />
NOTE<br />
Either switch marked “DOME LIGHT” will turn light on or off.<br />
a. Move domelight switch (3) on right side wall near door or domelight switch (2) under air<br />
conditioning unit once to turn on domelight (1) and a second time to turn off domelight.<br />
b. When service lights/blackout toggle switch is in “BLACKOUT ON” position, and rear doors<br />
or door between cab and patient compartment is open, domelight (1) goes off and a blackout light<br />
(4) comes on.<br />
(1),<br />
c. If in a blackout condition, make sure all curtains are closed before turning on domelight<br />
2-33. OPERATE BLACKOUT CURTAINS<br />
a. Lower curtains over all patient compartment windows during hours when blackout<br />
conditions are required.<br />
b. Secure curtains to velcro fasteners around window frames.<br />
2-34. OPERATE SPOTLIGHT<br />
2-78<br />
a.<br />
b.<br />
c.<br />
d.<br />
e.<br />
NOTE<br />
Spotlight will not operate in blackout mode.<br />
Move lever (2) to turn on spotlight.<br />
Rotate handle (1) counterclockwise to unlock,<br />
Direct light beam where needed by twisting and rotating handle (1).<br />
Push lever (2) in opposite direction to turn off spotlight when no longer needed.<br />
After operation, rotate handle (1) clockwise to lock.<br />
TA466628
2-35. OPERATE FLOODLIGHTS<br />
NOTE<br />
Floodlights will not operate in blackout mode.<br />
a. Push switch (1) to turn on floodlight on left side of truck.<br />
b. Push switch (2) to turn on floodlight on right side of truck.<br />
C. Push switch (1) to turn off floodlight on left side of truck.<br />
d. Push switch (2) to turn off floodlight on right side of truck.<br />
<strong>TM</strong> 9-<strong>2320</strong>-<strong>289</strong>-10<br />
TA466629<br />
2-79
<strong>TM</strong> 9-<strong>2320</strong>-<strong>289</strong>-10<br />
Section V. OPERATE AUXILIARY EQUIPMENT<br />
2-36. OPERATE WINTERIZATION KIT HEATERS<br />
2-80<br />
a. Operate Underhood Heaters, Below –10 O<br />
F (–24 0<br />
C).<br />
(1) Make sure that ignition key switch is moved to “OFF.”<br />
(2) Pull battery/interior control (7) to “BATTERY.”<br />
(3) Move battery/interior heater hi-low switch (3) to ‘“HI.”<br />
(4) Hold battery/interior heater run-start switch (4) to “START” until light (2) comes on<br />
to show burner is operating (approximately 3 minutes).<br />
(5) When light (2) comes on, move switch (4) to “RUN. ”<br />
NOTE<br />
If heater blower does not come on in 5 minutes, heater will shut itself off.<br />
(6) If heater blower does not come on, move switch (4) to “OFF.”<br />
(7) Wait 5 seconds,<br />
(8)<br />
(9)<br />
(10)<br />
(11)<br />
(12)<br />
Move switch (4) to “START” again.<br />
Make sure that “RESTART” light (5) comes on.<br />
Move engine heater switch (6) to “ON. ”<br />
Light (1) will come on in approximately 4 minutes to show burner is operating<br />
Wait before trying to start engine.<br />
(a) Wait forty-five minutes if outside temperature is –50°F (–46 0<br />
C).<br />
(b) Wait thirty-five minutes if outside temperature is –40 0<br />
F (–41°C).
(c) Wait twenty minutes if outside temperature is -30 0<br />
F (-35°C).<br />
(d) Wait ten minutes if outside temperature is -20 0<br />
F (-30 0<br />
C).<br />
(13) Once time period has elapsed, attempt to start engine normally.<br />
(14) After engine is started, move engine heater switch (6) to "OFF."<br />
b. Operate Defroster/Interior Heater.<br />
NOTE<br />
<strong>TM</strong> 9-<strong>2320</strong>-<strong>289</strong>-10<br />
Engine must be running for defroster/interior heating. The battery/interior<br />
heater will still be running.<br />
(1) Move battery/interior heater run-start switch (4) to "RUN."<br />
(2) Push battery/interior control (7) to "INTERIOR."<br />
(3) To defrost, move upper heater control lever (6) to "DEF."<br />
(4) Move lower heater control lever (9) to “’COLD.”<br />
(5) Move fan speed control (10) to "HI."<br />
(6)<br />
(7)<br />
(8)<br />
(9)<br />
(10)<br />
(11)<br />
To haat cab, move upper heater control lever (8) to "HEATER."<br />
Move lower heater control lever (9) to maximum "COLD" for best results.<br />
Move battery/interior hi-low switch (3) to either "HI" or "LOW."<br />
Move fan speed control (10) to "HI."<br />
If auxiliary cab heat is not required, move battery/interior run-start switch (4) to "OFF."<br />
For normal cab heating and ventilation, leave battery/interior heater control (7) set<br />
to "INTERIOR" and operate regular heater controls.<br />
TA466631<br />
2-81
<strong>TM</strong> 9-<strong>2320</strong>-<strong>289</strong>-10<br />
c. Operate Enclosed Cergo Area Personnel Heater.<br />
NOTE<br />
Engine should be running during heater operation to prevent battery drain.<br />
(1) Move run-start switch (12) to “START” and hold until amber light on heater control<br />
panel lights, then move switch to “RUN.”<br />
(2) Move HI-LO toggle switch (11) to either "HI" or "LO" for preferred fan operation.<br />
(3) Move air selection lever from "INSIDE AIR" to "OUTSIDE AIR" to mix heated air and<br />
fresh air as desired.<br />
(4) When heater is no longer needed, move run-start switch (12) to "OFF." Make sure that<br />
amber light goes off.<br />
d. Differences Between Models.<br />
2-82 Change 5<br />
TA466632
2-37. CARGO BOX COVER KIT<br />
a. Stow Cargo Cover.<br />
(1) Release front (3) and rear (4) support straps.<br />
<strong>TM</strong> 9-<strong>2320</strong>-<strong>289</strong>-10<br />
(2) From rear of truck, push bows (1) and canvas (2) forward, folding canvas around bows.<br />
(3) Once bows (1) are completely folded down against front of cargo box, secure with<br />
atraps.<br />
b. Erect Cargo Box Cover.<br />
(1) Remove atraps holding canvas (2) and bows (1) together.<br />
(2) Push bows (1) and canvas (2) toward rear of truck, until canvas is spread evenly and<br />
bows are fully extended.<br />
(3) Secure front (3) and rear (4) retaining straps to brackets on cargo bed wall.<br />
(4) If situation permits, sides of cover maybe rolled up and secured with strings on inside<br />
of cover.<br />
TA466633<br />
2-83
<strong>TM</strong> 9-<strong>2320</strong>-<strong>289</strong>-10<br />
2-38. INSTALL AND REMOVE TROOP SEAT KIT<br />
2-84<br />
NOTE<br />
Assistance will be required to perform tha following tasks.<br />
a. Install Troop Saat Kit.<br />
(1)<br />
(2)<br />
(3)<br />
(4)<br />
(5)<br />
(6)<br />
(7)<br />
(8)<br />
(9)<br />
Remove clamps (1) from seat assemblies by pulling hitch pin out of clamp pin hole.<br />
Place a troop seat assembly (2) on top of side rail (6) of cargo box.<br />
Tip seat assembly (3) outward to allow support (9) to fit in stake pockets (8) and to<br />
allow lower flange (7) to go beneath pockets.<br />
Place front and middle clamps (1) into stake pockets (8) with clamp hooked over rack.<br />
Ensure that plugs on bottoms of clamps (1) are placed through bottom of stake pockets<br />
(8) and holes in bottom of flange (7) on rack.<br />
Place rear clamp (4) in rear stake pocket (5) so that plug goes through bottom of pocket<br />
and hole in bottom flange (7).<br />
If required, insert wheel wrench in rear pocket (5). Apply pressure (leverage) against<br />
rear clamp (4) and force plug on side of clamp through hole in rear pocket and hole<br />
in rack.<br />
Insert hitch pins through holes in plugs on all clamps (l).<br />
Repeat steps for other seat assembly.<br />
b. Remove Troop Saat Kit.<br />
(1) Put seats in upright position and replace pins.<br />
(2) Remove hitch pin and clamp (1) from all three pockets (5 and 8)<br />
TA466634
<strong>TM</strong> 9-<strong>2320</strong>-<strong>289</strong>-10<br />
(3) Remove troop seat assemblies (2) and install clamps 1) and hitch pins back on seat<br />
assemblies.<br />
(4) Stow seats.<br />
2-39. OPERATE TROOP SEAT KIT<br />
a. To Stow Seat.<br />
(1) Standing in cargo box and facing seat (1), remove quick-release pin and move seat<br />
to a stowed position.<br />
(2) When seat (1) is in stowed position, fold legs in and place quick-release pin through<br />
leg nearest the cab on all seats,<br />
b. To Place Seat in Down Position.<br />
(1) Remove quick-release pin and place legs in angle where truck side and truck floor<br />
meet.<br />
(2) Place quick-release pin in hole provided in leg under hinge pin,<br />
(3) Hook safety strap (2) into eye bolts (3) across back of truck.<br />
TA466635<br />
2-85
<strong>TM</strong> 9-<strong>2320</strong>-<strong>289</strong>-10<br />
Section VI. OPERATE UNDER UNUSUAL CONDITIONS<br />
2-40. SLAVE START TRUCK<br />
2-86<br />
WARNING<br />
When slave starting, use NATO slave cables that do not hava loose or missing<br />
insulation. DO NOT procead if suitable cables are not available. DO NOT use<br />
civilian type jumper cables.<br />
CAUTION<br />
Wait 3 to 5 minutes after hooking up slave cable to "dead" truck, before<br />
attempting to start it. Damage to tha truck’s electrical system may result if<br />
the truck is started sooner.<br />
If "dead" truck’s engine doas not start within 15 seconds, release ignition key.<br />
Wait 3 to 5 minutes before repeating start procedure to pravent overheating<br />
the starter and damaging the battaries of the "live" truck. If engina does not<br />
start aftar several attempts, organizational maintenance must perform additional<br />
maintenance.<br />
Any vehicle with a 24 v system is suitable for slave cable starting. DO NOT<br />
attempt to slave start this truck with a 12 v system vehicle.<br />
NOTE<br />
Before slave starting, make sure checks have been made to determine if the<br />
problem is low or dead batteries. If ona battery is missing, DO NOT attempt<br />
to slave start.<br />
If a vehicle other than a CUCV Series truck is used to slave start a CUCV Series<br />
truck, refar to the Operator’s Manual for that vehicle for any special slave<br />
starting procedures.<br />
a. Connect a NATO slave cable to slave receptacle (1) on “dead” truck.
.<br />
c.<br />
d.<br />
e.<br />
f.<br />
g.<br />
Connect other end of NATO slave cable to slave receptacle on “live” vehicle.<br />
Ensure that engine in “live” vehicle is operating.<br />
Start engine of “dead” truck.<br />
Remove slave cable from “live” truck.<br />
Remove slave cable from “’dead” truck.<br />
Stow slave cable.<br />
2-41. TOW DISABLED TRUCK<br />
CAUTION<br />
<strong>TM</strong> 9-<strong>2320</strong>-<strong>289</strong>-10<br />
l NEVER tow by lifting front or rear wheels off ground when truck ie loadad.<br />
Stress may cause structural damage.<br />
A tow bar must be used to prevent damage to truck during towing.<br />
If truck is to be towed by a wrecker, use only equipment designed for this<br />
purpose.<br />
l A safety chain system must be used for all towing. Put safety chain around<br />
a portion of truck frame.<br />
o When towing a disabled truck, always shift transmission gearshift Iever to "N"<br />
(Neutral), transfer case control lever to “N” (Neutral), unlock front hubs, and<br />
release parking brake. DO NOT tow a truck which has become disabled<br />
because of damaged transfer case, axle, or transmission. Notify your<br />
supervisor.<br />
. NEVER tow a truck at speeds over 35 mph (56 kph).<br />
. NEVER allow passangers to rida in a towed truck for any reason.<br />
a. Tow Truck On All Four Wheels Using Tow Bar.<br />
NOTE<br />
o CUCV Series trucks may be towed on all four wheels with a tow bar, at speeds<br />
less than 35 mph (56 kph), for distances up to 50 miles (80 km), providad there<br />
is no damage to power train and steering is operable.<br />
l For distances over 5O miles, hava organizational maintenance disconnect rear<br />
propshaft at rear axle carrier and front propahaft at front axle carrier, and<br />
secure in a safe position.<br />
(1) Remove lifting shackles from front bumper mounting of truck and stow in disabled<br />
truck.<br />
(2) Connect legs of tow bar to lifting shackle mounting points on bumper and secure with<br />
mounting pins.<br />
NOTE<br />
If towing a disabled CUCV Series truck with a truck that is not CUCV Series,<br />
refer to Operator’a Manual for that truck for any spatial procedures during<br />
towing.<br />
(3) Connect other end of tow bar to tow pintle of towing truck.<br />
(4) Unlock steering by turning ignition key to “’OFF.”<br />
2-87
<strong>TM</strong> 9-<strong>2320</strong>-<strong>289</strong>-10<br />
(5) Shift transmission gearshift lever to "N" (Neutral).<br />
(6) Shift transfer case control lever to “N” (Neutral).<br />
(7) Unlock locking hubs.<br />
(8) Install safety chains.<br />
(9) Release parking brake.<br />
NOTE<br />
Remember, power assist for brakes and steering will not be available with engine<br />
off.<br />
(10) Tow truck<br />
b. Tow Truck on Rear Wheels.<br />
NOTE<br />
For distances over 50 miles, have organizational maintenance disconnect<br />
propshaft at rear axle carrier and secure in a safe position.<br />
(1) Unlock steering by turning ignition key to "OFF,"<br />
(2) Shift transmission gearshift lever to "N" (Neutral).<br />
(3) Shift transfer case control lever to "N" (Neutral),<br />
(4) Unlock locking hubs,<br />
(5) Release parking brake<br />
c. Tow Truck on Front Wheels.<br />
NOTE<br />
For distances over 50 miles, have organizational maintenance disconnect<br />
propshaft at front axle carrier and secure in a safe position.<br />
Steering wheel must be firmly secured with wheels in straight-ahead position.<br />
(1) Unlock steering by turning ignition key to "OFF."<br />
(2) Shift transmission gearshift lever to "N" (Neutral).<br />
(3) Shift transfer case control lever to "N" (Neutral).<br />
(4) Unlock locking hubs.<br />
NOTE<br />
DO NOT use truck’s steering column lock or seat belts for clamping steering<br />
wheel.<br />
(5) Firmly secure steering wheel in the straight-ahead position.<br />
(6) Release parking brake,<br />
2-42. OPERATE IN EXTREME COLD<br />
2-88<br />
a. Truck Start-up.
(1)<br />
(2)<br />
(3)<br />
(4)<br />
(5)<br />
(6)<br />
(7)<br />
<strong>TM</strong> 9-<strong>2320</strong>-<strong>289</strong>-10<br />
If truck is equipped with a winterization kit, follow operating instructions contained<br />
in paragraph 2-36.<br />
If not equipped with a winterization kit, continue with steps below,<br />
Let engine warm up for at least 5 minutes after it is started.<br />
Drive truck slowly for a short distance as a test run.<br />
Take it easy until truck is warmed up enough to allow normal driving.<br />
Frequently check instruments for any sign of trouble.<br />
If instrument readings are abnormal after engine is warm, IMMEDIATELY SHUT<br />
DOWN ENGINE and investigate.<br />
b. At Halt or Parking.<br />
(1) Park truck out of wind if possible.<br />
(2) If shelter is unavailable, park truck facing away from wind.<br />
(39 If truck will be parked for more than a day and high, dry ground is not available:<br />
(a) Make a footing of planks or brush.<br />
‘ NOTE<br />
DO NOT use parking brake in extremely cold weather. Parking brake cable could<br />
freeze.<br />
(b) Shift transmission gearshift lever to “P” (Park) and chock wheels.<br />
(c) Make sure transfer case is in gear.<br />
(d) Clean off any snow, ice, or mud from all parts of truck as soon as possible after<br />
parking.<br />
(e) Protect engine and accessories against loose, drifting snow which can melt and<br />
then refreeze, causing damage when truck is started up.<br />
(f) Cover truck with canvas if possible.<br />
(g) Check tires with tire gage for proper inflation pressure.<br />
2-43. OPERATE IN EXTREME HEAT<br />
a. Be alert for engine overheating.<br />
b. Engine may overheat during following situations:<br />
(1) Making long, hard pulls in lower gear ranges up steep grades.<br />
(2) Driving in slow, heavy traffic.<br />
(3) Idling for extended periods of time.<br />
(4) Hauling loads close to truck’s maximum capacity.<br />
(5) Operating over soft terrain (mud, sand, etc.).<br />
c. To avoid unnecessary overheating conditions:<br />
2-89
<strong>TM</strong> 9-<strong>2320</strong>-<strong>289</strong>-10<br />
(1) DO NOT operate with transmission in lower gears.<br />
(2) If engine starts to stall, shift to next lower gear.<br />
(3) Monitor engine coolant temperature light and pull over for cooling off period when<br />
necessary.<br />
(4) If any problems develop, such as overheating, refer to Troubleshooting, Table 3-1.<br />
d. At halt or parking:<br />
(1) Park under cover if possible. Direct sunlight will shorten life of rubber, fabric, plastic,<br />
and paint.<br />
(2) If cover cannot be found, protect truck with tarpaulins. If entire truck cannot be<br />
covered, cover window glass and engine compartment first.<br />
2-44. OPERATE IN UNUSUAL TERRAIN<br />
CAUTION<br />
M1028A2 and M1028A3 rear is wider than front. Use caution in unusual terrain,<br />
so that flared fender is not damaged.<br />
DO NOT use "4H" or "4L" trensfer case ranges on dry, hard-surfaced roads or<br />
the transfer case will bind, tires will wear excessively, and damage to truck may<br />
result.<br />
NOTE<br />
Four-wheel drive is used to provide additional traction and lower gear for use in<br />
off-road operations and to provide low-speed pulling power in unusual conditions.<br />
The four-wheel ("4L" and "4H") ranges of the transfer case should be used ONLY<br />
when greater traction and power are required in off-road operations.<br />
a. General Guidelines. Use good judgement when driving off-road over rough or unusual<br />
terrain. Follow these guidelines:<br />
(1) Keep engine at moderate speeds.<br />
(2) DO NOT let wheels start spinning. If wheels start to spin, ease off accelerator pedal<br />
and attempt to regain traction.<br />
(3) DO NOT let air out of tires in sand to gain traction.<br />
b. Use of "4H" and "4L" Transfer Case Range. Use four-wheel drive ONLY on soft ground<br />
or when driving on ice, through deep, loose snow, deep sand and deep mud, and where maximum<br />
traction is a must.<br />
c. Driving Techniques in Four-wheel Drive.<br />
NOTE<br />
A truck in four-wheel drive will accelerate much faster than a two-wheel drive<br />
truck on snow, but will not stop any more quickly.<br />
Locking hubs must be in the "LOCK" position.<br />
(1) Before climbing a steep grade, shift transfer case control lever to "4L" and<br />
transmission gearshift lever to "1." If wheels start to slip, “walk” the truck the last<br />
few remaining feet of a hill by swinging front wheels sharply left and right if situation<br />
permits. This action will provide fresh “bite” into the surface and will usually result<br />
in enough traction to complete climb,<br />
(2) You can proceed safely down a grade in four-wheel drive by shifting transfer case<br />
control lever to "4L" and transmission gearshift lever to "1." Let the truck go slowly<br />
down the hill with all four wheels turning against engine compression.<br />
2-90 Change 5
<strong>TM</strong> 9-<strong>2320</strong>-<strong>289</strong>-10<br />
(3) When moving across e slope, choose the Ieast angle possible, keep moving, and avoid<br />
turning quickly.<br />
If you go into a skid, DO NOT USE BRAKES until you ara straightened out. It will<br />
only cause greater loss of control.<br />
d. Snowy or Icy Roada and Terrain. If rear end skidding occurs:<br />
2-45. FORDING<br />
a.<br />
b.<br />
c.<br />
d.<br />
e.<br />
f.<br />
9.<br />
brakes.<br />
(1) Turn steering wheel in direction of skid.<br />
(2) Let up on<br />
manner.<br />
accelerator pedal and apply service brake pedal in a gradual, pumping<br />
CAUTION<br />
Never attempt to ford e crossing deeper than 20 inches (51 cm). The truck’s<br />
components may be dameged.<br />
h.<br />
Determine feasibility of fording by making sure bottom of crossing is not too soft to support<br />
truck.<br />
Shift transmission gearshift lever to "1."<br />
Shift transfer case control lever to "4L."<br />
Slowly enter water, but don’t let engine stall.<br />
Limit speed to 5 mph (8 kph).<br />
After fording, don’t rely on brakes until they have been tested.<br />
Depress brake pedal with light pressure several times while moving truck. This will dry out<br />
Do after fording maintenance. Refer to paragraph 3-11.<br />
2-91
<strong>TM</strong> 9-<strong>2320</strong>-<strong>289</strong>-10<br />
2-46. OPERATE SWINGFIRE HEATER<br />
2-92<br />
a. Prepare Swingfire Heater for Operation.<br />
(1) Remove fuel tank cap (1). Fill heater fuel tank (5) with clean gasoline, and install and<br />
tighten fuel tank cap.<br />
(2) Check operation of air shut-off valve (2) by pushing pressure pin (3). Pressure pin must<br />
bounce back.<br />
(3) Ensure that diaphragm valve (4) is in the "+" position<br />
b. Start Swingfire Heater.<br />
WARNING<br />
DO NOT operate heater in enclosed areas. Exhaust gases could cause injury or<br />
death.<br />
(1) Plug starting cable (10) connector into receptacle on left front fender of truck.<br />
(2) Plug other end of starting cable (10) into heater handle (1 1).<br />
(3) Squeeze pump lever (7), which pushes on pushbutton switch (6).<br />
(4) Listen for humming sound. If humming sound is not heard, go back to step (1) and<br />
repeat procedure. If humming is heard, continue.<br />
NOTE<br />
If during starting procedure a thick white fuel fog comes from pulsation pipe and<br />
pulsation stops, heater is flooded. (See Correction of Flooded Condition, below.)<br />
(5) Turn fuel regulator knob (8) fully counterclockwise (Closed).
NOTE<br />
<strong>TM</strong> 9-<strong>2320</strong>-<strong>289</strong>-10<br />
DO NOT pump heater handle (11) while depressing pushbutton switch (6).<br />
(6) If temperature is above 0 0<br />
F (-18°C) go on to step (7). If temperature is below 0 0<br />
F<br />
(-18°C) squeeze pump lever (7) to depress pushbutton switch (6) to activate<br />
preheating plug and hold down for the following time periods:<br />
(a) 0 0<br />
F to -20 0<br />
F (-18°C to -29 0<br />
C) depress for 2 minutes.<br />
(b) -20 0<br />
F to -30 0<br />
F (-29°C to -30 0<br />
C) depress for 3 minutes.<br />
(c) -30 0<br />
F to -40 0<br />
F (-34°C to -40 0<br />
C) depress for 4 minutes.<br />
(d) -40 0<br />
F to -50 0<br />
F (-40 0<br />
C to -46 0<br />
C) depress for 5 minutes.<br />
(7) Move pump lever (7) forward and backwards 3 or 4 times.<br />
(8) With one hand, turn fuel regulator knob (8) clockwise (Open) 1/2 to 1 turn if<br />
temperature is above 0 0<br />
F (-18°C), or 1 to 1-1/2 turns if temperature is below 0 0<br />
F<br />
C), while continuing to operate pump lever (7) with other hand.<br />
(18 0<br />
(9) When first pulsating sounds are heard, continue pumping and adjusting fuel regulator<br />
knob (8) until pulsating sounds come at regular intervals.<br />
(10) At this point, stop pumping; the heater has been started.<br />
(11) Allow heater to operate for 3 to 5 minutes while fine adjusting the fuel/air mixture<br />
using the fuel regulator knob (8).<br />
(12) Once heater is properly operating, disconnect the starting cable (10) from the heater<br />
and from the truck, and stow the cable.<br />
TA466638<br />
2-93
<strong>TM</strong> 9-<strong>2320</strong>-<strong>289</strong>-10<br />
c. Correction of Flooded Condition,<br />
(1)<br />
(2)<br />
(3)<br />
(4)<br />
NOTE<br />
Dense white fuel fog is the indication that tha heater has flooded.<br />
Close fuel regulator knob (8),<br />
Operate pump lever (7) until surplus fuel has been blown out exhaust pipe and<br />
pulsations start again,<br />
Once pulsations start again, open fuel regulator knob (8) 1/2 to 2 turns and fine adjust<br />
the fuel/air mixture.<br />
If heater has flooded to point that fuel overflows the diaphragm valve into the mixing<br />
chamber, perform the following steps:<br />
(a) Disconnect starting cable (10) from truck receptacle,<br />
(b) Unscrew wingnut (9).<br />
(c) Open chamber cover.<br />
(d) Tilt heater to the left to let fuel run out.<br />
(e) Clean up runoff fuel and allow chamber to dry.<br />
(f) Restart heater.<br />
2-47. START TRUCK WITH AI13 OF SWINGFIRE HEATER<br />
a. When heater is operating, and starting cable is removed, open clamp by turning turn buckle<br />
(1) counterclockwise,<br />
b. Position heater in water jacket, at left front fender of truck, and rotate turnbuckle (1) 16<br />
full turns to lock heater clamp to water jacket.<br />
2-94<br />
TA466639
Allow heater to operate until frost melts from engine block.<br />
Start engine in normal manner<br />
<strong>TM</strong> 9-<strong>2320</strong>-<strong>289</strong>-10<br />
With engine running, turn off heater by completely closing fuel regulator knob (2).<br />
Remove heater from water jacket.<br />
NOTE<br />
If heater is not to be used for 48 hours or longer, drain all fuel from fuel tank.<br />
g. Allow heater to cool before stowing.<br />
TA466640<br />
2-95/(2-96 blank)
3-1. GENERAL<br />
CHAPTER 3<br />
MAINTENANCE INSTRUCTIONS<br />
Section I. LUBRICATION<br />
NOTE<br />
<strong>TM</strong> 9-<strong>2320</strong>-<strong>289</strong>-10<br />
Lubrication procedures ere performed et the organizational maintenance level.<br />
You may be required to assist the mechanic.<br />
Periodic servicing ensures that the truck will operate at peak performance. Lubrication Order<br />
LO 9-<strong>2320</strong>-<strong>289</strong>-12 gives complete cleaning and lubricating instructions. Refer to “NOTES” for<br />
specific instructions on lubrication. Service intervals are based on normal operation under normal<br />
conditions.<br />
3-2. LUBRICATION ORDER LO 9-<strong>2320</strong>-<strong>289</strong>-12<br />
A copy of the Lubrication Order (LO) is issued with each truck and must remain with it at all<br />
times. If you receive the truck without a copy, immediately notify your supervisor.<br />
REMEMBER:<br />
a. The time to change oil is when starting or other operations become sluggish, or when<br />
outside temperatures move out of the appropriate range for the type of oil currently in the truck.<br />
Do not wait for the next normally scheduled oil change.<br />
b. When you are operating under extreme conditions, lubricants should always be changed<br />
more frequently than the normal intervals specified by the LO. Lubricants break down or become<br />
contaminated more frequently under extreme conditions.<br />
3-1
<strong>TM</strong> 9-<strong>2320</strong>-<strong>289</strong>-10<br />
3-3. SCOPE<br />
Section Il. TROUBLESHOOTING<br />
a. This section contains troubleshooting information that will help you locate and correct<br />
operating problems. Each problem is followed by a list of tests or inspections. These will help you<br />
to determine probable causes and corrective actions in the order listed.<br />
b. Not all malfunctions that mayoccur are listed. All tests or inspections and corrective actions<br />
are not listed. If a malfunction is not listed or is not corrected after you take the listed actions, return<br />
to organizational maintenance, if you can. Otherwise, stop the truck and notify your supervisor.<br />
3-4. TROUBLESHOOTING<br />
CAUTION<br />
When you get the truck running again, IMMEDIATELY RETURN to organizational<br />
maintenance. Corrective action is designed only to let you return to motor pool.<br />
Continued operations could damage the truck.<br />
a. Basic Procedure. If you have trouble starting the truck or have trouble on the road, some<br />
simple repairs can be made to get the truck running again. First, identify the MALFUNCTION (or<br />
problem). Then locate it in Table 3-1 and follow the directions in the CORRECTIVE ACTION column.<br />
b. If You Cannot Fix It. If you cannot pinpoint the problem, or if it is too serious to repair,<br />
stop the truck and notify your supervisor at once.<br />
3-2
3-5. SYMPTOM INDEX<br />
ELECTRICAL SYSTEM<br />
ENGINE<br />
TIRES<br />
<strong>TM</strong> 9-<strong>2320</strong>-<strong>289</strong>-10<br />
Troubleshooting<br />
Procedure<br />
Page<br />
Gages:<br />
Inoperative . . . . . . . . . . . . . . . . . . . . . . . . . . . . . . . . . . . . . . . . . . . . . . . . . . . . . . 3-7<br />
Operating abnormally . . . . . . . . . . . . . . . . . . . . . . . . . . . . . . . . . . . . . . . . . . . . . . . . . . 3-7<br />
Horn:<br />
Inoperative . . . . . . . . . . . . . . . . . . . . . . . . . . . . . . . . . . . . . . . . . . . . . . . . . . . . . .. 3-7<br />
Operates continually . . . . . . . . . . . . . . . . . . . . . . . . . . . . . . . . . . . . . . . . . . . . . . . . . . . . 3-7<br />
Lack of Power . . . . . . . . . . . . . . . .. . . . . . . . . . . . . . . . . . . . . . . . . . . . . . . . . . . . 3-6<br />
Lubricant Leaks . . . . . . . . . . . . . . . . . . . . . . . . . . . . . . . . . . . . . . . . . . . . . . . . . . . . . 3-7<br />
Misfires . . . . . . . . . . . . . . . . . . . . . . . . . . . . . . . . . . . . . . . . . . . . . . . . . . . . . . . . . . . . . . . . . . 3-7<br />
Overheats . . . . . . . . . . . . . . . . . . . . . . . . . . . . . . . . . . . . . . . . . . . . . . . . . . . . . . . . . . . . . . . . 3-6<br />
Will Not<br />
Continue to run . . . . . . . . . . . . . . . . . . . . . . . . . . . . . . . . . . . . . . . . . . . . . . . . . . . . . . . . 3-5<br />
Idle . . . . . . . . . . . . . . . . . . . . . . . . . . . . . . . . . . . . . . . . . . . . . . . . . . . . . . . . . . . . . . . . . . 3-7<br />
Start, but turns over . . . . . . . . . . . . . . . . . . . . . . . . . . . . . . . . . . . . . . . . . . . 3-4<br />
Turnover . . . . . . . . . . . . . . . . . . . . . . . . . . . . . . . . . . . . . . . . . . . . . . . . . . . . . . . . . . . . . . 3-4<br />
Abnormal Wear . . . . . . . . . . . . . . . .. . . . . . . . . . . . . . . . . . . . . . . . . . . . . . . . . . . .<br />
TRANSFER CASE<br />
Tranafer Case Remains in Four-wheel Drive . . . . . . . . . . . . . . . . . . . . . . . . . . . . . . . .<br />
3-8<br />
3-8<br />
3-3
<strong>TM</strong> 9-<strong>2320</strong>-<strong>289</strong>-10<br />
MALFUNCTION<br />
TEST OR INSPECTION<br />
CORRECTIVE ACTION<br />
Table 3-1. Troubleshooting<br />
1. ENGINE WILL NOT TURN OVER WHEN IGNITION SWITCH IS TURNED TO THE START POSITION<br />
CAUTION<br />
Use only NATO slave cables and slave receptacle mounted on front to slave start<br />
the truck. DO NOT attempt to use civilian style jumper cables to slave start truck.<br />
Damage can occur to both “dead” and “live” trucks if slave procedures and this<br />
caution are not followed.<br />
Step 1. Check position of transmission gearshift lever.<br />
Shift transmission gearshift lever to “P” (Park) or “N” (Neutral).<br />
Step 2. See if battery connections are loose<br />
Notify your supervisor.<br />
Step 3. Battery may be discharged. Look at charge indicator on battery.<br />
Notify your supervisor if battery is discharged.<br />
DARKENED DARKENED LIGHT<br />
INDICATOR INDICATOR YELLOW OR<br />
(WITH GREEN (NO GREEN BRIGHT<br />
DOT) DOT) INDICATOR<br />
MAY BE SLAVE MAY BE SLAVE DO NOT SLAVE<br />
STARTED STARTED START<br />
2. ENGINE TURNS OVER BUT WILL NOT START<br />
3-4<br />
Step 1. Fuel tank may be empty. Check gage with ignition switch in “ON” position.<br />
If empty, fill tank.<br />
NOTE<br />
DO NOT put fuel in intake manifold or use starting fluids.<br />
Assistant will be required for the following procedures.<br />
TA466641
MALFUNCTION<br />
TEST OR INSPECTlON<br />
CORRECTIVE ACTION<br />
Table 3-1. Troubleshooting - Continued<br />
Step 2. Open air bleed valve (1) on top of fuel filter on front of firewall<br />
<strong>TM</strong> 9-<strong>2320</strong>-<strong>289</strong>-10<br />
Step 3. Crank engine at 10-15 second intervals after WAIT light goes out, Continue until<br />
fuel flows out of air bleed valve (1).<br />
Step 4. Close air bleed valve (1).<br />
Step 5. Crank engine for 10 seconds. If it does not start, wait 15 seconds and crank engine<br />
again after WAIT light goes out. Refer to paragraph 2-8 for proper starting<br />
procedures.<br />
Step 6. If after three attempts, engine does not start, notify your supervisor.<br />
Step 7. Battery may be weak.<br />
Use same procedures outlined in Malfunction 1, Step 3.<br />
3. ENGINE STARTS BUT DOES NOT CONTINUE TO RUN<br />
Step 1. Fuel level may be low. Check fuel gage with ignition switch in the "ON" position.<br />
Add fuel if necessary.<br />
Step 2. Check for water in fuel.<br />
Drain fuel filter following procedures outlined in paragraph 3-7. Restart<br />
engine. Refer to paragraph 2-8.<br />
TA466642<br />
Change 5 3 - 5
<strong>TM</strong> 9-<strong>2320</strong>-<strong>289</strong>-10<br />
MALFUNCTION<br />
TEST OR INSPECTION<br />
CORRECTIVE ACTION<br />
4. ENGINE OVERHEATING<br />
Table 3-1. Troubleshooting - Continued<br />
WARNING<br />
NEVER remove radiator cap when engine is hot. This is a pressurized cooling<br />
system and escaping steam or hot water can cause serious burns.<br />
Step 1.<br />
Step 2.<br />
Step 3.<br />
Step 4.<br />
Check coolant level in see-through recovery tank. Observe low coolant warning<br />
light to see if it is on.<br />
If coolant level is low, obtain coolant mixture from organizational maintenance<br />
and put it in recovery tank. Refer to LO 9-<strong>2320</strong>-<strong>289</strong>-12.<br />
CAUTION<br />
DO NOT bend radiator cooling fins.<br />
Look at outside of radiator for obstructions such as leaves, etc.<br />
Remove anything that blocks the core or impedes air flow.<br />
Check cooling system hoses for evidence of leaks (wet spots, escaping steam, or<br />
water).<br />
Notify your supervisor.<br />
Check engine oil level.<br />
Refer to LO 9-<strong>2320</strong>-<strong>289</strong>-12.<br />
WARNING<br />
NEVER remove radiator cap when engine is hot. This is a pressurized cooling<br />
system and escaping steam or hot water can cause serious burns.<br />
CAUTION<br />
Kaep a careful eye on oil pressure and engine coolant temperature lights when<br />
you are driving a truck that you know is low on oil or coolant. You may still be<br />
losing oil or coolant. If either light comes on, IMMEDIATELY SHUT DOWN<br />
ENGINE and do not mova truck any further.<br />
5. LACK OF POWER<br />
3-6<br />
Step 5. After engine cools down, check coolant level in radiator. Radiator should be full.<br />
If coolant level is low, obtain coolant mixture from organizational maintenance<br />
and put it in radiator. Refer to LO 9-<strong>2320</strong>-<strong>289</strong>-12.<br />
Step 1. Your parking brake may be applied.<br />
Release your parking brake.<br />
Step 2. Recheck your load. You could be overloaded.<br />
Lighten load, if possible, or use a lower driving range.
MALFUNCTION<br />
TEST OR INSPECTION<br />
CORRECTIVE ACTION<br />
6. ENGINE WILL NOT IDLE OR IT MISFIRES<br />
Table 3-1. Troubleshooting - Continued<br />
WARNING<br />
<strong>TM</strong> 9-<strong>2320</strong>-<strong>289</strong>-10<br />
Care should be taken when working eround engine menifold. Hands or arms<br />
could be burned.<br />
Step 1. Check for water in fuel,<br />
Drain fuel filter. Refer to paragraph 3-7.<br />
7. GAGES INOPERATIVE OR OPERATING ABNORMALLY<br />
Step 1. Turn ignition switch to "ON" and start engine. Generator and oil pressure lights<br />
should immediately go out. Observe lights. (See paragraph 2-2 for normal readings)<br />
If lights register abnormally, SHUT DOWN engine.<br />
CAUTION<br />
DO NOT drive truck with a high oil level. Too much oil can blow out oil seals<br />
damage main bearings, and cause other damage requiring a complete ovarhaul.<br />
8. LUBRICANT LEAKS<br />
Step 2. Oil pressure light stays on. If light stays on when engine is warm and you are not<br />
using engine compression for braking, engine may be overfilled with oil.<br />
Step 1.<br />
Step 2.<br />
If possible, park truck on level ground. Wait two minutes and check engine<br />
oil level. If it is over the "FULL" mark on dipstick, notify your supervisor.<br />
Observe drain plugs for leaks and check oil level.<br />
If plugs are loose or oil level on dipstick is low, notify your supervisor.<br />
Loss of engine oil may be caused by oil level being too high.<br />
Notify your supervisor.<br />
9. HORN INOPERATIVE OR OPERATES CONTINUALLY<br />
NOTE<br />
If service lights/blackout toggle switch is at "ALL OFF," horn will not work.<br />
Step 1. Move service lights/blackout toggle switch to "SERVICE LIGHTS ON." If horn does<br />
not operate when you push the horn button:<br />
Step 2.<br />
Notify your supervisor.<br />
When horn operates continually or operates occasionally without button being<br />
depressed:<br />
Notify your supervisor.<br />
3-7
<strong>TM</strong> 9-<strong>2320</strong>-<strong>289</strong>-10<br />
MALFUNCTION<br />
TEST OR INSPECTION<br />
CORRECTIVE ACTION<br />
10. ABNORMAL TIRE WEAR<br />
Step 1. Check for proper tire pressure<br />
Table 3-1. Troubleshooting - Continued<br />
Inflate low tires to proper pressure<br />
NOTE<br />
Maka sure "4H" and "4L" positions in transfer case are not used on hard-surfaced<br />
roads. Use "4H" and "4L" positions in transfer case only when maximum traction<br />
is neaded. Refer to paragraph 2-44.<br />
Step 2. Truck alinement may not meet specifications.<br />
Notify your supervisor.<br />
11. TRANSFER CASE REMAINS IN FOUR-WHEEL DRIVE<br />
3-8<br />
Step 1. Shift transmission gearshift lever to “R” (Reverse) and drive in reverse for 15 feet<br />
(4.6m) while attempting to shift transfer case control lever to "2H."<br />
Step 2. Drive forward and ensure that truck has been taken out of four-wheel drive. If not,<br />
repeat step 1.<br />
If truck will not come out of four-wheel drive after two attempts, notify your<br />
supervisor.
3-6. CHANGING TIRES<br />
Section III. MAINTENANCE PROCEDURES<br />
NOTE<br />
<strong>TM</strong> 9-<strong>2320</strong>-<strong>289</strong>-10<br />
The jack on tha M1009 is located under the front passenger seat; behind tha<br />
driver’s seat on the M1010; and bahind the bench seat on the right-hand side<br />
of the cab for all other trucks.<br />
The truck has e spare tire Iocated under the frame, in the rear of the truck, on<br />
all trucks except the M1009, The spare tire on the M1009 is located behind<br />
the raar eeat on the right side of the truck.<br />
a. If possible, park on a level surface. Set parking brake tightly.<br />
b. Shift transmission gearshift lever to "P" (Park) and shift transfer case control lever to "2H,"<br />
"4H," or "4 L."<br />
c. Turn on hazard warning flasher (if tactical situation permits).<br />
WARNING<br />
Keep clear of spare tire when removing or replacing. It could cause injury to<br />
personnel.<br />
d. Remove spare tire and jacking tools from stowage areas.<br />
M1009<br />
TA466643<br />
3-9
<strong>TM</strong> 9-<strong>2320</strong>-<strong>289</strong>-10<br />
3-10<br />
TA466644
All Except M1009<br />
<strong>TM</strong> 9-<strong>2320</strong>-<strong>289</strong>-10<br />
e. Chock the front and rear wheels located diagonally opposite the one you are changing.<br />
f. Raise the jack to just below axle before positioning by turning jack handle with a slow,<br />
smooth motion.<br />
WARNING<br />
Do not operate the engine and make sure all personnel are outaide of the truck<br />
when the truck is raised on the jack. Sarious injury can result if tha truck moves<br />
and fails off tha jack.<br />
g. Position jack under front axle as close to wheel as possible. On rear axle, position jack<br />
between "U" bolta. Raise jack until tension is on axle. Loosen wheel lug nuts about one-quarter turn.<br />
NOTE<br />
Perform steps h and I for all except M1028A2 and M1028A3.<br />
h. Raise wheel high enough off the ground, so that an inflated tire will just clear the surface.<br />
Remove lug nuts and then remove wheel.<br />
i. Mount spare tire and finger tighten lug nuts.<br />
Change 5<br />
TA466645<br />
3-11
<strong>TM</strong> 9-2350-253-10<br />
i.1<br />
i.2<br />
i.3<br />
i.4<br />
i.5<br />
NOTE<br />
Perform steps 1.1 and 1.5 for M1028A2 and M1028A3 only.<br />
Raise wheel(s) high enough off the ground, so that an inflated tire will just clear the<br />
surface,<br />
Remove lug nuts, clamping plate and remove outer rear or front wheel.<br />
NOTE<br />
Perform steps i.3 and i.4 only if inner rear wheel must be removed.<br />
Remove spacer plate and inner rear wheel,<br />
CAUTION<br />
If spacer plate is left out, lug nuts cannot be tightened properly,<br />
and damage to vehicle could occur.<br />
Install spare wheel and spacer p!ate on rear hub.<br />
NOTE<br />
When installing outer rear wheel, ensure that valve stems are<br />
positioned 180° apart, and that the inner valve stem is accessible<br />
through a hole in the outer rim.<br />
Install outer rear or front wheel, clamping plate and finger tighten lug nuts.<br />
3-11.0/(3-11.1blank) Change 5
<strong>TM</strong> 9-<strong>2320</strong>-<strong>289</strong>-10<br />
NOTE<br />
Proper torque for Ml 009 is 90 Ib.-ft. (120 N.m). Proper torque for all others is<br />
140 Ib.-ft. (190 N.m).<br />
j. Lower the truck by turning jack handle counterclockwise. Retighten lug nuts in sequence<br />
shown. Have organizational maintenance apply proper torque as soon as possible after changing<br />
the spare tire.<br />
k. Properly stow the tire and jack equipment,<br />
1. Remove and stow chocks.<br />
m. Release parking brake before driving<br />
3-7. DRAIN FUEL FILTER<br />
3-12<br />
WARNING<br />
Do not work on a hot engine. Allow engine to cooI to a safa temperature. Failure<br />
to observe this warning can result in injury to personnel.<br />
NOTE<br />
You will need an assistant to perform the following procedure.<br />
a. Drain water from fuel filter<br />
(1) With engine off, parking brake applied, and gearshift lever in "P" (Park), open the<br />
hood. Place a suitable container under the fuel filter water drain hose (1) located<br />
at the rear of the right front wheelwell by the spring shackle.<br />
TA466646
(2) Remove truck fuel tank cap.<br />
NOTE<br />
DO NOT tamper with tha air bleed screw located on top of fuel filter.<br />
<strong>TM</strong> 9-<strong>2320</strong>-<strong>289</strong>-10<br />
(3) Open the water drain petcock (2) on the bottom of fuel filter by turning counterclockwise<br />
until water drains from hose (1).<br />
(4) Have an assistant observe drain hose (1).<br />
(5) Start the engine and allow it to idle while water drains f rom the hose (1) into container.<br />
NOTE<br />
If clean/clear fuel doaa not become apparent, notify your supervisor.<br />
(6) Have assistant signal when all evidence of water is gone. One to two minutes should<br />
be long enough.<br />
(7) Shut off engine and close petcock (2) by turning clockwise. Do not use force or tools.<br />
If fuel continues to leak, notify your supervisor.<br />
(6) Replace fuel tank cap.<br />
b. Restart engine and let run fortwoto three minutes. Engine may run rough for a few minutes.<br />
If it stops and will not restart, notify your supervisor. If WATER-IN-FUEL light comes on again after<br />
a short period of time, notify your supervisor.<br />
TA466647<br />
3-13
<strong>TM</strong> 9-<strong>2320</strong>-<strong>289</strong>-10<br />
Section IV. MAINTENANCE UNDER UNUSUAL CONDITIONS<br />
3-8. EXTREME COLD WEATHER<br />
a. Preparing the Truck. The truck requires careful preparation when it is to be operated in<br />
extreme cold weather. Extreme cold, below 0 0<br />
F (-18 0<br />
C) can thicken lubricants, cause electrical short<br />
circuits by cracking the insulation, and make structural materials hard, brittle, and easily damaged.<br />
In general, when preparing a truck for extreme cold weather service, follow these rules:<br />
(1) Schedule truck for cold weather servicing.<br />
(2) Make sure cooling system is protected. Refer to FM 9-207 for mandatory instructions.<br />
b. Cold Weather Maintenance Requirements. When temperature drops below 0 0<br />
F(-18 0<br />
C),<br />
be especially careful while you do your PMCS. Always report any operating problems or trouble in<br />
starting to your supervisor.<br />
WARNING<br />
Do not let solvents come in contact with your skin in extreme cold weether.<br />
Rapid evaporation causes supercooling and can give you e serious case of<br />
frostbite within minutes.<br />
Always allow extra tima for warm-up during this kind of weather. In arctic<br />
temperatures as low as -50 0<br />
F(-47 0<br />
C), it may take up to two hours just to<br />
reach normal operating ranges.<br />
c. For Lena Halts or Extended Shutdown. Park the truck in a warm place. if possible. You<br />
do not have to drain out the oil since it will remain fluid.<br />
3-9. EXTREME HOT OR HUMID WEATHER<br />
a. Hot Weather. In hot weather, always keep a watch on coolant levels. Don’t let recovery<br />
tank get low. Be especially careful to keep radiator free of leaves or other debris. If coolant level<br />
drops, Iook for leaks in the cooling system. When checking your tire pressures with a tire gage, make<br />
sure tires are not overinflated. DO NOT check tires immediately after running on the road. Wait until<br />
tires have had a chance to cool off. Have the cooling system, oil filter, and air cleaner checked and<br />
serviced frequently.<br />
b. Humid Weather. In hot, damp climates be watchful for accelerated corrosion. Evidence<br />
of deteriorating materials includes rust and paint blisters on metal surfaces, and fungus, mold, or<br />
mildew on fabrics and glass. Check the truck daily and act on these problems as soon as you notice<br />
them. If you find rusting metal or fungus, clean affected area and apply a thin coat of light oil.<br />
3-10. AFTER OPERATING ON UNUSUAL TERRAIN<br />
CAUTION<br />
DO NOT hose off radiator with a high pressure hose. High pressure can bend<br />
radiator fins and reduce the radiator’s cooling ability. (See paragraph 2-6)<br />
DO NOT hose out Inside of cab, Water can accumulate and cause rust, or<br />
can cause damage to electrical components in cab.<br />
a. Mud. Clean off truck as soon as possible after operating in mud. Pay careful attention to<br />
the radiator cooling fins. Hose off the radiator if you find mud deposits. Check air filter and have<br />
it replaced if necessary.<br />
3-14 Change 5
<strong>TM</strong> 9-<strong>2320</strong>-<strong>289</strong>-10<br />
b. Send or Dust. Clean out the engine compartment (see paragraph 2-6) and have<br />
organiztional maintenance schedule a complete oil change and lubrication. Make sure maintenance<br />
knows it’s due to operation in ssnd or dust. Check your air filter daily for dust and dirt. Have air filter<br />
replaced if it’s dusty, dirty, or sandy. If the engine starts overheating, thoroughly clean radiator<br />
cooling fins. Also, be on the lookout for leaks in radiator.<br />
3-11. AFTER FORDING<br />
a. Fresh Water Fording. No special maintenance is required after fording fresh water 16<br />
inches (41 cm) deep or less, but look for any deposits of sand or mud. If you find any sand or mud,<br />
clean it off. If the water YOU crossed was deeper than 20 inches (51 cm), notify your supervisor to<br />
schedule the truck for a complete oil change and lubrication. Make sure maintenance knows it’s an<br />
after fording special maintenance.<br />
b. SaIt Water Fording. Salt causes almost immediate corrosion of metal surfaces. Clean<br />
entire truck (including underneath) with fresh water as soon as possible. If the salt water was mora<br />
than 20 inches (51 cm) deep, notify your supervisor to schedule an immediate complete oil change<br />
and lubrication. Make sure maintenance knows it’s an after fording salt water maintenance.<br />
Change 5 3-15/(3-16blank)
A-1. SCOPE<br />
APPENDIX A<br />
REFERENCES<br />
<strong>TM</strong> 9-<strong>2320</strong>-<strong>289</strong>-10<br />
This appendix lists all forms, field manuals, technical manuals, and misc. pubs. referenced in<br />
this manual.<br />
A-2. PUBLICATION INDEXES<br />
The following indexes should be consulted frequently for the latest changes or revisions and<br />
for new publications relating to materiel covered in this technical manual.<br />
Consolidated Index of Army Publications and Blank Forms . . . . . . . . . . . . . . . . . DA Pam 25-30<br />
US Army Equipment Index of Modification Work Orders . . . . . . . . . . . . . . . . . . . . . . DA Pam 750-10<br />
A-3. FORMS<br />
Refer to DA Pam 310-1 for a current and complete list of blank forms. DA Pam 738-750, The<br />
Army Maintenance Management Systems (TAMMS), contains instructions on the use of maintenance<br />
forms pertaining to this materiel.<br />
A-4. OTHER PUBLICATIONS<br />
a. Decontamination.<br />
Nuclear, Biological, and Chemical (NBC) Decontamination . . . . . . . . . . . . . . . . . . . . . . . . . . . . . FM 3-5<br />
Operator’s and Organizational Maintenance Manual (including<br />
Repair Parts and Special Tools Lists): for Decontaminating<br />
Apparatus, Portable, DS2, 1-1/2 quart, ABC-M 11<br />
(NSN 4230-00-720-1618) . . . . . . . . . . . . . . . . . . . . . . . . . . . . . . . . . . . . . . . . . . . .<strong>TM</strong> 3-4230-204-12&P<br />
b. General.<br />
Evacuation of the Sick and Wounded . . . . . . . . . . . . .. FM 8-35<br />
First Aid for Soldiers . . . . . . . . . . . . . . . . . . . . . . . . . . . . . . . . . . . . . . . . . . . . . . . . . . . . . . . . . . .<br />
Manual for the Wheeled Vehicle Driver . . . . . . . . . . . . . . . . . . . . . . . . . . . . . . . . . . . . . . . . . .<br />
Basic Cold Weather Manual . . . . . . . . . . . . . . . . . . . . . . . . . . . . . . . . . . . . . . . . . . . . . . . . . . . . . .<br />
NorthernO aerations . . . . . . . . . . . . . . . . . . . . . . . . . . . . . . . . . . . . . . . . . . . . . . . . . . . . . . . . . . . .<br />
Operation and Maintenance of Ordnance Materiel in<br />
Cold Weather (0 0<br />
to-65 0<br />
F) . . . . . . . . . . . . . . . . . . . . . . . . . . . . . . . . . . . . . . . . . . . . . . . . . .<br />
Driver Selection and Training (Wheeled Vehicles) . . . . . . . . . . . . . . . . . . . . . . . . . . . . . . . . .<br />
FM 21-11<br />
FM 21-305<br />
FM 31-70<br />
FM 31-71<br />
FM 9-207<br />
FM 55-30<br />
Operator’s, Organizational, Direct Support and General Support Maintenance<br />
Manual (including Repair Parts and Special Tools Lists) for<br />
Trailer, Cargo: 3/4 Ton, 2 Wheel, M101(2330-00-738-9509),<br />
M101A1 (2330-00-898-6779), M102A2 (2330-01-102-4697), and<br />
Chassis: Trailer: 3/4 Ton, 2 Wheel. M116(2330-00-898-6780)<br />
and M116A2 (2330-01-101-8434) . . . . . . . . . . . . . . . . . . . . . . . . . . . . . . . <strong>TM</strong> 9-2330-202-14&P<br />
Operator’s and Organizational Maintenance Manual for<br />
Position and Azimuth Determining System AN/USQ-70<br />
Part Number 880500-1 (NSN 6675-01-071-5552) . . . . . . . . . . . . . . . . . . . . . <strong>TM</strong> 5-6675-308-12<br />
c. Maintenance.<br />
Lubrication Order for Truck, Cargo, Tactical, 4X4, M 1008,<br />
M1008A1, M1009, MI0I0, M1028, M1028A1, and M1031 . . . . . . . . . . . . . LO 9-<strong>2320</strong>-<strong>289</strong>-12<br />
Procedures for Destruction of Tank-Automotive Equipment<br />
to Prevent Enemy Use . . . . . . . . . . . . . . . . . . . . . . . . . . . . . . . . . . . . . . . . . . . . . <strong>TM</strong>750-244-6<br />
Use of Antifreeze Solutions and Cleaning Compounds in<br />
Engine Cooling Systems . . . . . . . . . . . . . . . . . . . . . . . . . . . . . . . . . . . . . . . . . . . . . . . . TB 750-651<br />
Change 3 A-1/(A-2 blank)
B-1. SCOPE<br />
APPENDIX B<br />
COMPONENTS OF END ITEM<br />
AND BASIC ISSUE ITEMS LISTS<br />
Section I. INTRODUCTION<br />
<strong>TM</strong> 9-<strong>2320</strong>-<strong>289</strong>-10<br />
This appendix lists Components of End Item and Basic Issue Items for the CUCV Series truck<br />
to help you inventory items required for safe and efficient operation.<br />
B-2. GENERAL<br />
NOTE<br />
CUCV Series trucks do not have Components of End Item currently assigned.<br />
The Basic Issue Items (Bll) List is found in Section II and identifies the minimum essential items<br />
required to place the truck in operation, to operate it, and to perform emergency repairs. Although<br />
shipped separately, packaged Bll must be with the truck during operation and whenever it is<br />
transferred between property accounts. The illustrations will assist you with hard-to-identify items.<br />
This appendix is your authority to request/requisition replacement Bll, based on TOE/MTOE<br />
authorization of the end item.<br />
B-3. EXPLANATION OF COLUMNS<br />
Below is an explanation of columns found in the tabular listings:<br />
a. Column (1) - Illustration Number (Illus Number). This column indicates the number of the<br />
illustration which shows the item.<br />
b. Column (2) - National Stock Number. Indicates the National Stock Number assigned to<br />
the item and will be used for requisitioning purposes.<br />
c. Column (3) - Description. Indicates the Federal item name and, if required, a minimum<br />
description in parentheses to identify and locate the item. The entry for each item ends with the<br />
Federal Supply Code for Manufacturer (FSCM) in parentheses followed by the part number. Used<br />
On Code indicates the truck to which the item is assigned. For an explanation of these codes, refer<br />
to paragraph C-3.<br />
d. Column (4) - Unit of Measure (U/M). Indicates the measure used in performing the actual<br />
operational/maintenance function. This measure is expressed by a two-character alphabetical<br />
abbreviation (e.g., ea, in, pr).<br />
e. Column (5)- Quantity Required (Qty Rqr). Indicates the quantity of the item authorized<br />
to be used with the equipment.<br />
B-1
B - 2<br />
<strong>TM</strong> 9-<strong>2320</strong>-<strong>289</strong>-10<br />
Figure BII.
Section Il. BASIC ISSUE ITEMS LIST<br />
<strong>TM</strong> 9-<strong>2320</strong>-<strong>289</strong>-10<br />
Change 5 B-3/(B-4blank)
C-1. SCOPE<br />
APPENDIX C<br />
ADDITIONAL AUTHORIZATION LIST<br />
Section I. INTRODUCTION<br />
<strong>TM</strong> 9-<strong>2320</strong>-<strong>289</strong>-10<br />
This appendix Iists additional Items that you are authorized for the support of the Truck, Cargo,<br />
Tactical, 4X4, M1008, M1008A1, M1009, M1010, M1028, M1028A1, M1028A2, M1028A3, and<br />
M1031 trucks.<br />
C-2. GENERAL<br />
This list identifies items thst do not hsve to accompany the truck and that do not have to be<br />
turned in with it. These items are authorized to you by CTA, MTOE, TDA, or JTA.<br />
C-3. EXPLANATION OF LISTING<br />
National Stock Numbers, description, and quantities are provided to help you identify and<br />
request the additional items you requira to support this equipment. If the item required differs for<br />
different models of this equipment, see the "Used On Code" column for the applicable model or<br />
models. Codes used are:<br />
USED ON CODE<br />
ALL<br />
194<br />
208<br />
209<br />
210<br />
230<br />
231<br />
252<br />
254<br />
256<br />
MODEL<br />
ALL<br />
M 1008<br />
M1008A1<br />
M1009<br />
M1010<br />
M1028<br />
M1031<br />
M1028A1<br />
M1028A2<br />
M1028A3<br />
Change 5 C-1
<strong>TM</strong> 9-<strong>2320</strong>-<strong>289</strong>-10<br />
C-2<br />
(1)<br />
National<br />
Stock<br />
Number<br />
5935-00-322-8959<br />
4730-00-808-5089<br />
4730-00-808-5090<br />
6665-00-935-6955<br />
5110-00-293-2336<br />
2540-00-670-2459<br />
5140-00-473-6256<br />
2540-00-791-3343<br />
5340-00-595-5208<br />
2590-00-148-7961<br />
6150-01-022-6004<br />
2590-00-398-6527<br />
2540-01-185-8306<br />
2540-00-528-7360<br />
4730-00-554-7208<br />
4730-00-554-7208<br />
1025-00-007-9453<br />
2510-00-567-0128<br />
Section Il. ADDITIONAL AUTHORIZATION LIST<br />
Description<br />
Used<br />
FSCM & Part Number On Code<br />
Adapter, Connector (1 9027) 11677570<br />
Adapter, Straight Pipe<br />
[81361) B5-19-1676-2<br />
Adapter, Straight Pipe<br />
[81361) B5-19-1676-1<br />
Alarm, Chemical Agent<br />
[81361) C5-15-8803<br />
Ax: Single Bit, 4 lb.<br />
Head Weight, 36-1/2” Long, Type 1,<br />
Class 1, Design A (19207) 6150925<br />
Bag Assembly, Pamphlet<br />
Cotton Duck, 3“ x 9-1/4” x 1 1-1/4”<br />
[19207) 11676920<br />
Bag, Tool, Cotton Duck,<br />
10” x 20” with Flap (34623) 11655979<br />
Block, Chock (1 9207)<br />
10860840<br />
Bracket, Angle (81361)<br />
B5-19-1831<br />
Cable, NATO Slave, 20’ with<br />
Adapter, Connector, 2 Prong<br />
(19207) 11682379-1<br />
Cable, NATO Slave with End<br />
Connectors (19207) 11682336-1<br />
Cable, 20’ without End<br />
Connectors (19207) 11682337-1<br />
Chain, Tire, 15” (16457) 3210<br />
Chain, Tire, 16” (72671) V2812<br />
Clamp, Hose (98441) 10181-20<br />
Clamp, Hose (96906) MS 22064-5<br />
Connector, Orifice<br />
(81361) B5-19-1829<br />
Connector, Slave Cable End<br />
(19207) 11682338<br />
ALL<br />
210<br />
210<br />
ALL<br />
209<br />
ALL<br />
ALL<br />
ALL<br />
210<br />
ALL<br />
ALL<br />
ALL<br />
209<br />
ALL<br />
EXC<br />
209<br />
210<br />
210<br />
210<br />
ALL<br />
(3)<br />
U/M<br />
ea<br />
ea<br />
ea<br />
ea<br />
ea<br />
ea<br />
ea<br />
ea<br />
ea<br />
ea<br />
ea<br />
ea<br />
se<br />
se<br />
ea<br />
ea<br />
ea<br />
ea<br />
(4)<br />
Qty<br />
Auth<br />
M U.S. GOVERNMENT PRINTING OFFICE: 1993 746-023/70076<br />
2<br />
23<br />
2<br />
1<br />
1<br />
1<br />
1<br />
2<br />
7<br />
1<br />
1<br />
1<br />
1<br />
1<br />
16<br />
30<br />
7<br />
2
<strong>TM</strong> 9-<strong>2320</strong>-<strong>289</strong>-10<br />
Section Il. ADDITIONAL AUTHORIZATION LIST - Continued<br />
(1) (2) (3) (4)<br />
National Description<br />
Stock Used Qty<br />
Number FSCM & Part Number On Code U/M Auth<br />
4730-00-935-1643 Coupling, Half Quick 210 ea 7<br />
(81361) C5-19-1900<br />
4230-00-720-1618 Decontamination Apparatus ALL ea 1<br />
(81361) D5-51-269 ABC M-11<br />
4230-01-133-4124 Decontamination Apparatus ALL ea 1<br />
(81361) E5-51-527 M-13<br />
4210-00-889-2221 Extinguisher, Fire, Monobro, ALL ea 1<br />
Hand (1 6236) EXC<br />
CS 4210-0009 CEFN 210<br />
4240-00-828-3952 Filter, Gas (81361) D5-19-2350 210 ea 2<br />
4240-01-026-3112 Filter, Particulate Assy. 210 ea 1<br />
(81361) D5-19-2353<br />
4240-00-565-6059 Frame Assy. (B1361) D5-19-1754 210 ea 1<br />
4910-00-204-3170 Gage, Tire (53477) 7188BH ALL ea 1<br />
5120-00-288-6574 Handle, Mattock Pick, 36” Long 209 ea 1<br />
(19207) 11677021<br />
4240-00-807-6856 Heater, Air Electric 210 ea 5<br />
(81361) D5-19-1782<br />
4720-00-829-2761 Hose, Air Duct (8 1361) C5-1 9-916-4 210 ea 8<br />
4720-00-279-0093 Hose, Air Duct (81361) 210 ea 1<br />
C5-1 9-916-2<br />
4720-00-279-0094 Hose, Air Duct (8 1361) 210 ea 1<br />
C5- 19-916-3<br />
4720-00-829-2760 Hose, Air Duct (8 1361) 210 ea 5<br />
C5-19-916<br />
4720-00-541-1313 Hose, Nonmetallic 210 ft 1<br />
(98441) 111-20<br />
Hose, Rubber, 2“ Long 210 ea 6<br />
M/F 4720-00-541-1313<br />
Hose, Rubber, 6-1/2” Long 210 ea 1<br />
M/F 4720-00-541-1313<br />
Hose, Rubber, 11” Long 210 ea 1<br />
M/F 4720-00-541-1313<br />
6545-00-922-1200 Kit, First Aid: 2-1/2” x 6-3/4” x ALL ea 1<br />
9-1/2” (19207) 11677011<br />
C-3
<strong>TM</strong> 9-<strong>2320</strong>-<strong>289</strong>-10<br />
C-4<br />
Section Il. ADDITIONAL AUTHORIZATION LIST - Continued<br />
(1) (2) (3) (4)<br />
National Description<br />
Stock Used Qty<br />
Number FSCM & Part Number On Code U/M Auth<br />
9905-00-148-9546 Kit, Warning Device ALL ea 1<br />
(81348) RR-W-1817<br />
6530-00-783-7905 Litter, Folding (90142) 51 L 1976 210 ea 4<br />
5120-00-243-2395 Mattock: Pick, Head, 19-1/2” Long 209 ea 1<br />
(19207) 11677022<br />
5120-00-223-7397 Pliers, Slip Joint with Cutter, 8“ ALL ea 1<br />
(19207) 5214421<br />
5365-00-514-0393 Ring, Retaining (96906) 210 ea 7<br />
MS 16624-4087<br />
5120-00-240-8716 Screwdriver, Crosstip, 3“ ALL ea 1<br />
(55719) SSDP31, Type 6<br />
5120-00-596-8502 Screwdriver, Flat Tip, 1 -1/2” ALL ea 1<br />
(81348) GGG-S-121<br />
5120-00-237-6985 Screwdriver, Flat Tip, 8“ ALL ea 1<br />
(56161) 10510988<br />
4910-00-437-7215 Seater, Tire Bead, 15“ 209 ea 1<br />
(01717) 93-240<br />
4910-01-022-9721 Seater, Tire 8ead, 16-1/2” ALL ea 1<br />
(85803) Model TC-50 EXC<br />
209<br />
5120-00-293-3336 Shovel: Hand, Round Point, 40-1/2” 209 ea 1<br />
Long (19207) 11655784<br />
5120-00-240-5328 Wrench, Adjustable, Open End, ALL ea 1<br />
8“ Long (92878) 1500559
D-1. SCOPE<br />
APPENDIX D<br />
EXPENDABLE/DURABLE SUPPLIES<br />
AND MATERIALS LIST<br />
Section I. INTRODUCTION<br />
<strong>TM</strong> 9-<strong>2320</strong>-<strong>289</strong>-10<br />
This appandix lists expendable/durable supplies and materials that you will need to operate<br />
and maintain the truck. These items are authorized to you by CTA 50-970, Expendable Items.<br />
D-2. EXPLANATION OF COLUMNS<br />
a. Column (1) - Item Number. This number is assigned to the entry in the listing.<br />
b. Column (2) - Level. This column identifies the lowest level of maintenance that requires<br />
the listed item.<br />
C - Operator/Crew<br />
c. Column (3) - National Stock Number. This is the National Stock Number assigned to the<br />
item; use it to request or requisition the item.<br />
d. Column (4) - Description. Indicates the Federal item name and, if required, a description<br />
to identify the item. The last line for each item indicates the Federal Supply Code for Manufacturer<br />
(FSCM) in parentheses, followed by the part number, if applicable.<br />
e. Column (5) - Unit of Measure (U/M). Indicates the measure used in performing the actual<br />
maintenance function. This measure is expressed by a two-character alphabetical abbreviation (e.g.,<br />
ea, in, pr). If the unit of measure differs from the unit of issue, requisition the lowest unit of issue<br />
that will satisfy your requirements.<br />
D-1
<strong>TM</strong> 9-<strong>2320</strong>-<strong>289</strong>-10<br />
D-2<br />
Section Il. EXPENDABLE/DURABLE SUPPLIES AND<br />
REQUIREMENTS LIST<br />
(1) (2) (3) (4) (5)<br />
National<br />
Itam Stock<br />
Number Level Number Description U/M<br />
1. c 6850-00-174-1806 Antifreeze: Arctic 55 Gallon gal<br />
Drum (81349) MlL-A-l 1755<br />
2. c 6850-00-181-7929 Antifreeze: Ethylene Glycol, gal<br />
Inhibited, Heavy Duty, Single<br />
Package, 1 Gallon Can<br />
(81349) MIL-A-46153<br />
3. c 6850-00-181-7933 Antifreeze: Ethylene Glycol, gal<br />
Inhibited, Heavy Duty, Single<br />
Package, 5 Gallon Can<br />
(81349) MIL-A-46153<br />
4, c 6850-00-181-7940 Antifreeze: Ethylene Glycol, gal<br />
Inhibited, Heavy Duty, Single<br />
Package, 55 Gallon Drum<br />
(81349) MIL-A-46153<br />
5. c 9150-01-102-9455 Brake Fluid: Silicone, gal<br />
Automotive, All Weather<br />
Operational and Preservative,<br />
1 Gallon Can (81349)<br />
MI L-B-46176<br />
6. c 9150-01-123-3152 Brake Fluid: Silicone, gal<br />
Automotive, All Weather<br />
Operational and Preservative,<br />
5 Gallon Can (81349)<br />
MI L-B-46176<br />
7. c 9150-01-072-8379 Brake Fluid: Silicone, gal<br />
Automotive, 55 Gallon Drum<br />
(81349) MIL-B-46176<br />
8. c 6850-00-926-2275 Cleaning Compound: pt<br />
Windshield Washer, 1 Pint<br />
Bottle (81348) O-C-1 901<br />
9. c 7930-00-282-9699 Detergent: General Purpose, gal<br />
Liquid, 1 Gallon Can<br />
(81349) MIL-D-16791<br />
10. c 6850-00-110-4498 Dry Cleaning Solvent: 1 Pint pt<br />
Can (81348) P-D-680<br />
11. c 6850-00-274-5421 Dry Cleaning Solvent: gal<br />
5 Gallon Can (81348)<br />
P-D-680<br />
12. c 6850-00-285-8011 Dry Cleaning Solvent: gal<br />
55 Gallon Drum (81348)<br />
P-D-680
Section Il. EXPENDABLE/DURABLE SUPPLIES AND<br />
REQUIREMENTS LIST - Continued<br />
<strong>TM</strong> 9-<strong>2320</strong>-<strong>289</strong>-10<br />
(1) (2) (3) (4) (5)<br />
National<br />
Item Stock<br />
Number Level Number Description U/M<br />
13. c 9140-00-286-5295 Fuel Oil, Diesel: Regular, gal<br />
DF-2, 5 Gallon Can (81348)<br />
VV-F-800<br />
14. c 9140-00-286-5296 Fuel Oil, Diesel: Regular, gal<br />
DF-2, 55 Gallon Drum<br />
(8 1348) VV-F-800<br />
15. c 9140-00-286-5287 Fuel Oil, Diesel: Winter, gal<br />
DF-1, 5 Gallon Can (81348)<br />
VV-F-800<br />
16. c 9140-00-286-5288 Fuel Oil, Diesel: Winter, DF-1, gal<br />
55 Gallon Drum (81348)<br />
VV-F-800<br />
17. c 9140-00-286-5282 Fuel Oil, Diesel: Arctic, gal<br />
DF-A, 5 Gallon Can (81348)<br />
VV-F-800<br />
18. c 9140-00-286-5284 Fuel Oil, Diesel: Arctic, DF-A, gal<br />
55 Gallon Drum (81348)<br />
VV-F-800<br />
19. c 9150-00-935-1017 Grease: Automotive and 02<br />
Artillery, 14 Ounce Cartridge<br />
(81349) MIL-G-10924<br />
20. c 9150-00-190-0904 Grease: Automotive and lb<br />
Artillery, 1-3/4 Pound Can<br />
(81349) MIL-G-10924<br />
21. c 9150-00-190-0905 Grease: Automotive and lb<br />
Artillery, 6-1/2 Pound Can<br />
(81349) MIL-G-10924<br />
22. c 9150-00-698-2382 Hydraulic Fluid: qt<br />
Transmission, 1 Quart Can<br />
(246 17) Dexron@ II<br />
23. c 9150-00-657-4959 Hydraulic Fluid: gal<br />
Transmission, 5 Gallon Can<br />
(246 17) Dexron@ II<br />
24. c 9150-01-035-5390 Lubricating Oil: Gear, qt<br />
Multipurpose, GO 75W, 1<br />
Quart Can (81349)<br />
MIL-L-2105<br />
D-3
<strong>TM</strong> 9-<strong>2320</strong>-<strong>289</strong>-10<br />
Section Il. EXPENDABLE/DURABLE SUPPLIES AND<br />
REQUIREMENTS LIST - Continued<br />
(1) (2) (3) (4) (5)<br />
National<br />
Item Stock<br />
Number Level Number Description U/M<br />
D-4<br />
25, c 9150-01-035-5391 Lubricating Oil: Gear, gal<br />
Multipurpose, GO 75W,<br />
5 Gallon Can (81349)<br />
MIL-L-2105<br />
26. c 9150-01-035-5392 Lubricating Oil: Gear, qt<br />
Multipurpose, GO 80 W/90,<br />
1 Quart Can (81349)<br />
MI L-L-2105<br />
27. c 9150-00-001-9395 Lubricating Oil: Gear, gal<br />
Multipurpose, GO 80 W/90,<br />
5 Gallon Can (81349)<br />
MIL-L-2105<br />
28. c 9150-00-231-6689 Lubricating Oil: General qt<br />
Purpose, Preservative, PL-S,<br />
1 Quart Can (81348)<br />
VVL800<br />
29. c 9150-00-402-4478 Lubricating Oil: Internal qt<br />
Combustion Engine, Arctic,<br />
OEA, 1 Quart Can (8 1349)<br />
MIL-L-46167<br />
30. c 9150-00-402-2372 Lubricating Oil: Internal gal<br />
Combustion Engine, Arctic,<br />
OEA, 5 Gallon Can (81349)<br />
MIL-L-46167<br />
31. c 9150-00-491-7197 Lubricating Oil: Internal gal<br />
Combustion Engine, Arctic,<br />
OEA, 55 Gallon Drum<br />
(81349) MIL-L-46167<br />
32. c 9150-00-189-6727 Lubricating Oil: Internal qt<br />
Combustion Engine, Tactical<br />
Service, OE/HDO 10W,<br />
1 Quart Can (81349)<br />
MIL-L-2104<br />
33. c 9150-00-186-6668 Lubricating Oil: Internal gal<br />
Combustion Engine, Tactical<br />
Service, OE/HDO 10W,<br />
5 Gallon Can (81349)<br />
MIL-L-2104<br />
34. c 9150-00-191-2772 Lubricating Oil: Internal gal<br />
Combustion Engine, Tactical<br />
Service, OE/HDO 10W,<br />
55 Gallon Drum (81349)<br />
MI L-L-2104
Section Il. EXPEINABLE/DURABLE SUPPLIES AND<br />
REQUIREMENTS LIST - Continued<br />
<strong>TM</strong> 9-<strong>2320</strong>-<strong>289</strong>-10<br />
(1) (2) (3) (4) (5)<br />
National<br />
Item Stock<br />
Number Level Number Description U/M<br />
35. c 9150-00-188-6681 Lubricating Oil: Internal qt<br />
Combustion Engine, Tactical<br />
Service, OE/HDO 30W,<br />
1 Quart Can (81349)<br />
MIL-L-2104<br />
36. c 9150-00-188-9858 Lubricating Oil: Internal gal<br />
Combustion Engine, Tactical<br />
Service, OE/HDO 30W,<br />
5 Gallon Can (81349)<br />
MIL-L-2104<br />
37. c 9150-00-189-6729 Lubricating Oil: Internal gal<br />
Combustion Engine, Tactical<br />
Service, OE/HDO 30W,<br />
55 Gallon Drum (81349)<br />
MIL-L-2104<br />
38. c 9150-01-152-4117 Lubricating Oil: Internal qt<br />
Combustion Engine, Tactical<br />
Service, OE/HDO 15W/40,<br />
1 Quart Can (81349)<br />
MIL-L-2104<br />
39. c 9150-01-152-4118 Lubricating Oil: Internal gal<br />
Combustion Engine, Tactical<br />
Service, OE/HDO 15W/40,<br />
5 Gallon Can (81349)<br />
MIL-L-2104<br />
40. c 9150-01-152-4119 Lubricating Oil: Internal gal<br />
Combustion Engine, Tactical<br />
Service, OE/HDO 15W/40,<br />
55 Gallon Drum (81349)<br />
MIL-L-2104<br />
41. c 7920-00-205-1711 Rag: Wiping Cotton and lb<br />
Cotton-Synthetic (58536)<br />
A-A-53 1, 50 Pound Bale<br />
42. c 6850-01-160-3868 Inhibitor, Corrosion, Liquid qt<br />
Cooling System (8 1349)<br />
MI L-A-53009<br />
D-5/(D-6 blank)
APPENDIX E<br />
<strong>TM</strong> 9-<strong>2320</strong>-<strong>289</strong>-10<br />
STOWAGE AND SIGN GUIDE<br />
FOR COMPONENTS OF END ITEM, BASIC ISSUE ITEMS,<br />
AND APPLICABLE ADDITIONAL AUTHORIZATION LIST ITEMS<br />
E-1. SCOPE<br />
This appendix shows the location for stowage of equipment and material required to be carried<br />
on the CUCV Series trucks.<br />
E-2. GENERAL<br />
The pictures below and on the following pages show the location of decals, stencils, and metal<br />
signs used on the truck. Some are cautions or information that you need to safely operate the truck.<br />
Signs outlined with boxes are decals, signs not outlined are stencils, and signs outlined with dotted<br />
boxes are metal stamped.<br />
NOTE<br />
Decal locations are the sama on all trucks unless specifically noted on model<br />
variations.<br />
TA466649<br />
E-1
<strong>TM</strong> 9-<strong>2320</strong>-<strong>289</strong>-10<br />
E - 2 TA466650
<strong>TM</strong> 9-<strong>2320</strong>-<strong>289</strong>-10<br />
TA466651<br />
Change 3 E-3
<strong>TM</strong> 9-<strong>2320</strong>-<strong>289</strong>-10<br />
E-4<br />
M1010 Only<br />
TA466652
INDEX<br />
SUBJECT Paragraph<br />
Abbreviations . . . . . . . . . . . . . . . . . . . . . . . . . . . . . . . . . . . . . . . . . . . . . . . . 1-5<br />
Accelerator pedal . . . . . . . . . . . . . . . . . . . . . . . . . . . . . . . . . . . . . . . . . ...2-2(1 6)<br />
Access door, heater . . . . . . . . . . . . . . . . . . . . . . . . . . . . . . . . . . . . . . . . . . 1-7<br />
Access steps:<br />
Location . . . . . . . . . . . . . . . . . . . . . . . . . . . . . . . . . . . . . . . . . . . . . . . . . 1-7<br />
Operation . . . . . . . . . . . . . . . . . . . . . . . . . . . . . . . . . . . . . . . . . . . . . . . . 2-30<br />
Additional authorization iist (AAL) . . . . . . . . . . . . . . . . . . . . . . . . . . . . . . . . C-1<br />
After fording maintenance . . . . . . . . . . . . . . . . . . . . . . . . . . . . . . . . . . . . . . 3-11<br />
After operating on unusual terrain . . . . . . . . . . . . . . . . . . . . . . . . . . . . . . . . 3-10<br />
Agents, cleaning . . . . . . . . . . . . . . . . . . . . . . . . . . . . . . . . . . . . . . . . . . . . . . 2-6<br />
Air conditioner (M1010), operation . . . . . . . . . . . . . . . . . . . . . . . . . . . . . . . 2-26<br />
Aircraft,towing . . . . . . . . . . . . . . . . . . . . . . . . . . . . . . . . . . . . . . . . . . . . . . 2-14(b)<br />
Airexhaustvent . . . . . . . . . . . . . . . . . . . . . . . . . . . . . . . . . . . . . . . . . . . . . . 1-7<br />
Air inlet, heater . . . . . . . . . . . . . . . . . . . . . . . . . . . . . . . . . . . . . . . . . . . . . . 1-7<br />
Air intake manifold . . . . . . . . . . . . . . . . . . . . . . . . . . . . . . . . . . . . . . . . . . .. 1-10(a)<br />
Air vent, operation . . . . . . . . . . . . . . . . . . . . . . . . . . . . . . . . . . . . . . . . . . . . 2-22<br />
Ambulance:<br />
General . . . . . . . . . . . . . . . . . . . . . . . . . . . . . . . . . . . . . . . . . . . . . . . . . . 1-6(f)<br />
Operation of peculiar components:<br />
Access steps . . . . . . . . . . . . . . . . . . . . . . . . . . . . . . . . . . . . . . . . . . . . 2-30<br />
Air conditioner . . . . . . . . . . . . . . . . . . . . . . . . . . . . . . . . . . . . . . . . . . 2-26<br />
Attendant’s seat . . . . . . . . . . . . . . . . . . . . . . . . . . . . . . . . . . . . . . . . . 2-29<br />
Blackout curtains . . . . . . . . . . . . . . . . . . . . . . . . . . . . . . . . . . . . . . . . 2-33<br />
Domelight . . . . . . . . . . . . . . . . . . . . . . . . . . . . . . . . . . . . . . . . . . . . . . 2-32<br />
Floodlights . . . . . . . . . . . . . . . . . . . . . . . . . . . . . . . . . . . . . . . . . . . . . 2-35<br />
Focus lights . . . . . . . . . . . . . . . . . . . . . . . . . . . . . . . . . . . . . . . . . . . . 2-31<br />
Gas-particulate filter unit . . . . . . . . . . . . . . . . . . . . . . . . . . . . . . . . . . 2-25<br />
Litter berth . . . . . . . . . . . . . . . . . . . . . . . . . . . . . . . . . . . . . . . . . . . . . 2-28<br />
Litter tie-down . . . . . . . . . . . . . . . . . . . . . . . . . . . . . . . . . . . . . . . . ...2-28(c)<br />
Heater, patient compartment . . . . . . . . . . . . . . . . . . . . . . . . . . . . . . . 2-27<br />
Spotlight . . . . . . . . . . . . . . . . . . . . . . . . . . . . . . . . . . . . . . . . . . . . . . 2-34<br />
Peculiar components:<br />
Air conditioning unit . . . . . . . . . . . . . . . . . . . . . . . . . . . . . . . . . . . . .. 1-17(b)<br />
Domelight and focus lights.. . . . . . . . . . . . . . . . . . . . . . . . . . . . . . .. 1-17(d)<br />
Gas-particulate filter unit . . . . . . . . . . . . . . . . . . . . . . . . . . . . . . . . .. 1-17(a)<br />
Heater, personnel . . . . . . . . . . . . . . . . . . . . . . . . . . . . . . . . . . . . . ...1-17(c)<br />
Attendant’s seat (M1010) . . . . . . . . . . . . . . . . . . . . . . . . . . . . . . . . . . . . . . 2-29<br />
Basic issue items (Bll) . . . . . . . . . . . . . . . . . . . . . . . . . . . . . . . . . . . . . . . . . .<br />
Battery system . . . . . . . . . . . . . . . . . . . . . . . . . . . . . . . . . . . . . . . . . . . . . . .<br />
Berth, litter (M1010), operation ‘. . . . . . . . . . . . . . . . . . . . . . . . . . . . . . . . . .<br />
Blackout<br />
Curtains, operation . . . . . . . . . . . . . . . . . . . . . . . . . . . . . . . . . . . . . . . . .<br />
Drive lights, operation . . . . . . . . . . . . . . . . . . . . . . . . . . . . . . . . . . . . . . .<br />
Markers, operation<br />
Block and tackle (M1010)... . . . . . . . . . . . .. .. . . . . . . . . . . . . . .<br />
Boom, patient assist . . . . . . . . . . . . . . . . . . . . . . . . . . . . . . . . . . . . . . . . . . .<br />
Bracket, patient assist boom . . . . . . . . . . . . . . . . . . . . . . . . . . . . . . . . . . . .<br />
Brake:<br />
Parking, operation . . . . . . . . . . . . . . . . . . . . . . . . . . . . . . . . . . . . . . . . . .<br />
Pedal . . . . . . . . . . . . . . . . . . . . . . . . . . . . . . . . . . . . . . . . . . . . . . . . . .<br />
Release . . . . . . . . . . . . . . . . . . . . . . . . . . . . . . . . . . . . . . . . . . . . . . . .<br />
Release handle . . . . . . . . . . . . . . . . . . . . . . . . . . . . . . . . . . . . . . . . . .<br />
A<br />
B<br />
<strong>TM</strong> 9-<strong>2320</strong>-<strong>289</strong>-10<br />
B-1<br />
1-14(a)<br />
2-28<br />
2-33<br />
2-15(b)<br />
2-15(c)<br />
2-28<br />
1-7<br />
1-7,<br />
2-28<br />
2-13(b)<br />
2-2(26)<br />
2-9<br />
2-2(23)<br />
Page<br />
1-1<br />
2-3<br />
1-7<br />
1-7<br />
2-77<br />
C-1<br />
3-15<br />
3-14<br />
2-6<br />
2-67<br />
2-57<br />
1-7<br />
1-7<br />
1-13<br />
2-62<br />
1-4<br />
2-77<br />
2-67<br />
2-76<br />
2-78<br />
2-78<br />
2-79<br />
2-77<br />
2-65<br />
2-70<br />
2-75<br />
2-68<br />
2-78<br />
1-19<br />
1-19<br />
1-18<br />
1-19<br />
2-76<br />
B-1<br />
1-16<br />
2-70<br />
2-78<br />
2-58<br />
2-58<br />
2-73<br />
1-7<br />
1-7,<br />
2-72<br />
2-57<br />
2-3<br />
2-54<br />
2-3<br />
Index 1
<strong>TM</strong> 9-<strong>2320</strong>-<strong>289</strong>-10<br />
SUBJECT<br />
Service, pedal:<br />
L o c a t i o n<br />
O p e r a t i o n<br />
S y s t e m<br />
System warning light<br />
Cab controls, operation:<br />
A i r v e n t s<br />
Hazard warning flasher<br />
INDEX<br />
c<br />
Paragraph<br />
2-2(25)<br />
2-10<br />
1-15<br />
2-2(17)<br />
2-22<br />
2-21<br />
Headlight dimmer switch . . . . . . . . . . . . . . . . . . . . . . . . . . . . . 2-16<br />
Headlight/pa parking light switch . . . . . . . . . . . . . . . . . . . . . . . . . . . . . . . 2-15<br />
Heater/defroster controls 2-20<br />
Ignition switch . . . . . . . . . . . . . . . . . . . . . . . . . . . . 2-8<br />
Parking brake pedal 2-13(b)<br />
Service brake pedal . . . . . . . . . . . .. . . . . . . . . . . . . . 2-10<br />
Transfer case control lever . . . . . . . . . . . . . . . . . . . . . . . . . . . . . . . . . . . 2-12<br />
Windshieldwiper/washercontrol . . . . . . . . . . . . . . . . . . . . . . . . . . . 2-18<br />
Capabilities, equipment . . . . . . . . . . . . . . . . . . . . . . . . . . . . . . . . . . . . . . . . 1-6<br />
Capacities, tabulated data . . . . . . . . . . . . . . . . . . . . . . . . . . . . . . . . . . . . . . 1-9<br />
Cargo box cover kit . . . . . . . . . . . . . . . . . . . . . . . . . . . . . . . . . . . . . . . . . . . 2-37<br />
Cargo, truck . . . . . . . . . . . . . . . . . . . . . . . . . . . . . . . . . . . . . . . . . . . . . . 1-6(d)<br />
Changing tires . . . . . . . . . . . . . . . . . . . . . . . . . . . . . . . . . . . . . . . . . . . . . . 3-6<br />
Characteristics, equipment. . . . . . . . . . . . . . . . . . . . . . . . . . . . . . . . . . 1-6<br />
Charging system . . . . . . . . . . . . . . . . . . . . . . . . . . . . . . . . . . . . . . . . . 1-14(a)<br />
Chassis, truck . . . . . . . . . . . . . . . . . . . . . . . . . . . . . . . . . . . . . . . . . . . . . . . . 1-6(g)<br />
Classification marker, weight . . . . . . . . . . . . . . . . . . . . . . . . . . . . . . . . . . . 1-7<br />
Cleaning agents:<br />
Cleaning rust or grease . . . . . . . . . . . . . . . . . . . . . . . . . . . . . . . . . . . . . . 2-6(c)<br />
Cleaning underwood areas.. . . . . . . . . . . . . . . . . . . . . . . . . . . . . . . . . . . 2-6(a)<br />
Treating mildewed areas.. . . . . . . . . . . . . . . . . . . . . . . . . . . . . . . . . . . . 2-6(b)<br />
Cold weather operations:<br />
Abnormal instrument readings . . . . . . . . . . . . . . . . . . . . . . . . . . . . . 2-42<br />
Halt or parking 2-42<br />
Long halts or extended shutdown 3-8(c)<br />
Maintenance . . . . . . . . . . . . . . . . . . . . . . . . . . . . . . . . . . . . . . . . . . . . . 3-8<br />
Preparing truck . . . . . . . . . . . . . . . . . . . . . . . . . . . . . . . . . . . . . . . . . . . . 3-8(a)<br />
Snow andice and mud . . . . . . . . . . . . . . . . . . . . . . . . . . . . . . . . . . . . . . 2-42<br />
Startup . . . . . . . . . . . . . . . . . . . . . . . . . . . . . . . . . . . . . . . . . . . . . . . . . . 2-42<br />
Columns, components of end item and Bll, explanation of B-3<br />
Columns, expendabie/durable supplies and materials Iist, explanation of D-2<br />
Controls and indicators, description and use of:<br />
Accelerator pedal . . . . . . . . . . . . . . . . . . . . . . . 2-2(16)<br />
Blackout drive switch 2-2(24)<br />
Brake release handle . . . . . . . . . . . . . . . . . . . . . .. .. . ..2-2(23)<br />
Brake system warning light... . . . . . . . . . . . . . . . . . . . . . . . . . . , .,...2-2(17)<br />
Door ajar indicator light (M1010 only) . . . . . . . . . . . . . . . . . . . . . . . ...2-2(1 1)<br />
Engine coolant temperature light<br />
2-2(4)<br />
Floodlight controls (M1010 only)<br />
2-2(15<br />
Four-wheel drive indicator light . . . . . . . . . . . . . . . . . . . . . . . . . . . . . . . . 2-2(2)<br />
Fuel gage . . . . . . . . . . . . . . . . . . . . . . . . . . . . . . . . . . . . . . . . . . . .2-2(10)<br />
Gas-particulate filter unit controls (M1010 only) . . . . . . . . . . . . . . . . . . . 2-2(14)<br />
Gen 1 and Gen 2 1ights . . . . . . . . . . . . . . . . . . . . . . . . . . . . . . . 2-2(1)<br />
Hazard warning flasher . . . . . . . . . . . . . . . . . . . . . . . .2-2(19)<br />
Headlight high beam indicator light . . . . . . . . . . . . . . . . . . . . . . . 2-2(6)<br />
Heater/defroster controls 2-2(13)<br />
H o o d h a n d l e<br />
2-2(27)<br />
Index 2<br />
2-3<br />
2-54<br />
1-17<br />
2-3<br />
2-62<br />
2-62<br />
2-58<br />
2-58<br />
2-61<br />
2-53<br />
2-57<br />
2-54<br />
2-55<br />
2-60<br />
1-3<br />
1-12<br />
2-83<br />
1-3<br />
3-9<br />
1-3<br />
1-16<br />
1-5<br />
1-6<br />
2-7<br />
2-6<br />
2-7<br />
2-89<br />
2-89<br />
3-14<br />
3-14<br />
3-14<br />
2-89<br />
2-88<br />
B-1<br />
D-1<br />
2-3<br />
2-3<br />
2-3<br />
2-3<br />
2-2<br />
2-2<br />
2-3<br />
2-2<br />
2-2<br />
2-3<br />
2-2<br />
2-3<br />
2-2<br />
2-3<br />
2-3
INDEX<br />
SUBJECT Paragraph<br />
Light switch . . . . . . . . . . . . . . . . . . . . . . . . . . . . . . . . . . . . . . . . . . . . . . .2-2( 21)<br />
Low coolant warning light . . . . . . . . . . . . . . . . . . . . . . . . . . . . . . . . . ...2-2(20)<br />
Oil pressure light . . . . . . . . . . . . . . . . . . . . . . . . . . . . . . . . . . . . . . . . . 2-2(3)<br />
Parking brake pedal . . . . . . . . . . . . . . . . . . . . . . . . . . . . . . . . . . . . . ...2-2(26)<br />
Seat belt indicator light . . . . . . . . . . . . . . . . . . . . . . . . . . . . . . . . . . . . . 2-2(9)<br />
Service brake pedal . . . . . . . . . . . . . . . . . . . . . . . . . . . . . . . . . . . . . . ...2-2(25)<br />
Service lights/blackout toggle switch . . . . . . . . . . . . . . . . . . . . . . . . . . . 2-2(22)<br />
Speedometer . . . . . . . . . . . . . . . . . . . . . . . . . . . . . . . . . . . . . . . . . . . . . 2-2(5)<br />
Turn signal indicators . . . . . . . . . . . . . . . . . . . . . . . . . . . . . . . . . . . . ...2-2(18)<br />
Voltmeter . . . . . . . . . . . . . . . . . . . . . . . . . . . . . . . . . . . . . . . . . . . . . . ...2-2(12)<br />
WAIT (glow plugs indicator) light . . . . . . . . . . . . . . . . . . . . . . . . 2-2(7)<br />
WATER-lN-FUEL indicator light . . . . . . . . . . . . . . . . . . . . . . . . . . . . . . . 2-2(8)<br />
Controls, instruments, gages, and lights . . . . . . . . . . . . . . . . . . . . . . . . 2-2<br />
Coupling, trailer electrical . . . . . . . . . . . . . . . . . . . . . . . . . . . . . . . . . . . . . . 1-7<br />
Cover kit, cargo box . . . . . . . . . . . . . . . . . . . . . . . . . . . . . . . . . . . . . . . . . . . 2-37<br />
Curtains, blackout, operation . . . . . . . . . . . . . . . . . . . . . . . . . . . . . . . . . . 2-33<br />
Data, tabulated . . . . . . . . . . . . . . . . . . . . . . . . . . . . . . . . . . . . . . . . . . . . . . . 1-9<br />
Defroster,heater/operation . . . . . . . . . . . . . . . . . . . . . . . . . . . . . . . . . . . . . 2-20<br />
Description of equipment and major components . . . . . . . . . . . . . . . . . . . . 1-6,<br />
1-7<br />
Differences between models . . . . . . . . . . . . . . . . . . . . . . . . . . . . . . . . . . . 1-8<br />
Dimmer switch, headlight . . . . . . . . . . . . . . . . . . . . . . . . . . . . . . . . . . . . . . . 2-16<br />
Disabled truck,tow . . . . . . . . . . . . . . . . . . . . . . . . . . . . . . . . . . . . . . . . . . . 2-41<br />
Distribution, fuel . . . . . . . . . . . . . . . . . . . . . . . . . . . . . . . . . . . . . . . . . . . . 1-10(a)<br />
Distribution, load . . . . . . . . . . . . . . . . . . . . . . . . . . . . . . . . . . . . . . . . . . . . . 1-18<br />
Domelight operation . . . . . . . . . . . . . . . . . . . . . . . . . . . . . . . . . . . . . . . . . 2-32<br />
Drain fuel filter . . . . . . . . . . . . . . . . . . . . . . . . . . . . . . . . . . . . . . . . . . . . . . . 3-7<br />
Drive truck:<br />
Forward . . . . . . . . . . . . . . . . . . . . . . . . . . . . . . . . . . . . . . . . . . . . . . . . . . 2-9<br />
In four-wheel drive . . . . . . . . . . . . . . . . . . . . . . . . . . . . . . . . 2-12<br />
In reverse . . . . . . . . . . . . . . . . . . . . . . . . . . . . . . . . . . . . . . . . . . . . . . . . 2-11<br />
Driving tips:<br />
Transfer case . . . . . . . . . . . . . . . . . . . . . . . . . . . . . . . . . . . . 1-13<br />
Transmission . . . . . . . . . . . . . . . . . . . . . . . . . . . . . . . . . . . . . . . . . . . . . . 1-12<br />
Dual wheel configuration . . . . . . . . . . . . . . . . . . . . . . . . . . . . . . . . . . . . . . . . . . 1-20<br />
Electrical system:<br />
Battery system . . . . . . . . . . . . . . . . . . . . . . . . . . . . . . . . . . . . . . . . . . . .<br />
Charging system . . . . . . . . . . . . . . . . . . . . . . . . . . . . . . . . . . . . . . . . . .<br />
Glow plug system . . . . . . . . . . . . . . . . . . . . . . . . . . . . . . . . . . . . . . . . .<br />
Starting system . . . . . . . . . . . . . . . . . . . . . . . . . . . . . . . . . . . . . . . . . . .<br />
Wiring and lighting system . . . . . . . . . . . . . . . . . . . . . . . . . . . . . . . . . . .<br />
Emergency procedures:<br />
Slave starting . . . . . . . . . . . . . . . . . . . . . . . . . . . . . . . . . . . . . . . . . .<br />
Towing . . . . . . . . . . . . . . . . . . . . . . . . . . . . . . . . . . . . . . . . . . . . . . .<br />
Engine:<br />
Air intake manifold . . . . . . . . . . . . . . . . . . . . . . . . . . . . . . . . . . . . . . .<br />
Cold weather starting . . . . . . . . . . . . . . . . . . . . . . . . . . . . . . . . . . . . . . .<br />
Fuel distribution . . . . . . . . . . . . . . . . . . . . . . . . . . . . . . . . . . . . . . . . . . . .<br />
General . . . . . . . . . . . . . . . . . . . . . . . . . . . . . . . . . . . . . . . . . . . . . . . . . .<br />
Hot weather starting . . . . . . . . . . . . . . . . . . . . . . . . . . . . . . . . . . . . . . .<br />
Ignition . . . . . . . . . . . . . . . . . . . . . . . . . . . . . . . . . . . . . . . . . . . . . .<br />
Normal starting . . . . . . . . . . . . . . . . . . . . . . . . . . . . . . . . . . . . . . . . . . . .<br />
D<br />
E<br />
Change 3<br />
<strong>TM</strong> 9-<strong>2320</strong>-<strong>289</strong>-10<br />
1-14(a)<br />
1-14(a)<br />
1-14(a)<br />
1-14(a)<br />
1-14(a)<br />
2-40<br />
2-41<br />
1-10(a)<br />
2-42<br />
1-10(a)<br />
1-10<br />
2-43<br />
1-10(a)<br />
2-8<br />
Page<br />
2-3<br />
2-3<br />
2-2<br />
2-3<br />
2-2<br />
2-3<br />
2-3<br />
2-2<br />
2-3<br />
2-2<br />
2-2<br />
2-2<br />
2-1<br />
1-6<br />
2-83<br />
2-78<br />
1-11<br />
2-61<br />
1-3,<br />
1-6<br />
1-11<br />
2-58<br />
2-87<br />
1-13<br />
1-19<br />
2-78<br />
3-12<br />
2-54<br />
2-54<br />
2-54<br />
1-16<br />
1-14<br />
1-20<br />
1-16<br />
1-16<br />
1-17<br />
1-16<br />
1-17<br />
2-86<br />
2-87<br />
1-13<br />
2-88<br />
1-13<br />
1-13<br />
2-89<br />
1-13<br />
2-53<br />
Index 3
<strong>TM</strong> 9-<strong>2320</strong>-<strong>289</strong>-10<br />
INDEX<br />
SUBJECT Paragraph<br />
Shut down . . . . . . . . . . . . . . . . 2-13<br />
Slave starting . . . . . . . . . 2-40<br />
Troubleshooting symptom index<br />
Equipment characteristics and capabilities:<br />
3-5<br />
A m b u l a n c e 1 -6(f)<br />
Cargo truck . . . . . . . . . . . . . . . . . . 1-6(d)<br />
Chassis truck . . . . . . . . . . . . . . . . . . . . . . . . . . 1-6(g)<br />
U t i l i t y t r u c k 1-6(e)<br />
Equipment improvement recommendations (EIR), reporting 1-3<br />
Erect carao box cover . . . . . . . . . . . . . . ... ........2-37(b)<br />
Expendable supplies and materials list<br />
Explanation of columns, components of end item and BII:<br />
D-1<br />
Column (1)-illustration number<br />
Column (2)-national stock number<br />
Column (3)-description . . . . . . . .. . . . . . . . . . . ..<br />
B-3<br />
B-3<br />
B-3<br />
Column (4)-unit of measure<br />
B-3<br />
Column (5)-quantity required<br />
Explanation of columns, expendable/durable supplies and materials list<br />
B-3<br />
Column (l)-item number . . . . . . . D-2<br />
Column (2)-level . . . . . . . . . . . . . . D-2<br />
Column (3)-national stock number . . . . . . . . D-2<br />
Column (4)-description<br />
D-2<br />
Column (5)-unit of measure . . . . . . . . . . . . .<br />
Explanation of listing, additional authorization list . . . . . . . . . . .<br />
External components:<br />
D-2<br />
C-3<br />
Access steps . . . . . . . . . . . . . . . . . . . . . . . . . . . . 1-7<br />
Air conditioner . . . . . . . . . . . . . . . . 1-7<br />
Air exhaust vent . . . . . . . . . . . . . . . . . . . . . . . .<br />
Blackout drive light . . . . . . . . . . . .<br />
Brush guard . . . . . . . . . . . .<br />
Dual gearwheel . . . . . . . . . . . . . . . . . . . . . . . . . . . . . . . . . . . . . . . . . . . . . . .<br />
Flared rear fender . . . . . . . . . . . . . . . . . . . . . . . . . . . . . . . . . . .<br />
Floodlights, . . . . . . . . . . . . . . . . . . . . . . . . . . . . . .<br />
1-7<br />
1-7<br />
1-7<br />
1-7<br />
1-7<br />
1-7<br />
Fuel filler cap . . . . . . . . . . . . . . . . . . . . . . . . . . . . . . . 1-7<br />
Heater access door . . . . . . . . . . . . . . . . . . . . . . 1-7<br />
Heater air inlet . . . . . . . . . . . . . . . . . . . . . . . . . . . . . . . . . 1-7<br />
Locking hubs . . . . . . . . . . . . . . . . . . . . . . . . . . . . . . 1-7<br />
Medical corps symbol . . . . . . . . . . . . . . . . . . . . . . . . . . . . . . . . 1-7<br />
Offset front wheel hub . . . . . . . . . . . . . . . . . . . . . . . . . . . . . . . . . . . . . . . .<br />
Patient assist boom . . . . . . .<br />
1-7<br />
1-7<br />
Patient assist boom bracket<br />
Rear fender side marker . . . . . . . . . . . . . . . . . . . .<br />
Red cross symbol . . . . . . . . . . . . . . . . . . . . . . . . . . . . . . .<br />
1-7<br />
1-7<br />
1-7<br />
Service light.. . . . . . . . . . . . . . . . . 1-7<br />
Side markers . . . . . . . . . . . . 1-7<br />
Slave receptacle . . . . . . . . . . . . . . . . . . . . . . . 1-7<br />
Spotlight . . . . . . . . . . . . . . . . . . . . . . . . . . . . . . . . . . . . . 1-7<br />
Stoplights . . . . . . . . . . . . . . . . . . . . . . . 1-7<br />
Tailgate . . . . . . . . . . . . . . . . . . . . . . . . 1-7<br />
Tailgate latch release . . . . . . . . . . . . . . . . . . . . . . . . . 1-7<br />
Tailgate window . . . . . . . . . . . . . . . . . . . . . . . . . . . . . . . .<br />
Taiigate window crank . . . . . . . . . . . . . . . . .<br />
Tow hooks . . . . . . . . . . . . . . . . . . . . . . . . . . . . . .<br />
Tow pintle . . . . . . . . . . . . . . . . . . . .<br />
Trailer electrical coupling . . . . . . . . . . . . . . . . . . .<br />
Weight classification marker . . . . . . . . . . . . . . . . . . . . . . .<br />
F<br />
Features, equipment . . . . . . . . . . . . . . . . . . . . . .<br />
Filter unit, gas-particulate, operation . . . . . . . . . . . . .<br />
Index 4 Change 3<br />
1-7<br />
1-7<br />
1-7<br />
1-7<br />
1-7<br />
1-7<br />
1-6<br />
2-25<br />
Page<br />
2-56<br />
2-86<br />
3-3<br />
1-4<br />
1-3<br />
1-5<br />
1-4<br />
1-1<br />
2-83<br />
D-1<br />
B-1<br />
B-1<br />
B-1<br />
B-1<br />
B-1<br />
D-1<br />
D-1<br />
D-1<br />
D-1<br />
D-1<br />
C-1<br />
1-7<br />
1-7<br />
1-7<br />
1-6<br />
1-6<br />
1-8<br />
1-8<br />
1-7<br />
1-7<br />
1-7<br />
1-7<br />
1-6<br />
1-7<br />
1-8<br />
1-7<br />
1-7<br />
1-8<br />
1-7<br />
1-6<br />
1-6<br />
1-6<br />
1-7<br />
1-6<br />
1-6<br />
1-6<br />
1-8<br />
1-8<br />
1-8<br />
1-6<br />
1-6<br />
1-6<br />
1-6<br />
1-3<br />
2-65<br />
U.S.G.P.O. 1991 543-025/20221 PIN: 053018-003
INDEX<br />
SUBJECT Paragraph<br />
Flasher, hazard warning, operation . . . . . . . . . . . . . . . . . . . . . . . . . 2-21<br />
Floodlight, operation . . . . . . . . . . . . . . . . . . . . . . . . . . . . . . 2-35<br />
Focus lights, operation . . . . . . . . . . . . . . . . . . 2-31<br />
Fording:<br />
After fording maintenance:<br />
Fresh water . . . . . . . . . . . . . . . . . . . . . . . . . . . . . . . . . . . . . . .. 3-11(a)<br />
Sal twater . . . . . . . . . . . . . . . . . . . . . . . . . . . . . . . . . . . . . . 3-11(b)<br />
Depth . . . . . . . . . . . . . . . . . . . . . . . . . . . . . . . . . . . . . . . . . . . . . .<br />
General . . . . . . . . . . . . . . . . . . . . . . . . . . . . . . . . . . . . . . . . . . . . .<br />
Forms . . . . . . . . . . . . . . . . . . . . . . . . . . . . . . . . . . . . . . . . . . . . . . . . .<br />
Forms and records, maintenance . . . . . . . . . . . . . . . . . . . . . . . . . .<br />
Forward, drive truck . . . . . . . . . . . . . . . . . . . . . . . . . . . . . . . . . . . . . . .<br />
Fuel:<br />
Distribution . . . . . . . . . . . . . . . . . . . . . . . . . . . . . . . . . . . . . . . . .<br />
Filter, draining . . . . . . . . . . . . . . . . . . . . . . . . . . . . . . . . . . . . . . . . . . . . .<br />
System . . . . . . . . . . . . . . . . . . . . . . . . . . . . . . . . . . . . . . . . . . . . . . .<br />
Gages . . . . . . . . . . . . . . . . . . . . . . . . . . . . . . . . . . . . . . . . . . . . . . . . .<br />
Gas-particulate filter:<br />
Air outlet . . . . . . . . . . . . . . . . . . . . . . . . . . . . . . . . . . . . . . . . . . . . . .<br />
Canisters . . . . . . . . . . . . . . . . . . . . . . . . . . . . . . . . . . . . . . . . . . . . . . . .<br />
Unit<br />
Heater . . . . . . . . . . . . . . . . . . . . . . . . . . . . . . . . . . . . . . . . . . . . . . . .<br />
Location . . . . . . . . . . . . . . . . . . . . . . . . . . . . . . . . . . . . . . . . . . . . .<br />
Operation . . . . . . . . . . . . . . . . . . . . . . . . . . . . . . . . . . . . . . . . . .<br />
General:<br />
AAL<br />
Bll . . . . .. . . . . . . . . . . . . . . . . . . . . . .<br />
Lubrication instructions . . . . . . . . . . . . . . . . . . . . . . . . . . . . . . . . . . . .<br />
PMCS . . . . . . . . . . . . . . . . . . . . . . . . . . . . . . . . . . . . . . . . . . . . . . . . . .<br />
Stowage and sign guide . . . . . . . . . . . . . . . . . . . . . . . . . . . . . . . . . . .<br />
Generator indicator lights... . . . . . . . . . . . . . . . . . . . . . . . . . . . . . . . . .<br />
Glow plug system . . . . . . . . . . . . . . . . . . . . . . . . . . . . . . . . . . . . . . . . . . . .<br />
Gross axle weight rating (GAWR) . . . . . . . . . . . . . . . . . . . . . . . . . . . . . . .<br />
Gross vehicle weight rating (GVWR) . . . . . . . . . . . . . . . . . . . . . . . . . .<br />
Handle, hood . . . . . . . . . . . . . . . . . . . . . . . . . . . . . . . . . . . . . . . . . . . . . . . .<br />
Hazard warning flasher, operation . . . . . . . . . . . . . . . . . . . . . . . . .<br />
Headlight dimmer switch, operation . . . . . . . . . . . . . . . . . . . . . . . . . . .<br />
Headlight/parkinglight switch . . . . . . . . . . . . . . . . . . . . . . . . . . . . . . . . . . .<br />
Heater<br />
Patient compartment (M1010), operation . . . . . . . . . . . . . . . . . . . . . . . .<br />
Personnel (M1010), operation . . . . . . . . . . . . . . . . . . . . . . . . . . . . . . . .<br />
Swingfire:<br />
Aid truck start-up . . . . . . . . . . . . . . . . . . . . . . . . . . . . . . . . . . . . . . .<br />
Operation . . . . . . . . . . . . . . . . . . . . . . . . . . . . . . . . . . . . . . . . . . . . . .<br />
Winterization kit, operation:<br />
Defroster/interiorheater... . . . . . . . . . . . . . . . . . . . . . . . . . . . . . . .<br />
Enclosed cargo area personnel heater . . . . . . . . . . . . . . . . . . . . . . .<br />
Underwood heaters . . . . . . . . . . . . . . . . . . . . . . . . . . . . . . . . . . . . . . .<br />
Heater/defroster, operation:<br />
Fan . . . . . . . . . . . . . . . . . . . . . . . . . . . . . . . . . . . . . . . . . . . . . . . . . .<br />
G<br />
H<br />
<strong>TM</strong> 9-<strong>2320</strong>-<strong>289</strong>-10<br />
2-45<br />
2-45<br />
A-3<br />
1-2<br />
2-9<br />
1-10(a)<br />
3-7<br />
1-11<br />
2-2<br />
1-7<br />
1-7<br />
1-7,<br />
2-25<br />
1-7<br />
2-25<br />
C-2<br />
B-2<br />
3-1<br />
2-4<br />
E-2<br />
2-2(1)<br />
1-14(a)<br />
1-18<br />
1-18<br />
2-2(27)<br />
2-21<br />
2-16<br />
2-15<br />
2-27<br />
1-17(c)<br />
2-47<br />
2-46<br />
2-36(b)<br />
2-36(c)<br />
2-36(a)<br />
2-20(c)<br />
2-62<br />
2-79<br />
2-77<br />
3-15<br />
3-15<br />
2-91<br />
2-91<br />
A-1<br />
1-1<br />
2-54<br />
1-13<br />
3-12<br />
1-13<br />
2-1<br />
1-10<br />
1-10<br />
1-10,<br />
2-67<br />
1-10<br />
2-65<br />
C-1<br />
B-1<br />
3-1<br />
2-5<br />
E-1<br />
2-2<br />
1-17<br />
1-19<br />
1-19<br />
2-3<br />
2-62<br />
2-58<br />
2-58<br />
2-68<br />
1-19<br />
2-94<br />
2-92<br />
2-81<br />
2-82<br />
2-80<br />
2-61<br />
Index 5
<strong>TM</strong> 9-<strong>2320</strong>-<strong>289</strong>-10<br />
SUBJECT<br />
In snow and<br />
Lower lever<br />
Upper lever<br />
Hood handle<br />
Horn, operation<br />
INDEX<br />
Paragraph Page<br />
2-20(d)<br />
2-20(b)<br />
2-20(a)<br />
2-2(27)<br />
2-19<br />
Hot weather operations:<br />
At halt or parking . . . . . . . . . . . . . . . . . . . . . . . .. 2-43<br />
Humid weather . . . . . . . . . . . .. . . . . .... .. 3-9(b)<br />
Maintenance . . . . . . . . . . . .. ... . . . .. .. . . .. . .. . . 3-9<br />
Hubs, locking . . . . . . . . .. . . . . . . ... . . . .. . . . . 1-7,<br />
2-12<br />
Index, troubleshooting symptom . . . . . . . . . . . . . 3-5<br />
Indexes, publications . . . . . . . . . . . A-2<br />
Indicators and controls. . . . . . . . . . . . . . . . . . . . 2-2<br />
Indicator, turn signal, operation . . . . . 2-17<br />
Information, warranty . . . . . . . . . . . . 1-4<br />
Inlet, heater, air . . . . . . . . . . . . . . . . . . . . . . . 1-7<br />
Install troop seat kit . . .. . . . .. . . . .. . .. . ... . . . . . . . . . . . . . . .. .. . 2-38(a)<br />
Instruction plates and decals E-2<br />
Instrument panel:<br />
Accelerator pedal . . . . . . . . . . . . . . . . . . . . . . . . . . . .2-2(16)<br />
Blackout drive switch . . . . . . . . . . 2-2(24)<br />
Brake release handle . . . . . . 2-2(23)<br />
Brake system warning light... . . . . . . . . . . . . . ... . . . . . . . . . . .2-2(17)<br />
Controls and indicators . . . . . . . . . . . . . . . . . . . . 2-2<br />
Door ajar indicator light (M1010 only) . . . . . . . . . . . . . . . . . . . . . . . . . . 2-2(11)<br />
Engine coolant temperature light . . . . . . . . . . . . . . . . . . 2-2(4)<br />
Floodlight controls (M1010 only) . . . . . . . . . . . . . . ...2-2(15)<br />
Four-wheel drive indicator light . . . . 2-2(2)<br />
Fuel gage . . . . . . . . . . . . . . . . . . . . . . . . . . . . . . . . ...2-2(10)<br />
Gas-particulate filter unit controls (M1010 only) . . . . . . . . . .2-2(14)<br />
Genland Gen 2 lights . . . . . . . . . . . . . . . . . 2-2(1)<br />
Hazard warning flasher . . . . . . . . . . . . . . . . . . . . . . . ...2-2(19)<br />
Headlight high beam indicator light . . . . . . . . . . . . .. . . . . . . . . . . . 2-2(6)<br />
Heater/defroster controls 2-2(13)<br />
Hood handle . . . . . . . . . . . .. . . . . . . . .. . . . . . . . . . . . .2-2(27)<br />
Light switch . . . . . . . . . . . . . . . . . . . . . . . . . . . . . ...2-2(21)<br />
Low coolant warning light .. . . . . . . . . . . . . . . . . . 2-2(20)<br />
Oil pressure light . . . . . . . . . . . . . . . . . . 2-2(3)<br />
Parking brake pedal 2-2(26)<br />
Seat belt indicator light 2-2(9)<br />
Service brake pedal . . . . . . . . . . . . . . . . . . . . . . . . . ..2-2(25)<br />
Service lights/blackout toggle switch . . . . . . . . . . . . . . . . . 2-2(22)<br />
Speedometer .. . . . . . . . . . . . . . 2-2(5)<br />
Turn signal indicators . . . . . . . . . . . . . . . . . . . . . . . . . . ..2-2(18)<br />
Voltmeter ., . . . . . . . . . . . . . . . . . . . . . . . . . . . . . . . . ..2-2(12)<br />
WAIT (glow plug indicator) light . . . . . . . . . . . . . . . . . 2-2(7)<br />
WATER-lN-FUEL indicator light . . . . . . . . . . . . . . . . . . . 2-2(8)<br />
Internal components:<br />
Air conditioner controls . . . . . . . . . . . . . . . . . . . . . . . . 1-7<br />
Air exhaust vents. . . . . . . . . . . . . 1-7<br />
Domelight . . . . . . . . . . . . . . . . . . . . . . . . . . . . . . . . . . . . 1-7<br />
Focus lights . . . . . . . . . . . . . . . . . . . . . 1-7<br />
Gas-particulate filter:<br />
Air outlet . . . . . . . . . . . . . . . . . . . . . . . . . . 1-7<br />
Index 6<br />
I<br />
2-62<br />
2-61<br />
2-61<br />
2-3<br />
2-60<br />
2-90<br />
3.14<br />
3-14<br />
1-6,<br />
2-54<br />
3-3<br />
A-1<br />
2-1<br />
2-59<br />
1-1<br />
1-7<br />
2-84<br />
E-1<br />
2-3<br />
2-3<br />
2-3<br />
2-3<br />
2-1<br />
2-2<br />
2-2<br />
2-3<br />
2-2<br />
2-2<br />
2-3<br />
2-2<br />
2-3<br />
2-2<br />
2-3<br />
2-3<br />
2-3<br />
2-3<br />
2-2<br />
2-3<br />
2-2<br />
2-3<br />
2-3<br />
2-2<br />
2-3<br />
2-2<br />
2-2<br />
2-2<br />
1-10<br />
1-9<br />
1-9<br />
1-9<br />
1-10
SUBJECT Paragraph<br />
Canisters . . . . . . . . . . . . . . . . . . . . . . . . . . . . . . . . . . . . . . . . . . . . . . . 1-7<br />
Unit . . . . . . . . . . . . . . . . . . . . . . . . . . . . . . . . . . . . . . . . . . . . . . . . . . . 1-7<br />
Unit heater . . . . . . . . . . . . . . . . . . . . . . . . . . . . . . . . . . . . . . . . . . . . . 1-7<br />
Heater outlet . . . . . . . . . . . . . . . . . . . . . . . . . . . . . . . . . . . . . . . . . . . . . . 1-7<br />
Lower litter berths . . . . . . . . . . . . . . . . . . . . . . . . . . . . . . . . . . . . . . . . . . 1-7<br />
Patient compartment front door . . . . . . . . . . . . . . . . . . . . . . . . . . . . . 1-7<br />
Rear door hold open . . . . . . . . . . . . . . . . . . . . . . . . . . . . . . . . . . . . . . . . 1-7<br />
Upper litter berths . . . . . . . . . . . . . . . . . . . . . . . . . . . . . . . . . . . . . . . . . . 1-7<br />
Upperlitter berth support . . . . . . . . . . . . . . . . . . . . . . . . . . . . . . . . . . . 1-7<br />
K<br />
<strong>TM</strong> 9-<strong>2320</strong>-<strong>289</strong>-10<br />
Page<br />
1-10<br />
1-10<br />
1-10<br />
1-9<br />
1-9<br />
1-9<br />
1-9<br />
1-9<br />
1-10<br />
Kit<br />
Cargo box cover . . . . . . . . . . . . . . . . . . . . . . . . . . . . . . . . . . . . . . . . . . . 2-37 2-83<br />
Troop seat<br />
Install . . . . . . . . . . . . . . . . . . . . . . . . . . . . . . . . . . . . . . . . . . . . . . . . 2-38(a) 2-84<br />
Operate . . . . . . . . . . . . . . . . . . . . . . . . . . . . . . . . . . . . . . . . . . . . . . . . 2-39 2-85<br />
Remove . . . . . . . . . . . . . . . . . . . . . . . . . . . . . . . . . . . . . . . . . . . . . . . . 2-38(b) 2-84<br />
Winterization<br />
General . . . . . . . . . . . . . . . . . . . . . . . . . . . . . . . . . . . . . . . . . . . . . . . . 1-19 1-20<br />
Heater operation . . . . . . . . . . . . . . . . . . . . . . . . . . . . . . . . . . . . . . . . . 2-36 2-80<br />
Leakage definitions . . . . . . . . . . . . . . . . . . . . . . . . . . . . . . . . . . . . . . . . . . . 2-7<br />
Lights:<br />
Blackout drive . . . . . . . . . . . . . . . . . . . . . . . . . . . . . . . . . . . . . . . . . . ...2-15(b)<br />
Blackout markers . . . . . . . . . . . . . . . . . . . . . . . . . . . . . . . . . . . . . . . . . .2-15(c)<br />
Brake system warning . . . . . . . . . . . . . . . . . . . . . . . . . . . . . . . . . . . . . ..2-2(17)<br />
Dome and focus . . . . . . . . . . . . . . . . . . . . . . . . . . . . . . . . . . . . . . . . . . . 1-17(d)<br />
Dome, operation . . . . . . . . . . . . . . . . . . . . . . . . . . . . . . . . . . . . . . . . . . . 2-32<br />
Flood, operation . . . . . . . . . . . . . . . . . . . . . . . . . . . . . . . . . . . . . . . . . 2-35<br />
Focus, operation . . . . . . . . . . . . . . . . . . . . . . . . . . . . . . . . . . . . . . . . . . . 2-31<br />
Head/parking, operation . . . . . . . . . . . . . . . . . . . . . . . . . . . . . . . . . . . 2-15(a)<br />
Service . . . . . . . . . . . . . . . . . . . . . . . . . . . . . . . . . . . . . . . . . . . . . . . . . . 2-15(a)<br />
Spot, operation . . . . . . . . . . . . . . . . . . . . . . . . . . . . . . . . . . . . . . . . . . . . 2-34<br />
Listing, explanation of (AAL). . . . . . . . . . . . . . . . . . . . . . . . . . . . . . . . . . . . . C-3<br />
Litter berth (M1010), operation . . . . . . . . . . . . . . . . . . . . . . . . . . . . . . . . . . 2-28<br />
Litter tie-down, operation . . . . . . . . . . . . . . . . . . . . . . . . . . . . . . . . . . . . .2-28(c)<br />
Loading,truck . . . . . . . . . . . . . . . . . . . . . . . . . . . . . . . . . . . . . . . . . . . . . . . 1-18<br />
Location and description of major components:<br />
External . . . . . . . . . . . . . . . . . . . . . . . . . . . . . . . . . . . . . . . . . . . . . . . . . . 1-7(a)<br />
Internal . . . . . . . . . . . . . . . . . . . . . . . . . . . . . . . . . . . . . . . . . . . . . . . 1-7(b)<br />
Locking hub, lock . . . . . . . . . . . . . . . . . . . . . . . . . . . . . . . . . . . . . . . . . . . . . 2-12<br />
Lubrication order . . . . . . . . . . . . . . . . . . . . . . . . . . . . . . . . . . . . . . . . . . . . . 3-2<br />
L<br />
M<br />
2-7<br />
2-58<br />
2-58<br />
2-3<br />
1-19<br />
2-78<br />
2-79<br />
2-77<br />
2-58<br />
2-58<br />
2-78<br />
C-1<br />
2-70<br />
2-75<br />
1-19<br />
1-6<br />
1-9<br />
2-54<br />
3-1<br />
Maintenance:<br />
Afterfording . . . . . . . . . . . . . . . . . . . . . . . . . . . . . . . . . . . . . . . . . . . . . . 3-11 3-15<br />
After operating on unusual terrain:<br />
Mud 3-1 O(a) 3-14<br />
Sand or dust . .. . . . . . .. . . . . . . . . . . . . . . . . . . . . . . . . . . 3-10(b) 3-14<br />
Cleaning agents and precautions:<br />
Mildewed areas . . . . . . . . . . . . . . . . . . . . . . . . . . . . . . . . . . . . . . . . . 2-6(b) 2-7<br />
Rust or grease . . . . . . . . . . . . . . . . . . . . . . . . . . . . . . . . . . . . . . . . . . 2-6(c) 2-7<br />
Index 7
<strong>TM</strong> 9-<strong>2320</strong>-<strong>289</strong>-10<br />
INDEX<br />
SUBJECT Paragraph<br />
Underhood areas<br />
Extreme cold weather<br />
Extreme hot or humid weather<br />
Forms and records, maintenance<br />
Recording repairs<br />
Major components, location and description of:<br />
External . . . . . . . . .. . . . . . . . . . . . . . . . . . .<br />
Interanl . . . . . . . . . . . . . . . . . . . . . . . . . .<br />
Manifold, air intake . . . . . . . . . . . .. . . . .. . . . . . . . . . . . . .. . . . . . .<br />
Mildew, cleaning .<br />
Model differences<br />
Mount, weapon, operation<br />
M1009,0perate tailgate . . . . . . . . . . .<br />
MIOIO, operate peculiar components:<br />
Air conditioner . . . . . . . . . . . . . . . . . .<br />
Gas-particulate filter system . . . ... . . .. . . . . . . . . . . . . . ..<br />
Litter berths . . . . . . . . . . . . . . . . . . . . . . .<br />
Patient compartment heater<br />
0<br />
2-6(a)<br />
3-8<br />
3-9<br />
1-2<br />
1-2<br />
1-7(a)<br />
1 -7(b)<br />
1-10(a)<br />
2-6(b)<br />
1-8<br />
2-24<br />
2-23<br />
2-26<br />
2-25<br />
2-28<br />
2-27<br />
Oil pressure light . . . . . . . . . . . . . . . . . . . . . . . 2-2(3)<br />
Operate:<br />
Access steps . . . . . . . . . . . . . . . . .. . . . . . . 2-30<br />
Air conditioner (M1010) . . . . . . . . . 2-26<br />
Air vents . . . 2-22<br />
Attendant’s seat . . . . . . . . . . . . . . . . . . . . 2-29<br />
Blackout curtains . . . . . . . . . . . . . . . 2-33<br />
Domelight . . . . . . . . . . . . 2-32<br />
Floodlights . . . . . . . . . . . . . . . . . . . . . 2-35<br />
Focus lights . . . . . . . . . . . . . . . . . 2-31<br />
Gas-particulate filter system (M1010) . . . . . . . . 2-25<br />
Hazard warning flasher . . . . . 2-21<br />
Headlight dimmer switch. . . . . . . . . . 2-16<br />
Heater/defroster . . . . . . . . . . . . . . 2-20<br />
Horn 2-19<br />
In extreme cold 2-42<br />
In extreme heat . . . . . . . . . . . . . . . . . . . . . . 2-43<br />
In unusual terrain 2-44<br />
Lights . . . . . . . . . . . . . . . . . . . ... ... . . 2-15<br />
Litter berths (M1010) . . . . . . . . . . . 2-28<br />
On unusual terrain . . . . . . . . . . . . . . . . . . . . . . . . . . . . . . 2-44<br />
Patient compartment heater (M1010) . . . . . . . . . 2-27<br />
Spotlight . . . . . . . . . . . . . . . . 2-34<br />
Swingfire heater . . . . . . . . . . . . . . . . . . . . . . . . . . . . . . 2-46<br />
Tailgate (M1009) . . . . . . . . . . . . . . . . . . . 2-23<br />
Troop seat kit . . . . . . . . . . . . . . . . . . . . . . . . . . . . 2-39<br />
Turn signal indicator . . . . . . . . . . . . . 2-17<br />
Weapons mount . . . . . . . . . . . . . . . . . 2-24<br />
Windshieldwiper/washer . . . . . . . . . . . . . . . . . . . . . . .<br />
Winterization kit heaters . . . . . . . . . 2-36<br />
Other publications:<br />
Decontamination . . . . . . . . . . . . . . . A-4<br />
General . . . . . . . . . . . . . . . . . . . . . . . . . . . . . . . . . . . . . . . . . . . . . . . . A-4<br />
Maintenance . . . . . . . . . . . . . A-4<br />
Index 8<br />
Page<br />
2-6<br />
3-14<br />
3-14<br />
1-1<br />
1-1<br />
1-6<br />
1-9<br />
1-13<br />
2-7<br />
1-11<br />
2-64<br />
2-63<br />
2-67<br />
2-65<br />
2-70<br />
2-68<br />
2-2<br />
2-77<br />
2-67<br />
2-62<br />
2-76<br />
2-78<br />
2-78<br />
2-79<br />
2-77<br />
2-65<br />
2-62<br />
2-58<br />
2-61<br />
2-60<br />
2-88<br />
2-89<br />
2-90<br />
2-58<br />
2-70<br />
2-90<br />
2-68<br />
2-78<br />
2-92<br />
2-63<br />
2-85<br />
2-59<br />
2-64<br />
2-80<br />
A-1<br />
A-1<br />
A-1
SUBJECT<br />
INDEX<br />
Parking brake:<br />
Operation . . . . . . . . . . . . . . . . . . . . . . . . . . . . . . . . . . . . . . . . . . . . . . . . .<br />
Pedal . . . . . . . . . . . . . . . . . . . . . . . . . . . . . . . . . . . . . . . . . . . . . . . . . . . .<br />
Release . . . . . . . . . . . . . . . . . . . . . . . . . . . . . . . . . . . . . . . . . . . . . . . .<br />
Release handle . . . . . . . . . . . . . . . . . . . . . . . . . . . . . . . . . . . . . . . . . . . .<br />
Parking truck:<br />
Cold weather . . . . . . . . . . . . . . . . . . . . . . . . . . . . . . . . . . . . . . . . . . . . . .<br />
General . . . . . . . . . . . . . . . . . . . . . . . . . . . . . . . . . . . . . . . . . . . . . . . . . .<br />
Hot weather . . . . . . . . . . . . . . . . . . . . . . . . . . . . . . . . . . . . . . . . . . . . . . .<br />
With trailer . . . . . . . . . . . . . . . . . . . . . . . . . . . . . . . . . . . . . . . . . . . . . . .<br />
Park truck and shutdown engine . . . . . . . . . . . . . . . . . . . . . . . . . . . . . . . .<br />
Patient compartment (M1010)<br />
General . . . . . . . . . . . . . . . . . . . . . . . . . . . . . . . . . . . . . . . . . . . . . . . . . .<br />
Heater(M1010) . . . . . . . . . . . . . . . . . . . . . . . . . . . . . . . . . . . . . . . . . . . .<br />
Peculiar components, M1010:<br />
Air conditioning unit . . . . . . . . . . . . . . . . . . . . . . . . . . . . . . . . . . . . . . . .<br />
Domelight and focus lights . . . . . . . . . . . . . . . . . . . . . . . . . . . . . . . . . . .<br />
Gas-particulate filter unit (GPFU) . . . . . . . . . . . . . . . . . . . . . . . . . . . . . . .<br />
Personnel heater . . . . . . . . . . . . . . . . . . . . . . . . . . . . . . . . . . . . . . . . . . .<br />
Pedal:<br />
Accelerator . . . . . . . . . . . . . . . . . . . . . . . . . . . . . . . . . . . . . . . . . . . . . .<br />
Parking Brake . . . . . . . . . . . . . . . . . . . . . . . . . . . . . . . . . . . . . . . . . . . . .<br />
Service Brake . . . . . . . . . . . . . . . . . . . . . . . . . . . . . . . . . . . . . . . . . . . . .<br />
Preparing truck for use, road test . . . . . . . . . . . . . . . . . . . . . . . . . . . . . . . .<br />
Preventive maintenance checks and services (PMCS)<br />
Cleaning agents . . . . . . . . . . . . . . . . . . . . . . . . . . . . . . . . . . . . . . . . . . . .<br />
General . . . . . . . . . . . . . . . . . . . . . . . . . . . . . . . . . . . . . . . . . . . . . . . .<br />
Leakage definitions . . . . . . . . . . . . . . . . . . . . . . . . . . . . . . . . . . . . . . . . .<br />
Table . . . . . . . . . . . . . . . . . . . . . . . . . . . . . . . . . . . . . . . . . . . . . . . . . . . .<br />
Procedures . . . . . . . . . . . . . . . . . . . . . . . . . . . . . . . . . . . . . . . . . . . . . . .<br />
Publication indexes . . . . . . . . . . . . . . . . . . . . . . . . . . . . . . . . . . . . . . . . . . .<br />
Publications, other . . . . . . . . . . . . . . . . . . . . . . . . . . . . . . . . . . . . . . . . . . . .<br />
P<br />
<strong>TM</strong> 9-<strong>2320</strong>-<strong>289</strong>-10<br />
Paragraph Page<br />
2- 13(b)<br />
2-2(26)<br />
2-9<br />
2-2(23)<br />
2-42(b)<br />
2-13<br />
2-43(d)<br />
2-14(c)<br />
2-13<br />
2-28<br />
2-27<br />
1-17(b)<br />
1-17(d)<br />
1-17(a)<br />
1-17(c)<br />
2-2( 16)<br />
2-2(26)<br />
2-2(25)<br />
2-3(a)<br />
Recording repairs . . . . . . . . . . . . . . . . . . . . . . . . . . . . . . . . . . . . . . . . . . . . . 1-2<br />
Records and forms, maintenance . . . . . . . . . . . . . . . . . . . . . . . . . . . . . . . . . 1-2<br />
References . . . . . . . . . . . . . . . . . . . . . . . . . . . . . . . . . . . . . . . . . . . . . . . . . . A-1<br />
Remove troop seat kit . . . . . . . . . . . . . . . . . . . . . . . . . . . . . . . . . . . . . . 2-38(b)<br />
Reporting equipment improvement recommendations (EIR) . . . . . . . . . . . . . 1-3<br />
Reverse -. . . . . . . . . . . . . . . . . . . . . . . . . . . . . . . . . . . . . . . . . . . . . .<br />
Road test . . . . . . . . . . . . . . . . . . . . . . . . . . . . . . . . . . . . . . . . . . . . . . . . . . .<br />
Scope:<br />
Appendix A . . . . . . . . . . . . . . . . . . . . . . . . . . . . . . . . . . . . . . . . . . . . . . .<br />
Appendix B . . . . . . . . . . . . . . . . . . . . . . . . . . . . . . . . . . . . . . . . . . . . . . .<br />
Appendix C . . . . . . . . . . . . . . . . . . . . . . . . . . . . . . . . . . . . . . . . . . . . . . .<br />
Appendix D . . . . . . . . . . . . . . . . . . . . . . . . . . . . . . . . . . . . . . . . . . . . . . .<br />
Appendix E . . . . . . . . . . . . . . . . . . . . . . . . . . . . . . . . . . . . . . . . . . . . . . .<br />
General information . . . . . . . . . . . . . . . . . . . . . . . . . . . . . . . . . . . . . . . . .<br />
Troubleshooting . . . . . . . . . . . . . . . . . . . . . . . . . . . . . . . . . . . . . . . . . . . .<br />
Seat, attendant’s (M1010), operation . . . . . . . . . . . . . . . . . . . . . . . . . . . . . .<br />
R<br />
s<br />
2-6<br />
2-4<br />
2-7<br />
2-5<br />
A-2<br />
A-4<br />
2-11<br />
2-3(a)<br />
A-1<br />
B-1<br />
C-1<br />
D-1<br />
E-1<br />
1-1<br />
3-3<br />
2-29<br />
2-57<br />
2-3<br />
2-54<br />
2-3<br />
2-89<br />
2-56<br />
2-90<br />
2-57<br />
2-56<br />
2-70<br />
2-68<br />
1-19<br />
1-19<br />
1-18<br />
1-19<br />
2-3<br />
2-3<br />
2-3<br />
2-3<br />
2-6<br />
2-5<br />
2-7<br />
2-8<br />
2-5<br />
A-1<br />
A-1<br />
1-1<br />
1-1<br />
A-1<br />
2-84<br />
1-1<br />
2-54<br />
2-3<br />
A-1<br />
B-1<br />
C-1<br />
D-1<br />
E-1<br />
1-1<br />
3-2<br />
2-76<br />
Index 9
<strong>TM</strong> 9-<strong>2320</strong>-<strong>289</strong>-10<br />
INDEX<br />
SUBJECT Paragraph<br />
Service brake pedal:<br />
Location . . . . . . . . . . . . . . . . . . . . . . . . . . . . . . . . . . . . . . . . . . . . . . 2-2(25)<br />
Operation . . . . . . . . . . . . . . . . . . . . . . . . . . . . . . . . . . . . . . . . . 2-10<br />
Service lights, operation, . . . . . . . . . . . . . . . . . . . . . . . . . . . . . . . . . . . . . 2-15(a)<br />
Shut down engine and park truck . . . . . . . . . . . . . . . . . . . . . . . 2-13<br />
Sign and stowage guide . . . . . . . . . . . . . . . . . . . . . . . . . . . . . . . . . . . . . . . E-1<br />
Slave start truck.. . . . . . . . . . . . . . . . . . . . . . . . . . . . 2-40<br />
Speeds, transfer case . . . . . . . . . . . . . . . . . . . . . . . . . . . . . . . . . 1-13<br />
Spotlightr operation . . . . . . . . . . . . . . . . . . . . . . . . . . . . . . . . . . . . . . . . . . . 2-34<br />
Start engine . . . . . . . . . . . . . . . . . . . . . . . . . . . . . . . . . . . . . . . . . . . . . . 2-8<br />
Starting system . . . . . . . . . . . . . . . . . . . . . . . . . . . . . . . . . . . . . . . . . . . . .. 1-14(a)<br />
Steering system . . . . . . . . . . . . . . . . . . . . . . . . . 1-16<br />
Steps, access:<br />
Location . . . . . . . . . . . . . . . . . . . . . . . . . . . . . . . . . . . . . . . . . . . 1-7<br />
Operation . . . . . . . . . . . . . . . . . . . . . . . . . . . . . . . . . . . . . . . . . 2-30<br />
Stop truck . . . . . . . . . . . . . . . . . . . . . . . . . . . . . . . . . . . . . . . . . . . . . . 2-10<br />
Stowage and sign guide . . . . . . . . . . . . . . . . . . . . . . . . . . . . . . . . . . . . . . . E-1<br />
Stow cargo box cover . . . . . . . . . . . . . . . . . . . . . . ..2-37(a)<br />
Swingfire heater:<br />
Operation<br />
Correct flooded condition. . . . . . . . . . . . . . . . . . . . . . . . . . . . . .2-46(c)<br />
Prepare heater . . . . . . . . . . . . . . . . . . . . . . 2-46(a)<br />
Start heater. . . . . . . . . . . . . . . . . . . . . . . . . . . . . . ...2-46(b)<br />
Start truck with heater . . . . . . . . . . . . . . . . . . . . . . . . . . . . . . . . . . . . . . 2-47<br />
Switch, headlight dimmer, operation . . . . . . . . . . . . . . . . . . . . . 2-16<br />
Symptom index, troubleshooting . . . . . . . . . . . . . . . . . . . . . . . . . . . . . . . . . 3-5<br />
System:<br />
Battery . . . . . . . . . . . . . . . . . . . . . . . . . . . . . . . . . . . . . . . . . . . 1-14(a)<br />
Brake . . . . . . . . . . . . . . . . . . . . . . . . . . . . . . . . . . . . . . . . . . . . . . . . . . . . 1-15<br />
Charging . . . . . . . . . . . . . . . . . . . . . . . . . . . . . . . . . . . . . . . . . . . .1-14(a)<br />
Electrical 1-14(b)<br />
F u e l 1-11<br />
Gas-particulate filter . . . . . . . . . . . . . . . . . . . . . . . . . . . . . . . . . . . . . . . . 2-25<br />
Glow plug . . . . . . . . . . . . . . . . . . . . . . . . . . . . . . . . . . . . . . . . . . . . . . .. 1-14(a)<br />
Starting . . . . . . . . . . . . . . . . . . . . . . . . . . . . . . . . . . . . . . . . . . . . . . . . .. 1-14(a)<br />
Steering . . . . . . . . . . . . . . . . . . . . . . . . . . . . . . . . . . . . . . . . . . . . . . 1-16<br />
Wiring and lighting . . . . . . . . . . . . . . . . . . . . . . . . . , . . . . . . . . . . . . . 1-14(a)<br />
Tabulated data . . . . . . . . . . . . . . . . . . . . . . . . . . . . . . . . . . . . . . . . . . . . . . . 1-9<br />
Tailgate:<br />
Latch release . . . . . . . . . . . . . . . . . . . . . . . . . . . . . . . . . . . . . . . . . . . . . . 1-7<br />
M1008 . . . . . . . . . . . . . . . . . . . . . . . . . . . . . . . . . . . . . . . . . . . . . . . . . . 1-7<br />
M1009, operation 2-23<br />
Window (M1009) 1-7<br />
Window crank (M1009) . . . . . . . . . . . . . . . . . . . . . . . . . . . . . . . . 1-7<br />
Tips, driving:<br />
Transfer case . . . . . . . . . . . . . . . . . . . . . . . . . . . . . . . . . . . . . . . . 1-13<br />
Transmission . . . . . . . . . . . . . . . . . . . . . . . . . . . . . . . . . . . . . . . . . . . . . . 1-12<br />
Tires, changing . . . . . . . . . . . . . . . . . . . . . . . . . . . . . . . . . . . . . . . . 3-6<br />
Towatrailer/aircraft . . . . . . . . . . . . . . . . . . . . . . . . . . . . . . . . . . . . . . . . . . 2-14<br />
Tow disabled truck:<br />
On front wheels . . . . . . . . . . . . . . . . . . . . . . . . . . . . . . . . . . . . . . . . . .2-41(c)<br />
On gearwheels . . . . . . . . . . . . . . . . . . . . . . . . .2-41(b)<br />
With tow bar . . . . . . . . . . . . . . . . . . . . . . . . . . ,2-41(a)<br />
Trailer, towing . . . . . . . . . . . . . . . . . . . . . . . . . . . . . . . . . . . . . . . . . . 2-14<br />
Index 10<br />
T<br />
Page<br />
2-3<br />
2-54<br />
2-58<br />
2-56<br />
E-1<br />
2-86<br />
1-16<br />
2-78<br />
2-53<br />
1-16<br />
1-18<br />
1-7<br />
2-77<br />
2-54<br />
E-1<br />
2-83<br />
2-94<br />
2-92<br />
2-92<br />
2-94<br />
2-58<br />
3-3<br />
1-16<br />
1-17<br />
1-16<br />
1-17<br />
1-13<br />
2-65<br />
1-17<br />
1-16<br />
1-18<br />
1-17<br />
1-11<br />
1-6,<br />
1-8<br />
1-6<br />
2-63<br />
1-8<br />
1-8<br />
1-16<br />
1-14<br />
3-9<br />
2-57<br />
2-88<br />
2-88<br />
2-87<br />
2-57
SUBJECT<br />
INDEX<br />
Transfer case:<br />
Driving tips . . . . . . . . . . . . . . . . . . . . . . . . . . . . . . . . . . . . . . . . . . .<br />
General . . . . . . . . . . . . . . . . . . . . . . . . . . . . . . . . . . . . . . . . . . . . . . . . . .<br />
Neutral(N) . . . . . . . . . . . . . . . . . . . . . . . . . . . . . . . . . . . . . . . . . . . . . . .<br />
Selecting a transfer range.. . . . . . . . . . . . . . . . . . . . . . . . . . . . . . . . .<br />
Shifting . . . . . . . . . . . . . . . . . . . . . . . . . . . . . . . . . . . . . . . . . . . . . . . . . .<br />
Transfer case control lever . . . . . . . . . . . . . . . . . . . . . . . . . . . . . . . . . .<br />
Transfer range selection . . . . . . . . . . . . . . . . . . . . . . . . . . . . . . . . . . . . . . . .<br />
Transmission driving tips . . . . . . . . . . . . . . . . . . . . . . . . . . . . . . . . . . . . . .<br />
Transmission range selection:<br />
Drive . . . . . . . . . . . . . . . . . . . . . . . . . . . . . . . . . . . . . . . . . . . . . . . . .<br />
Neutral . . . . . . . . . . . . . . . . . . . . . . . . . . . . . . . . . . . . . . . . . . . . . . . . . . .<br />
Park . . . . . . . . . . . . . . . . . . . . . . . . . . . . . . . . . . . . . . . . . . . . . . . . . . . .<br />
Reverse . . . . . . . . . . . . . . . . . . . . . . . . . . . . . . . . . . . . . . . . . . . . . . . . . .<br />
“l’’ . . . . . . . . . . . . . . . . . . . . . . . . . . . . . . . . . . . . . . . . . . . . . . . . . . . . . .<br />
“2’’ . . . . . . . . . . . . . . . . . . . . . . . . . . . . . . . . . . . . . . . . . . . . . . . . . . . . . .<br />
Troop seat kit<br />
<strong>TM</strong> 9-<strong>2320</strong>-<strong>289</strong>-10<br />
Paragraph<br />
1-13<br />
1-13<br />
1-13<br />
1-13,<br />
2-44<br />
1-13,<br />
2-12<br />
1-13<br />
1-13,<br />
2-44<br />
1-12<br />
1-12<br />
1-12<br />
1-12<br />
1-12<br />
1-12<br />
1-12<br />
Install . . . . . . . . . . . . . . . . . . . . . . . . . . . . . . . . . . . . . . . . . . . . . . . . . . . . 2-38(a)<br />
Operate . . . . . . . . . . . . . . . . . . . . . . . . . . . . . . . . . . . . . . . . . . . . . . . . . 2-39<br />
Remove . . . . . . . . . . . . . . . . . . . . . . . . . . . . . . . . . . . . . . . . . . . . . . . 2-38(b)<br />
Troubleshooting:<br />
Basic procedure . . . . . . . . . . . . . . . . . . . . . . . . . . . . . . . . . . . . . . . . . . .<br />
Scope . . . . . . . . . . . . . . . . . . . . . . . . . . . . . . . . . . . . . . . . . . . . . . . . . .<br />
Symptom index . . . . . . . . . . . . . . . . . . . . . . . . . . . . . . . . . . . . . . . . . . . .<br />
Table . . . . . . . . . . . . . . . . . . . . . . . . . . . . . . . . . . . . . . . . . . . . . . . . . .<br />
Truck characteristics:<br />
Brake system . . . . . . . . . . . . . . . . . . . . . . . . . . . . . . . . . . . . . . . . . . . . . .<br />
Fuel system . . . . . . . . . . . . . . . . . . . . . . . . . . . . . . . . . . . . . . . . . . . . . . .<br />
Steering system . . . . . . . . . . . . . . . . . . . . . . . . . . . . . . . . . . . . . . . . . . . .<br />
Truck loading:<br />
Gross axle weight rating (GAWR) . . . . . . . . . . . . . . . . . . . . . . . . . . . .<br />
Gross vehicle weight rating (GVWR) . . . . . . . . . . . . . . . . . . . . . . . . . .<br />
Truck maneuvers:<br />
Forward . . . . . . . . . . . . . . . . . . . . . . . . . . . . . . . . . . . . . . . . . . . . . . . . . .<br />
Reverse . . . . . . . . . . . . . . . . . . . . . . . . . . . . . . . . . . . . . . . . . . . . . . . .<br />
Stopping . . . . . . . . . . . . . . . . . . . . . . . . . . . . . . . . . . . . . . . . . . . . . . . .<br />
Truck operation, unusual conditions:<br />
Cold weather . . . . . . . . . . . . . . . . . . . . . . . . . . . . . . . . . . . . . . . . . . . . . .<br />
Fording . . . . . . . . . . . . . . . . . . . . . . . . . . . . . . . . . . . . . . . . . . . . . . . .<br />
Hot weather . . . . . . . . . . . . . . . . . . . . . . . . . . . . . . . . . . . . . . . . . . . . . . .<br />
Snowy or icy terrain . . . . . . . . . . . . . . . . . . . . . . . . . . . . . . . . . . . . . . . .<br />
Transfer ranges . . . . . . . . . . . . . . . . . . . . . . . . . . . . . . . . . . . . . . . . . . . .<br />
Unusual terrain . . . . . . . . . . . . . . . . . . . . . . . . . . . . . . . . . . . . . . . . . . . .<br />
Turn signal indicator . . . . . . . . . . . . . . . . . . . . . . . . . . . . . . . . . . . . . . . . . .<br />
u<br />
3-4<br />
3-3<br />
3-5<br />
1-15<br />
1-11<br />
1-16<br />
1-18<br />
1-18<br />
2-9<br />
2-11<br />
2-10<br />
2-42<br />
2-45<br />
2-43<br />
2-42<br />
1-13,<br />
2-44<br />
2-44<br />
2-17<br />
Underwood heaters, winterization kits, operation . . . . . . . . . . . . . . . . . . . . . 2-36(a)<br />
Unusual terrain:<br />
Maintenance after operating on . . . . . . . . . . . . . . . . . . . . . . . . . . . . . . . 3-10<br />
Operation . . . . . . . . . . . . . . . . . . . . . . . . . . . . . . . . . . . . . . . . . . . . . . . . . 2-44<br />
Use, preparation for . . . . . . . . . . . . . . . . . . . . . . . . . . . . . . . . . . . . . . . . . . . 2-3<br />
Utility, truck . . . . . . . . . . . . . . . . . . . . . . . . . . . . . . . . . . . . . . . . . . . . . . . . . 1-6(e)<br />
Page<br />
1-16<br />
1-15<br />
1-15<br />
1-15,<br />
2-90<br />
1-15,<br />
2-55<br />
1-15<br />
1-15,<br />
2-90<br />
1-14<br />
1-14<br />
1-14<br />
1-14<br />
1-14<br />
1-14<br />
1-14<br />
2-84<br />
2-85<br />
2-84<br />
3-2<br />
3-2<br />
3-3<br />
3-4<br />
1-17<br />
1-13<br />
1-18<br />
1-19<br />
1-19<br />
2-54<br />
2-54<br />
2-54<br />
2-88<br />
2-91<br />
2-89<br />
2-89<br />
1-15,<br />
2-90<br />
2-90<br />
2-59<br />
2-80<br />
3-14<br />
2-90<br />
2-3<br />
1-4<br />
Index 11
<strong>TM</strong> 9-<strong>2320</strong>-<strong>289</strong>-10<br />
SUBJECT<br />
Vents:<br />
Air exhaust<br />
Air, operation<br />
Voltmeter . . .<br />
INDEX<br />
Warning flasher, hazard, operation . . . . . . . . . . . . . . . . . . . . . . . . . . . . . . .<br />
Warranty . . . . . . . . . . . . . . . . . . . . . . . . . . . . . . . . . . . . . . . . . . . . . . . . . . .<br />
Water, fording:<br />
Fresh, maintenance . . . . . . . . . . . . . . . . . . . . . . . . . . . . . . . . . . . . . . . . .<br />
Salt, maintenance . . . . . . . . . . . . . . . . . . . . . . . . . . . . . . . . . . . . . . . . . .<br />
Weapons mount operation.. . . . . . . . . . . . . . . . . . . . . . . . . . . . . . . . . . . . .<br />
Weather:<br />
Extreme cold, maintenance . . . . . . . . . . . . . . . . . . . . . . . . . . . . . . . . . . .<br />
Extreme hot or humid, maintenance . . . . . . . . . . . . . . . . . . . . . . . . . . .<br />
Weight classification marker . . . . . . . . . . . . . . . . . . . . . . . . . . . . . . . . . . . .<br />
Weight limits . . . . . . . . . . . . . . . . . . . . . . . . . . . . . . . . . . . . . . . . . . . . . . . .<br />
Wheels and tires, changing tires . . . . . . . . . . . . . . . . . . . . . . . . . . . . . . . . .<br />
Window, tailgate:<br />
Location . . . . . . . . . . . . . . . . . . . . . . . . . . . . . . . . . . . . . . . . . . . . . . . . . .<br />
Operation . . . . . . . . . . . . . . . . . . . . . . . . . . . . . . . . . . . . . . . . . . . . . . . . .<br />
Window crank, tailgate:<br />
Location . . . . . . . . . . . . . . . . . . . . . . . . . . . . . . . . . . . . . . . . . . . . . . . . . .<br />
Operation . . . . . . . . . . . . . . . . . . . . . . . . . . . . . . . . . . . . . . . . . . . . . . . . .<br />
Windshieldwiper/washercontrol, operation . . . . . . . . . . . . . . . .<br />
Winterization kit:<br />
V<br />
w<br />
Paragraph<br />
1-7<br />
2-22<br />
2-2( 12)<br />
2-21<br />
1-4<br />
3-11<br />
3-11<br />
2-24<br />
3-8<br />
3-9<br />
1-7<br />
1-18<br />
3-6<br />
1-7<br />
2-23<br />
1-7<br />
2-23<br />
2-18<br />
Defroster\interior heating . . . . . . . . . . . . . . . . . . . . . . . . . . . . . . . . ...2-36(b)<br />
Differences between models. . . . . . . . . . . . . . . . . . . . . . . . . . . . . . . ...2-36(d)<br />
Enclosed cargo area personnel heater, operation . . . . . . . . . . . . . . . 2-36(c)<br />
General description . . . . . . . . . . . . . . . . . . . . . . . . . . . . . . . . . . . . . . . . . 1-19<br />
Underwood heater, operation . . . . . . . . . . . . . . . . . . . . . . . . . . . . . ...2-36(a)<br />
Wiring and lighting system . . . . . . . . . . . . . . . . . . . . . . . . . . . . . . . . . . . . . 1-14(a)<br />
Index 12<br />
Page<br />
1-7<br />
2-62<br />
2-2<br />
2-62<br />
1-1<br />
3-15<br />
3-15<br />
2-64<br />
3-14<br />
3-14<br />
1-6<br />
1-19<br />
3-9<br />
1-8<br />
2-63<br />
1-8<br />
2-63<br />
2-60<br />
2-81<br />
2-82<br />
2-82<br />
1-20<br />
2-80<br />
1-17
By Order of the Secretaries of the Army, the Navy and the Air Force:<br />
Official:<br />
R.L. DILWORTH<br />
Brigadier General United States Army<br />
The Adjutant General<br />
Official:<br />
J. J. Went<br />
Lieutenant General, USMC<br />
Deputy Chief of Staff for Installations and Logistics<br />
JOHN A. WICKHAM, JR.<br />
General, United States Army<br />
Chief of Staff<br />
CHARLES A. GABRIEL, General, USAF<br />
Chief of Staff<br />
Distribution:<br />
To be distributed in accordance with DA Form 12-38, Operator maintenance requirements for Truck,<br />
Commercial Utility Vehicle Cargo, Tactical 4x4, M1008, M1008A1, M1009, M1010, M1028, M1031.<br />
U. S. G. P.O. 1986-644-003
PIN: 053018-005


