INSTRUCTION AND RECIPE BOOKLET Mini-Prep® Plus ... - Cuisinart
INSTRUCTION AND RECIPE BOOKLET Mini-Prep® Plus ... - Cuisinart
INSTRUCTION AND RECIPE BOOKLET Mini-Prep® Plus ... - Cuisinart

You also want an ePaper? Increase the reach of your titles
YUMPU automatically turns print PDFs into web optimized ePapers that Google loves.
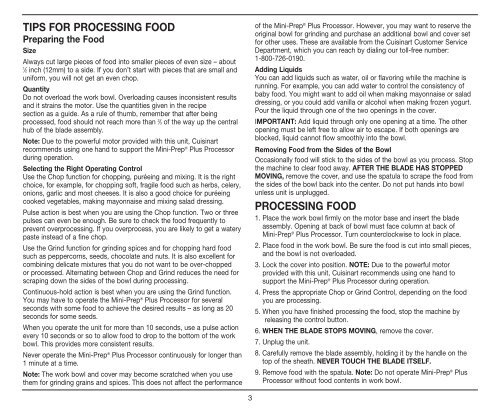
TIPS FOR PROCESSING FOOD<br />
Preparing the Food<br />
Size<br />
Always cut large pieces of food into smaller pieces of even size – about<br />
1<br />
⁄2 inch (12mm) to a side . If you don’t start with pieces that are small and<br />
uniform, you will not get an even chop .<br />
Quantity<br />
Do not overload the work bowl . Overloading causes inconsistent results<br />
and it strains the motor . Use the quantities given in the recipe<br />
section as a guide . As a rule of thumb, remember that after being<br />
processed, food should not reach more than 2 ⁄3 of the way up the central<br />
hub of the blade assembly .<br />
Note: Due to the powerful motor provided with this unit, <strong>Cuisinart</strong><br />
recommends using one hand to support the <strong>Mini</strong>-Prep ® <strong>Plus</strong> Processor<br />
during operation .<br />
Selecting the Right Operating Control<br />
Use the Chop function for chopping, puréeing and mixing . It is the right<br />
choice, for example, for chopping soft, fragile food such as herbs, celery,<br />
onions, garlic and most cheeses . It is also a good choice for puréeing<br />
cooked vegetables, making mayonnaise and mixing salad dressing .<br />
Pulse action is best when you are using the Chop function . Two or three<br />
pulses can even be enough . Be sure to check the food frequently to<br />
prevent overprocessing . If you overprocess, you are likely to get a watery<br />
paste instead of a fine chop .<br />
Use the Grind function for grinding spices and for chopping hard food<br />
such as peppercorns, seeds, chocolate and nuts . It is also excellent for<br />
combining delicate mixtures that you do not want to be over-chopped<br />
or processed . Alternating between Chop and Grind reduces the need for<br />
scraping down the sides of the bowl during processing .<br />
Continuous-hold action is best when you are using the Grind function .<br />
You may have to operate the <strong>Mini</strong>-Prep ® <strong>Plus</strong> Processor for several<br />
seconds with some food to achieve the desired results – as long as 20<br />
seconds for some seeds .<br />
When you operate the unit for more than 10 seconds, use a pulse action<br />
every 10 seconds or so to allow food to drop to the bottom of the work<br />
bowl . This provides more consistent results .<br />
Never operate the <strong>Mini</strong>-Prep ® <strong>Plus</strong> Processor continuously for longer than<br />
1 minute at a time .<br />
Note: The work bowl and cover may become scratched when you use<br />
them for grinding grains and spices . This does not affect the performance<br />
3<br />
of the <strong>Mini</strong>-Prep ® <strong>Plus</strong> Processor . However, you may want to reserve the<br />
original bowl for grinding and purchase an additional bowl and cover set<br />
for other uses . These are available from the <strong>Cuisinart</strong> Customer Service<br />
Department, which you can reach by dialing our toll-free number:<br />
1-800-726-0190 .<br />
Adding Liquids<br />
You can add liquids such as water, oil or flavoring while the machine is<br />
running . For example, you can add water to control the consistency of<br />
baby food . You might want to add oil when making mayonnaise or salad<br />
dressing, or you could add vanilla or alcohol when making frozen yogurt .<br />
Pour the liquid through one of the two openings in the cover .<br />
IMPORTANT: Add liquid through only one opening at a time . The other<br />
opening must be left free to allow air to escape . If both openings are<br />
blocked, liquid cannot flow smoothly into the bowl .<br />
Removing Food from the Sides of the Bowl<br />
Occasionally food will stick to the sides of the bowl as you process . Stop<br />
the machine to clear food away . AFTER THE BLADE HAS STOPPED<br />
MOVING, remove the cover, and use the spatula to scrape the food from<br />
the sides of the bowl back into the center . Do not put hands into bowl<br />
unless unit is unplugged .<br />
PROCESSING FOOD<br />
1 . Place the work bowl firmly on the motor base and insert the blade<br />
assembly . Opening at back of bowl must face column at back of<br />
<strong>Mini</strong>-Prep ® <strong>Plus</strong> Processor . Turn counterclockwise to lock in place .<br />
2 . Place food in the work bowl . Be sure the food is cut into small pieces,<br />
and the bowl is not overloaded .<br />
3 . Lock the cover into position . NOTE: Due to the powerful motor<br />
provided with this unit, <strong>Cuisinart</strong> recommends using one hand to<br />
support the <strong>Mini</strong>-Prep ® <strong>Plus</strong> Processor during operation .<br />
4 . Press the appropriate Chop or Grind Control, depending on the food<br />
you are processing .<br />
5 . When you have finished processing the food, stop the machine by<br />
releasing the control button .<br />
6 . WHEN THE BLADE STOPS MOVING, remove the cover .<br />
7 . Unplug the unit .<br />
8 . Carefully remove the blade assembly, holding it by the handle on the<br />
top of the sheath . NEVER TOUCH THE BLADE ITSELF.<br />
9 . Remove food with the spatula . Note: Do not operate <strong>Mini</strong>-Prep ® <strong>Plus</strong><br />
Processor without food contents in work bowl .