
You also want an ePaper? Increase the reach of your titles
YUMPU automatically turns print PDFs into web optimized ePapers that Google loves.
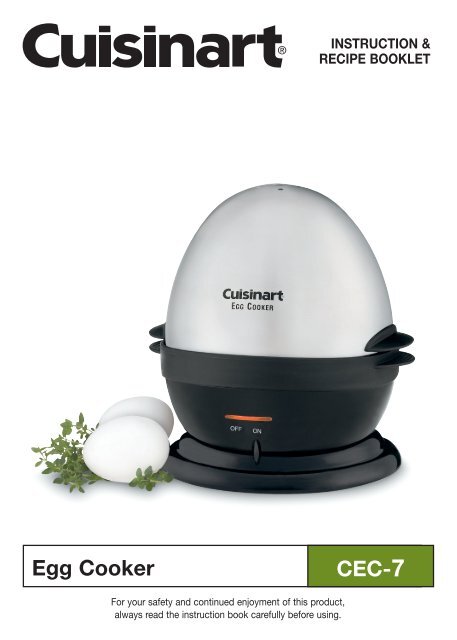
INSTRUCTION &<br />
RECIPE BOOKLET<br />
<strong>Egg</strong> <strong>Cooker</strong> <strong>CEC</strong>-7<br />
For your safety and continued enjoyment of this product,<br />
always read the instruction book carefully before using.<br />
10ce114842_cec7_ib.indd 1 8/16/10 3:53:53 PM
IMPORTANT<br />
SAFEGUARDS<br />
When using an electrical appliance, basic<br />
safety precautions should always be followed:<br />
1. READ ALL INSTRUCTIONS<br />
2. To protect against risk of<br />
electrical shock, do not immerse the<br />
<strong>Cuisinart</strong> ® <strong>Egg</strong> <strong>Cooker</strong> in water or<br />
any other liquid. If the <strong>Cuisinart</strong> ® <strong>Egg</strong><br />
<strong>Cooker</strong> falls into liquid, unplug the<br />
cord from outlet immediately. DO<br />
NOT reach into the liquid.<br />
3. To avoid possible accidental injury,<br />
close supervision is necessary<br />
when any appliance is used by or<br />
near children.<br />
4. Unplug from outlet when not in use,<br />
before putting on or taking off parts,<br />
and before cleaning.<br />
5. Avoid contact with moving parts.<br />
6. Do not operate any appliance with a<br />
damaged cord or plug or after the<br />
appliance has malfunctioned or has<br />
been dropped or damaged in any<br />
way or is not operating properly.<br />
Return the appliance to the<br />
nearest <strong>Cuisinart</strong> Repair Center for<br />
examination, repair, mechanical or<br />
electrical adjustment.<br />
7. The use of attachments not<br />
recommended by <strong>Cuisinart</strong> may<br />
cause fire, electrical shock, or risk of<br />
injury.<br />
8. Do not use outdoors or anywhere the<br />
cord or motor body might come into<br />
contact with water while in use.<br />
1<br />
9. Do not use the <strong>Cuisinart</strong> ® <strong>Egg</strong><br />
<strong>Cooker</strong> for anything other than its<br />
intended use.<br />
10. To avoid the possibility of the<br />
<strong>Egg</strong> <strong>Cooker</strong> being accidentally<br />
pulled off work area, which could<br />
result in damage to the <strong>Egg</strong> <strong>Cooker</strong><br />
or in personal injury, do not let cord<br />
hang over edge of table or counter.<br />
11. To avoid damage to cord and<br />
possible fire or electrocution<br />
hazard, do not let cord contact hot<br />
surfaces, including a stove.<br />
12. Do not operate <strong>Egg</strong> <strong>Cooker</strong> in water<br />
or under running water.<br />
SAVE THESE<br />
INSTRUCTIONS<br />
FOR HOUSEHOLD<br />
USE ONLY<br />
NOTICE:<br />
This appliance has a polarized plug (one<br />
prong is wider than the other). As a safety<br />
feature, this plug will fit into a polarized<br />
outlet only one way.<br />
If the plug does not fit fully into the<br />
outlet, reverse the plug. If it still does not<br />
fit, contact a qualified electrician. Do not<br />
attempt to defeat this safety feature.<br />
10ce114842_cec7_ib.indd 2 8/16/10 3:53:53 PM
TABLE OF CONTENTS<br />
Important Safeguards. .......... 1<br />
Features and Benefits .......... 2<br />
Assembly Instructions .......... 3<br />
Tips and Hints ................ 3<br />
Operation .................... 4<br />
Cleaning and Maintenance ...... 5<br />
Recipes. ..................... 6<br />
Warranty Information ........... 7<br />
FEATURES AND<br />
BENEFITS<br />
1. Lid: Stylish Rounded Stainless Steel lid<br />
with steam vents.<br />
2. Poaching Tray: Allows you to poach<br />
up to three eggs.<br />
3. Cooking Tray: Holds up to<br />
7 eggs in shells to cook hard,<br />
medium or soft.<br />
4. Base: Nonstick coating makes cleanup<br />
easy.<br />
5. Indicator Light: When switch is<br />
in the “On” position, indicator light will<br />
turn on. When the switch is in the “Off”<br />
position, the light will turn off.<br />
2<br />
6. Beaker w/ Piercing Pin: Fill lines<br />
on beaker indicate the amount of water<br />
to add for the way you’d like your eggs<br />
cooked. Piercing pin allows you to<br />
pierce the eggs to prevent the shells<br />
from cracking while cooking.<br />
NOTE: PIERCINg PIN IS ExTREmELy<br />
ShARP - USE CAUTION whEN<br />
REmOvINg PROTECTIvE COvER.<br />
7. <strong>Egg</strong> holder: Two holders keep eggs<br />
in place for serving.<br />
(not shown)<br />
8. On/Off Switch with Automatic<br />
Shutoff: When eggs are finished<br />
cooking, a continuous audible tone will<br />
sound until the egg cooker is manually<br />
turned off.<br />
9. BPA-Free (not shown): All parts<br />
that come in Contact with food are<br />
BPA-Free..<br />
10ce114842_cec7_ib.indd 3 8/16/10 3:53:54 PM<br />
1<br />
2<br />
3<br />
4<br />
5<br />
8<br />
6
ASSEmBLy<br />
INSTRUCTIONS<br />
To assemble your <strong>Cuisinart</strong> ® <strong>Egg</strong> <strong>Cooker</strong>:<br />
1. Rinse the lid, poaching tray and cooking<br />
rack in hot soapy water or in a<br />
dishwasher (top rack only). DO NOT<br />
submerge base of unit. Base can be<br />
wiped clean with a damp cloth. Please<br />
refer to the Cleaning Instructions<br />
section for more information.<br />
2. Place poaching tray, beaker and egg<br />
holders next to the unit. CAUTION:<br />
Piercing Pin on base of beaker is<br />
extremely sharp.<br />
3. Position the cooking tray over the<br />
base. Ribs on side handles should be<br />
facing upward.<br />
4. Place the stainless steel lid over the<br />
cooking tray.<br />
5. Plug in power cord. Your egg<br />
cooker is now assembled for use.<br />
TIP AND hINTS<br />
• When purchasing eggs, choose<br />
only those eggs that are stored in a<br />
refrigerator case. Refrigerate eggs<br />
until ready to use. (For baking, eggs<br />
may be placed in a bowl of warm<br />
water for 5 to 10 minutes to bring<br />
them safely to “room temperature”<br />
for best baking results.)<br />
• <strong>Egg</strong>s should be stored in the carton in<br />
which they were purchased to keep<br />
them from drying out and absorbing<br />
refrigerator odors. The eggs should be<br />
in the carton large end up - this will<br />
help them stay fresh longer and will<br />
keep the yolks centered.<br />
• Don’t know if your eggs are fresh?<br />
Place them in a bowl of salted cool<br />
3<br />
water. If they sink, they are fresh –<br />
if they float, they are not.<br />
• To prevent the development of bacteria<br />
in cooked egg dishes, eggs should not<br />
be left at room temperature longer than<br />
2 hours (count preparation as well as<br />
serving time.)<br />
• Chill and refrigerate hard cooked eggs<br />
immediately after removing from the<br />
<strong>Egg</strong> <strong>Cooker</strong>. For best results, plunge<br />
cooked eggs into a bowl of ice water -<br />
this will stop the cooking process and<br />
prevent a dark ring from developing<br />
around the yolk.<br />
• Is the egg hard cooked or raw? Can’t<br />
recall which ones you have cooked?<br />
Play spin the egg. A cooked egg will<br />
spin, a raw egg will wobble.<br />
• Fresher eggs (less than a week old)<br />
are harder to peel than those a<br />
little older.<br />
• To peel hard cooked eggs easily, roll<br />
gently on the counter, using the palm of<br />
your hand to crack. Dip in a bowl of<br />
cold water and begin peeling from the<br />
larger end.<br />
• Hard cooked eggs in the shell will keep<br />
for up to one week properly refrigerated.<br />
Hard cooked eggs out of the shell<br />
should be used immediately.<br />
• Hard cooked eggs that have been colored<br />
and displayed decoratively should<br />
not be consumed - enjoy their colorful<br />
display and discard. Cook extra eggs<br />
for eating and consider the discarded<br />
eggs an inexpensive way to decorate.<br />
• Hard cooked eggs make a colorful, flavorful<br />
and nutritious garnish. They can<br />
be sliced, wedged, finely chopped or<br />
pressed through a fine sieve to make<br />
a powder-like garnish.<br />
10ce114842_cec7_ib.indd 4 8/16/10 3:53:54 PM
• To serve soft or medium-cooked eggs<br />
out of the shell, break the shell through<br />
the center of the egg with a knife. Use<br />
a teaspoon to scoop the egg out of<br />
each half onto a serving dish or piece<br />
of toast.<br />
• To serve soft or medium-cooked eggs<br />
in a cup, place the egg in a cup, small<br />
end down. Slice off the large end,<br />
about one inch from the top, using a<br />
knife or egg scissors. Eat from the shell<br />
with a teaspoon or serve with toast<br />
strips to dip in the soft yolk.<br />
OPERATION<br />
1. FOR hARD, mEDIUm AND<br />
SOFT COOKED <strong>Egg</strong>S:<br />
1. Place egg cooker on a clean,<br />
dry surface.<br />
2. Remove lid and cooking rack.<br />
3. Determine the consistency of cooked<br />
eggs preferred (Hard, Medium or<br />
Soft). Using the measuring beaker,<br />
locate the consistency and number<br />
of eggs to be cooked. Fill to the<br />
appropriate line with cold water.<br />
For best results, use distilled water,<br />
since tap water has minerals that<br />
can cause discoloration of the eggs.<br />
4. Pour cold water into heating plate.<br />
5. Place cooking rack on top<br />
of base.<br />
6. Rinse the number of eggs desired –<br />
cook up to 7 eggs at one time.<br />
7. Using the piercing pin located under<br />
the beaker, pierce the large end of<br />
each egg and place in cooking tray.<br />
Rinse pin after use.<br />
4<br />
8. Place lid on top of unit and slide<br />
power switch to the “On” position.<br />
Indicator light will be lit.<br />
9. When liquid is completely evaporated,<br />
the eggs will be cooked to the<br />
desired consistency. Cooking time<br />
will vary depending on the number of<br />
eggs and consistency. See<br />
Approximate Cooking Time Chart,<br />
page 5.<br />
10. When cooking is complete, a<br />
continuous audible tone will sound<br />
and indicator light will turn off.<br />
11. Slide power switch to the “Off” position.<br />
NOTE: Once the unit cools off, it<br />
will automatically turn on again if the<br />
switch is not in the “Off “ position.<br />
12. Remove eggs immediately to<br />
prevent overcooking.<br />
13. Run cold water over eggs.<br />
14. <strong>Egg</strong>s are now ready to serve.<br />
For Additional <strong>Egg</strong>s:<br />
1. To remove possible mineral<br />
buildup, moisten a paper towel with<br />
one tablespoon white<br />
vinegar and wipe the heating plate<br />
clean.<br />
2. Repeat steps 1-14.<br />
* Cooking times will vary slightly<br />
depending on number and size of eggs,<br />
temperature of eggs prior to cooking,<br />
temperature and amount of water used,<br />
altitude and length of time eggs remain<br />
in cooker following cooking cycle.<br />
10ce114842_cec7_ib.indd 5 8/16/10 3:53:55 PM
Consistency of <strong>Egg</strong> Desired Number of <strong>Egg</strong>s Approx. Cooking Time<br />
SOFT (Runny Center) 1-7 8-9 minutes*<br />
MEDIUM (Partially Cooked Center) 1-7 13-14 minutes*<br />
HARD (Fully Cooked Center) 1-7 16-18 minutes*<br />
2. FOR POAChED <strong>Egg</strong>S:<br />
1. Place egg cooker on a clean,<br />
dry surface.<br />
2. Remove lid and cooking tray.<br />
3. Fill beaker with cold water to the<br />
Medium 1-3 eggs line. Pour cold<br />
water into heating plate.<br />
4. Lightly butter or spray vegetable oil<br />
on poaching tray.<br />
5. Break one egg for each poaching<br />
section – cooks up to three poached<br />
eggs.<br />
6. Place cooking tray on base and place<br />
poaching tray on top of cooking tray.<br />
7. Place lid on top of unit and slide<br />
power switch to the “On” position.<br />
Indicator light will be lit.<br />
8. When liquid is completely<br />
evaporated, the eggs will be<br />
poached. See Approximate Cooking<br />
Time Chart.<br />
9. When cooking is complete, a<br />
continuous audible tone will sound<br />
and indicator light will turn off.<br />
10. Slide power switch to the “Off” position.<br />
NOTE: Once the unit cools off, it<br />
will automatically turn on again if the<br />
switch is not in the “Off “ position.<br />
11. Remove eggs immediately to<br />
prevent overcooking.<br />
5<br />
12. Use small spatula to remove poached<br />
eggs from tray.<br />
Number of <strong>Egg</strong>s: 1-3<br />
Approx. Cooking Time: 17 minutes<br />
CLEANINg AND<br />
mAINTENANCE<br />
Always unplug your <strong>Cuisinart</strong> ® <strong>Egg</strong><br />
<strong>Cooker</strong> from the electrical outlet before<br />
cleaning.<br />
Wash lid, cooking and poaching trays in<br />
hot, soapy water or in the top shelf of a<br />
dishwasher.<br />
Clean heating plate with a paper towel<br />
moistened with one tablespoon white<br />
vinegar. This removes any mineral deposits<br />
left behind from the water and also<br />
works as an antibacterial agent. You may<br />
wipe the heating plate using water and a<br />
damp cloth if desired.<br />
NOTE: If unit is not cleaned with white<br />
vinegar (see above) on a regular basis,<br />
minerals naturally occurring in water will<br />
build up and cause discoloration of eggshells.<br />
However, discoloration of<br />
the eggshells does not affect the taste<br />
of the eggs.<br />
Wipe main body housing with a<br />
damp cloth.<br />
DO NOT immerse in water.<br />
10ce114842_cec7_ib.indd 6 8/16/10 3:53:55 PM
Use the cord wrap feature located underneath<br />
the unit to store extra cord.<br />
Place clean cooking tray, poaching tray,<br />
beaker and egg holders inside the egg<br />
cooker for storage.<br />
RECIPES<br />
DevileD eggs<br />
Perfectly cooked eggs from the<br />
<strong>Cuisinart</strong> <strong>Egg</strong> <strong>Cooker</strong> make<br />
our version of this American<br />
picnic classic simple to prepare.<br />
Makes 14 deviled egg halves<br />
7 hard cooked eggs,<br />
completely cooled<br />
3 tablespoons low-fat<br />
mayonnaise<br />
1 tablespoon Dijon-style mustard<br />
1/8 teaspoon Kosher salt<br />
3-5 drops Tabasco ® or other<br />
hot sauce<br />
Remove shells from eggs and discard.<br />
Slice each egg in half lengthwise. Wipe<br />
the knife with a paper towel after slicing<br />
each egg, to prevent the yolk from showing<br />
on the white. Remove yolks and<br />
arrange whites on a plate.<br />
Place the egg yolks in the work bowl of a<br />
<strong>Cuisinart</strong> ® Mini Prep Processor and pulse<br />
to break up, 5 times. Scrape the work<br />
bowl. Add the mayonnaise, mustard, salt<br />
and hot sauce to taste. Process for<br />
10 seconds on Grind; scrape the work<br />
bowl. Process 10 seconds on Chop;<br />
scrape the work bowl.<br />
6<br />
Spoon the deviled yolk mixture into the<br />
reserved egg white halves. Or place the<br />
deviled yolk mixture in a 1-quart freezer<br />
weight plastic bag. Cut about 1/4 inch<br />
off one corner of the bag. Use the bag to<br />
squeeze the yolk mixture into each egg<br />
white half. Refrigerate until ready to<br />
serve. Just before serving, sprinkle with<br />
paprika or chopped fresh parsley or<br />
chives.<br />
Nutritional information per serving<br />
(two halves):<br />
Calories 98 (68% from fat) • carb. 1g<br />
pro. 6g • fat 7g • sat. fat 2g • chol. 214mg<br />
sod. 174mg • calc. 25mg • fiber 0g<br />
Serving tips:<br />
If you don’t have a “deviled egg” plate,<br />
make a bed of alfalfa or radish sprouts<br />
on a plate to steady eggs for serving.<br />
To transport and store deviled eggs safely<br />
for a picnic, make filling and place in<br />
sealed food storage bag. Place egg<br />
whites in separate storage container. Chill<br />
both in cooler with ice. When you are<br />
ready to serve eggs, pipe the chilled filling<br />
into the chilled whites and Voilà – you<br />
have safe deviled eggs.<br />
10ce114842_cec7_ib.indd 7 8/16/10 3:53:55 PM
egg salaD<br />
This basic egg salad is great<br />
for sandwiches. It can be<br />
“dressed up” by adding chopped<br />
green onion or shallot, chopped<br />
pickles, chopped sun-dried<br />
tomatoes or chopped fresh herbs.<br />
Makes about 2 cups/4 servings<br />
7 hard cooked eggs,<br />
completely cooled<br />
1/2 stalk celery, about 4 inches,<br />
cut in 1-inch pieces<br />
1/3 cup low-fat mayonnaise<br />
2 teaspoons Dijon-style mustard<br />
1/4 teaspoon kosher salt<br />
1/8 teaspoon freshly ground<br />
white or black pepper<br />
Remove shells from eggs and<br />
discard. Cut eggs in quarters and<br />
reserve.<br />
Place the celery in the work bowl of<br />
a <strong>Cuisinart</strong> ® Food Processor. Pulse to<br />
chop finely, about 15 times; scrape the<br />
work bowl. Add the quartered eggs to<br />
the work bowl; pulse 5 times to chop<br />
roughly. Add mayonnaise, mustard, salt,<br />
and pepper. Pulse until mayonnaise and<br />
mustard are completely mixed in and<br />
desired<br />
texture is reached, 10 – 20 times.<br />
Nutritional information per serving (1/2 cup):<br />
Calories 196 (71% from fat) • carb. 3g<br />
pro. 11g • fat 15g • sat. fat 4g • chol. 378mg<br />
sod. 371mg •calc. 48mg • fiber 0g<br />
7<br />
wARRANTy<br />
ThREE-yEAR LImITED<br />
wARRANTy<br />
This warranty supersedes all previous<br />
warranties on <strong>Cuisinart</strong> ® <strong>Egg</strong> <strong>Cooker</strong>.<br />
This warranty is available to consumers<br />
only. You are a consumer if you own a<br />
<strong>Cuisinart</strong> ® <strong>Egg</strong> <strong>Cooker</strong> that was purchased<br />
at retail for personal, family, or<br />
household use. Except as otherwise<br />
required under applicable state law, this<br />
warranty is not available to retailers or<br />
other commercial purchasers or owners.<br />
We warrant that your <strong>Cuisinart</strong> ® <strong>Egg</strong><br />
<strong>Cooker</strong> will be free of defects in material<br />
or workmanship under normal home use<br />
for three years from the date of original<br />
purchase.<br />
We recommend that you visit our website,<br />
www.cuisinart.com for a fast, efficient<br />
way to complete your product registration.<br />
However, product registration<br />
does not eliminate the need for the consumer<br />
to maintain the original proof of<br />
purchase in order to obtain the warranty<br />
benefits. In the event that you do not<br />
have proof of purchase date, the purchase<br />
date for purposes of this warranty<br />
will be the date of manufacture.<br />
If your egg cooker should prove to be<br />
defective within the warranty period, we<br />
will repair it (or, if we think it<br />
necessary, replace it) without charge to<br />
you. To obtain warranty service, please<br />
call our Consumer Service Center tollfree<br />
at 1-800-726-0190, or write to:<br />
<strong>Cuisinart</strong><br />
7811 North Glen Harbor Blvd.<br />
Glendale, AZ 85307.<br />
10ce114842_cec7_ib.indd 8 8/16/10 3:53:55 PM
To facilitate the speed and accuracy of<br />
your return, please enclose $10.00 for<br />
shipping and handling of the product.<br />
Please also be sure to include a return<br />
address, daytime phone number, description<br />
of the product defect, product serial<br />
number (stamped on bottom of product<br />
base), and any other information pertinent<br />
to the product’s return.<br />
Please pay by check or money order.<br />
(California residents need only supply<br />
proof of purchase and should call<br />
1-800-720-0190 for shipping instructions).<br />
NOTE: For added protection and secure<br />
handling of any <strong>Cuisinart</strong> ® product that is<br />
being returned, we recommend you use a<br />
traceable, insured delivery service.<br />
<strong>Cuisinart</strong> cannot be held responsible for<br />
in-transit damage or for packages that are<br />
not delivered to us. Lost and/or damaged<br />
products are not covered under warranty.<br />
Your <strong>Cuisinart</strong> ® <strong>Egg</strong> <strong>Cooker</strong> has been<br />
manufactured to strict specifications and<br />
has been designed for use with the<br />
<strong>Cuisinart</strong> ® <strong>Egg</strong> <strong>Cooker</strong> accessories and<br />
replacement parts. These warranties<br />
expressly exclude any defects or damages<br />
caused by accessories, replacement<br />
parts, or repair service other than those<br />
that have been authorized by <strong>Cuisinart</strong>.<br />
These warranties do not cover any damage<br />
caused by accident, misuse, shipment,<br />
or other than ordinary household<br />
use. These warranties exclude all incidental<br />
or consequential damages. Some<br />
states do not allow the exclusion or limitation<br />
of incidental or consequential damages,<br />
so the foregoing limitation may not<br />
apply to you.<br />
8<br />
CALIFORNIA<br />
RESIDENTS ONLy<br />
California law provides that for<br />
In-Warranty Service, California residents<br />
have the option of returning a nonconforming<br />
product (A) to the store where it<br />
was purchased or (B) to another retail<br />
store which sells <strong>Cuisinart</strong> products of<br />
the same type. The retail store shall then,<br />
according to its preferences, either repair<br />
the product, refer the consumer to an<br />
independent repair facility, replace the<br />
product, or refund the purchase price<br />
less the amount directly attributable to<br />
the consumer’s prior usage of the product.<br />
If either of the above two options<br />
does not result in the appropriate relief to<br />
the consumer, the consumer may then<br />
take the product to an independent repair<br />
facility if service or repair can be economically<br />
accomplished.* <strong>Cuisinart</strong> and<br />
not the consumer will be responsible for<br />
the reasonable cost of such service,<br />
repair, replacement, or refund for nonconforming<br />
products under warranty.<br />
California residents may also,<br />
according to their preference, return nonconforming<br />
products directly to <strong>Cuisinart</strong><br />
for repair or, if necessary, replacement by<br />
calling our Consumer Service Center tollfree<br />
at 800-726-0190. <strong>Cuisinart</strong> will be<br />
responsible for the cost of the<br />
repair, replacement, and shipping<br />
and handling for such nonconforming<br />
products under warranty.<br />
10ce114842_cec7_ib.indd 9 8/16/10 3:53:55 PM
BEFORE RETURNINg<br />
yOUR CUISINART<br />
PRODUCT<br />
If you are experiencing problems with<br />
your <strong>Cuisinart</strong> product, we suggest that<br />
you call our Consumer Service Center at<br />
1-800-726-0190 before returning the<br />
product for servicing. Often, our<br />
Consumer Service Representatives can<br />
help solve the problem without having<br />
the product serviced. If servicing is needed,<br />
a Representative can confirm whether<br />
the product is under warranty and direct<br />
you to the nearest service<br />
location.<br />
* Important: If the nonconforming product<br />
is to be serviced by someone other than<br />
<strong>Cuisinart</strong>’s Authorized Service Center,<br />
please remind the servicer to call our<br />
Consumer Service Center at 1-800-726-<br />
0190 to ensure that the problem is properly<br />
diagnosed, the product is serviced<br />
with the correct parts, and to ensure that<br />
the product is still under warranty.<br />
9<br />
10ce114842_cec7_ib.indd 10 8/16/10 3:53:55 PM
NOTES<br />
10<br />
10ce114842_cec7_ib.indd 11 8/16/10 3:53:55 PM
Coffeemakers Food<br />
Processors<br />
Toaster Ovens Blenders Cookware Ice Cream<br />
Makers<br />
<strong>Cuisinart</strong> offers an extensive assortment of top quality products to make life in the<br />
kitchen easier than ever. Try some of our other countertop appliances and<br />
cookware, and Savor the Good Life ® .<br />
www.cuisinart.com<br />
©2010 <strong>Cuisinart</strong><br />
150 Milford Road<br />
East Windsor, NJ 08520<br />
Printed in China<br />
10CE114842<br />
IB-4786B<br />
10ce114842_cec7_ib.indd 12 8/16/10 3:53:56 PM