INSTRUCTION AND RECIPE BOOKLET Mini-Prep® Plus ... - Cuisinart
INSTRUCTION AND RECIPE BOOKLET Mini-Prep® Plus ... - Cuisinart
INSTRUCTION AND RECIPE BOOKLET Mini-Prep® Plus ... - Cuisinart

You also want an ePaper? Increase the reach of your titles
YUMPU automatically turns print PDFs into web optimized ePapers that Google loves.
<strong>INSTRUCTION</strong> <strong>AND</strong><br />
<strong>RECIPE</strong> <strong>BOOKLET</strong><br />
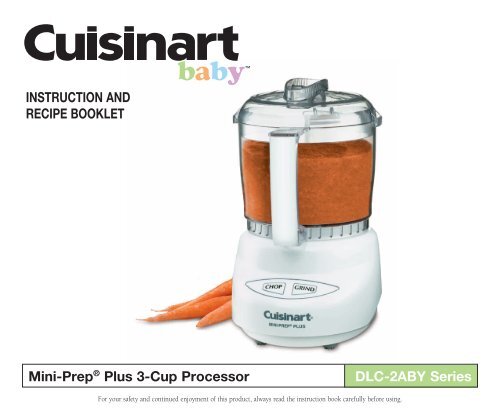
<strong>Mini</strong>-Prep ® <strong>Plus</strong> 3-Cup Processor DLC-2ABY Series<br />
For your safety and continued enjoyment of this product, always read the instruction book carefully before using.
CONTENTS<br />
Important Safeguards . . . . . . . . . . . . . . . . . . . . . . . . . . . . . . . . . . . 1<br />
Assembly Instructions . . . . . . . . . . . . . . . . . . . . . . . . . . . . . . . . . . . 2<br />
Parts and Features . . . . . . . . . . . . . . . . . . . . . . . . . . . . . . . . . . . . . . 2<br />
Tips for Processing Food . . . . . . . . . . . . . . . . . . . . . . . . . . . . . . . . . 3<br />
Processing Food . . . . . . . . . . . . . . . . . . . . . . . . . . . . . . . . . . . . . . . 3<br />
Cleaning and Storage . . . . . . . . . . . . . . . . . . . . . . . . . . . . . . . . . . . . 4<br />
Troubleshooting . . . . . . . . . . . . . . . . . . . . . . . . . . . . . . . . . . . . . . . . 4<br />
Using the <strong>Mini</strong>-Prep ® <strong>Plus</strong> for Baby and Family . . . . . . . . . . . . . . . 4<br />
Baby’s Readiness . . . . . . . . . . . . . . . . . . . . . . . . . . . . . . . . . . . . . . . 4<br />
User Guide and Capacity Chart . . . . . . . . . . . . . . . . . . . . . . . . . . .5-7<br />
Tips and Hints for Baby Food . . . . . . . . . . . . . . . . . . . . . . . . . . . . . 8<br />
Recipes . . . . . . . . . . . . . . . . . . . . . . . . . . . . . . . . . . . . . . . . . . . . . . . 8<br />
Warranty . . . . . . . . . . . . . . . . . . . . . . . . . . . . . . . . . . . . . . . . . . . . . 10<br />
IMPORTANT UNPACKING<br />
<strong>INSTRUCTION</strong>S<br />
This package contains a <strong>Cuisinart</strong> ® <strong>Mini</strong>-Prep ® <strong>Plus</strong> Processor and the<br />
standard parts for it: SmartPower ® metal chopping/grinding blade,<br />
spatula, and instruction/recipe booklet .<br />
CAUTION: THE CUTTING BLADE HAS VERY SHARP EDGES.<br />
To avoid injury when unpacking, please follow these instructions:<br />
1 . Place the box on a table or kitchen counter . Be sure the box is right<br />
side up .<br />
2 . Lift up and remove the cardboard lid from the work bowl cover .<br />
3 . Grasping the work bowl cover, lift the unit up and out of the box and<br />
place on the tabletop .<br />
4 . Turn the work bowl clockwise to unlock it from the unit base . Lift up<br />
and remove .<br />
5 . Carefully lift the protective cardboard off the chopping/grinding blade shaft .<br />
6 . CAREFULLY REMOVE THE METAL BLADE BY GRASPING THE<br />
CENTER WHITE HUB <strong>AND</strong> LIFTING IT STRAIGHT UP. NEVER<br />
TOUCH THE BLADE, AS IT IS RAZOR SHARP.<br />
7 . Read the instructions thoroughly before using the machine .<br />
1<br />
IMPORTANT SAFEGUARDS<br />
When using an electrical appliance, basic safety precautions should<br />
always be adhered to, including the following:<br />
1 . READ ALL <strong>INSTRUCTION</strong>S.<br />
2 . To protect against risk of electric shock, do not put motor base in<br />
water or other liquids .<br />
3 . Close supervision is necessary when any appliance is used by or near<br />
children .<br />
4 . Always unplug unit from outlet when not in use, before putting on or<br />
taking off parts, before cleaning, and before removing food from bowl .<br />
To unplug, grasp plug and pull from electrical outlet . Never pull cord .<br />
5 . Avoid contact with moving parts .<br />
6 . Do not operate any appliance with a damaged cord or plug, after<br />
the appliance malfunctions, or if appliance has been dropped<br />
or damaged in any manner. Return the appliance to the nearest<br />
authorized <strong>Cuisinart</strong> Service Facility for examination, repair, and<br />
electrical or mechanical adjustment.<br />
7 . The use of attachments not recommended or sold by <strong>Cuisinart</strong> may<br />
cause fire, electric shock or injury .<br />
8 . Do not let cord hang over edge of table or counter, or touch hot<br />
surfaces .<br />
9 . Do not use outdoors .<br />
10 . Keep hands and utensils away from moving blade while processing,<br />
to prevent the risk of severe injury to persons or damage to the<br />
appliance . A scraper may be used, but must be used only when the<br />
unit is not running .<br />
11 . BLADE IS EXTREMELY SHARP. Handle carefully when removing,<br />
inserting or cleaning . Always allow blade to stop moving before<br />
removing cover .<br />
12 . To reduce the risk of injury, never place cutting blade on base without<br />
first putting work bowl properly in place .<br />
13 . Be certain cover is securely locked in place before operating<br />
appliance . Do not attempt to remove cover until blade has stopped<br />
rotating .<br />
14 . Do not attempt to defeat the cover interlock mechanism, as serious<br />
injury may result .<br />
15 . Before using, check work bowl for presence of foreign objects .
SAVE THESE <strong>INSTRUCTION</strong>S<br />
FOR HOUSEHOLD USE ONLY<br />
NOTICE<br />
This appliance has a polarized plug (one blade is wider than the other) .<br />
To reduce the risk of electric shock, this plug is intended to fit into a<br />
polarized outlet only one way . If the plug does not fit fully into the outlet,<br />
reverse the plug . If it still does not fit, contact a qualified electrician . Do<br />
not modify plug in any way .<br />
ASSEMBLY <strong>INSTRUCTION</strong>S<br />
1 . With the base unit on the tabletop, place the work bowl over the<br />
center stem and turn slightly to the right, until bowl drops down to the<br />
bottom of the stem .<br />
2 . Turn the work bowl counterclockwise to lock onto base .<br />
3 . CAREFULLY pick up the blade by its hub and place on the center<br />
stem until it drops to the bottom of the stem . NEVER TOUCH THE<br />
BLADE ITSELF.<br />
4 . Add food ingredients .<br />
5 . Place the cover on the work bowl with the long tab to the right of the<br />
rear column .<br />
6 . Turn cover counterclockwise to securely lock into locking post .<br />
7 . Plug unit into wall socket .<br />
8 . You are ready to CHOP/GRIND .<br />
2<br />
*All parts that come in contact with food are BPA-free.<br />
Cover<br />
3-Cup<br />
Workbowl<br />
with handle<br />
<strong>Cuisinart</strong> ®<br />
SmartPower ®<br />
Blade<br />
Motor<br />
Housing Base<br />
Spatula<br />
(not shown)
TIPS FOR PROCESSING FOOD<br />
Preparing the Food<br />
Size<br />
Always cut large pieces of food into smaller pieces of even size – about<br />
1<br />
⁄2 inch (12mm) to a side . If you don’t start with pieces that are small and<br />
uniform, you will not get an even chop .<br />
Quantity<br />
Do not overload the work bowl . Overloading causes inconsistent results<br />
and it strains the motor . Use the quantities given in the recipe<br />
section as a guide . As a rule of thumb, remember that after being<br />
processed, food should not reach more than 2 ⁄3 of the way up the central<br />
hub of the blade assembly .<br />
Note: Due to the powerful motor provided with this unit, <strong>Cuisinart</strong><br />
recommends using one hand to support the <strong>Mini</strong>-Prep ® <strong>Plus</strong> Processor<br />
during operation .<br />
Selecting the Right Operating Control<br />
Use the Chop function for chopping, puréeing and mixing . It is the right<br />
choice, for example, for chopping soft, fragile food such as herbs, celery,<br />
onions, garlic and most cheeses . It is also a good choice for puréeing<br />
cooked vegetables, making mayonnaise and mixing salad dressing .<br />
Pulse action is best when you are using the Chop function . Two or three<br />
pulses can even be enough . Be sure to check the food frequently to<br />
prevent overprocessing . If you overprocess, you are likely to get a watery<br />
paste instead of a fine chop .<br />
Use the Grind function for grinding spices and for chopping hard food<br />
such as peppercorns, seeds, chocolate and nuts . It is also excellent for<br />
combining delicate mixtures that you do not want to be over-chopped<br />
or processed . Alternating between Chop and Grind reduces the need for<br />
scraping down the sides of the bowl during processing .<br />
Continuous-hold action is best when you are using the Grind function .<br />
You may have to operate the <strong>Mini</strong>-Prep ® <strong>Plus</strong> Processor for several<br />
seconds with some food to achieve the desired results – as long as 20<br />
seconds for some seeds .<br />
When you operate the unit for more than 10 seconds, use a pulse action<br />
every 10 seconds or so to allow food to drop to the bottom of the work<br />
bowl . This provides more consistent results .<br />
Never operate the <strong>Mini</strong>-Prep ® <strong>Plus</strong> Processor continuously for longer than<br />
1 minute at a time .<br />
Note: The work bowl and cover may become scratched when you use<br />
them for grinding grains and spices . This does not affect the performance<br />
3<br />
of the <strong>Mini</strong>-Prep ® <strong>Plus</strong> Processor . However, you may want to reserve the<br />
original bowl for grinding and purchase an additional bowl and cover set<br />
for other uses . These are available from the <strong>Cuisinart</strong> Customer Service<br />
Department, which you can reach by dialing our toll-free number:<br />
1-800-726-0190 .<br />
Adding Liquids<br />
You can add liquids such as water, oil or flavoring while the machine is<br />
running . For example, you can add water to control the consistency of<br />
baby food . You might want to add oil when making mayonnaise or salad<br />
dressing, or you could add vanilla or alcohol when making frozen yogurt .<br />
Pour the liquid through one of the two openings in the cover .<br />
IMPORTANT: Add liquid through only one opening at a time . The other<br />
opening must be left free to allow air to escape . If both openings are<br />
blocked, liquid cannot flow smoothly into the bowl .<br />
Removing Food from the Sides of the Bowl<br />
Occasionally food will stick to the sides of the bowl as you process . Stop<br />
the machine to clear food away . AFTER THE BLADE HAS STOPPED<br />
MOVING, remove the cover, and use the spatula to scrape the food from<br />
the sides of the bowl back into the center . Do not put hands into bowl<br />
unless unit is unplugged .<br />
PROCESSING FOOD<br />
1 . Place the work bowl firmly on the motor base and insert the blade<br />
assembly . Opening at back of bowl must face column at back of<br />
<strong>Mini</strong>-Prep ® <strong>Plus</strong> Processor . Turn counterclockwise to lock in place .<br />
2 . Place food in the work bowl . Be sure the food is cut into small pieces,<br />
and the bowl is not overloaded .<br />
3 . Lock the cover into position . NOTE: Due to the powerful motor<br />
provided with this unit, <strong>Cuisinart</strong> recommends using one hand to<br />
support the <strong>Mini</strong>-Prep ® <strong>Plus</strong> Processor during operation .<br />
4 . Press the appropriate Chop or Grind Control, depending on the food<br />
you are processing .<br />
5 . When you have finished processing the food, stop the machine by<br />
releasing the control button .<br />
6 . WHEN THE BLADE STOPS MOVING, remove the cover .<br />
7 . Unplug the unit .<br />
8 . Carefully remove the blade assembly, holding it by the handle on the<br />
top of the sheath . NEVER TOUCH THE BLADE ITSELF.<br />
9 . Remove food with the spatula . Note: Do not operate <strong>Mini</strong>-Prep ® <strong>Plus</strong><br />
Processor without food contents in work bowl .
Tip: Process foods in order from dry to wet to avoid having to clean bowl<br />
and blade between each task .<br />
To remove work bowl<br />
1 . Turn the work bowl cover clockwise and remove .<br />
2 . Turn the work bowl clockwise to unlock and lift off of the base .<br />
3 . Carefully remove the blade by lifting it up from the hub .<br />
CLEANING <strong>AND</strong> STORAGE<br />
To simplify cleaning, rinse the work bowl, cover, and blade immediately<br />
after each use, so that food won’t dry on them . Wash blade assembly,<br />
work bowl, cover, and spatula in warm soapy water . Rinse and dry .<br />
Wash the blade carefully .<br />
Avoid leaving blade in soapy water where it may disappear from sight .<br />
If you have a dishwasher, you can wash the workbowl, cover, blade<br />
assembly, and spatula on the top rack . Insert the work bowl upside down<br />
and the cover right side up . You may put the blade and spatula in the<br />
cutlery basket . Unload the dishwasher carefully to avoid contact with the<br />
sharp blade .<br />
Wipe the motor base clean with a damp sponge or cloth . Dry it immediately .<br />
Never submerge the motor base or the plug in water or other liquids .<br />
The <strong>Mini</strong>-Prep ® <strong>Plus</strong> Processor stores neatly on the countertop in a<br />
minimum of space . When it is not in use, be sure to leave it unplugged .<br />
The hidden cord storage underneath the motor base will help keep excess<br />
cord off the countertop . Store the unit assembled to prevent loss of parts .<br />
Store the blades as you would sharp knives – out of the reach of<br />
children.<br />
The <strong>Mini</strong>-Prep ® <strong>Plus</strong> Processor is intended for HOUSEHOLD USE ONLY .<br />
Any service other than cleaning and normal user maintenance should be<br />
performed by an authorized <strong>Cuisinart</strong> Service Representative .<br />
TROUBLESHOOTING<br />
Motor doesn’t start or blade doesn’t rotate.<br />
• Check that plug is securely inserted into outlet.<br />
• Check that work bowl and cover are securely locked into place.<br />
• Be sure to press only one operation control button at a time.<br />
Food is unevenly chopped.<br />
• Either you are chopping too much food at one time, or the pieces are<br />
not small enough . Try cutting food into smaller pieces of even size and<br />
processing a smaller amount per batch .<br />
Food is chopped too fine or is watery.<br />
• The food has been overprocessed. Use brief pulses, or process for a<br />
shorter time . Let blade stop completely between pulses .<br />
4<br />
Food collects on work bowl cover or sides of prep bowl.<br />
• You may be processing too much food. Turn machine off. When blade<br />
stops rotating, remove cover, and clean bowl and lid with spatula .<br />
Alternating between Chop and Grind reduces the need for scraping<br />
down the sides of the bowl during processing .<br />
Food catches on blade.<br />
• You may be processing too much food. Carefully remove blade.<br />
Remove food from blade with spatula, and start over again .<br />
USING THE MINI-PREP ® PLUS FOR BABY<br />
<strong>AND</strong> FAMILY<br />
With the <strong>Mini</strong>-Prep ® <strong>Plus</strong> Processor, you can chop, grind or purée small<br />
amounts of foods . Use the listing of ingredients and techniques on pages<br />
5-7 as a basic guide for processing .<br />
We’ve put together valuable information and recipes for you to use as<br />
guidelines for your baby’s transition from liquids to solids and even to<br />
family-friendly foods . Always keep in mind, however, baby’s doctor knows<br />
best . Check with your pediatrician before introducing any new food .<br />
BABY’S READINESS<br />
Every baby develops at his or her own pace, but some common changes and<br />
behaviors can indicate a readiness for solid foods . Be on the lookout for:<br />
• Baby holding up head<br />
• Chewing motion<br />
• Doubled birth weight<br />
• Ability to sit in high chair<br />
• Curiosity about food<br />
• Mouth closing around food<br />
• Hunger after liquid feeding (breast milk/formula)<br />
• Teething<br />
• Less tendency to push food out with tongue<br />
The first solid food to introduce is cereal . Start with rice, barley, or<br />
oatmeal when baby is between 4 and 6 months . Once baby has been<br />
successfully eating cereal, the next solid to introduce is vegetables so the<br />
baby has a chance to develop a taste for these before getting a “sweet<br />
tooth” from fruit . Next, introduce fruits, followed by meat and poultry .<br />
The following chart is a guideline for the types of food to feed your baby,<br />
how to prepare it, and how much it will serve . Other types of food not in<br />
this chart would follow similar instructions .
USER GUIDE <strong>AND</strong> CAPACITY CHART<br />
Apples<br />
Food<br />
Apricots/Prunes<br />
(dried)<br />
Avocado<br />
Bananas<br />
Beef/Lamb<br />
(boneless)<br />
Beets<br />
Broccoli<br />
Butternut Squash/<br />
Winter Squash/<br />
Pumpkin<br />
Starting<br />
Age<br />
4 to 6<br />
months<br />
6 to 8<br />
months<br />
4 to 6<br />
months<br />
4 to 6<br />
months<br />
8 to 10<br />
months<br />
10 to 12<br />
months<br />
8 to 10<br />
months<br />
4 to 6<br />
months<br />
Amount Preparation<br />
1 large apple (about 8 oz .)<br />
peeled, cored and cut into<br />
1-inch pieces (1¾ cups)<br />
½ cup packed (about 4 oz .)<br />
1 ripe avocado (about 8 oz .)<br />
cut into 1-inch pieces<br />
1 large ripe banana (7 to 8 oz .)<br />
peeled and cut into ½-inch<br />
rounds<br />
½ lb . beef or lamb<br />
3 to 4 small to medium beets,<br />
washed and trimmed<br />
(about 10 oz .)<br />
8 oz . of florets and upper<br />
stems, cut into ½- to 1-inch<br />
pieces<br />
1 small squash (about 8 oz .)<br />
peeled, seeded and cut into<br />
1-inch pieces (about 3 to 3¼<br />
cups)<br />
Steam for about 4 to 5 minutes . Pulse 2 to 3 times and then<br />
process until fully puréed, about 10 seconds .<br />
Bring apricots to a boil in just enough water to cover . Simmer<br />
until fruit is moist and plump, about 10 to 15 minutes . Process<br />
with ¹∕ ³ to ½ cup water until smooth .<br />
Process by alternating between Chop and Grind . Scrape down<br />
bowl and continue to chop until fully puréed, about 15 to 20<br />
minutes .<br />
Pulse 2 to 3 times and then process until fully puréed, about 20<br />
seconds .<br />
Steam for at least 25 minutes until soft and cooked through .<br />
Allow to cool slightly, then cut into 1-inch pieces . Pulse to<br />
break up and process by alternating between Chop and Grind<br />
for about 20 seconds . Scrape bowl and add reserved cooking<br />
liquid (1 to 2 tablespoons at a time) while chopping, until desired<br />
consistency is achieved .<br />
Bring to a boil in just enough water to cover . Simmer until beets<br />
are completely tender, about 50 to 60 minutes . Peel and cut into<br />
1-inch cubes . Process by alternating between Chop and Grind<br />
for about 15 seconds . Add cooking liquid (1 tablespoon at a<br />
time) if a thinner consistency is desired .<br />
Steam at least 8 to 12 minutes, until completely fork tender .<br />
Pulse about 3 to 4 times . Add 2 tablespoons (1 tablespoon at<br />
a time) cooking liquid and continue to process until desired<br />
consistency is achieved, about 1 minute .<br />
Steam at least 15 minutes, until completely fork tender . Process<br />
in 2 batches . Chop each batch 15 to 20 seconds until puréed .<br />
5<br />
Approx.<br />
Yields<br />
²∕ ³ cup<br />
½ cup<br />
²∕ ³ cup<br />
Nutritional<br />
Value<br />
High in fiber<br />
Contains vitamins<br />
A & C, as well as<br />
trace minerals<br />
High in vitamin A and<br />
B vitamins including<br />
folate<br />
High in potassium<br />
and contains iron<br />
B vitamins, vitamin<br />
E, potassium<br />
½ cup High in potassium<br />
6 oz .<br />
1 cup<br />
1 cup<br />
1½ cups<br />
High protein, folate,<br />
vitamin B12,<br />
phosphorous, iron,<br />
selenium and<br />
essential amino<br />
acids<br />
Beta carotene, folate,<br />
calcium, magnesium,<br />
potassium<br />
High in vitamin C,<br />
lutein, vitamin K,<br />
calcium<br />
Vitamins A & C, beta<br />
carotene, vitamin K,<br />
calcium
Carrots<br />
Food<br />
Cauliflower<br />
Chicken<br />
(dark meat)<br />
Chicken/Turkey<br />
(breast)<br />
Fennel<br />
Fish<br />
Green Beans<br />
Green Peas<br />
Starting<br />
Age<br />
6 to 8<br />
months<br />
8 to 10<br />
months<br />
6 to 8<br />
months<br />
6 to 8<br />
months<br />
8 to 10<br />
months<br />
12<br />
months +<br />
4 to 6<br />
months<br />
6 to 8<br />
months<br />
Amount Preparation<br />
6 oz . carrots peeled and cut into<br />
½-inch pieces (about 1¼ cups)<br />
8 oz . of florets cut into 1½-inch<br />
pieces<br />
½ lb . thighs or legs, skin<br />
removed<br />
1 boneless, skinless breast<br />
(about 6 to 8 oz .) cut in half to fit<br />
steaming basket<br />
2 cups (1 large or 2 small bulbs)<br />
thinly sliced, tough outer parts<br />
removed<br />
½ lb . fillet – salmon or white fish<br />
8 oz . of beans washed, ends<br />
trimmed and cut into 1-inch<br />
pieces (about 2 cups)<br />
1¾ cups (8 oz .) frozen green<br />
peas<br />
Steam at least 20 minutes, until completely fork tender . Process,<br />
alternating between Chop and Grind . Add reserved cooking liquid<br />
(1 tablespoon at a time) and continue to process until desired<br />
consistency is achieved, about 40 to 50 seconds .<br />
Steam at least 15 minutes until completely fork tender . Process,<br />
alternating between Chop and Grind, for about 10 seconds . Add<br />
reserved cooking liquid (1 tablespoon at a time) and continue to<br />
process until desired consistency is achieved, about 25 to 30<br />
seconds .<br />
Bring to a boil in just enough water to cover . Simmer until chicken<br />
is completely soft and falling off the bone, at least 1 hour . Carefully<br />
remove and discard all bones, put meat into work bowl and pulse<br />
to break up . Process, alternating between Chop and Grind for<br />
about 30 seconds . Scrape bowl and add liquid (1 tablespoon at a<br />
time) until desired consistency is achieved .<br />
Steam at last 15 minutes so that it is cooked through and moist .<br />
Let cool slightly and then cut into 1-inch pieces . Pulse first and<br />
then process by alternating between Chop and Grind for about 30<br />
seconds . Scrape bowl and add liquid (1 tablespoon at a time) until<br />
desired consistency is achieved, about 40 to 60 seconds .<br />
Steam at least 12 minutes, until completely fork tender . Process by<br />
pulsing 2 to 3 times, then chop continuously for about 60 seconds .<br />
Scrape bowl once during process time until a smooth purée is<br />
achieved .<br />
Steam for about 10 to 25 minutes depending on type of fish and<br />
thickness of fillet (salmon will take longer than fillet of sole) . Pulse<br />
to break up, then process by alternating between Chop and Grind<br />
for 10 seconds . Scrape bowl and add reserved cooking liquid<br />
(1 tablespoon at a time) while chopping, until desired consistency<br />
is achieved .<br />
Steam at least 20 minutes, until completely fork tender . Pulse<br />
2 to 3 times and then process, alternating between Chop and<br />
Grind . Scrape the sides of bowl and chop again, adding reserved<br />
cooking liquid (1 tablespoon at a time) until desired consistency is<br />
achieved .<br />
Steam for at least 15 minutes until completely fork tender . Pulse<br />
to mash and add then chop, adding 1 to 2 tablespoons of cooking<br />
liquid at a time until desired consistency is achieved, about 45 to<br />
60 seconds .<br />
6<br />
Approx.<br />
Yields<br />
½ cup<br />
¾ cup<br />
1 cup<br />
¾ cup<br />
²∕ ³ cup<br />
1¼ cups<br />
¾ cup<br />
7 oz .<br />
Nutritional<br />
Value<br />
High in vitamin A,<br />
beta carotene<br />
High in folate and<br />
vitamin C<br />
Vitamin A, B3,<br />
folate, some<br />
vitamin C, iron<br />
and essential<br />
amino acids<br />
B vitamins,<br />
phosphorous,<br />
potassium, iron<br />
and essential<br />
amino acids<br />
Vitamin C,<br />
potassium, calcium<br />
Omega 3 and 6<br />
fatty acids<br />
Salmon – vitamin A,<br />
folate, B12,<br />
calcium,<br />
phosphorous,<br />
potassium<br />
and selenium<br />
Beta carotene,<br />
vitamin A, calcium<br />
Vitamin A, lutein,<br />
folate
Food<br />
Mango/Papaya<br />
Parsnips<br />
Peaches/Pears<br />
Plums<br />
Sweet Potatoes,<br />
Yams<br />
Tofu<br />
Turnips/Rutabagas<br />
Zucchini/Summer<br />
Squash<br />
Starting<br />
Age<br />
6 to 8<br />
months<br />
8 to 10<br />
months<br />
6<br />
months<br />
6 to 8<br />
months<br />
4 to 6<br />
months<br />
6 to 8<br />
months<br />
8 to 10<br />
months<br />
6 to 8<br />
months<br />
Amount Preparation<br />
1 ripe mango (about 14 to 16<br />
oz .) peeled, pitted and cut into<br />
1-inch pieces, about 1 cup<br />
2 medium parsnips (about 10<br />
oz .) peeled and cut into ½-inch<br />
pieces (about 1¾ cups)<br />
1 ripe peach or pear (about 7 to<br />
8 oz .) peeled, cored and cut into<br />
1-inch pieces (about 1 cup)<br />
3 whole plums (about 12 oz .)<br />
peeled, pitted and cut into<br />
1-inch pieces<br />
1 medium potato (about 8 to 10<br />
oz .) peeled and cut into 1-inch<br />
pieces<br />
6 oz . soft tofu broken into small<br />
pieces<br />
2 small turnips (about 10 oz .)<br />
peeled and cut into 1-inch cubes<br />
2 squash (about 10 oz .) peeled,<br />
quartered, seeded and cut into<br />
½-inch pieces<br />
Process for about 15 to 20 seconds until well puréed, scraping<br />
sides of work bowl halfway through .<br />
Steam at least 15 minutes until completely fork tender . Process,<br />
alternating between Chop and Grind for about 15 seconds . Add<br />
reserved cooking liquid (1 tablespoon at a time) and continue to<br />
process until desired consistency is achieved .<br />
If peach or pear is really ripe it can be processed without cooking<br />
– simply place fruit in workbowl, pulse 2 to 3 times and then<br />
process until smooth . If not completely ripe, steam fruit until soft .<br />
Pulse 3 to 4 times and then process, alternating between Chop<br />
and Grind about 15 seconds until smooth .<br />
Steam until fork tender, about 5 to 8 minutes depending on<br />
ripeness . Pulse 3 to 4 times and then process, alternating<br />
between Chop and Grind about 15 seconds until smooth .<br />
Steam at least 10 minutes, until completely fork tender . Pulse<br />
2 to 3 times and then add about 2 to 3 tablespoons cooking<br />
liquid and pulse again . Add 1 to 2 tablespoons liquid and chop .<br />
Add additional liquid if necessary, until desired consistency is<br />
achieved, about 45 to 60 seconds .<br />
Pulse 3 times on Chop . Add 2 tablespoons liquid from tofu and<br />
process for about 10 to 15 seconds until smooth . Add additional<br />
liquid for a thinner consistency .<br />
Steam at least 10 minutes until completely fork tender . Process,<br />
alternating between Chop and Grind for about 10 seconds . Add<br />
1 tablespoon of reserved cooking liquid at a time and chop until<br />
desired consistency is achieved .<br />
Steam at least 8 minutes . Process on Chop for 15 to 20 seconds,<br />
adding reserved cooking liquid if necessary .<br />
7<br />
Approx.<br />
Yields<br />
1 cup<br />
1 cup<br />
Nutritional<br />
Value<br />
Mango – High in beta<br />
carotene, vitamin A,<br />
some folate, vitamin<br />
C, K, calcium and<br />
potassium<br />
Papaya – High in beta<br />
carotene, vitamins A<br />
and C<br />
Folate, calcium,<br />
potassium<br />
½ cup High in potassium<br />
¾ cup<br />
1 cup<br />
Vitamin A and<br />
potassium<br />
Folate, vitamin C,<br />
potassium,<br />
magnesium<br />
²∕ ³ cup Calcium<br />
1 cup<br />
Vitamin C, calcium,<br />
potassium (turnip)<br />
3 oz . Lutein, folate
TIPS <strong>AND</strong> HINTS FOR BABY FOOD<br />
The <strong>Mini</strong>-Prep ® <strong>Plus</strong> Processor is an excellent tool for puréeing fruits and<br />
vegetables . For optimal nutrient retention, steam or bake baby’s food<br />
using as little water as possible . When puréeing, use any leftover liquid<br />
to increase the nutritional content and achieve the desired consistency .<br />
Add new foods one at a time, one teaspoon at a time . Serve only that type<br />
of food for at least 3 days before beginning another to be sure baby is not<br />
allergic . Once baby has been introduced to different foods, mix and match<br />
to make great combinations . For example, oat cereal and fruit, sweet<br />
potatoes and apple, or chicken with carrots .<br />
Always use the freshest ingredients, organic if preferred . Homemade baby<br />
food should not be seasoned or sweetened .<br />
Save time by preparing larger portions and freezing into ice cube trays or<br />
airtight containers . Each cube is equal to 1 ounce or 2 tablespoons, which<br />
is a complete serving for baby . Never refreeze any food that has been<br />
previously frozen .<br />
When introducing a new food, if baby doesn’t accept it, and does not<br />
have any adverse reaction, try again in a few days .<br />
Certain foods should be avoided for a period of time because of their<br />
highly allergenic properties . The following foods should be avoided until<br />
after 12 months of age:<br />
• Honey • Corn<br />
• Egg whites • Wheat<br />
• Soy • Whole milk<br />
• Raw berries • Citrus (or other highly acidic fruits)<br />
The following foods should be avoided until after 24 months of age:<br />
• Peanuts/peanut butter • Tree nuts<br />
• Shellfish<br />
Certain foods that can be a choking hazard should also be avoided,<br />
including, but not limited to, grapes, raw carrots, raisins (and other small<br />
dry fruits), candy, hot dogs, popcorn, and large pieces of meat .<br />
Vegetables that are high in nitrates, like spinach, turnips, carrots, and<br />
beets, should be offered in limited quantities at a time .<br />
Baby will be ready for finger foods when he or she has achieved all the<br />
behaviors indicating a readiness for solid foods (see page 4), around 8<br />
months . Additionally, baby can transfer items from hand to hand, has<br />
more constant chewing motion, and puts “everything” into the mouth!<br />
8<br />
When baby is ready to graduate to family foods, he or she should be<br />
starting to use a spoon .<br />
Always remember to continue to check with your pediatrician regarding<br />
appropriate foods and ages, as every baby develops differently .<br />
For more information, recipes, and baby tools, please visit<br />
www.cuisinart.com/baby or www.cuisinart.com<br />
<strong>RECIPE</strong>S<br />
Summer Fruit Crisp<br />
Summer berries are loaded with vitamin C – this crisp is a great way<br />
to showcase them .<br />
Makes 6 servings<br />
Crumb topping:<br />
2 tablespoons whole wheat flour<br />
2 tablespoons packed light brown sugar<br />
2 tablespoons unsalted butter, cold and cut into small cubes<br />
½ teaspoon ground cinnamon<br />
¼ cup toasted pecans (or substitute ¼ cup old-fashioned rolled oats)<br />
pinch salt<br />
3 cups mixed fresh berries (strawberries, blueberries and<br />
blackberries work well)<br />
2 tablespoons whole wheat flour<br />
pinch salt<br />
1 . Preheat oven to 425°F .<br />
2 . Prepare the crisp topping . Put all crumb topping ingredients into the<br />
<strong>Cuisinart</strong> <strong>Mini</strong>-Prep ® <strong>Plus</strong> Processor . Pulse on Grind 8 to 12 times until<br />
combined . Remove and reserve .<br />
3 . In a medium bowl, toss the berries with the flour and salt .<br />
4 . Put the berries into a small baking dish (about 1 to 1½ quart) . Evenly<br />
sprinkle the topping over the fruit .<br />
5 . Bake in preheated oven for about 25 minutes, or until fruit has softened<br />
a bit and the top is golden and crispy .<br />
6 . Let crisp rest for 5 to 10 minutes before enjoying .<br />
Nutritional information per serving:<br />
Calories 151 (39% from fat) • carb. 21g • pro. 2g • fat 7g • sat. fat 1g<br />
• chol. 18mg • sod. 258mg • calc. 18 mg • fiber 0g
Banana Crumb Muffins<br />
These muffins are chock full of good-for-you whole grains .<br />
Makes 6 muffins<br />
nonstick cooking spray<br />
Crumb topping:<br />
2 tablespoons whole wheat flour<br />
2 tablespoons packed light brown sugar<br />
2 tablespoons unsalted butter, cold and cut into<br />
small cubes<br />
½ teaspoon ground cinnamon<br />
¼ cup toasted pecans (or substitute ¼ cup old-fashioned rolled oats)<br />
pinch salt<br />
Muffin batter:<br />
²∕ ³ cup unbleached, all-purpose flour<br />
¹∕ ³ cup whole wheat flour<br />
¼ cup old-fashioned rolled oats<br />
1 teaspoon baking powder<br />
¼ teaspoon salt<br />
¼ teaspoon ground cinnamon<br />
¼ cup light brown sugar<br />
2 tablespoons unsalted butter, melted<br />
1 large egg<br />
¼ cup sour cream<br />
2 tablespoons reduced-fat milk<br />
½ teaspoon pure vanilla extract<br />
1 small ripe banana<br />
¼ cup chopped toasted pecans (optional)<br />
1 . Preheat oven to 375°F . Lightly coat a 6-cup muffin pan with nonstick<br />
cooking spray .<br />
2 . Prepare the crumb topping . Put all crumb topping ingredients into the<br />
<strong>Cuisinart</strong> ® <strong>Mini</strong>-Prep ® <strong>Plus</strong> Processor . Pulse on Grind 8 to 12 times until<br />
combined . Remove and reserve in refrigerator until ready to use .<br />
3 . Prepare muffin batter . Put the flours, oats, baking powder, salt and<br />
cinnamon into the work bowl . Process until combined . Remove and<br />
reserve in a medium mixing bowl .<br />
9<br />
4 . Put the remaining ingredients, except for the pecans, into the work<br />
bowl . Process on Grind until fully combined and creamy . Transfer wet<br />
ingredients into the bowl with the dry ingredients . Add the pecans and<br />
gently fold together until just combined – do not overmix .<br />
5 . Scoop muffin batter evenly into the prepared muffin pan . Sprinkle the<br />
crumb topping evenly on the tops of each muffin . Bake for 18 to 20<br />
minutes, until a cake tester comes out clean .<br />
Nutritional information per serving (1 muffin):<br />
Calories 151 (39% from fat) • carb. 21g • pro. 2g • fat 7g • sat. fat 1g<br />
• chol. 18mg • sod. 258mg • calc. 18 mg • fiber 0g<br />
Parmesan Chicken Fingers<br />
Makes about 12 chicken fingers<br />
A classic at every dinner table .<br />
olive oil<br />
1 pound chicken breast (approximately 3 breasts)<br />
6 slices white bread, lightly toasted, crusts removed, fully dried<br />
1½ ounces Parmesan cheese, cut into ½-inch cubes<br />
1 large egg<br />
1 tablespoon milk<br />
½ cup unbleached, all-purpose flour<br />
salt<br />
pepper<br />
1 . Preheat oven to 375°F . Line a baking sheet with aluminum foil; coat<br />
evenly with a small amount of olive oil .<br />
2 . Cut chicken breasts into “finger” strips, about 6 strips per breast .<br />
3 . Crumble half of the toasted bread into the work bowl of the <strong>Cuisinart</strong> ®<br />
<strong>Mini</strong>-Prep ® <strong>Plus</strong> Processor and process to create fine breadcrumbs .<br />
Remove and reserve in a small mixing bowl . Repeat with remaining<br />
bread . Remove and reserve with other crumbs . Put the Parmesan cubes<br />
into the work bowl and pulse 10 times, then process for 30<br />
seconds to finely chop . Remove and mix in with breadcrumbs . Put the<br />
egg and milk into the work bowl and process for 10 seconds . Remove<br />
and reserve in separate mixing bowl . Put the flour into a third<br />
mixing bowl .
4 . Line up the bowls of flour, egg wash, and toasted Parmesan breadcrumbs<br />
. Mix a small amount of salt and pepper into the flour .<br />
5 . Dip each chicken finger into the flour, then the egg, and then the breadcrumbs<br />
. Be sure to shake the excess off after each step .<br />
6 . Place chicken fingers on prepared baking sheet and place in oven for<br />
about 25 to 30 minutes . Turn the fingers halfway through bake time .<br />
Serve with favorite dipping sauce .<br />
Nutritional information per serving:<br />
Calories 11 (31% from fat) • carb. 12g • pro.7g • fat 4g • sat. fat 2g<br />
• chol. 51mg • sod. 196mg • calc. 117mg • fiber 0g<br />
WARRANTY<br />
Limited Three-Year Warranty<br />
This warranty is available to consumers only . You are a consumer if you own<br />
a <strong>Cuisinart</strong> ® <strong>Mini</strong>-Prep ® <strong>Plus</strong> 3-Cup Processor that was purchased at retail<br />
for personal, family or household use . Except as otherwise required under<br />
applicable law, this warranty is not available to retailers or other commercial<br />
purchasers or owners . We warrant that your <strong>Cuisinart</strong> ® <strong>Mini</strong>-Prep ® <strong>Plus</strong> 3-Cup<br />
Processor will be free of defects in materials and workmanship under normal<br />
home use for 3 years from the date of original purchase .<br />
We recommend that you visit our website, www.cuisinart.com for a fast,<br />
efficient way to complete your product registration . However, product<br />
registration does not eliminate the need for the consumer to maintain the<br />
original proof of purchase in order to obtain the warranty benefits . In the event<br />
that you do not have proof of purchase date, the purchase date for purposes of<br />
this warranty will be the date of manufacture .<br />
CALIFORNIA RESIDENTS ONLY<br />
California law provides that for In-Warranty Service, California residents have<br />
the option of returning a nonconforming product (A) to the store where it was<br />
purchased or (B) to another retail store that sells <strong>Cuisinart</strong> products of the<br />
same type . The retail store shall then, according to its preference, either repair<br />
the product, refer the consumer to an independent repair facility, replace the<br />
product, or refund the purchase price less the amount directly attributable to<br />
the consumer’s prior usage of the product . If neither of the above two options<br />
results in the appropriate relief to the consumer, the consumer may then take<br />
the product to an independent repair facility, if service or repair can be economically<br />
accomplished . <strong>Cuisinart</strong> and not the consumer will be responsible for<br />
the reasonable cost of such service, repair, replacement, or refund of nonconforming<br />
products under warranty . California residents may also, according to<br />
their preference, return nonconforming products directly to <strong>Cuisinart</strong> for repair<br />
or, if necessary, replacement by calling our Consumer Service Center toll-free<br />
at 1-800-726-0190 . <strong>Cuisinart</strong> will be responsible for the cost of the repair,<br />
replacement, and shipping and handling of such nonconforming products<br />
under warranty .<br />
10<br />
BEFORE RETURNING YOUR CUISINART PRODUCT<br />
If your <strong>Cuisinart</strong> ® <strong>Mini</strong>-Prep ® <strong>Plus</strong> 3-Cup Processor should prove to be<br />
defective within the warranty period, we will repair or, if we think necessary,<br />
replace it . To obtain warranty service, please call our Customer Service<br />
Center toll-free at 1-800-726-0190 or write to: <strong>Cuisinart</strong>, 7811 North Glen<br />
Harbor Blvd, Glendale, AZ 85307 . To facilitate the speed and accuracy of your<br />
return, enclose $10 .00 for shipping and handling . (California residents need<br />
only supply a proof of purchase and should call 1-800-726-0190 for shipping<br />
instructions .) Please be sure to include your return address, description of the<br />
product’s defect, product serial number, and any other information pertinent to<br />
the return . Please pay by check or money order . NOTE: For added protection<br />
and secure handling of any <strong>Cuisinart</strong> product that is being returned, we<br />
recommend you use a traceable, insured delivery service . <strong>Cuisinart</strong> cannot be<br />
held responsible for in-transit damage or for packages that are not delivered to<br />
us . Lost and/or damaged products are not covered under warranty .<br />
Your <strong>Cuisinart</strong> ® <strong>Mini</strong>-Prep ® <strong>Plus</strong> 3-Cup Processor has been manufactured to<br />
the strictest specifications and has been designed for use only with authorized<br />
accessories and replacement parts . This warranty expressly excludes any<br />
defects or damages caused by accessories, replacement parts or repair<br />
service other than those authorized by <strong>Cuisinart</strong> . This warranty does not<br />
cover any damage caused by accident, misuse, shipment or other than<br />
ordinary household use . This warranty excludes all incidental or consequential<br />
damages . Some states do not allow the exclusion or limitation of these<br />
damages, so these exclusions may not apply to you . You may also have other<br />
rights, which vary from state to state .<br />
Important: If the nonconforming product is to be serviced by someone other<br />
than <strong>Cuisinart</strong>’s Authorized Service Center, please remind the servicer to call<br />
our Consumer Service Center at 1-800-726-0190 to ensure that the problem<br />
is properly diagnosed, the product is serviced with the correct parts, and to<br />
ensure that the product is still under warranty .
Water<br />
Filtration<br />
Blenders Juicers Food Waffle Makers<br />
Processors<br />
Discover the complete line of <strong>Cuisinart</strong> ® brand premier kitchen appliances<br />
including food processors, mini food processors, hand mixers, blenders, toasters,<br />
coffeemakers, cookware, ice cream makers and toaster ovens at<br />
www.cuisinart.com<br />
www.cuisinart.com/baby<br />
© 2010 <strong>Cuisinart</strong><br />
150 Milford Road<br />
East Windsor, NJ 08520<br />
Printed in China<br />
10CE113795<br />
U IB-10052
Version no: DLC2ABY Series IB-10052<br />
Size: 216 mm (W) X 178 mm (H)<br />
Total Pages: 12 pps<br />
Material:<br />
Cover: 157gsm matt artpaper<br />
Inside: 120gsm gloss artpaper<br />
Coating: Gloss varnishing in cover<br />
Color:<br />
Cover: 4C+1C(K)<br />
Inside: 1C+1C<br />
Die cut:<br />
Bar Code:<br />
Date: 06/19/10 (01)<br />
Coordinator: Astor You / Sophie Liu<br />
Tel: 2669 6173 Fax: 2677 6556<br />
C<br />
Y<br />
M