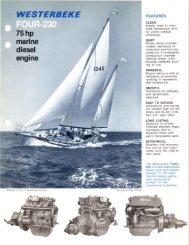
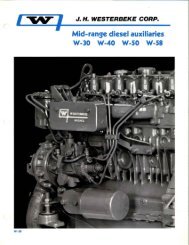
service manual 44240 8.0, 10.0, 12.5 and 15.0 - Westerbeke
service manual 44240 8.0, 10.0, 12.5 and 15.0 - Westerbeke
service manual 44240 8.0, 10.0, 12.5 and 15.0 - Westerbeke

Create successful ePaper yourself
Turn your PDF publications into a flip-book with our unique Google optimized e-Paper software.
)<br />
)<br />
SUP b,U',."'"<br />
TEsnNG THE ROTOR<br />
ASSEMBLE ALTERNATOR<br />
MANDO ALTERNATOR SERVICE<br />
FINGERS<br />
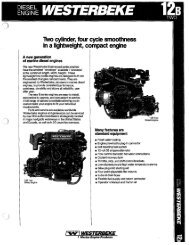
1. Carefully press the front bearing into the front housing,<br />
pushing against the bearing's outer race using a bearing<br />
driver. Lock the bearing in place with screws.<br />
TORQUE: 25 - 351b-in (2.B - 4.0 Nm)<br />
OUTER<br />
IIACf<br />
FRONT BEARING ASSEMBLY<br />
ASSEMBLING THE BEARINGS<br />
HOUSING<br />
BEARING LOCKING<br />
SCREWS<br />
FRONT BEARING<br />
2. Place the rotor (pulley end up) on the bed of an arbor<br />
press, on two steel blocks.<br />
3. Press the front housing <strong>and</strong> bearing assembly down<br />
onto the rotor shaft. Press against the bearing's inner<br />
race only, using a sleeve driver. Take care to insure that<br />
the rotor leads clear the steel blocks.<br />
SLEEVE DRIVER<br />
ROTOR<br />
FRONT HOUSING AND<br />
BEARING ASSEMBLY<br />
INSTALLING THE FRONT HOUSING ON THE ROTOR ASSEMBLY<br />
4. Install the rectifier assembly into the rear housing.<br />
5. Insert the Phillips screw <strong>and</strong> tighten it.<br />
RECTIFIER<br />
ASSEMBLY<br />
6. Assemble the front <strong>and</strong> rear housings as follows:<br />
Engines & Generators<br />
48<br />
a. Put the stator winding in the front housing with the<br />
stator leads away from the front housing <strong>and</strong> the<br />
notches in the stator laminations aligned with the<br />
four through-bolt holes in the housing.<br />
b. Align the scribe marks you made in the stator, <strong>and</strong><br />
front <strong>and</strong> rear housings during disassembly.<br />
c. Slip the rear housing into place over the rotor shaft.<br />
Align the mounting holes <strong>and</strong> put the stator leads<br />
through the holes at the top of the rear housing.<br />
d. Install the four bolts <strong>and</strong> tighten them.<br />
TORQUE: 35 - 65/b-tt (4.0 - 7.3 Nm)<br />
NOTE: If the front housing is new, the through-bolt<br />
will not be tapped.