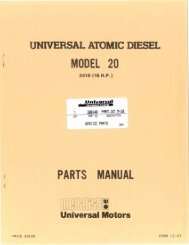
service manual 44240 8.0, 10.0, 12.5 and 15.0 - Westerbeke
service manual 44240 8.0, 10.0, 12.5 and 15.0 - Westerbeke
service manual 44240 8.0, 10.0, 12.5 and 15.0 - Westerbeke

Create successful ePaper yourself
Turn your PDF publications into a flip-book with our unique Google optimized e-Paper software.
GENERATOR DISASSEMBLY<br />
The generator layout should be studied carefully before<br />
disassembly.<br />
1. Remove terminal box cover. Disconnect the wire leads<br />
from the generator. If necessary, disassemble the voltage<br />
regulator support (if the Automatic Voltage Regulator is<br />
. mounted in the terminal box) <strong>and</strong> the box complete.<br />
2. Disconnect the voltage regulator leads <strong>and</strong> the leads<br />
from the exciter stator F + <strong>and</strong> F - to the voltage<br />
regulator.<br />
3. Remove the fastening bolts to the generator <strong>and</strong><br />
disassemble the generator from the prime mover by<br />
disconnecting the adapter housing <strong>and</strong> the coupling<br />
disc from the flywheel.<br />
4. Remove the protective cover on the exciter side <strong>and</strong><br />
loosen the bolts on the bearing shield. remove it from<br />
the housing by pulling it back.<br />
FLYWHEEL AND BELL<br />
HOUSING ASSEMBLY<br />
(TYPICAL)<br />
COVER HEAD BOLTS<br />
5mm ALLEN HEAD<br />
(COVER REMOVAL BOLTS)<br />
(8mm X 1.25)<br />
EXCITER<br />
ROTOR<br />
COLISEUM GENERATOR<br />
-.&IY: WESTERBEKE<br />
Engines & Generators<br />
60<br />
5. Remove the rotor horizontally through the flange end of<br />
the generator.<br />
6. When the rotating rectifier is to be removed, the bearing<br />
should be pulled out first.<br />
NOTES: During the transport of the single bearing generator,<br />
the rotor of the generator should be fixed to the housing with<br />
the coupling disc on the Jlange.<br />
Closed type bearings are used on this series of generators.<br />
During the dismantling, be careful not to damage the<br />
protective cover rings.<br />
To prevent damage to the rotor <strong>and</strong> stator windings while<br />
removing the rotor, place cardboard between the packnges<br />
<strong>and</strong> remove the rotor by pulling it out gently.<br />
START MOTOR<br />
DRIVE<br />
DISC