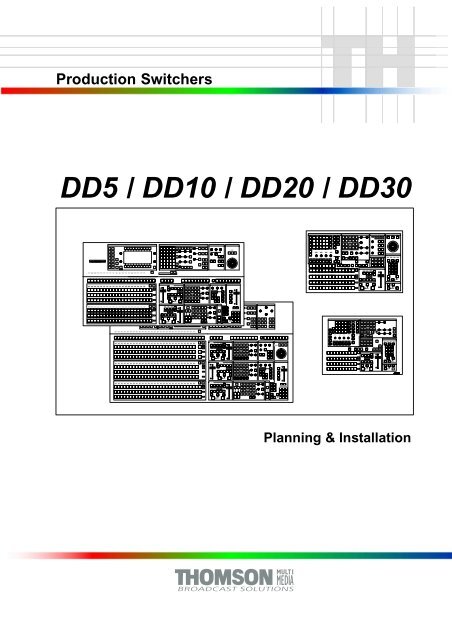
DD5 / DD10 / DD20 / DD30 - Grass Valley
DD5 / DD10 / DD20 / DD30 - Grass Valley
DD5 / DD10 / DD20 / DD30 - Grass Valley

Create successful ePaper yourself
Turn your PDF publications into a flip-book with our unique Google optimized e-Paper software.
Production Switchers<br />
<strong>DD5</strong> / <strong>DD10</strong> / <strong>DD20</strong> / <strong>DD30</strong><br />
BTS<br />
CAM1<br />
Planning & Installation
Published by<br />
BTS Media Solutions GmbH<br />
Brunnenweg 9<br />
D-64331 Weiterstadt, Germany<br />
P.O. Box 1165<br />
Tel: +49 (0) 6155-870-0<br />
Fax: +49 (0) 6155-870-300<br />
Web Sites<br />
Internet: www.thomsonbroadcast.com<br />
www.imagingsystems.de<br />
Intranet: www.weiterstadt.thmulti.com<br />
Trademarks<br />
All product names mentioned in this manual are the trademarks of their respective owners.<br />
Copyrights<br />
Information in this document is subject to change without notice.<br />
This document and any updates and/or supplemental information, including any copies thereof, cannot be reproduced, neither<br />
communicated to a third party, without written authorization from THOMSON multimedia Broadcast Solutions.<br />
Please notify THOMSON multimedia Broadcast Solutions of any errors in this document. We also would appreciate any comments<br />
you have to improve this manual.<br />
BTS Media Solutions GmbH 2002. All rights reserved.
Production Switchers<br />
<strong>DD5</strong> / <strong>DD10</strong> / <strong>DD20</strong> / <strong>DD30</strong><br />
Documentation Order Number<br />
Before reading the entire<br />
manual, please check for any<br />
supplements at the end<br />
of the manual.<br />
Item Rev Date Ser<br />
No<br />
Revision Report<br />
Planning & Installation<br />
RU 0021, 000 212 185 700<br />
Pages affected Contents Remarks<br />
1 0 05.93 100 all Planning & Installation 1st Edition<br />
2 1 11.93 100 all Planning & Installation 2nd Edition<br />
3 2 12.94 100 all Planning & Installation 3rd Edition<br />
4 3 06.95 100 all Planning & Installation 4th Edition<br />
5 4 08.96 100 all Planning & Installation 5th Edition<br />
6 5 02.98 100 all Planning & Installation 6th Edition<br />
General corrections
DD Production Switchers<br />
SAFETY INSTRUCTIONS<br />
Safety regulations<br />
Heavy weight<br />
Installation<br />
Ventilation<br />
Mains voltage<br />
Rev 1 / 03.1998<br />
Safety instructions<br />
The DD switcher is designed in conformity with the safety regulations EN60950 /<br />
VDE 0805 (protection class 1) and are in an unobjectionable condition when leaving<br />
the factory.<br />
Information on the following pages provides important safety guidelines for Operators<br />
and Service Personnel. Specific warnings and cautions will be found throughout<br />
the manual where they apply, but may not appear here. Please read and follow<br />
the important safety information, noting especially those instructions related to risk<br />
of fire, electrical shock or injury to person.<br />
Warning:<br />
Any instructions in this manual that require opening the equipment cover or<br />
enclosure are for use by qualified service personnel only. To reduce the risk<br />
of electric shock, do not perform any servicing other than contained in the<br />
manual unless you are qualified to do so.<br />
With the standard modules installed, the E Box and panels are heavy. During installation<br />
and until secured in the rack or the desk, use an appropriate lifing device to lift<br />
and support the mainframe. Failure to follow this precaution can result in injury to<br />
personnel and damage to equipment.<br />
The equipment shall be installed in Restricted Access Areas.<br />
The switcher is designed for operation with one-phase mains earthed neutral conductor.<br />
When setting up and connecting the switcher, connect the external earth<br />
line always before connecting the power line.<br />
Thus is ensured that in case of a short-circuit between mains and case, the voltage<br />
is led to earth.<br />
For this reason, never disconnect the earth line from the device while it is operated.<br />
The switcher must be only connected to an earthed socket. Check functioning of<br />
the protective conductors. It must not be live. Any discontinuity in the protective<br />
conductor may lead to a situation in which operational safety of the switcher can not<br />
longer guaranteed. Earthing has to be performed according to the regional safety<br />
regulations. When installing the lines, it is necessary to observe the national standards.<br />
When mounting the switcher EBox and panel, care should be taken to allow for adequate<br />
air circulation. Detailed information you can find in the respective sections in<br />
the installation manual of the switchers. Keep the EBox door always closed during<br />
operation.<br />
The admissible ambient temperature range of the switcher is within<br />
+5°C and +35°C. Optimum operation is ensured at an ambient temperature of<br />
25 °C ± 5 °C.<br />
Make sure that the switcher is protected against humidity and keep dry!<br />
Depending on the order of the customer, the switcher is adjusted to operate on<br />
115V or 230V. The respective adjustment is indicated on the connector panel of the<br />
unit. Before connecting power to the switcher, make sure that the voltage adjustment<br />
in the unit corresponds with the line voltage available in the studio.<br />
Switching-over to another line voltage has to be carried out by qualified service<br />
personnel.<br />
1
Safety instructions DD Production Switchers<br />
Fuses<br />
During operation<br />
Connecting cables<br />
Batteries<br />
Caution – Double-pole or neutral fusing! After acting of the protective devices,<br />
parts of the equipment may remain under voltage. Each main input is is protected<br />
by two primary-side fuses located on the power terminal of the switchers units<br />
(mainframe, panel). Additionally, the power supply units will be protected by internal<br />
fuses.<br />
When replacing the fuses, make sure that a fuse link of same type and same current<br />
rating is used. Never use a mended fuse! Do not short-circuit the fuseholder!<br />
Operate the switcher in the closed condition only, i.e. the mainframe with closed<br />
door and locked panel. There are no parts inside the unit to be adjusted by the user<br />
or parts to be exchanged.<br />
Caution: Opening the mainframe door or the panel desk may give<br />
access to live parts.<br />
In such cases, the unit has to be disconnected completely from the mains.<br />
If, however, working on the opened mainframe or opened panel is inevitable,<br />
this has only to be done by qualified service personnel being informed about<br />
the dangers involved.<br />
Attention! Capacitors may still carry a residual charge!<br />
If, for example, due to a failure, safe operation of the switcher is no longer ensured,<br />
put the switcher out of operation and secure it against further use.<br />
Do not insert or remove plug-in cards during operation.<br />
Make sure that no parts protrude into the air conditioning holes. This might lead to<br />
contact with dangerous voltages or to damages of sensitive circuit parts.<br />
To prevent damages in the control panel gear no drinks in top of the desk. Penetrated<br />
liquids can lead to destroying the control panel boards. Make sure that no<br />
small parts (e.g. office parenthesis) fall into the opening under the levers. This can<br />
lead to short-circuits and damages.<br />
The EMV regulations are only applicable when correctly shielded cables are used<br />
for the installation of the equipment. This applies to video cables as well as control<br />
cables. Corresponding cables can be obtained from BTS.<br />
Run all connection cables in covered cable ducts (risk of stumbling).<br />
For main connection, only use the supplied connection cable or a checked cable of<br />
the same type.<br />
The controller boards of the DD switchers contains a lithium battery, which has to be<br />
exchanged every five years. Detailed information you can find in the section Exchange<br />
of the lithium battery in the service manual.<br />
Used batteries must be disposed of carefully to avoid environmental damage.<br />
2 Rev 1 / 03.1998
DD Produktionsmischer<br />
SICHERHEITSHINWEISE<br />
Sicherheitsbestimmungen<br />
Hohes Gewicht<br />
Installation<br />
Belüftung<br />
Netzspannung<br />
Rev 1 / 03.1998<br />
Sicherheitshinweise<br />
Die DD Mischer entsprechen den Sicherheitsbestimmungen von EN60950 / VDE<br />
0805 (Schutzklasse 1) und haben das Werk in sicherheitstechnisch einwandfreiem<br />
Zustand verlassen.<br />
Um diesen Zustand zu erhalten und einen gefahrlosen Betrieb sicherzustellen,<br />
sind die nachfolgenden und die in den einzelnen Abschnitten des Handbuches aufgeführten<br />
Sicherheitshinweise, insbesondere die Hinweise bezüglich Brandgefahr,<br />
elektrischer Schlag und Verletzungsgefahren, zu beachten:<br />
Achtung:<br />
Alle Wartungsarbeiten dürfen nur von qualifiziertem Fachpersonal ausgeführt<br />
werden. Um die Gefahren eines elektrischen Schlages (hohe Spannungen,<br />
gefährliche Energien), Brandgefahr und Verletzungen zu vermeiden,<br />
sind bei Wartungsarbeiten, insbesondere wenn Gehäuseteile geöffnet werden,<br />
strikt die Angaben in der entsprechenden Anleitung zu befolgen. Andere<br />
als die angegebenen Wartungsarbeiten dürfen nur von Personen ausgeführt<br />
werden, die eine spezielle Befähigung dazu besitzen.<br />
Mit den Standard-Modulen bestückt wiegt die E-Box des <strong>DD20</strong> / <strong>DD30</strong> ca. 45 kg.<br />
Um Verletzungen von Personen oder Beschädigung des Gerätes zu vermeiden<br />
sind bei der Installation und Montage in einem Geräteschrank entsprechende Hebeeinrichtungen<br />
einzusetzen.<br />
Der Mischer ist für den Einsatz in besonderen Betriebsräumen mit beschränktem/<br />
überwachten Zutritt vorgesehen.<br />
Zur Spannungsversorgung ist ein Einphasen-Netz mit geerdetem Nulleiter notwendig.<br />
Beim Aufstellen und Anschließen des Mischers ist die Verkabelung einer<br />
externen Erdleitung immer vor der Verkabelung der Netzleitung vornehmen. Hiermit<br />
wird gewährleistet, daß im Falle eines Kurzschlusses zwischen Netz und Gehäuse<br />
die Spannung gegen Erde abgeleitet wird. Daher die Erdleitung niemals<br />
während des Betriebes vom Gerät lösen.<br />
Der Mischer darf nur an eine geerdete Steckdose angeschlossen werden. Die<br />
Funktion des Schutzleiters ist zu überprüfen. Er darf keine Spannung führen. Jede<br />
Unterbrechung des Schutzleiters ist geeignet den Mischer gefährlich zu machen.<br />
Die Erdung muß nach den regionalen Sicherheitsbestimmungen vorgenommen<br />
werden. Bei der Leitungsinstallation sind die landesüblichen Normen zu beachten.<br />
Bei der Montage der EBox und des Bedienpultes ist auf ausreichende Belüftung zu<br />
achten. Detaillierte Angaben für die Belüftung finden Sie in den entsprechenden<br />
Abschnitten des Installationshandbuches. Die Tür der E-Box ist während des Betriebes<br />
immer geschlossen zu halten.<br />
Die zulässige Umgebungstemperatur beträgt +5 °C bis +35 °C.<br />
Optimaler Betrieb ist bei einer Umgebungstemperatur von 25 °C ± 5 °C<br />
gegeben.<br />
Feuchtigkeitseinwirkungen (hohe Luftfeuchte, Flüssigkeiten) beeinträchtigen<br />
den Betrieb!<br />
Der Diamond digital Mischer ist entsprechend des Kundenauftrages entweder<br />
auf den Spannungsbereich 115V oder 230V eingestellt. Die jeweilige Einstellung<br />
ist auf der Anschlußplatte entsprechend gekennzeichnet.<br />
Vor dem Einschalten des Mischers ist diese Spannungsangabe noch einmal mit<br />
der vorhandenen Netzspannung des Studios zu überprüfen.<br />
Das Umschalten der Netzspannung ist von Fachpersonal auszuführen.<br />
1
Sicherheitshinweise DD Produktionsmischer<br />
Sicherungen<br />
Während des<br />
Betriebs<br />
Anschlußkabel<br />
Batterien<br />
Achtung – Zweipolige bzw. Neutralleiter-Sicherung! Teile des Gerätes können<br />
auch nach dem Auslösen einer Sicherung unter Spannung bleiben!<br />
Die Absicherung des Mischers erfolgt durch primärseitig angebrachte Schmelzeinsätze<br />
in den Netzanschlußeinheiten der Geräte (Bedienpult und E-Box).<br />
Beim Auswechseln dieser Sicherungen nur eine Sicherung vom angegebenen Typ<br />
und mit gleicher Nennstromstärke als Ersatz verwenden. Das Verwenden überbrückter<br />
Sicherungen oder das Kurzschließen des Sicherungshalters ist unzulässig.<br />
Der Mischer ist im geschlossenen Zustand zu betreiben, d.h. E-Box-mit geschlossener<br />
Tür und Pult verriegelt. Im inneren der Geräte befinden sich keine Elemente,<br />
die vom Benutzer während des Betriebs einzustellen oder auszutauschen sind.<br />
Achtung: Beim Öffnen der EBox-Türen oder beim Öffnen des Pultes,<br />
können Teile zugänglich werden, die Netzspannung führen.<br />
In solchen Fällen ist das Gerät vorher von der Netzspannung abzutrennen.<br />
Sind Arbeiten an der geöffneten EBox oder geöffneten Bedienpultes unvermeidlich,<br />
so darf dies nur durch eine Fachkraft durchgeführt werden, die mit<br />
den damit verbundenen Gefahren vertraut ist.<br />
ACHTUNG! Kondensatoren können noch geladen sein!<br />
Ist - z. B. infolge eines Schadens - ein gefahrloser Betrieb nicht mehr möglich, muß<br />
der Mischer außer Betrieb gesetzt, vom Netz abgetrennt und gegen Wiederinbetriebnahme<br />
gesichert werden.<br />
Platinen dürfen nicht während des Betriebes aus dem Mischer herausgezogen<br />
oder eingesteckt werden.<br />
Keine Teile in die Lüftungsöffnungen stecken! Dies kann zu Kontakt mit gefährlichen<br />
Spannungen oder zur Zerstörung von empfindlichen elektronischen Bauteilen<br />
führen.<br />
Zum Schutz vor Störungen und Beschädigung keine Getränke auf dem Bedienpult<br />
abstellen. Das Eindringen von Flüssigkeiten kann zu Zerstörung von Platinen führen.<br />
Ebenso sollten keine kleinen Metallteile, z. B. Büroklammern, auf dem Bedienfeld<br />
ablegen. Durch die Öffnungsschlitze der Blendhebel können sie ins Gerät fallen<br />
und zu Kurzschlüssen und Zerstörungen führen.<br />
Die EMV-Bestimmungen werden nur eingehalten, wenn bei der Installation der Geräte<br />
vorschriftsmäßig abgeschirmte Kabel verwendet werden. Dies gilt sowohl für<br />
Video- als auch für Steuerkabel.<br />
Entsprechende Kabel sind bei Philips BTS erhältlich.<br />
Sämtliche Anschlußkabel in abgedeckten Kabelschächten verlegen (Stolpergefahr).<br />
Für den Netzanschluß ist nur das mitgelieferte Anschlußkabel oder ein geprüftes<br />
Kabel gleichen Typs zu verwenden<br />
In den Controllern in der E-Box und im Bedienpult ist je eine Lithium-Batterie eingebaut,<br />
die im Abstand von etwa 5 Jahren ausgetauscht werden muß. Siehe hierzu<br />
im Abschnitt Austausch der Lithium-Batterie der Bedienungsanweisung.<br />
Die verbrauchte Batterie muß vorschriftsmäßig entsorgt werden, um Umweltschäden<br />
zu vermeiden.<br />
2 Rev 1 / 03.1998
Diamond digital<br />
ABOUT THIS MANUAL<br />
FURTHER INFORMATION<br />
About this manual<br />
The installation manual provides the information required for planning and initial<br />
installation of the switcher family Diamond digital. The manual is divided into the<br />
following sections:<br />
General, with a functional description of the switcher family, including the<br />
system architecture and the respective operational possibilities.<br />
Technical data of the individual switcher types.<br />
Mounting the E–Box, contains notes about mounting the switcher electronics<br />
into an equipment cabinet.<br />
Mounting the control panels, contains notes about mounting the control<br />
panels, and the dimensions for the table cutout.<br />
Connection and startup, contains notes and instructions for connecting<br />
the individual units as well as descriptions of all interfaces.<br />
Block diagrams, show the video paths of the switcher basic types as<br />
well as a typical system configuration with integration into a digital studio.<br />
In addition to this installation manual, the following manuals are also provided for<br />
the switcher family:<br />
Operation manual <strong>DD5</strong><br />
Operation manual <strong>DD10</strong><br />
Operation manual <strong>DD20</strong><br />
Operation manual <strong>DD30</strong><br />
Service manual <strong>DD5</strong> / <strong>DD10</strong> / <strong>DD20</strong> / <strong>DD30</strong>
About this manual Diamond digital
Diamond digital<br />
CONTENTS<br />
1. General . . . . . . . . . . . . . . . . . . . . . . . . . . . . . . . 3<br />
1.1 Unit family . . . . . . . . . . . . . . . . . . . . . . . 3<br />
1.2 Switcher architecture . . . . . . . . . . . . . . 9<br />
1.3 TV standards . . . . . . . . . . . . . . . . . . . . . 9<br />
1.4 Connection facilities . . . . . . . . . . . . . . 10<br />
1.4.1 Inputs . . . . . . . . . . . . . . . . . . . 10<br />
1.4.2 Matte generators . . . . . . . . . . 10<br />
1.4.3 Video outputs . . . . . . . . . . . . . 11<br />
1.4.4 Further outputs . . . . . . . . . . . 11<br />
1.4.5 Remotes . . . . . . . . . . . . . . . . . 11<br />
1.5 Mixing stages . . . . . . . . . . . . . . . . . . . . 12<br />
1.5.1 Inputs/outputs . . . . . . . . . . . . 12<br />
1.5.2 Amplitude mix . . . . . . . . . . . . 12<br />
1.5.3 Pattern mix . . . . . . . . . . . . . . 12<br />
1.5.4 Digital video effects (DVE) . . 13<br />
1.5.5 Wipe border matte generator 13<br />
1.5.6 Layer mode . . . . . . . . . . . . . . 13<br />
1.6 Key stages . . . . . . . . . . . . . . . . . . . . . . 14<br />
1.6.1 Inputs/outputs . . . . . . . . . . . . 14<br />
1.6.2 Key versions . . . . . . . . . . . . . 14<br />
1.6.3 Mask generators . . . . . . . . . . 15<br />
1.6.4 Matte generators,<br />
1.6.5<br />
border matte generators . . . . 15<br />
Borderliners . . . . . . . . . . . . . . 16<br />
1.7 Special effects generators . . . . . . . . 17<br />
1.7.1 Wipe generators . . . . . . . . . . 17<br />
1.7.2 Frame store . . . . . . . . . . . . . . 17<br />
2. Technical data . . . . . . . . . . . . . . . . . . . . . . . . 19<br />
2.1 Micro switcher <strong>DD5</strong> . . . . . . . . . . . . . . 19<br />
2.1.1 Inputs . . . . . . . . . . . . . . . . . . . 19<br />
2.1.2 Outputs . . . . . . . . . . . . . . . . . . 19<br />
2.1.3 Video system data . . . . . . . . . 19<br />
2.1.4 Interface data . . . . . . . . . . . . . 20<br />
2.1.5 Power supply . . . . . . . . . . . . . 20<br />
2.1.6 Environmental data . . . . . . . . 21<br />
2.1.7 Mechanical data . . . . . . . . . . 21<br />
2.2 Compact switcher <strong>DD10</strong> . . . . . . . . . . 22<br />
2.2.1 Inputs . . . . . . . . . . . . . . . . . . . 22<br />
2.2.2 Outputs . . . . . . . . . . . . . . . . . . 22<br />
2.2.3 Video system data . . . . . . . . . 22<br />
2.2.4 Interface data . . . . . . . . . . . . 23<br />
2.2.5 Power supply . . . . . . . . . . . . . 23<br />
2.2.6 Environmental data . . . . . . . . 24<br />
2.2.7 Mechanical data . . . . . . . . . . 24<br />
5th Edition, August 1996<br />
Document: RU 0021 / Benennung<br />
Order no.: 0 212 185 700<br />
Contents<br />
Page Page<br />
2.3 Production switcher <strong>DD20</strong> . . . . . . . . . 25<br />
2.3.1 Inputs . . . . . . . . . . . . . . . . . . . 25<br />
2.3.2 Outputs . . . . . . . . . . . . . . . . . . 25<br />
2.3.3 Video system data . . . . . . . . . 25<br />
2.3.4 Interface data . . . . . . . . . . . . . 26<br />
2.3.5 Power supply . . . . . . . . . . . . . 26<br />
2.3.6 Environmental data . . . . . . . . 27<br />
2.3.7 Mechanical data . . . . . . . . . . 27<br />
2.4 Production switcher <strong>DD30</strong> . . . . . . . . . 28<br />
2.4.1 Inputs . . . . . . . . . . . . . . . . . . . 28<br />
2.4.2 Outputs . . . . . . . . . . . . . . . . . . 28<br />
2.4.3 Video system data . . . . . . . . . 28<br />
2.4.4 Interface data . . . . . . . . . . . . 29<br />
2.4.5 Power supply . . . . . . . . . . . . . 29<br />
2.4.6 Environmental data . . . . . . . . 30<br />
2.4.7 Mechanical data . . . . . . . . . . 30<br />
3. Mounting the electronics box . . . . . . . . . . 31<br />
3.1 Mechanical measurements . . . . . . . . 31<br />
3.2 Installation in a 19-inch cabinet . . . . . 32<br />
3.3 Installation in a DIN cabinet . . . . . . . . 32<br />
3.4 Ventilation . . . . . . . . . . . . . . . . . . . . . . . 33<br />
4. Mounting the control panels . . . . . . . . . . . 35<br />
4.1 Dimensions of contr. panel RPD 5 . . 35<br />
4.2 Dimensions of contr. panel RPD 10 . 36<br />
4.3 Dimensions of contr. panel RPD 20 . 37<br />
4.4 Dimensions of contr. panel RPD 30 . 38<br />
4.5 Fastening . . . . . . . . . . . . . . . . . . . . . . . 39<br />
4.6 Profile set . . . . . . . . . . . . . . . . . . . . . . . 39<br />
4.7 Ventilation . . . . . . . . . . . . . . . . . . . . . . . 40<br />
5. Connection and startup . . . . . . . . . . . . . . . 41<br />
5.1 Connecting power and earth lines . . 41<br />
5.2 Changing the supply voltage . . . . . . . 43<br />
5.3 Control desk connector panel . . . . . . 44<br />
5.4 E-box connector panel RMD 5/10 . . 46<br />
5.5 E-box connector panel RMD 20/30 . 50<br />
5.6 Pin assignments . . . . . . . . . . . . . . . . . 53<br />
5.7 Connecting an menu monitor . . . . . . 58<br />
5.7.1 EGA monitor with panel<br />
controller RY1821 . . . . . . . . . 58<br />
5.7.2 Control panel controller<br />
RY1822 with VGA interface . 59<br />
5.8 Connecting a PC mouse . . . . . . . . . .<br />
60<br />
I
Contents Diamond digital<br />
6. Initial installation . . . . . . . . . . . . . . . . . . . . . 61<br />
II<br />
6.1 Installation checklist . . . . . . . . . . . . . . 61<br />
6.2 Powerup of the switcher . . . . . . . . . . . 62<br />
6.3 Input processor RY1900 . . . . . . . . . . 65<br />
6.4 ME processor RY1903 . . . . . . . . . . . . 66<br />
6.5 Key processor RY1906 . . . . . . . . . . . 67<br />
6.6 Wipe processor RY1908 . . . . . . . . . . 70<br />
6.7 Output processor RY1911 . . . . . . . . . 71<br />
6.8 Controller RY1917 . . . . . . . . . . . . . . . 72<br />
6.9 Store RY1913 . . . . . . . . . . . . . . . . . . . 73<br />
6.10 System messages and adjustments<br />
6.10.1 Control panel controller<br />
74<br />
RY1821/RY1822<br />
6.10.2 E-box controller<br />
. . . . . . . . . . 74<br />
RY1601/RY1917 . . . . . . . . . . 77<br />
6.10.3 Fader connector panel<br />
RC1855 . . . . . . . . . . . . . . . . . . 81<br />
6.10.4 Timing/Genlock aligment . . . 82<br />
6.10.5 Genlock adjust. with menu . . 84<br />
6.11 Diamond digital-Software update . . . 86<br />
6.12 Loading flash software from<br />
DD floppy disk drive . . . . . . . . . . . . . . 94<br />
7. Description of the interfaces . . . . . . . . . . 97<br />
7.1 Cheapernet specification . . . . . . . . . . 97<br />
7.2 Router inreface with BTS-<br />
ASCII-Protocol . . . . . . . . . . . . . . . . . . . 98<br />
7.2.1 General . . . . . . . . . . . . . . . . . . 98<br />
7.2.2 Interfaces . . . . . . . . . . . . . . . . 99<br />
7.2.3 Connection cables . . . . . . . . 100<br />
7.2.4 Menu settings . . . . . . . . . . . . 101<br />
7.3 Ident X-bar interface . . . . . . . . . . . . . 108<br />
7.4 Aux panel and under monitor<br />
display installation . . . . . . . . . . . . . . 110<br />
7.5 Connection of the status<br />
displays RP 1/2 UMD . . . . . . . . . . . 113<br />
7.6 Tally and GPI interface . . . . . . . . . . 117<br />
7.7 Function of tally in connectors . . . . 124<br />
8. DVE and editors . . . . . . . . . . . . . . . . . . . . . 125<br />
8.1 Technical setup and wiring . . . . . . . 125<br />
8.2 Preparations at the DVE device . . . 126<br />
8.3 Device specific notes . . . . . . . . . . . 127<br />
Page Page<br />
8.3.1 Pinnacle prizm . . . . . . . . . . . 127<br />
8.3.2 ABEKAS A-57 VTR protocol 128<br />
8.3.3 ABEKAS A-57<br />
RS232 protocol . . . . . . . . . . 129<br />
8.3.4 ABEKAS A53D . . . . . . . . . . 130<br />
8.3.5 QUESTECH charisma . . . 131<br />
8.3.6 GVG DPM 700 . . . . . . . . . . 132<br />
8.3.7 AMPEX ADO 100/500/1000 134<br />
8.4 DVE control . . . . . . . . . . . . . . . . . . . . 135<br />
8.5 Editors with GVG-200 o/e protocol 139<br />
8.6 Editors with GVG-100 protocol only 139<br />
8.7 Port protocols in the<br />
diamond digital switchers . . . . . . . . . 140<br />
8.8 System intergration <strong>DD5</strong>/<strong>DD10</strong> . . . 141<br />
8.9 System intergration <strong>DD20</strong>/<strong>DD30</strong> . . 142<br />
9. Port protocols GVG-200 emulation . . . 143<br />
9.1 Crosspoint bus command C1-C4 . . 143<br />
9.2 Analog control . . . . . . . . . . . . . . . . . . 144<br />
9.3 Key (button) commands . . . . . . . . . . 145<br />
9.4 Key commands . . . . . . . . . . . . . . . . . 147<br />
9.4.1 Borderline mode command<br />
(B0/B1) . . . . . . . . . . . . . . . . . 147<br />
9.4.2 Key accumulation command<br />
(BF/CO) . . . . . . . . . . . . . . . . 147<br />
9.5 Wipe generator commands . . . . . . . 148<br />
9.5.1 Wipe pattern select<br />
command (C8) . . . . . . . . . . . 148<br />
9.5.2 Wipe modulation<br />
command (B5) . . . . . . . . . . . 148<br />
9.5.3 Wipe multiplication<br />
command (B6) . . . . . . . . . . . 148<br />
9.5.4 Wipe rotation<br />
command (B7) . . . . . . . . . . . 148<br />
9.5.5 Transition mode<br />
command (CA) . . . . . . . . . . . 148<br />
9.5.6 Auto transition rate<br />
command (CC, CD) . . . . . . 149<br />
9.5.7 Transition key select (FB) . 149<br />
9.5.8 All stop command (F2) . . . . 149<br />
9.6 Section: E-MEM commands . . . . . . 150<br />
9.6.1 E-MEM LEARN/RECALL<br />
enable command (D8) . . . . 150<br />
9.6.2 LEARN E-MEM<br />
command DA) . . . . . . . . . . . 150<br />
9.6.3 RECALL E-MEM<br />
command (DB) . . . . . . . . . . . 152<br />
10.Block diagrams . . . . . . . . . . . . . . . . . . . . .<br />
153
Diamond digital<br />
1. GENERAL<br />
1.1 UNIT FAMILY<br />
1. General<br />
The Diamond digital of BTS provides a new family of video effects switchers in the<br />
serial 4:2:2 digital standard for studio and OB van applications.<br />
Due to their universal control surfaces, the switchers can be used for broadcast as<br />
well as for post production.<br />
The switcher family comprises small switchers and modularly designed larger<br />
switchers in different expansion phases designed as a modular system using equal<br />
p.c. boards and a uniform case.<br />
The unit family comprises the following versions:<br />
4:2:2 micro switcher Diamond digital <strong>DD5</strong> 0 211 902 000<br />
12 inputs<br />
1 mixing level with 1 keyer<br />
1 downstream keyer<br />
4:2:2 compact switcher Diamond digital <strong>DD10</strong> 0 211 902 100<br />
16 inputs<br />
1 mixing level with 2 keyers<br />
1 downstream keyer<br />
4:2:2 production switcher Diamond digital <strong>DD20</strong> 0 211 902 200<br />
32 inputs<br />
1 mixing level with 2 keyers<br />
preset/program stage with<br />
2 downstream keyers<br />
4:2:2 production switcher Diamond digital <strong>DD30</strong> 0 211 902 300<br />
32 inputs<br />
2 mixing levels with 2 keyers<br />
preset/program stage with<br />
2 downstream keyers<br />
3
1. General Diamond digital<br />
System configuration 4:2:2 compact switcher Diamond digital <strong>DD5</strong><br />
4<br />
BTS RMD<br />
RMD 5 Electronics box<br />
BTS<br />
Wipe Mask Mattes<br />
RPD 5 Control panel<br />
Keyers<br />
Stores<br />
Transition<br />
EXTRA<br />
DSK
Diamond digital<br />
System configuration 4:2:2 compact switcher Diamond digital <strong>DD10</strong><br />
BTS RMD<br />
RMD 10 Electronics box<br />
Wipe Mask Keyers<br />
Mattes<br />
Positioner<br />
A B C D<br />
A B C D<br />
RPD 10 Control panel<br />
Transition<br />
Stores<br />
EXTRA<br />
DSK<br />
1. General<br />
5
1. General Diamond digital<br />
System configuration 4:2:2 production switcher Diamond digital <strong>DD20</strong><br />
6<br />
BTS<br />
CAM1 CAM1<br />
CAM1 CAM1<br />
BTS<br />
RMD 20 Electronics box<br />
STIL DVE1<br />
CAM1 CAM1<br />
RPD 20 Control panel<br />
RMD<br />
0 1 2 3 4 5 6 7 8 9 0 1
Diamond digital<br />
System configuration 4:2:2 production switcher Diamond digital <strong>DD30</strong><br />
BTS<br />
BTS RMD<br />
RMD 30 Electronics box<br />
CAM1<br />
RPD 30 Control panel<br />
1. General<br />
7
1. General Diamond digital<br />
Example of a system configuration<br />
8<br />
BTS<br />
BTS<br />
BTS<br />
Diamond digital system with several electronics boxes and control panels
Diamond digital<br />
1.2 SWITCHER ARCHITECTURE<br />
1.3 TV STANDARDS<br />
1. General<br />
The switchers are set up as A/B mixers in the background (BGND) with 1 or 2 overlaid<br />
key layers for each mixing level. The next transition principle is consistently<br />
realized and includes also the downstream key stage.<br />
The mixing levels and the preset/program stage/downstream keyers are set up<br />
with the same p.c. cards and do not differ in their hardwares.<br />
For post-production, the mixing level of the switchers <strong>DD20</strong> and <strong>DD30</strong> can be<br />
switched over to the layer mode. In this case, 2 keyers are available for chroma or<br />
luminance key and 2 keyers for wipe signals.<br />
The preview facilities (AUTO PREVIEW, TRANSITION PREVIEW) for preparing<br />
the next contributions in the mixing levels are realized.<br />
Integration of an external DVE unit into the signal path of the switcher is possible.<br />
In this case, the signal path of the mixing level can be separated, the video signal<br />
can be fed out to the DVE and the signal manipulated by the DVE can be looped<br />
again into the signal path.<br />
The switcher processes without hardware modifications digital serial video signals<br />
with the aspect ratios 4:3 and 16:9 (270 Mbits/s) in the standards 625 lines/50 Hz<br />
2:1 interlaced and 525 lines/60 Hz 2:1 interlaced.<br />
9
1. General Diamond digital<br />
1.4 CONNECTION FACILITIES<br />
1.4.1 INPUTS<br />
1.4.2 MATTE GENERATORS<br />
10<br />
The switcher exclusively disposes of serial digital video inputs which, depending<br />
on the application, can be used without restrictions, either as background, key or<br />
fill signal in all mixing levels (including the downstream keyer).<br />
As a standard feature of the switcher, 12 (<strong>DD5</strong>), 16 (<strong>DD10</strong>), 24 (<strong>DD20</strong>) and 32<br />
(<strong>DD30</strong>) inputs are provided.<br />
The inputs are internally terminated and can process video signals in the format 4:3<br />
or 16:9 (270 Mbits/s) in the standards 525/60 2:1 or 625/50 2:1 (no mixed forms).<br />
All inputs are provided with an equalizer for compensating cable lengths of max.<br />
150 m.<br />
Furthermore, all inputs are provided with an automatic delay time correction which<br />
can compensate delay inequalities referred to the blackburst input in the range of<br />
± 1/4 line.<br />
Asynchronous signals or inputs not connected, are detected and indicated.<br />
For synchronization of the switcher in the studio, a loop-through reference input for<br />
an analog blackburst signal is provided.<br />
For background designing, 2 central matte generators are provided in the switchers<br />
<strong>DD20</strong> and <strong>DD30</strong>, which can be optionally used as background, key or fill signal.<br />
For the types <strong>DD5</strong> and <strong>DD10</strong>, only one central matte is available.<br />
As a standard feature, in addition to plain mattes, extremely soft color floating effects<br />
between two optional colors or black or white are possible in H or V direction<br />
or diagonally. Position and angle of the diagonal can be varied in steps of 2 degrees.<br />
Alternatively, color or brightness floating can be determined by the signal from a<br />
wipe generator of mixing level ME1.<br />
Optionally, a memory can be assigned to the matte generators, which stores wipe<br />
or key signals, thus enabling complex color and brightness floating effects.
Diamond digital<br />
1.4.3 VIDEO OUTPUTS<br />
1.4.4 FURTHER OUTPUTS<br />
1.4.5 REMOTES<br />
The switcher is provided with the following video outputs:<br />
• 4 program outputs<br />
• 1 clean-feed output (before or between DSK, switchable)<br />
• 1 output for second DSK preview in PP stage<br />
• 3 program outputs for each mixing level<br />
For preview purposes, the following outputs are available:<br />
1. General<br />
• 1 preview output for each mixing level, mask signal and wipe pattern signal<br />
can be additively connected with the video signal.<br />
• 1 preset output for preset/program stage, mask signal and wipe pattern signal<br />
can be additively connected with the video signal.<br />
All outputs are delay-compensated. The digital horizontal and vertical blanking intervals<br />
are transparent for the background signal. For the case of routing switcher<br />
changeovers in the vertical blanking interval, the lines 6 and 319 are faded to black.<br />
For special applications (integration of a DVE, preview of sources, measuring purposes),<br />
the switcher is provided (standard feature) with 5 (<strong>DD10</strong>) or 5 to 11<br />
(optional for <strong>DD20</strong> and 30) serial AUX outputs which can be optionally connected<br />
with the following signals:<br />
• all inputs<br />
• all central mattes<br />
• PGM: ME 1-2, PP, DSK (depending on the expansion phase)<br />
• PVW: ME 1-2, PP, DSK (depending on the expansion phase)<br />
• the signals of the frame stores (4:2:2)<br />
• DVE output; for background/fill per ME, selectable<br />
• DVE output for key per ME, selectable<br />
Selection is made on the control panel or the external AUX control units.<br />
The following interfaces are provided:<br />
• 3 serial interfaces RS 422 for edit, DVE, external routing switchers.<br />
• 1 serial interface; RS 423 (ES-BUS) or RS 422, switchable.<br />
• 8 universal interface inputs (general-purpose interface, GPI) and 8 GPI outputs.<br />
• For red tally, one potenial-free contact is provided per source. Furthermore,<br />
the individual mixing levels are indicated.<br />
• Tally input<br />
11
1. General Diamond digital<br />
1.5 MIXING STAGES<br />
1.5.1 INPUTS/OUTPUTS<br />
1.5.2 AMPLITUDE MIX<br />
1.5.3 PATTERN MIX (WIPE)<br />
12<br />
For background designing (BGND), a mixing stage (Mix, Add, Wipe with border)<br />
is available for each mixing level (ME).<br />
The mix and key stages are set up in a cascaded way and are provided with tappings<br />
for coupling in and out signals for a DVE unit. Re-entry of the mixing levels<br />
is possible.<br />
The preset/program stage (PP) at the output of the switcher is identically designed<br />
with regard to the mixing stage. Thus, for post-production purposes, a full mixing<br />
level is available.<br />
A separate channel is available for preview in the mixing levels, which is supplied<br />
with equal input signals. Different control signals enable to preview the next contribution<br />
(AUTO PREVIEW) or to make a transition without affecting the program<br />
signal (TRANSITION PREVIEW).<br />
As inputs, all video inputs, the signal of a preceding or succeeding mix/key stage,<br />
the signal of a frame store and the central mattes are available for each mixing<br />
stage.<br />
Additionally, a wipe border matte generator for the border of the wipe generator is<br />
provided for each mixing stage.<br />
As outputs, program signal and preview signal are available to the user. In the preset/program<br />
stage, a clean-feed output signal is additionally available, which can<br />
be optionally tapped off after the preset/program stage or after the downstream<br />
keyer.<br />
Transition between two input signals (MIX) is possible by hard cut (CUT), automatic<br />
fading (AUTO), automatic transition (EXTRA) or manually with the fader (FADE).<br />
For transition, different fading characteristics (linear, gamma, etc.) are possible.<br />
Transition via a black signal (BLACK PRESET) can also be performed.<br />
For additive mixing (ADD), the output level can be more than 100% and is internally<br />
limited.<br />
Pattern mix of two optional input signals is made with a control signal supplied by<br />
the wipe generator.<br />
Optionally, a second wipe generator (from <strong>DD10</strong>) can be inserted per mixing level<br />
(example: WIPE in PATTERN KEY).<br />
Additionally, the result of this manipulation can be provided with a border which can<br />
be filled with a wipe border matte. A special signal of the wipe generator (Wiper-<br />
Wash TM ), enables color wash effects of the border being coupled with the wipe pattern.<br />
The border can be switched into the video signal (CUT), the transparency (OPAC-<br />
ITY) is selectable.<br />
Switcher <strong>DD20</strong>/30 enables in conjunction with the mask store option to provide the<br />
wipe border with a shadow.
Diamond digital<br />
1.5.4 DIGITAL VIDEO EFFECTS (DVE)<br />
1.5.5 WIPE BORDER MATTE GENERATOR<br />
1.5.6 LAYER MODE<br />
1. General<br />
Pattern mix of a video signal supplied by the DVE. The DVE additionally supplies<br />
a key signal of the transformed DVE video signal. The procedure of the DVE is<br />
coupled with the fader (manual or automatic transition).<br />
Beside the central matte generators, an additional matte generator is provided for<br />
coloring the borders of the wipe generators. Beside unicolored mattes, extremely<br />
soft color floating effects (softness 20 - 80 %) between two optional colors or black<br />
or white are possible in H or V direction or diagonally. Position and angle of the diagonal<br />
can be varied in steps (2°). Futhermore, color floating can be varied by a signal<br />
from the wipe generator).<br />
For post-production, the layer mode (<strong>DD20</strong> and <strong>DD30</strong> only) enables to change the<br />
background mixing stage into two independent key stages. The signals of the wipe<br />
generators or the DVE can be used as control signals.<br />
13
1. General Diamond digital<br />
1.6 KEY STAGES<br />
1.6.1 INPUTS/OUTPUTS<br />
1.6.2 KEY VERSIONS<br />
14<br />
1 or 2 key stages with border facilities are available in the individual mixing levels<br />
for effects background designing or for caption insertion (chroma key), (lum key or<br />
linear key). The priority can be changed (OVER).<br />
The key stages are placed after the background mixing stage, set up in a cascaded<br />
way and provided with taps for coupling in and out a signal for a DVE unit.<br />
The downstream keyer (DSK) at the output of the switcher is identically designed<br />
with regard to the key stages (2 key stages).<br />
After the key stages, a facility is provided for fade to black (FTB). In <strong>DD5</strong> and <strong>DD10</strong><br />
which do not dispose of a preset/program stage, only 1 downstream keyer is available<br />
for luminance or linear key.<br />
For preview, a separate channel is available in the key stages, which can be connected<br />
with equal input signals but different control signals. It is possible to preview<br />
the next contribution (AUTO PREVIEW) or to make a transition without affecting<br />
the program signal (TRANSITION PREVIEW).<br />
For post-production, the layer mode permits to use the keyers as layers (<strong>DD20</strong> and<br />
<strong>DD30</strong> only). The layers can be interchanged.<br />
As key and fill signals, each keyer can dispose of more than 2 buses, and the DVE<br />
bus of all inputs, the stores for video and key signals, and the central mattes. In<br />
addition, own matte generators for fill and border are provided for each keyer.<br />
For the downstream keyer in switcher <strong>DD5</strong> or <strong>DD10</strong>, a bus with all inputs and the<br />
signal of a matte generator are available as a fill signal.<br />
Generation of the key signal is possible for each keyer from all inputs (SELF-KEY).<br />
As internal key sources, wipe and mask signals are available. It is also possible to<br />
feed a key signal modified by the DVE, into the key signal path (DVE LOOP).<br />
In the setup mode, a key signal can be assigned to each fill signal, which has to be<br />
switched together with selection of fill (couple). This assignment can optionally be<br />
cancelled (split) in order to select another key signal.<br />
As outputs, key or combined key signals, the signal of the key/mask store are available<br />
to the user via the AUX outputs. For preview purposes, the mask signal can<br />
also be additively connected with the preview signal.<br />
Chroma key<br />
As a standard feature, a linear chroma key with foreground desaturation and background<br />
transition is realized.<br />
Adjustment of the key parameters can be made automatically (for blue as key color<br />
without measuring window, for other colors with measuring window) and can be<br />
corrected manually.<br />
The key signal can be also inverted (KEY INVERT).<br />
The transparency (OPACITY) of each keyer can be adjusted separately.
Diamond digital<br />
1.6.3 MASK GENERATORS<br />
Luminance key/linear key<br />
1. General<br />
The key generator enables a luminance key. The signal can be bordered by means<br />
of the borderliner.<br />
It is possible to key on all luminance values (CLIP). The rise time (SOFTNESS) of<br />
the signal can be steepened. The key signal can be inverted (KEY INVERT).<br />
The LINEAR KEY mode allows the use of key and fill signals (on black background)<br />
from external sources, e.g. caption generators. The rise times of the signals cannot<br />
be varied in this case.<br />
The key can be faded into the video signal (MIX), switched (CUT) or faded over by<br />
means of a wipe generator (WIPE). The transparency (OPACITY) of each keyer<br />
can be adjusted separately.<br />
For restricting the key signal to defined picture areas, a masking generator is provided<br />
for each key generator. Furthermore, the mask signal can be used as a key<br />
signal.<br />
As a standard feature, a square mask is available for each keyer. Alternatively, one<br />
of the wipe generators of the associated mixing level can be used as a mask generator.<br />
A key/mask store is available, which offers beside storage of key or pattern signals<br />
in conjunction with the wipe generator, a paint mode for generating optional patterns<br />
(from <strong>DD10</strong>).<br />
The effect of the mask on the video signals can be switched over (forced foreground/background)<br />
and is invertible.<br />
1.6.4 MATTE GENERATORS, BORDER MATTE GENERATORS<br />
For coloring (fill) characters generated by luminance or linear key, and the<br />
associated borders, a matte generator and a border matte generator are provided<br />
for each keyer.<br />
Beside unicolored mattes, the matte generator allows extremely soft color floating<br />
effects (softness 20-80 %) between two optional colors or black or white in H or V<br />
direction or diagonally. Position and angle of the diagonals can be varied in steps.<br />
15
1. General Diamond digital<br />
1.6.5 BORDERLINERS<br />
16<br />
For bordering caption signals generated by chroma luminance or linear key, a borderliner<br />
is realized for each keyer. Two borderliners at maximum for <strong>DD10</strong>.<br />
As a standard feature, the following border types are provided:<br />
• H, 2H border<br />
• OUTLINE H, 2H<br />
• DROPSHADOW H, 2H, 3H, 4H<br />
• SLANTED SHADOW H, 2H, 3H, 4H<br />
positionable in steps over or under the caption.<br />
As a fill signal for the border, a border matte generator is available.<br />
The border can be switched into the video signal (CUT), transparency (OPACITY)<br />
is adjustable.<br />
The key/mask store option enables switcher <strong>DD20</strong> and <strong>DD30</strong> to generate a freely<br />
positionable shadow whose transparency can be adjusted.
Diamond digital<br />
1.7 SPECIAL EFFECTS GENERATORS<br />
1.7.1 WIPE GENERATORS<br />
1.7.2 FRAME STORE<br />
1. General<br />
As a standard feature, a wipe generator is available in each mixing level (preset/<br />
program stage as an option), which can be freely assigned to background transition<br />
(BGND) and/or to one or both keyers.<br />
The wipe generator supplies the signal for transition (PATTERN) and a border signal<br />
(BORDER). As additional application, the signal of the wipe generator can<br />
serve as a key source (PATTERN KEY) or can be used for modulating the floating<br />
of a matte of a central matte generator.<br />
Optionally, each mixing level can be extended by a second wipe generator freely<br />
assignable to the keyers.<br />
The wipe pattern can be switched (WIPE) into the video signal, the pattern size is<br />
adjusted with the fader or by automatic transition (AUTO). The transparency of the<br />
signal can be adjusted.<br />
The border can be switched into the video signal (CUT), the transparency is adjustable.<br />
In addition, the wipe generator generates a signal which can control color floating<br />
in the border.<br />
As wipes, the following patterns are available:<br />
• Rolling wipes (horizontal, vertical cut)<br />
• Geometric patterns (square, circle)<br />
• Rotary wipes<br />
• Fan/wiper effects (fan blade, clock wipes)<br />
• Combination transitions (square + clock)<br />
• Matrix wipes (mosaic)<br />
• Matrix combination transitions (corner cut + mosaic)<br />
For the basic functions, a series of possible variations is available, such as alteration<br />
of the aspect ratio (RATIO), rotation of the wipe (ROTATION) and multiplication<br />
of the wipe (MULTI).<br />
The wipe edges can be varied via an adjustable softness and additionally be modulated<br />
with defined functions (e.g. sine) in H and V direction.<br />
A wipe pattern positioning at any place by means of a trackball or a mouse is possible<br />
if appropriate patterns are available.<br />
As an option (from <strong>DD20</strong>), the switcher can be extended by a frame store which can<br />
process video and key signals separately. For storage, all those signals are available<br />
which can also be selected at the AUX outputs. The outputs of the frame store<br />
are available as primary inputs.<br />
The following manipulations are possible in the frame store:<br />
• Variation of the position H and/or V<br />
• NAM<br />
• ADD<br />
17
1. General Diamond digital<br />
18
Diamond digital<br />
2. TECHNICAL DATA<br />
2.1 MICRO SWITCHER DIAMOND DIGITAL <strong>DD5</strong><br />
2.1.1 INPUTS<br />
2.1.2 OUTPUTS<br />
2.1.3 VIDEO SYSTEM DATA<br />
2. Technical Data<br />
– 12 vid. sig. and/or key sig. BNC, serial component CCIR 656<br />
– Input level 0.8 Vpp ± 10%, 75 ohms,<br />
DC 0 ± 0.5 V<br />
– Quantization 10 bits<br />
– Common mode noise 2.5 Vpp DC - 1 kHz<br />
– Return loss 5 - 270 Mbits > 10 db<br />
– Autophasing range 52 s<br />
– Asynchronous signals switchable<br />
– Reference signal 2 BNC, 0.3 V sync, blackburst or CCVS<br />
75 ohms, DC 0 ± 0.1 V, can be looped through<br />
– Return loss reference up to 7 MHz > 30 db<br />
– 4 program video signals BNC, serial component CCIR 656<br />
– 1 clean video signal BNC, serial component CCIR 656<br />
– 1 preset video signal BNC, serial component CCIR 656<br />
– 1 auxiliary bus BNC, serial component CCIR 656<br />
– 1 DVE video BNC, serial component CCIR 656<br />
– 1 DVE key BNC, serial component CCIR 656<br />
– Output level 0.8 Vpp ± 10%, 75 ohms, DC 0 ± 0.5 V<br />
– Quantization 10 bits or 8 bits rounded, switchable<br />
Return loss 5 - 270 Mbits > 10 db<br />
– Standards, interlaced 525/60 or 625/50, switchable<br />
– Data rate 270 Mbits/s<br />
– Aspect ratio 4:3 or 16:9 (270 Mbits/s), switchable<br />
– Signal processing video 4:2:2 in conformity with CCIR 601<br />
– Sampling frequency lum. 13.5 MHz<br />
– Sampling frequency chrom. 6.75 MHz<br />
– Quantization video 10 bits<br />
– Overall delay input/<br />
program output < 1 line<br />
– Blanking horizontal transparent for background signal<br />
– Blanking vertical transparent for background signal<br />
except for lines 6 and 319 (625L/50 Hz)<br />
or 10 and 273 (525L/60 Hz)<br />
19
2. Technical Data Diamond digital<br />
2.1.4 INTERFACE DATA<br />
– 8 tally inputs 2 D-sub socket 9-pin<br />
TTL internal pull-up,<br />
control with dry contact<br />
– 12 + 5 tally outputs 2 D-sub connector 50-pin<br />
1 potential-free contact 24 V, 1 A for<br />
sources (12)<br />
contact 24 V, 1 A with common root for<br />
monitor (5),<br />
– 8 GPI inputs, 8 GPI outputs D-sub socket 25-pin<br />
inputs: TTL with optocoupler,<br />
control with dry contact,<br />
outputs: potential-free contact 24 V, 1 A<br />
– 3 serial ports (E-box) D-sub socket 9-pin, RS 422,<br />
1 serial port (E-box) D-sub socket 9-pin, RS 422 or RS 232,<br />
switchable<br />
– Service port (E-box) D-sub socket 9-pin, RS 232C<br />
– Remote (E-box) 1 BNC (remote), cheapernet,<br />
50 ohms, 150 m,<br />
with repeater max. 2.5 km,<br />
can be looped through with a T-junction<br />
– Remote (control panel) 1 BNC (remote), cheapernet,<br />
50 ohms, 150 m,<br />
with repeater max. 2.5 km,<br />
can be looped through with a T-junction<br />
– 1 serial port (control panel) D-sub socket 9-pin, RS 422,<br />
1 mouse port (control panel) D-sub connector 9-pin, RS 232C<br />
– Service port (control panel) D-sub socket 9-pin, RS 232C,<br />
optionally mouse or service,<br />
switchable<br />
2.1.5 POWER SUPPLY<br />
20<br />
– Line voltage AC 115 or 230 V +15/– 20 %,<br />
switchable<br />
– Line frequency 50/60 Hz ± 5 %<br />
– Current consumption E-box 115V: 3.9 A, 230V: 2 A<br />
– Current consumption panel 115V: 0.5 A, 230V: 0.25 A<br />
– Cut-in current < 16 A, < 100 A transient<br />
– Fuses Panel: 2 x 6,3 A slow-blow (IEC127 type)<br />
Ebox: 2 x 10 A slow-blow (IEC127 type)<br />
Manufacurer: Wickmann, Schurter<br />
– Power connection Appliance inputs IEC 320 type,<br />
VDE 0625 Part 1<br />
– Safety regulations VDE 0805/5.90 (EN 60950)<br />
– Power cords HAR cord H05VV–F1,0 2.5m<br />
– US power cords Panel: SJT 2.5m 3x AWG18<br />
EBox: SJT 3m 3x AWG18
Diamond digital<br />
2. Technical Data<br />
2.1.6 ENVIRONMENTAL DATA<br />
– Storage temp. E-box - 20 oC - + 70 oC – Storage temp. contr. pan. 0 oC - + 70 oC (32o - 158 oF) – Operating temp. E-box + 5 oC - +35 oC For operation within specs + 10 oC - +30 oC Op. temp. control panel + 5 oC - +35 oC – Ventilation E-box 140 m3 /h<br />
– Relative humidity 80 % non-condensing<br />
– Electromagn. compatibility (EMC) EN 55022, Class B<br />
FCC (47CFR) PART 15 Subp J Class A<br />
IEC 801-3, 3 V/m<br />
– ESD IEC 801-2, 8 kV<br />
2.1.7 MECHANICAL DATA<br />
– Dimensions E-box 212(h) x 483(w) x 470(d) mm, (19”, 5 RU)<br />
1 RU under the electronics box has to be<br />
left free for ventilation and slide-in rails<br />
– Dimensions contr. panel 373(h) x 482(w) x 97.5(d) mm<br />
– Cutout meas. contr. panel 449 x 358 mm<br />
– Ventilation E-box Suction port: left side panel<br />
Blow-out port: rear top<br />
– Weight E-box 20 kg<br />
– Weight control panel 7 kg<br />
– Mechanical stress vibration IEC 68-2-6,<br />
shock IEC 68-2-29<br />
tilt fall IEC 68-2-31,<br />
– Color E-box dark mushroom, Philips 10709/G8<br />
– Color control panel ultra dark grey, Philips 10714/G8<br />
21
2. Technical Data Diamond digital<br />
2.2 COMPACT SWITCHER DIAMOND DIGITAL <strong>DD10</strong><br />
2.2.1 INPUTS<br />
2.2.2 OUTPUTS<br />
2.2.3 VIDEO SYSTEM DATA<br />
22<br />
– 16 video signals<br />
and/or key signals BNC, serial component CCIR 656<br />
– Input level 0.8 Vpp ± 10%, 75 ohms,<br />
DC 0 ± 0.5 V<br />
– Quantization 10 bits<br />
– Common mode noise 2.5 Vpp DC - 1 kHz<br />
– Return loss 5 - 270 Mbits > 10 db<br />
– Autophasing range 52 s<br />
– Asynchronous signals switchable<br />
– Reference signal 2 BNC, 0.3 V sync, blackburst or CCVS<br />
75 ohms, DC 0 ± 0.1 V, can be looped through<br />
– Return loss reference up to 7 MHz > 30 db<br />
– 4 program video signals BNC, serial component CCIR 656<br />
– 1 clean video signal BNC, serial component CCIR 656<br />
– 1 preset video signal BNC, serial component CCIR 656<br />
– 3 auxiliary buses BNC, serial component CCIR 656<br />
– 1 DVE video BNC, serial component CCIR 656<br />
– 1 DVE key BNC, serial component CCIR 656<br />
– Output level 0.8 Vpp ± 10%, 75 ohms, DC 0 ± 0,5 V<br />
– Quantization 10 bits or 8 bits rounded, switchable<br />
Return loss 5 - 270 Mbits > 10 db<br />
– Standards, interlaced 525/60 or 625/50, switchable<br />
– Data rate 270 Mbits/s<br />
– Aspect ratio 4:3 or 16:9 (270 Mbits/s), switchable<br />
– Signal processing video 4:2:2 in conformity with CCIR 601<br />
– Sampling frequency lum. 13.5 MHz<br />
– Sampling frequency chrom. 6.75 MHz<br />
– Quantization video 10 bits<br />
– Overall delay input/<br />
program output < 1 line<br />
Blanking horizontal transparent for background signal<br />
– Blanking vertical transparent for background signal<br />
except for lines 6 and 319 (625L/50 Hz)<br />
or 10 and 273 (525L/60 Hz)
Diamond digital<br />
2. Technical Data<br />
2.2.4 INTERFACE DATA<br />
– 8 tally inputs 2 D-sub socket 9-pin<br />
TTL internal pull-up,<br />
control with dry contact<br />
– 16 + 7 tally outputs 2 D-sub connector 50-pin<br />
1 potential-free contact 24 V, 1 A for<br />
sources (16)<br />
contact 24 V, 1 A with common root for<br />
monitor (7),<br />
– 8 GPI inputs, 8 GPI outputs D-sub socket 25-pin<br />
inputs: TTL with optocoupler,<br />
control with dry contact,<br />
outputs: potential-free contact 24 V, 1 A<br />
– 3 serial ports (E-box) D-sub socket 9-pin, RS 422,<br />
1 serial port (E-box) D-sub socket 9-pin, RS 422 or RS 232,<br />
switchable<br />
– Service port (E-box) D-sub socket 9-pin, RS 232C<br />
Remote (E-box) 1 BNC (remote), cheapernet,<br />
50 ohms, 150 m,<br />
with repeater max. 2.5 km,<br />
can be looped through with a T-junction<br />
– Remote (control panel) 1 BNC (remote), cheapernet,<br />
50 ohms, 150 m,<br />
with repeater max. 2.5 km,<br />
can be looped through with a T-junction<br />
– 1 serial port (control panel) D-sub socket 9-pin, RS 422,<br />
1 mouse port (control panel) D-sub connector 9-pin, RS 232C<br />
– Service port (control panel) D-sub socket 9-pin, RS 232C,<br />
optionally mouse or service,<br />
switchable<br />
2.2.5 POWER SUPPLY<br />
– Line voltage AC 115 or 230 V +15/– 20 %,<br />
switchable<br />
– Line frequency 50/60 Hz ± 5 %<br />
– Current consumption E-box 115V: 3.9 A, 230V: 2 A<br />
– Current consumption panel 115V: 0.5 A, 230V: 0.25 A<br />
– Cut-in current < 16 A, < 100 A transient<br />
– Fuses Panel: 2 x 6,3 A slow-blow (IEC127 type)<br />
Ebox: 2 x 10 A slow-blow (IEC127 type)<br />
Manufacurer: Wickmann, Schurter<br />
– Power connection Appliance inputs IEC 320 type,<br />
VDE 0625 Part 1<br />
– Safety regulations VDE 805/5.90 (EN 60950)<br />
– Power cords HAR cord H05VV–F1,0 2.5m<br />
– US power cords Panel: SJT 2.5m 3x AWG18<br />
EBox: SJT 3m 3x AWG18<br />
23
2. Technical Data Diamond digital<br />
2.2.6 ENVIRONMENTAL DATA<br />
– Storage temperature E-box - 20 oC - + 70 oC – Storage temp. control panel 0 oC - + 70 oC (32o - 158 oF) – Operating temp. E-box + 5 oC - +35 oC For operation within specs + 10 oC - +30 oC Op. temp. control panel + 5 oC - +35 oC – Ventilation E-box 140 m3 /h<br />
– Relative humidity 80 % non-condensing<br />
– Electromagn. compatibility<br />
(EMC) EN 55022, Class B<br />
FCC (47CFR) PART 15 Subp J Class A<br />
IEC 801-3, 3 V/m<br />
– ESD IEC 801-2, 8 kV<br />
2.2.7 MECHANICAL DATA<br />
24<br />
– Dimensions E-box 212(h) x 483(w) x 470(d) mm, (19”, 5 RU)<br />
1 RU under the electronics box has to be<br />
left free for ventilation and slide-in rails<br />
– Dimensions control panel 385(h) x 640(w) x 97.5(d) mm<br />
– Cutout meas. control panel 620 x 363 mm<br />
– Ventilation E-box Suction port: left side panel<br />
Blow-out port: rear top<br />
– Weight E-box 20 kg<br />
– Weight control panel 9.5 kg<br />
– Mechanical stress vibration IEC 68-2-6,<br />
shock IEC 68-2-29<br />
tilt fall IEC 68-2-31,<br />
– Color E-box dark mushroom, Philips 10709/G8<br />
– Color control panel ultra dark grey, Philips 10714/G8
Diamond digital<br />
2.3 PRODUCTION SWITCHER DIAMOND DIGITAL <strong>DD20</strong><br />
2.3.1 INPUTS<br />
2.3.2 OUTPUTS<br />
2.3.3 VIDEO SYSTEM DATA<br />
2. Technical Data<br />
– 32 video signals<br />
and/or key signals BNC, serial component CCIR 656<br />
– Input level 0.8 Vpp ± 10%, 75 ohms,<br />
DC 0 ± 0.5 V<br />
– Quantization 10 bits<br />
– Common mode noise 2.5 Vpp DC - 1 kHz<br />
– Return loss 5 - 270 Mbits > 10 db<br />
– Autophasing range 32 s<br />
– Asynchronous signals switchable<br />
– Reference signal 2 BNC, 0.3 V sync, blackburst or CCVS<br />
75 ohms, DC 0 ± 0.1 V,<br />
can be looped through<br />
– Return loss reference up to 7 MHz > 30 db<br />
– 4 program video signals BNC, serial component CCIR 656<br />
– 3 program video signals per ME BNC, serial component CCIR 656<br />
– 1 clean video signal BNC, serial component CCIR 656<br />
– 1 preset video signal BNC, serial component CCIR 656<br />
– 1 preview video signal per ME BNC, serial component CCIR 656<br />
– 3 - 5 auxiliary buses BNC, serial component CCIR 656<br />
– 1 - 2 DVE video BNC, serial component CCIR 656<br />
– 1 - 2 DVE key BNC, serial component CCIR 656<br />
– Output level 0.8 Vpp ± 10%, 75 ohms, DC 0 ± 0.5 V<br />
– Quantization 10 bits or 8 bits rounded, switchable<br />
– Return loss 5 - 270 Mbits > 10 db<br />
– Standards, interlaced 525/60 or 625/50, switchable<br />
– Data rate 270 Mbits/s<br />
– Aspect ratio 4:3 or 16:9 (270 Mbits/s), switchable<br />
– Signal processing video 4:2:2 in conformity with CCIR 601<br />
– Sampling frequency lum. 13.5 MHz<br />
– Sampling frequency chrom. 6.75 MHz<br />
– Quantization video 10 bits<br />
– Overall delay input/<br />
program output < 1 line<br />
– Blanking horizontal transparent for background signal<br />
– Blanking vertical transparent for background signal<br />
except for lines 6 and 319 (625L/50 Hz)<br />
or 10 and 273 (525L/60 Hz)<br />
25
2. Technical Data Diamond digital<br />
2.3.4 INTERFACE DATA<br />
– 16 tally inputs 2 D-sub socket 9-pin<br />
TTL internal pull-up,<br />
control with dry contact<br />
– 32 + 12 tally outputs 2 D-sub connector 50-pin<br />
1 potential-free contact 24 V, 1 A<br />
for sources (32)<br />
contact 24 V, 1 A with common root<br />
for monitor (12)<br />
– 8 GPI inputs, 8 GPI outputs D-sub socket 25-pin<br />
inputs: TTL with optocoupler,<br />
control with dry contact,<br />
outputs: potential-free contact 24 V, 1 A<br />
– 3 serial ports (E-box) D-sub socket 9-pin, RS 422,<br />
1 serial port (E-box) D-sub socket 9-pin, RS 422 or RS 232,<br />
switchable<br />
– Service port (E-box) D-sub socket 9-pin, RS 232C<br />
Remote (E-box) 1 BNC (remote), cheapernet,<br />
50 ohms, 150 m,<br />
with repeater max. 2.5 km,<br />
can be looped through with a T-junction<br />
– Remote (control panel) 1 BNC (remote), cheapernet,<br />
50 ohms, 150 m,<br />
with repeater max. 2,5 km,<br />
can be looped through with a T-junction<br />
– 1 serial port (control panel) D-sub socket 9-pin, RS 422,<br />
1 mouse port (control panel) D-sub connector 9-pin, RS 232C<br />
– Service port (control panel) D-sub socket 9-pin, RS 232C,<br />
optionally mouse or service,<br />
switchable<br />
2.3.5 POWER SUPPLY<br />
26<br />
– Line voltage E-box AC 230 V +15/– 20 %,<br />
– Line voltage panel AC 115 or 230 V +15/– 20 %,<br />
switchable<br />
– Line frequency 50/60 Hz ± 5 %<br />
– Current consumption E-box 5.5 A<br />
– Current consumption panel 115V: 1.8 A, 230V: 0.9 A<br />
– Cut-in current < 16 A, < 100 A transient<br />
– Fuses Panel: 2 x 6,3 A slow-blow (IEC127 type)<br />
Ebox: 2 x 10 A slow-blow (IEC127 type)<br />
Manufacurer: Wickmann, Schurter<br />
– Power connection Appliance inputs IEC 320 type,<br />
VDE 0625 Part 1<br />
– Safety regulations VDE 805/5.90 (EN 60950)<br />
Leakage current >3.5 mA<br />
Additional earth connection<br />
essential before connecting.<br />
– Power cords HAR cord H05VV–F1,0 2.5m<br />
– US power cords Panel: SJT 2.5m 3x AWG18<br />
EBox: SJT 3m 3x AWG18
Diamond digital<br />
2. Technical Data<br />
2.3.6 ENVIRONMENTAL DATA<br />
– Storage temperature E-box - 20 oC - + 70 oC – Storage temperature E-box 0 oC - + 70 oC (32o - 158 oF) – Operating temp. E-box + 5 oC - +35 oC For operation within specs + 10 oC - +30 oC Op. temp. control panel + 5 oC - +35 oC – Ventilation E-box 430 m3 /h<br />
– Relative humidity 80 % non-condensing<br />
– Electromagn. compatibility<br />
(EMC) EN 55022, Class B<br />
FCC (47CFR) PART 15 Subp J Class A<br />
IEC 801-3, 3 V/m<br />
– ESD IEC 801-2, 8 kV<br />
2.3.7 MECHANICAL DATA<br />
– Dimensions E-box 533(h) x 483(w) x 470(d) mm, (19”, 12 RU)<br />
1 RU under the electronics box has to be<br />
left free for ventilation and slide-in rails<br />
– Dimensions control panel 551(h) x 1187(w) x 99(d) mm<br />
– Cutout measures contr. pan. 525(l) x 1164(w)<br />
– Ventilation Suction port: left side panel<br />
Blow-out port: rear top<br />
– Weight E-box 40 kg<br />
– Weight control panel 26 kg<br />
– Mechanical stress vibration IEC 68-2-6,<br />
shock IEC 68-2-29<br />
tilt fall IEC 68-2-31,<br />
Color E-box dark mushroom, Philips 10709/G8<br />
– Color control panel ultra dark grey, Philips 10714/G8<br />
27
2. Technical Data Diamond digital<br />
2.4 PRODUCTION SWITCHER <strong>DD30</strong><br />
2.4.1 INPUTS<br />
2.4.2 OUTPUTS<br />
2.4.3 VIDEO SYSTEM DATA<br />
28<br />
– 32 video signals<br />
and/or key signals BNC, serial component CCIR 656<br />
– Input level 0.8 Vpp ± 10%, 75 ohms,<br />
DC 0 ± 0.5 V<br />
– Quantization 10 bits<br />
– Common mode noise 2.5 Vpp DC - 1 kHz<br />
– Return loss 5 - 270 Mbits > 10 db<br />
– Autophasing range 32 s<br />
– Asynchronous signals switchable<br />
– Reference signal 2 BNC, 0.3 V sync, blackburst or CCVS<br />
75 ohms, DC 0 ± 0.1 V,<br />
can be looped through<br />
– Return loss reference up to 7 MHz > 30 db<br />
– 4 program video signals BNC, serial component CCIR 656<br />
– 3 program vid. sig. per ME BNC, serial component CCIR 656<br />
– 1 clean video signal BNC, serial component CCIR 656<br />
– 1 preset video signal BNC, serial component CCIR 656<br />
– 1 preview vid. sig. per ME BNC, serial component CCIR 656<br />
– 3 - 5 auxiliary buses BNC, serial component CCIR 656<br />
– 1 - 2 DVE video BNC, serial component CCIR 656<br />
– 1 - 2 DVE key BNC, serial component CCIR 656<br />
– Output level 0.8 Vpp ± 10%, 75 ohms, DC 0 ± 0.5 V<br />
– Quantization 10 bits or 8 bits rounded, switchable<br />
– Return loss 5 - 270 Mbits > 10 db<br />
– Standards, interlaced 525/60 or 625/50, switchable<br />
– Data rate 270 Mbits/s<br />
– Aspect ratio 4:3 or 16:9 (270 Mbits/s), switchable<br />
– Signal processing video 4:2:2 in conformity with CCIR 601<br />
– Sampling frequency lum. 13.5 MHz<br />
– Sampling frequency chrom. 6.75 MHz<br />
– Quantization video 10 bits<br />
– Overall delay input/<br />
program output < 1 line<br />
– Blanking horizontal transparent for background signal<br />
– Blanking vertical transparent for background signal<br />
except for lines 6 and 319 (625L/50 Hz)<br />
or 10 and 273 (525L/60 Hz)
Diamond digital<br />
2.4.4 INTERFACE DATA<br />
2.4.5 POWER SUPPLY<br />
2. Technical Data<br />
– 16 tally inputs 2 D-sub socket 9-pin<br />
TTL internal pull-up,<br />
control with dry contact<br />
– 32 + 13 tally outputs 2 D-sub connector 50-pin<br />
1 potential-free contact 24 V, 1 A<br />
for sources (32)<br />
contact 24 V, 1A with common root<br />
for monitor (12)<br />
– 8 GPI inputs, 8 GPI outputs D-sub socket 25-pin<br />
inputs: TTL with optocoupler,<br />
control with dry contact,<br />
outputs: potential-free contact<br />
24 V, 1 A<br />
– 3 serial ports (E-box) D-sub socket 9-pin, RS 422,<br />
1 serial port (E-box) D-sub socket 9-pin, RS 422 or<br />
RS 232, switchable<br />
– Service port (E-box) D-sub socket 9-pin, RS 232C<br />
Remote (E-box) 1 BNC (remote), cheapernet,<br />
50 ohms, 150 m,<br />
with repeater max. 2.5 km,<br />
can be looped through with a T-junction<br />
– Remote (control panel) 1 BNC (remote), cheapernet,<br />
50 ohms, 150 m,<br />
with repeater max. 2.5 km,<br />
can be looped through with a T-junction<br />
– 1 serial port (contr. pan.) D-sub socket 9-pin, RS 422,<br />
1 mouse port (contr. pan.) D-sub connector 9-pin, RS 232C<br />
– Service port (control pan.) D-sub socket 9-pin, RS 232C,<br />
optionally mouse or service,<br />
switchable<br />
– Line voltage E-box AC 230 V +15/– 20 %,<br />
– Line voltage AC 115 or 230 V +15/– 20 %,<br />
switchable<br />
– Line frequency 50/60 Hz ± 5 %<br />
– Current consumption E-box 5.5 A<br />
– Current consumption panel 115V: 2.2 A, 230V: 1.1 A<br />
– Cut-in current < 16 A, < 100 A transient<br />
– Fuses Panel: 2 x 6,3 A slow-blow (IEC127 type)<br />
Ebox: 2 x 10 A slow-blow (IEC127 type)<br />
Manufacurer: Wickmann, Schurter<br />
– Power connection Appliance inputs IEC 320 type,<br />
VDE 0625 Part 1<br />
– Safety regulations VDE 805/5.90 (EN 60950)<br />
Leakage current >3.5 mA<br />
Additional earth connection<br />
essential before connecting.<br />
– Power cords HAR cord H05VV–F1,0 2.5m<br />
– US power cords Panel: SJT 2.5m 3x AWG18<br />
EBox: SJT 3m 3x AWG18<br />
29
2. Technical Data Diamond digital<br />
2.4.6 ENVIRONMENTAL DATA<br />
– Storage temperature E-box - 20 oC - + 70 oC – Storage control panel E-box 0 oC - + 70 oC (32o - 158 oF) – Operating temp. E-box + 5 oC - +35 oC For operation within specs + 10 oC - +30 oC Op. temp. control panel + 5 oC - +35 oC – Ventilation E-box 430 m3 /h<br />
– Relative humidity 80 % non-condensing<br />
– Electromagn. compatibility<br />
(EMC) EN 55022, Class B<br />
FCC (47CFR) PART 15 Subp J Class A<br />
IEC 801-3, 3 V/m<br />
– ESD IEC 801-2, 8 kV<br />
2.4.7 MECHANICAL DATA<br />
30<br />
– Dimensions E-box 533(h) x 483(w) x 470(d) mm, (19”, 12 RU)<br />
1 RU under the electronics box has to be<br />
left free for ventilation and slide-in rails<br />
– Dimensions control panel 687(h) x 1350(w) x 99(d) mm<br />
– Cutout measures contr. pan. 1327(l) x 661(w) mm<br />
– Ventilation Suction port: left side panel<br />
Blow-out port: rear top<br />
– Weight E-box 41 kg<br />
– Weight control panel 33 kg<br />
– Mechanical stress vibration IEC 68-2-6,<br />
shock IEC 68-2-29<br />
tilt fall IEC 68-2-31,<br />
– Color E-box dark mushroom, Philips 10709/G8<br />
– Color control panel ultra dark grey, Philips 10714/G8
Diamond digital<br />
3. MOUNTING THE ELECTRONICS BOX<br />
3. Mounting the Electronics Box<br />
Your equipment may be shipped in several different boxes, depending upton order<br />
size and configuration.<br />
Check the contents of each box against the packing list to ensure your order is<br />
complete. If equipment is missing or damaged, contact the shipping company immediately.<br />
The electronics boxes of the switchers <strong>DD5</strong>, <strong>DD10</strong>, <strong>DD20</strong> and <strong>DD30</strong> are located<br />
in a closed 19-inch frame which houses the individual plug-in cards of the video and<br />
control electronics as well as the power supply units.<br />
ATTENTION:<br />
The device is orderly used when the electronics box is firmly incorporated<br />
into an equipment cabinet in a studio or O.B. van and is connected to earth!<br />
According to VDE, mobile application is not admissible.<br />
3.1 MECHANICAL MEASUREMENTS<br />
Electronics box for RMD 5 and RMD 10<br />
BTS<br />
19” = 483 mm<br />
450 mm<br />
470 mm<br />
5RU<br />
212 mm<br />
WARNING<br />
With the standard modules installed, the <strong>DD10</strong> mainframe weights 41 kg<br />
(44 lbs). During installation and until secured in the rack, use an appropriate<br />
lifing device to lift and support the mainframe. Failure to follow this precaution<br />
can result in injury to personnel and damage to equipment.<br />
31
3. Mounting the Electronics Box Diamond digital<br />
Electronics box for RMD 20 and RMD 30<br />
32<br />
BTS<br />
19” = 483 mm<br />
450 mm<br />
470 mm<br />
12 RU<br />
533 mm<br />
WARNING<br />
With the standard modules installed, the <strong>DD30</strong> mainframe weights 41 kg<br />
(91 lbs). During installation and until secured in the rack, use an appropriate<br />
lifing device to lift and support the mainframe. Failure to follow this precaution<br />
can result in injury to personnel and damage to equipment.<br />
3.2 INSTALLATION IN A 19-INCH CABINET<br />
For installation, BTS optionally provides a 19-inch cabinet of the series G 3 SK<br />
62969 with the associated mounting accessories. When using cabinets of other<br />
manufacturers, observe the respective mounting instructions.<br />
3.3 INSTALLATION IN A DIN CABINET<br />
For installation in a DIN cabinet, adapter pieces of the respective cabinet manufacturer<br />
have to be mounted on both sides of the lateral fastening flanges.<br />
The electronics box is mounted into the cabinet by means of the 19-inch fastening<br />
flanges located at both sides.<br />
For weight relief, it is necessary to mount 2 slide rails into the cabinet.
Diamond digital<br />
3.4 VENTILATION<br />
3. Mounting the Electronics Box<br />
The ambient temperature during operation must not fall below + 5 °C or exceed +<br />
40 °C. Optimum operation is ensured at an ambient temperature of 30 °C ± 5 °C<br />
(see the Technical Data).<br />
For ventilation of the electronics box, blowers are provided in the upper part.<br />
RMD 5 and RMD 10 1 blower<br />
RMD 20 and RMD 30 3 blowers<br />
These blowers serve to support air circulation in the unit and to lead the heated air<br />
into the room.<br />
For RMD 20 and RMD 30, air supply is made from the bottom, for RMD 5 and RMD<br />
10 from the left side. The heated air is blown by the blowers into the rear part of the<br />
cabinet.<br />
In order to ensure continuous air circulation, make sure that the air slots in the bottom<br />
of the electronics box are not covered when mounting the electronics box. This<br />
is ensured when leaving space enough underneath the electronics box.<br />
For this reason, it is recommended to provide for air circulation a space of 2 rack<br />
units (2RU) in the equipment cabinet underneath the electronics box.<br />
Minimum space underneath the frame has to be 1RU (for ventilation and sliding<br />
rails)!<br />
Air circulation electronics box RMD 5 and RMD 10<br />
Fresh air<br />
Outgoing air<br />
BTS<br />
33
3. Mounting the Electronics Box Diamond digital<br />
Air circulation electronics box RMD 20 and RMD 30<br />
34<br />
BTS<br />
Fresh air<br />
Outgoing air
Diamond digital<br />
4. MOUNTING THE CONTROL PANELS<br />
4.1 DIMENSIONS OF CONTROL PANEL RPD 5<br />
373<br />
Measures in mm<br />
4. Mounting the Control Panels<br />
The figure below shows all mechanical measurements of the RPD 5 control panel<br />
being relevant for installation in a master control desk. The size of the desk cutout<br />
is also indicated.<br />
439<br />
482<br />
Desk cutout: 449 x 358 mm<br />
347<br />
97.5<br />
35
4. Mounting the Control Panels Diamond digital<br />
4.2 DIMENSIONS OF CONTROL PANEL RPD 10<br />
36<br />
385<br />
Measures in mm<br />
The figure below shows all mechanical measurements of the RPD10 control panel<br />
being relevant for installation in a master control desk. The size of the desk cutout<br />
is also indicated.<br />
610<br />
640<br />
Desk cutout: 620 x 363 mm<br />
355<br />
97.5
Diamond digital<br />
4.3 DIMENSIONS OF CONTROL PANEL RPD 20<br />
343<br />
4. Mounting the Control Panels<br />
The figure below shows all mechanical measurements of the RPD 20 control panel<br />
being relevant for installation in a master control desk. The size of the desk cutout<br />
is also indicated.<br />
1154<br />
Measures in mm<br />
1187<br />
517<br />
Desk cutout: 1164 x 525 mm<br />
WARNING<br />
With the standard modules installed, the <strong>DD20</strong> control panel weights 26 kg<br />
(57 lbs). During installation and until secured in the desk, use an appropriate<br />
lifing device to lift and support the panel. Failure to follow this precaution can<br />
result in injury to personnel and damage to equipment.<br />
99<br />
551<br />
30°<br />
204<br />
37
4. Mounting the Control Panels Diamond digital<br />
4.4 DIMENSIONS OF CONTROL PANEL RPD 30<br />
38<br />
480<br />
Measures in mm<br />
The figure below shows all mechanical measurements of the RPD 30 control panel<br />
being relevant for installation in a master control desk. The size of the desk cutout<br />
is also indicated.<br />
1317<br />
1350<br />
653<br />
Desk cutout: 1327 x 661 mm<br />
WARNING<br />
With the standard modules installed, the <strong>DD30</strong> control panel weights 33 kg<br />
(73 lbs). During installation and until secured in the desk, use an appropriate<br />
lifing device to lift and support the panel. Failure to follow this precaution can<br />
result in injury to personnel and damage to equipment.<br />
99<br />
687<br />
30°<br />
204
Diamond digital<br />
4.5 FASTENING<br />
4.6 PROFILE SET<br />
4. Mounting the Control Panels<br />
For fastening the control panels RPD 5, RPD 10, RPD 20 and RPD 30 in the master<br />
control desk, bores are provided in the frame of the lower control panel part. The<br />
respective lower control panel part can be fastened with countersunk wood screws<br />
with a diameter of 4 mm. The length of the screw depends on the plate thickness<br />
of the master control desk. A set with mounting parts is included in the delivery of<br />
the switcher.<br />
For the different control panels of the switcher family, black anodized profile ledges<br />
are available as an accessory, to compensate the different heights between desk<br />
plate and control panel.<br />
Profil ledge<br />
Desk plate<br />
Control panel<br />
10mm<br />
22 mm<br />
underdesk part<br />
1 mm<br />
When mounting, slide the profile ledge under the edge of the underdesk part. The<br />
ledges are screwed together with the underdesk part into the desk plate.<br />
When upgrading the switcher types <strong>DD5</strong> and <strong>DD10</strong>, two holes each have to be<br />
bored in the right and left (<strong>DD10</strong>) or front and rear (<strong>DD5</strong>) edge of the underdesk<br />
part for fastening the profile ledges. The holes have to be countersunk to enable<br />
fastening the underdesk part with countersunk screws.<br />
The following profile sets are available:<br />
Switcher Number of profils Type Order No.<br />
<strong>DD5</strong> links, rechts, vorne, hinten RC 1885 2 351 670 010<br />
<strong>DD10</strong> links, rechts, vorne, hinten RC 1861 2 351 660 010<br />
<strong>DD20</strong> links, rechts, vorne RC 2008 2 351 680 010<br />
<strong>DD20</strong>M links, rechts, vorne, hinten RC 2062 2 351 720 010<br />
<strong>DD30</strong> links, rechts, vorne RC 1842 2 351 690 010<br />
39
4. Mounting the Control Panels Diamond digital<br />
4.7 VENTILATION<br />
40<br />
During operation, the ambient temperature in the desk must not fall below 5 °C and<br />
not exceed 35 °C.<br />
For supply air and exhaust air, ventilation slots are provided in the lower control<br />
panel part. In order to ensure continuous air circulation, make sure that the ventilation<br />
slots are not covered when mounting the control panel!<br />
The control panel must not be mounted into closed desks!
Diamond digital<br />
5. CONNECTION AND STARTUP<br />
5.1 CONNECTING POWER AND EARTH LINES<br />
PERMANENT EARTH CONNECTION<br />
POWER CONNECTION<br />
5. Connection and Startup<br />
The units of the switcher family Diamond digital have been completely checked in<br />
the factory and are in conformity with the safety regulation EN60950 (VDE0805)<br />
when leaving the factory.<br />
The respective switcher electronics (E-box) is located in a 19-inch case, suitable<br />
for being installed in a DIN or 19-inch cabinet.<br />
When mounting into a cabinet, care should be taken to allow for adequate horizontal<br />
air circulation. The maximum ambient temperature must not exceed +40 °C during<br />
operation.<br />
Due to their high leakage currents (>3.5 mA), the electronics boxes <strong>DD20</strong> and<br />
<strong>DD30</strong> must be permanently connected with the earth terminal of the equipment<br />
cabinet. For this purpose, the connector panel is provided with a separate earth<br />
cable (green/yellow, 4 mm 2) with a length of 2.80 m.<br />
Make the earth connections always before applying mains power!<br />
For this purpose, the connector panel also carries the following warning note:<br />
BTS Broadcast Television Systems GmbH<br />
HIGH LEAKAGE CURRENT<br />
EARTH CONNECTION<br />
ESSENTIAL BEFORE<br />
CONNECTING SUPPLY<br />
Prior to connecting the switcher components to the line voltage make sure that the<br />
power supplies of control panel and electronics box are adjusted to the corresponding<br />
primary voltage. The factory-adjusted voltage is indicated on the respective<br />
connector panel (E-box, control panel) were also the type label is fastened.<br />
Note for installing <strong>DD20</strong> and <strong>DD30</strong>:<br />
When operating within the line voltage range of 115V, mains-caused undervoltages<br />
may effect an increased current consumption and as a consequence<br />
an activation of the preceding fuses!<br />
For this reason, the electronics boxes of the mixers <strong>DD20</strong> and <strong>DD30</strong> must be<br />
only operated at a line voltage of 230V. When leaving the factory, the power<br />
supply units are adjusted to the respective voltage and marked accordingly.<br />
For switching over to another line voltage, see the corresponding section in this<br />
manual.<br />
In order to be able to make quickly deadly the mixer in the case of malfunction,<br />
the mains cabling of the mixer must be interruptable and at any time accessible.<br />
41
5. Connection and Startup Diamond digital<br />
EARTHING REQUIREMENTS<br />
42<br />
PE TE<br />
FUSES<br />
The Diamond digital switcher family is provided with two separate screw terminals<br />
for protective and video earth, located at the rear, which are short-circuited by a<br />
jumper when being delivered. The PE terminal (protective earth) is internally connected<br />
with the PE contact of the power cable.<br />
The following earthing methods are possible:<br />
1. Connect the central ground wires of the studio to the terminal screw PE. The<br />
jumper between the terminal screws PE and TE must not be broken. The cross<br />
section of the protective wire should be greater than that of the neutral wire N<br />
of the power cable, however, should be 2.5 mm2 at least (in accordance with<br />
VDE 0800/part 2, table 1). In case of need, e.g. in studios with separate protective<br />
and technical earth systems, the jumper can be broken. In this case, the<br />
central functional earth potential (video earth) has to be additionally applied to<br />
the TE terminal screw. This earth potential should have functional protective<br />
and noiseless earth qualities (FPE) as stated in VDE regulation 0800/part 2.<br />
Cross-section as above mentioned. A low impedance interconnection of both<br />
earth conductors must be provided at the central studio earthing point or at the<br />
earth bus.<br />
2. In case of non-stationary application, earthing is ensured by the leading protective<br />
earth contact of the AC power connector. The power cable, however, must<br />
be plugged into a wall socket whose PE contact is connected to protective earth<br />
potential. The effect of the protective earth connection must not be cancelled<br />
through the use of an extension cable without protective earth conductor nor<br />
must its function be disabled in any other way!<br />
The jumper across the PE and TE terminals must not be broken. When the<br />
jumper is broken, the central functional earth (see item 1) has to be connected<br />
to the TE terminal screw. This earth connection must be made before connecting<br />
the AC power cable.<br />
In case of TN-C power systems (without protective earth and with neutral earthing<br />
for protection purpose), it is necessary to observe VDE 0100 T.410<br />
(IEC 364-4-41, IEC 364-4-47), VDE 0100 T.540 (IEC 364-5-54) or the applicable<br />
national regulations.<br />
Any disconnection or break of the protective earth conductor inside or outside the<br />
unit may entail that, in the event of a failure, the operational safety of the unit will<br />
no longer be ensured.<br />
Any disconnection, demounting or break of the protective earth conductor<br />
inside or outside the unit may entail that, in the event of a failure, the operational<br />
safety of the unit will no longer be ensured.<br />
Caution<br />
Double-pole or neutral fusing. After operation of the protective device, parts<br />
of the equipment that remain under voltage might represent a hazard during<br />
servicing.
Diamond digital<br />
5.2 CHANGING THE SUPPLY VOLTAGE<br />
5. Connection and Startup<br />
The power supplies of the different control panel types and the associated electronics<br />
frames are designed for the supply voltage ranges of<br />
115V AC +15/–20% and 230V AC +15/–20%<br />
When leaving the factory, the power supplies are normally adjusted to operate on<br />
230V. The factory-adjusted voltage is indicated on the connector panel of the unit.<br />
Should it be required to operate with another supply voltage, modify all power supplies<br />
in the respective control panel and associated E-box.<br />
The modification has to be carried out from a qualfied service personal.<br />
Panel RPD 5<br />
Panel RPD 10<br />
Panel RPD 20<br />
Panel RPD 30<br />
E-Box RMD 5<br />
E-Box RMD 10<br />
E-Box RMD 20<br />
E-Box RMD 30<br />
Unit Power Supply Order No<br />
RC 1882<br />
RC 1824<br />
or RC 1832<br />
RC 1824<br />
or RC 1831<br />
or RC 1832<br />
RC 1824<br />
or RC 1831<br />
or RC 1832<br />
RC 1929<br />
RC 1929<br />
5x RC 1926<br />
5x RC 1926<br />
0 351 670 300<br />
0 351 692 500<br />
0 351 693 900<br />
0 351 692 500<br />
0 351 693 200<br />
0 351 693 900<br />
0 351 692 500<br />
0 351 693 200<br />
0 351 693 900<br />
0 212 183 000<br />
0 212 183 000<br />
0 212 182 700<br />
0 212 182 700<br />
Modification In spite of the different power supply types, modification is equal for all units and<br />
has to be carried out as follows:<br />
1. Switch off the control panel or E-box and disconnect it from power.<br />
2. Open the door of the E-box or tilt up the desk cover of the control panel.<br />
3. E-box: Unlock the power supply in the frame and pull it out of the<br />
frame.<br />
Control panel: Mounting can be carried out in the built-in state.<br />
230V AC<br />
115V AC<br />
with<br />
jumper<br />
without<br />
jumper<br />
Connector<br />
ST2 ST1 L1 L2 GND<br />
Connector<br />
ST2 ST1 L1 L2 GND<br />
4. Re-place the power supply into the frame and lock it.<br />
5. Connect it to power and switch the unit on.<br />
6. Correct the power indication on the connector panel.<br />
43
5. Connection and Startup Diamond digital<br />
5.3 CONTROL DESK CONNECTOR PANEL<br />
Item<br />
No:<br />
44<br />
1 2 13 14 5 16 17<br />
AC Power In<br />
J1<br />
Fuse:<br />
2 * 6,3A<br />
AC - Line<br />
Voltage<br />
115V AC<br />
230V AC<br />
Remote<br />
J2 J3<br />
50 OHM<br />
Monitor<br />
Attention: 50 Ohm cheapernet cable only!<br />
Socket / Connector<br />
Description<br />
1 J1<br />
AC POWER IN<br />
2 J2, J3<br />
REMOTE<br />
3 J4<br />
MONITOR<br />
Socket type<br />
Connector type<br />
Mouse Service Serial Port<br />
Floppy<br />
J4 J5 J6 J7 J8<br />
Function<br />
IEC-320, CEE-22 Convenience outlet for power supply to the<br />
control panel. The convenience outlet contains<br />
a mains filter as well as the two unit fuses.<br />
Fuse rating: 2 x 6,3A slow-blow.<br />
The factory-adjusted supply voltage is indicated.<br />
Caution<br />
Double-pole or neutral fusing.<br />
After operation of the protective device, parts of<br />
the equipment that remain under voltage might<br />
represent a hazard during servicing.<br />
BNC / 50-ohms (Loop-through/50-) cheapernet connector for<br />
connection between control panel and E-box or<br />
further control units in the network.<br />
For further information see the section ”Cheapernet<br />
Specifications”.<br />
Note:<br />
9-pin D-type<br />
female<br />
In the latest version, only jack J2 is equipped.<br />
For interconnection the signals a BNC-T-plug is<br />
included.<br />
TTL interface for connecting an EGA data monitor.<br />
The monitor serves for display of the<br />
switcher menu if the control panel is not provided<br />
with a display (<strong>DD5</strong> and <strong>DD10</strong> only).<br />
The monitor type suitable for use, depends on<br />
the controller of the control panel:<br />
– Controller RY1821: EGA monitor<br />
– Controller RY1822: VGA monitor<br />
For further information see the section ”Connecting<br />
a Monitor”.
Diamond digital<br />
Item<br />
No.:<br />
Socket / Connector<br />
Description<br />
4 J5<br />
MOUSE<br />
5 J6<br />
SERVICE<br />
6 J7<br />
SERIAL PORT<br />
7 J8<br />
FLOPPY<br />
Socket type<br />
Connector type<br />
9-pin D-type<br />
male<br />
9-pin D-type<br />
female<br />
9-pin D-type<br />
female<br />
25-pin D-type<br />
female<br />
Function<br />
Detailed information regarding the connector and socket assignment can be found<br />
in the section ”Pin Assignments”.<br />
5. Connection and Startup<br />
RS-232C interface for connecting a mouse<br />
(Logitech Series 9). The interface uses the<br />
same port as the interface SERVICE.<br />
The functions are mutually exclusive. Connecting<br />
a mouse, automatically switches to mouse<br />
mode.<br />
Further information is contained in the section<br />
”Connecting a Mouse”.<br />
RS-232 interface for connecting a diagnosis<br />
computer or external mass memory (personal<br />
computer). The interface uses the same port as<br />
the MOUSE interface. The functions are mutually<br />
exclusive.<br />
RS-422 interface (MPK bus) for connecting an<br />
the Under Monitor Displays UMD or the Aux<br />
Bus control panels.<br />
Connector socket for external floppy disk drive.<br />
45
5. Connection and Startup Diamond digital<br />
5.4 E-BOX CONNECTOR PANEL RMD 5 / 10<br />
46<br />
1 2 3 4 5 6 7 8<br />
AC POWER IN<br />
Fuse 2x 10A T<br />
115V AC AC POWER IN<br />
4A max<br />
230V AC<br />
2A max<br />
50/60Hz J1<br />
Warning!<br />
Unit must be<br />
connected to<br />
Protected Earth<br />
PE PE TE TE<br />
9 10<br />
Tally Out<br />
1 2<br />
Serial Ports Service Tally in<br />
1 2 3 4<br />
1 2<br />
J2 J3 J5<br />
CAUTION !<br />
TO PREVENT ELECTRIC<br />
SHOCK DO NOT REMOVE<br />
COVER .<br />
NO USER - SERVICEABLE<br />
PARTS INSIDE<br />
REFER SERVICING TO<br />
QUALIFIED SERVICE<br />
PERSONAL.<br />
11<br />
J6<br />
1<br />
1<br />
Main Outputs Clean Feed<br />
Preset<br />
2 3 4<br />
J9 J14 J19 J24<br />
J31 J39<br />
2 3 4<br />
Inputs<br />
5 6 7 8<br />
Blackburst<br />
Remote<br />
J4 J8 J22<br />
12 13<br />
J7 J13 J18<br />
Attention: 50 Ohm cheapernet cable only!<br />
J10<br />
J12<br />
J23<br />
50 OHM<br />
Auxiliary Outputs<br />
1 2 3<br />
PHILIPS RMD 10<br />
GPI Inputs / Outputs<br />
9 10 11 12 13 14 15 16<br />
J11<br />
J15 J20<br />
J16<br />
J17<br />
14 15<br />
J21<br />
J27 J30<br />
J35<br />
J25 J28 J32 J36 J40<br />
J26 J29 J33 J37 J41<br />
16<br />
J34<br />
DVE OUT<br />
Key Video<br />
J38 J42<br />
17
Diamond digital<br />
Item<br />
No.:<br />
Socket / Connector<br />
Description<br />
Socket type<br />
Connector type<br />
Function<br />
1 Unit blower<br />
2 J4<br />
TALLY OUT 1<br />
3 J8<br />
TALLY OUT 2<br />
4 J9, J14, J19, J24<br />
MAIN OUTPUT 1..4<br />
5 J22, J23<br />
REMOTE<br />
6 J31<br />
CLEAN FEED<br />
7 J35<br />
GPI INPUT/OUTPUT<br />
8 J39<br />
PRESET<br />
50-pin D-type<br />
male<br />
50-pin D-type<br />
male<br />
BNC / Serial Comp<br />
CCIR 656<br />
BNC / 50 ohms<br />
BNC / Serial Comp<br />
CCIR 656<br />
25-pin D-type<br />
female<br />
BNC / Serial Comp<br />
CCIR 656<br />
5. Connection and Startup<br />
Tally output sockets for indicating the picture<br />
sources 1 ...16.<br />
Tally output sockets for indicating the picture<br />
monitors assigned to the diverse outputs.<br />
Main outputs of the production switcher.<br />
Cheapernet connector for connection between<br />
E-box and control panel or further control units<br />
in the network. For further information see the<br />
section ”Cheapernet Specifications”.<br />
Note:<br />
In the latest version, only jack J23 is equipped.<br />
For interconnection the signals a BNC-T-plug is<br />
included.<br />
Switcher output without considering the DSK<br />
level.<br />
General-purpose interface connector with 8 input<br />
channels and 8 output channels.<br />
Switcher preview output supplies the current<br />
signal of the preset row.<br />
9 TE / PE M4 threaded pins Terminal screws for unit earthing<br />
10<br />
J1<br />
AC POWER IN<br />
PE protective earth<br />
TE technical earth<br />
When leaving the factory, both terminal screws<br />
are shorted with a jumper.<br />
IEC-320, CEE-22 Convenience outlet for power supply to the Ebox.<br />
The convenience outlet contains a mains<br />
filter as well as the two unit fuses.<br />
Fuse rating: 2 x 10A slow-blow.<br />
The factory-adjusted supply voltage is indicated.<br />
Caution<br />
Double-pole or neutral fusing.<br />
After operation of the protective device, parts of<br />
the equipment that remain under voltage might<br />
represent a hazard during servicing.<br />
47
5. Connection and Startup Diamond digital<br />
Item<br />
No.:<br />
48<br />
Socket / Connector<br />
Description<br />
11 J2, J3, J5, J6<br />
SERIAL PORTS 1..4<br />
12 J7<br />
SERVICE<br />
13 J13, J18<br />
TALLY IN 1 / 2<br />
14 J12, J17<br />
BLACKBURST<br />
15 J10, J11, J15, J16, J20,<br />
J21, J25, J26, J28, J29,<br />
J32, J33, J36, J37, J40,<br />
J41<br />
INPUTS<br />
16 J27 J30 J34<br />
AUXILIARY OUTPUTS<br />
17 J42<br />
DVE OUT VIDEO<br />
J38<br />
DVE OUT KEY<br />
Socket type<br />
Connector type<br />
9-pin D-type<br />
female<br />
9-pin D-type<br />
female<br />
9-pin D-type<br />
female<br />
Function<br />
Port 1: RS-422/RS-232 interface<br />
can be switched over<br />
Port 2, Port 3: RS-422 interface.<br />
Port 4: RS-232 interface<br />
Uses the same port of the controller as<br />
port1.<br />
For this reason, the functions are<br />
mutually exclusive.<br />
RS-232 interface for connecting a diagnosis<br />
computer<br />
Tally input sockets for supplying the tally information<br />
of succeeding units.<br />
BNC / 75 ohms Loop-through sync input for analog blackburst<br />
signal.<br />
BNC / Serial Comp<br />
CCIR 656<br />
BNC / Serial Comp<br />
CCIR 656<br />
BNC / Serial Comp<br />
CCIR 656<br />
1 ... 16 switcher main inputs.<br />
Detailed information regarding the connector and socket assignment can be found<br />
in the section ”Pin Assignments”.<br />
1 ... 3 additional switcher outputs via which external<br />
and internal video signals can be supplied.<br />
Video and key outputs for integration of a DVE<br />
into the signal path of the switcher.<br />
Feedback of the manipulated signals is made<br />
via the 16 standard inputs of the switcher.
Diamond digital<br />
5. Connection and Startup<br />
49
5. Connection and Startup Diamond digital<br />
5.5 E-BOX CONNECTOR PANEL RMD 20 / 30<br />
50<br />
1<br />
ME2 Out<br />
AC POWER IN<br />
Fuse 2x10A T<br />
AC Line Voltage<br />
115V AC<br />
9A max<br />
230V AC<br />
50/60Hz 5A max<br />
PE<br />
Warning!<br />
Unit must be<br />
connected to<br />
Protected Earth.<br />
PE TE<br />
ME2 =it<br />
Remote<br />
J6<br />
J7<br />
50 OHM<br />
Caution!<br />
To prevent electric<br />
shock do not remove<br />
cover.<br />
No user-serviceableparts<br />
inside.<br />
Refer servicing to<br />
qualified service<br />
personal<br />
Attention!<br />
Refer to installation<br />
manual before<br />
connecting unit to<br />
mains<br />
J1<br />
Main Outputs<br />
ME2 =it<br />
ME2 =it<br />
Service<br />
DP<br />
2 3 4 5 6 7<br />
8<br />
BTS<br />
BRODCAST TELEVISION SYSTEMS GMBH<br />
Tally out<br />
1 2<br />
J2<br />
232<br />
PST CLEAN<br />
GPI<br />
in/out<br />
J3<br />
Serial Ports<br />
1 2 3<br />
1<br />
Tally In<br />
J4<br />
2<br />
J5<br />
XBAR<br />
J8 J9 J10 J11 J12 J113<br />
J127 J124<br />
J128 J125<br />
J130 J129 J126<br />
9 10 11 12 13 14<br />
ME2 Outputs<br />
J94<br />
J95<br />
J96<br />
ME2 PVW<br />
J97<br />
15 16 17<br />
Attention: 50 Ohm cheapernet cable only!<br />
1<br />
2<br />
3<br />
4<br />
5<br />
6<br />
7<br />
8<br />
9<br />
J75<br />
10<br />
J76<br />
11<br />
J77<br />
12<br />
J78<br />
13<br />
J79<br />
14<br />
J80<br />
18<br />
J81<br />
J82<br />
16<br />
Inputs<br />
17<br />
J65<br />
18<br />
J66<br />
19<br />
J67<br />
20<br />
J68<br />
21<br />
J69<br />
22<br />
J70<br />
23<br />
J71<br />
24<br />
J72<br />
25<br />
J55<br />
26<br />
J56<br />
27<br />
J57<br />
28<br />
J58<br />
29<br />
J59<br />
30<br />
J60<br />
31<br />
J61<br />
32<br />
J62<br />
J45<br />
J46<br />
J47<br />
J48<br />
J49<br />
J50<br />
J51<br />
J52<br />
Black Burst<br />
J35<br />
J36<br />
RMD<br />
DIGITAL SWITCHER<br />
Auxiliary<br />
Outputs<br />
PVW<br />
1<br />
2<br />
3<br />
4<br />
5<br />
6<br />
J24<br />
J25<br />
J26<br />
J27<br />
J28<br />
J29<br />
J30<br />
ME1 Outputs<br />
J31<br />
J32<br />
J33<br />
ME1 PVW<br />
18 19<br />
J34<br />
DVE Outputs<br />
J14<br />
J15<br />
J16<br />
J17<br />
20<br />
Video Video<br />
1<br />
Key<br />
1<br />
Video<br />
2<br />
Key<br />
2
Diamond digital<br />
Item<br />
No.:<br />
Socket / Connector<br />
Description<br />
Socket type<br />
Connector type<br />
Function<br />
5. Connection and Startup<br />
1 AC POWER IN IEC-320, CEE-22 Convenience outlet for power supply to the Ebox.<br />
The convenience outlet contains a mains<br />
filter as well as the two unit fuses.<br />
Fuse rating: 2 x 10A slow-blow<br />
The factory-adjusted supply voltage is indicated.<br />
Caution<br />
Double-pole or neutral fusing.<br />
After operation of the protective device, parts of<br />
the equipment that remain under voltage might<br />
represent a hazard during servicing.<br />
2 PE M6 threaded pins Terminal screw for unit earthing<br />
PE protective earth<br />
See section 5.1 ”Connecting Power and Earth<br />
Lines”.<br />
3 3 unit blowers<br />
4 J1, J2<br />
TALLY OUT 1 / 2<br />
5 J3<br />
GPI INPUT/OUTPUT<br />
6 J4, J5<br />
TALLY IN 1 / 2<br />
7 J45-J52, J55-J62<br />
J65-J72, J75-J82<br />
INPUTS<br />
8 J24-J30<br />
AUXILIARY OUTPUTS<br />
50-pin D-type<br />
male<br />
25-pin D-type<br />
female<br />
9-pin D-type<br />
female<br />
BNC / Serial Comp<br />
CCIR 656<br />
BNC / Serial Comp<br />
CCIR 656<br />
Tally output sockets (1) for indicating the picture<br />
sources 1 ... 32.<br />
Tally output sockets (2) for indicating the picture<br />
monitors assigned to the diverse outputs.<br />
General-purpose interface connector with 8 input<br />
channels and 8 output channels.<br />
Tally input sockets for supplying the tally information<br />
of succeeding units.<br />
32 switcher main inputs.<br />
1 ... 6 additional switcher outputs via which external<br />
and internal video signals can be supplied.<br />
9 PE/TE M4 threaded pins Terminal screws for technical earth (TE) and<br />
protective earth (PE).<br />
TE technical earth<br />
PE protective earth<br />
10 J6, J7<br />
REMOTE<br />
BNC / 50 Ohm<br />
IEEE 802.3<br />
Cheapernet connector for connection between<br />
E-box and control panel or further control units<br />
in the network.<br />
For further information see the section ”Cheapernet<br />
Specifications”.<br />
Note:<br />
In the latest version, only jack J23 is equipped.<br />
For interconnection the signals a BNC-T-plug is<br />
included.<br />
51
5. Connection and Startup Diamond digital<br />
Item<br />
No.:<br />
11 J130<br />
DP<br />
12 J129<br />
PST<br />
52<br />
Socket / Connector<br />
Description<br />
13 J126<br />
CLEAN FEED<br />
14 J124, J125, J127-J128<br />
MAIN OUTPUT 1..4<br />
15 J8<br />
SERVICE<br />
16 J9-J12, J113<br />
SERIAL PORTS 232<br />
SERIAL PORTS 1..3<br />
SERIAL PORT XBAR<br />
17 J94-J96<br />
ME2 OUT 1..3<br />
J97<br />
ME2 PVW<br />
18 J35, J36<br />
BLACKBURST<br />
19 J31-J33<br />
ME1 OUT 1..3<br />
J34<br />
ME1 PVW<br />
20 J14, J15<br />
ME2 OUT 1..3<br />
J97<br />
ME2 PVW<br />
Socket type<br />
Connector type<br />
BNC / Serial Comp<br />
CCIR 656<br />
BNC / Serial Comp<br />
CCIR 656<br />
BNC / Serial Comp<br />
CCIR 656<br />
BNC / Serial Comp<br />
CCIR 656<br />
9-pin D-type<br />
female<br />
9-pin D-type<br />
female<br />
Function<br />
Preview output for the second downstream<br />
keyer.<br />
Switcher preview output supplies the current<br />
signal of the preset row.<br />
Switcher output without considering the DSK<br />
level.<br />
Main switcher outputs.<br />
RS-232 interface for connecting a diagnosis<br />
computer.<br />
Port 1: RS-422/RS-232 interface<br />
can be switched over<br />
Port 2, port 3:<br />
RS-422 interface.<br />
Port 232:<br />
RS-232 interface<br />
Uses the same port of the controller as<br />
port1.<br />
For this reason, the functions are<br />
mutually exclusive.<br />
Port XBAR:<br />
RS-422 interface for connecting an<br />
external crossbar.<br />
See the section ”XBAR interface for<br />
<strong>DD20</strong> and <strong>DD30</strong>”<br />
BNC / 75 ohms 3 x output sockets of mixing level ME2.<br />
1 x preview output of mixing level ME2.<br />
BNC / 75 ohms Loop-through sync input for analog blackburst<br />
signal.<br />
BNC / 75 ohms 3 x output sockets of mixing level ME1.<br />
1 x preview output of mixing level ME1.<br />
BNC / Serial Comp<br />
CCIR 656<br />
Video and key outputs for integrating a DVE<br />
into the signal path of the mixing levels ME1<br />
and ME2.<br />
The manipulated signals are fed back via the 32<br />
standard inputs of the switcher.<br />
Detailed information regarding the connector and socket assignment can be found in the section ”Pin Assignments”.
Diamond digital<br />
5.6 PIN ASSIGNMENTS<br />
5. Connection and Startup<br />
PORT RS-232 Pin Signal<br />
9-pin D-type<br />
female<br />
1<br />
2<br />
3<br />
4<br />
5<br />
6<br />
7<br />
8<br />
9<br />
GND (Chassis)<br />
TxD<br />
RxD<br />
RTS<br />
CTS<br />
-<br />
GND<br />
-<br />
-<br />
PORT RS-422 Pin Signal<br />
Bus Contr Tributary<br />
9-pin D-type<br />
female<br />
1<br />
2<br />
3<br />
4<br />
5<br />
6<br />
7<br />
8<br />
9<br />
GND GND<br />
RxA TxA<br />
TxB RxB<br />
GND GND<br />
- -<br />
GND GND<br />
RxB TxB<br />
TxA RxA<br />
GND GND<br />
SERVICE / RS-232 Pin Signal<br />
9-pin D-type<br />
female<br />
1<br />
2<br />
3<br />
4<br />
5<br />
6<br />
7<br />
8<br />
9<br />
-<br />
TxD<br />
RxD<br />
-<br />
GND<br />
-<br />
EXTRES<br />
-<br />
TEST<br />
53
5. Connection and Startup Diamond digital<br />
54<br />
TALLY IN 1 Pin Signal <strong>DD5</strong> <strong>DD10</strong> <strong>DD20</strong> <strong>DD30</strong> <strong>DD20</strong>M<br />
9-pin D-type<br />
female<br />
1<br />
2<br />
3<br />
4<br />
5<br />
6<br />
7<br />
8<br />
9<br />
MAIN=PP<br />
READY<br />
ME1<br />
ME2<br />
AUX1<br />
AUX2<br />
AUX3<br />
AUX4<br />
GND<br />
TALLY IN 2 Pin Signal <strong>DD5</strong> <strong>DD10</strong> <strong>DD20</strong> <strong>DD30</strong> <strong>DD20</strong>M<br />
9-pin D-type<br />
female<br />
1<br />
2<br />
3<br />
4<br />
5<br />
6<br />
7<br />
8<br />
9<br />
DVE1 (Video)<br />
DVE2 (Video)<br />
PVW<br />
CLEAN<br />
AUX5<br />
AUX6<br />
DVE1 (Key)<br />
DVE2 (Key)<br />
GND<br />
GPI IN / OUT Pin Signal<br />
25-pin<br />
D-type female<br />
1<br />
2<br />
3<br />
4<br />
5<br />
6<br />
7<br />
8<br />
9<br />
10<br />
11<br />
12<br />
13<br />
14<br />
15<br />
16<br />
17<br />
18<br />
19<br />
20<br />
21<br />
22<br />
23<br />
24<br />
25<br />
x = relevant – = nicht relevant<br />
–<br />
x<br />
x<br />
–<br />
x<br />
–<br />
–<br />
–<br />
x<br />
x<br />
–<br />
–<br />
x<br />
–<br />
–<br />
x<br />
–<br />
x<br />
–<br />
x<br />
x<br />
–<br />
x<br />
x<br />
x<br />
–<br />
x<br />
x<br />
–<br />
–<br />
x<br />
–<br />
–<br />
x<br />
–<br />
x<br />
x<br />
x<br />
x<br />
–<br />
x<br />
x<br />
x<br />
x<br />
x<br />
x<br />
x<br />
x<br />
x<br />
x<br />
x<br />
x<br />
x<br />
x<br />
GPI OUT1<br />
GPI OUT2<br />
GPI OUT3<br />
GPI OUT4<br />
GPI OUT5<br />
GPI OUT6<br />
GPI OUT7<br />
GPI OUT8<br />
GPI OUT COMMON<br />
GPI IN 1 (cathode)<br />
GPI IN 1 (anode)<br />
GPI IN 2 (cathode)<br />
GPI IN 2 (anode)<br />
GPI IN 3 (cathode)<br />
GPI IN 3 (anode)<br />
GPI IN 4 (cathode)<br />
GPI IN 4 (anode)<br />
GPI IN 5 (cathode)<br />
GPI IN 5 (anode)<br />
GPI IN 6 (cathode)<br />
GPI IN 6 (anode)<br />
GPI IN 7 (cathode)<br />
GPI IN 7 (anode)<br />
GPI IN 8 (cathode)<br />
GPI IN 8 (anode)<br />
x<br />
x<br />
x<br />
x<br />
x<br />
x<br />
x<br />
x<br />
x<br />
x<br />
x<br />
x<br />
x<br />
x<br />
x<br />
x<br />
x<br />
x<br />
x<br />
x<br />
–<br />
–<br />
x<br />
x<br />
x<br />
x<br />
x<br />
–<br />
–<br />
x<br />
x<br />
x<br />
–<br />
–<br />
–<br />
x
Diamond digital<br />
5. Connection and Startup<br />
TALLY OUT 1 Pin Signal <strong>DD5</strong> <strong>DD10</strong> <strong>DD20</strong> <strong>DD30</strong> <strong>DD20</strong>M<br />
50-pin<br />
D-type male<br />
1<br />
2<br />
3<br />
4<br />
5<br />
6<br />
7<br />
8<br />
9<br />
10<br />
11<br />
12<br />
13<br />
14<br />
15<br />
16<br />
17<br />
18<br />
19<br />
20<br />
21<br />
22<br />
23<br />
24<br />
25<br />
26<br />
27<br />
28<br />
29<br />
30<br />
31<br />
32<br />
33<br />
34<br />
35<br />
36<br />
37<br />
38<br />
39<br />
40<br />
41<br />
42<br />
43<br />
44<br />
45<br />
46<br />
47<br />
48<br />
49<br />
50<br />
Quelle 1a<br />
Quelle 1b<br />
Quelle 2a<br />
Quelle 2b<br />
Quelle 3a<br />
Quelle 3b<br />
Quelle 4a<br />
Quelle 4b<br />
Quelle 5a<br />
Quelle 5b<br />
Quelle 6a<br />
Quelle 6b<br />
Quelle 7a<br />
Quelle 7b<br />
Quelle 8a<br />
Quelle 8b<br />
Quelle 9a<br />
Quelle 9b<br />
Quelle 10a<br />
Quelle 10b<br />
Quelle 11a<br />
Quelle 11b<br />
Quelle 12a<br />
Quelle 12b<br />
Quelle 13a<br />
Quelle 13b<br />
Quelle 14a<br />
Quelle 14b<br />
Quelle 15a<br />
Quelle 15b<br />
Quelle 16a<br />
Quelle 16b<br />
Quelle 17a<br />
Quelle 17b<br />
Quelle 18a<br />
Quelle 18b<br />
Quelle 19a<br />
Quelle 19b<br />
Quelle 20a<br />
Quelle 20b<br />
Quelle 21a<br />
Quelle 21b<br />
Quelle 22a<br />
Quelle 22b<br />
Quelle 23a<br />
Quelle 23b<br />
Quelle 24a<br />
Quelle 24b<br />
x<br />
x<br />
x<br />
x<br />
x<br />
x<br />
x<br />
x<br />
x<br />
x<br />
x<br />
x<br />
x<br />
x<br />
x<br />
x<br />
x<br />
x<br />
x<br />
x<br />
x<br />
x<br />
x<br />
x<br />
–<br />
–<br />
–<br />
–<br />
–<br />
–<br />
–<br />
–<br />
–<br />
–<br />
–<br />
–<br />
–<br />
–<br />
–<br />
–<br />
–<br />
–<br />
–<br />
–<br />
–<br />
–<br />
–<br />
–<br />
x<br />
x<br />
x<br />
x<br />
x<br />
x<br />
x<br />
x<br />
x<br />
x<br />
x<br />
x<br />
x<br />
x<br />
x<br />
x<br />
x<br />
x<br />
x<br />
x<br />
x<br />
x<br />
x<br />
x<br />
x<br />
x<br />
x<br />
x<br />
x<br />
x<br />
x<br />
x<br />
–<br />
–<br />
–<br />
–<br />
–<br />
–<br />
–<br />
–<br />
–<br />
–<br />
–<br />
–<br />
–<br />
–<br />
–<br />
–<br />
x<br />
x<br />
x<br />
x<br />
x<br />
x<br />
x<br />
x<br />
x<br />
x<br />
x<br />
x<br />
x<br />
x<br />
x<br />
x<br />
x<br />
x<br />
x<br />
x<br />
x<br />
x<br />
x<br />
x<br />
x<br />
x<br />
x<br />
x<br />
x<br />
x<br />
x<br />
x<br />
x<br />
x<br />
x<br />
x<br />
x<br />
x<br />
x<br />
x<br />
x<br />
x<br />
x<br />
x<br />
x<br />
x<br />
x<br />
x<br />
x<br />
x<br />
x<br />
x<br />
x<br />
x<br />
x<br />
x<br />
x<br />
x<br />
x<br />
x<br />
x<br />
x<br />
x<br />
x<br />
x<br />
x<br />
x<br />
x<br />
x<br />
x<br />
x<br />
x<br />
x<br />
x<br />
x<br />
x<br />
x<br />
x<br />
x<br />
x<br />
x<br />
x<br />
x<br />
x<br />
x<br />
x<br />
x<br />
x<br />
x<br />
x<br />
x<br />
x<br />
x<br />
x<br />
x<br />
x<br />
x<br />
x<br />
x<br />
x<br />
x<br />
x<br />
x<br />
x<br />
x<br />
x<br />
x<br />
x<br />
x<br />
x<br />
x<br />
x<br />
x<br />
x<br />
x<br />
x<br />
x<br />
x<br />
x<br />
x<br />
x<br />
x<br />
x<br />
x<br />
x<br />
x<br />
x<br />
x<br />
x<br />
x<br />
x<br />
x<br />
x<br />
x<br />
x<br />
x<br />
x<br />
x<br />
x<br />
x<br />
x<br />
x<br />
x<br />
x<br />
55
5. Connection and Startup Diamond digital<br />
56<br />
TALLY OUT 2 Pin Signal <strong>DD5</strong> <strong>DD10</strong> <strong>DD20</strong> <strong>DD30</strong> <strong>DD20</strong><br />
M<br />
50-pin<br />
D-type male<br />
1<br />
2<br />
3<br />
4<br />
5<br />
6<br />
7<br />
8<br />
9<br />
10<br />
11<br />
12<br />
13<br />
14<br />
15<br />
16<br />
17<br />
18<br />
19<br />
20<br />
21<br />
22<br />
23<br />
24<br />
25<br />
26<br />
27<br />
28<br />
29<br />
30<br />
31<br />
32<br />
33<br />
34<br />
35<br />
36<br />
37<br />
38<br />
39<br />
40<br />
41<br />
42<br />
43<br />
44<br />
45<br />
46<br />
47<br />
48<br />
49<br />
50<br />
Quelle 25a<br />
Quelle 25b<br />
Quelle 26a<br />
Quelle 26b<br />
Quelle 27a<br />
Quelle 27b<br />
Quelle 28a<br />
Quelle 28b<br />
Quelle 29a<br />
Quelle 29b<br />
Quelle 30a<br />
Quelle 30b<br />
Quelle 31a<br />
Quelle 31b<br />
Quelle 32a<br />
Quelle 32b<br />
-<br />
-<br />
-<br />
-<br />
-<br />
-<br />
(Common)<br />
ME1 (48)<br />
ME2 (49)<br />
MAIN=PP (47)<br />
CLEAN (50)<br />
PRESET (47)<br />
AUX1 (47)<br />
AUX2 (47)<br />
AUX3 (47)<br />
AUX4 (47)<br />
AUX5 (49)<br />
AUX6 (49)<br />
DVE1(Video) (50)<br />
DVE2(Video) (50)<br />
PVW (49)<br />
DSK1 (50)<br />
DSK2<br />
-<br />
-<br />
(50)<br />
-<br />
-<br />
-<br />
-<br />
-<br />
-<br />
Common 25,27-31,<br />
Common 23<br />
Common 24,32,33,36<br />
Common 26,34,35,37,38<br />
–<br />
–<br />
–<br />
–<br />
–<br />
–<br />
–<br />
–<br />
–<br />
–<br />
–<br />
–<br />
–<br />
–<br />
–<br />
–<br />
x<br />
–<br />
–<br />
x<br />
x<br />
x<br />
–<br />
–<br />
–<br />
–<br />
–<br />
–<br />
–<br />
–<br />
–<br />
–<br />
–<br />
–<br />
–<br />
–<br />
–<br />
–<br />
–<br />
–<br />
–<br />
–<br />
–<br />
–<br />
–<br />
–<br />
–<br />
–<br />
x<br />
–<br />
–<br />
x<br />
x<br />
x<br />
x<br />
x<br />
–<br />
–<br />
–<br />
–<br />
–<br />
–<br />
–<br />
–<br />
x<br />
x<br />
x<br />
x<br />
x<br />
x<br />
x<br />
x<br />
x<br />
x<br />
x<br />
x<br />
x<br />
x<br />
x<br />
x<br />
–<br />
–<br />
–<br />
–<br />
–<br />
–<br />
x<br />
–<br />
x<br />
x<br />
x<br />
x<br />
x<br />
x<br />
x<br />
x<br />
x<br />
x<br />
x<br />
x<br />
x<br />
x<br />
x<br />
x<br />
x<br />
x<br />
x<br />
x<br />
x<br />
x<br />
x<br />
x<br />
x<br />
x<br />
x<br />
x<br />
x<br />
x<br />
–<br />
–<br />
–<br />
–<br />
–<br />
–<br />
x<br />
x<br />
x<br />
x<br />
x<br />
x<br />
x<br />
x<br />
x<br />
x<br />
x<br />
x<br />
x<br />
x<br />
x<br />
x<br />
x<br />
x<br />
x<br />
x<br />
x<br />
x<br />
x<br />
x<br />
x<br />
x<br />
x<br />
x<br />
x<br />
x<br />
x<br />
x<br />
–<br />
–<br />
–<br />
–<br />
–<br />
–<br />
–<br />
–<br />
x<br />
x<br />
x<br />
x<br />
x<br />
x<br />
x<br />
x<br />
x<br />
–<br />
–<br />
x<br />
x<br />
x
Diamond digital<br />
MONITOR (EGA)<br />
J4 / RY1821<br />
9-pin D-type<br />
female<br />
MONITOR (VGA)<br />
J4 / RY1822<br />
5<br />
15<br />
1<br />
11<br />
15-pin D-type<br />
female<br />
Pin Signal<br />
1<br />
2<br />
3<br />
4<br />
5<br />
6<br />
7<br />
8<br />
9<br />
5. Connection and Startup<br />
Masse<br />
Rot LSB<br />
Rot MSB<br />
Grün MSB<br />
Blau MSB<br />
Grün LSB<br />
Blau LSB<br />
H SYNC (aktiv low)<br />
V SYNC (aktiv high)<br />
Pin Signal<br />
1<br />
2<br />
3<br />
4<br />
5<br />
6<br />
7<br />
8<br />
9<br />
10<br />
11<br />
12<br />
13<br />
14<br />
15<br />
Red (analog 0.7Vpp/75 Ohm)<br />
Green (analog 0.7Vpp/75 Ohm)<br />
Blue (analog 0.7Vpp/75 Ohm)<br />
–<br />
–<br />
Red GND<br />
Green GND<br />
Blue GND<br />
–<br />
Sync GND<br />
–<br />
–<br />
H-Sync (TTL)<br />
V-Sync (TTL)<br />
–<br />
The interface at the control panel emulates the PC VGA standard.<br />
57
5. Connection and Startup Diamond digital<br />
5.7 CONNECTING AN MENU MONITOR<br />
5.7.1 EGA MONITOR WITH PANEL CONTROLLER RY1821<br />
58<br />
For supporting the operational and servicing possibilities, an EGA monitor can be<br />
connected to the control panel of the switcher types <strong>DD5</strong> and <strong>DD10</strong>. The switcher<br />
types <strong>DD20</strong> and <strong>DD30</strong> are not provided with this connection facility.<br />
BTS recommends to connect an EGA monitor available at the market for personal<br />
computer with TTL input.<br />
The following type have been tested:<br />
• EIZO Flexscan 9060s<br />
Monitor type The interface at the control panel emulates the PC EGA standard. The following<br />
data have to be concidered:<br />
Resolution: 640 x 350<br />
Picture frequency: 60 Hz<br />
Line frequency: 21.80 kHz<br />
Pixel clock: 16.00 MHz (PC: 16.26 MHz)<br />
Colors: 64<br />
Input: TTL<br />
Of the 350 possible lines, only 200 are utilized on the monitor. This corresponds<br />
to the display aspect ratio of the switcher types <strong>DD20</strong> and <strong>DD30</strong>. The remainder<br />
of the picture becomes black.<br />
Connection The monitor has to be connected to the Monitor socket J4 on the connector panel<br />
of the control desk.<br />
Color adjustment Color display on the monitor can be varied and consequently matched to the visual<br />
impression of the operator. Color adjustment can be made with the 8-step DIP<br />
switch T4 on the control panel controller RY 1821.<br />
1<br />
0<br />
1 8<br />
16 foreground 16 background<br />
colors colors<br />
The switches 1...4 select one of 16 possible foreground colors, the switches 5...8<br />
one of 16 possible background colors. The colors have been selected in such a way<br />
that adjustment with identical foreground and background colors is not possible.<br />
The cursor is always displayed in white.
Diamond digital<br />
5.7.2 CONTROL PANEL CONTROLLER RY1822 WITH VGA INTERFACE<br />
Display setup<br />
DIP switch T4<br />
5. Connection and Startup<br />
The RY1821 control panel controller has been modified and now features a VGA<br />
(video graphics adapter) interface. The VGA interface replaces the EGA interface<br />
and serves for the connection of VGA monitors as external menu monitors for<br />
switchers of the <strong>DD5</strong> and <strong>DD10</strong> type.<br />
The modified controller is designated RY1822 and can be ordered under no.<br />
0351 692 300. Its other functions correspond to that of the RY1821 controller.<br />
The following description contains amendments of the Planning and Installation<br />
manual. The sections<br />
5.7 System messages and settings<br />
5.9 Connection of a monitor<br />
are changed as follows:<br />
1<br />
0<br />
1 8<br />
The T4 dip switch on the RY1822 controller permits the selection of four different<br />
modes of operation.<br />
Switch<br />
Position<br />
ON = 1<br />
OFF= 2<br />
Description<br />
ÁÁÁÁÁ ÁÁÁÁÁÁÁÁÁÁÁÁÁÁ<br />
ÁÁÁÁÁÁ<br />
ÁÁÁÁÁÁÁÁÁÁÁÁÁÁ<br />
ÁÁÁÁÁÁ<br />
ÁÁÁÁÁ<br />
ÁÁÁÁÁ ÁÁÁÁÁÁÁÁÁÁÁÁÁÁ<br />
ÁÁÁÁÁÁ<br />
ÁÁÁÁÁÁÁÁÁÁÁÁÁÁ<br />
ÁÁÁÁÁ ÁÁÁÁÁÁ ÁÁÁÁÁÁÁÁÁÁÁÁÁÁ<br />
ÁÁÁÁÁÁ<br />
ÁÁÁÁÁ<br />
1..3<br />
000<br />
001<br />
010<br />
011<br />
100<br />
101<br />
110<br />
111<br />
1-of-8 colour combinations<br />
(foreground / background / cursor):<br />
amber / black / grey, transparent<br />
amber / black / grey, dominat<br />
beige / black / grey, transparent<br />
beige / black / grey, dominant<br />
yellow / black / grey, transparent<br />
yellow / black / grey, dominant<br />
green / black / red, dominant<br />
grey / black / white, transparent<br />
ÁÁÁÁÁ ÁÁÁÁÁÁÁÁÁÁÁÁÁÁ<br />
ÁÁÁÁÁÁ<br />
ÁÁÁÁÁÁÁÁÁÁÁÁÁÁ<br />
ÁÁÁÁÁÁ<br />
ÁÁÁÁÁ<br />
ÁÁÁÁÁ ÁÁÁÁÁÁÁÁÁÁÁÁÁÁ<br />
ÁÁÁÁÁÁ<br />
ÁÁÁÁÁÁÁÁÁÁÁÁÁÁ<br />
ÁÁÁÁÁÁ<br />
ÁÁÁÁÁ<br />
ÁÁÁÁÁ ÁÁÁÁÁÁÁÁÁÁÁÁÁÁ<br />
ÁÁÁÁÁÁ<br />
ÁÁÁÁÁÁÁÁÁÁÁÁÁÁ<br />
ÁÁÁÁÁÁ<br />
ÁÁÁÁÁ<br />
ÁÁÁÁÁ ÁÁÁÁÁÁÁÁÁÁÁÁÁÁ<br />
ÁÁÁÁÁÁ<br />
ÁÁÁÁÁÁÁÁÁÁÁÁÁÁ<br />
ÁÁÁÁÁÁ<br />
ÁÁÁÁÁ<br />
4, 5<br />
6...7<br />
not used<br />
ÁÁÁÁÁÁ<br />
ÁÁÁÁÁ<br />
ÁÁÁÁÁÁ ÁÁÁÁÁÁÁÁÁÁÁÁÁÁ<br />
ÁÁÁÁÁÁÁÁÁÁÁÁÁÁ<br />
ÁÁÁÁÁ<br />
ÁÁÁÁÁÁ ÁÁÁÁÁÁÁÁÁÁÁÁÁÁ<br />
00<br />
01<br />
10<br />
11<br />
Menu monitor modes (1):<br />
640 x 480<br />
640 x 350<br />
reserved<br />
reserved<br />
ÁÁÁÁÁ ÁÁÁÁÁÁÁÁÁÁÁÁÁÁ<br />
ÁÁÁÁÁÁ<br />
ÁÁÁÁÁÁÁÁÁÁÁÁÁÁ<br />
ÁÁÁÁÁÁ<br />
ÁÁÁÁÁ<br />
8<br />
ÁÁÁÁÁ ÁÁÁÁÁÁÁÁÁÁÁÁÁÁ<br />
ÁÁÁÁÁÁ<br />
ÁÁÁÁÁÁÁÁÁÁÁÁÁÁ<br />
ÁÁÁÁÁ<br />
ÁÁÁÁÁÁ<br />
ÁÁÁÁÁÁÁÁÁÁÁÁÁÁÁÁÁÁÁÁ<br />
0<br />
1<br />
Switching between EL/CRT mode (1):<br />
EL-display mode (<strong>DD20</strong>/<strong>DD30</strong>)<br />
Menu monitor mode (<strong>DD5</strong>/<strong>DD10</strong>)<br />
ÁÁÁÁÁ ÁÁÁÁÁÁÁÁÁÁÁÁÁÁ<br />
ÁÁÁÁÁÁ<br />
ÁÁÁÁÁÁÁÁÁÁÁÁÁÁ<br />
ÁÁÁÁÁÁ<br />
ÁÁÁÁÁ<br />
(1) If switch 8 is OFF (EL mode), the position of switch 6, 7 is don’t care.<br />
ÁÁÁÁÁÁ ÁÁÁÁÁÁÁÁÁÁÁÁÁÁ<br />
ÁÁÁÁÁ<br />
59
5. Connection and Startup Diamond digital<br />
Display formats<br />
5.8 CONNECTING A PC MOUSE<br />
60<br />
Mode: 640 dot x 480 line 640 dot x 350 line<br />
Pixel clock: 25.175 MHz 25.175 MHz<br />
Vert. scan. freq.: 59.941 Hz 70.08 Hz<br />
Hor. scan. freq.: 31.468 kHz 31.468 kHz<br />
Interlace: none none<br />
Sync. polarity: H–negative; V–negative H–negative; V–negative<br />
Socket J5, Mouse of the control panel enables connection of a PC mouse with serial<br />
interface which is operated from the same serial channel as the service terminal<br />
interface at socket J6 of the connector panel.<br />
After installation, the service interface has to be activated for this operating mode<br />
with the 8-step DIP switch T8 (Setup) on controller RY 1821/RY1822:<br />
Switch 1: Position ON = Mouse active<br />
Position OFF = Service terminal active<br />
With ”mouse active”, LED G6 on the control panel cvontroller RY 1821/ RY 1822 will<br />
light.<br />
The mouse has to be microsoft-compatible.<br />
Recommendation: Original Microsoft mouse
Diamond digital<br />
6. INITIAL INSTALLATION<br />
6.1 INSTALLATION CHECKLIST<br />
6. Initial Installation<br />
Note The installation checklist comprises the procedures for installation and initial<br />
installation described in this manual. It is recommended to install the devices<br />
with the aid of the instructions below.<br />
Please note that the line voltage is only applied when you are expressively<br />
requested in the checklist to do so.<br />
• After having thoroughly unpacked the equipment and checked the packings for<br />
mains cables and other small parts, check the delivery with regard to damages<br />
caused by transport. If you note a damage, immediately inform the forwarding<br />
agent.<br />
Using the packing slip make sure that the delivery is complete.<br />
• Before starting installation, read the enlosed installation instructions and become<br />
familiar with the safety instructions.<br />
• Mount the control panel into a desk.<br />
• Mount the electronics box into an equipment cabinet.<br />
• Check the plug-in cards in the E-box with regard to correct position in the support<br />
frame and make sure that the plug-in cards are locked.<br />
• Set the switches and jumpers to the required operating position.<br />
• Establish the earth connection.<br />
• Make sure that the line voltage is conform with the voltage adjusted in the delivered<br />
equipment. If required, change it over to the corresponding line voltage.<br />
• Set the service power switch on control panel and E-box to position ON.<br />
• Establish Cheapernet cabling between control panel and E-box. Connect the<br />
video input and output cables as well as the other control cables.<br />
ATTENTION Cheapernet has to be terminated with a 50-Ω resistor!<br />
• Connect the mains cable to the central mains distribution of the studio and<br />
switch on power.<br />
• Check the operational functions of the switcher.<br />
• Adjust timing.<br />
61
6. Initial Installation Diamond digital<br />
6.2 POWERUP OF THE SWITCHER<br />
Note The switchers are not provided with a central power switch. Switching on<br />
and off is made via the central mains distribution of the studio or the equipment<br />
cabinet!<br />
62<br />
For service works, the switcher control panel contains on the power supply<br />
board of the E-box one switch each for switching the line voltage.<br />
Switching on After having switched on the line voltage, a self-test is carried out in the electronics<br />
box and control panel controller.<br />
The correct functioning of controller RY 1917 is indicated by a running light in the<br />
two LED rows.<br />
Functiong of the power supply is indicated by the ”green” LEDs. For each main line<br />
of the voltage distribution in the support frame, a separate LED is available.<br />
If one of the status LEDs lights ”red”, the switch for the VCO adjustment is not in<br />
the OPERATE position. If the LED rows of the controller indicate a defined error<br />
code, please see the section ”Diagnosis” in the service manual.<br />
In the control panel, all key lamps are lit temporarily. Subsequently, the control<br />
panel returns to the operational state achieved before switching out.<br />
No Reference If the LED ”No Reference” on the plug-in cards RY 1911, RY 1912 and RY 1914<br />
is lit red, make sure that the switcher receives an external reference signal and<br />
press the RESET key.<br />
The status LEDs are switched off when switching on or performing a RESET. After<br />
run of a diagnosis, the LEDs are lit to indicate correctly operating p.c. boards.
Diamond digital<br />
Status LEDs electronics box RMD 10<br />
CONTR<br />
D10<br />
WIPE<br />
PROC<br />
KEY<br />
PROC<br />
ME<br />
PROC<br />
RES<br />
INPUT<br />
PROC<br />
OUTPUT<br />
PROC<br />
Status LED of the plug-in cards:<br />
”green” = OK<br />
”red” = error<br />
6. Initial Installation<br />
Controller status Service Service power switch<br />
Master Master Slave Slave<br />
RY 1917 xx<br />
RY 1908 xx<br />
RY 1906 xx<br />
RY 1903 xx<br />
xx<br />
RY 1900 xx<br />
RY 1911 xx<br />
green LEDs for DC voltage main lines<br />
RC 1929 xx<br />
POWER<br />
SUPPLY<br />
63
6. Initial Installation Diamond digital<br />
Status LEDs electonics box RMD 30<br />
64<br />
xx<br />
RES<br />
ME<br />
PROC<br />
RY 1903 xx<br />
KEY<br />
PROC<br />
RY 1906 xx<br />
RC 1926<br />
WIPE<br />
PROC<br />
RY 1908 xx<br />
Status LED of the plug-in cards<br />
”green” = OK<br />
”red” = error<br />
* = inserted on RMD30 only<br />
OUTPUT<br />
PROC<br />
RY 1911 xx<br />
RC 1926<br />
ME 1 ME 2<br />
INPUT<br />
PROC 1<br />
RY 1900 xx<br />
INPUT<br />
PROC 2<br />
RY 1900 xx<br />
RC 1926<br />
xx<br />
RES<br />
ME<br />
PROC<br />
RY 1903 xx<br />
1 2 3 4 5 6 7 8 9 10 11 12 13 14 15 16 17<br />
KEY<br />
PROC<br />
RY 1906 xx<br />
RC 1926<br />
Controller status<br />
WIPE<br />
PROC<br />
* * * *<br />
RY 1908 xx<br />
ME<br />
PROC<br />
RY 1903 xx<br />
RC 1926<br />
KEY<br />
PROC<br />
RY 1906 xx<br />
PP<br />
Service<br />
WIPE<br />
PROC<br />
RY 1908 xx<br />
RC 1931<br />
STORE<br />
RY 1913 xx<br />
Option<br />
RY 1917 xx<br />
CONTR<br />
RES<br />
Master<br />
Slave<br />
xx
Diamond digital<br />
6.3 INPUT PROCESSOR RY 1900<br />
G1<br />
STATUS LED<br />
T250<br />
ADJUST NORMAL<br />
6. Initial Installation<br />
RY 1900<br />
Pos Function Factory adjust.<br />
G1<br />
T250<br />
Two-colored LED display<br />
RED: Interface modules in adjust mode<br />
GREEN: P.c. board operate correctly<br />
Service switch for adjusting the center frequency of the<br />
VCOs of the serializers/deserializers<br />
NORMAL<br />
J1<br />
J2<br />
J3<br />
65
6. Initial Installation Diamond digital<br />
6.4 ME PROCESSOR RY 1903<br />
66<br />
T 1<br />
G4<br />
FRQ A0J<br />
OPERATE<br />
STATUS LED<br />
RY 1903<br />
Pos. Function Factory adjustment<br />
T 1<br />
G 4<br />
Service switch for adjusting the VCOs in the interface<br />
module for serial data<br />
FRQ ADJ: VCO in the free-running mode<br />
OPERATE: VCO in the operate mode<br />
Two-colored LED display<br />
RED: Interface modules in adjust mode<br />
GREEN: P.c. board operate correctly<br />
OPERATE<br />
J1<br />
J2<br />
J3
Diamond digital<br />
6.5 KEY PROCESSOR I RY 1906<br />
STATUS LED<br />
6. Initial Installation<br />
RY 1906<br />
Pos. Function Factory adjust.<br />
T 1<br />
G4<br />
Service switch for adjusting the VCOs in the interface<br />
module for serial data<br />
FRQ ADJ: VCO in the free-running mode<br />
OPERATE: VCO in the operate mode<br />
Two-colored LED display<br />
RED: Interface modules in adjust mode<br />
GREEN: P.c. board operate correctly<br />
FPQ ADJ<br />
T 1<br />
OPERATE<br />
OPERATE<br />
J1<br />
J2<br />
J3<br />
67
6. Initial Installation Diamond digital<br />
KEY-PROCESSOR II RY1943/RY 1944<br />
68<br />
RESET<br />
T1<br />
MONITOR<br />
T2<br />
G1<br />
G2<br />
G3<br />
J4<br />
T3<br />
G0/NOGO<br />
BOOT 1<br />
BOOT 2<br />
DSP<br />
STATUS<br />
G5<br />
G4<br />
G11<br />
G10<br />
G9<br />
G8<br />
G7<br />
G6<br />
SERVICE<br />
PORT<br />
RY 1943<br />
RY 1944<br />
J1<br />
J2<br />
J3
Diamond digital<br />
6. Initial Installation<br />
Pos. Function Factory adjust.<br />
T1<br />
T2<br />
T3<br />
G1<br />
G2<br />
G3<br />
J4<br />
G4-G11<br />
Reset for DSP<br />
Monitor button for loading the boot program<br />
(for service personnel only)<br />
Service switch for adjusting the VCOs in the interface<br />
module for serial data<br />
FRQ ADJ: VCO in free running<br />
OPERATE: VCO in operation mode<br />
RED: Interface modules in the adjustment mode<br />
GREEN:P.c. board works properly<br />
GREEN:DSP boot program was loaded successfully<br />
RED: Loading or error<br />
GREEN:DSP main program was loaded successfully<br />
RED: Loading or error<br />
Terminal interface for DSP<br />
(for service personnel only)<br />
LED row for DSP status<br />
Initializing phase: State of initialization<br />
Operational phase: Activity of the DSP (runing light)<br />
OPERATE<br />
69
6. Initial Installation Diamond digital<br />
6.6 WIPE PROCESSOR RY 1908<br />
70<br />
G501<br />
STATUS LED<br />
RY 1908<br />
Pos. Function Factory adjust.<br />
G501 Two-colored LED display<br />
RED: Interface modules in adjust mode<br />
GREEN: P.c. board operate correctly<br />
J1<br />
J2<br />
J3<br />
OPERATE
Diamond digital<br />
6.7 OUTPUT PROCESSOR RY 1911<br />
G1<br />
STATUS LED<br />
G30<br />
T1<br />
FREQ ADJ<br />
ON OFF<br />
NO EXT REF<br />
T3<br />
525Z/625Z<br />
RY 1911<br />
6. Initial Installation<br />
Pos. Function Factory adjust.<br />
T1<br />
T3<br />
Service switch for adjusting the center frequency of the<br />
VCOs of the serializers, deserializers.<br />
Standard selector switch for 525-line operation and 625-line<br />
operation.<br />
The switch should be only operated with the supply voltage<br />
switched off.<br />
Before switching on, apply a reference signal of the corresponding<br />
standard.<br />
J1<br />
J2<br />
J3<br />
FREQ ADJ<br />
OFF<br />
Depending on<br />
the delivery<br />
country<br />
71
6. Initial Installation Diamond digital<br />
6.8 CONTROLLER RY 1917<br />
72<br />
TEST T2<br />
TEST T3<br />
RESET T1<br />
LED POWER GOOD G6<br />
Controller–Staus–LEDs<br />
G13...G20 (Master)<br />
Service–Anschluß (Master)<br />
Service–Anschluß (Slave)<br />
Controller–Staus–LEDs<br />
G21-G28 (Slave)<br />
LED RUN G1<br />
LED LAN G2<br />
LED ERROR G3<br />
LED RUN G9<br />
LED ERROR G10<br />
DIL–Schalter T77 (Setup)<br />
GPI Interface Konfiguration<br />
RY 1601<br />
RY 1917<br />
Pos. Function Factory adjust.<br />
The adjustments are described in detail in section 5.7.<br />
J1<br />
J2<br />
J3
Diamond digital<br />
6.9 STORE RY 1913<br />
T1<br />
G1<br />
G2<br />
J4<br />
BUCHSE<br />
G3<br />
G6<br />
G7<br />
G8<br />
G9<br />
G10<br />
G4<br />
G5<br />
6. Initial Installation<br />
RY 1913<br />
FRQ A0J<br />
Pos. Function Factory adjust.<br />
T1<br />
T2<br />
G1<br />
G2<br />
G3-G10<br />
J4<br />
DSP reset<br />
Service switch for adjusting the center frequency of the<br />
VCOs of the serializers, deserializers.<br />
Green LED display DSP OK<br />
Two-colored LED display<br />
RED: Interface modules in adjust mode<br />
GREEN: P.c. board operate correctly<br />
DSP status indicator<br />
9-pin D-Sub socket for terminal interface<br />
T2<br />
––<br />
OFF<br />
ON<br />
J1<br />
J2<br />
J3<br />
73
6. Initial Installation Diamond digital<br />
6.10 SYSTEM MESSAGES AND ADJUSTMENTS<br />
74<br />
The controller boards in the control panels and E-boxes of the individual switchers<br />
contain a series of system and status indicators as well as adjusting facilities for<br />
configurating the switcher.<br />
6.10.1 CONTROL PANEL CONTROLLER RY 1821/ RY 1822<br />
RY 1821<br />
Controller<br />
RY 1822<br />
Controller<br />
The control panels of the switcher family are equipped with controller RY 1821 or<br />
RY 1822. The p.c. board is provided with a microcomputer and some required<br />
switches, keys as well as diverse LEDs and a status indicator. All indicating and<br />
adjusting elements are accordingly labelled on the board.<br />
Taste TEST/MONITOR T10<br />
Taste RESET T9<br />
Controller–Status–LED<br />
G11...G18<br />
Service–Anschluß<br />
LED POWER GOOD G7<br />
LED MOUSE G6<br />
LED RUN G3<br />
LED ERROR G1<br />
LED LAN G2<br />
DIL–Schalter T8 (Setup)<br />
DIL–Schalter T4 (Menü-Monitor)
Diamond digital<br />
Key RESET Microcomputer reset.<br />
6. Initial Installation<br />
Key TEST/MONITOR If this key is pressed when releasing the reset key, the microcomputer<br />
does not enter the normal operating program but the so-called ”Monitor”<br />
mode.<br />
This is a minimal system which is operative in the EPROMs. For the<br />
duration the microcomputer is in the monitor mode, the red Error LED<br />
will flash.<br />
This mode is intended for BTS-internal use only.<br />
DIL switch SETUP Switch T8 for adjustment of device type and configuration. The respective<br />
switch position is only inquired after a reset, i.e. a change of<br />
the switch position becomes only effective after a reset.<br />
The switch position can also be inquired at the service terminal with<br />
the program selection ”V” (software version).<br />
The switches have the following functions:<br />
Switch Position<br />
1 0<br />
1<br />
2...4<br />
On = 1<br />
Off = 0<br />
000<br />
001<br />
010<br />
011<br />
100<br />
101<br />
110<br />
111<br />
Meaning<br />
5...6 unused<br />
7 0<br />
1<br />
8 unused<br />
Service terminal active<br />
Mouse active<br />
Device type of panel:<br />
<strong>DD30</strong> panel<br />
<strong>DD10</strong> panel<br />
<strong>DD20</strong> panel<br />
<strong>DD5</strong> panel<br />
unused<br />
unused<br />
unused<br />
unused<br />
Standard hardware<br />
Prototype hardware (BTS only)<br />
LED POWER GOOD Voltage monitoring, lights as soon as the 5V supply voltage is high<br />
enough. Below this threshold, the microcomputer is permanently kept<br />
in the reset mode.<br />
LED RUN ”Lamp of life” of the microcomputer, is switched on with each bus cycle<br />
of CPU or LAN coprocessor. If this LED does not light, there will be<br />
a fatal error (no bus activities).<br />
LED ERROR Blinks in the monitor mode (see above, BTS-internal use). Error indication<br />
is made with the LED row STATUS.<br />
LED LAN Network activity indicator, is switched on with each LAN coprocessor<br />
cycle. The LED serves the qualitative judgement of the line load.<br />
75
6. Initial Installation Diamond digital<br />
76<br />
DIL switch MONITOR Switch T4 for adjusting the screen color of the menu monitor (EGA or<br />
VGA).<br />
See the section ”Connecting a menu monitor”.<br />
LED row STATUS Status indicator (G11...G18) of the power-up test.<br />
See the section ”Error Diagnosis” in the service manual.<br />
LED Test<br />
G11 RAM-Test<br />
G12 Service-Term (DUART 1 Channel B)<br />
G13 INT3-Test<br />
G14 EPROM-Test<br />
G15 DUART 1 Channel A, DUART 2 Channel A + B<br />
G16 INT2-Test<br />
G17 Hardware I/O<br />
G18 unused<br />
At the beginning of the test, all used LEDs are lit. After having passed<br />
the test, the associated LED is switched off. Switching-off is made<br />
from the left to the right. This, however, is hardly perceptible when<br />
powering up, since the tests – except for the RAM and EPROM<br />
checks – are very fast.<br />
If a certain test failed, the LED G18, stays lighted. An exception is the<br />
lowest LED which indicates during normal operation the error ”NO<br />
CHEAPERNET COMMUNICATION” in addition to the running light.<br />
When all tests have been passed, a kind of running light appears on<br />
the LED row. This shows immediately whether the controller operates<br />
in the normal mode.<br />
The running light is operated by the microcomputer only if it is not occupied<br />
with something more important.<br />
Thus, the speed of the running light allows a qualitative judgement<br />
of the the computer activity.
Diamond digital<br />
6.10.2 E-BOX CONTROLLER RY 1601/ RY 1917<br />
6. Initial Installation<br />
The electronics boxes of the switcher family are equipped with controller RY 1601<br />
or RY 1917. The p.c. boards are provided with two independent microcomputers<br />
(master and slave) and some required switches, keys as well as diverse LEDs and<br />
a status indicator. All indicating and adjusting elements are accordingly labelled on<br />
the board.<br />
Key RESET (T1) Microcomputer reset. Simultaneous resetting of the master and slave<br />
computers.<br />
Key TEST (Master T2)<br />
Key TEST (Slave T3) If these keys are pressed when releasing the reset key, the microcomputer<br />
does not enter the normal operating program but the so-called<br />
”Monitor” mode.<br />
This is a minimal system which is operative in the EPROMs. For the<br />
duration the microcomputer is in the monitor mode, the red Error LED<br />
will flash.<br />
This mode is intended for BTS-internal use only.<br />
DIL switch SETUP Switch T77 for adjustment of device type and configuration. The respective<br />
switch position is only inquired after a reset, i.e. a change of<br />
the switch position becomes only effective after a reset.<br />
The switch position can also be inquired at the service terminal with<br />
the program selection ”V” (software version).<br />
The switches have the following functions:<br />
Switch Position<br />
On = 1<br />
Off = 0<br />
Meaning<br />
1 unused<br />
2...4<br />
000<br />
001<br />
010<br />
011<br />
100<br />
101<br />
110<br />
111<br />
5...8 unused<br />
Device type of box:<br />
<strong>DD30</strong> box<br />
<strong>DD10</strong> box<br />
<strong>DD20</strong> box<br />
<strong>DD5</strong> box<br />
unused<br />
unused<br />
unused<br />
unused<br />
LED POWER GOOD Voltage monitoring, lights as soon as the 5V supply voltage of the p.c.<br />
board is high enough. Below this threshold, both microcomputers are<br />
permanently kept in the reset mode.<br />
LED RUN (Master G1)<br />
LED RUN (Slave G9) ”Lamp of life” of the microcomputer, is switched on with each bus cycle<br />
of CPU or LAN coprocessor. If these LEDs do not light, there will be<br />
a fatal error (no bus activities).<br />
77
6. Initial Installation Diamond digital<br />
TEST T2<br />
TEST T3<br />
78<br />
RESET T1<br />
LED POWER GOOD G6<br />
Controller status LEDs<br />
G13...G20 (Master)<br />
Service connector (Master)<br />
Service connector (Slave)<br />
Controller status LEDs<br />
G21 - G28 (Slave)<br />
LED RUN G1<br />
LED LAN G2<br />
LED ERROR G3<br />
LED RUN G9<br />
LED ERROR G10<br />
DIL switch T77 (Setup)<br />
GPI interface configuration<br />
Indicating and adjusting elements on the controller p.c. boards RY 1601 and RY 1917<br />
RY 1601<br />
RY 1917<br />
J1<br />
J2<br />
J3
Diamond digital<br />
LED ERROR (Master G3)<br />
LED ERROR (Slave G10)<br />
6. Initial Installation<br />
Blinks in the monitor mode (see above, BTS-internal use). Error indication<br />
is made with the LED row STATUS.<br />
LED LAN (G2) Network activity indicator, is switched on with each LAN coprocessor<br />
cycle. The LED serves the qualitative judgement of the line load.<br />
LED row STATUS (Master G13...G20)<br />
(Slave G21...G28)<br />
Status indicator of the power-up test.<br />
See the section ”Error Diagnosis” in the service manual.<br />
LED Test<br />
G13/G21 RAM-Test<br />
G14/G22 Service-Term (DUART 1 Channel B)<br />
G15/G23 INT3-Test<br />
G16/G24 EPROM-Test<br />
G17/G25 DUART 1 Channel A, DUART 2 Channel A + B<br />
G18/G26 INT2-Test<br />
G19/G27 Hardware I/O<br />
G20/G28 unused<br />
At the beginning of the test, all used LEDs are lit. After having passed<br />
the test, the associated LED is switched off. Switching-off is made<br />
from the left to the right. This, however, is hardly perceptible when<br />
powering up, since the tests – except for the RAM and EPROM<br />
checks – are very fast.<br />
If a certain test failed, the LED stays lighted. An exception is the lowest<br />
LED which indicates during normal operation the error ”NO CHEAP-<br />
ERNET COMMUNICATION” in addition to the running light.<br />
When all tests have been passed, a kind of running light appears on<br />
the LED row. This shows immediately whether the controller operates<br />
in the normal mode.<br />
The running light is operated by the microcomputer only if it is not occupied<br />
with something more important.<br />
Thus, the speed of the running light allows a qualitative judgement<br />
of the the computer activity.<br />
79
6. Initial Installation Diamond digital<br />
GPI Configuration The sliding switches T47, T48, T49, T56, T57, T58, T67 and T68 on the p.c. boards<br />
RY 1601 and RY 1917 are assigned to the GPI inputs 1...8 (general-purpose inputs).<br />
These inputs are provided with optocouplers. The switches enable to match<br />
the inputs to different control concepts:<br />
80<br />
Switch in position”1” (position ”left”)<br />
A simple connection between the two connectors activates the corresponding input.<br />
This kind of control is suitable for a connection to a relay contact or to an opencollector<br />
output.<br />
Attention: In this case, both lines are connected with the circuit ground. When<br />
connecting to an open-collector output, there is no ground potential<br />
isolation between the switcher electronics and controlling devices.<br />
Since the circuit ground is led out of the device, the cabling has to be shielded for<br />
this kind of control. Non-shielded cables may cause EMC and/or ESD problems!<br />
Switch in position ”2” (position ”right”)<br />
The optocoupler-internal LED is made available at the two connectors (including<br />
1kOhm drop resistor). For this kind of control, a ground potential isolation is provided;<br />
the controlling device, however, has to impress a current upon the LED, i.e.<br />
a simple contact is not suited in this case.<br />
Due to the ground potential isolation, the cabling is less critical for this kind of control.
Diamond digital<br />
6.10.3 FADER CONNECTOR PANEL RC 1855<br />
6. Initial Installation<br />
The faders in the control panels are each provided with connector panel RC 1855<br />
which establishes the connection to controller RY 1821. A 4-step DIP switch (T1)<br />
on the connector panel determines the input channel of the 12-bit A/D converter.<br />
On each of these connector panels, exactly one switch has to be set to ON,<br />
the other switches have to be switched off!<br />
Assignment is as follows::<br />
Switch no. 1 : ME1<br />
2 : ME2<br />
3 : PP<br />
4 : EXTRA<br />
The faders in the control panels <strong>DD5</strong> and <strong>DD10</strong> have to be configurated for ”ME1”.<br />
The three faders in the <strong>DD20</strong> control panel have to be configurated for ”ME1”, ”<br />
PP”and ”EXTRA”<br />
81
6. Initial Installation Diamond digital<br />
6.10.4 TIMING / GENLOCK ALIGNMENT<br />
82<br />
When source signals are fed into the switcher, it must be ensured that the time difference<br />
between the sources is not outside the operating range of the internal<br />
switcher autophasers (<strong>DD5</strong>/<strong>DD10</strong> = 52 µs, <strong>DD20</strong>/<strong>DD30</strong> = 32 µs). The output signals<br />
of the sources must correspond to the timing customary in operation. For<br />
instance, no EE picture in a VTR, PB-Ref on CCVS etc.<br />
The switcher’s Genlock Phase can be adjusted to the fed reference signal in the<br />
range of –1 line to + 2 lines.<br />
Note: During Genlock Phase adjustment Key Memory should be disabled<br />
to avoid a change-over of the key mode in the selection of the sources.<br />
For the Genlock Phase adjustment proceed as follows:<br />
1. <strong>DD5</strong>/<strong>DD10</strong>: Switch Keyer1 (or Keyer2) to Luminance Key.<br />
Select key bus for key fill and key source.<br />
<strong>DD20</strong>/<strong>DD30</strong>: Switch Keyer1 or Keyer2 of ME1 to Luminance Key.<br />
Select key bus for key fill and key source.<br />
2. Select first source on key bus.<br />
3. Select menu option Genlock Phase in the SETUP menu.<br />
4. Set Genlock Phase of the switcher to ”0” in the Setup and then increase until the<br />
red/green signal (asynchronous) of the selected key bus stops flashing. Maintain<br />
and observe the adjusted status for a short time to make sure that no running-in<br />
occurs.<br />
Then increase the value slightly to provide for a safe margin to the critical threshold.<br />
5. Switch through all applied sources on the key bus in the same way and verify.<br />
Determine the highest value of the Genlock Phase adjustment and maintain this<br />
value as final setup setting.
Diamond digital<br />
Timing reference diagram for <strong>DD5</strong> and <strong>DD10</strong><br />
Autophasing range inputs<br />
approx 52 us<br />
ME<br />
approx 11.6 us<br />
Min delay<br />
approx 0.8 us<br />
Total timing position of <strong>DD5</strong> and <strong>DD10</strong> in respect to reference blackburst:<br />
approx minus 1 lines approx plus 2 lines<br />
Timing reference diagram for <strong>DD20</strong> and <strong>DD30</strong><br />
Autophasing range inputs<br />
approx 32 us<br />
ME1<br />
Min delay<br />
approx 31 us<br />
approx 10 us<br />
ME2<br />
approx 10 us<br />
PP<br />
approx 10 us<br />
approx 0.8 us<br />
Total timing position of <strong>DD20</strong> and <strong>DD30</strong> in respect to reference blackburst:<br />
approx minus 1 lines approx plus 2 lines<br />
Aux outputs<br />
Main outputs, PVW<br />
Aux outputs<br />
ME1 outputs, PVW<br />
ME2 output, PVW<br />
Main outputs, PVW<br />
6. Initial Installation<br />
83
6. Initial Installation Diamond digital<br />
6.10.5 GENLOCK ADJUSTMENT WITH MENU<br />
From software version ”G”, the mixers include the possibility to perform the genlock<br />
adjustment of the individual input sources in Installation menu Config E-Box.<br />
When adjusting the genlock phase, all sources have to be successively checked<br />
for their timing by switching up on the bus Video store.<br />
To adjust the genlock phase, select the softkey Config E-Box in the Install menu.<br />
The following display is represented:<br />
84<br />
With controller Genlock, the phase relation of the mixer can be shifted by –1 line<br />
up to +2 lines in comparison with the genlock reference signal.<br />
The display TIMING serves for checking the timing of the sources.<br />
The bar diagram arranged horizontally under the TIMING field displays the timing<br />
of the source to the mixer that is selected on bus Video store.<br />
The display can give the following informations:<br />
Input signal IN03 lies 17.7 µs before<br />
the earliest mixer input.<br />
No input signal in the<br />
selected input.<br />
Input signal does not lie in<br />
area of the auto phasers.
Diamond digital<br />
6. Initial Installation<br />
The header line TIMING displays the source selected on bus Video store with the<br />
defined source name with the current status (e.g. IN03: no signal).<br />
The bar diagram under the header line displays the timing of the sources in the area<br />
of the auto phaser. Both arrows mark the area in which the phase relation of the<br />
sources can correctly be set for all mixer buses. In the correct timing range, the<br />
bar is light. A dark bar indicates that the source does not lie in the valid area. This<br />
can also happen when the display is between the arrows!<br />
Attention:<br />
At <strong>DD5</strong> and <strong>DD10</strong>, the mode of representation of the menu monitor can be<br />
changed (e.g. to inverse representation) by means of switch T4 on the control<br />
panel controller. Thus the bar colors and also all other softkeys can be<br />
displayed in the menu in an inverted way.<br />
The right arrow marks the earliest mixer input (latest timing of the sources). The<br />
left arrow marks the earliest timing of the sources.<br />
When adjusting the genlock phase, switching procedures in the genlock effect<br />
again a running in of the H phase. This is indicated in the bar diagram as bounces.<br />
In this case, the run-in procedure has to be waited for.<br />
85
6. Initial Installation Diamond digital<br />
6.11 DIAMOND DIGITAL – SOFTWARE UPDATE<br />
Important note<br />
86<br />
The enclosed two 3.5-inch disks contains files with the latest software (*.LOC) for<br />
the individual processors in the switcher and some utility files for the installation<br />
procedure.<br />
The files are:<br />
Disk 1: INSTALL.EXE – Software for loading the updates<br />
MSKERMIT.EXE – Terminal emulation program<br />
MSKERMIT.INI – Configuration file for MSKERMIT<br />
Disk 2: Fxxxxx.LOC – Software for control panel controller<br />
Sxxxxx.LOC – Software for slave controller E-box<br />
Mxxxxx.LOC – Software for master controller E-box<br />
README.TXT – Software information<br />
Copy all files into a subdirectory on the harddisc because INSTALL.EXE creates<br />
temporary files.<br />
E.g. COPY A:*.* C:\DS0011\REL_G<br />
or COPY B:*.* C:\DS0011\REL_G<br />
Please read first the software information before starting the software update. It<br />
might be possible that you are requested to make a backup of the RAM files, using<br />
the Disk menu in order to avoid data loss of your own presettings.
Diamond digital<br />
6. Initial Installation<br />
6.11.1 PRECONDITIONS<br />
Loading the software into panel controller and E-box controller requires the following<br />
equipment:<br />
• Personal computer IBM or compatible with 3.5-inch HD disk drive<br />
• RS-232 interface 9-pin D-type<br />
• Cable between PC and the respective controllers in the switchers (connnection<br />
see below). In most cases COM 1, when using COM 2, MSKERMIT.INI has to<br />
be matched.<br />
Change SET PORT 1 to SET PORT 2 using<br />
PC AT<br />
PC XT oder PS/2<br />
9-pol D-sud<br />
female<br />
25-pol D-sub<br />
female<br />
TxD<br />
RxD<br />
GND<br />
2<br />
3<br />
7<br />
EDIT MSKERMIT.INI<br />
1:1<br />
9-pol D-sub<br />
male<br />
Pin 7 and 9<br />
not assigned<br />
2<br />
3<br />
5<br />
9-pol D-sub<br />
male<br />
RxD<br />
TxD<br />
GND<br />
Pin 7 and 9<br />
not assigned<br />
Diamond digital<br />
EBox Controller<br />
EBox Connector Board<br />
Panel Controller<br />
Panel Connector Board<br />
Diamond digital<br />
EBox Controller<br />
EBox Connector Board<br />
Panel Controller<br />
Panel Connector Board<br />
87
6. Initial Installation Diamond digital<br />
6.11.2 CONNECTION AT THE CONTROL PANEL<br />
Connection at the control panel can be either made at socket J6 SERVICE on the<br />
connector panel or directly at the SERVICE socket of controller RY 1821.<br />
If a mouse is installed at the control panel, it has to be disconnected for the duration<br />
of the software update, and the Setup switch T8 on controller RY 1821 has to be<br />
set to ”Service Terminal active.”<br />
T8 Switch 1 = OFF<br />
Subsequently, press the RESET key on the controller so that the setting is read<br />
again.<br />
88<br />
RY 1821<br />
Controller<br />
RY 1821<br />
Controller<br />
Menü<br />
Monitor<br />
T4<br />
Setup<br />
T8<br />
Switch 1<br />
Taste RESET<br />
6.11.3 CONNECTION AT THE E-BOX<br />
Connection at the E-box can be optionally made at the SERVICE socket on the connector<br />
panel or at the socket SERVICE TERMINAL MASTER located on the front<br />
panel of controller RY 1917.<br />
CONTR<br />
Key RESET<br />
Master Slave<br />
RY 1917<br />
xx
Diamond digital<br />
6. Initial Installation<br />
6.11.4 LOADING THE SOFTWARE<br />
Please read in the service information ”Readme.txt” on your update disk whether<br />
you are requested to erase the FLASH EPROMS before starting the load procedure<br />
of the new software. See section 7.<br />
The following procedure has to be carried out three times, i.e. successively for<br />
each individual file of the disk in the sequence Panel, E-Box Master , E-Box Slave.<br />
• Connect the respective controller with the PC.<br />
• Switch on the PC and start the load program by running install.exe on your<br />
harddisc.<br />
The screen displays the menu below which enables you to stop or continue the<br />
program procedure.<br />
<strong>DD5</strong>..<strong>DD30</strong> FLASH Load Program Version 1.0<br />
Copyright (c) 1993 by<br />
BTS - Broadcast Television Systems<br />
Please read readme.txt first!<br />
continue program (y/n)?<br />
• When continuing the load program, the next menu will be displayed and enables<br />
you to recall the software information readme.txt also directly. Help can be demanded<br />
via the HELP menu.<br />
89
6. Initial Installation Diamond digital<br />
90<br />
Input ><br />
P – Program<br />
R – Type README.TXT<br />
H – HELP<br />
Q – Exit Menu<br />
• When continuing the program, the following menu will be displayed, enabling<br />
you to select whether update has to be made for Panel, E-Box Master or E-Box<br />
Slave.<br />
Input ><br />
P – Panel<br />
M – EBOX Master<br />
S – EBOX Slave<br />
Q – Exit Menu<br />
• If you have been requested in the service information readme.txt on the update<br />
disk to erase the RAM files, you have now to recall the Service menu of the switcher.<br />
See section 5.<br />
If you have been requested in the service information readme.txt on the update<br />
disk to enter again the option code number of your switcher after having succeeded<br />
loading the new software, you have also to recall the Service menu. See<br />
section 6.
Diamond digital<br />
6. Initial Installation<br />
6.11.5 CLEARING THE RAM FILES<br />
The following steps have to be carried out only if requested by the software information<br />
readme.txt on the update disk.<br />
• Recall the MSKERMIT program and establish with ”C” connection to<br />
the switcher controller.<br />
The screen displays again the respective Service menu.<br />
D30 Service Menu<br />
––––––––––––––––<br />
device: DD–PANEL<br />
user: COMMON<br />
software version [V]<br />
integrated error diagnosis [I]<br />
DICMAC direct control and memory access [D]<br />
halt normal operation [H]<br />
KERMIT file transfer [K]<br />
change KERMIT user [U]<br />
change device name [N]<br />
show network [S]<br />
install options [O]<br />
* I<br />
Integrated Error Diagnosis<br />
––––––––––––––––––––––––––<br />
display diagnostic messages [D]<br />
interactive tests [I]<br />
clear RAM–files [C]<br />
BTS personnel only [B]<br />
exit [E]<br />
* C<br />
do you really want to loose memory contents ?⁄ ( ALL / Query / No )<br />
* ALL<br />
select individual file with Y/N:<br />
ACCESS ? cleared<br />
ASSIGN ? cleared<br />
CONF–EB ? cleared<br />
CONF–PA ? cleared<br />
COUPLE ? cleared<br />
IDENT ? cleared<br />
MACRO–PA ? cleared<br />
PATT–USR ? cleared<br />
SEL–EBOX ? cleared<br />
STATE–EB ? cleared<br />
STATE–PA ? cleared<br />
SYSTEM ? cleared<br />
91
6. Initial Installation Diamond digital<br />
92<br />
-Note: The figure shows the procedure by means of the control panel. For the<br />
E-box it is the same procedure.<br />
When performing the step CLEAR RAM FILES, it might be possible that<br />
you are requested to clear only individual files. In this case, do not use<br />
ALL but QUERY.<br />
• After having cleared the RAM files, the system performs an automatic restart.<br />
Subsequently, the screen displays the superior Service menu.<br />
6.11.6 ENTERING THE OPTION CODE<br />
The following steps have to be carried out only if requested in the software information<br />
readme.txt on the update disk.<br />
Recall the MSKERMIT program and establish with ”C” connection to the<br />
switcher controller.<br />
The screen displays the respective Service menu.<br />
D30 Service Menu (Master) Ser. N0.: 100<br />
–––––––––––––––––––––––––––––––––––––––<br />
device: <strong>DD30</strong>–Box<br />
user: COMMON<br />
software version [V]<br />
integrated error diagnosis [I]<br />
DICMAC direct control and memory access [D]<br />
halt normal operation [H]<br />
KERMIT file transfer [K]<br />
change KERMIT user [U]<br />
change device name [N]<br />
show network [S]<br />
install options [O]<br />
*O<br />
enter device specific option code:<br />
options installed:<br />
Entering a ”0” enables you to inquire the options already installed. The customized<br />
code is contained in the Test Certificate which is enclosed by the manufacturer<br />
in the switcher delivery.
Diamond digital<br />
6. Initial Installation<br />
6.11.7 ERASING THE FLASH EPROMS<br />
The following steps have to be carried out only if the software information<br />
readme.txt on the update disk requests to erase the FLASH EPROMs before installing<br />
the new software version.<br />
• Establish the connection between PC and service socket SLAVE on controller<br />
RY 1917.<br />
• Recall the MSKERMIT program and establish with ”C” the connection<br />
to the switcher controller.<br />
• Permanently press the 2TERM key on the front panel of controller RY 1917 and<br />
shortly press the RESET key. After releasing the 2TERM key, the PC screen<br />
displays the letter ”W”.<br />
• Press the RETURN key using the PC keyboard and subsequently enter the letter<br />
”T” .<br />
• The PC screen displays a menu with the menu function:<br />
ERASE FLASH-EPROMS (F)<br />
• Using the PC keyboard, enter the letter ”F”. The erase procedure is started.<br />
• After having terminated the erase procedure, press the RESET key.<br />
For loading the new software, pull the cable from the slave socket and start the procedure<br />
as described in section 2.<br />
93
6. Initial Installation Diamond digital<br />
6.12 LOADING FLASH SOFTWARE FROM DD FLOPPY DISK DRIVE<br />
Starting SELFLOAD<br />
94<br />
The software permits loading updates (FLASH software) directly from the floppy<br />
disk drives of the switcher. This eliminates the need to connect a PC for the loading<br />
procedure. This mode is only possible if EPROM type PR752A (or higher) is<br />
installed in the switcher control panel and if EPROM type PR695A (or higher) is<br />
installed in the switcher E-box .<br />
There are two ways of loading the FLASH software with the internal (<strong>DD20</strong>/<strong>DD30</strong>)<br />
or the external (<strong>DD5</strong>/<strong>DD10</strong>) floppy disk drive:<br />
SELFLOAD Selfloading procedure of a control<br />
panel with own floppy disk drive.<br />
LOAD FOREIGN DEVICE From a control panel that is in the<br />
application and has its own floppy disk<br />
drive, the software can be loaded into<br />
any device in the network (E-box or<br />
panel without disk drive).<br />
In case of a control panel that (as a result of an EPROM change) is unable to return<br />
to the operating status, it is sufficient to insert a floppy with a control panel LOC file<br />
into the floppy disk drive and then trigger a reset (controller board). The loading procedure<br />
is started automatically.<br />
If a control panel already is in the application, a reloading of the software can be<br />
started in the SETUP menu (EXTRA panel).<br />
SETUP menu option<br />
In the subloop the options<br />
can be selected.<br />
L O A D S O F T W A R E : ><br />
LOAD MY PANEL for ”Selfload” and<br />
LOAD E-BOX MASTER<br />
LOAD E-BOX SLAVE<br />
LOAD OTHER PANEL for ”Load foreign devices”
Diamond digital<br />
Starting LOAD FOREIGN DEVICE<br />
Floppy disk contents<br />
If LOAD MY PANEL is confirmed, the selfloading procedure is started.<br />
6. Initial Installation<br />
The selfloading procedure comprises a test and a loading procedure that are<br />
executed successively. In the test procedure (approx. 5 minutes) the date on the<br />
floppy disk are verified for safety purposes. This is signalled by a cyclical beep<br />
sound.<br />
The loading procedure (approx. 5 minutes) is signalled by a cyclical long beep<br />
sound and the ”running” of the controller status LEDs.<br />
The loading procedure is completed when the control panel executes a RESTART.<br />
If the control panel is already in the application, a foreign device loading procedure<br />
can be started in the SETUP menu (EXTRA panel).<br />
Note: It is assumed that only the device to receive the software is active<br />
in the Cheapernet. Switch off all devices that are not involved<br />
before the foreign device loading procedure is started and press<br />
the reset button on the control panel controller afterwards.<br />
Setup Menu option<br />
L O A D S O F T W A R E : ><br />
In the subloop the following foreign devices can be selected:<br />
LOAD E-BOX MASTER<br />
LOAD E-BOX SLAVE<br />
LOAD OTHER PANEL<br />
If one of the submenu options is confirmed, the foreign loading procedure is started.<br />
As described above, the loading operating itself comprises a testing and a loading<br />
procedure that are executed successively. In this case both procedures are signalled<br />
with a rotating activity indication in the EXTRA display. The EXTRA display<br />
will also show any error messages.<br />
The loading procedure is completed when the newly loaded device executes a<br />
RESTART. In the control panel the EXTRA display shows the submenu option<br />
executed last together with the indication DONE.<br />
In line with the BTS designation conventions for LOC files, only files with the following<br />
names can be loaded in the switcher:<br />
Control panel F*.LOC<br />
E-box master M*.LOC<br />
E-box slave S*.LOC<br />
All LOC files must be in the root directory of the floppy. In this operation only the first<br />
three LOC files on a floppy can be loaded.<br />
95
6. Initial Installation Diamond digital<br />
96
Diamond digital<br />
7. DESCRIPTION OF THE INTERFACES<br />
7.1 CHEAPERNET SPECIFICATION<br />
50 Ohm<br />
min 0,5 m<br />
Elektronik- Panel 1<br />
Box<br />
Interconnection cables<br />
7. Description of the Interface<br />
For operation of the Diamond digital family, diverse control panels designed for different<br />
applications can be connected and operated via a coax line. Distribution of<br />
the control functions of the different panels and their access rights to the hardware<br />
of the switcher is made on the control panel via the ACCESS menu.<br />
The applied coax connection features the following characteristics:<br />
max 150 m max 150 m<br />
Panel 2 Panel 3<br />
Repeater<br />
– Cheapernet connection cable Kv 770 (50-ohms coax)<br />
– Cabling is also possible with T-connector<br />
– Maximum length per segment = 150 m,<br />
– Minimum length per segment = 0.5 m<br />
– Longer distances are possible with a repeater, i.e. each repeater<br />
provides a further segment with an extension of up to 150 m<br />
– 10 units per segment at maximum<br />
– End units must be terminated with a 50-ohms terminating plug.<br />
HF coax cable, length Order number<br />
1 m 0 782 740 100<br />
2 m 0 782 740 600<br />
5 m 0 782 740 300<br />
10 m 0 782 740 200<br />
20 m 0 782 740 400<br />
30 m 0 782 740 700<br />
80 m 0 782 740 500<br />
Terminating plug 50 ohms 3 130 602 055<br />
97
7. Description of the Interface Diamond digital<br />
7.2 ROUTER INTERFACE WITH BTS–ASCII–PROTOCOL<br />
7.2.1 GENERAL<br />
98<br />
The RS–422 router interface permits the control of external BTS crossbars such as<br />
Mars, Venus or TVS.<br />
The following applications are conceivable:<br />
Switching of an emergency crossbar<br />
Connection to upstream crossbars<br />
External Aux buses<br />
An external crossbar can be controlled from the switcher if the crossbar features a<br />
corresponding controller such as:<br />
Mars: CE–300 controller<br />
Venus: SC–400 controller<br />
TVS: CE–2200 controller<br />
Control is also possible with the BTS control system Jupiter provided this is<br />
equipped with the VM–3000 controller.<br />
In addition, the corresponding video and control wiring must be provided. The<br />
ROUTER INTERFACE protocol for the XBAR port is loaded by the switcher as a<br />
standard and need not be selected separately.<br />
The following pages contain more detailed information on wiring and control. The<br />
instruction set for the BTS–ASCII protocol is defined in BCS–3000 ASCII computer<br />
interface protocol documentation.<br />
The transfer of the source mnemonic codes from upstream crossbars to the<br />
switcher does not belong to the router interface but is possible with the IDENT<br />
XBAR protocol which can be selected in the CONFIG PANEL installation sub–<br />
menu.
Diamond digital<br />
7.2.2 INTERFACES<br />
Interface XBAR<br />
Diamond digital<br />
EBox <strong>DD20</strong> / <strong>DD30</strong><br />
Interface<br />
Jupiter / VM–3000<br />
Mars /CE–300<br />
Venus / SC–400<br />
Interface<br />
TVS<br />
7. Description of the Interface<br />
The interface assignment corresponds to an ES–bus–bus controller.<br />
Diamond digital<br />
XBAR RS 422<br />
Pin<br />
Signal<br />
ÁÁÁÁÁÁÁ<br />
ÁÁÁÁÁÁÁÁ<br />
ÁÁÁÁÁÁÁÁ<br />
ÁÁÁÁÁÁÁÁ<br />
ÁÁÁÁÁÁÁÁ<br />
ÁÁÁÁÁÁÁ<br />
1<br />
ÁÁÁÁÁÁÁÁ<br />
ÁÁÁÁÁÁÁ<br />
ÁÁÁÁÁÁÁÁ ÁÁÁÁÁÁÁÁ<br />
ÁÁÁÁÁÁÁÁ<br />
ÁÁÁÁÁÁÁÁ<br />
ÁÁÁÁÁÁÁ<br />
ÁÁÁÁÁÁÁ<br />
ÁÁÁÁÁÁÁÁ<br />
ÁÁÁÁÁÁÁÁ<br />
ÁÁÁÁÁÁÁÁ<br />
ÁÁÁÁÁÁÁÁ<br />
ÁÁÁÁÁÁÁ<br />
5<br />
6<br />
9<br />
9 pin D–type<br />
female<br />
1<br />
2<br />
3<br />
4<br />
5<br />
6<br />
7<br />
8<br />
9<br />
Frame GND<br />
RxA<br />
TxB<br />
Receive common<br />
–<br />
Transmit common<br />
RxB<br />
TxA<br />
Frame GND<br />
ÁÁÁÁÁÁÁ<br />
ÁÁÁÁÁÁÁÁ<br />
ÁÁÁÁÁÁÁÁ<br />
ÁÁÁÁÁÁÁÁ<br />
ÁÁÁÁÁÁÁÁ<br />
ÁÁÁÁÁÁÁ<br />
ÁÁÁÁÁÁÁ<br />
ÁÁÁÁÁÁÁÁ<br />
ÁÁÁÁÁÁÁÁ<br />
ÁÁÁÁÁÁÁÁ<br />
ÁÁÁÁÁÁÁÁ<br />
ÁÁÁÁÁÁÁ<br />
ÁÁÁÁÁÁÁÁ ÁÁÁÁÁÁÁÁ<br />
ÁÁÁÁÁÁÁ<br />
The interface assignment corresponds to an ES–bus–bus controller.<br />
Jupiter, Mars, Venus<br />
RS 422<br />
Pin<br />
Signal<br />
ÁÁÁÁÁÁÁ<br />
ÁÁÁÁÁÁÁÁ<br />
ÁÁÁÁÁÁÁÁ<br />
ÁÁÁÁÁÁÁÁ<br />
ÁÁÁÁÁÁÁÁ<br />
ÁÁÁÁÁÁÁ<br />
1<br />
ÁÁÁÁÁÁÁÁ<br />
ÁÁÁÁÁÁÁ<br />
ÁÁÁÁÁÁÁÁ ÁÁÁÁÁÁÁÁ<br />
ÁÁÁÁÁÁÁÁ<br />
ÁÁÁÁÁÁÁÁ<br />
ÁÁÁÁÁÁÁ<br />
ÁÁÁÁÁÁÁ<br />
ÁÁÁÁÁÁÁÁ<br />
ÁÁÁÁÁÁÁÁ<br />
ÁÁÁÁÁÁÁÁ<br />
ÁÁÁÁÁÁÁÁ<br />
ÁÁÁÁÁÁÁ<br />
5<br />
6<br />
9<br />
ÁÁÁÁÁÁÁ<br />
ÁÁÁÁÁÁÁÁ<br />
ÁÁÁÁÁÁÁÁ<br />
ÁÁÁÁÁÁÁÁ<br />
ÁÁÁÁÁÁÁÁ<br />
ÁÁÁÁÁÁÁ<br />
9 pin D–type<br />
female<br />
1<br />
2<br />
3<br />
4<br />
5<br />
6<br />
7<br />
8<br />
9<br />
Frame GND<br />
RxA<br />
TxB<br />
Receive common<br />
–<br />
Transmit common<br />
RxB<br />
TxA<br />
Frame GND<br />
ÁÁÁÁÁÁÁ<br />
ÁÁÁÁÁÁÁÁ<br />
ÁÁÁÁÁÁÁÁ<br />
ÁÁÁÁÁÁÁÁ<br />
ÁÁÁÁÁÁÁÁ<br />
ÁÁÁÁÁÁÁ<br />
ÁÁÁÁÁÁÁÁ ÁÁÁÁÁÁÁÁ<br />
ÁÁÁÁÁÁÁ<br />
The interface assignment corresponds to an ES–bus tributary.<br />
TVS<br />
RS 422<br />
Pin<br />
Signal<br />
ÁÁÁÁÁÁÁ<br />
ÁÁÁÁÁÁÁÁ<br />
ÁÁÁÁÁÁÁÁ<br />
ÁÁÁÁÁÁÁÁ<br />
ÁÁÁÁÁÁÁÁ<br />
ÁÁÁÁÁÁÁ<br />
1<br />
ÁÁÁÁÁÁÁÁ<br />
ÁÁÁÁÁÁÁ<br />
ÁÁÁÁÁÁÁ ÁÁÁÁÁÁÁÁ ÁÁÁÁÁÁÁÁ<br />
ÁÁÁÁÁÁÁÁ<br />
ÁÁÁÁÁÁÁÁ<br />
ÁÁÁÁÁÁÁ<br />
5<br />
6<br />
9<br />
ÁÁÁÁÁÁÁ<br />
ÁÁÁÁÁÁÁÁ<br />
ÁÁÁÁÁÁÁÁ<br />
ÁÁÁÁÁÁÁÁ<br />
ÁÁÁÁÁÁÁÁ<br />
ÁÁÁÁÁÁÁ<br />
9 pin D–type<br />
female<br />
1<br />
2<br />
3<br />
4<br />
5<br />
6<br />
7<br />
8<br />
9<br />
Frame GND<br />
TxA<br />
RxB<br />
Receive common<br />
–<br />
Transmit common<br />
TxB<br />
RxA<br />
Frame GND<br />
ÁÁÁÁÁÁÁ<br />
ÁÁÁÁÁÁÁÁ<br />
ÁÁÁÁÁÁÁÁ<br />
ÁÁÁÁÁÁÁÁ<br />
ÁÁÁÁÁÁÁÁ<br />
ÁÁÁÁÁÁÁ<br />
ÁÁÁÁÁÁÁ<br />
ÁÁÁÁÁÁÁÁ<br />
ÁÁÁÁÁÁÁÁ<br />
ÁÁÁÁÁÁÁÁ<br />
ÁÁÁÁÁÁÁÁ<br />
ÁÁÁÁÁÁÁ<br />
ÁÁÁÁÁÁÁÁ ÁÁÁÁÁÁÁÁ<br />
ÁÁÁÁÁÁÁ<br />
99
7. Description of the Interface Diamond digital<br />
7.2.3 CONNECTION CABLES<br />
Connection cable<br />
Diamond – Jupiter<br />
Diamond – Mars<br />
Diamond – Venus<br />
Connection cable<br />
Diamond – TVS<br />
100<br />
Diamond digital<br />
XBAR<br />
Jupiter / VM-3000<br />
Mars / CE-300<br />
Venus / SC-400<br />
9-pol male 9 pin male<br />
1<br />
1<br />
Frame GND Frame GND<br />
2<br />
2<br />
RxA<br />
RxA<br />
3<br />
3<br />
TxB<br />
TxB<br />
4<br />
4<br />
Receive common<br />
Receive common<br />
Transmit common<br />
6<br />
6<br />
Transmit common<br />
7<br />
7<br />
RxB<br />
RxB<br />
8<br />
8<br />
TxA<br />
TxA<br />
9<br />
9<br />
Frame GND<br />
Frame GND<br />
BTS connection cable S0909–197<br />
Order no.: 0 979 033 197<br />
Diamond digital<br />
XBAR<br />
TVS<br />
9-pol male 9 pin male<br />
1<br />
1:1<br />
1<br />
Frame GND Frame GND<br />
2<br />
2<br />
RxA<br />
TxA<br />
3<br />
3<br />
TxB<br />
RxB<br />
4<br />
4<br />
Receive common<br />
Receive common<br />
Transmit common<br />
6<br />
6<br />
Transmit common<br />
7<br />
7<br />
RxB<br />
TxB<br />
8<br />
8<br />
TxA<br />
RxA<br />
9<br />
9<br />
Frame GND<br />
Frame GND<br />
Attention:<br />
BTS connection cable S0909–117<br />
Order no.: 0 978 033 117<br />
The EMC regulations require the use of properly shielded cables in the installation<br />
of the device or the system.<br />
This applies for both video and control cables.<br />
Suitable cables can be ordered from BTS. Please indicate the desired cable<br />
length when ordering.
Diamond digital<br />
7.2.4 MENU SETTINGS<br />
7. Description of the Interface<br />
In order to adapt the system to the desired environment and to configure it for external<br />
crossbars, several menus are available in the switcher. The EXTERN AUX<br />
menu is selected by pressing the EXTERN AUX softkey in the INSTALLATION<br />
menu.<br />
The EXTERN AUX menu serves as a reference table for the source designations of<br />
the signals on the external crossbar. Standard sources have the designation PRxx<br />
(PreRouter xx).<br />
The source designations entered in this table are indicated in the displays above<br />
the Aux key bank when one of the six external crossbar outputs is selected.<br />
The table can be edited with the cursor softkeys, the alphabetical keyboard and the<br />
numeric keypad which permits entering user specific source designations.<br />
Press the EXIT softkey to return to the higher–order INSTALLATION menu.<br />
Press the CONFIG softkey to select a further menu for the entry of the configuration<br />
parameters.<br />
101
7. Description of the Interface Diamond digital<br />
102<br />
The CONFIG menu permits setting the configuration parameters for external<br />
crossbars.<br />
The menu is divided into two parts.<br />
active operation active crossbar control<br />
In this case an external crossbar output (max. 6) can<br />
be switched immediately upstream of the switcher<br />
operation. Operation of the external crossbar as with<br />
Aux bus. The delegation to external buses is made<br />
with the EXT AUX key.<br />
passive operation passive crossbar control<br />
In this case an external crossbar output (max. 6) is<br />
coupled to one of the internal crossbar buses of the<br />
switcher.<br />
The OUT XBAR line permits entering the desired output number of the external<br />
crossbar to be switched by the external Aux bus.<br />
Admissible output numbers are 0 ... 127.<br />
The Prerouter line serves to indicate with ”Yes/No” if the corresponding output of<br />
the external crossbar is selected as source in the IDENT INPUT menu. For further<br />
details please refer to Ident Input menu.<br />
The Coupled to line permits entering an internal switcher bus. In this case the<br />
external crossbar is coupled to an internal switcher bus. Repeated pressing of the<br />
COUPLE softkey scrolls through the various buses available in the switcher.<br />
Note: In active operation and enabled ”coupling” only the external crossbar<br />
is coupled. The direct switching of sources on the external<br />
crossbar with separate crossbar control panel does not have any<br />
effect on the internal switcher buses.
Diamond digital<br />
XBAR–Ident:<br />
7. Description of the Interface<br />
The source mnemonic codes from upstream crossbars can be transferred to the<br />
switcher using the IDENT XBAR protocol. For this purpose a corresponding control<br />
cable must be provided in addition to the video cable between switcher E–box and<br />
external crossbar (TVS, Mars, Venus) and the protocol for the relevant port must be<br />
selected in the CONFIG EBOX menu. For further details please refer to Supplement<br />
3 TVS Interface.<br />
The mnemonic code transfer is enabled with the IDENT XBAR# softkey in the<br />
IDENT INPUT menu.<br />
For this purpose the desired switcher input must be selected with the cursor. By<br />
pressing the IDENT XBAR# softkey a ”#” appears in the Ident line of the selected<br />
source. The desired output number of the external crossbar can be entered with the<br />
numeric keypad.<br />
Extern XBAR:<br />
Which external Aux bus is to be assigned to the switcher inputs can be determined<br />
with the EXTERN XBAR$ softkey.<br />
For this purpose the desired switcher input must be selected with the cursor. By<br />
pressing the EXTERN XBAR$ softkey a ”$” appears in the Ident line of the selected<br />
source. The desired output number of the external Aux bus can be entered with the<br />
numeric keypad. A ”YES” is entered automatically for this Aux bus in the Prerouter<br />
line.<br />
In order to delete an IDENT XBAR or EXTERN XBAR entry, move the cursor into<br />
the entry field to be cleared, press the IDENT XBAR or EXTERN XBAR softkey and<br />
press Clear (in the numeric keypad).<br />
After this operation the default input name appears in the entry field.<br />
103
7. Description of the Interface Diamond digital<br />
Basic diagram for pre-routing<br />
104<br />
00<br />
01<br />
02<br />
45<br />
46<br />
27<br />
VENUS<br />
SD Router<br />
SC-400<br />
Port<br />
CONFIG<br />
Inputs<br />
01<br />
02<br />
Hinweis: Keine Tally-Signalisierung über den Pre-Router<br />
Note: No tally lighting via pre-router<br />
30<br />
31<br />
32<br />
RS-422<br />
(gekreuzte Leitungen,<br />
crossed wires)<br />
DIAMOND DIGITAL<br />
Switcher<br />
Port<br />
XBAR
Diamond digital<br />
Basic diagram for pre-routing<br />
00<br />
01<br />
02<br />
21<br />
22<br />
23<br />
MARS<br />
SD Router<br />
24 x 8<br />
CE-300<br />
Port<br />
CONFIG<br />
Inputs<br />
01<br />
02<br />
Hinweis: Keine Tally-Signalisierung über den Pre-Router<br />
Note: No tally lighting via pre-router<br />
30<br />
31<br />
32<br />
RS-422<br />
(gekreuzte Leitungen,<br />
crossed wires)<br />
DIAMOND DIGITAL<br />
Switcher<br />
7. Description of the Interface<br />
Port<br />
XBAR<br />
105
7. Description of the Interface Diamond digital<br />
Basic diagram for parallel routing<br />
106<br />
Distribution<br />
Amplifiers<br />
....<br />
not assignet<br />
not assignet<br />
PRM ME1<br />
PGM ME2<br />
PGM PP<br />
PVW ME1<br />
PVW ME2<br />
PVW PP<br />
Clean feed<br />
....<br />
Inputs<br />
01<br />
02<br />
....<br />
31<br />
32<br />
00<br />
01<br />
30<br />
31<br />
BLACK<br />
32<br />
33<br />
34<br />
35<br />
36<br />
37<br />
38<br />
39<br />
40<br />
41<br />
DIAMOND DIGITAL<br />
Switcher<br />
Outputs<br />
PGM ME1 CLEAN<br />
....<br />
SD Router<br />
Port<br />
XBAR<br />
SC-400<br />
CE-300<br />
Hinweis: Keine Tally-Signalisierung über den Parallel-Pouter<br />
Note: No tally lighting via parallel-router<br />
8 Bus outputs<br />
similar to the internal<br />
mixer buses<br />
RS-422<br />
(gekreuzte Leitungen,<br />
crossed wires)<br />
Port<br />
CONFIG
Diamond digital<br />
00<br />
01<br />
02<br />
31<br />
32<br />
More<br />
VENUS<br />
SD Router<br />
Inputs<br />
01<br />
02<br />
7. Description of the Interface<br />
Online name transfer from routing system into DD production switcher<br />
Inputs<br />
....<br />
Tally<br />
contacts<br />
out<br />
<strong>DD30</strong><br />
Control panel<br />
VM-3000<br />
Tally<br />
Logic<br />
MI-3040<br />
UMDs<br />
DA<br />
DA<br />
DA<br />
....<br />
DA<br />
DA<br />
DA<br />
Signal routing<br />
to PVW monitors<br />
30<br />
31<br />
32<br />
<strong>DD30</strong> E-Box<br />
Note: The MI-3040 is hooked-up directly to the VM-3000 by a 9-pin serial cable and its<br />
relays and opto-isolators are defined by software in the configuration editor.<br />
....<br />
RS-422 cable for name transfer<br />
....<br />
PVW monitors<br />
Tally<br />
Distrib.<br />
RLW...<br />
....<br />
....<br />
Port 1/2/3 Tally<br />
to<br />
monitor<br />
tally<br />
RS-422<br />
107
7. Description of the Interface Diamond digital<br />
7.3 IDENT XBAR INTERFACE<br />
108<br />
If a TVS or Venus preselection matrix or a Philips Jupiter control system is connected<br />
to the <strong>DD20</strong> and <strong>DD30</strong> production switchers, the IDENT XBAR protocol<br />
may be used to transmit the abbreviated names of the sources corresponding to<br />
the current switcher status from the matrix to the switcher. The current source name<br />
is then indicated in the displays (option) of the source selection keys.<br />
Installation The installation of this mode of operation is made in the IDENT INPUT installation<br />
menu. The cursor must be moved to the table position of the input linked with XBAR<br />
output. Then the XBAR softkey must be selected in the menu and the number of the<br />
corresponding XBAR output must be entered with the numeric keypad.<br />
XBAR Protocol<br />
In the CONFIG E-BOX installation menu, the IDENT XBAR protocol must be<br />
selected for the port that is linked e.g. to the TVS controller interface CI-2000. The<br />
controller interface CI-2000 is in turn linked by party line to the TVS matrix and the<br />
TVS panel.<br />
Note: The controller interface CI-2000 must have the corresponding software.<br />
For the Jupiter control system a VM board or a SI board is<br />
available as interface.<br />
In order to clear a XBAR entry in the IDENT INPUT menu, proceed as follows: move<br />
cursor into the corresponding field, press XBAR again and then clear the entry by<br />
pressing CLEAR in the numeric keypad.<br />
For the three serial ports of the switcher electronics the XBAR Ident protocol is<br />
available. The protocol serves to transmit mnemonic codes to the switcher at a rate<br />
of<br />
38.4 kBaud, 8 databits, even parity, 1 stop bit.<br />
The transmission can be made from any computer system with a serial interface.<br />
The serial interface must correspond to the RS-422 standard.<br />
In this mode the switcher operates as tributary, the port (9 pin D-sub, female) of the<br />
switcher is assigned as follows:<br />
1<br />
5<br />
6<br />
9<br />
RS-422<br />
Pin 1, 9 Frame ground<br />
Pin 2 Transmit A<br />
Pin 3 Receive B<br />
Pin 4 Receive common<br />
Pin 5 not connected<br />
Pin 6 Transmit common<br />
Pin 7 Transmit B<br />
Pin 8 Receive A
Diamond digital<br />
The mnemonic codes are transmitted in the following binary form:<br />
7. Description of the Interface<br />
10010101 aaaaaaaa 0ccccccc 0ccccccc 0ccccccc 0ccccccc<br />
”a” corresponds to the XBAR output number entered during the installation in the<br />
IDENT INPUT Menu and ”c” correspond to the ASCII coded characters of the<br />
mnemonic codes to be transmitted.<br />
During the start-up phase the switcher sends a INIT REQUEST (hex BE). This<br />
informs the host that the switcher had been switched off and may have lost data or<br />
that the data may not be current. The host must respond by sending all mnemonic<br />
codes again.<br />
During the normal operation the switcher sends “I AM DIAMOND” (hex BF) at regular<br />
intervals (every 3 seconds). If the host is switched on, it should answer by sending<br />
all mnemonic codes until the switcher sends this message for the first time. The<br />
subsequent regularly arriving messages may be ignored. They may be used in the<br />
host to check that the connection is still alive.<br />
109
7. Description of the Interface Diamond digital<br />
7.4 AUX PANEL AND UNDER MONITOR DISPLAY INSTALLATION<br />
AUX delegation<br />
110<br />
For the switchers <strong>DD5</strong>, <strong>DD10</strong>, <strong>DD20</strong> and <strong>DD30</strong>, two types of AUX panels are available.<br />
Type CP-300 with 24 source selection keys and six bus delegation keys, and<br />
type CP-330 with 48 source selection keys and six bus delegation keys.<br />
In addition to the AUX panels, two types of status displays (UMDs) can be connected<br />
to the same control bus. Type RP 1 UMD includes a display with eight characters<br />
and type RP 2 UMD includes two displays with eight characters.<br />
Since maximally 32 devices can be operated at the MPK bus, the number of the<br />
connectable UMDs depends on the num ber of the installed AUX panels.<br />
Number of UMD = 32 – number of AUX panels<br />
The bus delegation keys can be assigned in menu AUX Panels to all buses. For<br />
this purpose, the mixer types <strong>DD5</strong> and <strong>DD10</strong> require the connection of a menu<br />
monitor.<br />
As default, the bus delegation keys are assigned to the AUX buses AUX1 to AUX6.<br />
Not all of the smaller mixer types have these buses.
Diamond digital<br />
AUX assignment<br />
for internal busse<br />
AUX assignment<br />
for external<br />
AUX busses<br />
7. Description of the Interface<br />
The assignment of the video signals to the keys of the AUX control panels CP-330<br />
and CP-300 cannot be changed, however, it depends on the electronics box selected<br />
at the control panel. For <strong>DD20</strong> and <strong>DD30</strong>, only CP-330 (with 48 source<br />
selection keys) should be used, in order to be able to select all signals. For <strong>DD10</strong><br />
and <strong>DD5</strong>, both panels can be used. The lower row of CP-300 (keys 24 .. 47) has<br />
the same assignment as the upper one.<br />
Key<br />
<strong>DD20</strong> and <strong>DD30</strong><br />
Input or<br />
internal signal<br />
Key<br />
<strong>DD5</strong> and <strong>DD10</strong><br />
Input or<br />
internal signal<br />
0 Black 0 Black<br />
1 IN 01 1 IN 01<br />
⇓ ⇓ ⇓ ⇓<br />
32 IN 32 16 IN 16<br />
33 COL1 17 COL<br />
34 COL2 18 VIDEO STORE<br />
35 VIDEO STORE 19 CLEAN<br />
36 MONT PROC 1 20 PVW<br />
37 MONT PROC 2 21 PGM<br />
38 ME1 22 Black<br />
39 ME2 23 Black<br />
40 PP (= PGM) 24 Black<br />
41 PVW ME1 25 IN 01<br />
42 PVW ME2 ⇓ ⇓<br />
43 PVW PP 40 IN 16<br />
44 ME1 KEY 41 COL<br />
45 ME2 KEY 42 VIDEO STORE<br />
46 CLEAN 43 CLEAN<br />
47 Black 44 PVW<br />
45 PGM<br />
46 Black<br />
47 Black<br />
In case of delegation the AUX panels to external crossbars (Ext Aux 1...6) the following<br />
assignment is valid:<br />
Key Signal __<br />
0 Input 0 of external crossbar<br />
1 Input 1 of external crossbar<br />
<br />
47 Input 47 of external crossbar<br />
111
7. Description of the Interface Diamond digital<br />
Installation<br />
112<br />
Each master control panel RPD-xx allows connection of up to four AUX panels to<br />
the serial port (RS-422). Previously, the address has to be adjusted at each AUX<br />
panel, adjusting at each of the four AUX panels another address.<br />
Proceed as follows:<br />
1. Remove on the rear of the panel the small cover cap, revealing a DIP switch<br />
module with 8 switches.<br />
2. Adjust the DIP switches 1 to 8 as follows:<br />
(0 means switch OFF = downwards, 1 means switch ON = upwards)<br />
Schalter 1 2 3 4 5 6 7 8<br />
1. Panel 0 0 0 0 0 0 0 1<br />
2. Panel 1 0 0 0 0 0 0 1 Is<br />
applicable up to<br />
3. Panel 0 1 0 0 0 0 0 1 software DS0011F<br />
4. Panel 1 1 0 0 0 0 0 1<br />
From software version ”DS0011G” which replaces the under–monitor displays,<br />
the switches have to be set as follows:<br />
Schalter 1 2 3 4 5 6 7 8<br />
1. Panel 0 0 0 0 1 1 1 1<br />
2. Panel 1 0 0 0 1 1 1 1<br />
3. Panel 0 1 0 0 1 1 1 1<br />
4. Panel 1 1 0 0 1 1 1 1<br />
3. Fasten the cover cap.<br />
4. Connect the panels among each other and with the serial port of the master<br />
control panel. For this purpose, a 9-wire cable with 9-pin Sub-D connectors is<br />
required (connected) by means of which the sockets MPK of the AUX panels<br />
and the serial port of the master control panel are connected.<br />
RPD 10<br />
MPK<br />
MPK<br />
MPK<br />
MPK<br />
AUX-CP<br />
AUX-CP<br />
AUX-CP<br />
AUX-CP<br />
5. Apply 5V DC to the AUX panels.<br />
6. Select the protocol AUX / UMD in the SETUP of the master control panel at<br />
PORTP.
Diamond digital<br />
7. Description of the Interface<br />
7.5 CONNECTION OF THE STATUS DISPLAYS RP 1/2 UMD<br />
In addition to the AUX panels, status displays (UMDs) can be connected to the MPK<br />
bus. Since maximally 32 devices can be operated at the MPK bus, the number of<br />
the connectable UMDs depends on the number of the connected AUX panels.<br />
BTS<br />
RP 1 UMD 3A<br />
BTS<br />
RP 2 UMD 3A<br />
POWER<br />
85 - 265 V<br />
ME 2 K EY 1<br />
VTR3 CAM1<br />
ME2 =it<br />
RS232C GPI RS485 ADDRESS<br />
DIAGNOSTIC MPK BUS<br />
Connection to the MPK bus is made in the same way as for the AUX panels. Power<br />
supply can be universally with line voltages of 85 V ... 265 V AC. The respective<br />
use of the UMDs can be adjusted with the two rotary switches ADDRESS on the<br />
terminal panel.<br />
Each rotary switch has t he hexadecimal range 0 ... F. See the table below.<br />
MPK<br />
MPK<br />
MPK<br />
MPK<br />
Number of UMD = 32 – Number of AUX-Panel<br />
4x AUX PANEL<br />
AUX CONTROL PANEL<br />
AUX CONTROL PANEL<br />
AUX CONTROL PANEL<br />
AUX CONTROL PANEL<br />
RPD 10<br />
MPK<br />
MPK<br />
MPK<br />
MPK<br />
TEST<br />
max 28x UMD<br />
UMD<br />
UMD<br />
UMD<br />
UMD<br />
TEST<br />
113
7. Description of the Interface Diamond digital<br />
114<br />
In this application, the following addesses are used:<br />
Address<br />
H L<br />
Display<br />
Left display RP 2 UMD<br />
Display<br />
Display RP 1 UMD<br />
right display RP 2 UMD<br />
0 0 – Input 1 1 )<br />
0 1 Input 1 Input 2<br />
0 2 Input 2 Input 3<br />
⇓ ⇓ ⇓<br />
0 F Input 15 Input 16<br />
1 0 Input 16 Input 17<br />
⇓ ⇓ ⇓<br />
1 F Input 31 Input 32<br />
2 2 – Output ME1 2 )<br />
2 3 Output ME1 Output ME2<br />
2 4 Output ME2 Output MAIN<br />
2 5 – PVW ME1 3 )<br />
2 6 PVW ME1 PVW ME2<br />
2 7 PVW ME2 PVW PP=PST=MAIN PVW<br />
2 8 PVW PP CLEAN FEED 4 )<br />
2 9 CLEAN FEED PVW BUS 5 )<br />
2 A PVW BUS Output DP 6 )<br />
2 B – AUX1 7 )<br />
2 C AUX1 AUX2<br />
2 D AUX2 AUX3<br />
2 E AUX3 AUX4<br />
2 F AUX4 AUX5<br />
3 0 AUX5 AUX6<br />
3 1 DVE1 KEY DVE1 VIDEO 8 )<br />
3 2 DVE1 VIDEO DVE1 KEY<br />
3 3 DVE2 KEY DVE2 VIDEO<br />
3 4 DVE2 VIDEO DVE2 KEY<br />
Attention: Other addresses are not admitted. Each address must be<br />
adjusted at one UMD only!<br />
Note
Diamond digital<br />
7. Description of the Interface<br />
The presentation on the display is mostly made with 4 characters. At the UMDs<br />
for CLEAN FEED and for the DVEs, alternatively an 8-character display can be selected.<br />
Adjustment is made via the softkey ”8-CHAR UMD’s” in the menu Config Panel<br />
of the mixer.<br />
Softkey ”8-CHAR UMD’s<br />
Notes to the address adjustment:<br />
1) The displays for the 32 inputs show the 4-digit source name.<br />
2) The displays for the three outputs can show the following:<br />
a) The source name of the input being visible in the output picture, if<br />
it is the only picture component,<br />
b) ”....”, when a mixed picture is at the output,<br />
c) ”FTB”, when the output has been faded to black with the<br />
fade-to-black function.<br />
3) The displays for the PVW ME1 / ME2 / PP Preview can show the following:<br />
a) ”PROG”, when no Preview is selected,<br />
b) ”AKAx”, when the cursor for Auto-Chroma-Key-Adjustment is<br />
selected,<br />
c) the states of the next transition keys are displayed with graphical<br />
symbols (on/off).<br />
e.g. ”__” In this case: NXT BGD A = off,<br />
NXT BGD B = on,<br />
NXT KEY 1 = off,<br />
NXT KEY 2 = on<br />
This preview mode is displayed when Look–Ahead-Preview<br />
is switched on.<br />
d) ”TRAN”, when Transition Preview is selected.<br />
e) ”KEYx”, when Key Preview is selected (Video: Key to background)<br />
f) ”keyx”, when Key Preview is selected (Video: pure key signal (SW))<br />
g) ”MSKx”, when Mask Preview is selected<br />
h) 4–digit source name of the DSK2, when PP-Preview = DUAL or CASC<br />
is selected.<br />
x = 1 or 2 for ME1,<br />
4 or 5 for ME2<br />
7 or 8 for PP<br />
115
7. Description of the Interface Diamond digital<br />
116<br />
4) The Clean Feed display shows in the 4–character mode ”CLEA” and in the<br />
8character mode ”CLEAN FD”.<br />
5) The display of the Preview AUX output shows the 4–digit source name of the<br />
selected input.<br />
6) The display of the DP output shows the 4–digit source name of the selected<br />
DSK1 input when PP–Preview = DUAL or CASC.<br />
In the other cases: ”####” (no meaning).<br />
7) The displays for the 6 AUX outputs show the 4–digit source name of the selected<br />
input.<br />
8) The displays for the 4 DVE outputs can show the following:<br />
a) The 4–digit source name of the selected input<br />
b) ”1PST”, ”1PGM”, ”1 K1”, ”1 K2”, ”2PST”, ”2PGM ”, ”2 K2”, ”PPST”,<br />
”PPGM”, ”P K1”, ”P K2” for the selected ME output in the<br />
4–character mode.<br />
c) ”ME1 PST”, ”ME1 PGM”, ”ME1 KEY1”, ”ME1 KEY2”, ”ME2 PST”,<br />
”ME2 PGM”, ”ME2 KEY1”, ”ME2 KEY2”, ”PP PST”, ”PP PGM”,<br />
”PP KEY1”, ”PP
Diamond digital<br />
7.6 TALLY AND GPI INTERFACE<br />
Tally inputs<br />
7. Description of the Interface<br />
The following supplement contains the specifications of the TALLY and GPI interfaces<br />
of the mixers <strong>DD5</strong>, <strong>DD10</strong>, <strong>DD20</strong> and <strong>DD30</strong>. You find the pin position of the<br />
TALLY and GPI sockets on the terminal panel of the respective mixer in the installation<br />
manual. You will find a circuit diagram of the tally distributor RC1940 as an appendix<br />
to this supplement.<br />
The tally inputs are controlled by connecting the respective input to ground. Control<br />
can be made by a relay contact, a switch or by an open collector out put.<br />
Example:<br />
External<br />
GND<br />
Mixer GND<br />
Connection specification TALLY IN (TTL interface):<br />
(absolutely max. )<br />
Mixer EBox<br />
1<br />
5<br />
6<br />
9<br />
TALLY IN<br />
DC input Voltage V I – 2V ... +7V<br />
Input High Voltage V IH ≥ 2 V or open<br />
Input Low Voltage VIL ≤ 0, 8 V<br />
Input Current High IIH internal pull-up 10kOhm<br />
Input Current Low dyn IIL ≤ 6 mA<br />
Input Current Low stat IIL ≤ 1 mA<br />
117
7. Description of the Interface Diamond digital<br />
TALLY and GPI<br />
Outputs<br />
118<br />
The TALLY and GPI outputs are laid out as relay contacts which a re controlled via<br />
open collector drivers.<br />
Example:<br />
Mixer EBox External<br />
TALLY OUT<br />
Sources<br />
SxA<br />
SxB<br />
Monitors<br />
AUX1<br />
Common<br />
Connection specification TALLY OUT and GPI OUT:<br />
(absolute max.)<br />
Switching current max. 1 A<br />
Switching voltage DC max. 24 V
Diamond digital<br />
GPI input<br />
(non isolated)<br />
7. Description of the Interface<br />
The switches T47, T48, T49, T56, T57, T58, T67 and T68 on the EBox controller<br />
RY1917 or RY1601 enable defineing the mode of operation for the GPI inputs.<br />
Position ”1” (to the left) is intended for the following application:<br />
A simple connection between the two connectors activates the corresponding input.<br />
This kind of control is suited for the connection to a relay contact or also to an<br />
open collector output. Please note that in this case, one of the two leads is connected<br />
with the circuit ground. Therefore, when connecting to an open collector<br />
output, no ground potential isolation is between mixer and controlling device.<br />
External Mixer EBox<br />
I L max. = ≤ 4 mA<br />
GPI IN / OUT<br />
IL<br />
VCC VCC<br />
1k 10k<br />
Controller<br />
ILCT6<br />
119
7. Description of the Interface Diamond digital<br />
GPI input<br />
(isolated)<br />
120<br />
The switches T47, T48, T49, T56, T57, T58, T67 and T68 on the EBox controller<br />
RY1917 or RY1601 enable defining the mode of operation for the GPI inputs.<br />
Position ”2” (to the right) is intended for the following application:<br />
At the two connectors, the opto coupler internal LED is made available (including<br />
drop resistor 1kOhm). With this type of control, a ground potential isolation is between<br />
mixer and controlling device. However, the controlling device has to imprint<br />
a current in the LED i.e. a simple contact is not suited in this case.<br />
External Mixer Ebox<br />
U L<br />
IL<br />
U L min 3 V<br />
U L typ 5 V<br />
U L max. one 24 V<br />
I L (UL=5V) 4 mA<br />
I L (UL=24V) 24 mA<br />
GPI IN / OUT<br />
anode<br />
cathode<br />
Controller<br />
1k<br />
VCC<br />
10k<br />
ILCT6
Diamond digital<br />
Tally distributor<br />
EBox<br />
7. Description of the Interface<br />
As an accessory, the tally distributor RC1959 is available for the mixer making<br />
available all inputs and outputs for TALLY and GPI on connector blocks. For this<br />
purpose, the tally distributor can be mounted in the rear of the equipm ent cabinet<br />
and is connected with five connector cables to the TALLY / GPI connectors of the<br />
Ebox terminal panel. The Tally distributor consists of distribution board RC1940<br />
and the five connector cables. The cable length is 2 m. Therefore, the distributor<br />
can be mounted at a free position within the equipment cabinet. If, depending on<br />
the projection, long cable lengths are required, make sure it is to be that protected<br />
cables are used. The pin assignment is 1:1.<br />
BTS cable with variable length:<br />
Cable Type Order number<br />
50-pin plug/hub S5050–001 0 979 093 001<br />
25-pin plug/hub S2525–001 0 979 063 001<br />
9-pin plug/hub S0909–001 0 979 033 001<br />
When ordering, indicate the cable length.<br />
Tally Tally Out Out<br />
GPI In/Out Tally In<br />
1 2<br />
1 2<br />
TALLY IN 1 TALLY IN 2 TALLY OUT 1 TALLY OUT 2 GPI IN/OUT<br />
TALLY IN TALLY IN<br />
BTS<br />
RC 1940<br />
TALLY DISTRIBUTOR<br />
TALLY SOURCE OUT TALLY MON OUT<br />
Cabling between EBox<br />
and tally distributor<br />
J1 J2 J3 J4 J5<br />
GPI IN<br />
GPI OUT<br />
DC IN<br />
121
7. Description of the Interface Diamond digital<br />
122<br />
The connector blocks are combined to functional groups labelled accordingly:<br />
TALLY IN<br />
TALLY SOURCE OUT<br />
TALLY MON OUT<br />
GPI IN<br />
GPI OUT
Diamond digital<br />
TALLY IN 1 TALLY IN 2 TALLY OUT 1 TALLY OUT 2 GPI IN/OUT<br />
1 1<br />
J1 J2 J3 J4 J5<br />
OUT1<br />
OUT2<br />
OUT3<br />
OUT4<br />
OUT5<br />
OUT6<br />
OUT7<br />
OUT8<br />
GND<br />
1<br />
2<br />
3<br />
1<br />
2<br />
3<br />
1<br />
2<br />
3<br />
J54<br />
IN1A<br />
IN1K<br />
in2A<br />
IN2K<br />
IN3A<br />
IN3K<br />
IN4A<br />
IN4K<br />
IN5A<br />
IN5K<br />
IN6A<br />
IN6K<br />
IN7A<br />
IN7K<br />
IN8A<br />
IN8K<br />
1<br />
J482<br />
3<br />
1<br />
J492<br />
3<br />
1<br />
J502<br />
3<br />
1<br />
J512<br />
3<br />
J521<br />
2<br />
J531<br />
2<br />
AUX4<br />
COM+<br />
AUX5<br />
COM+<br />
AUX6<br />
COM+<br />
DVE1<br />
COM+<br />
DVE2<br />
COM+<br />
PVW<br />
COM+<br />
DSK1<br />
COM+<br />
DSK2<br />
COM+<br />
ME1 1<br />
COM+ J42 2<br />
ME2 3<br />
COM+ 1<br />
PP J43 2<br />
COM+ 3<br />
CLEAN 1<br />
COM+ J44 2<br />
PST 3<br />
COM+ 1<br />
AUX1 J45 2<br />
COM+ 3<br />
AUX2 J46 1<br />
COM+ 2<br />
AUX3 J47 1<br />
COM+ 2<br />
1<br />
J36 2<br />
3<br />
1<br />
J37 2<br />
3<br />
1<br />
J38 2<br />
3<br />
1<br />
J39 2<br />
3<br />
J40 1<br />
2<br />
J41 1<br />
2<br />
S25A<br />
S25B<br />
S26A<br />
S26B<br />
S27A<br />
S27B<br />
S28A<br />
S28B<br />
S29A<br />
S29B<br />
S30A<br />
S30B<br />
S31A<br />
S31B<br />
S32A<br />
S32B<br />
1<br />
J30 2<br />
3<br />
1<br />
J31 2<br />
3<br />
1<br />
J32 2<br />
3<br />
1<br />
J33 2<br />
3<br />
J34 1<br />
2<br />
J35 1<br />
2<br />
S17A<br />
S17B<br />
S18A<br />
S18B<br />
S19A<br />
S19B<br />
S20A<br />
S20B<br />
S21A<br />
S21B<br />
S22A<br />
S22B<br />
S23A<br />
S23B<br />
S24A<br />
S24B<br />
1<br />
J24 2<br />
3<br />
1<br />
J25 2<br />
3<br />
1<br />
J26 2<br />
3<br />
1<br />
J27 2<br />
3<br />
J28 1<br />
2<br />
J29 1<br />
2<br />
S9A<br />
S9B<br />
S10A<br />
S10B<br />
S11A<br />
S11B<br />
S12A<br />
S12B<br />
S13A<br />
S13B<br />
S14A<br />
S14B<br />
S15A<br />
S15B<br />
S16A<br />
S16B<br />
1<br />
J18 2<br />
3<br />
1<br />
J19 2<br />
3<br />
1<br />
J20 2<br />
3<br />
1<br />
J21 2<br />
3<br />
J22 1<br />
2<br />
J23 1<br />
2<br />
S1A<br />
S1B<br />
S2A<br />
S2B<br />
S3A<br />
S3B<br />
S4A<br />
S4B<br />
S5A<br />
S5B<br />
S6A<br />
S6B<br />
S7A<br />
S7B<br />
S8A<br />
S8B<br />
1<br />
2<br />
3<br />
1<br />
2<br />
3<br />
1<br />
2<br />
3<br />
1<br />
2<br />
3<br />
1<br />
2<br />
1<br />
2<br />
DVE1<br />
DVE2 J12<br />
PVW<br />
CLEAN<br />
AUX5 J13<br />
AUX6<br />
AUX7<br />
AUX8 J14<br />
GND<br />
1<br />
2<br />
3<br />
1<br />
2<br />
3<br />
1<br />
2<br />
3<br />
J9<br />
MAIN PP<br />
READY<br />
ME1<br />
ME2<br />
AUX1<br />
AUX2<br />
AUX3<br />
AUX4<br />
GND<br />
1<br />
2<br />
3<br />
1<br />
2<br />
3<br />
1<br />
2<br />
3<br />
J6<br />
J55<br />
J10<br />
J7<br />
J56<br />
J11<br />
J8<br />
GPI OUT<br />
J57 COM–<br />
COM+<br />
1<br />
2<br />
DC IN<br />
J15<br />
TALLY IN TALLY IN<br />
J16<br />
J17<br />
GPI IN<br />
TALLY SOURCE OUT TALLY MON OUT<br />
BTS<br />
RC 1940<br />
TALLY DISTRIBUTOR<br />
+ –<br />
CAMERA<br />
Power Supply<br />
DC 24V<br />
MONITOR<br />
Monitor Tally<br />
passive<br />
Quellen-Signalisierung<br />
7. Description of the Interface<br />
MONITOR<br />
Connection example for source tally<br />
and monitor tally (active / passive)<br />
Monitor Tally<br />
aktive<br />
123
7. Description of the Interface Diamond digital<br />
7.7 FUNCTION OF TALLY IN CONNECTORS<br />
Note<br />
124<br />
TALLY IN 1 Pin Signal<br />
DD busses<br />
9-pin D-type<br />
female<br />
1<br />
2<br />
3<br />
4<br />
5<br />
6<br />
7<br />
8<br />
9<br />
MAIN=PP<br />
READY<br />
ME1<br />
ME2<br />
AUX1<br />
AUX2<br />
AUX3<br />
AUX4<br />
GND<br />
TALLY IN 2 Pin Signal<br />
DD busses<br />
9-pin D-type<br />
female<br />
1<br />
2<br />
3<br />
4<br />
5<br />
6<br />
7<br />
8<br />
9<br />
DVE1 (Video)<br />
DVE2 (Video)<br />
PVW<br />
CLEAN<br />
AUX5<br />
AUX6<br />
DVE1 (Key)<br />
DVE2 (Key)<br />
GND<br />
<strong>DD5</strong> <strong>DD10</strong> <strong>DD20</strong> <strong>DD30</strong> <strong>DD20</strong>M<br />
–<br />
x<br />
x<br />
–<br />
x<br />
–<br />
–<br />
–<br />
x<br />
–<br />
x<br />
x<br />
–<br />
x<br />
x<br />
x<br />
–<br />
x<br />
x<br />
x<br />
x<br />
–<br />
x<br />
x<br />
x<br />
x<br />
x<br />
<strong>DD5</strong> <strong>DD10</strong> <strong>DD20</strong> <strong>DD30</strong> <strong>DD20</strong>M<br />
x<br />
–<br />
–<br />
x<br />
–<br />
–<br />
x<br />
–<br />
x<br />
1. The mixers <strong>DD5</strong> and <strong>DD10</strong> have ME=MAIN OUT. For this reason, the studio<br />
tally has to be switched to ME1!<br />
For the mixers <strong>DD20</strong>, <strong>DD30</strong> and <strong>DD20</strong>M, the studio tally has to be switched to<br />
PP!<br />
2. Signal READY open (not connected to ground):<br />
Via the TALLY OUT connectors, the mixer tallies the picture sources being involved<br />
in the output picture of the mixer.<br />
Signal READY connected to ground:<br />
Tallying the picture source depends on whether the sources are involved in the<br />
output picture of the studio. For this reason, apply via the diverse TALLY IN connectors<br />
(see thetable above) in connection with a studio tally distributor, an information<br />
to the mixer saying which one of the mixer output buses is involved<br />
in the studio output picture.<br />
If no tally information is applied, the picture sources connected to the mixer, are<br />
also not tallied with ”On Air” – independent of the mixer state.<br />
x<br />
–<br />
–<br />
x<br />
–<br />
–<br />
x<br />
–<br />
x<br />
x<br />
x<br />
x<br />
x<br />
x<br />
x<br />
x<br />
x<br />
x<br />
x<br />
x<br />
x<br />
x<br />
x<br />
x<br />
x<br />
x<br />
x<br />
x<br />
x<br />
x<br />
x<br />
x<br />
x<br />
x<br />
x<br />
x<br />
x<br />
x<br />
–<br />
–<br />
x<br />
x<br />
x<br />
x<br />
x<br />
–<br />
–<br />
x<br />
x<br />
x<br />
–<br />
–<br />
–<br />
x
<strong>DD5</strong>, <strong>DD10</strong>, <strong>DD20</strong>, <strong>DD30</strong><br />
8. DVE AND EDITORS<br />
8.1 TECHNICAL SETUP AND WIRING<br />
Video connection of<br />
the DVE device<br />
8. DVE and Editors<br />
The DVE device is connected at the ”DVE Key” and ”DVE Fill” outputs of the<br />
switcher.<br />
If the DVE device is not equipped with a ”Flying Key” channel, only the ”Fill” connection<br />
is required.<br />
Connect the key and fill outputs of the DVE device as inputs to the switcher.<br />
ÁÁÁÁÁÁÁÁ ÁÁÁÁÁÁÁÁÁÁÁÁÁÁÁÁÁÁÁÁÁÁÁÁÁ<br />
ÁÁÁÁÁÁÁÁÁÁÁÁÁÁÁÁÁÁÁÁÁÁÁÁÁ<br />
ÁÁÁÁÁÁÁÁ<br />
ÁÁÁÁÁÁÁÁÁÁÁÁÁÁÁÁÁÁÁÁÁÁÁÁÁÁÁÁÁÁÁÁÁ<br />
ÁÁÁÁÁÁÁÁÁÁÁÁÁÁÁÁÁÁÁÁÁÁÁÁÁ<br />
ÁÁÁÁÁÁÁÁ<br />
ÁÁÁÁÁÁÁÁÁÁÁÁÁÁÁÁÁÁÁÁÁÁÁÁÁÁÁÁÁÁÁÁÁ<br />
ÁÁÁÁÁÁÁÁÁÁÁÁÁÁÁÁÁÁÁÁÁÁÁÁÁ<br />
ÁÁÁÁÁÁÁÁ ÁÁÁÁÁÁÁÁÁÁÁÁÁÁÁÁÁÁÁÁÁÁÁÁÁ<br />
ÁÁÁÁÁÁÁÁ<br />
Assignment of video<br />
sources in the<br />
switcher<br />
The inputs to which the DVE fill and key signals are connected are selected in the<br />
switcher setup.<br />
This setting will be required for the FX Loop mode.<br />
ÁÁÁÁÁÁÁÁÁÁÁÁÁÁÁÁÁÁÁÁÁÁÁÁÁÁÁÁÁÁÁÁÁ<br />
ÁÁÁÁÁÁÁÁÁÁÁÁÁÁÁÁÁÁÁÁÁÁÁÁÁ<br />
ÁÁÁÁÁÁÁÁ<br />
ÁÁÁÁÁÁÁÁÁÁÁÁÁÁÁÁÁÁÁÁÁÁÁÁÁÁÁÁÁÁÁÁÁ<br />
ÁÁÁÁÁÁÁÁÁÁÁÁÁÁÁÁÁÁÁÁÁÁÁÁÁ<br />
ÁÁÁÁÁÁÁÁ ÁÁÁÁÁÁÁÁÁÁÁÁÁÁÁÁÁÁÁÁÁÁÁÁÁ<br />
ÁÁÁÁÁÁÁÁ<br />
Control connection of<br />
the DVE device<br />
Connect the DVE device and the switcher via their remote control ports. In most<br />
cases this is done using a 9 pin 1:1 D-type cable and the RS-422 interface.<br />
For this purpose the ports 1, 2 and 3 are provided at the switcher.<br />
Each of these ports may be used for the connection of a DVE device. The desired<br />
port is set in the switcher setup.<br />
ÁÁÁÁÁÁÁÁÁÁÁÁÁÁÁÁÁÁÁÁÁÁÁÁÁÁÁÁÁÁÁÁÁ<br />
ÁÁÁÁÁÁÁÁÁÁÁÁÁÁÁÁÁÁÁÁÁÁÁÁÁ<br />
ÁÁÁÁÁÁÁÁ<br />
ÁÁÁÁÁÁÁÁÁÁÁÁÁÁÁÁÁÁÁÁÁÁÁÁÁÁÁÁÁÁÁÁÁ<br />
ÁÁÁÁÁÁÁÁÁÁÁÁÁÁÁÁÁÁÁÁÁÁÁÁÁ<br />
ÁÁÁÁÁÁÁÁ<br />
Exception: The DVE types A53D and A57 may only be connected at port 1<br />
using RS-232 interface.<br />
ÁÁÁÁÁÁÁÁÁÁÁÁÁÁÁÁÁÁÁÁÁÁÁÁÁ<br />
ÁÁÁÁÁÁÁÁ<br />
Assignment of the<br />
protocol in the<br />
switcher<br />
Designation of the sockets on the terminal boards<br />
<strong>DD5</strong>/<strong>DD10</strong><br />
<strong>DD20</strong>/<strong>DD30</strong><br />
ÁÁÁÁÁÁÁÁÁ<br />
ÁÁÁÁÁÁÁÁÁ<br />
ÁÁÁÁÁÁÁÁÁ<br />
ÁÁÁÁÁÁÁÁÁ<br />
ÁÁÁÁÁÁÁÁÁ<br />
ÁÁÁÁÁÁÁÁÁ<br />
Port 1 RS-232<br />
J6 Serial Port 4<br />
J9 Serial Port 232<br />
ÁÁÁÁÁÁÁÁÁ<br />
ÁÁÁÁÁÁÁÁÁ<br />
ÁÁÁÁÁÁÁÁÁ ÁÁÁÁÁÁÁÁÁ<br />
ÁÁÁÁÁÁÁÁÁ<br />
ÁÁÁÁÁÁÁÁÁ ÁÁÁÁÁÁÁÁÁ ÁÁÁÁÁÁÁÁÁ<br />
ÁÁÁÁÁÁÁÁÁ<br />
ÁÁÁÁÁÁÁÁÁ<br />
Port 1 RS-422<br />
Port 2 RS-422<br />
J2 Serial Port 1<br />
J3 Serial Port 2<br />
J10 Serial Port 1<br />
J11 Serial Port 2<br />
ÁÁÁÁÁÁÁÁÁ<br />
ÁÁÁÁÁÁÁÁÁ<br />
ÁÁÁÁÁÁÁÁÁ<br />
ÁÁÁÁÁÁÁÁÁ<br />
ÁÁÁÁÁÁÁÁÁ ÁÁÁÁÁÁÁÁÁ ÁÁÁÁÁÁÁÁÁ<br />
ÁÁÁÁÁÁÁÁÁ<br />
ÁÁÁÁÁÁÁÁÁ<br />
Port 3 RS-422<br />
J5 Serial Port 3<br />
J12 Serial Port 3<br />
ÁÁÁÁÁÁÁÁÁ<br />
ÁÁÁÁÁÁÁÁÁ<br />
ÁÁÁÁÁÁÁÁÁ ÁÁÁÁÁÁÁÁÁ<br />
ÁÁÁÁÁÁÁÁÁ<br />
ÁÁÁÁÁÁÁÁÁ<br />
ÁÁÁÁÁÁÁÁÁ<br />
Cross-bar control<br />
–<br />
J13 Serial Port XBAR<br />
ÁÁÁÁÁÁÁÁÁ<br />
ÁÁÁÁÁÁÁÁÁ<br />
ÁÁÁÁÁÁÁÁÁ ÁÁÁÁÁÁÁÁÁ<br />
ÁÁÁÁÁÁÁÁÁ<br />
ÁÁÁÁÁÁÁÁÁ<br />
ÁÁÁÁÁÁÁÁÁ<br />
The switch-over between port 1 with RS-232 and port 1 with RS-422 is made with<br />
the selection of the corresponding DVE protocol.<br />
ÁÁÁÁÁÁÁÁÁ ÁÁÁÁÁÁÁÁÁ<br />
ÁÁÁÁÁÁÁÁÁ<br />
Select the corresponding DVE protocol (for the port at which the DVE device is<br />
connected). A general DVE type is ”VTR protocol”.<br />
ÁÁÁÁÁÁÁÁ ÁÁÁÁÁÁÁÁÁÁÁÁÁÁÁÁÁÁÁÁÁÁÁÁÁ<br />
ÁÁÁÁÁÁÁÁÁÁÁÁÁÁÁÁÁÁÁÁÁÁÁÁÁ<br />
ÁÁÁÁÁÁÁÁ<br />
ÁÁÁÁÁÁÁÁÁÁÁÁÁÁÁÁÁÁÁÁÁÁÁÁÁÁÁÁÁÁÁÁÁ<br />
ÁÁÁÁÁÁÁÁÁÁÁÁÁÁÁÁÁÁÁÁÁÁÁÁÁ<br />
ÁÁÁÁÁÁÁÁ<br />
125
8. DVE and Editors <strong>DD5</strong>, <strong>DD10</strong>, <strong>DD20</strong>, <strong>DD30</strong><br />
8.2 PREPARATIONS AT THE DVE DEVICE<br />
Sequence generation DVE sequences for full transitions must start with a full-format, undistorted and correctly<br />
positioned picture and must end with a picture that is no longer visible.<br />
Based on our experience with various DVEs, we do not recommend programming<br />
DVE switching functions such as Freeze, GPI trigger, etc. into a DVE sequence that<br />
is to be used as transition from the switcher. Such functions are often not recalled<br />
when the transition is executed. Presumably this is a result of the key frame interpolation<br />
in the DVE. In no case the error should be localized in the DVE.<br />
Effects including switching functions can only be run perfectly in original speed.<br />
Sequence selection Recall DVE sequences that are to be controlled from the switcher and load them<br />
into the snapshot registers of the DVE.<br />
Scaling For most DVE devices a scaling of the DVE sequence to a certain time will be<br />
required in order to coordinate the movement of the switcher fader with the start<br />
and the end of the DVE sequence.<br />
Remote control Switch DVE device to Remote Control and/or enable the remote control.<br />
126
<strong>DD5</strong>, <strong>DD10</strong>, <strong>DD20</strong>, <strong>DD30</strong><br />
8.3 DEVICE SPECIFIC NOTES<br />
8.3.1 PINNACLE PRIZM<br />
8. DVE and Editors<br />
Connection cable: ÁÁÁÁÁÁÁÁÁÁÁÁÁÁÁÁÁÁÁÁÁÁÁÁÁ<br />
Standard RS-422 cable<br />
ÁÁÁÁÁÁÁÁ<br />
ÁÁÁÁÁÁÁÁÁÁÁÁÁÁÁÁÁÁÁÁÁÁÁÁÁ<br />
ÁÁÁÁÁÁÁÁ<br />
DD switcher setup<br />
and installation:<br />
Serial port: Port 1 or port 2 or port 3<br />
Protocol in switcher setup: DVE PRIZM<br />
ÁÁÁÁÁÁÁÁÁÁÁÁÁÁÁÁÁÁÁÁÁÁÁÁÁ<br />
ÁÁÁÁÁÁÁÁ<br />
ÁÁÁÁÁÁÁÁÁÁÁÁÁÁÁÁÁÁÁÁÁÁÁÁÁ<br />
ÁÁÁÁÁÁÁÁÁÁÁÁÁÁÁÁÁÁÁÁÁÁÁÁÁ<br />
ÁÁÁÁÁÁÁÁ<br />
DVE setups and<br />
installations:<br />
Enable RS-422 VTR.<br />
ÁÁÁÁÁÁÁÁÁÁÁÁÁÁÁÁÁÁÁÁÁÁÁÁÁÁÁÁÁÁÁÁÁ<br />
ÁÁÁÁÁÁÁÁÁÁÁÁÁÁÁÁÁÁÁÁÁÁÁÁÁ<br />
ÁÁÁÁÁÁÁÁ ÁÁÁÁÁÁÁÁÁÁÁÁÁÁÁÁÁÁÁÁÁÁÁÁÁ<br />
ÁÁÁÁÁÁÁÁ<br />
ÁÁÁÁÁÁÁÁÁÁÁÁÁÁÁÁÁÁÁÁÁÁÁÁÁÁÁÁÁÁÁÁÁ<br />
ÁÁÁÁÁÁÁÁÁÁÁÁÁÁÁÁÁÁÁÁÁÁÁÁÁ<br />
ÁÁÁÁÁÁÁÁ<br />
For DVE effect generation<br />
please note:<br />
Scaling to 30 seconds<br />
(problem with DVEator as a result of limited storage capacity).<br />
ÁÁÁÁÁÁÁÁÁÁÁÁÁÁÁÁÁÁÁÁÁÁÁÁÁ<br />
ÁÁÁÁÁÁÁÁ<br />
ÁÁÁÁÁÁÁÁÁÁÁÁÁÁÁÁÁÁÁÁÁÁÁÁÁ<br />
ÁÁÁÁÁÁÁÁÁÁÁÁÁÁÁÁÁÁÁÁÁÁÁÁÁ<br />
ÁÁÁÁÁÁÁÁ<br />
ÁÁÁÁÁÁÁÁÁÁÁÁÁÁÁÁÁÁÁÁÁÁÁÁÁÁÁÁÁÁÁÁÁ<br />
ÁÁÁÁÁÁÁÁÁÁÁÁÁÁÁÁÁÁÁÁÁÁÁÁÁ<br />
ÁÁÁÁÁÁÁÁ ÁÁÁÁÁÁÁÁÁÁÁÁÁÁÁÁÁÁÁÁÁÁÁÁÁ<br />
ÁÁÁÁÁÁÁÁ<br />
Possible<br />
functions:<br />
Sequence selection from DD switcher.<br />
Sequence run with DD fader.<br />
ÁÁÁÁÁÁÁÁÁÁÁÁÁÁÁÁÁÁÁÁÁÁÁÁÁÁÁÁÁÁÁÁÁ<br />
ÁÁÁÁÁÁÁÁÁÁÁÁÁÁÁÁÁÁÁÁÁÁÁÁÁ<br />
ÁÁÁÁÁÁÁÁ<br />
Particularities:<br />
• Stored events (Freeze, GPI trigger, etc.)<br />
may be lost during recalling.<br />
ÁÁÁÁÁÁÁÁÁÁÁÁÁÁÁÁÁÁÁÁÁÁÁÁÁ<br />
ÁÁÁÁÁÁÁÁ<br />
ÁÁÁÁÁÁÁÁÁÁÁÁÁÁÁÁÁÁÁÁÁÁÁÁÁ<br />
ÁÁÁÁÁÁÁÁÁÁÁÁÁÁÁÁÁÁÁÁÁÁÁÁÁ<br />
ÁÁÁÁÁÁÁÁ<br />
• At present the DVE Aux buses cannot be remote controlled.<br />
ÁÁÁÁÁÁÁÁÁÁÁÁÁÁÁÁÁÁÁÁÁÁÁÁÁÁÁÁÁÁÁÁÁ<br />
ÁÁÁÁÁÁÁÁÁÁÁÁÁÁÁÁÁÁÁÁÁÁÁÁÁ<br />
ÁÁÁÁÁÁÁÁ<br />
ÁÁÁÁÁÁÁÁÁÁÁÁÁÁÁÁÁÁÁÁÁÁÁÁÁÁÁÁÁÁÁÁÁ<br />
ÁÁÁÁÁÁÁÁÁÁÁÁÁÁÁÁÁÁÁÁÁÁÁÁÁ<br />
ÁÁÁÁÁÁÁÁ ÁÁÁÁÁÁÁÁÁÁÁÁÁÁÁÁÁÁÁÁÁÁÁÁÁ<br />
ÁÁÁÁÁÁÁÁ<br />
Pinnacle (2 channel):<br />
• Each DVE requires its own port at the switcher.<br />
This is easy to understand as each DVE can also be used as single-channel<br />
DVE.<br />
ÁÁÁÁÁÁÁÁÁÁÁÁÁÁÁÁÁÁÁÁÁÁÁÁÁÁÁÁÁÁÁÁÁ<br />
ÁÁÁÁÁÁÁÁÁÁÁÁÁÁÁÁÁÁÁÁÁÁÁÁÁ<br />
ÁÁÁÁÁÁÁÁ<br />
• The switcher cannot control both ports synchronously. Synchronous control is<br />
possible with the controls at the DVEs.<br />
With the switcher synchronous control is only possible with one wipe with<br />
EXTRA (1 ME controls only the DVE without video function).<br />
ÁÁÁÁÁÁÁÁÁÁÁÁÁÁÁÁÁÁÁÁÁÁÁÁÁÁÁÁÁÁÁÁÁ<br />
ÁÁÁÁÁÁÁÁÁÁÁÁÁÁÁÁÁÁÁÁÁÁÁÁÁ<br />
ÁÁÁÁÁÁÁÁ<br />
ÁÁÁÁÁÁÁÁÁÁÁÁÁÁÁÁÁÁÁÁÁÁÁÁÁÁÁÁÁÁÁÁÁ<br />
ÁÁÁÁÁÁÁÁÁÁÁÁÁÁÁÁÁÁÁÁÁÁÁÁÁ<br />
ÁÁÁÁÁÁÁÁ<br />
• The digital Pinnacle version does not permit a transition to a background.<br />
ÁÁÁÁÁÁÁÁÁÁÁÁÁÁÁÁÁÁÁÁÁÁÁÁÁÁÁÁÁÁÁÁÁ<br />
ÁÁÁÁÁÁÁÁÁÁÁÁÁÁÁÁÁÁÁÁÁÁÁÁÁ<br />
ÁÁÁÁÁÁÁÁ<br />
ÁÁÁÁÁÁÁÁÁÁÁÁÁÁÁÁÁÁÁÁÁÁÁÁÁÁÁÁÁÁÁÁÁ<br />
ÁÁÁÁÁÁÁÁÁÁÁÁÁÁÁÁÁÁÁÁÁÁÁÁÁ<br />
ÁÁÁÁÁÁÁÁ<br />
127
8. DVE and Editors <strong>DD5</strong>, <strong>DD10</strong>, <strong>DD20</strong>, <strong>DD30</strong><br />
8.3.2 ABEKAS A 57 WITH VTR PROTOCOL<br />
Connection cable: ÁÁÁÁÁÁÁÁÁÁÁÁÁÁÁÁÁÁÁÁÁÁÁÁÁ<br />
Standard RS-422 cable<br />
ÁÁÁÁÁÁÁÁ<br />
ÁÁÁÁÁÁÁÁÁÁÁÁÁÁÁÁÁÁÁÁÁÁÁÁÁ<br />
ÁÁÁÁÁÁÁÁ<br />
DD switcher setup<br />
and installation:<br />
ÁÁÁÁÁÁÁÁÁÁÁÁÁÁÁÁÁÁÁÁÁÁÁÁÁ<br />
ÁÁÁÁÁÁÁÁ<br />
ÁÁÁÁÁÁÁÁÁÁÁÁÁÁÁÁÁÁÁÁÁÁÁÁÁÁÁÁÁÁÁÁÁ<br />
ÁÁÁÁÁÁÁÁÁÁÁÁÁÁÁÁÁÁÁÁÁÁÁÁÁ<br />
ÁÁÁÁÁÁÁÁ<br />
DVE setups and<br />
installations:<br />
ÁÁÁÁÁÁÁÁÁÁÁÁÁÁÁÁÁÁÁÁÁÁÁÁÁÁÁÁÁÁÁÁÁ<br />
ÁÁÁÁÁÁÁÁÁÁÁÁÁÁÁÁÁÁÁÁÁÁÁÁÁ<br />
ÁÁÁÁÁÁÁÁ ÁÁÁÁÁÁÁÁÁÁÁÁÁÁÁÁÁÁÁÁÁÁÁÁÁ<br />
ÁÁÁÁÁÁÁÁ<br />
128<br />
Serial port: Port 1 or port 2 or port 3<br />
Protocol in switcher setup: DVE VTR<br />
Select Sony protocol.<br />
Set Edit Offset to one minute.<br />
Enable remote control on A 57 control unit.<br />
ÁÁÁÁÁÁÁÁÁÁÁÁÁÁÁÁÁÁÁÁÁÁÁÁÁÁÁÁÁÁÁÁÁ<br />
ÁÁÁÁÁÁÁÁÁÁÁÁÁÁÁÁÁÁÁÁÁÁÁÁÁ<br />
ÁÁÁÁÁÁÁÁ<br />
For DVE effect generation<br />
please note:<br />
Set run time (wipe duration in time menu) to 30 seconds.<br />
ÁÁÁÁÁÁÁÁÁÁÁÁÁÁÁÁÁÁÁÁÁÁÁÁÁÁÁÁÁÁÁÁÁ<br />
ÁÁÁÁÁÁÁÁÁÁÁÁÁÁÁÁÁÁÁÁÁÁÁÁÁ<br />
ÁÁÁÁÁÁÁÁ ÁÁÁÁÁÁÁÁÁÁÁÁÁÁÁÁÁÁÁÁÁÁÁÁÁ<br />
ÁÁÁÁÁÁÁÁ<br />
ÁÁÁÁÁÁÁÁÁÁÁÁÁÁÁÁÁÁÁÁÁÁÁÁÁÁÁÁÁÁÁÁÁ<br />
ÁÁÁÁÁÁÁÁÁÁÁÁÁÁÁÁÁÁÁÁÁÁÁÁÁ<br />
ÁÁÁÁÁÁÁÁ<br />
Possible<br />
functions:<br />
Sequence run with switcher fader.<br />
ÁÁÁÁÁÁÁÁÁÁÁÁÁÁÁÁÁÁÁÁÁÁÁÁÁ<br />
ÁÁÁÁÁÁÁÁ<br />
ÁÁÁÁÁÁÁÁÁÁÁÁÁÁÁÁÁÁÁÁÁÁÁÁÁÁÁÁÁÁÁÁÁ<br />
ÁÁÁÁÁÁÁÁÁÁÁÁÁÁÁÁÁÁÁÁÁÁÁÁÁ<br />
ÁÁÁÁÁÁÁÁ<br />
Impossible<br />
functions:<br />
Sequence selection.<br />
ÁÁÁÁÁÁÁÁÁÁÁÁÁÁÁÁÁÁÁÁÁÁÁÁÁÁÁÁÁÁÁÁÁ<br />
ÁÁÁÁÁÁÁÁÁÁÁÁÁÁÁÁÁÁÁÁÁÁÁÁÁ<br />
ÁÁÁÁÁÁÁÁ ÁÁÁÁÁÁÁÁÁÁÁÁÁÁÁÁÁÁÁÁÁÁÁÁÁ<br />
ÁÁÁÁÁÁÁÁ<br />
ÁÁÁÁÁÁÁÁÁÁÁÁÁÁÁÁÁÁÁÁÁÁÁÁÁÁÁÁÁÁÁÁÁ<br />
ÁÁÁÁÁÁÁÁÁÁÁÁÁÁÁÁÁÁÁÁÁÁÁÁÁ<br />
ÁÁÁÁÁÁÁÁ<br />
ÁÁÁÁÁÁÁÁÁÁÁÁÁÁÁÁÁÁÁÁÁÁÁÁÁ<br />
ÁÁÁÁÁÁÁÁ
<strong>DD5</strong>, <strong>DD10</strong>, <strong>DD20</strong>, <strong>DD30</strong><br />
8.3.3 ABEKAS A57 WITH RS232 PROTOCOL<br />
Connection cable:<br />
DD switcher setup<br />
and installation:<br />
Diamond<br />
Abekas A57<br />
9-pin 9-pin<br />
2<br />
8<br />
TxD RxD<br />
3<br />
2<br />
RxD<br />
TxD<br />
4<br />
RTS<br />
5<br />
CTS<br />
7<br />
4<br />
GND<br />
GND<br />
Note: Do not use this cable with the DD35!<br />
Serial port: RS-232 interface<br />
– <strong>DD5</strong>/<strong>DD10</strong> = port4<br />
– <strong>DD20</strong>/<strong>DD30</strong> = port 232<br />
Protocol in switcher setup: DVE A53D<br />
8. DVE and Editors<br />
ÁÁÁÁÁÁÁÁ ÁÁÁÁÁÁÁÁÁÁÁÁÁÁÁÁÁÁÁÁÁÁÁ<br />
ÁÁÁÁÁÁÁÁÁÁÁÁÁÁÁÁÁÁÁÁÁÁÁ<br />
ÁÁÁÁÁÁÁÁ<br />
ÁÁÁÁÁÁÁÁ ÁÁÁÁÁÁÁÁÁÁÁÁÁÁÁÁÁÁÁÁÁÁÁ<br />
ÁÁÁÁÁÁÁÁÁÁÁÁÁÁÁÁÁÁÁÁÁÁÁ<br />
ÁÁÁÁÁÁÁÁ<br />
DVE setups and<br />
installations:<br />
Port Aux B.<br />
Select RS-232 protocol for port Aux B.<br />
Set header 2 on address port to RS-232 (Techn. Guide A57, Fig. 36)<br />
Set into Slave control<br />
ÁÁÁÁÁÁÁÁ ÁÁÁÁÁÁÁÁÁÁÁÁÁÁÁÁÁÁÁÁÁÁÁ<br />
ÁÁÁÁÁÁÁÁÁÁÁÁÁÁÁÁÁÁÁÁÁÁÁ<br />
ÁÁÁÁÁÁÁÁ ÁÁÁÁÁÁÁÁÁÁÁÁÁÁÁÁÁÁÁÁÁÁÁ<br />
ÁÁÁÁÁÁÁÁ<br />
ÁÁÁÁÁÁÁÁÁÁÁÁÁÁÁÁÁÁÁÁÁÁÁÁÁÁÁÁÁÁÁ<br />
ÁÁÁÁÁÁÁÁÁÁÁÁÁÁÁÁÁÁÁÁÁÁÁ<br />
ÁÁÁÁÁÁÁÁ<br />
ÁÁÁÁÁÁÁÁ ÁÁÁÁÁÁÁÁÁÁÁÁÁÁÁÁÁÁÁÁÁÁÁ<br />
ÁÁÁÁÁÁÁÁÁÁÁÁÁÁÁÁÁÁÁÁÁÁÁ<br />
ÁÁÁÁÁÁÁÁ ÁÁÁÁÁÁÁÁÁÁÁÁÁÁÁÁÁÁÁÁÁÁÁ<br />
ÁÁÁÁÁÁÁÁ<br />
For DVE effect generation<br />
please note:<br />
No scaling required.<br />
ÁÁÁÁÁÁÁÁÁÁÁÁÁÁÁÁÁÁÁÁÁÁÁÁÁÁÁÁÁÁÁ<br />
ÁÁÁÁÁÁÁÁÁÁÁÁÁÁÁÁÁÁÁÁÁÁÁ<br />
ÁÁÁÁÁÁÁÁ<br />
Possible<br />
functions:<br />
Sequence selection from switcher.<br />
Sequence run with switcher fader.<br />
ÁÁÁÁÁÁÁÁ ÁÁÁÁÁÁÁÁÁÁÁÁÁÁÁÁÁÁÁÁÁÁÁ<br />
ÁÁÁÁÁÁÁÁÁÁÁÁÁÁÁÁÁÁÁÁÁÁÁ<br />
ÁÁÁÁÁÁÁÁ ÁÁÁÁÁÁÁÁÁÁÁÁÁÁÁÁÁÁÁÁÁÁÁ<br />
ÁÁÁÁÁÁÁÁ<br />
ÁÁÁÁÁÁÁÁÁÁÁÁÁÁÁÁÁÁÁÁÁÁÁÁÁÁÁÁÁÁÁ<br />
ÁÁÁÁÁÁÁÁÁÁÁÁÁÁÁÁÁÁÁÁÁÁÁ<br />
ÁÁÁÁÁÁÁÁ<br />
Particularities:<br />
Only possible with 9600 Baud.<br />
ÁÁÁÁÁÁÁÁÁÁÁÁÁÁÁÁÁÁÁÁÁÁÁ<br />
ÁÁÁÁÁÁÁÁ<br />
ÁÁÁÁÁÁÁÁ<br />
ÁÁÁÁÁÁÁÁÁÁÁÁÁÁÁÁÁÁÁÁÁÁÁ<br />
ÁÁÁÁÁÁÁÁÁÁÁÁÁÁÁÁÁÁÁÁÁÁÁ<br />
ÁÁÁÁÁÁÁÁ ÁÁÁÁÁÁÁÁÁÁÁÁÁÁÁÁÁÁÁÁÁÁÁ<br />
ÁÁÁÁÁÁÁÁÁÁÁÁÁÁÁÁÁÁÁÁÁÁÁ<br />
ÁÁÁÁÁÁÁÁ<br />
129
8. DVE and Editors <strong>DD5</strong>, <strong>DD10</strong>, <strong>DD20</strong>, <strong>DD30</strong><br />
8.3.4 ABEKAS A53D<br />
Connection cable:<br />
DD switcher setup<br />
and installation:<br />
130<br />
Diamond<br />
Abekas A53D<br />
9-pin 9-pin<br />
2<br />
3<br />
TxD RxD<br />
3<br />
2<br />
RxD<br />
TxD<br />
4<br />
5<br />
RTS<br />
CTS<br />
5<br />
4<br />
CTS<br />
RTS<br />
7<br />
7<br />
GND<br />
GND<br />
Serial port: RS-232 interface<br />
– <strong>DD5</strong>/<strong>DD10</strong> = port4<br />
– <strong>DD20</strong>/<strong>DD30</strong> = port 232<br />
Protocol in switcher setup: DVE A53D<br />
ÁÁÁÁÁÁÁÁ ÁÁÁÁÁÁÁÁÁÁÁÁÁÁÁÁÁÁÁÁÁÁÁÁÁ<br />
ÁÁÁÁÁÁÁÁÁÁÁÁÁÁÁÁÁÁÁÁÁÁÁÁÁ<br />
ÁÁÁÁÁÁÁÁ<br />
ÁÁÁÁÁÁÁÁÁÁÁÁÁÁÁÁÁÁÁÁÁÁÁÁÁÁÁÁÁÁÁÁÁ<br />
ÁÁÁÁÁÁÁÁÁÁÁÁÁÁÁÁÁÁÁÁÁÁÁÁÁ<br />
ÁÁÁÁÁÁÁÁ<br />
DVE setups and<br />
installations:<br />
Enable remote control on A53D control unit.<br />
ÁÁÁÁÁÁÁÁÁÁÁÁÁÁÁÁÁÁÁÁÁÁÁÁÁÁÁÁÁÁÁÁÁ<br />
ÁÁÁÁÁÁÁÁÁÁÁÁÁÁÁÁÁÁÁÁÁÁÁÁÁ<br />
ÁÁÁÁÁÁÁÁ ÁÁÁÁÁÁÁÁÁÁÁÁÁÁÁÁÁÁÁÁÁÁÁÁÁ<br />
ÁÁÁÁÁÁÁÁ<br />
ÁÁÁÁÁÁÁÁÁÁÁÁÁÁÁÁÁÁÁÁÁÁÁÁÁÁÁÁÁÁÁÁÁ<br />
ÁÁÁÁÁÁÁÁÁÁÁÁÁÁÁÁÁÁÁÁÁÁÁÁÁ<br />
ÁÁÁÁÁÁÁÁ<br />
For DVE effect generation<br />
please note:<br />
No scaling required.<br />
ÁÁÁÁÁÁÁÁÁÁÁÁÁÁÁÁÁÁÁÁÁÁÁÁÁ<br />
ÁÁÁÁÁÁÁÁ<br />
ÁÁÁÁÁÁÁÁÁÁÁÁÁÁÁÁÁÁÁÁÁÁÁÁÁÁÁÁÁÁÁÁÁ<br />
ÁÁÁÁÁÁÁÁÁÁÁÁÁÁÁÁÁÁÁÁÁÁÁÁÁ<br />
ÁÁÁÁÁÁÁÁ<br />
ÁÁÁÁÁÁÁÁÁÁÁÁÁÁÁÁÁÁÁÁÁÁÁÁÁÁÁÁÁÁÁÁÁ<br />
ÁÁÁÁÁÁÁÁÁÁÁÁÁÁÁÁÁÁÁÁÁÁÁÁÁ<br />
ÁÁÁÁÁÁÁÁ ÁÁÁÁÁÁÁÁÁÁÁÁÁÁÁÁÁÁÁÁÁÁÁÁÁ<br />
ÁÁÁÁÁÁÁÁ<br />
Possible<br />
functions:<br />
Sequence selection from switcher.<br />
Sequence run with switcher fader.<br />
ÁÁÁÁÁÁÁÁÁÁÁÁÁÁÁÁÁÁÁÁÁÁÁÁÁÁÁÁÁÁÁÁÁ<br />
ÁÁÁÁÁÁÁÁÁÁÁÁÁÁÁÁÁÁÁÁÁÁÁÁÁ<br />
ÁÁÁÁÁÁÁÁ<br />
Particularities:<br />
Only possible with 9600 Baud.<br />
ÁÁÁÁÁÁÁÁÁÁÁÁÁÁÁÁÁÁÁÁÁÁÁÁÁ<br />
ÁÁÁÁÁÁÁÁ<br />
ÁÁÁÁÁÁÁÁÁÁÁÁÁÁÁÁÁÁÁÁÁÁÁÁÁÁÁÁÁÁÁÁÁ<br />
ÁÁÁÁÁÁÁÁÁÁÁÁÁÁÁÁÁÁÁÁÁÁÁÁÁ<br />
ÁÁÁÁÁÁÁÁ<br />
ÁÁÁÁÁÁÁÁÁÁÁÁÁÁÁÁÁÁÁÁÁÁÁÁÁÁÁÁÁÁÁÁÁ<br />
ÁÁÁÁÁÁÁÁÁÁÁÁÁÁÁÁÁÁÁÁÁÁÁÁÁ<br />
ÁÁÁÁÁÁÁÁ
<strong>DD5</strong>, <strong>DD10</strong>, <strong>DD20</strong>, <strong>DD30</strong><br />
8.3.5 QUESTECH CHARISMA<br />
8. DVE and Editors<br />
Connection cable: ÁÁÁÁÁÁÁÁÁÁÁÁÁÁÁÁÁÁÁÁÁÁÁÁÁ<br />
RS-422 cable with male and female connector (assignment 1:1)<br />
ÁÁÁÁÁÁÁÁ<br />
ÁÁÁÁÁÁÁÁÁÁÁÁÁÁÁÁÁÁÁÁÁÁÁÁÁ<br />
ÁÁÁÁÁÁÁÁ<br />
DDswitcher setup<br />
and installation:<br />
Serial port: Port 1 or port 2 or port 3<br />
Protocol in switcher setup: DVE CHARIS<br />
ÁÁÁÁÁÁÁÁÁÁÁÁÁÁÁÁÁÁÁÁÁÁÁÁÁ<br />
ÁÁÁÁÁÁÁÁ<br />
ÁÁÁÁÁÁÁÁÁÁÁÁÁÁÁÁÁÁÁÁÁÁÁÁÁ<br />
ÁÁÁÁÁÁÁÁÁÁÁÁÁÁÁÁÁÁÁÁÁÁÁÁÁ<br />
ÁÁÁÁÁÁÁÁ<br />
ÁÁÁÁÁÁÁÁÁÁÁÁÁÁÁÁÁÁÁÁÁÁÁÁÁÁÁÁÁÁÁÁÁ<br />
ÁÁÁÁÁÁÁÁÁÁÁÁÁÁÁÁÁÁÁÁÁÁÁÁÁ<br />
ÁÁÁÁÁÁÁÁ ÁÁÁÁÁÁÁÁÁÁÁÁÁÁÁÁÁÁÁÁÁÁÁÁÁ<br />
ÁÁÁÁÁÁÁÁ<br />
DVE setups and<br />
installations:<br />
Set Charisma remote protocol to BVW 75.<br />
ÁÁÁÁÁÁÁÁÁÁÁÁÁÁÁÁÁÁÁÁÁÁÁÁÁÁÁÁÁÁÁÁÁ<br />
ÁÁÁÁÁÁÁÁÁÁÁÁÁÁÁÁÁÁÁÁÁÁÁÁÁ<br />
ÁÁÁÁÁÁÁÁ<br />
For DVE effect generation<br />
please note:<br />
No scaling required. Scaling is made in Charisma after effect selection<br />
from the switcher.<br />
Very long sequences may require very much<br />
computing time, i.e. long waiting period from<br />
effect selection until effect transition becomes<br />
possible.<br />
ÁÁÁÁÁÁÁÁÁÁÁÁÁÁÁÁÁÁÁÁÁÁÁÁÁ<br />
ÁÁÁÁÁÁÁÁ<br />
ÁÁÁÁÁÁÁÁ ÁÁÁÁÁÁÁÁÁÁÁÁÁÁÁÁÁÁÁÁÁÁÁÁÁ<br />
ÁÁÁÁÁÁÁÁÁÁÁÁÁÁÁÁÁÁÁÁÁÁÁÁÁ<br />
ÁÁÁÁÁÁÁÁ<br />
ÁÁÁÁÁÁÁÁÁÁÁÁÁÁÁÁÁÁÁÁÁÁÁÁÁÁÁÁÁÁÁÁÁ<br />
ÁÁÁÁÁÁÁÁÁÁÁÁÁÁÁÁÁÁÁÁÁÁÁÁÁ<br />
ÁÁÁÁÁÁÁÁ<br />
ÁÁÁÁÁÁÁÁÁÁÁÁÁÁÁÁÁÁÁÁÁÁÁÁÁÁÁÁÁÁÁÁÁ<br />
ÁÁÁÁÁÁÁÁÁÁÁÁÁÁÁÁÁÁÁÁÁÁÁÁÁ<br />
ÁÁÁÁÁÁÁÁ<br />
Possible<br />
functions:<br />
Sequence selection.<br />
Sequence run with switcher fader.<br />
ÁÁÁÁÁÁÁÁÁÁÁÁÁÁÁÁÁÁÁÁÁÁÁÁÁ<br />
ÁÁÁÁÁÁÁÁ<br />
ÁÁÁÁÁÁÁÁÁÁÁÁÁÁÁÁÁÁÁÁÁÁÁÁÁ<br />
ÁÁÁÁÁÁÁÁÁÁÁÁÁÁÁÁÁÁÁÁÁÁÁÁÁ<br />
ÁÁÁÁÁÁÁÁ<br />
For older Charisma software versions the sequence selection from the switcher<br />
must be confirmed on the main control panel.<br />
ÁÁÁÁÁÁÁÁÁÁÁÁÁÁÁÁÁÁÁÁÁÁÁÁÁÁÁÁÁÁÁÁÁ<br />
ÁÁÁÁÁÁÁÁÁÁÁÁÁÁÁÁÁÁÁÁÁÁÁÁÁ<br />
ÁÁÁÁÁÁÁÁ<br />
ÁÁÁÁÁÁÁÁÁÁÁÁÁÁÁÁÁÁÁÁÁÁÁÁÁÁÁÁÁÁÁÁÁ<br />
ÁÁÁÁÁÁÁÁÁÁÁÁÁÁÁÁÁÁÁÁÁÁÁÁÁ<br />
ÁÁÁÁÁÁÁÁ<br />
ÁÁÁÁÁÁÁÁÁÁÁÁÁÁÁÁÁÁÁÁÁÁÁÁÁ<br />
ÁÁÁÁÁÁÁÁ<br />
131
8. DVE and Editors <strong>DD5</strong>, <strong>DD10</strong>, <strong>DD20</strong>, <strong>DD30</strong><br />
8.3.6 GVG DPM 700<br />
For the GVG DPM-700, the switcher provides two protocols for different purposes.<br />
The protocols are:<br />
8.3.6.1 Selection and controls of effects<br />
Connection cable:<br />
DD switcher setup<br />
and installation:<br />
DVE setups and<br />
installations:<br />
Note when<br />
creating DVE<br />
effects:<br />
Possible<br />
functions:<br />
Special features:<br />
132<br />
1. Selection and control of DVE effects: protocol DVE DPM<br />
2. Control of aux buses by the DPN: protocol DVE DPM-AUX<br />
Tests showed that the DPM does not enable the operator to operate both functionalities<br />
at the same time without disturbances.<br />
Standard cable RS-422<br />
Serial port: Port1 or port2 or port3<br />
Protocol in switcher setup: DVE DPM<br />
Port: ACCESSORY port<br />
Protocol: Model 100 protocol<br />
On all other ports, select SONY protocol<br />
Enables: Editor has to be enabled with control by the<br />
switcher.<br />
The effects have to be scaled to 30 seconds.<br />
Effects selection is possible from the switcher.<br />
Effects control is possible with the fader lever.<br />
Effects control is possible by means of Auto Transition.<br />
With manual effects control from the switcher it may happen that contributions stored<br />
in the DVE effect (e.g. Freeze on/off, E-MEM-Recall etc.) are not reproduced<br />
(the associated key frame is not exactly selected).<br />
When on the other DPM ports, the SONY protocol is not selected, an unobjectionable<br />
functioning cannot be ensured.<br />
The tests are made with the DPM-700 Software Panel/Comm/Trans Version 2.4A.
<strong>DD5</strong>, <strong>DD10</strong>, <strong>DD20</strong>, <strong>DD30</strong><br />
8.3.6.2 Control of aux buses<br />
Connection cable:<br />
DD switcher setup<br />
and installation:<br />
DVE setups and<br />
installations:<br />
Functions:<br />
Special features:<br />
Standard cable RS-422<br />
Serial port: Port1 or port2 or port3<br />
Protocol in switcher setup: DVE DPM-AUX<br />
Enables: Key Edit Enable has to be active.<br />
8. DVE and Editors<br />
Port: SLAVE/MODEL100 port<br />
Protocol: 200-1 or 200-2 protocol<br />
Select in the Router menu AUX1, 2, 3 or 4 according to the table below:<br />
Select video signal from the switcher as router<br />
DVE1 AUX1<br />
DVE2 AUX2<br />
AUX3 AUX3<br />
AUX4 AUX4<br />
When switching the buses indicated above, the switcher transmits the coupling<br />
point information to the DPM. The DPM keeps in mind this coupling point to that<br />
side of the transformed picture being now visible. By 180 o rotation of the picture and<br />
selection of another coupling point, the latter is stored to the other side. When the<br />
DVE now turns the picture, the DVE transmits commands to the switcher in order<br />
that the switcher switches over the coupling point in time to transmit the ”other” side<br />
to the DVE.<br />
The tests are made with the DPM-700 Software Panel/Comm/Trans Version 2.4A.<br />
133
8. DVE and Editors <strong>DD5</strong>, <strong>DD10</strong>, <strong>DD20</strong>, <strong>DD30</strong><br />
8.3.7 AMPEX ADO 100 / 500 / 1000<br />
134<br />
Not tested with DD switchers. The interaction was tested with the R132ME analoge<br />
switcher. As the same protocol is used, no problems are anticipated.<br />
Connection cable: ÁÁÁÁÁÁÁÁÁÁÁÁÁÁÁÁÁÁÁÁÁÁÁÁÁ<br />
Standard RS-422 cable<br />
ÁÁÁÁÁÁÁÁ<br />
ÁÁÁÁÁÁÁÁÁÁÁÁÁÁÁÁÁÁÁÁÁÁÁÁÁ<br />
ÁÁÁÁÁÁÁÁ<br />
DD switcher setup<br />
and installation:<br />
Serial port: Port 1 or port 2 or port 3<br />
Protocol in switcher setup: DVE ADO<br />
ÁÁÁÁÁÁÁÁÁÁÁÁÁÁÁÁÁÁÁÁÁÁÁÁÁ<br />
ÁÁÁÁÁÁÁÁ<br />
ÁÁÁÁÁÁÁÁÁÁÁÁÁÁÁÁÁÁÁÁÁÁÁÁÁÁÁÁÁÁÁÁÁ<br />
ÁÁÁÁÁÁÁÁÁÁÁÁÁÁÁÁÁÁÁÁÁÁÁÁÁ<br />
ÁÁÁÁÁÁÁÁ<br />
DVE setups and<br />
installations:<br />
Select AVC protocol.<br />
ÁÁÁÁÁÁÁÁÁÁÁÁÁÁÁÁÁÁÁÁÁÁÁÁÁÁÁÁÁÁÁÁÁ<br />
ÁÁÁÁÁÁÁÁÁÁÁÁÁÁÁÁÁÁÁÁÁÁÁÁÁ<br />
ÁÁÁÁÁÁÁÁ ÁÁÁÁÁÁÁÁÁÁÁÁÁÁÁÁÁÁÁÁÁÁÁÁÁ<br />
ÁÁÁÁÁÁÁÁ<br />
ÁÁÁÁÁÁÁÁÁÁÁÁÁÁÁÁÁÁÁÁÁÁÁÁÁÁÁÁÁÁÁÁÁ<br />
ÁÁÁÁÁÁÁÁÁÁÁÁÁÁÁÁÁÁÁÁÁÁÁÁÁ<br />
ÁÁÁÁÁÁÁÁ<br />
For DVE effect generation<br />
please note:<br />
No scaling required.<br />
ÁÁÁÁÁÁÁÁÁÁÁÁÁÁÁÁÁÁÁÁÁÁÁÁÁ<br />
ÁÁÁÁÁÁÁÁ<br />
ÁÁÁÁÁÁÁÁÁÁÁÁÁÁÁÁÁÁÁÁÁÁÁÁÁ<br />
ÁÁÁÁÁÁÁÁÁÁÁÁÁÁÁÁÁÁÁÁÁÁÁÁÁ<br />
ÁÁÁÁÁÁÁÁ<br />
ÁÁÁÁÁÁÁÁÁÁÁÁÁÁÁÁÁÁÁÁÁÁÁÁÁÁÁÁÁÁÁÁÁ<br />
ÁÁÁÁÁÁÁÁÁÁÁÁÁÁÁÁÁÁÁÁÁÁÁÁÁ<br />
ÁÁÁÁÁÁÁÁ ÁÁÁÁÁÁÁÁÁÁÁÁÁÁÁÁÁÁÁÁÁÁÁÁÁ<br />
ÁÁÁÁÁÁÁÁ<br />
Possible<br />
functions:<br />
Sequence selection.<br />
Sequence run with switcher fader.<br />
ÁÁÁÁÁÁÁÁÁÁÁÁÁÁÁÁÁÁÁÁÁÁÁÁÁÁÁÁÁÁÁÁÁ<br />
ÁÁÁÁÁÁÁÁÁÁÁÁÁÁÁÁÁÁÁÁÁÁÁÁÁ<br />
ÁÁÁÁÁÁÁÁ<br />
Particularities:<br />
At present the DVE Aux buses cannot be remote controlled.<br />
ÁÁÁÁÁÁÁÁÁÁÁÁÁÁÁÁÁÁÁÁÁÁÁÁÁ<br />
ÁÁÁÁÁÁÁÁ<br />
ÁÁÁÁÁÁÁÁÁÁÁÁÁÁÁÁÁÁÁÁÁÁÁÁÁÁÁÁÁÁÁÁÁ<br />
ÁÁÁÁÁÁÁÁÁÁÁÁÁÁÁÁÁÁÁÁÁÁÁÁÁ<br />
ÁÁÁÁÁÁÁÁ<br />
ÁÁÁÁÁÁÁÁÁÁÁÁÁÁÁÁÁÁÁÁÁÁÁÁÁÁÁÁÁÁÁÁÁ<br />
ÁÁÁÁÁÁÁÁÁÁÁÁÁÁÁÁÁÁÁÁÁÁÁÁÁ<br />
ÁÁÁÁÁÁÁÁ
<strong>DD5</strong>, <strong>DD10</strong>, <strong>DD20</strong>, <strong>DD30</strong><br />
8.4 DVE CONTROL<br />
8. DVE and Editors<br />
Operating modes DVE devices that are linked to the DD switchers in terms of signals and control can<br />
be used in various modes.<br />
1. FX Loop<br />
In this mode, the video and key signals to the DVE device are switched automatically<br />
and the sequences of the DVE device are controlled with the fader in the<br />
Transition panel. The DVE device permits transitions of the background and of<br />
keyers that are controlled in the same way as wipe transitions.<br />
In this mode, Loop and DVE transition are enabled.<br />
2. FX Loop without fader<br />
In this mode, the video and key signals to the DVE device are switched manually.<br />
The control of the sequences is made with the DVE digipot in the Wipe<br />
panel, which in this mode is switched over to DVE operation.<br />
This mode permits integrating particularly static DVE effects into a picture, e.g.<br />
smaller pictures at a fixed position.<br />
In this mode, Loop is enabled and DVE transition is disabled.<br />
3. DVE effects without FX Loop<br />
In this mode, all signals applied to the switcher as well as the internal signals<br />
from the key levels may be selected as DVE input signals. The DVE sequence<br />
control is made with the DVE digipot in the Wipe panel, which in this mode is<br />
switched over to DVE operation. The DVE effect is faded-in at any key level of<br />
the switcher.<br />
In this mode, Loop and DVE transition are disabled.<br />
4. In modes 2 and 3, the DVE device may also be directly controlled by an external<br />
editor instead of the digipot. For this no control link exists between switcher and<br />
DVE.<br />
135
8. DVE and Editors <strong>DD5</strong>, <strong>DD10</strong>, <strong>DD20</strong>, <strong>DD30</strong><br />
Assignment for<br />
<strong>DD20</strong> and <strong>DD30</strong><br />
ÁÁÁÁÁÁÁÁÁ ÁÁÁÁÁÁÁÁÁÁÁÁÁÁÁÁÁÁÁÁÁÁÁÁ<br />
ÁÁÁÁÁÁÁÁÁÁÁÁÁÁÁÁÁÁÁÁÁÁÁÁ<br />
ÁÁÁÁÁÁÁÁÁ<br />
ÁÁÁÁÁÁÁÁÁÁÁÁÁÁÁÁÁÁÁÁÁÁÁÁÁÁÁÁÁÁÁÁÁ<br />
ÁÁÁÁÁÁÁÁÁÁÁÁÁÁÁÁÁÁÁÁÁÁÁÁ<br />
ÁÁÁÁÁÁÁÁÁ<br />
ÁÁÁÁÁÁÁÁÁÁÁÁÁÁÁÁÁÁÁÁÁÁÁÁÁÁÁÁÁÁÁÁÁ<br />
ÁÁÁÁÁÁÁÁÁÁÁÁÁÁÁÁÁÁÁÁÁÁÁÁ<br />
ÁÁÁÁÁÁÁÁÁ<br />
ÁÁÁÁÁÁÁÁÁÁÁÁÁÁÁÁÁÁÁÁÁÁÁÁÁÁÁÁÁÁÁÁÁ<br />
ÁÁÁÁÁÁÁÁÁÁÁÁÁÁÁÁÁÁÁÁÁÁÁÁ<br />
ÁÁÁÁÁÁÁÁÁ<br />
ÁÁÁÁÁÁÁÁÁÁÁÁÁÁÁÁÁÁÁÁÁÁÁÁÁÁÁÁÁÁÁÁÁ<br />
ÁÁÁÁÁÁÁÁÁÁÁÁÁÁÁÁÁÁÁÁÁÁÁÁ<br />
ÁÁÁÁÁÁÁÁÁ<br />
ÁÁÁÁÁÁÁÁÁÁÁÁÁÁÁÁÁÁÁÁÁÁÁÁÁÁÁÁÁÁÁÁÁ<br />
ÁÁÁÁÁÁÁÁÁÁÁÁÁÁÁÁÁÁÁÁÁÁÁÁ<br />
ÁÁÁÁÁÁÁÁÁ<br />
ÁÁÁÁÁÁÁÁÁÁÁÁÁÁÁÁÁÁÁÁÁÁÁÁÁÁÁÁÁÁÁÁÁ<br />
ÁÁÁÁÁÁÁÁÁÁÁÁÁÁÁÁÁÁÁÁÁÁÁÁ<br />
ÁÁÁÁÁÁÁÁÁ<br />
ÁÁÁÁÁÁÁÁÁÁÁÁÁÁÁÁÁÁÁÁÁÁÁÁ<br />
ÁÁÁÁÁÁÁÁÁ<br />
136<br />
Required for mode 1 only.<br />
As two DVE devices may be connected to the switchers, the DVE(s) must be<br />
assigned to the switching levels MEx/PP. One DVE may be assigned to several<br />
MEs.<br />
If only one DVE is connected, this must be assigned as well. It may be assigned to<br />
any ME and the PP stage. Any assignment will remain stored until the assignment<br />
is changed. Before the assignment, a port for the DVE must be defined by port<br />
number and port protocol in the Setup.<br />
Assignment is made as follows:<br />
• Hold down the DVE transition key in the Transition panel of the respective ME<br />
and<br />
• Press DVE1 or DVE2 of the Aux bus delegation to assign the DVE device to<br />
the respective ME.<br />
Note: Each DVE (DVE1 or DVE2) may only be selected as type of transition<br />
in one ME for one picture component.<br />
Effect selection After Remote has been enabled in the DVE, the desired DVE sequence is selected<br />
with the wipe effect keys in the Wipe panel of the switcher. <strong>DD5</strong> and <strong>DD10</strong> are<br />
switched over to DVE operation by disabling the functions (keys) Wipe1, Wipe2 or<br />
Mask. Below one of the digipots DVE is displayed.<br />
The wipe keys of a <strong>DD20</strong> switcher correspond to the DVE snapshot numbers 1-15<br />
or, when the 2nd key is actuated, to the snapshots 16 - 30.<br />
The <strong>DD5</strong> switcher features less keys for the wipe or sequence selection.<br />
The selectable sequence numbers are as follows:<br />
Mode 1<br />
FX Loop<br />
1. bank 1 - 4 2. bank 6- 9 3. bank 11 - 14<br />
with the 2nd key<br />
1. bank 16 - 19 2. bank 21 - 24 3. bank 26 - 29<br />
In the <strong>DD20</strong> and <strong>DD30</strong> switchers, the Wipe panel is switched over to DVE operation<br />
control with the DVE1 or DVE2 delegation keys. Below one of the digipots DVE is<br />
displayed.<br />
If the DVE transition type key is actuated, DVE is selected as transition for a picture<br />
component. In this case the assigned DVE device is controlled automatically and<br />
the video and key signal is switched to the DVE device for the respective picture<br />
component. The Loop mode is enabled automatically.<br />
ÁÁÁÁÁÁÁÁ ÁÁÁÁÁÁÁÁÁÁÁÁÁÁÁÁÁÁÁÁÁÁÁÁÁ<br />
ÁÁÁÁÁÁÁÁÁÁÁÁÁÁÁÁÁÁÁÁÁÁÁÁÁ<br />
ÁÁÁÁÁÁÁÁ<br />
ÁÁÁÁÁÁÁÁÁÁÁÁÁÁÁÁÁÁÁÁÁÁÁÁÁÁÁÁÁÁÁÁÁ<br />
ÁÁÁÁÁÁÁÁÁÁÁÁÁÁÁÁÁÁÁÁÁÁÁÁÁ<br />
ÁÁÁÁÁÁÁÁ<br />
Note: In order to assign the DVE transition mode to a different picture component,<br />
a different transition type, e.g. Mix or Wipe must be selected<br />
for the original picture component. If DVE transition is selected, it is<br />
not possible to change the transition component as is usual e.g. with<br />
the Mix or Wipe transition.<br />
It is particularly important to monitor this particularity when working<br />
with a <strong>DD5</strong> switcher as there are no displays above the keys for picture<br />
component.
<strong>DD5</strong>, <strong>DD10</strong>, <strong>DD20</strong>, <strong>DD30</strong><br />
Mode 2<br />
FX Loop without<br />
fader<br />
8. DVE and Editors<br />
If DVE is used as background transition, it is possible to select whether the signal is<br />
to be switched to the DVE from the Background or the Preset bus. This selection<br />
permits a determination of the type of transition.<br />
Key Preset ON: new picture comes in<br />
Key BGD* ON: old picture goes out<br />
* With some devices this key is designated PGM.<br />
If the function (key) Loop is disabled, only the DVE key signal is switched to the<br />
DVE, not the video signal. This way, a DVE effect may also be used as wipe effect<br />
without manipulating the video signal.<br />
In this mode 1 (FX Loop), the DVE is only switched into the signal path during the<br />
transition.<br />
Note: It is possible to deviate from the automatically switched video and<br />
key signals and to switch other signals. However, this may result in<br />
partly peculiar pictures.<br />
Select the DVE key (DVE1 or DVE2 in case of <strong>DD20</strong>; <strong>DD30</strong>) on the Aux bus delegation<br />
bank.<br />
Disable DVE transition in the Transition panel (if enabled).<br />
Select the picture component to be switched to the DVE (Key 1, Key 2).<br />
Enable Loop, i.e. switch DVE into the video path.<br />
ÁÁÁÁÁÁÁÁ ÁÁÁÁÁÁÁÁÁÁÁÁÁÁÁÁÁÁÁÁÁÁÁÁÁ<br />
ÁÁÁÁÁÁÁÁÁÁÁÁÁÁÁÁÁÁÁÁÁÁÁÁÁ<br />
ÁÁÁÁÁÁÁÁ<br />
ÁÁÁÁÁÁÁÁÁÁÁÁÁÁÁÁÁÁÁÁÁÁÁÁÁÁÁÁÁÁÁÁÁ<br />
ÁÁÁÁÁÁÁÁÁÁÁÁÁÁÁÁÁÁÁÁÁÁÁÁÁ<br />
ÁÁÁÁÁÁÁÁ<br />
Note: For <strong>DD20</strong>, <strong>DD30</strong>:<br />
In exceptional operating states the keys in the ”to DVE only” field may<br />
fail to respond. For the selection of a picture component, one of the<br />
keys ME1, ME2 or PP must be held down.<br />
ÁÁÁÁÁÁÁÁÁÁÁÁÁÁÁÁÁÁÁÁÁÁÁÁÁÁÁÁÁÁÁÁÁ<br />
ÁÁÁÁÁÁÁÁÁÁÁÁÁÁÁÁÁÁÁÁÁÁÁÁÁ<br />
ÁÁÁÁÁÁÁÁ<br />
The DVE digipot in the Wipe panel permits running the DVE effect. As it is difficult<br />
to achieve a continuous sequence with the digipot, this operation can only be<br />
recommended for a static DVE positioning. A uniform movement can, however, be<br />
realized with an EXTRA timeline. The picture component manipulated with the<br />
DVE can be faded with Wipe or Mix in the Transition panel.<br />
Note: Function Loop ON DVE in video path for the picture component<br />
Function Loop OFF DVE not in video path for the picture component<br />
137
8. DVE and Editors <strong>DD5</strong>, <strong>DD10</strong>, <strong>DD20</strong>, <strong>DD30</strong><br />
Mode 3<br />
DVE effects<br />
without FX Loop<br />
ÁÁÁÁÁÁÁÁ ÁÁÁÁÁÁÁÁÁÁÁÁÁÁÁÁÁÁÁÁÁÁÁÁÁ<br />
ÁÁÁÁÁÁÁÁÁÁÁÁÁÁÁÁÁÁÁÁÁÁÁÁÁ<br />
ÁÁÁÁÁÁÁÁ<br />
ÁÁÁÁÁÁÁÁÁÁÁÁÁÁÁÁÁÁÁÁÁÁÁÁÁÁÁÁÁÁÁÁÁ<br />
ÁÁÁÁÁÁÁÁÁÁÁÁÁÁÁÁÁÁÁÁÁÁÁÁÁ<br />
ÁÁÁÁÁÁÁÁ<br />
ÁÁÁÁÁÁÁÁÁÁÁÁÁÁÁÁÁÁÁÁÁÁÁÁÁÁÁÁÁÁÁÁÁ<br />
ÁÁÁÁÁÁÁÁÁÁÁÁÁÁÁÁÁÁÁÁÁÁÁÁÁ<br />
ÁÁÁÁÁÁÁÁ<br />
ÁÁÁÁÁÁÁÁÁÁÁÁÁÁÁÁÁÁÁÁÁÁÁÁÁÁÁÁÁÁÁÁÁ<br />
ÁÁÁÁÁÁÁÁÁÁÁÁÁÁÁÁÁÁÁÁÁÁÁÁÁ<br />
ÁÁÁÁÁÁÁÁ<br />
138<br />
Select the DVE key (DVE1 or DVE2 in case of <strong>DD20</strong>; <strong>DD30</strong>) on the Aux bus delegation<br />
bank.<br />
Disable Loop.<br />
Disable DVE transition in the Transition panel (if enabled).<br />
In this mode, the following signals can be switched to the DVE:<br />
• all signals of the Aux bus; if a coupled key signal exists, this is sent to the DVE<br />
as key signal.<br />
• video signals and – if existing – the pertaining key signal from the respective<br />
switching level.<br />
If only a video signal and no key signal exists, 100 % white is sent to the DVE as<br />
key signal.<br />
If the DVE delegation key is held down, any signal may be selected as key signal.
<strong>DD5</strong>, <strong>DD10</strong>, <strong>DD20</strong>, <strong>DD30</strong><br />
8.5 EDITORS WITH GVG-200 o/e-PROTOCOL<br />
8. DVE and Editors<br />
CMX-OMNI BTS protocol in preparation<br />
ACCOM-AXIAL BTS protocol in preparation<br />
AMPEX-ACE 100<br />
AMPEX-MICRO ACE<br />
GVG-VPE ...<br />
PALTEX ... (GVG 200 e) tested with R132ME switcher<br />
VIDEO MEDIA<br />
SONY-BVE 9000<br />
SONY-BVE 9100<br />
SONY-BVE 2000<br />
BTS-BBE-2000<br />
8.6 EDITORS WITH GVG-100 PROTOCOL ONLY<br />
SONY-BVE-900<br />
SONY-BVE-910<br />
AMPEX-ACE 25<br />
139
8. DVE and Editors <strong>DD5</strong>, <strong>DD10</strong>, <strong>DD20</strong>, <strong>DD30</strong><br />
8.7 PORT PROTOCOLS IN THE DD SWITCHERS<br />
140<br />
GVG 200 o ÁÁÁÁÁ<br />
to ÁÁÁÁÁ<br />
DVE editorÁÁÁÁÁÁÁÁÁÁÁ<br />
from note<br />
x<br />
38.4 kBaud, odd, parity<br />
ÁÁÁÁÁÁÁ ÁÁÁÁÁ<br />
ÁÁÁÁÁ ÁÁÁÁÁÁÁÁÁÁÁÁÁÁÁÁ<br />
ÁÁÁÁÁÁÁ ÁÁÁÁÁ<br />
ÁÁÁÁÁÁÁ<br />
ÁÁÁÁÁÁÁÁÁÁÁ<br />
Audio Mast<br />
to SES audio switcher for<br />
<strong>DD20</strong>M<br />
ÁÁÁÁÁ ÁÁÁÁÁÁÁÁÁÁÁ<br />
ÁÁÁÁÁÁÁ<br />
ÁÁÁÁÁ ÁÁÁÁÁ<br />
ÁÁÁÁÁÁÁÁÁÁÁ<br />
ÁÁÁÁÁÁÁÁÁÁÁÁÁÁÁÁ<br />
ÁÁÁÁÁ<br />
ÁÁÁÁÁÁÁ<br />
DVE A53 D<br />
x<br />
only port 1<br />
RS-232<br />
see chapter 1<br />
Technical setup and wiring<br />
ÁÁÁÁÁ ÁÁÁÁÁÁÁÁÁÁÁ<br />
ÁÁÁÁÁÁÁ<br />
ÁÁÁÁÁ ÁÁÁÁÁ<br />
ÁÁÁÁÁÁÁÁÁÁÁ<br />
ÁÁÁÁÁÁÁÁÁÁÁÁÁÁÁÁ<br />
ÁÁÁÁÁ<br />
ÁÁÁÁÁÁÁ<br />
DVE prizm ÁÁÁÁÁ x<br />
ÁÁÁÁÁÁÁ ÁÁÁÁÁ<br />
ÁÁÁÁÁ ÁÁÁÁÁÁÁÁÁÁÁ<br />
ÁÁÁÁÁÁÁÁÁÁÁÁÁÁÁÁ<br />
ÁÁÁÁÁÁÁ<br />
ÁÁÁÁÁ<br />
ÁÁÁÁÁÁÁ ÁÁÁÁÁ<br />
ÁÁÁÁÁ<br />
ÁÁÁÁÁ ÁÁÁÁÁÁÁÁÁÁÁ<br />
ÁÁÁÁÁÁÁÁÁÁÁ<br />
ÁÁÁÁÁÁÁ ÁÁÁÁÁÁÁÁÁÁÁÁÁÁÁÁ<br />
DVE ADO ÁÁÁÁÁ<br />
x<br />
GVG 100 ME1<br />
GVG 100 ÁÁÁÁÁ<br />
ME2<br />
Ident ÁÁÁÁÁ<br />
Xbar<br />
x<br />
ÁÁÁÁÁÁÁÁÁÁÁ<br />
x<br />
from BTS control system<br />
ÁÁÁÁÁ ÁÁÁÁÁÁÁÁÁÁÁ<br />
ÁÁÁÁÁÁÁ<br />
ÁÁÁÁÁ ÁÁÁÁÁ<br />
ÁÁÁÁÁÁÁÁÁÁÁ<br />
ÁÁÁÁÁÁÁÁÁÁÁÁÁÁÁÁ<br />
ÁÁÁÁÁ<br />
ÁÁÁÁÁÁÁ<br />
ÁÁÁÁÁ ÁÁÁÁÁÁÁÁÁÁÁÁÁÁÁÁ<br />
ÁÁÁÁÁÁÁ<br />
ÁÁÁÁÁ ÁÁÁÁÁÁÁ<br />
ÁÁÁÁÁ<br />
ÁÁÁÁÁÁÁÁÁÁÁ<br />
ÁÁÁÁÁÁÁ ÁÁÁÁÁÁÁÁÁÁÁÁÁÁÁÁ<br />
ÁÁÁÁÁ<br />
DVE Charis ÁÁÁÁÁ x<br />
DVE VTR<br />
x<br />
Sony VTR protocol<br />
ÁÁÁÁÁ ÁÁÁÁÁÁÁÁÁÁÁÁÁÁÁÁ<br />
ÁÁÁÁÁÁÁ<br />
ÁÁÁÁÁ<br />
ÁÁÁÁÁÁÁ<br />
ÁÁÁÁÁÁÁÁÁÁÁÁÁÁÁÁ<br />
ÁÁÁÁÁÁÁÁÁÁÁ<br />
ÁÁÁÁÁÁÁ ÁÁÁÁÁ<br />
ÁÁÁÁÁ ÁÁÁÁÁÁÁÁÁÁÁÁÁÁÁÁ<br />
GVG 200 e<br />
Autom SAST ÁÁÁÁÁ<br />
x<br />
38.4 kBaud, even, parity<br />
BTS station automation master<br />
control (bidirectional for<br />
<strong>DD20</strong>M)<br />
ÁÁÁÁÁ ÁÁÁÁÁÁÁÁÁÁÁ<br />
ÁÁÁÁÁÁÁ<br />
ÁÁÁÁÁ ÁÁÁÁÁ<br />
ÁÁÁÁÁÁÁÁÁÁÁ<br />
ÁÁÁÁÁÁÁÁÁÁÁÁÁÁÁÁ<br />
ÁÁÁÁÁ<br />
ÁÁÁÁÁÁÁ<br />
ÁÁÁÁÁ ÁÁÁÁÁÁÁÁÁÁÁ<br />
ÁÁÁÁÁÁÁ<br />
ÁÁÁÁÁ<br />
ÁÁÁÁÁÁÁÁÁÁÁ<br />
ÁÁÁÁÁÁÁÁÁÁÁÁÁÁÁÁ<br />
ÁÁÁÁÁ<br />
ÁÁÁÁÁÁÁ<br />
Auto ICS<br />
DVE DPM<br />
x<br />
BTS control<br />
ÁÁÁÁÁ ÁÁÁÁÁÁÁÁÁÁÁ<br />
ÁÁÁÁÁÁÁ<br />
ÁÁÁÁÁ ÁÁÁÁÁ<br />
ÁÁÁÁÁÁÁÁÁÁÁ<br />
ÁÁÁÁÁÁÁÁÁÁÁÁÁÁÁÁ<br />
ÁÁÁÁÁÁÁ ÁÁÁÁÁ ÁÁÁÁÁÁÁÁÁÁÁÁÁÁÁÁ<br />
ÁÁÁÁÁ<br />
ÁÁÁÁÁÁÁ<br />
ÁÁÁÁÁ<br />
DPM-AUX x<br />
from and to<br />
DPM<br />
as yet not working together<br />
ÁÁÁÁÁÁÁ ÁÁÁÁÁ<br />
ÁÁÁÁÁ ÁÁÁÁÁÁÁÁÁÁÁ<br />
ÁÁÁÁÁÁÁÁÁÁÁÁÁÁÁÁ<br />
ÁÁÁÁÁÁÁ ÁÁÁÁÁÁÁÁÁÁÁÁÁÁÁÁ<br />
ÁÁÁÁÁ<br />
ÁÁÁÁÁÁÁ<br />
ÁÁÁÁÁÁÁ ÁÁÁÁÁ<br />
ÁÁÁÁÁ ÁÁÁÁÁÁÁÁÁÁÁ<br />
ÁÁÁÁÁÁÁÁÁÁÁÁÁÁÁÁ<br />
ÁÁÁÁÁ<br />
ÁÁÁÁÁÁÁ
<strong>DD5</strong>, <strong>DD10</strong>, <strong>DD20</strong>, <strong>DD30</strong><br />
8.8 SYSTEM INTEGRATION <strong>DD5</strong> / <strong>DD10</strong><br />
Any inputs *<br />
for DVE video<br />
and DVE key<br />
* Assignment in Setup<br />
DVE VIDEO<br />
DVE KEY<br />
AC<br />
1<br />
2<br />
3<br />
4<br />
5<br />
6<br />
7<br />
8<br />
9<br />
10<br />
11<br />
12<br />
13<br />
14<br />
15<br />
16<br />
IN<br />
<strong>DD10</strong><br />
Control panel<br />
AC<br />
BB<br />
REMOTE<br />
MAINFRAME<br />
<strong>DD5</strong>/<strong>DD10</strong><br />
KEY<br />
OUT<br />
VIDEO<br />
OUT<br />
DVE<br />
50 OHM<br />
SERIAL PORT<br />
PGM<br />
CLEAN<br />
KEY<br />
IN<br />
VIDEO<br />
IN<br />
1 2 3 4<br />
DVE<br />
AUX<br />
1<br />
2<br />
3<br />
4<br />
VID<br />
KEY<br />
1<br />
2<br />
3<br />
EDITOR<br />
GVG 100 PROTOCOL<br />
GVG 200 PROTOCOL<br />
8. DVE and Editors<br />
Any serial ports *<br />
Except: A53D and A57<br />
only with serial port 4 = RS-232<br />
141
8. DVE and Editors <strong>DD5</strong>, <strong>DD10</strong>, <strong>DD20</strong>, <strong>DD30</strong><br />
8.9 SYSTEM INTEGRATION <strong>DD20</strong> / <strong>DD30</strong><br />
142<br />
VIDEO<br />
OUT<br />
DVE1<br />
VIDEO<br />
IN<br />
EDITOR<br />
GVG 100 PROTOCOL<br />
GVG 200 PROTOCOL<br />
KEY<br />
OUT<br />
KEY<br />
IN<br />
VIDEO<br />
OUT<br />
DVE2<br />
VIDEO<br />
IN<br />
KEY<br />
OUT<br />
KEY<br />
IN<br />
<strong>DD30</strong><br />
Control panel<br />
Any inputs *<br />
for DVE video<br />
and DVE key<br />
BTS<br />
AC<br />
DVE1 VIDEO<br />
DVE1 KEY<br />
DVE2 VIDEO<br />
DVE2 KEY<br />
Any serial ports *<br />
Except: A53D and A57<br />
only with serial port 232<br />
* Assignment in Setup<br />
1<br />
2<br />
3<br />
4<br />
5<br />
6<br />
7<br />
8<br />
9<br />
10<br />
11<br />
12<br />
13<br />
14<br />
15<br />
16<br />
17<br />
18<br />
19<br />
20<br />
21<br />
22<br />
23<br />
24<br />
25<br />
26<br />
27<br />
28<br />
29<br />
30<br />
31<br />
32<br />
IN<br />
AC<br />
BB<br />
REMOTE<br />
ME1 PGM<br />
MAINFRAME<br />
<strong>DD20</strong>/<strong>DD30</strong><br />
1<br />
2<br />
SERIAL PORTS<br />
3<br />
232<br />
X BAR<br />
SERVICE<br />
1<br />
2<br />
TALLY IN<br />
50 OHM<br />
MAIN OUT<br />
1<br />
2<br />
3<br />
ME1 PVW<br />
ME2 PGM<br />
1<br />
2<br />
3<br />
ME2 PVW<br />
MAIN OUT<br />
PGM<br />
DVE<br />
1<br />
2<br />
3<br />
4<br />
PRESET<br />
CLEAN<br />
AUX<br />
TALLY OUT<br />
1<br />
2<br />
3<br />
4<br />
5<br />
6<br />
7<br />
8<br />
VIDEO1<br />
KEY1<br />
VIDEO2<br />
KEY2<br />
GPI<br />
IN/OUT<br />
1<br />
2
Diamond digital<br />
9. PORT PROTOCOLS GVG-200 EMULATION<br />
9. Port Protocols GVG-200 Emulation<br />
The Diamond digital switcher can be controlled by an editing system via the RS-422<br />
interfaces of the switcher electronics (E-box).<br />
Control is made by means of the GVG-200 protocol which can be emulated by the<br />
Diamond digital switcher.<br />
The following description explains how the Diamond digital switcher interprets<br />
commands from an editing system.<br />
For connecting an editing system, one of the three RS-422 interfaces of the E-box<br />
has to be switched to GVG-200 emulation. See the operation manual of the Diamond<br />
digital switcher, section CONFIG E-BOX MENU.<br />
In order to make all Diamond inputs available under the GVG-200 emulation which<br />
allows only input numbers from 1 to 20, the edit interface uses the assignment of<br />
the input keys of that panel which possesses the edit port exclusively. It is absolutely<br />
necessary that the allocation of the port is exclusive to that panel from which<br />
the assignment shall be taken, because different panels can have different key assignments<br />
and of course the edit interface can use only one of them.<br />
If the MATRIX TVS protocol is used on another port of the Diamond digital switcher<br />
electronics, the panel has to own this port exclusively too. Please note that an edit<br />
decision list will result in different edits if the assignment of inputs, used in that list,<br />
has been changed.<br />
The reactions of a GVG-200 on commands in the following tables are taken from<br />
the description ”MODEL 200 EDITOR PROTOCOL AND DIALECT” from GVG. In<br />
the following, ”EX” always refers to the ME address byte, that is the second byte<br />
of any command/message block.<br />
The reader is assumed to be familiar with both the GVG-100/300 protocol and the<br />
GVG-200 dialect. The hex-numbers behind the command names are the command<br />
codes for the write version of these commands. The read version should always<br />
report the real state of the switcher unless noted otherwise in the text.<br />
Note:<br />
The function Transfer E-MEM of the GVG-200 protocol is not assisted.<br />
9.1 CROSSPOINT BUS COMMAND (C1 - C4)<br />
The crosspoint numbers from 1 to 20 select the inputs and internal signals (e.g.<br />
color background 2) which are assigned to the buttons 1 - 20 on the panel.<br />
Crosspoint numbers<br />
21 the crosspoint number selects ME1 reentry crosspoint on ME2, PP, and<br />
auxiliary buses;<br />
22 - 25 selects Fill 1 - 4 on ME1, ME2;<br />
22 selects ME2 on PP.<br />
For edit systems that accept all numbers within the range of a byte value, there is<br />
the possibility to address all inputs and internal signal sources independent of the<br />
current key assignment. To address physical inputs, 0x40 has to be added to the<br />
input, respectively to the signal number. Inputs are numbered 0x00–0x1F, 0x20 is<br />
black, 0x22 is ME1 and so on. The complete list is contained in the Diamond digital<br />
Command Set.<br />
143
9. Port Protocols GVG-200 Emulation<br />
9.2 ANALOG CONTROL<br />
144<br />
Analog setting value (C5)<br />
# GVG-200 Diamond digital EX<br />
01H<br />
02H<br />
03H<br />
04H<br />
05H<br />
06H<br />
07H<br />
08H<br />
09H<br />
0AH<br />
08H<br />
0CH<br />
0DH<br />
0EH<br />
0FH<br />
10H<br />
<br />
18H<br />
19H<br />
1AH<br />
1BH<br />
1CH<br />
1DH<br />
1EH<br />
1FH<br />
20H<br />
21H<br />
22H<br />
23H<br />
24H<br />
25H<br />
26H<br />
27H<br />
1FH-26H<br />
27H-2CH<br />
2DH, 2EH<br />
position V<br />
position H<br />
border lum keyer 1<br />
density<br />
chroma keyer 1<br />
hue keyer 1<br />
luminance keyer 1<br />
clip keyer 2<br />
gain keyer 2<br />
clip keyer 1<br />
gain keyer 1<br />
top mask, keyer 1<br />
left mask, keyer 1<br />
right mask, keyer 1<br />
bottom mask, keyer 1<br />
see 03H-07H and 0CH-0FH<br />
chroma, bknd<br />
hue, bknd color hue<br />
lum, bknd<br />
pst ptn size<br />
width<br />
aspect<br />
softness<br />
symmetry<br />
rotation angle<br />
rotation magnitude<br />
rotation speed<br />
modulation freq<br />
modulation amp<br />
size mask<br />
soft mask<br />
shadow clip 1 - 8<br />
chroma keyer 1 - 6 hue<br />
chroma keyer 7 - 8 hue<br />
pattern positive V<br />
pattern position H<br />
border intensity<br />
not assigned<br />
matte chroma keyer 1<br />
matte hue keyer 1<br />
matte lum keyer 1<br />
clip level keyer 2<br />
softness keyer 1<br />
clip level keyer 1<br />
softness keyer 1<br />
top mask 1<br />
left mask 1<br />
right mask 1<br />
bottom mask 1<br />
color chroma<br />
color lum<br />
pattern size<br />
pattern border width<br />
pattern ratio<br />
pattern border softness<br />
pattern border symmetry<br />
rotation angle<br />
rotation couple #<br />
rotation speed<br />
modulation speed<br />
modulation amplitude<br />
not assigned<br />
not assigned<br />
not assigned<br />
chroma keyer 1 - 6 hue<br />
not assigned<br />
Diamond digital<br />
EX = 1, 2, 0<br />
EX = 1 (Color 1)<br />
EX = 2 (Color 2)<br />
EX = 8
Diamond digital<br />
9.3 KEY (BUTTON) COMMANDS<br />
Key (button) command (C6 = on, C7 = off)<br />
# GVG-200 KEY Diamond digital<br />
00H<br />
01H<br />
02H<br />
03H<br />
04H<br />
05H<br />
06H<br />
07H<br />
08H<br />
09H<br />
0AH<br />
0BH<br />
0CH<br />
0DH<br />
0EH<br />
0FH<br />
10H<br />
11H<br />
12H<br />
13H<br />
14H<br />
15H<br />
16H<br />
17H<br />
18H<br />
19H<br />
1AH<br />
Auto trans<br />
Preset black mix/dsk out<br />
ME : trans pvw<br />
DSK : black auto trans<br />
WIPE or BLACK CUT<br />
KEY 1 over<br />
KEY 2 over<br />
Key cut, Keyer 1<br />
Mask Keyer 1 or DSK<br />
Key invert (Keyer/DSK)<br />
Shadow, (Keyer 1/DSK)<br />
MATTE Fill, (Keyer 1/DSK)<br />
KEY BUS FILL, (Keyer 1/DSK)<br />
KEY BUS SOURCE (Keyer 1/DSK)<br />
AUTO SELECT SOURCE<br />
(Keyer 1/DSK)<br />
LUM KEY, (Keyer 1/DSK)<br />
MIX<br />
LINEAR KEY<br />
CHROMA KEY, (Keyer 1)<br />
PRESET PTN (Keyer 1)<br />
BOX mask source (Keyer 1/DSK)<br />
ME 1 WIPE mask source (Keyer 1)<br />
MIX<br />
ME 2 WIPE mask source (Keyer 1)<br />
WIPE<br />
CUT<br />
EXT mask source (Keyer 1/DSK)<br />
FORCED FOREGROUND<br />
(Keyer 1/DSK)<br />
9. Port Protocols GVG-200 Emulation<br />
Start/stop auto transition<br />
DSK : Cut<br />
ME : black preset (mix and wipe)<br />
ME : transition (on/off)<br />
DSK : start/stop FTB auto transition<br />
FTB : Cut<br />
ME : write on: WIPE is selected<br />
Write function on: Key Change 2-1<br />
Write function off: Key Change 1-2<br />
Write function on: Key Change 1-2<br />
Write function off: Key Change 2-1<br />
Write function on: Key 1, 100 %<br />
Write function off: Key 1, 0 %<br />
Mask on/off key 1, key 4 or DSK<br />
Key invert (keyer 1/DSK)<br />
Border key: drop shadow on/off<br />
Selects matte as fill signal of key<br />
Selects key bus for fill signals.<br />
Recall of fill signal source which has been selected before<br />
a MATTE FILL command.<br />
Works only if a crosspoint has been selected via edit<br />
interface.<br />
Selects key bus for key source signals.<br />
Activates/deactivates coupled mode.<br />
Key mode: luminance key<br />
Selects transition type mix.<br />
Key mode: linear key<br />
Key mode: chroma key<br />
An appropriate key source must be selected before issueing<br />
this command.<br />
Sets transition mode to mix and selects wipe generator<br />
as a key source. If a wipe transition has been stopped<br />
half way, switching to mix mode will fail and the wipe<br />
generator cannot be selected as a key source.<br />
Switches mask mode to rectangle and selects mask as<br />
a key source.<br />
Painted mask is lost.<br />
Not available.<br />
Sets transition type to mix, write off has no effect.<br />
Not available.<br />
Sets transition type to wipe, write off has no effect.<br />
Same effect as if the CUT key is pressed on the panel.<br />
Write function off has no effect.<br />
Sets mask type to external mask.<br />
Sets key to forced foreground mode.<br />
145
9. Port Protocols GVG-200 Emulation<br />
146<br />
# GVG-200 KEY Diamond digital<br />
1BH<br />
1CH<br />
1DH<br />
1EH<br />
1FH<br />
20H<br />
21H<br />
22H<br />
23H<br />
24H<br />
25H<br />
26H<br />
27H<br />
28H<br />
29H<br />
2AH<br />
2BH<br />
2CH<br />
2DH<br />
2EH<br />
2FH<br />
30H<br />
31H<br />
32H<br />
33H<br />
34H<br />
35H<br />
36H<br />
37H<br />
4AH<br />
*<br />
5EH<br />
5FH<br />
BOX MASK INVERT<br />
(Keyer 1/DSK)<br />
KEY CUT (Keyer 2)<br />
REV (Wipe)<br />
MASK (Keyer 2)<br />
KEY INVERT (Keyer 2)<br />
SHADOW (Keyer 2)<br />
MATTE Fill (Keyer 2)<br />
KEY BUS FILL (Keyer 2)<br />
KEY BUS SOURCE (Keyer 2)<br />
AUTO SELECT SOURCE (Keyer 2)<br />
LUM KEY (Keyer 2)<br />
LINEAR KEY<br />
CHROMA KEY (Keyer 2)<br />
PRESET PTN (Keyer 2)<br />
BOX mask source (Keyer 2)<br />
ME1 mask source (Keyer 2)<br />
ME2 WIPE mask source (Keyer 2)<br />
EXT mask source (Keyer 2)<br />
FORCED FOREGROUND<br />
(Keyer 2)<br />
BOX MASK INVERT (Keyer 1/DSK)<br />
ASPECT ON (Wipe)<br />
BORDER ON (Wipe)<br />
SOFT ON (Wipe)<br />
AUTO CENTER (Positioner)<br />
POS ON (Positioner)<br />
SPLIT WIPE<br />
FLIPFLOP WIPE<br />
EXT mask invert<br />
WIPE mask invert<br />
CUT<br />
NORMAL (Wipe)<br />
REV (Wipe)<br />
Diamond digital<br />
Switches mask invert on/off.<br />
Mask type is not changed, painted masks are retained.<br />
(Also external masks are inverted).<br />
Sets key 2 level to 100% resp. 0%<br />
Sets wipe mode to reverse/normal.<br />
Switches mask on/off on key 2.<br />
Invert key 2 on/off.<br />
Drop shadow on/off on keyer 2.<br />
Selects matte as a fill signal of key 2/5.<br />
Selects key bus for fill signals.<br />
Recall of fill signal source which has been selected before<br />
a MATTE FILL command.<br />
Works only if a crosspoint has been selected via the edit<br />
interface.<br />
Selects key bus for key source signals on keyer 2.<br />
Activates/deactivates coupled mode for key 2/5.<br />
Key mode: luminance key 2.<br />
Key mode: linear key 2.<br />
Key mode: chroma key 2<br />
An appropriate key source must be selected before issueing<br />
this command.<br />
When WIPE is active, PTN-Size will be ignored.<br />
Switches mask mode to rectangle and selects mask as a<br />
key source (note 1).<br />
Painted mask is lost.<br />
Not available.<br />
Not available.<br />
Sets mask type to external mask 2<br />
Key is set to forced foreground mode.<br />
If EX=0, DSK 2 is switched to this mode.<br />
Switches mask invert on/off.<br />
Mask type is not changed, painted masks are retained.<br />
(Also external masks are inverted).<br />
Switches ratio on/off.<br />
Switches border on/off.<br />
Switches normal softness on/off.<br />
Resets positioner to center of screen.<br />
Write off has no effect.<br />
Positioner on/off.<br />
Not available.<br />
Sets wipe direction to N/R.<br />
Switches mask invert on/off.<br />
(Also internal masks are inverted).<br />
Not available.<br />
Same effect as if the CUT key is pressed on the panel.<br />
Write function off has no effect.<br />
Write function on: switches wipe direction REV and N/R<br />
off.<br />
Write function off: switches wipe direction REV and N/R<br />
on/off.
Diamond digital<br />
9.4 KEY COMMANDS<br />
9.4.1 BORDERLINE MODE COMMAND (B0/B1)<br />
Command B0 acts on keyer 1<br />
Command B1 acts on keyer 2 or keyer 5.<br />
EXT determines the mixing level.<br />
The mode byte is interpreted as follows:<br />
Mode Byte Function<br />
9.4.2 KEY ACCUMULATION COMMAND (BF/C0)<br />
0<br />
1<br />
2<br />
3<br />
4<br />
5<br />
6<br />
7<br />
8<br />
9<br />
A<br />
B<br />
C<br />
D<br />
E<br />
F<br />
Key Border off<br />
Border H<br />
Border 2H<br />
Border H-W<br />
Border 2H-W<br />
Border H-B<br />
Border 2H-B<br />
Drop Shadow<br />
Drop Shadow<br />
Drop Shadow<br />
Border Soft<br />
Float Shadow<br />
Slant Shadow<br />
Outline H<br />
Outline 2H<br />
Key Border off<br />
Not available in current software releases.<br />
9. Port Protocols GVG-200 Emulation<br />
147
9. Port Protocols GVG-200 Emulation<br />
9.5 WIPE GENERATOR COMMANDS<br />
148<br />
Diamond digital<br />
If any of the selected effects is not available with the current pattern, no action is<br />
taken. For instance, the selection ”vertical wipe multiplication” or ”rotation” for pattern<br />
number 1 is just ignored.<br />
9.5.1 WIPE PATTERN SELECT COMMAND (C8)<br />
9.5.2 WIPE MODULATION COMMAND (B5)<br />
The specified wipe pattern number is to be selected. There is no translation of wipe<br />
pattern numbers, so that the wipe pattern number of the Diamond digital has to be<br />
specified.<br />
The wipe pattern numbers are available on lists.<br />
Only the lowest two bits of the mode byte are evaluated as follows:<br />
Low Bits Effect<br />
00<br />
01<br />
10<br />
11<br />
9.5.3 WIPE MULTIPLICATION COMMAND (B6)<br />
9.5.4 WIPE ROTATION COMMAND (B7)<br />
modulation off<br />
modulation on, modulation locked<br />
modulation on, but not locked<br />
no effect on Diamond digital<br />
The highest four bits of the mode byte select the horizontal multiplication factor, the<br />
lowest four bits the vertical multiplication. The values are interpreted as binary<br />
numbers. All values from 0 to 15 are valid. (0 is treated as 1.)<br />
Only the lowest two bits of the mode byte are evaluated as follows:<br />
Low Bits Effect<br />
00<br />
01<br />
10<br />
11<br />
9.5.5 TRANSITION MODE COMMAND (CA)<br />
wipe rotation off<br />
rotation on, rotation mode angle<br />
rotation on, rotation mode coupled<br />
rotation on, rotation mode speed<br />
Turns the NEXT TRANSITION on or off. The Diamond digital has no next transition<br />
key for PP/DSK so with EX=0 this command will not have much of an effect.<br />
Only bits 0, 1 and 2 are relevant for the selection:<br />
Bit 0 for next transition key 2<br />
Bit 1 for next transition key 1,<br />
Bit 2 for next transition background.
Diamond digital<br />
9.5.6 AUTO TRANSITION RATE COMMAND (CC, CD)<br />
9.5.7 TRANSITION KEY SELECT (FB)<br />
9.5.8 ALL STOP COMMAND (F2)<br />
9. Port Protocols GVG-200 Emulation<br />
The command byte is followed by three ”rate bytes” which contain the auto transition<br />
time in BCD. If the first rate byte comes with the highest bit set, the auto transition<br />
is immediately started after setting the desired rate. If this bit is zero, only the<br />
rate is set. Because only three bytes are used, the range for the rate can be 0-999<br />
frames. The hundreds are transmitted in the first byte, followed by the tens and<br />
units digits.<br />
This command acts in the Diamond digital in the same way as the AUTO (transition)<br />
key on the control panel: an auto transition is started on the switcher.<br />
1BH: Auto Transition MES<br />
18H: Auto Transition DSK<br />
1FH: Auto Transition FTB<br />
Stops ongoing auto transitions.<br />
Stops ongoing EXTRA dissolves and running EXTRA sequences.<br />
149
9. Port Protocols GVG-200 Emulation<br />
9.6 SECTION: E-MEM COMMANDS<br />
9.6.1 E-MEM LEARN/RECALL ENABLE COMMAND (D8)<br />
9.6.2 LEARN E-MEM COMMAND (DA)<br />
150<br />
Diamond digital<br />
Enables or disables the execution of the simulated ”learn E-MEM” and ”recall<br />
E-MEM” commands. A set bit enables the execution of these commands, a zero<br />
bit disables it. Snapshot learns and recalls are always enabled upon power on.<br />
Bit 0 corresponds to PP/DSK<br />
Bit 1 corresponds to ME 1<br />
Bit 2 corresponds to ME 2<br />
Bit 8 corresponds to the remaining functions (see below)<br />
Note that the allocation is different for the Diamond digital switcher. See also under<br />
”Learn E-MEM” command the table of EX values. This command has no effect on<br />
accessing the EXTRA from a panel.<br />
This is a write only command which performs a STORE SNAPSHOT operation on<br />
the Diamond digital. Which modules are stored depends on the value of the EX byte<br />
and not on the current setting within the DEFINE MEMO menu (<strong>DD20</strong>, <strong>DD30</strong>).<br />
Table 1: EX value with stored mixing level assignment<br />
EX Modules stored Same as selected<br />
with key<br />
00 PP matrix, PP+DSK<br />
PP pattern,<br />
key+mask 7 (8 if avail.)<br />
DSK1, FTB/DSK2<br />
PP + DSK<br />
01 ME1-matrix, ME1 transition,<br />
ME1 matrix, key+mask 1-3<br />
ME1<br />
02 ME2 matrix, ME2 transition,<br />
ME2 pattern, key+mask 4-6<br />
ME2<br />
08 Color background 1 and 2<br />
Aux buses 1-4<br />
OTHER<br />
06 performs snapshots for all four regions<br />
ALL<br />
Note that all three keyers are stored within ME snapshots and unlike the GVG store<br />
E-MEM they contain also all of the settings of the chroma keyers.<br />
The settings of both color background generators are stored with EX=08 (OTHER)<br />
and not together with the state of PP/DSK.<br />
For this command, only register numbers 0-29 are allowed . If the E-MEM LEARN/<br />
RECALL ENABLE command (D8) has been used to disable the storage of a region,<br />
the snapshot will not be performed.
Diamond digital<br />
9. Port Protocols GVG-200 Emulation<br />
The snapshots get special names to distinguish them from manually taken ones,<br />
but nevertheless the operator is allowed to manually recall them, to change their<br />
names or to overwrite them with new ones.<br />
The naming follows this scheme:<br />
The first two letters are<br />
M1 for ME1 snapshots (EX=01)<br />
M2 for ME2 snapshots (EX=02)<br />
DB for PP/DSK snapshots (EX=00)<br />
UP for ”user program” (OTHER) snapshots (EX=08).<br />
These are followed by two digits denoting the register number. The last four letters<br />
are EDSN which stands for EDit-SNapshot.<br />
If a sequence is stored onto the position (!) where the snapshot wants to reside, the<br />
store command will fail, an existing snapshot will be overwritten. The location of a<br />
snapshot taken via the edit interface is determined by the value of the EX byte and<br />
the E-MEM register number.<br />
Details of this mapping are described below and are also shown on the pictures of<br />
menus.<br />
Very important:<br />
In connection with editing systems which do not use the LEARN-E-MEM command<br />
for performing snapshots, the snapshots have to be taken manually.<br />
E-MEM reg. EXTRA snapshot<br />
ME1: 0<br />
1<br />
2<br />
3<br />
<br />
29<br />
ME2: 0<br />
<br />
29<br />
61<br />
62<br />
63<br />
64<br />
<br />
100<br />
71<br />
<br />
100<br />
151
9. Port Protocols GVG-200 Emulation<br />
9.6.3 RECALL E-MEM COMMAND (DB)<br />
152<br />
Diamond digital<br />
This write only command enables the user to recall snapshots stored with the<br />
LEARN E-MEM command as well as manually taken snapshots. For E-MEM 0-29,<br />
the snapshots within the menus EXTRA 2 to EXTRA 9 (EXTRA 1) as described<br />
above, are used for recall. If a sequence has been stored meanwhile onto the place<br />
where the edit interface assumes the snapshot to be recalled, the execution of this<br />
command fails.<br />
The start of sequences via the edit interface is now possible by applying the recall<br />
E-MEM command to register 30 - 39. In this case, the EX value is ignored. The table<br />
below shows the positions for timelines that can be started from an editor.<br />
E-MEM seg no. EXTRA no.<br />
30<br />
31<br />
<br />
39<br />
16<br />
17<br />
<br />
25
Diamond digital<br />
10. BLOCK DIAGRAMS<br />
<strong>DD10</strong><br />
AC IN<br />
REMOTE<br />
GPI IN<br />
TALLY IN<br />
SERIAL IN<br />
BLACK BURST<br />
INPUTS<br />
1 16<br />
16 x 1 IN<br />
EQUAL EQUAL<br />
KEY 1<br />
KEY 2<br />
KEY DSK<br />
KEY DVE<br />
BGDA (PGM)<br />
BGDB<br />
KEY FILL 1<br />
KEY FILL 2<br />
KEY FILL DSK<br />
DSK VIDEO<br />
DVE VIDEO OUT<br />
DVE KEY OUT<br />
AUX 1<br />
AUX 2<br />
AUX 3<br />
DIAGNOSE<br />
INPUT PROCESSOR<br />
POWER SUPPLY<br />
CONTROLLER<br />
BUFFER<br />
8 X IN<br />
BUFFER<br />
REMOTE<br />
GPI OUT<br />
TALLY OUT<br />
SERIALOUT<br />
AUTO<br />
PHASE<br />
DIAGNOSE<br />
S AUTO<br />
P PHASE<br />
8 INTERNAL SIGNALS<br />
WIPE PROCESSOR<br />
KEY PROCESSOR<br />
ME PROCESSOR<br />
FROM AUX1<br />
MATTE<br />
STORE<br />
S AUTO<br />
P PHASE<br />
5 X<br />
S AUTO<br />
P PHASE<br />
COL BGD<br />
COL BGD<br />
4:2:2<br />
STORE<br />
P<br />
S<br />
S<br />
P<br />
BUF<br />
BUF<br />
OUTPUT PROCESSOR/GENLOCK<br />
P<br />
S<br />
P<br />
S<br />
P<br />
S<br />
1<br />
2<br />
3<br />
4<br />
DVE KEY/WIPE<br />
PGM<br />
PVW<br />
CLEAN<br />
DVE VIDEO<br />
10. Block diagrams<br />
OUTPUTS<br />
1<br />
2<br />
3<br />
4<br />
PST<br />
CLEAN<br />
MAIN OUT<br />
DVE VIDEO<br />
DVE KEY<br />
AUX 1<br />
AUX 2<br />
AUX 3<br />
153
10. Block diagrams Diamond digital<br />
154
Diamond digital<br />
<strong>DD30</strong><br />
AC IN<br />
REMOTE<br />
GPI IN<br />
TALLY IN<br />
SERIAL IN<br />
BLACK BURST<br />
INPUTS<br />
1 16<br />
EQUAL<br />
EQUAL BUFFER BUFFER<br />
EQUAL<br />
INPUT PROCESSOR<br />
RY 1900<br />
POWER SUPPLY RC 1927<br />
CONTROLLER RC 1917<br />
INPUTS<br />
17 32<br />
EQUAL BUFFER<br />
INPUT PROCESSOR<br />
RY 1900<br />
BUFFER<br />
KEY 1<br />
KEY 2<br />
DVE KEY<br />
MASK BUS<br />
KEY FILL 1<br />
KEY FILL 2<br />
DVE VIDEO<br />
BGD A<br />
BGD B<br />
SPEC<br />
REMOTE<br />
GPI OUT<br />
TALLY OUT<br />
SERIALOUT<br />
16 INTERN SIGNALS<br />
DVE VIDEO 1<br />
DVE KEY 1<br />
DV VIDEO 2<br />
DVE KEY 2<br />
AUX 1<br />
AUX 2<br />
AUX 3<br />
AUX 4<br />
AUX 5<br />
AUX 6<br />
PVW<br />
DIAGNOSE<br />
OUTPUT PROCESSOR/GENLOCK<br />
RY 1911 / RY 1912<br />
S AUTO<br />
P PHASE<br />
S<br />
P<br />
FROM AUX1<br />
AUTO<br />
PHASE<br />
DIAGNOSE<br />
AUTO<br />
PHASE<br />
WIPE PROCESSOR<br />
RY 1908 / RY 1909<br />
KEY PROCESSOR<br />
RY 1906 / RY 1907<br />
ME PROCESSOR<br />
RY 1903<br />
WIPE PROCESSOR<br />
RY 1908 / RY 1909<br />
KEY PROCESSOR<br />
RY 1906 / RY 1907<br />
ME PROCESSOR<br />
RY 1903<br />
WIPE PROCESSOR<br />
RY 1908 / RY 1909<br />
KEY PROCESSOR<br />
RY 1906 / RY 1907<br />
ME PROCESSOR<br />
RY 1903<br />
S<br />
P<br />
MATTE<br />
STORE<br />
11 X<br />
AUTO<br />
PHASE<br />
COL BGD<br />
GEN 1<br />
COL BGD<br />
GEN 2<br />
4:2:2<br />
STORE<br />
BUFFER<br />
P<br />
BUFFER<br />
S<br />
P<br />
S<br />
P<br />
S<br />
P<br />
S<br />
1<br />
2<br />
3<br />
4<br />
1<br />
2<br />
3<br />
4<br />
1<br />
2<br />
3<br />
4<br />
ME1<br />
DVE KEY / WIPE<br />
PGM<br />
PVW<br />
DVE VIDEO<br />
PGM INTERN<br />
ME2<br />
DVE KEY / WIPE<br />
PGM<br />
PVW<br />
DVE VIDEO<br />
PGM (INTERN)<br />
PGM<br />
PVW<br />
PP<br />
DVE KEY / WIPE<br />
CLEAN<br />
DVE VIDEO<br />
OPTION<br />
RY 1913<br />
S<br />
P<br />
4:2:2<br />
STORE<br />
4:2:2<br />
STORE<br />
S<br />
4:2:2<br />
STORE<br />
P<br />
P<br />
4:2:2<br />
STORE<br />
S<br />
3 X LUM STORES<br />
10. Block diagrams<br />
P<br />
S<br />
OUTPUTS<br />
PGM1<br />
PGM2<br />
PVW<br />
PGM1<br />
PGM2<br />
PVW<br />
ME1 OUT<br />
ME2 OUT<br />
1<br />
2<br />
3<br />
4<br />
PST/PVW<br />
VON PST<br />
CLEAN<br />
DPGRO<br />
DVE VIDEO 1<br />
DVE KEY 1<br />
DV VIDEO 2<br />
DVE KEY 2<br />
AUX 1<br />
AUX 2<br />
AUX 3<br />
AUX 4<br />
AUX 5<br />
AUX 6<br />
PVW<br />
155
10. Block diagrams Diamond digital<br />
156
Diamond digital<br />
EXTERNAL (DSC) IN<br />
LDK<br />
BVW 75P<br />
BVW D-75<br />
CHARACTER<br />
GENERATOR<br />
MOTIF<br />
U-MATIC<br />
RECORDER<br />
3<br />
3<br />
3<br />
ADC 410<br />
ADC 410<br />
ADC 410<br />
ADC 410<br />
MNR 10<br />
D5<br />
RECORDER<br />
AC<br />
AC<br />
WID1<br />
WID2<br />
WID3<br />
WID4<br />
WID5<br />
CG VID<br />
CG KEY<br />
WID8<br />
WID9<br />
DVE VID<br />
DVE KEY<br />
1<br />
2<br />
3<br />
4<br />
5<br />
6<br />
7<br />
8<br />
9<br />
10<br />
11<br />
12<br />
13<br />
14<br />
15<br />
16<br />
IN<br />
AC<br />
BB<br />
REMOTE<br />
DIAMOND<br />
DIGITAL<br />
<strong>DD10</strong><br />
50 OHM<br />
1 2 3<br />
PORT<br />
PGM<br />
CLEAN<br />
DVE<br />
AUX<br />
1<br />
2<br />
3<br />
4<br />
VID<br />
KEY<br />
1<br />
2<br />
3<br />
DVE<br />
PINNACLE<br />
PRIZM<br />
EDITOR<br />
CMX<br />
OMNI<br />
(GVG-200 Protocol)<br />
DVE VIDEO<br />
DVE KEY<br />
DAC 410 TO BVW 75P<br />
DCR 500<br />
MONITOR<br />
(SD-INPUT)<br />
BTS Broadcast Television Systems<br />
<strong>DD10</strong> Post Production<br />
TO D5-RECORDER<br />
10. Block diagrams<br />
157
10. Block diagrams Diamond digital<br />
158
Diamond digital<br />
BCN 52<br />
BCB/BVW 75P<br />
BVW 65 P<br />
BVW D-75<br />
ROUTER<br />
VIDEO<br />
BB<br />
MNR10<br />
FBAS<br />
FBAS<br />
1<br />
2<br />
REF<br />
BB<br />
S<br />
1<br />
2<br />
MNR10<br />
FBAS<br />
FBAS<br />
1<br />
2<br />
REF<br />
BB<br />
S<br />
1<br />
2<br />
ADC 410<br />
ADC 410<br />
CAM 1<br />
Y PR PB<br />
CPU..<br />
S<br />
1 2 3 4<br />
PHILIPS<br />
TEST GEN<br />
ADC 410<br />
Y PR PB<br />
CPU..<br />
S<br />
1 2 3 4<br />
SG<br />
R G B<br />
Y PR PB<br />
ADC 410<br />
S<br />
1 2 3 4<br />
SG KEY UHR<br />
Y PR PB<br />
ADC 410<br />
S<br />
1 2 3 4<br />
Y PR PB<br />
CPU..<br />
S<br />
1 2 3 4<br />
Y PR PB<br />
ADC 410<br />
S<br />
1 2 3 4<br />
ROUTER KEY<br />
Y PR PB<br />
ADC<br />
S<br />
1 2 3 4<br />
CAM 2 CAM 3 CAM 4<br />
R G B R G B R G B R G B<br />
TALLY<br />
DISTRIBUTOR<br />
Y PR PB<br />
CPU..<br />
S<br />
1 2 3 4<br />
AC<br />
AC<br />
KAM1<br />
KAM2<br />
KAM3<br />
KAM4<br />
SG-V<br />
SG-K<br />
UHR-V<br />
UHR-K<br />
DVE-V<br />
DVE-K<br />
TEST<br />
BTS<br />
1<br />
2<br />
3<br />
4<br />
5<br />
6<br />
7<br />
8<br />
9<br />
10<br />
11<br />
12<br />
13<br />
14<br />
15<br />
16<br />
17<br />
18<br />
19<br />
20<br />
21<br />
22<br />
23<br />
24<br />
25<br />
26<br />
27<br />
28<br />
29<br />
30<br />
31<br />
32<br />
1<br />
2<br />
3<br />
4<br />
IN<br />
AC<br />
50 OHM<br />
BB REMOTE<br />
ME1 PGM<br />
DIAMOND ME1 PVW<br />
DIGITAL<br />
<strong>DD20</strong><br />
1<br />
ME2 PGM 2<br />
3<br />
SERIAL PORTS<br />
SERVICE<br />
1<br />
2<br />
TALLY IN<br />
MAIN OUT<br />
PINNACLE<br />
PRIZM<br />
1<br />
2<br />
3<br />
ME2 PVW<br />
MAIN OUT<br />
PGM<br />
1<br />
2<br />
3<br />
4<br />
PP PVW<br />
DSK 2<br />
CLEAN<br />
1<br />
2<br />
3<br />
AUX<br />
4<br />
5<br />
6<br />
AUX PVW<br />
VIDEO1<br />
KEY1<br />
DVE<br />
VIDEO2<br />
KEY2<br />
TALLY OUT<br />
GPI<br />
IN/OUT<br />
1<br />
2<br />
BB<br />
DAC 410<br />
1<br />
FBAS<br />
2<br />
REF<br />
BB 1<br />
S<br />
2<br />
DAC 410<br />
REF<br />
BB<br />
FBAS<br />
S<br />
1<br />
2<br />
1<br />
2<br />
PIX MON<br />
PIX MON<br />
MONITOR<br />
(SD-INPUT)<br />
MONITOR<br />
(SD-INPUT)<br />
10. Block diagrams<br />
BTS Broadcast Television Systems<br />
<strong>DD20</strong> Typical Aplication<br />
159
Preliminary Information<br />
Diamond digital<br />
5.8. MONITOR STATUS DISPLAY FSC 3286, FSC 3287<br />
For displaying the source names directly on the monitor stack, universal status<br />
displays with computer connection are provided for the switchers.<br />
BTS<br />
5.8.1 DISPLAY OF THE SOURCES<br />
Control is made directly from the computer of a control panel, transferring the<br />
4-digit source name to the respective status display, which is defined in the<br />
INPUT IDENT menu.<br />
Mechanical dimensions:<br />
Width Height Depth<br />
FCS-3286 (small display) 19” 1 RU 30 mm<br />
FCS-3287 (large display) 19” 2 RU 30 mm<br />
Source monitors:<br />
When displaying a picture on the monitor, directly coming from one of the picture<br />
sources of the switcher, the status display shows the source name defined in<br />
the ident input menu.<br />
VTR 2<br />
PGM monitors: ME1 OUT, ME2 OUT, MAIN OUT<br />
If a mixed picture, being composed of picture components from different sources,<br />
is available at the main outputs of the switcher, this is shown on the associated<br />
status display.<br />
. . . . .<br />
If a picture, coming directly from a picture source, is available at these outputs,<br />
the status display shows the associated source name.<br />
61<br />
BTS
62 Diamond digital<br />
BTS<br />
PVW monitors ME1 PVW, ME2 PVW, PP PST:<br />
In dependence on the selected mode, the respective status display shows<br />
the following internal source names:<br />
KEY PREVIEW<br />
PATTERN PREVIEW<br />
TRANSITION PREVIEW<br />
MASKS/MASK PREVIEW<br />
PREVIEW switched off = program<br />
measuring window for AKA<br />
In the AUTO PREVIEW mode, the status display shows the state of the NEXT<br />
TRANSITION key row.<br />
The associated preview monitor shows in this mode what the mixed picture will<br />
look like after the next transition.<br />
The next transition status is displayed as follows:<br />
ON<br />
OFF<br />
In the PP stage, the AUTO PREVIEW softkeys replace in the AUTO PREVIEW<br />
mode the NEXT TRANSITION keys in the Fader menu.<br />
Preliminary Information
5.8.2 CONNECTION<br />
Preliminary Information<br />
Diamond digital<br />
Data connection<br />
For control, the status display is provided with an RS-422 interface. A second<br />
RS-422 interface serves as a loop-through output in order to enable switching<br />
further status displays in series.<br />
By means of a data cable (e. g. 9-pin 1:1 connection from BTS), the first status<br />
display can be connected to the ES-BUS socket of the control panel. This<br />
requires selection of ”PORT = Mon.Ident” in the CONFIGURATION PANEL<br />
menu.<br />
See the operation manual of the switcher.<br />
RS–422 Pin Signal<br />
9-pin D-type<br />
female<br />
1<br />
2<br />
3<br />
4<br />
5<br />
6<br />
7<br />
8<br />
9<br />
63<br />
Frame Ground<br />
Transmit ”A”<br />
Receive ”B”<br />
Receive sign common<br />
Spare<br />
Transmit sign common<br />
Tansmit ”B”<br />
Receive ”A”<br />
Frame ground<br />
Power connection<br />
The status display requires a regulated DC voltage of + 5 V.<br />
The DC voltage is connected via a 3-pole pin bar on the rear of the status display.<br />
DC POWER IN Pin Signal<br />
MAS–CON<br />
(Panduit)<br />
1<br />
2<br />
3<br />
+ 5 V<br />
Ground<br />
+ 5 V<br />
BTS
64 Diamond digital<br />
5.8.3 ADJUSTING THE DISPLAY ADDRESS<br />
BTS<br />
Communication between the computer in the control panel and the status display<br />
takes place in one direction only.<br />
The computer in the control panel transmits data to the status display, containing<br />
beside a sync character and the 4 ASCII characters (source name) also<br />
an individual address. It is possible to select two monitor ident protocols:<br />
Mon.-Ident/I: In this protocol, the displays for the switcher sources are directly<br />
assigned to the inputs, i.e. input 1 is always shown in display<br />
1, input 2 in display 2 etc.<br />
Mon.-Ident/B: In this protocol, the displays for the switcher sources are assigned<br />
to the keys on the routing switcher, i.e. the contents of<br />
the display depends on the assign table.<br />
The address consists of a hex character and has to be adjusted on each individual<br />
status display according to the following table:<br />
Monitor addresses:<br />
Monitor Hex addresses<br />
Preliminary Information
Preliminary Information<br />
Diamond digital<br />
Adjustment is made by means of the DIL switch on the rear of the status monitor<br />
according to the following scheme:<br />
1<br />
0<br />
1 8<br />
OPEN<br />
Lower Byte Higher Byte<br />
Example: Monitor address = 04H = Video In 5<br />
65<br />
BTS
7. Notes about Connection and Operation for DVE Integration Diamond digital<br />
10. NOTES ABOUT CONNECTION AND OPERATION<br />
FOR DVE INTEGRATION<br />
10.1 PRESETTINGS<br />
Video connection<br />
of the DVE<br />
Control connection<br />
of the DVE<br />
Assignment of the<br />
protocol<br />
Assignment of video<br />
sources<br />
10.2 PREPARATION<br />
Sequence selection<br />
Scaling<br />
Remote<br />
66<br />
Utilize the ”DVE key” and ”DVE fill” outputs of the switcher to feed the DVE.<br />
If the DVE does not have a ”flying key” channel, only the ”fill” connection is needed.<br />
Feed the DVE key and fill outputs as inputs into the switcher.<br />
Memorize the selected inputs.<br />
Connect DVE and switcher via their remote ports (in most cases RS422) with a 1:1<br />
D-type cable, 9-pin.<br />
The appropriate DD switcher ports are the ports 1, 2, 3: any port can be selected.<br />
Exception: A53D only on port 1 because of the RS232 interface.<br />
Select the appropriate DVE protocol (for the port, the DVE is connected to) within<br />
the setup of the switcher (the DVE type is indicated). A general DVE type is ”VTR<br />
protocol”.<br />
Select – within the setup of the switcher – to which the DVE fill and key signal is<br />
attached.<br />
This is needed for the FXLoop operation.<br />
Recall or generate DVE sequences, that are supposed to be controlled by the<br />
switcher.<br />
Load them into the snapshot registers of the DVE.<br />
With most DVEs, a scaling of the DVE sequence is needed (in order to harmonize<br />
the move of the switcher fader arm with the start and the end of the DVE sequence).<br />
Scale the sequence to 30 seconds.<br />
It gives a sufficient fader resolution to avoid jerky effect movement.<br />
(30 s x 25 frames = 750 iteration values).<br />
Set the DVE to remote control.
Digital Diamond<br />
10.3 OPERATION<br />
Source selection<br />
Effect selection<br />
Effect move<br />
7. Notes about Connection and Operation for DVE Integration<br />
Press the Aux Bus selection DVE on the switcher control panels and select the desired<br />
source to be manipulated via the DVE.<br />
Note, that this DVE routing consists of a fill bus and a key bus.<br />
The key signal is selected according to the assignment that is made within the ”couple”<br />
menu of the switcher (e.g.: selection of the fill signal ”Character Generator” input<br />
1 automatically selects the key signal ”Character Generator” input 2).<br />
This can be overwritten by holding the key ”DVE” bus down and selecting another<br />
key source.<br />
Note, that the above described selection scheme is in many cases redundant:<br />
”FXLoop” allows to operate the DVE move, as if it was a wipe effect in the background,<br />
allowing to simplify the DVE integration dramatically:<br />
Press ”DVE Loop” and the desired effect layer This determines whether the user<br />
wants to move the DVE within the background or one of the keyers:<br />
Select the DVE feed signal (i.e. select the next DVE signal) via the ME preset bus<br />
or one of the Key Fill buses.<br />
Selection of ”Preset” or ”Program” as feed signal determines whether the DVE sequence<br />
runs as it was programmed, or reverses its polarity.<br />
Select the desired DVE sequence via the Wipe selection panel of the switcher (in<br />
case of <strong>DD5</strong> and <strong>DD10</strong>, this is done by switching the selection ”wipe 1, 2, mask”<br />
off, in case of <strong>DD20</strong> and <strong>DD30</strong>, this is indicated via an LED).<br />
Select the transition type DVE within the transition module for the desired effect<br />
layer (<strong>DD10</strong>/20/30).<br />
Note, that the bus selection follows automatically.<br />
The DVE sequence can now be moved by means of the fader arm, resp. runs automatically<br />
by pressing the AUTO key.<br />
Once the scaling is done, the sequence run time is independently selectable within<br />
the transition module (just like a wipe effect).<br />
Note, that a DVE can always be selected by one fader only, i.e. if the DVE is selected<br />
as transition type for ME 1, it will not react within ME 2.<br />
Note that restrictions for FXLoop apply within the <strong>DD30</strong> in the PP stage, should this<br />
stage be utilized with independent PVW outputs.<br />
67
8. Notes for special Editors and DVEs Diamond digital<br />
11. NOTES FOR SPECIAL EDITORS AND DVES<br />
11.1 EDITORS<br />
AMPEX ACE MICRO<br />
AMPEX ACE 200<br />
AMPEX ACE 25<br />
CMX OMNI<br />
CMX 3500<br />
SONY BBE 900 /<br />
BBE 910<br />
SONY BBE 2000<br />
SONY BBE 9100<br />
VIDEOMEDIA<br />
ALL EDITORS<br />
68<br />
GVG200 protocol<br />
Analog values are transmitted from the emitter in the GVG100 format, thus allowing<br />
only coarse adjustments with increments.<br />
GVG100 protocol<br />
Number of frames for autotransition is one too low.<br />
No information.<br />
GVG100 protocol<br />
Adaption has been made in conjunction with the Diamand analog switcher.<br />
GVG200 protocol<br />
D10: AUX bus 4 is derivated to AUX-Bus 3.<br />
Aux bus 3 does not logically exist any more.<br />
No information.<br />
GVG100 protocol<br />
No Init panel function<br />
GVG100 protocol<br />
Not tested.<br />
Init panel function should be possible with no transfer<br />
GVG200 protocol<br />
Not tested.<br />
Addresses only ME2.<br />
No transfer of timelines or snapshots into editor.
Diamond digital<br />
11.2 DVES<br />
PINNACLE PRIZM<br />
ABEKAS A57<br />
Selection of sequences.<br />
Runtime has to be set to 30s.<br />
Select DVE PRIZM as port protocol within switcher setup.<br />
Standard RS422 cable can be used.<br />
8. Notes for special Editors and DVEs<br />
VTR protocol<br />
No sequence selection.<br />
Runtime (effects duration, within time menu) has to be set to 30s.<br />
Select DVE VTR as port protocol within switcher setup.<br />
A57 setup<br />
Select Sony protocol.<br />
Set edit offset to one minute.<br />
Enable remote control on A57 keyboard.<br />
RS232 protocol<br />
Sequence selection, fader transitions possible, no scaling necessary, runs only at<br />
9600bps.<br />
Select DVE A53D as port protocol within switcher setup.<br />
Select RS232 protocol on Abekas A57 for port B.<br />
Set header 2 on A57’s address port to RS232 (see A57 technical guide, Fig. 36).<br />
Use cable with following connections:<br />
Diamond<br />
Abekas A57<br />
9-polig 9-polig<br />
2<br />
8<br />
TxD RxD<br />
3<br />
2<br />
RxD<br />
TxD<br />
4<br />
RTS<br />
5<br />
CTS<br />
7<br />
4<br />
GND<br />
GND<br />
69
8. Notes for special Editors and DVEs Diamond digital<br />
ABEKAS A53D<br />
QUESTECH<br />
CHARISMA<br />
GVG-DPM 100<br />
GVG-DPM 700<br />
70<br />
Not tested. See A57.<br />
RS232 protocol<br />
Sequence selection, fader transition possible, no scaling necessary, runs only at<br />
9600bps.<br />
Select DVE A53D as port protocol for PORT1 (RS232) within switcher setup.<br />
Enable remote control on A53 keyboard.<br />
Use cable with following connections:<br />
Diamond<br />
Abekas A53D<br />
9-polig 25-polig<br />
2<br />
8<br />
TxD RxD<br />
3<br />
2<br />
RxD<br />
TxD<br />
4<br />
5<br />
RTS<br />
CTS<br />
5<br />
4<br />
CTS<br />
RTS<br />
7<br />
7<br />
GND<br />
GND<br />
Set Charisma Remote protocol to ”BVW75”. Select ”DVE CHARIS” as port protocol<br />
within switcher setup. Runtime is set to 30s from <strong>DD10</strong> (may fail, if runtime is stored<br />
with effect).<br />
Problems may arise with extremely long timelines. With earlier software versions<br />
(Charisma), sequence selection from switcher had to be confirmed on local panel.<br />
A special RS422 cable with one male and one female connector and 1:1 connections<br />
has to be used.<br />
No information.<br />
Model-100 protocol<br />
Set runtime to 30s, fader play, sequence selection.<br />
Do not stop ongoing sequences or manual transitions!<br />
On manual sequence run from switcher as well as from local console events stored<br />
in the sequence (e.g. freeze, E-MEM-recall etc.) can be omitted.<br />
Select protocol ”DVE DPM” in the switcher setup, Model-100 protocol on<br />
DPM100/700.<br />
Standard RS422 cable can be used.<br />
VTR protocol<br />
Is of no use at all.<br />
Control panel protocol<br />
Not implemented.
Diamond digital<br />
AMPEX ADO 100<br />
AMPEX ADO 500<br />
AMPEX ADO 1000<br />
No information.<br />
No information.<br />
No information.<br />
8. Notes for special Editors and DVEs<br />
71