

Instructions for Setting up a Sioux Tipi (pdf - Nomadics Tipi Makers
Instructions for Setting up a Sioux Tipi (pdf - Nomadics Tipi Makers
Instructions for Setting up a Sioux Tipi (pdf - Nomadics Tipi Makers

You also want an ePaper? Increase the reach of your titles
YUMPU automatically turns print PDFs into web optimized ePapers that Google loves.
The ties are also designed so that you may have<br />
either a right-hand or left-hand opening door. By tying<br />
a short stick to one side of the door cover a useful<br />
door handle is made. This helps keep animals from<br />
“nosing” their way into the tipi. Generally a right-hand<br />
door is best since the prevailing winds are<br />
from the left to right when the tipi is facing<br />
east. See 49 and 50.<br />
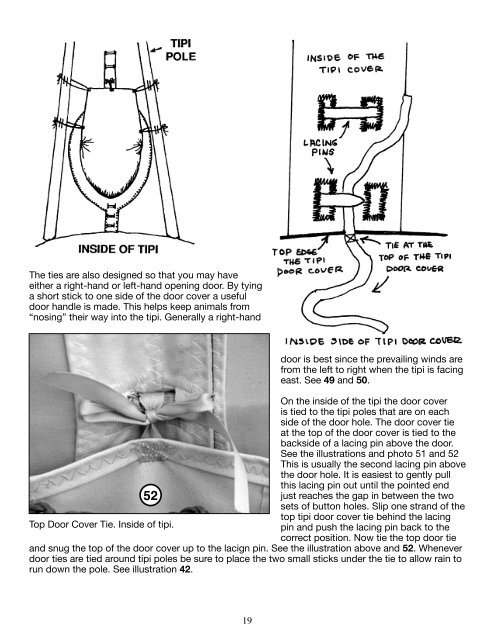
On the inside of the tipi the door cover<br />
is tied to the tipi poles that are on each<br />
side of the door hole. The door cover tie<br />
at the top of the door cover is tied to the<br />
backside of a lacing pin above the door.<br />
See the illustrations and photo 51 and 52<br />
This is usually the second lacing pin above<br />
the door hole. It is easiest to gently pull<br />
this lacing pin out until the pointed end<br />
52<br />
just reaches the gap in between the two<br />
sets of button holes. Slip one strand of the<br />
top tipi door cover tie behind the lacing<br />
Top Door Cover Tie. Inside of tipi.<br />
pin and push the lacing pin back to the<br />
correct position. Now tie the top door tie<br />
and snug the top of the door cover <strong>up</strong> to the lacign pin. See the illustration above and 52. Whenever<br />
door ties are tied around tipi poles be sure to place the two small sticks under the tie to allow rain to<br />
run down the pole. See illustration 42.<br />
19