

Instructions for Setting up a Sioux Tipi (pdf - Nomadics Tipi Makers
Instructions for Setting up a Sioux Tipi (pdf - Nomadics Tipi Makers
Instructions for Setting up a Sioux Tipi (pdf - Nomadics Tipi Makers

You also want an ePaper? Increase the reach of your titles
YUMPU automatically turns print PDFs into web optimized ePapers that Google loves.
INSTRUCTIONS FOR SETTING UP A SIOUX TIPI<br />
Set your tipi <strong>up</strong> on level ground that is slightly higher than the surrounding area - this prevents drainage<br />
problems in wet weather. Avoid living directly under old trees that might drop dead branches on your<br />
tipi during wind storms. Try to choose a tipi site that will get maximum sun in the winter.<br />
PREPARING YOUR TIPI POLES: If you have purchased tipi poles from<br />
us the poles have already been hand peeled. You will need to smooth<br />
out any remaining rough spots or branch nodes. Use either a sharp flat<br />
blade hatchet, a draw knife, a hand or small electric planer or an electric<br />
belt sander using progressively smoother grades of sandpaper. Once<br />
your poles are smooth you need to treat them with a wood preservative.<br />
This will ensure that they will last you 10-15 years and will also help keep<br />
the natural light color of the wood. For an organic treatment we prefer a<br />
brew of 50% boiled linseed oil (it comes that way from the store) and 50%<br />
turpentine. Apply this mixture three times allowing complete drying in-<br />
between coats. An excellent commercial product is called S<strong>up</strong>erdeck. Buy<br />
it in a clear, natural color. If you are getting your own tipi poles then any<br />
species of tree will do <strong>for</strong> a tipi pole. The important requirements are that it<br />
be 3” in diameter at the butt and taper to 2” in diameter where the cluster<br />
of poles cross. Of course the straighter the tipi pole the better. If a pole<br />
is a little bowed, twist the pole so that the bow is against the tipi canvas<br />
once the tipi cover is around the poles. If your pole<br />
choice is limited it is better to get poles that are<br />
2-1/2” at the butt rather than going to a larger to<br />
a 3 1⁄2” or 4” diameter at the butt. Your poles can<br />
extend beyond the top of your tipi as far as you like.<br />
However, if you are trying to keep them short <strong>for</strong><br />
easy transportation then they only need to be 2 ft. longer than the stated size of your tipi, i.e. 20 ft.<br />
long <strong>for</strong> an 18 ft. tipi.<br />
Regardless of where you live there will usually be one species of<br />
tree that will grow in a rather tight, crowded stand causing the trees<br />
to grow tall and thin. Unless these trees have a lot of limbs they will<br />
probably be your best bet <strong>for</strong> a good tipi pole. Thin out your tipi poles<br />
carefully. This can actually help the remaining trees to grow by reducing the competition <strong>for</strong> light and<br />
soil nutrients. Work your poles smooth with a draw knife or sharp hatchet. If time and energy allow,<br />
sand the poles smooth with medium sand paper and then rub them down with wood preservative.<br />
If you gather your poles in the spring then you may be able to simply pull the bark off with you fingers.<br />
Poles should be as dry as possible be<strong>for</strong>e putting <strong>up</strong> your tipi. The sooner you remove the bark from<br />
the poles the easier it will be to get it off. Be sure your poles are laid flat <strong>for</strong> drying, the first few days<br />
being critical. If you have no trees available to you and you can’t af<strong>for</strong>d to buy any then you can make<br />
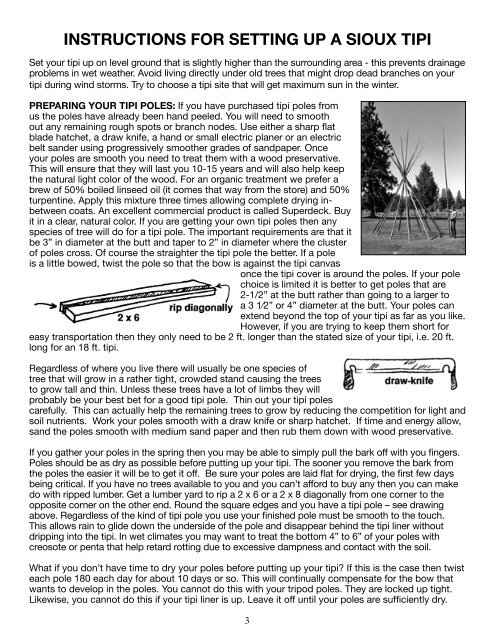
do with ripped lumber. Get a lumber yard to rip a 2 x 6 or a 2 x 8 diagonally from one corner to the<br />
opposite corner on the other end. Round the square edges and you have a tipi pole – see drawing<br />
above. Regardless of the kind of tipi pole you use your finished pole must be smooth to the touch.<br />
This allows rain to glide down the underside of the pole and disappear behind the tipi liner without<br />
dripping into the tipi. In wet climates you may want to treat the bottom 4” to 6” of your poles with<br />
creosote or penta that help retard rotting due to excessive dampness and contact with the soil.<br />
What if you don’t have time to dry your poles be<strong>for</strong>e putting <strong>up</strong> your tipi? If this is the case then twist<br />
each pole 180 each day <strong>for</strong> about 10 days or so. This will continually compensate <strong>for</strong> the bow that<br />
wants to develop in the poles. You cannot do this with your tripod poles. They are locked <strong>up</strong> tight.<br />
Likewise, you cannot do this if your tipi liner is <strong>up</strong>. Leave it off until your poles are sufficiently dry.<br />
3