
You also want an ePaper? Increase the reach of your titles
YUMPU automatically turns print PDFs into web optimized ePapers that Google loves.
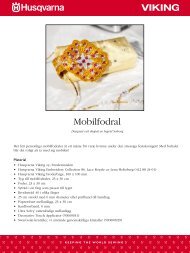
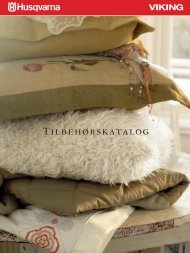
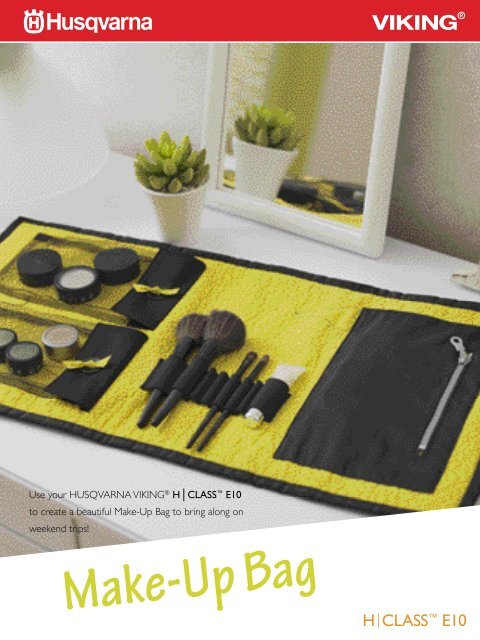
Use your HUSQVARNA VIKING ® H│CLASS E10<br />
to create a beautiful <strong>Make</strong>-<strong>Up</strong> <strong>Bag</strong> to bring along on<br />
weekend trips!<br />
<strong>Make</strong>-<strong>Up</strong> <strong>Bag</strong> H ICLASS E10
Approximate size: 25” x 12 1/2” (63 cm x 32 cm)<br />
SEwing S<strong>Up</strong>pLiES<br />
HUSQVARNA VIKING ® H│CLASS E10<br />
Yellow fabric 1/2 yard (35 cm) of 55” (140 cm) wide<br />
Netting 1/4 yard (20 cm) of 35.5” (90 cm) wide<br />
Black fabric for pocket and binding<br />
5/8 yard (50 cm) of 35.5” (90 cm) wide<br />
Batting 1/2 yard (35 cm) of 35.5” (90 cm) wide<br />
Elastic 3/8 yard (30 cm) of 2” (5 cm) wide<br />
Scraps from netting/organza/felt/yarn etc. for flower<br />
application<br />
3 buttons<br />
1 zipper 7 ¾” (20 cm)<br />
Round elastic 27.5” (70 cm)<br />
Yellow sewing thread<br />
Black sewing thread<br />
CUt<br />
illu 1<br />
Back and front pieces, 2 pieces 25” x 12 1/2” (63 x 32 cm)<br />
Batting 1 piece 25” x 12 1/2” (63 x 32 cm)<br />
Black pocket (part 1A)<br />
Zipper part (part 1B) 1 piece<br />
1 piece<br />
Pockets from netting (part 2) 2 pieces<br />
Pocket flaps (part 3) 4 pieces<br />
Bindning 3 1/8” x 79” (8 cm x 2 meters)<br />
ACCESSoriES<br />
HUSQVARNA VIKING ® Pictogram Pen illu 3<br />
(412 08 38-48)<br />
SEw<br />
Free-motion stippling<br />
1. Place the yellow front piece on top of the batting.<br />
Trace a couple of hearts onto the fabric using the<br />
Pictogram pen.<br />
2. Thread with sewing thread to match your fabric on<br />
top and in the bobbin.<br />
3. Attach the darning plate to cover the feed teeth.<br />
Attach the Satin Stitch Foot.<br />
4. Free-motion stipple all over the fabric.<br />
5.<br />
illu<br />
Change<br />
1<br />
to contrasting black thread for the hearts.<br />
6. When our free motion sewing is complete, remove<br />
illu<br />
the<br />
3<br />
darning plate.<br />
Black pocket<br />
1. To create the opening for the zipper, center part 1A<br />
about 1 ¼” (3 cm) from the top of the black pocket<br />
piece. Trace the markings from the pattern.<br />
2. Snap on the All Purpose Foot. Select straight stitch<br />
illu 2<br />
SL 2.5 and sew along the line.<br />
3. Cut along the dotted lines. Fold<br />
the fabric under to the wrong<br />
side of the pocket, press. Center<br />
the zipper in the opening. Pin<br />
and topstitch the zipper in place.<br />
4. Fold and press a 3/8” (1 cm)<br />
illu hem 6 on all sides of the pocket. illu 7<br />
Center the pocket about 1 3/8”<br />
(3.5 cm) from one of the short<br />
sides of the stippled front piece.<br />
Topstitch the pocket using a straight stitch SL 2.5 and<br />
illu 4<br />
the All Purpose Foot.<br />
pockets in netting<br />
1. Fold and press a 5/8” (2.5 cm) hem on the top side<br />
illu of 9the<br />
pockets. Topstitch with a straight stitch SL 2.5.<br />
2. Fold a 3/8” (1 cm) illu hem 5<br />
on the other three sides.<br />
From the folded hem, create a ½” (1 3/4 cm) deep<br />
tuck on each of the long sides.<br />
3. Pin the pockets in place 1¾” (4.5 cm) from the other<br />
HUSQVARNA VIKING ® H│CLASS E10 <strong>Make</strong> <strong>Up</strong>-<strong>Bag</strong><br />
2<br />
illu 5<br />
illu<br />
illu
short illu 3 end of the stippled front piece. Attach with a<br />
straight stitch SL 2.5. Hint: <strong>Make</strong> sure to not catch<br />
the fold/tuck when topstitching the pocket!<br />
illu 3<br />
illu 6 illu 7<br />
4. Place the pocket flaps right sides together. Stitch<br />
along illu 6 the short ends and one illu long 7 side and turn<br />
right side out. Topstitch.<br />
5. <strong>Make</strong> a buttonhole in each of the pocket flaps.<br />
Attach the pocket flaps above the pockets using a<br />
straight stitch. Attach the buttons.<br />
illu 4<br />
Brush/pen/Mascara Holder<br />
illu 9<br />
1. Measure your make-up utensils/eyeliners/mascara<br />
and mark the desired sizes for your utensils on the<br />
wide illu 9elastic.<br />
2. Pin the elastic into place. Use a straight stitch SL 2.5<br />
and sew along your marked lines.<br />
illu 5<br />
Flower Application<br />
illu 2<br />
1. Cut 1 ¼” – 2” (3-5 cm) wide strips from your scraps.<br />
illu 8<br />
Select straight stitch SL 4.0 and increase the thread<br />
tension.<br />
2. Snap on your All-Purpose Foot.<br />
3. Sew a straight stitch in the center of the scraps<br />
leaving 4” (10 cm) long thread ends at the start and<br />
finish to pull at when gathering. Pull on the threads<br />
illu 1<br />
to form the flower. Place the different scraps on top<br />
illu 4<br />
of<br />
illu<br />
each<br />
6<br />
other to create different illu 7 layers in the flower.<br />
illu 5<br />
illu 5<br />
4. illu Pin 9the<br />
flower into place on the back piece. Pin felt or<br />
yarn in the middle illu 3 of the flower to create the center.<br />
Attach your flower using a straight stitch SL 2.5.<br />
Binding<br />
illu 4<br />
1. Place the back piece on a flat surface, right side<br />
down. Center the front piece right side up on top of<br />
the back piece. Baste with safety pins approximately<br />
every 4’’ illu (10 8 cm) all over the make-up bag.<br />
illu 8<br />
2. Place the ends of the binding strips right sides together<br />
across each other as shown and join them together.<br />
Trim excess fabric and press seam allowance open.<br />
illu 9<br />
HUSQVARNA VIKING ® H│CLASS E10 <strong>Make</strong> <strong>Up</strong>-<strong>Bag</strong><br />
3<br />
illu 6 illu 7<br />
illu 8
3. Pin the binding in place on the back of the layered<br />
fabrics, right side together, edges aligned. Remember<br />
to include the round elastic in the seam. Sew in place<br />
with a straight stitch.<br />
4. Turn the binding over to the right side and pin into<br />
place. Tuck excess fabric at the corners into a miter.<br />
Sew the binding in place with a straight stitch.<br />
5. Stitch the button in place at the same spot as the<br />
round elastic.<br />
Place your make-up in your new bag and you’re ready to<br />
go! Have a great weekend!<br />
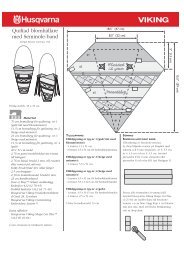
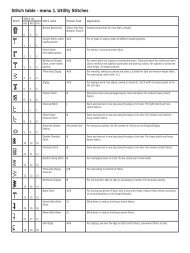
Pocket Flaps<br />
4x<br />
3<br />
HUSQVARNA VIKING ® H│CLASS E10 <strong>Make</strong> <strong>Up</strong>-<strong>Bag</strong><br />
4<br />
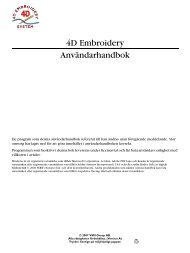
Zipper,<br />
Facing<br />
1x<br />
1B<br />
©2010 KSIN Luxembourg II, S.ar.l. All rights reserved. Printed in Sweden on environmentally friendly paper. VIKING and HICLASS are trademarks of KSIN Luxembourg II, S.ar.l. HUSQVARNA is the trademark of <strong>Husqvarna</strong> AB. All trademarks<br />
are used under license by VSM Group AB. All other product and company names are trademarks and/or registered tradmarks of the respective owners.
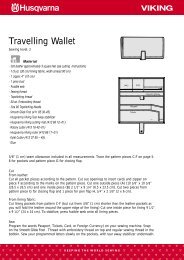
Black Pocket<br />
1x<br />
1A<br />
HUSQVARNA VIKING ® H│CLASS E10 <strong>Make</strong> <strong>Up</strong>-<strong>Bag</strong><br />
5
2<br />
Pocket<br />
2x<br />
HUSQVARNA VIKING ® H│CLASS E10 <strong>Make</strong> <strong>Up</strong>-<strong>Bag</strong><br />
6