FALCON XR6 intercooler installation - ImageEvent
FALCON XR6 intercooler installation - ImageEvent
FALCON XR6 intercooler installation - ImageEvent

You also want an ePaper? Increase the reach of your titles
YUMPU automatically turns print PDFs into web optimized ePapers that Google loves.
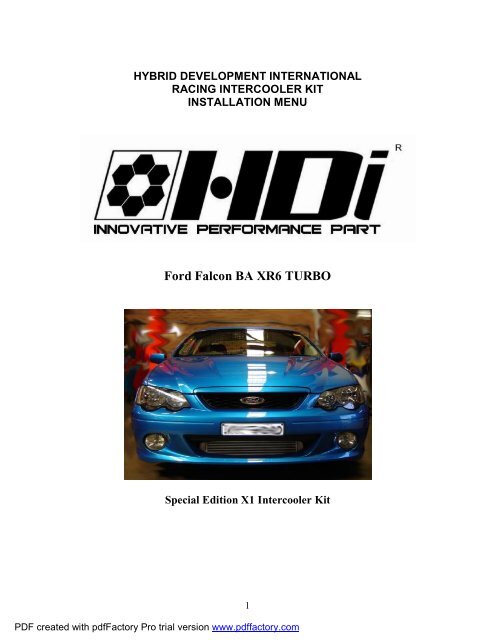
HYBRID DEVELOPMENT INTERNATIONAL<br />
RACING INTERCOOLER KIT<br />
INSTALLATION MENU<br />
Ford Falcon BA <strong>XR6</strong> TURBO<br />
Special Edition X1 Intercooler Kit<br />
PDF created with pdfFactory Pro trial version www.pdffactory.com<br />
1
Please read before continue<br />
Please read through all the instruction and practice all precaution in all aspect of safety and every step prior<br />
and during the <strong>installation</strong>. This <strong>installation</strong> menu is purely for HYBRID DEVELOPMENT INTERNATIONAL<br />
RACING INTERCOOLER KIT<br />
and is used as guide only. As different vehicles in different countries may have different specifications and<br />
component layout. Therefore, it is important to make sure the connection is properly done by authorized<br />
personals or dealers.<br />
Warning<br />
• Check and clean all open area for foreign object inside.<br />
• Installation should only be carried out by authorized dealer or agent only.<br />
• Avoiding water, liquid or fluid during and post <strong>installation</strong>.<br />
• Do not install the unit in a place that will interface the driver.<br />
• This product is off road only not for public road.<br />
• Never adjust the fitment when the car is moving or on public road ,doing so is dangerous to<br />
yourselves and others<br />
• Make sure there is adequate ventilation if you are installing or setting it in door.<br />
LIMITED WARRANTY<br />
Hybrid Development International P/L will warranty for the period of 1 year from original purchase against<br />
all defects in workmanship and materials. Hybrid Development International P/L is not responsible for<br />
expenses incurred for labor, personal injury or inconvenience. Hybrid Development International P/L sole<br />
responsibility is to offer a replacement product or to repair the damaged product. Hybrid Development<br />
International P/L cannot warranty products damaged by improper <strong>installation</strong>. All other products sold by<br />
Hybrid Development International P/L are warranted by the original manufactures and is not the<br />
responsibility of Hybrid Development International P/L.<br />
All products are for racing use only.<br />
All rights reserved.<br />
For more information please visit www.hybrid-power.com or contact tech@hybrid-power.com<br />
PDF created with pdfFactory Pro trial version www.pdffactory.com<br />
2
Pictures are for illustration purposes only and to be used as a guide.<br />
Remove the plastic splash guard from under the<br />
car front bumper bar. From underneath the car,<br />
disconnect the factory fog lights in the bumper<br />
bar then remove the bolts and clips from inside<br />
the wheel arches and underneath the front<br />
bumper bar.<br />
Using a Heavy duty Car Jack, lift the car and place<br />
it on Jack Stands.<br />
PDF created with pdfFactory Pro trial version www.pdffactory.com<br />
3<br />
Remove the plastic air duct from air box<br />
(permanently removed), front grille and radiator<br />
plastic shroud.<br />
Now remove the front bumper bar by releasing<br />
the mounting clips in a sideways motion on both<br />
sides.<br />
Remove the white plastic impact bar from the<br />
support bar.
PDF created with pdfFactory Pro trial version www.pdffactory.com<br />
4<br />
Remove standard <strong>intercooler</strong> and <strong>intercooler</strong> top<br />
pipe<br />
Remove front factory <strong>intercooler</strong> pipe from<br />
engine cross over manifold<br />
Install the supplied HDi boost adaptor between<br />
the factory cast pipe under the battery<br />
Or remove the cast pipe and mount directly to<br />
the car. Fasten the factory pressure sensor.
PDF created with pdfFactory Pro trial version www.pdffactory.com<br />
5<br />
Trim back the bumper support bar on the<br />
passenger side as per the shaded area<br />
Trim back the bumper support bar on the drivers<br />
side as per the shaded area<br />
Remove the lower power steering cooler from<br />
the radiator support bar<br />
Lower Intercooler Bracket Assembly<br />
Mount the brackets in this order to the radiator<br />
reinforcement:<br />
1. Lower <strong>intercooler</strong> bracket<br />
2. HDi Spacer<br />
3. Power steering cooler<br />
4. Fasten to the reinforcement bar.
PDF created with pdfFactory Pro trial version www.pdffactory.com<br />
6<br />
Carefully install the HDi <strong>intercooler</strong> behind the<br />
bumper support bar. (We recommend that you<br />
place cardboard over the <strong>intercooler</strong> tank ends<br />
while making adjustments to lessen chances of<br />
damage). Check for Intercooler clearance.<br />
Fasten the HDi Intercooler with the 8mm bolts to<br />
the lower <strong>intercooler</strong> brackets.<br />
Using the L Shaped top brackets, mark a point<br />
to fasten the top brackets on both side of the<br />
bumper support. Make sure the cooler is clear<br />
of the support bar to avoid abrasion. Drill an<br />
8mm hole to later fasten the top bracket and<br />
8mm nut and bolt.<br />
Fasten the L Shaped top brackets to the vehicle<br />
and the <strong>intercooler</strong>. Check <strong>intercooler</strong> alignment<br />
and fasten all brackets securely.
PDF created with pdfFactory Pro trial version www.pdffactory.com<br />
7<br />
Beware of foreign objects falling into the <strong>intercooler</strong><br />
piping during <strong>installation</strong><br />
Install the HDi silicon hose 2.5 – 2.4” reducer to<br />
the cold pipe cross over with the supplied HDi<br />
Super clamp. Fasten tightly.<br />
Install an HDi Clamp to the silicon hose then<br />
install the top driver’s side <strong>intercooler</strong> pipe. Do<br />
not fasten tightly to allow for adjustments.<br />
Remove the power steering bottle plastic shroud<br />
if there is no clearance (May vary depending on<br />
the model)<br />
Connect the supplied HDi silicon vacuum hose<br />
between the top <strong>intercooler</strong> pipe and the HDI<br />
boost adaptor/boost sensor near the battery.<br />
Cable tie if required.
PDF created with pdfFactory Pro trial version www.pdffactory.com<br />
8<br />
Install top passenger side pipe using the<br />
supplied HDi silicon hose and HDi Clamps.<br />
(Connect this pipe using the longer straight<br />
section to the top pipe) Do not fasten tightly to<br />
make adjustments<br />
Gently by hand, bend towards the passenger<br />
side chassis rail the air conditioner pipe enough<br />
to clear the <strong>intercooler</strong> pipe. (may vary<br />
dependent on model)<br />
Install bottom passenger side <strong>intercooler</strong> pipe<br />
with HDi silicon hose and HDi Clamps. You may<br />
need to trim the side of the radiator fan plastic<br />
cover for pipe clearance for the bottom<br />
<strong>intercooler</strong> pipe (May vary depending on the<br />
model)
PDF created with pdfFactory Pro trial version www.pdffactory.com<br />
9<br />
Install supplied support bracket to the lower<br />
<strong>intercooler</strong> pipe. Fastening to the existing nut<br />
on the washer bottle support<br />
Support Bracket Assembly<br />
1. U shaped bracket<br />
2. Standard clamp<br />
3. Clamp mounting and nut<br />
Join the lower passenger side <strong>intercooler</strong> pipe<br />
with supplied HDi silicon hose and HDi Clamps<br />
If your Falcon model has a joiner between two<br />
rubber pipes (from the drivers side hot pipe),<br />
remove the joiner and install the lower drivers<br />
side <strong>intercooler</strong> pipe to the rubber hose using<br />
the HDi Clamps .<br />
Note: Depending on your model Falcon, if you<br />
are supplied with a one piece rubber hot pipe, it<br />
will need to be cut so too join the lower driver’s<br />
side <strong>intercooler</strong> pipe to the rubber hose with the<br />
HDi Clamps and fasten.
PDF created with pdfFactory Pro trial version www.pdffactory.com<br />
10<br />
Check all pipes and fasteners for proper<br />
clearance, especially around the air conditioner<br />
compressor belt. Then tighten all HDi Clamps.<br />
Re install the white plastic impact bar.<br />
Now re-install the front bumper bar and connect<br />
the fog lights from underneath the bumper bar.<br />
Re install the splash guard under the bumper bar<br />
Finally, re insert the front grille and radiator<br />
plastic shroud.<br />
Ready for test drive…feel the power<br />
Note:<br />
Due to the high flow and low pressure drop<br />
characteristic of the HDi <strong>intercooler</strong>s – the turbo<br />
efficiency may increase and the factory boost<br />
limiter maybe reached. If this is experienced,<br />
please consult an HDi Technical Dealer.