You also want an ePaper? Increase the reach of your titles
YUMPU automatically turns print PDFs into web optimized ePapers that Google loves.
<strong>Reflow</strong> <strong>for</strong> <strong>Mac</strong> - <strong>User</strong> <strong>Manual</strong>! Version 1.5 - English - 04/27/2012<br />
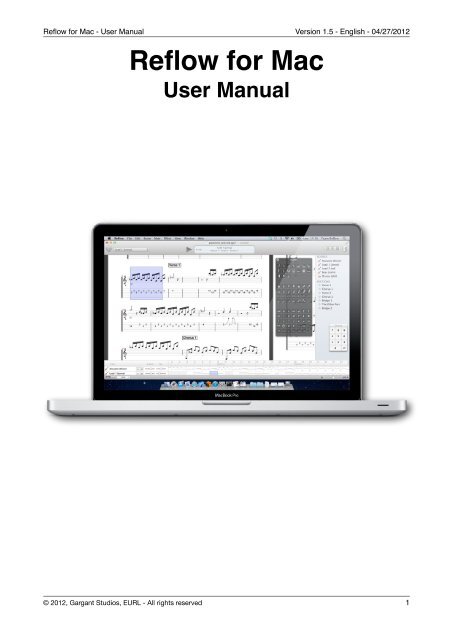
<strong>Reflow</strong> <strong>for</strong> <strong>Mac</strong><br />
<strong>User</strong> <strong>Manual</strong><br />
© 2012, Gargant Studios, EURL - All rights reserved! 1
<strong>Reflow</strong> <strong>for</strong> <strong>Mac</strong> - <strong>User</strong> <strong>Manual</strong>! Version 1.5 - English - 04/27/2012<br />
Table of Contents<br />
Getting Started! 4<br />
The <strong>Reflow</strong> Start Screen! 4<br />
Creating a New File! 5<br />
The File Library! 6<br />
The <strong>Reflow</strong> <strong>User</strong> Interface! 7<br />
Entering Notes! 7<br />
On a Tablature! 7<br />
Using the Visual Fretboard! 7<br />
Using a MIDI Keyboard! 8<br />
Using the Visual Keypad! 8<br />
Changing Rhythm! 9<br />
Mouse Selection! 9<br />
Multi-Voice Edition! 10<br />
Reference! 11<br />
File Properties! 11<br />
Tracks! 12<br />
Create a Track! 13<br />
Remove a Track! 13<br />
Reorder and Duplicate Tracks! 13<br />
Tuning and String Count! 14<br />
Capo! 14<br />
MIDI Program! 15<br />
The Mixer! 15<br />
Parts! 16<br />
Switching between Parts! 17<br />
Adding a new Part! 17<br />
Removing a Part! 17<br />
Reorder and Duplicate Parts! 17<br />
Measures! 18<br />
Manipulate Measures! 18<br />
Time Signature! 18<br />
Key Signature! 19<br />
Clef and Ottavia! 19<br />
Sections! 20<br />
Create and Remove Sections! 20<br />
© 2012, Gargant Studios, EURL - All rights reserved! 2
<strong>Reflow</strong> <strong>for</strong> <strong>Mac</strong> - <strong>User</strong> <strong>Manual</strong>! Version 1.5 - English - 04/27/2012<br />
Reorder and Duplicate Sections! 20<br />
Repeats and Directions! 21<br />
Chord Names and Diagrams! 22<br />
Insert Chord Names! 22<br />
Insert Chord Diagrams! 23<br />
The Chord Diagram Browser! 24<br />
Effects and Articulations! 25<br />
Dynamics! 25<br />
Accents! 25<br />
Staccato! 26<br />
Drum Sticking! 26<br />
Brush and Arpeggio! 26<br />
Dead Note! 27<br />
Pickstrokes! 27<br />
Hammer-on, Pull-off! 27<br />
Tap, Slap, Pop! 28<br />
Vibrato! 28<br />
Palm Mute, Let Ring! 28<br />
Bends! 29<br />
Slides! 29<br />
Share your compositions! 30<br />
MIDI Export! 30<br />
WAVE Export! 30<br />
Guitar Pro 5 Export! 30<br />
PDF Export! 30<br />
© 2012, Gargant Studios, EURL - All rights reserved! 3
<strong>Reflow</strong> <strong>for</strong> <strong>Mac</strong> - <strong>User</strong> <strong>Manual</strong>! Version 1.5 - English - 04/27/2012<br />
Getting Started<br />
The <strong>Reflow</strong> Start Screen<br />
The first time you start <strong>Reflow</strong> <strong>for</strong> <strong>Mac</strong>, you will see this empty document.<br />
Here we have a One Measure long Guitar Song, with Tablature and Standard Notation<br />
Staves.<br />
Use the numeric keys of your <strong>Mac</strong> keyboard to enter notes quickly, and move your cursor<br />
with the Arrow keys or by clicking on the score.<br />
The Palette on the Right gives you access to all major editing features in <strong>Reflow</strong>. Do not<br />
hesitate to try them, as they are all undoable (Edit > Undo or Cmd - Z).<br />
On the bottom side of the picture, you can see the Visual Keyboard and the Visual<br />
Fretboard, which you can use to input your notes, and see where the selected notes<br />
should be played on a Piano or on a Guitar.<br />
There is also a numeric keypad on the Right that is mostly used as a remainder of the<br />
numeric keypad on your <strong>Mac</strong> Keyboard. Drummers will find this usefull as it directly maps<br />
to drum elements.<br />
© 2012, Gargant Studios, EURL - All rights reserved! 4
<strong>Reflow</strong> <strong>for</strong> <strong>Mac</strong> - <strong>User</strong> <strong>Manual</strong>! Version 1.5 - English - 04/27/2012<br />
Creating a New File<br />
The easiest way to create an empty file is by calling the menu File > New. This will create<br />
an empty song <strong>for</strong> an Acoustic Guitar, using a Standard Tuning (EADGBe).<br />
You can also call the Browser Window, to bring a list of Template Songs. This is usefull if<br />
you don’t play the Guitar, but Drums, Piano, Bass or Banjo.<br />
Call the Browser with the View > Show Browser menu entry, or by clicking on the<br />
button in the Toolbar. This will bring you the following window, then you can double-click on<br />
a File to create an empty Song.<br />
© 2012, Gargant Studios, EURL - All rights reserved! 5
<strong>Reflow</strong> <strong>for</strong> <strong>Mac</strong> - <strong>User</strong> <strong>Manual</strong>! Version 1.5 - English - 04/27/2012<br />
The File Library<br />
The Browser window references all the <strong>Reflow</strong> files located on your iCloud storage.<br />
To add files to your library, you can simply drag ‘n drop files on the Browser Window. They<br />
will be copied to the Library.<br />
© 2012, Gargant Studios, EURL - All rights reserved! 6
<strong>Reflow</strong> <strong>for</strong> <strong>Mac</strong> - <strong>User</strong> <strong>Manual</strong>! Version 1.5 - English - 04/27/2012<br />
The <strong>Reflow</strong> <strong>User</strong> Interface<br />
Entering Notes<br />
On a Tablature<br />
If your cursor is located on a Tablature Staff, the easiest way to enter notes <strong>for</strong> Stringed<br />
Instruments such as Guitars, Bass and Banjo, is to type fret numbers on the numeric<br />
keypad of your <strong>Mac</strong>.<br />
Using the Visual Fretboard<br />
You can also use the Visual Fretboard and click where you want to add notes :<br />
Clicking on a red note will remove it.<br />
Notes in the same measure but not on the current chord will be shown as a circle, as<br />
shown in the following picture :<br />
© 2012, Gargant Studios, EURL - All rights reserved! 7
<strong>Reflow</strong> <strong>for</strong> <strong>Mac</strong> - <strong>User</strong> <strong>Manual</strong>! Version 1.5 - English - 04/27/2012<br />
Using a MIDI Keyboard<br />
If you have a MIDI Keyboard connected, open the Preferences Window (<strong>Reflow</strong> ><br />
Preferences menu), and select your MIDI Input Keyboard as you see in the following<br />
picture :<br />
You can then use your MIDI Keyboard to enter notes directly by playing them.<br />
Every time you play a chord, <strong>Reflow</strong> will automatically insert and go to the next beat so<br />
you can keep on playing notes without the need to move your cursor right.<br />
This input mode is new to <strong>Reflow</strong> 1.5 and will simplify the sheet music creation <strong>for</strong> Piano<br />
players.<br />
Using the Visual Keypad<br />
This last mode is similar to using the numeric keypad on your keyboard, but using a<br />
Mouse.<br />
As shown on the picture, this makes editing Drum easier. Press the “Hh” Button to enter a<br />
Hi-Hat hit, Press the “Bd” button to enter a Bass Drum hit, and so on ...<br />
Using the alt button on the lower right corner of the keypad, you have access to extra<br />
drum elements.<br />
© 2012, Gargant Studios, EURL - All rights reserved! 8
<strong>Reflow</strong> <strong>for</strong> <strong>Mac</strong> - <strong>User</strong> <strong>Manual</strong>! Version 1.5 - English - 04/27/2012<br />
Changing Rhythm<br />
To select the note value of the selected chords, use the topmost line of the Tool Palette :<br />
You can also use the palette to add Triplets, dotted notes and tied notes.<br />
The “Split Beat” button ( ) is quite interesting, especially <strong>for</strong> drummers. It can be used<br />
to split a chord between two equal parts. For example, you can split a quarter note<br />
between two eighth notes.<br />
To increase or decrease the Note Value of the selected chords, you can also use the Plus /<br />
Minus keys on your Keyboard.<br />
Mouse Selection<br />
Select multiple adjacent chords by dragging your mouse over Staves. This will start an<br />
extended selection as following :<br />
If you hold down the Alt key while dragging the mouse, you can start a rectangle selection,<br />
which is usefull <strong>for</strong> selecting only a subset of strings of your tablature :<br />
© 2012, Gargant Studios, EURL - All rights reserved! 9
<strong>Reflow</strong> <strong>for</strong> <strong>Mac</strong> - <strong>User</strong> <strong>Manual</strong>! Version 1.5 - English - 04/27/2012<br />
Multi-Voice Edition<br />
<strong>Reflow</strong> allows you to write your notes on two different melodic voices, commonly referred<br />
as High Voice, and Low Voice.<br />
Here is an example of using multivoice edition :<br />
Drummers will easily recognize this pattern; Cymbals are written with the stems up, and<br />
Bass Drum / Snare Hits are written with the stem down. These are two independent<br />
rhythmic phrases which share the same staff.<br />
To switch between the High Voice and Low voice, use the toggle at the lower left corner of<br />
the screen ( ).<br />
Note that the Tracks using a Grand Staff can have up to four voices (two <strong>for</strong> each staff) :<br />
© 2012, Gargant Studios, EURL - All rights reserved! 10
<strong>Reflow</strong> <strong>for</strong> <strong>Mac</strong> - <strong>User</strong> <strong>Manual</strong>! Version 1.5 - English - 04/27/2012<br />
Reference<br />
File Properties<br />
Every file in <strong>Reflow</strong> comes with some extra in<strong>for</strong>mation that can be used in different<br />
places. The more important ones are the Song Title, and the Song Artist.<br />
To change the File Properties, simply call File > File Properties (Cmd + Shift + i). This will<br />
bring the following dialog :<br />
Not all these properties are directly reflected to your score (at the moment), but title and<br />
artist are shown up on your sheet :<br />
Also, Title and Artist are used in your File Library to identify your files :<br />
© 2012, Gargant Studios, EURL - All rights reserved! 11
<strong>Reflow</strong> <strong>for</strong> <strong>Mac</strong> - <strong>User</strong> <strong>Manual</strong>! Version 1.5 - English - 04/27/2012<br />
Tracks<br />
<strong>Reflow</strong> is designed to separate the concept of Tracks with the concept of Parts (see the<br />
following section <strong>for</strong> more details about the Parts, sometimes named Scores).<br />
You can see a <strong>Reflow</strong> Track as an Instrument, or an entry on your Mixer. Whereas Parts<br />
are physical sheet music that can group one or more instruments, hence tracks.<br />
As an example, in a classical orchestra, the Conductor would use a Full Score which<br />
contain all instruments of the composition, whereas every single instrument player should<br />
have only the Part he or she has to play.<br />
To manipulate the Tracks in your <strong>Reflow</strong> song, call the Score > Tracks and Parts (Cmd +<br />
T) menu. Or press the button in the Tool Bar.<br />
This will bring you the following Properties window :<br />
© 2012, Gargant Studios, EURL - All rights reserved! 12
<strong>Reflow</strong> <strong>for</strong> <strong>Mac</strong> - <strong>User</strong> <strong>Manual</strong>! Version 1.5 - English - 04/27/2012<br />
Create a Track<br />
Simply click on the + button to bring the Track Templates popover, in which you can<br />
choose which Instrument you would like your track to represent by double clicking in the<br />
list :<br />
Note that not all the instruments are represented in this List, <strong>for</strong> example if you want to<br />
create a Violin Track, simply create a Keyboard track and change its MIDI Program to<br />
Violin. Keyboard Track just refers to a generic instrument that uses a Single Standard<br />
Staff. (while Grand Staff Keyboard is a generic instrument that uses one staff <strong>for</strong> each<br />
hand).<br />
Similarly, remember that you can change the String Count of your Track after having<br />
created it. So if you need a 8 strings Guitar, simply create a 7 strings guitar and add one<br />
string in the Tuning settings.<br />
Note that <strong>Reflow</strong> allows you to manipulate Tracks while audio playback is running, giving<br />
you a non interruptive workflow.<br />
Remove a Track<br />
To Delete a Track, simply press the - button below the track list.<br />
Important: All these changes can be undone if you close this window.<br />
Reorder and Duplicate Tracks<br />
You can drag n’ drop Tracks in the Tracks list with your mouse to reorder them.<br />
Also, if Alt is held down while dragging, <strong>Reflow</strong> will duplicate the whole track with its<br />
content. This can be very useful if you don’t want to start a new track from scratch.<br />
© 2012, Gargant Studios, EURL - All rights reserved! 13
<strong>Reflow</strong> <strong>for</strong> <strong>Mac</strong> - <strong>User</strong> <strong>Manual</strong>! Version 1.5 - English - 04/27/2012<br />
Tuning and String Count<br />
Changing the Tuning or adding strings to your Tablature based Track is an easy task.<br />
Simply click on the button right to the Tuning field ( ) to bring the<br />
Tuning Popover :<br />
In this popover, you can detune all your strings, add/remove strings, or select a Tuning in<br />
the Tuning Preset List.<br />
When you’re done with your changes, click Apply to modify your tuning.<br />
Note that like every other operations in <strong>Reflow</strong>, tuning changes can be made while<br />
playback is running. And of course these changes are reversible.<br />
Capo<br />
You can add a Capo to your Guitar using the following field in this window :<br />
This will transpose all the notes up and should be visible in the fretboard :<br />
© 2012, Gargant Studios, EURL - All rights reserved! 14
<strong>Reflow</strong> <strong>for</strong> <strong>Mac</strong> - <strong>User</strong> <strong>Manual</strong>! Version 1.5 - English - 04/27/2012<br />
MIDI Program<br />
<strong>Reflow</strong> 1.5 comes packed with a SoundFont that gives you access to all the 128<br />
instruments in the General Midi specification, plus a Drumkit.<br />
The Mixer<br />
All your tracks present in your song are visible in the Mixer, at the bottom of the screen :<br />
This is where you can tweak the Audio settings of your tracks, such as Solo / Mute,<br />
Volume and Pan.<br />
<strong>Reflow</strong> 1.5 now introduces the Navigator on the right side of the picture shown above. This<br />
makes it easier to see where the playback is and get an overall view of the song.<br />
© 2012, Gargant Studios, EURL - All rights reserved! 15
<strong>Reflow</strong> <strong>for</strong> <strong>Mac</strong> - <strong>User</strong> <strong>Manual</strong>! Version 1.5 - English - 04/27/2012<br />
Parts<br />
Parts in <strong>Reflow</strong> are quite similar to physical sheet music.<br />
Every Part contains one or more instruments from your track List, and has its own display<br />
properties.<br />
Manipulating Parts is done in the same window as the tracks properties window (see the<br />
previous chapter), but on the second Tab.<br />
You can bring this dialog with Score > Edit Tracks and Parts.<br />
On the right side, you can select which instruments you want to display in every Parts.<br />
Please note that you can create as many Parts as you want, and Removing a Part does<br />
not delete the Track it contains. So feel free to add, remove and reorder your parts to get<br />
the configuration you prefer.<br />
You can choose to hide Standard Notation or Tablature by unchecking the corresponding<br />
boxes in the Presentation Options.<br />
Moreover, <strong>Reflow</strong> 1.5 introduced the Multi-bar Rests, which are automatically calculated<br />
per score, by checking the Use Multibar Rests option, useful to reduce your Part page<br />
count when printing.<br />
© 2012, Gargant Studios, EURL - All rights reserved! 16
<strong>Reflow</strong> <strong>for</strong> <strong>Mac</strong> - <strong>User</strong> <strong>Manual</strong>! Version 1.5 - English - 04/27/2012<br />
Switching between Parts<br />
If you want to work on a different part, you can click on the Part List in the Part Properties<br />
window shown on the previous picture.<br />
Alternatively, you can use the right panel of the main window to switch :<br />
And finally there is the popup list at the left of the Tool Bar :<br />
Adding a new Part<br />
By clicking on the + button just below the Part List, you will create a new empty score.<br />
Then you can select which tracks you want to present in it.<br />
Removing a Part<br />
This is done easily by clicking the minus button below the Part List while selecting the part<br />
you want to erase.<br />
Reorder and Duplicate Parts<br />
Similarly to the way Tracks are handled, you can drag and drop your parts in the List to<br />
reorder them.<br />
If Alt is held down while dragging, you will duplicate your part.<br />
© 2012, Gargant Studios, EURL - All rights reserved! 17
<strong>Reflow</strong> <strong>for</strong> <strong>Mac</strong> - <strong>User</strong> <strong>Manual</strong>! Version 1.5 - English - 04/27/2012<br />
Measures<br />
Manipulate Measures<br />
To manipulate measures in <strong>Reflow</strong>, you can use the Score menu, as shown on the<br />
following picture :<br />
These options are also available in the Palette ( ).<br />
Time Signature<br />
Time Signature (or Time Meter) can be changed using the Time Signature dialog. Open it<br />
using the Score > Time Signature menu, or the ( ) Button in the Palette.<br />
Please Note that if you select a Bar Range be<strong>for</strong>e calling this dialog, you will be able to<br />
modify the Time Signature from the first selected bar, to the last selected bar.<br />
© 2012, Gargant Studios, EURL - All rights reserved! 18
<strong>Reflow</strong> <strong>for</strong> <strong>Mac</strong> - <strong>User</strong> <strong>Manual</strong>! Version 1.5 - English - 04/27/2012<br />
Key Signature<br />
Key Signature can be changed using the Key Signature dialog. Open it using the Score ><br />
Key Signature menu, or the ( ) button in the Palette.<br />
In this dialog, you can choose your key, and switch between Minor and Major Keys.<br />
Clef and Ottavia<br />
Clef and ottavia can be changed in the Clef dialog. Open it using the Score > Clef menu or<br />
the ( ) button in the Palette.<br />
In this dialog, you can choose between Treble and Bass clef. (Note: C-Clef will be added<br />
in a future <strong>Reflow</strong> update).<br />
You can also choose clef ottaviation (8va, 8vb, 15ma, 15 mb).<br />
© 2012, Gargant Studios, EURL - All rights reserved! 19
<strong>Reflow</strong> <strong>for</strong> <strong>Mac</strong> - <strong>User</strong> <strong>Manual</strong>! Version 1.5 - English - 04/27/2012<br />
Sections<br />
Sections in <strong>Reflow</strong> makes working on small chunks of your song easier.<br />
Sections are listed on the right panel of the Main window :<br />
Create and Remove Sections<br />
<strong>Reflow</strong> recognizes sections with the Rehearsal Signs you define in your Song.<br />
To add Rehearsal signs, press the Rehearsal button in the Palette ( ), or call Score ><br />
Rehearsal Sign. This will bring you the following popup :<br />
The Section List is automatically updated when you insert or clear Rehearsal Signs.<br />
Reorder and Duplicate Sections<br />
You can reorder complete chunks of your song using the Sections. Drag and drop sections<br />
in the Sections List and you will move the corresponding measures in your song.<br />
Similarly, if you hold down the Alt button, you will be able to duplicate the corresponding<br />
measures.<br />
© 2012, Gargant Studios, EURL - All rights reserved! 20
<strong>Reflow</strong> <strong>for</strong> <strong>Mac</strong> - <strong>User</strong> <strong>Manual</strong>! Version 1.5 - English - 04/27/2012<br />
Repeats and Directions<br />
All the repeats and musical directions in <strong>Reflow</strong> are handled in the same popup. You can<br />
call it from Score > Repeats or by pressing the Repeats button in the Palette ( ).<br />
Starting at version 1.5, <strong>Reflow</strong> now handles the musical symbols and jumps, such as<br />
Coda, Segno, D.C., ...<br />
© 2012, Gargant Studios, EURL - All rights reserved! 21
<strong>Reflow</strong> <strong>for</strong> <strong>Mac</strong> - <strong>User</strong> <strong>Manual</strong>! Version 1.5 - English - 04/27/2012<br />
Chord Names and Diagrams<br />
In <strong>Reflow</strong>, you can add Chord diagrams to your compositions. And if you don’t need<br />
diagrams, you can insert only chord names.<br />
Insert Chord Names<br />
To insert a Chord Name, call the Score > Chord Name menu, or press the ( ) button in<br />
the Palette.<br />
You should then see this popup where your cursor is located :<br />
This window contains all the options you need to build your Chord Name, start by selecting<br />
the Root Note, then choose your Chord Type, and then select a suggested symbol, or<br />
write your own symbol if it does not suit your needs.<br />
There is a subtile difference between how <strong>Reflow</strong> handles chord names and chord<br />
diagrams. Chord Names are attached to every tracks, while Chord Diagrams are attached<br />
to a single Track. This way your chord names appear on every score, while diagrams will<br />
appear only <strong>for</strong> the scores that contain the corresponding Tracks.<br />
Clearing a Chord Name is done in this same window.<br />
© 2012, Gargant Studios, EURL - All rights reserved! 22
<strong>Reflow</strong> <strong>for</strong> <strong>Mac</strong> - <strong>User</strong> <strong>Manual</strong>! Version 1.5 - English - 04/27/2012<br />
Insert Chord Diagrams<br />
Similarly to the Chord Names, you can insert Chord Diagrams, by calling the Score ><br />
Chord Diagram menu, or by pressing the ( ) button in the Palette.<br />
It will bring the Chord Diagram Popup window, which is very similar to the Chord Name<br />
popup with some Diagram additions :<br />
To edit your diagram, you can click on a Suggested diagram in the Diagram Hints list, or<br />
simply enter the Frets using the appropriate field.<br />
When you’re done, click on the Insert button.<br />
If you want to remove a chord diagram, simply put your cursor on the corresponding beat<br />
the diagram is attached to, call this dialog and click on the Clear button.<br />
Note that <strong>Reflow</strong> does not suggest Diagram Hints <strong>for</strong> all chord types, and does not validate<br />
that your diagram you enter corresponds to the chord you requested. You should double<br />
check that when typing the Diagram yourself. This behavior is likely to be improved in<br />
future <strong>Reflow</strong> Versions.<br />
© 2012, Gargant Studios, EURL - All rights reserved! 23
<strong>Reflow</strong> <strong>for</strong> <strong>Mac</strong> - <strong>User</strong> <strong>Manual</strong>! Version 1.5 - English - 04/27/2012<br />
The Chord Diagram Browser<br />
You can also access the diagrams list in the <strong>Reflow</strong> Browser.<br />
Prior to <strong>Reflow</strong> 1.5, this browser was the only way to add chords to your compositions.<br />
Note that you can drag and drop a diagram from this list to your composition :<br />
© 2012, Gargant Studios, EURL - All rights reserved! 24
<strong>Reflow</strong> <strong>for</strong> <strong>Mac</strong> - <strong>User</strong> <strong>Manual</strong>! Version 1.5 - English - 04/27/2012<br />
Effects and Articulations<br />
The <strong>Reflow</strong> Palette contains many things you can add to your compositions.<br />
All of these effects are also accessible in the Note or Effect menu.<br />
Dynamics<br />
Dynamics (illustrated below) gives in<strong>for</strong>mation about the velocity at which the notes should<br />
be played.<br />
Dynamics (here are shown mf, ff, and ppp)<br />
Accents<br />
Accents are used to alterate velocity of the notes.<br />
From left to right, you will find: Ghost Note, Accent, Strong Accent.<br />
© 2012, Gargant Studios, EURL - All rights reserved! 25
<strong>Reflow</strong> <strong>for</strong> <strong>Mac</strong> - <strong>User</strong> <strong>Manual</strong>! Version 1.5 - English - 04/27/2012<br />
Staccato<br />
Staccato indicates that the notes should be played briefly. It alters the notes duration but<br />
not velocity.<br />
Staccato Notes are notated with a small dot below the note head.<br />
Drum Sticking<br />
You can indicate which hand to use when dealing with drum patterns.<br />
Some basic paradiddle with sticking<br />
Brush and Arpeggio<br />
Add Brush and Arpeggio effects to your compositions. Brush is used mostly by guitar<br />
players, while Arpeggios can be used <strong>for</strong> other instruments such as Piano.<br />
This effect that the notes in the brushed or arpeggiated chord should not be played simultaneously,<br />
but progressively in time.<br />
© 2012, Gargant Studios, EURL - All rights reserved! 26
<strong>Reflow</strong> <strong>for</strong> <strong>Mac</strong> - <strong>User</strong> <strong>Manual</strong>! Version 1.5 - English - 04/27/2012<br />
Dead Note<br />
The Dead Note is a Guitar Effect.<br />
This is used to indicate that a note has no particular fret, and should be muted with the left<br />
hand (<strong>for</strong> right handed players).<br />
Dead Notes on a Tablature<br />
Pickstrokes<br />
Sometimes you need to write on a Tablature which direction the pick stroke should go,<br />
upwards or downwards.<br />
Pickstrokes on a Tablature<br />
Hammer-on, Pull-off<br />
Guitar Notes notated as Hammer on / Pull off do not need to be played with the right hand.<br />
The triplet in this phrase is played as Hammer-on / Pull-off (Legato).<br />
© 2012, Gargant Studios, EURL - All rights reserved! 27
<strong>Reflow</strong> <strong>for</strong> <strong>Mac</strong> - <strong>User</strong> <strong>Manual</strong>! Version 1.5 - English - 04/27/2012<br />
Tap, Slap, Pop<br />
Use these buttons to add Tapping, Slapping and Popping in<strong>for</strong>mation to your Tablature.<br />
Slapping and Popping strings on a Bass phrase<br />
Vibrato<br />
Vibrato effect is used to slightly alterate pitch up and down over time.<br />
Left Hand Vibrato on a Guitar Tablature.<br />
Palm Mute, Let Ring<br />
Palm mute is achieved by damping the sound with the right hand. Let Ring means that<br />
notes should not be muted from chord to chord, this is used mostly in arpeggiated chords.<br />
Palm Mute and Let Ring on a Tablature<br />
© 2012, Gargant Studios, EURL - All rights reserved! 28
<strong>Reflow</strong> <strong>for</strong> <strong>Mac</strong> - <strong>User</strong> <strong>Manual</strong>! Version 1.5 - English - 04/27/2012<br />
Bends<br />
Clicking on this button will bring up the following Bend popup :<br />
Select your Bend Type, and pitch at which the note should be bent, then released.<br />
Slides<br />
Slides are used to make a smooth transition between two notes.<br />
© 2012, Gargant Studios, EURL - All rights reserved! 29
<strong>Reflow</strong> <strong>for</strong> <strong>Mac</strong> - <strong>User</strong> <strong>Manual</strong>! Version 1.5 - English - 04/27/2012<br />
Share your compositions<br />
MIDI Export<br />
<strong>Reflow</strong> can generate a MIDI file containing your entire song by calling File > Export ><br />
Export as MIDI.<br />
You can then easily import this MIDI file in your favorite DAW software such as Garage<br />
Band, Logic, Live, Reason, ...<br />
WAVE Export<br />
You can export your song as an audio file, in the raw uncompressed WAVE <strong>for</strong>mat.<br />
You can run this exporter using File > Export > Export as WAVE.<br />
Guitar Pro 5 Export<br />
If you wish to share your composition with a Guitar Pro user, simply call File > Export ><br />
Export as Guitar Pro 5.<br />
Please note that some elements won’t be exported because the file data <strong>for</strong>mats are not<br />
fully compatible. We’ll make our best to implement missing features.<br />
PDF Export<br />
Exporting as a PDF is done by Printing your document, and selecting the PDF menu.<br />
© 2012, Gargant Studios, EURL - All rights reserved! 30


