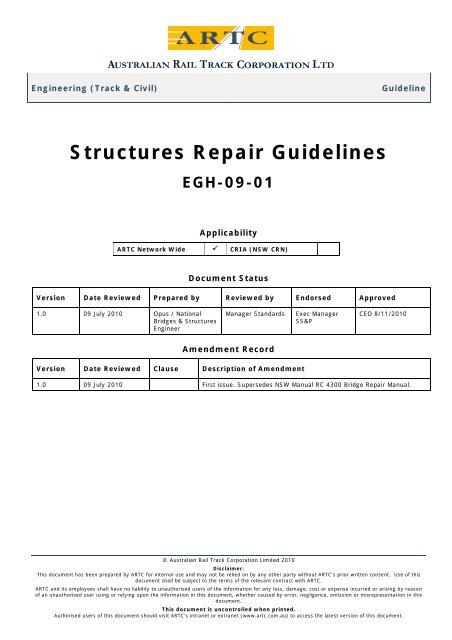
Structures Repair Guidelines EGH-09-01 - ARTC
Structures Repair Guidelines EGH-09-01 - ARTC
Structures Repair Guidelines EGH-09-01 - ARTC

Create successful ePaper yourself
Turn your PDF publications into a flip-book with our unique Google optimized e-Paper software.
Engineering (Track & Civil) Guideline<br />
<strong>Structures</strong> <strong>Repair</strong> <strong>Guidelines</strong><br />
<strong>EGH</strong>-<strong>09</strong>-<strong>01</strong><br />
Applicability<br />
<strong>ARTC</strong> Network Wide CRIA (NSW CRN)<br />
Document Status<br />
Version Date Reviewed Prepared by Reviewed by Endorsed Approved<br />
1.0 <strong>09</strong> July 2<strong>01</strong>0 Opus / National<br />
Bridges & <strong>Structures</strong><br />
Engineer<br />
Manager Standards Exec Manager<br />
SS&P<br />
Amendment Record<br />
Version Date Reviewed Clause Description of Amendment<br />
CEO 8/11/2<strong>01</strong>0<br />
1.0 <strong>09</strong> July 2<strong>01</strong>0 First issue. Supersedes NSW Manual RC 4300 Bridge <strong>Repair</strong> Manual.<br />
© Australian Rail Track Corporation Limited 2<strong>01</strong>0<br />
Disclaimer:<br />
This document has been prepared by <strong>ARTC</strong> for internal use and may not be relied on by any other party without <strong>ARTC</strong>’s prior written consent. Use of this<br />
document shall be subject to the terms of the relevant contract with <strong>ARTC</strong>.<br />
<strong>ARTC</strong> and its employees shall have no liability to unauthorised users of the information for any loss, damage, cost or expense incurred or arising by reason<br />
of an unauthorised user using or relying upon the information in this document, whether caused by error, negligence, omission or misrepresentation in this<br />
document.<br />
This document is uncontrolled when printed.<br />
Authorised users of this document should visit <strong>ARTC</strong>’s intranet or extranet (www.artc.com.au) to access the latest version of this document.
Engineering (Track & Civil) Guideline<br />
<strong>EGH</strong>-<strong>09</strong>-<strong>01</strong> <strong>Structures</strong> <strong>Repair</strong> <strong>Guidelines</strong><br />
Contents<br />
Contents<br />
1 Introduction ................................................................................................... 5<br />
1.1 The Purpose of the <strong>Guidelines</strong>.....................................................................5<br />
1.2 Common Users of the <strong>Guidelines</strong>.................................................................5<br />
1.3 Safety and Environmental Issues ................................................................5<br />
1.4 Cross Reference........................................................................................5<br />
1.5 Durability of <strong>Repair</strong>s..................................................................................5<br />
2 Steel ............................................................................................................... 6<br />
2.1 General ...................................................................................................6<br />
2.2 <strong>Repair</strong> Methods and Materials .....................................................................6<br />
2.2.1 Removing rivets and replacing with bolts ............................................6<br />
2.2.2 Patch painting.................................................................................6<br />
2.2.3 Filling voids ....................................................................................6<br />
2.2.4 Sealing interfaces............................................................................6<br />
2.2.5 <strong>Repair</strong>s to corroded flanges and webs of I girders ................................6<br />
2.2.6 <strong>Repair</strong>s to stiffeners, bracing connections, and bearings .......................6<br />
2.2.7 <strong>Repair</strong>s to fatigue damage................................................................6<br />
2.2.8 <strong>Repair</strong>s to impact damage ................................................................6<br />
2.2.9 <strong>Repair</strong>s to stepways and footway structures........................................6<br />
2.2.10 Complete replacement of members....................................................6<br />
2.3 References...............................................................................................6<br />
3 Reinforced Concrete ....................................................................................... 6<br />
3.1 General ...................................................................................................6<br />
3.2 <strong>Repair</strong> of Cracks .......................................................................................6<br />
3.2.1 Epoxy injection ...............................................................................6<br />
3.2.2 Grouting ........................................................................................6<br />
3.2.3 Routing and sealing .........................................................................6<br />
3.2.4 Drilling and plugging........................................................................6<br />
3.2.5 Stitching ........................................................................................6<br />
3.2.6 Adding reinforcement ......................................................................6<br />
3.2.7 Overlays and surface treatment ........................................................6<br />
3.2.8 Flexible sealant...............................................................................6<br />
3.3 Patch <strong>Repair</strong>s ...........................................................................................6<br />
3.3.1 <strong>Repair</strong> with cement-sand mortars ......................................................6<br />
3.3.2 <strong>Repair</strong> with polymer modified cementitious mortars .............................6<br />
Version 1.0 Date of last revision: <strong>09</strong> July 2<strong>01</strong>0 Page 2 of 78<br />
This document is uncontrolled when printed. See <strong>ARTC</strong> Intranet for latest version.
Engineering (Track & Civil) Guideline<br />
<strong>EGH</strong>-<strong>09</strong>-<strong>01</strong> <strong>Structures</strong> <strong>Repair</strong> <strong>Guidelines</strong><br />
Contents<br />
3.3.3 <strong>Repair</strong> with epoxy mortar .................................................................6<br />
3.4 Recasting with Concrete.............................................................................6<br />
3.5 Corrosion <strong>Repair</strong>s .....................................................................................6<br />
3.6 Sprayed Concrete (Shotcreting) ..................................................................6<br />
3.7 Protective Coatings ...................................................................................6<br />
3.7.1 Coating/repair to prevent chlorides ingress .........................................6<br />
3.7.2 Coating/repair to prevent carbonation ................................................6<br />
4 Masonry.......................................................................................................... 6<br />
4.1 General ...................................................................................................6<br />
4.2 Crack <strong>Repair</strong>s...........................................................................................6<br />
4.2.1 Active cracks ..................................................................................6<br />
4.2.2 Inactive cracks ...............................................................................6<br />
4.3 Fretting <strong>Repair</strong>s ........................................................................................6<br />
4.3.1 <strong>Repair</strong> of damaged joints..................................................................6<br />
4.3.2 <strong>Repair</strong> of damaged masonry units......................................................6<br />
4.4 <strong>Repair</strong> to Impact Damaged Masonry Units ....................................................6<br />
4.5 Other Types of <strong>Repair</strong>s ..............................................................................6<br />
4.5.1 Minor displacement of masonry .........................................................6<br />
4.5.2 Sulphate attack...............................................................................6<br />
4.5.3 Salt water and marine organisms ......................................................6<br />
5 Timber ............................................................................................................ 6<br />
5.1 General ...................................................................................................6<br />
5.2 <strong>Repair</strong>s Required for Common Defects .........................................................6<br />
5.2.1 Decay resulting in troughing, pipes, crushing or loss of section ..............6<br />
5.2.2 Splitting.........................................................................................6<br />
5.2.3 Pile splicing ....................................................................................6<br />
5.2.4 Vehicle impact damage ....................................................................6<br />
5.2.5 Weathering – abrasion, cracks, shakes, checks and splits......................6<br />
5.2.6 Corroded fasteners, missing fasteners and loose connections.................6<br />
5.2.7 Termite infestation (white ants) ........................................................6<br />
5.3 Replacement / Strengthening Methods.........................................................6<br />
5.3.1 Strengthening of internal girders .......................................................6<br />
5.3.2 Replacement of timber piles with new steel trestle ...............................6<br />
5.3.3 Replacement of headstocks, braces and wales, sills, etc........................6<br />
5.4 Propping..................................................................................................6<br />
5.4.1 Emergency propping........................................................................6<br />
5.4.2 Place / reinstate relieving props ........................................................6<br />
Version 1.0 Date of last revision: <strong>09</strong> July 2<strong>01</strong>0 Page 3 of 78<br />
This document is uncontrolled when printed. See <strong>ARTC</strong> Intranet for latest version.
Engineering (Track & Civil) Guideline<br />
<strong>EGH</strong>-<strong>09</strong>-<strong>01</strong> <strong>Structures</strong> <strong>Repair</strong> <strong>Guidelines</strong><br />
Contents<br />
5.4.3 Propping for maintenance activities....................................................6<br />
5.5 Reference ................................................................................................6<br />
5.6 List of Drawings in Appendix A....................................................................6<br />
6 Miscellaneous <strong>Repair</strong>s .................................................................................... 6<br />
6.1 General ...................................................................................................6<br />
6.2 <strong>Repair</strong>s to Scour Protection ........................................................................6<br />
6.3 Removal of Damaged / Deteriorated Bearing Pads .........................................6<br />
6.4 Replacement/ Installation of Road/Pedestrian Traffic Barriers ..........................6<br />
6.5 Track Baulking .........................................................................................6<br />
6.6 Installation of Transoms ............................................................................6<br />
6.6.1 Notching of transom ........................................................................6<br />
6.6.2 Transom fastenings .........................................................................6<br />
6.6.3 Location of fastenings ......................................................................6<br />
6.6.4 Removal of transom bolts.................................................................6<br />
6.7 Bridge Ends .............................................................................................6<br />
6.7.1 Transition zone from flexible to rigid formation ....................................6<br />
6.7.2 Ballast log for transom top underbridge..............................................6<br />
6.7.3 Ballast retention walls......................................................................6<br />
6.8 Culvert <strong>Repair</strong>s.........................................................................................6<br />
6.8.1 <strong>Repair</strong> of steel pipe invert.................................................................6<br />
6.8.2 Sleeving of brick culverts .................................................................6<br />
6.9 List of Drawings in Appendix B....................................................................6<br />
7 Typical Examples of Past <strong>Repair</strong> Work ............................................................ 6<br />
Appendices ............................................................................................................. 6<br />
Appendix A: Drawings relevant for Timber............................................................6<br />
Appendix B: Drawings relevant for Miscellaneous Items .........................................6<br />
Appendix C: Typical Examples of Past <strong>Repair</strong> Work ................................................6<br />
Version 1.0 Date of last revision: <strong>09</strong> July 2<strong>01</strong>0 Page 4 of 78<br />
This document is uncontrolled when printed. See <strong>ARTC</strong> Intranet for latest version.
Engineering (Track & Civil) Guideline<br />
<strong>EGH</strong>-<strong>09</strong>-<strong>01</strong> <strong>Structures</strong> <strong>Repair</strong> <strong>Guidelines</strong><br />
1 Introduction<br />
1.1 The Purpose of the <strong>Guidelines</strong><br />
Introduction<br />
The purpose of the guidelines is to provide repair methods for commonly found defects in concrete,<br />
masonry, steel, and/or timber structures, which are a part of routine maintenance of <strong>ARTC</strong> assets.<br />
Where necessary, <strong>Structures</strong> Representative is to seek advice from the <strong>Structures</strong> Manager whether<br />
a detailed structural design document is required.<br />
1.2 Common Users of the <strong>Guidelines</strong><br />
The users of the guidelines are:<br />
• <strong>Structures</strong> Manager<br />
• <strong>Structures</strong> Representative<br />
• Project Engineers<br />
• <strong>Structures</strong> Engineers<br />
• <strong>Structures</strong> Inspectors<br />
• Team Managers<br />
• Infrastructure Workers<br />
• Alliance Partners<br />
• Team Leaders<br />
• Work Group Leaders<br />
• Asset Managers<br />
• Contractors<br />
The responsibilities of <strong>Structures</strong> Manager/Representative/Inspector are defined in <strong>ARTC</strong> Track &<br />
Civil CoP Section 9.<br />
1.3 Safety and Environmental Issues<br />
At all times, persons entering the Rail Danger Zone must ensure that they comply with <strong>ARTC</strong>’s<br />
procedure SP-05-02 Competency/Communication Protocol for Entering the Rail Corridor, which can<br />
be found at www.artc.com.au.<br />
Site Manager or Supervisor to ensure the following are in place but not limited to:<br />
• Safety briefing is undertaken on site<br />
• Safe Work Method Statement (SWMS ) is available on site<br />
• All on-site workers have appropriate level of Personal Protective Equipment (PPE)<br />
• All on-site work is carried out in accordance with <strong>ARTC</strong> OH&S and Environmental policies.<br />
1.4 Cross Reference<br />
All sections are standalone in this document and therefore sections that are applicable for a<br />
particular work should be adopted.<br />
1.5 Durability of <strong>Repair</strong>s<br />
All repairs should have durability equal to or better than the original work/material. The<br />
accessibility of all parts of a repaired structure for inspection, cleaning, or painting should be<br />
accomplished by the proper proportioning of repairs and the design of their details. Closed<br />
sections, and pockets or depressions that will retain water, should be avoided. Pockets should be<br />
provided with effective drain holes or filled with waterproofing materials.<br />
Version 1.0 Date of last revision: <strong>09</strong> July 2<strong>01</strong>0 Page 5 of 78<br />
This document is uncontrolled when printed. See <strong>ARTC</strong> Intranet for latest version.
Engineering (Track & Civil) Guideline<br />
<strong>EGH</strong>-<strong>09</strong>-<strong>01</strong> <strong>Structures</strong> <strong>Repair</strong> <strong>Guidelines</strong><br />
2 Steel<br />
2.1 General<br />
This section presents methods for repairing defects in steel elements of any structure.<br />
The following minimum requirements apply, Unless Noted Otherwise (UNO), for any strengthening<br />
or replacement of steel elements:<br />
• Grade 250 mild steel<br />
• Minimum plate thickness is 8mm<br />
• Minimum diameter of a load carrying fastener is 16mm<br />
• All bolts are Grade 8.8, High Strength Structural (HSS) or swage bolts<br />
• All steel and, bolts, nuts and washers must be galvanised<br />
2.2 <strong>Repair</strong> Methods and Materials<br />
2.2.1 Removing rivets and replacing with bolts<br />
This section covers the removal of existing rivets and replacement with either high strength friction<br />
grip bolts or snug tightened bolts.<br />
To remove rivet heads, one of the following two methods can be used:<br />
• cutting using oxy-fuel equipment;<br />
• grinding off all or part of the head/tail.<br />
The following notes are useful to observe for removing of the rivet heads.<br />
Oxy-fuel cutting:<br />
Oxy-fuel cutting can be used in the following circumstances where the head to be removed is<br />
adjacent to:<br />
i. any steel that is to be removed and discarded as part of the repair process;<br />
ii. intermediate web stiffeners; or<br />
iii. minor bracing members that are not subject to dynamic or cyclic loading.<br />
Do not allow the oxy flame or molten steel to touch any other steel element except those listed<br />
above.<br />
In cases (ii) and (iii) above, where the steel adjacent to the rivet head is to remain in place, take<br />
care to avoid or minimise flame effects on that steel, to leave a neat hole for installation of the<br />
bolts.<br />
If the use of oxy-fuel cutting cannot be avoided in cases other than those above, take great care to<br />
avoid flame effects on the adjacent steel. Any flame affected steel around the hole must be<br />
completely removed by reaming prior to installing the bolt.<br />
Grinding:<br />
Use grinding to remove the head, if it is necessary to remove the portion of the head outside the<br />
shank diameter.<br />
Take care to avoid creating grooves and indentations in steel that is to remain in place. If such<br />
indentations and grooves occur, remove them by grinding the surface smooth after removing the<br />
rivet.<br />
Where large numbers of rivets are to be removed, consideration should be given to procuring a<br />
grinding bit such as a broaching bit, which when positioned centrally on the domed head will grind<br />
away material outside the shank diameter.<br />
Version 1.0 Date of last revision: <strong>09</strong> July 2<strong>01</strong>0 Page 6 of 78<br />
This document is uncontrolled when printed. See <strong>ARTC</strong> Intranet for latest version.<br />
Steel
Engineering (Track & Civil) Guideline<br />
<strong>EGH</strong>-<strong>09</strong>-<strong>01</strong> <strong>Structures</strong> <strong>Repair</strong> <strong>Guidelines</strong><br />
The procedure for preparing the hole for the bolt and limitations (in accordance with<br />
AS5100.6 – 2004) are described below:<br />
Prepare the hole to accept the bolt by reaming out the hole to the required diameter, then<br />
removing burrs etc. at the edge of the hole and creating a smooth, level surface on both sides for<br />
bedding the washer and bolt head. Grinding, wire brushing and scraping may be used.<br />
Use reaming to remove any areas of steel around the hole that have been flame affected during<br />
the removal of the rivet.<br />
The hole diameter after reaming must be no more than 2 mm larger than the diameter of the bolt<br />
not greater than 24mm diameter, and not more than 3mm larger for a bolt of greater than 24mm<br />
diameter. For all other holes, both oversize and slotted holes, hardened square plate washers of<br />
minimum thickness 10mm, to be installed under both the bolt head and nut as shown in Figure 2 -<br />
1.<br />
Figure 2 - 1 Replacement of bolts in oversize holes<br />
For the oversize and slotted holes the hole diameter cannot be greater than values provided in<br />
Table 2 - 1.<br />
Nominal diameter<br />
of fastener, d f<br />
(mm)<br />
Oversize hole in<br />
diameter (mm)<br />
Maximum size<br />
Slotted hole in<br />
length (mm)<br />
16 24 40<br />
20 28 50<br />
22 30 55<br />
24 32 60<br />
27 35 68<br />
30 38 75<br />
36 45 90<br />
Table 2 - 1 Limit on oversize or slotted holes<br />
The width of slotted hole should not be more than 2mm larger than the bolt diameter.<br />
Limitations on the use of oversize and slotted holes<br />
i. An oversize hole may be used in any or all plies of bearing-type and friction-type connections.<br />
ii. A slotted hole may be used only in alternate plies of friction-type and bearing-type<br />
connections.<br />
Table 2 - 2 lists the edge distances from the centre of a fastener to the edge of a plate or the<br />
flange of a rolled section and pitch distances between the fasteners.<br />
Version 1.0 Date of last revision: <strong>09</strong> July 2<strong>01</strong>0 Page 7 of 78<br />
This document is uncontrolled when printed. See <strong>ARTC</strong> Intranet for latest version.<br />
Steel
Engineering (Track & Civil) Guideline<br />
<strong>EGH</strong>-<strong>09</strong>-<strong>01</strong> <strong>Structures</strong> <strong>Repair</strong> <strong>Guidelines</strong><br />
Nominal<br />
diameter<br />
of<br />
fastener,<br />
d f (mm)<br />
Minimum Edge Distance (mm)<br />
Sheared or<br />
hand flame<br />
cut edge<br />
1.75d f<br />
Rolled plate;<br />
machine<br />
flame cut,<br />
sawn or<br />
planed edge<br />
1.5d f<br />
Rolled<br />
edge of a<br />
rolled<br />
section<br />
1.25d f<br />
Maximum<br />
edge<br />
Distance<br />
(mm)<br />
Minimum<br />
pitch<br />
(mm)<br />
2.5d f<br />
Version 1.0 Date of last revision: <strong>09</strong> July 2<strong>01</strong>0 Page 8 of 78<br />
This document is uncontrolled when printed. See <strong>ARTC</strong> Intranet for latest version.<br />
Steel<br />
Maximum<br />
pitch<br />
(mm)<br />
16 28 24 20 100 40 200<br />
20 35 30 25 100 50 200<br />
22 39 33 28 100 55 200<br />
24 42 36 30 100 60 200<br />
27 48 41 34 120 68 200<br />
30 53 45 38 120 75 200<br />
36 63 54 45 120 90 200<br />
Table 2 - 2 Edge distance and pitch for bolts<br />
For each standard rivet size the minimum size of replacement bolt to give equivalent shear<br />
capacity is given in Table 2 - 3. Larger bolts may be used.<br />
Rivet size<br />
Bolt size<br />
(Grade 8.8 ,<br />
High Strength<br />
Friction Grip)<br />
3/4" M20<br />
7/8” M22 or M24<br />
1” M27 or M30<br />
Table 2 - 3 Minimum replacement bolt sizes<br />
Preparation of interface for bolting should be as follows:<br />
i. All oil, dirt, loose scale, loose rust, burrs, fins and any other defects on the surfaces of contact,<br />
which will prevent solid seating of the fastener/washer and/or elements in the snug-tight<br />
condition, should be removed.<br />
ii. For a friction-type connection, the contact surfaces should be clean as-rolled surfaces or<br />
equivalent, and also need to be free from paint, lacquer, galvanizing or other applied finish.<br />
iii. For a bearing-type connection, an applied finish on the contact surfaces should be permitted.<br />
Following describes the assembly of a connection involving tensioned bolts<br />
i. The nut should be placed so that the mark visible after tightening.<br />
ii. Packing should be provided wherever necessary to ensure that the load-transmitting plies are<br />
in effective contact when the connection is tightened to the snug-tight condition. All packing<br />
should be steel with a surface condition similar to that of the adjacent plies.<br />
iii. Snug-tightening and final tensioning of the bolts in a connection should proceed from the<br />
stiffest part of the connection towards the free edges. High strength structural bolts that are to<br />
be tensioned may be used temporarily during erection to facilitate the assembly; however, if<br />
so used, they should not be finally tensioned until all bolts in the connection have been snugtightened<br />
in the correct sequence.
Engineering (Track & Civil) Guideline<br />
<strong>EGH</strong>-<strong>09</strong>-<strong>01</strong> <strong>Structures</strong> <strong>Repair</strong> <strong>Guidelines</strong><br />
iv. Re-tensioning of bolts that have been fully tensioned should be avoided, except that if retensioning<br />
is carried out it should only be permitted once and only where the bolt remains in<br />
the same hole in which it was originally tensioned and with the same grip. Re-tensioning of<br />
galvanized bolts should not be permitted. Under no circumstances should bolts that have been<br />
fully tensioned be reused in another hole. Touching up or re-tensioning of previously tensioned<br />
bolts that may have been loosened by the tensioning of adjacent bolts should not be<br />
considered as re-tensioning.<br />
Methods of tensioning bolts<br />
The methods of tensioning of bolts involve using of part-turn method, load indicating washer, or a<br />
direct-tension indication device.<br />
a) The procedure for tensioning of bolts by the part-turn method involves the following:<br />
• On assembly, all bolts in the connection should be first tightened to a snug-tight condition<br />
which is the tightness attained by a few impacts of an impact wrench or by the full effort<br />
of a person using a standard podger spanner.<br />
• After completing snug-tightening, location marks should be established to mark the<br />
relative position of the bolt and the nut and to control the final nut rotation. Observation<br />
of the final nut rotation may be achieved by using marked wrench socket, but location<br />
marks should be permanent when required for inspection.<br />
• Bolts should be finally tensioned by rotating the nut by the amount given in Table 2 - 4.<br />
During the final tensioning, the component not turned by the wrench should not rotate.<br />
Bolt length<br />
(underside of head<br />
to end of bolt)<br />
Up to and including 4<br />
diameter<br />
Over 4 diameter but not<br />
exceeding 8 diameter<br />
Over 8 diameters but not<br />
exceeding 12 diameter<br />
Both faces normal<br />
to bolt axis<br />
Disposition of outer face of bolted parts<br />
One face normal to<br />
bolt axis and other<br />
sloped<br />
Both faces<br />
sloped<br />
1/3 turn 1/2 turn 2/3 turn<br />
1/2 turn 2/3 turn 5/6 turn<br />
2/3 turn 5/6 turn 1 turn<br />
Table 2 - 4 Nut rotations from the snug-tight condition<br />
b) The procedure for tensioning of bolts using Load Indicating (LI) washers<br />
In this method Load Indicating (LI) washers with protrusions are used. Note that the LI<br />
washer should be placed under the nut.<br />
On tightening, the gap reduces as the protrusions depress and when the specified gap<br />
(usually 0.40mm) is obtained, the bolt tension will not be less than the required minimum.<br />
This gap is measured by means of a feeler gauge, consisting of small bits of steel plates of<br />
varying thickness, which can be inserted into the gap.<br />
c) The procedure for tensioning of bolts using a direct-tension indication device<br />
involves the following:<br />
• The suitability of the device should be demonstrated by testing a representative sample of<br />
not less than three bolts for each diameter and grade of bolt in a calibration device<br />
capable of indicating bolt tension. The calibration test should demonstrate that the device<br />
indicates a tension not less than 1.05 times the minimum bolt tension given in Table 2 -<br />
5.<br />
Version 1.0 Date of last revision: <strong>09</strong> July 2<strong>01</strong>0 Page 9 of 78<br />
This document is uncontrolled when printed. See <strong>ARTC</strong> Intranet for latest version.<br />
Steel
Engineering (Track & Civil) Guideline<br />
<strong>EGH</strong>-<strong>09</strong>-<strong>01</strong> <strong>Structures</strong> <strong>Repair</strong> <strong>Guidelines</strong><br />
2.2.2 Patch painting<br />
• On assembly, all bolts and nuts in the connection should be first tightened to a snug-tight<br />
condition.<br />
• After completing sung-tightening, the bolt should be tensioned to provide the minimum<br />
bolt tension specified in Table 2 - 5. This should be indicated by the tension indication<br />
device.<br />
Nominal diameter of bolt (mm) Minimum bolt tension (kN)<br />
16 95<br />
20 145<br />
22 178<br />
24 210<br />
27 273<br />
30 335<br />
36 490<br />
Table 2 - 5 Minimum bolt tension<br />
The procedure for patch painting involves the following:<br />
i. Prepare the surface<br />
For normal steel surfaces - Prepare the surfaces for painting in accordance with the<br />
recommendations of the paint manufacturer for the paint system to be applied. Hand or power<br />
tool cleaning to AS1627.7 or AS1627.2 Class 2 is the minimum requirement. That is, when<br />
viewed without magnification, the surface should be free from visible oil, grease and dirt, and<br />
should be free from most mill scale, rust, paint coatings and foreign matter. Any residual<br />
contamination should be firmly adhering without being lifted with a blunt putty knife.<br />
For rough surfaces - Remove sharp ridges and deep narrow grooves or pits from the steel<br />
surface by power grinding. Alternatively, for the surface of site fillet welds, fill the surface to a<br />
smooth even finish using epoxy resin fillers such as those used for void filling.<br />
Where the depth of the roughness is less than 0.5mm, an adequate and durable paint system<br />
can be achieved without the above surface levelling by applying multiple coats of the paint.<br />
Each coat is to be no more than the maximum film thickness recommended by the<br />
manufacturer. Enough coats are to be applied so that the minimum required dry film thickness<br />
(typically 150 micrometres) is achieved at all sharp ridges.<br />
For galvanised surfaces - Prepare the galvanised surface for painting in accordance with the<br />
paint manufacturer’s recommendations. Coating manufacturers usually recommend<br />
degreasing and abrasion, acid etching or pre-treatment with etch (wash) primers prior to<br />
painting. Light abrasive blast cleaning (brush blasting) is the most reliable means of achieving<br />
satisfactory coating adhesion. However, where light abrasive blast cleaning is impractical due<br />
to the small areas involved, power wire brushing/hard scouring with aluminium oxide<br />
impregnated nylon pads to remove the shiny patina on new galvanised steelwork and the<br />
white soluble zinc salts on old (weathered) galvanised steelwork is preferred to acid etching or<br />
pre-treatment with etch primer.<br />
ii. Apply the paint<br />
Mix the paint components and apply in accordance with the manufacturer’s instructions. The<br />
paint should be applied immediately after surface preparation, preferably within 4 hours, and<br />
certainly on the same day. The minimum total dry film thickness of the system should not be<br />
less than 125 micrometres.<br />
Paint systems suitable for patch painting are listed below. They are typically 2 part epoxy<br />
based, high build systems.<br />
• Taubmans Interseal 2020<br />
Version 1.0 Date of last revision: <strong>09</strong> July 2<strong>01</strong>0 Page 10 of 78<br />
This document is uncontrolled when printed. See <strong>ARTC</strong> Intranet for latest version.<br />
Steel
Engineering (Track & Civil) Guideline<br />
<strong>EGH</strong>-<strong>09</strong>-<strong>01</strong> <strong>Structures</strong> <strong>Repair</strong> <strong>Guidelines</strong><br />
2.2.3 Filling voids<br />
• PPG Amerlock 400 GF and 400<br />
• Dulux Luxaprime zinc phosphate<br />
When new steel plates or sections are fitted to existing steel as part of repair procedures, voids<br />
may be created, usually as a result of the existing steel being heavily corroded or pitted. The voids<br />
may need to be filled with epoxy resin for one or both of the following reasons.<br />
i. To preclude the ingress of air and moisture which would lead to further corrosion, and/or<br />
ii. To provide a smooth, level surface on to which the new steel elements can be fitted.<br />
Two alternative procedures for applying filling epoxies are described below. In the first, the<br />
covering steel member is fitted before the epoxy has hardened and excess epoxy is squeezed out<br />
during bolt tightening. Squeezing out excess epoxy ensures the void is completely filled. In the<br />
second procedure, the epoxy is trowelled or screeded smooth and flat and allowed to harden prior<br />
to fitting the steel member.<br />
The procedure of alternative 1 – New steel elements fitted before epoxy hardens involve<br />
the following:<br />
i. Prepare the existing steel surface by abrasive blast cleaning to Class 2½ in accordance with AS<br />
1627.4. That is, when viewed without magnification, the surface should be free from visible<br />
oil, grease and dirt, and should be free from most mill scale, rust, paint coatings and foreign<br />
matter. Any remaining contamination should show only as slight stains in the form of spots or<br />
stripes. If abrasive blast cleaning is impractical due to small areas involved then use power<br />
tool cleaning to Class 2 in accordance with AS 1627.2.<br />
ii. Mix the epoxy according to the manufacturer’s directions and apply to the steel surface.<br />
Trowel and screed into position to the approximate surface required. Ensure that there is a<br />
slight excess of epoxy that can be squeezed out when the steel part is fitted. Make sure there<br />
is an adequate escape path for excess epoxy.<br />
iii. While the epoxy is still plastic, position the new steel part and install the fixing bolts. Use the<br />
tightening of the bolts to bring the steel part into the correct position and squeeze out excess<br />
epoxy. Bolts may only be fully tensioned prior to curing if the member would not distort and<br />
be forced out of position by such action. If in doubt about the effects of bolt tensioning, wait<br />
until the epoxy has cured.<br />
iv. Clean away excess epoxy and make sure all steel to steel interfaces are effectively sealed at<br />
the perimeters ready for painting.<br />
v. Tension the bolts after the epoxy has cured.<br />
The procedure of alternative 2 – New steel elements fitted after epoxy hardens involve<br />
the following:<br />
i. Prepare the existing steel surface by abrasive blast cleaning to Class 2½ in accordance with AS<br />
1627.4. If abrasive blast cleaning is impractical due to small areas involved then use power<br />
tool cleaning to Class 2 in accordance with AS 1627.2.<br />
ii. Mix the epoxy according to the manufacturer’s directions and apply to the steel surfaces.<br />
Screed the epoxy to the smooth, flat surface required using a straight edge screed. If<br />
necessary to achieve a flat surface, apply the epoxy in two or more coats with each successive<br />
coat filling any valleys until the required flatness is achieved.<br />
iii. Clean away excess epoxy. Ensure that empty bolt holes are not obstructed by epoxy.<br />
iv. After the epoxy has cured, fit the steel part and fully tension any bolts.<br />
v. Seal any remaining gaps at interfaces.<br />
The repair materials are described below:<br />
Use high strength, two part epoxy fillers or adhesives. Epoxies should have high strength and nonsag<br />
properties if they are to be applied to overhead or vertical surfaces. Select an epoxy with a<br />
work time appropriate to the repair being carried out. Recommended products include the<br />
following:<br />
Version 1.0 Date of last revision: <strong>09</strong> July 2<strong>01</strong>0 Page 11 of 78<br />
This document is uncontrolled when printed. See <strong>ARTC</strong> Intranet for latest version.<br />
Steel
Engineering (Track & Civil) Guideline<br />
<strong>EGH</strong>-<strong>09</strong>-<strong>01</strong> <strong>Structures</strong> <strong>Repair</strong> <strong>Guidelines</strong><br />
• Epirez 8242<br />
• Epirez 633 (moisture tolerant)<br />
• Megapoxy 108, 206<br />
When the procedure of alternative 2 is to be used, choose an epoxy which is suitable for working<br />
and screeding.<br />
Comment: Seek advice from recognised manufacturers to select the best epoxy and application<br />
procedure for the particular repair.<br />
2.2.4 Sealing interfaces<br />
In repairing steel, gaps may occur at the interface between new and existing steel, often as a<br />
result of the existing steel being corroded. In these and similar situations the gaps are to be sealed<br />
with a single component polyurethane sealant prior to painting when they are greater than a<br />
specified width.<br />
The procedure for sealing interfaces involves the following:<br />
i. Prior to fitting new steel elements, prepare existing steel surfaces by abrasive blast cleaning to<br />
Class 2½ in accordance with AS 1627.4. If abrasive blast cleaning is impractical due to small<br />
areas involved then use power tool cleaning to Class 2 in accordance with AS 1627.2.<br />
ii. Identify areas to be sealed. Interfaces where the gap exceeds 0.5mm or twice the maximum<br />
recommended dry film thickness are to be sealed with a single component polyurethane<br />
sealant sealing is required whether the concealed steel surfaces are painted or bare steel.<br />
iii. Break inner seal at extrusion end of cartridge, affix nozzle, cut tip to suit joint size, install in<br />
caulking gun and apply in accordance with the manufacturers’ instructions.<br />
The repair materials are described below:<br />
Use a single component polyurethane sealant suitable for being painted over with solvent-based<br />
paints. Recommended products include the following:<br />
• Epirez 8242<br />
• Epirez 633 (moisture tolerant)<br />
• Epirez D5-707 NS (flexible)<br />
• Dulux Luxepoxy Barrier Coat<br />
2.2.5 <strong>Repair</strong>s to corroded flanges and webs of I girders<br />
2.2.5.1 Corrosion in flanges of rolled or welded girders<br />
The procedure for repairing flange corrosion in rolled or welded girders involves the following<br />
(Refer Figure 2 - 2):<br />
i. Mark and drill holes in the flange to suit the cover plate.<br />
ii. Prepare the flange surface for cover plating by removing all loose rust and dirt and by grinding<br />
where necessary to create a smooth surface. Fill any deep pitting (>1mm deep) or any area of<br />
unevenness to create a flat surface for seating the cover plate.<br />
iii. Position the cover plate, holding it in place with clamps.<br />
iv. Fit and tension all bolts.<br />
v. Seal open interfaces to new steel.<br />
vi. Prepare for and paint new steelwork and areas of existing steelwork to the extent.<br />
Version 1.0 Date of last revision: <strong>09</strong> July 2<strong>01</strong>0 Page 12 of 78<br />
This document is uncontrolled when printed. See <strong>ARTC</strong> Intranet for latest version.<br />
Steel
Engineering (Track & Civil) Guideline<br />
<strong>EGH</strong>-<strong>09</strong>-<strong>01</strong> <strong>Structures</strong> <strong>Repair</strong> <strong>Guidelines</strong><br />
Figure 2 - 2 <strong>Repair</strong>ing flange corrosion in rolled or fabricated girders<br />
2.2.5.2 Corrosion in flanges of riveted girders<br />
The procedure for repairing flange corrosion in riveted girders involves the following (Refer Figure 2<br />
- 3):<br />
i. Remove heads of rivets that are to be replaced by bolts. Remove the underside heads for<br />
bottom flanges and the topside heads for top flanges. For top flange rivet removal, fit clamps<br />
to the underside to prevent rivets falling out.<br />
ii. Prepare the flange surface for cover plating by removing all loose rust and dirt and by grinding<br />
where necessary to create a smooth surface. Fill any deep pitting (>1mm deep) or any area of<br />
unevenness to create a flat surface for seating the cover plate.<br />
iii. Position the packer plates and cover plate, holding them in place with clamps.<br />
iv. Progressively remove rivets to be replaced and fit and tension replacement bolts. Note that no<br />
more than 10% of rivets, evenly distributed along the member, are to be removed at any one<br />
time.<br />
v. Seal open interfaces to new steel where required. Fill exposed rivet head holes on the top<br />
flange to prevent collection of water.<br />
vi. Prepare for and paint new steelwork and areas of existing steelwork to the extent.<br />
Version 1.0 Date of last revision: <strong>09</strong> July 2<strong>01</strong>0 Page 13 of 78<br />
This document is uncontrolled when printed. See <strong>ARTC</strong> Intranet for latest version.<br />
Steel
Engineering (Track & Civil) Guideline<br />
<strong>EGH</strong>-<strong>09</strong>-<strong>01</strong> <strong>Structures</strong> <strong>Repair</strong> <strong>Guidelines</strong><br />
Figure 2 - 3 <strong>Repair</strong>ing flange corrosion in riveted girders<br />
2.2.5.3 Corrosion in web near bottom flange angles in riveted girders<br />
The procedure for repairing web corrosion near bottom flange angles in riveted girders involves the<br />
following (Refer Figure 2 - 4):<br />
Version 1.0 Date of last revision: <strong>09</strong> July 2<strong>01</strong>0 Page 14 of 78<br />
This document is uncontrolled when printed. See <strong>ARTC</strong> Intranet for latest version.<br />
Steel
Engineering (Track & Civil) Guideline<br />
<strong>EGH</strong>-<strong>09</strong>-<strong>01</strong> <strong>Structures</strong> <strong>Repair</strong> <strong>Guidelines</strong><br />
i. Remove all loose rust from the surface to be plated by mechanical wire brushing and scraping.<br />
Scrape or grind smooth the vertical face of flange angles.<br />
Working on only one panel of web at a time carry out the following:<br />
ii. Drill holes in the web above flange angle to match the holes in the prefabricated, galvanised<br />
cover plate and packer plate.<br />
iii. Remove the rivets through vertical legs of angles.<br />
iv. Position the packer plate and fill the void between the packer and the flange angle.<br />
v. Fit the cover plate and, install and tension all bolts. Repeat steps (ii), (iii), (iv) and (v) for each<br />
web panel requiring plating; then<br />
vi. Prepare for and patch paint new steelwork and areas of existing steelwork to the extent,<br />
including the region of corrosion on the unplated side.<br />
2.2.5.4 Localised corrosion in webs<br />
The procedure for repairing webs with localised corrosion involves the following (Refer Figure 2 -<br />
5):<br />
i. Cut back reinforced concrete etc. that is causing corrosion as directed.<br />
ii. Remove all rust, dirt, adhering concrete, old paint etc, from the area to be plated by<br />
mechanical wire brushing and scraping.<br />
iii. Mark and drill bolt holes in the web to match the holes in prefabricated, galvanised cover<br />
plates.<br />
iv. Fill voids and surface pitting with epoxy resin filler over area of web to be covered.<br />
v. Position cover plates, and fit and tension bolts. Seal with epoxy any open interfaces around<br />
the perimeter of the cover plates.<br />
vi. Prepare for and patch paint new steelwork and areas of existing steelwork to the extent.<br />
Version 1.0 Date of last revision: <strong>09</strong> July 2<strong>01</strong>0 Page 15 of 78<br />
This document is uncontrolled when printed. See <strong>ARTC</strong> Intranet for latest version.<br />
Steel
Engineering (Track & Civil) Guideline<br />
<strong>EGH</strong>-<strong>09</strong>-<strong>01</strong> <strong>Structures</strong> <strong>Repair</strong> <strong>Guidelines</strong><br />
Figure 2 - 4 <strong>Repair</strong>ing web plate corrosion near bottom flange angles in riveted girders<br />
Version 1.0 Date of last revision: <strong>09</strong> July 2<strong>01</strong>0 Page 16 of 78<br />
This document is uncontrolled when printed. See <strong>ARTC</strong> Intranet for latest version.<br />
Steel
Engineering (Track & Civil) Guideline<br />
<strong>EGH</strong>-<strong>09</strong>-<strong>01</strong> <strong>Structures</strong> <strong>Repair</strong> <strong>Guidelines</strong><br />
Figure 2 - 5 <strong>Repair</strong>ing webs with localised corrosion<br />
Version 1.0 Date of last revision: <strong>09</strong> July 2<strong>01</strong>0 Page 17 of 78<br />
This document is uncontrolled when printed. See <strong>ARTC</strong> Intranet for latest version.<br />
Steel
Engineering (Track & Civil) Guideline<br />
<strong>EGH</strong>-<strong>09</strong>-<strong>01</strong> <strong>Structures</strong> <strong>Repair</strong> <strong>Guidelines</strong><br />
2.2.6 <strong>Repair</strong>s to stiffeners, bracing connections, and bearings<br />
2.2.6.1 Relieving of corrosion site at the base of intermediate web stiffeners<br />
The procedure involves the following:<br />
i. Remove any rivets securing the lower portion of the web stiffener that is to be removed.<br />
ii. Cut off the lower portion of the stiffener to the extent shown on Figure 2 - 6 or Figure 2 – 7 by<br />
flame cutting and/or with an angle grinder. Several possible arrangements of web stiffeners<br />
are shown on these figures. The appropriate location for the cut is shown in each case.<br />
To avoid accidental creation of heat affected zones (fatigue sites) in the adjacent web and<br />
flange, do not use flame cutting to remove portions of intermediate web stiffeners in direct<br />
contact with the web or flange. Use an angle grinder to cut these portions. Take care to avoid<br />
grinding a groove into the web or flange.<br />
iii. Dress any flame cut edge to the stiffener by grinding smooth and fit and tension bolts to any<br />
holes formerly occupied by rivets.<br />
iv. Prepare for and patch paint the exposed steel of the web stiffener and the local area of bottom<br />
flange and flange angle now exposed.<br />
2.2.6.2 <strong>Repair</strong>ing intermediate and bearing web stiffeners with localised<br />
corrosion<br />
The procedure for the following two cases:<br />
Case Corrosion away from end of stiffeners<br />
i. Mark and drill holes in the existing stiffener and web to suit the prefabricated splicing angle.<br />
ii. If directed, cut away the severely corroded portion of stiffener by flame cutting and by using<br />
an angle grinder. Avoid flame effects and grinding of grooves in the web plate. Dress any<br />
flame cut edges.<br />
iii. Clean existing steelwork where new steel is to abut. Fill pitting and depressions so that there<br />
is no void between the web and the new stiffener segment.<br />
iv. Bolt in place the new galvanised stiffener segment, installing new bolts.<br />
v. Seal any gaps at the interface between new and existing steel.<br />
vi. Prepare for and patch paint new and existing steel to the extent.<br />
Case B –Corrosion near end of stiffeners<br />
i. Remove rivets connecting the part of web stiffener to be removed.<br />
ii. Cut away the corroded portion of stiffener by flame cutting and by using an angle grinder.<br />
Avoid flame effects and grinding grooves in the web plate. Dress any flame cut edges.<br />
iii. Clean existing steelwork where new steel is to abut. Fill pitting and depressions so that there<br />
is no void between the web and the new stiffener segment.<br />
iv. Fit the prefabricated, galvanised replacement segment of stiffener. Fit only for "bracing<br />
connection" stiffeners, otherwise just remove.<br />
v. Mark and drill bolt holes in the web to match the holes in the splicing angle.<br />
vi. Fit the prefabricated galvanised splicing angle in accordance with details on these figures.<br />
vii. Seal any gaps at the interface between new and existing steel.<br />
viii. Prepare for and patch paint new and existing steel to the extent.<br />
Version 1.0 Date of last revision: <strong>09</strong> July 2<strong>01</strong>0 Page 18 of 78<br />
This document is uncontrolled when printed. See <strong>ARTC</strong> Intranet for latest version.<br />
Steel
Engineering (Track & Civil) Guideline<br />
<strong>EGH</strong>-<strong>09</strong>-<strong>01</strong> <strong>Structures</strong> <strong>Repair</strong> <strong>Guidelines</strong><br />
Figure 2 - 6 Relief of corrosion site at the base of intermediate web stiffeners<br />
Version 1.0 Date of last revision: <strong>09</strong> July 2<strong>01</strong>0 Page 19 of 78<br />
This document is uncontrolled when printed. See <strong>ARTC</strong> Intranet for latest version.<br />
Steel
Engineering (Track & Civil) Guideline<br />
<strong>EGH</strong>-<strong>09</strong>-<strong>01</strong> <strong>Structures</strong> <strong>Repair</strong> <strong>Guidelines</strong><br />
Figure 2 - 7 Relief of corrosion site at the base of intermediate web stiffeners<br />
2.2.6.3 <strong>Repair</strong>ing bearing web stiffeners with localised corrosion at base of<br />
outstand leg of stiffener<br />
The procedure involves the following:<br />
i. Cut away the corroded portion of outstand leg of stiffener by flame cutting and by using an<br />
angle grinder. Avoid flame effects in the remaining leg of stiffener. Dress any flame cut edges.<br />
ii. Clamp new plate with holes drilled to outstand leg. New plate must bear hard on bottom<br />
flange.<br />
iii. Drill existing stiffener and grind smooth all burrs.<br />
iv. Bolt new plate to existing stiffener.<br />
v. Prepare for and patch paint new and existing steelwork.<br />
2.2.6.4 Relieving of corrosion site at base of splayed angle bearing end<br />
stiffeners<br />
The procedure involves the following:<br />
i. Remove the section of stiffener by oxy-fuel cutting. Avoid or minimise flame effects on the<br />
steel of the girder section.<br />
ii. Dress the flame cut steel edges by grinding. Clean the area at the base of the stiffener of dirt<br />
and debris by power wire brushing, grinding etc.<br />
iii. Prepare for and patch paint the area.<br />
2.2.6.5 Relieving of corrosion at bottom flange bracing connection<br />
The procedure involves the following (Refer Error! Reference source not found.):<br />
i. Install temporary braces as required to compensate for the braces that are to be disconnected.<br />
ii. Remove rivets as necessary and remove the gusset plate.<br />
iii. If structurally acceptable, modify members as detailed by flame cutting or with an angle<br />
grinder. Avoid flame effects and grinding grooves on the flange and web of main girder.<br />
Version 1.0 Date of last revision: <strong>09</strong> July 2<strong>01</strong>0 Page 20 of 78<br />
This document is uncontrolled when printed. See <strong>ARTC</strong> Intranet for latest version.<br />
Steel
Engineering (Track & Civil) Guideline<br />
<strong>EGH</strong>-<strong>09</strong>-<strong>01</strong> <strong>Structures</strong> <strong>Repair</strong> <strong>Guidelines</strong><br />
Figure 2 - 8 <strong>Repair</strong>ing corrosion at bottom flange bracing connection<br />
Version 1.0 Date of last revision: <strong>09</strong> July 2<strong>01</strong>0 Page 21 of 78<br />
This document is uncontrolled when printed. See <strong>ARTC</strong> Intranet for latest version.<br />
Steel
Engineering (Track & Civil) Guideline<br />
<strong>EGH</strong>-<strong>09</strong>-<strong>01</strong> <strong>Structures</strong> <strong>Repair</strong> <strong>Guidelines</strong><br />
iv. Completely remove the brace if necessary to avoid these effects. Dress any flame cut edges by<br />
grinding.<br />
v. <strong>Repair</strong> the web stiffener if required.<br />
vi. Clean all steel surfaces of loose rust and paint by scraping and power wire brushing.<br />
vii. Reassemble the connection with a new prefabricated galvanised gusset plate if required. In the<br />
process fill voids, including surface pitting. Install new bolts.<br />
viii. Prepare for and patch paint new and existing steel to the extent.<br />
2.2.6.6 Replacing bearing plates<br />
The procedure involves the following:<br />
i. Remove existing attachment bolts between girder and bed plate. If necessary drill out the bolt<br />
shank to a larger diameter and tap the hole in the bed plate to suit the new attachment bolt.<br />
Refer Figure 2 – 9. Alternative attachment arrangement 2 or 3 shown in Figures 10 and 11,<br />
could be adopted.<br />
ii. Raise the girder(s) by jacking the minimum amount required to enable completion of the<br />
replacement operation. Raise all girders at one end, simultaneously if necessary, to avoid<br />
overstressing cross-connecting members. Lock jacks or pack under the girders to prevent<br />
accidental dropping of the girders. If the bridge is to remain open to traffic, restrain the<br />
girders longitudinally by blocking against the abutments, unless they are suitably restrained at<br />
the remote end bearings.<br />
iii. Remove rivets connecting the bearing plates and remove the bearing plate.<br />
iv. Clean the bed plate and underside of the girder flange to remove loose rust, dirt etc. Use wire<br />
brushing if possible. Prepare the existing holes for new bolts by reaming, dressing etc.<br />
v. If the underside of the flange is severely corroded, pitted or uneven, apply an even coat of<br />
epoxy filler to the underside of the flange over the bearing plate contact area. Apply sufficient<br />
epoxy to fill any pitting voids on the underside of the flange.<br />
Comment: Note that all Holding Down (HD) bolts for bearing plates should have a lock nut (or<br />
double nut). Sliding end of the bearing HD bolts should permit sufficient sliding to occur during<br />
normal operation of the structure.<br />
2.2.6.7 <strong>Repair</strong>ing cracked and broken wind brace welded connections<br />
The procedure involves the following:<br />
i. Prepare new gusset plates.<br />
ii. Remove cracked/broken wind brace member by oxy-fuel cutting. Do not allow the cutting<br />
flame to damage the main girder flange. Leave cut area proud if necessary.<br />
iii. Grind smooth after removing brace member.<br />
iv. Mark flange for location of bolts.<br />
v. Drill flange and grind smooth all burrs.<br />
vi. Mark and drill new wind brace, grinding smooth all burrs.<br />
vii. Install new wind brace. Fill voids and pitting. Fit new bolts.<br />
viii. Prepare for and patch paint new and existing steel to the extent.<br />
Version 1.0 Date of last revision: <strong>09</strong> July 2<strong>01</strong>0 Page 22 of 78<br />
This document is uncontrolled when printed. See <strong>ARTC</strong> Intranet for latest version.<br />
Steel
Engineering (Track & Civil) Guideline<br />
<strong>EGH</strong>-<strong>09</strong>-<strong>01</strong> <strong>Structures</strong> <strong>Repair</strong> <strong>Guidelines</strong><br />
Figure 2 - 9 <strong>Repair</strong>s to bearing plates<br />
Version 1.0 Date of last revision: <strong>09</strong> July 2<strong>01</strong>0 Page 23 of 78<br />
This document is uncontrolled when printed. See <strong>ARTC</strong> Intranet for latest version.<br />
Steel
Engineering (Track & Civil) Guideline<br />
<strong>EGH</strong>-<strong>09</strong>-<strong>01</strong> <strong>Structures</strong> <strong>Repair</strong> <strong>Guidelines</strong><br />
Figure 2 - 10 <strong>Repair</strong>s to bearing plates<br />
Version 1.0 Date of last revision: <strong>09</strong> July 2<strong>01</strong>0 Page 24 of 78<br />
This document is uncontrolled when printed. See <strong>ARTC</strong> Intranet for latest version.<br />
Steel
Engineering (Track & Civil) Guideline<br />
<strong>EGH</strong>-<strong>09</strong>-<strong>01</strong> <strong>Structures</strong> <strong>Repair</strong> <strong>Guidelines</strong><br />
2.2.7 <strong>Repair</strong>s to fatigue damage<br />
2.2.7.1 <strong>Repair</strong> of fatigue cracks<br />
Figure 2 - 11 <strong>Repair</strong>s to bearing plates<br />
The procedure for repairing fatigue cracks involves the following:<br />
i. Determine the position of the end of the fatigue crack by Magnetic Particle Inspection (MPI),<br />
close visual inspection or other suitable means.<br />
ii. Drill a hole of at least 20mm diameter to intercept the crack. Locate the centre of the hole at<br />
the observed crack tip. The preferred hole size is 25 to 26mm to fit an M24 Bolt.<br />
iii. Use MPI on the inside of the hole to confirm that there are no other cracks around the<br />
perimeter of the hole other than the entry crack, i.e. confirm that the tip of the crack has been<br />
drilled out.<br />
iv. Install and fully tension a high strength structural bolt in the hole. The bolt is to have standard<br />
washers under both head and nut.<br />
2.2.7.2 <strong>Repair</strong> of fatigue cracks at connections<br />
The procedure for repairing fatigue cracks at connections involves the following:<br />
i. Determine the position of the end of the fatigue crack by MPI, close visual inspection or other<br />
suitable means.<br />
ii. Drill a hole of at least 20mm diameter to intercept the crack. Locate the centre of the hole at<br />
the observed crack tip. The preferred hole size is 25 to 26mm to suit an M24 Bolt.<br />
Version 1.0 Date of last revision: <strong>09</strong> July 2<strong>01</strong>0 Page 25 of 78<br />
This document is uncontrolled when printed. See <strong>ARTC</strong> Intranet for latest version.<br />
Steel
Engineering (Track & Civil) Guideline<br />
<strong>EGH</strong>-<strong>09</strong>-<strong>01</strong> <strong>Structures</strong> <strong>Repair</strong> <strong>Guidelines</strong><br />
iii. Drill other holes in the member to suit the brackets to be installed.<br />
iv. Temporarily support the end of the member under repair.<br />
v. Disconnect the end of the member by removing rivets etc. as required to fit the new brackets.<br />
vi. Fit new prefabricated, galvanised brackets in accordance with the design details. Install and<br />
fully tension all bolts including the bolt through the hole at the crack tip.<br />
vii. Prepare for and patch paint new steelwork and areas of existing steelwork to the extent.<br />
Note: Section 2.2.7.3, 2.2.7.4, and 2.2.7.5 are extracts from JRC Scientific and Technical Reports<br />
on “Assessment of Existing Steel <strong>Structures</strong>: Recommendations for Estimation of Remaining<br />
Fatigue Life” published in 2008. [Ref.1]<br />
2.2.7.3 <strong>Repair</strong> of fatigue cracks in welded structures<br />
i. Welded structures can have fatigue cracks starting from either the weld root or from the weld<br />
toe. Fatigue cracks starting from the weld root are much more difficult to identify. Concerning<br />
crack propagation, one has to differentiate between a continuously growing process, starting<br />
usually at the weld and propagating into secondary or main structural elements and fatigue<br />
cracks arresting in low stress areas to relieve the restraint condition. The latter one is in<br />
general not that serious compared to the first type of crack propagation.<br />
ii. The following list gives an overview of typical fatigue failure causes in welded structures:<br />
(w-1) poor weld or weld defects (fabrication)<br />
(w-2) lack of fusion (fabrication)<br />
(w-3) cold cracks (environmental conditions)<br />
(w-4) restraint (geometrical imperfection, distortion, out of plane bending)<br />
(w-5) vibration (traffic, wind, earthquake – low cycle fatigue, lateral bracing)<br />
(w-6) web gaps (e.g. gap between lateral gusset plate and transverse web stiffener)<br />
(w-7) geometrical changes (end of cover plate, joints, stiffener, and diaphragms)<br />
(w-8) web breathing (repeated web buckling deformation)<br />
iii. The following listing contains the most important repair and strengthening methods for welded<br />
structures:<br />
(w-a) removal of crack by grinding<br />
(w-b) re-welding<br />
(w-c) surface treatments such as Tungsten Inert Gas (TIG) dressing, hammer peening or<br />
grinding<br />
(w-d) adding plates or Fibre Reinforced Polymer (FRP) strips<br />
(w-e) bolted splices using high strength tensioned bolts<br />
(w-f) shape improving<br />
(w-g) stop holes, for detailed information concerning the hole diameter refer Ref 2.<br />
(w-h) modification of the connection detail<br />
iv. Table 2 – 6 proposes methods to repair fatigue cracks for causes given in this Section (See<br />
References 3 and 4).<br />
Version 1.0 Date of last revision: <strong>09</strong> July 2<strong>01</strong>0 Page 26 of 78<br />
This document is uncontrolled when printed. See <strong>ARTC</strong> Intranet for latest version.<br />
Steel
Engineering (Track & Civil) Guideline<br />
<strong>EGH</strong>-<strong>09</strong>-<strong>01</strong> <strong>Structures</strong> <strong>Repair</strong> <strong>Guidelines</strong><br />
Causes of fatigue cracks<br />
grinding<br />
re-welding<br />
<strong>Repair</strong> and strengthening methods<br />
Version 1.0 Date of last revision: <strong>09</strong> July 2<strong>01</strong>0 Page 27 of 78<br />
This document is uncontrolled when printed. See <strong>ARTC</strong> Intranet for latest version.<br />
surface treatments<br />
adding plates<br />
bolted splices<br />
shape improving<br />
stop holes<br />
Connection<br />
modification<br />
weld defects G G N G E G N G<br />
lack of fusion F G G G E E G E<br />
cold cracks F G G F E G G E<br />
restraint F F G G E G G E<br />
vibration F F G G F G F E<br />
web gaps G F G F N N F E<br />
geometrical<br />
changes<br />
F F F G E N F G<br />
web breathing N F F F F N G E<br />
E: Excellent G: Good F: Fair N: Not good<br />
Table 2 - 6 <strong>Repair</strong> and strengthening methods for fatigue failures in welded structures<br />
2.2.7.4 <strong>Repair</strong> of fatigue cracks in riveted and bolted structures<br />
i. The magnitude of stress concentration and tensile stresses is dictated by the geometry of the<br />
detail and the fabrication process. Fatigue crack initiation may start from micro-cracks around<br />
the rivet hole, resulting from drilling, punching, or riveting process.<br />
ii. In bearing type connections both stress concentration and residual stresses are responsible for<br />
susceptibility to fatigue failure. The major reasons for fatigue cracking in riveted and bolted<br />
structures are:<br />
(r-1) drilling, punching, or riveting process (micro-cracks due to punching or drilling of the<br />
holes or due to poor workmanship during riveting)<br />
(r-2) change of geometry (cracks at the holes perpendicular to the main tension stress in net<br />
cross section, e.g. end of cover plates, gusset plates, etc.)<br />
(r-3) change of geometry (cracks in the gross cross section, e.g. in the tension flange near the<br />
web stiffener)<br />
(r-4) thin connection plates (too thin gusset plates or other structural members)<br />
(r-5) out-of-plane bending, distortion, and restraints<br />
(r-6) secondary stresses due to tension rods<br />
(r-7) cut-outs, local stress concentration<br />
(r-8) frozen or corroded bearings or joints (e.g. cracks from temperature differences or<br />
secondary stresses)<br />
(r-9) poor structural detail with low fatigue strength and high loading<br />
iii. The following list contains the most common repair and strengthening methods for riveted and<br />
bolted structures. In each case a verification of the efficiency of the chosen method is<br />
recommended.<br />
(r-a) strengthening by means of pre-stressed bolts or injection bolts,<br />
(r-b) adding new structural members, e.g. filler plates, cover plates or angles<br />
Steel
Engineering (Track & Civil) Guideline<br />
<strong>EGH</strong>-<strong>09</strong>-<strong>01</strong> <strong>Structures</strong> <strong>Repair</strong> <strong>Guidelines</strong><br />
(r-c) repair-welding (verification of weldability needed)<br />
(r-d) adding FRP strips<br />
(r-e) changing the static system<br />
(r-f) stop holes<br />
(r-g) repair of the bearing conditions<br />
iv. Table 2 – 7 proposes repair methods in riveted structures in relation to the fatigue failure<br />
causes given in this Section.<br />
Causes of fatigue cracks<br />
Pre- stressed<br />
bolts<br />
<strong>Repair</strong> and strengthening methods<br />
Version 1.0 Date of last revision: <strong>09</strong> July 2<strong>01</strong>0 Page 28 of 78<br />
This document is uncontrolled when printed. See <strong>ARTC</strong> Intranet for latest version.<br />
Adding plates<br />
<strong>Repair</strong>-welding<br />
FRP strips<br />
Changing static<br />
system<br />
riveting process G G F/N G G - -<br />
cracks at holes E E N F F N -<br />
cracks in gross cross section N E N G F N -<br />
thin connection plates E N N F F N -<br />
out of plane bending N N N G F E -<br />
secondary stresses N N N G - G E<br />
local stress concentration - - - - - F -<br />
frozen joints - - N - - - E<br />
poor detailing F G - G G/F - -<br />
E: Excellent G: Good F: Fair N: Not good - : Not applicable<br />
Table 2 - 7 <strong>Repair</strong> and strengthening methods for riveted and bolted structures<br />
2.2.7.5 Summary of common fatigue failure and repair/strengthening<br />
Table 2 - 8 summarises the most common fatigue failures in existing welded steel structures<br />
together with repair and strengthening methods. See References 3, 4, 5, and 6.<br />
In Table 2 - 8, notations in brackets are related to locations and causes of fatigue cracking<br />
mentioned in Section 2.2.7.3 (ii) and repair or strengthening methods mentioned in Section 2.2.7.3<br />
(iii).<br />
Stop holes<br />
<strong>Repair</strong> bearing<br />
Steel
Engineering (Track & Civil) Guideline<br />
<strong>EGH</strong>-<strong>09</strong>-<strong>01</strong> <strong>Structures</strong> <strong>Repair</strong> <strong>Guidelines</strong><br />
Transverse groove welds<br />
Cracks in the butt connection groove weld of tension-side<br />
longitudinal stiffener or flanges (w1), (w2), (w3)<br />
crack<br />
longitudinal<br />
stiffener<br />
Groove weld<br />
connection of<br />
longitudinal<br />
stiffener<br />
Cover end plates<br />
Cracks at transverse front welds at cover plate end (w7),<br />
(w1)<br />
crack<br />
Gusset plates on flanges<br />
Cracks in welded gusset plate joint on flanges (w7), (w1)<br />
Coped end of deck plate girder<br />
Cracks at the coped end of deck plate girders (w7)<br />
crack<br />
Cross bracing connections<br />
Fatigue cracks at the cross bracing connection detail on the<br />
upper flange (w4), (w1)<br />
Gusset<br />
plate<br />
stiffener<br />
flange<br />
web<br />
- adding filler plate or<br />
FRP (w-d)<br />
- splicing by using bolts<br />
(w-e)<br />
- re-welding and surface<br />
treatments if cracks are<br />
small and have not<br />
reached the web (w-b)<br />
and (w-c)<br />
depending on the surface<br />
crack length:<br />
- long cracks L
Engineering (Track & Civil) Guideline<br />
<strong>EGH</strong>-<strong>09</strong>-<strong>01</strong> <strong>Structures</strong> <strong>Repair</strong> <strong>Guidelines</strong><br />
Sole plate connection<br />
Fatigue crack in sole plate connection detail at support<br />
(w4), (w7)<br />
vertical stiffener on support<br />
bottom flange<br />
sole plate<br />
Cut out web (mouse-hole)<br />
Fatigue crack in the web or flange, initiated at the fillet<br />
weld toe of the cut out web (w7)<br />
Orthotropic deck<br />
Orthotropic steel bridge deck, different details with low<br />
fatigue strength (w4), (w7), (w1), (w2)<br />
Hanger and pinned connections<br />
Cracks induced by vibration, e.g. by wind or traffic (w4),<br />
(w5)<br />
hangar<br />
crack<br />
Field Welded Joint<br />
flange<br />
Lateral Rip<br />
Splice Plate<br />
- adding plates or ribs to<br />
the web of the supported<br />
girder (w-d)<br />
- reinforcement by<br />
bolted splices (w-e)<br />
- stop holes (w-g)<br />
- stop holes (w-g) when<br />
crack in the web<br />
- adding filler plate or<br />
FRP (w-d)<br />
- stop holes (w-g)<br />
- adding filler plate or<br />
FRP (w-d)<br />
- re-welding of small<br />
cracks followed by<br />
surface treatments<br />
(w-b) and (w-c)<br />
- adding plates or ribs to<br />
the web of the supported<br />
girder (w-d)<br />
- reinforcement by<br />
bolted splices (w-e)<br />
- modification of<br />
connection detail (w-h)<br />
- adding filler plate or<br />
FRP (w-d)<br />
- increasing the<br />
curvature ratios of the<br />
cut outs (w-f)<br />
-full penetration welding<br />
(w-b) and surface<br />
treatment (w-c)<br />
- preventive stop holes<br />
(w-g)<br />
-strengthening deck<br />
plate by thicker steel<br />
deck or thicker<br />
pavement (w-h)<br />
- adding steel plate or<br />
FRP strips (w-d)<br />
- change of the static<br />
system or connection<br />
detail (w-h)<br />
- improvement of<br />
weld quality by<br />
surface treatment<br />
methods (w-c)<br />
- increase curvature<br />
ratios (w-f)<br />
Version 1.0 Date of last revision: <strong>09</strong> July 2<strong>01</strong>0 Page 30 of 78<br />
This document is uncontrolled when printed. See <strong>ARTC</strong> Intranet for latest version.<br />
Steel
Engineering (Track & Civil) Guideline<br />
<strong>EGH</strong>-<strong>09</strong>-<strong>01</strong> <strong>Structures</strong> <strong>Repair</strong> <strong>Guidelines</strong><br />
Floor-beam bottom flange<br />
Fatigue cracks occurred in the coped web of the end<br />
floor-beam (w7)<br />
floor<br />
beam<br />
crack<br />
Transverse stiffener web gaps<br />
Cracks near the end of a vertical web stiffener (w6)<br />
(w1)<br />
- stop holes (w-g)<br />
- gouging and<br />
re- welding (w-b)<br />
- stop holes (w-g)<br />
- weld toe finishing by<br />
TIG-dressing or<br />
grinding (w-c)<br />
- adding filler plate<br />
(w-d) splicing by<br />
using HSS tensioned<br />
bolts (w-e)<br />
- prevention out-ofplane<br />
distortion of the<br />
girder web (w-h)<br />
- increase flexibility of<br />
the connection (w-h)<br />
Table 2 - 8 Typical fatigue failures of welded structures and recommended remedial measures<br />
Table 2 - 9 presents a summary of typical fatigue failures of riveted and bolted structures together<br />
with repair and/or strengthening methods. See References 7, 8, and 9.<br />
Notations in brackets are related to above mentioned locations and causes of fatigue cracks (Refer<br />
Section 2.2.7.4(ii)) and repair or strengthening methods (Refer Section 2.2.7.4(iii)).<br />
Note that the existing riveted structures should not be welded without detailed verification of the<br />
weldability of the used old steel.<br />
Version 1.0 Date of last revision: <strong>09</strong> July 2<strong>01</strong>0 Page 31 of 78<br />
This document is uncontrolled when printed. See <strong>ARTC</strong> Intranet for latest version.<br />
Steel
Engineering (Track & Civil) Guideline<br />
<strong>EGH</strong>-<strong>09</strong>-<strong>01</strong> <strong>Structures</strong> <strong>Repair</strong> <strong>Guidelines</strong><br />
Gusset plates<br />
Cracks in gusset plates due to insufficient thickness (r4)<br />
Ballast sheets Cracks in barrel shaped ballast sheets (r5)<br />
Cross beam –longitudinal beam connection<br />
Cracks in a connection between cross beam and longitudinal stringers<br />
(r5)<br />
Bearings<br />
Cracks due to frozen bearings or joints, because of corrosion or<br />
temperature differences (r8)<br />
Stringer to floor-beam connection<br />
Fatigue failure of rivet heads due to local bending<br />
- short cracks:<br />
HSS tensioned bolts<br />
(r-a)<br />
- long cracks: replace<br />
the gusset plate (r-b)<br />
- stop holes as contemporary<br />
measure<br />
(r-f)<br />
- change of the static<br />
system by applying<br />
the load directly into<br />
the cross beams by<br />
means of stiff load<br />
transfer beams (r-e)<br />
- reduce stiffness by<br />
drilling a large hole<br />
(r-e)<br />
- replace structural<br />
member<br />
(r-b)<br />
- stop holes (r-f)<br />
- replacement of the<br />
cracked member (r-b)<br />
- control of the<br />
bearings (r-g)<br />
- high strength bolts<br />
in the last connection<br />
of the connected<br />
member or angle of<br />
the stringer (r-a)<br />
- use bolts in the last<br />
3-4 rivets of the<br />
connected truss<br />
members (r-a)<br />
- drilling of rivet<br />
holes to remove micro<br />
cracks, caused by<br />
riveting process<br />
- unload the barrel<br />
shaped ballast sheets<br />
without horizontal<br />
stiffeners by stiff load<br />
transfer beams (r-e)<br />
- reduce stiffness by<br />
drilling a large hole<br />
(r-e)<br />
- replace structural<br />
member<br />
(r-b)<br />
- control corrosion<br />
protection (r-g)<br />
- control of<br />
moveability of<br />
bearings and joints<br />
(r-g)<br />
- replace rivets by<br />
high strength bolts<br />
(r-a)<br />
- adding additional<br />
members (r-b)<br />
- change static system<br />
(r-e)<br />
Version 1.0 Date of last revision: <strong>09</strong> July 2<strong>01</strong>0 Page 32 of 78<br />
This document is uncontrolled when printed. See <strong>ARTC</strong> Intranet for latest version.<br />
Steel
Engineering (Track & Civil) Guideline<br />
<strong>EGH</strong>-<strong>09</strong>-<strong>01</strong> <strong>Structures</strong> <strong>Repair</strong> <strong>Guidelines</strong><br />
Cover plate end<br />
Cracks initiating at the holes in net cross section at the end<br />
of cover plates due to overload and changes of geometry<br />
(r2)<br />
Cover plate end<br />
Cracks in the flange of the net cross section due to<br />
changes of geometry (r3)<br />
Table 2 - 9 Typical fatigue failures of riveted/bolted structures and recommended remedial<br />
measures<br />
2.2.8 <strong>Repair</strong>s to impact damage<br />
<strong>Repair</strong> solutions can be selected from the following range for impact damage. A combination of<br />
repair procedures may result in the best repair solution. Refer Table 2 - 10.<br />
2.2.8.1 Flame straightening<br />
This repair method does not significantly degrade steel properties, but is not generally effective<br />
where yielding has exceeded about 1%. It may be considered for the repair of all bent members<br />
with the following exceptions:<br />
Do not flame straighten fracture-critical members unless the flame straightened area is fully<br />
supplemented by bolted cover plates.<br />
Do not attempt to flame straighten excessively wrinkled plates or plate with excessive kinks. It is<br />
nearly impossible to flame straighten this type of damage.<br />
2.2.8.2 Hot mechanical straightening<br />
- remove cracked<br />
member, add longer<br />
cover and filler plate in<br />
the tension flange with<br />
bolts (r-a) (r-b)<br />
- remove cracked<br />
member, add longer<br />
cover and filler plate in<br />
the tension flange with<br />
bolts (r-b)<br />
- high strength bolts in<br />
the last connection of<br />
the upper cover plate<br />
(r-a)<br />
- adding filler plate and<br />
longer cover plate by<br />
bolts (r-b)<br />
- adding FRP or steel<br />
plates (r-d)<br />
- high strength bolts in<br />
the last connection of<br />
the upper cover plate<br />
(r-a)<br />
- adding filler plate and<br />
longer cover plate by<br />
bolts (r-b)<br />
- adding FRP or steel<br />
plates (r-d)<br />
This is a process where heat is applied to all sides of a bent member, and while the member is still<br />
hot it is straightened by applying force. Agencies that use this method restrict the maximum<br />
temperature to 640 o C. The results of this type of straightening are highly dependent on operator<br />
skill. Lack of skill (or care) is frequently indicated by waviness of edges (especially the convex side<br />
of the damage) and local indentations due to local hot yielding under jacking loads.<br />
It is believed that flame straightening is a superior method and should be used in lieu of hot<br />
mechanical straightening for all primary tension members, where practical. Hot mechanical<br />
straightening may be used on primary compression members or secondary members provided the<br />
Version 1.0 Date of last revision: <strong>09</strong> July 2<strong>01</strong>0 Page 33 of 78<br />
This document is uncontrolled when printed. See <strong>ARTC</strong> Intranet for latest version.<br />
Steel
Engineering (Track & Civil) Guideline<br />
<strong>EGH</strong>-<strong>09</strong>-<strong>01</strong> <strong>Structures</strong> <strong>Repair</strong> <strong>Guidelines</strong><br />
operators have the skill to produce results that are free of wrinkles, cracks, bulges, and poor<br />
alignment.<br />
2.2.8.3 Cold mechanical straightening<br />
Cold mechanical straightening is a process where an accidentally bent member is straightened by<br />
applying force. No heat is used. It is believed that a bridge member can be cold straightened once<br />
without causing significant degradation, provided the plastic strain is limited to 5% nominal strain.<br />
Cold mechanical straightening should not be applied to member areas that have cracks, nicks, or<br />
gouges, or to fracture-critical members. Cold mechanical straightening should not be applied to<br />
members with low Charpy impact values.<br />
2.2.8.4 Welding<br />
Welding may be used for several types of repair, including defect or crack repair, welding<br />
replacement segments into place, and adding straightening plates by welding. Poorly executed<br />
weld repairs in tensile areas can be very dangerous and in some instances may do more harm than<br />
good. Fracture-critical members should not be repaired by welding unless fully strengthened by<br />
additional bolted material.<br />
The steels to be repaired should be weldable steels.<br />
Do not weld members with low Charpy impact values unless plated in addition.<br />
2.2.8.5 Bolting<br />
Bolting may be used as a repair method or as a supplement to other repair methods. Replacement<br />
of a damaged element with a new piece of steel fastened with fully tensioned high-strength bolts is<br />
regarded as the safest method of repair. Replacing damaged riveted elements with bolted material<br />
may not be excessively difficult and should be considered. Fracture-critical members should be<br />
repaired by bolting or repaired by other methods and fully strengthened by adding new bolted<br />
material.<br />
2.2.8.6 Partial replacement<br />
In some instances damage will be so serious that partial replacement is necessary. This damage<br />
includes excessively wrinkled plates, excessive deformation and bends, tears in member elements,<br />
and large cracks.<br />
Partial replacement will normally consists of removing the damaged area and replacement with<br />
either a welded insert or a bolted splice insert.<br />
Welded inserts are not recommended for fracture-critical members. Partial replacement by bolting<br />
and welding is an acceptable method, provided the longitudinal web weld is located in a<br />
compression area.<br />
Partial replacements can be used in conjunction with other repair methods, such as flame<br />
straightening. For example, a bent member with a crack could be flame straightened and the crack<br />
should be repaired by bolted cover plates.<br />
2.2.8.7 Complete replacement<br />
Complete replacement of a member is normally the most expensive method of repair. If a member<br />
is excessively damaged throughout its full length, replacement may be the only alternative. Other<br />
less difficult methods of repair should be carefully studied prior to selecting replacement.<br />
Version 1.0 Date of last revision: <strong>09</strong> July 2<strong>01</strong>0 Page 34 of 78<br />
This document is uncontrolled when printed. See <strong>ARTC</strong> Intranet for latest version.<br />
Steel
Engineering (Track & Civil) Guideline<br />
<strong>EGH</strong>-<strong>09</strong>-<strong>01</strong> <strong>Structures</strong> <strong>Repair</strong> <strong>Guidelines</strong><br />
Damage Assessment Factors<br />
Weldable Steel<br />
Non-Weldable Steel<br />
Low Charpy Impact Values<br />
Adequate Charpy Impact values<br />
Fracture-Critical Member<br />
Primary Tension Member<br />
Secondary Members<br />
All Compression Members<br />
Tearing and Excessive Wrinkles<br />
Primary Tension Member<br />
Curvature Strain Meets <strong>Guidelines</strong><br />
Primary Tension Member<br />
Curvature Strain Does Not Meet<br />
<strong>Guidelines</strong><br />
Flame<br />
Straightening<br />
Hot Mechanical<br />
Straightening<br />
Cold Mechanical<br />
Straightening<br />
<strong>Repair</strong> Methods<br />
Version 1.0 Date of last revision: <strong>09</strong> July 2<strong>01</strong>0 Page 35 of 78<br />
This document is uncontrolled when printed. See <strong>ARTC</strong> Intranet for latest version.<br />
Welding<br />
Flame<br />
Straightening<br />
Supplemented by<br />
Bolting<br />
Field Welding<br />
Supplemented by<br />
Bolting<br />
Bolting<br />
Partial<br />
Replacement<br />
Full Replacement<br />
Steel
Engineering (Track & Civil) Guideline<br />
<strong>EGH</strong>-<strong>09</strong>-<strong>01</strong> <strong>Structures</strong> <strong>Repair</strong> <strong>Guidelines</strong><br />
Member Curvature Radius More<br />
than Recommended<br />
Cracks – Weldable Steel<br />
Non Weldable Steel<br />
Flame<br />
Straightening<br />
Hot Mechanical<br />
Straightening<br />
Cold Mechanical<br />
Straightening<br />
<strong>Repair</strong> Methods<br />
Version 1.0 Date of last revision: <strong>09</strong> July 2<strong>01</strong>0 Page 36 of 78<br />
This document is uncontrolled when printed. See <strong>ARTC</strong> Intranet for latest version.<br />
Welding<br />
Flame Straightening<br />
Supplemented by<br />
Bolting<br />
Field Welding<br />
Supplemented by<br />
Bolting<br />
Member will return to correct position when adjacent members or joints are straightened<br />
Superficial Nicks and Gouges Grind Defect Smoothly<br />
Nicks and Gouges Weldable Steel<br />
Flame Straightening is recommended<br />
Table 2 - 10 Selection of repair method for impact damage<br />
Bolting<br />
Partial Replacement<br />
Full Replacement<br />
Steel
Engineering (Track & Civil) Guideline<br />
<strong>EGH</strong>-<strong>09</strong>-<strong>01</strong> <strong>Structures</strong> <strong>Repair</strong> <strong>Guidelines</strong><br />
2.2.9 <strong>Repair</strong>s to stepways and footway structures<br />
2.2.9.1 <strong>Repair</strong>ing steel risers and stringers in stepways<br />
The procedure for repairing steel risers and stringers in stepways involves the following:<br />
Note that stringers with severe corrosion to flanges should be replaced. Where severe corrosion is<br />
limited to the web, a web cover plate may be welded in lieu of complete replacement.<br />
Risers with severe corrosion are to be replaced entirely with galvanised steel channels, site welded<br />
to stringers.<br />
Case A – Stringers and risers to be replaced<br />
(Only if cost evaluation shows that total stepway renewal is not the cost effective solution).<br />
i. Remove precast treads and handrails etc.<br />
ii. Remove stringers and risers. Remove rivets securing stringers.<br />
iii. Install new stringers, fabricated to existing steelwork, except use the lower end support detail<br />
as shown in Figure 2 - 13. Use splice plates where required to connect stringer segments. Use<br />
high strength structural bolts in lieu of rivets.<br />
iv. Prepare new risers for installation by cutting and trimming flanges at the ends, all as detailed<br />
in Figure 2 - 12.<br />
v. Site weld the new risers to the stringers at positions and levels to suit the precast step units to<br />
be used.<br />
vi. Prepare for and patch paint at the riser connections and other areas of steel. Note the special<br />
preparation required for rough surfaces such as site fillet welds. Where galvanised surfaces are<br />
to be painted, use the appropriate paint system and surface preparation.<br />
vii. Refit precast treads and handrails using new galvanised or stainless steel bolts and fittings.<br />
Case B – Risers only to be replaced<br />
i. Remove precast treads and handrails etc.<br />
ii. Remove risers to be replaced by oxy-fuel cutting adjacent to the attachment to the stringers.<br />
Do not allow the cutting flame to burn or otherwise affect the stringers that are to remain.<br />
Remove other attachments supporting risers.<br />
iii. Grind smooth the face of the stringer web and expose the base metal for welding.<br />
iv. Prepare new risers for installation by cutting and trimming flanges at the ends, all as detailed<br />
in Figure 2 - 12.<br />
v. Site-weld the new risers to the stringers at positions and levels to suit precast step units to be<br />
used.<br />
vi. Prepare for and patch paint at the riser connections and other areas of steel. Note the special<br />
preparation required for rough surfaces such as site fillet welds. Where galvanised surfaces are<br />
to be painted, use the appropriate paint system and surface preparation.<br />
vii. Refit precast treads and handrails using new galvanised or stainless steel bolts and fittings.<br />
Case C - Risers to be replaced and stringer web to be plated<br />
i. Remove precast treads and handrails etc.<br />
ii. Remove risers to be replaced by oxy-fuel cutting adjacent to the attachment to the stringers.<br />
Do not allow the cutting flame to burn or otherwise affect the stringers that are to remain.<br />
Remove other attachments supporting the risers.<br />
iii. Grind smooth the inner face of the stringer web to remove any remaining steel from the cross<br />
member and any other protrusion that would interfere with the cover plate. Where rivets<br />
project through web, provide holes in the cover plate.<br />
iv. Remove all loose rust from the face of the web to be plated by mechanical wire brushing. Fill<br />
all areas of pitting and all depressions with epoxy filler to create a smooth even surface for<br />
mounting the cover plate.<br />
Version 1.0 Date of last revision: <strong>09</strong> July 2<strong>01</strong>0 Page 37 of 78<br />
This document is uncontrolled when printed. See <strong>ARTC</strong> Intranet for latest version.<br />
Steel
Engineering (Track & Civil) Guideline<br />
<strong>EGH</strong>-<strong>09</strong>-<strong>01</strong> <strong>Structures</strong> <strong>Repair</strong> <strong>Guidelines</strong><br />
v. Fit prefabricated, galvanised 8mm web cover plates and fix to the stringers by site welding, all<br />
in accordance with the details in Figure 2 - 13.<br />
vi. Prepare new galvanised risers for installation by cutting and trimming flanges at the ends, all<br />
as detailed in Figure 2 - 12.<br />
vii. Site-weld the new risers to the stringers at positions and levels to suit precast step units to be<br />
used.<br />
viii. Prepare for and patch paint at the riser connections and other areas of steel. Note the special<br />
preparation required for rough surfaces such as site fillet welds. Where galvanised surfaces are<br />
to be painted, use the appropriate paint system and surface preparation.<br />
ix. Refit precast treads and handrails using new galvanised or stainless steel bolts and fittings.<br />
Version 1.0 Date of last revision: <strong>09</strong> July 2<strong>01</strong>0 Page 38 of 78<br />
This document is uncontrolled when printed. See <strong>ARTC</strong> Intranet for latest version.<br />
Steel
Engineering (Track & Civil) Guideline<br />
<strong>EGH</strong>-<strong>09</strong>-<strong>01</strong> <strong>Structures</strong> <strong>Repair</strong> <strong>Guidelines</strong><br />
Figure 2 - 12 <strong>Repair</strong>ing steel risers and stringers in stepways<br />
Version 1.0 Date of last revision: <strong>09</strong> July 2<strong>01</strong>0 Page 39 of 78<br />
This document is uncontrolled when printed. See <strong>ARTC</strong> Intranet for latest version.<br />
Steel
Engineering (Track & Civil) Guideline<br />
<strong>EGH</strong>-<strong>09</strong>-<strong>01</strong> <strong>Structures</strong> <strong>Repair</strong> <strong>Guidelines</strong><br />
Figure 2 - 13 <strong>Repair</strong>ing steel risers and stringers in stepways<br />
Version 1.0 Date of last revision: <strong>09</strong> July 2<strong>01</strong>0 Page 40 of 78<br />
This document is uncontrolled when printed. See <strong>ARTC</strong> Intranet for latest version.<br />
Steel
Engineering (Track & Civil) Guideline<br />
<strong>EGH</strong>-<strong>09</strong>-<strong>01</strong> <strong>Structures</strong> <strong>Repair</strong> <strong>Guidelines</strong><br />
2.2.9.2 <strong>Repair</strong>ing corroded angle columns (temporary support available)<br />
The repair involves complete or partial replacement of the column with a galvanised Universal<br />
Column (UC) section that is less prone to corrosion damage. Concrete footings with significant<br />
damage are to be repaired or rebuilt in conjunction with this repair.<br />
The procedure for repairing corroded angle columns involves the following:<br />
i. Install temporary supports to allow removal of the column.<br />
ii. Remove the rivets connecting bracing to the column then remove the column. If the concrete<br />
footing is to remain, cut a pocket at the base of the columns to permit oxy-fuel cutting of the<br />
steel 50mm below the concrete surface.<br />
iii. <strong>Repair</strong> the existing footing or build a new footing in reinforced concrete if required. Drill holes<br />
for hold-down bolts.<br />
iv. Install the new column and complete the base detail as shown in Figure 2 -14. Connect to<br />
structure or remainder of column above<br />
v. Trim bracing members to size and drill new holes for connection to the new bracing cleats.<br />
vi. Prepare for and patch paint new and existing steel.<br />
2.2.9.3 <strong>Repair</strong>ing corroded 4-angle columns (no temporary support)<br />
The repair involves progressive replacement of each angle of the column, in part or in full. Only<br />
one angle is removed from the column at any time. The remaining angles support the dead load of<br />
the structure. Partial replacement involves splicing new, galvanised angle segments to the existing<br />
steelwork by bolting or, where permissible, welding.<br />
The procedure for repairing corroded 4-angle columns without any temporary support involves the<br />
following:<br />
i. Cut a pocket in the concrete footing around the base of the column as shown in Figure 2 - 16.<br />
If welded splices are to be adopted, excavate sufficient depth to expose an uncorroded section<br />
of column.<br />
ii. Drill holes for HD bolts.<br />
iii. As each of the 4 angle segments is positioned, complete the base connection (HD bolt and<br />
base plate or welded splice) and the upper splice connection (bolted or welded). The bolts in<br />
the bolted splice connection will need to be removed and reinserted as described for bracing<br />
and packing bolts during the procedure.<br />
iv. Mortar is to be packed under each individual base plate before the next angle is removed to<br />
ensure adequate transfer of load.<br />
v. Fill voids at the heel of splice angles as they are installed. Refer to Section D-D of Figure 2 -<br />
15.<br />
vi. Seal any open interfaces between individual base plates and at splice angles or at backing bars<br />
as required.<br />
vii. Apply epoxy filler between the angles at the base, profiled as shown in Figure 2 - 17 to<br />
promote free drainage of water from column base.<br />
viii. Prepare for and paint new steelwork and areas of existing steelwork.<br />
Version 1.0 Date of last revision: <strong>09</strong> July 2<strong>01</strong>0 Page 41 of 78<br />
This document is uncontrolled when printed. See <strong>ARTC</strong> Intranet for latest version.<br />
Steel
Engineering (Track & Civil) Guideline<br />
<strong>EGH</strong>-<strong>09</strong>-<strong>01</strong> <strong>Structures</strong> <strong>Repair</strong> <strong>Guidelines</strong><br />
Figure 2 - 14 <strong>Repair</strong>ing corroded angle columns (temporary support available)<br />
Version 1.0 Date of last revision: <strong>09</strong> July 2<strong>01</strong>0 Page 42 of 78<br />
This document is uncontrolled when printed. See <strong>ARTC</strong> Intranet for latest version.<br />
Steel
Engineering (Track & Civil) Guideline<br />
<strong>EGH</strong>-<strong>09</strong>-<strong>01</strong> <strong>Structures</strong> <strong>Repair</strong> <strong>Guidelines</strong><br />
Figure 2 - 15 <strong>Repair</strong>ing corroded 4-angle columns (no temporary support available)<br />
Version 1.0 Date of last revision: <strong>09</strong> July 2<strong>01</strong>0 Page 43 of 78<br />
This document is uncontrolled when printed. See <strong>ARTC</strong> Intranet for latest version.<br />
Steel
Engineering (Track & Civil) Guideline<br />
<strong>EGH</strong>-<strong>09</strong>-<strong>01</strong> <strong>Structures</strong> <strong>Repair</strong> <strong>Guidelines</strong><br />
Figure 2 - 16 <strong>Repair</strong>ing corroded 4-angle columns (no temporary support available)<br />
Version 1.0 Date of last revision: <strong>09</strong> July 2<strong>01</strong>0 Page 44 of 78<br />
This document is uncontrolled when printed. See <strong>ARTC</strong> Intranet for latest version.<br />
Steel
Engineering (Track & Civil) Guideline<br />
<strong>EGH</strong>-<strong>09</strong>-<strong>01</strong> <strong>Structures</strong> <strong>Repair</strong> <strong>Guidelines</strong><br />
Figure 2 - 17 <strong>Repair</strong>ing corroded 4-angle columns (no temporary support available)<br />
Version 1.0 Date of last revision: <strong>09</strong> July 2<strong>01</strong>0 Page 45 of 78<br />
This document is uncontrolled when printed. See <strong>ARTC</strong> Intranet for latest version.<br />
Steel
Engineering (Track & Civil) Guideline<br />
<strong>EGH</strong>-<strong>09</strong>-<strong>01</strong> <strong>Structures</strong> <strong>Repair</strong> <strong>Guidelines</strong><br />
Order of replacement<br />
1<br />
2<br />
3<br />
Replace outer free leg first<br />
Replace Leg 2<br />
B3<br />
Leg 2<br />
4 3<br />
2<br />
Replace Leg 3 using the same procedure as for Leg 2.<br />
B1<br />
B2<br />
Leg 1<br />
B2<br />
B1<br />
B3 B2<br />
Leg 3<br />
(a) Remove rivets from positions B1 and B2<br />
(b) Remove Leg 1 and pack plates<br />
(c) Install galvanised replacement leg and<br />
packs, fitting bolts at position B1 only ‐<br />
fit nuts snug tight only.<br />
(a) One by one remove rivets at position B3<br />
and immediately replace with bolt as<br />
shown. Do not fit nuts.<br />
(b) After all rivets have been replaced<br />
remove Leg 2, sliding off bolt shanks. Fit<br />
replacement Leg 2 and install bolts at<br />
position B2<br />
(c) One by one remove bolts at position B3<br />
and insert from other side and fit nuts<br />
(snug tight). After all bolts have been<br />
reversed, remove bolts from position B1.<br />
Version 1.0 Date of last revision: <strong>09</strong> July 2<strong>01</strong>0 Page 46 of 78<br />
This document is uncontrolled when printed. See <strong>ARTC</strong> Intranet for latest version.<br />
1<br />
Steel
Engineering (Track & Civil) Guideline<br />
<strong>EGH</strong>-<strong>09</strong>-<strong>01</strong> <strong>Structures</strong> <strong>Repair</strong> <strong>Guidelines</strong><br />
4<br />
Replace Leg 4.<br />
Leg 4<br />
B3<br />
2.2.10 Complete replacement of members<br />
(a) Remove nuts at positions B3 and B4.<br />
(b) Remove Leg 4, oxy cutting as required to<br />
allow legs to slide off bolt shanks.<br />
Alternatively bolts may be retracted at<br />
one position at a time only sufficient to<br />
allow removal of leg (extreme care is<br />
required).<br />
(c) Install galvanised replacement Leg 4 and<br />
complete all bolted connections.<br />
(d) Tension all bolts<br />
Figure 2 - 18 Illustrations to show repairing angles one by one<br />
The procedure for replacing members or elements of riveted members involves the following:<br />
i. Determine the size, shape and layout dimension for bolt holes by careful measurement on site.<br />
ii. Fabricate and galvanise the replacement member or elements.<br />
iii. Fit any temporary bracing or support members required.<br />
B4<br />
B1<br />
B2<br />
iv. Unbolt connecting bolts or remove connecting rivets. Remove the member or component.<br />
v. Prepare the area of interface to the new member or element by cleaning, grinding and<br />
painting if required.<br />
vi. Fit the new member or element and complete the bolted connections.<br />
vii. Prepare for and patch paint new and existing steelwork to the extent.<br />
Version 1.0 Date of last revision: <strong>09</strong> July 2<strong>01</strong>0 Page 47 of 78<br />
This document is uncontrolled when printed. See <strong>ARTC</strong> Intranet for latest version.<br />
Steel
Engineering (Track & Civil) Guideline<br />
<strong>EGH</strong>-<strong>09</strong>-<strong>01</strong> <strong>Structures</strong> <strong>Repair</strong> <strong>Guidelines</strong><br />
2.3 References<br />
1) “Assessment of Existing Steel <strong>Structures</strong>: Recommendations for Estimation of Remaining<br />
Fatigue Lift”, JRC Scientific and Technical Reports, Italy, 2008.<br />
2) Fisher, J.W., Barthelemy, B.M., Mertz, D.R., Edinger, J.A., NCHRP Report 227: “Fatigue<br />
Behaviour of Full Scale Welded Bridge Attachments”, Transportation Research Board,National<br />
Council, Washington, D.C., 1980<br />
3) http://iiw-wg5.cv.titech.ac.jp/: International Institute of Welding (IIW), Commission XIII:<br />
4) Fatigue of welded components and structures, Working Group 5 (WG5): <strong>Repair</strong> of fatigue<br />
loaded welded structures, Homepage<br />
5) Miki, C.: “<strong>Repair</strong>ing and reinforcing of fatigue damaged steel bridges”, WRC Proceedings IIW,<br />
pp. 286-298. 1998<br />
6) Lüesse, G., Ruscheweyh, H., Verwiebe, C., Günther, G. H.: “Regen-Wind-induzierte<br />
Schwingungserscheinungen an der Elbebrücke Dömitz”, Stahlbau 65 (1996), Heft 3, pp. 105-<br />
114<br />
7) Mang, F., Bucak, Ö.: „Tauglichkeit und Lebensdauer von bestehenden Stahlbauwerken“,<br />
Beitrag im Stahlbauhandbuch für Studium und Praxis 1, Teil B, Stahlbau- Verlagsgesellschaft<br />
mbH Köln, 1996<br />
8) Muncke, M.; Quoos, V.; Tschumi, M.; Sedlacek, G.; Feldmann, M.; Kühn, B.; Brandes, K.;<br />
Helmerich, R.; Hirt, M.; Nussbaumer, A.; Bassetti, A.; Geissler, K.; Gut, J.; Kunz, P.; Liechti,<br />
P.: “Vereinheitlichter Sicherheitsnachweis für bestehende Stahlbrücken”, Endbericht im<br />
Rahmen der Zusammenarbeitsvereinbarung DB AG – SBB, 31.05.20<strong>01</strong><br />
9) Helmerich, R.: “Alte Stähle und Stahlkonstruktionen – Materialuntersuchungen,<br />
Ermüdungsversuche an originalen Brückenträgern und Messungen von 1990 bis 2003“, BAM,<br />
Forschungsbericht 271, Berlin, 2005, ISBN 3-865<strong>09</strong>-362-0<br />
10) Akesson, B.: “Fatigue life of riveted railway bridges”, Dissertation at Chalmers University,<br />
Göteborg, 1994<br />
Version 1.0 Date of last revision: <strong>09</strong> July 2<strong>01</strong>0 Page 48 of 78<br />
This document is uncontrolled when printed. See <strong>ARTC</strong> Intranet for latest version.<br />
Steel
Engineering (Track & Civil) Guideline<br />
<strong>EGH</strong>-<strong>09</strong>-<strong>01</strong> <strong>Structures</strong> <strong>Repair</strong> <strong>Guidelines</strong><br />
3 Reinforced Concrete<br />
3.1 General<br />
Reinforced Concrete<br />
This section presents methods for repairing common types of defects and damage to concrete<br />
elements in any structure. Techniques that require special equipment and expertise such as<br />
cathodic protection, chloride removal, and re-alkalisation have been excluded.<br />
The repair methods presented in this section are for minor and routine nature of repairs for<br />
reinforced concrete deterioration. Any significant deterioration that affects the structure capacity<br />
and integrity should not be treated with these repair methods. These require engineering<br />
investigation prior to deciding on repair or reconstruction methods in achieving desirable strength.<br />
<strong>Repair</strong> materials that are given as examples can be replaced with any approved equivalent material<br />
with similar material properties.<br />
3.2 <strong>Repair</strong> of Cracks<br />
There are various types of cracks, however for the purposes of repair they can be classified into<br />
two categories:<br />
i. Dead cracks that are inactive and do not move or propagate<br />
ii. Live cracks that are subject to movement and propagation due to applied loads and<br />
temperature changes.<br />
Dead cracks can be repaired by the methods described in Section 3.2.1 to 3.2.7. Live cracks that<br />
are not yet likely to cause any defects in structures’ integrity can be repaired by a flexible sealant<br />
described in Section 3.2.8.<br />
The purpose of sealing is to prevent water from reaching the reinforcing steel, accelerated<br />
weathering of concrete, development of hydrostatic pressure within the crack, staining of concrete<br />
surface and causing moisture problems on the far side of the crack.<br />
3.2.1 Epoxy injection<br />
Epoxy injection can be applied to cracks of width between 0.05mm and 5mm. Cracks wider than<br />
5mm generally require grouting, which is described in Section 3.2.2.<br />
The procedure of epoxy injection involves the following:<br />
i. Clean and remove any contamination such as oil, grease, dirt, and fine particle of concrete<br />
from the cracks with water under high pressure or some special effective solvent. Blow out the<br />
residual water or solvent in the crack with filtered compressed air free of dust and oil or allow<br />
adequate time for air drying.<br />
ii. Seal cracks at the surface to keep the epoxy from leaking out before it has hardened. The<br />
surface can be sealed by brushing an epoxy on the surface of the crack and allowing it to<br />
harden. If extremely high injection pressures are needed, cut a 12mm deep x 20mm wide Vgrove<br />
along the crack, fill with an epoxy and strike off flush with the surface.<br />
iii. Drill holes into the crack for fitting pipe nipple entry ports for epoxy injection. Spacing of ports<br />
varies between 150mm to 500mm generally depending on the width and depth of cracks.<br />
iv. Mix the epoxy as per manufacturer’s instructions.<br />
v. Inject the epoxy with hydraulic pumps, paint pressure pots or air-activated caulking guns<br />
using the appropriate injection pressure for the application.<br />
vi. After the crack has been sealed, remove the projecting entry ports and fill holes with an epoxy<br />
patching compound. If required, remove or even out the surface seals by grinding in order to<br />
restore the appearance of the structure. Apply surface coating if it is part of the repair<br />
process.<br />
Following are some useful notes to consider for the injection of epoxy:<br />
• If the crack is vertical, commence the injection of epoxy at the lowest entry port until the<br />
epoxy exudes from the next port above. Cap the lower port and repeat the process at<br />
Version 1.0 Date of last revision: <strong>09</strong> July 2<strong>01</strong>0 Page 49 of 78<br />
This document is uncontrolled when printed. See <strong>ARTC</strong> Intranet for latest version.
Engineering (Track & Civil) Guideline<br />
<strong>EGH</strong>-<strong>09</strong>-<strong>01</strong> <strong>Structures</strong> <strong>Repair</strong> <strong>Guidelines</strong><br />
Reinforced Concrete<br />
successfully higher ports till the crack has been completely filled and all ports have been<br />
capped.<br />
• For horizontal cracks, carry out the injection from one end of the crack to the other in the<br />
same manner. The crack is full only if the pressure can be maintained. If the pressure cannot<br />
be maintained, the epoxy is still flowing into the crack or leaking out from somewhere.<br />
Some of the approved epoxy products include the following:<br />
• EPIREZ R 123<br />
• Nitofill LV (Fosroc)<br />
• Sikadur R - 52<br />
3.2.2 Grouting<br />
Wide cracks that are inactive may be repaired by filling with Portland cement grout. Grout mixture<br />
may contain cement and water or cement plus sand and water depending on the width of the<br />
crack. Other admixtures or polymers may be used to improve the properties of the grout, such as<br />
bond. The water-cement ratio should be kept as low as practical to maximise strength and<br />
minimise shrinkage. Another product that can be used is Sikadur – 53 epoxy grout.<br />
The procedure of grout injection involves the following:<br />
i. If the crack is contaminated with oil or grease, remove the contamination with detergents. If<br />
oil and grease have penetrated into concrete, remove the affected concrete and repair by<br />
replacing with fresh concrete.<br />
ii. Flush out all dust and debris from the crack with high pressure water jets.<br />
iii. Install grout nipples at intervals along the crack.<br />
iv. Seal the crack between the nipples with a sealant.<br />
v. Flush the crack to clean it and test the seal.<br />
vi. Grout the crack until it is completely filled. Maintain the grout pressure for several minutes to<br />
ensure good penetration.<br />
vii. Remove the nipples and fill holes with cement mortar.<br />
3.2.3 Routing and sealing<br />
Routing and sealing is used for repairing dead cracks that are of no structural significance. The<br />
method involves enlarging the crack along its exposed face and filling it with a suitable joint<br />
sealant.<br />
This is the simplest and most common technique for crack repair and can be executed with<br />
relatively untrained labour. It is suitable for both fine pattern cracks and larger isolated defects,<br />
but will not be effective on active cracks and cracks subject to a pronounced hydrostatic pressure.<br />
The sealant material is often an epoxy compound. There are many commercial products available<br />
in the market. Thus, the type and grade of sealant most suitable for the specific purpose and<br />
conditions of exposure should be selected.<br />
Some of the commercially available materials that can be used for sealing are Sikadur – 31 or<br />
Sikadur – 33.<br />
The procedure of routing and sealing involves the following:<br />
i. Prepare a minimum 6mm wide x 6mm deep V-groove at the surface along the crack using a<br />
concrete saw, hand tools or pneumatic tools. (Refer air jet. Allow to dry completely before).<br />
ii. Clean the groove with an oil free air jet. Allow to dry completely before placing the sealant.<br />
iii. Apply the sealant as per manufacturer's instructions.<br />
Version 1.0 Date of last revision: <strong>09</strong> July 2<strong>01</strong>0 Page 50 of 78<br />
This document is uncontrolled when printed. See <strong>ARTC</strong> Intranet for latest version.
Engineering (Track & Civil) Guideline<br />
<strong>EGH</strong>-<strong>09</strong>-<strong>01</strong> <strong>Structures</strong> <strong>Repair</strong> <strong>Guidelines</strong><br />
3.2.4 Drilling and plugging<br />
Figure 3 - 1 Routing and sealing<br />
Reinforced Concrete<br />
This method is suitable for repairing vertical retaining walls and consists of drilling a hole down the<br />
length of the crack and grouting it to form a key. (Refer Figure 3 - 2). The crack must run<br />
reasonably straight and the hole must be large enough to intersect the crack along its full length<br />
and provide enough section of shear key to structurally take the loads exerted on it. The grout key<br />
prevents transverse movement of the sections of concrete wall adjacent to the crack. It will also<br />
reduce heavy leakage through the crack and loss of soil from behind the wall.<br />
The grout is made up of cement and sand (1:3) and water. The water-cement ratio should be kept<br />
as low as practical to maximise strength and minimise shrinkage. Other admixtures or polymers<br />
may be added to improve the properties of the grout.<br />
If water tightness is also required in addition to the structural load transfer, a second hole should<br />
be drilled and filled with a resilient material of low modulus, the first hole being grouted.<br />
Commercially available resilient products include Sikaflex – PRO, Sikaflex CONSTRUCTION, and<br />
Vandex Plug.<br />
Figure 3 - 2 Drilling and plugging<br />
Version 1.0 Date of last revision: <strong>09</strong> July 2<strong>01</strong>0 Page 51 of 78<br />
This document is uncontrolled when printed. See <strong>ARTC</strong> Intranet for latest version.
Engineering (Track & Civil) Guideline<br />
<strong>EGH</strong>-<strong>09</strong>-<strong>01</strong> <strong>Structures</strong> <strong>Repair</strong> <strong>Guidelines</strong><br />
The procedure of drilling and plugging involves the following:<br />
3.2.5 Stitching<br />
i. Drill a 50mm to 75mm diameter hole centred on and following the crack.<br />
Reinforced Concrete<br />
ii. Flush the hole and crack with high pressure water jet to remove dust and debris. (Caution:<br />
Restrict flushing to the minimum so that backfill soil is not washed into the crack). Allow the<br />
crack to damp dry.<br />
iii. Seal the crack tight on the exposed face. Allow the seal to cure and harden.<br />
iv. Fill the hole and crack with grout.<br />
This method involves drilling holes on both sides of the crack and grouting in stitching dogs (Ushaped<br />
metal units with short legs) that span across the crack. (Refer Figure 3 - 3).<br />
Where possible, stitching should be done on both sides of a concrete section so that further<br />
movement of the structure would not pry or bend the dogs. This is particularly so in tension<br />
members where the dogs must be placed symmetrically. In bending members however the cracks<br />
may be stitched on the tension face only.<br />
Stitching will not close a crack but can prevent it from propagating further. If it is required to seal<br />
the crack, the sealing should be completed before stitching begins.<br />
The procedure of stitching involves the following:<br />
Figure 3 - 3 <strong>Repair</strong> of crack by stitching<br />
i. If it is required, seal the crack by epoxy injection, grouting, or routing and sealing.<br />
ii. The stitching dogs should be galvanised steel or stainless steel with minimum 16mm diameter<br />
bars.<br />
iii. The stitching dogs should be variable in length and orientation so that the tension across the<br />
crack is not transmitted to a single plane but well distributed in the concrete.<br />
iv. Drill holes on both sides of the crack accordingly to suit the size and location of the stitching<br />
dogs. Spacing of the dogs should be reduced at each end of the crack.<br />
v. Clean the holes of all dust and debris.<br />
vi. Anchor legs of the dogs in holes with a non-shrink grout or epoxy resin-based grout system.<br />
Version 1.0 Date of last revision: <strong>09</strong> July 2<strong>01</strong>0 Page 52 of 78<br />
This document is uncontrolled when printed. See <strong>ARTC</strong> Intranet for latest version.
Engineering (Track & Civil) Guideline<br />
<strong>EGH</strong>-<strong>09</strong>-<strong>01</strong> <strong>Structures</strong> <strong>Repair</strong> <strong>Guidelines</strong><br />
Reinforced Concrete<br />
vii. Apply a protective coating on top of the repair covering all stitching dogs. Commercially<br />
available protective coating includes Sika Ferrogard 903.<br />
3.2.6 Adding reinforcement<br />
When cracks impair the strength of a concrete structure, the structure can be strengthened by<br />
addition of conventional or prestressed reinforcement. The method of fixing such reinforcement will<br />
depend on a particular structure, type, and location of the cracks. The damage must be examined<br />
and reinforcement designed by a Structural Engineer to resist the forces causing the cracks. (Refer<br />
Figure 3 - 4).<br />
Cracked structures may be repaired by epoxy injection and reinforcing bar insertion across the<br />
cracks.<br />
Figure 3 - 4 Adding reinforcement for strengthening<br />
The procedure of adding reinforcement involves the following:<br />
i. Clean the cracks of dust, debris and contamination. Allow the cracks to dry.<br />
ii. Seal the cracks at exposed surfaces with an epoxy sealant approximately 3mm thick and<br />
40mm wide. Allow one or two vent holes at the top for escape of air during epoxy injection.<br />
iii. Drill holes at 45 o to the concrete surface and crossing the crack plane at approximately 90 o .<br />
Use vacuum bits and chucks to prevent dust from clogging the cracks. The holes should<br />
extend minimum 450mm on each side of the crack. Number, spacing and location of the holes<br />
should be determined by design, taking care to avoid existing reinforcement.<br />
iv. Fill the holes and cracks with epoxy pumped under low pressure (350 to 550kPa). The epoxy<br />
used should have low viscosity and high modulus of elasticity and it should be capable of<br />
bonding to concrete and steel in presence of moisture. Holes should be filled with epoxy to<br />
part depth sufficient to raise the epoxy level to surface when steel bars are inserted.<br />
v. Insert reinforcing bars (typically 16 to 24mm diameter) making sure the reinforcement are<br />
sufficiently embedded into concrete to protect them from the weather and environmental<br />
effects.<br />
3.2.7 Overlays and surface treatment<br />
Slabs with numerous fine cracks caused by drying shrinkage or other one-time occurrences can be<br />
effectively repaired by the use of protective coatings such as Sikagard – 703W or surface<br />
treatments.<br />
Version 1.0 Date of last revision: <strong>09</strong> July 2<strong>01</strong>0 Page 53 of 78<br />
This document is uncontrolled when printed. See <strong>ARTC</strong> Intranet for latest version.
Engineering (Track & Civil) Guideline<br />
<strong>EGH</strong>-<strong>09</strong>-<strong>01</strong> <strong>Structures</strong> <strong>Repair</strong> <strong>Guidelines</strong><br />
Reinforced Concrete<br />
Concrete surfaces that are not subjected to wear may be sealed with a low solid, epoxy resin-based<br />
system (film forming type) or silane/siloxane based coatings (penetration type) depending on the<br />
circumstances of the repair job.<br />
Surfaces subject to traffic such as walkways, parking decks and interior slabs may be sealed with a<br />
heavy coat of epoxy resin covered with aggregate to provide skid resistance. The method will close<br />
dormant cracks, even if the aggregate is abraded from the surface, because traffic cannot abrade<br />
the resin that has penetrated the cracks.<br />
A suitable proprietary repair system should be selected according to the requirements of the job.<br />
The procedure of adding surface treatment involves the following:<br />
i. Select appropriate repair materials according to the particular job requirements.<br />
ii. Clean the surface to remove laitance, or contaminants such as grease or oil<br />
iii. Apply the repair materials strictly according to the supplier's written specifications.<br />
3.2.8 Flexible sealant<br />
Live cracks are treated as movement joints and repaired with flexible sealants.<br />
The sealant is generally installed in a wide recess cut along the crack. The dimensions of the recess<br />
(width and depth) depend on the total crack movement and the cyclic movement capability of the<br />
joint sealant used. The crack movement should be calculated taking into account the applied loads,<br />
shrinkage and temperature variations.<br />
Where aesthetics is not important and surface is not subject to traffic, the sealant may be applied<br />
on the surface without making a recess.<br />
The commonly used sealants for movement type of joints are polysulphides, epoxy polysulphides,<br />
polyurethanes, silicones and acrylics. They have generally excellent adhesion to concrete, high<br />
movement capability of 50% to 100% and require a width/depth ratio of 2:1.<br />
The procedure of repairing recessed seal involves the following:<br />
i. If the concrete is still uncontaminated, cut a recess along the line of the crack using a power<br />
chisel, crack cutter or saw cutting machine. Dimensions of the recess should comply with the<br />
requirements of the crack movement and sealant material. (Refer rosion of reinforcement, it<br />
must be bro).<br />
ii. Clean the recess of dust and debris by wire brushing followed by air-blasting with oil-free<br />
compressed air.<br />
iii. Coat the surfaces of the recess with primer as specified by the sealant manufacturer.<br />
iv. Place a bond breaker (such as polyethylene strip, pressure sensitive tape or other material<br />
that will not bond to the sealant) at the bottom of the recess.<br />
v. Fill the recess with flexible sealant as per manufacturer's instructions. Where the concrete is<br />
carbonated or contaminated with chlorides or has deteriorated due to corrosion of<br />
reinforcement, it must be broken out, replaced, and a sealed movement joint formed as<br />
detailed below.<br />
Version 1.0 Date of last revision: <strong>09</strong> July 2<strong>01</strong>0 Page 54 of 78<br />
This document is uncontrolled when printed. See <strong>ARTC</strong> Intranet for latest version.
Engineering (Track & Civil) Guideline<br />
<strong>EGH</strong>-<strong>09</strong>-<strong>01</strong> <strong>Structures</strong> <strong>Repair</strong> <strong>Guidelines</strong><br />
Figure 3 - 5 Flexible joint sealant – recessed seal<br />
The procedure of repairing surface seal involves the following:<br />
Reinforced Concrete<br />
i. Narrow cracks subject to movement, where aesthetics are not important and where the<br />
structure is not subject to traffic, may be sealed with a flexible surface seal. (Refer r the crack.<br />
ii. Apply minimum 60mm wide an).<br />
iii. Clean the concrete surface adjacent to the crack of laitance and contaminants such as grease<br />
and oil.<br />
iv. Coat the concrete surface along the crack in approximately 100mm wide strips with a primer<br />
recommended by the sealant manufacturer.<br />
v. Place a 20mm wide bond breaker strip over the crack.<br />
vi. Apply minimum 60mm wide and 3mm thick flexible joint sealant over the bond breaker with a<br />
trowel.<br />
Flexible joint sealant<br />
Flexible surface sealant can be used over narrow crack<br />
subject to movement, if appearance is not a consideration.<br />
Note bond breaker over the crack itself.<br />
Figure 3 - 6 Flexible joint sealant – surface seal<br />
Bond breaker<br />
Version 1.0 Date of last revision: <strong>09</strong> July 2<strong>01</strong>0 Page 55 of 78<br />
This document is uncontrolled when printed. See <strong>ARTC</strong> Intranet for latest version.
Engineering (Track & Civil) Guideline<br />
<strong>EGH</strong>-<strong>09</strong>-<strong>01</strong> <strong>Structures</strong> <strong>Repair</strong> <strong>Guidelines</strong><br />
3.3 Patch <strong>Repair</strong>s<br />
Reinforced Concrete<br />
Patch repairing is employed to restore small areas of otherwise sound concrete damaged by<br />
spalling, scaling, honeycombing and impact. Patch repairs are generally trowel applied, require<br />
none or minimum formwork and their thickness is limited to a maximum of about 100mm in high<br />
build applications.<br />
Depending on the type, location and extent of damage and urgency of repairing, patch repairs may<br />
be carried out with Portland cement mortars, latex modified cementitious mortars or epoxy<br />
mortars.<br />
If ordinary Portland cement is used in the mortar, the patched surface would tend to be darker<br />
than the surrounding concrete. Therefore, a part of the Portland cement should be replaced with<br />
white cement to lighten the patch. It is desirable to make a trial patch to achieve matching colour.<br />
Mortar of a consistency suitable for trowelling usually does not contain enough cement paste to<br />
coat the old concrete surface or the reinforcement adequately and a bonding coat of cement grout<br />
or polymer admixtures must be used. Bonding coats containing polymer admixtures dry quickly<br />
and work must be organised so that application of mortar follows the bonding coat within a few<br />
minutes.<br />
The following sections describe the procedure involved in repair with the above mentioned<br />
materials.<br />
3.3.1 <strong>Repair</strong> with cement-sand mortars<br />
The procedure of applying cement-sand mortar involves the following:<br />
i. Remove all damaged, unsound and contaminated concrete and prepare the edges of the patch<br />
area.<br />
ii. Clean concrete substrate and saturate it with water for 24 hours prior to repair.<br />
iii. Clean the reinforcement if exposed and contaminated with rust.<br />
iv. Select appropriate patch material and bonding coat for the job. It may be a proprietary prepackaged<br />
formulation or site-mixed preparation. For proprietary products carefully follow the<br />
manufacturer's recommendations. For common repair jobs a cement and coarse sand mixture<br />
in the ratio of 1:3 by weight is generally adequate. If the patch must match the colour of the<br />
surrounding concrete a blend of Portland cement and white cement may be used. Normally,<br />
about one-third white cement is sufficient, but the precise proportions can only be determined<br />
by a trial.<br />
v. Prepare the cement-sand mortar by mixing with minimum amount of water. Slump of the mix<br />
for shallow patches should not exceed 25mm. To minimise shrinkage, allow the mortar to<br />
stand for half an hour after mixing and then re-mix prior to use. Do not re-temper with water.<br />
vi. Apply the bonding coat to the concrete substrate and to the reinforcement.<br />
vii. Apply the mortar immediately following the bonding coat. The mortar should be forcibly<br />
projected or dashed onto the substrate and placed in layers about 10mm thick. Compact each<br />
layer thoroughly over the entire surface using a blunt piece of wood or hammer. Each layer<br />
should be cross-scratched to facilitate bonding with the next layer. Generally, there need be<br />
no time delays between the layers. For vertical and overhead repairs of considerable<br />
thickness, in order to prevent sagging of the mortar, the repair may be limited to about 50mm<br />
thickness at one time, and should then be kept moist for a day before applying the successive<br />
layer.<br />
viii. Finish the patch to the texture of the surrounding concrete by using similar form material and<br />
hammering with a mallet or by wood floating or steel trowelling as necessary.<br />
ix. Start curing as soon as possible.<br />
3.3.2 <strong>Repair</strong> with polymer modified cementitious mortars<br />
The procedure of applying polymer modified cementitious mortar involves the following:<br />
i. The repair procedure is the same as for cement-sand mortars, except for the details noted<br />
below.<br />
Version 1.0 Date of last revision: <strong>09</strong> July 2<strong>01</strong>0 Page 56 of 78<br />
This document is uncontrolled when printed. See <strong>ARTC</strong> Intranet for latest version.
Engineering (Track & Civil) Guideline<br />
<strong>EGH</strong>-<strong>09</strong>-<strong>01</strong> <strong>Structures</strong> <strong>Repair</strong> <strong>Guidelines</strong><br />
ii. The proportion of polymer admixtures to be added should be as per manufacturer's<br />
recommendations.<br />
Reinforced Concrete<br />
iii. The working time of polymer modified mortars is relatively short. Therefore, limit the quantity<br />
of mix for a particular job such that it can be placed, compacted and finished within the<br />
working time, approximately 20 minutes.<br />
iv. Soak the concrete substrate with water for one hour before applying bonding coat.<br />
v. Apply polymer based bonding coat to concrete substrate and reinforcement. Polymer in the<br />
bonding coat should be the same as in the repair mortar.<br />
vi. Place the mortar in the patch without any delay and before the bonding coat can dry. Compact<br />
and finish within the working time of the mortar.<br />
vii. Do not re-work or manipulate the mortar after the latex has coalesced otherwise cracking will<br />
occur on drying.<br />
viii. Curing procedure for polymer modified mortars should follow manufacturer’s instructions.<br />
3.3.3 <strong>Repair</strong> with epoxy mortar<br />
Patch repairs with epoxy mortars require special skills and should be entrusted to personnel<br />
experienced in mixing, handling and applying epoxy materials.<br />
The procedure of applying epoxy mortar involves the following:<br />
i. Do not carry out repairs with epoxy-based materials at low temperatures as it is difficult to get<br />
the mixture to harden quickly enough.<br />
ii. Restrict application of epoxy mortar to thin sections, say not exceeding 20mm.<br />
iii. Prepare and clean the patch area. The concrete surface should be completely dry.<br />
iv. Mix the epoxy components and aggregates accurately as recommended by the manufacturer<br />
in a high shear mixer, preferably in whole pre-weighed batches as supplied by the<br />
manufacturer.<br />
v. Working time of resin-based materials is very short. Mix the quantities that can be easily<br />
placed and finished within the working time. Also, a large batch of resin-hardener mixture has<br />
a shorter working life than a small batch.<br />
vi. Handle the materials cleanly to avoid contamination of both the resin mixtures and the people<br />
working with them.<br />
vii. Prime the concrete substrate (and reinforcement, if exposed) with the same liquid resin<br />
mixture as used for the epoxy mortar.<br />
viii. Apply the mortar with a trowel immediately following the bonding coat and finish the repair<br />
before the resin hardens.<br />
ix. No curing is required for resin mortar patches.<br />
3.4 Recasting with Concrete<br />
Recasting with concrete is required to replace concrete that has been severely damaged and nonremoval<br />
of which would lead to further deterioration and could impair the strength, stability and<br />
functioning of the structure.<br />
Recasting with concrete generally involves removal of deteriorated concrete, cleaning up the<br />
substrate and reinforcement, setting up formwork and placement of new concrete. (Refer Figure 3<br />
- 7).<br />
Version 1.0 Date of last revision: <strong>09</strong> July 2<strong>01</strong>0 Page 57 of 78<br />
This document is uncontrolled when printed. See <strong>ARTC</strong> Intranet for latest version.
Engineering (Track & Civil) Guideline<br />
<strong>EGH</strong>-<strong>09</strong>-<strong>01</strong> <strong>Structures</strong> <strong>Repair</strong> <strong>Guidelines</strong><br />
Underside view<br />
Reinforced Concrete<br />
Figure 3 - 7 Holes cut in slab to allow placing of concrete when soffit forms have been fixed<br />
The procedure of recasting with concrete involves the following:<br />
i. Support the existing structure adequately to safeguard against instability and deformation<br />
during repair work.<br />
ii. Remove all deteriorated or damaged concrete and prepare edges of repair work.<br />
iii. Examine the reinforcement for loss of section due to corrosion. If cross-sectional area of the<br />
reinforcement has reduced by more than 15%, seek engineering advice for extra<br />
reinforcement.<br />
iv. Clean the concrete substrate and reinforcement.<br />
v. Select a suitable bonding agent for concrete and reinforcement taking into consideration its<br />
limited working time available for fixing the formwork and placing the new concrete. If<br />
concrete can be placed immediately after applying bonding coat, use either Portland cement<br />
grout or polymer modified cement grout. If delay is expected due to formwork, specially<br />
formulated epoxy bonding agents with long working life should be used.<br />
vi. Apply bonding coat to concrete substrate and reinforcement.<br />
vii. Fix formwork, if required.<br />
viii. Place concrete in the forms by a suitable method. Compact well using internal or external<br />
vibrators as necessary. Finish unformed surfaces by brooming, wood floating, steel trowelling<br />
or any other methods to match the adjacent existing concrete.<br />
ix. Forms for load bearing structural members should remain in position until at least 80% of the<br />
28 day compressive strength of the new concrete is achieved. (10 days for normal Portland<br />
cement, 7 days for high early strength Portland cement). Forms for non-load bearing members<br />
may be removed after 2 to 3 days.)<br />
x. After stripping the formwork, examine the concrete for any blemishes. <strong>Repair</strong> any defective<br />
work using stiff cement mortar having the same proportion of cement and fine aggregate as<br />
used in the concrete and bring to an even surface using wooden float.<br />
3.5 Corrosion <strong>Repair</strong>s<br />
The presence of corrosion in concrete structures is generally known when cracks occur. Extensive<br />
corrosion shows up in long cracks running along the reinforcement leading to spalling and<br />
delamination or corrosion may be localised due to impact damage, honeycombing or water<br />
penetration.<br />
In all cases it is advisable to remove the concrete and examine the extent of corrosion<br />
immediately. Where the corrosion is extensive, concrete should be tested for chloride penetration<br />
and carbonation.<br />
If it is determined that patch repairing or re-casting with new concrete will be cost effective then<br />
the procedures in Section 3.3 and 3.4 should be followed rigorously. The repair should also include<br />
Version 1.0 Date of last revision: <strong>09</strong> July 2<strong>01</strong>0 Page 58 of 78<br />
This document is uncontrolled when printed. See <strong>ARTC</strong> Intranet for latest version.
Engineering (Track & Civil) Guideline<br />
<strong>EGH</strong>-<strong>09</strong>-<strong>01</strong> <strong>Structures</strong> <strong>Repair</strong> <strong>Guidelines</strong><br />
Reinforced Concrete<br />
cleaning the reinforcement and possibly applying protective treatment. Consideration should be<br />
given to the application of a protective coating to the concrete surface to limit further ingress of<br />
chlorides and carbonation.<br />
3.6 Sprayed Concrete (Shotcreting)<br />
The procedure of spraying concrete involves the following:<br />
i. Remove all damaged and unsound concrete from the structure to be repaired. Concrete should<br />
be removed so that there is no abrupt change in thickness of repair and any square shoulders<br />
should be tapered.<br />
ii. Clean concrete substrate and exposed reinforcement.<br />
iii. Fix required fabric reinforcement rigidly to prevent vibration during spraying.<br />
iv. Fix formwork as required to restrict the boundaries of sprayed concrete. (Refer Figure 3 - 8).<br />
Coat the formwork liberally with form release agents compatible with the spray mix.<br />
v. Protect adjacent buildings, trees, garden, etc. from dust and rebound concrete that would<br />
follow during spraying operations, with suitable covers.<br />
vi. Ensure that local work safety regulations are adhered to.<br />
vii. Check operation of all spraying equipment before commencing work.<br />
viii. Wet the substrate with an air/water blast before spraying concrete.<br />
ix. Apply spray concrete in layers. Build up each layer by making passes of the nozzle over the<br />
working area in a pattern of overlapping loops. To minimise rebound, the nozzle should be<br />
held nearly perpendicular to the surface being sprayed at a distance of between 0.6m and<br />
1.2m.<br />
x. Finish the surface by screeding or trowelling if required.<br />
xi. Commence curing as soon as possible.<br />
Figure 3 - 8 Sprayed concrete<br />
Version 1.0 Date of last revision: <strong>09</strong> July 2<strong>01</strong>0 Page 59 of 78<br />
This document is uncontrolled when printed. See <strong>ARTC</strong> Intranet for latest version.
Engineering (Track & Civil) Guideline<br />
<strong>EGH</strong>-<strong>09</strong>-<strong>01</strong> <strong>Structures</strong> <strong>Repair</strong> <strong>Guidelines</strong><br />
3.7 Protective Coatings<br />
Reinforced Concrete<br />
Protective coatings on surfaces of concrete structures are not exactly repair methods. They are<br />
protective or preventive measures applied to inhibit the deterioration process caused by<br />
environmental factors such as penetration by moisture, chlorides and carbon dioxide.<br />
Coatings may be applied in any of the following circumstances:<br />
i. On surfaces of new structures for aesthetics and increased durability.<br />
ii. On surfaces of the existing structures where tests indicate that chloride ingress and<br />
carbonation has occurred in the concrete but as yet no corrosion is evident, in which case<br />
application of coatings would help in reducing further deterioration. However, if there are signs<br />
of corrosion, application of protective coatings will not stop the corrosion. In this case the<br />
deteriorated concrete should be removed and replaced by patch repairing or recasting.<br />
iii. On surfaces of newly repaired concrete to give extra protection against recurrence of<br />
deterioration and to conceal the repair work.<br />
3.7.1 Coating/repair to prevent chlorides ingress<br />
The procedure of applying coating to prevent chlorides ingress involves the following:<br />
i. Ascertain the profile of chloride penetration into concrete. Determine if the chloride was<br />
inherent in the original concrete mix or it has entered later. If there is no corrosion of steel<br />
yet, estimate on the basis of chloride profile and age of concrete the time to depassivation of<br />
steel.<br />
ii. Based on this estimate and if the concrete otherwise is in sound condition, decide whether to<br />
leave the concrete as it is and re-inspect after an appropriate interval or to take action to limit<br />
further chloride ingress. The following techniques can be considered as possible for controlling<br />
chloride attack:<br />
• Silane/siloxane coating<br />
• Cathodic protection<br />
• Chloride extraction and re-alkalisation<br />
Procedure for silane/siloxane coating is given below. The other methods require special technology<br />
and should be undertaken only in consultation with the experts in the field.<br />
iii. <strong>Repair</strong> surface cracks and spalls if any by appropriate methods.<br />
iv. Clean the surfaces to be coated of all contaminants. Make good any blowholes and areas of<br />
substantial pitting with an approved finishing compound.<br />
v. Wash down the surfaces with clean water. Allow to dry for 24 hours.<br />
vi. Mask or protect adjacent areas, paints, sealants, asphalt or coated surface.<br />
vii. Apply silane/siloxane in at least two flood coats using a low pressure sprayer. Repeat<br />
application until correct coverage is achieved as recommended by the manufacturer.<br />
(Silane/siloxane is also used as a primer for some protective coating systems. Allow to dry for<br />
at least two hours before applying another coating).<br />
3.7.2 Coating/repair to prevent carbonation<br />
i. Monitor the situation at periodic intervals by phenolphthalein tests by drilling holes and<br />
applying phenolphthalein to see colour change to determine the progressive depth of<br />
carbonation front. No protective surface treatment is necessary until the carbonation front<br />
reaches the steel reinforcement.<br />
ii. Once the carbonation front reaches the steel, and if the concrete otherwise is in sound<br />
condition, any of the following options can be considered to prevent further carbonation:<br />
• Silane/siloxane primer plus anti-carbonation coating<br />
• Rendering and painting<br />
• Cathodic protection<br />
Version 1.0 Date of last revision: <strong>09</strong> July 2<strong>01</strong>0 Page 60 of 78<br />
This document is uncontrolled when printed. See <strong>ARTC</strong> Intranet for latest version.
Engineering (Track & Civil) Guideline<br />
<strong>EGH</strong>-<strong>09</strong>-<strong>01</strong> <strong>Structures</strong> <strong>Repair</strong> <strong>Guidelines</strong><br />
• Re-alkalisation<br />
Reinforced Concrete<br />
Guideline procedure for rendering and painting is given below. Depending on the proprietary<br />
materials or coating system selected, exact procedure as recommended by the product<br />
manufacturer should be adopted.<br />
iii. <strong>Repair</strong> surface cracks and spalls, if any, by appropriate repair methods.<br />
iv. Clean the surface to be coated of all contaminants. Make good any blowholes and areas of<br />
substantial pitting with an approved finishing compound.<br />
v. Wash down the surfaces with clean water. Thoroughly soak the substrate for one hour. Allow<br />
to become damp dry without residual water.<br />
(Instead, a primer may be applied as recommended by the product manufacturer).<br />
vi. Apply cement-based render with a trowel from "feather edge" to 3mm thickness. Allow to set<br />
partly before finishing finally with trowel, or sponge float, as required.<br />
vii. Cure the render with fine spray of water or a curing material recommended by the<br />
manufacturer. The curing material must be compatible with the anticarbonation coating<br />
proposed to be applied. Allow at least 48 hours before top coating.<br />
viii. Apply the selected protective coating as per manufacturer's recommendations. The coating<br />
should be pinhole free. One or two coats may be required as per the product used.<br />
Version 1.0 Date of last revision: <strong>09</strong> July 2<strong>01</strong>0 Page 61 of 78<br />
This document is uncontrolled when printed. See <strong>ARTC</strong> Intranet for latest version.
Engineering (Track & Civil) Guideline<br />
<strong>EGH</strong>-<strong>09</strong>-<strong>01</strong> <strong>Structures</strong> <strong>Repair</strong> <strong>Guidelines</strong><br />
4 Masonry<br />
4.1 General<br />
<strong>Repair</strong>s for following types of defects are covered in this section:<br />
• Cracks<br />
• Fretting<br />
• Impact Damage<br />
• Other types<br />
4.2 Crack <strong>Repair</strong>s<br />
For typical repair materials/products refer Reinforced Concrete in Section 3.<br />
4.2.1 Active cracks<br />
i. <strong>Repair</strong> of cracks not to be sealed permanently involves the following:<br />
Masonry<br />
• Clean the crack of loose dust and debris, oil, algae and other contaminants by using high<br />
pressure water jets, compressed air (oil free) or vacuum suction. Allow the surfaces of the<br />
crack to dry.<br />
• Prime the crack surfaces with a primer recommended by sealant manufacturer.<br />
• If the width of crack is more than 5mm insert a tight fitting closed-cell polyethylene foam<br />
backer rod into the crack. The backer rod must be pushed to a depth such that the<br />
sealant applied will have width to depth ratio of 2:1, or minimum 5mm depth of sealant.<br />
(For cracks less than 5 mm do not insert backer rod).<br />
• Seal the crack by caulking with a flexible sealant flush with the masonry face.<br />
ii. <strong>Repair</strong> of cracks to be sealed permanently involves the following:<br />
Either a recessed seal or surface seal as described below can be used:<br />
Recessed Seal<br />
• Cut a recess along the crack using a power chisel or crack cutter. Dimensions of the<br />
recess should comply with the requirements of the crack movement and sealant material.<br />
• Clean the recess of dust and debris by wire brushing followed by air-blasting with oil free<br />
compressed air.<br />
• Prime the surfaces of the recess with a primer specified by the sealant manufacturer.<br />
• Place a bond breaker strip at the bottom of recess.<br />
• Fill the recess with flexible sealant as per manufacturer's instructions.<br />
Surface Seal<br />
• Narrow cracks subject to significant movement where aesthetics are not important may<br />
be sealed with a flexible surface seal.<br />
• Clean the masonry surface adjacent to the crack of dirt, algae, and other contaminants.<br />
• Prime the masonry surface along the crack in approximately 100mm width with a primer<br />
specified by the sealant manufacturer.<br />
• Place a 20mm wide bond breaker strip over the crack.<br />
• Apply minimum 60mm wide and 3mm thick flexible joint sealant over the bond breaker<br />
with a trowel.<br />
Version 1.0 Date of last revision: <strong>09</strong> July 2<strong>01</strong>0 Page 62 of 78<br />
This document is uncontrolled when printed. See <strong>ARTC</strong> Intranet for latest version.
Engineering (Track & Civil) Guideline<br />
<strong>EGH</strong>-<strong>09</strong>-<strong>01</strong> <strong>Structures</strong> <strong>Repair</strong> <strong>Guidelines</strong><br />
4.2.2 Inactive cracks<br />
Fine cracks can be repaired by epoxy injection. The procedure for repairing wider cracks involves<br />
the following:<br />
Masonry<br />
i. If cracks run through masonry units and mortar beds, cut out the units and remove joint<br />
mortar. Wet the masonry. Allow to dry until it is just damp (no residual water). Install new<br />
units, bonding with mortar similar to that in the existing wall. Avoid strong mortar and use a<br />
well graded sand to minimise shrinkage. Where the wall is severely exposed, polymer<br />
additives may be used in the mortar to increase bond and durability provided the sand used<br />
has negligible clay content.<br />
Note that the above procedure for repairing cracked masonry units is also applicable for<br />
repairing spalled masonry.<br />
ii. If cracks run through joints only (that is, masonry units are not affected), rake the joints (on<br />
both sides of the walls if accessible) to a minimum depth of 15mm using a square edged tool.<br />
Clean the joints of dust and debris with a wire brush or by oil-free air-blasting. Wet the<br />
masonry. Allow to dry until it is just damp. Fill and point with mortar not richer than a 1:2:9<br />
mix of cement: lime: sand.<br />
4.3 Fretting <strong>Repair</strong>s<br />
4.3.1 <strong>Repair</strong> of damaged joints<br />
The procedure for repairing damage to jointing mortar involves the following:<br />
i. Where the jointing mortar has been damaged without disturbing the masonry units, rake out<br />
all loose and fretting mortar from joints, with a square edged tool. Rake out another 20mm of<br />
mortar to make sure that all crystallised salt is removed. Rake the joints in top most 3-4<br />
courses to be repaired first.<br />
ii. Thoroughly wet the masonry and allow to dry till it is just damp and without any residual<br />
water.<br />
iii. The mortar mix for re-pointing should consist of hydrated lime and washed concrete sand<br />
(without any clay content) in the ratio of 1 lime: 4-5 sand. Sand must be free of salts. Only<br />
potable water (that is, suitable for drinking) should be used for the mortar.<br />
iv. Mix dry sand and lime, then slowly add water while still mixing to make a stiff mix. As the lime<br />
takes a long time to go off, prepare the mortar some hours in advance of the re-pointing<br />
operation and keep it covered with damp bags until used.<br />
v. Pack joints with the stiff mortar. Ensure that no voids are left, using a pointing tool to ram the<br />
mortar into the joint. (Start at the top most joint and work progressively down). Tool off the<br />
joint surface to match the original.<br />
4.3.2 <strong>Repair</strong> of damaged masonry units<br />
The procedure for repairing damaged masonry units involves the following:<br />
i. Cut out the spalled units to a depth at least 20mm beyond the depth of spalling, or remove<br />
the whole units. Remove the jointing mortar also.<br />
ii. Wash down the broken surfaces to remove dust and debris. Allow the surfaces to dry till it is<br />
just damp.<br />
iii. Set new units (whole or sawn as required) in place of the old with a lime and sand mortar as<br />
described in Section 4.3.1 (iii) above.<br />
CAUTION: Before commencing repairs check with the <strong>Structures</strong> Engineer if the stability<br />
of the wall would be adversely affected by removal of the spalled masonry. Remove and<br />
replace only a few spalled units at a time as necessary to ensure stability at all times.<br />
Version 1.0 Date of last revision: <strong>09</strong> July 2<strong>01</strong>0 Page 63 of 78<br />
This document is uncontrolled when printed. See <strong>ARTC</strong> Intranet for latest version.
Engineering (Track & Civil) Guideline<br />
<strong>EGH</strong>-<strong>09</strong>-<strong>01</strong> <strong>Structures</strong> <strong>Repair</strong> <strong>Guidelines</strong><br />
4.4 <strong>Repair</strong> to Impact Damaged Masonry Units<br />
Masonry<br />
Masonry spalled by accidental impact would require removal and replacement of the spalled units<br />
and repair of cracks. <strong>Repair</strong> procedure for this is the same as for wide cracks.<br />
4.5 Other Types of <strong>Repair</strong>s<br />
4.5.1 Minor displacement of masonry<br />
Minor displacement of parts of the masonry is not very important. However, large movements may<br />
endanger structural stability. It is advisable to find out the cause of all movements and take steps<br />
to prevent its continuing or recurring.<br />
When a part of the masonry is displaced horizontally, rake out the joints on that movement has<br />
taken place and repoint.<br />
4.5.2 Sulphate attack<br />
Sulphate attack that is affected by dampness is liable to continue unless the masonry can be dried<br />
out and kept reasonably dry. The repair therefore should be aimed at investigating the cause of<br />
dampness and eliminating it, if possible.<br />
If the damage due to sulphate attack has gone too far, rebuilding may be necessary, in which case<br />
use clay bricks of low sulphate content with 1:1:6 or stronger mortar of sulphate-resisting Portland<br />
cement.<br />
Rendering that has been damaged by sulphate attack should not be patch repaired. It is best to<br />
strip it off and allow the masonry to dry and, preferably, to remain bare. If it is necessary to render<br />
again use a weaker mix of sulphate-resisting cement.<br />
4.5.3 Salt water and marine organisms<br />
<strong>Repair</strong> of masonry damaged by salt water and marine organisms is difficult and thus specialised<br />
work should be entrusted to organisations experienced in this field.<br />
Basically, the repair consists of cleaning of the affected masonry by grit and water blasting and<br />
protecting the masonry by epoxies or by concrete encasement.<br />
Version 1.0 Date of last revision: <strong>09</strong> July 2<strong>01</strong>0 Page 64 of 78<br />
This document is uncontrolled when printed. See <strong>ARTC</strong> Intranet for latest version.
Engineering (Track & Civil) Guideline<br />
<strong>EGH</strong>-<strong>09</strong>-<strong>01</strong> <strong>Structures</strong> <strong>Repair</strong> <strong>Guidelines</strong><br />
5 Timber<br />
5.1 General<br />
Typical primary members for railway bridges are Grade F22 with a cross-section of 300 x 300mm.<br />
The size of secondary elements generally varies.<br />
Replacement of a member implies that a defective element is replaced with either a like-for-like<br />
element or bigger size element. Otherwise, the replacement element needs to be designed by a<br />
Structural Engineer.<br />
Timber<br />
All replacement fasteners for timber connections are of Grade 4.6 mild steel galvanized bolts, nuts,<br />
and washers of equivalent or bigger size to the existing fasteners.<br />
For the timber strength group and stress grade for transom replacement refer “ETA-02-<strong>01</strong>: Timber<br />
Sleepers, Turnout and Bridge Transom Specification” (See Section 5.5).<br />
Note that Section 5.4 Propping has some typical details and notes to cover general conditions only<br />
due to difficulties in presenting details of temporary supports for various sites with different<br />
foundation requirements. For all propping, site conditions should be considered prior to applying a<br />
propping system. Adequate drainage should be allowed for the new footing of the propping so that<br />
the footing would not be undermined due to poor drainage.<br />
5.2 <strong>Repair</strong>s Required for Common Defects<br />
The following sections describe the repair methods for commonly found defects in timber<br />
structures.<br />
5.2.1 Decay resulting in troughing, pipes, crushing or loss of section<br />
When elements are extensively decayed resulting in troughing, piping, crushing, or loss of section<br />
(Refer Figure 5 - 1) due to fire or any other means, these elements should be replaced with either<br />
like-for-like elements or bigger size elements of similar grade and durability class.<br />
The exception to the above is timber piles, which may be spliced.<br />
5.2.2 Splitting<br />
Figure 5 - 1 Common defects in timber<br />
Splitting in the timber elements can be repaired with bolting galvanized mild steel large washers<br />
(100 x 100 x 12 plates typical) or 100mm wide x 3mm thick metal straps with M24 galvanized<br />
bolts in most cases. If bolting is not feasible due to the excessive splitting then the element should<br />
be replaced.<br />
Version 1.0 Date of last revision: <strong>09</strong> July 2<strong>01</strong>0 Page 65 of 78<br />
This document is uncontrolled when printed. See <strong>ARTC</strong> Intranet for latest version.
Engineering (Track & Civil) Guideline<br />
<strong>EGH</strong>-<strong>09</strong>-<strong>01</strong> <strong>Structures</strong> <strong>Repair</strong> <strong>Guidelines</strong><br />
Timber<br />
The splitting can be in the vertical or horizontal direction of the element. zontal splits. e 5 - 2 Mild<br />
shows the details of plate bolting to vertical and horizontal splits. e 5 - 2 Mild illustrates the details<br />
of metal strapping to timber elements.<br />
5.2.3 Pile splicing<br />
Figure 5 - 2 Mild steel plate bolting to vertical and horizontal splitting in timber elements<br />
Figure 5 - 3 Metal strapping for split timber elements<br />
Where the upper part of the pile has defects and the lower part in ground is sound and has<br />
adequate ground support, splicing in of a new section of timber pile can be used.<br />
Appendix A shows a splice detail to connect the new upper part of pile to the existing pile.<br />
5.2.4 Vehicle impact damage<br />
Elements that are damaged by vehicle impact are normally replaced otherwise can be repaired as<br />
detailed in Sections 5.2.1, 5.2.2, and 5.2.3.<br />
Version 1.0 Date of last revision: <strong>09</strong> July 2<strong>01</strong>0 Page 66 of 78<br />
This document is uncontrolled when printed. See <strong>ARTC</strong> Intranet for latest version.
Engineering (Track & Civil) Guideline<br />
<strong>EGH</strong>-<strong>09</strong>-<strong>01</strong> <strong>Structures</strong> <strong>Repair</strong> <strong>Guidelines</strong><br />
5.2.5 Weathering – abrasion, cracks, shakes, checks and splits<br />
If timber elements have weathered, they are normally repaired with above mentioned methods<br />
(Sections 5.2.1, 5.2.2, and 5.2.3) if practical, otherwise they are replaced with like-for-like new<br />
elements.<br />
5.2.6 Corroded fasteners, missing fasteners and loose connections<br />
Replace with new fasteners.<br />
5.2.7 Termite infestation (white ants)<br />
Engage a licensed pest controller to eradicate ants.<br />
5.3 Replacement / Strengthening Methods<br />
Replacement of a member implies that a defective element is replaced with either a like-for-like<br />
element or bigger size element. Otherwise, the replacement element needs to be designed by a<br />
Structural Engineer.<br />
5.3.1 Strengthening of internal girders<br />
l girders to strengthen the damaged or shows installation of new additional girders to strengthen<br />
the damaged or deteriorated existing timber girders when they cannot be repaired in-situ.<br />
Figure 5 - 4 Installation of additional girders<br />
5.3.2 Replacement of timber piles with new steel trestle<br />
When piles cannot be strengthened, they should be removed and steel trestles installed on a new<br />
concrete sill.<br />
Standard drawing in Appendix A shows installation of a new steel trestle to replace the existing<br />
deteriorated piles.<br />
5.3.3 Replacement of headstocks, braces and wales, sills, etc<br />
When headstocks, braces, wales, and sills cannot be strengthened then these elements should be<br />
replaced with like-for-like new elements.<br />
Timber<br />
Version 1.0 Date of last revision: <strong>09</strong> July 2<strong>01</strong>0 Page 67 of 78<br />
This document is uncontrolled when printed. See <strong>ARTC</strong> Intranet for latest version.
Engineering (Track & Civil) Guideline<br />
<strong>EGH</strong>-<strong>09</strong>-<strong>01</strong> <strong>Structures</strong> <strong>Repair</strong> <strong>Guidelines</strong><br />
5.4 Propping<br />
Timber<br />
As highlighted in Section 5.4.1, the propping details provided in this section only cover a few<br />
typical site situations. Care should be taken when installing props to provide adequate footing and<br />
drainage around it.<br />
Circumstances where propping is provided include the following:<br />
a) To provide emergency support to allow continued use of the bridge<br />
b) To provide short/medium term relief to deteriorating substructure<br />
c) To provide temporary support during various maintenance activities, including replacement of<br />
elements.<br />
Typical prop size includes 300 x 300, Grade F22, recovered timber girders for spans less than 7m.<br />
Other types of typical props can include Acro props or steel beams. However they all must be<br />
designed / checked by a Structural Engineer.<br />
5.4.1 Emergency propping<br />
ties should be carried out using timber shows emergency propping arrangements for defective<br />
headstocks and girders.<br />
Timber bearing area for props is typically minimum 1m x 1m per post on firm or well compacted<br />
ground with nominal 100kPa bearing pressure.<br />
5.4.2 Place / reinstate relieving props<br />
Relieving props are normally used adjacent to log abutments or silled piles where settlements are<br />
occurring due to sill deterioration. Propping of the superstructure will reduce load to the defective<br />
components and provide extra time before repairs are required. Figure 5 - 6 shows an arrangement<br />
of a relieving prop.<br />
5.4.3 Propping for maintenance activities<br />
Propping for maintenance activities should be carried out using timber/steel trestles supported on<br />
shallow timber/concrete footing on firm ground.<br />
Figure 5 - 5 Emergency propping for defective headstocks and girders<br />
Version 1.0 Date of last revision: <strong>09</strong> July 2<strong>01</strong>0 Page 68 of 78<br />
This document is uncontrolled when printed. See <strong>ARTC</strong> Intranet for latest version.
Engineering (Track & Civil) Guideline<br />
<strong>EGH</strong>-<strong>09</strong>-<strong>01</strong> <strong>Structures</strong> <strong>Repair</strong> <strong>Guidelines</strong><br />
5.5 Reference<br />
Figure 5 - 6 Relieving Prop Arrangement<br />
1) ETA-02-<strong>01</strong>: Timber Sleepers, Turnout and Bridge Transom Specification<br />
5.6 List of Drawings in Appendix A<br />
The following standard drawings are provided in Appendix A:<br />
i. Pile splicing detail (AA-0<strong>01</strong>)<br />
ii. Steel trestle on a concrete sill (AA-002)<br />
iii. Standard protection for span ends at abutments (AA-003)<br />
iv. Bracings to girder at piers and abutments (AA-004)<br />
v. Temporary strengthening arrangements (AA-005 Sheets 1 and 2)<br />
Timber<br />
Version 1.0 Date of last revision: <strong>09</strong> July 2<strong>01</strong>0 Page 69 of 78<br />
This document is uncontrolled when printed. See <strong>ARTC</strong> Intranet for latest version.
Engineering (Track & Civil) Guideline<br />
<strong>EGH</strong>-<strong>09</strong>-<strong>01</strong> <strong>Structures</strong> <strong>Repair</strong> <strong>Guidelines</strong><br />
6 Miscellaneous <strong>Repair</strong>s<br />
6.1 General<br />
Structure repairs that are common to all types of materials are covered in this section.<br />
6.2 <strong>Repair</strong>s to Scour Protection<br />
• Reno mattress – supply and installation by approved installer<br />
• Gabion baskets – supply and installation by approved installer<br />
• Concrete slab – unreinforced concrete with or without mesh reinforcement<br />
• Rip – rap mattress – 200 to 300mm rocks<br />
6.3 Removal of Damaged / Deteriorated Bearing Pads<br />
Miscellaneous <strong>Repair</strong>s<br />
Removal of damaged or deteriorated bearing pads in several situations, such as cracking,<br />
shattering, crushing, pier/abutment-cracked and shattered, to lift/lower bridge to suit track height<br />
and superelevation.<br />
The procedure of replacing bearing pads involves the following:<br />
i. If bed plates are to be raised with girders, ensure bolts/studs connecting bearing plate to bed<br />
plate are in place.<br />
ii. Remove nuts from Holding Down (HD) bolts or unscrew nuts to allow bed plates to be raised<br />
to correct height.<br />
iii. Raise the girders by jacking the minimum amount required to enable completion of the<br />
replacement operation.<br />
iv. Remove damaged bearing pad.<br />
v. Assess condition of HD bolts and repair/replace as required.<br />
vi. Clean concrete/masonry substrate.<br />
vii. Locate bed plate to correct height.<br />
viii. Apply bonding coat to concrete/masonry.<br />
ix. Erect formwork.<br />
x. Place new bearing pad material in formwork.<br />
xi. Allow time to cure.<br />
xii. Lower girders and screw up HD bolts.<br />
6.4 Replacement/ Installation of Road/Pedestrian Traffic Barriers<br />
Fences, safety screens, etc. patch up first where practical otherwise replace.<br />
6.5 Track Baulking<br />
Track baulking can be carried out in accordance with Drawing No. 207-165 in Appendix B for<br />
excavations not greater than 4m wide.<br />
6.6 Installation of Transoms<br />
Refer standard drawings ETI–<strong>09</strong>–04 Transom 1 and Transom 4 in Appendix B.<br />
Version 1.0 Date of last revision: <strong>09</strong> July 2<strong>01</strong>0 Page 70 of 78<br />
This document is uncontrolled when printed. See <strong>ARTC</strong> Intranet for latest version.
Engineering (Track & Civil) Guideline<br />
<strong>EGH</strong>-<strong>09</strong>-<strong>01</strong> <strong>Structures</strong> <strong>Repair</strong> <strong>Guidelines</strong><br />
6.6.1 Notching of transom<br />
Miscellaneous <strong>Repair</strong>s<br />
Note that square cut notching is not permitted. Any localised reduction in thickness of a transom<br />
must be achieved by a maximum 1 in 8 bevelling and rounded change of direction away from the<br />
reduced section. (Refer Figure 6-1).<br />
6.6.2 Transom fastenings<br />
The following are approved transom fastenings:<br />
Figure 6 - 1 Notching of transom<br />
i. Swage bolts - Swage bolts, tension reduced to suit timber application, are considered to be<br />
permanently locked and maintenance free.<br />
ii. Galvanised bolt/conical spring/nylon lock nut assembly - This system is considered to be<br />
permanently locked and almost maintenance free.<br />
iii. Galvanised bolts - Galvanised bolt with round washer at head and square washer together with<br />
normal flat spring washer at nut. Nuts to be secured by applying a tack weld to the bolt shank<br />
just above the nut. For this type of installation retightening will be initially required after six<br />
months and every twelve months thereafter.<br />
6.6.3 Location of fastenings<br />
i. Drilled flanges<br />
Many transoms are attached to girders/stringers by a bolt on the outside of one girder flange<br />
and on the inside of the other. The latter bolt (inside location), that is, under the track plate is<br />
to be relocated during the re-transomming where practical, to the outer flange.<br />
ii. Undrilled flanges, that is, clipped transom conversion<br />
General<br />
• Holes to be drilled in outer flange. Burning is not permitted.<br />
• Holes to be free of rag and perpendicular to top flange.<br />
• Drilling to be carried out by competent persons.<br />
Lateral positioning of holes<br />
• Not less than 40mm from edge to centre of hole<br />
• Sufficient distance from the web so that the head of the bolt clears the fillet of the girder<br />
• Preferred distance from centre line of girder is 60mm (if bolts are kept as close as<br />
convenient to the web less damage is caused by transom flexing under load).<br />
Longitudinal positioning of holes<br />
• At abutments, first holes as near as practical to girder ends but with transom wholly<br />
supported by girder flanges<br />
• Holes positioned as close as practical to transom centrelines and holes to be spaced as<br />
uniformly as practical along the span<br />
• Ensure that no hole is located such that the bolt head will foul the edge of a stiffener of<br />
other attachment<br />
Version 1.0 Date of last revision: <strong>09</strong> July 2<strong>01</strong>0 Page 71 of 78<br />
This document is uncontrolled when printed. See <strong>ARTC</strong> Intranet for latest version.
Engineering (Track & Civil) Guideline<br />
<strong>EGH</strong>-<strong>09</strong>-<strong>01</strong> <strong>Structures</strong> <strong>Repair</strong> <strong>Guidelines</strong><br />
• No hole to be located within 50mm of any other holes.<br />
Hole size:<br />
• 24mm or 15/16 inch are suitable for 22mm or 7/8 inch bolts – preferred option<br />
• 26mm or 1 inch are suitable for 24mm bolts<br />
Miscellaneous <strong>Repair</strong>s<br />
• 25mm are suitable where 22mm bolts used but it is intended to upgrade to 24mm bolts<br />
• If existing (undersize) holes are to be reused they must be enlarged by drilling or<br />
reaming.<br />
6.6.4 Removal of transom bolts<br />
Burning off of transom bolts adjacent to the top flange surface is not permitted, as burning damage<br />
cannot be tolerated on any structural members of a railway bridge.<br />
6.7 Bridge Ends<br />
6.7.1 Transition zone from flexible to rigid formation<br />
Refer standard drawings BDS 20 Page 9 of 11 and, Drawing No. 11742 – TA – <strong>01</strong> and 11742 – TA<br />
– <strong>01</strong> in Appendix B. Note that a reinforced concrete slab is not desirable.<br />
6.7.2 Ballast log for transom top underbridge<br />
Refer standard drawings <strong>ARTC</strong>N20703100<strong>01</strong> Sheets 1, 2 and 3 in Appendix B.<br />
6.7.3 Ballast retention walls<br />
Refer standard drawing BDS Page 11 of 11 in Appendix B.<br />
6.8 Culvert <strong>Repair</strong>s<br />
6.8.1 <strong>Repair</strong> of steel pipe invert<br />
Refer standard drawing “Page D1” in Appendix B.<br />
6.8.2 Sleeving of brick culverts<br />
Refer standard drawing <strong>ARTC</strong>N3<strong>09</strong>0<strong>09</strong>60<strong>01</strong> in Appendix B.<br />
6.9 List of Drawings in Appendix B<br />
The following standard drawings provided in Appendix B can be used as required without further<br />
engineering input. Drawing numbers are provided in brackets.<br />
1) Baulk Rail Installation (No. 207 – 165)<br />
2) Installation of transom (ETI–<strong>09</strong>–04 Transom 1 and Transom 4)<br />
3) Transition zone from flexible to rigid formation (BDS 20 Page 9 of 11)<br />
4) Standard ballast box detail (11742 – TA – <strong>01</strong> and 11742 – TA – <strong>01</strong>)<br />
5) Ballast log for transom top underbridge (<strong>ARTC</strong>N20703100<strong>01</strong> Sheet 1, 2 and 3)<br />
6) Ballast retention walls (BDS Page 11 of 11)<br />
7) Typical detail for repair of steel pipe invert (Page D1)<br />
8) Typical sleeving of brick culverts (<strong>ARTC</strong>N3<strong>09</strong>0<strong>09</strong>60<strong>01</strong>)<br />
9) Delkor fastener detail (RF 0.02.192 CL)<br />
Version 1.0 Date of last revision: <strong>09</strong> July 2<strong>01</strong>0 Page 72 of 78<br />
This document is uncontrolled when printed. See <strong>ARTC</strong> Intranet for latest version.
Engineering (Track & Civil) Guideline<br />
<strong>EGH</strong>-<strong>09</strong>-<strong>01</strong> <strong>Structures</strong> <strong>Repair</strong> <strong>Guidelines</strong><br />
10) Apron slab for culvert floor<br />
11) Standard - steel trestle for road overbridges (No. CV 0219816)<br />
12) Typical 3 or 5 timber trestle renewal – new pile cap (No. CV 0<strong>01</strong>4037)<br />
13) Steel walkways and handrails for concrete structures (No. CV 0022997)<br />
14) Typical timber underbridge renewal - abutment and wingwall (No. CV <strong>01</strong>74890)<br />
15) Typical timber underbridge renewal – wingwall type 2 (No. CV <strong>01</strong>74896)<br />
Miscellaneous <strong>Repair</strong>s<br />
16) Replacement of concrete treads and landing slabs for standard steel footbridges (No. CV<br />
<strong>01</strong>91345)<br />
Version 1.0 Date of last revision: <strong>09</strong> July 2<strong>01</strong>0 Page 73 of 78<br />
This document is uncontrolled when printed. See <strong>ARTC</strong> Intranet for latest version.
Engineering (Track & Civil) Guideline<br />
<strong>EGH</strong>-<strong>09</strong>-<strong>01</strong> <strong>Structures</strong> <strong>Repair</strong> <strong>Guidelines</strong><br />
7 Typical Examples of Past <strong>Repair</strong> Work<br />
Typical Examples of Past <strong>Repair</strong> Work<br />
Appendix C provides a selection of drawings/sketches of typical repair works undertaken on railway<br />
structures.<br />
These drawings/sketches may/may not comply with current traffic and/or design vehicle loadings.<br />
Prior to their use they must be verified by a Structural Engineer and if required complete set of<br />
detail design document must be sought.<br />
Version 1.0 Date of last revision: <strong>09</strong> July 2<strong>01</strong>0 Page 74 of 78<br />
This document is uncontrolled when printed. See <strong>ARTC</strong> Intranet for latest version.
Engineering (Track & Civil) Guideline<br />
<strong>EGH</strong>-<strong>09</strong>-<strong>01</strong> <strong>Structures</strong> <strong>Repair</strong> <strong>Guidelines</strong><br />
8 Appendices<br />
Appendix A: Drawings relevant for Timber<br />
Appendix B: Drawings relevant for Miscellaneous Items<br />
Appendix C: Typical Examples of Past <strong>Repair</strong> Work<br />
Appendices<br />
Version 1.0 Date of last revision: <strong>09</strong> July 2<strong>01</strong>0 Page 75 of 78<br />
This document is uncontrolled when printed. See <strong>ARTC</strong> Intranet for latest version.
Engineering (Track & Civil) Guideline<br />
<strong>EGH</strong>-<strong>09</strong>-<strong>01</strong> <strong>Structures</strong> <strong>Repair</strong> <strong>Guidelines</strong><br />
8.1 Appendix A: Drawings relevant for Timber<br />
Page numbers of the drawings are provided in brackets.<br />
1) Pile splicing detail (AA-0<strong>01</strong>)<br />
2) Steel trestle on a concrete sill (AA-002)<br />
3) Standard protection for span ends at abutment (AA-003)<br />
4) Bracings to girder at piers and abutment (AA-004)<br />
5) Temporary strengthening arrangements (AA-005 Sheets 1 and 2)<br />
Appendices<br />
Version 1.0 Date of last revision: <strong>09</strong> July 2<strong>01</strong>0 Page 76 of 78<br />
This document is uncontrolled when printed. See <strong>ARTC</strong> Intranet for latest version.
Engineering (Track & Civil) Guideline<br />
<strong>EGH</strong>-<strong>09</strong>-<strong>01</strong> <strong>Structures</strong> <strong>Repair</strong> <strong>Guidelines</strong><br />
8.2 Appendix B: Drawings relevant for Miscellaneous Items<br />
Drawing numbers are provided in brackets.<br />
1) Baulk rail Installation (No. 207 – 165)<br />
2) Installation of transom (ETI–<strong>09</strong>-04 Transom 1 and Transom 4)<br />
3) Transition zone from flexible to rigid formation (BDS 20 Page 9 of 11)<br />
4) Standard ballast box detail (11742 – TA – <strong>01</strong> and 11742 – TA – <strong>01</strong>)<br />
5) Ballast log for transom top underbridge (<strong>ARTC</strong>N20703100<strong>01</strong> Sheet 1, 2 and 3)<br />
6) Ballast retention walls (BDS Page 11 of 11)<br />
7) Typical detail for repair of steel pipe invert (ARUP report Page D1)<br />
8) Typical sleeving of brick culverts (<strong>ARTC</strong>N3<strong>09</strong>0<strong>09</strong>60<strong>01</strong>)<br />
9) Delkor fastener detail (RF 0.02.192 CL)<br />
10) Apron slab for culvert floor<br />
11) Standard - steel trestle for road overbridges (No. CV 0219816)<br />
12) Typical 3 or 5 timber trestle renewal – new pile cap (No. CV 0<strong>01</strong>4037)<br />
13) Steel walkways and handrails for concrete structures (No. CV 0022997)<br />
14) Typical timber underbridge renewal - abutment and wingwall (No. CV <strong>01</strong>74890)<br />
15) Typical timber underbridge renewal – wingwall type 2 (No. CV <strong>01</strong>74896)<br />
16) Replacement of concrete treads and landing slabs for standard steel footbridges (No. CV<br />
<strong>01</strong>91345)<br />
Appendices<br />
Version 1.0 Date of last revision: <strong>09</strong> July 2<strong>01</strong>0 Page 77 of 78<br />
This document is uncontrolled when printed. See <strong>ARTC</strong> Intranet for latest version.
Engineering (Track & Civil) Guideline<br />
<strong>EGH</strong>-<strong>09</strong>-<strong>01</strong> <strong>Structures</strong> <strong>Repair</strong> <strong>Guidelines</strong><br />
8.3 Appendix C: Typical Examples of Past <strong>Repair</strong> Work<br />
Page numbers of the drawings are provided in brackets.<br />
1) Standard brick arch culvert extensions (AC-0<strong>01</strong> to AC-004)<br />
2) Macksville- Nambucca River abutment and pier repairs (AC-005)<br />
3) Bowna Creek pier repairs (AC-006)<br />
4) Typical RSJ span pier strengthening (AC-007)<br />
5) Anti Throw Screens (See paper AC-008)<br />
6) Standard Precast concrete girders for underbridges<br />
• 10-10.9m (AC-0<strong>09</strong>)<br />
• 11-11.9m (AC-<strong>01</strong>0)<br />
• 12-12.9m (AC-<strong>01</strong>1)<br />
• 13-13.9m (AC-<strong>01</strong>2)<br />
• 14-14.9m (AC-<strong>01</strong>3)<br />
• 15-15.9m (AC-<strong>01</strong>4)<br />
7) Steel girder span: 9 - 15 m (AC-<strong>01</strong>5)<br />
8) Precast single cell box culvert (1200-1800 overall cell height) (AC-<strong>01</strong>6)<br />
9) Precast wingwall unit type A – (to suit 1200-1800 overall cell height) (AC-<strong>01</strong>7)<br />
10) Precast wingwall unit type C – (to suit 1200-1800 overall cell height) (AC-<strong>01</strong>8)<br />
11) Precast single cell box culvert (2000 - 3000 overall cell height) (AC-<strong>01</strong>9)<br />
12) Precast wingwall unit (to suit 2000 - 3000 overall cell height) (AC-020)<br />
13) Precast wingwall unit type B (to suit 2000 - 3000 overall cell height) (AC-021)<br />
14) Box Culverts 1500 x 1000 (AC-022)<br />
15) Precast twin cell box culvert (1800 -2400) (AC-023)<br />
Appendices<br />
Version 1.0 Date of last revision: <strong>09</strong> July 2<strong>01</strong>0 Page 78 of 78<br />
This document is uncontrolled when printed. See <strong>ARTC</strong> Intranet for latest version.