HustlerTM IV Camera Dolly - ARRI Rental
HustlerTM IV Camera Dolly - ARRI Rental
HustlerTM IV Camera Dolly - ARRI Rental

You also want an ePaper? Increase the reach of your titles
YUMPU automatically turns print PDFs into web optimized ePapers that Google loves.
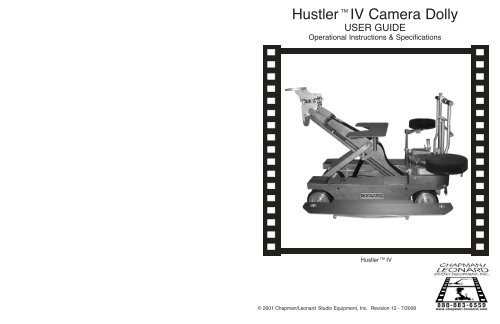
Hustler TM<br />
<strong>IV</strong> <strong>Camera</strong> <strong>Dolly</strong><br />
USER GUIDE<br />
Operational Instructions & Specifications<br />
Hustler TM <strong>IV</strong><br />
© 2001 Chapman/Leonard Studio Equipment, Inc. Revision 12 - 7/2008
The Operator should be Qualified. For Assistance Please call our 24 hour Customer Service at 1-888-883-6559.<br />
© 2001 No part of this manual may be reproduced or electronically transmitted without<br />
the written permission of Chapman/Leonard Studio Equipment, Inc.<br />
The Operator should be Qualified. For Assistance Please call our 24 hour Customer Service at 1-888-883-6559.<br />
© 2001 No part of this manual may be reproduced or electronically transmitted without<br />
the written permission of Chapman/Leonard Studio Equipment, Inc.
24<br />
Revision 12 - 7/2008<br />
Hustler <strong>IV</strong> Technical Help<br />
For Specific Questions relating to the Hustler <strong>IV</strong>, the following Technicians can help you:<br />
Frank Requena - Maintenance and Quality Control<br />
Jason Sutton - Transmission and any Steering/Shifting Adjustments<br />
Gregg Martin - Hydraulics and Assembly<br />
Chapman/Leonard Studio Equipment, Inc. for Customer Service:<br />
Main Office 888-883-6559 or 818-764-6726 FAX 818-764-2728<br />
Orlando 888-337-8243 or 407-851-3456<br />
The Extended Tracking Bar allows the grip to<br />
move the dolly without touching the steering<br />
handle.<br />
The Operator should be Qualified. For Assistance Please call our 24 hour Customer Service at 1-888-883-6559.<br />
© 2001 No part of this manual may be reproduced or electronically transmitted without<br />
the written permission of Chapman/Leonard Studio Equipment, Inc.<br />
The optional Rainhouse protects the camera and<br />
operator from the elements. It is also available in<br />
an opaque sunshade version.<br />
It is Chapman/Leonard’s goal to provide the best camera support equipment with<br />
exceptional Customer Service. Therefore, we are compiling this User Guide to aid in<br />
the reordering of Replacement Parts for your Leased Equipment.<br />
For any questions regarding this User Guide, please contact<br />
Customer Service at 888-883-6559 or 818-764-6726.<br />
MAIN OFFICE<br />
12950 Raymer Street,<br />
North Hollywood, CA 91605<br />
888-883-6559<br />
or 818-764-6726<br />
Fax: 818-764-6730<br />
or 818-764-4347<br />
Texas<br />
1901 E. 51st Street, Suite 38<br />
Austin, Texas 78723<br />
512-473-0084<br />
or 888-758-4826<br />
Fax: 512-473-0042<br />
Chapman/Leonard Certified Locations:<br />
Canada<br />
8301 Eastlake Drive<br />
Burnaby, British Columbia<br />
V5A 4W2 Canada<br />
866-848-2602<br />
or 604-299-0913<br />
Fax: 604-299-0926<br />
Louisiana<br />
660 Distributors Row Suite C & D<br />
Elmwood Business Park<br />
New Orleans, LA 70123<br />
888-758-4826<br />
The Operator must be a Chapman Technician. For Assistance Please call our 24 hour Customer Service at 1-888-883-6559 or 1-818-764-6726.<br />
© 2007 No part of this manual may be reproduced or electronically transmitted without<br />
the written permission of Chapman/Leonard Studio Equipment, Inc.<br />
UK and Europe<br />
Chapman Leonard Studio<br />
Equipment, Ltd.<br />
Unit 5<br />
Kingley Park Station Road<br />
Kings Langley, Herts<br />
England WD4 8GW<br />
01923 265 953<br />
Florida<br />
9460 Delegates Drive<br />
Orlando, Florida 32837<br />
888-337-8243<br />
or 407-851-3456<br />
Fax: 407-855-1653<br />
1<br />
Revision 12 - 7/2008
2<br />
Revision 12 - 7/2008<br />
3 Specifications<br />
CONTENTS<br />
4 Attaching Boards in Upper Walk-Around Mode<br />
6 Attaching Boards in Lower Walk-Around Mode<br />
7 Upper and Lower Board Setup Modes<br />
8 Tracks & Setup Strategy<br />
10 Quick Release Wheel Locks<br />
11 Steering Choices<br />
12 Shifting/Steering Modes<br />
13 Cleaning the Arm Rollers<br />
14 Arm Markers<br />
15 Feathering Levers<br />
16 Charging the <strong>Dolly</strong><br />
17 Control Valve & Gauge<br />
18 Fast Mode<br />
19 Leveling Head Choices<br />
20 Accessory Cart Features<br />
21 Storing the Accessories<br />
22 Compact Accessory Cart<br />
23 Shipping<br />
24 Technical Help<br />
The Operator should be Qualified. For Assistance Please call our 24 hour Customer Service at 1-888-883-6559.<br />
© 2001 No part of this manual may be reproduced or electronically transmitted without<br />
the written permission of Chapman/Leonard Studio Equipment, Inc.<br />
Hustler <strong>IV</strong> Shipping<br />
The Customer should be sure that the <strong>Dolly</strong> is properly crated for shipment. Get a signed receipt from the Shipping<br />
Company that will be transporting the <strong>Dolly</strong>. Keep the receipt from the transport company indicating that the <strong>Dolly</strong> has been<br />
shipped to Chapman/Leonard Studio Equipment, Inc.<br />
When picking up or returning rental gear to Chapman/Leonard Studio Equipment, Inc., please remember that rentals<br />
are due back by 10 a.m. at our North Hollywood facility. The <strong>Rental</strong> office is open from 7 a.m. to 5 p.m. Monday<br />
through Friday and 8 a.m. to 1 p.m. on Saturdays. The <strong>Rental</strong> bays are located on your left, immediately after entering the<br />
studio yard from Raymer Street. Trucks should be backed up to the bays for easier loading. If no bays are available, you<br />
can temporarily park on Raymer Street and advise the <strong>Rental</strong> Office of your arrival. A Customer Service Agent will advise<br />
you when a spot opens at the bay.<br />
All drivers should first report to the <strong>Rental</strong> Staff for paperwork.<br />
Unloading will not begin until the paperwork has been picked up and<br />
stamped. Our <strong>Rental</strong> Staff is well trained to process equipment and<br />
documents quickly and courteously. It is our intent to get you back on<br />
the road in a timely manner.<br />
Sherman Way<br />
Raymer<br />
Coldwater Cyn.<br />
Chapman/Leonard Studio Equipment, Inc.<br />
12950 Raymer Street<br />
North Hollywood, CA 91605<br />
The Operator should be Qualified. For Assistance Please call our 24 hour Customer Service at 1-888-883-6559.<br />
© 2001 No part of this manual may be reproduced or electronically transmitted without<br />
the written permission of Chapman/Leonard Studio Equipment, Inc.<br />
N<br />
23<br />
Revision 12 - 7/2008
Hustler <strong>IV</strong> Compact Accessory Cart<br />
The Compact Accessory Cart offers an alternative to the standard profile Hustler <strong>IV</strong> Accessory Cart. Instead of storing the<br />
Hustler <strong>IV</strong> under the Accessory Cart, the Hustler <strong>IV</strong> is stored separately from the Compact Accessory Cart.<br />
The lower center of gravity and compact profile of the Compact Accessory Cart make it the ideal choice when working in<br />
tight quarters.<br />
22<br />
Placing the Standing Board on<br />
the Compact Accessory Cart<br />
Placing the 90 Degree Plate on<br />
the Compact Accessory Cart<br />
Revision 12 - 7/2008<br />
Mount for<br />
Seat Post<br />
Wheel Locks<br />
Lower Front Board<br />
The Operator should be Qualified. For Assistance Please call our 24 hour Customer Service at 1-888-883-6559.<br />
© 2001 No part of this manual may be reproduced or electronically transmitted without<br />
the written permission of Chapman/Leonard Studio Equipment, Inc.<br />
Upper Front Board<br />
Risers<br />
Side Board<br />
Leg Position Locks<br />
Minimum <strong>Camera</strong> Mount Height 18 in.<br />
48 cm<br />
Maximum <strong>Camera</strong> Mount Height 60 in.<br />
1.5 m<br />
Vertical Boom Travel 42 in.<br />
1.06 m<br />
Minimum <strong>Camera</strong> Mount Height 1 13 /16 in.<br />
(Low Plate Setup)<br />
Maximum <strong>Camera</strong> Mount Height 60 1 /2 in.<br />
(Low Plate Setup)<br />
Maximum Load Capacity with<br />
Accumulator Charge @ 3300psi 750 lbs.<br />
341 kg<br />
Maximum Number of Lifts on<br />
a Single Charge 6 Lifts<br />
Carrying Weight 465 lbs.<br />
211 kg<br />
Hustler <strong>IV</strong> Specifications<br />
The Hustler <strong>IV</strong> is capable of three different steering modes. In Conventional Mode the rear wheels pivot as the<br />
operator makes a tracking turn. In Crab Mode all wheels turn in unison enabling the dolly to be moved in any direction<br />
while maintaining the orientation of the camera plane. In Round Mode the dolly can turn while remaining in the same<br />
spot. The operator can select any mode by twisting the steering handles. Control Pins can be set to limit which modes<br />
can be selected during critical moments, ensuring the operator can make transitions with confidence.<br />
The Universal Stop Valve controls arm movement with smooth feathered stops. Adjustments to the Universal<br />
Stop Valve can be made without tools or the need to remove any covers or access plates. Feathering Levers are<br />
located below the Steering Controls, within the operators reach for ease of use.<br />
The arm is a new design with greater rigidity, smoothness, speed and quietness of operation. Six full strokes of<br />
the arm is possible with a single charge.<br />
A new tire design has dramatically reduced friction for smoother rolling shots. Tires can be matched to<br />
various track configurations.<br />
The Side Board System provides complete walk-around-capability on the dolly in both high and low level<br />
setups.<br />
The Hustler <strong>IV</strong> has a built-in heat control system in the hydraulic system to maintain a minimum hydraulic oil<br />
temperature of 70ºF. This maintains optimum performance in even the coldest environment.<br />
The Operator should be Qualified. For Assistance Please call our 24 hour Customer Service at 1-888-883-6559.<br />
© 2001 No part of this manual may be reproduced or electronically transmitted without<br />
the written permission of Chapman/Leonard Studio Equipment, Inc.<br />
The Hustler ® <strong>IV</strong> in Low Profile Mode with<br />
Attachments Removed for Shipping or Storage.<br />
With the deck controls removed there is<br />
no interference for 360 degree pan shots.<br />
3<br />
Revision 12 - 7/2008
4<br />
Revision 12 - 7/2008<br />
Hustler <strong>IV</strong> Attaching Boards in Upper Walk-Around Mode<br />
The Front Board attaches with two thumb screws. The Front Board may be retracted or extended.<br />
The Operator should be Qualified. For Assistance Please call our 24 hour Customer Service at 1-888-883-6559.<br />
© 2001 No part of this manual may be reproduced or electronically transmitted without<br />
the written permission of Chapman/Leonard Studio Equipment, Inc.<br />
The Side Boards are designed to be<br />
interchangeable. There is no left or right version.<br />
This simplifies the installation of the boards.<br />
The Side Boards are also adjustable for and<br />
aft on the Hustler <strong>IV</strong> chassis. A large knob secures<br />
the board to the desired location.<br />
Position lock down knob.<br />
The Hustler <strong>IV</strong> Accessory Cart<br />
has latch doors to secure the<br />
equipment during transport.<br />
The legs are removable when<br />
the Quick Release Pins are<br />
removed.<br />
Ultra Glide Seats<br />
Seat Adapter<br />
Hustler <strong>IV</strong> Storing the Accessories<br />
Rubber Bumpers allow the<br />
Accessory Cart to be turned on<br />
end for storage or moving in<br />
elevators.<br />
The Operator should be Qualified. For Assistance Please call our 24 hour Customer Service at 1-888-883-6559.<br />
© 2001 No part of this manual may be reproduced or electronically transmitted without<br />
the written permission of Chapman/Leonard Studio Equipment, Inc.<br />
Seat Offset and Seat Risers<br />
Hustler <strong>IV</strong> 90 degree Plate<br />
Hustler <strong>IV</strong> Tires<br />
<strong>Camera</strong> Risers<br />
Extensions<br />
21<br />
Revision 12 - 7/2008
20<br />
Revision 12 - 7/2008<br />
Upper Front Board<br />
Lower Front Board<br />
Universal Side Boards<br />
Hustler <strong>IV</strong> Accessory Cart Features<br />
CB Nose Plate with Seat Pocket<br />
#20773<br />
Side Board Lock Down Feature<br />
The Operator should be Qualified. For Assistance Please call our 24 hour Customer Service at 1-888-883-6559.<br />
© 2001 No part of this manual may be reproduced or electronically transmitted without<br />
the written permission of Chapman/Leonard Studio Equipment, Inc.<br />
Extended Low Plate “Enterprise”<br />
#10725<br />
The Hustler <strong>IV</strong> can be stored<br />
under the Accessory Cart when<br />
the rear legs are positioned<br />
outward.<br />
Hustler <strong>IV</strong> Attaching Boards in Upper Walk-Around Mode<br />
The Side Boards attach to either side of the Hustler <strong>IV</strong>.<br />
They slide into place and are secured to the chassis<br />
with two thumb screws.<br />
The Operator should be Qualified. For Assistance Please call our 24 hour Customer Service at 1-888-883-6559.<br />
© 2001 No part of this manual may be reproduced or electronically transmitted without<br />
the written permission of Chapman/Leonard Studio Equipment, Inc.<br />
The Side Boards may be moved to the rear of the <strong>Dolly</strong> for<br />
easy access to the front thumb screw. Then move the board<br />
forward to access the rear thumb screw.<br />
With the Side Boards securely attached to the<br />
Hustler <strong>IV</strong>, a stable platform allows the Grip to move<br />
the <strong>Dolly</strong> with a <strong>Camera</strong>man on board.<br />
5<br />
Revision 12 - 7/2008
6<br />
Revision 12 - 7/2008<br />
Hustler <strong>IV</strong> Attaching Boards in lower Walk-Around mode<br />
The Operator should be Qualified. For Assistance Please call our 24 hour Customer Service at 1-888-883-6559.<br />
© 2001 No part of this manual may be reproduced or electronically transmitted without<br />
the written permission of Chapman/Leonard Studio Equipment, Inc.<br />
The procedure for setting up the Side Boards in<br />
Lower Setup Mode is the same. The Side Boards attach<br />
to either side of the Hustler <strong>IV</strong>. They slide into place and<br />
are secured to the chassis with two thumb screws.<br />
The Side Boards securely attached to the Hustler <strong>IV</strong> in<br />
lower Setup Mode offers an alternative stable platform<br />
for the <strong>Camera</strong>man.<br />
Height = 6 1 /2”<br />
Hustler <strong>IV</strong> Leveling Head Choices<br />
#1688<br />
Adjusting the 4-Way Leveling/Swing Head<br />
Park the <strong>Dolly</strong> on level ground and set the Wheel Locks.<br />
Observe the Bubble Level Indicator positions. If the bubble is<br />
not centered in each tube, an adjustment should be made. Lower<br />
the Leveling Knob (clockwise) that is diagonally opposite a low<br />
bubble. Raise the Leveling Knob (counter clockwise) that is diagonally<br />
opposite a high bubble. Adjust all four Leveling Knobs until<br />
both Bubble Level Indicators are centered.<br />
Height = 2 1 /2”<br />
Height = 1 3 /4”<br />
Hustler <strong>IV</strong> Low 4-Way Leveling/Swing Head Features<br />
#1636<br />
Hustler <strong>IV</strong> Flat 4-Way Leveling/Swing Head Features<br />
#1637<br />
The Operator should be Qualified. For Assistance Please call our 24 hour Customer Service at 1-888-883-6559.<br />
© 2001 No part of this manual may be reproduced or electronically transmitted without<br />
the written permission of Chapman/Leonard Studio Equipment, Inc.<br />
To Pan the 4-Way Leveling/Swing Head,<br />
pull the Quick Release Pin on the Universal Head,<br />
loosen the Knob only slightly and move the 4-Way<br />
Leveling/Swing Head to the desired pan direction.<br />
Tighten the Knob to prevent movement.<br />
Leveling Knobs<br />
This version can be<br />
positioned backwards on the<br />
arm. When using Geared Head<br />
Turrets, a smaller Pan Wheel<br />
must be used.<br />
Loosen only slightly to pan.<br />
This version is<br />
restricted to forward use only.<br />
When using Geared Head<br />
Turrets, a smaller Pan Wheel<br />
must be used.<br />
19<br />
Revision 12 - 7/2008
18<br />
Revision 12 - 7/2008<br />
Hustler <strong>IV</strong> Fast Mode<br />
A new feature of the Hustler <strong>IV</strong> enables lowering the hydraulic arm when there is a small payload, or no payload to<br />
push the arm down when the control value is opened. The Fast Mode Value is located on the rear deck of the Hustler<br />
<strong>IV</strong>. It is a by-pass of the Universal Stop Valve. During normal operation, the Fast Mode Valve is not used. The dial<br />
should be placed on the Normal Mode setting.<br />
WARNING! Before activating the Fast Mode feature, place the Control Valve in the Neutral position. Failure to<br />
place the Control Value in the Neutral position may cause the arm to crash into the chassis.<br />
After the Fast Mode is activated, the Control Valve may again be used to raise and lower the arm quickly.<br />
NOTE: When the Fast Mode is activated, the Feathered Stops of the Universal Stop Valve are deactivated.<br />
Therefore, if a situation calls for moving past a Feathered Stop, close the Control Valve (neutral position) and activate<br />
the Fast Mode Valve. The arm may now move past the upper and lower Feathered Stops without having to readjust<br />
their positions.<br />
The Operator should be Qualified. For Assistance Please call our 24 hour Customer Service at 1-888-883-6559.<br />
© 2001 No part of this manual may be reproduced or electronically transmitted without<br />
the written permission of Chapman/Leonard Studio Equipment, Inc.<br />
Hustler <strong>IV</strong> Upper and Lower Board Setup Modes<br />
The Operator should be Qualified. For Assistance Please call our 24 hour Customer Service at 1-888-883-6559.<br />
© 2001 No part of this manual may be reproduced or electronically transmitted without<br />
the written permission of Chapman/Leonard Studio Equipment, Inc.<br />
Full Upper Walk-Around Setup with Boards<br />
extended forward.<br />
Lower Side Board Setup with Boards<br />
in standard position.<br />
7<br />
Revision 12 - 7/2008
Note: On both straight and<br />
curved I-Beam track, release<br />
ALL four Tab locks on the <strong>Dolly</strong>.<br />
This disengages the steering<br />
column and prevents the <strong>Dolly</strong><br />
from being accidentally<br />
“steered” off the track.<br />
8<br />
Revision 12 - 7/2008<br />
Hustler <strong>IV</strong> Tracks & Setup Strategy<br />
When operating on curved track, release ALL<br />
four Tab Locks on the <strong>Dolly</strong>. On the Outside Curve of<br />
the Track, remove BOTH Wheel Spacers on one side<br />
of the <strong>Dolly</strong>. This will allow the wheels to articulate<br />
with the requirements of the track.<br />
Excess speed on the track could result in a<br />
derailment. Weighting the <strong>Dolly</strong> on the inside of a turn<br />
helps offset the centrifugal force effect. Remember to<br />
ascertain safety of movement under controlled<br />
conditions.<br />
To prepare the Hustler <strong>IV</strong> for use on track, loosen the Tab Locks with the Special Wrench on BOTH sides of the <strong>Dolly</strong>. Tab<br />
Locks are located on top of each Wheel Assembly. These are used to lock the Wheel Kingpin to the Steering System.<br />
During normal operation these Tab Locks should not be touched. However, when using curved track, freeing the Wheels<br />
to follow the track is achieved by unlocking the Tab Locks on ALL four wheels of the <strong>Dolly</strong>.<br />
On the outside curve side of the <strong>Dolly</strong>, remove the Quick<br />
Release Wheel Lock from the front and rear wheels.<br />
Remove and store the Both Spacers.<br />
The Operator should be Qualified. For Assistance Please call our 24 hour Customer Service at 1-888-883-6559.<br />
© 2001 No part of this manual may be reproduced or electronically transmitted without<br />
the written permission of Chapman/Leonard Studio Equipment, Inc.<br />
Replace the Quick Release Wheel Locks to the front and<br />
rear wheels (on one side of the <strong>Dolly</strong>).<br />
Hustler <strong>IV</strong> Control Valve & Gauge<br />
The Control Valve regulates the movement of the Arm. A fully charged system will read 3300 psi on the Pressure<br />
Gauge. This is enough pressure to enable 5 to 7 full strokes/lifts of the payload (camera). Total Payload = 750 lbs.<br />
@ 3300 psi. As a safety feature the Relief Valve will open automatically at 3500 psi.<br />
The Control Valve Handle has an adjustable detent system. In the 2 Detent Control System this can be felt<br />
as the handle is rotated and gives the Grip more control over the Arm as it transitions between up and down movements.<br />
The Off position is between the Detents.<br />
A special Single or Triple Detent Control System is available, but must be installed at the Chapman facility or by a<br />
qualified technician.<br />
Wheel Lock Brake Lever<br />
Hustler <strong>IV</strong> Brakes<br />
The Operator should be Qualified. For Assistance Please call our 24 hour Customer Service at 1-888-883-6559.<br />
© 2001 No part of this manual may be reproduced or electronically transmitted without<br />
the written permission of Chapman/Leonard Studio Equipment, Inc.<br />
Steering Column<br />
Valve Control Handle<br />
Hand Pump<br />
Pressure Gauge<br />
Electrical Plug<br />
Brakes on each of the rear wheels hold the <strong>Dolly</strong> stationary between planned moves. The Wheel Locks are not<br />
intended for stopping the <strong>Dolly</strong> while in motion. The Hustler <strong>IV</strong> should always be held in place with Blocks or Wheel<br />
Chocks when on any kind of incline.<br />
17<br />
Revision 12 - 7/2008
16<br />
Revision 12 - 7/2008<br />
Hustler <strong>IV</strong> Charging the <strong>Dolly</strong> - Electronics<br />
A Female Plug can be inserted into the AC Receptacle (110v or 220v) located at the rear of the <strong>Dolly</strong>. Push the<br />
Start Button to begin automatic charging. The unit will stop charging when the <strong>Dolly</strong> Hydraulic System is fully charged.<br />
Start Button<br />
Plug Receptacle<br />
Hustler <strong>IV</strong> Charging the <strong>Dolly</strong> - Manual<br />
The Operator should be Qualified. For Assistance Please call our 24 hour Customer Service at 1-888-883-6559.<br />
© 2001 No part of this manual may be reproduced or electronically transmitted without<br />
the written permission of Chapman/Leonard Studio Equipment, Inc.<br />
Do not attempt maintenance on the<br />
<strong>Dolly</strong> when it is plugged into an electrical outlet.<br />
Insert the Valve Control Handle into the Hand Pump Receptacle. Approximately 60 full strokes are needed to<br />
fully charge the <strong>Dolly</strong> system to 3300 psi. This pressurizes the nitrogen in the accumulators, which in turn moves the oil<br />
through the Hydraulic System.<br />
The Valve Control Handle doubles as<br />
a Charging Handle when it is inserted<br />
into the Hand Pump.<br />
This will allow the wheels to move laterally on the axis.<br />
Spray the tires with Zep Par NC Silicone Spray<br />
(Key Words on Label “Mold Release Agent”). This will<br />
improve performance on Floors, Hardwood, Track and<br />
even on Concrete. That’s because friction is the culprit<br />
behind tire squeaks and the tendency of tires to stick to<br />
track or polished floors. Treated tires begin rolling and run<br />
through turns with only moderate force.<br />
Use the same spray to clean the tires.<br />
Hustler <strong>IV</strong> Tracks & Setup Strategy<br />
Before removing the <strong>Dolly</strong> from the track, replace the<br />
Spacers and Quick Release Wheel Locks. Use the Special<br />
Wrench to tighten the Tab Lock with the indicator pointing at<br />
the Alignment Mark.<br />
The Operator should be Qualified. For Assistance Please call our 24 hour Customer Service at 1-888-883-6559.<br />
© 2001 No part of this manual may be reproduced or electronically transmitted without<br />
the written permission of Chapman/Leonard Studio Equipment, Inc.<br />
As the <strong>Dolly</strong> moves onto a curved section of track,<br />
the extra space on the axle is used.<br />
Always read Warning labels!<br />
9<br />
Revision 12 - 7/2008
10<br />
Revision 12 - 7/2008<br />
Hustler <strong>IV</strong> Quick Release Wheel Locks<br />
Changing a Wheel is a fast and easy procedure. Each<br />
wheel is held in place with a Quick Release Wheel Lock.<br />
Slide the Quick Release Wheel Lock into place on the axle.<br />
The spring will snap into place.<br />
The Wheel is now secure.<br />
NOTE:<br />
Tires from earlier versions of the Hustler series are<br />
not compatible with the Hustler <strong>IV</strong>.<br />
The Operator should be Qualified. For Assistance Please call our 24 hour Customer Service at 1-888-883-6559.<br />
© 2001 No part of this manual may be reproduced or electronically transmitted without<br />
the written permission of Chapman/Leonard Studio Equipment, Inc.<br />
Hustler <strong>IV</strong> Feathering Levers<br />
The Universal Stop Valve regulates the speed and smoothness of the Arm deceleration to a selected Stop.<br />
The Feathering Levers are located to either side of the Steering Handle. They are used for fine tuning the operation of<br />
the Universal Stop Valve. The Arm will move to the upper and lower Stops that the operator has designated, instead of<br />
the factory settings. This also ensures that the Arm does not “Bottom-Out” when lowered to the Chassis.<br />
The UP Feathering Lever is located to the right (standing at the rear of the <strong>Dolly</strong>). Pushing the Lever in to<br />
engage, then moving the Lever Back (ratcheting) allows the Arm to travel further up (Maximum Arm Height). Moving the<br />
Lever Forward (ratcheting) limits the Arm travel height.<br />
The DOWN Feathering Lever is located to the left. Pushing the Lever in to engage, then moving the Lever<br />
Back (ratcheting) limits the Arm movements lowest position. Moving the Lever Forward (ratcheting) allows the Arm to<br />
travel to a lower position (Minimum <strong>Camera</strong> Height).<br />
More Travel<br />
Push<br />
Less Travel<br />
Turn<br />
Turn<br />
DOWN<br />
DOWN UP<br />
Looking down while standing at the rear of the <strong>Dolly</strong>.<br />
Control Valve Handle and Steering Handle removed for clarity.<br />
When making Stop Adjustments:<br />
1. Be certain the Arm is well beyond the desired Stop point. Then turn the Lever in beyond the desired Stop point.<br />
2. Open the Main Control Valve to approach the desired Stop.<br />
3. Open Lever to achieve movement until the desired Stop point is reached.<br />
4. Close the Main Control Valve.<br />
For rapid deceleration beyond the normal for this system, the <strong>Dolly</strong> Grip can use the Stop Valve to initiate the Stop, then<br />
finalize the Stop with the Main Control Valve.<br />
The Operator should be Qualified. For Assistance Please call our 24 hour Customer Service at 1-888-883-6559.<br />
© 2001 No part of this manual may be reproduced or electronically transmitted without<br />
the written permission of Chapman/Leonard Studio Equipment, Inc.<br />
Turn<br />
Turn<br />
Less Travel<br />
UP<br />
Push<br />
More Travel<br />
15<br />
Revision 12 - 7/2008
14<br />
Revision 12 - 7/2008<br />
Hustler <strong>IV</strong> Arm Markers<br />
Colored Velcro Markers attach to the Arm (Upper and Lower). They can be repositioned to different locations on<br />
the Arm as a visual aid in repeating an Arm movement.<br />
The Arm travels on a vertical line, eliminating focus problems on extreme closeups. Precise repetitive Stops are<br />
possible at all speeds. An improved Stop Valve System allows even faster, smoother stops.<br />
A variety of options are available to the Grip when using the Control Valve. A Single or Double Detent can be set<br />
on the Hustler <strong>IV</strong>. This is usually set at the Chapman facility. However, it is a simple adjustment that can be performed in<br />
the field by a qualified technician.<br />
The Steering Column is removed for<br />
clarity in this photo. It does not need to<br />
be removed.<br />
Markers<br />
Lined Up<br />
Marker<br />
Indicator<br />
The Operator should be Qualified. For Assistance Please call our 24 hour Customer Service at 1-888-883-6559.<br />
© 2001 No part of this manual may be reproduced or electronically transmitted without<br />
the written permission of Chapman/Leonard Studio Equipment, Inc.<br />
The Conventional Steering Mode<br />
is rear controlled steering.<br />
The Hustler <strong>IV</strong> can be<br />
shifted smoothly into either Round<br />
or Crab Steering Modes during<br />
the course of a shot, even while<br />
moving. Steering Control Pins<br />
(see page 12) aid the Grip in<br />
making the desired transitions<br />
with confidence.<br />
Hustler <strong>IV</strong> Steering Choices<br />
Minimum<br />
Turn<br />
Radius<br />
19 5/8"<br />
The Round Steering Mode<br />
is a new feature of the<br />
Hustler <strong>IV</strong>.<br />
The <strong>Dolly</strong> can now be<br />
turned completely within<br />
its own space, making<br />
it an ideal choice for<br />
tight locations.<br />
Conventional Steering Mode<br />
The Crab Steering Mode<br />
is the selection used most<br />
often by experienced Grips.<br />
It gives them more control<br />
moving the <strong>Dolly</strong> instantly in<br />
any direction. The camera lens<br />
maintains its orientation to the<br />
picture plane, ensuring a steady<br />
shot without unwanted panning.<br />
The Operator should be Qualified. For Assistance Please call our 24 hour Customer Service at 1-888-883-6559.<br />
© 2001 No part of this manual may be reproduced or electronically transmitted without<br />
the written permission of Chapman/Leonard Studio Equipment, Inc.<br />
Minimum Turn<br />
Radius<br />
33 5/8"<br />
Round Steering Mode Crab Steering Mode<br />
11<br />
Revision 12 - 7/2008
12<br />
Both Pins Out<br />
Top Pin Out<br />
Bottom Pin In<br />
Top Pin In<br />
Bottom Pin Out<br />
Both Pins In<br />
Revision 12 - 7/2008<br />
Hustler <strong>IV</strong> Shifting/Steering Modes Hustler <strong>IV</strong> Cleaning the Arm Rollers<br />
Free Shifting Between<br />
All Selections<br />
Shifting Between<br />
Crab & Conventional Only<br />
Shifting Between<br />
Crab & Round Only<br />
Locked in Crab Only<br />
The Hustler <strong>IV</strong> is capable of three different steering<br />
modes. In Conventional Mode the rear wheels pivot as<br />
the operator makes a tracking turn. In Crab Mode all wheels<br />
turn in unison enabling the dolly to be moved in any direction<br />
while maintaining the orientation of the camera plane. In<br />
Round Mode the <strong>Dolly</strong> can turn while remaining in the same<br />
spot. The operator can select any mode by twisting the<br />
Steering Handles. Control Pins can be set to limit which<br />
modes can be selected during critical moments, ensuring the<br />
operator can make transitions with confidence.<br />
When attaching the Steering Column to the <strong>Dolly</strong>, the<br />
Lockdown Collar should be tightened by hand only.<br />
Never use pliers or channel locks on any part of the <strong>Dolly</strong>.<br />
The Operator should be Qualified. For Assistance Please call our 24 hour Customer Service at 1-888-883-6559.<br />
© 2001 No part of this manual may be reproduced or electronically transmitted without<br />
the written permission of Chapman/Leonard Studio Equipment, Inc.<br />
1<br />
2<br />
1. Wiggle the Steering Column to<br />
ensure that all four wheels are<br />
straight.<br />
2. Twist the Handle gently to shift<br />
into Round, Crab or<br />
Conventional Modes. If the<br />
transmission still won’t shift,<br />
repeat step 1.<br />
Begin by removing the screws on the Roller Housing.<br />
Remove the Roller Housing to expose the Rollers.<br />
Wipe the Bar and Rollers with a clean, dry cloth.<br />
Always begin cleaning the <strong>Dolly</strong> with a Vacuum Cleaner.<br />
Never use an air hose, because dirt and metal shavings will find<br />
their way into joints and bearings. This can seriously shorten the<br />
life of the <strong>Dolly</strong>.<br />
Never directly spray the <strong>Dolly</strong> with water. Use soap and<br />
water applied to a cloth or paper towel, or preferably a brush to<br />
wipe down the rubber and metal parts of the <strong>Dolly</strong>.<br />
Wax the exterior of the <strong>Dolly</strong> using Megular’s Mirror Glaze<br />
Cleaner Wax. This keeps the <strong>Dolly</strong> cleaner during regular use and<br />
preserves the finish. A clean <strong>Dolly</strong> will ensure optimum<br />
performance with smooth and quiet movements while enhancing<br />
its aesthetics.<br />
Spray the tires with Zep Par NC Silicone Spray (Key<br />
Words on Label are “Mold Release Agent”). This dramatically<br />
improves Tire Performance on Tile Floors, Hardwood, Track and<br />
even on Concrete. Use the same spray to clean the Tires.<br />
For Metal.<br />
The Operator should be Qualified. For Assistance Please call our 24 hour Customer Service at 1-888-883-6559.<br />
© 2001 No part of this manual may be reproduced or electronically transmitted without<br />
the written permission of Chapman/Leonard Studio Equipment, Inc.<br />
For Rubber and Plastic.<br />
Always read Warning Labels.<br />
13<br />
Revision 12 - 7/2008