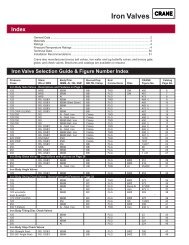
Design 461 Anti-Coke Valve Body
Design 461 Anti-Coke Valve Body
Design 461 Anti-Coke Valve Body

You also want an ePaper? Increase the reach of your titles
YUMPU automatically turns print PDFs into web optimized ePapers that Google loves.
I <strong>Design</strong> <strong>461</strong><br />
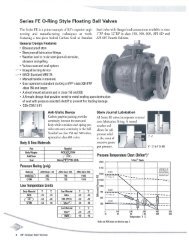
3. Use accepted piping practices when installing the valve.<br />
4. Do not install the valve in a system where the service conditions exceed<br />
those specified when the valve was ordered.<br />
5. If continuous operation is required during maintenance and inspection,<br />
install a three-valve bypass around the body so that it will be isolated.<br />
6. Orient the body so that the flow will be in the direction indicated by<br />
the flow direction arrow located on the outside of the valve body to<br />
ensure proper self-cleaning action.<br />
7. If the actuator and valve are shipped separately, refer to the actuator<br />
mounting procedure outlined in the appropriate actuator instruction<br />
manual.<br />
MAINTENANCE<br />
<strong>Valve</strong> parts are subject to normal wear and must be inspected and replaced as<br />
necessary. The frequency of inspection and replacement depends upon the<br />
severity of service conditions.<br />
Replacing Packing<br />
WARNING<br />
To avoid personal injury and equipment damage, isolate<br />
the control valve from the system, and release all<br />
pressure from the body and actuator before starting<br />
maintenance operations.<br />
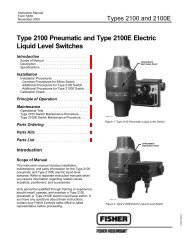
Refer to figure 1 unless otherwise indicated.<br />
1. Turn the spring adjustor to release all spring compression in the actuator.<br />
2. Disconnect the operating lines from the actuator. Disconnect the stem<br />
connector, and then remove the actuator from the valve.<br />
3. Remove the hex nuts (key 8, figure 2) from the bonnet flange, and loosen<br />
the packing flange nuts (key 25) so that the packing is not tight on the<br />
valve stem.<br />
4. Lift the bonnet (key 14) off the valve stem (key 10, figure 2). If the<br />
valve plug and stem assembly starts to lift with the bonnet, tap it back<br />
down using a brass or lead haoxner on the end of the stem. Set the bonnet<br />
on a cardboard or wooden surface to prevent damage to the bonnet gasket<br />
surface.<br />
5. Remove the packing flange nuts (key 25), packing flange (key 23), and<br />
packing follower (key 29) from the bonnet (key 14).<br />
-2-
![ratings & DEFINITIONS452-467_Technical Information[1].pdf](https://img.yumpu.com/49871719/1/190x245/ratings-definitions452-467-technical-information1pdf.jpg?quality=85)