blouberg a climber's guide to limpopo big walling, south ... - Climb ZA
blouberg a climber's guide to limpopo big walling, south ... - Climb ZA
blouberg a climber's guide to limpopo big walling, south ... - Climb ZA

Create successful ePaper yourself
Turn your PDF publications into a flip-book with our unique Google optimized e-Paper software.
BLOUBERG<br />
A CLIMBER’S GUIDE<br />
TO LIMPOPO BIG WALLING,<br />
SOUTH AFRICA<br />
By Hec<strong>to</strong>r Pringle<br />
SECOND EDITION<br />
1<br />
2007<br />
Blouberg – a <strong>Climb</strong>er’s Guide <strong>to</strong> Limpopo Big Walling, South Africa<br />
First Edition<br />
Published in 2007 by Hec<strong>to</strong>r Pringle.<br />
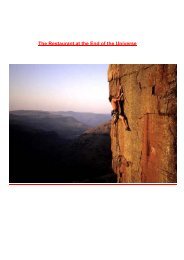
Cover Pho<strong>to</strong>: Hec<strong>to</strong>r Pringle on the 7 th pitch of Teddy Bears’ Picnic. Pho<strong>to</strong> by Chris Ziranek<br />
DISCLAIMER<br />
<strong>Climb</strong>ing is a potentially dangerous sport with significant risk of personal injury or even death.<br />
Do not partake in climbing unless you have had proper and professional instruction. Before<br />
any climbing trip, and particularly <strong>to</strong> Blouberg, you should become familiar with the risks and<br />
take responsibility for your own safety and that of those climbing with you.<br />
<strong>Climb</strong><strong>ZA</strong> and its authors, and the route <strong>guide</strong> contribu<strong>to</strong>rs and edi<strong>to</strong>rs specifically<br />
disclaim all warranties with respect <strong>to</strong> this publication or your use thereof, express,<br />
implied, or otherwise, including without limitation, all warranties of merchantability,<br />
fitness for a particular purpose, and non infringement. In no event shall the<br />
abovementioned be liable for any special, incidental, indirect or consequential<br />
damages, or any damages whatsoever, including, without limitation, the loss of life or<br />
limbs, damages due <strong>to</strong> personal injury, the loss of data or profits resulting from or in<br />
connection with the use, misuse, or performance of the information herein.<br />
The authors, edi<strong>to</strong>rs and contribu<strong>to</strong>rs assume no responsibility for errors or omissions<br />
in this route <strong>guide</strong> or other sources of information or documents referred <strong>to</strong> by this site.<br />
Feedback regarding any errors, omissions, additions, or simply <strong>to</strong> say how brilliant the <strong>guide</strong> is<br />
(☺) is most welcome. Please submit all feedback <strong>to</strong> <strong>Climb</strong><strong>ZA</strong> (www.climb.co.za).<br />
COPYRIGHT<br />
In the early 1990’s, a Blouberg route <strong>guide</strong> was published for the first time by Southern Rock,<br />
with Mike Cartwright as the driving force. The Southern Rock <strong>guide</strong> was, for the most part, a<br />
compilation of route descriptions (RD’s) which had appeared in Mountain Club of South Africa<br />
(MCSA) Journals since the 1960’s. The accuracy of much of the information contained in the<br />
Southern Rock <strong>guide</strong> has been proven through use, and so most of the RD’s from that <strong>guide</strong><br />
have been re-published here, with little or no editing. Mike Cartwright has given his express<br />
permission for these RD’s <strong>to</strong> be used and published free on the internet. Wherever possible,<br />
the Southern Rock RD’s have been checked against the original RD’s from the MCSA<br />
Journals. These Journals have provided a wealth of information over the years, and reference<br />
has been made in the <strong>guide</strong> <strong>to</strong> the relevant Journals when applicable. Again, any information<br />
used from MCSA Journals, has been reproduced here with the express permission of the<br />
MCSA. Many of the pho<strong>to</strong>graphs in this <strong>guide</strong> are being published for the first time, and in<br />
each case the pho<strong>to</strong>grapher is acknowledged. Some pho<strong>to</strong>s were first published in MCSA<br />
Journals, and in these cases, the relevant Journal, as well as the pho<strong>to</strong>grapher is<br />
acknowledged. Again, all pho<strong>to</strong>s are included with the express permission of the<br />
pho<strong>to</strong>graphers and / or publishers. It is the intention of the authors and edi<strong>to</strong>rs of this<br />
<strong>guide</strong> that it is published free on the internet for the benefit of climbers. All<br />
contributions have been made free of charge. This <strong>guide</strong> may be printed, copied and<br />
distributed free, but under no circumstances may the <strong>guide</strong> or any part thereof, be sold<br />
or distributed for financial gain, except <strong>to</strong> recoup printing and binding costs.<br />
ACKNOWLEDGEMENTS<br />
Many people contributed in one way or another <strong>to</strong> this <strong>guide</strong>. My sincere thanks <strong>to</strong> the<br />
following:<br />
Route description contribu<strong>to</strong>rs: Mike Cartwright, Kevin Smith, Charles Edelstein, Dylan Morgan<br />
and Paul Fatti as well as all those nameless RD authors without whom the real gems would be<br />
lost and forgotten. Thanks also <strong>to</strong> the MCSA for allowing RD’s from various journals <strong>to</strong> be<br />
published.<br />
Pho<strong>to</strong> contribu<strong>to</strong>rs: Graham Terrell, Karin Magogg, Steve Crowe, Mark Millar, Paul Fatti and<br />
Chris Ziranek. Many thanks <strong>to</strong> the MCSA for allowing pho<strong>to</strong>s from various journals <strong>to</strong> be used<br />
as well.<br />
Others: Joffrey Hyman for grade conversions and copyright stuff. Alan Grant for <strong>to</strong>pos and for<br />
some awesome times up on the wall. Graham Terrell and Ian Kotse for advice, comments, and<br />
good climbs. Finally, my girlfriend Marija for her patience and putting up with all my trips <strong>to</strong> the<br />
Middle of Nowhere.<br />
i
CONTENTS<br />
CONTENTS ..................................................................................................................ii<br />
INTRODUCTION ......................................................................................................... 1<br />
WHATS NEW? ............................................................................................................ 2<br />
ACCESS CONDITIONS .............................................................................................. 3<br />
GETTING THERE........................................................................................................ 3<br />
GENERAL MOUNTAIN LAYOUT............................................................................ 4<br />
DRIVING .................................................................................................................. 4<br />
FRANS’ KRAAL ....................................................................................................... 5<br />
DRIVING............................................................................................................... 5<br />
WALKING ............................................................................................................. 7<br />
AFRICAN IVORY ................................................................................................... 10<br />
LIMPOPO AIR........................................................................................................ 10<br />
CAMPING .................................................................................................................. 11<br />
WATER .................................................................................................................. 12<br />
NEAR THE CAVE .............................................................................................. 12<br />
ON THE SUMMIT............................................................................................... 12<br />
RESCUE AND SAFETY ............................................................................................ 13<br />
HOW TO USE THIS GUIDE...................................................................................... 15<br />
GRADES ................................................................................................................ 15<br />
STAR RATING ....................................................................................................... 17<br />
LAYOUT ................................................................................................................. 17<br />
ABBREVIATIONS .................................................................................................. 19<br />
ETHICS...................................................................................................................... 20<br />
BOLTING................................................................................................................ 20<br />
STYLE OF ASCENT .............................................................................................. 21<br />
ROUTES .................................................................................................................... 22<br />
NEAR THE CAVE .................................................................................................. 22<br />
BAPM AREA....................................................................................................... 22<br />
KLOOF AREA..................................................................................................... 26<br />
VALLEY AREA ................................................................................................... 28<br />
AVALON AREA .................................................................................................. 30<br />
MAZE AREA....................................................................................................... 34<br />
THE DONJONS ..................................................................................................... 36<br />
SOUTH DONJON .................................................................................................. 37<br />
EAST FACE........................................................................................................ 37<br />
NORTH DONJON .............................................................................................. 39<br />
NORTH WALL........................................................................................................ 40<br />
LEFT OF THE RAMP ......................................................................................... 42<br />
LOST TRIBE AREA............................................................................................ 43<br />
LEFT FACE AREA ............................................................................................. 46<br />
MOONLIGHT AREA........................................................................................... 64<br />
MOON AREA...................................................................................................... 69<br />
BIG CORNER AREA.......................................................................................... 97<br />
ROUTES BY GRADE .......................................................................................... 104<br />
SHORT ROUTES (Less than 150m) ............................................................... 104<br />
ii<br />
LONG ROUTES (More than 150m) ................................................................. 105<br />
STORIES ................................................................................................................. 107<br />
INTRODUCTION.................................................................................................. 107<br />
BLOUBERG NORTH WALL FRONTAL ROUTE ................................................ 108<br />
THE RAZOR’S EDGE.......................................................................................... 111<br />
PRIVATE INVESTIGATIONS .............................................................................. 113<br />
EIGHT MILES HIGH ............................................................................................ 118<br />
THE BIG PUSH.................................................................................................... 120<br />
BLOUBERG: MY BACKYARD............................................................................. 124<br />
BROKEN ON BLOUBERG .................................................................................. 127<br />
iii
INTRODUCTION<br />
“To <strong>Climb</strong> at Blouberg is <strong>to</strong> <strong>to</strong>uch the soul of rock climbing.” (Charles Edelstein,<br />
1997 MCSA Journal). Blouberg has a mythical feel <strong>to</strong> it, with its his<strong>to</strong>ry engraved<br />
in<strong>to</strong> its ridges, plateaus and valleys, and more recently in<strong>to</strong> its cliff faces. For some<br />
people, the mountain is huge and ominous, shaking off all attempts, even on the<br />
walk up. It has always had that aura of a place only the brave or stupid go. Given a<br />
bit of time, however, and it starts <strong>to</strong> relinquish its secrets. The obscure paths and<br />
<strong>to</strong>rtured boulders gradually become familiar and distinct. The cozy bivi spots, and<br />
comfy ledges start <strong>to</strong> form a pattern, and the links between the different routes<br />
become obvious.<br />
I have been coming <strong>to</strong> Blouberg now for about eight years. I’ve had my fair share of<br />
epics and adventures, good times and really bad times, but it truly is starting <strong>to</strong> feel<br />
like home There’s no longer any nagging doubt on the walk-in, and on a lot of the<br />
routes I know the easy traverse off or the sneaky variation. This has inspired more<br />
confidence on the harder (for me!) routes which in turn has opened huge<br />
possibilities in both repeating old routes and opening new ones. I always seem <strong>to</strong><br />
climb my best 200m off the deck with arms starting <strong>to</strong> tire, and mind starting <strong>to</strong><br />
expand, lulled by the gentle cow bells and baboon cries far below. I have found, and<br />
continue <strong>to</strong> find, the soul of rock climbing on the Big Blue Mountain. I hope that this<br />
<strong>guide</strong> will inspire and motivate others <strong>to</strong> step off the beaten path a little bit and find<br />
out what African climbing is all about.<br />
1<br />
Until now, there has been very little in the way of a central “bank” for all information<br />
Blouberg-wise. The Southern Rock <strong>guide</strong> compiled by Mike Cartwright in the early<br />
1990’s went out of print years ago, and there has been no replacement. It is time!<br />
Hopefully this <strong>guide</strong> will fill the void, and become a regularly updated source for all<br />
would-be adventurers.<br />
During the South African traditional climbing “Golden Age”, from the late ‘70’s <strong>to</strong> the<br />
early ‘90’s, climbing activity on Blouberg was frenetic. With the advent of sport<br />
climbing, the numbers have dwindled <strong>to</strong> a muddy drip. The intention is that a freely<br />
available <strong>guide</strong> will remove the mystery and (some) of the epic from the place and<br />
motivate both local and international climbers enough <strong>to</strong> haul their asses up a three<br />
hour hill <strong>to</strong> experience some soulful climbing, and get some traffic on such<br />
deserving routes.<br />
WHATS NEW?<br />
A substantial number of new routes have been opened since the Southern Rock<br />
days, and these have all (hopefully) been included. Other routes were opened years<br />
ago, but details were not previously available.<br />
Routes not included in the Southern Rock <strong>guide</strong>, in alphabetical order, are:<br />
A DOG DAY IN HEAVEN<br />
ALL THE SMALL THINGS<br />
BOLTM<br />
CHOKE CHAIN<br />
DREAM OF WHITE DOGS<br />
INSPIRATIONAL EXCHANGE<br />
OPEN PROJECT<br />
SOLAR ECLIPSE<br />
STORMCHASER<br />
THE MISSING LINK<br />
WALK OF SHAME<br />
YOU ONLY LIVE TWICE (ORIGINAL)<br />
The following improvements and additions have also been made <strong>to</strong> the information<br />
from the Southern Rock <strong>guide</strong>:<br />
Walking directions have been drastically improved!<br />
Some star ratings have been changed for (in my opinion) the better.<br />
One or two grades have been changed.<br />
Lots of pho<strong>to</strong>s!<br />
The climbs and areas near the cave are detailed, including pho<strong>to</strong>-<strong>to</strong>pos.<br />
A detailed overview of the NORTH WALL, hopefully making the various<br />
climbing areas clearer and easier <strong>to</strong> find.<br />
Detailed <strong>to</strong>pos of high route density areas.<br />
Extensive revisions <strong>to</strong> existing RD’s, including notes on links <strong>to</strong> other<br />
routes, traverse and bivi options, style of first ascent and references <strong>to</strong><br />
MCSA Journals and articles about the first ascent.<br />
Articles and s<strong>to</strong>ries about Blouberg included at the end for interest’s sake.<br />
Loads of other stuff!<br />
2
ACCESS CONDITIONS<br />
Blouberg is owned as a tribal trust by the Tswana-speaking Hananwa tribe. Thus<br />
any climbing or other activities are by the good grace of the tribe. As things now<br />
stand, access on<strong>to</strong> the mountain itself is free, with payment usually being made for<br />
parking. Please treat the locals with respect. The tribe has been living on the<br />
mountain for at least 200 years so they call the shots! There are numerous kraals up<br />
the sides of the mountain and I have even, after staggering up the three hour slog<br />
sweating and cursing, seen <strong>big</strong> mammas calmly starting the descent from the<br />
middle plateau with huge bundles of thatch on their heads. None of these people<br />
have ever given problems, so be courteous.<br />
GETTING THERE<br />
There are two main walk-ins <strong>to</strong> the Big Blue Mountain. The Frans’ Kraal route is the<br />
older of the two and is the only route described in this <strong>guide</strong>. The African Ivory route<br />
is the alternative. For either walk, it is highly recommended <strong>to</strong> take someone who’s<br />
done it before <strong>to</strong> avoid a <strong>big</strong> adventure. The drive is more or less the same for both<br />
walk-ins, apart from the last section on dirt. The Frans’ Kraal route tackles the<br />
mountain from the East, while African Ivory comes in from the South.<br />
Men’s Health – trying <strong>to</strong> shelter on a particularly memorable walk-in<br />
Pho<strong>to</strong> by Graham Terrell<br />
3<br />
GENERAL MOUNTAIN LAYOUT<br />
The mountain of Blouberg forms an alpine oasis in a fairly densely populated rural<br />
plain. The mountain is one of the last remaining sources of commodities such as<br />
firewood and decent grazing in the area. There are therefore hundreds of footpaths,<br />
used by the locals, criss-crossing the slopes of the mountain. Many of the smaller<br />
paths are liable <strong>to</strong> change from year <strong>to</strong> year as the locals shift their operations and<br />
since both walk-ins use a combination of these footpaths, changed paths is one of<br />
the reasons so many people get lost. Another reason is that the lower slopes are<br />
covered by a dense indigenous forest. It can be difficult <strong>to</strong> find a viewpoint through<br />
the trees <strong>to</strong> get your bearings. The best way <strong>to</strong> avoid getting lost is <strong>to</strong> get a sense of<br />
the structure of the mountain, and <strong>to</strong> follow mountain features rather than paths.<br />
Basically Blouberg consists of the main bulk of the mountain, including the summit<br />
and the North wall, surrounded <strong>to</strong> the east by three prominent subsidiary peaks<br />
known as the Donjons. All four peaks rise out of an extensive plateau, known as the<br />
lower plateau, about 400 m above the level of the surrounding plain. This plateau is<br />
protected <strong>to</strong> the east and <strong>south</strong> by a band of 50 <strong>to</strong> 100 m cliffs. A few valleys and<br />
ridges breach these cliffs, and allow access <strong>to</strong> the lower plateau. To the <strong>south</strong>west<br />
of the main peak of Blouberg, the lower plateau forms a hanging valley with another<br />
prominent peak.<br />
The centre of operations for most Blouberg trips is the valley formed between the<br />
South Donjon and the main peak. The East and North Donjons are more<br />
substantially separated from the main peak, and some exploring and bundu bashing<br />
is required <strong>to</strong> get <strong>to</strong> their summits.<br />
DRIVING<br />
Head <strong>to</strong> Polokwane (formerly Pietersburg). When coming in from the <strong>south</strong> on the<br />
N1:<br />
At the second traffic light turn left at the sign <strong>to</strong> Dendron (and Zimbabwe)<br />
on the R521.<br />
After 3.7 km turn right, again <strong>to</strong> Dendron and the R521.<br />
After 1.9 km turn left <strong>to</strong> Dendron on<strong>to</strong> the R521.<br />
Head north on the R521. After 60 km you’ll pass Dendron and the turn left<br />
<strong>to</strong> Bochum.<br />
Keep going straight <strong>to</strong> get <strong>to</strong> Frans’ Kraal or head west <strong>to</strong> Bochum from<br />
here <strong>to</strong> get <strong>to</strong> the African Ivory walk.<br />
4
Where <strong>to</strong> dude? Somewhere near Bochum Pho<strong>to</strong> by Hec<strong>to</strong>r Pringle<br />
FRANS’ KRAAL<br />
DRIVING<br />
From Dendron, continue straight on the R521, heading North. Look out for<br />
signs such as “Meanderthal” and “Tropic of Capricorn”.<br />
22 km from Dendron you’ll pass the sign for “Mara Research Station”.<br />
24 km after Dendron is the turn-off <strong>to</strong> the left (west) on<strong>to</strong> a dirt road,<br />
labelled “Blouberg”. There used <strong>to</strong> be two signs, but the second one now<br />
resides proudly in the WITS Mountain Club clubroom.<br />
Travel along the good dirt road between game fences for 15.2 km <strong>to</strong> an<br />
intersection with a <strong>big</strong> dirt road.<br />
Cross the <strong>big</strong> road, and make a small dog-leg <strong>to</strong> continue west as before.<br />
After 5.6 km the road makes a sharp curve right, then another sharp curve<br />
left, just after a <strong>big</strong> lonely tree standing in a dust patch just <strong>to</strong> the left of the<br />
road. There is a church on the right half way through the S-bend.<br />
Carry on another 4 km, over a bridge <strong>to</strong> a T-junction at a school.<br />
Follow the sign right <strong>to</strong> “The Glade”. Almost immediately you’ll go through a<br />
concrete-based dip through a river bed.<br />
Follow the deteriorating dirt road for a further 6.2 km (measured from the Tjunction),<br />
as it curves gradually left (west) around the mountain <strong>to</strong> arrive at<br />
Isaac’s house (Frans’ Kraal).<br />
GPS: Datum WGS84 S23 04 57.2 E 29 02 18.5<br />
5<br />
Africa parking Pho<strong>to</strong> by Hec<strong>to</strong>r Pringle<br />
Isaac is the trusty car guard and has taken over the car watching business from his<br />
uncle, Frans. Isaac’s property contains three rondawels, a small mielie patch and a<br />
white wrought iron gate. When arriving, s<strong>to</strong>p your car outside the property first, and<br />
ask Isaac or his wife if you can park. Isaac speaks passable English and Afrikaans.<br />
Let him show you where you can park, and agree on a fee. The usual is R20 per<br />
night, but if he asks for more that’s his prerogative. If you arrive late at night, its best<br />
not <strong>to</strong> wake him up. Try be quiet, and drive your car around the rondawel <strong>to</strong> park<br />
intelligently and out of the way near the mielie patch.<br />
There are often industrious entrepreneurs who try their luck on you at the parking.<br />
The only person you should pay for parking is Isaac himself. It is inadvisable <strong>to</strong> pay<br />
someone <strong>to</strong> act as a porter, as they usually lose interest pretty quickly. If you want,<br />
you can usually negotiate for a <strong>guide</strong>, but make it clear where you want <strong>to</strong> go and<br />
that payment will only be made when you get there!<br />
6
Blouberg<br />
Blouberg<br />
plateau<br />
South Donjon<br />
The Drip<br />
The Cave, on<br />
other side of<br />
Donjon<br />
East Donjon<br />
Lower plateau The Glade<br />
The ridge<br />
Frans’ Kraal<br />
on other side<br />
of this ridge<br />
North Donjon<br />
Frans’ Kraal walk up, taken from the road <strong>to</strong> Frans’ Kraal, just before the<br />
concrete dip Pho<strong>to</strong> by Hec<strong>to</strong>r Pringle<br />
WALKING<br />
The general idea:<br />
Head up the prominent valley (The Glade) directly above Frans’ Kraal. About<br />
halfway up the valley <strong>to</strong>wards the lower band of cliffs, the valley steepens sharply.<br />
At this point the route leaves the valley and goes up on<strong>to</strong> the ridge forming the true<br />
right side of the valley. The ridge is followed <strong>to</strong> where it breaks through <strong>to</strong> the <strong>south</strong><br />
(left, looking up) of the cliffs. This puts one on the lower plateau. Directly above is<br />
the East Donjon, with the South Donjon <strong>to</strong> the left of it. The South Donjon is easily<br />
recognised by its large, blank, orange east-facing wall. The route follows the plateau<br />
under this wall until a vague watercourse provides a weakness up <strong>to</strong> the <strong>south</strong>ern<br />
shoulder of the Donjon. Above the shoulder one crosses the Blouberg plateau <strong>to</strong> get<br />
<strong>to</strong> the kloof leading <strong>to</strong> the cave.<br />
In detail:<br />
The approximate times given are from the start of the walk.<br />
From Isaac’s house walk west down the road <strong>to</strong>wards the mountain. Frans' Kraal is<br />
the white house on your LHS 100m down the road. Cross the small river at <strong>big</strong><br />
smooth boulders. Carry on along the s<strong>to</strong>nking path until, just after entering the thorn<br />
tree forest, turn right on<strong>to</strong> the massive path that goes up the hill. Follow the path <strong>to</strong> a<br />
kraal on your RHS. Take the path that veers left, following a con<strong>to</strong>ur, until it veers<br />
right up the hill, next <strong>to</strong> the main river (usually running). The path becomes steep,<br />
7<br />
staying on the true left of the river, until it levels off slightly and crosses the river. It<br />
usually takes 15-25 mins <strong>to</strong> get <strong>to</strong> this point.<br />
There is a very well worn path on the other side, heading <strong>south</strong> (i.e. away from the<br />
river). Head slightly left through the trees <strong>to</strong> find a good path that gradually takes<br />
you on<strong>to</strong> a ridge. A bit up this path it suddenly opens up and you get a good view of<br />
the plain below. Stick <strong>to</strong> the right (there are many paths splitting and joining - they all<br />
go more or less the same way, except for the left most one which goes the wrong<br />
way). You’re now heading due west again, up a steady ridge. This path is eroded at<br />
times. Eventually, it levels off, goes through a small dip past a little stream, and then<br />
up a short steep, boulder hopping section through trees <strong>to</strong> a con<strong>to</strong>ur path running<br />
north-<strong>south</strong>. Turn left (<strong>south</strong>) on<strong>to</strong> the con<strong>to</strong>ur. It usually takes an hour <strong>to</strong> get here.<br />
Walk along the con<strong>to</strong>ur path for a way until you encounter a <strong>big</strong> thorn fence blocking<br />
the path. Turn left along the fence until you find a devious gate through (this is not<br />
<strong>to</strong>o obvious). Turn back right and head up <strong>to</strong> join the original con<strong>to</strong>ur path. This area<br />
is in constant "development" by the local kraal owner, and fences etc are liable <strong>to</strong><br />
change between trips. You should get back on<strong>to</strong> the con<strong>to</strong>ur path in the region of a<br />
massive clearing with one or two <strong>big</strong> lone trees in the middle. The path goes through<br />
a gate at the <strong>south</strong>ern end of the clearing. Carry on along the path until you see a<br />
<strong>big</strong> tree on the left, with a deep arrow carved in<strong>to</strong> its trunk. The arrow points right<br />
(west). About 30m after this tree is a good path heading right. The path then turns a<br />
bit left and goes up a steep hill between two thorn fences. At the <strong>to</strong>p of the hill is a<br />
gate on the right. Go through the gate and follow your nose westwards through the<br />
kraal. You'll soon get <strong>to</strong> a muddy stream with some massive boulders and a green<br />
hose-pipe.<br />
Follow the devious path left around the <strong>big</strong> boulder, and find the path through the<br />
steep, dense vegetation behind. You should be going steeply up the hill here. This<br />
takes you <strong>to</strong> a clearing after a while, on the other side of which the yellowwood<br />
forest starts. Find the path where it enters this forest and veers rightwards. Within a<br />
minute or two you should be amongst some massive yellowwoods. The perennial<br />
Drip of clean water is just a little bit up the hill. The <strong>big</strong>gest tree around marks the<br />
start of the next section of the walk. It usually takes about 1hr30 <strong>to</strong> get <strong>to</strong> the Drip.<br />
From behind the <strong>big</strong> tree, find the path over the boulders and over a <strong>big</strong> fallen<br />
yellowwood trunk. The path starts off heading <strong>south</strong>, then turns sharp right (west)<br />
and goes very steeply up the boulders. At the <strong>to</strong>p of the steep stuff is a <strong>big</strong> boulder<br />
cave. Follow the path in<strong>to</strong> the thorn tree forest. You can’t really go wrong here. After<br />
about ten minutes you should pop out the trees on<strong>to</strong> the beautiful Blouberg plateau.<br />
It usually takes about 1hr50 <strong>to</strong> get <strong>to</strong> the plateau.<br />
Choose your own way across the plateau. There is one path that goes at a low level<br />
(left) and another easier one, if you can find it, at a high level (right). Just head in the<br />
general direction of the crags due west. You'll find the river immediately below the<br />
crags. Turn upstream (right) and follow the river up the little kloof. <strong>Climb</strong> out on the<br />
true right of the kloof. Follow the path up the little valley, veer rightwards over a<br />
small ridge in<strong>to</strong> a second small valley, and climb on<strong>to</strong> the ridge on the other side.<br />
Follow this ridge up <strong>to</strong> a <strong>big</strong> boulder. <strong>Climb</strong> the boulder and con<strong>to</strong>ur right <strong>to</strong> The<br />
Cave.<br />
The whole walk usually takes between 2hr30 and 4hrs. Apart from on the final<br />
plateau the paths are solid the whole way. The many splits and joins, however,<br />
mean that the route is not obvious.<br />
8
9<br />
The Blouberg plateau looking East. The walk up from the drip pops out of the forest on the extreme left<br />
and meanders through the boulders <strong>to</strong>wards the camera Pho<strong>to</strong> by Hec<strong>to</strong>r Pringle<br />
AFRICAN IVORY<br />
I’ve only done this walk once, and we <strong>to</strong>ok the path less travelled, so find someone<br />
who knows the way <strong>to</strong> <strong>guide</strong> you. By all accounts, Frans’ Kraal is the way <strong>to</strong> go!<br />
LIMPOPO AIR<br />
For the adventurous there is an exciting and quicker access – just an hour and a<br />
half from Johannesburg <strong>to</strong> the Cave! In June 2006, James Pitman and Mariaan<br />
Pre<strong>to</strong>rius cleared an airstrip on the plateau near the <strong>to</strong>p pools. A few weeks later<br />
they were back, in a light aircraft and a microlight! The approach is spectacular <strong>to</strong><br />
say the least: fly straight at the 300m wall <strong>to</strong> the left of the ramp, clearing it by a few<br />
meters, then <strong>to</strong>uch down and try s<strong>to</strong>p before smashing in<strong>to</strong> the boulders at the end<br />
of the strip. Only for experienced pilots!<br />
Blouberg International – looking north along the airstrip. The <strong>to</strong>p of the North<br />
Donjon is just visible <strong>to</strong> the right Pho<strong>to</strong> by Hec<strong>to</strong>r Pringle<br />
10
CAMPING<br />
You camp where you please but the following will probably be the most comfortable:<br />
The Cave: For climbers, this is the easiest and best spot. It is a short walk<br />
from the Top Pools and the <strong>to</strong>p of The Ramp. See walking<br />
directions <strong>to</strong> get here. The cave is completely sheltered from<br />
wind and rain and is a very friendly place <strong>to</strong> hang out. It can<br />
sleep 4 <strong>to</strong> 6 comfortably, but more could cram in if necessary.<br />
The Grot<strong>to</strong>: This is a nifty hidden cave between the The Cave and the lower<br />
pools. Just before entering the little kloof from the bot<strong>to</strong>m,<br />
con<strong>to</strong>ur around <strong>to</strong> the left (west) for some 50 metres. The<br />
Grot<strong>to</strong> is hidden behind a <strong>big</strong> tree, sleeps 8-10 at a squeeze<br />
and is guaranteed <strong>to</strong> be dry, even when The Cave isn’t. It is a bit<br />
claustrophobic though.<br />
Lower Campsite: A river winds across the western extremity of the Blouberg<br />
plateau, forming some nice swimming potholes and pools. There<br />
are many places <strong>to</strong> camp on the grass near these pools. This<br />
spot is directly below the BAPM buttress.<br />
The Top Plateau: Just before the <strong>to</strong>p of The Ramp there is a little grassy plateau<br />
with some great campsites. It can be a bit exposed <strong>to</strong> wind and<br />
mist though. See directions for the NORTH WALL <strong>to</strong> get here.<br />
The Top Pools are found here.<br />
Hey Jude Pools: This spot is near the summit, at the <strong>to</strong>p of the NORTH WALL.<br />
This is a stunning camp spot and the Rap Route provides a<br />
convenient access <strong>to</strong> the base of the wall. See notes below on<br />
water at this spot.<br />
There are a few other secret spots – find them yourself!<br />
Beware of the Beast in the cave! Pho<strong>to</strong> by Hec<strong>to</strong>r Pringle<br />
11<br />
WATER<br />
NEAR THE CAVE<br />
Water is available year round on Blouberg. Some winters the river can be a bit<br />
stagnant and nasty so chlorine pills might be a good idea, but generally water is no<br />
problem. If the river looks dodge, the best place <strong>to</strong> fill up is the <strong>big</strong> pool directly<br />
below the BAPM buttress. To get there from The Cave, head down the little kloof,<br />
and stick in the river bed, until some slabs lead down <strong>to</strong> the pool and shady tree.<br />
During most summers, the Top Pools have potable water. In really good summers<br />
one can get water from The Slot, which is about 75m <strong>south</strong> of the cave, at the same<br />
con<strong>to</strong>ur level.<br />
Too much water – contemplating perfect Irish climbing weather<br />
Pho<strong>to</strong> by Hec<strong>to</strong>r Pringle<br />
ON THE SUMMIT<br />
During most summers, and even some winters, water can be found in the pools at<br />
the <strong>to</strong>p of HEY JUDE. This is great after a baking day on the wall. Any of the routes<br />
heading up the NORTH WALL <strong>to</strong> the right (west) of GREAT GULLEY will <strong>to</strong>p out<br />
near these pools. If you don’t have a recent report on the state of these pools, then<br />
don’t count on there being water here!<br />
12
RESCUE AND SAFETY<br />
The Magaliesberg and Johannesburg Sections of the MCSA have an excellent<br />
Search and Rescue team who service the old Transvaal area of SA. Always take a<br />
cell phone loaded with the following numbers:<br />
Rob Thomas S&R Coordina<strong>to</strong>r 082-652-1490 / 012-482-2957<br />
Gauteng Emergency Medical Services 011-315-0203<br />
There is good reception for all three major networks from many spots on the<br />
mountain, including from all routes on the NORTH WALL. There have been a<br />
number of epic helicopter rescues from both the base of the wall and off routes. The<br />
success of such rescues is very dependant on early call-out, which can only be<br />
done with a cell phone.<br />
GIVE THE FOLLOWING INFORMATION:<br />
1. YOUR NAME<br />
2. THE PHONE NUMBER YOU ARE PHONING FROM<br />
3. WHAT HAPPENED AND WHEN<br />
4. NUMBER OF VICTIM(S), NAMES AND THEIR INJURIES<br />
5. CONDITION OF PERSON(S)<br />
6. EXACT LOCATION (AREA, ROUTE NAME, PITCH NUMBER)<br />
7. LOCAL WEATHER<br />
8. FIRST AID GIVEN<br />
STAY AT THE PHONE. IF NECESSARY SEND SOMEONE BACK.<br />
FIRST AID DUMP<br />
There is a first aid dump on the mountain which usually contains bandages, fluids<br />
and other emergency equipment.<br />
WHEN STANDING AT THE TOP OF THE RAMP LOOKING AT THE<br />
NORTH WALL, YOU WILL SEE A GULLEY ON THE LEFT. THE DUMP IS<br />
IN THIS GULLEY.<br />
A good medical aid is also a must. The bill for helicopter rescue is footed by the<br />
person being rescued, and you really don’t want <strong>to</strong> end up paying a few hundred<br />
thousand rand for the direct route home.<br />
Read BROKEN ON BLOUBERG in the STORIES section <strong>to</strong> find out what happens<br />
when things go wrong.<br />
13<br />
View from the cave after <strong>to</strong>rrential flooding Pho<strong>to</strong> by Hec<strong>to</strong>r Pringle<br />
Playing chess in the cave Pho<strong>to</strong> by Graham Terrel<br />
14
HOW TO USE THIS GUIDE<br />
GRADES<br />
The modern South African grading system is used in this <strong>guide</strong>. Aid grades are<br />
based on the Yosemite aid scale (A1 <strong>to</strong> A5). Where a route has been opened with<br />
aid and subsequently freed, the free grade is given first, with the aid grade in<br />
brackets. The same applies <strong>to</strong> individual pitches on the climb.<br />
South Africa has a rich and colourful trad climbing his<strong>to</strong>ry, and the old SA grading<br />
system was an integral part of this. These grades often give a valuable insight in<strong>to</strong><br />
the “severity” of a pitch. The system is alpha-numeric with three numbers for every<br />
letter (i.e. F1, F2, F3, G1, …) and is quite coarse. One grade difference on this<br />
system is roughly equal <strong>to</strong> two on the modern SA system. For many years the “G”<br />
grade was considered <strong>to</strong> be the upper limit of the system, and consequently many<br />
routes graded G1, G2 or G3 can be brutal. Often the G grade was assigned <strong>to</strong> a<br />
particularly strenuous or “thrutchy” pitch. When the conversion <strong>to</strong> the modern<br />
system occurred in the mid 1980’s, the grades for many of these routes were<br />
“translated” directly. This doesn’t necessarily mean that the modern technical grade<br />
of the pitch is inaccurate. The old grade does, however, indicate the effort required<br />
<strong>to</strong> get up it!<br />
To add a bit of colour <strong>to</strong> some of the older routes in this <strong>guide</strong>, the original SA<br />
grades have been included in brackets after each pitch. Routes such as YOU ONLY<br />
LIVE TWICE have high adventure fac<strong>to</strong>r, and the old grades are thus appropriate.<br />
As with any route description, all grades here are subjective. Most of the grades<br />
have been reached by consensus over a few years. There is a perception that<br />
grading at Blouberg tends <strong>to</strong> be harsh. This is not the Magaliesberg and often the<br />
exposure and isolation add <strong>to</strong> the psychological grade of a particular pitch, even<br />
though the technical grade is within your limits. The grading of some of the easier<br />
pitches (in the 14 <strong>to</strong> 17 range) might be a bit off. Take for instance the no<strong>to</strong>rious first<br />
pitch of HEY JUDE (16) (its easy if you do it right!). Many of these routes were<br />
opened by guys climbing solid 24, so some discrepancies on the easier stuff are<br />
inevitable. Like any place, Blouberg has a particular “feel” and the grades seem a bit<br />
easier after a couple of routes. In a few cases, I’ve changed the grades on the<br />
easier pitches from the consensus grades given by the Blouberg pioneers. These<br />
changes are small and have not affected the overall route grades.<br />
The grade conversion chart on the next page is reproduced here courtesy of the SA<br />
<strong>Climb</strong>ing Info Network (SACIN – www.saclimb.co.za). The grade conversions have<br />
been reached by consensus, but are obviously still subjective.<br />
15<br />
Grade conversion chart<br />
Courtesy of SA <strong>Climb</strong>ing Info Network (www.saclimb.co.za)<br />
16
STAR RATING<br />
The quality of a route is indicated by a star rating out of five as follows:<br />
* Don’t bother. Seriously grotty, chossy stuff with loads of bats<br />
** Poor route. Fair amounts of choss and bush. Perhaps contrived<br />
*** Good route<br />
**** Very good route. Perhaps a classic<br />
***** Brilliant. Absolute classic.<br />
Like grades, the quality of a route is very subjective. For some of the routes, the<br />
ratings given here differ from the ratings of the previous generation. A good example<br />
is TEDDY BEARS’ PICNIC which I rate as one of the best routes at Blouberg, but<br />
which previously only picked up three stars. Over time some routes have attained<br />
classic status, due <strong>to</strong> their continued popularity and / or unique feel. A route such as<br />
LAST MOON used <strong>to</strong> be rated *** but I think an extra star is justified.<br />
Even routes with low star ratings can be enjoyed, if climbed with the right frame of<br />
mind. GULLEY CORNER and GREAT GULLEY might be grovelly, but they are<br />
never boring!<br />
LAYOUT<br />
There are many different crags at Blouberg. The main attraction is obviously the<br />
NORTH WALL, but the smaller crags closer <strong>to</strong> the cave can be a lot of fun on a<br />
“rest” day. The crags follow on sequentially in (hopefully) a logical way, starting from<br />
those lower down the river (i.e. BAPM Butress) and then working up past the cave.<br />
The Donjons are then listed, and finally the NORTH WALL.<br />
For each crag the height, aspect and access vital statistics are given. Descent<br />
descriptions are usually given under access. For most crags, the routes are listed<br />
left <strong>to</strong> right. Pho<strong>to</strong> <strong>to</strong>po’s are also included for many of the smaller crags. Due <strong>to</strong> the<br />
number of routes on the NORTH WALL, this crag has been split in<strong>to</strong> seven distinct<br />
areas. A description of the area precedes the RD’s for each of these.<br />
As outlined in the previous section, a wealth of information is often wrapped up in<br />
the grading of the route. For this reason, and in the interests of tradition, as much<br />
grading information has been retained as possible. Often, the original RD’s as first<br />
published in MCSA Journals vary drastically from the “modern” descriptions. A<br />
classic example is MOONLIGHT, where the original 21 pitch route description first<br />
published in 1966 has been condensed in<strong>to</strong> 6 concise pitches. An RD author is<br />
sandwiched between two forces: providing enough detail for the route of first ascent<br />
<strong>to</strong> be consistently found and followed; and avoiding unwieldy descriptions bogged<br />
down in detail that ultimately become cryptic. Hopefully the balance has been struck<br />
here.<br />
If a route was opened with aid and subsequently freed, the aiding description is<br />
usually retained. The original aid and corresponding free grade will then be given in<br />
brackets.<br />
17<br />
The typical layout for a route name is given below.<br />
A DOG DAY IN HEAVEN **** 24 A0 [4B, 4P, N]<br />
Route<br />
name<br />
A typical pitch description would be:<br />
Pitch<br />
number<br />
Pitch<br />
length<br />
Pitch free<br />
grade<br />
Star<br />
rating<br />
Overall<br />
route free<br />
grade<br />
Original aid and<br />
corresponding free<br />
grade of the pitch<br />
Overall<br />
route aid<br />
grade<br />
Many of the RD’s are followed by notes which include information about gear<br />
requirements, style of first ascent, his<strong>to</strong>ry of the route and other useful or interesting<br />
information. Where accounts of the first ascent, or of subsequent interesting ascents<br />
are available, these have been referenced. All the s<strong>to</strong>ries and accounts can be<br />
found in the last section of the <strong>guide</strong>. The opening party and date of first ascent are<br />
included at the end of each RD.<br />
Wherever possible, RD’s are limited <strong>to</strong> one page so that they can be printed and<br />
easily referred <strong>to</strong> on a route (watching your four bits of precious paper being blown<br />
in different directions halfway up the wall is no fun!). As many pictures as possible<br />
have been included <strong>to</strong> help with getting psyched!<br />
18<br />
Total<br />
number<br />
of bolts<br />
Total<br />
number<br />
of pi<strong>to</strong>ns<br />
Natural<br />
protection<br />
required<br />
Pitch description.<br />
Will usually include<br />
aid details if pitch<br />
was opened with aid<br />
10. 40m 20 (18A1) <strong>Climb</strong> the crack. Continue <strong>to</strong> the left in<strong>to</strong> a narrow, deep<br />
chimney and climb this <strong>to</strong> a large platform.
ABBREVIATIONS<br />
2B – This shows the number of bolts on a mixed route. Some of the bolts on<br />
Blouberg were placed a long time ago and can’t be trusted. A note will<br />
usually indicate how good a particular bolt is.<br />
BB: – Bolted by<br />
F – Fixed gear. Again, fixed gear is often dubious.<br />
FA: – First ascent by<br />
FFA: – First free ascent by<br />
N – Natural protection required. This applies <strong>to</strong> almost every route.<br />
1P – The number of pi<strong>to</strong>ns or pegs. As with bolts, these can be dubious.<br />
R – Runout, risky falls<br />
Looking East between the East and South Donjons Pho<strong>to</strong> by Hec<strong>to</strong>r Pringle<br />
19<br />
ETHICS<br />
BOLTING<br />
Blouberg is primarily a trad climbing area. The logistics of the place (fortunately)<br />
mean that it can never really become a crowded sport venue. Bolts have been<br />
placed on some of the routes, and there are even a few fully bolted short routes<br />
around, but any new bolt placements should be made with discretion. Please keep<br />
in mind the character of the climbing before placing any new bolts. Routes here tend<br />
<strong>to</strong> be <strong>big</strong> and wild, and bolts should not detract from this. The general consensus<br />
amongst many of the regular Blouberg first ascentionists is that a plumb 400m route<br />
should not be s<strong>to</strong>pped by a 10m section with no protection. Just make sure that the<br />
bolted pitch is of excellent quality, and that any bolts placed are absolutely essential<br />
<strong>to</strong> s<strong>to</strong>p a death fall. Try steer clear of fully bolted pitches. They are generally<br />
unnecessary.<br />
People have different opinions about bolting single pitch routes on Blouberg.<br />
Personally I don’t think its necessary or called for because of the limited number of<br />
ascents such routes will get. There is much more scope for mixed routes that have<br />
one or two bolts <strong>to</strong> protect a blank section. If in doubt, however, don’t bolt!<br />
Many of the existing bolts on Blouberg are very old and suspect. If anyone has the<br />
time and inclination it would be great if these could be replaced. The high, dry air on<br />
the mountain means that stainless steel is ideal. When replacing bolts, keep the<br />
new ones close <strong>to</strong> the old, and don’t add any extra bolts. Also, try remove as much<br />
of the old bolt as possible.<br />
On no account must any of the existing routes be tampered with by retro-bolting.<br />
Respect the style of first ascent, and if you’re <strong>to</strong>o scared <strong>to</strong> do a particular pitch,<br />
then go away and get stronger. Don’t bring the route down <strong>to</strong> your level.<br />
Old and new – scary 5mm nut and hanger replaced on Teddy Bears’ Picnic<br />
Pho<strong>to</strong> by Hec<strong>to</strong>r Pringle<br />
20
STYLE OF ASCENT<br />
Wherever possible the style of first ascent of various routes has been included in the<br />
RD’s. Obviously, the goal of any subsequent ascentionist is <strong>to</strong> climb the route in at<br />
least as good a style as the opening party. Most of the earlier routes were opened<br />
ground up in either a single push or over a few trips. LAST MOON and<br />
SOMETHING OF VALUE are prime examples of good route finding and tenacity<br />
resulting in high quality lines. As the route density increased, it became harder and<br />
harder <strong>to</strong> force the routes ground up. The use of fixed lines and traverses on<strong>to</strong> the<br />
climb from other routes resulted in some of the harder quality routes such as EIGHT<br />
MILES HIGH and RAZOR’S EDGE being opened. Some real gems, like PSYCHO<br />
REPTILE, were literally “unearthed” after repeated abseil forays by many people.<br />
There is still a lot of room for style improvement on many routes. Many of the<br />
current aid pitches can go free, and some of the harder routes on the Wall of White<br />
Light still need single day ascents.<br />
Barent “B-man” Engelbrecht styling on the Grassy Ledge<br />
Pho<strong>to</strong> by Hec<strong>to</strong>r Pringle<br />
21<br />
ROUTES<br />
NEAR THE CAVE<br />
BAPM AREA<br />
These routes go up the striking buttress above the pools of the lower campsite.<br />
When looking <strong>south</strong> from the cave, this buttress is seen in profile. The routes are<br />
about 3 <strong>to</strong> 4 pitches. Some mossy lichen <strong>to</strong>wards the <strong>to</strong>p of some of the routes is<br />
character building. The major feature of this buttress is the “candleflame” – two<br />
curving cracks merging in<strong>to</strong> one about a third of the way up. BAPM climbs the left<br />
hand side of the candleflame. Routes are listed left <strong>to</strong> right.<br />
HEIGHT<br />
15-80 Metres<br />
ACCESS<br />
From the cave head down the river and small kloof. Just before the <strong>big</strong>, shady pool,<br />
break right and head up <strong>to</strong> the base of the crag. Descent is either by rapping off 2<br />
bolts at the <strong>to</strong>p of BAPM (no chains here, so bring some ab-cord or leaver-biners),<br />
or by scrambling down the northern side of the buttress <strong>to</strong> gain a very wide, flat<br />
ledge. It is possible <strong>to</strong> walk/scramble all the way along this con<strong>to</strong>ur <strong>to</strong> reach the<br />
cave. Expect a bit of bush whacking.<br />
ASPECT<br />
The crag faces east and therefore picks up morning sun. Good shade in the<br />
afternoon.<br />
VROOM 16 ** [N]<br />
About 50m <strong>to</strong> the left of the start of BAPM are a series of <strong>big</strong> red overhangs. The<br />
route takes a line through these, finally traversing out <strong>to</strong> the right. Scramble <strong>to</strong> a <strong>big</strong><br />
ledge beneath the overhangs. Start <strong>to</strong> the right, beneath a steep, broken recess.<br />
1. Pull up in<strong>to</strong> the recess then move out immediately <strong>to</strong> the right on<strong>to</strong> a ledge.<br />
Continue up <strong>to</strong> another recess and up this <strong>to</strong> a roof. Rail <strong>to</strong> the left under the roof<br />
<strong>to</strong> a ledge. From the right-hand side of the ledge, pull up in<strong>to</strong> a short off-width<br />
crack and climb this <strong>to</strong> the roof. Traverse <strong>to</strong> the right under the roof <strong>to</strong> a grassy<br />
ledge. Scramble <strong>to</strong> the <strong>to</strong>p.<br />
FA: S. Mallory, M. Giddy, 1983.<br />
22
BOLM<br />
(22)<br />
BAPM<br />
(20)<br />
Candleflame<br />
BAPM Buttress from the Blouberg Plateau Pho<strong>to</strong> by Hec<strong>to</strong>r Pringle<br />
BOLTM 22 *** [3B, N, A]<br />
Scramble up <strong>to</strong> the start of BAPM. On the orange face up and <strong>to</strong> the left of the<br />
candleflame is a bolt. Start 5m <strong>to</strong> the left of BAPM, below the obvious corner.<br />
1. 35m 22: <strong>Climb</strong> the corner <strong>to</strong> a small ledge. Traverse the orange face past the<br />
bolt (tricky), <strong>to</strong> the right arête. <strong>Climb</strong> straight up past another bolt <strong>to</strong> an<br />
overhang. Pull strenuously through the overhang on the right and diagonally up<br />
the ramp <strong>to</strong> the right in the groove above. <strong>Climb</strong> easily <strong>to</strong> a tree belay. Scramble<br />
<strong>to</strong> the base of BAPM's second pitch.<br />
2. 22m 21 <strong>Climb</strong> the crack just <strong>to</strong> the left of BAPM until it peters out. Continue <strong>to</strong><br />
the right and up past a bolt. Take care over the huge blocks and lichen and<br />
finish as for BAPM.<br />
Notes:<br />
1. Check out BLOUBERG: MY BACKYARD in the STORIES section for an account<br />
of the FA.<br />
FA:<br />
Pitch 1: Charles Edelstein and D. van Zyl, circa 1990.<br />
Pitch 2: Charles Edelstein and George Mallory, 28 December 1997.<br />
23<br />
Descent<br />
POWER<br />
SURGE (24)<br />
BAPM 21 *** [N, A]<br />
BAPM takes a fairly direct line up the buttress opposite the deep 'pothole pool'.<br />
Scramble up <strong>to</strong> small flat overhangs on the lower grey section of the buttress.<br />
1. 15m 10 <strong>Climb</strong> past the overhangs on the left, step <strong>to</strong> the right and continue<br />
straight up <strong>to</strong> a large ledge below steep red and black rock.<br />
2. 25m 19 <strong>Climb</strong> up 2m then undercling <strong>to</strong> the right <strong>to</strong> the left hand side of two<br />
cracks which form the candleflame shape as seen from below. Move up <strong>to</strong> the<br />
<strong>to</strong>p of the 'flame' and continue up <strong>to</strong> the right <strong>to</strong> belay on a small ledge next <strong>to</strong> a<br />
tree.<br />
3. 25m 7 Move around <strong>to</strong> the right in<strong>to</strong> the main corner, which is followed <strong>to</strong> large<br />
ledges (this portion is common with MARTHA). <strong>Climb</strong> <strong>to</strong> the right <strong>to</strong> the ledge at<br />
the foot of the appealing final crack, which runs up a zone of red rock right of an<br />
overhang.<br />
4. 25m 21 Follow the crack as it curves up <strong>to</strong> the right. When it fades, move up and<br />
<strong>to</strong> the left beneath the grey overhang. Traverse <strong>to</strong> the left past a dubious block<br />
until the <strong>to</strong>p can be reached by climbing steep grey, lichen-covered rock (18A1).<br />
Notes:<br />
1. It makes sense <strong>to</strong> do this route in two pitches – scramble past the 1 st pitch on<br />
the right, and link pitches 2 and 3.<br />
2. Check out BLOUBERG: MY BACKYARD in the STORIES section for an account<br />
of the FA.<br />
FA: Charles Edelstein, Kevin Smith, Ronnie van Dijk, 1980.<br />
Foul weather view of BAPM buttress Pho<strong>to</strong> by Hec<strong>to</strong>r Pringle<br />
24
Paul Fatti leading past the candleflame on the second pitch of BAPM (19)<br />
Pho<strong>to</strong> by Hec<strong>to</strong>r Pringle<br />
MARTHA<br />
No route description available<br />
POWER SURGE 24 *** [N, P, F]<br />
Takes the rail through the monster roof about 50m <strong>to</strong> the right of BAPM. Scramble<br />
right up <strong>to</strong> the roof <strong>to</strong> belay.<br />
1. 15m 24 Rail out past fixed hex, pegs and wire and pull through <strong>to</strong> a good flake<br />
above the lip. Down climb <strong>to</strong> the fixed wire and lower off.<br />
Notes:<br />
1. Gear required: 4 draws for the route. Friend 1, Friend 1.5, and large wires for the<br />
belay.<br />
2. The fixed gear might be dubious by now. Handle with care.<br />
FA: Roger Nattrass, Mike Cartwright, 1990.<br />
25<br />
KLOOF AREA<br />
This stunning mini-kloof has some very striking and powerful lines. The climbing is<br />
very steep. Routes are listed left <strong>to</strong> right.<br />
HEIGHT<br />
20-30 Metres<br />
ACCESS<br />
This is the small kloof on the way up <strong>to</strong> The Cave. Descent from these routes is by<br />
walking down rightwards (looking up), back <strong>to</strong> the river.<br />
ASPECT<br />
The kloof runs from north <strong>to</strong> <strong>south</strong> with the climbing on the true left. Thus most<br />
shade is in the morning, but the overhanging nature of the wall and the surrounding<br />
trees mean that there is usually shade here.<br />
OPEN PROJECT<br />
The kloof viewed from upstream Pho<strong>to</strong> by Hec<strong>to</strong>r Pringle<br />
26<br />
CHOKE<br />
CHAIN<br />
(26)<br />
DOG<br />
STAR<br />
(24)
OPEN PROJECT Grade unknown [4B, N]<br />
Upstream of DOG STAR is a very steep wall heading up <strong>to</strong> a large tree. The bolts<br />
are visible below and <strong>to</strong> the right of the tree.<br />
1. 25m Grade unknown. <strong>Climb</strong> up <strong>to</strong> below the bolts. Straight up <strong>to</strong> finish just right<br />
of the tree.<br />
Notes:<br />
1. Check the condition of the bolts before climbing – they could be dodge.<br />
BB: Mike Cartwright, sometime in the early ‘90’s<br />
FA: Still <strong>to</strong> be climbed. Give it a bash!<br />
CHOKE CHAIN 26 *** [2B, N]<br />
Just upstream of the roof crack of DOG STAR is an overhanging, left trending,<br />
groove with two bolts.<br />
1. 25m 26 Pull up on jugs <strong>to</strong> the first bolt. Up <strong>to</strong> a rail at the base of the corner,<br />
then power up the corner past the second bolt. Carry on up the groove and finish<br />
up right.<br />
FA: Kevin Smith, Charles Edelstein.<br />
DOG STAR 24 **** [N]<br />
This excellent route (dry when raining) takes the striking roof crack on the true left of<br />
the kloof, just upstream of where the kloof opens up in<strong>to</strong> a valley.<br />
1. 20m 20 Takes the most obvious crack on the wall. Belay from a large, flat ledge<br />
just above the stream. <strong>Climb</strong> the crack <strong>to</strong> a good ledge below the overhangs<br />
(there is a bolt on this ledge, <strong>to</strong> the left of the roof crack).<br />
2. 5m 24 Think horizontally and climb the crack (which opens, closes and then<br />
flares) through the 3,5m roof on immaculate jams.<br />
Notes:<br />
1. This is an ideal route for a rainy day or when time is limited. The roof pitch is<br />
easily avoided by traversing left.<br />
2. The two pitches can easily be linked.<br />
3. This route might still require a second ascent. Go wild!<br />
FA: Charles Edelstein, 1986.<br />
27<br />
VALLEY AREA<br />
This area has some short, fun routes, close <strong>to</strong> the cave, as well as some bouldering.<br />
HEIGHT<br />
10-15 Metres<br />
ACCESS<br />
This is the wide river valley below the cave, starting from just below the <strong>to</strong>p pools.<br />
ASPECT<br />
The valley runs from north <strong>to</strong> <strong>south</strong>, with the climbing on the true left (i.e. facing<br />
west). Thus these routes mostly get shade in the morning. The valley is sheltered,<br />
however, and acts as a bit of a sun trap, so it can get very hot.<br />
ALL THE SMALL<br />
THINGS (18)<br />
THE MISSING<br />
LINK (20)<br />
The Missing Link Boulder as viewed from the valley Pho<strong>to</strong> by Mark Millar<br />
THE MISSING LINK 20 *** [N]<br />
This short route is on the west face of a large boulder on the true left of the valley<br />
directly below the cave. Standing in the cave, the boulder is below (<strong>south</strong>) of the<br />
striking, bulgy wall, directly across the valley. The route climbs the A-shaped corner.<br />
1. 15m 20 After Tricky take-off, climb corner <strong>to</strong> rail. Finish up left on jugs.<br />
Descent: Scramble down the back of the boulder.<br />
FA: Hec<strong>to</strong>r Pringle, Mark Millar, December 2005<br />
28
ALL THE SMALL THINGS 18 ** [N]<br />
Another short route, on the west face of the boulder just behind (east) of The<br />
Missing Link boulder.<br />
1. 10m 18 <strong>Climb</strong> crack about 2m right of arête until it dies at 4m. Make a move up<br />
and right (crux), and continue up on good grips <strong>to</strong> the <strong>to</strong>p.<br />
Notes:<br />
1. A camalot #3 and a good small cam protect the crux. The easier climbing above<br />
is unprotected.<br />
Variation: Instead of moving right at the crux, step left <strong>to</strong> the arête and climb this<br />
until able <strong>to</strong> move easily back on<strong>to</strong> the face. This variation is contrived.<br />
Descent: Scramble down the back of the boulder.<br />
FA: Mark Millar, Hec<strong>to</strong>r Pringle, December 2005<br />
Looking North over the North Donjon from above the <strong>to</strong>p pools<br />
Pho<strong>to</strong> by Graham Terrell<br />
29<br />
AVALON AREA<br />
This area has some great short crack climbs, a stunning bolted 26 as well as some<br />
fun bouldering. A great place <strong>to</strong> spend a rest day. Routes in the valley are listed<br />
from <strong>to</strong>p <strong>to</strong> bot<strong>to</strong>m, followed by routes just outside the valley.<br />
HEIGHT<br />
5-15 Metres<br />
ACCESS<br />
From the <strong>to</strong>p pools, walk <strong>south</strong> for a minute or two. A flat-bot<strong>to</strong>med valley with short<br />
walls on either side will open up <strong>to</strong> the right. Head up the valley.<br />
ASPECT<br />
The valley runs from <strong>south</strong>east <strong>to</strong> northwest, with climbing on both walls, so there is<br />
usually some shade. The valley does act as a sun trap, so it can get very hot.<br />
SOUNDTRACK<br />
(21)<br />
AVALON valley is<br />
just over this ridge<br />
AVALON (28 right<br />
or 26 left)<br />
STORM CHASER<br />
(19)<br />
To WALK OF<br />
SHAME (17)<br />
Routes near Avalon from the cave side (looking north) Pho<strong>to</strong> by Hec<strong>to</strong>r Pringle<br />
AVALON 28 (or 26) **** [6B, N]<br />
The steep yellow wall facing SW, at the head of and on the true right of the valley.<br />
Walk up the valley until able <strong>to</strong> scramble up and right, and then around <strong>to</strong> base of<br />
obvious bolted line. This face is obvious from the cave.<br />
1. 15m 28 Join the dots, moving rightwards at the last bolt. Top out (no chains).<br />
Variation:<br />
1. 15m 26 Follow the natural line up leftwards from the last bolt.<br />
Notes:<br />
1. Gear required: 6 draws for the route. Friend 1.5 & 2.5, wires for the <strong>to</strong>p belay.<br />
2. The old bolts on this route were replaced in September 2005 with 10mm<br />
stainless steel bolts.<br />
Descent: Scramble down the back of the crag<br />
FA: Mike Cartwright, 1990.<br />
30
GRAND ILLUSION 16 *** [N]<br />
A good crack up an orange wall just below AVALON. Situated on the true right of<br />
the valley, on the last wall before the valley steepens up <strong>to</strong> AVALON.<br />
1. 15m 16 <strong>Climb</strong> the crack.<br />
Descent: Scramble down and <strong>to</strong> the right.<br />
FA: Mike Cartwright, 1990.<br />
Steve Crowe on the first ascent of INSPIRATIONAL EXCHANGE (21) with the<br />
Avalon Valley below him Pho<strong>to</strong> by Karin Magogg<br />
INSPIRATIONAL EXCHANGE 21 *** [N]<br />
<strong>Climb</strong>s the face just <strong>to</strong> the left of GRAND ILLUSION.<br />
1. 15m 21 Start a metre left of GRAND ILLUSION and head up the face, trending<br />
left. Place gear at a vague rail on the arête and then finish up right.<br />
Notes:<br />
1. Gear is marginal. Opened on pre-placed gear.<br />
2. Opened on an international MCSA meet, grits<strong>to</strong>ne-style. Steve is from the UK.<br />
Descent: As for GRAND ILLUSION.<br />
FA: Steve Crowe, April 2005.<br />
31<br />
Ian Kotze onsighting<br />
SOUNDTRACK (21)<br />
Pho<strong>to</strong> by Karin Magogg<br />
32<br />
Bouldering in the Avalon Valley<br />
Pho<strong>to</strong> by Steve Crowe<br />
SOUNDTRACK 21 *** [N]<br />
A short overhanging finger crack on a buttress on the true left of the AVALON<br />
valley, opposite GRAND ILLUSION. The buttress faces <strong>south</strong> east.<br />
1. 10m 21 <strong>Climb</strong> the crack.<br />
Descent: Scramble off the back of the buttress.<br />
FA: A. Margetts, 1990.<br />
STORMCHASER 19 *** [N]<br />
A short, slightly overhanging, <strong>south</strong>west-facing face, just <strong>south</strong> of AVALON. From<br />
the AVALON valley, scramble up on the true left, past SOUNDTRACK.<br />
STORMCHASER is <strong>to</strong> the left, on a red-yellow wall, facing the same direction as<br />
AVALON and with a flat platform at its base.<br />
1. 15m 19 <strong>Climb</strong> the main break straight up the face, taking care on the flakes near<br />
the <strong>to</strong>p.<br />
Notes:<br />
1. Opened on the wettest weekend of the decade – the kloof was shoulder-deep in<br />
water!<br />
Descent: Either abseil off some tat or solo down the east side of the buttress<br />
(careful!).<br />
FA: Hec<strong>to</strong>r Pringle, Graham Terrell, February 2006.
WALK OF SHAME 17 *** [N]<br />
A splitter left-facing corner crack <strong>south</strong> of AVALON. From the AVALON valley,<br />
scramble up on the true left, past SOUNDTRACK and STORMCHASER. The corner<br />
is obvious <strong>to</strong> the <strong>south</strong>.<br />
1. 15m 19 <strong>Climb</strong> the corner.<br />
Descent: An adventurous scramble east then down <strong>to</strong> the north.<br />
FA: Hec<strong>to</strong>r Pringle, Carl Kritzinger, Marion Penso, January 2007.<br />
Hec<strong>to</strong>r Pringle on the FA of WALK OF SHAME (17) Pho<strong>to</strong> by Marian Penso<br />
33<br />
MAZE AREA<br />
This area has some thin slab routes as well as plenty of bouldering. Another good<br />
place <strong>to</strong> spend a rest day if you feel like a bit of exploring. There are plenty of short<br />
routes waiting for a first ascent in this area.<br />
HEIGHT<br />
5-25 Metres<br />
ACCESS<br />
It’s called the maze for a reason. The established routes are actually above the<br />
maze, at the base of the descent gulley coming down from the summit of Blouberg.<br />
The routes climb the grey band of cliffs visible from the upper pools. These routes<br />
are probably best done on the way back <strong>to</strong> the cave after doing one of the routes on<br />
the main wall. To get through the maze from the bot<strong>to</strong>m, start at the <strong>to</strong>p pools and<br />
follow the path <strong>to</strong>wards the nek at the <strong>to</strong>p of the ramp. Break off left half way along<br />
this path, follow your nose through some gullies and hunt about until you find a<br />
cairn. Follow the cairns. There are many ways through the maze and some involve<br />
a fair amount of scrambling.<br />
ASPECT<br />
In the maze itself, shade can always be found. The slab routes near the descent<br />
gulley face north east, and get shade for most of the afternoon.<br />
Slab routes and<br />
descent gulley<br />
Cave Con<strong>to</strong>ur<br />
path <strong>to</strong><br />
<strong>to</strong>p<br />
pools<br />
The maze from the South Donjon Pho<strong>to</strong> by Hec<strong>to</strong>r Pringle<br />
34<br />
Maze<br />
descent
CRAG RATS AGAINST MILEAGE 23 ** [B, N]<br />
This bolted pitch is on the slabish wall just outside and on the true right of the gully<br />
that marks the start of the maze descent route. From the <strong>to</strong>p of the maze, walk up<br />
the grassy slopes <strong>to</strong> the wall.<br />
1. 25m 23 Join the dots. Finish up and right after the last dot <strong>to</strong> belay under the<br />
roof.<br />
Notes:<br />
1. This route has no chains. Friend 1.5 and Rock 8 required for the <strong>to</strong>p.<br />
2. The bolts are old and should be clipped with caution.<br />
Descent: Scramble off rightwards in<strong>to</strong> the gully.<br />
FA: Mike Cartwright, 1988.<br />
THE LAYER THEORY 21 ** [1B, N, 2P]<br />
This states enough thin layers of clothing worn at night obviate the need for a<br />
sleeping bag in winter at Blouberg. Its corollary says that enough poor protection<br />
before a long runout obviates the need for cowboy action on the route. The validity<br />
of both have been questioned.<br />
1. 25m 21 Start 5m left of CRAG RATS AGAINST MILEAGE. <strong>Climb</strong> the corner<br />
crack until it ends. Ascend a further 4m <strong>to</strong> a questionable peg. Move left along<br />
the thin seam/rail <strong>to</strong> place more gear. (Peg, small Me<strong>to</strong>lius and Walnut 0, 00).<br />
<strong>Climb</strong> up <strong>to</strong> the undercling and continue up <strong>to</strong> the ledge.<br />
Notes:<br />
1. If you are as short as Lobster, this is impossible. If you have a psyche problem,<br />
don't bother. Now sports a bolt (the bolt is most likely dubious by now)<br />
FA: Clive Curson, 1989.<br />
Troglodytes in the AVALON valley Pho<strong>to</strong> by Steve Crowe<br />
35<br />
THE DONJONS<br />
The Donjons are the three peaks that encircle the main Blouberg peak <strong>to</strong> the east.<br />
The cave looks out on<strong>to</strong> the back of the South Donjon. The Frans’ Kraal walk-in<br />
takes one under the <strong>big</strong> east face of this peak. There are currently two routes on this<br />
face. The East Donjon is fairly scraggly and vegetated. The prominent feature on<br />
this peak is the massive ramp and time-bomb block on its <strong>south</strong>ern side – visible<br />
from the Frans’ Kraal walk-in as well as from the plateau at the <strong>to</strong>p of the ramp.<br />
There are no established routes on the East Donjon. The North Donjon has a <strong>big</strong><br />
north face and a vegetated and rugged <strong>south</strong> flank. There is currently one route up<br />
the north face of this peak.<br />
Time bomb and s<strong>to</strong>rm clouds Pho<strong>to</strong> by Hec<strong>to</strong>r Pringle<br />
36
SOUTH DONJON<br />
Currently there is only one established climbing area on this peak: The massive<br />
East face sports two long adventure routes, but there is plenty of scope for new<br />
shorter routes, particularly on the north face.<br />
EAST FACE<br />
ACCESS<br />
Approach is easiest from the plateau at the <strong>to</strong>p of the ramp via the neck between<br />
the South and East Donjons. From the <strong>to</strong>p pools head east, across the airstrip.<br />
Keep going <strong>to</strong> the edge of the escarpment. A vague path, with some scrambling<br />
sections heads down in<strong>to</strong> the forest of the neck below. Scramble down <strong>to</strong> the right<br />
in<strong>to</strong> the forest, then across, <strong>to</strong> the lip of the hanging valley overlooking Frans’ Kraal.<br />
The East face is around <strong>to</strong> the right from here. On the way you pass under some<br />
very impressive walls which still need <strong>to</strong> be climbed.<br />
Descent is via lots of bush whacking back <strong>to</strong> the <strong>to</strong>p plateau. Try stay <strong>to</strong>wards the<br />
northern side of the Donjon.<br />
ASPECT<br />
The east face gets morning sun.<br />
THE SHIELD 22 ** [N]<br />
<strong>Climb</strong>s the obvious stepped corner system on the east face of the <strong>south</strong> Donjon.<br />
The route starts up a corner left of a 6m high pillar next <strong>to</strong> the rock face.<br />
1. 43m 19 <strong>Climb</strong> the corner exiting left and up <strong>to</strong> the ledge on <strong>to</strong>p of some flakes.<br />
2. 38m 17 up the front of the pillar for a few metres then in<strong>to</strong> corner on the right<br />
and up <strong>to</strong> traverse line. Traverse right and up <strong>to</strong> ledge beneath roofs.<br />
3. 41m 22 <strong>Climb</strong> up corner/peapod/groove/chimney above <strong>to</strong> a stance below large<br />
roof (Originally climbed as 2 pitches (20A1 and 19A1) with a hanging belay).<br />
4. 40m 20 Traverse right under roof and climb corner/chimney above <strong>to</strong> ledge on<br />
arête. (Originally 2 pitches, 19A1 and 19).<br />
5. 40m 18 <strong>Climb</strong> the corner past a tree <strong>to</strong> a bushy ledge. <strong>Climb</strong> diagonally left up<br />
lichen-covered face <strong>to</strong> belay in gully.<br />
Scramble rightwards up the gully then walk right along the ledge <strong>to</strong> another gully<br />
which is followed <strong>to</strong> the <strong>to</strong>p.<br />
FA: Clive Curson, Ian Slatem, 1986.<br />
37<br />
FISLAYJAM 16 * [N]<br />
This route starts on the N.E. corner of the South Donjon, where a very obvious<br />
series of horizontal bedding plane ledges run in<strong>to</strong> the rising foot of the cliff just<br />
around the corner.<br />
1. 5m 10 Ascend the initial 5m. Walk <strong>to</strong> the left about 300m.<br />
2. 30m 10 <strong>Climb</strong> down <strong>to</strong> the next obvious ledge, traverse left using underhand<br />
grips, and ascend <strong>to</strong> a stance at the foot of an obvious recess.<br />
3. 33m 14 Ascend an easy section of chimney <strong>to</strong> a ledge. The Fislayjam section<br />
follows, up a slightly overhanging section of the recess. Continue up easier rock<br />
<strong>to</strong> a tree stance.<br />
4. 33m 14 Continue up recess, up a face <strong>to</strong> left of crack, and left around small<br />
overhang. Continue over dirty section <strong>to</strong> block and pi<strong>to</strong>n stance on long ledge.<br />
5. 7m 14 Ascend slight recess (<strong>to</strong> left of main recess) and do an awkward swing<br />
back in<strong>to</strong> the main recess. Tree belay.<br />
6. 33m 12 <strong>Climb</strong> easy chimney, then face followed by a more difficult face and<br />
layback crack <strong>to</strong> a large ledge with ample blocks.<br />
Scramble diagonally up right through bush <strong>to</strong> the <strong>to</strong>p.<br />
FA: John Anderson, Rod Blackhurst, Dave Alexander, 1965.<br />
The impressive east face of the South Donjon Pho<strong>to</strong> by Hec<strong>to</strong>r Pringle<br />
38<br />
THE SHIELD (22)<br />
FISLAYJAM (16)
NORTH DONJON<br />
ACCESS<br />
Note that the edi<strong>to</strong>r has not actually walked the approaches described below. Allow<br />
plenty of time and expect some interesting route finding.<br />
There is currently one route on this peak, on the northern face. There are two<br />
approaches:<br />
1. From the plateau below the Donjons, use the Frans’ Kraal northern variation. I.e.<br />
from Frans’ Kraal, after reaching the first <strong>big</strong> plateau, turn right (north) and go<br />
around the East and then the North Donjon counter clockwise. Bush whack up <strong>to</strong><br />
the north face.<br />
2. From the Cave head between the South and East Donjons, as described in the<br />
access <strong>to</strong> the East Face of the South Donjon. Instead of bashing through the<br />
forest <strong>to</strong> the South Donjon, turn left (west) and head down the main<br />
watercourse, between the north Donjon and the wall beneath the ramp. There<br />
should be a path most of the way. At the bot<strong>to</strong>m, walk clockwise around the<br />
northern Donjon <strong>to</strong> get <strong>to</strong> the north face.<br />
Descent is via lots of bush whacking down the <strong>south</strong>ern side of the Donjon, back <strong>to</strong><br />
the neck between the east and <strong>south</strong> Donjons. Alternatively, <strong>to</strong> descend back <strong>to</strong> the<br />
base of the route, it is possible <strong>to</strong> abseil down a gulley.<br />
ASPECT<br />
The north face gets sun most of the day in winter. In summer, there is shade from<br />
about 1pm.<br />
NO MOON 17 * [N]<br />
A large gully bisects the northern face of the Donjon. About 50m west of the base of<br />
the gully is a long, low roof (20m wide and 2m deep at chest height). The climb<br />
starts at the western side of this roof where it runs in<strong>to</strong> a rise in the ground, in the<br />
first obvious corner. Although the last pitches are of easy grade, they are particularly<br />
enjoyable.<br />
1. 35m 14 Up crack in corner 5m, left and up over awkward bulge. Ascend open<br />
book above, traversing left at the <strong>to</strong>p of the open book. <strong>Climb</strong> the second open<br />
book with pink and white streaks, again traversing left at <strong>to</strong>p on<strong>to</strong> ledge.<br />
2. 20m 17 <strong>Climb</strong> third open book at right hand side of ledge and traverse left at <strong>to</strong>p<br />
under roof. Proceed up nose (crux) on<strong>to</strong> flake and traverse left past pigeon nests<br />
under roof <strong>to</strong> grassy stance.<br />
3. 40m 12 Follow crack on lichen covered rock on good holds.<br />
4. 40m 12 Continue up the crack.<br />
5. 40m 11 Continue up the crack <strong>to</strong> ledge.<br />
6. 30m 11 <strong>Climb</strong> <strong>to</strong> a large ledge with trees, at base of overhanging buttress.<br />
7. Walk left about 30m in<strong>to</strong> the large gully and abseil.<br />
FA: Bruce Reela, Sakkie van Rensburg, 1985.<br />
39<br />
NORTH WALL<br />
This is the main event at Blouberg, home <strong>to</strong> some great single day, <strong>big</strong> wall classics<br />
of moderate grade, as well as true, scary <strong>big</strong> wall aid and free routes. The character<br />
of the wall changes significantly between the various areas. The usual access from<br />
the cave is down the ramp (originally called THE DIAGONAL and given a grade of<br />
B, 1960 MCSA Journal), which cuts diagonally across the eastern part of the wall,<br />
starting from the little grassy plateau just above the <strong>to</strong>p pools.<br />
The North Wall. GREAT GULLEY cuts the wall on the extreme left, with the<br />
WALL OF WHITE LIGHT just <strong>to</strong> the right of it. The MOONLIGHT corner heads<br />
up <strong>to</strong> the sloping ledge <strong>to</strong> the right of this. The MOON and BIG CORNER areas<br />
occupy the right hand half of the picture.<br />
HEIGHT<br />
100-350 Metres<br />
ACCESS<br />
There are a few different ways <strong>to</strong> reach the North Wall:<br />
1. From the Cave: Con<strong>to</strong>ur round <strong>to</strong> the <strong>to</strong>p pools (i.e. <strong>to</strong> the north). From the<br />
pools, head west along a good path across the little grassy plateau. The ramp<br />
extends down <strong>to</strong> the west from a small neck, from which the north wall can be<br />
seen in all its glory. There is a good path down the ramp. From the bot<strong>to</strong>m of the<br />
ramp try and stick fairly close <strong>to</strong> the wall on your left.<br />
2. From the summit of Blouberg: It is possible <strong>to</strong> scramble down on the western<br />
side of the wall. There is a gulley that puts one near the base of MALEBOCH.<br />
This descent is particularly useful if climbing more than one route in a day. No<br />
40
detailed description is yet available for this descent, so expect a bit of route<br />
finding. Steep scrambling and/or abseiling might be required.<br />
3. Also from the summit: Rap down the convenient rap route. The start of the rap<br />
route is tricky <strong>to</strong> find if you don’t know where <strong>to</strong> look. It is advisable <strong>to</strong> climb<br />
BUSHPIG first (which follows the rap route) <strong>to</strong> figure out where the chains start.<br />
4. From below: On the Frans’ Kraal walk-in head counter clockwise around the<br />
East and North Donjons, along the <strong>big</strong> lower plateau. Bundu bash up <strong>to</strong> the base<br />
of the ramp and head right along the base of the wall.<br />
ASPECT<br />
The North Wall, for the most part, faces north east, so expect morning sun. The wall<br />
can be baking or freezing at any time of year, but if there are no clouds it will<br />
definitely be hot until after lunch. Because the mountain lies north of the Tropic of<br />
Capricorn, the North Wall gets shade after about 1pm in summer. In winter, the wall<br />
is in the sun for longer.<br />
AREAS ON THE NORTH WALL<br />
There are 7 distinct areas on the north wall, each with its own feel and character.<br />
LEFT OF THE RAMP - Directly below the <strong>to</strong>p of the ramp is an impressive<br />
wall which is, however, quite vegetated. This has one<br />
route up it, DARE TO BE DIFFERENT.<br />
LOST TRIBE AREA - Two thirds of the way down the ramp, the vegetated<br />
rock opens up in<strong>to</strong> a beautiful orange amphitheatre<br />
with some fine shorter routes (5 odd pitches).<br />
LEFT FACE AREA - From the bot<strong>to</strong>m of the ramp, moving rightwards the<br />
wall shows its true colours with a few 300 m routes in<br />
the LEFT FACE area, being the section of wall<br />
between the main feature of GREAT GULLEY and<br />
the base of the ramp. Some of the easier (although<br />
vegetated) routes are in this area.<br />
WALL OF WHITE LIGHT - To the right of GREAT GULLEY lurks the truly<br />
impressive WALL OF WHITE LIGHT, named after the<br />
aid test-piece that winds up the blank walls and <strong>big</strong><br />
overhangs. Expect some serious climbing in this area.<br />
MOONLIGHT AREA - The WALL OF WHITE LIGHT is bounded on its<br />
western side by the striking MOONLIGHT corner.<br />
This corner provides a convenient access route <strong>to</strong><br />
some fine adventure routes up the faces above and <strong>to</strong><br />
the right.<br />
MOON AREA - Extending westwards from the start of MOONLIGHT,<br />
the base of the wall becomes a large, grassy ledge<br />
with a 20m cliff below. This is the MOON area, a very<br />
craggy section of the wall with some ultimate classic<br />
moderate routes. This area seems tailor made for<br />
friendly <strong>big</strong>-<strong>walling</strong>, with ledges at convenient<br />
BIG CORNER AREA -<br />
intervals, and usually 2 or 3 options off each ledge.<br />
This area is out of sight, around the skyline of the wall<br />
as viewed from the <strong>to</strong>p of the ramp. This has a similar<br />
feel <strong>to</strong> the MOON area, although routes such as THE<br />
RAZORS EDGE can get a bit wild.<br />
41<br />
LEFT OF THE RAMP<br />
This wall is quite vegetated and there is only one route here.<br />
DARE TO BE DIFFERENT ** 21 [N]<br />
Start about 500m left of the base of the ramp below a drip coming from an overhang<br />
about 40m up. Start on a boulder about 10m left of a large tree with a white bark.<br />
There is a small tree on the face about 8m up.<br />
1. 25m 19 Straight up, through a diagonal L <strong>to</strong> a corner. Up the corner for a few<br />
metres, then right <strong>to</strong> a ledge.<br />
2. 15m 21 Diagonally up and left <strong>to</strong> below a roof. Pull through and up <strong>to</strong> a semihanging<br />
belay.<br />
3. 20m 20 Traverse right around the nose, and upwards past a drip.<br />
4. 25m 16 <strong>Climb</strong> up and right <strong>to</strong> a cabbage tree. Traverse right <strong>to</strong> break, then up <strong>to</strong><br />
a ledge. Traverse 5m left below a crack.<br />
5. 15m 20 <strong>Climb</strong> steep crack <strong>to</strong> ledge then move 5m left, and down <strong>to</strong> below<br />
chimney.<br />
6. 25m 17 <strong>Climb</strong> up chimney. Then left through overhang and up <strong>to</strong> a ledge/cave<br />
just below corner.<br />
7. 45m 19 Start on right, up corner <strong>to</strong> below roof, then traverse left <strong>to</strong> arête. Up<br />
over easy ground <strong>to</strong> burned grass ledge.<br />
8. 45m 10 Up diagonally left over pleasant clean rock <strong>to</strong> traverse level, traverse left<br />
<strong>to</strong> below chimney.<br />
9. 25m 16 Up chimney then up through bush <strong>to</strong> <strong>to</strong>p.<br />
Crawl 45 <strong>to</strong> 50 seconds (i.e. less than one minute!) stroll <strong>to</strong> pool at <strong>to</strong>p of rock.<br />
FA: S. Middlemis, E. February, 1992.<br />
42
LOST TRIBE AREA<br />
Two thirds of the way down the ramp is an orange amphitheatre with roofs. From<br />
the path, scramble up diagonally right (looking at the cliff) <strong>to</strong> a large ledge below a<br />
break in the centre of the amphitheatre. There are some clay pot shards a few<br />
metres <strong>to</strong> the right. Some routes here only go up one or two pitches, and descent is<br />
either via <strong>to</strong>pping out on a different route, or rapping off the bolts on EXODUS.<br />
LOOK SHARP *** 21 [N]<br />
Start 20m left of LOST TRIBE at the base of a blunt arête. A steep corner can be<br />
seen about 10m up. Cairn.<br />
1. 35m 19 <strong>Climb</strong> up diagonally left for a few metres over juggy rock (loose looking,<br />
but mega solid). <strong>Climb</strong> up <strong>to</strong> corner, climb it for about 6m, then move out left<br />
on<strong>to</strong> the arête, then straight up <strong>to</strong> a small stance.<br />
2. 25m 19 Straight up for a few meters then traverse right and up (airy), and along<br />
a ledge until about 4m left of the 3rd pitch of LOST TRIBE (i.e. the <strong>big</strong> corner <strong>to</strong><br />
the right). <strong>Climb</strong> up and left, then straight up <strong>to</strong> a stance on <strong>to</strong>p of some blocks<br />
below a steep crack.<br />
3. 20m 20 <strong>Climb</strong> the steep rock and crack above <strong>to</strong> a roof. Move 2m left and pull<br />
up through on<strong>to</strong> a ledge above. Walk 5m left.<br />
4. 20m 19 <strong>Climb</strong> the crack/recess <strong>to</strong> a roof. Pull through the roof and move right<br />
and up <strong>to</strong> a stance on a small ledge below a flake.<br />
5. 35m 21 <strong>Climb</strong> the corner/flake <strong>to</strong> the roof and make long moves right <strong>to</strong> gain a<br />
jug. Pull up then move 2m left <strong>to</strong> a shallow corner. Up the corner and the one<br />
above <strong>to</strong> until one can climb easily up <strong>to</strong> the left <strong>to</strong> a large scoop below a roof.<br />
Traverse about 5m left <strong>to</strong> stance on a narrow ledge.<br />
6. 20m 19 <strong>Climb</strong> the crack above the stance <strong>to</strong> another ledge (8m). Move left then<br />
climb the steep face/crack above <strong>to</strong> a ledge.<br />
Scramble up from the stance <strong>to</strong> a bushy ledge. Bash <strong>to</strong> the chimney gully about<br />
10m right and climb the tree and arête above <strong>to</strong> take you <strong>to</strong> ledges and gullies that<br />
are part of the LOST TRIBE scramble. Bash/climb <strong>to</strong> the summit. A casual stroll (via<br />
the maze) brings you back <strong>to</strong> the campsite.<br />
FA: Stewart Middlemiss, Ian Slatem, 1988.<br />
THE JOURNEY ** 21 [N]<br />
Start in the obvious recess left of LOST TRIBE.<br />
1. 21 <strong>Climb</strong> the recess <strong>to</strong> a stance common with LOST TRIBE.<br />
FA: Clive Curson, 1992.<br />
GETTING THERE ** 23 [N, A]<br />
Start from the stance at the end of THE JOURNEY.<br />
1. 23 Break through the right hand edge of the roof. <strong>Climb</strong> <strong>to</strong> the chains above.<br />
FA: Clive Curson, 1992.<br />
43<br />
LOST TRIBE *** 21 or 18A2 [N]<br />
A short route with excellent climbing starting 1m right of the main recess.<br />
1. 35m 18 Move up slightly right <strong>to</strong> the bot<strong>to</strong>m of an obvious crack, is climbed until<br />
able <strong>to</strong> veer left <strong>to</strong> the base of a recessed crack which is climbed <strong>to</strong> a stance on<br />
loose blocks.<br />
2. 15m 21 (18A2) Traverse 6m left <strong>to</strong> below the first break through the overhang.<br />
Aid up, with 3 nuts, <strong>to</strong> a large ledge.<br />
3. 35m 16 <strong>Climb</strong> up the recess until forced <strong>to</strong> exit right. Traverse 10m right and<br />
them up <strong>to</strong> stance on a block.<br />
4. 20m l8 From the block drop down and traverse 2m right <strong>to</strong> below a crack. <strong>Climb</strong><br />
the superb crack until able <strong>to</strong> move right on<strong>to</strong> a ledge with blocks.<br />
5. 45m 16 From the right of the stance move diagonally up <strong>to</strong> a rail. Rail right then<br />
climb up <strong>to</strong> a tree in the gully. Scramble off <strong>to</strong> <strong>to</strong>p of the maze.<br />
Notes:<br />
1. Variation: 4. 25m 20 Instead of moving right, continue straight up crack <strong>to</strong> ledge<br />
on the left with chains. 2 abseils take you back <strong>to</strong> the ground.<br />
FA: Tarquin Holt, Steven Mallory, 1983.<br />
FFA: Mick Haffner and party, 1985.<br />
THIRD WORLD CHILD *** 25 [N]<br />
Start from the "nose" stance after the traverse pitch of LOST TRIBE. I.e. at the end<br />
of pitch 3 of that route.<br />
1. 25 <strong>Climb</strong> straight up <strong>to</strong> the crack and follow this <strong>to</strong> the roof. Pull through and<br />
stance. (Good Rock 4 at lip of roof).<br />
Notes:<br />
1. Mr Clegg <strong>to</strong>ok time out from his hectic concert <strong>to</strong>ur schedule <strong>to</strong> open this route.<br />
FA: Mike Cartwright, Johnny Clegg, 1990.<br />
EXODUS *** 23 [N]<br />
Start as for LOST TRIBE (about 10m right of the central break).<br />
1. 40m 23 Follow LOST TRIBE for a few metres until it veers off left. Continue up<br />
the layback crack until it ends. Traverse right and up <strong>to</strong> gain a recess leading <strong>to</strong><br />
easy ground which is followed <strong>to</strong> a ledge.<br />
2. 40m 20 <strong>Climb</strong> up leftwards and pull through the roof at a crack. Continue left and<br />
up <strong>to</strong> gain LOST TRIBE's long hand crack/recess. <strong>Climb</strong> the crack and exit left <strong>to</strong><br />
belay on a long narrow ledge (LOST TRIBE moves right slightly lower down).<br />
Where <strong>to</strong> now? Either rap off, traverse right and scramble as for LOST TRIBE, or<br />
traverse left for about 25m and climb LOOK SHARP's flake. Alternatively, the brave<br />
may traverse further left <strong>to</strong> gain an interesting recess which leads <strong>to</strong> slabs, ledges,<br />
corridors and pillars.<br />
Notes:<br />
1. The first ascentionists <strong>to</strong>ok the last option described above <strong>to</strong> <strong>to</strong>p out. Only the<br />
VERY brave should try it.<br />
FA: Mike Cartwright, Kevin Smith, 1990.<br />
44
CARAVANS ** 23 [1B, N]<br />
Start 5m right of LOST TRIBE. Scramble 5m.<br />
1. <strong>Climb</strong> crack and climb past bolt and good RP 4 <strong>to</strong> block. <strong>Climb</strong> wall above <strong>to</strong><br />
large ledge.<br />
Notes:<br />
1. The bolt is probably dubious by now. It was placed by Mr Cockburn after all.<br />
FA: Mike Cartwright, G. Cockburn, 1990.<br />
THE NEW STONE AGE ** 23 [1B, N]<br />
Start 5m right of LOST TRIBE. Scramble 5m and belay on the right end of the ledge.<br />
1. <strong>Climb</strong> past bolt <strong>to</strong> a good RP 4. <strong>Climb</strong> the wall and corner <strong>to</strong> large ledge.<br />
Notes:<br />
1. The bolt is probably dubious by now.<br />
FA: M. Cartwright, G. Cockburn, l990.<br />
45<br />
LEFT FACE AREA<br />
This is the section of wall from the bot<strong>to</strong>m of the ramp <strong>to</strong> just beyond GREAT<br />
GULLEY. The crag kicks back <strong>to</strong> its full height in this area, although it is quite<br />
vegetated.<br />
DOWNWARD BOUND * 20 [N]<br />
Start about 125 metres right of the base of the descent ramp. The initial cornercrack<br />
is situated 30 metres right of a large right-facing dihedral, and 15 metres left of<br />
an orange slab capped by an arch.<br />
1. 42m 17 <strong>Climb</strong> the corner-crack for a few metres, and continue up the rightleaning<br />
break <strong>to</strong> a ledge. Step off a short pillar on the right, turn the overhang,<br />
and traverse left <strong>to</strong> move up <strong>to</strong> a stance a few metres beneath a long roof. One<br />
is now a couple of metres left of the start.<br />
2. 25m 20 <strong>Climb</strong> diagonally left over red rock, then rail left around an arête using a<br />
dubious looking block. <strong>Climb</strong> up and right <strong>to</strong> a steep recess which is used <strong>to</strong> pull<br />
through the roofs <strong>to</strong> a ledge on the right.<br />
3. 40m 19 Move up the left-leaning ramp from the left end of the ledge <strong>to</strong> beneath<br />
the overhang. Traverse right until able <strong>to</strong> pull through the overhangs. <strong>Climb</strong><br />
diagonally leftwards, then blast straight up the grey face (not much pro) <strong>to</strong> easier<br />
rock and the highest ledge, a few metres beneath on obvious triangular roof.<br />
4. 40m 17 Move up a couple of metres, then right <strong>to</strong> cross the prominent lefttrending<br />
gully-ramp. <strong>Climb</strong> diagonally right <strong>to</strong> gain a short chimney which is used<br />
<strong>to</strong> reach ledges above.<br />
5. 45m 17 Walk right a few metres. <strong>Climb</strong> up and traverse left <strong>to</strong> the arête beneath<br />
the left end of a large roof. <strong>Climb</strong> up and right <strong>to</strong> negotiate the bulge above the<br />
roof. <strong>Climb</strong> the crack and continuation corner above, then move right and up in<strong>to</strong><br />
a shallow alcove. Exit left and climb a corner <strong>to</strong> a small ledge on the left beneath<br />
a large roof.<br />
6. 35m 19 Traverse right beneath the roof, around the arête <strong>to</strong> a narrow ledge. Go<br />
right until able <strong>to</strong> gain the diagonal break leading up leftwards, through a small<br />
yellow wood tree. Continue traversing leftwards around arête (some way out in<br />
space) then climb a grey recess <strong>to</strong> a stance.<br />
7. 45m 18 Move left and up, and traverse back right in<strong>to</strong> a recess. <strong>Climb</strong> up <strong>to</strong> a<br />
crack, which is climbed past a small tree. Keep left and climb up until able <strong>to</strong> rail<br />
right <strong>to</strong> easier ground. Continue <strong>to</strong> the end of the rope.<br />
Scramble <strong>to</strong> the <strong>to</strong>p.<br />
FA: Kevin Smith, George Mallory, 1989.<br />
46
LEFT FACE ** 16 [N]<br />
The route heads up the centre of the face, 120m <strong>to</strong> the left of GREAT GULLY.<br />
1. 33m 16 Up smooth, narrow chimney/crack in a left facing corner formed by a<br />
buttress and the main face. Alternatively, start about 15m <strong>to</strong> the right, in a right<br />
facing corner on the other side of the buttress.<br />
2. 50m 7 Ascend from <strong>to</strong>p of crack <strong>to</strong> large grass ledge. Traverse right 66m and<br />
scramble up <strong>to</strong> a higher ledge at the base of a left trending ramp system.<br />
3. 50m 7 Ascend diagonally leftwards <strong>to</strong> the highest yellowwood trees.<br />
4. 30m 16 Walk leftwards along ledge. Either take the first crack which starts easily<br />
and ends with a difficult move, or take the second crack which has an awkward<br />
start past a small bush, but an easier exit via twin flakes. Continue diagonally<br />
leftwards <strong>to</strong> a tree belay under a steep face.<br />
5. 20m 15 Traverse left, and then climb up 2m <strong>to</strong> the rail leading round bulge. Use<br />
the rail as an undercling and move left for a few meters until able <strong>to</strong> drop down<br />
on<strong>to</strong> a block (exposed). Move left in<strong>to</strong> a gully.<br />
6. 25m 12 <strong>Climb</strong> gully <strong>to</strong> stance at <strong>to</strong>p of pinnacle.<br />
7. 60m 15 An awkward start gains the recess leading upwards from the right hand<br />
end of the gully. <strong>Climb</strong> this, trending leftwards <strong>to</strong> <strong>to</strong>p out at the start of the maze.<br />
FA: unknown<br />
BURN THE DOG ** 22 [N]<br />
Start 90m left of SKIN THE CAT. A long roof can be seen 70m up. Start directly<br />
below the notch in the roof. Scramble 12m up LHS of pillar <strong>to</strong> a ledge.<br />
1. 50m 19 Up flake on right for 8m. Move left on <strong>to</strong> face, up tree roots <strong>to</strong> tree. Up<br />
groove (becomes a flake) then up wall. Traverse right <strong>to</strong> ledge, up, back left in<strong>to</strong><br />
corner and up the ledge.<br />
2. 35m 19 Up <strong>to</strong> next ledge, then up right <strong>to</strong> pull through right hand V-notch. Up <strong>to</strong><br />
grass ledge. Walk 30m right and up <strong>to</strong> under steep cave and scramble up. (25m<br />
left of SKIN THE CAT).<br />
3. 35m 21 Move up about 5m left of corner and move through roofs at their<br />
smallest. Diagonally up rightwards <strong>to</strong> crack, up this, then left <strong>to</strong> ledge.<br />
4. 25m 20 Up <strong>to</strong> cubby hole under roof. Pull through and up right <strong>to</strong> ledge.<br />
5. 35m 20 Up and diagonally left across slab <strong>to</strong> below steep gnarly rock. Pull<br />
through and up <strong>to</strong> stance at base of chimney.<br />
6. 40m 22 Delicate Slab Pitch: Up chimney and out on<strong>to</strong> wall above. Up crack<br />
system straight up <strong>to</strong> ledge.<br />
Traverse 12m right <strong>to</strong> base of corner behind tree.<br />
7. 50m 18 Up corner/crack, move left on<strong>to</strong> arête at <strong>to</strong>p, follow nose straight <strong>to</strong> <strong>to</strong>p.<br />
Scramble <strong>to</strong> the <strong>to</strong>p.<br />
FA: Stewart Middlemiss, Clive Curson, 1990.<br />
47<br />
48<br />
GREAT GULLEY and LEFT FACE from the air Pho<strong>to</strong> by Rob Thomas
SKIN THE CAT ** 20 [N]<br />
A sustained climb on excellent rock, which ascends between LEFT FACE and<br />
GREAT GULLY. Start 15m right of the leftward slanting recess about 80m right of<br />
the alternate start of LEFT FACE, and 80m left of the GREAT GULLY. Start at a<br />
boulder below a prominent tree 25m up, which is just <strong>to</strong> the right of a large overhang<br />
stretching leftwards <strong>to</strong> the leftward-slanting recess. The first two pitches may be<br />
avoided by scrambling (7/10) up the recess <strong>to</strong> the large grass ledge.<br />
1. 45m 16 <strong>Climb</strong> straight up <strong>to</strong> a slight arête and climb this, passing about 5m <strong>to</strong><br />
the right of the prominent tree, <strong>to</strong> a ledge on the right. <strong>Climb</strong> the face above,<br />
bearing slightly left <strong>to</strong> stance.<br />
2. 40m 16 Head straight up then left near the <strong>to</strong>p, <strong>to</strong> the vast grass ledge from<br />
which the leftward-slanting ramp of the middle section of LEFT FACE starts.<br />
Walk leftwards across the <strong>to</strong>p of the leftward-slanting recess mentioned in the start,<br />
and scramble up from a point 30m further left (about 20m right of the start of the<br />
ramp). Scramble up 10m and then 8m right <strong>to</strong> the foot of a prominent rock slab<br />
leaning against the face, leading <strong>to</strong> a small overhang 6m up.<br />
3. 45m 19A2 <strong>Climb</strong> left-hand edge of slab for 3m. Swing right and climb slanting<br />
crack <strong>to</strong> overhang. Step back down and right <strong>to</strong> crack at right-hand side of slab.<br />
<strong>Climb</strong> <strong>to</strong> overhang past some loose flakes, and continue up shallow depression<br />
above using two aid points. <strong>Climb</strong> delicately <strong>to</strong> a rail. Swing left and up in<strong>to</strong><br />
corner and move up 2m <strong>to</strong> stance. Move diagonally right for 2m <strong>to</strong> crack which is<br />
climbed for 2m before swinging back left on small holds and moving up the<br />
shallow corner <strong>to</strong> below small overhang. <strong>Climb</strong> overhang crack above (crux -<br />
originally aided) and continue up and slightly left <strong>to</strong> awkward resting place right<br />
of two small trees. Step left on detached block and move up <strong>to</strong> ledge between<br />
the two trees. Move diagonally up right and continue up small recess <strong>to</strong> stance<br />
on the left.<br />
4. 25m 19 Hand traverse right for 8m <strong>to</strong> prominent leftward slanting recess. <strong>Climb</strong><br />
this, past an overlap on the left, <strong>to</strong> stance. Continue up leftward slanting recess<br />
<strong>to</strong> ledge below smooth face. Stance on the left.<br />
5. 40m 20 Traverse 8m right <strong>to</strong> first recess through face above. <strong>Climb</strong> up 4m <strong>to</strong><br />
small overhang and step left <strong>to</strong> base of shallow recess above. Move up, swing<br />
right on small holds and climb up awkwardly <strong>to</strong> a resting point (crux). Continue<br />
up recess above <strong>to</strong> stance on comfortable ledge above tree.<br />
6. 35m 19 Step right and climb up <strong>to</strong> crack on the left of large slab. <strong>Climb</strong> crack<br />
and continue up shallow depression above (crux) <strong>to</strong> where angle eases.<br />
Continue up another 5m then traverse left for about 8m <strong>to</strong> tree in main recess.<br />
Scramble up leftwards along bushy ramp and continue leftwards on exposed but<br />
easy rock for about 80m <strong>to</strong> point just before shallow recess leading up from below.<br />
7. 55m 9 <strong>Climb</strong> up on right-hand side of recess until able <strong>to</strong> traverse across it and<br />
continue traversing leftwards over pleasant rock <strong>to</strong> the <strong>to</strong>p.<br />
FA: Paul Fatti, H. P. Bakker, 1985.<br />
49<br />
GREAT GULLY ** 13 [1P, N]<br />
<strong>Climb</strong>s the obvious gully half way between The Ramp and the Main Wall.<br />
1. 50m 5 Scramble up <strong>to</strong> the foot of a dry waterfall.<br />
2. 33m 10 Ascend the face <strong>to</strong> a thin tree belay in a recess.<br />
3. 25m 12 Move out left, up, and back in<strong>to</strong> a recess. Continue up <strong>to</strong> the overhang<br />
and move out right (12) on<strong>to</strong> an extensive ledge.<br />
4. Scramble for 100m up bushy gully.<br />
5. 33m 10 From this point the route veers off <strong>to</strong> the right of the main trend of the<br />
gully which becomes unclimbable. Ascend the face <strong>to</strong> a small ledge (pi<strong>to</strong>n<br />
belay).<br />
6. 23m 7 Continue up face <strong>to</strong> a tree belay in a slight recess.<br />
7. 33m 10 Continue straight up until about 20m beneath overhanging rock.<br />
8. 33m 7 Traverse right.<br />
9. 33m 10 Traverse right, ascend a little and continue traversing.<br />
10. 33m 10 Traverse right, ascending at intervals.<br />
11. 33m 10 <strong>Climb</strong> down a little, then climb diagonally up <strong>to</strong> the right. Scramble <strong>to</strong> the<br />
<strong>to</strong>p.<br />
Notes:<br />
1. The route as written up is quite difficult <strong>to</strong> follow, and most people end up<br />
climbing something harder than 13, sometimes even as hard as 19!<br />
FA: Dave Cretchley, Tim Ferguson, Mike Richardson, 1965.<br />
GULLY CORNER ** 15<br />
See the <strong>to</strong>po on the next page<br />
This route follows the ridge <strong>to</strong> the right (looking up) of GREAT GULLY. Two difficult<br />
sections are encountered:<br />
1. At 66m up: <strong>Climb</strong> steep corner for 13m and traverse right for 5m <strong>to</strong> large stance.<br />
2. 3/4 way up: 33m of good climbing in a cleft (F3) culminating in a strenuous one<br />
arm, one leg crack.<br />
Rest of climb: 7-9.<br />
Notes:<br />
1. The route as written up is quite difficult <strong>to</strong> follow, and most people end up<br />
climbing something harder than 13. Experienced parties have encountered<br />
climbing as hard as 19.<br />
FA: Unknown<br />
50
Topo – Gulley Corner 15 or F3+ (depending on conditions! By Alan Grant<br />
51<br />
WALL OF WHITE LIGHT<br />
This is the scary looking wall with grass slopes below, extending rightwards from<br />
GREAT GULLEY. These routes are all serious undertakings. The wall is bounded<br />
on the right by the very obvious, 80m corner of MOONLIGHT, which starts at ground<br />
level.<br />
AFTERGLOW ** 20A3 [N]<br />
This route takes the very obvious open book <strong>to</strong> the left of a blank, overhanging red<br />
wall, i.e. <strong>to</strong> the left of YOU ONLY LIVE TWICE, and is therefore a 100m <strong>to</strong> the right<br />
of the Gully.<br />
1. 25m 12 Start at a beacon at the base of a small pillar. <strong>Climb</strong> <strong>to</strong> the <strong>to</strong>p of the<br />
pillar, then continue up a crack above the pillar. At the <strong>to</strong>p, where the crack<br />
peters out, step <strong>to</strong> the right (difficult) <strong>to</strong> a small ledge.<br />
2. 45m 20+ From the ledge, move <strong>to</strong> the left and up <strong>to</strong> the level of a loose flake 2-<br />
3m below a small yellow overhang. From here, step <strong>to</strong> the left in<strong>to</strong> a black crack<br />
where one aid move allows one <strong>to</strong> climb <strong>to</strong> an overhang. Straddle out <strong>to</strong> the right<br />
under the overhang, then move up a metre, and back <strong>to</strong> the left <strong>to</strong> end up<br />
standing on <strong>to</strong>p of the overhang. From here, easy but dirty climbing on the left<br />
hand retaining wall of the open book leads <strong>to</strong> a stance on a small ledge. (20A2)<br />
3. 35m 18 From the stance, climb about 3m, then move 5-6m diagonally <strong>to</strong> the left<br />
<strong>to</strong> a rightward sloping slab with what appears <strong>to</strong> be difficult climbing above. Do<br />
not continue up the slab but climb with difficulty <strong>to</strong> the left, around <strong>to</strong> an arête.<br />
Continue up <strong>to</strong> a stance on large blocks.<br />
4. 30m 18 Above is an obvious but overhanging off-width part, but from here, cross<br />
the face on small holds on <strong>to</strong> the arête. Continue easily up the arête just <strong>to</strong> the<br />
right of the large overhangs, <strong>to</strong> a long narrow ledge (bivvie spot).<br />
5. 16A3 The main open book continues above. <strong>Climb</strong> 4m then use aid with<br />
difficulty <strong>to</strong> reach a small, sloping ledge. An obvious feature is the overhanging<br />
jamming crack on the left-hand retaining wall.<br />
6. 25m 16A1 From the ledge, step <strong>to</strong> the left in<strong>to</strong> the jamming crack and climb the<br />
crack free or with aid <strong>to</strong> a tree and a large ledge on the right. (This pitch now<br />
goes free, FFA by G. and S. Mallory, reference MCSA Journal 1988).<br />
7. 18 The corner looks very dirty above, so move <strong>to</strong> the left on<strong>to</strong> the arête (4-5m).<br />
Do a difficult move on<strong>to</strong> easy rock, which is followed in several pitches trending<br />
leftward <strong>to</strong> the <strong>to</strong>p of the wall. At this point one can see down in<strong>to</strong> the main gully.<br />
FA: Charles Edelstein, Peter Douglas, Alan Lambert.<br />
52
53<br />
Endless roofs: Backing off PSYCHO REPTILE (22) on the Wall of White Light Pho<strong>to</strong> by Hec<strong>to</strong>r Pringle<br />
ANOTHER DAY IN HELL *** 25 (22A1) [1B, N]<br />
<strong>Climb</strong>s the wall between AFTERGLOW and WALL OF WHITE LIGHT, finishing<br />
where the continuation of the AFTERGLOW corner system intersects the left<br />
skyline. A recess starts immediately right of a bush at the right-hand end of the open<br />
grassy area <strong>to</strong> the right of AFTERGLOW.<br />
1. 30m 15 Scramble up the recess <strong>to</strong> gain the highest ledge.<br />
2. 25m 20 Starting left, climb the undercut recess for a few metres. Traverse right<br />
across a slab <strong>to</strong> a groove and corner system which is followed until a short<br />
traverse right leads <strong>to</strong> a foothold stance in a small right facing corner.<br />
3. 40m 20 Traverse 10m right then climb steeply <strong>to</strong> easier ground. <strong>Climb</strong> the<br />
slightly right-trending grooves, and when level with the base of a large left-facing<br />
corner <strong>to</strong> the right, traverse left <strong>to</strong> a small ledge.<br />
4. 15m 18 <strong>Climb</strong> up then left over dubious rock <strong>to</strong> a stance.<br />
5. 20m 18 Traverse left, past a recess, then climb steeply <strong>to</strong> a large ledge.<br />
6. 40m 25 Start right of the 1.5m high block in the middle of the ledge system.<br />
<strong>Climb</strong> diagonally right for 10m (scarce pro) and move up <strong>to</strong> rails. Continue left<br />
and up, heading for a short crack right of a flake. Aid up the crack and use a bolt<br />
<strong>to</strong> gain a recess/crack on the left which leads <strong>to</strong> a good ledge. (22Al)<br />
7. 15m 20 <strong>Climb</strong> the recess <strong>to</strong> the highest ledge (which extends left <strong>to</strong> the <strong>to</strong>p of<br />
AFTERGLOW's corner).<br />
8. 25m 21 Traverse 4m right and climb the recess until able <strong>to</strong> move back left.<br />
<strong>Climb</strong> a shallow crack/recess (tricky start), then traverse left <strong>to</strong> stance on a small<br />
ledge in a right facing corner.<br />
9. 15m 20 Traverse left for 5m <strong>to</strong> the base of a wide recess. <strong>Climb</strong> this and finish<br />
on the left.<br />
Three or four rope lengths of easier climbing on the left side of the buttress bring<br />
one <strong>to</strong> walking ground.<br />
FA: Kevin Smith, Charles Edelstein, 1990.<br />
54
A DOG DAY IN HEAVEN **** 24 A0 [4B, 4P, N]<br />
This route takes one of the most direct lines at Blouberg, <strong>to</strong> the left of the WALL OF<br />
WHITE LIGHT. The start is 30m <strong>to</strong> the right of ANOTHER DAY IN HELL and about<br />
10m left from the start of THE DELICATE SOUND OF THUNDER. A small beacon<br />
marks the start. The route takes a more or less direct line transecting ANOTHER<br />
DAY IN HELL. It <strong>to</strong>ps out <strong>to</strong> the left of the huge, trapezoidal roof which is easily<br />
visible from the ground, virtually at the <strong>to</strong>p of the face and just <strong>to</strong> the left of the start.<br />
It is basically an independent line, but shares the bivy stance with ANOTHER DAY<br />
IN HELL. To keep the line direct it has two short sections which are common <strong>to</strong> that<br />
route.<br />
1. 27m 20 <strong>Climb</strong> the clean line directly <strong>to</strong> the large ledge system above. Avoid the<br />
grassy corner on the right at 12m by staying on the face <strong>to</strong> the left of it.<br />
2. 40m 22 <strong>Climb</strong> an obvious orange groove a few metres <strong>to</strong> the left of the start and<br />
climb through the overhang above. There is a peg visible at the overhang at<br />
10m. Once through the overhang, continue up <strong>to</strong>wards the right beneath a small<br />
roof <strong>to</strong> easier ground and then <strong>to</strong> a blocky stance <strong>to</strong>pped by an overhang. Move<br />
right 2m and climb though the overlap <strong>to</strong> a rail (in common with ANOTHER DAY<br />
IN HELL. Continue up leftwards (crux). Move diagonally left a few metres (tricky)<br />
and then up <strong>to</strong> a point where you can traverse <strong>to</strong> a perch just left of a prominent<br />
right-facing corner beneath a large roof.<br />
3. 50m 20 Move left 2m and up underneath a small overhang. Step right on<strong>to</strong> the<br />
ridge and continue up easier rock <strong>to</strong> a steep broken section at 40m. Pull through<br />
this on good jugs <strong>to</strong> a large ledge (bivvie common with ANOTHER DAY IN<br />
HELL).<br />
4. 35m 21 ANOTHER DAY IN HELL takes the first diagonal break <strong>to</strong> the right<br />
starting at the end of the ledge. Continue past this for 3 - 4m and then take the<br />
obvious break heading for the scooped section of the wall 25m above. Fantastic<br />
climbing, protected by a bolt, brings you <strong>to</strong> a crux section, where an RP affords<br />
reasonable protection. Prior <strong>to</strong> this point there is a peg on the right. Move<br />
through this crux section (try not <strong>to</strong> break off the good handhold on the left), <strong>to</strong> a<br />
hanging stance off a <strong>big</strong> block. Pitches 4 and 5 can be combined.<br />
5. 25m 24 Move right 5m <strong>to</strong> a point below two pegs 10m above. Place good pro in<br />
a rail and continue up <strong>to</strong> the pegs. A crux move past the pegs brings you <strong>to</strong><br />
easier ground. <strong>Climb</strong> diagonally up left <strong>to</strong> a good stance.<br />
6. 35m 23 Above is a shallow, right-curving corner with a peg visible but the route<br />
does not take this corner. Walk left about 5m <strong>to</strong> where the ledge ends, <strong>to</strong> a<br />
perch stance and climb the obvious orange corner directly above for 12m. When<br />
the corner peters out, do a delicate move right and then gingerly climb on <strong>to</strong> a<br />
large precarious-looking block. A tricky move (for short people) brings you in<strong>to</strong> a<br />
left-leaning crack. Continue up this until it peters out after 5m, <strong>to</strong> a crouching<br />
position. Move up left on<strong>to</strong> lichen covered rock and then diagonally right <strong>to</strong> a<br />
good stance.<br />
7. 35m 22 Some tricky moves up <strong>to</strong> the left bring you in<strong>to</strong> a right-curving crack<br />
system <strong>to</strong>pped by a roof. At the roof rail right (slippery) and then climb up <strong>to</strong> a<br />
small stance under a small roof.<br />
8. 40m 23A0 Continue up the broken corner-crack <strong>to</strong> the roof above. A hard move<br />
up through the left brings you in<strong>to</strong> an orange corner. Aid up this <strong>to</strong> a rail<br />
underneath an overhang. Rail left <strong>to</strong> an amazing stance on the skyline. This<br />
pitch has three bolts.<br />
55<br />
9. 50m 17 A chossy start brings you on<strong>to</strong> lichen-covered rock. Continue up the<br />
obvious line more or less straight <strong>to</strong> the <strong>to</strong>p.<br />
From here the scramble off is straightforward and fortunately not <strong>to</strong>o bushy.<br />
Notes:<br />
1. Check out BLOUBERG: MY BACKYARD in the STORIES section for an account<br />
of the FA.<br />
2. The route is well-protected, apart from pitch 4, which is runout and may be<br />
protected using an RP.<br />
3. No special gear is required, however a set of RP's will prove useful.<br />
4. Pitch 8 has been freed (apart from the last move which was obstructed by a haul<br />
bag) on <strong>to</strong>p-rope by C Edelstein at grade 25.<br />
5. Bivi sites: at the <strong>to</strong>p of pitches 3 and 5 there are excellent bivvies. The opening<br />
party also bivvied uncomfortably at the <strong>to</strong>p of pitch 6. The bivvi site at the <strong>to</strong>p of<br />
pitch 3 has a drum and there is at least one mattress, chalk and a duvet jacket.<br />
Please leave these articles in situ for the benefit of future ascentionists.<br />
FA:<br />
Pitches 1 <strong>to</strong> 6: Charles Edelstein and Matt Murrison, November 1996.<br />
Pitches 7 <strong>to</strong> 9: Charles Edelstein and E. Maguire, August 1997.<br />
56
THE DELICATE SOUND OF THUNDER *** 25A3 [B, N]<br />
Left of the WALL OF WHITE LIGHT start is a long ledge 20m off the deck. Start<br />
from a block at the rightmost end of the ledges (20m above the twisted pair of<br />
trees). This is a serious route.<br />
1. 38m 20 <strong>Climb</strong> straight up through broken looking rock and a small roof <strong>to</strong> a small<br />
stance directly above the start.<br />
2. 42m 15 Continue up easier rock, moving right under the roofs and on up <strong>to</strong> a<br />
good ledge.<br />
3. 20m 20 From the right end of the ledge move up over broken rock <strong>to</strong> a good left<br />
facing corner. Follow this <strong>to</strong> a small stance on the left on the arête above.<br />
4. 40m 23 Move up from the stance and traverse right <strong>to</strong> a right leaning crack.<br />
Follow this until it fades. Move left and up <strong>to</strong> beneath roof. <strong>Climb</strong> straight up the<br />
wall above <strong>to</strong> the bivy stance.<br />
5. 15m 25 Start from a small ledge 10m right of the bivy. Pull through roof (Friend<br />
#1&1/2) and continue <strong>to</strong> narrow ledge. Move left and up a short corner <strong>to</strong> rail.<br />
Move left and up <strong>to</strong> stance at a good rail.<br />
6. 25m 23A3 Move up and right <strong>to</strong> rail via small nuts and a hook hole. <strong>Climb</strong> up<br />
and right <strong>to</strong> next rail, up <strong>to</strong> good rock placement then right <strong>to</strong> main left facing<br />
corner. Up this a few metres <strong>to</strong> a great hanging stance.<br />
7. 20m 24 Continue up crack <strong>to</strong> <strong>to</strong>p of flake. Follow right hand break <strong>to</strong> rail beneath<br />
roof. Hang a right! When you see bolts place a Friend #2 far right and drop in <strong>to</strong><br />
chains.<br />
8. 15m 25A1 <strong>Climb</strong> up <strong>to</strong> bolts. Aid on bolts (a cheat stick is useful) Continue up<br />
and right <strong>to</strong> belay on ledge above roof.<br />
9. 30m 18 <strong>Climb</strong> the left facing corner/crack <strong>to</strong> a cubby. Move diagonally left across<br />
the face <strong>to</strong> belay on a ramp in curving twin cracks.<br />
10. 44m 25 Five Bolt Pitch: <strong>Climb</strong> cracks and then move out left <strong>to</strong> dodge roof. Rail<br />
right above lip and move up across slab heading for V-groove. <strong>Climb</strong> groove and<br />
main recess above, then move out left under small roof. Move back right above<br />
lip <strong>to</strong> stance.<br />
11. 40m 20 <strong>Climb</strong> up and right and then back left <strong>to</strong> ledges. <strong>Climb</strong> pillar and faces<br />
above. Traverse right in<strong>to</strong> chimney. Top out.<br />
Notes:<br />
1. Special equipment: Hook (dowel) <strong>to</strong> fit 20mm by 5mm diameter hole, 2 foot<br />
cheat stick.<br />
FA: Mike Cartwright, Cathy O'Dowd, 1990.<br />
57<br />
DREAM OF WHITE DOGS (THE DREAM) *** 26 [P, B, N]<br />
The route starts one metre right of Delicate Sound of Thunder and around the<br />
corner on the right of the start of Dog Day in Heaven. 12m <strong>to</strong> the right is the start of<br />
Wall of White Light and the start of Moonlight is about 150m <strong>to</strong> further right. Great<br />
Gully is about 100m <strong>to</strong> the left.<br />
1. 30m 19 <strong>Climb</strong> the left slanting ramp until able <strong>to</strong> move left past a perched block<br />
<strong>to</strong> a stance.<br />
2. 25m 21 Move back right past the perched block and up <strong>to</strong> the overlap. Tricky<br />
move leads <strong>to</strong> easier rock. Continue up <strong>to</strong> a convenient stance.<br />
3. 35m 18 <strong>Climb</strong> up <strong>to</strong> a large shattered ledge below a very steep overhanging<br />
crack system.<br />
4. 35m 26 Undercling traverse <strong>to</strong> left where a peg is visible. The peg is in a hollow<br />
flake so place a rock 1 or similar nut above it. Continue up <strong>to</strong> a bolt. From there<br />
continue straight up past the next bolt (or an easier variation is <strong>to</strong> traverse 2 m <strong>to</strong><br />
the right, up crack and back above the first bolt). Continue through the roof and<br />
up <strong>to</strong> a bolt belay on a small hanging perch.<br />
5. 35m 24 Directly above a blade peg is visible and bolts. <strong>Climb</strong> up the groove just<br />
below and left of the peg. Move up past the peg and bolt and then slightly left <strong>to</strong><br />
easier rock move diagonally left and continue directly up <strong>to</strong> a left facing corner<br />
crack. <strong>Climb</strong> this <strong>to</strong> a rail system level with the bivvy ledge which is about 30m <strong>to</strong><br />
the right. Stance at the bolt.<br />
Move 20m left <strong>to</strong> a stance<br />
6. 35m 22 <strong>Climb</strong> up <strong>to</strong> a good rail (the smallest alien is useful pro here) and up <strong>to</strong><br />
the scoop above. Protect the next move with an RP5 and climb the scoop <strong>to</strong><br />
easier rock and climb an easy crack <strong>to</strong> a perch. Small cam and nut belay.<br />
7. 21 Step around 2m <strong>to</strong> the right <strong>to</strong> a straightforward crack and climb this <strong>to</strong> a<br />
blocky rail. Rail left <strong>to</strong> a thorn tree and up <strong>to</strong> crack. Place pro and stretch left <strong>to</strong><br />
gain a small stance. Nut and cam belay.<br />
8. 22 Rail left 4m or so on grey rock <strong>to</strong> a point where you can step up. Small cams<br />
for protection. The “bird-shit” crack of Dog Day in Heaven is a few metres <strong>to</strong> the<br />
left. <strong>Climb</strong> up <strong>to</strong> a dirty crack and climb it. Move diagonally right on easier rock<br />
and do a tricky move <strong>to</strong> a small, but good, stance.<br />
9. 40m 19 Move over easy but dubious, lichen covered rock diagonally right for<br />
about 4m and then step left in<strong>to</strong> a bushy, short chimney crack. Up this for 3m<br />
and then climb easily up large, hollow sounding grey flakes. Step <strong>to</strong> the right and<br />
stance.<br />
10. 15 Up diagonally right for 3m and then move up left.<br />
11. 14 Walk off up and <strong>to</strong> the left but belay recommended as a slip is tickets!<br />
FA: C Edelstein, Andrew De Klerk. Circa 2000<br />
58
WALL OF WHITE LIGHT *** 24A3 [N]<br />
This route is on the North Wall, taking a direct line up the middle of the steepest<br />
section of the wall between GREAT GULLY and MOONLIGHT. Start just over<br />
halfway along from GREAT GULLY <strong>to</strong>wards MOONLIGHT, on a blocky ledge <strong>to</strong> the<br />
right of a 6m high flat <strong>to</strong>pped <strong>to</strong>oth of rock.<br />
1. 40m 24 <strong>Climb</strong> the crack system <strong>to</strong> a good ledge. (19 A1)<br />
2. 45m 18 Traverse 10m right along the ledge, then climb up slightly leftwards,<br />
then slightly rightward <strong>to</strong> pass the first overhangs on the right. Continue<br />
diagonally leftwards <strong>to</strong> a vague break, which is followed <strong>to</strong> ledges on the right,<br />
beneath steep grey rock.<br />
3. 45m 19 Move up 3m, then traverse left for about 10m, until able <strong>to</strong> break through<br />
the steep crack above. <strong>Climb</strong> a short groove on the right, traverse delicately<br />
right, and continue diagonally leftwards on a rail. Move right <strong>to</strong> a vague break,<br />
which is climbed <strong>to</strong> easy rock. <strong>Climb</strong> up <strong>to</strong> a belay about 15m above.<br />
4. 20m 21 <strong>Climb</strong> straight through steep rock then move easily <strong>to</strong> a ledge. This<br />
ledge is part of a long narrow ledge system, just beneath a prominent horizontal<br />
band of overhangs halfway up the wall. An excellent bivy is situated 15m left.<br />
5. 40m 24 Start 5m right along the ledge. <strong>Climb</strong> diagonally right beneath an<br />
overhang a couple of metres above the ledge, <strong>to</strong> gain a crack. <strong>Climb</strong> the crack<br />
then traverse left until able <strong>to</strong> move up <strong>to</strong> a ledge on the right. <strong>Climb</strong> up <strong>to</strong> a<br />
prominent rail, which is followed leftwards for a few metres, <strong>to</strong> a point below a<br />
shallow recess. Tricky moves lead up <strong>to</strong> a hanging stance in the recess, about<br />
5m below a roof.<br />
6. 20m 24 <strong>Climb</strong> up <strong>to</strong> the roof via right side of flake, then rail left and continue<br />
traversing <strong>to</strong> a narrow ledge. (17 A1 on aid up left side of flake)<br />
7. 30m 22A3 <strong>Climb</strong> rightwards <strong>to</strong> the base of a thin left facing dihedral. Aid up the<br />
dihedral and face above <strong>to</strong> a horizontal crack, then left <strong>to</strong> the base of a groove<br />
(small wires, blades and 3 hook moves). Free climb <strong>to</strong> groove <strong>to</strong> easy rock on<br />
the left, which is followed <strong>to</strong> a stance next <strong>to</strong> a flake.<br />
8. 40m I8 <strong>Climb</strong> the easy angled right-trending break then traverse right across a<br />
slab <strong>to</strong> a short crack. <strong>Climb</strong> this, and continue up the right facing corner above <strong>to</strong><br />
stance below a roof.<br />
9. 35m 24 Swing left around the arête, and move up <strong>to</strong> a rail. <strong>Climb</strong> the steep<br />
double cracks above and move left on<strong>to</strong> vulture ledges. <strong>Climb</strong> up <strong>to</strong> a blocky<br />
ledge on the right, traverse right, and move up <strong>to</strong> a rail. <strong>Climb</strong> a short way up the<br />
groove above, then make a tricky traverse left <strong>to</strong> reach a recess (above the<br />
blocky ledge). <strong>Climb</strong> this <strong>to</strong> a ledge on the right.<br />
10. 40m 17 Traverse right <strong>to</strong> a large pillar, climb the crack on its left, then climb up<br />
and right <strong>to</strong> the <strong>to</strong>p.<br />
FA: Andrew de Klerk, Kevin Smith, 1985.<br />
59<br />
YOU ONLY LIVE TWICE (FREE VERSION) *** 24 (21A2) [N]<br />
Start 100m left of MOONLIGHT.<br />
1. 30m 12 <strong>Climb</strong> the crack/chimney on the right-hand side of the pillar.<br />
2. 30m 21 Sword of Damocles: From the <strong>to</strong>p of the pillar, climb diagonally left <strong>to</strong> a<br />
ledge (crux) The pointed flake is loose, but resisted all attempts <strong>to</strong> kick it off.<br />
Continue diagonally left <strong>to</strong> stance on a block/ledge near some bush. (17A1)<br />
3. 25m 20 Move left along the ledge about 10m, then break through above (crux).<br />
Go up along the slanting break <strong>to</strong> stance below another steep section.<br />
4. 25m 20 <strong>Climb</strong> the bulge, then continue up diagonal left break <strong>to</strong> a small stance.<br />
5. 35m 20 <strong>Climb</strong> diagonally right for 5m, left and up, before descending and<br />
moving left <strong>to</strong> rejoin the slanting break. Pull through the steep section on good<br />
holds 5-6m then generally rightwards and up (scarce pro) <strong>to</strong> a point just right of<br />
the previous stance (small friends in rail).<br />
6. 40m 19 Move right about 3m then break though the ledge above just before a<br />
vague arête. Continue up and right over easier ground <strong>to</strong> large ledges.<br />
7. 45m 18 Walk right over easy ground in<strong>to</strong> the slanting crack system. <strong>Climb</strong> up<br />
past blocky ledges then steeply up <strong>to</strong> bivy ledges.<br />
8. 35m 21 <strong>Climb</strong> the crack/corner <strong>to</strong> the <strong>to</strong>p of the ledge system. Continue up <strong>to</strong><br />
where the crack splits. Hanging belay on the left.<br />
9. 45m 21 Continue up the right-hand crack for about 30m <strong>to</strong> where it is possible <strong>to</strong><br />
break left in<strong>to</strong> a subsidiary dihedral. <strong>Climb</strong> up <strong>to</strong> a sloping ledge in a fantastic<br />
position.<br />
10. 30m 18 <strong>Climb</strong> up just right of the arête up a flaky crack. At 10m move right on<strong>to</strong><br />
bird-shit ledges and continue up <strong>to</strong> a huge ledge.<br />
11. 30m 24 Monkey Puzzle Pitch: Above are two large corners. <strong>Climb</strong> the left hand<br />
one over flaky ground up <strong>to</strong> the roof. Pull through <strong>to</strong> place nuts 4m up. Down<br />
climb 10m and tension left <strong>to</strong> a grotty crack. Aid up <strong>to</strong> a roof then out <strong>to</strong> a stance<br />
on the skyline. It may be necessary <strong>to</strong> climb right <strong>to</strong> protect the second (19A2).<br />
The free version goes straight up the corner.<br />
12. 40m 19 <strong>Climb</strong> the arête for a few metres before moving left <strong>to</strong> the base of a<br />
deep crack that leads <strong>to</strong> the bushy ledges at the <strong>to</strong>p.<br />
Notes:<br />
1. The route as described above is a free version of the original route. It is believed<br />
that the original route followed the right slanting diagonal break from somewhere<br />
on pitch 3 or 4 <strong>to</strong> rejoin on pitch 7.<br />
FA:<br />
Original route: Eckhard Druschke, Dave Cheesmond, 1979 (10 aid pitches)<br />
Free version: George Mallory, Clive Curzon, 1986.<br />
The original route description is given below:<br />
60
YOU ONLY LIVE TWICE (ORIGINAL ROUTE) *** 20A2 [N]<br />
Start 100m left of MOONLIGHT.<br />
1. 30m 12 <strong>Climb</strong> the crack/chimney on the right-hand side of the pillar. (F1)<br />
2. 30m 17A1 From the <strong>to</strong>p of the pillar use 3 aid points <strong>to</strong> gain climbable rock<br />
diagonally left. Free up and then further left <strong>to</strong> stance on block near bushes.<br />
(F3,A1)<br />
3. 17A1 Move up and left 3 meters using aid and continue up free <strong>to</strong> ledge.<br />
Continue up back right <strong>to</strong> belay (hanging) below overhang. (F3,A1)<br />
4. 19A1 Up and through overhang (A1) then free up <strong>to</strong> next roof and rail right then<br />
up diédre <strong>to</strong> ledge. (G1,A1)<br />
5. 17 Move up ramp <strong>to</strong> left. <strong>Climb</strong> around corner <strong>to</strong> left and jam crack <strong>to</strong> large<br />
ledge. Move right and up <strong>to</strong> next ledge. (F3)<br />
6. 15A1 Start on the right hand side and climb up and traverse left <strong>to</strong> point above<br />
belayer. <strong>Climb</strong> groove on left side of pillar. Use one aid point <strong>to</strong> gain small<br />
stance on right hand side of nose above pillar. (F2,A1)<br />
7. 20A1 <strong>Climb</strong> the crack <strong>to</strong> large ledges (bivy site). Continue up the crack until<br />
forced <strong>to</strong> use 2 aid points where the crack is choked. Up until the crack fades<br />
and move left <strong>to</strong> hanging belay in flared crack. (G2,A1)<br />
8. 17A2 Move up and in<strong>to</strong> right hand crack/open book. Continue up this <strong>to</strong> a stance<br />
on blocks. (F3,A2)<br />
9. 20 <strong>Climb</strong> the face on right for a move then climb in<strong>to</strong> crack. Continue up crack <strong>to</strong><br />
loosish block and move right <strong>to</strong> stance. (G2)<br />
10. 19A1 Move up <strong>to</strong> flake then use 4 aid points out under right hand flake. Cross<br />
slab diagonally leftwards in<strong>to</strong> crack. Continue up crack <strong>to</strong> stance below steep<br />
corner on left. (G1,A1)<br />
11. 15A2 Take the left hand crack (i.e. the steep corner) <strong>to</strong> large ledge above and<br />
left. (F2,A2)<br />
12. 19A2 Claim the main left hand corner over large flake, through overhang and up<br />
<strong>to</strong> a small stance on the right, below the <strong>to</strong>p roof. (G1,A2)<br />
13. 19A1 Move left on aid, place 2 points above the roof and tension left in<strong>to</strong> a large<br />
deep crack. <strong>Climb</strong> this <strong>to</strong> the <strong>to</strong>p. (G1,A1)<br />
Notes:<br />
1. The route description given above is the original, first published in the 1988<br />
Journal of the Mountain Club of South Africa, pp124-5. It is reproduced here with<br />
kind permission from the MCSA.<br />
2. Gradings have been converted <strong>to</strong> the modern SA system, but they are included<br />
in brackets at the end of each pitch for completeness. Some G2’s are harder<br />
than others!<br />
3. Pitch lengths were not published.<br />
FA: Eckhard Druschke, Dave Cheesmond, 1979<br />
61<br />
Ian Kotze following pitch 2 of PSYCHO REPTILE (18) Pho<strong>to</strong> by Hec<strong>to</strong>r Pringle<br />
62
PSYCHO REPTILE **** 22 [1P, N]<br />
An obvious roof 20m up is situated about halfway between YOU ONLY LIVE TWICE<br />
and MOONLIGHT. Start about 5m left of the roof where a 1m boulder lies about 1m<br />
from the base of the face.<br />
1. 42m 21 <strong>Climb</strong> a crack/recess system, step left at a rounded ledge, and continue<br />
<strong>to</strong> another vague ledge at a point a few metres up and <strong>to</strong> the left of the roof. Up<br />
another few metres until able <strong>to</strong> climb diagonally leftwards <strong>to</strong> a stance (friend<br />
crack).<br />
2. 40m 18 <strong>Climb</strong> up, trending slightly rightwards, <strong>to</strong> a hand crack a few metres <strong>to</strong><br />
the right of a 7m x lm roof. Up the crack and traverse left <strong>to</strong> an adequate ledge<br />
above the roof (fixed pi<strong>to</strong>n).<br />
3. 40m 16 <strong>Climb</strong> up and traverse left <strong>to</strong> the arête. <strong>Climb</strong> left and up until able <strong>to</strong><br />
trend diagonally right and up <strong>to</strong> shattered ledges below steeper rock. Walk 10m<br />
left <strong>to</strong> stance about 10m right of a grassy right-facing corner.<br />
4. 30m 18 Starting off blocks climb a narrow left-facing dihedral. Traverse right<br />
(Poor pro) until able <strong>to</strong> move up <strong>to</strong> a ledge <strong>to</strong> the right of a large flake.<br />
5. 40m 15 Traverse right <strong>to</strong> gain a crack and block system which is followed<br />
diagonally rightwards <strong>to</strong> a stance on <strong>to</strong>p of a large pillar/flake.<br />
6. 45m 20 Traverse left and climb up <strong>to</strong> the base of the obvious right-facing corner<br />
crack. Follow this <strong>to</strong> a ledge, then climb another 6 metres <strong>to</strong> the <strong>to</strong>p of a flake.<br />
Stance on the highest ledge <strong>to</strong> the left.<br />
7. 40m 22 Starting near the left end of the ledge, climb a left facing ramp, up past a<br />
block <strong>to</strong> reach a rail. Rail a few metres left until able <strong>to</strong> move up about two<br />
metres. Traverse back right <strong>to</strong> above the stance. Then climb the obvious break<br />
and slab <strong>to</strong> stance high on the left.<br />
8. 30m 22 Traverse right beneath the overhang <strong>to</strong> the undercut base of a crack.<br />
<strong>Climb</strong> this, and finish right on a ledge. <strong>Climb</strong> the corner on the right and stance<br />
on a large ledge.<br />
9. 50m 20 Starting in the middle of the ledge, climb straight up <strong>to</strong> a rail. Traverse<br />
right a few metres, and climb the face above, trending rightwards at first. Exit<br />
right on<strong>to</strong> sloping ledges, then traverse right and up past the base of a<br />
vegetated groove, <strong>to</strong> stance about 5 metres <strong>to</strong> the right of a small yellow wood<br />
tree.<br />
10. 30m 22 <strong>Climb</strong> diagonally right over a grassy ledge and up a smooth, shallow<br />
recess. Continue past a small roof <strong>to</strong> gain a jam-crack. From halfway up this<br />
crack, traverse across the smooth face <strong>to</strong> a crack 3m right. Up this <strong>to</strong> exit right<br />
on<strong>to</strong> a ledge.<br />
11. 25m 10 A rising traverse right <strong>to</strong> stance 4m below a roof.<br />
12. 30m 16 Move up <strong>to</strong> the roof and dassie-crawl left on<strong>to</strong> a good ledge. Continue<br />
around the arête and climb the face on the left <strong>to</strong> <strong>to</strong>p-out Monteseel-style.<br />
Notes:<br />
1. The first ascent required considerable cleaning. It does not see many ascents<br />
and so there is a chance the climb could be dirty.<br />
FA: Kevin Smith, Stewart Middlemiss, Clive Curson, 1990.<br />
63<br />
MOONLIGHT AREA<br />
MOONLIGHT is the very obvious 80m east facing corner, starting from ground level<br />
and ending at a sloping grass ledge, at the right hand side of the Wall of White<br />
Light. The MOONLIGHT area extends rightwards from here. Large portions of the<br />
base of this section of the wall are very chossy, so all the routes use MOONLIGHT’s<br />
initial corner <strong>to</strong> access the sloping grassy ledge. An easy traverse cuts right from<br />
this ledge (the traverse is, in fact, part of MOONLIGHT), providing the gateway <strong>to</strong><br />
the good rock above.<br />
FUTURE SHOCK *** 23A2 [1P, N]<br />
<strong>Climb</strong>s the huge recess system, visible from the <strong>to</strong>p of the ramp, <strong>to</strong> the left of<br />
MOONLIGHT DIRECT. This is the dark, overhanging recess directly above<br />
MOONLIGHT’s initial corner. Scramble 20m <strong>to</strong> stance in MOONLIGHT's left-facing<br />
corner/crack.<br />
1. 50m 18 <strong>Climb</strong> the corner/crack <strong>to</strong> the grass ledge (as for MOONLIGHT).<br />
Scramble up <strong>to</strong> the <strong>to</strong>p of a short pillar at the back right corner of the <strong>big</strong> ledge.<br />
One is now in the base of the left-facing dihedral.<br />
2. 40m 21 <strong>Climb</strong> the dihedral, past a hanging block, <strong>to</strong> a hanging belay beneath the<br />
large roof.<br />
3. 20m 20Al Move out left, turn roof and continue up <strong>to</strong> a hidden ledge.<br />
4. 35m 22 <strong>Climb</strong> deviously up in the main corner system <strong>to</strong> a tiny stance at the<br />
base of the bomb-bay Chimney (fixed pi<strong>to</strong>n).<br />
5. 40m 23A2 The Batman Pitch: Aid up back of chimney (small wires) <strong>to</strong> where<br />
crack peters out. Wild stemming leads <strong>to</strong> a yellowwood tree. Pull through the<br />
overhang and continue up <strong>to</strong> the roof capping the chimney (poor pro). Aid out<br />
along roof-crack <strong>to</strong> hanging belay (Friend 3).<br />
6. 20m 20A1 Aid around lip of roof <strong>to</strong> gain a fighting off-width, which leads <strong>to</strong> an<br />
alcove.<br />
7. 45m 18 Turn overhang surprisingly easily by means of strenuous armpulls and<br />
climb continuation recess <strong>to</strong> highest ledge.<br />
8. 130m Bash <strong>to</strong> summit.<br />
Notes:<br />
1. Guano detracts from otherwise impressive climbing.<br />
2. Opening party climbed with double rack.<br />
FA: Mike Cartwright, Clive Curson, Stewart Middlemiss, Kevin Smith, 1990.<br />
64
MOONLIGHT * 18 [1P, N]<br />
From the ramp leading down <strong>to</strong> the foot of the main band of cliffs, a slightly<br />
overhanging crack or recess leading up <strong>to</strong> a very large grass ledge about 250ft<br />
above the ground can be seen about 150 yards beyond the main gully in the centre<br />
of the cliffs. The route follows this crack, then proceeds <strong>to</strong> the right along <strong>to</strong> the far<br />
(right) side of the grass ledge, and then continues another 250ft or so further <strong>to</strong> the<br />
right along a small broken ledge at the same level. The route then roughly follows<br />
the skyline.<br />
The original route revisited for only the 5th time by Clive Curson, Snort Edelstien<br />
and Stewart Middlemiss. The 21 pitches previously described by P Fatti, A Chinery<br />
and A Shaw in 1965 may be shortened <strong>to</strong> 6 as follows:<br />
Scramble 20m up the corner (7)<br />
1. 50m 18 <strong>Climb</strong> up <strong>to</strong> the grass ledge, with an optional step right at about 10m.<br />
From the right hand end of the grass ledge, traverse about 60m right at grade 7 <strong>to</strong><br />
the second corner (CRACK OF ADVENTURE braves the bushes above).<br />
2. 50m 7 Round the corner, climb first diagonally right, then up left though sundry<br />
jungles passing a chimney <strong>to</strong> a grassy ledge.<br />
3. 60m 17 <strong>Climb</strong> up and right <strong>to</strong> a recess. Up 2m and step left on<strong>to</strong> a rib. Up <strong>to</strong> the<br />
roof about 40m above the stance. Go 3m right (careful?) across a hollow flake,<br />
up through the major break <strong>to</strong> a small stance just above the tree.<br />
4. 40m 18 Continue up the large recess then out left <strong>to</strong> a ledge. <strong>Climb</strong> right past a<br />
peg in the roof, across and up <strong>to</strong> the right leaning crack. Up easily <strong>to</strong> a huge<br />
block.<br />
5. 30m 18 <strong>Climb</strong> tired rock, up the chimney, out and up easy ground <strong>to</strong> a platform.<br />
6. 40m 17 Move up <strong>to</strong> the roof jam crack and out right <strong>to</strong> a ledge. Diagonally up<br />
right over arbitrary rock <strong>to</strong> a stance.<br />
Either scramble up and right over exposed rock (E) or traverse across the jungled<br />
gully on the right <strong>to</strong> join the HEY JUDE walk-off.<br />
Notes:<br />
1. Read BLOUBERG NORTH WALL FRONTAL ROUTE for an account of the FA.<br />
2. Some experienced parties that have climbed pitch 4 in recent years say that it is<br />
substantially harder than 18 (perhaps even 22ish), because all the good grips at<br />
the chimney exit have broken off. The second on this ascent had the dubious<br />
honour of removing the last remaining grip.<br />
FA:<br />
Pitches 1 <strong>to</strong> 4: Anthony Chinery, Tony Shaw, July 1965.<br />
Pitches 5 <strong>to</strong> 6: Anthony Chinery, Paul Fatti, July 1966.<br />
65<br />
MOONLIGHT DIRECT *** 22 [N]<br />
Start as for MOONLIGHT.<br />
1. 50m 18 <strong>Climb</strong> <strong>to</strong> the grass ledge as for MOONLIGHT.<br />
Walk 80m <strong>to</strong> the right-hand end of the grass ledge.<br />
2. 35m 16 <strong>Climb</strong> 6m up left-hand side of sloping face on corner then traverse right<br />
under overhang. Mantle up on loose block and up steep crack <strong>to</strong> square ledge.<br />
Step down <strong>to</strong> block wedged in crack. Handswing left around corner <strong>to</strong> ledge.<br />
<strong>Climb</strong> recess above for 5m and continue diagonally up leftwards <strong>to</strong> ledge below<br />
overhanging recess. Traverse 2m left along ledge and climb steep face on left<br />
for 10m <strong>to</strong> small, exposed stance below small tree.<br />
3. 42m 22 <strong>Climb</strong> groove on right for 2m. Descend diagonally right (delicate) for 4m<br />
<strong>to</strong> ledge. Traverse 2m right <strong>to</strong> base of slightly overhanging groove <strong>to</strong>pped by<br />
overhang. <strong>Climb</strong> this for 10m (A2, pegs and wires) (stance 3m below overhang).<br />
Continue up <strong>to</strong> overhang and traverse 2m left under it (A2) <strong>to</strong> base of short<br />
groove. The crux free move brings one <strong>to</strong> small ledge above overhang and<br />
below second one. Step left past this and continue up, using two pegs, until<br />
angle eases. <strong>Climb</strong> slanting groove and face for 11m <strong>to</strong> next overhang. Traverse<br />
right on 3 pegs beneath overhang <strong>to</strong> ledge (chocks<strong>to</strong>ne belay).<br />
4. 33m 18 Move up 2m <strong>to</strong> higher ledge and continue up steep crack for 5m. Move<br />
diagonally up right <strong>to</strong> behind, then on<strong>to</strong> huge flake. Continue 3m <strong>to</strong> ledge and<br />
two-man bivy (peg belay). <strong>Climb</strong> steep recess above stance <strong>to</strong> overhang then<br />
traverse left under it for 5m <strong>to</strong> small ledge with a bush 6m below next overhang.<br />
<strong>Climb</strong> steep rock <strong>to</strong> 2m below overhang then step diagonally up left <strong>to</strong> foothold<br />
on the left of overhang (crux). <strong>Climb</strong> steep recess above for 3m. Make awkward<br />
traverse back right in<strong>to</strong> stance in base of overhanging recess.<br />
5. 35m 19 <strong>Climb</strong> arête <strong>to</strong> right of recess, move <strong>to</strong> crack and up <strong>to</strong> ledge. From far<br />
right of ledge, move up crack (peg for aid on first move). From <strong>to</strong>p of crack move<br />
diagonally left along ramp. Continue <strong>to</strong> large cave with yellowwood tree.<br />
6. 33m 14 <strong>Climb</strong> chimney at back of cave 16m and traverse right <strong>to</strong> large ledge.<br />
Continue diagonally rightwards on large ledges <strong>to</strong> base of deep 3m lichen crack.<br />
<strong>Climb</strong> this (strenuous) <strong>to</strong> large ledge.<br />
7. 45m 12 <strong>Climb</strong> behind and on <strong>to</strong> flake on left. Continue up steep crack above<br />
then traverse right <strong>to</strong> steep face. <strong>Climb</strong> up on incut holds. Move diagonally left<br />
over steep grass in<strong>to</strong> recess which is climbed <strong>to</strong> <strong>big</strong> ledges above.<br />
8. 60m 10 Walk 15m right, then climb straight up for 45m, following easiest line.<br />
9. 45m 11 <strong>Climb</strong> straight up over vegetated rock, finally finishing up chimney.<br />
Notes:<br />
1. The rock is exceptionally good throughout. From pitch 2 <strong>to</strong> 9 the climb is very<br />
sustained and exposed.<br />
2. Pi<strong>to</strong>ns were not left in-situ on FA, but may not be essential.<br />
3. The above is based on the RD for the original aid route. The free version follows<br />
the same line.<br />
FA: Paul Fatti, Art McGarr, 1972.<br />
FFA: Disputed, but sometime after 1981 (reference MCSA Journal, 1988, p125)<br />
66
CRACK OF ADVENTURE ** 22 [N]<br />
The first pitch and subsequent scrambling are common with MOONLIGHT, but are<br />
rewritten here in the form they are currently climbed. Start as for MOONLIGHT and<br />
MOONLIGHT DIRECT. Scramble up in the corner for about 15m.<br />
1. 45m l8 <strong>Climb</strong> the recess/corner <strong>to</strong> the huge grass ledge.<br />
Walk <strong>to</strong> the right-hand end of the grass ledge and traverse right (grade 7) for as far<br />
again <strong>to</strong> stance on the left side of a buttress leaning against the face.<br />
2. 45m 15 <strong>Climb</strong> the recess on the left side of the buttress and continue up a few<br />
metres <strong>to</strong> beneath a bushy slot. Traverse about 10m left and up <strong>to</strong> a ledge.<br />
3. 30m 13 <strong>Climb</strong> up <strong>to</strong> the left-trending groove which leads <strong>to</strong> a large ledge. Walk<br />
left <strong>to</strong> belay at the base of the ominous right facing corner-crack.<br />
4. 35m 22 The Crack of Adventure: <strong>Climb</strong> the crack. Continue up leftwards <strong>to</strong> an<br />
excellent ledge.<br />
5. 30m 17 Move up the ramp and traverse left, around the skyline, and in<strong>to</strong> the<br />
base of a left trending recess. Follow this recess through a yellowwood tree <strong>to</strong><br />
stances.<br />
6. 45m 14 <strong>Climb</strong> up for about 10m, and climb <strong>to</strong> a ledge on the left. <strong>Climb</strong> a short<br />
face and grassy ramp <strong>to</strong> ledges on the left.<br />
7. 100m of upgradeable scrambling (a la MOONLIGHT DIRECT) leads <strong>to</strong> the <strong>to</strong>p.<br />
FA: Kevin Smith, George Mallory, 1986.<br />
67<br />
THE ROAD TO NOWHERE *** 22A3 [2B, N]<br />
The route starts as for MOONLIGHT, takes the natural line leading up <strong>to</strong> the<br />
CRACK OF ADVENTURE and then takes the incredible wall between that climb and<br />
MOONLIGHT (Original).<br />
Scramble 20m up the corner.<br />
1. 50m 18 <strong>Climb</strong> the corner <strong>to</strong> the large grass ledge. Stepping out right after 8m<br />
does not change the grade.<br />
Walk <strong>to</strong> the right hand end of the ledge. Then a 7 traverse 40m over sometimes<br />
broken rock take one <strong>to</strong> a small cave.<br />
2. 25m 20 From a point 4m right of the cave (about 5m left of the hard looking<br />
corner) climb diagonally up left and up <strong>to</strong> the large roof. Traverse right 8m <strong>to</strong> a<br />
break which leads steeply up <strong>to</strong> a small ledge.<br />
3. 25m 20 <strong>Climb</strong> the corner above until can escape right <strong>to</strong> the arête. <strong>Climb</strong> up and<br />
right <strong>to</strong> a cubby hole in another left facing corner.<br />
4. 20m 18 Pull up from the right on<strong>to</strong> the face above. Move up till a right tending<br />
crack leads <strong>to</strong> the large ledge system (about 12-15m right of the base of COA)<br />
One is now aiming at the corner starting some 30m up and 7m right. Continue<br />
up <strong>to</strong> the next ledge if desirable. (*)<br />
5. 55m 22 Midget proof Pitch: Move up 2-3m <strong>to</strong> a wide foot rail and traverse 7m<br />
right. <strong>Climb</strong> up and move back left <strong>to</strong> reach the base of a flake leading up right <strong>to</strong><br />
a detached ledge (*). Traverse right 8-10m until one is almost under the left<br />
hand edge of the large roof on MOONLIGHT. <strong>Climb</strong> up 3m and traverse left <strong>to</strong> a<br />
point 2m right of the belay. <strong>Climb</strong> up 3m <strong>to</strong> a welcome rail. Left 1m then stretch<br />
hard up <strong>to</strong> a sloping ledge. <strong>Climb</strong> delicately up right till one can reach up (far!) <strong>to</strong><br />
a rail. Up and left <strong>to</strong> gain the base of the corner. By judicious gear bouncing on<br />
the (easy) traverses the ropes only travel about 35m<br />
6. 42m 22 Yosemite Pitch: <strong>Climb</strong> the corner and crack straight above up <strong>to</strong> a<br />
ledge. Amazing!<br />
7. 35m 19A3 End Of the Road: <strong>Climb</strong> <strong>to</strong> the base of the crack above. A hook<br />
move from the <strong>to</strong>p of this gets you <strong>to</strong> the crack on the right. <strong>Climb</strong> and aid this. 3<br />
or 4 hook moves above this get you <strong>to</strong> a bolt, from which you can reach the next<br />
crack. Where this dies, hook up and left for 5m passing another bolt <strong>to</strong> gain<br />
another short crack. From the <strong>to</strong>p of this traverse 3m left on another point <strong>to</strong><br />
reach climbable ground. <strong>Climb</strong> up 15m <strong>to</strong> easy ground.<br />
Scramble right (and sometimes down) 100m <strong>to</strong> the HEY JUDE scramble off.<br />
Notes:<br />
1. The bolts are probably suspect by now.<br />
FA: Clive Curson, Stewart Middlemiss, 1989.<br />
68
MOON AREA<br />
When walking rightwards from MOONLIGHT the base of the wall forms a wide<br />
grassy ledge, visible from the <strong>to</strong>p of the ramp. The moon area encompasses the<br />
routes that start off this ledge. This is the friendliest, craggy section of the wall, with<br />
many classic moderate routes.<br />
FEATURES<br />
Grassy Ledge - About 3 pitches off the deck a <strong>big</strong> ledge cuts right across the<br />
MOON AREA. The pitches leading up <strong>to</strong> the ledge are generally<br />
not brilliant, but above the rock becomes excellent. Most of the<br />
good climbing in the MOON AREA can be accessed by climbing<br />
the start <strong>to</strong> either HEY JUDE or SOMETHING OF VALUE <strong>to</strong> the<br />
grassy ledge, and then walking <strong>to</strong> the start of the remaining<br />
pitches.<br />
Jungle Ledge - About 2 pitches above the eastern end of the Grassy Ledge is a<br />
<strong>big</strong>, lush bowl of a ledge with a nice shady tree. The ledge is<br />
encountered on routes that go up near BUSHPIG and it is an<br />
excellent bivi spot.<br />
Bivi Cave - About 3 pitches above the western end of the Grassy Ledge is a<br />
sheltered cave which makes a good 2-person bivi. The cave is<br />
encountered on routes that have upper pitches near LAST MOON.<br />
Rap Route - The rap route basically follows the climb BUSHPIG. To get <strong>to</strong> the<br />
start, from the HEY JUDE pools at the <strong>to</strong>p, find the gulley that<br />
HEY JUDE <strong>to</strong>ps out on. Scramble down this until able <strong>to</strong> abseil<br />
diagonally down left from a tree (looking up) <strong>to</strong> a <strong>big</strong> boulder<br />
perched on the edge of the true cliff. The first set of chains are just<br />
below this boulder. You’ll need 2 x 50m ropes for the rap route.<br />
Once on the Grassy Ledge, the route continues down just left of<br />
HEY JUDE, and almost directly on SCATTERLINGS. Two abseils<br />
put you on the ground from the Grassy Ledge. The last abseil is<br />
free hanging.<br />
Looking East from the Bivi Cave Pho<strong>to</strong> by Hec<strong>to</strong>r Pringle<br />
69<br />
ADVENTURE TIME ** 22 [N]<br />
Start location as for<br />
HALFMOON.<br />
1. 40m 21 <strong>Climb</strong> up the<br />
steep red face<br />
immediately left of<br />
HALFMOON’s<br />
corner/crack, and move<br />
out right above the 2nd<br />
roof on<strong>to</strong> a ledge. <strong>Climb</strong><br />
diagonally left <strong>to</strong> a<br />
stance (stance common<br />
with HALFMOON).<br />
2. 40m l8 <strong>Climb</strong> up <strong>to</strong> the<br />
roof, then traverse left<br />
until able <strong>to</strong> climb<br />
straight up steep rock <strong>to</strong><br />
a ledge on <strong>to</strong>p of a pillar<br />
(stance common with<br />
HALFMOON).<br />
3. 40m 14 Traverse 5m<br />
right then climb straight<br />
up <strong>to</strong> a large ledge.<br />
Belay in the cave 5m<br />
left of the corner.<br />
4. 40m 19 Pull through on<br />
the left-hand side of the<br />
cave, and climb up <strong>to</strong> a<br />
ledge. Move left and<br />
climb the thin corner,<br />
moving out left under<br />
roofs <strong>to</strong> a good ledge.<br />
Abbing <strong>to</strong> the Grassy Ledge Pho<strong>to</strong> by Alan Grant<br />
5. 40m 20 Move up 3m <strong>to</strong> a rail and traverse left <strong>to</strong> move up <strong>to</strong> a small ledge at the<br />
left extremity of the roofs above. Move right on the lip for 2m and up a small<br />
corner <strong>to</strong> a large horizontal break. Traverse 20m left <strong>to</strong> a ledge with a block.<br />
6. 50m 22 Up <strong>to</strong> a short corner, up this (5m) then traverse 5m left <strong>to</strong> a thin crack.<br />
Up the crack <strong>to</strong> a long rail. Move left 4m and up the face for 6m <strong>to</strong> a horizontal<br />
break. Up the steep face/crack system <strong>to</strong> a corner, up <strong>to</strong> the <strong>to</strong>p of this, moving<br />
out right and up <strong>to</strong> a tree.<br />
7. 45m 16 Past the tree following the obvious line <strong>to</strong> the <strong>to</strong>p of the pillar.<br />
8. 40m 14 Up the face on the right, then diagonally left <strong>to</strong> a chimney. Up the<br />
chimney <strong>to</strong> a ledge.<br />
9. 60m Roped scrambling <strong>to</strong> the <strong>to</strong>p.<br />
FA: Stewart Middlemiss, Kevin Smith, Clive Curson, 1990.<br />
70
HALFMOON ** 18<br />
Start about 250m right of MOONLIGHT a short distance past a large pile of<br />
boulders. A series of corners and ledges slant diagonally up rightward for about<br />
30m. A prominent series of overhangs leads diagonally up leftwards about 33m up.<br />
1. 30m 12 Start up short steep recess then diagonally up right <strong>to</strong> ledge. Step right<br />
and climb up just right of overhanging recess <strong>to</strong> next ledge. <strong>Climb</strong> up, via<br />
another ledge then a series of vertical cracks <strong>to</strong> small stance.<br />
2. 30m 14 Traverse left 8m via prominent detached block (appears safe) <strong>to</strong> recess<br />
right of pillar. <strong>Climb</strong> 3m up thin recess then traverse delicately left around pillar<br />
in<strong>to</strong> another recess. Move up left side of recess (loose blocks at start) <strong>to</strong> just<br />
below overhang. Traverse 3m left then up, passing overhang on left <strong>to</strong> ledge.<br />
3. 23m 16 <strong>Climb</strong> up 3m and traverse left 7m in<strong>to</strong> base of open recess. <strong>Climb</strong> up<br />
slightly right, <strong>to</strong> short overhanging section. <strong>Climb</strong> this <strong>to</strong> small ledge on right.<br />
4. 30m 14 Traverse left, moving up in a few places and finish traverse along<br />
narrow, grass covered ledge. From left of ledge, climb up steep face on slightly<br />
unsound rock, move slightly left, in<strong>to</strong> easier angled recess slanting up rightwards<br />
and follow this <strong>to</strong> large ledge.<br />
5. 43m 14 Step up and traverse 8m right <strong>to</strong> below bulging face. Surmount bulge at<br />
easiest point then traverse <strong>to</strong>wards small tree in vegetated recess. Avoiding tree<br />
on the left, traverse across recess and climb right hand face which steepens<br />
near the <strong>to</strong>p, <strong>to</strong> stance in easier angled recess above.<br />
6. 17m 7 <strong>Climb</strong> diagonally right <strong>to</strong> large grassy ledge. Walk about 85m rightwards<br />
<strong>to</strong> where ledge ends at overhanging vegetated recess.<br />
7. 25m l4 Traverse right across recess and climb up 3m <strong>to</strong> grassy ledge. Traverse<br />
back left in<strong>to</strong> vegetated recess above overhang and climb it <strong>to</strong> stance on the left.<br />
8. 25m 16 <strong>Climb</strong> diagonally up left for 12m then straight up <strong>to</strong> ledge below steep<br />
face. From left end of ledge climb up thin face <strong>to</strong> just below a turf ledge. Step<br />
right and continue diagonally up right <strong>to</strong> ledge.<br />
9. 25m 16 <strong>Climb</strong> face above, partly via layback crack, <strong>to</strong> base of overhanging<br />
corner and jamming crack (hard). Ascend this and continue <strong>to</strong> large stance.<br />
10. 14m 7 Traverse right <strong>to</strong> large tree in lush recess (Jungle Ledge - superb bivvy).<br />
About 35m above ledge are two chimneys. The route goes up right hand one.<br />
11. 25m 14 <strong>Climb</strong> recess behind tree starting left and traversing <strong>to</strong> the right side 4m<br />
up. Continue up <strong>to</strong> overhang at <strong>to</strong>p of recess and move out delicately around<br />
corner in<strong>to</strong> groove in right hand face. <strong>Climb</strong> up 5m <strong>to</strong> ledge on right.<br />
12. 30m 16 <strong>Climb</strong> face diagonally above for 7m. Trend left <strong>to</strong>wards ledge below<br />
prominent right hand overhanging chimney. <strong>Climb</strong> <strong>to</strong> chimney with difficulty and<br />
climb it more easily <strong>to</strong> ledge below red, recessed face (bivy site).<br />
13. 25m 17 About 8m up face is small tree with a crack <strong>to</strong> its left. <strong>Climb</strong> face,<br />
starting on the right then traversing left in<strong>to</strong> crack just below tree. Aid on a nut <strong>to</strong><br />
pass tree on left and continue as far as possible up crack system <strong>to</strong> awkward<br />
resting place in small open book. Aid on pi<strong>to</strong>n <strong>to</strong> the left <strong>to</strong> cross an undercut<br />
face and gain base of prominent chimney. <strong>Climb</strong> up 8m <strong>to</strong> ledge.<br />
14. 25m l8 <strong>Climb</strong> the chimney and continuation cracks <strong>to</strong> ledge.<br />
15. 25m 16 <strong>Climb</strong> continuation chimney above.<br />
16. 25m 10 Continue up until able <strong>to</strong> scramble.<br />
17. 66m 5 With bits of 10, scramble via short unpleasant chimney <strong>to</strong> summit.<br />
Notes:<br />
1. One of the “<strong>big</strong> push routes” see THE BIG PUSH in the STORIES section.<br />
FA: Paul Fatti, Art McGarr, 1976.<br />
71<br />
REBEL YELL ** 21 [N]<br />
<strong>Climb</strong>s the pillar <strong>to</strong> the left of the 50m long roof situated about 70m up, between<br />
HALFMOON and HEY JUDE. Start below the pillar at a V in the path between two<br />
boulders. Above is an obvious fist crack on the left side of a large flake.<br />
1. 20m 21 <strong>Climb</strong> the fist crack, move right, and climb the final few metres from the<br />
<strong>to</strong>p of the flake <strong>to</strong> gain a narrow, continuous ledge.<br />
2. 30m 19 <strong>Climb</strong> up <strong>to</strong> the base of an obvious V-groove, and climb this <strong>to</strong> exit right.<br />
Traverse right, move up in<strong>to</strong> the base of a stepped corner and climb this <strong>to</strong> a<br />
ledge on the arête on the left.<br />
3. 25m 18 <strong>Climb</strong> up about 15 metres <strong>to</strong> the level of a prominent traverse line which<br />
is followed left <strong>to</strong> a stance on the arête (a loose pitch).<br />
4. 50m 20 <strong>Climb</strong> more or less straight up <strong>to</strong> large grass ledge. The next pitch starts<br />
about 10 metres <strong>to</strong> the right, from a tree about 6 metres left of a damp corner.<br />
5. 50m 19 Move up steeply and rail right <strong>to</strong> pull on<strong>to</strong> a ledge. Follow a left trending<br />
dihedral <strong>to</strong> a ledge, then climb straight up, keeping left, <strong>to</strong> a high stance.<br />
6. 40m 16 <strong>Climb</strong> up rightwards <strong>to</strong> a grassy ledge at the left base of a huge<br />
pinnacle. <strong>Climb</strong> the recess on the left side of the pinnacle <strong>to</strong> a ledge on <strong>to</strong>p.<br />
7. 30m 21 Step on<strong>to</strong> the face at the base of obvious left trending crack system.<br />
Tricky moves <strong>to</strong> start lead <strong>to</strong> recess which is climbed <strong>to</strong> semi-stance on the left.<br />
8. 20m 21 <strong>Climb</strong> the left-hand left-leaning crack, moving left at the <strong>to</strong>p <strong>to</strong> gain a<br />
scoop. Continue up leftwards until able <strong>to</strong> traverse left <strong>to</strong> a stance.<br />
9. 45m 20 Starting on the left, climb up <strong>to</strong> a scoop. Continue up the break, through<br />
a tree, and climb the right-hand crack through two roofs <strong>to</strong> reach a good ledge<br />
(MOONLIGHT stance). Jam through the apex of the roof <strong>to</strong> the highest ledge.<br />
10. 40m 19 <strong>Climb</strong> the right leaning crack, traverse left <strong>to</strong> the base of a right facing<br />
dihedral, and climb this <strong>to</strong> large ledges.<br />
11. 75m 15 Follow the right-trending ramp on the wall above. Continue <strong>to</strong> the <strong>to</strong>p.<br />
FA: Stewart Middlemiss, Kevin Smith, 1988.<br />
Another day in Africa - sunrise from the wall Pho<strong>to</strong> by Hec<strong>to</strong>r Pringle<br />
72
SOLAR ECLIPSE *** 22A2+ [2P, N]<br />
Between HALFMOON and HEY JUDE, there is a 50m long roof at 70m height. In<br />
the middle of the roof are two large flake lines. Below the right-hand one, on a ledge<br />
about 10m off the normal ground level, is a pillar with a chimney-sized gap behind it.<br />
Start at the base of the right hand side of the pillar.<br />
1. 45m 20. <strong>Climb</strong> right hand side of pillar. Continue up flake line until first roof is<br />
reached. Move left <strong>to</strong> a break, and continue up <strong>to</strong> narrow ledge, directly above<br />
pillar, and about 8m below main roof.<br />
2. 30m A2. Great Roof Pitch. Thrash through hanging gardens up and left from<br />
stance (the swath of clear-cut from FA is likely <strong>to</strong> have re-grown). Move left at<br />
roof, then out along flake. At pi<strong>to</strong>n, move left for two moves on<strong>to</strong> drilled bat hook<br />
hole Move up through overlap <strong>to</strong> reach rail, then right on<strong>to</strong> ledge with poor peg<br />
belay.<br />
3. 40m 16. Move right in<strong>to</strong> corner, then up and left <strong>to</strong> a grassy ledge, belaying off a<br />
tree. Awesome bivy <strong>to</strong> right of tree on cleared ledge below some low roofs<br />
(blackened corner). Next pitch starts from left end of these roofs, as for<br />
PROJECT THREE. The Grassy Ledge can be reached by walking right.<br />
4. 30m 21. Pull through initial overhang at chest height, move right, then follow<br />
corner <strong>to</strong> next roof. Move left, then up <strong>to</strong> stance on small ledge 10m left of peg<br />
on HEY JUDE.<br />
5. 35m 19 Clamber up blocks forming right hand side of stance. Follow intermittent<br />
crack above, stepping left when holds run out, then right again 2m higher.<br />
Continue up <strong>to</strong> stance on right end of Jungle Ledge (essentially the same pitch<br />
as PROJECT THREE).<br />
6. 50m 22A2+. Move up and right from stance, with very technical climbing leading<br />
<strong>to</strong> left-facing corner 15m right of HALFMOON’s chimney. When free climbing<br />
becomes untenable, start aiding. Beyond the roof, technically easy but exciting<br />
aid leads up and left of overhang, then up again on slabs until a stance can be<br />
made just below the right-leaning cracks.<br />
7. 40m 22 (19A1) Step left from the stance <strong>to</strong> gain the long right-leaning crack.<br />
Follow this until the crack splits. The right-hand line becomes a frightening offwidth<br />
through a huge roof. Follow the left-hand line around the roof with two<br />
points of aid, then right in<strong>to</strong> a gully (as for SCATTERLINGS).<br />
8. 15m 15. Continue up through trees until the Disco Ledge Bivi is reached (a flat<strong>to</strong>pped<br />
pillar about the area of a small car, with a small cave/fissure behind).<br />
9. 5m 15. Leave the Disco Ledge via the crack that the gully has narrowed <strong>to</strong>.<br />
10. 100m. Contribute <strong>to</strong> deforestation on your way <strong>to</strong> the <strong>to</strong>p.<br />
Notes:<br />
1. Special equipment. Two hooks suitable for small edges, two standard hooks,<br />
one hook for 5mm wide, 8mm deep holes. Aiders (etriers) are useful. A handbolting<br />
kit is recommended <strong>to</strong> beef-up the second stance with two bolts. A<br />
double or triple rack of small wires is useful for pitch 6.<br />
2. Free notes. Pitch 2 can probably be mostly freed at grades that someone you<br />
know can climb. Pitch 6 would be bold, but most moves should be doable free.<br />
3. Pitch 7 sounds suspiciously like the crux of SCATTERLINGS (22)?<br />
FA: A. Hufner, D Morgan, 14-16/02/1999.<br />
73<br />
SC7,21<br />
20m<br />
SC6,18<br />
20m<br />
JUNGLE LEDGE<br />
SC4,13<br />
40m<br />
Pillar and platform<br />
GRASSY LEDGE<br />
SC1,18<br />
40m<br />
SC8,18<br />
20m<br />
SC5,21<br />
45m<br />
SC9,22<br />
20m<br />
SOV12,16<br />
55m<br />
TBP11,15<br />
SC10,17<br />
45m<br />
45m<br />
TBP10,15<br />
35m<br />
SOV11,21<br />
40m<br />
SOV10,17<br />
20m<br />
SOV8,18<br />
20m<br />
SOV5,21<br />
20m<br />
SC3,18<br />
55m<br />
Large boulder<br />
SC2,21<br />
35m<br />
SOV6,17<br />
40m<br />
SOV9,20<br />
30m<br />
SOV7,19<br />
25m<br />
SOV4,19<br />
20m<br />
SOV2,17<br />
40m<br />
SOV1,18<br />
40m<br />
TBP9,15<br />
35m<br />
TBP8,21<br />
35m<br />
SOV3,18<br />
40m<br />
TBP7,20 TBP6,21<br />
30m 30m<br />
TBP5,17<br />
30m<br />
TBP4,20<br />
50m<br />
BIVY CAVE<br />
Escape traverse on<strong>to</strong><br />
LAST MOON. 17, 45m<br />
TBP3,16<br />
35m<br />
TBP2,20<br />
40m<br />
TBP1,20<br />
45m<br />
Direct variation from<br />
TEQUILA SUNRISE<br />
21, 45m<br />
SCATTERLINGS (22) SOMETHING TEDDY BEARS’<br />
OF VALUE (21) PICNIC (21)<br />
Topo – Moderate routes in the Moon Area By Hec<strong>to</strong>r Pringle<br />
74<br />
Bolts
SCATTERLINGS **** 22 [N]<br />
(See <strong>to</strong>po of moderate routes)<br />
A 50m long roof is situated about 70m up, between HALF MOON and HEY JUDE.<br />
SCATTERLNGS climbs up about 10m <strong>to</strong> the right of the right hand end of the roof.<br />
Directly below this point, scramble up 2m <strong>to</strong> the base of a short square recess. This<br />
point is about 15m left of HEY JUDE’s start.<br />
1. 40m 18 Straight up a blocky rock, past wide ledge and small tree <strong>to</strong> base of<br />
crack system running up scooped face. <strong>Climb</strong> crack and corner then traverse 4m<br />
left <strong>to</strong> ledge on arête. 10m up <strong>to</strong> the right is obvious small nose-like roof.<br />
2. 35m 21 <strong>Climb</strong> right and up <strong>to</strong> a rail which extends rightwards 4m below nose.<br />
Rail right, about 3m past the nose, then climb up until level with roof. Traverse<br />
left on<strong>to</strong> the nose then move up <strong>to</strong> a rail which is followed left until able <strong>to</strong> climb<br />
up leftwards <strong>to</strong> a small ledge. <strong>Climb</strong> up a few metres further <strong>to</strong> a large ledge on<br />
the right. One is now directly above the start of the climb.<br />
3. 55m 18 35m up <strong>to</strong> the left is a small tree. <strong>Climb</strong> diagonally leftwards up railed<br />
face. At about 20m move right past end of long narrow roof. From small tree<br />
follow left-leading corner <strong>to</strong> ledge on <strong>to</strong>p of pillar. Continue up <strong>to</strong> left end of<br />
Grassy Ledge. The chains of the Rap Route are just below the ledge.<br />
4. 40m 13 <strong>Climb</strong> up obvious gully/corner on left side of pillar (HEY JUDE climbs<br />
right side of pillar). Before the <strong>to</strong>p of gully traverse left a few metres until able <strong>to</strong><br />
climb up and left <strong>to</strong> ledge directly above previous stance. (HEY JUDE stances<br />
further left, where there are chains hidden by grassy tuft).<br />
5. 45m 21 Move past a small cammed block <strong>to</strong> righthand end of ledge. <strong>Climb</strong> up<br />
rightward <strong>to</strong> gain vague crack system leading up wall. <strong>Climb</strong> crack <strong>to</strong> its end,<br />
then move left <strong>to</strong> base of narrow left facing dihedral. <strong>Climb</strong> this <strong>to</strong> small roof then<br />
move slightly left <strong>to</strong> gain a crack (about 2m right of HEY JUDE). <strong>Climb</strong> up <strong>to</strong> rail<br />
and traverse 3m right. <strong>Climb</strong> straight up past a prong <strong>to</strong> ledge, move 2m left,<br />
then continue up <strong>to</strong> long narrow ledge.<br />
Walk left for half a rope length, <strong>to</strong> a point 10m right of the tallest tree (Jungle<br />
Ledge). HALFMOON heads up <strong>big</strong> recess on the left.<br />
6. 20m 18 turn the small roof a few metres up, then zig-zag up face above <strong>to</strong> reach<br />
ledge and block. Above and slightly left are two steep.<br />
7. 20m 21 <strong>Climb</strong> up and left <strong>to</strong> base of right-hand chimney (HALF MOON).<br />
Undercling left <strong>to</strong> gain left hand chimney/recess which is followed <strong>to</strong> ledge.<br />
8. 20 m 18 <strong>Climb</strong> diagonally right <strong>to</strong> gain right leaning crack. Gain the <strong>to</strong>p of large<br />
block/flake left of crack. Continue up crack <strong>to</strong> cubbyhole (uncomfortable).<br />
9. 20m 22 <strong>Climb</strong> the continuation crack (amazing!) until an easier angled slab on<br />
the right is reached. Stance at apex of slab.<br />
10. 45m 17 Move round right in<strong>to</strong> recess. 10m up this climb out diagonally<br />
rightwards and continue up <strong>to</strong> easy ground and ledges.<br />
Scramble about 75m <strong>to</strong> the <strong>to</strong>p.<br />
Notes:<br />
1. It makes sense <strong>to</strong> link pitches 8 and 9.<br />
2. Gear is bomber on all the hard pitches.<br />
FA: Kevin Smith, George Mallory, 1987.<br />
75<br />
PROJECT THREE<br />
Starts between SCATTERLINGS and<br />
EIGHT MILES HIGH, about 15 metres left<br />
of HEY JUDE, straight up <strong>to</strong> the grass<br />
ledge between the two climbs. Start about<br />
5 metres left of EIGHT MILES HIGH.<br />
1. 40m 17 Up 7m then 2m right <strong>to</strong> crack<br />
which is about 6m left of EMH. More or<br />
less straight up <strong>to</strong> a ledge.<br />
2. 40m 19 <strong>Climb</strong> up behind stance<br />
passing small overhang on the right at<br />
7m. Continue up and slightly left <strong>to</strong><br />
pass another roof on the left. Rail haul<br />
up <strong>to</strong> ledge under small roof above<br />
previous stance (5m left of EMH).<br />
3. 35m 22 7m up is a bulge with a small<br />
triangle in it. When established above<br />
this, move left 2m then straight up the<br />
crack <strong>to</strong> the Grassy Ledge.<br />
Walk up and 25m left <strong>to</strong> cleaned ledge,<br />
below some overhanging rock (3m right of<br />
tree).<br />
4. 30m 20 <strong>Climb</strong> corner above blackened<br />
overhang, moving right at 15m. Move<br />
up, then trend back leftwards <strong>to</strong> ledge<br />
slightly above and 5m left of HEY<br />
JUDE’s peg stance (rap chains hidden<br />
by grass tuft).<br />
5. 35m 20 <strong>Climb</strong> the crack above the left<br />
hand edge of the stance, stepping<br />
right at about 12m, then moving up<br />
and back left. Stance at the right edge<br />
of the HALFMOON Jungle Ledge.<br />
76<br />
*** 23 (23A2) [N]<br />
Karin Magogg cranking the roof in the<br />
Scatterlings chimney (pitch 7, 21)<br />
Pho<strong>to</strong> by Steve Crowe<br />
6. 45m 18 <strong>Climb</strong> the short corners rightish <strong>to</strong> reach the slabby face. Continue up<br />
leftwards <strong>to</strong> the base of a crack through a steep orange section. Aid this or (alt.)<br />
climb the narrow HALF MOON chimney (5m left) <strong>to</strong> a ledge.<br />
7. 45m 23 Continue up and climb the left facing corner above the niche on<br />
HALFMOON <strong>to</strong> a small ledge where the crack splits under a large roof. The bulge is<br />
harder for climbers shorter than 1.8m.<br />
8. 35m 18 <strong>Climb</strong> the right hand crack up <strong>to</strong> a <strong>big</strong> rail and move out right under the roof<br />
<strong>to</strong> bucket seat on the lip. Continue up the crack and ledges above on the right <strong>to</strong> the<br />
HEY JUDE scramble.<br />
FA: Clive Curson, Stewart Middlemiss, 1989.
JUNGLE LEDGE<br />
Pillar and platform<br />
GRASSY LEDGE<br />
EMH1,<br />
21,45m<br />
EIGHT MILES<br />
HIGH (24)<br />
EMH9<br />
24,35m<br />
EMH8<br />
19,40m<br />
EMH7<br />
21,30m<br />
EMH6<br />
21,15m<br />
EMH5<br />
21,15m<br />
EMH4<br />
22,20m<br />
EMH&TS3<br />
15,35m<br />
EMH&TS2<br />
17 35m<br />
Bolts<br />
TS1,<br />
16,45m<br />
EMH10<br />
&TS8<br />
20,40m<br />
TS7<br />
20,35m<br />
TS6<br />
25,25m<br />
TS5<br />
21,45m<br />
EMH11<br />
&TS9<br />
16,45m<br />
TS4<br />
18,20m<br />
WF3,<br />
18,30m<br />
WF5,<br />
18,30m<br />
WF4,<br />
14,40m<br />
WF2,<br />
27,30m<br />
WF1,<br />
21,17m<br />
WF8,<br />
21,40m<br />
WF7,<br />
17,45m<br />
WF11,<br />
13,35m<br />
WF6,<br />
20,15m<br />
Large boulder<br />
TEQUILA WOW FUCK (27)<br />
SUNRISE (25)<br />
BIVY CAVE<br />
WF12,<br />
16,20m<br />
WF10,<br />
17,45m<br />
WF9,<br />
20,45m<br />
Topo – Hard routes in the Moon Area By Hec<strong>to</strong>r Pringle<br />
77<br />
EIGHT MILES HIGH ***** 24 (21A0) [1P, N]<br />
(See <strong>to</strong>po of hard routes)<br />
Takes a fairly direct line up the wall, the first three pitches between<br />
SCATTERLINGS and HEY JUDE, and the remaining between HEY JUDE and<br />
SOMETHING OF VALUE.<br />
Start about 3m left of HEY JUDE at the base of a rounded slab.<br />
1. 45m 21 <strong>Climb</strong> the thin crack system running up the centre of the slab <strong>to</strong> a ledge.<br />
<strong>Climb</strong> the hand crack on the right side of the pillar above, and continue up and<br />
right <strong>to</strong> a narrow ledge (shared with HEY JUDE).<br />
2. 35m l7 Pull through the narrowest point in the roof about 3m right of the stance.<br />
<strong>Climb</strong> trending slightly left <strong>to</strong> small ledge at the base of a shallow water scoop.<br />
3. 35m 15 <strong>Climb</strong> up scoop, trending right at <strong>to</strong>p <strong>to</strong> exit on<strong>to</strong> Grassy Ledge. Directly<br />
above is an immaculate corner, about 10m right of HEY JUDE.<br />
4. 20m 22 Gain the base of the dihedral (hard with marginal gear), climb it and pull<br />
though the overhang <strong>to</strong> beneath the long roof (blade peg). Rail right <strong>to</strong> a long<br />
ledge (SOMETHING OF VALUE stances further <strong>to</strong> the right).<br />
5. 15m 21 Circle-Arrow Pitch: <strong>Climb</strong> left and up from the left end of the ledge <strong>to</strong><br />
gain the rail beneath the roof. Rail left <strong>to</strong> a ledge.<br />
6. 15m 21 Hot Tin Roof pitch: <strong>Climb</strong> the crack on the left side of the ledge <strong>to</strong><br />
beneath a roof. Turn this on the right and climb a short recess <strong>to</strong> exit left <strong>to</strong> a<br />
narrow stance.<br />
Note: Pitches 5 & 6 can be combined<br />
7. 30m 21 <strong>Climb</strong> more or less straight up the face above <strong>to</strong> gain the ledge beneath<br />
the long roof. Pull through the roof at the narrowest point and move left. <strong>Climb</strong> a<br />
short steep face <strong>to</strong> a narrow stance.<br />
8. 40m 19 <strong>Climb</strong> up leftwards for a few metres until able <strong>to</strong> traverse easily right<br />
some way <strong>to</strong> the base of a short pillar. Traverse right from <strong>to</strong>p of pillar, <strong>to</strong> the<br />
base of prominent left-facing corner. Up this <strong>to</strong> ledge, then up corner above <strong>to</strong><br />
reach the boggling ledge on <strong>to</strong>p of the main pillar (Stance of the Eagles).<br />
9. 35m 24 (21A0) Pendulum pitch: <strong>Climb</strong> a few metres up the narrow dihedral<br />
until able <strong>to</strong> pendulum <strong>to</strong> the base of a corner further right, or simply traverse<br />
right across the face. <strong>Climb</strong> the corner system until able <strong>to</strong> exit left <strong>to</strong> a long<br />
ledge. Traverse left (past the SOMETHING OF VALUE off-width) <strong>to</strong> belay above<br />
the previous stance.<br />
10. 40m 20 Emmlets Direct Pitch: <strong>Climb</strong> up the black scoop (no pro) <strong>to</strong> reach holds<br />
above the overlap. <strong>Climb</strong> straight up the obvious crack <strong>to</strong> the <strong>big</strong>gest ledge.<br />
Above and slightly left is a chimney whose base is blocked by trees.<br />
(Alternatively: From the stance traverse left, climb up and traverse back right<br />
above the overlap <strong>to</strong> gain the obvious crack - 19).<br />
11. 45m 16 <strong>Climb</strong> the juggy face immediately right of the chimney. Move left at the<br />
<strong>to</strong>p then diagonally left up the slab in<strong>to</strong> the corner beneath a roof-crack. <strong>Climb</strong><br />
the crack, keeping right at first then trending left <strong>to</strong> gain the final ledge.<br />
Scramble <strong>to</strong> the <strong>to</strong>p.<br />
1. Read EIGHT MILES HIGH in the STORIES section for an account of the FA.<br />
2. Be careful on pitch 4. It bites! To find out why read BROKEN ON BLOUBERG in<br />
the STORIES section.<br />
FA: Kevin Smith, Stewart Middlemiss, George Mallory, 1988.<br />
78
HEY JUDE **** 20 (17A1) [2P, N]<br />
(See <strong>to</strong>po of easy routes)<br />
LAST MOON is a gnarly fist sized crack in a left facing 40m corner. Start from the<br />
highest ledge 10m left of LAST MOON below the right facing corner flake.<br />
1. 45m 16 <strong>Climb</strong> <strong>to</strong> bot<strong>to</strong>m of flared chimney crack. Step across right <strong>to</strong> a little foot<br />
ledge and pull up. Traverse 1.5m right then ascend face, moving diagonally left<br />
as high as possible. Traverse about 8m left <strong>to</strong> below hanging block. Ascend<br />
crack system 2m left of hanging block. <strong>Climb</strong> face in steps diagonally right <strong>to</strong><br />
good ledge.<br />
2. 35m 17 <strong>Climb</strong> up <strong>to</strong> narrow roof. Traverse 8m <strong>to</strong> the right. Continue hand<br />
traversing 6m <strong>to</strong> end of traverse line. Pull overhang and climb face <strong>to</strong> good<br />
ledge.<br />
3. 45m 16 <strong>Climb</strong> slightly diagonally right for about 15m. Traverse left for about 5m<br />
via pull-up on block. Follow recess line diagonally left <strong>to</strong> Grassy Ledge.<br />
Walk <strong>to</strong> pillar on left of ledge and scramble up <strong>to</strong> base of crack forming right side of<br />
pillar.<br />
4. 30m 15 <strong>Climb</strong> crack <strong>to</strong> <strong>to</strong>p of pillar. From <strong>to</strong>p of pillar, climb up another 3m <strong>to</strong> a<br />
good handrail. Hand traverse left for about 15m <strong>to</strong> a good ledge. The rap chains<br />
are hidden by a grass tuft near the stance.<br />
5. 35m 20 (17A1) <strong>Climb</strong> up via small ledge <strong>to</strong> bot<strong>to</strong>m of recess (the only one<br />
cutting through this face). Use aid (one knife) <strong>to</strong> get <strong>to</strong> crack. Follow crack for 5m<br />
using another aid point <strong>to</strong> reach small ledge above. <strong>Climb</strong> up for 6m and then<br />
diagonally left <strong>to</strong> block (mostly aid climbing with a few free moves). <strong>Climb</strong><br />
diagonally out right <strong>to</strong> sloping block. Continue straight up <strong>to</strong> narrow ledge<br />
(originally 3 pitches). This ledge leads leftwards <strong>to</strong> the Jungle Ledge bivy site.<br />
6. 35m 14 From end of pitch 5 continue up shallow groove for about 10m and then<br />
traverse diagonally right <strong>to</strong> <strong>big</strong> block.<br />
7. 15m 20 (17A1) Twin Cracks Pitch: Ascend crack left of block with some aid<br />
moves, <strong>to</strong> the left side of the pillar. Continue <strong>to</strong> <strong>to</strong>p of pillar.<br />
8. 35m 19 (17A1) <strong>Climb</strong> off-width crack above the ledge (use one sling for aid just<br />
below the ledge). Follow chimney-type recess <strong>to</strong> ledge and stance on right.<br />
9. 20m 12 <strong>Climb</strong> diagonally right in<strong>to</strong> gully above. Scramble 10m through trees <strong>to</strong><br />
mouth of deep cave.<br />
10. 40m 14 <strong>Climb</strong> slabs on left <strong>to</strong> broken ground.<br />
11. 30m 11 Fight 10m <strong>to</strong> chossy gully and climb same <strong>to</strong> <strong>to</strong>p.<br />
Notes:<br />
1. A #4 Camalot and #4 Friend or equivalent are useful on pitch 8.<br />
2. One of the “<strong>big</strong> push routes” see THE BIG PUSH in the STORIES section.<br />
FA: J. Linke, H Zangerl, R Druschke, E Druschke, 1981.<br />
79<br />
BP8,13<br />
30m<br />
BP7,18<br />
45m<br />
BP6,18<br />
55m<br />
JUNGLE LEDGE<br />
Pillar and platform<br />
HJ&BP4<br />
15 30m<br />
HJ11,11<br />
30m<br />
GRASSY LEDGE<br />
HJ,MS&BP1<br />
16,45m<br />
HJ10,14<br />
40m<br />
HJ&BP5<br />
20 35m<br />
HJ9,12<br />
20m<br />
HJ8,19<br />
35m<br />
HJ7,20<br />
15m<br />
HJ6,14<br />
35m<br />
Large boulder<br />
HJ2,17<br />
35m<br />
HJ,MS&BP3<br />
16,45m<br />
MS&BP2<br />
17,38m<br />
LM2,16<br />
36m<br />
LM7,11<br />
12m<br />
LM1,19<br />
40m<br />
80<br />
LM9, MS6<br />
15,25m<br />
LM8,17<br />
35m<br />
LM3,12<br />
40m<br />
LM12,11<br />
20m<br />
MR9,18<br />
45m<br />
MR11,16<br />
20m<br />
LM6,12<br />
40m<br />
MR4,10<br />
20m<br />
LM13,12<br />
20m<br />
MS10,15,20m<br />
MR10,MS9,16,20m<br />
MS8,18,38m<br />
L11, 15<br />
38m<br />
LM10,MS7<br />
17,50m<br />
MR8,19<br />
45m<br />
BIVY CAVE<br />
MR6,16,45m<br />
MS5,15,50m<br />
MR3,18<br />
40m<br />
MR2,18<br />
40m<br />
MR1,16<br />
25m<br />
MR5,MS4<br />
18,45m<br />
MR7,16<br />
45m<br />
LM5,16<br />
40m<br />
LM4,10<br />
10m<br />
HEY JUDE (20)<br />
BUSH PIG (20)<br />
MOONSHADOW (18)<br />
LAST<br />
MOON (19)<br />
MOONRAKER (19)<br />
Topo – Easy routes in the Moon Area By Hec<strong>to</strong>r Pringle
MOONSHADOW **** 18 [N]<br />
(See <strong>to</strong>po of easy routes)<br />
LAST MOON is a gnarly fist sized crack in a left facing 40m corner. Start from the<br />
highest ledge 10m left of LAST MOON below the right facing corner flake (as for<br />
HEY JUDE).<br />
1. 45m 16 Start up the flake and move right at 5m. <strong>Climb</strong> the slabs trending left <strong>to</strong> a<br />
flake/crack. <strong>Climb</strong> this then up and right on good holds <strong>to</strong> a ledge.<br />
2. 38m 17 <strong>Climb</strong> up from the right hand edge of the ledge for 8m (through small<br />
roof). Straight up another 30m <strong>to</strong> stance directly above the previous stance on a<br />
good ledge.<br />
3. 38m 15 <strong>Climb</strong> up on good but improbable looking rock. Trend right and then<br />
stance at the back of the Grassy Ledge. (blocks).<br />
Walk <strong>to</strong> the right hand end of the Grassy Ledge. Down climb <strong>to</strong> a stance on the far<br />
right of the ledge, at the base of chossy-looking, east-facing corner.<br />
4. 35m 18 (17A0) <strong>Climb</strong> corner, stepping right at the <strong>to</strong>p. Pull through roof on the<br />
left. Move right a few metres <strong>to</strong> a break. Follow this for 25m <strong>to</strong> a stance near<br />
some blocks (17A0 if you rest on a nut below the roof).<br />
5. 50m 15 2m right is a left facing corner capped by a half metre roof. <strong>Climb</strong> this<br />
and continue up the next right facing corner <strong>to</strong> a ledge. Walk left until the ledge<br />
narrows, then blast straight up the wall above finishing up a left leaning corner<br />
crack <strong>to</strong> a large ledge. <strong>Climb</strong> up the wall <strong>to</strong> a small pillar. Move delicately right<br />
and then head for the yellowwood tree at the <strong>big</strong> platform up and right.<br />
6. 15m 15 Head for the next yellowwood tree up and left. Follow the recess above<br />
<strong>to</strong> large ledges. The Bivi Cave lies <strong>to</strong> the right.<br />
7. 45m 17 Move through the yellowwood and step off it on <strong>to</strong> the thin face. <strong>Climb</strong><br />
the face diagonally left <strong>to</strong> the arête, follow this <strong>to</strong> the corner. Up this <strong>to</strong> step left<br />
at the <strong>big</strong> roof. Wind through on monster jugs <strong>to</strong> huge ledge.<br />
8. 38m 18 From the upper ledge attack the jug forest above. Move right on <strong>to</strong><br />
thinner stuff a little higher and climb <strong>to</strong> ledge.<br />
9. 25m 16 Start from right hand side of large boulder. <strong>Climb</strong> the break, moving out<br />
left and exit in<strong>to</strong> jungle.<br />
10. 25m 15 LAST MOON takes the obvious major chimney behind the jungle. <strong>Climb</strong><br />
the jug infested face just right of the chimney.<br />
Notes:<br />
1. This RD is a stand alone version of the easiest pleasant route up the north wall.<br />
It climbs parts of HEY JUDE (pitch 1), EIGHT MILES HIGH (pitches 2 and 3),<br />
MOONRAKER (pitch 4 and some of pitch 5), LAST MOON (pitches 6 and 7) and<br />
ROAD WARRIOR (pitches 8 and 9).<br />
FA: Mike Cartwright. Grant Cockburn, 1990.<br />
81<br />
TEQUILA SUNRISE 25 **** [2P, N]<br />
(See <strong>to</strong>po of hard routes)<br />
LAST MOON is a gnarly fist sized crack in a left facing 40m corner. Start from the<br />
highest ledge 10m left of LAST MOON below the right facing corner flake (as for<br />
HEY JUDE).<br />
1. 45m 16 <strong>Climb</strong> a few metres up the corner and then move right on <strong>to</strong> the face.<br />
<strong>Climb</strong> tending leftwards <strong>to</strong> the base of a short corner crack. <strong>Climb</strong> this and finish<br />
up and right <strong>to</strong> a stance.<br />
2. 35m 17 Pull through the narrowest point in the roof about 3m right of the stance,<br />
then climb trending slightly leftwards <strong>to</strong> a reasonable ledge.<br />
3. 35m 15 <strong>Climb</strong> the water worn scoop above trending right at the <strong>to</strong>p <strong>to</strong> exit on <strong>to</strong><br />
the mega Grassy Ledge. Walk about 10m <strong>to</strong> the right.<br />
4. 20m 18 <strong>Climb</strong> the left-leaning ramp, then the face above <strong>to</strong> a long, narrow ledge.<br />
Belay on the right. (Alternatively, see pitch 4 of SOMETHING OF VALUE).<br />
5. 45m 21 <strong>Climb</strong> the face <strong>to</strong> a rail leading left <strong>to</strong> the base of the dihedral, which is<br />
climbed <strong>to</strong> a roof. Move rightwards past the roof <strong>to</strong> pegs and follow the leftleading<br />
crack above <strong>to</strong> a small, off balance ledge. Navigate through the roof in<strong>to</strong><br />
the corner above and follow this <strong>to</strong> the jumbo ledge. Wild climbing.<br />
6. 25m 25 From the front of the jumbo ledge, climb easily up the wall <strong>to</strong> a two foot<br />
roof. Move through this and up the crack on the right <strong>to</strong> stance above the next<br />
overlap. There is good gear below the crux sequence.<br />
7. 35m 20 Move left then up and right in<strong>to</strong> a thin crack. <strong>Climb</strong> up a bit and then<br />
head leftwards <strong>to</strong> the base of a clean corner system. <strong>Climb</strong> the corners <strong>to</strong> exit<br />
left <strong>to</strong> a long ledge. Scuttle left <strong>to</strong> belay about 3m beyond the obvious off-width<br />
crack.<br />
8. 40m 20 <strong>Climb</strong> up about 5m <strong>to</strong> gain a crack. <strong>Climb</strong> this <strong>to</strong> stance at the highest<br />
ledge.<br />
9. 45m 16 <strong>Climb</strong> the juggy face immediately right of the chimney. Step left at the<br />
<strong>to</strong>p of the slab <strong>to</strong> below a roof crack. Up this keeping right at first then exit left <strong>to</strong><br />
the ledge.<br />
Stay roped <strong>to</strong> scramble rightwards up the stepped ledge system and then up <strong>to</strong> the<br />
<strong>to</strong>p.<br />
Notes:<br />
1. In the interests of the quest for consumer climbing on the <strong>big</strong> blue mountain, this<br />
RD is a stand alone version of a pretty direct variation of existing routes up the<br />
craggy section of the main wall with a few new pitches thrown in for good<br />
measure. HEY JUDE (pitch 1), EIGHT MILES HIGH (pitches 2, 3, 8 and 9) and<br />
SOMETHING OF VALUE (pitch 4 and first half of pitch 5). The second half of<br />
pitch 5 and pitches 6 and 7 are independent of other routes.<br />
FA: Mike Cartwright, Mike Brunke, 1989.<br />
82
BUSHPIG *** 20 (18A1) [1P, 6A, N]<br />
(See <strong>to</strong>po of easy routes)<br />
LAST MOON is a gnarly fist sized crack in a left facing 40m corner. Start from the<br />
highest ledge 10m left of LAST MOON below the right facing corner flake (as for<br />
HEY JUDE).<br />
1. 45m 16 Start up the flake and move right at 5m. <strong>Climb</strong> the slabs trending left <strong>to</strong> a<br />
flake/crack. <strong>Climb</strong> this then up and right on good holds <strong>to</strong> a ledge.<br />
2. 38m 17 <strong>Climb</strong> up from the right hand edge of the ledge for 8m through small<br />
roof. Amble up another 30m <strong>to</strong> stance directly above the previous stance on a<br />
good ledge.<br />
3. 30m 15 <strong>Climb</strong> up on good but improbable looking rock. Trend right and then<br />
stance at the back of the Grassy Ledge (blocks).<br />
Walk <strong>to</strong> major pillar on left of ledge and scramble up <strong>to</strong> a ledge at the base of the<br />
right facing corner formed by the pillar.<br />
4. 30m 15 <strong>Climb</strong> the crack <strong>to</strong> <strong>to</strong>p of pillar. From <strong>to</strong>p of pillar, climb up another 3m <strong>to</strong><br />
a good handrail. Traverse left for about 15m <strong>to</strong> stance at chains (hidden by a tuft<br />
of grass).<br />
5. 45m 20 <strong>Climb</strong> past peg (17A1) above in<strong>to</strong> recess. At <strong>to</strong>p of recess, move<br />
through left break (17A1) on <strong>to</strong> face above. Trend left and then right <strong>to</strong> reach the<br />
right end of the Jungle Ledge.<br />
6. 55m 18 20m above the ledge are two chimneys. Head for the right hand one and<br />
climb it, then continue past a good ledge up and right and then left <strong>to</strong> chains.<br />
7. 45m 18 <strong>Climb</strong> chimney <strong>to</strong> chains.<br />
8. 30m 13 Scramble out and up <strong>to</strong> chains.<br />
Stay roped for the scramble <strong>to</strong> the <strong>to</strong>p.<br />
Notes:<br />
1. This route was opened as a fast but pleasant outing basically using the rap<br />
ladder in reverse (from the Grassy Ledge upwards!). It climbs parts of HEY<br />
JUDE (pitches 1 and 4), EIGHT MILES HIGH (pitches 2 and 3),<br />
SCATTERLINGS (part of pitch 6) and HALF MOON (remainder of pitch 6 and<br />
pitches 7 and 8).<br />
2. Pitch 5 was originally graded 18, for this route, but is grade 20 for HEY JUDE.<br />
20 is a fair grade.<br />
FA: Mike Cartwright, Clive Curson, 1991.<br />
83<br />
Leading the first pitch (19) of LAST MOON. The picture is taken from HEY<br />
JUDE’s first pitch. WOW FUCK and SOMETHING OF VALUE start just around<br />
the arête <strong>to</strong> the right.<br />
Pho<strong>to</strong> by Paul Fatti. First published in MCSA Journal, 1997, p167.<br />
Reproduced courtesy of the MCSA<br />
84
LAST MOON **** 19 [N]<br />
GPS: Datum WGS84 S23 03 57.4 E28 59 10.9<br />
(See <strong>to</strong>po of easy routes)<br />
Start about 400m <strong>to</strong> the right of the prominent corner where MOONLIGHT starts.<br />
From that corner, traverse along the ledge at the base of the main face past a large<br />
pile of boulders <strong>to</strong> an obvious 40m high pillar with a gnarly crack system along its<br />
left-hand side. The initial pitches follow the crack system.<br />
1. 40m 19 <strong>Climb</strong> <strong>to</strong> ledge beneath 2 chimneys. <strong>Climb</strong> right chimney awkwardly <strong>to</strong><br />
second ledge, above which the crack steepens. <strong>Climb</strong> crack system (crux) <strong>to</strong><br />
just below cubbyhole below overhangs. Swing 1,5m right <strong>to</strong> vertical crack on<br />
face of pinnacle. <strong>Climb</strong> crack <strong>to</strong> ledge.<br />
2. 36m 16 Traverse about 8m right then climb diagonally left past loose flake <strong>to</strong><br />
resting place below steep face. Move up and left <strong>to</strong> where the angle eases.<br />
Continue up <strong>to</strong> the left over ledges, then diagonally right <strong>to</strong> stance.<br />
3. 40m 12 <strong>Climb</strong> up and diagonally left <strong>to</strong> stance at the base of Grassy Ledge.<br />
Walk <strong>to</strong> right-hand end of Grassy Ledge. MOONRAKER takes the chossy-looking,<br />
east facing corner above.<br />
4. 10m 10 <strong>Climb</strong> down small pinnacle <strong>to</strong> narrow ledge. Continue right <strong>to</strong> a stance.<br />
5. 40m 16 <strong>Climb</strong> diagonally left <strong>to</strong> small left-facing corner in overhangs. <strong>Climb</strong> the<br />
corner <strong>to</strong> off balance ledge, then right for about 1.5m <strong>to</strong> small, steep recess.<br />
<strong>Climb</strong> this <strong>to</strong> where the angle eases and continue diagonally right <strong>to</strong> a stance.<br />
6. 40m 12 From right-hand end of stance, climb 3m, traverse 5m left, then move<br />
up. Step <strong>to</strong> the right, then move up <strong>to</strong> prominent ledge below overhang.<br />
Traverse left <strong>to</strong> stance in small recess.<br />
7. 12m 11 Hand swing <strong>to</strong> the left and then continue traversing <strong>to</strong> the main recess.<br />
<strong>Climb</strong> the right-hand side about 4m <strong>to</strong> a block ledge with a yellow wood tree<br />
(good two man bivi site).<br />
8. 35m 17 <strong>Climb</strong> recess <strong>to</strong> ledge at <strong>to</strong>p of pinnacle. Difficult sections at about 10m<br />
and 30m. One point of aid was used in the second difficult section.<br />
9. 25m 15 <strong>Climb</strong> steep knobbly face leftwards past tree and then continue up<br />
slanting recesses <strong>to</strong> large ledge, Bivi Cave and yellowwood trees.<br />
10. 50m 17 Crawl through yellowwood tree <strong>to</strong> face on outside of recess. <strong>Climb</strong> steep<br />
face for 8m, at first upward, then diagonally left <strong>to</strong> join the recess. Continue <strong>to</strong><br />
<strong>to</strong>p of recess <strong>to</strong> small ledge beneath overhangs. From right edge of ledge, climb<br />
<strong>to</strong> overhang. Traverse left <strong>to</strong> left facing corner in overhang. <strong>Climb</strong> steeply <strong>to</strong><br />
large ledge (awesome!).<br />
11. 38m 15 From right end of ledge, climb diagonally right <strong>to</strong> where rock steepens.<br />
<strong>Climb</strong> more or less straight up <strong>to</strong> large ledge.<br />
Walk about 50m left along the ledge.<br />
12. 20m 11 Move up small face in<strong>to</strong> slanting recess then up <strong>to</strong> a ledge. Traverse<br />
right then up short chimney <strong>to</strong> large bushy ledge.<br />
Walk 20m <strong>to</strong> right <strong>to</strong> base of obvious steep chimney (the right hand of 2 chimneys).<br />
13. 20m 12 <strong>Climb</strong> the chimney and continue <strong>to</strong> the <strong>to</strong>p.<br />
Notes:<br />
1. Variation <strong>to</strong> pitches 7 and 8: 40m 16 <strong>Climb</strong> directly up from the stance and<br />
continue up a face and crack <strong>to</strong> the stance at the <strong>to</strong>p of pitch 8.<br />
2. Variation <strong>to</strong> pitch 9: 25m 20 <strong>Climb</strong> the left curving corner crack at the back right<br />
of the ledge. Continue up chimney <strong>to</strong> Bivi Cave.<br />
3. One of the “<strong>big</strong> push routes” see THE BIG PUSH in the STORIES section.<br />
FA: Paul Fatti, Art McGarr, 1978.<br />
85<br />
WOW FUCK 27 *** [2B, N]<br />
(See <strong>to</strong>po of hard routes)<br />
Starts between LAST MOON and SOMETHING OF VALUE.<br />
1. 17m 21 <strong>Climb</strong> up <strong>to</strong> and through the apex of inverted V recess, then move up<br />
and right <strong>to</strong> belay in a hollow.<br />
2. 30m 27 <strong>Climb</strong> the continuation recess and crack past two bolts on the headwall.<br />
Continue easily for another 15 metres <strong>to</strong> a ledge (shared with LAST MOON)<br />
(Alternative: 23 <strong>Climb</strong> the continuation recess but traverse right beneath the<br />
headwall, <strong>to</strong> a recess which is climbed diagonally leftwards <strong>to</strong> rejoin the last 15<br />
metres of the original pitch).<br />
3. 30m 18 <strong>Climb</strong> straight up then slightly leftwards <strong>to</strong> a ledge.<br />
4. 40m 14 <strong>Climb</strong> up <strong>to</strong> the Grassy Ledge.<br />
5. 30m 18 Start about 5 metres right of the large flake lying against the back of the<br />
grass ledge. <strong>Climb</strong> a crack/recess leading <strong>to</strong> a ledge in the base of a left facing<br />
corner. Extending <strong>to</strong> the right is a very large roof about 25 metres above the<br />
grass ledge. Move right around the arête and continue traversing rightwards until<br />
able <strong>to</strong> move up <strong>to</strong> a hanging belay immediately beneath the widest part of the<br />
roof. A handrail runs right beneath the roof from the stance.<br />
6. 15m 20 Drop back down <strong>to</strong> a level about 3 metres beneath the roof. Traverse<br />
right for about 8 metres, then climb diagonally left <strong>to</strong> a stance above the right<br />
end of the roof. (Alternative: 22A1 Rail right until able <strong>to</strong> pull round the lip.<br />
Traverse left <strong>to</strong> a stance on the edge of the roof).<br />
7. 45m 17 <strong>Climb</strong> up for about 15 metres <strong>to</strong> a long ledge. From a point a couple of<br />
metres left of the widest part of the ledge, climb up then trend right across the<br />
face. Stance on a ledge a few metres right of a 5 metre long lens shaped roof.<br />
(Stance shared with TEDDY BEARS PICNIC).<br />
8. 40m 21 <strong>Climb</strong> the right-hand crack/flake, and traverse right <strong>to</strong> a flared crack<br />
leading <strong>to</strong> ledge (pitch shared with TEDDY BEARS PICNIC up <strong>to</strong> here).<br />
Continue up and right <strong>to</strong> the LAST MOON Bivi Cave in the base of a left facing<br />
recess.<br />
9. 45m 20 Crawl out <strong>to</strong> the right and pull on<strong>to</strong> the face 2 metres right of LAST<br />
MOON. <strong>Climb</strong> diagonally rightwards across the face, heading for the skyline.<br />
After a thin traverse right, continue right and up until able <strong>to</strong> move back left and<br />
up <strong>to</strong> belay at the right hand end of a large ledge (last 8 metres shared with<br />
MOONRAKER).<br />
10. 40m 17 <strong>Climb</strong> diagonally right for about 10 metres, <strong>to</strong> a one metre block on a<br />
ledge. Continue more or less straight up <strong>to</strong> a large ledge. (This pitch climbs<br />
between ROAD WARRIOR and LAST MOON).<br />
11. 35m 13 Walk left and select a pitch up <strong>to</strong> a broad bushy ledge. (Alternative: 17<br />
fight right <strong>to</strong> the base of a third chimney).<br />
12. 20m 16 <strong>Climb</strong> the face <strong>to</strong> the right of the right hand chimney. (Alternative: 13<br />
<strong>Climb</strong> <strong>to</strong> the <strong>to</strong>p if you climbed the alternative <strong>to</strong> pitch 11).<br />
Notes:<br />
1. Pitch 6 is tricky. The leader is well protected but the second might have an<br />
exciting swing.<br />
2. Pitch 8 was originally graded 20, which is a sandbag.<br />
FA: Kevin Smith, Charles Edelstein, 1990<br />
86
Russ Dodding leading the seventh pitch (19) of SOMETHING OF VALUE<br />
Pho<strong>to</strong> by Paul Fatti. First published in MCSA Journal, 1997, p168.<br />
Reproduced courtesy of the MCSA<br />
87<br />
SOMETHING OF VALUE **** 21 [N]<br />
(See <strong>to</strong>po of moderate routes)<br />
The route starts about 10m right of LAST MOON at a 3m flake/pillar.<br />
1. 40m 18 From the <strong>to</strong>p of the flake, climb straight up the break above <strong>to</strong> stance on<br />
a ledge on the right.<br />
2. 40m 17 Continue directly up the break, through a small overhang at 30m <strong>to</strong> a<br />
stance at the base of a small face.<br />
3. 40m 18 <strong>Climb</strong> straight up <strong>to</strong> a Grassy Ledge. It is unnecessary <strong>to</strong> deviate more<br />
than a metre or 2 either way anywhere on the first 3 pitches.<br />
Walk about 20m <strong>to</strong> the left (i.e. <strong>to</strong> about 4m right of the striking dihedral, capped by<br />
a long roof, taken by EIGHT MILES HIGH).<br />
4. 20m 19 <strong>Climb</strong> up 4m <strong>to</strong> place gear behind a <strong>big</strong> flake. Continue up cracks until<br />
able <strong>to</strong> traverse right <strong>to</strong> another crack. <strong>Climb</strong> up <strong>to</strong> a large ledge, then walk 5m<br />
right <strong>to</strong> belay below the corner.<br />
5. 20m 21 Out of the Frying Pan: <strong>Climb</strong> up on the right <strong>to</strong> the rail, traverse left <strong>to</strong><br />
move up in<strong>to</strong> the dihedral. About 3m below the roof move out left and diagonally<br />
up In<strong>to</strong> The Fire. Thin traversing leads <strong>to</strong> a ledge on the left. Stance under the<br />
left-hand edge of the roof about 15m up (TEQUILA SUNRISE continues straight<br />
up the dihedral <strong>to</strong> the roof, then goes right in<strong>to</strong> the main corner feature).<br />
6. 40m 17 <strong>Climb</strong> up past the roof then rail right <strong>to</strong> the base of an obvious layback<br />
corner. Up this and <strong>to</strong> a large ledge on the right.<br />
Walk about 10m right and down <strong>to</strong> the base of a short crack/groove.<br />
7. 25m 19 Move up the crack <strong>to</strong> rail which is traversed rightwards a few metres.<br />
<strong>Climb</strong> up 3-4m <strong>to</strong> another traverse line leading right then down <strong>to</strong> a small ledge.<br />
8. 20m 18 Move up and left until under the roof. Continue traversing leftwards until<br />
it is possible <strong>to</strong> gain a small ledge in the break.<br />
9. 30m 20 Above are two cracks through a gnarly wall. <strong>Climb</strong> the left-hand one <strong>to</strong> a<br />
rail about 10m up, then move left, up then diagonally right <strong>to</strong> a point above the<br />
stance. Move straight up <strong>to</strong> a bivi ledge.<br />
10. 20m 17 Traverse left <strong>to</strong> an off-width crack (mostly walking).<br />
11. 40m 21 Key Crack: <strong>Climb</strong> directly up until the going gets easier. Continue <strong>to</strong> the<br />
second ledge.<br />
12. 55m 16 <strong>Climb</strong> the crack above <strong>to</strong> a ledge about 10m up. Move 5m right <strong>to</strong> the<br />
clean break, which is climbed for 5m. Move 4m right <strong>to</strong> where it is possible <strong>to</strong><br />
gain the knobbly slabs above. <strong>Climb</strong> these straight up <strong>to</strong> a stance on a short<br />
square pillar.<br />
Stay roped for the scramble <strong>to</strong> the <strong>to</strong>p.<br />
Notes:<br />
1. The traverse on pitch 5 is very character building. Take care of the ledge below.<br />
2. The TEQUILA SUNRISE version of pitch 5 is excellent, more direct and slightly<br />
less character building, at a similar grade.<br />
3. The original pitch 4 started further right and climbed the left leaning break. The<br />
pitch as written up is more aesthetic and is the same grade.<br />
4. Pitch 7 was originally graded 20.<br />
5. It is possible <strong>to</strong> traverse right <strong>to</strong> LAST MOON from the end of pitch 7 at about<br />
grade 18. Careful rope management required! You’ll end up on the platform with<br />
yellowwood, one pitch below the bivi cave.<br />
6. For an account of a solo ascent of the route, read PRIVATE INVESTIGATIONS<br />
in the STORIES section.<br />
FA: Kevin Smith, Ian Slatem, Clive Curson, May 1986<br />
88
89<br />
th<br />
George Mallory seconding out of the fire on the scary 5 (21) pitch of SOMETHING OF VALUE.<br />
TEQUILA SUNRISE takes the first corner <strong>to</strong> his right and BLUE MOON heads up the <strong>big</strong> corner<br />
left of the main arête.<br />
Pho<strong>to</strong> by Stewart Middlemiss<br />
First published in MCSA Journal, 1988, p122. Reproduced courtesy of the MCSA<br />
BLUE MOON PROJECT<br />
Hec<strong>to</strong>r’s never-ending s<strong>to</strong>ry. This route WILL be open soon!<br />
90<br />
Ian Kotze on the first pitch (22) of BLUE MOON Pho<strong>to</strong> by Hec<strong>to</strong>r Pringle
TEDDY BEARS' PICNIC **** 21 [2B, N]<br />
(See <strong>to</strong>po of moderate routes)<br />
Start about 35m right of LAST MOON, below a 3m by 2m roof 15m up (as for<br />
MOONRAKER).<br />
1. 45m 20 <strong>Climb</strong> flake <strong>to</strong> recess between flakes (MOONRAKER takes right flake).<br />
Move left and up then traverse left <strong>to</strong> (delicate) double flakes. Up these <strong>to</strong><br />
narrow roof, which is turned <strong>to</strong> gain recess. <strong>Climb</strong> this, moving right at <strong>to</strong>p.<br />
2. 40m 20 Move 2m left, then climb steeply until able <strong>to</strong> finger-rail left through <strong>to</strong>p<br />
of green patch. Move up and diagonally right <strong>to</strong> reach a ledge. <strong>Climb</strong> left facing<br />
corner, pull right through roof and stance.<br />
3. 35m 16 <strong>Climb</strong> up <strong>to</strong> Grassy Ledge. Walk right.<br />
4. 50m 20 Start a few metres left of pinkish-white amphitheatre, directly below the<br />
point where main roof tapers <strong>to</strong> about 1,5 metres. <strong>Climb</strong> deviously up orange<br />
face <strong>to</strong> rounded blocky buttress beneath roof. Pull through and move up <strong>to</strong> base<br />
of recess. <strong>Climb</strong> easily up <strong>to</strong> left of recess <strong>to</strong> reach a large ledge on the left.<br />
5. 30m 17 <strong>Climb</strong> obvious recess directly above previous pitch and continue up <strong>to</strong> a<br />
stance at the base of two cracks (LAST MOON's obvious gully is <strong>to</strong> the right).<br />
6. 30m 21 <strong>Climb</strong> the right-leaning right crack (narrow dihedral), and traverse right<br />
<strong>to</strong> a left facing corner crack, which is followed <strong>to</strong> reach the left end of a ledge<br />
(LAST MOON's Bivi Cave <strong>to</strong> the right).<br />
7. 30m 20 Traverse left <strong>to</strong> <strong>big</strong> ledges – awesome!<br />
8. 35m 21 Precious Mettles pitch: Starting near left end of ledge, climb face past<br />
2 bolts, trend right, then up and left <strong>to</strong> a small ledge. Continue up <strong>to</strong> next (<strong>big</strong>)<br />
ledge at base of right facing corner.<br />
9. 35m 15 Move left and climb up <strong>to</strong> ledges. Continue up face <strong>to</strong> right of a bushy<br />
crack and stance on ledge on right (follow your nose on this pitch).<br />
10. 35m 15 Move right across crack, climb up and right <strong>to</strong> an easy face which is<br />
followed right <strong>to</strong> a large ledge.<br />
11. 45m 15 <strong>Climb</strong> <strong>to</strong> the <strong>to</strong>p.<br />
Notes:<br />
1. Pitch 8 (Precious Mettles) was originally bolted on abseil by Mike Cartwright as a<br />
direct finish <strong>to</strong> SOMETHING OF VALUE.<br />
2. The (very dodgy) bolts were replaced in 2005 with M10, 100mm stainless<br />
expansion.<br />
3. Pitch 7 was first climbed by Mike Cartwright before the route was opened.<br />
4. The remainder of the route was opened on-sight, in a day.<br />
5. It is possible <strong>to</strong> traverse right <strong>to</strong> LAST MOON from the last part of pitch 4 and<br />
from many places on pitch 5, at about grade 18 (depending).<br />
6. SOMETHING OF VALUE and DARK SIDE OF THE MOON join the <strong>big</strong> ledge at<br />
the end of pitch 7 from directly below. SOV traverses left and DSOTM heads up<br />
the right-facing corner.<br />
FA: George Mallory, Stewart Middlemiss, Kevin Smith, Mike Cartwright, 1988<br />
91<br />
Hec<strong>to</strong>r Pringle leading the perfect 6 th pitch (21) of TEDDY BEARS’ PICNIC.<br />
Pho<strong>to</strong>s by Chris Ziranek<br />
92
MOONRAKER *** 19 [N]<br />
(See <strong>to</strong>po of easy routes)<br />
The route starts 50m right of LAST MOON and 15m left of NEW MOON. There are<br />
two large flakes below a roof 20m up. Right of the route is a corner facing west.<br />
1. 25m 16 <strong>Climb</strong> up right hand flake. At the <strong>to</strong>p, climb up small corner <strong>to</strong> 3m below<br />
large roof. Step right and move up <strong>to</strong> stance at base of west facing corner.<br />
2. 40m 18 Start 2m right of corner and climb up past tricky move at 4m then<br />
rightwards over easier ground for about 5m. <strong>Climb</strong> left <strong>to</strong> <strong>to</strong>p of corner. <strong>Climb</strong> up<br />
about 5m <strong>to</strong> stand on 1 m high block with cracks on both sides of it. Traverse 3m<br />
left and move (with difficulty) left around bulge. <strong>Climb</strong> up with difficulty for 6m <strong>to</strong><br />
ledge where a 30cm block is cammed below small roof. Pull the roof and<br />
continue up ledges.<br />
3. 45m 18 <strong>Climb</strong> up slightly diagonally right for 35m <strong>to</strong> under a roof (generally easy<br />
ground with hard move at 10m). <strong>Climb</strong> the roof at a break which is 6m right of<br />
stance below. Move left on<strong>to</strong> jugs then back right <strong>to</strong> stand on lip of roof. <strong>Climb</strong><br />
up another 4m <strong>to</strong> stance at small tree.<br />
4. 30m 10 Scramble up <strong>to</strong> Grassy Ledge.<br />
5. 45m 18 From right end of Grassy Ledge climb up broken crack in a corner<br />
which faces east. At <strong>to</strong>p of crack move right and crank small roof. Continue a<br />
few metres up and right <strong>to</strong> below a small roof. Strenuously through roof and<br />
continue up for another 8m <strong>to</strong> where rock steepens. Traverse right 3m and then<br />
climb up <strong>to</strong> ledge.<br />
Walk left 20m <strong>to</strong> base of prominent west-facing open book with jam crack.<br />
6. 45m 16 <strong>Climb</strong> open book for 3m and step left on<strong>to</strong> smooth face. <strong>Climb</strong> up <strong>to</strong> a<br />
1m roof with jam crack. Pull roof and continue straight up <strong>to</strong> ledge. From right of<br />
ledge move right. <strong>Climb</strong> up easy ground <strong>to</strong> 2m high pinnacle. Traverse right on<strong>to</strong><br />
grassy ledge and stance. <strong>Climb</strong> up 5m <strong>to</strong> blocky ledge behind yellowwood tree.<br />
7. 45m 16 From right side of ledge climb up <strong>to</strong> foot rail. Use a hand rail <strong>to</strong> gain<br />
recess on the right. Move right around arête on<strong>to</strong> knobbly face. Traverse right for<br />
20m then climb up <strong>to</strong> stance between two prominent corners/cracks which are<br />
8m apart. The third crack splitting a yellow, lichen-covered face <strong>to</strong> the left is<br />
climbed by ROAD WARRIOR.<br />
8. 45m 19 <strong>Climb</strong> the middle crack which curves rightwards in an undercling (crux)<br />
near the <strong>to</strong>p. After the crux, move left on<strong>to</strong> knobbly face. <strong>Climb</strong> up diagonally left<br />
<strong>to</strong> eventually gain a huge ledge (common stance with LAST MOON).<br />
9. 45m 18 From extreme left of ledge climb a <strong>big</strong> west-facing corner for 15m. At the<br />
<strong>to</strong>p of the corner move right on<strong>to</strong> knobbly rock. Up 1m then back left for 3m.<br />
Straight up <strong>to</strong> the huge ledge.<br />
10. 20m 16 <strong>Climb</strong> a finger crack directly behind the stance. Move 1m left at about<br />
15m and climb up <strong>to</strong> the large bundu ledge.<br />
11. 20m 16 Bash through bushes right for 10m. There are two deep chimneys 3m<br />
apart. The right chimney is the final pitch of LAST MOON. <strong>Climb</strong> the left chimney<br />
<strong>to</strong> the roof and move left then up a layback <strong>to</strong> the summit.<br />
Notes:<br />
1. The route was opened in a day with no aid, falls, yo-yos etc. Pitches 6, 7 and 8<br />
were climbed two months previously with S Isabeck while off route.<br />
2. It makes sense <strong>to</strong> climb <strong>to</strong> the Grassy Ledge in 3 pitches instead of 4. I.e.<br />
combine part of pitch 2 with pitch 1.<br />
3. The route (and pitch 8) was originally graded 20.<br />
FA: George Mallory, Steven Mallory, 1984.<br />
93<br />
Jonathan Levy following the tenth pitch (14) of NEW MOON<br />
Pho<strong>to</strong> by Paul Fatti. First published in MCSA Journal, 1997, p164.<br />
Reproduced courtesy of the MCSA<br />
94
NEW MOON ** 20 (18A2) [N]<br />
About 50m right of the pillar marking the start <strong>to</strong> LAST MOON is a prominent<br />
overhang about 4m up, increasing in height and size <strong>to</strong>wards the right. The route<br />
starts just <strong>to</strong> the left of this overhang and takes a line trending slightly <strong>to</strong> the left, <strong>to</strong><br />
below a small line of overhangs about 60m up, which are surmounted on the right.<br />
Start at the base of a short arête, just <strong>to</strong> the left of the overhang.<br />
1. 30m 18 <strong>Climb</strong> arête for 4m <strong>to</strong> ledge and continue up and delicately left, <strong>to</strong><br />
resting place just below short steep 4m face right of the crack. <strong>Climb</strong> up with<br />
difficulty (crux – originally climbed with aid) <strong>to</strong> ledge, and continue up crack<br />
above for 5m. Traverse 4m right, then move up and back left <strong>to</strong> small stance in<br />
corner.<br />
2. 30m 16 From stance, traverse 2m left, then climb steep, slightly recessed face<br />
and awkward groove above until able <strong>to</strong> traverse diagonally left <strong>to</strong> below steep<br />
crack/recess. <strong>Climb</strong> this past and continue up some dubious rock <strong>to</strong> small,<br />
exposed stance about 9m below and <strong>to</strong> the left of the small line overhangs.<br />
3. 30m 16 <strong>Climb</strong> crack above stance for 4m, then traverse 8m right <strong>to</strong> 4m below<br />
the overhang (exposed). <strong>Climb</strong> up steeply <strong>to</strong> a crouching ledge below overhang,<br />
then traverse 3m right <strong>to</strong> where overhang narrows. <strong>Climb</strong> straight up <strong>to</strong> ledge<br />
and continue up <strong>to</strong> short, steep face above <strong>to</strong> a ledge and comfortable stance.<br />
4. 30m 11 <strong>Climb</strong> diagonally up right past short section of loose rock. Continue<br />
diagonally rightwards <strong>to</strong> stance on ledge below short crack where rock steepens.<br />
5. 25m 14 <strong>Climb</strong> the crack, then step delicately right at the <strong>to</strong>p. Continue diagonally<br />
right <strong>to</strong> below short, steep face, then traverse right in<strong>to</strong> awkward overhanging<br />
recess breaking through the face. <strong>Climb</strong> this (strenuous) and continue up and<br />
slightly left <strong>to</strong> stance in open recess, just below where it steepens again.<br />
6. 30m 16 Step left from stance and move 6m up steep recess until able <strong>to</strong> step<br />
right on<strong>to</strong> the lip of overhang directly above stance. Traverse 3m right, then<br />
move up and right on <strong>to</strong> easier rock. <strong>Climb</strong> recess above <strong>to</strong> where it steepens<br />
and continue up with difficulty <strong>to</strong> small overhang before moving left <strong>to</strong> stance on<br />
a grassy ledge.<br />
7. 30m 16 <strong>Climb</strong> 8m diagonally right, then straight up <strong>to</strong> a steep crack, which is<br />
climbed <strong>to</strong> a resting place on the right. <strong>Climb</strong> continuation crack till it is possible<br />
<strong>to</strong> make a spectacular move left. Move up and further left <strong>to</strong> comfortable grassy<br />
stance below imposing, steep, red face (possible bivi site for two).<br />
8. 45m 18 <strong>Climb</strong> face above on good grips, moving right higher up and then back<br />
left past a steep section <strong>to</strong> ledge below prominent steep crack. <strong>Climb</strong> crack<br />
(strenuous <strong>to</strong>wards the <strong>to</strong>p) and continue diagonally up left on a steep face<br />
above, <strong>to</strong> where the angle eases. Stance in small recess.<br />
9. 15m 7 <strong>Climb</strong> diagonally right over ledges <strong>to</strong> stance below small tree in a corner.<br />
(It is possible <strong>to</strong> traverse <strong>to</strong> the left on <strong>to</strong> LAST MOON from this point).<br />
10. 35m 14 Traverse right on steep rock <strong>to</strong> an arête, then move up steeply <strong>to</strong> where<br />
angle eases. Make a long traverse right over knobbly face <strong>to</strong> a small recess<br />
where an uncomfortable stance is made just below where the rock steepens.<br />
11. 30m 16 <strong>Climb</strong> recess past a very steep section <strong>to</strong> where the angle eases.<br />
Continue up and slightly right <strong>to</strong> the base of crack in smooth corner leading up <strong>to</strong><br />
overhang. <strong>Climb</strong> the crack, then traverse right <strong>to</strong> ledge <strong>to</strong> the right of the<br />
overhang. Continue diagonally up right over smooth slab <strong>to</strong> below short,<br />
awkward recess, which is climbed <strong>to</strong> large, guano-filled ledge 5m below a very<br />
steep, narrow chimney. (ANCIENT DUST OF AFRICA shares parts of this pitch).<br />
95<br />
12. 35m 20 (18A2) <strong>Climb</strong> the steep crack (4 nuts for aid) in<strong>to</strong> the base of chimney<br />
and continue (very strenuous) up this <strong>to</strong> where the shortly before an overhang.<br />
<strong>Climb</strong> up the overhang, then move awkwardly out <strong>to</strong> the left on <strong>to</strong> on exposed<br />
face. Continue diagonally out <strong>to</strong> the left, then up <strong>to</strong> a stance on a <strong>big</strong> ledge<br />
below a large band of overhangs.<br />
13. 35m 10 Walk 15m right along ledge, past the end of the overhang, then climb up<br />
and back <strong>to</strong> the left able <strong>to</strong> scramble <strong>to</strong> the <strong>to</strong>p.<br />
FA: Paul Fatti, Jonathan Levy, 1983<br />
Mid-morning malaise – contemplating life on the ledge Pho<strong>to</strong> by Hec<strong>to</strong>r Pringle<br />
96
BIG CORNER AREA<br />
This area extends rightwards from the end of the <strong>big</strong> grass ledge that the MOON<br />
AREA routes start off. This point is marked by a <strong>big</strong> pile of boulders that must be<br />
either climbed over or squeezed through (tight!) when walking along the bot<strong>to</strong>m of<br />
the wall.<br />
ROAD WARRIOR ** 21 [N, R]<br />
Starts up the obvious left-leaning diagonal break about 30m left of THE RAZORS<br />
EDGE (i.e. just right of the pile of huge boulders that one has <strong>to</strong> crawl through or<br />
climb over).<br />
1. 40m 20 <strong>Climb</strong> the break, passing two bulging <strong>to</strong> a small stance.<br />
2. 35m 19 up the break for 8m <strong>to</strong> where it steepens. Traverse left <strong>to</strong> break in left<br />
skyline with spike. Traverse 5m left <strong>to</strong> small stance.<br />
3. 35m 21 Move up and left a few metres <strong>to</strong> a small, vague corner and up a few<br />
metres <strong>to</strong> a roof. Up <strong>to</strong> a nail (originally aided on 3 points), then left 2m <strong>to</strong> a<br />
break. <strong>Climb</strong> up and diagonally left <strong>to</strong> a stance.<br />
4. 40m 19 Up from stance then diagonally right <strong>to</strong> rejoin the diagonal crack at the<br />
base of the grey pillar. <strong>Climb</strong> up the left-hand side of this <strong>to</strong> a large stance.<br />
5. 42m 21 [R] Straight up <strong>to</strong> the right-hand edge of some roofs about 15m up. Pass<br />
these on the right and climb up and right <strong>to</strong> a crack <strong>to</strong> the left of some more<br />
roofs. <strong>Climb</strong> this <strong>to</strong> a stance, passing right of an aloe and bush.<br />
6. 40m 18 Move up and left in<strong>to</strong> a corner. Up the corner and up gnarly rock <strong>to</strong><br />
semi-hanging belay where the rock steepens.<br />
7. 42m 19 [R] Straight up through bulge (2-3m right of thin crack). Move slightly<br />
right <strong>to</strong> a crack, up this for a few metres then diagonally left <strong>to</strong> a long grassy<br />
ledge.<br />
Stroll 15m left <strong>to</strong> below a crack splitting a yellow, lichen covered face. This is a few<br />
metres left and below MOONRAKER's 19 (crux) pitch.<br />
8. 48m 19 [R] Straight up the crack <strong>to</strong> <strong>to</strong>p and straight up bulging wall above <strong>to</strong> join<br />
MOONRAKER for the last few metres <strong>to</strong> a stance common with LAST MOON as<br />
well.<br />
9. 40m 17 Straight up the jug forest above the stance and move slightly right on<strong>to</strong><br />
the slab above. <strong>Climb</strong> straight up and finish left of some aloes <strong>to</strong> a long ledge.<br />
10. 20m 16 <strong>Climb</strong> up on the right hand side of the huge boulder <strong>to</strong> an undercling<br />
flake. Move out left and up <strong>to</strong> the bundu ledge.<br />
11. Bash across the ledge and climb the chimney of your choice <strong>to</strong> the <strong>to</strong>p.<br />
Notes:<br />
1. Pitches 5,7 and 8 are not abundantly well protected.<br />
FA: Clive Curson, Stewart Middlemiss, Mike Hislop, 1989.<br />
97<br />
THE RAZOR'S EDGE *** 23 [N]<br />
Near the right hand side of the North Wall (but <strong>to</strong> the left of BIG CORNER) a 20m<br />
high rock pillar is situated just left of a large, white-trunked tree. Immediately left of<br />
the pillar a break extends up and slightly left, initially as a faint crackline, and after<br />
20m as a recess.<br />
1. 40m 21 <strong>Climb</strong> the faint crack and make thin moves right and up <strong>to</strong> gain a rail.<br />
Traverse left and climb the recess <strong>to</strong> reach small ledges.<br />
2. 30m 23 Starting on the right climb up and then traverse about l0m left <strong>to</strong> a block.<br />
Move up 3m <strong>to</strong> a roof. Rail left until able <strong>to</strong> pull up rightwards <strong>to</strong> the next roof.<br />
Traverse right <strong>to</strong> an off balance ledge, step right, and climb up <strong>to</strong> a small ledge.<br />
Rail 5m <strong>to</strong> the left and move up <strong>to</strong> a long, narrow ledge.<br />
3. 30m 20 Traverse left and climb up via the obvious gap in the overhangs. Follow<br />
the recess and corner above until able <strong>to</strong> move right <strong>to</strong> ledges.<br />
4. 35m 17 <strong>Climb</strong> up the right leaning break and continue up easy rock <strong>to</strong> a grassy<br />
ledge in a corner and just below a tree (ANCIENT DUST OF AFRICA crosses<br />
here).<br />
5. 30m 13 Move around left on<strong>to</strong> a face, climb up this, move back right and<br />
continue <strong>to</strong> ledges.<br />
6. 35m 17 <strong>Climb</strong> up leftwards and continue up just <strong>to</strong> the left of overhangs. <strong>Climb</strong><br />
the break <strong>to</strong> reach ledges on the right.<br />
7. 45m 19 <strong>Climb</strong> up 15m <strong>to</strong> a long narrow overhang. Traverse about 10m left, until<br />
able <strong>to</strong> climb up diagonally right <strong>to</strong> reach a small left facing corner, about 25m<br />
above the stance. Traverse right from the <strong>to</strong>p of the corner and climb the ramp<br />
leading <strong>to</strong> ledge on the right.<br />
8. 25m 18 Traverse right in<strong>to</strong> the base of a huge dihedral, and climb up a few<br />
metres until able <strong>to</strong> move right <strong>to</strong> a ledge on the arête.<br />
9. 35m 20 Traverse right <strong>to</strong> a ledge.<br />
10. 20m 17 Move right and climb the recess/crack <strong>to</strong> reach two large ledges. BIG<br />
CORNER stances <strong>to</strong> the right and climbs the obvious crack on the right.<br />
11. 23 <strong>Climb</strong> the steep crack in the left corner. Step left on<strong>to</strong> the face (above the<br />
belayer) and climb this <strong>to</strong> a rounded ledge. Traverse left and move up <strong>to</strong> a<br />
sloping ledge.<br />
12. 35m 19 <strong>Climb</strong> up the recess and bot<strong>to</strong>mless chimney. Sneak left and scramble<br />
<strong>to</strong> the <strong>to</strong>p.<br />
Notes:<br />
1. Read THE RAZOR’S EDGE in the STORIES section for an account of the FA.<br />
2. This route was opened at the grades given above, but was subsequently<br />
downgraded in the Southern Rock route <strong>guide</strong>. The original grades are res<strong>to</strong>red<br />
here as they more accurately reflect the seriousness of the route.<br />
3. A knifeblade provided protection on the crux of the 1 st pitch on the FA.<br />
FA: Kevin Smith, George Mallory, 1984.<br />
98
Kevin Smith finishing off the FA of the first pitch (21) of THE RAZOR’S EDGE<br />
in good style<br />
Pho<strong>to</strong> by George Mallory. First published in MCSA Journal, 1984, p83.<br />
Reproduced courtesy of the MCSA<br />
99<br />
ANCIENT DUST OF AFRICA *** 20 [N]<br />
The first 4 pitches climb between THE RAZORS EDGE and BIG CORNER, and the<br />
remainder of the route is located between NEW MOON and THE RAZORS EDGE.<br />
About 25m of climbing are shared with NEW MOON high up. Start 4m right of the<br />
obvious large white tree.<br />
1. 35m 16 <strong>Climb</strong> the crack <strong>to</strong> a ledge. Continue up the left-facing dihedral, and then<br />
<strong>to</strong> the highest ledge on the right.<br />
2. 25m 10 Traverse/walk right.<br />
3. 35m 16 Follow the left leaning ramp until a short traverse leads along a ledge on<br />
the left.<br />
4. 40m 14 <strong>Climb</strong> diagonally left <strong>to</strong>wards a tree at the <strong>to</strong>p of a right-facing corner.<br />
Stance on the ledge above and left (directly above the start of the route).<br />
5. 50m 11 Traverse left, up, and left <strong>to</strong> belay at the grassy base of a right-facing<br />
dihedral (THE RAZOR’S EDGE crosses here).<br />
6. 45m 16 Move left around the corner, then climb generally left and up, <strong>to</strong> stance<br />
on a good ledge in a right-facing dihedral, 5m below a roof.<br />
7. 45m 16 Move out left beneath the roof then climb straight up the face, past an<br />
overlap, <strong>to</strong> belay 3m below and right of the apex of a large pillar/flake.<br />
8. 30m 20 <strong>Climb</strong> up from the <strong>to</strong>p of the pillar, then diagonally left. <strong>Climb</strong> the lefthand<br />
crack <strong>to</strong> a ledge on the left.<br />
9. 45m 18 <strong>Climb</strong> up on the left, and continue through an overlap <strong>to</strong> reach easier<br />
angled rock. As for NEW MOON, traverse right and up <strong>to</strong> a steep crack which is<br />
followed <strong>to</strong> a stance on the right.<br />
10. 35m 20 <strong>Climb</strong> the smooth V-corner, traverse right and across a smooth slab,<br />
then move up <strong>to</strong> a ledge (NEW MOON climbs the corner crack above). Traverse<br />
right until able <strong>to</strong> move up <strong>to</strong> a stance (the monster dihedral avoided by THE<br />
RAZOR’S EDGE lies below).<br />
11. 40m 16 <strong>Climb</strong> slightly rightwards, leftwards, and then straight up <strong>to</strong> reach<br />
scrambling terri<strong>to</strong>ry.<br />
FA: Kevin Smith, Mike Loewe, 1990.<br />
100
BIG CORNER **** 21 (18A2) [N]<br />
The climb is situated on the right-hand side of the face. It follows a huge pink corner<br />
starting halfway up the cliff. Start directly below this, about 100m left of<br />
MALEBOCH. Start at a large block leaning against the face <strong>to</strong> the right of a <strong>big</strong> tree.<br />
1. 40m 14 <strong>Climb</strong> chimney on right side of block. Traverse 5m right in<strong>to</strong> shallow<br />
groove. <strong>Climb</strong> groove and wide crack <strong>to</strong> ledge. Step up and traverse 3m left.<br />
<strong>Climb</strong> <strong>to</strong> <strong>to</strong>p of block. Traverse 4m right in<strong>to</strong> recess. Ascend this <strong>to</strong> <strong>big</strong> ledge.<br />
2. 20m 11 Walk 10m right <strong>to</strong> end of ledge and climb a recess <strong>to</strong> base of prominent<br />
curving crack.<br />
3. 25m 12 <strong>Climb</strong> crack for 4m and continue diagonally right around corner <strong>to</strong> ledge.<br />
4. 20m 12 <strong>Climb</strong> recess diagonally left via short steep section <strong>to</strong> small stance and<br />
chock belay. This recess runs parallel <strong>to</strong> curving crack mentioned in pitch 2.<br />
5. 25m 12 Step right. <strong>Climb</strong> up for 2m and traverse left around a corner. Ascend a<br />
recess <strong>to</strong> a <strong>big</strong> ledge (shared with MALEBOCH).<br />
6. 25m 14 <strong>Climb</strong> up behind large flake and continue <strong>to</strong> the left below steep broken<br />
corner. <strong>Climb</strong> the corner via sloping face <strong>to</strong> ledge below huge open book.<br />
7. 35m 18 <strong>Climb</strong> left-hand face for 15m and traverse right in<strong>to</strong> the open book.<br />
<strong>Climb</strong> this <strong>to</strong> a small ledge. (BIG CORNER DIRECT goes straight up from here).<br />
8. 28m 21 (18A2) Traverse left <strong>to</strong> break below recess (bivi spot further along this<br />
ledge on the corner). Straddle square recess for 5m. Step delicately left on<strong>to</strong><br />
face and climb steeply <strong>to</strong> <strong>to</strong>p of pillar. Stretch across right <strong>to</strong> thin crack. Make<br />
two layback moves <strong>to</strong> below aloe. Step left and mantle on<strong>to</strong> a ledge. <strong>Climb</strong> crack<br />
above <strong>to</strong> another ledge, step right under an aloe and move up <strong>to</strong> stance.<br />
9. 10m 16 <strong>Climb</strong> a steep corner and exit right via an awkward sloping groove <strong>to</strong><br />
stance below steep overhanging crack.<br />
10. 40m 20 (18A1) <strong>Climb</strong> the crack. Continue <strong>to</strong> the left in<strong>to</strong> a narrow, deep chimney<br />
and climb this <strong>to</strong> large platform.<br />
11. 35m 20 (18A1) <strong>Climb</strong> right hand crack. Continue up steep crack rightwards, then<br />
step right <strong>to</strong> ledge and stance. Brilliant pitch!<br />
12. 23m 16 Step on<strong>to</strong> small ledge and pull up strenuously, climbing diagonally left.<br />
Continue straight up through small overhang on<strong>to</strong> face above, using good<br />
layback holds. Move diagonally up and right across face <strong>to</strong> where the angle<br />
eases. Continue up <strong>to</strong> ledge with trees.<br />
13. 35m 16 <strong>Climb</strong> a crack on the left and continue up sloping face past tree <strong>to</strong> a<br />
grassy ledge. <strong>Climb</strong> up steeply (hard) in<strong>to</strong> base of huge chimney.<br />
14. 20m 14 Walk up around the corner then chimney <strong>to</strong> the <strong>to</strong>p (chimney common<br />
with MALEBOCH).<br />
Notes:<br />
1. Most people use a scrambling route <strong>to</strong> the right of the first 5 pitches, roping up<br />
for pitch 6 onwards. Continue rightwards past the start of the route until able <strong>to</strong><br />
scramble up and then diagonally left. Scramble till scared, then rope up and<br />
follow your nose <strong>to</strong> the base of the obvious dihedral of pitch 7.<br />
2. PRIVATE INVESTIGATIONS in the STORIES section describes a solo ascent.<br />
3. One of the “<strong>big</strong> push routes” see THE BIG PUSH in the STORIES section.<br />
FA: Romey and Eckhard Druschke, Paul Fatti, 1977.<br />
BIG CORNER DIRECT *** 22 [N]<br />
8./9. 40m Blast up the BIG CORNER. At the <strong>to</strong>p, move left <strong>to</strong> rejoin the original<br />
route.<br />
FA: Clive Curson.<br />
101<br />
WHITE NIGHTS *** 23 [N]<br />
<strong>Climb</strong>s the front of the buttress between BIG CORNER and MALEBOCH. Scramble<br />
as for these routes, <strong>to</strong> the usual rope-up point left of a squeeze through flake. The<br />
buttress <strong>to</strong>wers directly above.<br />
1. 35m 16 <strong>Climb</strong> right and up <strong>to</strong> beneath a roof. Step right <strong>to</strong> gain the crack which<br />
is followed <strong>to</strong> a shady ledge and yellowwood tree (first pitch of MALEBOCH).<br />
2. 35m 18 Traverse left, then continue diagonally left <strong>to</strong> the front of the buttress.<br />
<strong>Climb</strong> up and left <strong>to</strong> belay on a good ledge on the left side of the buttress, a few<br />
metres above rap chains.<br />
3. 40m 20 Traverse right a few metres and climb the left trending crack system.<br />
Continue up the face, <strong>to</strong> belay at the chains a few metres up a left-leaning ramp.<br />
4. 30m 23 Continue <strong>to</strong> the <strong>to</strong>p of the ramp, then climb a few metres up the slab on<br />
the right. <strong>Climb</strong> the steep crack and flared groove <strong>to</strong> reach a small ledge.<br />
5. 40m 16 Finish the short corner, then climb diagonally right <strong>to</strong> the arête, which is<br />
followed <strong>to</strong> a wide ledge.<br />
Walk 10m left.<br />
6. 15m 20 <strong>Climb</strong> the flared corner-crack and continuation fist crack <strong>to</strong> a ledge.<br />
7. 25m 16 A few metres right and up is a right-facing corner-cum-chimney which is<br />
climbed <strong>to</strong> a large ledge. The easiest finish is on the left.<br />
Notes:<br />
1. There is a rap route in this vicinity. Exact details are sketchy.<br />
FA: Mike Cartwright, Kevin Smith, 1990.<br />
MALEBOCH *** 20 (18A2) [N, 2B, 1P]<br />
270m <strong>to</strong> right of Great (Main) Gully the face steps back. The general route lies up<br />
the internal corner of the step. Start at bot<strong>to</strong>m of gully which steepens in<strong>to</strong> an<br />
overhanging crack (water in summer). When viewed from the bot<strong>to</strong>m, this is the next<br />
<strong>big</strong> open book <strong>to</strong> the right of BIG CORNER.<br />
1. 80m 10 Diagonally left in<strong>to</strong> corner where one follows the narrow crack <strong>to</strong> the <strong>to</strong>p.<br />
2. 13m 12 To stance below overhang. Pass overhang in crack.<br />
3. 50m 20 Original ascent included 2 A1 pi<strong>to</strong>n moves.<br />
4. 33m 18 Crux pitch up smooth, steep, right-angled corner. Fixed pi<strong>to</strong>n at 10m.<br />
Adequate stance in enlargement of crack.<br />
5. 17m 16 up <strong>to</strong> substantial ledge. Then ascend half in the crack <strong>to</strong> stance inside<br />
the crack below first overhang.<br />
6. 20 (A2) Route through the two overhangs is artificial. A2 through first overhang<br />
on chocks<strong>to</strong>ne. Use two bolts left in position by opening party through second<br />
overhang. From cubbyhole above second overhang walk left <strong>to</strong> end of narrow<br />
ledge and ascend a face <strong>to</strong> a good ledge with large tree (10) with A1 passage<br />
using 2 pi<strong>to</strong>ns.<br />
7. 33m Up the crack which becomes a chimney behind a pinnacle <strong>to</strong> complete the<br />
route.<br />
Notes:<br />
1. This RD needs some serious updating. Please help!<br />
2. The bolts and pi<strong>to</strong>ns are definitely dodge by now.<br />
3. One of the “<strong>big</strong> push routes” see THE BIG PUSH in the STORIES section.<br />
FA: Unknown, date unknown.<br />
102
ICE NINE * 21 [N]<br />
<strong>Climb</strong>s a section of the wall <strong>to</strong> the right of MALEBOCH. Scramble as for<br />
MALEBOCH / BIG CORNER. Before the squeeze-through-flake marking the end of<br />
the other routes’ scramble, traverse right and up across grassy rock for about 20m<br />
<strong>to</strong> a ledge.<br />
1. 25m 21 <strong>Climb</strong> up and slightly right <strong>to</strong> a ledge. <strong>Climb</strong> the right-facing dihedral <strong>to</strong> a<br />
rail, move right, and continue up <strong>to</strong> a ledge. <strong>Climb</strong> <strong>to</strong> the <strong>to</strong>p of the block on the<br />
right.<br />
2. 40m 21 <strong>Climb</strong> up and right <strong>to</strong> the arête. Move back diagonally left and climb a<br />
short groove. Traverse right then trend left and up <strong>to</strong> a stance between two small<br />
trees.<br />
3. 35m l7 <strong>Climb</strong> the face, steep cracks and negotiate the bulge. Continue up and<br />
right <strong>to</strong> a large ledge at the <strong>to</strong>p of the right arête.<br />
4. Scramble up the broad gully <strong>to</strong> the <strong>to</strong>p.<br />
FA: Kevin Smith, Peter Lazarus, 1990<br />
103<br />
ROUTES BY GRADE<br />
SHORT ROUTES (Less than 150m)<br />
GRADE<br />
NAME<br />
CRAG<br />
OPEN PROJECT KLOOF AREA 1<br />
28 AVALON **** AVALON AREA 1<br />
26 CHOKE CHAIN *** KLOOF AREA 1<br />
26 AVALON VARIATION *** AVALON AREA 1<br />
25 THIRD WORLD CHILD *** LOST TRIBE AREA 1 (+ 3)<br />
24 POWER SURGE *** BAPM AREA 1<br />
24 DOG STAR **** KLOOF AREA 2<br />
23 CRAG RATS AGAINST MILEAGE ** MAZE AREA 1<br />
23 GETTING THERE ** LOST TRIBE AREA 1 (+1)<br />
23 EXODUS *** LOST TRIBE AREA 2<br />
23 CARAVANS ** LOST TRIBE AREA 1<br />
23 THE NEW STONE AGE ** LOST TRIBE AREA 1<br />
22 BOLTM *** BAPM AREA 2<br />
21 BAPM *** BAPM AREA 4<br />
21 INSPIRATIONAL EXCHANGE *** AVALON AREA 1<br />
21 SOUNDTRACK *** AVALON AREA 1<br />
21 THE LAYER THEORY ** MAZE AREA 1<br />
21 LOOK SHARP *** LOST TRIBE AREA 6<br />
21 THE JOURNEY ** LOST TRIBE AREA 1<br />
21 LOST TRIBE *** LOST TRIBE AREA 5<br />
20 THE MISSING LINK *** VALLEY AREA 1<br />
19 STORMCHASER *** AVALON AREA 1<br />
18 ALL THE SMALL THINGS ** VALLEY AREA 1<br />
17 WALK OF SHAME *** AVALON AREA 1<br />
16 VROOM ** BAPM AREA 1<br />
16 GRAND ILLUSION *** AVALON AREA 1<br />
STARS<br />
104<br />
NO.<br />
PITCHES<br />
PAGE
LONG ROUTES (More than 150m)<br />
GRADE<br />
NAME<br />
STARS<br />
105<br />
CRAG<br />
NO.<br />
PITCHES<br />
27 WOW FUCK *** MOON AREA 11<br />
26 DREAM OF WHITE DOGS *** WALL OF WHITE LIGHT 11<br />
25 ANOTHER DAY IN HELL *** WALL OF WHITE LIGHT 9<br />
25A3<br />
DELICATE<br />
THUNDER<br />
SOUND OF<br />
*** WALL OF WHITE LIGHT 11<br />
25 TEQUILA SUNRISE **** MOON AREA 9<br />
24A0 A DOG DAY IN HEAVEN **** WALL OF WHITE LIGHT 9<br />
24A3 WALL OF WHITE LIGHT *** WALL OF WHITE LIGHT 10<br />
24<br />
YOU ONLY LIVE TWICE<br />
(FREE)<br />
*** WALL OF WHITE LIGHT 12<br />
24 EIGHT MILES HIGH ***** MOON AREA 11<br />
23A2 FUTURE SHOCK *** MOONLIGHT AREA 8<br />
23 PROJECT THREE *** MOON AREA 8<br />
23 RAZOR’S EDGE *** BIG CORNER AREA 12<br />
23 WHITE NIGHTS *** BIG CORNER AREA 7<br />
22 THE SHEILD ** E FACE OF S DONJON 5<br />
22 BURN THE DOG ** LEFT FACE AREA 7<br />
22 PSYCHO REPTILE **** WALL OF WHITE LIGHT<br />
22 MOONLIGHT DIRECT *** MOONLIGHT AREA 9<br />
22 CRACK OF ADVENTURE ** MOONLIGHT AREA 7<br />
22A3 ROAD TO NOWHERE *** MOONLIGHT AREA 7<br />
22 ADVENTURE TIME ** MOON AREA 9<br />
22A2 SOLAR ECLIPSE *** MOON AREA 10<br />
22 SCATTERLINGS **** MOON AREA 10<br />
22 BIG CORNER DIRECT *** BIG CORNER AREA 2 (+7)<br />
21 DARE TO BE DIFFERENT ** LEFT OF THE RAMP 9<br />
21 REBEL YELL ** MOON AREA 11<br />
21 SOMETHING OF VALUE **** MOON AREA 12<br />
21 TEDDY BEARS’ PICNIC **** MOON AREA 11<br />
21 ROAD WARRIOR ** BIG CORNER AREA 11<br />
21 BIG CORNER **** BIG CORNER AREA 14<br />
21 ICE NINE * BIG CORNER AREA 4<br />
PAGE<br />
GRADE<br />
NAME<br />
STARS<br />
106<br />
CRAG<br />
NO.<br />
PITCHES<br />
20 DOWNWARD BOUND * LEFT FACE AREA 7<br />
20 SKIN THE CAT ** LEFT FACE AREA 7<br />
20A3 AFTERGLOW ** WALL OF WHITE LIGHT 7<br />
20A2<br />
YOU ONLY LIVE TWICE<br />
(ORIGINAL)<br />
*** WALL OF WHITE LIGHT 13<br />
20 HEY JUDE **** MOON AREA 11<br />
20 BUSH PIG *** MOON AREA 8<br />
20 NEW MOON ** MOON AREA 13<br />
20 ANCIENT DUST OF AFRICA *** BIG CORNER AREA 11<br />
20 MALEBOCH *** BIG CORNER AREA 7<br />
19 LAST MOON **** MOON AREA 13<br />
19 MOONRAKER *** MOON AREA 11<br />
18 MOONLIGHT * MOONLIGHT AREA 6<br />
18 HALFMOON ** MOON AREA 17<br />
18 MOONSHADOW **** MOON AREA 10<br />
17 NO MOON * N FACE OF N DONJON 7<br />
16 FISLAYJAM * E FACE OF S DONJON 6<br />
16 LEFT FACE ** LEFT FACE AREA 7<br />
15 GULLEY CORNER ** LEFT FACE AREA 2+<br />
13 GREAT GULLEY ** LEFT FACE AREA 11<br />
PAGE
STORIES<br />
INTRODUCTION<br />
Many trips <strong>to</strong> Blouberg end up with a lot of time being spent in The Cave or on<br />
some small ledge waiting for conditions <strong>to</strong> improve (the condition of your arms,<br />
psych or ego for instance). Its great <strong>to</strong> have some bedtime reading on these<br />
occasions <strong>to</strong> take your mind off the strange howling from down in the valley (don’t<br />
stress- its only the donkeys). The s<strong>to</strong>ries and accounts that follow add some life <strong>to</strong><br />
many of the classic routes, and are highly recommended <strong>to</strong> get an idea of what <strong>to</strong><br />
expect. The thing with the trad climbing experience is that it is seldom just a<br />
sequence, a tick and a number. A classic or an epic can play in your mind for<br />
weeks, and afterwards you always wonder “what next?” So the stuff that follows has<br />
already been done. What’s next? 6 routes in a day…<br />
Most of the s<strong>to</strong>ries have been taken from MCSA journals and are reprinted here<br />
courtesy of the Mountain Club. The Club has been instrumental over the years in<br />
pushing route development on Blouberg and in many other places, and particularly<br />
in recording the climbing exploits of its members. Most of the information in this<br />
<strong>guide</strong> would have been lost if not for the MCSA.<br />
Ian and Hec<strong>to</strong>r after a mini-epic on Psycho Reptile Pho<strong>to</strong> by Hec<strong>to</strong>r Pringle<br />
107<br />
BLOUBERG NORTH WALL FRONTAL ROUTE<br />
AN ACCOUNT OF THE FIRST ASCENT OF MOONLIGHT<br />
Taken from The Journal of the Mountain Club of South Africa, 1966 edition, pp111-<br />
113, courtesy of the MCSA.<br />
Article by A.G. Chinery<br />
In 1965 I made my first visit <strong>to</strong> Blouberg, which lies in the Northern Transvaal,<br />
approximately 300 miles from Johannesburg. I had been <strong>to</strong>ld of the awe-inspiring<br />
scenery and 1,200-foot cliff faces of good rock providing a paradise for the rock<br />
enthusiast.<br />
The mountain lies in the centre of a Bantu Reserve and the countryside alongside<br />
the road leading through the reserve <strong>to</strong> the mountain looked like a desert. Where<br />
once there were green pastures with tall grass and green, stately mielie fields, there<br />
was now hard, barren rocky soil with the occasional thornbush protruding like a<br />
skele<strong>to</strong>n. The flowing river of yester-year was now only a brown sandy scar on the<br />
face of the land. My first impression was not favourable as the area seemed one of<br />
the hardest hit by the drought that had stricken the Transvaal for many years. We<br />
parked our cars at a small kraal situated at the bot<strong>to</strong>m of “The Glade” and were<br />
immediately besieged by a rather large group of Bantu children only <strong>to</strong>o keen <strong>to</strong><br />
scrounge some delicacy <strong>to</strong> eat, or <strong>to</strong> volunteer for the price of 50 cents <strong>to</strong> carry a<br />
rucksack <strong>to</strong> the campsite which lies on the <strong>to</strong>p of the mountain, four hours of<br />
strenuous walking away.<br />
I entered in<strong>to</strong> conversation with one of the better-looking young lads whom I judged<br />
<strong>to</strong> be at least 12 years old. When I asked him when last it had rained I was shocked<br />
<strong>to</strong> hear that he could not recall having ever seen rain in his life.<br />
“The Glade” is a tree-engulfed gulley running down between the main massif and a<br />
long shoulder extending <strong>to</strong> the east. The local population still managed <strong>to</strong> get<br />
sufficient water for survival from pools in the upper reaches of the stream that had<br />
not yet dried out. We were assured, however, that there was always water emerging<br />
from a spring high on the mountain where the campsite lies. The mountain was not<br />
as parched as the vlakte below. After ascending the initial 1,000 feet, the<br />
surroundings started <strong>to</strong> change <strong>to</strong> a deep shade of green typical of the Transvaal<br />
during good times This made us all feel at home again.<br />
My first glimpse of the rock faces of Blouberg left me with an enduring memory of a<br />
rockclimber’s paradise. Sheer vertical faces of clean rock stretch out for some two<br />
miles, and range in height from 600 <strong>to</strong> 1,000 feet. The campsite is marked on the<br />
map opposite page 132 in the 1960 Journal. The small spring supplied sufficient<br />
water for our needs. As a matter of fact some of the pools were deep enough <strong>to</strong><br />
bath in. Access <strong>to</strong> the bot<strong>to</strong>m of the rock faces is provided by a ramp down which<br />
one can walk. After a climb it is no great distance back <strong>to</strong> the high-level camp.<br />
A section of the <strong>to</strong>pography resembles a labyrinth that can cause the unwary hours<br />
of frustration if not negotiated correctly. One enters this maze of bushy passages<br />
108
winding through the 20 <strong>to</strong> 30 foot bollards well within sight of camp, thinking that, at<br />
the most, ten minutes separates one from tea or cold beer. Alas, the ten minutes<br />
can easily become much longer if the route is lost.<br />
The central section of Blouberg North Wall was still considered “unclimbable”, or “I<br />
have looked at it and it does not seem very hopeful”. My first impression coincided<br />
with the latter, although I had spotted a break that could be worked on should one<br />
have plenty of time <strong>to</strong> waste and plenty of nerve reserves <strong>to</strong> draw on.<br />
During a subsequent Transvaal Section Meet in mid-April 1966 I fell <strong>to</strong> discussing<br />
this wall with Tony Shaw while we were planning <strong>to</strong> climb one of Bob Davies’<br />
numerous classic routes. During the conversation we called Bob in<strong>to</strong> our little powwow<br />
in an effort <strong>to</strong> extract more information about his route. At the same time we<br />
mentioned that we had our eye on the Central Wall. Bob immediately declared that<br />
the line I had mentioned had been attempted before, many years back, and that<br />
although the party had not ventured very far off the ground, they had not retreated<br />
due <strong>to</strong> the rock being unclimable.<br />
This was all the encouragement that we needed, so we immediately set about<br />
planning an attempt on the following day. Our plan <strong>to</strong> spend one day on the rock<br />
stretched out in practice <strong>to</strong> two days, mainly because of route-finding difficulties.<br />
After pitch No. 10, we noted several potential easier alternatives veering off from our<br />
original line of ascent which never looked inviting at the best of times. But alas, on<br />
attempting them we found that they all petered out in<strong>to</strong> holdless faces or overhangs,<br />
causing us <strong>to</strong> retreat <strong>to</strong> pitch No. 10 each time. We ended up having <strong>to</strong> spend a<br />
bitterly cold and sleepless night on a large, grass ledge about 60 feet <strong>to</strong> the right of<br />
the stance above pitch No. 10 (Ed: this grassy ledge is the stance at the end of pitch<br />
2 in the modern RD).<br />
The following morning at sun-up we were at it again, this time on our original route,<br />
and after spending the morning negotiating the next five severe pitches we decided<br />
<strong>to</strong> retreat due <strong>to</strong> sheer exhaustion, heat and lack of food and water. We had gained<br />
some 750 feet and it <strong>to</strong>ok the whole afternoon <strong>to</strong> abseil off. We could not abseil<br />
directly downwards without ending up dangling under some overhang or other, so<br />
this led <strong>to</strong> quite a few complications. We arrived back in camp just before dark <strong>to</strong><br />
find a group of rescuers discussing a plan for “retrieving the bodies” so <strong>to</strong> speak.<br />
The route haunted Tony and me, so a date was fixed for the long weekend in July.<br />
Unfortunately Tony Shaw fell ill just before the intended trip, and with his blessing<br />
Paul Fatti, John Anderson Jnr. and Mat. Makowsky were persuaded <strong>to</strong> give it<br />
another “<strong>to</strong>nk” with me.<br />
We started on the face at sun-up and after negotiating the first five pitches, the<br />
second and third of which had certainly not become any easier in the meantime,<br />
John and Mat. decided <strong>to</strong> retreat as they were not equipped for a bivouac which<br />
again seemed inevitable. Paul and I ploughed on until the thirteenth pitch where I<br />
developed very severe cramp in my right hand and arm. We continued on, but after<br />
the fifteenth pitch I had <strong>to</strong> relinquish my share of the leading as the cramp was now<br />
occurring at regular intervals.<br />
109<br />
Darkness forced us <strong>to</strong> bivouac at the <strong>to</strong>p of the eighteenth pitch on a small shelf,<br />
sheltered from the wind, that just accommodated both of us. The cold Transvaal<br />
winter night kept us awake for most of the time and it was two very stiff and frozen<br />
individuals who glanced at the rock above the following morning.<br />
The cramps in m arm had ceased after I had kept myself entertained for most of the<br />
night with physical jerks (Ed: interesting…). After giving the sun half an hour <strong>to</strong><br />
remove the chill from the rock and defrost our bodies, which were somewhat below<br />
normal running temperature, we once again got busy with the task before us.<br />
The results of our efforts are described below.<br />
(Ed: The original description of the crux pitch (pitch 18) is reproduced here)<br />
18. 110 feet “G” and ‘A1’: <strong>Climb</strong> up in the corner over some very bad rock <strong>to</strong> a pi<strong>to</strong>n<br />
about 30 feet up. Holding on<strong>to</strong> a sling on the pi<strong>to</strong>n, move up in<strong>to</strong> a chimney<br />
position and continue chimneying up (strenuous) <strong>to</strong> the roof of the overhang<br />
where the chimney narrows and knee-jamming is necessary. When it is<br />
impossible <strong>to</strong> move up any further in the chimney, a small handhold high up on<br />
the left hand wall can just be reached. Traverse out <strong>to</strong> the left (very strenuous<br />
knee-jamming) at this level, until the crack opens up and the grade eases of.<br />
<strong>Climb</strong> up the crack for a further 25 feet <strong>to</strong> a platform stance with a pi<strong>to</strong>n in it.<br />
Note:<br />
The route had its second ascent on April 8, 1967, by M. Prior and P. Fatti who<br />
climbed it in one day.<br />
110
THE RAZOR’S EDGE<br />
AN ACCOUNT OF THE FIRST ASCENT<br />
Taken from The Journal of the Mountain Club of South Africa, 1984 edition, pp111-<br />
113, courtesy of the MCSA.<br />
Article by George Mallory<br />
Technical descriptions of <strong>big</strong> routes leave so much unsaid. To many climbers, the<br />
style is the ascent, and route descriptions seldom give an accurate picture of what<br />
happened on the first ascent. Here is an account of our trip <strong>to</strong> Blouberg where we<br />
climbed THE RAZOR’S EDGE.<br />
The journey <strong>to</strong> Blouberg was ridiculous. Mike, Kevin and I left Pre<strong>to</strong>ria at 10h30 pm,<br />
slept for two hours next <strong>to</strong> the road and arrived at Frans’ Kraal at 05h30 on Saturday<br />
morning. It takes lots of enthusiasm <strong>to</strong> walk up Blouberg in under two hours;<br />
alternatively, some masochistic tendencies will do. Mike and I relied on the latter.<br />
From the base of the 300m wall we spent several hours looking for a new line and<br />
when we decided where <strong>to</strong> start, an elaborate three-way spin gave Mike the first<br />
lead. I immediately scrambled up a pillar <strong>to</strong> take pho<strong>to</strong>graphs and so Kevin <strong>to</strong>ok<br />
over the lead when Mike asked for help. He <strong>to</strong>ok two hours <strong>to</strong> lead the pitch which<br />
required a peg for protection below the crux. From my position on the pillar the crux<br />
looked berserk and the pho<strong>to</strong>graphs taken from there certainly did the situation<br />
justice.<br />
My turn on the sharp end lasted the next four hours during which time Kevin “talked”<br />
me up the “horror pitch”. From the stance a delicate traverse on bad rock led <strong>to</strong> a<br />
strenuous section on worse rock which ended on an off-balance ledge.<br />
The sequence from the ledge was tricky and the lack of good protection made<br />
working it out very scary.<br />
A few meters above the ledge, when the stance was in sight over easy ground, a<br />
foothold broke and I fell eight meters. After picking up the pieces of my shattered<br />
nerve I climbed up <strong>to</strong> the stance. Kevin joined me, then we rappelled <strong>to</strong> the ground,<br />
leaving the ropes fixed <strong>to</strong> our high point. We scrambled back <strong>to</strong> the campsite in the<br />
moonlight.<br />
Ascending our free-hanging fixed ropes the following morning was not without<br />
incident. I was already on the stance when Kevin, who was ten metres below me,<br />
pointed out that the rope he was jumaring up was badly chafed a few meters above<br />
him. I looked down and was alarmed <strong>to</strong> see that only a few strands of perlon<br />
prevented him making a fatally swift descent <strong>to</strong> the deck. As Kevin gingerly slid his<br />
<strong>to</strong>p jumar above the frayed section, we both felt very relieved. At this stage Mike<br />
decided not <strong>to</strong> join us on the route.<br />
The third pitch was much easier but <strong>to</strong>o hard for me <strong>to</strong> follow with the day-sack<br />
which was stuffed with spare hardware, water, food and some light bivy gear.<br />
111<br />
Several mild pitches <strong>to</strong>ok us <strong>to</strong> the base of an enormous open book which we had<br />
seen from the base of the wall. After a closer look we decided that we would<br />
probably have <strong>to</strong> use aid <strong>to</strong> climb it. The alternative was <strong>to</strong> traverse right and hope<br />
<strong>to</strong> find a free exit <strong>to</strong> the <strong>to</strong>p. This sounded like a good idea since it was Kevin’s turn<br />
<strong>to</strong> lead.<br />
At this stage it was late afternoon and I was feeling very drowsy. Kevin’s occasional<br />
grumbles about “pushing the boat out” fell on deaf ears because I was feeding rope<br />
mostly in my sleep. Seconding the traverse was a rude awakening. The moves were<br />
hard and the protection barely adequate. Our efforts were, however, well rewarded<br />
because the ledge at the far end was cus<strong>to</strong>m built for a two-man bivouac. Our<br />
delight was soon blown away by a chilly wind and we shivered violently throughout<br />
the night.<br />
By sunrise on Monday we had climbed an easy pitch <strong>to</strong> the jumbo stance on BIG<br />
CORNER. The jam crack on the left looked desperate but the only other line was<br />
the crux pitch of BIG CORNER which, naturally, we wanted <strong>to</strong> avoid. Kevin flashed<br />
the fierce crack then moved left on<strong>to</strong> a smooth face before disappearing from view.<br />
Following the crack proved it <strong>to</strong> be as strenuous as it looked and after struggling up<br />
it I needed ten minutes <strong>to</strong> recover before I could tackle the smooth face. The face<br />
looked so improbable that I wondered if Kevin hadn’t secretly used an aid point.<br />
Eventually I cranked right up and found a minute hold at full stretch which provided<br />
the key <strong>to</strong> the sequence. To complete the pitch required some sophisticated<br />
footwork on an exposed traverse which was poorly protected but exhilarating<br />
climbing.<br />
The final pitch was much easier. A tricky take-off in<strong>to</strong> a jam crack, which widened <strong>to</strong><br />
a chimney at the <strong>to</strong>p, was pleasant way <strong>to</strong> finish THE RAZOR’S EDGE.<br />
112
PRIVATE INVESTIGATIONS<br />
AN ASCENT OF SOMETHING OF VALUE<br />
Taken from the Southern Rock Blouberg Guide Book 1 st edition, pp72-78, courtesy<br />
of Mike Cartwright.<br />
Article by Mike Cartwright<br />
Mike and I had been wanting <strong>to</strong> go <strong>to</strong> the Little Blue Mountain for a quiet weekend<br />
for some time now. None of the varsity crowd were keen because of the time of the<br />
year and the Smith clique had been there two weeks before <strong>to</strong> catch the full moon.<br />
Like I said, it was going <strong>to</strong> be a quiet weekend. We planned <strong>to</strong> leave Joburg at noon<br />
on Thursday and return by late Monday night. Mike and I completed our “Big-wall”<br />
rack by borrowing a couple of friends and crabs. We ended up with 45 crab and 12<br />
friends. (We superstitiously left a friend 4 behind <strong>to</strong> drop the number from 13<br />
friends!) On Wednesday evening we realised <strong>to</strong> our distress that we didn’t have any<br />
water bottles so I went and visited a mate at Res. It <strong>to</strong>ok a bit of explaining as <strong>to</strong><br />
why I wanted 5 two litre bottles in the middle of the week, but he lent them <strong>to</strong> me<br />
anyway. We even borrowed a car (from a rental company) <strong>to</strong> get there.<br />
An uneventful trip brought us <strong>to</strong> Frans’ Kraal. Frans was distressed at the size of our<br />
party. For some strange reason, still unknown <strong>to</strong> me, he seemed <strong>to</strong> think that a<br />
small party would be in great danger wandering around in the mountains. Mike<br />
convinced him that we would be quite alright and at that we set off up the long hill<br />
that makes up the first third of the walk-in. With 37 kilos of gear between us and<br />
Walkman blaring we made an easy killing of it and pushed through <strong>to</strong> s<strong>to</strong>p for the<br />
first time at the clearing before the forest. That’s where the camera started giving<br />
shit. Mike <strong>to</strong>ok a pho<strong>to</strong> of me in a collapsed, sweaty state, sitting against a rock and<br />
ready <strong>to</strong> puke from over exertion! Thank Christ it never came out. I sat and watched<br />
the last trickles of twilight being soaked up by The Dark listening <strong>to</strong> Juluka trying <strong>to</strong><br />
explain <strong>to</strong> me that my body was a bus. I suggested <strong>to</strong> Mike that we stay right there<br />
and camp for the night. Mike started what turned out <strong>to</strong> be a long on-going con job<br />
on why we should get <strong>to</strong> the cave by 9pm. “You’ll be really chuffed when you’re<br />
snug in your sleeping bag in the cave”, he said, “just put your mind in neutral and<br />
walk.”<br />
<strong>Climb</strong>ing in under our sacks, we set off again at full tilt straight in<strong>to</strong> the mindenclosing<br />
pitch black forest. Eyes fixed <strong>to</strong> the puddle of light shed by my Petzl, I<br />
trundled on in “neutral” as he put it but I couldn’t help noticing the Boggie monster<br />
following me, the Preda<strong>to</strong>r monster on my right and the Aliens monster on my left.<br />
The Dark was getting the better of me. Basically I shat myself. Clegg kept telling me<br />
things like:<br />
“Takes all my courage <strong>to</strong> look down that long road,<br />
I’m going <strong>to</strong> Giyani with such a heavy load.<br />
I’ve got <strong>to</strong>:<br />
Shintsa (Change)<br />
Qina (Strengthen Myself)<br />
Quingel ‘Isibindi (Take Courage)<br />
And Don’t Give Up.”<br />
113<br />
So I left my troubles behind me and after a brief s<strong>to</strong>p at the spring for water, we<br />
found ourselves up on the plain, two thirds of the way there and it was only 7.30pm.<br />
I walked in front from now on because Mike said he usually got lost on this part.<br />
Anyway, we free-wheeled from there up <strong>to</strong> the lower campsite and pools in just over<br />
twenty minutes. (You might notice from the <strong>to</strong>ne that I had perked up a lot since the<br />
clearing. Wrong. I simply threw Jaluka out and switched <strong>to</strong> The Pretenders).<br />
Bending over a pool <strong>to</strong> fill a water bottle in the pitch dark without the comfort of a<br />
sack on your back as a rear-guard against the evils lurking in The Dark behind you<br />
can only be described as “Chill-fac<strong>to</strong>r <strong>to</strong> the bone”. Here we had our first little<br />
bickering session. We could either add eight litres of water <strong>to</strong> our sacks and slog the<br />
last bit up <strong>to</strong> the cave, or leave the day sack and make a trip back down <strong>to</strong> get it<br />
later. I wanted <strong>to</strong> leave the water because I knew I could con Mike in<strong>to</strong> coming back<br />
<strong>to</strong> fetch it on his own. Mike wanted <strong>to</strong> get it over with so we brought our combined<br />
load up <strong>to</strong> 45 kilos and spent the next forty minutes slogging it up <strong>to</strong> the cave. I<br />
nearly tripped over a cairn that some tit had built right in the middle of the path. I did<br />
mankind a service and kicked it in<strong>to</strong> the bushes. Mike was right about being chuffed<br />
about getting <strong>to</strong> the cave before 9 pm. I was grateful that he had pushed me so hard<br />
and kept me going against my will for the last two hours. We even made up and said<br />
we would still be friends. And here’s where you find out about all the crap we<br />
dragged up. Mike made tea in the small billy over on the Cadac Handy Cooker.<br />
“Handy” has nothing <strong>to</strong> do with size (huge) or weight (3.5 kilos). Its simply “Handy”.<br />
You put it down anywhere and it sits there. None of this wobbling crap. It has a fine<br />
tuned volume control which, when on max, will bring a <strong>big</strong> billy <strong>to</strong> the boil in a<br />
fraction of the time that lesser cookers could. Yes folks, this is one mean cooker. I<br />
started buttering bread rolls and plastering them with honey., bil<strong>to</strong>ng cheese spread<br />
or bacon cheese spread. We each forced down six of these in the name of “carboloading”.<br />
We then ploughed our way through one of those Sea-King meal-in-a-bagjobs<br />
that’s meant <strong>to</strong> feed two. Well, it’s a good thing we had the rolls. Mike sorted<br />
the rack and I packed the munchens and crunchens for the next day’s climbing. (It<br />
may seem at first that munchens and crunchens played a major role in this trip …<br />
they did!) We packed it all in<strong>to</strong> a Boulder sack, set the alarm clock for 6 am and hit<br />
our gaper mats.<br />
6 am and all hell breaks loose. If we didn’t have a real alarm clock I don’t know what<br />
would have pulled Mike out of bed <strong>to</strong> make that first vital brew. Without hot tea there<br />
is just no way that I’ll get up before 9.30 am! We didn’t have much breakfast<br />
because we were still suffering from our glut<strong>to</strong>nous behaviour the night before. By 7<br />
we were well on our way down the ramp and after a deceptively long walk along the<br />
base of the wall, we finally arrived at the bot<strong>to</strong>m of the scramble start <strong>to</strong> BIG<br />
CORNER. As usual I got the short end of the stick and ended up with the sack for<br />
the 400 ft scramble. We would have taken a day pack but then it would have been<br />
one hell of a schlep <strong>to</strong> carry 6 kg of gear for this one hour little hike. That’s why we<br />
opted <strong>to</strong> throw it all in<strong>to</strong> a decent sack.<br />
We decided <strong>to</strong> lead full rope length pitches at all costs because Mike had done the<br />
route before and knew it well enough <strong>to</strong> break it down <strong>to</strong> five roped pitches. I lead<br />
the first F2 pitch in<strong>to</strong> the corner with no sweat and carried on halfway up the next G1<br />
pitch. When I ran out of rope I stanced on a small ledge and brought Mike up. He<br />
experienced the joy of climbing with a full size sack although it weighed almost<br />
114
nothing without the climbing gear in it. Mike <strong>to</strong>ok the next lead and combined the<br />
rest of my G1 pitch with the next G1 pitch. We originally wanted <strong>to</strong> combine these<br />
two with the next short F3 pitch <strong>to</strong>o but had <strong>to</strong> stance before this because ropes are<br />
only so long. I followed with the sack and <strong>to</strong>ok mega strain. Ever tried just sticking<br />
your arms straight up in<strong>to</strong> the air wearing a Boulder? Just think how much fun<br />
following G1 with it could be. I was trashed by the time I got <strong>to</strong> Mike so he quickly<br />
led the F3 bit and stanced about three metres up the G2 off-width at a fairly<br />
reasonable rest spot. I followed again with the pack, this time a lot smoother. After a<br />
short rest, some water and Tarzan bar I lead the rest of the off-width. Mike had<br />
thoughtfully used the friend 4 and one of the friend 3.5’s in his belay. The crack <strong>to</strong>ok<br />
anything from a 2.5 <strong>to</strong> a 4 leaving me with four pieces <strong>to</strong> choose from, but I shat on<br />
him anyway! I led through the grovel chimney and fired straight on up the next G2<br />
pitch, the Dihedral pitch, <strong>to</strong> a stance. Mike followed s<strong>to</strong>pping every now and then <strong>to</strong><br />
haul the sack. The G2 bit was definitely the most enjoyable part of the route for both<br />
of us. One more roped pitch and Mike got <strong>to</strong> the end of the serious stuff. He brought<br />
me up, once again climbing with the sack, and we coiled the ropes. I wasn’t entirely<br />
at ease with this solo idea of his but he assured me that he’d been there before and<br />
it was fairly basic from then on. Guess who ended up with the sack for the next two<br />
pitches: E and F1!<br />
Well, we <strong>to</strong>pped out at 3 pm and pigged ourselves until 4 pm on Provita and Cheese<br />
Spread, Granola Bars, Mini Bar-Ones and all sorts of other nice things <strong>to</strong> eat. We<br />
<strong>to</strong>ok our time and strolled back <strong>to</strong> the cave by 5.30 pm. I conned Mike in<strong>to</strong> making a<br />
quick water trip and he fetched eight litres from a nearby stagnant pool using the<br />
day sack. We also had the <strong>big</strong> billy full of water from the day before. The next two<br />
hours were spent playing a tricky game of musical chairs with the water containers.<br />
Fresh water, stagnant pool water, filtered water, filtered and boiled water…the net<br />
result was four full water bottles of reasonably healthy water. (By the way, those<br />
water purification tablets suck!) Once again we pigged ourselves on a mega supper<br />
of rice, tuna and a savoury sauce not <strong>to</strong> mention the Ultramel and canned peaches<br />
for dessert. I also put down a one litre tea transfusion. By 9 pm I had run out of<br />
things <strong>to</strong> keep my mind busy. The Boggie monsters and other fun loving creatures<br />
were lurking in The Dark just outside the cave and the Gerbils were scaring the shit<br />
out of us every time one of them scampered by. We set the alarm for 3 am and<br />
chickened out of facing reality by falling asleep.<br />
Mike forced me out of my sleeping bag just after 3 with a cup of hot tea. We tucked<br />
in<strong>to</strong> a couple of Oatsas (Yeuk!), packed our sleeping bags in<strong>to</strong> the sack along with<br />
the rack, ropes, six litres of the magic liquid and a huge amount of bivi gear and <strong>to</strong>ns<br />
of other rubbish including lank munchens and crunchens. True <strong>to</strong> form, the sack<br />
weighed in at 26kg of which only 12kg was climbing gear (“How do you know how<br />
much it weighed?” you may ask. I planned this <strong>to</strong> the nearest 100g back in a little<br />
flat in Braamfontein silly!) On the ramp in The Dark by 4 and at the base of<br />
SOMETHING OF VALUE by 5.30 just in time <strong>to</strong> watch the sunrise. After a quick shit<br />
(the wall always seems <strong>to</strong> do this <strong>to</strong> me at first) and a gear sort I <strong>to</strong>ok the first lead,<br />
forty meters of F3 (18) <strong>to</strong> the stance. Mike followed with the sack (14kg) and was<br />
<strong>to</strong>tally buggered by the time he crawled on<strong>to</strong> the stance. So, I got <strong>to</strong> lead the next<br />
pitch, 40 more meters of roofish F3 (17) <strong>to</strong> the next stance. Things were running<br />
slowly and Mike repeated his performance. I explained <strong>to</strong> him that he had <strong>to</strong> climb<br />
faster if we wanted <strong>to</strong> <strong>to</strong>p out in this life. He growled, grabbed the rack and led off on<br />
115<br />
the next 40 meters of F3 (17). I followed this with Eric (the sack finally had some<br />
form of identity) and realised why Mike was so stuffed. I panted a gasped on<strong>to</strong> the<br />
mega grass ledge at about 10 am. Mike had a huge grin on his face. The sun was<br />
determined <strong>to</strong> make life difficult and bake us <strong>to</strong> death. We left Eric outside and went<br />
<strong>to</strong> hide in the Adele’s hole under the <strong>big</strong> boulder. I lay there for half an hour eating<br />
Tarzan bars, sweets and drowning myself in magic liquid. I studied the RD and<br />
worked out how much we needed <strong>to</strong> climb <strong>to</strong> make it <strong>to</strong> the bivi ledge before dark.<br />
Only three more pitches! With eight hours of daylight left, at the slug speed of <strong>to</strong><br />
hours per pitch, we could even fix the G2 pitch after the bivi ledge and ab back<br />
down <strong>to</strong> kip. No problem. I started on the G1 (19) ramp pitch at 10.30 am feeling like<br />
a new man. Neither Mike nor I found this pitch particularly difficult although we did<br />
haul Eric. We gave it a grade of F3 (17).<br />
Here’s the RD for pitch 5:<br />
20m 21 <strong>Climb</strong> the brown face <strong>to</strong> a rail leading left <strong>to</strong> the base of an obvious dihedral,<br />
which is climbed <strong>to</strong> beneath a roof. Traverse about 10m left across the face <strong>to</strong> a<br />
stance.<br />
The 10m traverse is a <strong>to</strong>uch bleak as far as pro goes. Its protected by a sideways<br />
RP1 at about 5m. Get it? Twenty meter pitch…ten meter traverse…belay ledge<br />
below…great potential for hitting the deck, enhanced even more by the fact that the<br />
crux is just after the RP and that Mike’s back-belay system left plenty <strong>to</strong> be desired.<br />
Oh well, he handled it ok and needless <strong>to</strong> say we hauled Eric. Following was even<br />
more fun because you face the same deck potential, only with the RP pulling the<br />
wrong way. There were some tense moments but what we kept on forgetting was<br />
that we’re actually fairly good climbers, climbing below our grade. This fact is one of<br />
the things that’s very difficult <strong>to</strong> explain <strong>to</strong> your little brain while you’re trying <strong>to</strong> put it<br />
back <strong>to</strong>gether under extreme stress conditions. The next 40 m of F3 including a 15m<br />
traverse was tame compared <strong>to</strong> what we’d just been through. It was my turn <strong>to</strong> lead<br />
and Mike followed with Eric. We both felt that this pitch was more like F2 although<br />
the last little corner was a bit tricky. Anyway, this very pleasant pitch ends at The<br />
Five Star Bivi Ledge. We wandered around our bedroom in the sky and introduced<br />
ourselves <strong>to</strong> the locals (hundreds of swallows in little nooks and crannies all over the<br />
ledge). Mike built a nice flat platform out of huge flat rock flakes <strong>to</strong> kip on, with a<br />
surrounding wall of rocks <strong>to</strong> keep the breeze out. After a good munch and some<br />
more magic liquid Mike suggested that I lead a hard pitch for a change so I fixed the<br />
next G2 (20) pitch and reversed it in the dark on my Petzl shunt.<br />
“And far from flying high on clear blue skies, I am spiralling down <strong>to</strong> the hole in the<br />
ground where I hide…”<br />
I emptied Eric out in<strong>to</strong> a corner of my villa and was boggled at the amount of<br />
munchens that we still had left so I proceeded <strong>to</strong> rectify the situation. Empty Eric<br />
made a nice padded mat <strong>to</strong> kip on so I snuggled up on it in my sleeping bag and <strong>to</strong><br />
the sound of Floyd we fell asleep. (The Dark couldn’t get <strong>to</strong> me high up on my little<br />
ledge.)<br />
The next morning we slothed until 6.30 and then woke up <strong>to</strong> a good solid breakfast<br />
of Yogi-Crunch with powder milk and Cheese Rolls with Honey. I did what I’ve<br />
116
always wanted <strong>to</strong> do on a <strong>big</strong>-wall bivi: drop my blessing on a flat rock and Frisbee it<br />
in<strong>to</strong> the valley below. I think I <strong>to</strong>ok out a donkey. We followed pitch 7 hauling Eric,<br />
who was by now down <strong>to</strong> about 8kg I guess, through the crux. We both found it a<br />
<strong>to</strong>uch desperate for F3 and decided that we must have over-eaten. Anyway, it was<br />
definitely harder than the G1 ramp pitch. I then lead the Double Crax G2 (20) pitch<br />
and traversed left <strong>to</strong>o low like a real clutz and made life really difficult for myself, not<br />
<strong>to</strong> mention airy and scary. Mike followed the conventional line at the conventional<br />
grade wearing the unconventional Eric. We s<strong>to</strong>pped in the shade before the next<br />
easy traverse pitch for an early but drawn-out lunch break. I led the F3 (17) <strong>to</strong> give<br />
Mike a chance <strong>to</strong> follow a traverse with Eric for a change. We both found this pitch<br />
fairly basic. The same cannot be said about the first sequence of moves on the next<br />
G2 (21) off-width pitch. Mike and I spent just over two whole hours fathoming the<br />
first few moves out and putting our minds back in their respective little boxes. The<br />
problem lay somewhere between the belay ledge and the four meters of rope one<br />
needed <strong>to</strong> clip the first runner on back-belay. When Mike finally got the runner out<br />
and clipped he blew his bracket and other gaskets. His mind simply packed it in and<br />
he was forced <strong>to</strong> take a poofy fall on<strong>to</strong> the runner and lower off <strong>to</strong> the ledge. I led<br />
through on his gear and he followed. Eric got a free ride through the overhanging<br />
first six meters and then hopped on Mike’s back for the rest of the pitch. These may<br />
not technically have been the hardest moves on the route but it definitely was the<br />
crux pitch as far as we were concerned.<br />
Another hour of trivial climbing brought us <strong>to</strong> the start of the scrambling. After a rope<br />
coiling ceremony we <strong>to</strong>ok turns with Eric and <strong>to</strong>pped out in no time. After much<br />
shaking of hands – Mike and I, Mike and Eric, Eric and I – and all the other strange<br />
things one normally does on <strong>to</strong>pping out such as letting go of loads of yells of<br />
triumph, drinking all the excess magic liquid and noshing all the lef<strong>to</strong>ver munchens<br />
and crunchens (and believe me, this was no small task!), we headed for the cave at<br />
full tilt <strong>to</strong> the sound of, what else, Floyd. Forty minutes later we were watching a<br />
brew in the making.<br />
The Dark moved in and the sky turned evil. Lighting raked the heavens and thunder<br />
shook the foundations of the earth. Then it started pissing down. By 9pm it hadn’t<br />
s<strong>to</strong>pped and I needed water! Stark naked, armed only with a coke bottle and a Petzl<br />
headlamp I went off in the quest for the magic liquid. Rain has this habit of being wet<br />
without being easy <strong>to</strong> catch. Anyway, I found a full rock pool, filled my bottle and<br />
then <strong>to</strong>ssed the Petzl aside <strong>to</strong> have a much needed bath.<br />
I had challenged The Dark and I had won.<br />
117<br />
EIGHT MILES HIGH<br />
AN ACCOUNT OF THE FIRST ASCENT<br />
Taken from The Journal of the Mountain Club of South Africa, 1988 edition, pp118-<br />
120, courtesy of the MCSA.<br />
Article by Stewart Middlemiss<br />
On a midwinter’s afternoon at 4h30 pm with one hour of daylight left, halfway up the<br />
North Wall of Blouberg, your options are very limited; abseil, bivy or climb very fast.<br />
We elected <strong>to</strong> do the latter and traversed off on<strong>to</strong> HEY JUDE, which provided an<br />
easy escape conduit for those willing <strong>to</strong> “boat” it a little. <strong>Climb</strong>ing alpine style (one<br />
person leading, placing occasional runners and the other two following at the end of<br />
the rope) enabled us <strong>to</strong> do six pitches before dark and have only the final bushy<br />
gulley <strong>to</strong> do without any light. We had taken the head<strong>to</strong>rch with us, and as George<br />
had led the last section, this resulted in him stumbling up the potholed, but nearly<br />
level, gulley like a blind man; which cost him some skin and bruising and no doubt<br />
contributed <strong>to</strong> his good humour on the walk down. Three people, one head<strong>to</strong>rch, no<br />
moon and the slog across plus the maze ensures that its at least three hour after<br />
dark before you get back <strong>to</strong> the cave.<br />
The previous day Mike Cartwright and I had abseiled about two rope lengths down<br />
the area <strong>to</strong> the right of YOU ONLY LIVE TWICE. It didn’t take long <strong>to</strong> decide that it<br />
looked pretty good terri<strong>to</strong>ry for an aid route (see PSYCHO REPTILE), or as Mike put<br />
it “A library route – bookcases of loose rock”. We also both got scared enough <strong>to</strong> put<br />
an end <strong>to</strong> any thoughts of establishing any route from the <strong>to</strong>p down. You are not in<br />
the right frame of mind <strong>to</strong> deal with intimidating rock and the problems it poses. At<br />
the same time Dominic and Grant had gone <strong>to</strong> climb LAST MOON, while Kevin and<br />
George had made a start on a new route, completing four pitches before abseiling<br />
off.<br />
On Saturday Mike was still keen <strong>to</strong> do some more inspection from above, but in a<br />
different area, so I teamed up with Kevin and George for another push at their route.<br />
I ended up leading the crux pitch off the grass ledge and appreciated the blade peg<br />
that Kevin had given me <strong>to</strong> place; he had led it the previous day with a nut scratcher<br />
slid in<strong>to</strong> a crack for protection! A lot of trying of various alternatives saw us getting<br />
nowhere. The most feasible alternative looked like it needed a bolt, so with just over<br />
an hour of daylight left we climbed SOMETHING OF VALUE’S traverse pitch and<br />
traversed on<strong>to</strong> HEY JUDE.<br />
Sunday dawned cold and wet (until 10.30 am), so we all enjoyed a rare laid-back<br />
day – Dominic and Grant apart. They had experienced a character-building bivy on<br />
LAST MOON, so Mike and George went <strong>to</strong> look for them while Kev and I packed up.<br />
When the miserable pair arrived with their would-be rescuers we left for home. A<br />
good natured race developed, starting as a brisk walk and escalating in<strong>to</strong> a sprint.<br />
Kevin got <strong>to</strong> the front and tried <strong>to</strong> shake us off with a burst of speed. Such was the<br />
scene that greeted Adam Roff and Duncan Elliot staggering up through the forest on<br />
their first visit <strong>to</strong> Blouberg. Three maniacs, with packs, hell-bent on suicide, crashing<br />
down the path, or in its vicinity, at full tilt! brief yelled greeting and we were gone.<br />
118
Smith, without s<strong>to</strong>pping, made Frans’ Kraal in 43 minutes from the <strong>to</strong>p campsite. We<br />
lesser beings <strong>to</strong>ok a bit longer.<br />
The next weekend saw Kev and me back on the great road north (George couldn’t<br />
make it). It was new moon, but the walk-in in the dark isn’t <strong>to</strong>o bad if you’ve done it<br />
before. We met Mike at Frans’ Kraal – he had spent the week at Blouberg along<br />
with Adam and Duncan (who did LAST MOON over three days but that’s another<br />
s<strong>to</strong>ry).<br />
Early the next morning the three of us climbed “our route” / HEY JUDE /<br />
SOMETHING OF VALUE combination <strong>to</strong> our high point. The pitch that “needed a<br />
bolt” went fairly easily with a little commitment followed by two more excellent<br />
pitches, then one that required a little gardening. Possibly one of the reasons why it<br />
<strong>to</strong>ok such a long time <strong>to</strong> open the route was the unanimous yet unvoiced feeling that<br />
with pitches this good, mixed climbing would be out of place. This most cracks were<br />
dug out with nut picks and brushed clean (on lead) as were a few ledges, a timeconsuming<br />
process calculated not <strong>to</strong> make you feel good ‘n clean ‘n fresh.<br />
Mike had a severe attack of sloth the next morning so Kev and I set off <strong>to</strong> do battle<br />
with the rock again. Up HEY JUDE, by now almost a well-worn highway, and then a<br />
rising traverse <strong>to</strong> gain our high point. More excellent climbing <strong>to</strong>ok us <strong>to</strong> “the best<br />
stance on the hill”. A small ledge, one meter by three meters, surrounded by steep<br />
rock and directly above the start A s<strong>to</strong>ne dropped from here cleared the base of the<br />
route by a few meters. The next pitch looked intimidating, a steep protectionless<br />
corner which I climbed up and down a few times – eventually getting two meters off<br />
the ledge.<br />
Kevin <strong>to</strong>ok over the sharp end and got one meter higher before deciding this was<br />
not on – bathooking was not part of the game even if we did have them. Inspiration<br />
<strong>to</strong>ok charge when a possible crack-line was seen seven meters <strong>to</strong> the right with a<br />
steep wall in between. “Looks like a 5.13 face at Smith Rocks!”<br />
A nut and a friend were placed and Kevin did a very airy pendulum <strong>to</strong> a good crack<br />
which <strong>to</strong>ok us <strong>to</strong> the stance below the SOMETHING OF VALUE off width. There are<br />
two lines <strong>to</strong> the left of the off width. The first is blank at the start and the second is<br />
blind higher up. Solution: start on the far left crack and traverse across the bulge <strong>to</strong><br />
the right on “emmlets”, (the English diminutive of emmer or bucket). Although a bit<br />
run-out, it gave positive climbing <strong>to</strong> gain a good crack. A long (55 m) pitch in semi<br />
darkness followed. This brought us <strong>to</strong> the SOMETHING OF VALUE scramble and<br />
yet another after dark descent. Now all we had <strong>to</strong> do was climb it all in one push!<br />
119<br />
THE BIG PUSH<br />
FIVE ROUTES IN A DAY<br />
Taken from The Journal of the Mountain Club of South Africa, 1990 edition, pp88-<br />
92, courtesy of the MCSA.<br />
Article by George Mallory<br />
Blouberg, which is situated in the Northern Transvaal, approximately 450km from<br />
Johannesburg, has a 300m high north wall. When I first visited the mountain in1982,<br />
I really enjoyed climbing there, but it seemed such a pity that the logistics of the<br />
place confined climbing there <strong>to</strong> long weekend trips: day one <strong>to</strong> drive up and walk<br />
up, day two for the route and day three <strong>to</strong> walk down and drive home.<br />
When I left WITS my appetite for climbing soon outstripped the supply of long<br />
weekends. In 1984, my brother and I realised that long weekend trips had <strong>to</strong> be<br />
possible. We left work early one Friday afternoon, drove <strong>to</strong> Frans’ Kraal, walked up<br />
in the moonlight and started our route on the Saturday morning. In those days,<br />
standard practice for doing a route in a day called for an alpine start. Because we<br />
started late, we bivouacked on the route and <strong>to</strong>pped out on Sunday. This was the<br />
first time that a route on Blouberg was climbed in a two-day weekend trip. It opened<br />
the door <strong>to</strong> an unlimited supply of climbing at Blouberg.<br />
When I returned <strong>to</strong> the Transvaal after a year of depravity in the Free State, Kevin<br />
Smith and I started talking about Blouberg. We decided that we would like <strong>to</strong> climb<br />
two routes in a day. We felt that this was possible. When the day came in December<br />
1986, things went so well that we actually did three routes: HEY JUDE (G2, 20),<br />
LAST MOON (G1, 18) and BIG CORNER (G2, 20).<br />
Naturally we were thrilled with this achievement but in the back of our minds a<br />
question lurked: “Is it possible <strong>to</strong> do more than three routes in a day?” After all, we<br />
hadn’t practiced the routes and we had finished with mre than an hour of daylight <strong>to</strong><br />
spare and we could definitely have been fitter. I couldn’t see how we could squeeze<br />
a fourth route in<strong>to</strong> one day because, on average, we had taken five hours per route<br />
and there aren’t 20 daylight hours in a day. But Kevin was less inhibited in his<br />
thinking and, in June 1987, over a good bottle of wine he suggested that, by<br />
climbing at night with head <strong>to</strong>rches, we might be able <strong>to</strong> climb five rotes in 24 hours.<br />
The concept as<strong>to</strong>unded me. Imagine climbing at night with head <strong>to</strong>rches! How fit<br />
would I have <strong>to</strong> be <strong>to</strong> keep climbing for 24 hours? We resolved <strong>to</strong> go <strong>to</strong> Blouberg<br />
every full moon weekend <strong>to</strong> prepare for “the <strong>big</strong> push” as we called the project.<br />
There was plenty of preparation <strong>to</strong> be done. Firstly we needed <strong>to</strong> decide which five<br />
routes we would climb. Neither of us had ever climbed HALFMOON (G1, 19) or<br />
MALEBOCH (G2, 20) so we did the routes and found them <strong>to</strong> be suitable “<strong>big</strong> push”<br />
material. Secondly we needed <strong>to</strong> explore the western end of the wall. I thought we<br />
might find a descent ramp there which would hopefully reduce the time required <strong>to</strong><br />
walk back down <strong>to</strong> the base of the wall between routes. Reducing our walking down<br />
time was in fact essential. When we did three routes in a day it <strong>to</strong>ok us about three<br />
120
hours <strong>to</strong> climb each route and about two hours <strong>to</strong> walk down <strong>to</strong> the base, i.e. a <strong>to</strong>tal<br />
time per route of about five hours.<br />
Five hours times five routes gives 25 hours which is obviously longer than a day.<br />
However we did find a descent ramp at the western end of the wall and with<br />
hindsight, using this ramp made the project possible. Thirdly, we needed <strong>to</strong> learn the<br />
technique of <strong>big</strong> wall climbing by <strong>to</strong>rch-light. It still seems ludicrous now, but one<br />
moonless weekend we drove <strong>to</strong> Frans’ Kraal on Friday night, walked up <strong>to</strong> the cave,<br />
arrived there at 11h30pm and set off <strong>to</strong> climb HEY JUDE half an hour later, at<br />
midnight. My head <strong>to</strong>rch batteries didn’t last the distance so I got some unexpected<br />
practice at climbing in the dark. We <strong>to</strong>pped out at first light, slept for a couple of<br />
hours and went on <strong>to</strong> climb another route.<br />
By the end of 198 we were ready <strong>to</strong> attempt the “<strong>big</strong> push”, but Kevin went <strong>to</strong><br />
London over the December full moon weekend and when he returned he caught<br />
hepatitis. Consequently we had <strong>to</strong> shelve the idea for the time being.<br />
In 1988 we concentrated our efforts on more conventional projects. We opened<br />
SCATTERLINGS, EIGHT MILES HIGH and TEDDY BEARS’ PICNIC. To add spice<br />
<strong>to</strong> the weekends the walk up <strong>to</strong> the cave became a highly competitive activity. My<br />
previous personal best time of 1h50 was whittled down <strong>to</strong> 1h24 (at night). Kevin<br />
slashed his previous best of 1h23 <strong>to</strong> 1h15. Schemes were devised and deals<br />
negotiated <strong>to</strong> reduce pack weight and hence time. I know one lunatic who even<br />
trained specifically for the event by walking up <strong>to</strong> his 17 th floor office every morning.<br />
The all Africa record (without a pack and in daylight) now stands at 58 minutes.<br />
As the summer of 88/89 approached, “<strong>big</strong> push” fever broke out again. Clive Curson<br />
and I were the first victims. We wanted <strong>to</strong> do two routes in a one day trip from<br />
Johannesburg. We set off from Johannesburg at midnight one Friday, drove <strong>to</strong><br />
Frans’ Kraal, walked up at dawn, climbed HEY JUDE and BIG CORNER, ran down<br />
<strong>to</strong> the car, drove back <strong>to</strong> Johannesburg, and even managed <strong>to</strong> get <strong>to</strong> a party by<br />
10h30pm. On Christmas eve, Kevin and I climbed EIGHT MILES HIGH (22, 11<br />
pitches) and THE RAZORS’ EDGE (21, 12 pitches) in 16 hours. This project, <strong>to</strong><br />
climb two long hard routes in a day, was the product of “<strong>big</strong> push” mentality. In<br />
retrospect, climbing two hard routes quickly was a better quality experience than<br />
doing vast quantities of easy mileage.<br />
We thought that January would be the best month for the “<strong>big</strong> push” because the<br />
days are long and the wall is shaded in the afternoon. However, Kevin went <strong>to</strong><br />
London in January and we both went <strong>to</strong> an important wedding over the February full<br />
moon weekend. The “<strong>big</strong> push” had <strong>to</strong> be postponed <strong>to</strong> the March 1989 full moon<br />
weekend. The days are shorter than in January which is an obvious disadvantage<br />
and the sun shines on the wall all day, which can be murder on a hot day but<br />
despite these disadvantages we decided that the project could not wait till the next<br />
summer.<br />
Michele, Kevin and I drove <strong>to</strong> Frans’ Kraal on Friday night, walked up by <strong>to</strong>rch-light,<br />
and got <strong>to</strong> sleep at 2h00am. On Saturday we walked down <strong>to</strong> the base of the wall<br />
and stashed water and food at the base of each route. We returned <strong>to</strong> the cave via<br />
the western ramp (memorising the route in the process) and also made a cache at<br />
121<br />
the <strong>to</strong>p of this ramp. We then hoped and prayed for favourable weather conditions.<br />
A ten-minute downpour in the afternoon didn’t exactly inspire confidence.<br />
Furthermore, an experienced party <strong>to</strong>ld us that they were forced <strong>to</strong> aid the twin<br />
cracks pitch on HEY JUDE earlier that day because it was wet.<br />
We woke at 11h15 after what felt like (and was) far <strong>to</strong>o little sleep. The night was<br />
warm, so at exactly midnight we set off clad only in T-shirts and cot<strong>to</strong>n longs. HEY<br />
JUDE went like a dream. We <strong>to</strong>pped out an hour ahead of our planned schedule<br />
then walked down <strong>to</strong> the base of HALFMOON. At that stage we were forced <strong>to</strong> wait<br />
a quarter of an hour for first light as we hadn’t planned <strong>to</strong> take head <strong>to</strong>rches on that<br />
route.<br />
HALFMOON didn’t go quite so well. went off route on the third pitch and when we<br />
<strong>to</strong>pped out we were only half an hour ahead of schedule. LAST MOON was next on<br />
the list. As we started, Michele appeared at the base and encouraged us. By<br />
1h00pm we had done three routes ad had two <strong>to</strong> go. It was hot and a piece of dirt in<br />
my eye was hampering my vision. At the base of BIG CORNER Michele fed us<br />
cheese and tuna rolls. At that stage the pressure was on us because we needed <strong>to</strong><br />
get back down <strong>to</strong> the base of MALEBOCH with enough time <strong>to</strong> scramble the first<br />
few pitches in the light. We combined pitches on BIG CORNER in such a way that I<br />
had a full rope length of drag on the crux. I really battled with the move and that<br />
psyched me out. While Kevin led the last pitch I prepared my resignation speech:<br />
“We’ve already improved on our previous best and in my exhausted state, climbing<br />
MALEBOCH in the dark simply cant be justified.” But when I joined him on <strong>to</strong>p I<br />
didn’t have the heart <strong>to</strong> deliver my speech. Kevin encouraged me and we<br />
descended the western ramp for the fourth time that day.<br />
Michele was still at the base. We ate and drank as quickly as we could and then, in<br />
the last light, scrambled up the start of MALEBOCH. The timing was looking good.<br />
We had five hours for six pitches and then a walk back <strong>to</strong> the cave. I made a deal<br />
with Kevin: I would lead the “fighting pitch of G1 standard” (which he found very<br />
difficult) if he led all the other pitches. It is difficult <strong>to</strong> describe our ascent. I kept<br />
falling asleep on the stances while belaying Kevin and he did the same <strong>to</strong> me. While<br />
actually climbing I felt fine but we seemed <strong>to</strong> be wasting so much time and there<br />
was so much at stake. Eventually I was woken by Kevin’s shout of “belay ff” at the<br />
<strong>to</strong>p of the crux pitch. We had first free climbed this pitch 18 months earlier and had<br />
graded it 20. In the dark, after nearly 1500m of climbing I resorted <strong>to</strong> standing on a<br />
peg at the crux (embarrassing as it is <strong>to</strong> admit it).<br />
We walked back <strong>to</strong> the cave and arrived there at seven minutes <strong>to</strong> midnight. We had<br />
done nearly 1500m of climbing and 1500m of descending in a singe day. We were<br />
exhausted.<br />
I was <strong>to</strong>o tired <strong>to</strong> become philosophical then and even now I can’t explain why we<br />
did it. Perhaps my grandfather had the answer: “what we get from this adventure is<br />
just sheer joy. And joy is after all the end of life. We do not live <strong>to</strong> eat and make<br />
money. We eat and make money <strong>to</strong> be able <strong>to</strong> enjoy life. This is what life means and<br />
what life is for.”<br />
122
Notes by Kevin Smith<br />
Timetable:<br />
0000 Leave cave<br />
0050 Start HEY JUDE<br />
0350 Top out HEY JUDE<br />
0515 Base HALFMOON – still dark!<br />
0530 Start HALFMOON<br />
0900 Top out HALFMOON<br />
1000 Start LAST MOON<br />
1300 Top out LAST MOON<br />
1410 Base BIG CORNER<br />
1430 Start BIG CORNER scramble<br />
1715 Top out BIG CORNER<br />
1815 Base MALEBOCH<br />
1830 Start MALEBOCH scramble<br />
2250 Top out MALEBOCH<br />
2353 Reach cave<br />
Pitches:<br />
HEY JUDE 8 roped pitches (usually 9)<br />
HALFMOON 9 roped pitches (usually 9)<br />
LAST MOON 8 roped pitches (usually 11)<br />
BIG CORNER 4 roped pitches (usually 6+)<br />
MALEBOCH 6 roped pitches (usually 6+)<br />
Food:<br />
Water and Game at each start, 4 litres Game and 4 litres water at <strong>to</strong>p stash.<br />
Cheese spread and tuna rolls, <strong>to</strong>ma<strong>to</strong>es, dried peaches, zoo and chocolate<br />
digestive biscuits and sweets at starts. Chocolate bars (7 in <strong>to</strong>tal) and sweets at<br />
<strong>to</strong>p stash.<br />
Gear:<br />
Headlamps and helmets on first and last routes.<br />
Longs used and shirts – nothing else.<br />
Rack – 4 slings, 6 jalobes, Rocks 1-7, Friends 0, 0.5 1, 1.5, Camalots 1, 2, 3,<br />
Hex 8, each with krab, 2 spare krabs, 1 bandolier, 2 scratchers, 2 belay<br />
devices. All krabs lightweight, Friends technical i.e. wired.<br />
No pack, takkies carried on harness, water only at start and <strong>to</strong>p.<br />
Weather:<br />
Clear at night, misty and windy pre-dawn <strong>to</strong> mid-morning, hottish midday <strong>to</strong><br />
mid-afternoon, cool in evening.<br />
123<br />
BLOUBERG: MY BACKYARD<br />
STORIES AND ADVENTURES AT BLOUBERG<br />
Taken from The Journal of the Mountain Club of South Africa, 1997 edition, pp164-<br />
169, courtesy of the MCSA.<br />
Article by Charles Edelstein<br />
To climb at Blouberg is <strong>to</strong> <strong>to</strong>uch the soul of rock climbing. The impressive 400 meter<br />
high north face of Blouberg <strong>to</strong>wers above the plains of the Northern Province. It<br />
overlooks in the distance the Limpopo Valley, which can be an arid orange-red<br />
desert one year or a luscious green savannah dotted with trees in another year. To<br />
the north-east lies the Soutpansberg. If you ever wanted <strong>to</strong> get <strong>to</strong> grips with the<br />
“This is Africa” vibe, Blouberg is the epi<strong>to</strong>me.<br />
The north face is guarded by thousands upon thousands of alpine swifts. They feed<br />
on the aerial plank<strong>to</strong>n in the early morning and the late evening. If you are unfamiliar<br />
with climbing on the north face it is wise <strong>to</strong> be well-established on a route before the<br />
swifts appear in the morning and off the face in the evening before they re-emerge.<br />
It is a wonderful sight <strong>to</strong> see them racing around at great speed with their shrill<br />
chirps. Three or four of them will peel off from the main formation and dive after a<br />
small s<strong>to</strong>ne <strong>to</strong>ssed from a high point on the face.<br />
Throughout the day the rock martins lazily flit around interspersed with noisy groups<br />
of red-winged starlings. Pigeons abound and later in the afternoon you will be visited<br />
by the Cape vultures with their languid flight along the upper reaches of the face.<br />
Beware of the pesky black ravens who will annihilate any article which may<br />
resemble a food container – even a chalk bag has been carried off!<br />
My first visit <strong>to</strong> Blouberg <strong>to</strong>ok place in 1978 with Kevin Smith. We were on a mission<br />
<strong>to</strong> explore and conquer. Very few routes had been established by our predecessors,<br />
such as Paul Fatti. However, even <strong>to</strong>day, and despite improved roads, a visit <strong>to</strong><br />
Blouberg is an adventure of epic proportions unless you are accompanied by a<br />
“regular”. This trip was no exception. El Nino, which wasn’t known about at the time,<br />
was doing its thing and besides getting stuck in the then sand (but now concrete)<br />
drift, and taking the long way around, we eventually managed <strong>to</strong> <strong>to</strong>p out after a four-<br />
or five-hour walk. Ronnie van Dijk, who travelled on his own and was <strong>to</strong> meet us, got<br />
hopelessly lost and dehydrated. Kevin and I spent a very wet night under a pathetic<br />
overhang at the upper rock pools, and the next day we went careering down the<br />
kloof on our imaginary mo<strong>to</strong>r bikes. “BAPM, BAPM!”, we went. When Ronnie<br />
eventually found us, the look of utter joy on his face was a sight <strong>to</strong> behold. He had<br />
spent the night slightly drier than us, but all on his own in this wild place. We spent<br />
that weekend bouldering and opened a route on the lower campsite buttress which<br />
we called BAPM, which is still good for its grade at 21 free.<br />
Over the next few years Blouberg was <strong>to</strong> become my passion: even Yosemite<br />
Valley <strong>to</strong>ok second place because of its crowds and commercialism. It started with<br />
Margaret Milne and I losing the path on the walk-in and bivying in the forest. Then<br />
we spent an uncomfortable night bivying on a tiny ledge on LAST MOON, somehow<br />
124
not finding the five-star site further up. Fortunately Blouberg graced us with a mild<br />
night and we were not cold even though it was mid-June. However, our final night<br />
was spent at one of the many wonderful sites under the trees next <strong>to</strong> one of the<br />
crystal-clear rock pools – an experience which cemented our relationship, which is<br />
still fantastic up <strong>to</strong> this day.<br />
In the 1980’s Blouberg became very popular with the so-called “regulars”; the<br />
stashes grew and the routes were conquered. The ritual evolved <strong>to</strong> sneak off from<br />
work on Friday afternoon and race <strong>to</strong> Pietersburg, risking life and limb. This meant<br />
being subjected <strong>to</strong> more than one “NDE” (Near Death Experience)! We would<br />
descend on the Spur restaurant <strong>to</strong> gorge ourselves on salads and coffee, followed<br />
by the drive <strong>to</strong> Dendron and Frans’ Kraal. Frans was always there <strong>to</strong> greet us,<br />
surrounded by hordes of children with their bright eyes and their cries for sweets.<br />
Then came the race up <strong>to</strong> the cave in the moonlight. George Mallory defined the<br />
ultimate “PB” (personal best) – an hour from Frans’ Kraal <strong>to</strong> the cave.<br />
The 1980’s and early 1990’s saw the HEY JUDE area developed <strong>to</strong> produce fine<br />
routes such as EIGHT MILES HIGH and SCATTERLINGS. Also, the Wall of White<br />
Light section of the face developed and delivered world-standard <strong>big</strong>-wall routes<br />
such as WALL OF WHITE LIGHT, YOU ONLY LIVE TWICE, PSYCHO REPTILE<br />
and THE DELICATE SOUND OF THUNDER. Meanwhile, an amazing feat of<br />
endurance, “The Big Push” (five routes in under 24 hours by Kevin Smith and<br />
George Mallory) was accomplished. Bolting, fortunately judicious, occurred,<br />
resulting in routes such as ANOTHER DAY IN HELL (25), being free climbed. On<br />
the minor rock faces some short routes appeared and some testing trad problems<br />
emerged including POWER SURGE (24) and DOG STAR (24), which still requires a<br />
repeat ascent. Mike “Rat” Cartwright hauled a genera<strong>to</strong>r, a drill and 90m of cable up<br />
<strong>to</strong> the <strong>to</strong>p of the main face and installed rappel routes in the HEY JUDE and BIG<br />
CORNER areas. These proved invaluable <strong>to</strong> me as I have preferred <strong>to</strong> camp next <strong>to</strong><br />
the HEY JUDE pools over the last few years <strong>to</strong> evade the theft which has become<br />
rife at Blouberg. The rappel route allows for an exposed 90 minute descent <strong>to</strong> the<br />
base.<br />
Fringe lunatics have also had their day: George Mallory on one occasion<br />
parapented of f the BAPM buttress, and a group of BASE-jumpers hurled<br />
themselves off the Wall of White Light in front of television cameras.<br />
More recently I started paying more attention <strong>to</strong> the routes in the Wall of White Light<br />
area. Mike Cartwright and Cathy O’Dowd had finished THE DELICATE SOUND OF<br />
THUNDER, which, like THE WALL OF WHITE LIGHT wanders somewhat around<br />
that part of the face. The two routes cross each other about half way up, and<br />
unfortunately the lines of both are rather broken. To the left is a vast amount of<br />
unclimbed rock. Kevin and I completed ANOTHER DAY ON HELL in 1990, so<br />
named because of the intense heat we had <strong>to</strong> endure during our various attempts.<br />
Towards the end of 1995 I envisaged pushing a line straight through the middle of<br />
the face left of THE WALL OF WHITE LIGHT and THE DELICATE SOUND OF<br />
THUNDER.<br />
However, the mid-1990’s saw the “regulars” disappearing and experienced climbing<br />
partners were becoming difficult <strong>to</strong> find for such a venture. Matt Murrison was<br />
125<br />
introduced <strong>to</strong> me and we set off in November 1996 <strong>to</strong> establish what I thought would<br />
be a serious aid route. Armed with all the aid <strong>to</strong>ys and the experience I had gained a<br />
few months previously on ZODIAC in Yosemite, we embarked on the project. We<br />
completed six pitches – all of the pitches having very little aid. It was almost a year<br />
later that I returned with Eric Maguire <strong>to</strong> finish off the route. In the meanwhile Matt<br />
had returned and had finished off a version of the route, taking a different line <strong>to</strong> the<br />
one I had envisaged. 1997 delivered DOG DAY IN HEAVEN (24, A2). George<br />
Mallory visited South Africa in December and we hauled a Hilti drill up the route. I<br />
placed a bolt on the “Bottle Pitch” (pitch 5) and bolted the final dihedral. In the<br />
dihedral I managed <strong>to</strong> free all but the last move (which was obstructed by the haul<br />
bag), and I have no doubt that it will go free at grade 24 or 25. This takes a virtually<br />
straight line and is one of the more consistently hard routes at Blouberg.<br />
On the same trip George and I placed rap hangars at the <strong>to</strong>pe of BAPM and placed<br />
three carefully positioned bolts on the route just <strong>to</strong> the left of it. Some years ago<br />
Dion van Zyl and I had failed at the last move <strong>to</strong> complete this route, which George<br />
and I now climbed. It is of a similar quality <strong>to</strong> BAPM and we thought that BOLTM<br />
was an appropriate name.<br />
The drive home from Blouberg must be done in the late afternoon. The road <strong>to</strong><br />
Pietersburg is a veritable bonus for bird-watchers. All the bushveld birds: lilacbreasted<br />
and racket-tailed rollers adorn the branches of the thorn trees and the<br />
telephone line; crimson-breasted and all manner of other shrikes and hornbills<br />
abound; on virtually every telephone pole is perched a rap<strong>to</strong>r (mostly brown snake<br />
eagles). Then comes the long haul back <strong>to</strong> Johannesburg, fortified by multitudinous<br />
cups of death-defying coffee at the Spur. And finally surviving Monday at work.<br />
Blouberg is an amazing rock climbing and trekking venue. If you respect it, it<br />
delivers the most friendly <strong>big</strong>-wall climbing in South Africa: the rock is good <strong>to</strong><br />
excellent; the protection on all the trade routes is good; the weather is not capricious<br />
(morning mist should not deter you from setting off a it burns off quickly) and it is an<br />
all-year venue. There is still endless potential <strong>to</strong> establish rock routes. Several of the<br />
routes have yet <strong>to</strong> have second attempts.<br />
As I wrote <strong>to</strong> a fellow climber recently, “Blouberg is like my backyard. It is a<br />
mountain that has provoked other guys like Kevin Smith and George Mallory <strong>to</strong><br />
undertake dramatic feats of endurance and bold climbing.” Blouberg gives meaning<br />
<strong>to</strong> words like “serene”, “ethics”, “camaraderie”, “trad” and “soul”. A visit will redefine<br />
your value system and give a new meaning <strong>to</strong> your concept of rock climbing. If<br />
someone wants <strong>to</strong> know why I climb, I suggest they undertake a trip <strong>to</strong> Blouberg. In<br />
the Ahwanhnee Hotel in Yosemite, there is a definition of climbing: “Maximum effort<br />
<strong>to</strong> achieve absolutely nothing”. To me Blouberg represents maximum effort <strong>to</strong><br />
achieve <strong>to</strong>tal contentment.<br />
126
BROKEN ON BLOUBERG<br />
AN ACCOUNT OF AN EPIC ON EIGHT MILES HIGH<br />
Taken from The Journal of the Mountain Club of South Africa, 2003 edition, pp135-<br />
139, courtesy of the MCSA.<br />
Article by Andrew Pedley<br />
The piece was shocking, but the climbing demon in my head said “Go, you’ll be ok,<br />
caution <strong>to</strong> the wind; like the thousand times before, you’ll be pumped and grinning in<br />
a few moments time”. He’s always right, all those years trading he’s never failed me.<br />
Without that reckless little fiend in my head I’d have never made it up so many<br />
classics from sea-cliff <strong>to</strong> spire; he’s been there every time, on that “bold move” or<br />
“necky pitch”, those decisions that really pay. Those are the mind-bending moments<br />
that make trading what it is <strong>to</strong> all who love it, that heady feeling that accompanies all<br />
the best ascents, the one thing that really sets us on high and pulls us free from the<br />
tennis of sport climbing. There is a risk though, of that little fiend becoming <strong>to</strong>o<br />
strong for a moment; the leash we keep him on stretches a little bit and he pulls <strong>to</strong>o<br />
hard. The knack of good trading is keeping that leash just right, letting it out a little<br />
when necessary <strong>to</strong> the very edge in the finest of times; the full experience will never<br />
be gained if you haven’t.<br />
For about six seconds o that fourth pitch I just let him run away. That’s all he<br />
needed, just six seconds in fourteen years of climbing, the first time I’d really done<br />
that, I went <strong>to</strong>tally freeform. Next thing I was stressing, then greasing out of baggy<br />
jams, then I kind of caught an edge, kind of swung a leg over the rope, yelled<br />
something and then, off. I saw but didn’t feel the nut rip and the ledge cam with a<br />
smack and a roll and I was looking up at Hec<strong>to</strong>r, my partner. I was calm for a<br />
second. I even thought about getting up and trying again.<br />
Like in a vacuum, everything suddenly rushes in, implosion-like, on<strong>to</strong> all my senses<br />
at once, but mainly the pain screaming in my leg and arm. “Why is my foot angled<br />
like that?” So I try <strong>to</strong> lift it but it just hangs there like it’s not connected. The bot<strong>to</strong>m<br />
half of my leg is at forty-five degrees <strong>to</strong> the rest of it and the pain is hammering in<strong>to</strong><br />
my <strong>to</strong>es with each pulse like someone riving a spade in<strong>to</strong> them. My elbow is<br />
smashed, my hand furled in<strong>to</strong> a ball, the nerves mashed.<br />
I don’t remember Hec<strong>to</strong>r untying me, just a nasty haziness and through spinning<br />
eyes I looked up <strong>to</strong> see my pitch, and I realised what had happened, lying upsidedown<br />
amongst rocks on the Grassy Ledge. I remember the sun warming my face<br />
and the familiar sound of bells from cows grazing in the forest below, nice things,<br />
soothing sounds colliding with the swarming pain and the taste of blood in my<br />
mouth. I’d knocked my head but was ok and my back was fine. You just know right<br />
away what’s hurt and what’s not. So Hec<strong>to</strong>r moved me around in<strong>to</strong> a better position,<br />
head up and floppy limbs supported with all manner of socks and grassy tussocks,<br />
just so long as my bones weren’t grating.<br />
So there we were, 120 meters off the ground, three pitches up EIGHT MILES HIGH,<br />
a classic 24 on Blouberg. “What a damn shame” I remember thinking, “I really<br />
127<br />
wanted <strong>to</strong> climb this and I’ve fucked-it-all-up”. The climb is one of the greats at<br />
Blouberg, 11 steep and long pitches with beautiful handrails and traverses working<br />
you up the wall, and with hardly any ledges except for the one I lay upon. We’d<br />
spent the first two pitches shivering in a low morning mist, but minutes earlier this<br />
had burst open, giving us a perfect day for a perfect climb. It had been awesome<br />
and I had been so excited. Lying there, looking up, I was gutted not <strong>to</strong> be up there,<br />
swinging out through roofs, busting hard moves. I had failed, a poor decision, my<br />
fault entirely and I hated that as much as the injuries.<br />
Thank God for my three year old cellphone with batteries that never go flat, for the<br />
Mountain Rescue who grouped immediately for the job in hand, and for the Air<br />
Force who were able <strong>to</strong> divert an Oryx and fly north.<br />
Waiting on that ledge was a strange time, the pain became bearable and I enjoyed<br />
the views over the western Soutpansberg, the pleasant shifts from sun <strong>to</strong> shade, as<br />
perfect uniformly spaced cumulus clouds moved across the sky. Its real Africa up<br />
there, endless veld spreading away pretty much unspoilt in all directions. How silly I<br />
felt, one minute on <strong>to</strong>p of the world in that great place, the next so out of place,<br />
risking my neck for a kick while the locals struggle <strong>to</strong> have a life at all.<br />
I talked a bit with Hec<strong>to</strong>r, who was so solid throughout, and I focused on staying<br />
calm. There was no shock or wailing pain, just a steady throb counting down the<br />
minutes, while my thoughts circled. The team had left Pre<strong>to</strong>ria and was on its way,<br />
and as I dozed I thought of them flying a beeline <strong>to</strong> our mountain, crossing the<br />
Waterberg then perhaps gaining their first view of Blouberg. Four hours lying in<br />
amongst those boulders on that sloping ledge, waiting, pain, more waiting. Midday<br />
passed and the afternoon became more chilly. Then at last, over the rustle of the<br />
space blanket there came the heavy chop of the Oryx from behind the mountain <strong>to</strong><br />
the <strong>south</strong>. Minutes past and the sound burst upon us as the helicopter rounded the<br />
mountain <strong>to</strong> our right, a fat green speck, nose down <strong>to</strong> inspect the scene awaiting. It<br />
came in close <strong>to</strong> look at our position. I realised there was no chance of its landing on<br />
our ledge or even hovering above it and at about that time the pilot must have<br />
realised the same; with a renewed chop of the blades the helicopter was up over the<br />
<strong>to</strong>p of the mountain and out of sight.<br />
The rescue was incredible. Every member of the team was confident and rehearsed<br />
and despite the difficulty there appeared never <strong>to</strong> be a moment’s doubt. It <strong>to</strong>ok three<br />
hours <strong>to</strong> make the 210 meter abseil down <strong>to</strong> my narrow ledge with all the kit. By now<br />
the pain had become a deep throbbing ache and my leg and arm were massively<br />
swollen and misshapen, but with heavy doses of morphine it didn’t seem so bad,<br />
though I was worried; bones can join but nerves may not. Thoughts of a spastic<br />
hand plagued me.<br />
A sunset, with very little daylight remaining, a 180 meter rope was lowered <strong>to</strong> my<br />
stretcher from the helicopter hovering way above. I remember lots of noise,<br />
instructions and confirmations firing from person <strong>to</strong> person, ropes being clipped and<br />
slings equalised.<br />
The lift rope was <strong>to</strong>o short by about 20 meters! The sand bag swung against the cliff<br />
about a pitch above us, threatening <strong>to</strong> catch on a block or roof. With no other option<br />
128
except leaving us, the pilot brought the craft down lower, moving in close <strong>to</strong> the rock<br />
face way above, until finally, in a flurry of action, the doc<strong>to</strong>r was able <strong>to</strong> catch the<br />
rope and clip me and himself in. Seconds later I felt the rope come tight and the lift,<br />
and the faces of the team on the ledge. Weird and remarkably scary. We spun<br />
through the air, with the massive dark rock face of the mountain still <strong>to</strong>wering above<br />
and the high pitched whirr of our lifeline arcing up from us <strong>to</strong> the helicopter in the<br />
wind. “This”, I thought, “is a real epic”. From there on I remember very little, a<br />
packed helicopter, injections, x-rays, lots of arms lifting me about, then waking up<br />
after surgery surrounded by friends bearing armfuls of sweets and bil<strong>to</strong>ng.<br />
After six months I am now recovered, went climbing for the first time on a <strong>to</strong>p-rope<br />
at Boven. I will be one hundred percent and I have decided that I will go eight miles<br />
again. I’ve thought about it a lot, those few moments when it all went terribly wrong.<br />
It was not a case of “accidents happen” or “bad luck”, but a lapse in my ability <strong>to</strong><br />
keep controlled that most powerful of climbing aids, that demon who spurs us on<br />
when we most need it, whose name would probably be Recklessness. He made me<br />
believe that my piece was good and that “it doesn’t matter anyway as I’ll never fall”.<br />
He lied, as he always does, and this time I got smashed. I’ll never let it happen<br />
again.<br />
I would like <strong>to</strong> thank every member of the Gauteng sections of the Mountain Search<br />
and Rescue team for their incredible work that day. I cannot express enough<br />
admiration and thanks <strong>to</strong> the crew of the South African Air Force, who made the<br />
rescue possible by mobilising so quickly and operating the helicopter with such skill<br />
and bravery. Finally I would like <strong>to</strong> thank Hec<strong>to</strong>r for being so cool on the ledge, and<br />
Hein and Sarel for lugging all my kit down the mountain!<br />
129