Technical Data Sheet - CertainTeed
Technical Data Sheet - CertainTeed
Technical Data Sheet - CertainTeed

Create successful ePaper yourself
Turn your PDF publications into a flip-book with our unique Google optimized e-Paper software.
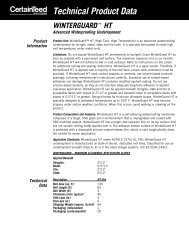
<strong>Technical</strong> <strong>Data</strong> <strong>Sheet</strong><br />
WinterGuard HT Waterproofing Underlayment<br />
WinterGuard Sand Waterproofing Shingle Underlayment<br />
WinterGuard Granular Waterproofing Shingle Underlayment<br />
NOTE: Reference to “WinterGuard” without specific reference to HT, Sand or Granular relates to all three<br />
products.<br />
PRODUCT INFORMATION<br />
WinterGuard products are most commonly used in critical areas such as roof eaves, valleys, and as a<br />
waterproofing underlayment for low-slope shingle, metal, slate, and mechanically-fastened tile roofing<br />
applications. WinterGuard HT (High Tack, High Temperature) is an advanced waterproofing<br />
underlayment for shingle, metal, slate and tile roofs. It is specially formulated to resist high roof<br />
temperatures under metal roofs. WinterGuard Sand and Granular underlayments are designed for use<br />
on roof decks as a waterproofing barrier beneath shingle, slate and tile roofs to prevent leakage due to<br />
water back-up from ice dams or wind-driven rain.<br />
Limitations:<br />
• Do not expose WinterGuard permanently to sunlight. Cover WinterGuard as soon as possible<br />
with a permanent roof surface. The maximum exposure time is six (6) months.<br />
• WinterGuard will not adhere to wet or cold surfaces. Refer to instructions on the carton for<br />
additional nailing and sealing instructions.<br />
• Do not apply WinterGuard over shingles or underlayment of any sort.<br />
• WinterGuard is a vapor barrier. Therefore, if WinterGuard is applied over a majority of the roof<br />
deck, proper deck ventilation must be provided.<br />
• If WinterGuard must contact sealants or cements, use solvent-based products sparingly,<br />
following manufacturer’s instructions carefully. Excessive use of solvent-based adhesives can<br />
damage WinterGuard’s polymer modified asphalt coating. Do not use silicone-based sealants,<br />
as they do not maintain adequate long-term adhesion to asphalt.<br />
• Low-slope application: WinterGuard HT can be applied beneath shingles, slate and mechanicallyfastened<br />
tile to acceptable decks with slopes of 2"/12" or greater and beneath metal to<br />
acceptable decks with slopes of 0.5"/12" or greater. WinterGuard Sand and Granular products<br />
can be applied beneath shingles, slate and mechanically-fastened tile to acceptable roof decks<br />
with slopes of 2"/12" or greater. See grid below for minimum allowable slopes.<br />
• WinterGuard HT is specially designed to withstand temperatures up to 250°F.<br />
• WinterGuard may become slippery under certain weather conditions. When this occurs, avoid<br />
walking or crawling on the product.<br />
WINTERGUARD – MINIMUM ALLOWABLE APPLICATION SLOPES<br />
Applied Beneath WinterGuard HT WinterGuard Sand WinterGuard Granular<br />
SHINGLES 2”/12” 2”/12” 2”/12”<br />
METAL 0.5”/12” Not Recommended Not Recommended<br />
TILE 2”/12” 2”/12” 2”/12”<br />
SLATE 2”/12” 2”/12” 2”/12”<br />
Product Composition:<br />
WinterGuard is a self-adhering waterproofing membrane composed of a tough reinforcement that is<br />
impregnated and coated with SBS-modified asphalt. WinterGuard is available in three finishes: sand,<br />
granular, and film. WinterGuard Sand and Granular have top surfaces consisting of mineral matter (sand<br />
or granules) to enhance traction during application. WinterGuard HT has a tough, tear resistant film on its<br />
top surface that won’t scratch metal roofing applied over it. The adhesive bottom surface of all<br />
WinterGuard products is protected with a disposable silicone-coated release film, which is split<br />
longitudinally down the middle for easier application.
<strong>Technical</strong> <strong>Data</strong> <strong>Sheet</strong> (Continued)<br />
WinterGuard Series Page 2 of 3<br />
Applicable Standards:<br />
ASTM D 1970<br />
ICC ESR-1492<br />
UL 790: Classified for use as underlayment beneath Class A, B, or C fire rated shingle systems<br />
Florida Product Approval # FL3455<br />
Miami-Dade Product Control Approved<br />
TECHNICAL DATA<br />
WinterGuard Products by Surface Finish<br />
Sand<br />
(short)<br />
Sand Granular HT film<br />
Roll Area (sq.ft.) 97.5 195 195 195<br />
Roll Length (ft.) 32.5 65 65 65<br />
Roll Width (ft.) 3 3 3 3<br />
Thickness (mils. typical) 60 60 60 45<br />
Side Laps (in.) 6 6 4 4<br />
End Laps (in.) 6 6 6 6<br />
Shipping Weight (approx. lb/roll) 36 68 68 51<br />
Packaging (cartons/pallet) 30 20 20 20<br />
INSTALLATION<br />
Storage: Store WinterGuard rolls in their packaging in a dry, protected area at a temperature not<br />
exceeding 110°F.<br />
Deck Preparation: Clean the roof deck until it is free of dirt, dust, nails, and other materials. Providing a<br />
clean, dry and smooth deck surface is important to assure proper adhesion of the WinterGuard to the<br />
deck. Before application to existing roofs, remove all roofing materials including the roofing felt and nails.<br />
Priming: Priming is not necessary for clean and dry wood decks. Concrete and masonry deck surfaces<br />
and oily metal surfaces require priming with an asphalt primer meeting ASTM D 41 standards, such as<br />
<strong>CertainTeed</strong>’s FlintPrime, or equivalent. Before WinterGuard is applied, primer must be dry. Follow<br />
manufacturer's instructions for the application of the primer.<br />
Membrane Application at the Eaves for Ice Dam Protection: WinterGuard can be applied in any length<br />
convenient to the applicator. First, align unrolled material with lower edge of roof and hold in place. Lift<br />
starting end of material approximately 1 foot, peel back and fold under at least 6 inches of both sheets of<br />
protective release film. Carefully return the exposed adhesive surface to the deck and press firmly in<br />
place. If, at lower temperatures, the material does not adhere immediately, tack it in place with roofing<br />
nails or staples. Reroll material from the other end until the peeled and folded back film is exposed.<br />
Beginning with the folded back film, peel both sheets of the remaining film from the roll, pulling parallel to<br />
the eave. Be sure all material lays flat without wrinkling and is well adhered.<br />
Alternatively, apply by the “peel and flop” method, utilizing the two-piece split-sheet release film feature to<br />
adhere longitudinal halves, one at a time. It is best to cut the product into manageable lengths of about 10<br />
feet when applying WinterGuard by this method.<br />
Applying WinterGuard is strongly recommended wherever there is a possibility of ice build-up. Many<br />
building codes require that the upper edge of ice dam protection extend no less than 24 inches beyond<br />
the interior wall line of the exterior walls. In areas of severe icing, it is recommended that WinterGuard be<br />
applied at least up to the highest water level expected to occur from ice dams. In order to assure<br />
waterproofing, overlap all membrane side laps and end laps per <strong>Technical</strong> <strong>Data</strong> table above, press all<br />
overlaps firmly with a membrane seam roller, and offset end laps at least 2 feet from course to course.
<strong>Technical</strong> <strong>Data</strong> <strong>Sheet</strong> (Continued)<br />
WinterGuard Series Page 3 of 3<br />
Application of Drip Edge at Rakes and Eaves: At the rake, the drip edge may be installed under or over<br />
WinterGuard. At the eaves, when the WinterGuard does not overlap the gutter or fascia, the drip edge<br />
should be installed under WinterGuard. At the rake or eaves, when WinterGuard overlaps the gutter or<br />
fascia, drip edge or other metal must be installed over the WinterGuard to protect it against damage from<br />
exposure.<br />
Low-Slope Shingle, Metal, Shake, or Tile Application: WinterGuard can be applied under these roofing<br />
materials to provide protection against the infiltration of wind-driven rain on low-slope applications. If<br />
applied to cover the entire roof, ensure sufficient ventilation to avoid condensation. WinterGuard HT can<br />
be applied beneath shingles, slate and mechanically-fastened tile to acceptable decks with slopes of<br />
2"/12" or greater and beneath metal to acceptable decks with slopes of 0.5"/12" or greater. WinterGuard<br />
Sand and Granular products can be applied beneath shingles, slate and mechanically-fastened tile to<br />
acceptable roof decks with slopes of 2"/12" or greater.<br />
Application at Valleys and Ridges: In the valleys, the width of the WinterGuard must be 36 inches<br />
minimum, and on the ridges, 12 inches minimum. Cut WinterGuard to convenient premeasured lengths (4<br />
to 6 feet recommended). Peel off the release film and drape the sheet into place, allowing the membrane<br />
to locate and adhere in the valley centerline or ridge peak first, working outward toward the edges. In<br />
valleys, start the application at the low point and work upwards. To assure waterproofing, overlap all<br />
sheets 6 inches at lap joints. Do not use WinterGuard as a permanent weathering surface (such as in an<br />
open valley).<br />
MAINTENANCE<br />
WinterGuard requires no maintenance when installed according to manufacturer's application<br />
instructions.<br />
WARRANTY<br />
WinterGuard is warranted against manufacturing defects and to remain watertight for the same period as<br />
the warranty duration carried by the roofing product applied above it – up to a maximum of 50 years. For<br />
specific warranty details and limitations, refer to the warranty itself.<br />
FOR MORE INFORMATION<br />
Sales Support Group: 800-233-8990<br />
Web site: www.certainteed.com<br />
See us in Sweets and ARCAT printed and electronic publications<br />
<strong>CertainTeed</strong> Roofing<br />
P.O. Box 860<br />
Valley Forge, PA 19482<br />
© Copyright <strong>CertainTeed</strong> Corporation, 2009.<br />
All rights reserved. Updated: 12/2009