The Priscilla Battenberg and point lace book; a collection of lace ...
The Priscilla Battenberg and point lace book; a collection of lace ...
The Priscilla Battenberg and point lace book; a collection of lace ...

Create successful ePaper yourself
Turn your PDF publications into a flip-book with our unique Google optimized e-Paper software.
equal to the distance between the upper thread<br />
<strong>and</strong> the upper braid. This is continued across the<br />
space <strong>and</strong> makes equilateral enclosures. At the<br />
completion <strong>of</strong> the first row <strong>of</strong> enclosed triangles<br />
the thread is at the right end <strong>of</strong> the upper line.<br />
It is then passed under the second line <strong>and</strong> back to<br />
the first, passing under both the first thread <strong>and</strong><br />
the thread looped around it at that <strong>point</strong>. It is<br />
again passed under the second thread <strong>and</strong> back to<br />
the first, forming the equilateral triangles <strong>of</strong> the<br />
second row. This is continued row by row until<br />
the entire space is laid <strong>of</strong>f in a canvjas-like network.<br />
<strong>The</strong> second method <strong>of</strong> preparing this network is<br />
simpler. <strong>The</strong> parallel horizontal lines are laid as<br />
before. A series <strong>of</strong> diagonal parallel lines the same<br />
distance apart as are the horizontal lines are then<br />
woven over <strong>and</strong> under the first lines, across the<br />
space from the upper <strong>and</strong> right sides to the left<br />
<strong>and</strong> lower sides, crossing the horizontal lines at an<br />
angle <strong>of</strong> sixty degrees. A second series <strong>of</strong> diago-<br />
nal lines is then woven in the same way <strong>and</strong> at<br />
the same "angle from the upper <strong>and</strong> left sides to the<br />
Combination Stitches.<br />
right <strong>and</strong> lower sides. This completes the network<br />
<strong>of</strong> equilateral triangles.<br />
<strong>The</strong>se triangles are then covered with cones <strong>of</strong><br />
darning. <strong>The</strong> thread is attached to the <strong>point</strong> or<br />
apex <strong>of</strong> the triangle to be covered, <strong>and</strong> the thread<br />
is passed over <strong>and</strong> under the foundation threads<br />
forming the sides <strong>of</strong> the triangle until the space<br />
is filled. It is then passed under the threads at<br />
the cornen (which form the apex <strong>of</strong> another tri-<br />
angle) <strong>and</strong> carried down the side <strong>of</strong> the adjoining<br />
triangle to its apex. <strong>The</strong> darning <strong>of</strong> this triangle<br />
is accomplished <strong>and</strong> the work continued until the<br />
remaining triangles are covered.<br />
Another method <strong>of</strong> covering the triangles con-<br />
sists <strong>of</strong> the use <strong>of</strong> buttonhole stitches. <strong>The</strong> thread<br />
is attached to the apex <strong>of</strong> the triangle. Two close<br />
buttonhole stitches are worked over the right<br />
foundation thread <strong>of</strong> the triangle. <strong>The</strong>n two are<br />
worked over the left side. In this way the work-<br />
ing thread passes from one side to the other <strong>of</strong><br />
the triangle after every second buttonhole stitch<br />
until the triangle is filled.<br />
Combination <strong>and</strong> Miscellaneous Stitches.<br />
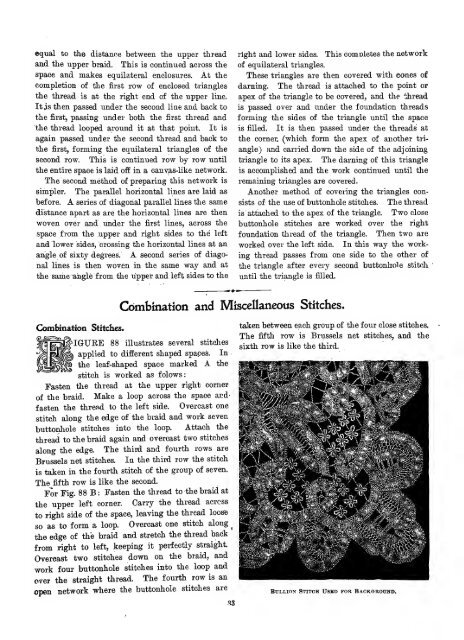
f'IGURE 88 illustrates several stitches<br />
applied to different shaped spaces. In<br />
the leaf-shaped space marked A the<br />
stitch is worked as folows:<br />
Fasten the thread at the upper right corner<br />
<strong>of</strong> the braid. Make a loop across the space ard-<br />
fasten the thread to the left side. Overcast one<br />
stitch along the edge <strong>of</strong> the braid <strong>and</strong> work seven<br />
buttonhole stitches into the loop. Attach the<br />
thread to the braid again <strong>and</strong> overcast two stitches<br />
along the edge. <strong>The</strong> third <strong>and</strong> fourth rows are<br />
Brussels net stitches. In the third row the stitch<br />
is taken in the fourth stitch <strong>of</strong> the group <strong>of</strong> seven.<br />
<strong>The</strong> fifth row is like the second.<br />
For Fig. 88 B : Fasten the thread to the braid at<br />
the upper left corner. Carry the thread across<br />
to right side <strong>of</strong> the space, leaving the thread loosie<br />
so as to form a loop. Overcast one stitch along<br />
the edge <strong>of</strong> the braid <strong>and</strong> stretch the thread back<br />
from right to left, keeping it perfectly straight.<br />
Overcast two stitches down on the braid, <strong>and</strong><br />
work four buttonhole stitches into the loop <strong>and</strong><br />
over the straight thread. <strong>The</strong> fourth row is an<br />
open network where the buttonhole stitches are<br />
^<br />
83<br />
taken between each group <strong>of</strong> the four close stitches.<br />
<strong>The</strong> fifth row is Brussels net stitches, <strong>and</strong> the<br />
sixth row is like the third.<br />
BuLLiox Stitch Used for Background.