The Priscilla Battenberg and point lace book; a collection of lace ...
The Priscilla Battenberg and point lace book; a collection of lace ...
The Priscilla Battenberg and point lace book; a collection of lace ...
You also want an ePaper? Increase the reach of your titles
YUMPU automatically turns print PDFs into web optimized ePapers that Google loves.
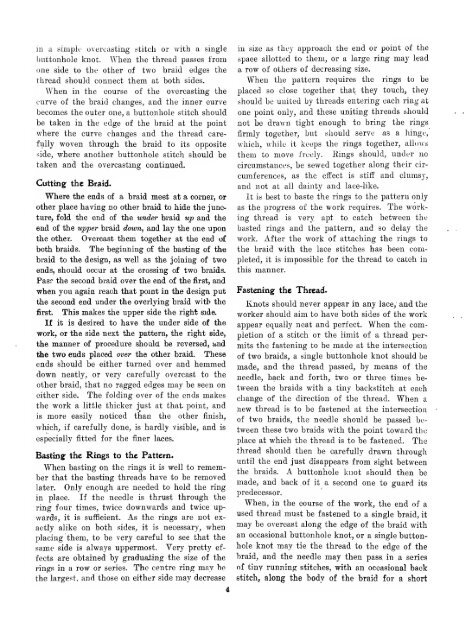
in a simple overcasting stitch or with a single<br />
buttonhole knot. When the thread passes from<br />
one side to the other <strong>of</strong> two braid edges the<br />
thread should connect them at both sides.<br />
When in the course <strong>of</strong> the overcasting the<br />
curve <strong>of</strong> the braid changes, <strong>and</strong> the inner curve<br />
becomes the outer one, a buttonhole stitch should<br />
be taken in the edge <strong>of</strong> the braid at the <strong>point</strong><br />
where the curve changes <strong>and</strong> the thread care-<br />
fully woven through the braid to its opposite<br />
side, where another buttonhole stitch should be<br />
taken <strong>and</strong> the overcasting continued.<br />
Cutting the Braid.<br />
Where the ends <strong>of</strong> a braid meet at a corner, or<br />
other p<strong>lace</strong> having no other braid to hide the junc-<br />
ture, fold the end <strong>of</strong> the under braid up <strong>and</strong> the<br />
end <strong>of</strong> the upper braid down, <strong>and</strong> lay the one upon<br />
the other. Overcast them together at the end <strong>of</strong><br />
both braids. <strong>The</strong> beginning <strong>of</strong> the basting <strong>of</strong> the<br />
braid to the design, as well as the joining <strong>of</strong> two<br />
ends, should occur at the crossing <strong>of</strong> two braids.<br />
Pasr the second braid over the end <strong>of</strong> the first, <strong>and</strong><br />
when you again reach that <strong>point</strong> in the design put<br />
the second end under the overlying braid with the<br />
first. This makes the upper side the right side.<br />
If it is desired to have the under side <strong>of</strong> the<br />
work, or the side next the pattern, the right side,<br />
the manner <strong>of</strong> procedure should be reversed, <strong>and</strong><br />
the two ends p<strong>lace</strong>d over the other braid. <strong>The</strong>se<br />
ends should be either turned over <strong>and</strong> hemmed<br />
down neatly, or very carefully overcast to the<br />
other braid, that no ragged edges may be seen on<br />
either side. <strong>The</strong> folding over <strong>of</strong> the ends makes<br />
the work a little thicker just at that <strong>point</strong>, <strong>and</strong><br />
is more easily noticed than the other finish,<br />
which, if carefully done, is hardly visible, <strong>and</strong> is<br />
especially fitted for the finer lajces.<br />
Bastingf the Rings to the Pattern.<br />
When basting on the rings it is well to remember<br />
that the hasting threads have to be removed<br />
later. Only enough are needed to hold the ring<br />
in p<strong>lace</strong>. If the needle is thrust through the<br />
ring four times, twice downwards <strong>and</strong> twice up-<br />
wards, it is sufficient. As the rings are not exactly<br />
alike on both sides, it is necessary, when<br />
placing them, to be very careful to see that the<br />
same side is always uppermost. Very pretty ef-<br />
fects are obtained by graduating the size <strong>of</strong> the<br />
rings in a row or series. <strong>The</strong> centre ring may he<br />
the largest, <strong>and</strong> those on either side may decrease<br />
in size as the}- approach the end or <strong>point</strong> <strong>of</strong> the<br />
space allotted to them, or a large ring may lead<br />
a row <strong>of</strong> others <strong>of</strong> decreasing size.<br />
When the pattern requires the rings to be<br />
p<strong>lace</strong>d so close together that they touch, they<br />
should be united by threads entering each ring at<br />
one <strong>point</strong> only, <strong>and</strong> these uniting threads should<br />
not be drawn tight enough to bring the rings<br />
firmly together, but should serve as a hinge,<br />
which, while it keeps the rings together, allo\vi<br />
them to move freely. Kings should, under no<br />
circumstances, be sewed together along their cir-<br />
cumferences, as the effect is stiff <strong>and</strong> clumsy,<br />
<strong>and</strong> not at all dainty <strong>and</strong> <strong>lace</strong>-like.<br />
It is best to baste the rings to the pattern only<br />
as the progress <strong>of</strong> the work requires. <strong>The</strong> work-<br />
ing thread is very apt to catch between the<br />
basted rings <strong>and</strong> the pattern, <strong>and</strong> so delay the<br />
work. After the work <strong>of</strong> attaching the rings to<br />
the braid with the <strong>lace</strong> stitches has been com-<br />
pleted, it is impossible for the thread to catch in<br />
this manner.<br />
Fastening the Thread.<br />
Knots should never appear in any <strong>lace</strong>, <strong>and</strong> the<br />
worker should aim to have both sides <strong>of</strong> the work<br />
appear equally neat <strong>and</strong> perfect. When the com-<br />
pletion <strong>of</strong> a stitch or the limit <strong>of</strong> a thread per-<br />
mits the fastening to be made at the intersection<br />
<strong>of</strong> two braids, a single buttonhole knot should be<br />
made, <strong>and</strong> the thread passed, by means <strong>of</strong> the<br />
needle, hack <strong>and</strong> forth, two or three times be-<br />
tween the braids with a tiny backstitch at each<br />
change <strong>of</strong> the direction <strong>of</strong> the thread. When a<br />
new thread is to be fastened at the intersection<br />
<strong>of</strong> two braids, the needle should be passed be-<br />
tween these two braids with the <strong>point</strong> toward the<br />
p<strong>lace</strong> at which the thread is to be fastened. <strong>The</strong><br />
thread should then be carefully drawn through<br />
until the end just disappears from sight between<br />
the braids. A buttonhole knot should then be<br />
made, <strong>and</strong> back <strong>of</strong> it a second one to guard its<br />
predecessor.<br />
When, in the course <strong>of</strong> the work, the end <strong>of</strong> a<br />
used thread must be fastened to a single braid, it<br />
may be overcast along the edge <strong>of</strong> the braid with<br />
an occasional buttonhole knot, or a single button-<br />
hole knot may tie the thread to the edge <strong>of</strong> the<br />
braid, <strong>and</strong> the needle may then pass, in a series<br />
<strong>of</strong> tiny running stitches, with an occasional back<br />
stitch, along the body <strong>of</strong> the braid for a short


