
Create successful ePaper yourself
Turn your PDF publications into a flip-book with our unique Google optimized e-Paper software.
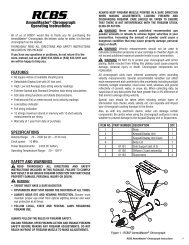
HAND<br />
PRIMING TOOL<br />
Patent #5,435,223<br />
PRODUCT INSTRUCTIONS
IMPORTANT<br />
Before using the <strong>RCBS</strong> <strong>Hand</strong> <strong>Priming</strong> <strong>Tool</strong> read this instruction sheet carefully to<br />
learn how to safely operate the tool. Failure to properly operate this product can result in<br />
severe personal injury and/or equipment damage. This instruction sheet contains specific<br />
safety and operating information. It should be considered a permanent part of your reloading<br />
equipment and remain with the equipment at all times for easy reference. Call us if you<br />
have any questions at any time while assembling or operating this tool.<br />
SAFETY<br />
▲!<br />
Reloading is an enjoyable and rewarding hobby that is easily conducted with safety. But<br />
carelessness or negligence can make reloading hazardous. This product has been designed<br />
from the beginning with the user’s safety in mind.<br />
As with any reloading operation, some safety rules must be followed. By observing<br />
these few rules, the chance of a hazardous occurrence causing damage or injury becomes<br />
extremely remote.<br />
GENERAL<br />
• Use the reloading equipment as the manufacturer recommends.<br />
• Study the instructions carefully and become thoroughly familiar with the<br />
operation of the product. Don’t take short cuts.<br />
• Observe “good housekeeping” in the reloading area. Keep tools and components<br />
neat, clean and orderly. Promptly and completely clean<br />
up primer and powder spills.<br />
• Reload only when you can give your undivided attention. Do not reload<br />
when fatigued or ill. Develop a reloading routine to avoid mistakes. Avoid<br />
haste - load at a leisurely pace.<br />
• Always wear adequate eye protection. You assume unnecessary risk when<br />
reloading without wearing safety glasses.<br />
LOADING DATA<br />
• Use only laboratory tested reloading data. We highly recommend the<br />
use of the SPEER Reloading Manual.<br />
• OBSERVE ALL WARNINGS ABOUT THE USE OF MAXIMUM LISTED<br />
LOADS.
PRIMERS AND POWDER<br />
• WARNING: Primers are designed to explode and will do so when subjected to<br />
heat or percussion.<br />
• Do not decap live primers.<br />
• Never attempt to seat or reseat a primer in a loaded round.<br />
• Store primers and powder beyond the reach of children and away from<br />
heat, dampness, open flames and electrical equipment.<br />
• DO NOT use primers of unknown identity. Scrap unknown primers in accordance<br />
with applicable regulations.<br />
• Keep primers in original factory container until ready to use. Return unused<br />
primers to the same factory packaging for safety and to preserve<br />
their identity.<br />
• DO NOT store primers in bulk. The blast of just a few hundred primers is<br />
sufficient to cause serious injury to anyone nearby.<br />
• DO NOT force primers. Use care in handling primers.<br />
• DO NOT use any powder unless its identity is positively known. Discard<br />
all mixed powders and those of uncertain or unknown identity.<br />
• If you use a powder measure, replace the lids on both the powder hopper<br />
and powder can after the powder hopper has been filled.<br />
• Before charging cases, settle the powder in the powder hopper. Throw<br />
and check the weight of at least ten charges. This will assure you that the<br />
correct powder charge is being thrown.<br />
• After a reloading session ends, pour the remaining powder back in its<br />
original factory container. This will preserve the identity and shelf life of<br />
the powder.<br />
• DO NOT smoke while handling powder or primers.<br />
RECORD KEEPING<br />
• Keep complete records of reloads. Apply a descriptive label to each box<br />
showing the date produced, and the primer, powder and bullet used.<br />
Labels for this purpose are packed with SPEER bullets.<br />
Since <strong>RCBS</strong> has no control over the choice of components, the manner in which they<br />
are assembled, the use of this product, or the guns in which the resulting ammunition may<br />
be used, no responsibility, either expressed or implied, is assumed for the use of ammunition<br />
reloaded with this product.
GENERAL INFORMATION<br />
The <strong>Hand</strong> <strong>Priming</strong> <strong>Tool</strong> from <strong>RCBS</strong> is the safest priming tool you can get your hand on. Its most<br />
important feature is the exclusive safety gate mechanism which isolates the primer seating operation<br />
from the primer supply. The gate is an essential safety mechanism and is designed to<br />
eliminate the possibility of a primer tray detonation caused by an improperly seated primer<br />
propogating or “flashing back” into the tray of primers. The gate will cause a small amount of<br />
inconvenience when changing shell holders but it is an essential part of the tool. DO NOT UN-<br />
DER ANY CIRCUMSTANCE attempt to operate the tool without the safety gate in position or<br />
attempt to modify the tool in any way. Primer rods and primer feeds for large and small primers<br />
are provided and are easily interchanged. Other features include:<br />
• A primer feeding system that requires no hand contact with primers.<br />
• A detachable 100-count primer tray that is “grooved” to position primers<br />
anvil-side-up.<br />
• A die cast body designed to fit comfortably in the palm of your hand.<br />
• Uses standard <strong>RCBS</strong> shell holders manufactured after 1980 - the same ones used on<br />
<strong>RCBS</strong> presses. This eliminates the cost and hassle of buying extra equipment.<br />
• Covered by our lifetime guarantee.<br />
Unpack the <strong>Hand</strong> <strong>Priming</strong> <strong>Tool</strong> carefully. Look for and identify the following items:<br />
• <strong>Hand</strong> <strong>Priming</strong> <strong>Tool</strong> with large primer feed installed<br />
• Green plastic primer tray with clear plastic lid<br />
• Plastic bag with the following parts: Small Primer Feed, Small and Large<br />
Primer Rods.<br />
Refer to the parts list at the end of these instructions for part numbers and descriptions.<br />
TO USE<br />
The <strong>Hand</strong> <strong>Priming</strong> <strong>Tool</strong> has been assembled and shipped with the large primer feed in position.<br />
The small primer feed can be located in the parts bag. Each primer feed is identified with an “L”<br />
or an “S” for large or small primers. Also, the large and small primer feeds are each a different<br />
color. The large primer feed is black and the small primer feed is white.<br />
Before the <strong>Hand</strong> <strong>Priming</strong> <strong>Tool</strong> can be used, the appropriate shell holder must be installed on top<br />
of the primer feed and the large or small primer rod dropped into the body of the priming tool. To<br />
do this, follow these simple steps:<br />
Grip the priming tool in your hand and gently squeeze the handle. Loosen the safety gate screw<br />
on the handle and pull the safety gate out of the tool. Be sure to keep the handle compressed. If<br />
you release the tension on the handle without the safety gate in position, the tool will open too far<br />
and the internal parts will need to be realigned. This is a safety feature so the tool cannot be used<br />
without the safety gate in place.<br />
Now slide the primer feed to the side and out of the tool. Place the appropriate shell holder on top<br />
of the primer feed and slide the unit back into the priming tool body. See Photo #1. Replace the
safety gate and tighten the safety gate screw. See Photo #2 and Photo #3. The safety gate<br />
screw can be attached from either the left or right side of the tool, whichever is more convenient.<br />
Next, select the appropriate size primer rod and drop it down through the shell holder and into the body<br />
Photo #1 Photo #2<br />
of the priming tool. MAKE SURE THE FLAT SURFACE ON THE PRIMER ROD IS UP AND THE<br />
ROUNDED END IS DOWN. SEE PHOTO #4. IF THE ROD IS INSTALLED WITH THE ROUNDED<br />
END UP, A PRIMER MAY DISCHARGE AS IT IS SEATED. The rod is easy to install but it will also<br />
easily fall out if the tool is turned upside down.<br />
Photo #3 Photo #4<br />
The next step is to install the primer tray. At some point, primers will need to be loaded into the tray.<br />
This can be done before or after the tray is attached to the priming tool. The following instructions are<br />
for loading the tray with primers before the tray is attached to the tool.<br />
First, remove the clear plastic lid from the primer tray and scatter some primers onto the grooved<br />
surface of the green tray. Gently shake the green tray from side to side and the primers will “flip<br />
over” and be positioned anvil side up for feeding into the <strong>Hand</strong> <strong>Priming</strong> <strong>Tool</strong>. Replace the clear<br />
plastic lid and install the primer tray into the primer feed on the tool. See Photo #5. You’ll notice<br />
there is a “notch” cut into the lid that fits over the portion of the tray that funnels the primers into<br />
the primer feed. By turning the lid you can either start or stop the flow of primers into the primer
Photo #5 Photo #6<br />
feed. Photo #6 shows the primer tray lid is in a position to stop the flow of primers. Photo #7<br />
shows the primer tray is in an open position to allow primers into the primer feed.<br />
The tool is now ready to be used. To prime cases, hold the <strong>Hand</strong> <strong>Priming</strong> <strong>Tool</strong> comfortably in your<br />
hand, tilt the tool to cause a primer to enter the primer feed and insert an unprimed case into the<br />
shell holder. See Photo #8. With steady, gentle pressure, slowly squeeze the handle until you<br />
feel the primer seated to the bottom of the primer pocket. With a little practice you’ll soon appreciate<br />
the sensitive “feel” of the <strong>Hand</strong> <strong>Priming</strong> <strong>Tool</strong>. Release the handle and remove the primed<br />
case from the shell holder. Check the seated depth of the primer. If you encounter any unexpected<br />
resistance during seating, STOP! Discontinue priming until the problem is found and<br />
corrected.<br />
Photo #7 Photo #8<br />
PRIMER SEATING DEPTH<br />
During priming, check cases occasionally to be sure the primers are seated to the bottom of the primer<br />
pocket. Correct seating depth is .003 inches to .005 inches below the case head. The base of a<br />
correctly primed case will sit flat when placed on a level surface. If it rocks, the primer needs to be<br />
seated deeper. DO NOT UNDER ANY CIRCUMSTANCE attempt to reseat high primers in completed<br />
cartridges (a case with the primer, powder and bullet in place). Pull the bullet, dump the powder and<br />
then seat the primer to the correct depth.
CARE AND MAINTENANCE<br />
Clean the primer tray and dispensers every 500 rounds to prevent the build-up of primer dust.<br />
Occasionally lubricate the pivot link assembly with a drop of light oil. Remember, oil will contaminate<br />
primers and cause misfires. Avoid using too much lubricant on the tool. If you need additional<br />
help or replacement parts, call <strong>RCBS</strong>.<br />
12<br />
2<br />
14<br />
10<br />
13<br />
8<br />
11<br />
7<br />
5<br />
6<br />
9<br />
1<br />
14<br />
4<br />
<strong>Hand</strong> <strong>Priming</strong> <strong>Tool</strong><br />
Parts List<br />
KEY PART # DESCRIPTION<br />
1 7-90201 <strong>Hand</strong> <strong>Priming</strong> <strong>Tool</strong> Body<br />
2 7-90202 <strong>Hand</strong>le<br />
3 1-90203 Primer Feed, Large, Right Half<br />
3 1-90205 Primer Feed, Small, Right Half<br />
4 1-90204 Primer Feed, Large, Left Half<br />
4 1-90206 Primer Feed, Small, Left Half<br />
5 1-90207 Primer Tray Lid<br />
6 1-90208 Primer Tray<br />
7 7-90220 Pivot Link Assembly<br />
8 7-90211 Safety Gate Screw<br />
9 7-90212 <strong>Hand</strong>le Pin<br />
10 7-90213 Primer Rod, Small<br />
10 7-90214 Primer Rod, Large<br />
11 7-90215 Link Follower<br />
12 1-90221 Safety Gate Assembly<br />
13 1-90217 Return Spring<br />
14 1-87670 Retaining Ring (2)<br />
15 Shell Holder (Not Supplied)<br />
3<br />
15
PRECISIONEERED ® RELOADING EQUIPMENT<br />
We think that we make the very best<br />
reloading equipment in the world.<br />
If you agree, please tell your friends.<br />
If you disagree, tell us - we want to do something about it!<br />
Customer Service<br />
1-800-533-5000 (US or Canada) or 530-533-5191<br />
Hours: Monday - Thursday, 6:30am - 3:00pm (hours may vary)<br />
e-mail: rcbs.tech@atk.com • www.rcbs.com<br />
<strong>RCBS</strong> • 605 Oro Dam Blvd. • Oroville, CA 95965<br />
CCI • SPEER • <strong>RCBS</strong><br />
OUTERS • RAMLINE • ORBEX • FEDERAL<br />
7200521/1204