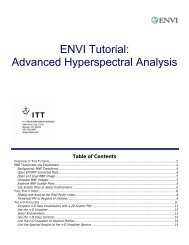
ENVI Tutorial: Georeferencing Images Using Input Geometry
ENVI Tutorial: Georeferencing Images Using Input Geometry
ENVI Tutorial: Georeferencing Images Using Input Geometry

You also want an ePaper? Increase the reach of your titles
YUMPU automatically turns print PDFs into web optimized ePapers that Google loves.
<strong>ENVI</strong> <strong>Tutorial</strong>:<br />
<strong>Georeferencing</strong> <strong>Images</strong> <strong>Using</strong> <strong>Input</strong> <strong>Geometry</strong><br />
Table of Contents<br />
OVERVIEW OF THIS TUTORIAL.....................................................................................................................................2<br />
GEOREFERENCING USING INPUT GEOMETRY ....................................................................................................................2<br />
OPENING AND EXPLORING UNCORRECTED HYMAP HYPERSPECTRAL DATA ................................................................................3<br />
OPENING AND EXPLORING HYMAP INPUT GEOMETRY DATA (IGM) ........................................................................................4<br />
GEOCORRECTING AN IMAGE USING AN IGM FILE ..............................................................................................................4<br />
Displaying and Evaluating Correction Results .......................................................................................................5<br />
EXAMINING GEOMETRY LOOKUP (GLT) FILES ..................................................................................................................5<br />
GEOCORRECTING AN IMAGE USING A GLT FILE ................................................................................................................6<br />
Displaying and Evaluating Correction Results .......................................................................................................6<br />
USING BUILD GLT WITH A MAP PROJECTION...................................................................................................................6<br />
OVERLAYING MAP GRIDS ...........................................................................................................................................7<br />
SAVING THE IMAGE AS AN RGB FILE .............................................................................................................................7<br />
DIRECT PRINTING ....................................................................................................................................................7<br />
ENDING THE <strong>ENVI</strong> SESSION .......................................................................................................................................7
Overview of This <strong>Tutorial</strong><br />
<strong>Tutorial</strong>: <strong>Georeferencing</strong> <strong>Using</strong> <strong>Input</strong> <strong>Geometry</strong><br />
Data from many sensors now come with detailed acquisition (platform geometry) information that allows model-based<br />
geometric rectification and map registration. This tutorial provides basic information about georeferenced images in <strong>ENVI</strong><br />
and model-based geometric correction using image input geometry within <strong>ENVI</strong>. It discusses required data characteristics<br />
and covers step-by-step procedures for successful registration. It assumes that you are already familiar with general<br />
image-registration and resampling concepts.<br />
Files Used in This <strong>Tutorial</strong><br />
CD-ROM: <strong>Tutorial</strong> Data CD #2<br />
Path: envidata\cup99hym<br />
File Description<br />
cup99hy_true.img True Color Composite, Cuprite 1999 HyMap Data<br />
cup99hy_true.hdr <strong>ENVI</strong> Header for above<br />
cup99hy_geo_glt <strong>Geometry</strong> Lookup File<br />
cup99hy_geo_glt.hdr <strong>ENVI</strong> Header for above<br />
cup99hy_geo_igm <strong>Input</strong> <strong>Geometry</strong> File<br />
cup99hy_geo_igm.hdr <strong>ENVI</strong> Header for above<br />
copyright.txt Description of data copyright<br />
1999 HyMap data of Cuprite, Nevada, used for the tutorial are copyright 1999 Analytical Imaging and Geophysics (AIG)<br />
and HyVista Corporation (All Rights Reserved), and may not be redistributed without explicit permission from AIG<br />
(info@aigllc.com).<br />
<strong>Georeferencing</strong> <strong>Using</strong> <strong>Input</strong> <strong>Geometry</strong><br />
<strong>ENVI</strong> provides full support for georeferenced images in numerous predefined map projections including UTM and State<br />
Plane. In addition, <strong>ENVI</strong>’s user-configurable map projections allow construction of custom map projections utilizing many<br />
different projection types, ellipsoids, and datums to suit most map requirements.<br />
<strong>ENVI</strong> map projection parameters are stored in an ASCII text file map_proj.txt. The information in this file is used in<br />
the <strong>ENVI</strong> header files associated with each image and allows simple association of a “magic pixel” location with known<br />
map projection coordinates. Selected <strong>ENVI</strong> functions can then use this information to work with the image in<br />
georeferenced data space.<br />
Modern sensors collect ephemeris data along with their image data to allow precision georeferencing to map coordinates.<br />
<strong>ENVI</strong> provides a paradigm for storing sensor geometry information and automatically correcting image data to specified<br />
map projections/coordinates. The input geometry (IGM) file contains the x and y map coordinates for a specified map<br />
projection for each pixel in the uncorrected input image. The geometry lookup (GLT) file contains the sample and line<br />
that each pixel in the output image came from in the input image. If the GLT value is positive, there was an exact pixel<br />
match. If the GLT value is negative, there was no exact match and the nearest neighboring pixel is used.<br />
Three <strong>ENVI</strong> routines available via the <strong>ENVI</strong> main menu bar are provided to do the georeferencing:<br />
• Map Georeference from <strong>Input</strong> <strong>Geometry</strong> Build GLT builds a GLT file from input geometry information.<br />
• Map Georeference from <strong>Input</strong> <strong>Geometry</strong> Georeference from GLT performs geocorrection utilizing<br />
the <strong>Geometry</strong> Lookup images.<br />
• Map Georeference from <strong>Input</strong> <strong>Geometry</strong> Georeference from IGM performs geocorrection utilizing<br />
the input geometry and creates the GLT file.<br />
Users must have the IGM or GLT file as a minimum to conduct this form of geocorrection. Image geometry data files are<br />
available for delivery as products from several sensors, including AVIRIS, MASTER, and HyMap. HyMap is a state-of-theart<br />
aircraft-mounted commercial hyperspectral sensor developed by Integrated Spectronics, Sydney, Australia, and<br />
operated by HyVista Corporation.<br />
2<br />
<strong>ENVI</strong> <strong>Tutorial</strong>: <strong>Georeferencing</strong> <strong>Using</strong> <strong>Input</strong> <strong>Geometry</strong>
<strong>Tutorial</strong>: <strong>Georeferencing</strong> <strong>Using</strong> <strong>Input</strong> <strong>Geometry</strong><br />
HyMap provides unprecedented spatial, spectral, and radiometric excellence. The system is a whiskbroom scanner<br />
utilizing diffraction gratings and four 32-element detector arrays (1 Si, 3 liquid-nitrogen-cooled InSb). Data consists of<br />
126 spectral channels covering the 0.44 - 2.5 mm range with approximately 15nm spectral resolution and 1000:1 SNR<br />
over a 512-pixel swath. Spatial resolution is 3-10 m (approximately 8 meters for the Cuprite data used here). Because the<br />
instrument uses a gyro-stabilized platform, the initial image geometry (prior to this correction) is quite good and<br />
corrections are minor.<br />
While geocorrected images produced using the above methods are visually pleasing and map-correct, they do have<br />
several practical drawbacks. First, they have null values around their edges that must be masked in processing. Second,<br />
they are often inflated in size by replicated pixels as indicated in the GLT files. These two disadvantages lead to our<br />
suggestion to acquire and process the hyperspectral imagery in its raw spatial format, then apply the geocorrection to the<br />
derived final products. It is not recommend that you geocorrect the entire reflectance data cube.<br />
The following sections provide examples of the model-based geocorrection built into <strong>ENVI</strong>.<br />
Opening and Exploring Uncorrected HyMap Hyperspectral Data<br />
This portion of the tutorial will familiarize you with uncorrected image geometry and characteristics.<br />
Before attempting to start the program, ensure that <strong>ENVI</strong> is properly installed as described in the Installation Guide that<br />
shipped with your software.<br />
1. From the <strong>ENVI</strong> main menu bar, select File Open Image File.<br />
2. Navigate to the envidata\cup99hym directory, select the file cup99hy_true.img from the list, and click<br />
Open. The Available Bands List appears on your screen and the image is loaded into the display. This is a<br />
TrueColor image extracted from the HyMap reflectance data.<br />
3. Examine the characteristics of the uncorrected HyMap data by displaying the Cursor Location/Value dialog.<br />
Double-click in the Image window. A dialog box will appear displaying the location of the cursor in the Image,<br />
Scroll, or Zoom windows. The dialog also displays the screen value and the actual data value of the pixel<br />
underneath the crosshair cursor.<br />
4. Move the cursor throughout the image. Examine the pixel locations and data values, and geometric relations<br />
between pixels (rotation, road curvature, etc.).<br />
5. From the Cursor Location/Value dialog menu bar, select File Cancel to dismiss the dialog.<br />
3<br />
<strong>ENVI</strong> <strong>Tutorial</strong>: <strong>Georeferencing</strong> <strong>Using</strong> <strong>Input</strong> <strong>Geometry</strong>
<strong>Tutorial</strong>: <strong>Georeferencing</strong> <strong>Using</strong> <strong>Input</strong> <strong>Geometry</strong><br />
Opening and Exploring HyMap <strong>Input</strong> <strong>Geometry</strong> Data (IGM)<br />
1. From the <strong>ENVI</strong> main menu bar, select File Open Image File.<br />
2. Navigate to the envidata\cup99hym directory, select the file cup99hy_geo_igm file from the list, and click<br />
Open. The Available Bands List appears.<br />
3. From the Available Bands List dialog, select the IGM <strong>Input</strong> X Map file from the list. The band you have chosen<br />
will be displayed in the Selected Band field.<br />
4. Click Display #1 and select New Display.<br />
5. Click the Load Band button to load the image into the new display.<br />
6. Examine the characteristics of the uncorrected HyMap data using the Cursor Location/Value feature. Move the<br />
cursor throughout the image, and examine the pixel locations and data values (map coordinates).<br />
7. Load the IGM <strong>Input</strong> Y Map band into a new display and explore the image using the Cursor Location/Value<br />
feature.<br />
Geocorrecting an Image <strong>Using</strong> an IGM File<br />
1. From the <strong>ENVI</strong> main menu bar, select Map Georeference from <strong>Input</strong> <strong>Geometry</strong> Georeference from IGM.<br />
The <strong>Input</strong> Data File dialog appears.<br />
2. Click the Open drop-down button and select New File.<br />
3. Select the cup99hy.eff file and click Open to return to the <strong>Input</strong> Data File dialog<br />
4. Select the cup99hy.eff file and click the Spectral Subset button. The File Spectral Subset dialog appears.<br />
5. Select only band 109 and click OK to return to the <strong>Input</strong> Data File dialog.<br />
6. From the <strong>Input</strong> Data File dialog click OK. The <strong>Input</strong> X <strong>Geometry</strong> Band dialog appears.<br />
7. Select the IGM <strong>Input</strong> X Map band and click OK. The <strong>Input</strong> Y <strong>Geometry</strong> Band dialog appears.<br />
8. Select the IGM <strong>Input</strong> Y Map band and click OK. The <strong>Geometry</strong> Projection Information dialog appears.<br />
4<br />
<strong>ENVI</strong> <strong>Tutorial</strong>: <strong>Georeferencing</strong> <strong>Using</strong> <strong>Input</strong> <strong>Geometry</strong>
<strong>Tutorial</strong>: <strong>Georeferencing</strong> <strong>Using</strong> <strong>Input</strong> <strong>Geometry</strong><br />
9. For both the input an output projections, select UTM, the North America 1927 datum, Zone 13, and click OK. This<br />
produces an image with the same map projection as the input geometry. The Build <strong>Geometry</strong> Lookup File<br />
Parameters dialog appears.<br />
10. Type or choose an output filename for the GLT file.<br />
11. In the Georeference Background Value field, type -9999.<br />
12. Type or choose an output filename for the georeference image and click OK.<br />
Displaying and Evaluating Correction Results<br />
1. From the Available Bands List, load the Georef band into a new display.<br />
2. Examine the characteristics of the data using the Cursor Location/Value feature. Move the cursor throughout<br />
the image, and examine the image geometry, pixel locations, map coordinates, and data values.<br />
3. Close the IGM displays when finished examining results.<br />
Examining <strong>Geometry</strong> Lookup (GLT) Files<br />
1. From the <strong>ENVI</strong> main menu bar, select File Open Image File.<br />
2. Navigate to the envidata\cup99hym directory, select the file cup99hy_geo_glt file from the list, and click<br />
Open. The Available Bands List appears.<br />
3. Load the GLT Sample Look-up band into a new display.<br />
4. Examine the characteristics of the data using the Cursor Location/Value feature. Move the cursor throughout<br />
the image, and examine the pixel locations and data values (input pixel locations). Pay particular attention to the<br />
negative values, which indicate use of nearest neighbor pixels.<br />
5. Load the GLT Line Look-up band into a new display and explore the image using the Cursor Location/Value<br />
feature.<br />
5<br />
<strong>ENVI</strong> <strong>Tutorial</strong>: <strong>Georeferencing</strong> <strong>Using</strong> <strong>Input</strong> <strong>Geometry</strong>
Geocorrecting an Image <strong>Using</strong> a GLT File<br />
<strong>Tutorial</strong>: <strong>Georeferencing</strong> <strong>Using</strong> <strong>Input</strong> <strong>Geometry</strong><br />
1. From the <strong>ENVI</strong> main menu bar, select Map Georeference from <strong>Input</strong> <strong>Geometry</strong> Georeference from<br />
GLT. The <strong>Input</strong> <strong>Geometry</strong> Lookup File dialog appears.<br />
2. Select the cup99hy_geo_glt file and click OK. The <strong>Input</strong> Data File dialog appears.<br />
3. Select the cup99hy.eff file and click the Spectral Subset button. The File Spectral Subset dialog appears.<br />
4. Select only band 109 and click OK to return to the <strong>Input</strong> Data File dialog.<br />
5. From the <strong>Input</strong> Data File dialog click OK. The Georeference from GLT Parameters dialog appears.<br />
6. In the Background Value field, type -9999.<br />
7. Type or choose an output filename for the georeferenced image then click OK.<br />
Displaying and Evaluating Correction Results<br />
1. From the Available Bands List, load the Georef band into a new display.<br />
2. Examine the characteristics of the data using the Cursor Location/Value feature. Move the cursor throughout<br />
the image, and examine the image geometry, pixel locations, map coordinates, and data values.<br />
3. Close the GLT displays when finished examining results.<br />
<strong>Using</strong> Build GLT with a Map Projection<br />
1. From the <strong>ENVI</strong> main menu bar, select Map Georeference from <strong>Input</strong> <strong>Geometry</strong> Build GLT. The <strong>Input</strong><br />
X <strong>Geometry</strong> Band dialog appears.<br />
2. Select the IGM <strong>Input</strong> X Map file and click OK. The <strong>Input</strong> Y <strong>Geometry</strong> Band dialog appears.<br />
3. Select the IGM <strong>Input</strong> Y Map file and click OK. The <strong>Geometry</strong> Projection Information dialog appears.<br />
6<br />
<strong>ENVI</strong> <strong>Tutorial</strong>: <strong>Georeferencing</strong> <strong>Using</strong> <strong>Input</strong> <strong>Geometry</strong>
<strong>Tutorial</strong>: <strong>Georeferencing</strong> <strong>Using</strong> <strong>Input</strong> <strong>Geometry</strong><br />
4. At the bottom of the <strong>Geometry</strong> Projection Information dialog, select State Plane (NAD 27) as the Output<br />
Projection.<br />
5. Click the Set Zone button, select Nevada West (2703) as the output zone, and click OK.<br />
6. Click OK in the <strong>Geometry</strong> Projection Information dialog. The Build <strong>Geometry</strong> Lookup File Parameters dialog<br />
appears.<br />
7. Type or choose an output filename for the GLT file and click OK to create the GLT.<br />
8. <strong>Using</strong> the steps listed under “Geocorrecting an Image <strong>Using</strong> a GLT File”, geocorrect band 109 of the cup99hy.eff<br />
data and compare the resulting image to the UTM-corrected image.<br />
9. Close all displays by selecting Window Close All Display Windows from the <strong>ENVI</strong> main menu bar.<br />
Overlaying Map Grids<br />
1. In the Available Bands List dialog, load one of the<br />
georeferenced images produced above<br />
2. From the Display group menu bar, select Overlay Grid<br />
Lines. The Grid Line Parameters dialog appears. A virtual<br />
border will be added to the image to allow display of map<br />
grid labels exterior to the image.<br />
3. Change the Map Grid Spacing to 1000 and the Geographic<br />
Grid Spacing to 1 minute and click Apply.<br />
4. Examine the characteristics of the data using the Cursor<br />
Location/Value feature. Compare the grids to the pixel<br />
coordinates.<br />
Saving the Image as an RGB File<br />
<strong>ENVI</strong> gives you several options for saving and outputting your image<br />
maps. You can save your work in <strong>ENVI</strong>’s image file format, or in<br />
several popular graphics formats (including Postscript) for printing or<br />
importing into other software packages.<br />
1. From the Display group menu bar, select File Save Image As Image File. The Output Display to Image<br />
File dialog appears.<br />
2. Ensure the Output File Type drop-down menu reads <strong>ENVI</strong>.<br />
3. Select the Memory radio button and click OK to output the image.<br />
4. Load the RGB image into another display and examine the results of the grid annotation as a raster image.<br />
Direct Printing<br />
<strong>ENVI</strong> also allows direct printing to devices supported by your operating system. Select File Print and follow your<br />
standard printing procedures. For example, in Microsoft Windows, you would select the printer name from the pulldown<br />
menu, change the properties as desired, and click on OK to print the image. Once you have selected all of the parameters<br />
and clicked OK, a dialog appears to allow you to set additional basic <strong>ENVI</strong> printing parameters similar to those used for<br />
postscript output. Set these as desired and click OK to begin printing.<br />
Ending the <strong>ENVI</strong> Session<br />
You can quit your <strong>ENVI</strong> session by selecting File Exit from the <strong>ENVI</strong> main menu.<br />
7<br />
<strong>ENVI</strong> <strong>Tutorial</strong>: <strong>Georeferencing</strong> <strong>Using</strong> <strong>Input</strong> <strong>Geometry</strong>