

Implant Extraction Set - Stryker
Implant Extraction Set - Stryker
Implant Extraction Set - Stryker

Create successful ePaper yourself
Turn your PDF publications into a flip-book with our unique Google optimized e-Paper software.
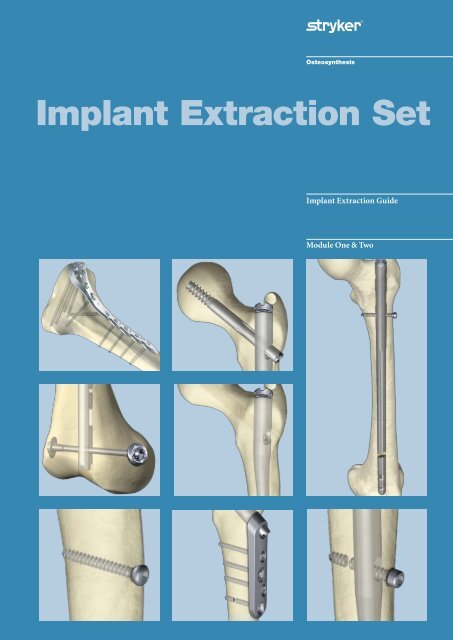
<strong>Implant</strong> <strong>Extraction</strong> <strong>Set</strong><br />
1<br />
<strong>Implant</strong> <strong>Extraction</strong> Guide<br />
Module One & Two
Contents<br />
This publication sets forth detailed<br />
recommended procedures for using<br />
<strong>Stryker</strong> Osteosynthesis devices and<br />
instruments.<br />
It offers guidance that you should<br />
heed, but, as with any such technical<br />
guide, each surgeon must consider<br />
the particular needs of each patient<br />
and make appropriate adjustments<br />
when and as required. A workshop<br />
training is required prior to first<br />
surgery.<br />
See package insert (L22000007) for<br />
a complete list of potential adverse<br />
effects, contraindications, warnings<br />
and precautions. The surgeon must<br />
discuss all relevant risks, including the<br />
finite lifetime of the device, with the<br />
patient, when necessary.<br />
Warning:<br />
All bone screws referenced in<br />
this document here are not<br />
approved for screw attachment or<br />
fixation to the posterior elements<br />
(pedicles) of the cervical, thoracic<br />
or lumbar spine.<br />
1. Introduction 3<br />
2<br />
Introduction 3<br />
Features and Benefits 3<br />
Contraindications 3<br />
2. Product Description 4<br />
3. Technical Details 6<br />
Screws 6<br />
Condyle Screws 6<br />
Cannulated Screws 7<br />
Damaged Screw Head 7<br />
Broken Screws 8<br />
Plates 9<br />
Broken Cannulated Screws 10<br />
Lag Screw 11<br />
IM Nails 13<br />
Broken IM Nails 14<br />
4. Additional Information 15<br />
Hydro<strong>Set</strong> 15<br />
References 15<br />
Page<br />
Ordering Information – Instruments 16
Introduction<br />
Introduction<br />
Hardware removal occurs for<br />
four reasons:<br />
1. Elective removal.<br />
2. Removal secondary to symptoms.<br />
3. Removal for infection.<br />
4. During revision procedures.<br />
The most challenging are typically<br />
points 3 and 4 as the hardware maybe<br />
broken and / or tissue planes distorted.<br />
In addition, there is frequently no<br />
bail out because the hardware must<br />
be removed in order to revise the<br />
fixation for a non-union or to address<br />
infection.<br />
Although considered easy and<br />
straightforward by patients, hardware<br />
removal is almost always more<br />
challenging than the insertion of the<br />
implants ¹.<br />
Specialty instruments can significantly<br />
facilitate hardware removal<br />
while minimizing damage to the<br />
surrounding bone/soft-tissue. <strong>Stryker</strong><br />
has developed a comprehensive set of<br />
instruments / techniques to assist the<br />
surgeon with these challenging issues,<br />
regardless of the indication or timing.<br />
Additionally, stripped screws and<br />
stripped IM Nails proximal threads<br />
(used for removal) may rise surgical<br />
difficulty and should be treated<br />
together.<br />
<strong>Stryker</strong> <strong>Extraction</strong> System is a set<br />
of instrumentation developed to<br />
meet the surgeons need for implant<br />
extraction.<br />
The System consist of two modules<br />
for the removal of almost any <strong>Stryker</strong><br />
Trauma implant, as well as many non-<br />
<strong>Stryker</strong> plates, nails, and screws*.<br />
It has evolved from our extensive<br />
clinical experience with trauma<br />
devices, as well as from the<br />
collaboration with experienced<br />
surgeons worldwide.<br />
Module One includes<br />
instrumentation for the removal<br />
of internal fixation systems and<br />
associated screws.<br />
Conical and Spreading Tip<br />
Screwdrivers are provided in<br />
varying sizes for the safe removal<br />
of torx, hex, and cannulated<br />
screws. Nail and Lag Screw<br />
removal is facilitated through<br />
the availability of different sized<br />
Adaptors and Conical <strong>Extraction</strong><br />
Rods that are easily assembled.<br />
Module Two contains extraction<br />
instruments for the removal of<br />
stripped and / or broken screws and<br />
implants.<br />
<strong>Stryker</strong> <strong>Extraction</strong> System is a single<br />
instrument platform that can be<br />
used for various extraction methods<br />
according to each individual case,<br />
in a minimally invasive operating<br />
procedure, allowing for the removal of<br />
almost any <strong>Stryker</strong> Trauma implants.<br />
It may also be compatible with non-<br />
<strong>Stryker</strong> implants*.<br />
Since broken hardware can often<br />
be identified on preoperative<br />
radiographs, but may also be<br />
encountered unexpectedly during<br />
an operation, <strong>Stryker</strong> recommends<br />
having both modules present in the<br />
operating room to facilitate surgical<br />
procedures and to reduce operative<br />
time.<br />
* <strong>Stryker</strong> can only recommend use of the extractor instruments with its own products. Application of the<br />
instruments to competitive products or to <strong>Stryker</strong> products that have been altered may be possible but has not<br />
been validated. Where competitive products are mentioned in this document this is solely to indicate where<br />
application of the extractor instruments appears possible due to similar design or dimensions, and <strong>Stryker</strong> does<br />
not guarantee that the extractor instruments demonstrated herein will work in any cases where competitive<br />
products are used, or in cases where <strong>Stryker</strong> products have been altered. As a precaution, make sure to have<br />
other standard instruments available in case the tolerances of the implants do not match the tolerances of the<br />
extractor tool.<br />
1. J Am Acad Orthop Surg 2006;14:113-120 Hardware Removal: Indications and Expectations<br />
Matthew L. Busam, MD, Robert J. Esther, MD, MSc, William T. Obremskey, MD,<br />
3<br />
Features and<br />
Benefits<br />
Versatility:<br />
• Removal of standard, broken<br />
and / or stripped nails, plates<br />
and screws<br />
• Multiple extraction methods<br />
Universal Instruments<br />
• Compatible for use with other<br />
manufactures’ implants*<br />
Single Instrument Platform<br />
• Simplified surgical technique<br />
Contraindications<br />
Cold welded screws require cutting<br />
tools for metal to remove the screws.<br />
The extraction set does not feature<br />
carbide drills or other cutting tools to<br />
remove cold welded screws.<br />
Screws<br />
Lag Screw<br />
Nails<br />
Hydro<strong>Set</strong><br />
Instruments
Product Description<br />
Article <strong>Stryker</strong> Systems<br />
Teardrop handle, AO-medium For AO medium bits:<br />
- Screwdriver bits<br />
- Crowndrills (Trephines)<br />
- Conical extractors male/female<br />
Screwdriver Bit 2.5 (conical) For 2.5mm Hex Screws:<br />
T2 Hum Compression; Asnis III 4.0;<br />
Numelock 4.5; ISO 2.7;<br />
ISO 3.5; ISO 4.0<br />
Screwdriver Bit 3.5 (conical) For 3.5mm Hex Screws:<br />
4 and 5mm Locking Screws (T2, S2, Gamma3, IC etc.);<br />
T2/S2 End Caps; T2/S2 Fem/Tib Compr. Screws;<br />
TLN all Screws; T2 Recon <strong>Set</strong> Screws 3.7 and 4.6mm Locking Screws G&K;<br />
Asnis III 5.0;<br />
Numelock 6.5; ISO 4.5; ISO 6.5<br />
Screwdriver Bit 4 (conical) <strong>Set</strong> Screws for Gamma, Gamma3, Gamma Ti, Dyax-A, AP, AP-J;<br />
Proximal Plugs for Gamma, Gamma Ti, Dyax, Dyax-A, AP, AP-J<br />
Screwdriver Bit 5 For 5mm Hex Screws:<br />
6.28mm Locking Screws; Asnis III 6.5 and 8.0<br />
and T2/S2 Recon Lag Screws<br />
Screwdriver Bit 6.3 For 6.3mm Hex Screws: T2/S2 Condyle Screws<br />
Screwdriver Bit 8 G&K SCN Condyle Screws; Gamma3 End Caps<br />
Screwdriver Bit T 8 (Torx) AxSOS 3.0<br />
Screwdriver Bit T 15 (Torx) AxSOS 4.0<br />
Screwdriver Bit T 20 (Torx) ALTA 3.7mm Locking Screws; AxSOS 5.0<br />
Screwdriver Bit T 25 (Torx) ALTA 5mm Locking Screws, Lag Screws and Caps<br />
Conical Extractor, male, left hand, small<br />
Asnis III 4.0<br />
(left hand driving) for diameter range 1–2.5mm<br />
Conical Extractor, male, left hand, 2.5<br />
(left hand driving, for damaged hex 2.5mm<br />
and diameter range 2.3–4mm)<br />
Conical Extractor, male, left hand, 3.5<br />
(left hand driving, for damaged hex 3.5mm and<br />
diameter range 3.3–4mm)<br />
Conical Extractor, male, left hand, 4<br />
(left hand driving, for damaged hex 4mm and<br />
diameter range 3.8–4.4mm)<br />
Conical Extractor, male, left hand, 5<br />
(left hand driving, for damaged hex 5mm and<br />
diameter range 4.8–5.4mm)<br />
Crowndrill 3 (bonedrill for broken Screws with<br />
diameter range =< 3mm)<br />
Crowndrill 4 (bonedrill for broken Screws with<br />
diameter range =< 4mm)<br />
Crowndrill 5 (bonedrill for broken Screws with<br />
diameter range =< 5mm)<br />
Crowndrill 6.5 (bonedrill for broken Screws with<br />
diameter range =< 6.5mm)<br />
Crowndrill 8 (bonedrill for broken Screws with<br />
diameter range =< 8mm)<br />
Crowndrill 10 (bonedrill for broken Screws with<br />
diameter range =< 10mm)<br />
Crowndrill 12 (bonedrill for broken Screws with<br />
diameter range =< 12mm)<br />
Conical Extractor, female, left hand, 3<br />
(left hand driving, for broken Screws with diameter<br />
range =
Product Description<br />
Article <strong>Stryker</strong> Systems<br />
Teardrop handle, AO-medium, cannulated<br />
(including Rotation Rod)<br />
for AO medium bits:<br />
Spreading Screwdriver<br />
Spreading Screwdriver Bit 5 6.28mm Locking Screws; Asnis III 6.5 and 8.0<br />
and T2/S2 Recon Lag Screws<br />
Spreading Screwdriver Bit 6.3 T2/S2 Condyle Screws<br />
Spreading Screwdriver Bit 8 G&K SCN Condyle Screws; Gamma3 End Caps<br />
Punches 2.7 for broken Screws with diameter range =4mm<br />
Forceps, small for damaged Screws, broken Screws with diameter 9mm<br />
Conical <strong>Extraction</strong> Rod 6 <strong>Extraction</strong> of nails using proximal Nail End:<br />
T2 Humeral<br />
Conical <strong>Extraction</strong> Rod 8 <strong>Extraction</strong> of nails using proximal Nail End:<br />
Humerus Seidel, T2 Proximal Humeral, T2 Humeral, Alta Humeral,<br />
TLN (M7),SCN (M8), Alta Femoral & Tibial, Zickel, IC Femoral & Tibial,<br />
T2/S2 Tibial & Femoral Antegrade/Retrograde<br />
Conical <strong>Extraction</strong> Rod 10 <strong>Extraction</strong> of nails for the proxmal Nail End:<br />
Gamma3, Dyax-A, all G&K Nails (Fem, Tib, SFN, STN, SCN)<br />
Conical <strong>Extraction</strong> Rod 13 <strong>Extraction</strong> of nails using proximal Nail End:<br />
Gamma, Gamma Ti, Dyax, AP, AP-J<br />
<strong>Extraction</strong> Hook, small <strong>Extraction</strong> of cannulated nails with inner diameter 4.6–5.5mm:<br />
G&K, Gamma3 (Ti), Seidel, IC, SCN, TLN, T2/S2<br />
<strong>Extraction</strong> Hook, large <strong>Extraction</strong> of cannulated nails with inner diameter =>5.6mm:<br />
Gamma, Gamma3 (StSt), Dyax, Dyax-A, AP, AP-J, G&K, IC,<br />
SCN, Kuentscher Nails<br />
<strong>Extraction</strong> Instrument Lag Screw Consisting of Handle and <strong>Extraction</strong> Rod.<br />
To be used with the threaded rod and nut for the Lag screw extraction<br />
Nut Fastens the <strong>Extraction</strong> Rod to the threaded rods and Connectors<br />
Threaded Rod M7 Threaded into Lag screw (Gamma/Dyax-A), fastens connection between<br />
<strong>Extraction</strong> Rod and Connectors<br />
Threaded Rod M5 Threaded into Lag screw (Omega), fastens connection between <strong>Extraction</strong> Rod<br />
and Connectors<br />
Threaded Rod M4 Threaded into Lag screw (OHS/OCS), fastens connection between <strong>Extraction</strong><br />
Rod and Connectors<br />
Spanner SW17<br />
Connector, Gamma<br />
Connector, Gamma U-Blade<br />
Connector, Gamma3 U-Blade<br />
Serves for larger torque transmission of the <strong>Extraction</strong> Instrument Lag Screw<br />
Connector, Dyax-A<br />
Connector, Gamma3<br />
Connector, Omega and Omega plus<br />
Connector, OHS/OCS<br />
Fits onto the specific Lag Screws, over the threaded Rod, and connects<br />
with the <strong>Extraction</strong> Instrument Lag Screw<br />
Sharp Hook (Optional) Removes from bone material<br />
Osteotome (Optional) Removes from bone material<br />
Outer Introducer (Optional) Hansson Pin<br />
Inner Introducer (Optional) Hansson Pin<br />
Extractor (Optional) Hansson Pin<br />
Emergency Inner Extractor (Optional) Hansson Pin<br />
Extractor Handle (Optional) Hansson Twin Hook<br />
Outer Extractor (Optional) Hansson Twin Hook<br />
Inner Extractor (Optional) Hansson Twin Hook<br />
T-Handle, AO-medium (Optional) for AO medium bits: Screwdriver–Screw removal, conical - Crowndrill -<br />
Screw extraction, conical<br />
Screwdriver 2.5 Seidel Humerus Spreading Screw (Standard Seidel instrument)<br />
Caution:<br />
<strong>Implant</strong>s can be subject to change. This can impact the compatibility of extraction<br />
instruments. It is therefore required to start the implant extraction with a complete<br />
<strong>Extraction</strong> <strong>Set</strong> in order to have access to alternative instruments.<br />
5
Screws<br />
Technical Details<br />
Screws<br />
After identifying screw type and<br />
diameter, extract the screws with the<br />
appropriate screwdriver bit by turning<br />
the screwdriver counterclockwise.<br />
To avoid damaging the screw, make<br />
sure the screwdriver is in line with the<br />
screw axis and fully inserted.<br />
Condyle Screws<br />
For T2/S2 Condyle Screw removal,<br />
assemble the necessary screwdrivers:<br />
The 6.3hex Screwdriver Bit<br />
with the Solid Teardrop Handle<br />
(for the nut) and the 6.3hex<br />
Spreading Screwdriver bit with<br />
the Cannulated Teardrop Handle<br />
(in combination with the Rotation<br />
Rod) as shown in the illustration.<br />
6<br />
Screwdriver Bits (hex)<br />
Screwdriver Bits (torx)<br />
Solid Teardrop<br />
Handle<br />
Screwdriver Bit<br />
Solid Teardrop Handle<br />
Spreading Screwdriver Bit<br />
Teardrop Handle (cannulated)<br />
Rotation Rod<br />
Partially threaded screw removal<br />
(e.g. Asnis III screws, T2 Recon<br />
Lag Screws) is facilitated by<br />
using the spreading screwdriver<br />
bits and cannulated handle.<br />
For spreading screwdriver<br />
instructions see Condyle<br />
Screw removal below.<br />
<strong>Stryker</strong> offers a wide variety of<br />
hex (standard, conical, spreading)<br />
and torx screwdrivers. Check the<br />
available type and size on the<br />
Ordering Information page.<br />
Make sure to tighten the Rotation<br />
Rod until the tip of the screwdriver<br />
spreads firmly and fully into the<br />
screw head.<br />
A screwdriver needs to be inserted<br />
from each side of the Condyle Screw<br />
using one to stabilize the Nut and the<br />
Spreading Screwdriver to loosen and<br />
extract the Condyle Screw.<br />
If necessary, use the Spreading<br />
Screwdriver to remove the Nut in a<br />
second step.<br />
The Condyle Screw is extracted<br />
by turning the Screwdriver in a<br />
counterclockwise direction.
Technical Details<br />
Cannulated Screws<br />
Never use a worn or damaged<br />
screwdriver to remove Asnis screws.<br />
Reverse cutting flutes are present for<br />
this reason. It is recommended that the<br />
Solid Screwdriver be used for Screw<br />
removal. The Solid Screwdriver applies<br />
greater torque and will reduce the<br />
potential for damaging the hexagonal<br />
tip on the Screwdriver. Strong bone<br />
formation around the implant has<br />
been seen in the pediatric cases<br />
using partially threaded screws.<br />
Damaged Screw Head<br />
Screw stripping is commonly<br />
caused by slippage of a screwdriver<br />
that is not correctly aligned with<br />
the screw axis and/or fully seated.<br />
This can occur either during<br />
insertion or, more commonly,<br />
during attempted screw removal.<br />
The appropriate sized Conical<br />
Extractor (based on the size of the<br />
Spreading Screwdriver<br />
Bit<br />
Solid Teardrop Handle<br />
Screwdriver Bits (hex)<br />
Teardrop Handle (cannulated)<br />
Rotation Rod<br />
Conical Extractor (male)<br />
Solid Teardrop Handle<br />
Forceps for Screw Removal<br />
Slotted Hammer<br />
7<br />
This may lead to difficult implant<br />
removal with an increased risk of<br />
screw head breakage or stripping<br />
of screw hexagonal head.<br />
If the oblique direction of the screw<br />
(approximately 135° to the shaft) is<br />
not changed, then the reverse flutes<br />
are not in an opportune position<br />
to cut the cortex. If the screw head<br />
is placed under traction and the<br />
angle of the screw is brought to a<br />
perpendicular position relative to<br />
the bone, cutting the cortex will<br />
progress and facilitate screw removal.<br />
Caution:<br />
Be sure to use the Solid<br />
Screwdriver in combination with<br />
the appropriate sized screwdriver<br />
bits or the cannulated screwdriver<br />
with the Spreading Screwdriver<br />
Bits. Proceed as described above.<br />
screw head hex / torx) is inserted<br />
firmly into the screw head.<br />
Lightly tapping the Conical Extractor<br />
with a Slotted Hammer may be<br />
tried if purchase is not initially<br />
obtained with manual pressure. It<br />
is at the surgeons’ discretion if and<br />
how hard to use the hammer.<br />
Assemble the selected Conical Extractor<br />
(male) with the Teardop- Handle<br />
and turn it counter-clockwise while<br />
applying pressure in line with the<br />
screw axis, extracting the screw at the<br />
same time. If the screw does not come<br />
completely out, the Foreceps can be<br />
used to complete the extraction.<br />
Screws
Screws<br />
Technical Details<br />
Broken Screws<br />
In case of a Broken Screw Shaft:<br />
Step 1:<br />
Remove the screw head portion in<br />
order to gain access to the remaining<br />
part of the screw shaft. The screw head<br />
can be removed with the appropriate<br />
screwdriver as described on page 6.<br />
Step 2:<br />
Use the Drift Punch to extract the<br />
remaining part of the screw.<br />
If difficulties are encountered with<br />
the above process, overdrill the<br />
remaining part of the screw with<br />
a Crowndrill before proceeding<br />
with the Drift Punch.<br />
Broken screw shaft - Step 1<br />
Torn-off screw head - Step 1<br />
In case of a Torn off Screw Head:<br />
Step 1:<br />
Overdrill the remaining part of the<br />
screw with a Crowndrill.<br />
Use another Crowndrill, one size<br />
larger, in order to create space for<br />
the female Conical Extractor/Drift<br />
Punch. It may be necessary to start<br />
with light pressure on the crowndrill<br />
in order to avoid the drill walking<br />
on the cortex surface before applying<br />
additional pressure to penetrate the<br />
bone. Light tapping with the Slotted<br />
Hammer may be required. It remains<br />
at the surgeons` own discretion if and<br />
how hard to use the Slotted Hammer.<br />
8<br />
Broke screw shaft - Step 2<br />
Torn-off screw head - Step 2<br />
Alternatively, the optional Countersink<br />
(6 or 8mm) can be used to create a<br />
path for the Crowndrill.<br />
Step 2:<br />
Remove the remaining part of the<br />
screw with the Conical Extractor,<br />
(female) if the screw is broken close<br />
to the first cortex or with the help of<br />
a Drift Punch if the screw is broken<br />
close to the second cortex.<br />
This procedures can also be applied to<br />
broken IM locking screws.<br />
Screwdriver Bit<br />
Crowndrill<br />
(Trephine)<br />
Drift Punches<br />
Slotted Hammer<br />
Forceps for<br />
Screw Removal<br />
Conical Extractor<br />
(female)<br />
Solid<br />
Teardrop<br />
Handle
Technical Details<br />
Plates<br />
To remove any plate, first extract<br />
all screws by using the appropriate<br />
size Screwdriver Bits. Remove the<br />
plate by using a regular forceps.<br />
The development of locking plate<br />
technology has lead to “cold welding”<br />
of screws to the plates. In this case,<br />
cutting tools for metal have to be used<br />
for the removal of the screws. In order<br />
to protect the soft tissue from excessive<br />
heat and metal debris accumulation,<br />
irrigation and suction should be used<br />
in combination with cutting tools.<br />
Warning:<br />
If screws are cold welded to<br />
the plate, carbide drills may be<br />
required. The extraction set<br />
does not feature carbide drills<br />
or any other instruments to<br />
remove cold welded screws.<br />
Solid Teardrop<br />
Handle<br />
Screwdriver Bit<br />
9<br />
Crowndrill<br />
(Trephine)<br />
Solid Teardrop<br />
Handle<br />
Forceps<br />
Screws
Screws<br />
Technical Details<br />
Broken Cannulated Screws<br />
To remove the torn-off head:<br />
Step 1:<br />
Select the appropriate Spreading<br />
Screwdriver Bit. Attach Cannulated<br />
Teardrop Handle. Insert Rotation<br />
Rod through the top of the Teardrop<br />
Handle. Insert tip into the screw head<br />
and turn Rotation Rod to engage and<br />
remove screw head.<br />
To remove remaining screw body<br />
(parts):<br />
Step 2:<br />
Insert the Conical Extractor (male)<br />
and extract the remaining screw<br />
body turning the Conical Extractor<br />
in a counter-clockwise fashion.<br />
Cannulated Screw Removal - Method A - Step 1<br />
Cannulated Screw Removal - Method B - Step 1<br />
Spreading<br />
Screwdriver Bit<br />
Conical Extractor<br />
(male)<br />
Teardrop Handle<br />
(cannulated)<br />
10<br />
Crowndrill<br />
(Trephine)<br />
Conical Extractor<br />
(female)<br />
Rotation<br />
Rod<br />
If Steps 1 and 2 are unsuccessfully<br />
for screw removal:<br />
Step 3:<br />
Overdrill the shaft using the<br />
Crowndrill.<br />
Cannulated Screw Removal - Method A - Step 2<br />
Cannulated Screw Removal - Method B - Step 2<br />
Step 4:<br />
Use a Conical Extractor (female) for<br />
screw removal.<br />
If the attempt for screw removal is<br />
not successful, follow the standard<br />
procedure for broken screw removal<br />
describes on page 8.
Technical Details<br />
Lag Screw<br />
An incision is made over the proximal<br />
end of the nail.<br />
The End Cap, if used, is removed<br />
using the appropriate Screwdriver Bit<br />
followed by removal of the <strong>Set</strong> Screw<br />
using the 4.0mm Screwdriver as shown<br />
in the image below 1 .<br />
1<br />
Screwdriver Bit 4.0mm<br />
Threaded Rod<br />
Solid Teardrop Handle<br />
11<br />
Make a small incision through the old<br />
scar distal to the greater trochanter to<br />
expose the end of the Lag Screw.<br />
The Threaded Rod is then threaded<br />
and tightened into the end of the Lag<br />
Screw 2 .<br />
For Gamma <strong>Implant</strong>s:<br />
At first, position the K-Wire through<br />
the Lag Screw.<br />
Then, the Threaded Rod is inserted<br />
over the K-Wire (when used for<br />
Gamma) and tightened into the end of<br />
the Lag Screw.<br />
Remove the K-Wire, if used.<br />
2<br />
Lag Screw
Lag Screw<br />
Technical Details<br />
Lag Screw (continued)<br />
3<br />
6<br />
5<br />
4<br />
12<br />
Connector<br />
Threaded Rod<br />
<strong>Extraction</strong> Rod and Nut<br />
Wrench 8/10mm,<br />
standard<br />
Handle<br />
Spanner 17mm standard<br />
Check that ingrowth does not obstruct<br />
secure engagement of the <strong>Extraction</strong><br />
Device, otherwise the implant or the<br />
instrument may be damaged and<br />
extraction will be more difficult.<br />
Slide the appropriate Connector over<br />
the Threaded Rod before adding the<br />
<strong>Extraction</strong> Rod & Nut as shown in the<br />
picture 3 .<br />
Note:<br />
In this Technical Guide the<br />
Gamma3 Lag Screw is selected as<br />
an example to demonstrate Lag<br />
Screw removal.<br />
However, different Connectors<br />
are available for other implants<br />
including a Lag Screw. See details<br />
on the ordering information page.<br />
Finish assembly of the Lag Screw<br />
<strong>Extraction</strong> Device by tightening the<br />
Nut 4 and attaching the T-Handle 5<br />
in a final step as shown in the picture.<br />
The Lag Screw is extracted by turning<br />
counterclockwise direction 6 .<br />
Use the 17mm Spanner if<br />
higher forces are required for the<br />
removal of the Lag Screw.
Technical Details<br />
IM Nails<br />
When removing an IM nail,<br />
it is helpful to identify the<br />
nail brand and its diameter<br />
in order to choose the<br />
correct instrumentation.<br />
Step 1 Step 2<br />
Conical <strong>Extraction</strong> Rod<br />
Universal Rod<br />
Strike Plate<br />
Sliding Hammer<br />
Slotted Hammer<br />
Universal Rod<br />
Sliding<br />
Hammer<br />
or use the<br />
Slotted<br />
Hammer<br />
Strike Plate<br />
Conical<br />
<strong>Extraction</strong> Rod<br />
13<br />
Caution:<br />
Special care must be taken to<br />
check if the nail moves offcenter<br />
from the entry point<br />
when screws are removed.<br />
Any attempt to remove a<br />
nail that is off-center may<br />
result in fractures of the<br />
distal condylar region.<br />
The End Cap, if used, is removed<br />
using a Screwdriver. If bone<br />
ingrowth obstructs access to the<br />
nail, use of either a Crowndrill,<br />
pick (not supplied), or currette (not<br />
supplied) may provide access.<br />
Remove the distal/proximal screw<br />
with the appropriate Screwdriver<br />
Bit. Do not take out the screws of<br />
the driving end until the Conical<br />
<strong>Extraction</strong> Rod is attached to the top<br />
of the nail in order to avoid rotation.<br />
Insert the Conical <strong>Extraction</strong> Rod<br />
into the driving end of the nail.<br />
Lightly hammer the Conical<br />
Extractor in order to fully<br />
engage the cutting flutes.<br />
Connect the Strike Plate and<br />
the Universal Rod either adding<br />
the Sliding or Slotted Hammer<br />
as shown in the picture.<br />
Remove now the remaining<br />
locking screws before using either<br />
Hammer to remove the nail.<br />
Nails
Nails<br />
Technical Details<br />
Broken IM Nails<br />
Removal of broken IM nails<br />
is particularly challenging.<br />
<strong>Stryker</strong> developed a system that<br />
can be used for the removal of<br />
many cannulated IM nails.<br />
Remove the distal screw with the<br />
appropriate Screwdriver Bit. Do<br />
not take out the proximal screws<br />
until you have attached the Conical<br />
<strong>Extraction</strong> Rod to the top of the<br />
nail in order to avoid rotation.<br />
Broken IM Nails -<br />
Step 1<br />
Broken IM Nails -<br />
Step 2<br />
14<br />
Conical <strong>Extraction</strong> Rod<br />
Universal Rod<br />
Sliding Hammer<br />
Strike Plate<br />
<strong>Extraction</strong> Hook<br />
Universal Rod<br />
Sliding<br />
Hammer<br />
Strike Plate<br />
<strong>Extraction</strong> Hook<br />
Broken IM Nails -<br />
Step 3<br />
An incision is made over the proximal<br />
end of the nail. The End Cap, if used,<br />
is removed using a Screwdriver.<br />
If bone ingrowth obstructs the<br />
access to the nail, the use of either<br />
a Chisel / Pick (not provided) or a<br />
Crowndrill will facilitate removal.<br />
Connect the Universal Rod and the<br />
Strike Plate to the <strong>Extraction</strong> Rod<br />
(center of page) either adding the<br />
Sliding or the Slotted Hammer.<br />
Step 1:<br />
Insert the nail <strong>Extraction</strong> Device<br />
into the proximal end of the nail,<br />
tightening it as firm as possible.<br />
Remove the proximal screws<br />
before using either Hammer<br />
to remove the nail end.<br />
Step 2:<br />
After removal of the proximal nail end,<br />
exchange the Conical <strong>Extraction</strong> Rod<br />
for the <strong>Extraction</strong> Hook (as shown to<br />
the left). Insert <strong>Extraction</strong> Hook into<br />
the cannulation of the nail fragment.<br />
Step 3:<br />
Under fluoroscopy, verify that the<br />
Hook has passed through the nail end.<br />
Make sure that the Hook takes<br />
a hold at the end of the nail<br />
before pulling to remove it.<br />
Step 4:<br />
Use the Sliding or the Slotted<br />
Hammer to pull out the<br />
remaining part of the nail.<br />
Broken IM Nails -<br />
Step 4
Additional Information<br />
Hydro<strong>Set</strong><br />
Hydro<strong>Set</strong> is an injectible self-setting<br />
calcium phosphate cement indicated<br />
to fill bony voids or gaps of the<br />
skeletal system (i.e. extremities,<br />
craniofacial, spine, and pelvis).<br />
These defects may be surgically<br />
created or osseous defects created<br />
from traumatic injury to the bone.<br />
Hydro<strong>Set</strong> is indicated only for bony<br />
voids or gaps that are not intrinsic to<br />
the stability of the bony structure.<br />
Hydro<strong>Set</strong> cured in situ provides<br />
an open void/gap filler that can<br />
augment provisional hardware<br />
(e.g. K-Wires, Plates, Screws) to<br />
help support bone fragments during<br />
the surgical procedure. The cured<br />
cement acts only as a temporary<br />
support media and is not intended<br />
to provide structural support<br />
during the healing process.<br />
Carefully read the IFU, the specific<br />
indications and the contraindications.<br />
REF Description<br />
397003 Hydro<strong>Set</strong> 3cc<br />
397005 Hydro<strong>Set</strong> 5cc<br />
397010 Hydro<strong>Set</strong> 10cc<br />
397015 Hydro<strong>Set</strong> 15cc<br />
References<br />
J Am Acad Orthop Surg 2006;<br />
14:113- 120 Hardware Removal: Indications and Expectations<br />
Matthew L. Busam, MD, Robert J. Esther, MD, MSc,<br />
William T. Obremskey, MD<br />
15<br />
Hydro<strong>Set</strong>
Instruments<br />
Ordering Information - Instruments<br />
REF Description<br />
1806-6150 Tray Module 1 (Generic Sterilization and Storage Tray)<br />
1806-6152 Module 1 Fully loaded<br />
Universal Screw <strong>Extraction</strong> Devices<br />
1806-6106 Screwdriver Bits conical, hex. 2.5mm<br />
1806-6108 Screwdriver Bits conical, hex. 3.5mm<br />
1806-6110 Screwdriver Bits conical, hex. 4.0mm<br />
1806-6112 Screwdriver Bits, hex. 5.0mm<br />
1806-6114 Screwdriver Bits, hex. 6.3mm<br />
1806-6116 Screwdriver Bits, hex. 8.0mm<br />
1806-6118 Screwdriver Bits, Torx T 8.0<br />
1806-6119 Screwdriver Bits, Torx T 15.0<br />
1806-6120 Screwdriver Bits, Torx T 20.0<br />
1806-6121 Screwdriver Bits, Torx T 25.0<br />
1806-6113 Spreading Screwdriver Bit, hex. 5.0mm<br />
1806-6115 Spreading Screwdriver Bit, hex. 6.3mm<br />
1806-6117 Spreading Screwdriver Bit, hex. 8.0mm<br />
1806-6102 Teardrop Handle, solid<br />
1806-6104 Cannulated Teardrop Handle<br />
Rotation Rod used with Cannulated Teardrop Handle<br />
Universal Nail <strong>Extraction</strong> Device<br />
1806-0353 Conical <strong>Extraction</strong> Rod, standard 6mm<br />
1806-0350 Conical <strong>Extraction</strong> Rod, standard 7/8mm<br />
1806-6125 Conical <strong>Extraction</strong> Rod, 10mm<br />
1806-6130 Conical <strong>Extraction</strong> Rod, male, 13mm<br />
1806-0130 Wrench 8 /10mm, standard<br />
1806-0150 Strike Plate, standard<br />
1806-6100 Sliding Hammer<br />
1806-0110 Universal Rod<br />
1806-0170 Slotted Hammer, standard<br />
Universal Lag Screw <strong>Extraction</strong> Device<br />
1806-6140 Connector Gamma<br />
1806-6141 Connector Gamma U-Blade<br />
1806-6142 Connector Gamma3 U-Blade<br />
1806-6144 Connector Gamma3<br />
1806-6143 Connector Dyax-Asiatic<br />
1806-6146 Connector Omega<br />
1806-6148 Connector OHS /OCS<br />
16<br />
1806-6136 Threaded Rod Gamma etc.<br />
1806-6137 Threaded Rod Omega<br />
1806-6138 Threaded Rod OHS /OCS<br />
1114-5002 Spanner 17mm standard<br />
1806-6135 <strong>Extraction</strong> Instrument Lag Screw<br />
1806-6139 Nut
Ordering Information - Instruments<br />
REF Description<br />
Universal Emergency Screw <strong>Extraction</strong> Devices<br />
1806-6151 Tray Module 2 (Generic Sterilization and Storage Tray)<br />
1806-6153 Module 2 Fully Loaded<br />
1806-6169 Conical Extractor, male, small<br />
1806-6170 Conical Extractor, male, 2.5mm<br />
1806-6171 Conical Extractor, male, 3.5mm<br />
1806-6172 Conical Extractor, male, 4.0mm<br />
1806-6173 Conical Extractor, male, 5.0mm<br />
1806-6165 Crowndrill (Trephine), 3.0mm<br />
1806-6166 Crowndrill (Trephine), 4.0mm<br />
1806-6167 Crowndrill (Trephine), 5.0mm<br />
1806-6168 Crowndrill (Trephine), 6.5mm<br />
1806-6180 Crowndrill (Trephine), 8.0mm<br />
1806-6181 Crowndrill (Trephine), 10.0mm<br />
1806-6182 Crowndrill (Trephine), 12.0mm<br />
1806-6183 Conical Extractor, female, 3.0mm<br />
1806-6184 Conical Extractor, female, 4.0mm<br />
1806-6185 Conical Extractor, female, 5.0mm<br />
1806-6186 Conical Extractor, female, 6.3mm<br />
1806-6175 Drift Punch, 2.7mm<br />
1806-6176 Drift Punch, 3.7mm<br />
1806-6177 Drift Punch, 5.0mm<br />
1806-6102 Teardrop Handle, solid<br />
1806-6160 <strong>Extraction</strong> Hook (can also be stored in Module 1), small<br />
1806-6162 <strong>Extraction</strong> Hook (can also be stored in Module 1), large<br />
1806-6178 Forceps for Screw Removal, small<br />
1806-6179 Forceps for Screw Removal, large<br />
Optional Instruments Module 1 & 2<br />
700151 Sharp Hook, Removal from bone material<br />
700225 Osteotome, Removal from bone material<br />
702811 Countersink 6mm, Preparing the cortex<br />
702812 Countersink 8mm, Preparing the cortex<br />
704515 Outer Introducer, Hansson Pin<br />
704516 Inner Introducer, Hansson Pin<br />
704518 Extractor, Hansson Pin<br />
704540 Emergency Inner Extractor, Hansson Pin<br />
704607 Extractor Handle, Hansson Twin Hook<br />
704608 Outer Extractor, Hansson Twin Hook<br />
704609 Inner Extractor, Hansson Twin Hook<br />
702628 T-Handle, AO-medium, for AO medium bits:<br />
screwdriver - screw removal, conical - crowndrill - screw extraction, conical<br />
0106-3043 Screwdriver 2.5, Seidel Humerus Spreading Screw<br />
1806-6206 Gamma3 U-Blade Extractor<br />
* Please ask your <strong>Stryker</strong> sales representative for further information.<br />
17<br />
Instruments
Notes<br />
18
Notes<br />
19
This document is intended solely for the use of healthcare professionals. A surgeon must always rely on his or her<br />
own professional clinical judgment when deciding whether to use a particular product when treating a particular<br />
patient. <strong>Stryker</strong> does not dispense medical advice and recommends that surgeons be trained in the use of any<br />
particular product before using it in surgery. The information presented in this brochure is intended to demonstrate a<br />
<strong>Stryker</strong> product. Always refer to the package insert, product label and/or user instructions including the instructions<br />
for Cleaning and Sterilization (if applicable) before using any <strong>Stryker</strong> products. Products may not be available in all<br />
markets. Product availability is subject to the regulatory or medical practices that govern individual markets. Please<br />
contact your <strong>Stryker</strong> representative if you have questions about the availability of <strong>Stryker</strong> products in your area.<br />
<strong>Stryker</strong> Corporation or its divisions or other corporate affiliated entities own, use or have applied for the following<br />
trademarks or service marks: <strong>Stryker</strong>, Alta, Asnis, AxSOS, G&K, Gamma, IC Nails, Küntscher Nails, Numelock,<br />
OHS&OCS, S2, SCN, Seidel, T2, TLN, Zickel.<br />
All other trademarks are trademarks of their respective owners or holders.<br />
The products listed above are CE marked.<br />
Swemac Orthopaedics AB owns the following trademark: Hansson.<br />
Wacker-Chemie GmbH owns the following trademark: Elastosil.<br />
Literature Number : B1000057<br />
LOT D4809<br />
Copyright © 2009 <strong>Stryker</strong><br />
<strong>Stryker</strong> Trauma GmbH<br />
Prof.-Küntscher-Strasse 1–5<br />
D - 24232 Schönkirchen<br />
Germany<br />
www.osteosynthesis.stryker.com


