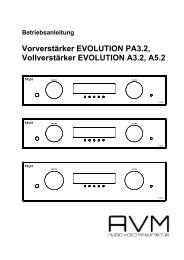
betriebsanleitung vollverstarker evolution a2 operating ... - AVM Audio
betriebsanleitung vollverstarker evolution a2 operating ... - AVM Audio
betriebsanleitung vollverstarker evolution a2 operating ... - AVM Audio

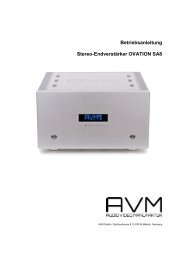
Create successful ePaper yourself
Turn your PDF publications into a flip-book with our unique Google optimized e-Paper software.
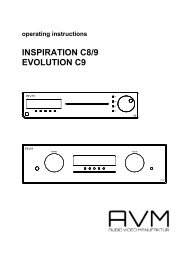
CONNECTION / CABLING OF THE A2<br />
POWER CONNECTION<br />
Connect the supplied power cable with the socket (24) and to a mains socket.<br />
TIP<br />
Please leave the A2 unit switched off initially (button I not pressed) until all remaining cable connections to<br />
the unit have been made.<br />
CONNECTION OF THE SIGNAL SOURCES<br />
Connect the outputs of your signal sources with cinch cables to the input sockets (12 to 18).The left chann<br />
nel is to be connected to the upper row of sockets, the right channels to the lower row.<br />
CONNECTING A TAPE RECORDER<br />
The outputs of the recorder are connected with the TAPE input sockets (18) of the A2 and the inputs of the<br />
recorder to the socket REC OUT (19). The following is applicable for both input and output connections:<br />
the right channel is to be connected to the lower row of sockets and the left channel to the upper row.<br />
CONNECTION OF TONAL PROCESSORS / EQUALIZERS<br />
The A2 is equipped with a switchable processor input. If you possess an equalizer or equipment to correct<br />
loudspeaker frequency response (CANTON DIGITAL I etc) this can be connected to the unit as follows:<br />
processor input with the socket PROCESSOR OUT (21) and processor output with PROCESSOR IN (20)<br />
(right channels always to the lower sockets).<br />
CONNECTING A SEPARATE POWER AMPLIFIER<br />
For music to be played in a different room or for bi-amping operation you can connect a stereo poweramp<br />
or two mono poweramps to the cinch output PRE OUT (22).<br />
CONNECTING A SURROUND AMPLIFIER (FREEZE FUNCTION)<br />
To integrate your equipment into an existing surround installation you can use the A2 as a stereo poweramp<br />
by connecting to any of the inputs. To do this the two front channels (PRE OUT) of the surround amplifier<br />
(or decoder) are connected to one of the inputs (12 to 18). The settings for VOLUME, INPUT LEVEL,<br />
BALANCE, MONITOR and PROCESSOR can now be stored through the FREEZE function. These settings<br />
will be retained automatically for each suitable source until further adjustment is carried out.<br />
The FREEZE function can only be activated through the remote control (see Remote control of the A2).<br />
24<br />
OPERATION OF THE A2<br />
SWITCHING THE UNIT ON AND OFF<br />
You can switch the unit on and off by <strong>operating</strong> the switch (I).<br />
WARNING<br />
Even when the on/off switch (I) has not been pressed the equipment is not completely separated from the<br />
mains supply. We therefore advise you to remove the mains plug from the mains socket during a thunder<br />
storm or longer absence to prevent damage to your unit.<br />
SELECTION OF THE PROGRAM SOURCE<br />
The selection switch PROGRAM (3) located on the extreme left of the unit allows selection of the program<br />
source.The name of the selected source will be shown in text in the LCD-display (6).<br />
LEVEL ADJUSTMENT<br />
The volume level is adjusted by the rotational button VOLUME (9) located on the extreme right. It is multi<br />
functional. The measure of the volume change is dependent on the speed with which the button is rotated.<br />
If turned slowly the level change increases in steps of 0.5 dB, at medium speed 1.5 dB and at fast speed 4 dB.<br />
The actual setting is shown in the display (6) by a bar chart.<br />
BALANCE ADJUSTMENT<br />
Following a short press of the button BAL (8) the VOLUME button (9) can be used to adjust the balance.<br />
The actual setting is shown as a bar in the display (6). Renewed short pressure on the button will save the<br />
selected setting and return the unit to its normal volume setting.<br />
ADJUSTMENT OF SENSITIVITY/VOLUME MATCHING<br />
Not all signal sources reproduce equally loudly. This often leads to unpleasant jumps in the volume. To pre<br />
vent this the A2 can regulate the input level. To achieve this every input has provision for an adjustment band<br />
between - 6 dB to + 6 dB. If this is not sufficient the hi-level input AUX I (16) offers the possibility of redu<br />
cing the level by a further 6 dB. For the best tonal results please connect your CD player or converter, with<br />
an output voltage greater than 3 V, with the AUX I input (16).This does not apply to <strong>AVM</strong> equipment.<br />
After a short press of the button LEVEL (7) the sensitivity of the selected input can be set with the adjust<br />
ment button VOLUME (9).The actual setting is shown as a bar in the display (6).<br />
25