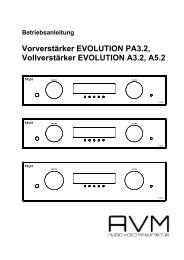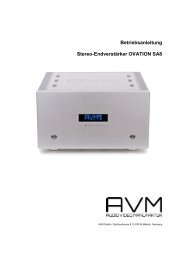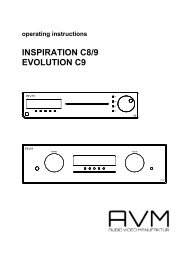
betriebsanleitung vollverstarker evolution a2 operating ... - AVM Audio
betriebsanleitung vollverstarker evolution a2 operating ... - AVM Audio
betriebsanleitung vollverstarker evolution a2 operating ... - AVM Audio

Create successful ePaper yourself
Turn your PDF publications into a flip-book with our unique Google optimized e-Paper software.
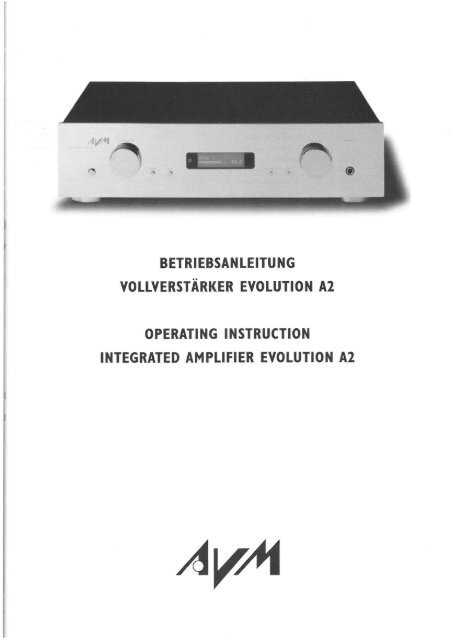
BETRIEBSANLEITUNG<br />
VOLLVERSTARKER EVOLUTION A2<br />
OPERATING INSTRUCTION<br />
INTEGRATED AMPLIFIER EVOLUTION A2
CONNECTION / CABLING OF THE A2<br />
POWER CONNECTION<br />
Connect the supplied power cable with the socket (24) and to a mains socket.<br />
TIP<br />
Please leave the A2 unit switched off initially (button I not pressed) until all remaining cable connections to<br />
the unit have been made.<br />
CONNECTION OF THE SIGNAL SOURCES<br />
Connect the outputs of your signal sources with cinch cables to the input sockets (12 to 18).The left chann<br />
nel is to be connected to the upper row of sockets, the right channels to the lower row.<br />
CONNECTING A TAPE RECORDER<br />
The outputs of the recorder are connected with the TAPE input sockets (18) of the A2 and the inputs of the<br />
recorder to the socket REC OUT (19). The following is applicable for both input and output connections:<br />
the right channel is to be connected to the lower row of sockets and the left channel to the upper row.<br />
CONNECTION OF TONAL PROCESSORS / EQUALIZERS<br />
The A2 is equipped with a switchable processor input. If you possess an equalizer or equipment to correct<br />
loudspeaker frequency response (CANTON DIGITAL I etc) this can be connected to the unit as follows:<br />
processor input with the socket PROCESSOR OUT (21) and processor output with PROCESSOR IN (20)<br />
(right channels always to the lower sockets).<br />
CONNECTING A SEPARATE POWER AMPLIFIER<br />
For music to be played in a different room or for bi-amping operation you can connect a stereo poweramp<br />
or two mono poweramps to the cinch output PRE OUT (22).<br />
CONNECTING A SURROUND AMPLIFIER (FREEZE FUNCTION)<br />
To integrate your equipment into an existing surround installation you can use the A2 as a stereo poweramp<br />
by connecting to any of the inputs. To do this the two front channels (PRE OUT) of the surround amplifier<br />
(or decoder) are connected to one of the inputs (12 to 18). The settings for VOLUME, INPUT LEVEL,<br />
BALANCE, MONITOR and PROCESSOR can now be stored through the FREEZE function. These settings<br />
will be retained automatically for each suitable source until further adjustment is carried out.<br />
The FREEZE function can only be activated through the remote control (see Remote control of the A2).<br />
24<br />
OPERATION OF THE A2<br />
SWITCHING THE UNIT ON AND OFF<br />
You can switch the unit on and off by <strong>operating</strong> the switch (I).<br />
WARNING<br />
Even when the on/off switch (I) has not been pressed the equipment is not completely separated from the<br />
mains supply. We therefore advise you to remove the mains plug from the mains socket during a thunder<br />
storm or longer absence to prevent damage to your unit.<br />
SELECTION OF THE PROGRAM SOURCE<br />
The selection switch PROGRAM (3) located on the extreme left of the unit allows selection of the program<br />
source.The name of the selected source will be shown in text in the LCD-display (6).<br />
LEVEL ADJUSTMENT<br />
The volume level is adjusted by the rotational button VOLUME (9) located on the extreme right. It is multi<br />
functional. The measure of the volume change is dependent on the speed with which the button is rotated.<br />
If turned slowly the level change increases in steps of 0.5 dB, at medium speed 1.5 dB and at fast speed 4 dB.<br />
The actual setting is shown in the display (6) by a bar chart.<br />
BALANCE ADJUSTMENT<br />
Following a short press of the button BAL (8) the VOLUME button (9) can be used to adjust the balance.<br />
The actual setting is shown as a bar in the display (6). Renewed short pressure on the button will save the<br />
selected setting and return the unit to its normal volume setting.<br />
ADJUSTMENT OF SENSITIVITY/VOLUME MATCHING<br />
Not all signal sources reproduce equally loudly. This often leads to unpleasant jumps in the volume. To pre<br />
vent this the A2 can regulate the input level. To achieve this every input has provision for an adjustment band<br />
between - 6 dB to + 6 dB. If this is not sufficient the hi-level input AUX I (16) offers the possibility of redu<br />
cing the level by a further 6 dB. For the best tonal results please connect your CD player or converter, with<br />
an output voltage greater than 3 V, with the AUX I input (16).This does not apply to <strong>AVM</strong> equipment.<br />
After a short press of the button LEVEL (7) the sensitivity of the selected input can be set with the adjust<br />
ment button VOLUME (9).The actual setting is shown as a bar in the display (6).<br />
25
To ensure that all sources are adjusted to the same loudness first select a medium-loud source using the<br />
switch PROGRAM (3). This source will be the reference for comparisons. Adjust the loudness with the<br />
VOLUME button (9) until a pleasant volume is reached.With the switch PROGRAM (3) select another sour<br />
ce and press the button LEVEL (7).Adjust the VOLUME button (9) until the loudness of this source matches<br />
that of the reference source. Continue these operations until all signal sources have been satisfactorily set.<br />
After this process has been successfully completed press the button LEVEL (7) anew. All settings are now<br />
saved and you can use the VOLUME button (9) to carry out any further adjustments manually.<br />
TAPE RECORDING<br />
If a tape recorder is connected to theA2 you can record whichever source you have selected with the switch<br />
PROGRAM (3). The recording level is independent of the volume and balance settings.<br />
MONITORING<br />
To check the quality of the recording you can activate the monitor function. Provided the A2 unit is swit<br />
ched on the monitor function can be activated by pressing the toggle switch MON (4). The outputs (loud<br />
speaker (11.23), headphones (10) and PRE OUT (22)) receive the incoming signal from the connected tape<br />
recorder for background monitoring. Monitoring operation is shown in the display (6). The selected setting<br />
remains until the toggle switch MON (4) is pressed anew. Further information to this mode of operation can<br />
be found in the operational manual of your recorder under the headings "Background monitoring" or<br />
"Monitor",<br />
TIP<br />
The A2 possesses "intelligent" monitoring circuitry which hinders simultaneous monitor operation when<br />
TAPE is selected. Feedback would otherwise occur.<br />
TAPE PLAYBACK<br />
If you wish to listen to a tape recording set the switch PROGRAM (3) to TAPE. This is shown in the <br />
display (6).<br />
OPERATION OF TONAL PROCESSORS/EQUALIZERS<br />
When the A2 unit is switched on and the toggle switch PROCESSOR (5) has been pressed the processor is<br />
activated. This influences the output signal of the A2 (loudspeakers (11.23) and PRE OUT (22)). The tape<br />
recording signai (socket 19) remains uninfiuenced.Activation of the processor is shown in the display (6).The<br />
selected setting is retained until the toggie switch PROC (5) is pressed again.<br />
26<br />
HEADPHONES OPERATION<br />
Stereo headphones can be used with the A2. These utilize a 6.3mm headphone socket. As long as the head<br />
phones are connected the outputs (loudspeakers (11,23) and PRE OUT (22)) are automatically switched off.<br />
The tape recording output remains active.<br />
If your headphones are not equipped with a suitable plug you will need an adapter.<br />
REMOTE CONTROL OF THE EVOLUTION A2 (OPTIONAL)<br />
A system remote control is available with which you can operate all the functions of your integrated ampli<br />
fier from the comfort of your place of listening.The desired functions can be activated by pressing the rele<br />
vant button on the remote control transmitter (see the remote control diagram above).<br />
Some buttons have a dual role to permit comfortable operation.The "ON" button permits the switch bet<br />
ween "Standby" and "On". Alternativeiy, with the unit already operational, it allows you to switch between,<br />
or leave, the next menu leveL The "VOLUME -" and the "VOLUME +" buttons can be used to move the cur<br />
sor arrow in the sub menus.They can also be used to set the balance (sub menu "bal") and input sensitivity<br />
(submenu "set").<br />
Always point the remote control transmitter at the display (6) of the A2 unit. This is where the IR-receiver<br />
is located.<br />
TIP<br />
The selection "standby" is available to mute the integrated amplifier temporarily, for example to make a tele<br />
phone calL "Standby" condition is no replacement for switching off the unit. In standby mode the end stages<br />
are switched off. However the electronic circuitry that controls the amplifier remains in operation. In this<br />
condition the unit consumes about 4 Watt from the main supply. This does not damage the components in<br />
any way but is not environmentally friendly because of the unnecessary energy consumption.<br />
CARE OF THE CASING<br />
The surface and text of the casing are mainly scratch resistant. To clean use a mild soap solution or general<br />
spirit based glass cleaner (use sparingiy) with a soft lint free cloth.<br />
WARNING<br />
Care should be taken during cleaning to ensure that no liquids can ingress into the casing. For safety reasons<br />
it is advised to remove the power cable from the mains supply before cleaning the casing with a damp cloth.<br />
Do not use solvents or abrasives for cleaning.This could damage the surface or text.<br />
27
IF AT FIRST YOU DON'T SUCCEED<br />
Some suspected defects of the equipment are in fact very often found to have arisen from faulty operation.<br />
Sometimes malfunctioning ancillary equipment which is connected to the A2 unit is to blame. Before you<br />
consult your dealer or contact us, we would like you to check the items on the foilowing list to see whet<br />
her you can correct the malfunction yourself.<br />
I. NO MUSICAL REPRODUCTION IS POSSIBLE:<br />
a) Headphones are connected, In which case the other outputs are switched off. Remove the headphones<br />
plug.<br />
b) You have selected MONITOR (4). The display (6) shows "MON". Switch off the monitor function.<br />
c) You have selected PROCESSOR (5). The display (6) shows "PROC". Switch off the processor.<br />
d) "Standby" mode unintentionaily switched on via the remote control. Press the button "On".<br />
e) Check whether one of the causes given below under Paragraph 3.is responsible.<br />
f) If the green LED on the front panel and the display is not iiluminated the fault could be with the mains<br />
fuse. This results mainly from a defect in the power transformer or the amplifier electronics (eg as a<br />
result of a lightning strike). Please consult your dealer.<br />
2. THE AMPLIFIER SWITCHES OFF DURING OPERATION.<br />
In this case one of the safety circuits (overheating, short circuit, ultrasonic or DC) has functioned. This fault<br />
will be diagnosed by the processor and shown in the display.At the same time you will be requested to switch<br />
off the amplifier with the onloff switch (I).<br />
a) If the word "temp" blinks in the display proceed as follows: switch the EVOLUTION A2 off (on/off switch<br />
(I)) and wait 5 minutes. Providing the amplifier works correctly after this overheating had occurred.<br />
Please check whether the conditions explained in this manual regarding placement and cooling have been<br />
complied with.<br />
b) If the A2 unit switches itself off within a few seconds of being switched on and the word "overload" appe<br />
ars in the display, a short circuit has occurred in the loudspeaker cabling or in the loudspeaker itself.This<br />
fault must be rectified before the unit can be retaken into use. Before taking the unit into reuse it is to<br />
be switched off with the onloff switch (I) for about I minute.<br />
c) When "dc" is shown in the display it is the result of a direct voltage arising.from a source, possibly defec<br />
tive, such as a CD player etc which disturbs the functioning of the EVOLUTION A2.<br />
d) Generally these faults can be eliminated by checking that cables of ancillary equipment are properly<br />
28<br />
connected and that the unit is correctly placed.<br />
I<br />
3. HUMMING DURING MUSICAL REPRODUCTION.<br />
Ground loop through the aerial amplifier or postal cabling: Check if the humming stops following removal of<br />
the aerial cable from the tuner (and, if connected to the A2, the television and video recorder). If this is succ<br />
cessful fit a sheath current filter to the aerial cables of these receivers. (Your dealer will supply).<br />
a) The remote control battery is empty.<br />
4. REMOTE CONTROL DOES NOT FUNCTION.<br />
b) There is no line of sight between the remote control transmitter and the A2 (the transmission of the<br />
signal is by infra-red light).<br />
29
,<br />
<strong>Audio</strong>-Video-Messetechnik GmbH, DaimlerstraBe 8,76316 Malsch