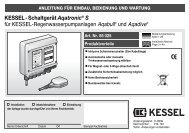
KESSEL - backwater pumping station Pumpfix® F Standard/Comfort
KESSEL - backwater pumping station Pumpfix® F Standard/Comfort
KESSEL - backwater pumping station Pumpfix® F Standard/Comfort

You also want an ePaper? Increase the reach of your titles
YUMPU automatically turns print PDFs into web optimized ePapers that Google loves.
4.1 Service<br />
The system must be checked once every<br />
month by the operator through observation<br />
of the switching routine for operational<br />
ability and leaks.<br />
• Close emergency valve or with Komfort:<br />
press test key to carry out functional test<br />
on <strong>backwater</strong> valve -> valve closes<br />
• Allow water to flow in<br />
• Wait until level-LED + pump trigger.<br />
• Switch off water feed<br />
• Switch off level-LED and wait for pump<br />
• Open hand lever (vertical position OPEN)<br />
-> <strong>Standard</strong><br />
Komfort: Please note that the <strong>backwater</strong><br />
valve must be open after the inspection<br />
has been completed.<br />
The pump should be checked at regular intervals.<br />
If operational noises increase,<br />
<strong>pumping</strong> capacity decreases or there are<br />
vibrations in the pipeline system, the pump<br />
housing and impeller must be checked for<br />
any stubborn soiling or wear.<br />
4.2 Maintenance (at least every six<br />
months)<br />
CAUTION: Disconnect the unit from the<br />
mains during all servicing work! Heed<br />
safety instructions! No warranty will be<br />
granted in the event of insufficient<br />
maintenance! All the servicing and<br />
maintenance work described below<br />
may only be carried out by authorised<br />
qualified personnel. Repairs may only<br />
be carried out by the manufacturer.<br />
DIN 1986, part 3, must be heeded during<br />
maintenance work on systems. Maintenance<br />
work must be carried out at least every<br />
six months by authorised qualified staff.<br />
The following tasks have to be carried out:<br />
• Visual inspection of the complete system<br />
• Thorough cleaning of the complete system<br />
and the pump<br />
• Check on the complete system and pump<br />
housing for external damage and visible<br />
wear<br />
• Check on the pump for free movement,<br />
wear and deposits<br />
• Check the connection cables for mechanical<br />
damage and wear<br />
• Check the seal connections for leaks and<br />
any recognisable wear<br />
• Insulation test on the pump motor<br />
• Check the control unit for damage and<br />
soiling<br />
• Check and clean the ventilation valve<br />
• Clean the optical probe<br />
4. Service and maintenance<br />
We recommend these jobs after longer periods<br />
of standstill or intermediate storage, too,<br />
as well as after longer or frequent occurrences<br />
of <strong>backwater</strong>. If problems should occur<br />
that cannot be eliminated, please contact<br />
the specialist company who carried out the<br />
installation (see stamp on cover sheet) if in<br />
doubt.<br />
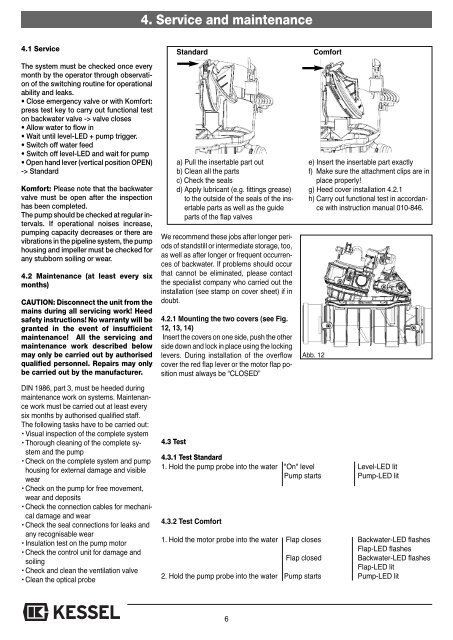
4.2.1 Mounting the two covers (see Fig.<br />
12, 13, 14)<br />
Insert the covers on one side, push the other<br />
side down and lock in place using the locking<br />
levers. During installation of the overflow<br />
cover the red flap lever or the motor flap position<br />
must always be “CLOSED”<br />
4.3 Test<br />
<strong>Standard</strong> <strong>Comfort</strong><br />
a) Pull the insertable part out<br />
b) Clean all the parts<br />
c) Check the seals<br />
d) Apply lubricant (e.g. fittings grease)<br />
to the outside of the seals of the insertable<br />
parts as well as the guide<br />
parts of the flap valves<br />
6<br />
e) Insert the insertable part exactly<br />
f) Make sure the attachment clips are in<br />
place properly!<br />
g) Heed cover installation 4.2.1<br />
h) Carry out functional test in accordance<br />
with instruction manual 010-846.<br />
Abb. 12<br />
4.3.1 Test <strong>Standard</strong><br />
1. Hold the pump probe into the water "On" level Level-LED lit<br />
Pump starts Pump-LED lit<br />
4.3.2 Test <strong>Comfort</strong><br />
1. Hold the motor probe into the water Flap closes Backwater-LED flashes<br />
Flap-LED flashes<br />
Flap closed Backwater-LED flashes<br />
Flap-LED lit<br />
2. Hold the pump probe into the water Pump starts Pump-LED lit