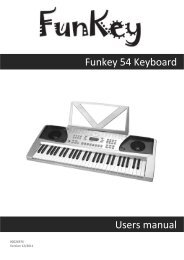
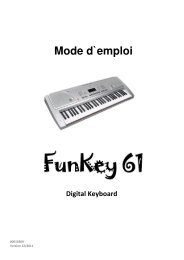
Funkey MD-100 Keyboard Users manual
Funkey MD-100 Keyboard Users manual
Funkey MD-100 Keyboard Users manual
Create successful ePaper yourself
Turn your PDF publications into a flip-book with our unique Google optimized e-Paper software.
00025074<br />
Version 01/2012<br />
<strong>Funkey</strong> <strong>MD</strong>-<strong>100</strong> <strong>Keyboard</strong><br />
<strong>Users</strong> <strong>manual</strong>
1<br />
Congratulations<br />
Congratulations on your purchase of this professional electronic keyboard.<br />
The keyboard is an easy-to-use keyboard with advanced functions especially designed for in self-learning<br />
players and beginners, users can learn playing songs in 3 different ways. The LCD display makes it<br />
easier for users to learn how to play songs in a more directive way.<br />
You are recommended to study this <strong>manual</strong> carefully before using the unit.<br />
Inside This Package<br />
Please make sure the package completely contains the following:<br />
The Instrument<br />
Music Stand Instruction Manual<br />
12V Adaptor
Important Notes<br />
Your keyboard will give you years of playing pleasure if you follow the simple rules<br />
given below:<br />
Location<br />
Do not expose the unit to the following<br />
conditions to avoid deformation,<br />
discoloration, or more serious damage.<br />
Direct sunlight.<br />
High temperature (near a heat source,<br />
or in a car during the day time).<br />
Excessive humidity.<br />
Excessive dust.<br />
Power Supply<br />
Make sure to use the suitable AC adaptor,<br />
and also make sure the AC outlet voltage<br />
at your country matches the input voltage<br />
specified on the AC adaptor's label.<br />
Turn the power switch OFF when the<br />
instrument is not in use.<br />
An AC adaptor should be unplugged from<br />
the AC outlet if the instrument will not be<br />
used for an extended period of time.<br />
Unplug the AC adaptor during electric<br />
storms.<br />
Avoid plugging the AC adaptor into the<br />
same AC outlets as appliances with high<br />
power consumption, such as electric<br />
heaters or ovens. Also avoid using multiplug<br />
adaptors since this could reduce<br />
sound's quality, causes operation errors<br />
and damages.<br />
Turn Power OFF When Making<br />
Connections<br />
To avoid damaging the instrument and<br />
other devices to which it is connected,<br />
turn the power switches of all related<br />
devices OFF prior to connecting or<br />
disconnecting cables.<br />
Cleaning<br />
Clean the unit with a soft dry cloth.<br />
A slightly dampened cloth may remove<br />
stubborn grime and dirt.<br />
Never use cleaners such as alcohol or<br />
thinner.<br />
Avoid placing vinyl object on top of the<br />
unit (vinyl might discolor and stick to the<br />
surface).<br />
Handling and Transporting<br />
Never apply excessive force to the<br />
controls, connectors or other parts of the<br />
instrument.<br />
Always unplug cables by gripping the plug<br />
firmly, but not pulling the cables.<br />
Disconnect all cables before moving the<br />
instrument.<br />
Physical shocks caused by dropping,<br />
bumping, or placing heavy objects on the<br />
instrument could result in scratches or<br />
even severe damages.<br />
Electrical Interference<br />
This instrument contains digital circuitry<br />
and may cause interference if it is placed<br />
too close to radio or television receivers.<br />
If this occurs, move the instrument<br />
further away from the receivers.<br />
2
3<br />
Main Features<br />
KEYBOARD<br />
61-key touch keyboard<br />
OPERATION<br />
Use the Direct Select Button to select "Voices" and "Styles" more conveniently.<br />
VOICE<br />
138 voices in total, including 128 GM Voices, 8 Chinese Voices and 2 Percussion Voices.<br />
STYLE<br />
<strong>100</strong> styles in total.<br />
SONG<br />
50 songs in total. Each song has its learning mode.<br />
CHORD MODE<br />
Both Single finger chords and Fingers chords.<br />
CHORD DICTIONARY<br />
Provide chord information for users.<br />
MEMORY FEATURE<br />
Contains 6 memory registers.<br />
STYLE CONTROL<br />
Sync Start/Stop Fill In A/Normal Fill In B/Variation Intro/Ending<br />
OTHER FEATURES<br />
Dual, Sustain, O.T.S., Record, Demo, Transpose, Octave, Pitchbend wheel, DSP, USB and etc.<br />
NOTE:<br />
Press and hold + and - together and to turn the power on simultaneously;<br />
the default setting will be loaded into the keyboard, and the memory will be lost.
Contents<br />
General Guide................................. 5-6<br />
Front Panel................................................. 5-6<br />
Rear Panel................................................... 6<br />
LCD Display................................................... 6<br />
Preparation................................... 7-8<br />
Power Supply................................................... 7<br />
Setting the Music Stand................................. 8<br />
Connections....................................... 8-9<br />
Headphone Jack........................................ 8<br />
AUX.OUT Jack............................................... 8-9<br />
Sustain Jack......................................... 9<br />
USB Jack................................................. 9<br />
Basic Operation................................. 10<br />
Power Switch & Volume.................................... 10<br />
Demo...................................................... 10<br />
Voices and Effects............................ 11-14<br />
Select a Voice............................................ 11<br />
Dual Voice..................................................... 11-12<br />
Sustain................................................... 12<br />
DSP Effect.......................................... 12<br />
Pitch Bend............................................. 13<br />
Modulation.................................................... 13<br />
Touch............................................................ 13<br />
Transpose..................................................... 14<br />
Octave........................................................ 14<br />
Style Control....................................... 15-21<br />
Select a Style.............................................. 15<br />
Start a Style............................................. 15<br />
Stop a Style............................................... 16<br />
17<br />
Intro/Ending..........................................<br />
17<br />
Fill A/B.........................................................<br />
18<br />
Tempo....................................................... 19<br />
Accomp Volume........................................... 19<br />
Chord Recognize.................................... 20-21<br />
Memory................................................<br />
22<br />
Memory Bank..................................................... 22<br />
Memory Data............................................................ 22<br />
One Touch Setting.................................. 23<br />
Record.................................................... 24<br />
Start Record............................................................. 24<br />
Stop Record......................................................... 24<br />
Playback Record................................................ 24<br />
Song..................................................... 25<br />
LESSON....................................... .................... 25-27<br />
Chord Dictionary.................................. 28-29<br />
MIDI Function<br />
30-32<br />
What is MIDI.......................................................... 30<br />
USB Connection...................................................... 30<br />
MIDI Application............................................. 31-32<br />
Specifications.......................................... 33<br />
Trouble Shooting.................................... 33<br />
Appendix.......................................... 34-38<br />
Appendix 1- Voice List............................................ 34<br />
Appendix 2 - Style List................................................ 35<br />
Appendix 3 - Song List.......................................... 36<br />
Appendix 4 - Chord List........................................... 37<br />
Appendix 5 - MIDI List.............................................. 38<br />
4
5<br />
General Guide<br />
Front Panel
1 POWER ON/OFF<br />
17 -/+ BUTTON<br />
212<br />
3<br />
4<br />
5<br />
6<br />
7<br />
8<br />
9<br />
10<br />
11<br />
12<br />
13<br />
14<br />
15<br />
16<br />
MASTER VOLUME<br />
STYLES DIRECT SELECTED<br />
ACCOMPANIMENT VOLUME -/+<br />
TEMPO -/+<br />
START/STOP<br />
SYNC<br />
INTRO/ENDING<br />
FILL-IN A<br />
FILL-IN B<br />
AUTO BASS CHORD<br />
CHORD DICTIONARY<br />
LESSON<br />
VOICE<br />
STYLE<br />
SONG<br />
Rear Panel<br />
1 2 3 4 5<br />
USB<br />
SUSTAIN<br />
LCD Display<br />
10<br />
15<br />
17<br />
9<br />
AUX OUT PHONES<br />
16<br />
LESSON 1<br />
LESSON 2<br />
LESSON 3<br />
12V<br />
11<br />
12<br />
13<br />
14<br />
18<br />
19<br />
20<br />
21<br />
22<br />
23<br />
24<br />
25<br />
26<br />
27<br />
28<br />
29<br />
30<br />
31<br />
1<br />
2<br />
3<br />
4<br />
5<br />
STORE<br />
ONE TOUCH SETTING<br />
PANEL MEMORY<br />
M1-M6<br />
DUAL<br />
TOUCH<br />
SUSTAIN<br />
DSP<br />
DEMO<br />
TRANSPOSE -/+<br />
OCTAVE -/+<br />
RECORD<br />
PLAY/STOP<br />
MODULATION<br />
PITCHBEND<br />
USB JACK<br />
SUSTAIN JACK<br />
AUX OUT JACK<br />
PHONES JACK<br />
12V JACK<br />
AUTO BASS CHORD<br />
DUAL<br />
TOUCH<br />
TEMPO<br />
BEAT<br />
VOLUEM<br />
CHORD<br />
STYLE/SONG/VOICE<br />
STORE M1-M6<br />
General Guide<br />
ONE TOUCH SETTING<br />
CHORD DICTIONARY<br />
LESSON 1<br />
LESSON 2<br />
LESSON 3<br />
BASS CLEF<br />
TREBLE CLEF<br />
61 KEYBOARD<br />
6
7<br />
1.<br />
2.<br />
Preparation<br />
Power Supply<br />
This electronic keyboard can be powered by the current of a standard household wall outlet (using the<br />
specified AC adaptor) or by batteries.<br />
Using The AC Adaptor<br />
Make sure that only the AC adaptor specified for this electronic keyboard is used. The adaptor shall<br />
be 12V DC output, and center positive type. Be sure to turn off the electronic keyboard before you<br />
connect the adaptor into the AC wall outlet and the cord into the unit.<br />
USB AUX OUT PHONES<br />
12V<br />
SUSTAIN<br />
Using Batteries<br />
Always make sure to turn the keyboard off before inserting new batteries or replacing old ones.<br />
To insert batteries<br />
Open the battery compartment on the bottom of the keyboard.<br />
Insert 6 D-size (SUM-1, R-20) batteries into the battery compartment and follow the correct polarity.<br />
Replace the compartment cover and make sure that it locks firmly in place.<br />
Low battery indications<br />
Any of the following symptoms indicate low battery power. Replace the batteries as soon as possible<br />
whenever any of the following occurs.<br />
A dim and difficult-to-read LCD display.<br />
Abnormally low speaker/headphone volume.<br />
Distortion of the sound output.<br />
Sudden power failure when playing at high volume.<br />
Abnormal rhythms or demo songs are played.<br />
Dimming of the display when playing at high volume.<br />
CAUTIONS!<br />
Use only the specified AC adaptor. Using other types<br />
of adaptor creates the risk of fire and electrical shock.<br />
For safety sake, be sure to unplug the AC adaptor<br />
from the wall outlet whenever leaving the electronic<br />
keyboard unattended for a long time.<br />
CAUTIONS!<br />
When inserting batteries, make sure to follow the<br />
polarity marking.<br />
Never use batteries of different types.<br />
Never mix old batteries with new ones.<br />
Replace the batteries as soon as possible after any<br />
sign of discharge.<br />
Always remove the batteries from the battery<br />
compartment when the keyboard is not expected to<br />
be used for a long period of time.
1.<br />
2.<br />
1.<br />
2.<br />
Setting Music Stand<br />
Please set up the music stand as the instruction below:<br />
Connections<br />
Headphone Jack<br />
USB AUX OUT PHONES<br />
12V<br />
SUSTAIN<br />
AUX.OUT Jack<br />
Preparation<br />
If you prefer to play with headphone for high quality personal monitoring, plug a set of stereo headphone<br />
into the rear panel PHONES jack.<br />
Plug a set of headphone into the PHONES jack and the speakers will be shut automatically.<br />
NOTE:<br />
Never use headphones in high volume,<br />
as it may hurt your ears.<br />
The AUX. OUT jack delivers the output signal of the keyboard to an external amplifier.<br />
Use an audio cord to plug into the AUX. OUT jack located on the rear panel; then plug the other end<br />
of the cord into LINE IN or AUX. IN of the amplifier.<br />
8
9<br />
1.<br />
2.<br />
1.<br />
2.<br />
Connections<br />
USB AUX OUT PHONES<br />
12V<br />
SUSTAIN<br />
Sustain Jack<br />
An optional footswitch can be plugged into the SUSTAIN jack for sustain control.<br />
USB AUX OUT PHONES<br />
12V<br />
SUSTAIN<br />
USB Jack<br />
NOTE:<br />
To avoid damaging of the speakers, please<br />
ensure that the volume has set to the minimum<br />
level before connecting the power and<br />
other devices.<br />
The footswitch functions like the damper pedal of a piano. Press for sustain, release for normal sound.<br />
Connect PC or other USB host devices that support USB Audio.<br />
For devices with USB cable, after the driver is installed and initialization is finished, you can choose USB Audio<br />
Device in the device menu of the software to transfer midi data.<br />
WARNING<br />
To avoid damages, turn the power switches of<br />
this keyboard and all related devices OFF if you<br />
want to plug in or unplug between this instrument<br />
with all related devices.
Basic Operation<br />
Power Switch & Volume<br />
1. Turn the POWER switch on. The LCD display lights up.<br />
Demo<br />
START/STOP<br />
ON<br />
OFF<br />
POWER<br />
2. Use the VOLUME control switch to adjust the volume to<br />
your desired level.<br />
VOLUME<br />
There are total 50 demos. (See appendix)<br />
1. Press DEMO button to play demo songs.<br />
2.<br />
You can select a demo song with - / + button<br />
The name of demo will appear on the LCD.<br />
3. Press the DEMO or START/STOP button to exit from the demo mode.<br />
DEMO<br />
DEMO<br />
NOTE:<br />
If the LCD display does not light up after you<br />
turned on the keyboard, please check the<br />
power supply.<br />
If the keyboard is silent, that means the<br />
volume has adjusted to its minimum level.<br />
NOTE:<br />
In the demo mode, all function keys except<br />
DEMO, START/STOP, TEMPO, +/-, VOLUME,<br />
POWER ON/OFF will be voided.<br />
10
11<br />
Voices and Effects<br />
There are 138 voices in total (See appendix), including 128 GM voices, 8 Chinese voices,<br />
and 2 percussion voices.<br />
Select a Voice<br />
1. Press VOICE button to enter " voice mode " .The default VOICE R1 is No:01;<br />
LCD displays "VOICE 1" and the voice number.<br />
Dual Voice<br />
VOICE STYLE SONG<br />
2. Press + / - button or use the Direct Select Button to select the voice you want.<br />
Direct Select Button<br />
Use the Direct Select Button to select a voice(among 30 voices),<br />
2 direct voices for each button(upper & nether key)<br />
3. After selecting a voice, you can now play the keyboard.<br />
NOTE:<br />
While changing a voice, pay attention to the<br />
rules:<br />
If you press the same button, the voice will be<br />
changed between the upper and nether key.<br />
When the upper/nether voice is on, and then<br />
you press another direct button, the corresponding<br />
upper/nether voice will be selected.<br />
This keyboard has a " dual voice " function. This function is capable to enhance the delicacy of your music by playing<br />
two voices of musical instruments simultaneously; new combinations of voices and music could be created then.<br />
When the dual function is off, the voice indicated is VOICE 1, when the dual function is on, the voice indicated is<br />
VOICE 2.<br />
1. During the VOICE 1 status, press [DUAL] button to enter the dual voice function. " VOICE R2 " and " DUAL "<br />
signal<br />
would be lightened simultaneously. The number of the dual voice will be displayed on the LCD.<br />
Two selected voices will be overlapped at the same time.<br />
DUAL
2.<br />
3.<br />
4.<br />
1.<br />
2.<br />
1.<br />
2.<br />
Press DUAL button again to turn off the dual voice function.<br />
Voices and Effects<br />
To select your desired 'voice 2',press + / - button, or to select by the Direct Select Button.<br />
To experience the dual voice effect, play any note on the keyboard.<br />
Sustain<br />
NOTE:<br />
In DUAL VOICE status, only the right section<br />
of keyboard has dual voice.<br />
This function helps you to get a voice with a sustained effect, while playing the keyboard.<br />
Press SUSTAIN button to activate the sustain effect. The "SUSTAIN flag" show up on the display.<br />
Press SUSTAIN button again to eliminate the sustain<br />
effect. The "SUSTAIN flag" will disppear.<br />
DSP Effect<br />
Two voice will sound<br />
at the same time.<br />
SUSTAIN<br />
NOTE:<br />
When you step on the 'sustain pedal', its<br />
sustain effect is stronger than the effect<br />
by pressing the SUSTAIN button.<br />
This function allows you to perform the overall sound in a more realistic style.<br />
The DSP effect is set to ON when keyboard power on.<br />
Press DSP button to turn off the DSP effect.<br />
DSP<br />
12
1.<br />
2.<br />
13<br />
Voices and Effects<br />
Pitch Bend<br />
The pitch band wheel can be used to bend the note upwards or downwards, range between +/- 2 cent.<br />
When the wheel is released, the note will return back to the normal status.<br />
Modulation<br />
Touch<br />
higher<br />
(+2)cent<br />
lower<br />
(-2)cent<br />
Press and hold MODULATION button. You can hear the modulation effect while playing the keyboard.<br />
Release the button to exit the modulation effect.<br />
NOTE:<br />
In MODULATION status, only the right section<br />
of the keyboard has the modulation effect.<br />
This function allows you to turn on the dynamic level while playing the keyboard.<br />
The LCD will display the "touch value". If the "touch function" is disabled, there will be no touch response.<br />
To experience the effect, play any note on the keyboard after you turn it on.<br />
TOUCH
1.<br />
Transpose<br />
Octave<br />
TRANSPOSE<br />
OCTAVE<br />
Voices and Effects<br />
You can change the key of the entire keyboard with the TRANSPOSE function by adjusting the<br />
pitch in semitone steps..<br />
Press TRANSPOSE + or TRANSPOSE - button to the Transpose setting mode.<br />
The LCD will display the current transpose value. The default octave value is 00.<br />
Use TRANSPOSE + / TRANSPOSE - to adjust the value from 12 to +12 semitones.<br />
TRANSPOSE<br />
2. Press TRANSPOSE + and TRANSPOSE - simultaneously to set the default value: 00.<br />
1.<br />
2. Press OCTAVE + and OCTAVE - simultaneously to set the tune value back to its default.<br />
3. The default octave value is 00.<br />
NOTE:<br />
If you don't press any button for 5 seconds<br />
after entering the Transpose setting mode,<br />
it will quit this menu automatically.<br />
Press OCTAVE + or OCTAVE - button to set the Octave mode.<br />
The LCD will display the current octave value. Use OCTAVE + / OCTAVE - to change the octave value.<br />
This function can change the key to 1 octave up or down.<br />
OCTAVE<br />
NOTE:<br />
If you don't press any button for 5 seconds<br />
after entering the Octave setting mode,<br />
it will quit this menu automatically.<br />
14
15<br />
1.<br />
Style Control<br />
The keyboard has a total of <strong>100</strong> styles, from 1 to <strong>100</strong>. The default style is 01.<br />
Select a Style<br />
Press STYLE button to set the keyboard to the "style mode". The "STYLE flag" and the<br />
style number will show up on the display.<br />
Start a Style<br />
1. Start button:<br />
START/STOP SYNC INTRO/ENDING FILL-IN A FILL-IN B<br />
VOICE STYLE SONG<br />
2. Press + / - button or use the Direct Select Button to select the voice you want.<br />
Direct Select Button<br />
Use the Direct Select Button to select your desired style<br />
(among 24 styles), 2 direct styles for each button<br />
(upper & nether).<br />
3. After a style is selected, you can then play the keyboard.<br />
Use START/STOP button to start the style.<br />
NOTE:<br />
While changing a style, pay attention to the<br />
rules:<br />
If the same button has been pressed twice, the<br />
style will be swapped from one to another.<br />
When the upper/nether style is on, and you<br />
then press another direct button, the<br />
corresponding upper/nether style will be<br />
selected.
Style Control<br />
2. A.B.C. mode<br />
Press A.B.C button to set the A.B.C mode on. The A.B.C flag will appear on the LCD. Under this mode,<br />
the keys below the split point are known as the CHORD area.<br />
Chord area<br />
3. Sync Start<br />
4. Intro Start<br />
Flash simultaneously<br />
INTRO/ENDING<br />
LESSON 1<br />
LESSON 2<br />
LESSON 3<br />
A.B.C.<br />
NOTE:<br />
There are 2 ways to detect the chord:<br />
" single finger detect " and " multi fingers detect " .<br />
If a chord played has been detected in notes<br />
more than one, it is recognized as the " multi<br />
fingers chord " .<br />
If not, " single finger chord " will be recognized.<br />
Press SYNC button. There will be 4 beats flashing simultaneously on the screen according to the current<br />
tempo.<br />
START/STOP SYNC INTRO/ENDING FILL-IN A FILL-IN B<br />
NOTE:<br />
If A.B.C. mode is off, play any key on the<br />
keyboard to start a style.<br />
If A.B.C. mode is on, play only the chord area<br />
key to start a style with the Auto Bass Chord<br />
accompaniment.<br />
Press the INTRO/ENDING button to insert an intro section before you start to play .<br />
The intro section will be followed by the main section.<br />
There are two main sections, "normal" and "variation". It has its own two or four-measure section.<br />
16
17<br />
Stop a Style<br />
1. Stop immediately<br />
Use START/STOP button to start a style.<br />
2. Ending stop<br />
Press the INTRO/ENDING button if you<br />
want to proceed to the ending section and then<br />
stop.<br />
The ending section will begin from the top of<br />
the next measure.<br />
3. Sync stop<br />
Press the SYNC button to stop playing, and<br />
the synchronized start mode will be activated.<br />
Intro/Ending<br />
INTRO/ENDING<br />
Style Control<br />
START/STOP SYNC INTRO/ENDING FILL-IN A FILL-IN B<br />
START/STOP SYNC INTRO/ENDING FILL-IN A FILL-IN B<br />
START/STOP SYNC INTRO/ENDING FILL-IN A FILL-IN B<br />
1. If you press the INTRO/ENDING button before starting a style, this key will be used as the INTRO function.<br />
2.<br />
3.<br />
This function is applicable to add in the beginning / ending of a style. Its length varies in<br />
different styles.<br />
When the " INTRO/ENDING " mode is processing, "NOR " or "VAR " above the LCD will be flashing until<br />
the mode finishes.<br />
Press START/STOP or SYNC and the style will begin with a fill in intro. When a style is playing,<br />
hit this key as an ENDING function.<br />
START/STOP SYNC<br />
NOTE:<br />
After you pressed FILL-IN A and then pressed<br />
the INTRO/ENDING button, the NOR flag<br />
will be flashing.<br />
After you pressed FILL-IN B and then pressed<br />
the INTRO/ENDING button, the VAR flag<br />
will be flashing.
1.<br />
2.<br />
3.<br />
Style Control<br />
Fill A/B<br />
Choose the desired style and press the START/STOP button.<br />
Press the FILL-IN A button, the fill a-a or fill b-a will begin immediately and smoothly lead into the<br />
"normal style". LCD will display "NOR".<br />
FILL-IN A<br />
FILL-IN A<br />
FILL-IN B<br />
Press the FILL-IN B button, the fill a-b or fill b-b will begin immediately and smoothly lead into the<br />
"variation style". LCD will display "VAR".<br />
FILL-IN B<br />
4. Playing FILL IN A / FILL IN B section<br />
In NORMAL mode, press FILL-IN A button to insert 1 measure fill in and LCD will flash out 'NOR'.<br />
After one measure is over, NORMAL style will be returned.<br />
In VARIATION mode, press FILL-IN B button to insert 1 measure fill in and LCD will flash out 'VAR',<br />
After one measure is over, VIRIATION style will be returned.<br />
In NORMAL mode, press FILL-IN B button to insert 1 measure fill in and LCD will flash out 'VAR'.<br />
After one measure is over, VARIATION style will be started.<br />
In VARIATION mode, press FILL-IN A button to insert 1 measure fill in and LCD will flash out 'NOR' .<br />
After one measure is over, NORMAL style will be started.<br />
NOTE:<br />
Hold down the button when a style is playing, the FILL pattern repeats continually until you release the button.<br />
Press FILL-IN A , when the style stops, it will be changed to the "normal section", the 'NOR' flag on the LCD<br />
will be lightened.<br />
Press FILL-IN B , it will be changed to the "variation section", the 'VAR' flag on the LCD will be lightened.<br />
18
19<br />
1.<br />
2.<br />
1.<br />
2.<br />
3.<br />
Tempo<br />
Press the TEMPO+ or TEMPO- button to change the tempo.<br />
TEMPO<br />
TEMPO<br />
Accomp Volume<br />
ACC.VOL<br />
ACC.VOL<br />
ACC.VOL<br />
Style Control<br />
Press TEMPO+ and TEMPO- simultaneously to set the tempo value back to its default one.<br />
NOTE:<br />
Selecting a style when it stops, the tempo<br />
will be change with the style automatically to<br />
the default one. When a style is playing, the<br />
tempo will not change along with the style.<br />
Press ACC.VOL+ or ACC.VOL- button to adjust the ACCOMP volume. The LCD displays the ACCOMP<br />
volume ranges between 0 and 31.(Default ACCOMP value is 26.)<br />
Press ACC.VOL+ and ACC.VOL- buttons together to turn off the ACCOMP volume.<br />
Press ACC.VOL+ and ACC.VOL- buttons together again to turn on the ACCOMP volume.
Style Control<br />
Chord Recognize<br />
"A.B.C." is off on the keyboard is the default mode. Press A.B.C. button to turn on this "auto bass chord"<br />
function, the A.B.C. flag on the LCD is lightened. The left section of the keyboard is known as the "chord area",<br />
while playing the chord, both the bass and the chord voices phonate.<br />
A.B.C.<br />
There are 2 ways to detect the chord: "single finger detect" and "multi fingers<br />
detect".<br />
If the chord played is based on "multi fingers detect", it is recognized as the "multi fingers chord".<br />
If not, "single finger chord" will be recognized.<br />
Single Finger Chords<br />
This method allows you easily play chords easily<br />
in the accompaniment range of the keyboard<br />
using only one, two, or three fingers.<br />
The examples of Single Finger Chord "C, Cm, C7<br />
and Cm7" are shown as below:<br />
To play a major chord<br />
Press the root note of the chord<br />
To play a minor chord<br />
Press the root note together with the<br />
nearest black key to the left of it .<br />
To play a seventh chord<br />
Press the root note together with the<br />
nearest white key to the left of it .<br />
To play a minor seventh chord<br />
Press the root notes together with<br />
the nearest white and black keys to<br />
the left of it (three keys altogether) .<br />
NOTE:<br />
When A.B.C. is on, press the keys on the left<br />
of split point. The chord will be recognized as<br />
single finger chords.<br />
NOTE:<br />
Since the chord detection of A.B.C. is based<br />
on the Chord Root priority, some chords that<br />
could be played under the Chord Dictionary<br />
may not be recognised by A.B.C. , eg. B6<br />
bB6 B6(9) bB6 9 Baug bBaug<br />
bBm6 Bm6 Adim7 bBdim7 Bdim.<br />
Multi Finger Chords<br />
This method allows you to produce an accompaniment<br />
by playing chords with normal fingerings<br />
in the accompaniment range of the keyboard.<br />
To play Multi Chords ( Example for C chords)<br />
A total of 32 chords are provided as below:<br />
Notes enclosed in parentheses are optional;<br />
the chords could be recognized without them.<br />
20
21<br />
Chord Basics<br />
Three or more notes played together constitute a "chord".<br />
The most basic chord type is the "triad" consisting three notes:<br />
the root, third, and fifth degrees of the corresponding scale.<br />
A "C major triad", for example, is made up of the notes C (the root),<br />
E(the third note of the C major scale),and G (the fifth note of the<br />
C major scale).<br />
Reading Chord Names<br />
Some Chord Types<br />
Style Control<br />
In the C major triad shown above, the lowest note is the " root" of the chord(this is the chord's "root<br />
position"...using other chord notes for the lowest note results in "inversion"). The root is the central<br />
sound of the chord, which supports and anchors the other chord notes.<br />
The distance(interval) between adjacent notes of triad in root position is either a major or minor third.<br />
The lowest interval in our root-position trial (between the root and the third) determines whether the triad<br />
is a major or minor chord, and we can shift the highest note up or down by a semitone to produce two<br />
additional chords, as shown below.<br />
The basic characteristics of the chord sound remain intact even if we change the order of the notes to create<br />
different inversions. Successive chords in a chord progression can be smoothly connected, for example, by<br />
choosing the appropriate inversions (or chord "voicings ").<br />
Chord names tell you just about everything you need to know about<br />
a chord (other than the inversion/voicing). The chord name tells you<br />
what the root of a chord is, whether it is major, minor, or diminished,<br />
whether it requires a major or flatted seventh, what alterations<br />
or tension does it use...all at a glance.
1.<br />
2.<br />
3.<br />
1.<br />
2.<br />
3.<br />
Memory<br />
Memory feature can be used to memorize 24 complete control-panel setups(4 banks, 6 setups<br />
each) that you can recall whenever needed.<br />
Memory bank<br />
There are 4 banks at all, each bank has 6 memories (M1-M6).<br />
Press and hold STORE , press M1 (or M2 - M4 ) meanwhile. The data will be stored to the<br />
M1 (M2-M6),LCD displays the memory number MEM 1.<br />
STORE<br />
Memory Date<br />
ONE TOUCH SETTING<br />
M1 M2 M3 M4 M5 M6<br />
Press any of the M1 - M6 button. LCD will display<br />
MEM 1- MEM 6.<br />
Use + / - button to select the bank you want.<br />
Press STORE and M1 simultaneously, the<br />
memory data will return to the default value.<br />
Please note that it will clear the record data.<br />
NOTE:<br />
If the current data is not the same as the<br />
current memory data, the corresponding<br />
memory flag on the LCD will flash.<br />
VOICE DATA<br />
VOICE:VOICE R1, VOICE R2, and VOICE LOWER;<br />
VOICE EFFECT:TOUCH NUMBER, DSP ON/OFF, SUSTAIN, ON/OFF, TRANSPOSE VALUE, TUNE, OCTAVE.<br />
ACCOMP DATA<br />
STYLE NUMBER, TEMPO, BEAT, A.B.C ON/OFF, ACCOMP VOLUME, NORMAL/VARIATION STATUS.<br />
MIXER VOLUME<br />
VOICE R1 VOLUME, VOICE R2 VOLUME, VOICE LOWER VOLUME, DRUM VOICE, BASS VOLUME,<br />
OC1, OC2, OC3 VOLUME.<br />
22
23<br />
1.<br />
One Touch Setting<br />
One Touch Setting is a powerful and convenient function that allows you to reconfigure all<br />
settings instantly with the touch of a single button.<br />
In this function, 4 types of parameters (M1~M4) will be loaded for operating the current style.<br />
Press O.T.S button to turn this mode on and lighten the O.T.S. flag on the LCD.<br />
Press any of the M1 ~ M4 button, it will load the relative type of parameter according to the<br />
current style. M1 and M2 store the parameters for the normal style, while M3 and M4 store the parameters<br />
for the "variation style". The keyboard will turn the A.B.C. mode on automatically while the O.T.S. is on.<br />
ONE TOUCH SETTING<br />
M1 M2 M3 M4 M5 M6<br />
2. Press any of the M1-M4 buttons, which is corresponded to your desired setting.<br />
ONE TOUCH SETTING<br />
M1 M2 M3 M4 M5 M6<br />
3. When a style is playing, press O.T.S to turn the O.T.S mode on; it will insert a "Fill in " section automatically.<br />
Insert "FILL-IN A'' when<br />
pressed.<br />
M1 or M2 button is pressed. Insert "FILL-IN B" when M3 or M4 button is<br />
4. Press O.T.S button again to turn off the O.T.S. Mode.<br />
5.<br />
The parameters stored in the O.T.S. including:<br />
VOICE R1, VOICE R2, OCTAVE(R1/R2) and VOLUME.<br />
O.T.S<br />
O.T.S<br />
NOTE:<br />
While you are recording or playing back a<br />
recorded song, press any of the M1 ~<br />
M4 button, no "FILL IN" will be inserted.
1.<br />
2.<br />
1.<br />
2.<br />
Record<br />
Start Record<br />
Press the RECORD button, the four-beat on the LCD will flash simultaneity, indicating a "record waiting status".<br />
A voice, style and memory can be selected in this status. The ACCOMP track and MELODY track can be recorded<br />
together.<br />
Stop Record<br />
Playback Record<br />
RECORD<br />
PLAY/STOP<br />
RECORD<br />
PLAY/STOP<br />
After all the settings in the "record waiting status" have been selected, next, play the keyboard (the chord area<br />
when recording ACCOMP) or press the START/STOP button; it will start recording and the beat will display<br />
according to the current tempo.<br />
START/STOP<br />
STOP AUTOMATICALLY<br />
While recording, once the capability is full, the recording will be stopped automatically, and will display "FULL"<br />
on the LCD. When a style is playing, press the INTRO/ENDING button, it will stop recording automatically<br />
after "ending".<br />
STOP MANUALLY<br />
Press RECORD button again while recording to stop this action immediately.<br />
NOTE:<br />
Once the recording of one track is started,<br />
the original data in the track will be<br />
overwritten.<br />
Press PLAY/STOP button to start playing the recorded data. Press PLAY/STOP again to stop playing.<br />
Voice, style, memory and recording tracks can be selected in this status.<br />
NOTE:<br />
If the recording memory is empty, the<br />
character "EMPTY" will appear temporary on<br />
the LCD, when you press PLAY/STOP .<br />
24
25<br />
1.<br />
2.<br />
Song<br />
There are 50 songs in total (see Appendix). Each song can be practised in the LESSON mode.<br />
START/STOP the song<br />
Press SONG button to enter the "song mode", the song flag on the LCD will show up.<br />
Then press START/STOP or SONG button, it will play the current song repeatedly.<br />
Press START/STOP or SONG button again to stop playing the song, but it will not<br />
quit the song mode.<br />
SELECT the song<br />
Use + / - button to select the song that you want.<br />
SONG STYLE SONG<br />
3. Press LESSON button to enter the "lesson mode". There are 3 different ways to practise the songs.<br />
4.<br />
When the song is stopped, press CHORD DICTIONARY , STYLE , VOICE , DUAL or<br />
voice/style Direct Select Button to exit the song mode.<br />
Lesson<br />
In "song mode", press the LESSON button to enter the lesson mode.<br />
The song mode includes LESSON 1/2/3.<br />
CHORD<br />
DICTIONARY LESSON
Song<br />
The 3 levels of the lessons are as follows:<br />
1. LESSON 1<br />
Press LESSON button to enter the lesson 1 mode, the lesson 1 flag will be lightened on the LCD.<br />
CHORD<br />
DICTIONARY LESSON<br />
Press the START/STOP button, and then play the keyboard to start the LESSON.<br />
START/STOP SYNC INTRO/ENDING FILL-IN A FILL-IN B<br />
This mode focuses on time practising, instead of notes accuracy.<br />
2. LESSON 2<br />
Press the LESSON button again to enter the lesson 2 mode, the lesson 2 flag will be lightened on the LCD.<br />
CHORD<br />
DICTIONARY LESSON<br />
Press the START/STOP button and start playing the keyboard with the "LESSON" function.<br />
START/STOP SYNC INTRO/ENDING FILL-IN A FILL-IN B<br />
This mode focuses on notes practising, instead of time accuracy.<br />
Once you have played the correct note, the song will continue to play to the next note.<br />
26
27<br />
3. LESSON 3<br />
Press the LESSON button during LESSON 2 mode for entering LESSON 3.<br />
Lesson 3 flag will be lightened on the LCD.<br />
CHORD<br />
DICTIONARY LESSON<br />
Press the START/STOP button and start playing the keyboard with the "LESSON" function.<br />
START/STOP SYNC INTRO/ENDING FILL-IN A FILL-IN B<br />
This mode simply allows users to practise with time and notes, instead of their accuracy.<br />
Press the START/STOP button again to stop the LESSON mode.<br />
Song
1.<br />
2.<br />
3.<br />
Chord Dictionary<br />
Chord dictionary is a function which helps you to check for the chord notes.<br />
Press CHORD DICTIONARY button to enter the DICT mode. The "chord dictionary flag" on the LCD will be<br />
lightened. In this mode, the keys above "C4" are used to assign as the Chord Type, the keys above C6 are<br />
used to assign as the Chord Root.<br />
CHORD<br />
DICTIONARY LESSON<br />
For example , if we want to play a Cm7 CHORD. Press the "C" key in the section of the keyboard labeled<br />
"CHORD ROOT". (The note does not note sound) The root note you set will be shown on the display.<br />
C<br />
CHORD TYPE<br />
(m7)<br />
CHORD ROOT<br />
Press the "m7" key in the section of the keyboard which has labeled "CHORD TYPE" (The note does not sound).<br />
The notes you should play for the specified chord (root note and chord type) are shown in the display<br />
as the notation and also in the keyboard diagram.<br />
Individual notes<br />
of chord(keyboard)<br />
Chord name<br />
(root and type)<br />
Notation of chord<br />
28
29<br />
4.<br />
Chord Dictionary<br />
When the Chord Type and Chord Root are confirmed, the LCD will display the chord and its keyboard position.<br />
A bell sound will be heard when you play it correctly.<br />
5. Specify and play the chord type and the chord root that you would like to play on the keyboard as follow:<br />
6. 24 chords will be displayed in the dictionary mode as follows:<br />
7.<br />
8.<br />
Chord Root :<br />
Note Chord Root Note Chord Type<br />
C6 C F6# F#/Gb<br />
C6# C#/Db G6 G<br />
D6 D A6b Ab/G#<br />
E6b Eb/D# A6 A<br />
E6 E B6b Bb/A#<br />
F6 F B6 B<br />
Press CHORD DICTIONARY button again to turn off the Chord Dictionary.<br />
CHORD<br />
DICTIONARY LESSON<br />
Chord Type:<br />
Note Chord type Note Chord<br />
type<br />
C4 M C5 7(b9)<br />
C4# M(9) C5# 7(9)<br />
D4 6 D5 7(#9)<br />
E4b mM7 E5b 7(b13)<br />
E4 M7 E5 7(13)<br />
F4 m F5 7(#11)<br />
F4# m(9) F5# dim7<br />
G4 m6 G5 dim<br />
Ab4 m7(9) A5b 7aug<br />
A4 m7 A5 aug<br />
B4b m7b5 B5b 7sus4<br />
B4 7 B5 sus4<br />
Some fingerings may be recognised as different chords by A.B.C. , eg. B6 bB6 B6(9) bB6 9<br />
Baug bBaug bBm6 Bm6 Adim7 bBdim7 Bdim.
1.<br />
2.<br />
3.<br />
4.<br />
MIDI Function<br />
What is MIDI<br />
MIDI stands for " Musical Instrument Digital Interface ",<br />
that is the standard interface between a PC and other<br />
electronic instrument(s).<br />
USB connection can be used for midi data transference<br />
with computer or other USB host devices that support<br />
USB audio device with an USB cable.<br />
The keyboard can be connected to the PC or other USB<br />
host device with an USB interface.<br />
Use the keyboard as a tone generator, the data (MIDI)<br />
recorded on the PC or other USB host devices can be<br />
played on the keyboard.<br />
USB Connection<br />
1. System Requirements<br />
CPU: 300 MHz or higher, Pentium 2<br />
Memory: 64MB or more<br />
Hard Disk: at least 2 MB of free base<br />
OS: WINDOWS 2000/XP<br />
2. The Method of Connection<br />
Connect a standard USB cable between the rear-panel<br />
of the USB jack of the instrument and the USB jack<br />
on your computer (USB cable sold separately).<br />
3. USB Precautions<br />
Please observe the following precautions when connecting<br />
the instrument to a computer via a USB cable.<br />
Failure to do so can cause the instrument and/or the<br />
computer to hang up(freeze), possibly causing<br />
corruption or losing the data.<br />
If the instrument or computer does hang up, turn the<br />
power of both devices off and then turn it on again<br />
after a few seconds.<br />
NOTE:<br />
While a recording is playing back and a style is<br />
playing, you can not use the MIDI IN function,<br />
or the song you are playing will have error<br />
occurs for the same channel.<br />
CAUTIONS!<br />
Activate the computer from a sleep/suspended/<br />
standby mode before connecting the USB cable.<br />
Connect the USB cable to the instrument and<br />
a computer before turning the power of the<br />
instrument on.<br />
30
31<br />
MIDI Application<br />
1. The keyboard can control other equipments or electronic instruments.<br />
2. Some equipments can be used to control the keyboard.<br />
3. PC recorded data (MIDI) can be played on the keyboard.<br />
MIDI Function<br />
4.<br />
In order to transfer songs between your computer and the keyboard you will need to install other applications.
Specifications<br />
LCD display<br />
Keys<br />
Polyphony<br />
Voice<br />
Style<br />
Demo Song<br />
Control button<br />
Accompaniment Control<br />
Record Function<br />
Panel Memory<br />
Power Supply<br />
Connectors<br />
Speaker<br />
Dimension<br />
Weight<br />
Attachment<br />
Trouble Shooting<br />
Multi-functional LCD<br />
61 keys with Touch Response<br />
64-note polyphony(max)<br />
138 Voices<br />
<strong>100</strong> Styles<br />
50 Demo songs<br />
4 10w x 2<br />
970(L)x350(W)x135(H)mm<br />
5kg(without batteries)<br />
Adaptor, Music stand, <strong>manual</strong><br />
Problem Possible Cause and Solution<br />
No matter the instrument is turned on or off, a popping<br />
sound will be temporarily produced.<br />
There is no sound even when the keyboard is played or<br />
when a song or style is being played.<br />
The volume is too soft.<br />
The sound quality is poor.<br />
The rhythm stops unexpectedly or not responding.<br />
The recorded data of the song is not playing correctly.<br />
The LCD display suddenly goes dark, and all panel settings<br />
are reset.<br />
Power on/off Volume Accomp Volume,Tempo +/-,Chord Dictionary,<br />
Lesson, Voice, Style, Song, O.T.S. , M1-M6, Store, Start/Stop, Sync,<br />
Intro/Ending, Fill-in A, Fill-in B, A.B.C. Record, Play/Stop, Dual, Touch,<br />
Sustain, DSP, Demo, Transpose +/- , Octave +/-, +/-<br />
Start/Stop, Sync, Intro/Ending, Fill-in A, Fill-in B<br />
Record, Play/Stop<br />
24 Memory Storage<br />
12V 2000mA<br />
AC Power, Headphones, Aux.Out, Sustain, USB<br />
All specifications and appearances are subject to change without notice.<br />
This is normal and indicates that the instrument<br />
is receiving electrical power.<br />
Check if any cable or headphone is connected to<br />
the PHONES jack on the rear panel. When a set<br />
of headphonesis plugged into this jack, no sound<br />
is output.<br />
The batteries are low or dead. Replace all six<br />
batteries with completely new ones, or use the<br />
optional AC adaptor.<br />
32
33<br />
Appendix 1- Voice List<br />
NO Name<br />
PIANO<br />
01 Grand Piano<br />
02 Bright Piano<br />
03 El Grd Piano<br />
04 Honky-Tonk Piano<br />
05 Elec Piano 1<br />
06 Elec Piano 2<br />
07 Harpsichord<br />
08 Clavi<br />
09 Celesta<br />
10 Glockenspiel<br />
11 Music Box<br />
12 Vibraphone<br />
13 Marimba<br />
14 Xylophone<br />
15 Tubular Bell<br />
16 Dulcimer<br />
ORGAN<br />
17 Drawbar Organ<br />
18 Percussive Organ<br />
19 Rock Organ<br />
20 Church Organ<br />
21 Reed Organ<br />
22 Accordion<br />
23 Harmonica<br />
24 Tango Accordion<br />
GUITAR<br />
25 NylonGuitar<br />
26 Steel Guitar<br />
27 Jazz Guitar<br />
28 Clean Guitar<br />
29 Muted Guitar<br />
30 Overdriven Guitar<br />
31 Distortion Guitar<br />
32 Guitar Harmonics<br />
33 Acoustic Bass<br />
34 Finger Bass<br />
35 Picked Bass<br />
36 Fretless Bass<br />
37 Slap Bass 1<br />
38 Slap Bass 2<br />
39 Synth Bass 1<br />
40 Synth Bass 2<br />
41 Violin<br />
42 Viola<br />
MALLET<br />
BASS<br />
43 Cello<br />
STRINGS<br />
44 Contrabass<br />
45 Tremolo Strings<br />
46 Pizzcato Strings<br />
47 Harp<br />
48 Timpani<br />
STRING ENSEMBLE<br />
49 Strings 1<br />
50 Strings 2<br />
51 Synth Strings 1<br />
52 Synth Strings 2<br />
53 Choir Aahs<br />
54 Voice Ooh<br />
55 Synth Voice<br />
56 Orchestra Hit<br />
BRASS<br />
57 Trumpet<br />
58 Trombone<br />
59 Tuba<br />
60 Muted Trumpet<br />
61 Horn<br />
6 2<br />
Brass Ensemble<br />
63 Synth Brass 1<br />
64 Synth Brass 2<br />
REED<br />
65 Soprano Sax<br />
66 Alto Sax<br />
67 Tenor Sax<br />
68 Baritone Sax<br />
69 Oboe<br />
70 English Horn<br />
71 Bassoon<br />
72 Clarinet<br />
PIPE<br />
73 Piccolo<br />
74 Flute<br />
75 Recorder<br />
76 Pan Flute<br />
77 Blown Bottle<br />
78 Shakuhachi<br />
79 Whistle<br />
80 Ocarina<br />
LEAD<br />
81 Square<br />
82 Sawtooth<br />
83 Calliope<br />
84 Chiff<br />
85 Charang<br />
86 Voice<br />
87 Fifths<br />
88 Bass Lead<br />
89<br />
PAD<br />
Fantasia<br />
90 Warm<br />
91<br />
92<br />
93<br />
94<br />
95<br />
96<br />
97<br />
98<br />
99<br />
<strong>100</strong><br />
101<br />
102<br />
103<br />
104<br />
Poly Synth<br />
Cho ir<br />
Bowed<br />
Metallic<br />
Halo<br />
Sweep<br />
Rain<br />
SoundTrk<br />
Crystal<br />
Atmosphr<br />
Bright<br />
Goblins<br />
Echoes<br />
Sci-Fi<br />
105 Sitar<br />
106 Banjo<br />
107 Shamisen<br />
108 Koto<br />
EFFECTS<br />
ETHNIC<br />
109 Kalimba<br />
110 Bag Pipe<br />
111 Fiddle<br />
112 Shanai<br />
113 Tinkle Bell<br />
114<br />
115<br />
PERCUSSIVE<br />
Agogo<br />
Steel Drums<br />
116 Woodblock<br />
117<br />
Taiko Drum<br />
118 Melodic Tom<br />
119<br />
120<br />
121<br />
122<br />
123<br />
124<br />
125<br />
126<br />
127<br />
128<br />
132<br />
133<br />
134<br />
135<br />
136<br />
137<br />
138<br />
Synth Drum<br />
Reverse Cymbal<br />
SOUND EFFECTS<br />
Gt Fret Noise<br />
Breath Noise<br />
Seashore<br />
Bird Tweet<br />
Telephone Ring<br />
Helicopter<br />
Applause<br />
Gunshot<br />
CHINESE INSTRUMENT<br />
129<br />
130<br />
131<br />
Pipa<br />
Guzheng<br />
Yangqin<br />
Erhu<br />
Hi-sola<br />
Lushen<br />
Qudi<br />
Xiao<br />
DRUM SET<br />
Standard drum<br />
ChinesePercussion
Appendix 2- Style List<br />
8/16BEAT<br />
01 8 Beat 1<br />
02<br />
03<br />
04<br />
05<br />
06<br />
07<br />
08<br />
09<br />
10<br />
11<br />
12<br />
13<br />
14<br />
15<br />
16<br />
17<br />
18<br />
19<br />
20<br />
21<br />
22<br />
23<br />
24<br />
25<br />
26<br />
27<br />
28<br />
29<br />
8 Beat 2<br />
8 Beat 3<br />
8 Beat 4<br />
8 Beat 5<br />
8 Beat Rock<br />
8 Beat Pop<br />
16 Beat 1<br />
16 Beat 2<br />
Hiphop<br />
16 Beat Funk<br />
Funk Pop<br />
Fusion<br />
Jazz Rock<br />
Shuffle<br />
Hard Rock<br />
Slow Rock 1<br />
Rock<br />
Rock N Roll<br />
6/8 Rock<br />
Rock Shuffle<br />
4/4 Blues<br />
DANCE<br />
30 Disco 1<br />
31<br />
32<br />
33<br />
34<br />
35<br />
36<br />
37<br />
38<br />
BALLAD<br />
Slow Ballad<br />
Ballad 1<br />
16 Beat Ballad<br />
Pop Ballad<br />
Dance Ballad<br />
Organ Ballad<br />
Blues Ballad<br />
ROCK<br />
Disco 2<br />
Dance<br />
House<br />
Techno<br />
SWING&JAZZ<br />
Big Band Boogie<br />
Jazz Ballad<br />
Big Band Ballad<br />
Boogie<br />
39 Swing 1<br />
40<br />
41<br />
42<br />
Swing 2<br />
Dixieland<br />
Jazz Trio<br />
R & B<br />
43 R&B 1<br />
44<br />
45<br />
46<br />
47<br />
48<br />
49<br />
50<br />
51<br />
52<br />
53<br />
54<br />
55<br />
56<br />
57<br />
58<br />
59<br />
60<br />
61<br />
62<br />
63<br />
64<br />
R&B 2<br />
Soul<br />
Soul Shuffle<br />
Country Pop<br />
Country<br />
Country 8Beat<br />
Country Rock<br />
Country Shuffle<br />
Blue Grass<br />
Jazz Samba<br />
Pop Bossa<br />
Guitar Bossa<br />
Rhumba1<br />
Guitar Rhumba<br />
Samba<br />
Mambo<br />
Salsa<br />
Bossa Nova1<br />
Pop Cha Cha<br />
Reggae<br />
Pop Reggae<br />
65 Tango<br />
66<br />
67<br />
68<br />
69<br />
70<br />
71<br />
72<br />
73<br />
74<br />
75<br />
76<br />
COUNTRY<br />
BALL ROOM<br />
Cha Cha<br />
Beguine<br />
Rhumba 2<br />
Samba<br />
Bounce<br />
Foxtrot<br />
Quick Step<br />
Jive<br />
LATIN<br />
TRADITIONAL<br />
March<br />
German March<br />
6/8 March<br />
77<br />
78<br />
79<br />
80<br />
81<br />
82<br />
83<br />
84<br />
85<br />
86<br />
87<br />
88<br />
89<br />
90<br />
91<br />
92<br />
93<br />
94<br />
95<br />
96<br />
97<br />
98<br />
99<br />
<strong>100</strong><br />
Polka<br />
Polka Pop1<br />
Polka Pop2<br />
Waltz 1<br />
Slow Waltz<br />
Country Waltz<br />
Jazz Waltz<br />
Orchestra Waltz<br />
Musette<br />
PIANIST<br />
Pianist<br />
Ballad 2<br />
Slow Rock 2<br />
Bossa Nova 2<br />
COUNTRY<br />
Dangdut<br />
Keroncong<br />
Pop Malay<br />
Xin Jiang<br />
Yun Nan<br />
Nei Meng Gu<br />
Jiang Nan<br />
Oriental 1<br />
Oriental 2<br />
Oriental 3<br />
Oriental 4<br />
34
35<br />
Appendix 3- Song List<br />
01~37 CLASSICAL<br />
01<br />
02<br />
03<br />
04<br />
05<br />
06<br />
07<br />
08<br />
09<br />
10<br />
11<br />
12<br />
13<br />
14<br />
15<br />
16<br />
17<br />
18<br />
19<br />
20<br />
21<br />
22<br />
23<br />
24<br />
25<br />
26<br />
27<br />
28<br />
29<br />
30<br />
31<br />
32<br />
33<br />
34<br />
35<br />
36<br />
37<br />
Allegro In BBK003<br />
Chant Sans Paroles Op.40 No.6<br />
Blue Danube Waltz<br />
Violin Sonata In F<br />
German Dance No.6<br />
Sonata<br />
Flute Sonata No.7<br />
L'Amour<br />
Guitar Quartet<br />
Nocturne Op.15 No.2<br />
Joy to The World<br />
The Song Of Season<br />
The Colt Is Taking A Walk<br />
The light<br />
Happy Landman<br />
Old Black Joe<br />
O Sol e Mio<br />
Long Long Ago<br />
The Entertainer<br />
Trumpet Voluntary<br />
Mazurka For Piano Op.6 No.1<br />
Etudes Op.10 No.3 in E Major<br />
Etudes Op.10 No.11 in b E Major<br />
Arioso<br />
Nocturnes OP.32 No.2 in bA<br />
Waltz No.2 Op.70<br />
Nocturnes Op.62 No.2 in E<br />
Nocturnes OP.55 NO.1 in F minor.mid<br />
German Dance No.1 in D<br />
German Dance No.5 in D<br />
Clarinet Polka<br />
Mov.2 Adagio Cello Concerto In D Op.101<br />
Mov.1 Symphony No.45 In F#<br />
Brahms Lullaby<br />
Concerto In F Op.4 NO.5 Mov.3<br />
Concerto In F Op.4 No.5 Mov.2<br />
Divertissement - Pizzicato (Sylvia Ballet)<br />
38~50 PIANIST<br />
38 Bagatelle No.3<br />
39 Wedding March<br />
40 Turkish March<br />
41 Four Little Swans<br />
42 Minuet In G<br />
43 Minuet<br />
44 Invent -2<br />
45 Did You Ever See A Lassie<br />
46 Old France<br />
47 Old Macdonald Had A Farm<br />
48 Moseta Dance<br />
49 Santa Claus Is Coming To Town<br />
50 America The Beautiful
Appendix 4- Chord List<br />
Chord Name/[Abbreviation] Normal Voicing Chord(C)<br />
Major [M] 1-3-5<br />
C C<br />
Sixth [6] 1-(3)-5-6<br />
C6<br />
Major seventh[M7]<br />
Major seventh add sharp Eleventh<br />
[M7(#11)]<br />
CM7<br />
CM7(#11)<br />
Major add ninth [M(9)] 1-2-3-5<br />
CM(9)<br />
Major seventh ninth [M7(9)] 1-2-3-(5)-7 CM7(9)<br />
DISPLAY<br />
C6<br />
CM7<br />
CM7(#11)<br />
CM (9)<br />
CM7 (9)<br />
Sixth ninth [6 (9)] 1-2-3-(5)-6 C6(9) C6(9)<br />
Augmented [aug] 1-3-#5<br />
Caug<br />
Minor [m] 1-b3-5<br />
Cm<br />
Minor sixth [m6] 1-b3-5-6<br />
Cm6<br />
Minor seventh [m7] 1-b3-(5)-b7 Cm7<br />
Minor seventh flatted fifth [m7b5] 1-b3-b5-b7 Cm7b5<br />
Minor add ninth [m(9)] 1-2-b3-5<br />
Cm(9)<br />
Minor seventh ninth [m7(9)] 1-2-b3-(5)-b7 Cm7(9)<br />
Minor seventh add eleventh [m7(11)] 1-2-b3-4-5-(b7) Cm7(11)<br />
Minor major seventh [mM7] 1-b3-(5)-7<br />
CmM7<br />
Minor major seventh ninth [mM7(9)] 1-2-b3-(5)-7 CmM7(9)<br />
Diminished [dim] 1-b3-b5<br />
Cdim<br />
Diminished seventh [dim7] 1-b3-b5-6<br />
Cdim7<br />
Seventh [7] 1-3-(5)-b7<br />
C7<br />
Seventh suspended fourth [7sus4] 1-4-5-b7<br />
C7sus4<br />
Seventh flatted fifth [7b5] 1-3-b5-b7<br />
C7b5<br />
Seventh ninth [7(9)] 1-2-3-(5)-b7 C7 (9)<br />
Seventh add sharp eleventh [7(#11)] 1-(2)-3-#4-5-b7 or C7(#11)<br />
Seventh add thirteenth [7 (13)] 1-3-(5)-6-b7 C7(13)<br />
Seventh flatted Ninth [7(b9)] 1-b2-3-(5)-b7 C7(b9)<br />
Seventh add flatted thirteen [7(b13)]<br />
1-3-(5)-7<br />
1-(2)-3-#4-5-7<br />
or 1-2-3-#4-(5)-7<br />
1-2-3-#4-(5)-b7<br />
1-3-5-b6-b7<br />
C7(b13)<br />
Seventh sharp ninth [7(#9)] (1)-#2-3-(5)-b7 C7(#9)<br />
Major seventh augmented [M7aug] 1-3-#5-7<br />
CM7aug<br />
Caug<br />
Cm<br />
Cm6<br />
Cm7<br />
Cm7b5<br />
Cm (9)<br />
Cm7(9)<br />
Cm7(11)<br />
CmM7<br />
CmM7(9)<br />
Cdim<br />
Cdim7<br />
C7<br />
C7sus4<br />
C7b5<br />
C7 (9)<br />
C7(#11)<br />
C7 (13)<br />
C7(b9)<br />
C7(b13)<br />
C7 (#9)<br />
CM7aug<br />
Seventh augmented [7aug] (1)-3-#5-b7 C7aug C7aug<br />
Suspended Fourth [sus4] 1-4-5<br />
Csus4 Csus4<br />
One plus tow plus five [1+2+5] 1-2-5<br />
C1+2+5<br />
C<br />
36
37<br />
Appendix 5- MIDI List<br />
Function Transmitted Recognized Remarks<br />
Basic Default<br />
1ch<br />
1-16ch<br />
Channel Changed<br />
Mode<br />
Note<br />
Number<br />
Velocity :<br />
After<br />
Touch<br />
Pitch Bend<br />
Control<br />
Change<br />
Program<br />
Change :<br />
System Exclusive<br />
System<br />
Common<br />
System<br />
Real Time<br />
Aux<br />
Messages<br />
Note:<br />
:<br />
Default<br />
Messages<br />
Altered<br />
True voice<br />
Note on<br />
Noteoff<br />
Keys<br />
Chs<br />
0<br />
1<br />
7<br />
5<br />
6<br />
10<br />
11<br />
64<br />
65<br />
66<br />
67<br />
80<br />
81<br />
91<br />
93<br />
120<br />
121<br />
123<br />
true #<br />
Song Position<br />
Song Select<br />
Tune<br />
:Clock<br />
:Commands<br />
:LOCAL ON/OFF<br />
:All Notes Off<br />
:Active sense<br />
:Reset<br />
1ch<br />
X<br />
X<br />
***********<br />
0-127<br />
***********<br />
O 9nH,V=1-127<br />
X<br />
(9nH,V=0)<br />
X<br />
X<br />
O<br />
O<br />
***********<br />
X<br />
X<br />
X<br />
X<br />
X<br />
X *1<br />
O<br />
1-16ch<br />
3<br />
X<br />
X<br />
0...127<br />
0...127<br />
9nH,V=1-127<br />
X (9nH,V=0; 8nH,V=0-127<br />
X<br />
X<br />
O<br />
O<br />
0...127<br />
Mode 1: OMNI ON , POLY Mode 2 : OMNI ON , MONO O : YES<br />
Mode 3: OMNI OFF , POLY Mode 4 : OMNI OFF , MONO X : NO<br />
O<br />
O<br />
X<br />
O<br />
O<br />
X<br />
X<br />
O<br />
X<br />
X<br />
X<br />
X<br />
X<br />
X<br />
X<br />
X<br />
X<br />
X<br />
X<br />
X<br />
X<br />
X<br />
O<br />
O<br />
O<br />
O<br />
O<br />
O<br />
O<br />
O<br />
O<br />
O<br />
O<br />
O<br />
O<br />
O<br />
O<br />
O<br />
O<br />
O<br />
O<br />
X<br />
X<br />
X<br />
X<br />
X<br />
X<br />
O<br />
O<br />
O<br />
*1<br />
Bank Select<br />
Modulation<br />
Portamento Time<br />
Data Entry<br />
Volume<br />
Pan<br />
Expression<br />
Sustain Pedal<br />
Portamento ON/OFF<br />
Sostenuto Pedal<br />
Soft Pedal<br />
Reverb Program<br />
Chorus Program<br />
Reverb<br />
Level<br />
Chorus Level<br />
All Sound<br />
Off<br />
Reset All Controllers<br />
All Notes Off<br />
*1<br />
When the accompaniment is started, an FAH message is transmitted.<br />
When accompaniment is stoped, an FCH message is transmitted.<br />
When an FAH message is received, accompaniment is started.<br />
When an FCH message is received, accompaniment is stoped.


