

Download Installation Guidelines - Iplex Pipelines
Download Installation Guidelines - Iplex Pipelines
Download Installation Guidelines - Iplex Pipelines

You also want an ePaper? Increase the reach of your titles
YUMPU automatically turns print PDFs into web optimized ePapers that Google loves.
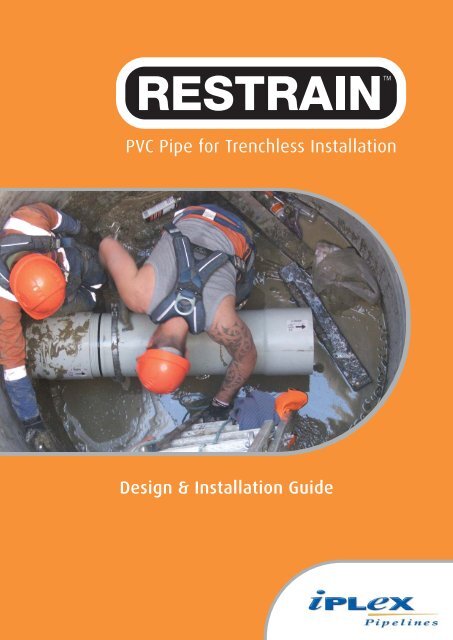
PVC Pipe for Trenchless <strong>Installation</strong><br />
Design & <strong>Installation</strong> Guide<br />
1
2<br />
CONTENTS PAGE NUMBER<br />
Introduction 3<br />
Applications 3<br />
Features and Benefi ts 3<br />
Product Data 4<br />
Material Properties 4<br />
Pipe Stiffness 4<br />
Standards & Testing 4<br />
Product Range 4<br />
Pipe Fittings 4<br />
Rubber Ring Seals 4<br />
Colour & Markings 4<br />
Pipe Dimensions 4<br />
Hydraulic Design 5<br />
Structural Design 5<br />
Pipe Grouting 5<br />
Handling and Storage 6<br />
General <strong>Installation</strong> <strong>Guidelines</strong> 7<br />
Pipe Jointing Lubricant 7<br />
Strap Wrenches 7<br />
Pull Heads 7<br />
Bore Hole & Drill Mud 7<br />
Tensile & Compressive Loads 8<br />
Radius of Curvature 8<br />
<strong>Installation</strong> 8<br />
Horizontal Directional Drilling (HDD) 10<br />
Reaming 12<br />
Pipe Bursting, Static & Hydraulic 13<br />
Pilot Tube Micro Tunnelling & Horizontal Auger Boring 15<br />
Slip Lining 16<br />
Field Testing 17<br />
Frequently Asked Questions 18
1.0 INTRODUCTION<br />
<strong>Iplex</strong> <strong>Pipelines</strong> has developed Restrain PVC Sewer Pipe<br />
specifi cally for gravity sewer applications using trenchless<br />
techniques, for the installation, repair or replacement of<br />
underground infrastructure.<br />
Restrain is a rubber ring jointed, SN16 PVC-U sewer pipe,<br />
utilizing a threaded spigot and “low profi le” threaded socket,<br />
which provides axial end load restraint.<br />
Figure 1 Typical joint arrangement showing the rubber sealing ring,<br />
threaded spigot and “low profi le” threaded socket.<br />
1.2 Applications<br />
<strong>Iplex</strong> Restrain Sewer Pipe has been designed for gravity<br />
sewer applications and is suitable for installation by a range<br />
of trenchless methods, including:<br />
• Horizontal Directional Drilling (HDD)<br />
• Pipe Reaming (PR) or Pipe Eating (PR-PE)<br />
• Pipe Bursting Static (PB-ST)<br />
• Pipe Bursting Hydraulic (PB-HY)<br />
• Pipe Bursting Slitting (PB-SL)<br />
• Pilot Tube Micro Tunnelling (PTMT)<br />
• Horizontal Auger Boring (HAB)<br />
• Slip Lining (SL)<br />
RESTRAIN PVC Sewer Pipe is not suitable for use with<br />
pneumatic or concussive pipe bursting equipment. It is also<br />
not suitable for pipe ramming or impact moling.<br />
1.3 Features and Benefi ts<br />
The threaded spigot and socket provides axial end load<br />
restraint to ensure joint integrity during installation using<br />
trenchless techniques.<br />
<strong>Iplex</strong> Restrain PVC Sewer Pipe is compatible with both<br />
solvent weld and rubber ring jointed DWV PVC-U Sewer Pipe<br />
and fi ttings complying with AS/NZS 1260.<br />
Restrain is available in a range of pipe lengths from 1m to<br />
6m to suit project and site requirements.<br />
The Restrain socket is “low profi le”, i.e. has a smaller<br />
outside diameter than a conventional “SC” style PVC pipe<br />
socket.<br />
The following table provides a summary of features and<br />
benefi ts.<br />
Table 1 Features and benefi ts of Restrain PVC<br />
Sewer Pipe<br />
Feature Benefi t<br />
Threaded socket & spigot<br />
joint<br />
Pipe lengths can be<br />
customised to suit the<br />
installation or project<br />
requirements<br />
Compatible with standard<br />
DWV PVC Sewer fi ttings to<br />
AS/NZS 1260<br />
Bi-directional installation<br />
capability<br />
Rubber sealing ring<br />
performance conforming to<br />
AS/NZS 1260<br />
Complies with AS/NZS 1260.<br />
Independently certifi ed in<br />
accordance with the test<br />
requirements of AS/NZS<br />
1260. StandardsMark licence<br />
number SMKP 20184<br />
Allows axial restraint during<br />
installation using trenchless<br />
methods<br />
Enables use with a range of<br />
installation technologies or<br />
site requirements<br />
Allows simple connection to<br />
maintenance chambers and<br />
service laterals<br />
Pipe can be pushed or<br />
pulled into place to suit<br />
installation methodology<br />
Eliminates the risk of<br />
leakage and root intrusion<br />
Product meets industry<br />
manufacturing and<br />
performance standard<br />
Manufactured from PVC-U Compatible with standard<br />
PVC-U drainage fi ttings<br />
Manufactured in stiffness<br />
class SN16<br />
Provides the structural<br />
performance of SN16<br />
<strong>Iplex</strong> <strong>Pipelines</strong> NZ Ltd retain the intellectual<br />
property rights for Restrain pipe; New Zealand<br />
Patent No. 561752.<br />
3
2.0 PRODUCT DATA<br />
<strong>Iplex</strong> Restrain is a DWV sewer pipe with a threaded spigot<br />
and socket assembly, with a rubber sealing ring. Restrain is<br />
manufactured in accordance with AS/NZS 1260 “PVC-U pipe<br />
for drain, waste and vent applications”.<br />
2.1 Material Properties<br />
Restrain is manufactured from PVC-U (unplasticised<br />
polyvinyl chloride). The properties listed in Table 2 are<br />
typical for PVC-U Sewer Pipes.<br />
Table 2 Mechanical Properties for PVC-U Sewer Pipe<br />
Property Value & Unit<br />
Density 1450 kg/m3 Ultimate tensile strength 52 MPa*<br />
Compressive strength 66 MPa*<br />
Ring Bending Modulus (3min) 3200 MPa<br />
Ring Bending Modulus (50 yr) 1400 MPa<br />
Hardness (Shore) 85 (ASTM D2240)<br />
Hardness (Brinnell) at 23°C 12-15<br />
Poisson’s Ratio 0.38<br />
Coeffi cient of linear thermal<br />
expansion<br />
7.0 x 10⁻⁵ /m/m/°C<br />
*Refer Table 5 for maximum allowable axial loads for<br />
Restrain<br />
For more technical specifi cations and chemical resistance<br />
information please refer to the <strong>Iplex</strong> website<br />
www.iplex.co.nz or contact an <strong>Iplex</strong> <strong>Pipelines</strong> Engineer.<br />
2.3 Pipe Stiffness<br />
All Restrain PVC Sewer Pipe is manufactured with a<br />
minimum pipe ring bending stiffness of 16000 N/m.m and<br />
is classifi ed as SN16, to AS/NZS 1260.<br />
2.4 Standards & Testing<br />
<strong>Iplex</strong> <strong>Pipelines</strong> NZ Limited is certifi ed by Licence No.<br />
QEC4169 as satisfying the requirements of ISO 9001: 2008<br />
“Quality Management Systems - requirements”.<br />
<strong>Iplex</strong> Restrain is certifi ed by StandardsMark Licence No.<br />
SMKP20184 as conforming to AS/NZS 1260:2009 “PVC-U<br />
pipe and fi ttings for drain, waste and vent application”.<br />
4<br />
3.0 PRODUCT RANGE<br />
Restrain Sewer Pipe is available in nominal diameters<br />
DN100, DN150, DN225 and DN300.<br />
Restrain is available in lengths ranging from 1m to 6m to<br />
suit project specifi c and/or site requirements. The length of<br />
the pipe is generally a function of the method of installation<br />
and site space requirements.<br />
3.1 Pipe Fittings<br />
Restrain PVC Sewer Pipe is compatible with standard<br />
PVC-U sewer pipes and fi ttings for both solvent weld and<br />
rubber ring joints. A list of fi ttings is available from the <strong>Iplex</strong><br />
Product Catalogue.<br />
3.2 Rubber Ring Seals<br />
The rubber ring seal is supplied loose and should be stored to<br />
ensure that they are not damaged. The rubber ring seal should<br />
be placed in the pipe spigot groove and lubricated with silicone<br />
spray during the pipe jointing process. (Refer Section 8.)<br />
3.3 Colour & Markings<br />
Restrain Sewer Pipe is manufactured in a light grey colour<br />
with a semi gloss fi nish which is opaque and fl awless.<br />
<strong>Iplex</strong> Restrain Sewer pipes are repetitively marked in<br />
accordance with AS/NZS1260 ‘PVC-U pipes and fi ttings for<br />
drain, waste and vent application’. Markings include:<br />
• Manufacturers name and brand name<br />
• Australian Standard number<br />
• StandardsMark Licence No.<br />
• Nominal Pipe Size<br />
• Pipe Type<br />
• Pipe Class<br />
• Date of manufacture<br />
• Manufacturer’s code<br />
3.4 Pipe Dimensions<br />
Restrain PVC Sewer Pipe is available in lengths ranging from<br />
1m to 6m to suit specifi c project and/or site requirements.<br />
The length of the pipe is generally a function of the method of<br />
installation and site space requirements.<br />
The product is specifi ed by overall length in order to facilitate<br />
on site requirements. The effective length of the pipe is the<br />
overall pipe length plus dimension ”A” as shown in Table 3.<br />
Other typical pipe dimensions are shown in this table.<br />
Table 3 Restrain Pipe Dimensions<br />
Pipe<br />
DN<br />
Mean<br />
Pipe<br />
OD<br />
(mm)<br />
Socket<br />
OD<br />
(mm)<br />
SN Mean<br />
ID<br />
(mm)<br />
Effective<br />
length<br />
converter<br />
“A”<br />
100 110.2 115 16 101.6 70mm<br />
150 160.3 170 16 147.9 90mm<br />
225 250.4 260 16 231.3 140mm<br />
300 315.5 330 16 290.8 140mm
4.0 HYDRAULIC DESIGN<br />
Where a sewer pipeline is fl owing full under gravity<br />
conditions the method of determining the pipe size is similar<br />
to that used for pressure pipes. The grade of the pipeline<br />
gives the allowable head-loss but special attention should be<br />
given to the effect of entry and exit losses at structures such<br />
as manholes as these may be signifi cant.<br />
For pipes fl owing full, full capacity can be calculated similarly<br />
as for pressure pipes.<br />
Contact <strong>Iplex</strong> <strong>Pipelines</strong> for Restrain Flow Capacity<br />
information.<br />
5.0 STRUCTURAL DESIGN<br />
Restrain Sewer Pipes are defi ned as fl exible pipes. Flexible<br />
pipes are designed to defl ect slightly under load and hence<br />
utilise surrounding soil strength, as well as pipe stiffness, to<br />
oppose the vertical loads.<br />
Structural design of Restrain Sewer Pipes should conform<br />
to the requirements of AS/NZS 2566.1 “Buried Flexible<br />
<strong>Pipelines</strong> – Structural Design”. Contact <strong>Iplex</strong> <strong>Pipelines</strong><br />
for more information on structural design of trenchless<br />
installations.<br />
Pipe Grouting<br />
Where it is necessary to pressure grout the annulus between<br />
Restrain pipe and a host pipe during slip lining, it is<br />
important to ensure that the grout is introduced so as not<br />
to damage the Restrain sewer pipe. The grout must be<br />
introduced into the annulus as evenly as possible and must<br />
not exceed the Restrain pipe’s maximum safe grouting<br />
pressure (refer Table 4).<br />
Table 4 – Maximum Safe Grouting Pressure<br />
(factor of safety = 2.5)<br />
Pipe DN Maximum Safe Grouting<br />
Pressure<br />
(kPa)<br />
100 180<br />
150 180<br />
225 180<br />
300 180<br />
It is strongly recommended to “cap off” and fi ll the<br />
Restrain pipe with water prior to grouting to reduce the<br />
effects of grouting pressure and heat of hydration of the<br />
grout during curing. It may be possible to stage the grouting<br />
process in two or three lifts allowing the grout to solidify in<br />
the annulus to the spring line before the top section is fi lled.<br />
5
6.0 HANDLING AND STORAGE<br />
Whilst Restrain Sewer Pipes are easy to handle, careless<br />
handling can cause unnecessary damage to the pipe and/<br />
or joints. Pipes and fi ttings should not be dropped or thrown<br />
onto hard surfaces or allowed to come into contact with hard<br />
sharp objects that could infl ict deep scratches. PVC-U pipe<br />
should not be allowed to slide across sharp edges.<br />
Wire slings or chains must not be used to lift pipes.<br />
Particular care should be taken to prevent any damage to<br />
the thread on the spigot and socket which may affect the<br />
axial capacity and/or the jointing process.<br />
Figure 6.1 Handling of bulk bundles<br />
Storage<br />
If pipes and fi ttings are to be stored outdoors for more<br />
than 12 months they should be protected in a manner that<br />
prevents heat build-up and allows ventilation. Hessian or<br />
white shadecloth have been shown to be good materials for<br />
this purpose.<br />
Pipes may be stacked on site providing the surface is level<br />
and free from loose stones and other sharp objects. Pipes<br />
should be stacked in layers with sockets placed so that they<br />
are not load-bearing. This can be achieved by stacking pipes<br />
with alternate layers of sockets facing in opposite directions.<br />
6<br />
1m or 7 layers maximum<br />
Figure 6.2 Typical loose pipe storage on ground<br />
1.5m<br />
Racks for long term storage are recommended and should<br />
preferably provide continuous support, however if this is not<br />
possible, supports of at least 75mm bearing width at 1m<br />
maximum centres should be placed beneath the pipes. Side<br />
restraints should be placed at centres not exceeding 1.5m<br />
and stacks should not exceed 1m in height.<br />
75mm bearing width<br />
Figure 6.3 Typical loose pipes on bearers<br />
1m spacing<br />
maximum<br />
When unloading alongside excavated trenches it is<br />
recommended that pipes be placed on the opposite side of<br />
the trench from excavated material if it is safe to do so.<br />
Rubber rings and silicone spray should be stored under cover<br />
until pipe laying commences.
7.0 GENERAL INSTALLATION GUIDELINES<br />
General<br />
Restrain Sewer Pipe can be installed by a number of<br />
trenchless methods. A brief description of some of these<br />
methods are:<br />
Horizontal Directional Drilling (HDD)<br />
Pipe Reaming (PR) or Pipe Eating (PR-PE)<br />
Pipe Bursting Static (PB-ST)<br />
Pipe Bursting Hydraulic (PB-HY)<br />
Pipe Bursting Slitting (PB-SL)<br />
Pilot Tube Micro Tunnelling (PTMT)<br />
Horizontal Auger Boring (HAB)<br />
Slip Lining (SL)<br />
Each installation method has its own unique installation<br />
technique, detailed installation instructions by method are<br />
reported later in Section 8 of this manual.<br />
7.1 Pipe Jointing Lubricant<br />
Use only “Gensil 601”, “CRC 808” or “Rocol” spray silicone<br />
lubricant or an <strong>Iplex</strong> approved equivalent for lubrication of<br />
the joint assembly prior to assembly.<br />
The silcone lubricant is used to lubricate the thread and<br />
seal ring prior to jointing of the pipes. The silicone lubricant<br />
allows the ability to reverse the thread jointing process<br />
should the pipes need to be removed from the bore hole or<br />
installation pit.<br />
7.2 Strap Wrenches<br />
Use strap wrenches with extended woven nylon webbing<br />
straps for pipe turning during assembly. “Rigid”, “Hit” or<br />
Super Ego” brand or any <strong>Iplex</strong> approved equivalent are<br />
recommended.<br />
It is recommended that a strap wrench with an extended<br />
1200mm long strap be used to successfully join DN225 and<br />
DN300 Restrain sewer pipe. The Rigid No 5 strap wrench<br />
product code #31345 is well proven. The extended strap<br />
is an “after market” purchase, any canvas fabricator or<br />
upholsterer can stitch the replacement strap together from<br />
45mm wide woven fabric.<br />
Figure 7.1 Rigid No. 5 Strap Wrench and replacement after market<br />
1200mm extended strap<br />
7.3 Pull Heads<br />
We recommend the use of a “cone style” pull head as<br />
shown in fi gure 7.3 for HDD, Pipe Bursting, Auger Boring and<br />
Micro Tunnelling installations. These pull heads are normally<br />
fabricated from mild steel plate or pipe. The pull head is<br />
connected to a Restrain socket starter pipe (2-3 pipe<br />
diameters long) fastened to the pull head with threaded rod<br />
or cross bolts as shown in fi gures 7.2 and 7.3 Allow one pipe<br />
diameter between the cross bolt centrelines and off set by<br />
90 degrees. Contact our Technical Services Call Centre on<br />
0800 800 262 for more information.<br />
Figure 7.2 Typical DN150 Internal Pull Head<br />
Figure 7.3 Typical DN300 External “Cone Style” Pull Head<br />
7.4 Bore Hole & Drill Mud<br />
The bore hole dimensions vary depending upon the<br />
installation methodology being used, native soil type,<br />
additives used to produce drilling mud, drill mud viscosity,<br />
reamer type/style and pipe diameter. The contractor or driller<br />
is responsible for determining their bore hole diameter and<br />
drill mud type before drilling commences. Drill mud is an<br />
important component of successful installations. (See fi gure<br />
7.4.) It is used to stabilise the borehole, assist in the cutting<br />
process, cool down the transmitter, carry spoil out of the<br />
borehole and lubricate the borehole for reducing the frictional<br />
resistance of the product being pulled into the borehole.<br />
Figure 7.4 Typical free fl owing drill mud/lubricant<br />
7
7.5 Tensile & Compressive Loads<br />
Restrain Sewer Pipe is able to be pushed or pulled through<br />
a bore hole or host pipe. The threaded spigot and socket<br />
provides axial restraint capability. Do not exceed the<br />
maximum allowable axial load parameters shown in Table 5.<br />
Table 5<br />
Pipe<br />
DN<br />
8<br />
100<br />
150<br />
225<br />
300<br />
SN<br />
16<br />
16<br />
16<br />
16<br />
Maximum Allowable Axial Load<br />
Tensile Compression<br />
(kN) (KG) (kN) (KG)<br />
17.6<br />
34.3<br />
93.2<br />
117.7<br />
1800<br />
3500<br />
9500<br />
12000<br />
17.6<br />
29.4<br />
93.2<br />
117.7<br />
1800<br />
3000<br />
9500<br />
12000<br />
7.6 Radius of Curvature<br />
Restrain Sewer Pipe must be axially aligned with the host<br />
hole or host pipe at the point of entry. Some curvature back<br />
from the host hole/pipe is permitted.<br />
The minimum radius of curvature is based on 300 x outside<br />
diameter as detailed in Table 6.<br />
Table 6<br />
Pipe DN Pipe OD (mm)<br />
100<br />
150<br />
225<br />
300<br />
8.0 <strong>Installation</strong><br />
110<br />
160<br />
250<br />
315<br />
Minimum Radii<br />
of curvature (m)<br />
33<br />
48<br />
75<br />
94.5<br />
Step 1<br />
Place a temporary wind up or pneumatic test plug inside the<br />
socket end of the fi rst Restrain pipe being installed. This<br />
prevents the new Restrain pipe barrel from being invaded<br />
by drill mud or ground water, allowing easier assembly<br />
during joining.<br />
Step 2<br />
Unpack and thoroughly inspect all Restrain Sewer Pipes to<br />
ensure the threads, seal rings and the joint assemblies are<br />
clean, undamaged and free of dirt or grit before beginning<br />
assembly.<br />
Step 3<br />
Place the seal ring in the groove (the last groove from<br />
the end of the pipe). The crown of the seal ring should be<br />
facing outwards. Carefully stretch the seal ring into the seal<br />
ring groove, tensioning the seal ring as you go by running<br />
your fi nger between the seal ring and the pipe in a circular<br />
motion around the pipes spigot/seal ring groove.<br />
Step 4<br />
Lubricate the spigot thread, the seal ring, the socket<br />
thread and the lead into the socket.
Step 5<br />
Align the clean spigot with the socket in a straight line.<br />
Ensure there is a smooth initial engagement. Do not cross<br />
thread. Use temporary support blocks if required.<br />
Step 6<br />
Align thread start arrows and initially turn the spigot by<br />
hand in a clock-wise direction to engage the fi rst few<br />
threads. Ensure the pipe barrel is supported. The fi rst thread<br />
engagement and the fi rst few turns should be smooth and<br />
free of “binding”.<br />
Step 7<br />
Continue to hand screw the spigot into the socket as far as<br />
it will easily go, or up to where seal ring engages into the<br />
socket.<br />
Step 8<br />
Apply the strap wrenches to both the spigot and socket<br />
and screw up pipe until the seal ring completely disappears<br />
up into the mouth of the socket and the joint fi rmly resists<br />
further tightening. Do not overtighten.<br />
Spigot end<br />
machine mark<br />
Spigot thread<br />
Seal ring<br />
groove<br />
Step 9<br />
Completed Restrain TM joint assembly with spigot end<br />
machine mark not visible.<br />
Note:<br />
A Restrain “C Wrench” assembly tool may be required for<br />
DN300 Restrain Sewer Pipe due to the higher rotational<br />
forces required. The Restrain “C Wrench” is sometimes<br />
useful when working in confi ned spaces or between trench<br />
shields.<br />
9
8.1 <strong>Installation</strong> <strong>Guidelines</strong> – Horizontal<br />
Directional Drilling (HDD)<br />
Figure 8.1 Typical cartridge style HDD pull-back.<br />
Restrain has been installed in many locations throughout<br />
New Zealand. Typical shots of 80 to 100m are common with<br />
the longest known drill-shot to be 190m completed in one<br />
continuous pull-back. Restrain Pipe lengths vary depending<br />
upon geography, native soils, site layout and installation pit<br />
or manhole/chamber dimensions. Drillers have installed<br />
Restrain Sewer Pipe in lengths from 1m to 6 metres. 3.6m<br />
pipe-lengths correspond with most HDD Drill Rod lengths.<br />
Fig 8.2-8.3 show cartridge style pull-backs being completed.<br />
Here, pipe strings could not be employed owing to limited<br />
space available on site.<br />
Step 1<br />
Before you arrive on site determine the dimensions of your<br />
installation pit then order Restrain Sewer Pipe to suit your<br />
installation methodology. This may result in the selection<br />
of 6m pipe-lengths for a normal pipe-string or cartridge<br />
style HDD installation or you may choose 1m lengths or less<br />
if you plan to drill to a new or existing manhole structure<br />
completing pipe jointing within tight confi ned spaces. Some<br />
HDD operators order their pipe made to the same length as<br />
their HDD drill rods (usually 3.6m), this allows jointing to<br />
occur during drill rod changes and reduces your work site<br />
foot print as a pipe-string may or may not be required.<br />
Step 2<br />
Ensure tools and equipment are available, tools and<br />
equipment are detailed in section 7 of this manual.<br />
Step 3<br />
Once on site, excavate installation pits. Ensure the<br />
installation pits are 1-2 pipe diameters below the new pipe<br />
invert.<br />
10<br />
Figure 8.2 Typical HDD cartridge style pull-back within a 1.8m diameter<br />
x 4.5m deep manhole structure installing DN300 x 1m Restrain Sewer<br />
Pipe<br />
Figure 8.3 Typical HDD cartridge style pull-back within trench shields,<br />
7m deep. DN225 x 3m Restrain<br />
Figure 8.4 Typical HDD cartridge style pull-back between trench shields<br />
at a depth of 4.5m. DN150 x 6m Restrain
Step 4<br />
Select a reamer style/type to suit your native soils, drill mud<br />
type/viscosity and Restrain Sewer Pipe outside diameter.<br />
Recommended reamer diameter guidelines are listed below<br />
in Table 7.<br />
Table 7<br />
Pipe Diameter Reamed Diameter<br />
DN100 & DN150 Pipe Diameter + 100mm<br />
DN225 & DN300 Pipe Diameter x 1.5<br />
The driller is responsible for selecting the borehole diameter<br />
and reamer type/size and drilling mud type or viscosity.<br />
Some typical reamer types are illustrated on the right.<br />
Drilling fl uids are an important component of the HDD<br />
process. They are used to stabilize the borehole, assist in the<br />
cutting process, cool down the transmitter, carry the spoil<br />
out of the borehole, and lubricate the borehole for reducing<br />
frictional resistance of the product pipe.<br />
Warning:<br />
If the HDD drill rig pressure gauge suddenly increases, cease<br />
pull back IMMEDIATELY to avoid hydro-lock, buckling of the<br />
pipe and/or other mechanical breakages.<br />
Check water fl ow, drill mud fl ow, drill mud viscosity and<br />
or mix. Consider backing out the reamer reversing the<br />
Restrain jointing procedure. Check for bore hole collapse.<br />
Proceed with precaution.<br />
Step 5<br />
Begin reaming or pull-back, follow the installation steps<br />
within Section 8.0.<br />
Step 6<br />
Connect new sewer laterals into Restrain Sewer Pipe using<br />
a 3 way, plain ended wye junction or with a Restrain Quick<br />
Fit Saddle as illustrated in Figure 8.6. Traditional PVC fi ttings<br />
are used to complete the fi nal connections.<br />
Figure 8.5 Plain ended wye<br />
junction.<br />
Figure 8.6 Restrain Quick Fit<br />
Saddle.<br />
Typical Sand Reamers<br />
Typical Clay Reamers<br />
Typical Cobble Reamers<br />
11
8.2 <strong>Installation</strong> <strong>Guidelines</strong> – Reaming<br />
Figure 8.7 Typical reaming or pipe eating using a traditional Horizontal<br />
directional drill.<br />
Restrain has been installed using reaming methods.<br />
Reaming or Pipe Eating uses a traditional HDD rig where the<br />
drill rods are inserted inside existing earthenware pipes. A<br />
reaming head is connected prior to the new Restrain Sewer<br />
Pipe. Typical reams between manholes of up to 100m have<br />
been completed. Restrain Pipe lengths may vary however<br />
6m lengths are most common.<br />
Step 1<br />
Before you arrive on site determine the dimensions of the<br />
installation pits then order Restrain Sewer Pipe to suit<br />
installation pit dimensions. This may result in the selection<br />
of 6m pipe-lengths for a normal pipe-string or shorter<br />
lengths for a cartridge style deep pit ream.<br />
Step 2<br />
Once on site excavate entry, exit and a small pit at each<br />
house lateral connection. Ensure the entry and exit pits are<br />
1-2 pipe diameters below the invert of the old host pipe.<br />
Step 3<br />
Introduce drill rods from a traditional HDD rig into the<br />
existing host pipe.<br />
12<br />
Step 4<br />
Attach reaming head and Restrain starter pipe using a<br />
swivel bearing.<br />
Step 5<br />
Follow the installation steps within section 8.0 of this<br />
manual.<br />
Step 6<br />
Proceed with the back reaming process pulling the new pipe<br />
into position.<br />
Step 7<br />
Connect existing house laterals using a 3 way, plain ended<br />
wye junction connecting into the main in place with<br />
traditional PVC slip couplers, bends and ceramic to PVC<br />
adaptors if required.
8.3 <strong>Installation</strong> <strong>Guidelines</strong> – Pipe Bursting, Static<br />
& Hydraulic<br />
Figure 8.8 Typical Static Hydraulic Pipe Bursting installation DN225 x 3m<br />
Restrain Sewer Pipe<br />
Restrain has been installed in many locations throughout<br />
New Zealand using Static/Hydraulic Bursting methods,<br />
typical burst lengths of 50 - 100m are common. Restrain<br />
Pipe lengths may vary depending upon installation pit<br />
or manhole/chamber dimensions. One of the deepest<br />
installations was completed in Auckland city during 2011<br />
where 750mm lengths of DN300 Restrain Sewer Pipe<br />
was installed within existing 1050mm diameter concrete<br />
manhole structures at depths of up to 8m.<br />
The largest PB-HY upsize completed in a single pass using<br />
Restrain Sewer Pipe was completed with a TT (Tracto -<br />
Technik) 800g hydraulic PB rig, where existing DN150 steel<br />
reinforced concrete sewer pipe was upsized three sizes,<br />
pulling in DN300 Restrain Sewer Pipe behind the bursting<br />
head.<br />
Bursting mandrill types will vary depending upon the<br />
host pipe type that you intend to replace. When replacing<br />
traditional materials such as Concrete, Clay and AC a bursting<br />
head as illustrated in Figure 13.0 is normally used, for Cast<br />
Iron and Polyethylene host pipe replacements a blade<br />
mandrill is installed ahead of the bursting head. Steel pipe<br />
replacement requires extreme hydraulic forces with specialist<br />
roller or wheeled mandrills, leading the bursting head.<br />
Step 1<br />
Before you arrive on site determine the dimensions of<br />
installation pit then order Restrain Sewer Pipe to suit.<br />
This may result in the selection of pipe lengths measuring<br />
between 1 & 6m pipes for normal pipe-string or cartridge<br />
style PB installations.<br />
Step 2<br />
Ensure tools and equipment are available, tools and<br />
equipment are detailed in Section 7.<br />
Typical Pipe Burst Heads & Mandrills<br />
Figure 8.9 Typical “steel wheel” or “blade” type bursting heads.<br />
Figure 8.10 Typical External “Cone Style” Bursting Head. Upsize of<br />
existing 100mm CI pipe with new PVC pipe.<br />
Figure 8.11 Typical External Bursting Head. DN300 Restrain Sewer<br />
Pipe.<br />
13
Step 3<br />
Once on site excavate installation pits and or lateral<br />
connections. Ensure the installation and receiving pits are 1-2<br />
pipe diameters below the existing host pipe invert.<br />
Figure 8.12 Figure 8.13<br />
<strong>Installation</strong> pit Receiving pit<br />
Step 4<br />
Select a mandrill or expander to suit the existing host pipe<br />
material. Allow for over expansion for a successful pull<br />
in. Over expansion will vary depending upon on factors<br />
including soil type, pipe diameter, pipeline length and tidal<br />
activity.<br />
Do not exceed the maximum allowable axial loads detailed<br />
in Table 5.<br />
Step 5<br />
Attach your Restrain socket starter pipe (refer Section 7.3)<br />
to the pull head.<br />
Step 6<br />
In high water table applications a wind up test plug can be<br />
installed inside the socket end of your Restrain lead pipe.<br />
This will prevent ground water invading your new pipe.<br />
Step 7<br />
Begin pull back. Follow the installation steps in Section 8.0.<br />
Step 8<br />
Sewer laterals can be replaced using Restrain Sewer<br />
Pipe. 1, 2 or 3m pipes are often used for the pull back. The<br />
Hammer Head PB-30 Static PB unit is ideal for installing<br />
Restrain Sewer lateral pipe.<br />
Figure 8.14 Figure 8.15<br />
<strong>Installation</strong> pit Receiving pit<br />
14<br />
Step 9<br />
Once your new Restrain Sewer & lateral pipes are in<br />
place, connect sewer laterals using a 3 way, plain ended<br />
wye junction. or a Restrain Quick Fit Saddle, as illustrated<br />
in Figure 13.5. Traditional PVC fi ttings are used to make the<br />
fi nal connections.<br />
Figure 8.16 Restrain Sewer, Lateral Pipe & Quick Fit Saddle installed.
8.4 <strong>Installation</strong> <strong>Guidelines</strong> – Pilot Tube Micro<br />
Tunnelling & Horizontal Auger Boring<br />
Figure 8.17 Typical Micro Tunnelling installation.<br />
Pilot Tube Micro Tunnelling (PTMT) is a method of installing<br />
new pipes below ground, at depth, working with limited<br />
space, accurately installing a pipe behind a remotely<br />
controlled, steerable, guided auger boring machine. PTMT<br />
employs augers to transport the spoil out of the bore hole<br />
and a guidance system.<br />
Horizontal Auger Boring (HAB) when compared to PTMT,<br />
employs less complicated & less expensive equipment. HAB<br />
is widely used to install pipes and casings.<br />
Restrain Sewer Pipe has been installed using both<br />
techniques, the installation method is similar for PTMT and<br />
HAB.<br />
Step 1<br />
Before you arrive on site determine what length of<br />
Restrain Sewer Pipe you will require. Pipe lengths are<br />
usually consistent with the length of the PTMT or HAB, auger<br />
casings. Some contractors have their pipe manufactured the<br />
same length as their augers or in multiples of 2, then order<br />
Restrain Sewer Pipe.<br />
Step 2<br />
Ensure tools and equipment are available, tools and<br />
equipment are detailed in Sections 7.1 through to 7.6.<br />
Step 3<br />
Attach your Restrain socket starter pipe (Section 7.4) to<br />
the lead auger. Insert augers inside the pipe sections (refer<br />
Figure 8.18).<br />
Step 4<br />
Begin pilot tube installation and MT the bore hole. Add your<br />
next auger then follow the jointing procedure in Section 8.0,<br />
pushing Restrain Sewer Pipe into place.<br />
Warning:<br />
The amount of over cut required to carry out the MT process<br />
depends upon factors including the type of soil, lubrication,,<br />
pipe size and line length, and is normally at least 20mm<br />
larger than the maximum pipe socket OD, or may be 30 to<br />
50mm larger in rock or swelling clay.<br />
Do not exceed the maximum allowable axial load detailed<br />
in Table 5.<br />
Figure 8.18<br />
PTMT, DN225 x 2m Restrain Sewer Pipe, with auger section inserted.<br />
Figure 8.19 PTMT using DN225 x 2m Restrain Sewer Pipe. Installed at<br />
0.04% grade.<br />
15
8.5 <strong>Installation</strong> <strong>Guidelines</strong> – Slip Lining<br />
Figure 8.20 Typical Slip Lining installation using DN150 x 6m Restrain<br />
Sewer Pipe.<br />
Slip Lining (SL) is a method of installing a new pipe by<br />
inserting (or slipping) Restrain Sewer Pipe inside a<br />
deteriorated host pipe. SL can be used to rehabilitate gravity<br />
sewer and stormwater pipelines however the decrease<br />
in the existing pipe’s cross sectional area needs to be<br />
evaluated. Restrain provides a larger cross sectional area<br />
when compared with other thermoplastic pipe systems.<br />
Step 1<br />
Check alignment, establish if the grade of the host pipe<br />
provides suitable fall for your new Restrain Sewer Pipe.<br />
Step 2<br />
Gain approval from the asset owner to ensure they are<br />
satisfi ed with the existing pipe-grade.<br />
Step 3<br />
Before you arrive on site determine what length of<br />
Restrain Sewer Pipes are fi t for use at the site. In most<br />
cases the contractor orders the longest pipe available, 6m<br />
lengths are common when installing via SL methods. Once<br />
pipe lengths are determined order Restrain Sewer Pipe.<br />
Step 4<br />
Clean and prepare the host pipe for insertion.<br />
Step 5<br />
Ensure tools and equipment are available, tools and<br />
equipment are detailed in Section 7.<br />
Step 6<br />
Once on site excavate entry and exit pits ensuring your work<br />
platform is free from ground water. Ensure the entry and<br />
receiving pits are 1-2 pipe diameters below the existing host<br />
pipe invert.<br />
16<br />
Step 7<br />
A proving plug should be pulled through the existing host<br />
pipe to cross check a successful installation.<br />
Step 8<br />
Begin pull back, follow the installation steps within Section<br />
8.0.<br />
Figure 8.21 Assembling Restrain joint with strap wrench<br />
Step 9<br />
Push or pull your fi rst Restrain pipe into the host pipe.<br />
Step 10<br />
Stabilise your new pipe within the host pipe. For short SL<br />
installations, concrete anchor blocks are poured at the entry<br />
and receiving pits. For longer SL installations, grouting of the<br />
new pipe into the host pipe may be required.<br />
(Refer Section 5.)
9.0 Field Testing<br />
General<br />
The Restrain Sewer Pipe system may be fi eld tested after<br />
installation, in accordance with the relevant parts of these<br />
industry Standards:<br />
New Zealand Standard<br />
NZS4404:2010 “Land Development and Subdivision<br />
Infrastructure”, Appendix C2 “Non-pressure pipelines -fi eld<br />
leakage testing”, and Clause C2.2 “ Hydrostatic Test”.<br />
Joint Australian / New Zealand Standards<br />
AS/NZS2566.2 “Design of Buried Flexible <strong>Pipelines</strong> –<br />
<strong>Installation</strong>”, Section 6 “Field testing”, and Appendix N<br />
“Leakage testing for non-pressure pipelines”<br />
AS/NZS2032 “<strong>Installation</strong> of PVC Pipe and Fittings”, Section<br />
7.3 “Testing of non-pressure pipelines”<br />
Figure 9.0 Field Testing. DN150 Restrain Sewer Pipe.<br />
17
10.0 Frequently Asked Questions<br />
Question 1<br />
Can Restrain sewer pipe be used with traditional PVC drain,<br />
waste & vent pipe and fi ttings?<br />
Answer<br />
Yes, Restrain sewer pipe is fully compatible with PVC DWV<br />
pipe and fi ttings, manufactured to AS/NZS1260.<br />
Question 2<br />
How do I test Restrain sewer pipe on site?<br />
Answer<br />
Restrain sewer pipe is tested in the same as traditional<br />
PVC pipe. Refer to Section 9.<br />
Question 3<br />
Can I use solvent cement DWV fi ttings on Restrain sewer<br />
pipe?<br />
Answer<br />
Yes, Restrain sewer pipe has the same outside diameter<br />
as traditional PVC DWV pipe, and can be used with PVC DWV<br />
fi ttings designed for solvent cement jointing. Remove the<br />
threaded Restrain socket or spigot before assembling of<br />
the solvent cement joint.<br />
Question 4<br />
What type of lubricant do I use when jointing Restrain<br />
sewer pipe?<br />
Answer<br />
We recommend CRC808 or Gensil 601 silicone spray<br />
lubricant.<br />
Question 5<br />
Why can’t I use standard rubber ring pipe lubricant on<br />
Restrain ?<br />
Answer<br />
Standard pipe lubricant looses its slippery properties soon<br />
after the joint is made. Silcone lubricant remains slippery<br />
longer, which may allow you to unscrew the threaded joint<br />
should the installation need changes.<br />
Question 6<br />
Why is a different pull head necessary?<br />
Answer<br />
Standard wind-up pull heads designed for PE pipe may<br />
not be suitable for Restrain, as the internal engagement<br />
grooves may not “grip” effectively into the dense PVC<br />
surface. Cross-bolt style pull heads, for internal or external<br />
use, are recommended for Restrain pipe, as shown in<br />
paragraph 7.3.<br />
18
10.0 <strong>Iplex</strong> <strong>Pipelines</strong> – The Company<br />
<strong>Iplex</strong> <strong>Pipelines</strong> is a major Australasian manufacturer and distributor of a wide range of plastics based pipeline<br />
systems for the Civil, Mining, Plumbing, Irrigation, Gas, Telecommuniations and Electrical Cable conduit<br />
markets. One of the Fletcher Building Group of Companies, <strong>Iplex</strong> <strong>Pipelines</strong> is well placed for accessing the<br />
latest overseas products, technologies, and service initiatives and has become a recognised leader in plastics<br />
pipes and associated fi ttings, together with related water engineering expertise.<br />
Manufacturing and Standards<br />
<strong>Iplex</strong> <strong>Pipelines</strong> operates modern manufacturing facilities in New Zealand and every mainland Australian State.<br />
All factories operate under stringent requirements of local equivalents to international standard ISO 9001.<br />
Where applicable, <strong>Iplex</strong> products also have StandardsMark third party quality assurance accreditation. Sales<br />
and marketing teams are strongly supported by advanced technical, communication and distribution systems<br />
to ensure prompt and effective service.<br />
Products and Brands<br />
<strong>Iplex</strong> products and brand names in New Zealand include APOLLO PVC-O pressure pipes, RHINO PVC-M pressure<br />
pipes, NOVAKEY PVC-U pressure pipes and fi ttings, BLUE BRUTE PVC-U pressure pipes, NOVADRAIN DWV pipes<br />
and fi ttings, POLIPLEX polyethylene pressure pipes, RESTRAIN drillable PVC-U gravity sewer pipe, NEXUS<br />
subsoil drainage pipe and fi ttings and FARMTUFF culvert pipe.<br />
Markets and applications for the <strong>Iplex</strong> product range in New Zealand include water reticulation and<br />
transmission mains, sewerage reticulation and carrier mains, stormwater drainage, trenchless pipe systems,<br />
chemical and process water circuits, slurry and tailings pipe systems, drain, waste and vent plumbing,<br />
domestic hot and cold water plumbing, subsoil drainage systems, turf watering, stock watering, horticultural<br />
irrigation systems and broad acre irrigation systems.<br />
You can obtain further product or technical information by contacting <strong>Iplex</strong> <strong>Pipelines</strong> directly. Please refer to<br />
the back cover of this catalogue for contact details.<br />
IPLEX PIPELINES (NZ) LTD RETAIN THE INTELLECTUAL PROPERTY RIGHTS FOR RESTRAIN PIPE, NEW ZEALAND PATENT No. 561752<br />
IMPORTANT DISCLAIMER: THE INFORMATION, OPINIONS, ADVICE AND RECOMMENDATIONS CONTAINED IN THIS PUBLICATION ARE PUT FORWARD WITH THE<br />
MAIN OBJECT OF PROVIDING A BETTER UNDERSTANDING OF TECHNICAL MATTERS ASSOCIATED WITH PIPELINE INSTALLATION USING IPLEX PIPELINES. WHILST<br />
ALL REASONABLE CARE HAS BEEN MADE IN ENSURING THAT THE INFORMATION CONTAINED IN THIS PUBLICATION IS ACCURATE, THIS PUBLICATION SHOULD<br />
NOT BE USED AS THE ONLY SOURCE OF INFORMATION BY THE READER. REFERENCE SHOULD ALSO BE MADE TO ESTABLISHED TEXTBOOKS AND OTHER PUBLISHED<br />
MATERIAL, AND READERS SHOULD NOT RELY ON THE INFORMATION CONTAINED IN THIS PUBLICATION WITHOUT TAKING APPROPRIATE PROFESSIONAL ADVICE<br />
FOR THEIR PARTICULAR CIRCUMSTANCES. PIPES AND FITTINGS HAVE BEEN SHOWN AS TYPICAL CONFIGURATIONS, HOWEVER, IN SOME CASES PRODUCT<br />
DIMENSIONS MAY VARY OR BE CHANGED WITHOUT NOTICE. IN ALL INSTANCES, THE READER SHOULD CONTACT IPLEX PIPELINES FOR CLARIFICATION THAT THE<br />
SPECIFIC PRODUCT IS APPROPRIATE FOR THEIR CIRCUMSTANCES. - IPLEX PIPELINES NZ LIMITED.<br />
19
20<br />
Ver.07<br />
NOVADRAIN & NOVACOR<br />
PVC DRAIN WASTE & VENT SYSTEMS<br />
POLIDRAIN<br />
POLYETHYLENE DRAINAGE SYSTEM<br />
SUPERSTORM & STORMFIT<br />
PVC STORMWATER DUCT SYSTEM<br />
NEXUS HI-WAY<br />
ROAD DRAINAGE SYSTEM<br />
NOVAKEY & BLUE BRUTE<br />
PVC-U PRESSURE SYSTEMS<br />
WHITE & BLUE RHINO<br />
HIGH IMPACT PVC-M PRESSURE PIPE<br />
APOLLO & APOLLOBLUE<br />
PVC-O PRESSURE PIPE<br />
NOVAFUSE FUSIBLE PVC PIPE<br />
<strong>Iplex</strong> <strong>Pipelines</strong> NZ Limited.<br />
Call Centre -<br />
Phone: 0800 800 262<br />
Fax: 0800 800 804<br />
Web: www.iplex.co.nz<br />
BLUELINE & POLIPLEX<br />
POLYETHYLENE PRESSURE PIPE<br />
ALKATHENE<br />
LOW DENSITY POLYETHYLENE PIPE<br />
NOVATUBE<br />
HORTICULTURAL LATERAL TUBE<br />
GREENLINE, REDLINE, RURAL BLACK & BLACKLINE<br />
POLYETHYLENE PRESSURE PIPE<br />
PLASSON<br />
METRIC COMPRESSION FITTINGS<br />
NEXUSFLO, NEXUSCOIL, NOVAFLO & NOVACOIL<br />
LAND DRAINGE SYSTEMS<br />
IPLEX EFFLUENT PIPE<br />
MEDIUM DENSITY POLYETHYLENE PIPE<br />
FARMTUFF & NEXUS CULVERT<br />
CULVERT PIPE<br />
POLIGAS<br />
POLYETHYLENE GAS SYSTEMS<br />
© 2008 IPLEX PIPELINES (NZ) LIMITED. NEXUS, IPLEX, RESTRAIN, APOLLO, NOVAFUSE, NOVAFLO, FARMTUFF, NOVAKEY,<br />
POLIGAS, RHINO, REDLINE, POLYDRAIN, SUPERSTORM are registered trademarks of IPLEX PIPELINES (NZ) LIMITED.<br />
Offi ces At:<br />
Auckland: PO Box 13772, Onehunga, 2 Rockridge Avenue, Penrose.<br />
Palmerston North: Private Bag 11019, 67 Malden Street.<br />
Christchurch: PO Box 16225, 22 Braeburn Drive, Sockburn.