
Create successful ePaper yourself
Turn your PDF publications into a flip-book with our unique Google optimized e-Paper software.
.<br />
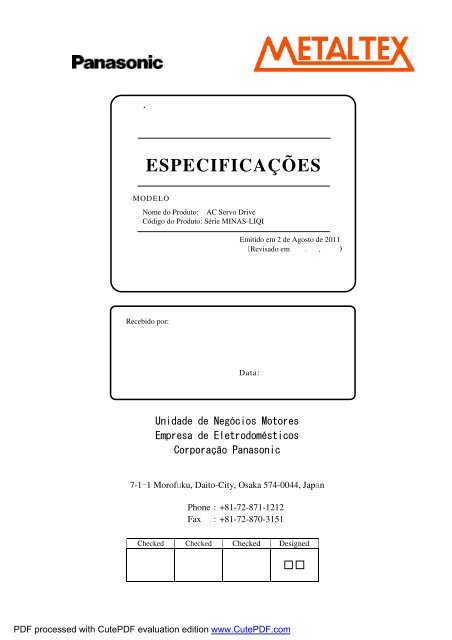
<strong>ESPECIFICAÇÕES</strong><br />
MODELO<br />
Nome do Produto: AC Servo Drive<br />
Código do Produto: Série MINAS-LIQI<br />
Recebido por:<br />
Emitido em 2 de Agosto de 2011<br />
(Revisado em . , )<br />
Data:<br />
Unidade de Negócios Motores<br />
Empresa de Eletrodomésticos<br />
Corporação Panasonic<br />
7-1-1 Morofuku, Daito-City, Osaka 574-0044, Japan<br />
Phone:+81-72-871-1212<br />
Fax :+81-72-870-3151<br />
Checked Checked Checked Designed<br />
PDF processed with CutePDF evaluation edition www.CutePDF.com
Data<br />
Página<br />
Rev.<br />
REVISÕES<br />
Descrição<br />
SR-ZSV00024<br />
www.metaltex.com.br<br />
Assinado
Conteúdo<br />
SR-ZSV00024<br />
1. Escopo............................................................................................................................................................................. 1<br />
2. Model Designation Code................................................................................................................................................. 1<br />
3. Disposição dos Produtos ................................................................................................................................................. 2<br />
4. Especificações Gerais...................................................................................................................................................... 3<br />
5. Aparência e Descrição das partes.................................................................................................................................... 5<br />
6.Detalhes dos Conectores .............................................................................................................................................................. 7<br />
6-1Conector USB X1 ............................................................................................................................................................ 7<br />
...........................................................................................................................................................<br />
Conector de I/O 7<br />
6-3 Conector de Encoder X3 ............................................................................................................................................... 11<br />
X2 6-2<br />
6-4 Conector do Motor e Alimentação X4 .......................................................................................................................... 11<br />
6-5 Painel Frontal........................................................................................................................................................................ 12<br />
7. Dimensões..................................................................................................................................................................... 13<br />
8. Precauções de Segurança .............................................................................................................................................. 15<br />
9. Vida útil e Garantia ....................................................................................................................................................... 19<br />
9-1 Expectativa de vida útil do Driver ........................................................................................................................................ 19<br />
9-2 Condições de Vida Útil......................................................................................................................................................... 19<br />
9-3 Perído de Garantia ................................................................................................................................................................ 19<br />
10. Outros.......................................................................................................................................................................... 20<br />
www.metaltex.com.br
1. Escopo<br />
SR-ZSV00005 -1-<br />
Estas especificações referem-se ao servo driver de sistema AC, que é composto pelo servo motor AC, fabricado e<br />
fornecido pela Companhia de Motor, Corporation Panasonic, e o servo driver para controle deste motor. Este<br />
documento de especificações define os produtos fornecidos com base no do contrato de OEM básica.<br />
2. Definição do Código do Modelo<br />
Notação de definição do código do equipamento conforme abaixo:<br />
Tamanho<br />
B: Tamanho B<br />
C: Tamanho C<br />
AC Servo Drive<br />
série LIQI J:<br />
Corrente Máxima<br />
instantânea de Saída<br />
T2:15A<br />
T3:30A<br />
2 1 0<br />
1 2 3 4 5 6 7 8 9<br />
D T<br />
M B<br />
J<br />
2<br />
Corrente nominal do detector de<br />
Corrente<br />
10: 10A<br />
20: 20A<br />
30: 30A<br />
Tensão de Alimentação<br />
2: Monofásica 200V<br />
www.metaltex.com.br
3. Disposição dos Produtos<br />
Código do Driver Tamanho<br />
B MCDJT3220 MBDJT2210<br />
MCDJT3230<br />
C<br />
Tensão de<br />
Alimentação<br />
Potência de<br />
Saída<br />
Motor<br />
Monofásico<br />
220-240 VAC 400W MHMJ042P1A<br />
Monofásico<br />
220-240 VAC<br />
Monofásico<br />
220-240 VAC 1200W<br />
750W MHMJ082P1A 1000W MHMJ102P1A<br />
MHMJ122P1A<br />
SR-ZSV00024 - 2 -<br />
www.metaltex.com.br
Funções<br />
Especificações Básicas<br />
4. Especificações Gerais B<br />
Controle de Posição<br />
Tensão de<br />
Alimenta-<br />
ção<br />
Comandos<br />
Isolação<br />
Condições de<br />
Operação<br />
200V<br />
linha<br />
Alimentação<br />
Circuito Principal C<br />
Alimentação<br />
Circuito de<br />
Controle C<br />
Temperatura<br />
Monofásico<br />
Monofásico<br />
Monofásico<br />
Monofásico B<br />
200 – 240 V +5%<br />
-10% 50/60 Hz<br />
200 – 240 V +5%<br />
-10% 50/60 Hz<br />
200 – 240 V +5%<br />
-10% 50/60 Hz<br />
200 – 240 V +5%<br />
-10% 50/60 Hz<br />
Suporta as condições de 1500V/1Min sensível a corrente elétrica de 20mA entre primário e terra.<br />
Temperatura de Operação: 0 – 50 °C / Temperatura de Armazenamento: -20 a 65 °C<br />
(Temperatura Max. Garantia: 80˚C por 72 horas)<br />
Umidade Umidade de operação e armazenamento 20~85%RH ou menos (sem condensação)<br />
Altitude acima do nível do<br />
Altitude acima do nível do mar: 1.000 metros ou menos<br />
mar<br />
Vibração 5.88 m/s2 ou menos, 10 – 60 Hz (Operação contínua em ponto de ressonância não é permitida)<br />
Método de Controle IGBT método PWM, drive senoidal.<br />
Encoder de feedback 2500p/r (resolução: 10000)5-serial incremental encoder<br />
Sinais de Controle<br />
Pulsos<br />
Entrada<br />
Saída<br />
Entrada<br />
Saída<br />
6 Entradas Multi-função,<br />
Função de cada entrada é atribuída por parâmetros.<br />
3 Saídas Multi-função,<br />
Função de cada saída é atribuída por parâmetros.<br />
1 Entrada Ótico-acoplada:<br />
Coletor aberto e Line Driver, ambas as interfaces podem ser conectadas.<br />
1 Receptor de Entrada Line driver<br />
Interface de alta velocidade line driver pode ser conectada.<br />
4 Saídas<br />
Saída Line driver para pulsos do encoder (Sinais A/B/Z) ou pulsos externos de feedback (Sinais<br />
EXA/EXB/EXZ)<br />
Saída coletor aberto também disponível para os sinais Z ou EXZ<br />
Comunicação USB Interface USB para conectar com computadores para parametrização e monitoramento.<br />
Painel Frontal<br />
2-digitos 7-segmentos LED,2-digitos RSW<br />
Regeneração Somente resistor externo de regeneração.<br />
Frenagem Dinâmica Incorporada<br />
Modo de controle Controle de Posição<br />
SR-ZSV00024 - 3 -<br />
Entrada Digital Limpa contador de desvio, Inibição de Pulso de Comando, Troca comando Escala, Comuta Anti-vibração.<br />
Saída Digital Em posição<br />
Entrada de<br />
Pulsos<br />
Max. Frequência de Pulso de<br />
Comando<br />
500kpps (Interface ótico-acoplada)<br />
Modo de entrada de pulso Entrada Diferencial. Selecionável por parâmetro. ([1]Pulso Positivo/Negativo [2]Quadratura A/B [3]Pulso/Direção)<br />
Comando escala de pulso<br />
(Redutor Eletrônico)<br />
Relação de Escala Aplicável: 1/1000 – 1000<br />
Qualquer valor de 1 – 20 20 podem ser ajustados para o numerador (que corresponde à resolução do encoder) e<br />
denominador (que corresponde ao comando de resolução pulsos por rotação do motor), mas a combinação tem que<br />
estar dentro da faixa indicada acima.<br />
Filtro de Suavização Filtro primeira ordem ou Filtro FIR selecionável para entrada de comando.<br />
Controle Anti-vibração Disponível<br />
Auto ajuste<br />
Comando de operação do controlador, com comando de funcionamento interno do amplificador, de acordo com a<br />
identificação em tempo real da inércia da carga, a rigidez é configurada automaticamente.<br />
Escala de pulsos de Feedback Qualquer número pode pulsos pode ser configurado. (O número máximo configurável é a resolução do encoder)<br />
Funções de Proteção<br />
Erro de Hardware Sobre tensão, Sub tensão, Sobre velocidade, Sobrecarga, Superaquecimento, Sobre corrente, erro de encoder, etc.<br />
Erro de Software Erro de falhas seguidas, erro de comando escala de pulso, erro de EEPROM, etc.<br />
Dados de Alarme Rastreabilidade dos dados de alarme disponível.<br />
www.metaltex.com.br
SR-ZSV00024 - 4 -<br />
www.metaltex.com.br
5. Aparência de Descrição das Partes<br />
200V Tamanho B<br />
X1:Conector USB Comutador Rotativo ERD716CMZ (ECE) Painel Frontal<br />
(JST) UB-M5BR-DMP14-4S<br />
X2: Conector de I/O<br />
X3: Conector de Encoder<br />
X4:Conector do Motor<br />
Conector de<br />
10226-52A2PE<br />
Alimentação<br />
(3M) 3E106-2230 KV (3M)<br />
(DINKEL) 0138-76-S2060909<br />
Terminal de Conexão do Motor<br />
Terminal de Conexão do Resistor de<br />
Dissipação da energia regenerativa<br />
Terminal de Alimentação do<br />
Circuito de Controle<br />
Terminal de Alimentação do<br />
Circuito Principal<br />
U<br />
V<br />
W<br />
B1<br />
B2<br />
L1C<br />
L2C<br />
L1<br />
L2<br />
de Identificação Placa<br />
SR-ZSV00024 - 5 -<br />
Invólucro<br />
Parafuso<br />
Terminais de<br />
Aterramento<br />
www.metaltex.com.br
200V Tamanho C<br />
X1:Conector USB ERD716CMZ Painel Frontal<br />
(ECE) Rotativo Comutador<br />
UB-M5BR-DMP14-4S<br />
X2: Conector de I/O<br />
X3: Conector de Encoder<br />
X4:Conector do Motor<br />
Conector de<br />
(JST)<br />
Alimentação<br />
10226-52A2PE (3M) 3E106-2230 KV (3M)<br />
(DINKEL) 0138-76-S2060909<br />
Terminal de Conexão do Motor<br />
Terminal de Conexão do Resistor de<br />
Dissipação da energia regenerativa<br />
Terminal de Alimentação do<br />
Circuito de Controle<br />
Terminal de Alimentação do<br />
Circuito Principal<br />
de Identificação Placa<br />
U<br />
V<br />
W<br />
B1<br />
B2<br />
L1C<br />
L2C<br />
L1<br />
L2<br />
SR-ZSV00024 - 6 -<br />
Invólucro<br />
Parafuso<br />
Terminais de<br />
Aterramento<br />
www.metaltex.com.br
6. Detalhes dos Conectores<br />
SR-ZSV00024 - 7 -<br />
Conector USB X1<br />
Ao conectar a um computador ou a um controlador via interface USB, as seguintes operações estarão disponíveis.<br />
6-1<br />
Referência de parâmetros / alteração<br />
Salvar / carregar parâmetros<br />
Monitoramento de status<br />
Verificação de alarme ou histórico de alarme<br />
Nome Símbolo<br />
Sinal USB<br />
Para uso do fabricante -<br />
Nº Pin.<br />
Conector<br />
VBUS 1<br />
D- 2<br />
D+ 3<br />
Aterramento GND<br />
4<br />
5 Aterramento<br />
Entradas Digitais Comuns<br />
Nome Símbolo<br />
6-2 Conector de I/O X2<br />
Fonte de Alimentação<br />
– Entradas<br />
COM+ 1<br />
2 3 4 5 6 7<br />
Entrada Multi função 1 SI1<br />
Entrada Multi função 2 SI2<br />
Entrada Multi função 3 SI3<br />
Entrada Multi função 4 SI4<br />
Entrada Multi função 5 SI5<br />
Entrada Multi função 6 SI6<br />
Pino<br />
Conector<br />
COM- 11<br />
Descrição<br />
Comunica-se com um computador ou um controlador<br />
Não conectado<br />
Descrição<br />
- Conecte ao de uma fonte de alimentação DC externa (12 a 24 V)<br />
- Use uma fonte de alimentação 12 V (±5%) a 24 V (±5%)<br />
- Conecte ao de uma fonte de alimentação DC externa (12 a 24 V)<br />
- A capacidade da fonte de alimentação varia conforme a configuração dos<br />
circuitos de entradas e saídas. É recomendado 0,5A ou mais. - +<br />
- A função muda de acordo com as definições dos parâmetros.<br />
Veja abaixo.<br />
Circuito<br />
Interface<br />
――<br />
――<br />
i-1<br />
www.metaltex.com.br
Funções atribuíveis às entradas Multi função<br />
Descrição<br />
SR-ZSV00024 - 8 -<br />
Pin 2 7<br />
6 4<br />
Pela combinação de DIV1 e DIV2 possível 4 comutações 5 3<br />
Função Símbolo<br />
Liga Servo<br />
-Colocando em ON o status do servo torna-se ON (Motor energizado) e desliga<br />
SRV-ON<br />
a energização do motor.<br />
Limite de deslocamento<br />
Positivo<br />
POT<br />
-Esta é a entrada que proíbe a operação de movimento de direção positiva.<br />
-Por favor, conecte a um ponto de conexão aberto quando a parte móvel da<br />
máquina estiver sobre limite positivo de deslocamento.<br />
-Caso a entrada seja desligada, o movimento positivo não acontece.<br />
Limite de deslocamento<br />
Negativo<br />
NOT<br />
- Esta é a entrada que proíbe a operação de movimento de direção negativa.<br />
- Por favor, conecte a um ponto de conexão aberto quando a parte móvel da<br />
máquina estiver sobre limite negativo de deslocamento.<br />
-Caso a entrada seja desligada, o movimento negativo não acontece.<br />
Zera contador de desvio CL -Esta entrada zera o contador de desvio (CL).<br />
Comutador Anti-vibração 1<br />
Comutador Anti-vibração 2<br />
VS-SEL1<br />
VS-SEL2<br />
-<br />
-Esta entrada comuta a supressão de vibração.<br />
-<br />
Troca de Ganho GAIN - -Esta entrada comuta o ganho.<br />
Reset Alarme A-CLR -A condição de alarme é desativada.<br />
Comutador Comando DIV1 - - Troca o numerador do comando de redutor eletrônico de pulsos.<br />
Escala DIV2 -<br />
é até Inibição pulso de comando INH -Esta entrada ignora os pulsos de comando (INH).<br />
Sinais de Entradas (Trem de pulso de comando) e suas funções<br />
Duas interfaces compatíveis podem ser escolhidas com base na especificação de pulsos de comando.<br />
Interface trem de pulso com line driver<br />
Nome Símbolo<br />
Pulso de comando<br />
Trem de pulso 1<br />
Pulso de comando<br />
Direção 1<br />
PULSH1 20<br />
PULSH2 21<br />
SIGNH1 22<br />
SIGNH2 23<br />
Nº Pin<br />
Conector<br />
Sinais de Saída (Comum) e suas funções<br />
Nome Símbolo<br />
8 9 10<br />
Saída Multi função 1 SO1<br />
Saída Multi função 2 SO2<br />
Saída Multi função 3 SO3<br />
Descrição Circuito<br />
- Terminal entrada de pulso comando de posição. Pode ser selecionada<br />
através do parâmetro correspondente.<br />
- Desativado em modos de controle tais como o controle de velocidade ou<br />
controle de torque, que não requer comandos posições.<br />
- A frequência de entrada máxima permitida é de 4 Mpps.<br />
Nº Pin<br />
Conector<br />
Di-1<br />
Descrição Circuito<br />
- A função muda de acordo com as definições dos parâmetros.<br />
Veja abaixo.<br />
o-1<br />
www.metaltex.com.br
Funções atribuíveis às saídas Multi-função<br />
Pin 8 Nome Símbolo<br />
Alarme Servo ALM<br />
Outros<br />
P-CMD ALM-ATB - P-ON -<br />
-<br />
Nome Símbolo<br />
Nº Pin<br />
Conector<br />
Aterramento<br />
na Carcaça<br />
FG<br />
Shell<br />
26<br />
Sinal Terra GND 12<br />
Saída digital que indica status de alarme no servo.<br />
SR-ZSV00024 - 9 -<br />
-<br />
Libera freio externo<br />
do Motor<br />
BRK-OFF<br />
-<br />
Descrição<br />
-<br />
- Saída digital para fornecer o sinal de temporização para controlar o freio externo de<br />
bloqueio do motor.<br />
Velocidade Zero ZSP - - Saída digital que indica o status de velocidade zero.<br />
Limite de Torque TLC - - Saída digital que indica o limite de torque atingido.<br />
Na posição INP - Saída digital que indica o status de servo na posição. (INP)<br />
Na posição 2 INP2 - Saída digital que indica o status de servo na posição 2. (INP2)<br />
Aviso saída 1 WARN1<br />
- Saída digital que indica o status do sinal de saída. Configurado pelo Pr4.31 "aviso<br />
saída 1"<br />
Aviso saída 2 WARN2<br />
- Saída digital que indica o status do sinal de saída. Configurado pelo Pr4.32 "aviso<br />
saída 2"<br />
Saída comando de<br />
posição<br />
- Saída digital que indica o comando de posição.<br />
Saída atributo do<br />
Alarme<br />
- Saída digital para alarme que pode ser cancelado.<br />
Saída Alimentação<br />
Principal<br />
-A saída digital de tensão que excedem o nível de tensão do Servo on.<br />
Descrição Circuito<br />
- Internamente conectado ao terminal terra. ―<br />
- Sinal Terra<br />
- Internamente isolado da fonte de alimentação de controle (COM-).<br />
Reservado - 24/25 - Não conectar ―<br />
―<br />
www.metaltex.com.br
Interface de sinais de entrada e saída 4.7K DC<br />
7 12 12~24V 24V i-1 12<br />
12 12~24V 24V DC ou<br />
4.7K 7 12<br />
DC VDC<br />
DC VDC<br />
ou<br />
Pinos 2,3,4,5,6,7<br />
Para Para Para coletor coletor aberto aberto Di-1<br />
220 21.23 20 20.22 22 10mA R Vp ~24V 24V ON/ ON/OFF OFF 220<br />
DIREÇÂ GND 12 24V DIRE PULS PULSO L/H GND<br />
ÇÂ ÇÂO ÇÂ<br />
+:pinos 8,9,10, -:pino 11 12 12~24V 24V 50mA R + - o-1<br />
SR-ZSV00024 - 10 -<br />
ao relé, por favor, instale um diodo no sentido indicado acima.<br />
VCE sat = 1.2V<br />
Se deseja acionar um relé direto pelo driver, em paralelo VDC Nota)<br />
AM26 AM26C31 31 31(Equivalent Equivalent Equivalent) AM26<br />
+:12,15,17<br />
AM26<br />
GND 12 pin, -:14,16,18 pin<br />
+ - D o-1 GND<br />
D o-2<br />
CZ DD 30V MAX 30V MAX 30V MAX 30V MAX 15mA MAX 15mA MAX 15mA MAX 15mA MAX 19 CZ<br />
DD VDD<br />
www.metaltex.com.br
6-3 Conector de Encoder X3<br />
Descrição<br />
Nº Pin<br />
Conector<br />
Símbolo<br />
Saída da Fonte de Alimentação do 1 E5V<br />
Encoder 2 E0V (*Observação1)<br />
――<br />
3 ――<br />
4 ――<br />
Sinal de Entrada/Saída do Encoder 5 PS<br />
(Sinal Serial) 6 /PS<br />
Aterramento na Carcaça shell FG<br />
SR-ZSV00024 - 11 -<br />
* Observação 1) O E0V da saída da fonte de alimentação do encoder está conectado ao GND conector X3 do<br />
circuito de controle.<br />
6-4 Conector de Motor e Alimentação X4<br />
Tamanho do Sistema B, C 200V<br />
X4<br />
Símbolo<br />
Terminal<br />
U(vermelho)<br />
V(cinza)<br />
W(preto)<br />
B1(cinza)<br />
B2(cinza)<br />
Nome do Terminal Descrição<br />
Conector do Motor<br />
Conector Resistor<br />
Regenerativo<br />
Conecte cada fase do enrolamento do motor.<br />
U: fase U V: fase V W: fase W<br />
Se o driver indicar alarme de regeneração, conecte um resistor regenerativo<br />
externo (Adquirido pelo cliente) entre B1 e B2.<br />
L1C(vermelho) Alimentação<br />
+ 5%<br />
220V Monofásico<br />
L2C(vermelho)<br />
220~240V<br />
Circuito de Controle<br />
- 10%<br />
L1(preto) Alimentação<br />
+ 5%<br />
220V Monofásico 220~240V<br />
L2(preto) Circuito Principal<br />
- 10%<br />
Terra Terminal de terra para aterramento.<br />
Entrada 50/60Hz<br />
Entrada 50/60Hz<br />
Por favor, escolha um terminal com 12mm ~ 15mm de comprimento. Terminais curtos não são fixados durante<br />
a inserção. São recomendados terminais pino modelo DNH4-112 (4mm de diâmetro) da DINKEL.<br />
※Apertar os parafusos de fixação com o torque de 0.4~0.6 N.m ou menos.<br />
※Ao não usar um terminal, assegurar que todos os cabos estão dentro do terminal para evitar curto-circuito.<br />
www.metaltex.com.br
6-5 Painel Frontal<br />
■ Configuração do Painel Frontal<br />
Rotativo (RSW)<br />
SR-ZSV00024 - 12 -<br />
Comutador<br />
Ao manipular o RSW o Pr.0.03 (seleção de rigidez em auto ajuste de ganho em tempo real) será corrigido pela ■<br />
configuração do RSW, e pode ser alterado pelo controle de ganho do painel frontal.<br />
Exemplo<br />
Ajuste RSW Correção da rigidez Rigidez após<br />
LED Display<br />
correção<br />
Possível<br />
±0 8 Pc PC -Pr0.03=8<br />
+1 9 9 +2 +2 10 10 +3 +3 11 11 +4 +4 12 12 +1<br />
+5 13 13 +6 +6 14 14 +7 +7 15 15 - ±0 8 8 +5<br />
-7 1 1 -6 -6 2 2 -7<br />
■ Método de Operação<br />
-5 3 3 -4 -4 4 4 -3 -3 5 5 -2 -2 6 6 -5<br />
-1 7 7 -1<br />
Parâmetro Pr0.03 é<br />
Alterado<br />
Impossível<br />
Quando a alimentação é ligada, após mostrar a verificação padrão, exibe o valor normal a seguir.<br />
Se você operar o RSW, o LED exibe a rigidez em tempo real após o ajuste do RSW.<br />
No entanto, caso ocorra um alarme, o código do alarme (Principal e sub) é exibido.<br />
・Durante a ocorrência dos avisos, o display piscará lentamente.<br />
・Quando um erro ocorrer, o display mudará para causar um erro com números piscando.<br />
・O Comutador Rotativo tem um comprimento de 4mm e uma largura de 1mm, para alterar o Comutador Rotativo<br />
use chave de fenda plana que seja inferior a 4mm de largura e 1mm ou menos de espessura.<br />
www.metaltex.com.br
7. Dimensões<br />
Dimensões Externas Tamanho B<br />
pela base (Padrão: Montado pelo fundo) Montagem<br />
de Montagem (opcional) Identificação Suporte<br />
SR-ZSV00024 - 13 -<br />
de Montagem (opcional) Montagem em Rack TYPE (Opcional: Montado pela frente)<br />
Suporte<br />
www.metaltex.com.br
Dimensões Externas Tamanho C<br />
de Montagem (opcional) Suporte<br />
de Montagem (opcional) Montagem pela base Suporte<br />
Montado pelo fundo) Montagem em Rack TYPE (Opcional: Montado pela frente)<br />
(Padrão:<br />
SR-ZSV00024 - 14 -<br />
www.metaltex.com.br
SR-ZSV00024 - 15 -<br />
P R E C A U Ç Õ E S D E S E G U R A N Ç A<br />
8. Precauções de Segurança<br />
■ Perigo e dano poderão ocorrer quando o equipamento for usado ignorando as precauções de segurança. O perigo e<br />
dano são descritos na seguinte categoria, como indicado pela sinalização.<br />
PERIGO<br />
ATENÇÃO<br />
A descrição desse sinal indica “perigo urgente que pode causar ferimentos graves ou<br />
morte”.<br />
A descrição desse sinal indica “perigo que pode causar dano material”.<br />
■ Regras para manter são categorizadas e descritas com os seguintes gráficos.<br />
Este gráfico indica “Proibição” atos que não são permitidos.<br />
Este gráfico indica “Obrigatoriedade” atos que devem ser executados.<br />
PERIGO<br />
(1) Certifique-se de não armazenar ou utilizar o equipamento em condições sujeitas a vibrações<br />
(5.88m/s² ou maiores) ou um impacto, impurezas tais como poeira, partículas de metal, vapor de<br />
óleo, líquidos tais como água, óleo, perto de objetos inflamáveis, numa atmosfera de gases<br />
corrosivos (tais como H2S, SO2, NO2, Cl2) ou em uma atmosfera de gases inflamáveis.<br />
(2) Não coloque objetos inflamáveis próximo ao moto, amplificador ou resistor regenerativo.<br />
(3) Não acionar o motor com uma força externa.<br />
(4) Não danifique ou estique o cabo, ou não aplique uma tensão excessiva. Não coloque um item<br />
pesado sobre os cabos ou não prense o cabo.<br />
(5) Não utilize o equipamento com os cabos imersos em água ou óleo.<br />
(6) Não instale o equipamento perto de objetos de aquecimento tais como um aquecedor ou uma<br />
grande resistência a fio. (Instale uma placa de blindagem de calor para evitar influência de um objeto<br />
de aquecimento.)<br />
(7) Não conecte o motor diretamente com a energia da rede comercial.<br />
(8) Não use o equipamento em condições sujeitas a fortes vibrações ou impacto.<br />
(9) Tenha cuidado para não tocar em uma parte rotativa de um motor durante o funcionamento.<br />
(10) Não toque na chaveta do eixo de saída do motor com as mãos.<br />
(11) Tenha cuidado para não tocar no interior de um servo amplificador.<br />
(12) Motor, dissipador do amplificador e periféricos ficam muito quentes. Não toque estes dispositivos.<br />
(13) Não realize a ligação ou opere o equipamento com as mãos molhadas.<br />
www.metaltex.com.br
SR-ZSV00024 - 16 -<br />
P R E C A U Ç Õ E S D E S E G U R A N Ç A<br />
(14) Trabalho de ligação é estritamente permitido apenas para engenheiro especializado em elétrica.<br />
(15) Outro motor que não é fornecido com dispositivo de proteção especificado. Proteger o motor com<br />
um dispositivo de sobre corrente, um interruptor de fuga à terra, um dispositivo de<br />
superaquecimento e parada de emergência.<br />
(16) Quando operar o amplificador depois de um terremoto, inspecionar as condições de instalação do<br />
amplificador, motor e segurança do equipamento para se certificar de que nenhuma falha existe.<br />
(17) Depois de desligar a alimentação, o circuito permanece carregado com alta tensão dentro de um<br />
tempo. Quando mover a fiação ou inspecionar o equipamento, desligue completamente a fonte de<br />
alimentação do amplificador e aguarde 15 minutos ou mais para trabalhar.<br />
(18) Instalar e montar o equipamento de segurança pode prevenir danos pessoais causados por má<br />
instalação ou montagem sobre um terremoto.<br />
(19) Instale um circuito externo de parada de emergência para parar a operação e interromper<br />
imediatamente a alimentação.<br />
Emissão de fumaça ou pó pode ocorrer devido a uma falha de um motor ou amplificador usado em<br />
combinação.<br />
Por exemplo, se o sistema está energizado com um transistor de controle de energia regenerativa em<br />
curto-circuito por falha, sobreaquecimento de um resistor regenerativo instalado fora do<br />
amplificador pode ocorrer e emitir fumaça e poeira. Se um resistor regenerativo está ligado fora do<br />
amplificador, fornecer um meio de detecção de superaquecimento como um protetor térmico para<br />
desligar ao detectar um aquecimento anormal.<br />
(20) Montar o motor, o amplificador e os periféricos sobre uma superfície não combustível tal como<br />
metal. (21) Providenciar fiação correta e segura. Fiação insegura ou incorreta pode causar fuga ou queima do<br />
motor. Durante o trabalho de instalação, evite a entrada de poeira condutora ou pedaços de fio no<br />
amplificador.<br />
(22) Conecte os cabos de forma segura e proporcionam isolamento seguro em partes condutoras de<br />
corrente, utilizando material de isolamento.<br />
(23) Certifique-se de instalar um fusível de proteção na fonte de alimentação. Certifique-se de ligar os<br />
terminais de aterramento e os fios de aterramento.<br />
Para evitar um choque elétrico e mau funcionamento, aterramento tipo D (aterramento resistência<br />
em 100Ω ou inferior) ou grau superior é recomendado.<br />
ATENÇÃO<br />
(24) Não segurar nos cabos ou eixo do motor ao transportar o equipamento.<br />
(25) Não ajustar ou alterar ganhos do amplificador extremamente, e não tornar as operações da<br />
máquina instável.<br />
(26) O equipamento pode de repente reiniciar após restabelecer uma queda de energia. Mantenha-se<br />
longe do equipamento.<br />
Especifique as configurações do equipamento para garantir a segurança para humanos contra tais<br />
operações de reinicialização.<br />
(27) Quando o equipamento está energizado, mantenha-se longe do motor e mecanismos acionado pelo<br />
motor em caso de mau funcionamento.<br />
(28) Evite fortes choques no eixo do motor.<br />
(29) Evite fortes choques no produto.<br />
(30) Certifique-se de não usar o contator eletromagnético instalado na fonte de alimentação principal<br />
para iniciar ou parar o motor.<br />
(31) Evite ligar e desligar frequentemente a fonte de alimentação principal do amplificador.<br />
(32) O freio incorporado ao motor é usado apenas para manter. Não use o freio para parar (frear) para<br />
garantir a segurança do equipamento.<br />
www.metaltex.com.br
SR-ZSV00024 - 17 -<br />
P R E C A U Ç Õ E S D E S E G U R A N Ç A<br />
(33) Não derrubar ou tombar o equipamento ao transportar ou instalar.<br />
(34) Não subir no motor ou colocar um item pesado no motor.<br />
(35) Não bloqueie as aberturas de ventilação do amplificador e não colocar um corpo estranho dentro<br />
do amplificador.<br />
(36) Não use o equipamento sob luz solar direta. Ao guardar o equipamento evitar a luz solar direta, e<br />
armazenar em condições de temperaturas e umidade de operação.<br />
(37) Tenha cuidado para não desmontar ou modificar o equipamento. Desmonta e reparar só é<br />
permitido para o fabricante ou revendas autorizada pelo fabricante.<br />
(38) Em utilização normal, por favor, não usar a desaceleração de parada do motor usando a<br />
capacidade do freio dinâmico.<br />
Devido ao mau funcionamento ou função de proteção, podem ocorrer paradas.<br />
Depois de um comando de desaceleração, por favor, use o freio dinâmico com servo off.<br />
(39) Não remover os parafusos de montagem do painel frontal.<br />
Não retire o parafuso e trave novamente também.<br />
(40) Utilizar um motor e um amplificador em combinação especificada pelo fabricante. O cliente será<br />
responsável por verificar as performances e segurança de combinação com outro amplificador.<br />
(41) Uma falha no motor ou amplificador combinado pode causar queima do motor, ou emissão de<br />
fumaça e pó. Preste atenção ao usar o equipamento em uma sala limpa.<br />
(42) Instalar o equipamento adequadamente considerando a produção e o peso da unidade principal.<br />
(43) Manter as condições ambientes do motor instalado dentro das faixas de temperaturas ambiente e<br />
admissíveis de humidade permissível.<br />
(44) Instale o equipamento pelos procedimentos e orientações especificadas.<br />
(45) Instalar os dispositivos mantendo distâncias especificadas entre um amplificador e outro, e<br />
também de outros dispositivos internos do painel de controle.<br />
(46) Se um motor tem um olhal, utilizar o olhal para transportar um único motor. Não use o olhal para<br />
transportar equipamentos.<br />
(47) Conecte um relé de parada de emergência em série com o relé de controle do freio.<br />
(48) Para um teste, fixe o motor e desconecte do sistema mecânico para verificar as operações antes de<br />
instalar no equipamento. (Um motor deve rodar sem problemas a 30r/min controlado com um<br />
amplificador).<br />
(49) Verifique se a tensão de alimentação da entrada satisfaz as especificações do amplificador antes de<br />
ligar a energia e iniciar operação.<br />
Uma tensão de entrada superior à nominal pode causar a queima do amplificador, que pode causar<br />
em alguns casos fuga ou queima de um motor.<br />
(50) Quando um alarme ocorrer remova a causa do problema antes de reiniciar.<br />
Descuidado reiniciando sem remover uma causa do problema pode causar mau funcionamento ou<br />
a queima para o motor ou amplificador.<br />
(51) O freio incorporado ao motor pode não ser capaz de manter devido à vida útil expirada ou<br />
estrutura mecânica. Instalar um dispositivo de bloqueio no equipamento para garantir a segurança.<br />
(52) Preste atenção na radiação de calor. O amplificador gera calor por operar um motor. Um<br />
amplificador utilizado em uma caixa de controle selada pode causar um aumento extremo de<br />
temperatura. Considere resfriamento de modo que uma temperatura ambiente em torno do<br />
amplificador satisfaça a faixa de funcionamento.<br />
(53) Manutenção e inspeção só são permitidas para uma pessoa especializada.<br />
(54) Desligue o aparelho quando o equipamento não for utilizado por um longo prazo.<br />
dos capacitores do circuito de retificação da fonte de alimentação cai ao longo do tempo. Para evitar um<br />
problema secundário devido a uma falha, a substituição dos capacitores é recomendada em um intervalo de cerca de cinco<br />
anos. Delegar ao fabricante ou representante autorizado pelo fabricante para substituir as peças.<br />
Capacitância<br />
Não deixe de ler o manual de instruções (livro de segurança) antes do uso.<br />
・ www.metaltex.com.br
SR-ZSV00024 - 18 -<br />
P R E C A U Ç Õ E S D E S E G U R A N Ç A<br />
Temperatura ambiente do servo<br />
driver.<br />
A vida útil do driver significativamente depende da<br />
temperatura ambiente. Certifique-se de que a temperatura<br />
ambiente do driver não excederá a faixa de temperatura<br />
operacional especificada. (a distância de 5 cm a partir do<br />
driver).<br />
Faixa Temperatura de Operação: 0 to 50°C<br />
Panasonic Corporation fez os melhores esforços para garantir a qualidade desse produto. No entanto,<br />
a aplicação de ruído externo (inclusive radiação) ou eletricidade estática, ou um defeito na fonte de<br />
alimentação, instalação ou componentes pode fazer com que o servo amplificador opere além das<br />
condições pré-definidas. Portanto, você deve ter cuidado minucioso para garantir a segurança contra<br />
uma operação inesperada.<br />
5 cm<br />
Servo driver<br />
5 cm<br />
5 cm<br />
www.metaltex.com.br
9. Vida útil e Garantia<br />
9-1 Expectativa de vida útil do driver<br />
SR-ZSV00024 - 19 -<br />
O amplificador possui 28.000 horas de expectativa de vida quando usado continuamente sob as seguintes condições.<br />
Definição da vida:<br />
Vida útil deve ser definida como o tempo até que redução de 20% da capacidade do condensador<br />
electrolítico a partir de estado do envio de fábrica.<br />
Condições Tensão de Entrada : Monofásico 200VAC, 50/60Hz<br />
Temper. de trabalho : 50 °C<br />
Impulso de saída : Impulso constante na carga.<br />
Velocidade : Velocidade constante na carga<br />
Note-se que a vida pode variar dependendo das condições de utilização.<br />
9-2 Condições de vida útil<br />
※ Relé de proteção de corrente de pico<br />
A expectativa de vida do circuito de proteção de corrente de partida é cerca de 20.000 vezes.<br />
No entanto, pode variar dependendo das condições ambientais e de utilização.<br />
※ Ventilador de resfriação<br />
A expectativa de vida do cooler de arrefecimento é cerca de 10.000 a 30.000 horas.<br />
No entanto, pode variar dependendo das condições ambientais e da utilização.<br />
9-3 Período de Garantia<br />
(1) Período de garantia será de 12 meses a partir da data de saída da fábrica ou 18 meses a partir da data de fabricação.<br />
Esta garantia deverá ser interrompida nos seguintes casos,<br />
※defeitos resultantes de má utilização e / ou reparação ou modificação por parte do cliente<br />
※defeitos resultantes de queda do produto ou danos durante o transporte<br />
※defeitos resultantes de uso indevido do produto fora das especificações<br />
※defeitos resultantes de terremoto, incêndio, raio, inundação, do sal, tensão anormal ou outro ato de Deus, ou<br />
outro desastre.<br />
※defeitos resultantes da introdução de material estranho ao produto, tais como água, óleo ou partículas<br />
metálicas.<br />
Esta garantia deverá ser interrompida quando a vida útil dos componentes descritos acima excede a sua vida<br />
normal.<br />
(2) Escopo de Garantia<br />
Panasonic garante a substituição das partes defeituosas do produto ou reparo deles quando os defeitos<br />
do produto ocorrer durante o Período de Garantia, e quando os defeitos estão sob responsabilidade da<br />
Panasonic. Esta garantia cobre apenas o produto em si e não cobre danos diretos ou indiretos<br />
incorridos por esses defeitos.<br />
www.metaltex.com.br
10. Outros<br />
SR-ZSV00024 - 20 -<br />
- Precauções para exportação deste produto e do equipamento que incorpora este produto<br />
Se o usuário final ou propósito final deste produto diz respeito a assuntos militares, armamento e assim por diante,<br />
este produto pode estar sujeito às regulamentações de exportação previstas no "Câmbio e Lei de Controle de<br />
Comércio Exterior". Para exportar este produto, faça uma análise aprofundada e siga o procedimento de exportação<br />
exigido.<br />
- Nós não podemos garantir este produto, se for usado para além das condições de funcionamento especificadas.<br />
- Conformidade com as normas devem ser consideradas pelo usuário.<br />
- A decisão final sobre a compatibilidade com as instalações e componentes no local do usuário, em termos de estrutura,<br />
dimensões, características e outras condições devem ser feitas pelo usuário.<br />
- Se o usuário seleciona o servo motor e amplificador para sua máquina, o usuário deve prestar muita atenção para<br />
selecionar um servo motor e driver correspondente à sua máquina.<br />
- Para a melhoria do desempenho ou outras razões, alguns componentes deste produto podem ser modificados em um<br />
intervalo que satisfaz as especificações dadas neste documento.<br />
- Qualquer alteração de especificação será baseada em nossas especificações autorizadas ou nos documentos<br />
apresentados pelo usuário. Se uma mudança de especificação podem afetar as funções e características deste produto,<br />
vamos produzir um produto de teste, e procederá a uma análise com antecedência. Nota-se que o preço de produtos<br />
pode ser alterado com uma mudança nas suas especificações.<br />
- Fizemos os melhores esforços para garantir a qualidade do produto. No entanto, o equipamento completo pode não<br />
funcionar devido a uma falha do produto no local do cliente. Portanto, tome precauções fornecendo prova de falhas de<br />
projeto no site do cliente, e garanta a segurança dentro da faixa de operação do local de trabalho.<br />
- Dependendo o mau funcionamento deste produto, este pode gerar fumaça de aproximadamente um cigarro. Leve isso<br />
em consideração quando a aplicação da máquina é usada em sala limpa etc.<br />
- Se o equipamento está funcionando sem conexão do eixo do motor elétrico com o terra, corrosão eletrolítica ocorre<br />
no enrolamento do motor e pode resultar em um alto ruído de enrolamento dependendo do equipamento ou das<br />
condições de instalação. O usuário deverá verificar e inspecionar o equipamento.<br />
- Tenha cuidado para que a utilização do equipamento em ambiente com altas concentrações de gases de enxofre ou<br />
sulfatados, leve à desconexão do resistor chip e / ou um mau contato na ligação.<br />
- Tome cuidado para evitar introduzir uma tensão que excede significativamente o faixa nominal da fonte de<br />
alimentação deste produto. Se exceder a faixa nominal, pode resultar em danos para as partes internas, causando<br />
fumaça e / ou de ignição, etc.<br />
- Por favor, descartar adequadamente a bateria que deve ser isolada através de uma fita. De acordo com cada país e<br />
cada regulamento local e de direito.<br />
- Por favor, descartar o equipamento como o lixo industrial.<br />
www.metaltex.com.br
Especificações por Modelos (Modelos Globais)<br />
Modelo MBDJT2210<br />
Entrada Fonte de Alimentação<br />
Máxima corrente de saída<br />
instantânea<br />
Máxima corrente de saída contínua 10A<br />
Sinal encoder rotativo de feedback<br />
Resistor de dissipação regenerativa<br />
Montagem<br />
Peças opcionais<br />
frontal<br />
Resistor<br />
regenerativo Peças opcionais<br />
externo RF180B DVOPM20028<br />
Monofásico<br />
200 V<br />
Monofásico<br />
200 V<br />
Monofásico<br />
200 V<br />
10000 10000 10000 DVOPM20028 DVOPM20028<br />
Resolução: Resolução: Resolução:<br />
P/r<br />
P/r<br />
P/r<br />
Conectado<br />
Conectado<br />
Conectado<br />
externamente externamente externamente<br />
MCDJT3230 15A 30A 30A MCDJT3220<br />
30A 20A<br />
RF240 RF180B Função de auto ajuste de ganho Fornecido Fornecido Fornecido<br />
Função de frenagem dinâmica Fornecido Fornecido Fornecido<br />
Temperatura ambiente 0-50°C 0-50°C 0-50°C<br />
Cabo Fonte de Alimentação<br />
Circuito Principal<br />
Cabo de aterramento<br />
Cabo Motor<br />
Corrente de Partida<br />
(Fonte de alimentação Principal)<br />
(*1)<br />
Corrente de Partida<br />
(Fonte de Alimentação Controle)<br />
(*1)<br />
Dimensões Tamanho Tamanho B<br />
HVSF<br />
0.75 - 2.0 mm 2<br />
HVSF<br />
0.75 - 2.0 mm 2<br />
HVSF<br />
0.75 - 2.0 mm 2<br />
AWG14 - 18 AWG14 - 18 AWG14 – 18<br />
HVSF 2.0 mm 2 HVSF 2.0 mm 2 HVSF 2.0 mm 2<br />
AWG14 AWG14 AWG14<br />
HVSF<br />
0.75 - 2.0 mm 2<br />
HVSF<br />
0.75 - 2.0 mm 2<br />
HVSF<br />
0.75 - 2.0 mm 2<br />
AWG14 - 18 AWG14 - 18 AWG14 - 18<br />
Max.14A Max.29A Max.29A<br />
Max.28A Max.28A Max.28A<br />
Tamanho C<br />
C<br />
SR-ZSV00024 - 21 -<br />
www.metaltex.com.br
MODEL<br />
TECHNICAL REFERENCE<br />
Product name: AC Servo Amplifier<br />
Product number: Minas-LIQI series<br />
Received by<br />
Issued on March 26, 2012<br />
(REVISION . . )<br />
Motor Business Unit, Appliances Company<br />
Panasonic Corporation<br />
Date:<br />
CHECKED CHECKED CHECKED DESIGNED<br />
7-1-1 Morofuku, Daito-City, Osaka 574-0044, Japan<br />
No. SR-ZSV00039
REVISIONS<br />
№SR-ZSV00039<br />
Date Page Sym REVISION Signed<br />
Mar. 26, 2012 - - NEWLY ISSUED Kang,Wu<br />
Motor Business Unit, Appliances Company, Panasonic Corporation
Contents<br />
№SR-ZSV00039<br />
1. Specification Overview.........................................................................................................................1<br />
2. Specifications of Interface.....................................................................................................................2<br />
2-1 Specifications of Input Signal of I/F Connector.................................................................................2<br />
2-2 Specifications of Output Signal of I/F Connector ..............................................................................4<br />
2-3 Input/Output Signal Allocation ..........................................................................................................5<br />
2-3-1 Allocation of Input Signal ..........................................................................................................5<br />
2-3-2 Allocation of Output Signal .......................................................................................................8<br />
3. Specifications of Front Panel ..............................................................................................................10<br />
3-1 Rotary switch(RSW) ........................................................................................................................10<br />
3-2 7 segment LED.................................................................................................................................11<br />
4. Basic function .....................................................................................................................................12<br />
4-1 Setting Rotational Direction.............................................................................................................12<br />
4-2 Position control ................................................................................................................................13<br />
4-2-1 Command Pulse Input ..............................................................................................................13<br />
4-2-2 Command Scaling (Electronic Gear)........................................................................................15<br />
4-2-3 Position Command Filter..........................................................................................................16<br />
4-2-4 Pulse Regeneration...................................................................................................................18<br />
4-2-5 Counter Clear (CL)...................................................................................................................21<br />
4-2-6 In-position Output (INP) ..........................................................................................................22<br />
4-2-7 Command Pulse Inhibition (INH) ............................................................................................23<br />
4-3 Setting of Regenerative Resistor ......................................................................................................24<br />
5. Gain Adjustment / Damping Control Functions .................................................................................25<br />
5-1 Automatic Adjusting Function.........................................................................................................25<br />
5-1-1 Real-time Auto Tuning.............................................................................................................26<br />
5-1-2 Adaptive Filter..........................................................................................................................31<br />
5-2 Manual Adjustment..........................................................................................................................33<br />
5-2-1 Block Diagram of Position Control Mode................................................................................34<br />
5-2-2 Gain Switching Function..........................................................................................................35<br />
5-2-3 Notch Filter ..............................................................................................................................39<br />
5-2-4 Damping Control......................................................................................................................41<br />
5-2-5 Feed Forward Function ............................................................................................................44<br />
5-2-6 3rd Gain Switching...................................................................................................................46<br />
5-2-7 Friction Torque Compensation.................................................................................................47<br />
6. Applied Functions ...............................................................................................................................49<br />
6-1 Torque Limit Switching ...................................................................................................................49<br />
6-2 Motor Movement Range Setting......................................................................................................50<br />
6-3 Electronic Gear Switching ...............................................................................................................52<br />
6-4 Setting of Sequence Movements ......................................................................................................53<br />
6-4-1 Drive prohibition input (POT , NOT ) sequence......................................................................53<br />
6-4-2 Sequence at Servo Off..............................................................................................................54<br />
6-4-3 Emergency Stop at Alarm ........................................................................................................55<br />
6-4-4 Emergency Stop at Alarm ........................................................................................................56<br />
7. Protective/Warning Functions.............................................................................................................57<br />
7-1 List of Protective Functions .............................................................................................................57<br />
7-2 Details of Protective Functions ........................................................................................................59<br />
7-3 Warning Functions ...........................................................................................................................64<br />
7-4 Protection Function Setting before Gain Adjustment ......................................................................65<br />
8. Others..................................................................................................................................................67<br />
8-1 List of parameters.............................................................................................................................67<br />
8-2 Timing Chart ....................................................................................................................................73<br />
8-2-1 Timing Chart of Operations After Turning Power On .............................................................73<br />
Motor Business Unit, Appliances Company, Panasonic Corporation
№SR-ZSV00039<br />
8-2-2 Timing Chart of Servo On/Off When Monitor is Turned Off..................................................74<br />
8-2-3 Timing Chart of Servo On/Off When Motor is Operating .......................................................74<br />
8-2-4 Timing Chart of Operations When Alarm is Issued (Servo-On Command Status)..................75<br />
8-2-5 Timing Chart of Operations When Alarm is Cleared (Servo-On Command Status) ...............76<br />
Motor Business Unit, Appliances Company, Panasonic Corporation
Basic Specification<br />
1.Specification Overview<br />
№SR-ZSV00039 - 1 -<br />
Control method IGBT PWM method sine wave drive<br />
Control mode Position Control<br />
Encoder feedback 2500p/r(resolution: 10,000) 5-wire serial incremental encoder<br />
Control signal<br />
Input<br />
output<br />
6 multi-function inputs<br />
Functions of multi-function inputs: parameter-selectable<br />
3 multi-function outputs<br />
Functions of multi-function outputs: parameter-selectable<br />
1 inputs each<br />
Input Both line driver interface and open collector interface supported using optocouple<br />
r input<br />
Pulse signal<br />
4 outputs each<br />
output<br />
Encoder pulses (phase A, B and Z signals) or external scale pulses (phase EXA, EXB and<br />
EXZ signals) output by line driver. Open collector output is also available for phase Z<br />
and EXZ signals.<br />
Communication function(USB)<br />
Personal computer, etc. can be connected for parameter setting configuration and status<br />
monitoring.<br />
Front panel ①7 seg LED 2pcs ②RSW 1pcs<br />
Regeneration External resistor<br />
Dynamic brake Provided<br />
Control input<br />
Deviation counter clear, command pulse input inhibition, electronic gear switching,<br />
damping control switching, etc.<br />
Control output In-position, etc.<br />
Maximum command<br />
pulse frequency<br />
500 kpps<br />
Input pulse train<br />
Differential input; parameter-selectable (1) Positive/Negative 2) Phase A/Phase B 3)<br />
Command/Direction)<br />
Function<br />
Position control<br />
Common<br />
Input pulse<br />
Command scaling<br />
(electric gear ratio<br />
setting)<br />
1/1000 - thousandfold<br />
Encoder resolution (numerator) and command pulse count per motor revolution (denominator)<br />
can be arbitrarily specified between 1-2 20 for numerator and 1-2 20 for denominator<br />
but use within the range above.<br />
Smoothing filter Selectable between first order filter and FIR filter for command input.<br />
Damping control Available<br />
Auto tuning<br />
Identifying load inertia real-time and automatically setting gain that meets set stiffness<br />
when the motor is driving by a operation command from the host or drive<br />
Dividing encoder pulse Pulse count can be arbitrarily specified (up to encoder pulse count).<br />
Overvoltage, undervoltage, overspeed, overload, overheat, overcurrent,<br />
Protective function<br />
encoder abnormalities<br />
Position deviation fault, Command pulse division, EEPROM error, etc.<br />
Alarm data trace back function Alarm data history can be viewed.<br />
Motor Business Unit, Appliances Company, Panasonic Corporation
2.Specifications of Interface<br />
2-1 Specifications of Input Signal of I/F Connector<br />
Input signals and their functions<br />
Category Signal Code<br />
Common<br />
Input pulse<br />
Control input<br />
Power supply<br />
Connector<br />
pin No.<br />
Command pulse inp PULS1 20<br />
ut 1 PULS2 21<br />
Command direction i SIGN1 22<br />
nput 1 SIGN2 23<br />
Servo On SRV-ON<br />
Positive overtravel<br />
limit<br />
Negative overtravel<br />
limit<br />
Deviation counter<br />
clear<br />
Item<br />
COM+ 1 Plus terminal of an external 12 - 24 V DC power<br />
COM- 11 Minus terminal of an external 12 - 24 V DC power<br />
POT<br />
NOT<br />
CL<br />
Alarm clear A-CLR<br />
Command pulse<br />
inhibition input<br />
INH<br />
2<br />
(SI1)<br />
*<br />
7<br />
(SI6)<br />
*<br />
6<br />
(SI5)<br />
*<br />
4<br />
(SI3)<br />
*<br />
3<br />
(SI2)<br />
*<br />
5<br />
(SI4)<br />
*<br />
№SR-ZSV00039 - 2 -<br />
Position command pulse input terminal dedicated for the line<br />
driver output.<br />
This input is invalid with the default setting.<br />
For details, see Section 4-2-1.<br />
Digital input to enable/disable the drive (with and without p<br />
ower to the motor).<br />
This is an overtravel limit to the positive direction.<br />
The operation when this input is turned on is set by Pr5.04<br />
"Over-travel inhibit input setup".<br />
Before use, set "Over-travel inhibit input setup" to any value other<br />
than 1, and connect pins so that the input is turned on when the<br />
signal input exceeds the moving range in the positive direction of<br />
the moving part of the machine.<br />
An overtravel limit to the negative direction.<br />
The operation when this input is turned on is set by Pr5.04<br />
"Over-travel inhibit input setup".<br />
Before use, set "Over-travel inhibit input setup" to any value other<br />
than 1, and connect pins so that the input is turned on when the<br />
signal input exceeds the moving range in the negative direction of<br />
the moving part of the machine.<br />
Digital input to clear the deviation counter.<br />
This input clears the counter at the edges with the default setting.<br />
To change the setting, use Pr5.17 "Counter clear input mode".<br />
For details, see Section 4-2-5.<br />
This input clears the alarm state.<br />
Note some alarms cannot be cleared with this input.<br />
Digital input to inhibit the position command pulse input<br />
Before use, set Pr5.18 "Invalidation of command pulse inhibit<br />
input" to 0.<br />
For details, see Section 4-2-7.<br />
*1 "-" in the table means that operations do not depend on "on/off" of the input signal.<br />
Motor Business Unit, Appliances Company, Panasonic Corporation
Category Signal Code<br />
Connector<br />
pin No.<br />
Item<br />
№SR-ZSV00039 - 3 -<br />
Command scaling<br />
switch 1<br />
DIV1 -<br />
This input switches the command scaling numerator.<br />
For details, see Section 6-4.<br />
This input switches frequencies applied for the damping control.<br />
Damping switch 1 VS-SEL1 -<br />
Together with the damping switch 2 (VS-SEL2), it is possible to<br />
switch between four frequencies at the maximum.<br />
For details, see Section 5-2-4.<br />
Digital input to switch the gains between the 1st and 2nd in the<br />
Gain switch GAIN - servo loop.<br />
For details, see Section 5-2-2.<br />
Torque limit switch TL-SEL -<br />
Digital input to switch between the 1st and 2nd torque limits.<br />
For details, see Section 6-1.<br />
This input switches frequencies applied for the damping control.<br />
Damping switch 2 VS-SEL2 -<br />
Together with the damping switch 1 (VS-SEL1), it is possible to<br />
switch between four frequencies at the maximum.<br />
For details, see Section 5-2-4.<br />
Command scaling<br />
switch 2<br />
DIV2 <br />
This input switches the command scaling.<br />
For details, see Section 6-3.<br />
Forced Alarm Input E-STOP Generates Err87.0 "Compulsory alarm input protection".<br />
The "*" mark attached to pin numbers displays that functions of signals and logics can be altered among pins with number<br />
Pr4.00 - Pr4.05 (SI* input selection). Note that pin numbers assignable to the following functions cannot be changed.<br />
Deviation Counter Clear Input (CL): SI3; Command Pulse Inhibition Input (INH): SI4<br />
No function is allocated to the connector pins marked with "-" in the default setting.<br />
Control input<br />
Motor Business Unit, Appliances Company, Panasonic Corporation
2-2 Specifications of Output Signal of I/F Connector<br />
Output signals and their functions<br />
Category Signal Code<br />
Common<br />
Pulse output<br />
Control output<br />
Control output<br />
Frame ground FG<br />
Connector<br />
pin No.<br />
Shell<br />
26<br />
Signal ground GND 12<br />
Phase A signal output<br />
Phase B signal output<br />
Phase Z signal output<br />
OA+ 13<br />
OA- 14<br />
OB+ 15<br />
OB- 16<br />
OZ+ 17<br />
OZ- 18<br />
Phase Z signal output CZ 19<br />
Servo alarm output ALM<br />
Servo ready output S-RDY<br />
Motor holding brake<br />
release<br />
In-position INP<br />
8<br />
(SO1)<br />
*<br />
10<br />
(SO3)<br />
*<br />
BRK-OFF -<br />
9<br />
(SO2)<br />
*<br />
Torque limited TLC -<br />
Zero speed ZSP -<br />
In-position 2 INP2 -<br />
Warning 1 WARN1 -<br />
Warning 2 WARN2 -<br />
Output for<br />
presence/absence of<br />
position command<br />
Alarm clear attribute<br />
output<br />
P-CMD -<br />
ALM-ATB -<br />
Main Power output P-ON -<br />
Item<br />
Internally connected with the earth terminal.<br />
№SR-ZSV00039 - 4 -<br />
Signal ground<br />
The signal ground is internally isolated from the control signal<br />
power supply (COM-).<br />
Differential outputs after the parameterized scaling of either an<br />
encoder signal or an external scale signal (A, B, and Z phases)<br />
(RS422 equivalent).<br />
The ground terminal of the line driver in the output circuit is<br />
connected to the signal ground (GND) and thus not isolated.<br />
The maximum frequency of the pulse output is 4 Mpps after<br />
quadrature.<br />
Open collector output of phase Z signal<br />
The emitter terminal of the transistor in the output circuit is<br />
connected to the signal ground (GND) and thus not isolated.<br />
Digital output to display the alarm state.<br />
Turns on the output transistor in a normal state, and turns off the<br />
output transistor when an alarm is issued.<br />
Digital output to display the driver is ready to be enabled.<br />
The output transistor turns on when both the main and control<br />
power supplies are properly provided and no alarm is shown.<br />
Turns on the output transistor after absolute data are transferred,<br />
when the absolute I/F function is valid in the absolute mode.<br />
Outputs a timing signal that activates the electromagnetic brake of<br />
the motor.<br />
Turns on the output transistor at the time the electromagnetic<br />
brake is released.<br />
Digital output to give an in-position signal.<br />
Turns on the output transistor in the in-position state.<br />
For details, see Section 4-2-6.<br />
Digital output to display the torque is limited.<br />
Turns on the output transistor while torque is limited.<br />
Digital output to display the zero speed state.<br />
Turns on the output transistor while zero-speed is detected.<br />
Outputs the in-position 2 signal.<br />
Turns on the output transistor in the state of in-position.<br />
For details, see Section 4-2-6.<br />
Outputs a warning output signal that has been set by Pr4.40<br />
"Selection of alarm output 1".<br />
Turns on the output transistor while a warning is issued.<br />
Outputs a warning output signal that has been set by Pr4.41<br />
"Selection of alarm output 2".<br />
Turns on the output transistor while a warning is issued.<br />
Turns on the output transistor when a position command is<br />
present.<br />
・Turns on the output transistor when an alarm that can be cleared<br />
is issued.<br />
・Turns on the output transistor when the main DC power after<br />
commuting is in low level.<br />
·The "*" mark attached to pin numbers displays that signal functions can be altered among pins with number Pr4.10 - Pr4.10 (which<br />
can be selected by SO* output).<br />
·No function is allocated to the connector pins marked with "-" in the default setting.<br />
Motor Business Unit, Appliances Company, Panasonic Corporation
2-3 Input/Output Signal Allocation<br />
The assignment of the input/output signals can be changed from the default setting.<br />
№SR-ZSV00039 - 5 -<br />
2-3-1 Allocation of Input Signal<br />
An input signal that you wish can be assigned to an input pin of the I/F connectors. It is also possible to change the<br />
logic.<br />
Note that for some signals, assignment is limited. For details, see (2) "Change the default assignment for input<br />
signals."<br />
(1) Use the default signal assignment<br />
The following table shows the default setting for the signal assignment.<br />
Input signals*2<br />
Corresponding<br />
parameter<br />
SI1 input Pr4.00<br />
SI2 input Pr4.01<br />
SI3 input Pr4.02<br />
SI4 input Pr4.03<br />
SI5 input Pr4.04<br />
SI6 input Pr4.05<br />
Default value<br />
(): Decimal<br />
number<br />
00000003h<br />
(3)<br />
00000004h<br />
(4)<br />
00000007h<br />
(7)<br />
00000088h<br />
(136)<br />
00000082h<br />
(130)<br />
00000081h<br />
(129)<br />
Default status<br />
Signal Logic *1<br />
SRV-ON a connect<br />
A-CLR a connect<br />
CL a connect<br />
INH b connect<br />
NOT b connect<br />
POT b connect<br />
*1 "a connect" and "b connect" represent the following respectively:<br />
a connect : A signal input is open with COM-, and thus the function is invalid (OFF state).<br />
A signal input is connected with COM-, and thus the function is valid (ON state).<br />
b connect : A signal input is open with COM-, and thus the function is valid (ON state).<br />
A signal input is connected with COM-, and thus the function is invalid (OFF state).<br />
In this specification, a signal input is defined ON when its function is valid; OFF when the function is invalid.<br />
*2 For pin numbers assigned as input signals SI1 – SI10, see Specifications.<br />
*3 The mark "-" displays that there is no function assigned.<br />
Motor Business Unit, Appliances Company, Panasonic Corporation
(2) Change the default assignment for input signals<br />
To reassign an input signal, change the following parameter.<br />
№SR-ZSV00039 - 6 -<br />
Category No. Parameter Setup range Unit Function<br />
To assign a function to the input SI1.<br />
Set this parameter with the hexadecimal system. *1<br />
Following the hexadecimal form, set each control mode as follows:<br />
4 00 SI1 input selection<br />
4 01 SI2 input selection<br />
4 02 SI3 input selection<br />
4 03 SI4 input selection<br />
4 04 SI5 input selection<br />
4 05 SI6 input selection<br />
0~<br />
00FFFFFFh<br />
0~<br />
00FFFFFFh<br />
0~<br />
00FFFFFFh<br />
0~<br />
00FFFFFFh<br />
0~<br />
00FFFFFFh<br />
0~<br />
00FFFFFFh<br />
-<br />
-<br />
-<br />
-<br />
-<br />
-<br />
000000**h<br />
Enter a function number in the place marked with "**."<br />
Please refer to the function number table shown later in this section.<br />
The setting of logics is also included in the function numbers.<br />
If you wish to assign to a pin DIV1_a connect,<br />
the setting will be0000000Ch.<br />
To assign a function to the input SI2.<br />
Set this parameter with the hexadecimal system.<br />
Settings can be made in the same way for Pr4.00.<br />
To assign a function to the input SI3.<br />
Set this parameter with the hexadecimal system.<br />
Settings can be made in the same way for Pr4.00.<br />
To assign a function to the input SI4.<br />
Set this parameter with the hexadecimal system.<br />
Settings can be made in the same way for Pr4.00.<br />
To assign a function to the input SI5.<br />
Set this parameter with the hexadecimal system.<br />
Settings can be made in the same way for Pr4.00.<br />
To assign a function to the input SI6.<br />
Set this parameter with the hexadecimal system.<br />
Settings can be made in the same way for Pr4.00.<br />
Motor Business Unit, Appliances Company, Panasonic Corporation
Function number table<br />
Signal<br />
Code Setting<br />
a connect b connect<br />
Invalid - 00h Not available<br />
Positive overtravel limit POT 01h 81h<br />
Negative overtravel limit NOT 02h 82h<br />
Servo on SRV-ON 03h 83h<br />
Alarm clear A-CLR 04h Not available<br />
(No setting) - 05h 85h<br />
Gain switch GAIN 06h 86h<br />
Deviation counter clear CL 07h Not available<br />
Command pulse inhibition INH 08h 88h<br />
Torque limit switch TL-SEL 09h 89h<br />
Damping switch 1 VS-SEL1 0Ah 8Ah<br />
Damping switch 2 VS-SEL2 0Bh 8Bh<br />
Command scaling switch DIV1 0Ch 8Ch<br />
Command scaling switch 2 DIV2 0Dh 8Dh<br />
(No setting) - 0Eh~13h 8Eh~93h<br />
Forced alarm input E-STOP 14h 94h<br />
(No setting) - 15h 95h<br />
№SR-ZSV00039 - 7 -<br />
Precautions:<br />
・Do not set any value other than set values specified in the table.。If it is set other than values specified in the<br />
table,Err33.2 "IF input function number error 1 protection" or Err33.3 "IF input function number error 2 protection" will occur.<br />
And the (No setting) in the table is set to protection function. Because input do not operate, please set it to invalid(00h).<br />
・A function can not be assigned to more than one signal. If any function is assigned to more than one signal, Err33.0 "IF overlaps<br />
allocation error 1 protection" and Err33.1 "IF overlaps allocation error 2 protection" will occur.<br />
・Deviation Counter Clear (CL) can be assigned only to SI7 Input. If it is assigned to the other signals, Err33.6 "CL fitting error<br />
protection" will occur.<br />
・Command Pulse Inhibition (INH) can be assigned only to SI10 Input. If it is assigned to the others, Err33.7 "INH fitting error<br />
protection" will occur.<br />
・Control input pins set as invalid do not affect operations.<br />
・Servo-on Input Signal (SRV-ON) must always be assigned. When it is not assigned, Servo-on cannot be activated<br />
Motor Business Unit, Appliances Company, Panasonic Corporation
№SR-ZSV00039 - 8 -<br />
2-3-2 Allocation of Output Signal<br />
Output signals can assign any function except Servo Alarm Output (ALM) to output pins of the I/F connector.<br />
The logic cannot be changed for the output pins.<br />
(1) Use the default signal assignment<br />
The following table shows the default setting for the signal assignment.<br />
Output signals *1<br />
Corresponding<br />
parameter<br />
SO1 output Pr4.10<br />
SO2 output Pr4.11<br />
SO3 output Pr4.12<br />
Default value<br />
(): Decimal<br />
number<br />
00000001h<br />
(1)<br />
00000004h<br />
(4)<br />
00000002h<br />
(2)<br />
Default status<br />
Signal<br />
ALM<br />
INP<br />
S-RDY<br />
*1 For pin numbers assigned as output signals SO1 – SO3, see Specifications.<br />
Motor Business Unit, Appliances Company, Panasonic Corporation
(2) Change the default assignment for output signals<br />
To reassign an output signal, change the following parameter.<br />
№SR-ZSV00039 - 9 -<br />
Category No. Parameter Setup range Unit Function<br />
To assign a function to the output SO1.<br />
Set this parameter with the hexadecimal system.*1<br />
Following the hexadecimal form, set each control mode as follows:<br />
4 10 SO1 output selection<br />
4 11 SO2 output selection<br />
4 12 SO3 output selection<br />
Function number table<br />
0~<br />
00FFFFFFh<br />
0~<br />
00FFFFFFh<br />
0~<br />
00FFFFFFh<br />
-<br />
-<br />
-<br />
000000**h<br />
Enter a function number in the place marked with "**."<br />
Please refer to the function number table shown later in this section.<br />
To assign a function to the output SO2.<br />
Set this parameter with the hexadecimal system.<br />
Settings can be made in the same way for Pr4.10.<br />
To assign a function to the output SO3.<br />
Set this parameter with the hexadecimal system.<br />
Settings can be made in the same way for Pr4.10.<br />
Signal Code Setting<br />
Invalid - 00h<br />
Servo alarm output ALM 01h<br />
Servo ready output S-RDY 02h<br />
Motor holding brake release BRK-OFF 03h<br />
In-position INP 04h<br />
(No setting) - 05h<br />
Torque limited TLC 06h<br />
Zero speed ZSP 07h<br />
(No setting) - 08h<br />
Warning 1 WARN1 09h<br />
Warning 2 WARN2 0Ah<br />
Output for presence/absence of<br />
position command<br />
P-CMD 0Bh<br />
In-position 2 INP2 0Ch<br />
(No setting) - 0Dh<br />
Alarm attribute output ALM-ATB 0Eh<br />
(No setting) - 0Fh<br />
Main power on output P-ON 10h<br />
Precautions:<br />
The same function can be assigned to multiple output signals.<br />
A control output pin set as invalid normally keeps the output transistor turned off.<br />
Do not set any value other than set values specified in the table.<br />
If it is set to other than set values specified in the table, Err33.4「I/F output function code error<br />
will occur. And the (No setting) in the table is set to protection function..If it is set to any values ,output will get unstable.<br />
Motor Business Unit, Appliances Company, Panasonic Corporation
3.Specifications of Front Panel<br />
3-1 Rotary switch(RSW)<br />
№SR-ZSV00039 - 10 -<br />
By manipulating the RSW、Pr.0.03(selection of stiffness at real-time auto-gain tuning) was corrected by setting<br />
the RSW, and can be changed from the front panel gain control.<br />
RSW setting<br />
The stiffness correction<br />
Example)Pr0.03=8<br />
Parameter Pr0.03<br />
is changed<br />
Stiffness after<br />
correction<br />
LED Display<br />
PC ±0 8 Pc Possible<br />
+1 +1 9 9<br />
+2 +2 10 10<br />
+3 +3 11 11<br />
+4 +4 12 12<br />
+5 +5 13 13<br />
+6 +6 14 14<br />
+7 +7 15 15<br />
- ±0 8 8<br />
-7 -7 1 1<br />
-6 -6 2 2<br />
-5 -5 3 3<br />
-4 -4 4 4<br />
-3 -3 5 5<br />
-2 -2 6 6<br />
-1 -1 7 7<br />
Impossible<br />
*1 The setting value is 0 that the arrow of rotary switch upward direction. The value is increased<br />
while the arrow is turned by clockwise direction.<br />
Motor Business Unit, Appliances Company, Panasonic Corporation
3-2 7 segment LED<br />
№SR-ZSV00039 - 11 -<br />
At power-up after displaying the check pattern, perform the following normal display.<br />
If you operate the front RSW will show the real-time stiffness value of RSW after adjustment for the front.<br />
However, when an alarm occurs when an alert will display a warning code, the alarm code (main + sub)。<br />
Servo-off state<br />
[--]<br />
Control power ON<br />
All display<br />
Dot display<br />
Servo-on command Servo-off command<br />
Alarm occur Alarm clear<br />
< Alarm><br />
(riht dot:main power OK)<br />
(left dot:motor electrified)<br />
The main code and sub-code(+left dot) of alarm<br />
code(algorism) display alternantly.<br />
(For example:overload)<br />
Main code<br />
<br />
[88] display<br />
Priority display of PANATERM and panel RSW is decided by the vaule of RSW.<br />
The display of right dot means main power OK. The diplay of left dot means motor electrified.<br />
Servo on/off state is displayed by character。<br />
Set the stiffness by using computer(PANATERM).<br />
Servo-on state<br />
[Pc]<br />
<br />
Decimal indicate:<br />
(right dot:main power OK)<br />
Sub-code<br />
(+left dot)<br />
Panel RSW<br />
operate<br />
RSW=0<br />
confirm(2s)<br />
Warning occur<br />
< Warning ><br />
RSW operating<br />
RSW except 0<br />
confirm(2s)<br />
RSW confirm<br />
latch:settle problem+alarm clear<br />
No latch:settle problem<br />
Warning code(hex) and normal state display<br />
alternantly. Left dot flash while warning occur.<br />
(For example:overload)<br />
Warning code(about 2s)<br />
Left dot flash<br />
Panel RSW priority indicate (RSW≠0)<br />
LED displays a real-time stiffness in<br />
algorism after adjustment for the<br />
RSW. It can not be set by computer.<br />
Panel RSW<br />
operate<br />
Normal(about 4s)<br />
Motor Business Unit, Appliances Company, Panasonic Corporation
Cate-<br />
gory<br />
4.Basic function<br />
4-1 Setting Rotational Direction<br />
The rotation direction of the motor to the directions of position command can be switched.<br />
■Related parameters<br />
No. Parameter Setup range Unit Function<br />
0 0 Rotational<br />
direction setup<br />
0~1<br />
№SR-ZSV00039 - 12 -<br />
- Specifies the relationship between the commanded direction and the<br />
direction of rotation of the motor.<br />
0 : CW motor rotation for positive direction command<br />
1 : CCW motor rotation for positive direction command<br />
As the direction of motor rotation, clockwise as seen from the shaft end to the load is defined as CW and<br />
counterclockwise as CCW<br />
The positive or negative direction referred to in this document displays the direction as specified with this parameter.<br />
The table below shows the relationships with positive overtravel limit and negative overtravel limit as examples.<br />
Pr0.00<br />
Command<br />
direction<br />
Direction of<br />
motor rotation<br />
Positive overtravel<br />
limit<br />
Negative overtravel<br />
limit<br />
0 Positive CW Enabled <br />
0 Negative CCW Enabled<br />
1 Positive CCW Enabled <br />
1 Negative CW Enabled<br />
Motor Business Unit, Appliances Company, Panasonic Corporation
№SR-ZSV00039 - 13 -<br />
4-2 Position control<br />
Position control is performed based on a position command (pulse train) input from the controller. This section<br />
describes basic settings for position control.<br />
4-2-1 Command Pulse Input<br />
The input of position command (pulse train) use PULS1,PULS2,SIGN1,SIGN2.<br />
Three command pulse formats are supported: 2-phase pulse, positive pulse train/negative pulse train and pulse<br />
train + sign. The pulse format must be selected out of the three and the pulse counting direction must be specified<br />
according to the specifications of the controller and equipment installation condition.<br />
■Related parameters<br />
Category No. Parameter Setup range Unit Function<br />
0<br />
0<br />
6<br />
*<br />
7<br />
*<br />
Position<br />
command<br />
(pulse train)<br />
Controller Servo drive<br />
CL input<br />
INH input<br />
Pulse output<br />
INP<br />
Output<br />
Command pulse<br />
rotational direction<br />
setup<br />
Command pulse input<br />
mode setup<br />
Command<br />
pulse input<br />
section<br />
Pulse regenerationfunction<br />
01 <br />
03 <br />
Command<br />
scaling<br />
function<br />
Counter clear function<br />
Position command<br />
filter<br />
function<br />
Command pulse inhibition function<br />
INP outputfunction<br />
Specifies the counting direction for command pulse input.<br />
See the table on the following page for the details.<br />
Specifies the counting mode for command pulse input.<br />
See the table on the following page for the details.<br />
Position control<br />
section<br />
Motor Business Unit, Appliances Company, Panasonic Corporation
№SR-ZSV00039 - 14 -<br />
The following table shows the combinations of Pr0.06 "Command pulse rotational direction setup" and Pr0.07<br />
"Command pulse input mode setup"<br />
Pulses are counted at the edges with arrows in the table.<br />
Pr0.06 Pr0.07 Command pulse Signal Positive command Negative command<br />
t1 t1<br />
t1 t1<br />
0<br />
1<br />
0<br />
or<br />
2<br />
1<br />
2-phase pulse with<br />
90 difference<br />
(Phase A + Phase B)<br />
Positive pulse train +<br />
Negative pulse train<br />
3 Pulse train + Sign<br />
0<br />
or<br />
2<br />
1<br />
2-phase pulse with<br />
90 difference<br />
(Phase A + Phase B)<br />
Positive pulse train +<br />
Negative pulse train<br />
3 Pulse train + Sign<br />
PULS<br />
SIGN<br />
PULS<br />
SIGN<br />
PULS<br />
SIGN<br />
PULS<br />
SIGN<br />
PULS<br />
SIGN<br />
PULS<br />
SIGN<br />
Phase A<br />
Phase B advanced by 90 deg from<br />
phase A<br />
Phase B delayed by 90 deg from phase<br />
A<br />
Phase B delayed by 90 deg from<br />
phase A<br />
Phase B advanced by 90 deg from<br />
phase A<br />
Max. allow-<br />
Minimum required time width [μs]<br />
PULS/SIGN signal<br />
able input<br />
frequency<br />
t1 t2 t3 t4 t5 t6<br />
PULS1, 2, SIGN1, 2<br />
Line driver<br />
Open collector<br />
500 kpps<br />
200 kpps<br />
2<br />
5<br />
1<br />
2.5<br />
1<br />
2.5<br />
1<br />
2.5<br />
1<br />
2.5<br />
1<br />
2.5<br />
Phase B<br />
Phase A<br />
t6<br />
Phase B<br />
t1<br />
t1<br />
t6<br />
t2<br />
t2<br />
T4<br />
t4<br />
t1<br />
t2<br />
t2<br />
T5<br />
H<br />
t5<br />
t3<br />
t3<br />
Motor Business Unit, Appliances Company, Panasonic Corporation<br />
T4<br />
t2<br />
t2<br />
T5<br />
t6<br />
t6 L<br />
t1 t1<br />
t1<br />
t1<br />
L t6 t6 H<br />
t6<br />
t1<br />
t1<br />
t4<br />
t1<br />
t1<br />
t5<br />
t2<br />
t1<br />
t2<br />
t6
№SR-ZSV00039 - 15 -<br />
4-2-2 Command Scaling (Electronic Gear)<br />
This function multiplies a pulse command value input from the controller by the specified scaling factor to use as a position<br />
command to the position control section. Using this function allows arbitrary setting of the motor revolution and distance<br />
per unit input command pulse and increase of a command pulse frequency when the required motor speed cannot be<br />
obtained due to the limit to the controller pulse output capability.<br />
Related parameters<br />
Category No. Parameter Setup range Unit Function<br />
0 08<br />
0 09<br />
0 10<br />
Command pulse counts<br />
per one motor<br />
revolution<br />
1st numerator of<br />
electronic gear<br />
Denominator of<br />
electronic gear<br />
0<br />
1048576<br />
0<br />
1073741824<br />
1<br />
1073741824<br />
pulse<br />
<br />
<br />
Specifies the command pulse count corresponding to one revolution<br />
of the motor.<br />
When this setting is 0, Pr0.09 "1st numerator of electronic gear" and<br />
Pr0.10 "Denominator of electronic gear" are valid.<br />
This setting is invalid in full-closed control.<br />
Specifies the numerator for scaling for a command pulse input.<br />
Valid when Pr0.08 "Command pulse counts per one motor revolution"<br />
is 0 or in full-closed control.<br />
When this parameter is set to 0, the encoder resolution is set to the<br />
numerator for position control, and for full-closed control, the<br />
command scaling ratio becomes 1:1.<br />
Specifies the denominator for scaling for a command pulse input.<br />
Valid when Pr0.08 "Command pulse counts per one motor revolution"<br />
is 0 or in full-closed control.<br />
The relationships between Pr0.08, 0.09, and 0.10 in position control<br />
Pr0.08 Pr0.09 Pr0.10 Command scaling<br />
11048576<br />
0<br />
<br />
(No effect)<br />
<br />
(No effect)<br />
0 11073741824<br />
11073741824 11073741824<br />
Command<br />
pulse input<br />
* The process shown in the above diagram is executed in<br />
accordance with the set value of Pr0.08, regardless of settings<br />
of Pr0.09 and Pr0.10.<br />
Command<br />
pulse input<br />
Encoder resolution *1<br />
Position<br />
command<br />
* When the set value of both Pr0.08 and Pr0.09 is 0, the<br />
process shown in the above diagram is executed in accordance<br />
with the set value of Pr0.10.<br />
Command<br />
pulse input<br />
[Set value of Pr0.08]<br />
Encoder resolution *1<br />
[Set value of Pr0.10]<br />
[Set value of Pr0.09]<br />
[Set value of Pr0.10]<br />
Position<br />
command<br />
Position<br />
command<br />
* When the set value of Pr0.08 is 0 and that of Pr0.09 is not 0,<br />
the process shown in the above diagram is executed in accordance<br />
with the set values of Pr0.09 and Pr0.10.<br />
Motor Business Unit, Appliances Company, Panasonic Corporation
4-2-3 Position Command Filter<br />
A command filter can be specified to smooth a position command after scaling (electric gear).<br />
Related parameters<br />
Category No. Parameter<br />
2 22<br />
2 23<br />
Position command<br />
smoothing filter<br />
Position command FIR<br />
filter<br />
Setup<br />
range<br />
010000 0.1 ms<br />
010000 0.1 ms<br />
Unit Function<br />
№SR-ZSV00039 - 16 -<br />
Specifies the first order filter time constant for a position command.<br />
Specifies the FIR filter time constant for a position command.<br />
Pr2.22 "Position command smoothing filter"<br />
Specifies the first order filter time constant for a square wave command with a target velocity of Vc as shown in the<br />
figure below.<br />
Velocity<br />
[r/min]<br />
Vc<br />
Vc0.632<br />
*1<br />
Vc0.368<br />
*1<br />
Position command<br />
before<br />
filtering<br />
Position command<br />
after filtering<br />
Positional command smoothing<br />
filter Position command<br />
smoothing filter setting time<br />
[ms]<br />
(Pn2Pr2.22×0.1 ms)<br />
Waiting time for swiching<br />
filter *2<br />
*1 Actual filter time constant contains absolute error of 0.4 ms maximum when the set value multiplied by 0.1 ms is less than<br />
100 ms and relative error of 0.2% maximum when the set value multiplied by 0.1 ms is 20 ms or greater.<br />
*2 Pr2.22 " Positional command smoothing filter " is switched when "in-position" is being output and when a command whose<br />
command pulse per time (0.166 ms) changes from 0 to any state except 0 is rising.<br />
Specifically when filter time constant is decreased and the in-position range is increased, the motor may temporarily rotates at<br />
a faster speed than the command speed if accumulated pulses—an area acquired by integrating the difference between the position<br />
command before filtering and the position command after filtering by time—are left in the filter at the point above. This<br />
is because accumulated pulses are rapidly cleared immediately after the switching and the motor goes back to the initial position.<br />
Use caution.<br />
*3 There is a delay until the change in Pr2.22 " Positional command smoothing filter " is applied to internal calculation. If the switching<br />
timing described in *2 comes during the delay, the change may be suspen<br />
Time<br />
Motor Business Unit, Appliances Company, Panasonic Corporation
№SR-ZSV00039 - 17 -<br />
Pr2.23 "Position command FIR filter"<br />
Specifies the time required to reach Vc for a square wave command with a target velocity of Vc as shown in the figure<br />
below.<br />
Velocity<br />
[r/min]<br />
Vc<br />
Position command<br />
before filtering<br />
Position command<br />
after filtering<br />
Position command FIR filter<br />
setting time [ms]<br />
(Pn2Pr2.230.1 ms) *1<br />
Waiting time for swiching<br />
filter *2<br />
*1 Actual average travel times contains absolute error of 0.2 ms maximum when the set value multiplied by 0.1 ms is less than<br />
10 ms and relative error of 1.6% maximum when the set value multiplied by 0.1 ms is 10 ms or greater.<br />
*2 Before changing Pr2.23 "Position command FIR filter," stop the command pulse, and wait until the time for filter switching<br />
passes. The time for filter switching is as follows: the set value 0.1 ms + 0.25 ms in the range of 10 ms or smaller, and the<br />
set value 0.1 ms 1.05 ms in the range of 10 ms or greater. When changing Pr2.23 "Position command FIR filter" during<br />
inputting a command pulse, the change is not updated immediately. It is updated when no command pulse is present during<br />
the time for filter switching.<br />
*3 There is a delay until the change in Pr2.23 "Position command FIR filter" is applied to internal calculation. If the switching<br />
timing described in *2 comes during the delay, the change may be suspended.<br />
Time<br />
Motor Business Unit, Appliances Company, Panasonic Corporation
№SR-ZSV00039 - 18 -<br />
4-2-4 Pulse Regeneration<br />
A distance can be transmitted from the servo drive as phase A and phase B pulses signal to the controller. If the<br />
output source is an encoder, the phase Z signal is output one time per rotation of the motor.<br />
■Related parameters<br />
Category No. Parameter Setup range Unit Function<br />
0 11<br />
0 12<br />
5 03<br />
5 33<br />
Output pulse counts per<br />
one motor revolution<br />
Reversal of pulse<br />
output logic<br />
Denominator of pulse<br />
output division<br />
Pulse regenerative<br />
output limit setup<br />
1262144 P/r<br />
03 <br />
0262144 <br />
01 <br />
Specifies the output pulse resolution as the output pulse count per<br />
rotation for OA and OB. Accordingly, if the pulse count has been<br />
multiplied by 4, the equation below applies.<br />
Output pulse resolution per rotation = Set value of Pr0.11 4<br />
Specifies the logic of the pulse output phase B signal and the output<br />
source. Reversing the phase B pulse logic allows the phase<br />
relation of phase B pulse with reference to phase A pulse. In the<br />
full-closed control mode, an encoder or external scale can be chosen<br />
as the output source. The output source must be an encoder in<br />
other than full-closed control modes.<br />
If the output pulse counts per one motor revolution is not an integer,<br />
set "Denominator of pulse output division" to any value except 0.<br />
It is also set using a divider ratio with Pr0.11 as the numerator and<br />
Pr5.03 as the denominator. Accordingly, if the pulse count has<br />
been multiplied by 4, the equation below applies.<br />
Output pulse resolution per rotation<br />
= (Set value of Pr0.11 / Set value of Pr5.03) Encoder resolution<br />
Set the error detection function (Err28.0 "Limit of pulse replay error<br />
protection") as valid or invalid.<br />
0: Invalid 1: Valid<br />
Motor Business Unit, Appliances Company, Panasonic Corporation
№SR-ZSV00039 - 19 -<br />
The following table shows combinations of Pr0.11 "Output pulse counts per one motor revolution" and Pr5.03 "Denominator<br />
of pulse output division".<br />
Pr0.11 Pr5.03 Pulse regeneration output processing<br />
[When the output source is the encoder]<br />
1~262144 0<br />
1~262144 1~262144<br />
Encoder pulse<br />
[pulse]<br />
* When Pr5.03 is set as 0, the process shown above is executed in accordance with the set<br />
value of Pr0.11. Accordingly, each of OA and OB of pulse regeneration output will be<br />
identical to the number of pulses set in Pr0.11. The output pulse resolution will not be<br />
identical to the encoder pulse resolution or greater.<br />
* When Pr5.03 ≠ 0, the process above takes place based on the Pr0.11 and Pr5.03<br />
settings, which allows applications where the pulse count per rotation of the pulse regeneration<br />
output OA and OB is not an integer.<br />
Note that when the pulse output resolution per rotation is not a multiple of 4, output of<br />
phase Z may not be synchronous with phase A, resulting in a smaller pulse width. The<br />
output pulse resolution will not be identical to the encoder pulse resolution or greater.<br />
Details of Pr0.12 "Reversal of pulse output logic" are shown below.<br />
Pr0.12 Ph B logic Output source For positive direction For negative direction<br />
0 Non-reversed Encoder<br />
1 Reverse Encoder<br />
Encoder FB pulse<br />
[pulse]<br />
*Please do not set setting 2 and 3.<br />
PH A<br />
PH B<br />
PH A<br />
PH B<br />
[Set value of Pr0.11] 4<br />
Encoder resolution<br />
[Set value of Pr0.11]<br />
[Set value of Pr5.03]<br />
Output pulse<br />
[pulse]<br />
Output pulse<br />
[pulse]<br />
PH A<br />
PH B<br />
PH A<br />
PH B<br />
Motor Business Unit, Appliances Company, Panasonic Corporation
№SR-ZSV00039 - 20 -<br />
■Notes on pulse regeneration function<br />
The maximum output frequency of pulse regeneration output is 4 Mpps (after multiplying by 4). Operation at a<br />
speed exceeding this may cause faulty functioning of regeneration leading to displacement.<br />
PH A<br />
PH B<br />
0.25μs min<br />
By Pr5.33 "Pulse regenerative output limit setup", Err28.0 "Limit of pulse replay error protection" can be issued<br />
when reaching the limit of pulse regeneration. Note that this error message is issued by detecting the output limit<br />
of pulse regeneration, not using the maximum output frequency. The error message may be issued when frequency<br />
jumps instantaneously, depending on the rotational state of the motor such as rotational fluctuation.<br />
・When the output source is an encoder and the pulse output resolution per rotation is not a multiple of 4, phase Z<br />
may not be synchronous with phase A, leading to a smaller pulse width.<br />
PH A<br />
PH B<br />
PH Z<br />
Scaling factor: multiple of 4<br />
・When an incremental encoder is used, the first phase Z signal after power-up may not agree with the pulse width as<br />
shown above. When using a phase Z signal, operate the motor by at least one rotation after power-up, make sure<br />
that the phase Z signal has been regenerated once and use the second or later phase Z signal.<br />
PH A<br />
PH B<br />
PH Z<br />
Scaling factor: not multiple of 4<br />
* If Pr5.03 = 0 and output resolution is specified with Pr0.11, factor is always a multiple of 4.<br />
* Not in sync with ph A<br />
Motor Business Unit, Appliances Company, Panasonic Corporation
№SR-ZSV00039 - 21 -<br />
4-2-5 Counter Clear (CL)<br />
This function allows the position deviation counter value in position control to be cleared to 0 by using a deviation<br />
counter clear input (CL).<br />
■Related parameters<br />
Category No. Parameter Setup range Unit Function<br />
5 17<br />
Counter clear input<br />
mode<br />
04 <br />
Selects the input mode of deviation counter clear input.<br />
0: Invalid<br />
1: Clear by level (without reading filter)<br />
2: Clear by level (with reading filter)<br />
3: Clear by edge (without reading filter)<br />
4: Clear by edge (with reading filter)<br />
For signal width and timing of deviation clear that need deviation counter clear input (CL), see the table below.<br />
Pr5.17<br />
CL signal<br />
width<br />
Timing of clearing deviation<br />
1<br />
500 s or<br />
longer Continue to clear when the deviation counter clear input is ON*1.<br />
2 1 ms min.<br />
3<br />
100 s or<br />
longer<br />
4 1 ms min.<br />
Clear once at the edge*1 where the deviation counter clear input turns<br />
ON.<br />
*1 The deviation counter clear input being OFF represents the input photocoupler being OFF, and the deviation<br />
counter clear input being ON represents the input photocoupler being ON.<br />
Motor Business Unit, Appliances Company, Panasonic Corporation
№SR-ZSV00039 - 22 -<br />
4-2-6 In-position Output (INP)<br />
Whether or not positioning has been completed can be checked with the In-position output (INP). This signal is<br />
turned on when the absolute value of the deviation counter value in position control is in the in-position range specified<br />
with the parameter. Settings such as including in the criteria whether or not a position command has been given are<br />
also available.<br />
■Related parameters<br />
Category No. Parameter<br />
4 31<br />
4 32<br />
Positioning complete<br />
(In-position) range<br />
Positioning complete<br />
(In-position) output<br />
setup<br />
Setup<br />
range<br />
0262144<br />
Unit Function<br />
Command<br />
unit<br />
03 -<br />
4 33 INP hold time 030000 1 ms<br />
4 42<br />
2nd Positioning<br />
complete (In-position)<br />
range<br />
0262144 Comman<br />
d unit<br />
Set the threshold of position deviation that outputs the in-position signal<br />
(INP1).<br />
The unit is command by default, but it can be changed to encoder in<br />
Pr5.20 "Position setup unit select". Note that in that case, the unit of<br />
Pr0.14 "Position deviation excess setup" is also changed.<br />
Selects a condition to output the in-position signal (INP1).<br />
0: The signal turns ON when the position deviation does not exceed<br />
Pr4.31 "Positioning complete (In-position) range".<br />
1: The signal turns ON when there is no position command and the<br />
position deviation does not exceed Pr4.31 "Positioning complete<br />
(In-position) range".<br />
2: The signal turns ON when there is no position command, the<br />
zero-speed detection signal is ON, and the position deviation does<br />
not exceed Pr4.31 "Positioning complete (In-position) range".<br />
3: The signal turns ON when there is no position command and the<br />
position deviation does not exceed Pr4.31 "Positioning complete<br />
(In-position) range". Then, the signal remains turned ON until<br />
Pr4.33 "INP hold time" is over. After "INP hold time" is over, the<br />
INP output turns ON/OFF depending on the status of position<br />
command or position deviation.<br />
Set the hold time for Pr4.32 "Positioning complete (In-position) output<br />
setup" being set as 3.<br />
0: The hold time is infinite and the ON status is maintained until<br />
the next position command is given.<br />
1 - 30000: The motor remains turned ON for the period set [ms]. Note<br />
that the motor is turned OFF when a position command is<br />
issued during the hold time.<br />
Set the threshold of position deviation that outputs the in-position signal<br />
2 (INP2). INP2 turns ON whenever the position deviation does not<br />
exceed the value set in this setting, regardless of Pr4.32 "Positioning<br />
complete (In-position) output setup". (The presence/absence of a<br />
position command is irrelevant.)<br />
The unit is command by default, but it can be changed to encoder in<br />
Pr5.20 "Position setup unit select". Note that in that case, the unit of<br />
Pr0.14 "Position deviation excess setup" is also changed.<br />
The presence/absence of a position command is judged by a command issued after the position command filter.<br />
For the position command filter, see Section 4-2-3 "Position Command Filter."<br />
Motor Business Unit, Appliances Company, Panasonic Corporation
№SR-ZSV00039 - 23 -<br />
4-2-7 Command Pulse Inhibition (INH)<br />
The command pulse inhibition input signal (INH) can be used to force the command pulse input processing to stop.<br />
Turning the INH input on forces the servo drive to ignore the command pulse input and the pulse counting does not take<br />
place.<br />
This function is disabled by the factory setting. Before use, change the setting of Pr5.18 "Invalidation of command<br />
pulse inhibit input".<br />
Related parameters<br />
Category No. Parameter<br />
5 18<br />
5 19<br />
Invalidation of command<br />
pulse inhibit input<br />
Command pulse inhibit<br />
input reading setup<br />
Setup<br />
range<br />
01 <br />
04 <br />
Unit Function<br />
Enables/disables the command pulse inhibition input.<br />
0: Enable<br />
1: Disable<br />
Selects the cycle of reading the signal of command pulse inhibition<br />
input. Updates the status of signal when it is periodically read and<br />
found the same twice or more.<br />
0: 0.166 ms<br />
1: 0.333 ms<br />
2: 1 ms<br />
3: 1.666 ms<br />
4: 0.166 ms (when the signal is found the same twice or more)<br />
A prolonged cycle of reading decreases the likelihood of misoperation<br />
caused by noise, but it also reduces responsiveness to signal input.<br />
Motor Business Unit, Appliances Company, Panasonic Corporation
4-3 Setting of Regenerative Resistor<br />
This section describes the settings concerning the regenerative resistor.<br />
For detailed specifications of the regenerative resistor.<br />
Related parameters<br />
Category No. Parameter Setup range Unit Function<br />
0 16<br />
External regenerative<br />
resistor setup<br />
03 <br />
№SR-ZSV00039 - 24 -<br />
Set this parameter according to whether the built-in regenerative resistor is<br />
used as it is or the built-in resistor is isolated and an external regenerative<br />
resistor is provided.<br />
0: Use the built-in resistor and provide regeneration over.<br />
1: Use an external resistor and provide regeneration over.<br />
2: Use an external resistor but not provide regeneration over.<br />
3: Use with no regenerative resistor (no regeneration over).<br />
Motor Business Unit, Appliances Company, Panasonic Corporation
5.Gain Adjustment / Damping Control Functions<br />
5-1 Automatic Adjusting Function<br />
The following figure shows an overview of automatic adjustment function.<br />
Position Command<br />
1)Real-time auto tuning<br />
№SR-ZSV00039 - 25 -<br />
This function estimates load characteristic using motor speed and torque command, and automatically<br />
specifies basic gain with regard to position control and speed control on the basis of inertia estimation<br />
value. At the same time, setting time for positioning is reduced by adding an estimated friction torque to<br />
a torque command in advance.<br />
2)Adaptive filter<br />
Basic gain auto<br />
configuration<br />
Position/<br />
velocity<br />
Control<br />
Adaptive processing<br />
Notch filter<br />
Friction torque<br />
compensation<br />
Torque commandgeneration<br />
Load characteristic<br />
estimation<br />
Resonance frequency<br />
measurement<br />
Sarvo drive<br />
Torque command<br />
Current<br />
control<br />
Motor<br />
current<br />
Motor<br />
speed<br />
Motor<br />
Encoder<br />
Estimating a resonance frequency using a motor speed and removing the frequency components from a<br />
torque command suppresses vibrations caused by resonance.<br />
Motor Business Unit, Appliances Company, Panasonic Corporation
5-1-1 Real-time Auto Tuning<br />
№SR-ZSV00039 - 26 -<br />
Load characteristic of a machine is estimated on a real-time basis, and using the results, basic gain settings<br />
and friction compensation are automatically specified in accordance of hardness parameters.<br />
1) Scope of application<br />
This function is enabled under the following conditions:<br />
Conditions for real-time auto tuning<br />
In Servo On status.<br />
Parameters for other functions than control, such as deviation counter clearing, input<br />
Operation status<br />
signals such as command input prohibition, and torque limit settings, must be specified<br />
appropriately and normal rotation of motor must have no problems.<br />
2) Cautions<br />
Real-time auto tuning may not normally function in the following conditions. If that happens, change<br />
the load conditions/operation pattern or see the descriptions about manual tuning to manually configure<br />
relevant parameters.<br />
Conditions hindering real-time auto tuning<br />
The load inertia is too small or large with reference to the rotor inertia (smaller than three times<br />
or 20 times or larger).<br />
Load condition The load inertia varies.<br />
The mechanical stiffness is extremely low.<br />
Any non-linear characteristic exists such as backlash.<br />
Operation pattern<br />
Continuous use at a low speed of less than 100 [r/min]<br />
The acceleration is low at 2000 [r/min] per 1 [s].<br />
A speed at 100 [r/min] or higher or a acceleration/deceleration of 2000 [r/min] per 1<br />
[s] does not continue for 50 [ms] or longer.<br />
The acceleration/deceleration torque is small with reference to the uneven load/<br />
viscous friction torque.<br />
Motor Business Unit, Appliances Company, Panasonic Corporation
3) Parameters controlling operation of real-time auto tuning<br />
Configure the real-time auto tuning operation by setting the following parameters.<br />
Category No. Parameter Setup range Unit Function<br />
0 02 Real-time<br />
auto-gain tuning<br />
setup<br />
0 03 Selection of machine<br />
stiffness at realtime<br />
auto-gain tuning<br />
6 31<br />
Real time auto tuning<br />
estimation speed<br />
№SR-ZSV00039 - 27 -<br />
0~6 - Specifies the operation mode of real-time auto tuning.<br />
Setting Mode Description<br />
0 Invalid The real-time auto tuning function<br />
is disabled.<br />
1 Standard The mode for the optimum<br />
stability. No uneven load or<br />
friction compensation takes place<br />
and no gain switching is used.<br />
2 Positioning The mode for the optimum<br />
positioning. Used for a ball<br />
screw-driven device, etc. with no<br />
uneven load and little friction, as<br />
in a horizontal axis.<br />
3 Vertical axis In addition positioning mode,<br />
compensation against biased load<br />
on vertical axis is made to reduce<br />
variations in settling time of<br />
positioning.<br />
4 Friction<br />
compensation<br />
5 Load<br />
characteristic<br />
measurement<br />
In addition to the vertical axis<br />
mode, settling time of positioning<br />
is reduced for belt-drive axis<br />
where frictions are high.<br />
Basic gain settings and friction<br />
compensation settings are not<br />
changed and load characteristic<br />
estimation only is made. This is<br />
used in combination with setup<br />
support software.<br />
6 (No setting) It can not be used.<br />
0~31 - Specifies the response for enabled real-time auto tuning. A larger<br />
setting increases the speed response and servo stiffness but invites<br />
more vibration. Gradually increase the setting while monitoring the<br />
operation.<br />
While the RSW is not 0,the vaule of parameter can be<br />
corrected by actual setting of RSW.Please refer to 3. the<br />
front panel specification.<br />
0~3 -<br />
Specifies the load characteristics estimation speed for enabled<br />
real-time auto tuning. A larger setting allows faster follow-up to<br />
the variation in the load characteristics but also increases estimation<br />
fluctuation due to disturbance. The result of estimation is stored in<br />
the EEPROM every 30 minutes.<br />
Setting Mode Description<br />
0 No change Terminates estimation of load<br />
characteristic.<br />
1 Little change Responded against change of<br />
load characteristic on the order of<br />
minutes.<br />
2 Gradual change Responded against change of<br />
load characteristic on the order of<br />
3<br />
*<br />
seconds.<br />
Steep change Appropriate estimation is made<br />
against change of load<br />
characteristic.<br />
* If oscillation automatic detection is made valid from setup support<br />
software, this setting is ignored and operation is based on settings of<br />
setting value 3.<br />
Motor Business Unit, Appliances Company, Panasonic Corporation
4)Parameter changed by real-time auto tuning<br />
№SR-ZSV00039 - 28 -<br />
The real-time auto tuning function updates the following parameters using load characteristic values, in<br />
accordance with Pr0.02 "Real-time auto-gain tuning setup".<br />
Category No. Parameter Setup range Unit Function<br />
0 04 Inertia ratio 010000 %<br />
This parameter is updated if updating inertia ratio of real-time<br />
auto tuning is valid.<br />
6 07<br />
Torque command<br />
additional value<br />
-100100 %<br />
This parameter is updated if vertical axis mode of real-time auto<br />
tuning is valid.<br />
6 08<br />
6 09<br />
Positive direction<br />
torque compensation<br />
value<br />
Negative direction<br />
torque compensation<br />
value<br />
-100100 %<br />
-100100 %<br />
This parameter is updated if friction compensation mode of<br />
real-time auto tuning is valid.<br />
This parameter is updated if friction compensation mode of<br />
real-time auto tuning is valid.<br />
The real-time auto tuning function updates the following basic gain setting parameters in accordance<br />
with Pr0.03 "Selection of machine stiffness at realtime auto-gain tuning" For details, refer to 7) Basic<br />
gain parameter settings table.<br />
Category No. Parameter Setup range Unit Function<br />
If hardness setting is valid, update the setting values in accordance<br />
1 00 1st gain of position loop 030000 0.1/s with hardness.<br />
1 01 1st gain of velocity loop 132767 0.1 Hz<br />
1 02<br />
1 04<br />
1 05<br />
1 06<br />
1 07<br />
1 09<br />
1st time constant of<br />
velocity loop integration<br />
1st time constant of<br />
torque filter<br />
2nd gain of position<br />
loop<br />
2nd gain of velocity<br />
loop<br />
2nd time constant of<br />
velocity loop integration<br />
2nd time constant of<br />
torque filter<br />
110000 0.1 ms<br />
02500 0.01 ms<br />
030000 0.1/s<br />
132767 0.1 Hz<br />
110000 0.1 ms<br />
02500 0.01 ms<br />
If hardness setting is valid, update the setting values in accordance<br />
with hardness.<br />
If hardness setting is valid, update the setting values in accordance<br />
with hardness.<br />
If hardness setting is valid, update the setting values in accordance<br />
with hardness.<br />
If hardness setting is valid, update the setting values in accordance<br />
with hardness.<br />
If hardness setting is valid, update the setting values in accordance<br />
with hardness.<br />
If hardness setting is valid, update the setting values in accordance<br />
with hardness.<br />
If hardness setting is valid, update the setting values in accordance<br />
with hardness.<br />
Specify fixed values for the following parameters for real-time auto tuning.<br />
Category No. Parameter Setup range Unit Function<br />
1 03<br />
1st filter of speed<br />
detection<br />
05 <br />
If fixed parameter setting is valid, specify "0."<br />
1 08<br />
2nd filter of speed<br />
detection<br />
05 <br />
If fixed parameter setting is valid, specify "0."<br />
1 10<br />
Velocity feed forward<br />
gain<br />
01000 0.1%<br />
If fixed parameter setting is valid, specify "300" (30%).<br />
1 11<br />
Velocity feed forward<br />
filter<br />
16400 0.01 ms<br />
If fixed parameter setting is valid, set "50" (0.5 ms).<br />
1 12<br />
Torque feed forward<br />
gain<br />
01000 0.1%<br />
If fixed parameter setting is valid, specify "0."<br />
1 13<br />
Torque feed forward<br />
filter<br />
06400 0.01 ms<br />
If fixed parameter setting is valid, specify "0."<br />
(Continued)<br />
Motor Business Unit, Appliances Company, Panasonic Corporation
№SR-ZSV00039 - 29 -<br />
Specify the following parameters for real-time auto tuning in accordance with gain switching settings.<br />
Category No. Parameter Setup range Unit Function<br />
1 14 2nd gain setup 01 Specify "0" for other cases than maintaining current settings.<br />
1 15<br />
Mode of position<br />
control switching<br />
010 <br />
If gain switching is valid, specify "10."<br />
If gain switching is invalid, specify "0."<br />
1 16<br />
Delay time of position<br />
control switching<br />
010000 0.1 ms<br />
Specify "50" for other cases than maintaining current settings.<br />
1 17<br />
Level of position<br />
control switching<br />
020000 <br />
Specify "50" for other cases than maintaining current settings.<br />
1 18<br />
Hysteresis at position<br />
control switching<br />
020000 <br />
Specify "33" for other cases than maintaining current settings.<br />
1 19<br />
Position gain<br />
switching time<br />
010000 0.1 ms<br />
Specify "33" for other cases than maintaining current settings.<br />
5) Usage<br />
Control parameters are specified automatically if a value other than "0" is specified for Pr0.02 "Real-time auto-g<br />
ain tuning setup" in accordance with Pr0.03 "Selection of machine stiffness at realtime auto-gain tuning"<br />
Input an operation command after the drive has been enabled by Servo On. If estimation load characteristic is<br />
successful, Pr0.04 "Inertia ratio" is updated. In addition, some mode setting may cause changes of Pr6.07<br />
"Torque command additional value", Pr6.08 "Positive direction torque compensation value", and Pr6.09<br />
"Negative direction torque compensation value".<br />
Specifying higher settings for Pr0.03 "Selection of machine stiffness at realtime auto-gain tuning" can<br />
increase response of motor. Adjust to the optimum value while monitoring the positioning stabilization<br />
time and vibration conditions.<br />
6) Other cautions<br />
① Strange noises or vibrations may occur on the first action of turning on the servo immediately after startup<br />
or setting higher value of Pr0.03 "Selection of machine stiffness at realtime auto-gain tuning" until estimation<br />
of load characteristic becomes stable. This is not a fault if the function becomes stable soon. If oscillation<br />
or continued generation of abnormal noise through three or more reciprocating movements often<br />
occurs, take the following steps.<br />
1) Specify lower value for Pr0.03 "Selection of machine stiffness at realtime auto-gain tuning"<br />
2) Specify "0" for Pr0.02 "Real-time auto-gain tuning setup" and make real-time auto tuning invalid.<br />
3) Specify a theoretical value of device for Pr0.04 "Inertia ratio" and specify "0" for Pr6.07 "Torque<br />
command additional value", Pr6.08 "Positive direction torque compensation value", and Pr6.09 "Negative<br />
direction torque compensation value".<br />
② After occurrence of strange noises or vibrations, values of Pr0.04 "Inertia ratio," Pr6.07 "Torque command<br />
additional value", Pr6.08 "Positive direction torque compensation value", or Pr6.09 "Negative direction<br />
torque compensation value" may have been changed into extreme values. If this is the case, take Step 3)<br />
above.<br />
③ The results of real-time automatic gain tuning, such as Pr0.04 "Inertia ratio," Pr6.07 "Torque command additional<br />
value", Pr6.08 "Positive direction torque compensation value", and Pr6.09 "Negative direction<br />
torque compensation value" are written in EEPROM in every 30 minutes. Upon restarting of power, auto<br />
tuning is performed using the data for initial values. The results of real-time auto gain tuning are not<br />
stored if the power is turned off before 30 minutes have elapsed. In this case, manually write the parameters<br />
to the EEPROM before turning off the power.<br />
④ The control gain is updated when the motor is stopped. Therefore, if motor is not stopped because gain is<br />
excessively low or commands are given continually in one direction, the change in Pr0.03 “Real-time<br />
auto-tuning machine stiffness setup” may not be reflected. In this case, abnormal sound or oscillation<br />
may be generated depending on the stiffness setting that is reflected after the motor stops.<br />
After the stiffness setting is changed, be sure to stop the motor and check that the stiffness setting is reflected<br />
before performing next operation.<br />
Motor Business Unit, Appliances Company, Panasonic Corporation
7)Basic gain parameter settings table<br />
Stiffness<br />
Gain 1 Gain 2<br />
Pr1.00 Pr1.01 Pr1.02<br />
Pr1.04<br />
*2 Pr1.05 Pr1.06 Pr1.07<br />
Position<br />
[0.1/s]<br />
Speed<br />
[0.1 Hz]<br />
Velocity<br />
integral<br />
[0.1 ms]<br />
Torque<br />
[0.01 ms]<br />
Position<br />
[0.1/s]<br />
Speed<br />
[0.1 Hz]<br />
Velocity<br />
integral<br />
[0.1 ms]<br />
№SR-ZSV00039 - 30 -<br />
Pr1.09<br />
*2<br />
Torque<br />
[0.01 ms]<br />
0 20 15 3700 1500 25 15 10000 1500<br />
1 25 20 2800 1100 30 20 10000 1100<br />
2 30 25 2200 900 40 25 10000 900<br />
3 40 30 1900 800 45 30 10000 800<br />
4 45 35 1600 600 55 35 10000 600<br />
5 55 45 1200 500 70 45 10000 500<br />
6 75 60 900 400 95 60 10000 400<br />
7 95 75 700 300 120 75 10000 300<br />
A4 Series<br />
stiffness<br />
setting<br />
(Reference)<br />
*1<br />
8 115 90 600 300 140 90 10000 300 0<br />
9 140 110 500 200 175 110 10000 200<br />
10 175 140 400 200 220 140 10000 200<br />
11 320 180 310 126 380 180 10000 126 1<br />
12 390 220 250 103 460 220 10000 103 2<br />
13 480 270 210 84 570 270 10000 84 3<br />
14 630 350 160 65 730 350 10000 65 4<br />
15 720 400 140 57 840 400 10000 57 5<br />
16 900 500 120 45 1050 500 10000 45 6<br />
17 1080 600 110 38 1260 600 10000 38 7<br />
18 1350 750 90 30 1570 750 10000 30 8<br />
19 1620 900 80 25 1880 900 10000 25 9<br />
20 2060 1150 70 20 2410 1150 10000 20 10<br />
21 2510 1400 60 16 2930 1400 10000 16 11<br />
22 3050 1700 50 13 3560 1700 10000 13 12<br />
23 3770 2100 40 11 4400 2100 10000 11 13<br />
24 4490 2500 40 9 5240 2500 10000 9 14<br />
25 5000 2800 35 8 5900 2800 10000 8<br />
26 5600 3100 30 7 6500 3100 10000 7 15<br />
27 6100 3400 30 7 7100 3400 10000 7<br />
28 6600 3700 25 6 7700 3700 10000 6<br />
29 7200 4000 25 6 8400 4000 10000 6<br />
30 8100 4500 20 5 9400 4500 10000 5<br />
31 9000 5000 20 5 10500 5000 10000 5<br />
*1 Hardness settings of A4 series refers to the setting values (0 to 15) of A4 series parameter Pr22 "Real-time auto tuning machine hardness<br />
selection."<br />
*2 For 2500[p/r] encoder, a value is limited to 25, a maximal value.<br />
Motor Business Unit, Appliances Company, Panasonic Corporation
5-1-2 Adaptive Filter<br />
№SR-ZSV00039 - 31 -<br />
Vibrations are reduced by estimating resonance frequency on the basis of vibration components appearing<br />
in motor speeds under actual operations, and by removing the resonance components from torque command.<br />
1) Scope of application<br />
This function is enabled under the following conditions<br />
Conditions for the functioning of adaptive filter<br />
Control mode Control mode must be that other than torque control mode.<br />
In servo On status.<br />
Factors other than control parameters, such as prohibition of deviation counter clearing<br />
Other<br />
command input and torque limiter, are appropriately specified and normal motor rotation<br />
is possible with no problems.<br />
2) Cautions<br />
The adaptive filter may not function normally in the following conditions. If that happens, manually<br />
configure the notch filters for suppressing resonance.<br />
Conditions that interfere with operations of adaptable filter<br />
When a resonance frequency is lower than 3 times as high as speed responding<br />
frequency [Hz].<br />
Resonance point The resonance peak is low or control gain is low and its effect is not observed in the<br />
motor speed.<br />
Three or more resonance points exist.<br />
Motor speed variation including a high-frequency component is generated due to any<br />
Load<br />
nonlinear factor such as backlash.<br />
Command pattern Acceleration/deceleration is rapid at 30000 [r/min] in 1 [s] or higher.<br />
3) Related parameters<br />
The operation of the adaptive filter can be specified by using the following parameters.<br />
Category No. Parameter Setup range Unit Function<br />
Operating mode of adaptive filter is specified.<br />
2 00<br />
Adaptive filter mode<br />
setup<br />
(Continued)<br />
04 <br />
Setting value 0: Adaptive filter invalid<br />
Adaptive filter is Invalid. Current values are retained for<br />
parameters related to 3rd and 4th Notch filter.<br />
Setting value 1: One adaptive filter is valid.<br />
One adaptive filter is made valid. Update parameters related<br />
with 3rd Notch filter in accordance with adapting results.<br />
Setting value 2: Two adaptive filters are valid.<br />
Two adaptive filters are valid. Update parameters related with<br />
3rd and 4th Notch filter in accordance with adapting results.<br />
Setting value 3: Resonance frequency measurement mode<br />
Resonance frequency is measured. Measurement results are<br />
verified on PANATERM. Current values are retained for<br />
parameters related to 3rd and 4th Notch filter.<br />
Setting value 4: Clearing adapting results.<br />
Parameters related to 3rd and 4th Notch filter are made invalid<br />
and adapting results are cleared.<br />
Motor Business Unit, Appliances Company, Panasonic Corporation
№SR-ZSV00039 - 32 -<br />
The adaptive filter function automatically specifies the following parameters.<br />
Setup<br />
range<br />
Unit Function<br />
Automatically specifies the first resonance frequency estimated by the<br />
2 07 3rd Notch frequency 505000 Hz<br />
adaptive filter function.<br />
If no resonance point is found, 5000 is specified.<br />
Category No. Parameter<br />
2 08<br />
2 09<br />
3rd notch width<br />
selection<br />
3rd notch depth<br />
selection<br />
020 -<br />
099 -<br />
2 10 4th Notch frequency 505000 Hz<br />
2 11<br />
2 12<br />
4) Usage<br />
4th notch width<br />
selection<br />
4th notch depth<br />
selection<br />
020 -<br />
099 -<br />
This is automatically specified when adaptive filter is valid.<br />
This is automatically specified when adaptive filter is valid.<br />
Automatically specifies the second resonance frequency estimated by<br />
the adaptive filter function.<br />
If no resonance point is found, 5000 is specified.<br />
This is automatically specified when two adaptive filters are valid.<br />
This is automatically specified when two adaptive filters are valid.<br />
Input an operating command with a value other than "0" specified for Pr2.00 "Adaptive filter mode<br />
setup". If any effect of the resonance point is observed in the motor speed, the parameters for the third<br />
and/or fourth notch filters are automatically specified according to the number of adaptive filters.<br />
5) Other cautions<br />
1) Abnormal noise or oscillation may be generated immediately after the first Servo On after power-up or after<br />
increasing the stiffness setting when real-time auto tuning is enabled until the load characteristics estimation<br />
has been stabilized. This is normal if the condition is stabilized soon. If oscillation or continued<br />
generation of abnormal noise through three or more reciprocating movements often occurs, take the following<br />
steps.<br />
1) Write the parameters with which normal operation has been observed to the EEPROM.<br />
2) Reduce value of Pr0.03 "Selection of machine stiffness at realtime auto-gain tuning"<br />
3) Specify "0" for Pr2.00 "Adaptive filter mode setup" and make adaptive invalid.<br />
4) Manually specify the notch filters.<br />
2) After any abnormal noise or oscillation has occurred, the third and fourth notch filter settings may be<br />
modified to an extreme value. In that case, make adaptive filter invalid by the procedures of 3) above and<br />
specify a setting value "5000" (Invalid) for Pr2.07 "3rd notch frequency" and Pr2.10 "4th notch frequency."<br />
Then make the adaptive filter valid again.<br />
3) 3rd notch frequency (Pr2.07) and 4th notch frequency (Pr2.10) are written in EEPROM every 30 minutes.<br />
The data are used as the initial values for adaptive processing at the next power-up.<br />
Motor Business Unit, Appliances Company, Panasonic Corporation
5-2 Manual Adjustment<br />
№SR-ZSV00039 - 33 -<br />
The LIQI series the automatic adjustment function described above. However, if the function is not<br />
available due to load conditions or restrictions of operating patterns, or if best responses and stability<br />
is needed suitable for device characteristics, manual readjustment may be required.<br />
This section describes the manual tuning function with different subsections for the individual control<br />
modes and functions as shown below.<br />
1) Position control mode block diagram (5-2-1)<br />
2) Gain switching function (5-2-2)<br />
3) Notch filter (5-2-3)<br />
4) Vibration suppression control (5-2-4)<br />
5) Feed forward function (5-2-5)<br />
6) 3rd Gain switching function (5-2-6)<br />
7) Friction torque compensation (5-2-7)<br />
Motor Business Unit, Appliances Company, Panasonic Corporation
5-2-1 Block Diagram of Position Control Mode<br />
Pulse train<br />
LIQI series position control has a structure shown in the following block diagram.<br />
Input configuration<br />
Input<br />
selection<br />
Reference<br />
direction<br />
Mode<br />
Command<br />
scaling (electronic<br />
gear)<br />
reverse conver-<br />
Pulse output<br />
Pulse regeneration<br />
One<br />
revolution<br />
Reverse<br />
Numerator/<br />
denominator<br />
Denominator<br />
Cumulative command<br />
pulse [command<br />
unit]<br />
One<br />
revolution<br />
Command scaling (electronic gear)<br />
Numerator<br />
1<br />
Denominator<br />
Command position<br />
deviation<br />
[command unit]<br />
1<br />
2<br />
Velocity feed<br />
forward<br />
Gain<br />
Filter<br />
Position<br />
control<br />
Position deviation<br />
[encoder pulses]<br />
Cumulative<br />
feedback pulse<br />
[encoder pulses]<br />
Encoder Motor<br />
Load<br />
Numerator<br />
2<br />
Numerator<br />
3<br />
Numerator<br />
4<br />
Position command<br />
speed<br />
Velocity control command<br />
Motor speed<br />
Smoothing<br />
filter<br />
FIR<br />
First<br />
order<br />
Velocity<br />
detection filter<br />
Velocity<br />
detection<br />
Gain<br />
Filter<br />
Position control block diagram<br />
1<br />
2<br />
Instantaneous<br />
speed<br />
1<br />
2<br />
Anti-vibration control<br />
Switching<br />
mode<br />
1<br />
2<br />
3<br />
4<br />
Frequency<br />
Filter<br />
Torque feed<br />
forward<br />
Velocity control<br />
Proportional<br />
Inertia ratio<br />
Switching mode<br />
Inertia ratio 2<br />
Current<br />
control<br />
Response<br />
Main<br />
power<br />
№SR-ZSV00039 - 34 -<br />
Internal position<br />
command speed<br />
Friction compensation<br />
Addition<br />
Positive<br />
Negative<br />
Disturbance<br />
observer<br />
Torque command<br />
Motor Business Unit, Appliances Company, Panasonic Corporation<br />
Gain<br />
Filter<br />
Second<br />
gain<br />
Mode<br />
Delay<br />
Level<br />
Hysteresis<br />
Switching<br />
time<br />
1<br />
2<br />
3<br />
4<br />
Notch filter<br />
Frequency Width Depth<br />
Adaptive mode<br />
Gain switching<br />
Torque filter<br />
1<br />
2<br />
Torque limit<br />
Select<br />
1<br />
2<br />
Third gain<br />
Multi-<br />
plication
5-2-2 Gain Switching Function<br />
Gain switching by internal data or external signals provides the following effects.<br />
Decreased gain during stop (servo lock) for reducing vibration.<br />
Increased gain during stop (stabilization) for reducing the stabilization time.<br />
Increased gain during operation for faster follow-up to command.<br />
Gain is switched by external signals in accordance with device conditions.<br />
1)Related parameters<br />
№SR-ZSV00039 - 35 -<br />
The gain switching function can be specified by the following parameters:<br />
Category No. Parameter Setup range Unit Function<br />
1 14 2 nd Specified for optimum tuning by using the gain switching function.<br />
0: Fixed at first gain. The gain switch input (GAIN) is used to<br />
switch the speed loop operation between PI and P operations.<br />
From GAIN input photocoupler OFF to PI operation<br />
gain setup 0~1<br />
-<br />
From GAIN input photocoupler ON to P operation<br />
* The above is the case when the logic setting of GAIN input<br />
is connect A. When the logic setting is connect B, OFF<br />
and ON are reversed.<br />
1: Gain switching of 1 st gain (Pr1.00 to Pr1.04) and 2 nd<br />
1 15<br />
1 16<br />
1 17<br />
1 18<br />
1 19<br />
Mode of position<br />
control switching<br />
Delay time of position<br />
control switching<br />
Level of position<br />
control switching<br />
Hysteresis at position<br />
control switching<br />
Position gain switching<br />
time<br />
0~10<br />
010000 0.1 ms<br />
020000<br />
020000<br />
-<br />
Depends<br />
on the<br />
mode<br />
Depends<br />
on the<br />
mode<br />
010000 0.1 ms<br />
gain (Pr1.05 to Pr1.09) is made valid.<br />
Specifies the trigger condition for gain switching in position control.<br />
Setting Condition of switching<br />
0 Fixed to the first gain<br />
1 Fixed to the second gain<br />
2 Gain switch<br />
3 Torque command<br />
4 Disabled (fixed to the first gain)<br />
5 Speed command<br />
6 Position deviation<br />
7 Position command<br />
8 Not in-position<br />
9 Actual speed<br />
10 Position command + actual speed<br />
Specifies the time between trigger detection and actual gain<br />
switching from the second to the first gain when the switching mode<br />
is 3 or any of 5 - 10 in position control.<br />
Specifies the level of the trigger when the switching mode is 3, 5, 6,<br />
9 or 10 in position control.<br />
The unit depends on the switching mode setting.<br />
Note) Specify a level Hysteresis.<br />
Specifies the hysteresis for the trigger when the switching mode is<br />
3, 5, 6, 9 or 10 in position control.<br />
The unit depends on the switching mode setting.<br />
Note) If a level is lower than hysteresis, hysteresis is set to be the<br />
same as level internally.<br />
Under position control, if a difference between Pr1.00 ”1 st gain of<br />
position loop” and Pr1.05 “2 nd gain of position loop“ is large, a<br />
sudden increase of position loop gain may be suppressed.<br />
When position loop gain increases, gains change taking time<br />
specified by a setting value.<br />
Motor Business Unit, Appliances Company, Panasonic Corporation
№SR-ZSV00039 - 36 -<br />
2)Usage<br />
After a gain switching mode for each control mode to use, and make gain switching function valid<br />
(Pr1.14=1) by Pr1.14 “2 nd gain setup” to use.<br />
Switching<br />
Condition of switching Description of gain switching<br />
mode setting<br />
0 Fixed to the first gain Fixed to 1 st gain (Pr1.00 to Pr1.04).<br />
1 Fixed to the second gain Fixed to 2 nd gain (Pr1.05 to Pr1.09).<br />
2 Gain switch The first gain is used when Gain switch (GAIN) is open.<br />
The second gain is used when Gain switch (GAIN) is connected to COM-.<br />
* If Gain switch (GAIN) is not assigned to any input signal, the first gain is<br />
always used.<br />
3 Torque command If the previously used first gain has caused the absolute value of the torque<br />
command to exceed “Level + Hysteresis” [%], the second gain is used.<br />
If the previously used second gain has caused the absolute value of the<br />
torque command to stay below “Level – Hysteresis” [%] for the delay time,<br />
the first gain is used again.<br />
4 Fixed to the first gain Fixed to 1 st gain (Pr1.00 to Pr1.04).<br />
5 Speed command If the previously used first gain has caused the absolute value of the speed<br />
command to exceed “Level + Hysteresis” [r/min], the second gain is used.<br />
If the previously used second gain has caused the absolute value of the<br />
speed command to stay below “Level – Hysteresis” [r/min] for the delay<br />
time, the first gain is used again.<br />
7 Position command If the first gain has been previously used and the position command is not<br />
0, the second gain is used.<br />
If the second gain has been previously used and the position command has<br />
stayed 0 for the delay time, the first gain is used again.<br />
8 Not in-position If the previously used first gain has caused incomplete positioning, the<br />
second gain is used.<br />
If the previously used second gain has caused in-position state to be<br />
maintained for the delay time, the first gain is used again.<br />
9 Actual speed If the previously used first gain has caused the absolute value of the actual<br />
speed to exceed “Level + Hysteresis” [r/min], the second gain is used.<br />
If the previously used second gain has caused the absolute value of the<br />
actual speed to stay below “Level – Hysteresis” [r/min] for the delay time,<br />
10 Position command + actu<br />
al speed<br />
the first gain is used again.<br />
If the first gain has been previously used and the position command is not<br />
0, the second gain is used.<br />
If the second gain has been previously used, the position command has<br />
stayed 0 for the delay time and the absolute value of the actual speed is<br />
below “Level – Hysteresis” [r/min], the first gain is used again.<br />
Motor Business Unit, Appliances Company, Panasonic Corporation
№SR-ZSV00039 - 37 -<br />
3)Setting procedures<br />
For example, assume that conditions inside the servo drive changed as shown in the following figure, when the<br />
load moved from A position to B position. The following describes the procedures for specifying related parameters<br />
when using the gain switching function under those conditions.<br />
① Specify the conditions of switching gains with the following parameters:<br />
Pr1.15”Mode of position control switching”<br />
Position control<br />
M<br />
Position command<br />
Position deviation<br />
In-position ON<br />
OFF ON<br />
Motor speed<br />
Velocity command<br />
Velocity control command<br />
Torque command<br />
Select 1s t gain regardless of state.<br />
Select 2n d gain regardless of state.<br />
A B<br />
Switch by gain switching input (GAIN).<br />
Open: 1 st gain, short: 2nd gain<br />
* In the case that the logic is s et at a contact<br />
Large<br />
Specify Prl.15<br />
9,10<br />
Motor Business Unit, Appliances Company, Panasonic Corporation<br />
7<br />
6<br />
8<br />
5<br />
3<br />
0、4<br />
1<br />
2
② Specify switching level and hysteresis in accordance<br />
with switching conditions.<br />
№SR-ZSV00039 - 38 -<br />
③ Specify switching delay time。<br />
The switching delay time specifies a period of delay time for switching from 2 nd gain to 1 st gain.<br />
When switching from 2 nd gain to 1 st gain, the switching conditions must be satisfied during a period of switching delay<br />
time.<br />
Hysteresis<br />
Switching<br />
level<br />
1st gain<br />
1st gain<br />
2nd gain<br />
④ Specify position gain switching time<br />
When switching gains, velocity loop gain, speed integration constant, speed detection filter, and torque filtering constant<br />
are switched instantaneously. However, position loop gain can be gradually switched to avoid problems<br />
caused by sudden change to a high gain.<br />
When “0” is specified for Pr1.19 “Position gain switching time”<br />
Low gain<br />
High gain<br />
When “5” is specified for Pr1.19 “Position gain switching time”<br />
Low gain<br />
2nd gain<br />
166µs<br />
0.5ms<br />
1st gain<br />
High gain<br />
Hysteresis<br />
Switching<br />
level<br />
Cancelled because the conditions<br />
are not satisfied.<br />
Gain switching delay<br />
1st gain<br />
Motor Business Unit, Appliances Company, Panasonic Corporation
5-2-3 Notch Filter<br />
№SR-ZSV00039 - 39 -<br />
When the mechanical stiffness is low, resonance due to axis distortion, etc. may generate vibration or noise,<br />
in which case a high gain cannot be specified. In that case, specifying a higher gain or reducing vibrations<br />
is made possible by suppressing a resonance peak with the notch filter.<br />
1)Related parameter<br />
It is possibility to adjust the frequency、width、depth,four related parameter can be used.<br />
Category No. Parameter Setup range Unit Function<br />
2 1 1 st Specifies the center frequency of the first notch filter.<br />
Notch frequency 505000 Hz Specifying 5000 disables the notch filter.<br />
2 2<br />
2 3<br />
1 st notch width<br />
selection<br />
1 st notch depth<br />
selection<br />
020 -<br />
0-99 -<br />
2 4 2 nd notch frequency 505000 Hz<br />
2 5<br />
2 6<br />
2 7<br />
2 8<br />
2 9<br />
2 10<br />
2 nd notch width<br />
selection<br />
2 nd notch depth<br />
selection<br />
3 rd Notch frequency<br />
*1<br />
3 rd notch width<br />
selection *1<br />
3 rd notch depth<br />
selection *1<br />
4 th Notch frequency<br />
*1<br />
020 -<br />
099 -<br />
505000 Hz<br />
020 -<br />
099 -<br />
505000 Hz<br />
Specifies the frequency width of the first notch filter.<br />
Specifies the depth at the center frequency of the first notch filter.<br />
Specifies the center frequency of the second notch filter.<br />
Specifying 5000 disables the notch filter.<br />
Specifies the frequency width of the second notch filter.<br />
Specifies the depth at the center frequency of the second notch<br />
filter.<br />
Specifies the center frequency of the third notch filter.<br />
Specifying 5000 disables the notch filter.<br />
Specifies the frequency width of the third notch filter.<br />
Specifies the depth at the center frequency of the third notch filter.<br />
Specifies the center frequency of the fourth notch filter.<br />
Specifying 5000 disables the notch filter.<br />
2 11<br />
4 th notch width<br />
selection *1<br />
020 -<br />
Specifies the frequency width of the fourth notch filter.<br />
2 12<br />
4 th notch depth<br />
selection *1<br />
099 -<br />
Specifies the depth at the center frequency of the fourth notch filter.<br />
*1 When the adaptive filter function is used, the parameter value is automatically specified.<br />
2)Usage<br />
Specify a resonance frequency on the basis of the frequency characteristics measurement function of the<br />
setup support software, or operating waveform on the waveform graphic function, and specify a Notch<br />
frequency for use.<br />
3)Notch width/depth<br />
A value on the left of the following table is specified for a width of Notch filter, which is a ratio of frequency<br />
band width in which damping factor becomes –3 [dB] against the Notch center frequency with<br />
depth of “0.”<br />
The depth of a notch filter is an I/O ratio that provides the complete interruption of the center frequency<br />
input with a setting of 0 and complete passage with a setting of 100. In [dB], the values are as shown<br />
in the rightmost column of the table below on the right.<br />
Motor Business Unit, Appliances Company, Panasonic Corporation
Bandwidth/Center frequency<br />
Notch width A4 series<br />
(Reference)<br />
№SR-ZSV00039 - 40 -<br />
Notch depth I/O ratio In [dB]<br />
0 0.41 0.50 0 0.00 -∞<br />
1 0.56 0.59 1 0.01 -40.0<br />
2 0.71 0.71 2 0.02 -34.0<br />
3 0.86 0.84 3 0.03 -30.5<br />
4 1.01 1.00 4 0.04 -28.0<br />
5 1.19 5 0.05 -26.0<br />
6 1.41 6 0.06 -24.4<br />
7 1.68 7 0.07 -23.1<br />
8 2.00 8 0.08 -21.9<br />
9 2.38 9 0.09 -20.9<br />
10 2.83 10 0.10 -20.0<br />
11 3.36 15 0.15 -16.5<br />
12 4.00 20 0.20 -14.0<br />
13 4.76 25 0.25 -12.0<br />
14 5.66 30 0.30 -10.5<br />
15 6.73 35 0.35 -9.1<br />
16 8.00 40 0.40 -8.0<br />
17 9.51 45 0.45 -6.9<br />
18 11.31 50 0.50 -6.0<br />
19 13.45 60 0.60 -4.4<br />
20 16.00 70 0.70 -3.1<br />
80 0.80 -1.9<br />
90 0.90 -0.9<br />
100 1.00 0.0<br />
Gain<br />
ゲイン[dB]<br />
[dB]<br />
10<br />
-5<br />
-10<br />
-15<br />
-20<br />
-25<br />
Depth: 0 / Width: 8<br />
5<br />
0<br />
-3[dB]<br />
Notch<br />
ノッチフィルタ周波数特性<br />
filter frequency characteristics<br />
-30<br />
10 100<br />
Frequency 周波数[Hz] [Hz]<br />
1000<br />
Depth:0 深さ0、幅4 / Width: 4<br />
Depth:50 深さ50、幅4 / Width:4<br />
Depth: 深さ0、幅8 0 / Width: 8<br />
Motor Business Unit, Appliances Company, Panasonic Corporation
5-2-4 Damping Control<br />
Position<br />
command<br />
№SR-ZSV00039 - 41 -<br />
When an end of the equipment vibrates or the entire device shakes, damping control can be used to remove<br />
the vibration frequency component from a position command for the reduction of vibration. Of the four<br />
frequency settings, up to two can be used simultaneously.<br />
Anti-<br />
vibration filter<br />
1)Scope of applications<br />
Position/velocity<br />
control<br />
Ser vo drive<br />
End vibration frequency specified<br />
Torque<br />
command<br />
Motor position<br />
Curr ent<br />
control<br />
Motor<br />
current<br />
ドライバ<br />
モータ<br />
カップリング<br />
シーケンサ<br />
移動体 Moving<br />
Coupling<br />
object<br />
PLC<br />
Motor<br />
Encoder<br />
End 先端が振動 vibrates<br />
Vibration observe d with<br />
変位センサで振動観測<br />
displacement sensor<br />
薄い鉄の板<br />
Damping control functions under the following conditions.<br />
Conditions for the functioning of damping control<br />
Action state When sub-on,because the input instruction,lead the action shaking.<br />
2)Cautions<br />
ボールねじ Ball scr ew<br />
Damping control may not function normally or may not be effective in the following conditions.<br />
Conditions hindering the functioning of damping control<br />
Vibration is excited by a factor other than a command (external force, etc.).<br />
The ratio of the resonance frequency to the antiresonance frequency is large.<br />
Load condition The vibration frequency is out of the 1.0 - 200.0 [Hz] range.<br />
For the frequency of vibration,the responsion of the position<br />
control is low.<br />
Load<br />
Motor Business Unit, Appliances Company, Panasonic Corporation<br />
移動<br />
機台<br />
Base
3)Related parameters<br />
№SR-ZSV00039 - 42 -<br />
The operation of damping control can be specified by using the following parameters.<br />
Category No. Parameter Setup range Unit Function<br />
Specifying the mode for switching between four filters used for<br />
damping control.<br />
・up to two filters can be used simultaneously.<br />
・1 or 2: switched by external input (VS-SEL1/VS-SEL2)<br />
2 13<br />
Selection of damping<br />
filter switching<br />
0~3 -<br />
2 14 1 st damping frequency 0~2000 0.1Hz<br />
2 15 1 st damping filter setup 0~1000 0.1Hz<br />
2 16 2 nd damping frequency 0~2000 0.1Hz<br />
2 17 2 nd damping filter setup 0~1000 0.1Hz<br />
Pr<br />
2.13<br />
VS-<br />
SEL2<br />
VS-<br />
SEL1<br />
1 st<br />
vibration<br />
suppressi<br />
on<br />
2 nd<br />
vibration<br />
suppressi<br />
on<br />
3 rd<br />
vibration<br />
suppressi<br />
on<br />
4 th<br />
vibration<br />
suppressi<br />
on<br />
0 - - Enabled Enabled Invalid Invalid<br />
1 - OFF Enabled Invalid Enabled Invalid<br />
- ON Invalid Enabled Invalid Enabled<br />
2 OFF OFF Enabled Invalid Invalid Invalid<br />
OFF ON Invalid Enabled Invalid Invalid<br />
ON OFF Invalid Invalid Enabled Invalid<br />
ON ON Invalid Invalid Invalid Enabled<br />
・3: switched by direction<br />
Pr Position com-<br />
2.13 mand<br />
3<br />
1 st<br />
vibration<br />
suppressi<br />
on<br />
2 nd<br />
vibration<br />
suppressi<br />
on<br />
3 rd<br />
vibration<br />
suppressi<br />
on<br />
4 th<br />
vibration<br />
suppressi<br />
on<br />
Positive Enabled Invalid Enabled Invalid<br />
Negative Invalid Enabled Invalid Enabled<br />
Specifies the first damping frequency of damping control to<br />
suppress vibration of an end of the load. Measure the<br />
frequency of the vibration of the load end and specify in<br />
increments of 0.1 [Hz].<br />
The effective frequency setting range is 1.0 - 200.0 [Hz].<br />
Specifying 0 - 9 disables the setting.<br />
Specify a small value if torque saturation has occurred when<br />
specified to enable the first damping frequency. Specify a large<br />
value for faster operation.<br />
Normally, use 0 as the setting.<br />
Note) A maximum setting value is internally limited to<br />
smaller value of corresponding damping frequency or (2000 -<br />
damping frequency ).<br />
Specifies the second damping frequency of damping control to<br />
suppress vibration of an end of the load. Measure the<br />
frequency of the vibration of the load end and specify in<br />
increments of 0.1 [Hz].<br />
The effective frequency setting range is 1.0 - 200.0 [Hz].<br />
Specifying 0 - 9 disables the setting.<br />
Specify a small value if torque saturation has occurred when<br />
specified to enable the second damping frequency. Specify a<br />
large value for faster operation.<br />
Normally, use 0 as the setting.<br />
Note) A maximum setting value is internally limited to smaller<br />
value of corresponding damping frequency or (2000 - damping<br />
frequency ).<br />
*1 1 Switching of damping frequency and damping filter setup is performed during output of positioning<br />
completion, and upon starting up command of changing command pulse (before positioning command filtering)<br />
from “0” to a value other than “0” for an command pulse detection cycle (0.166 ms).<br />
If damping frequency is particularly high or it is changed to be invalid, and a wide range of positioning completion<br />
has been specified, massive amount of residing pulses in the filter (an area found by integrating a value of<br />
subtracting position command after filtering from position command before filtering with time) may be suddenly<br />
released immediately after switching. Therefore, a sudden action of returning to a correct position may result in<br />
temporary rotation of motor faster than originally instructed. Use caution.<br />
Motor Business Unit, Appliances Company, Panasonic Corporation
№SR-ZSV00039 - 43 -<br />
*2 There is a delay in applying changed vibration suppression frequencies and damping filter setup to internal<br />
calculations. If a switching timing of *1 comes within the delay time, the changes may be suspended.<br />
Category No. Parameter Setup range Unit Function<br />
2 18 3 rd damping frequency 0~2000 0.1Hz<br />
2 19 3 rd damping filter setup 0~1000 0.1Hz<br />
2 20 4 th damping frequency 0~2000 0.1Hz<br />
2 21 4 th damping filter setup 0~1000 0.1Hz<br />
4)Usage<br />
① Setting of damping frequency (Pr2.14, Pr2.16, Pr2.18, Pr2.20)<br />
Specifies the third damping frequency of damping control to suppress vibration of<br />
an end of the load. Measure the frequency of the vibration of the load end and<br />
specify in increments of 0.1 [Hz].<br />
The effective frequency setting range is 1.0 - 200.0 [Hz]. Specifying 0 - 9<br />
disables the setting.。<br />
Specify a small value if torque saturation has occurred when specified to enable<br />
the third damping frequency. Specify a large value for faster operation.<br />
Normally, use 0 as the setting.<br />
Note) A maximum setting value is internally limited to smaller value of<br />
corresponding damping frequency or (2000 - damping frequency ).<br />
Specifies the fourth damping frequency of damping control to suppress vibration<br />
of an end of the load. Measure the frequency of the vibration of the load end and<br />
specify in increments of 0.1 [Hz].<br />
The effective frequency setting range is 1.0 - 200.0 [Hz]. Specifying 0 - 9<br />
disables the setting.<br />
Specify a small value if torque saturation has occurred when specified to enable<br />
the fourth damping frequency. Specify a large value for faster operation.<br />
Normally, use 0 as the setting.<br />
Note) A maximum setting value is internally limited to smaller value of<br />
corresponding damping frequency or (2000 - damping frequency ).<br />
Measure the vibration frequency of the end of the load. If it can be directly measured with a laser displacement<br />
gauge, etc., read the vibration frequency in increments of 0.1 [Hz] from the measured waveform<br />
and specify the value for the parameter.<br />
If a measuring instrument is not available, measure a frequency using the vibration frequency monitor of<br />
the setup support software, or using the residing vibrations of position deviation waveform measured<br />
with the waveform graphic function.<br />
② Setting of damping filter setup (Pr2.15, Pr2.17, Pr2.19, Pr2.21)<br />
Specify 0 first to monitor the torque waveform during operation.<br />
Setting the large value can reduce the stabilization time, but it increases ripple at the command change<br />
point as shown in the figure below. Specify the value in the range that does not cause torque saturation<br />
in the actual conditions of use. Torque saturation may impair the damping effect.<br />
Anti-vibration filter setting appropriate Anti-vibration filter setting too l arge<br />
Torque command<br />
Command<br />
speed<br />
指令速度<br />
位置偏差 Position deviation<br />
Calculate vibration<br />
frequency<br />
振動周波数を算出<br />
Torque saturation<br />
Motor Business Unit, Appliances Company, Panasonic Corporation
5-2-5 Feed Forward Function<br />
№SR-ZSV00039 - 44 -<br />
Position deviation can be reduced and response can be improved in comparison with controlling by<br />
feedback only, but also using the velocity feed forward function, which calculates speed control command<br />
required for operations on the basis of internal position command and adds the calculation to speed control,<br />
which is calculated by comparison with position feedback.<br />
The torque feed forward function, which calculates torque command required for operations on the basis of<br />
speed control command and adds the calculation to torque command calculated by comparison with speed<br />
feedback, improves responses of the speed control system.<br />
1)Related parameters<br />
using two feed forward functions, velocity feed forward and torque feed forward<br />
Category No. Parameter Setup range Unit Function<br />
1 10<br />
1 11<br />
1 12<br />
1 13<br />
Velocity feed forward<br />
gain<br />
Velocity feed forward<br />
filter<br />
Torque feed forward<br />
gain<br />
Torque feed forward<br />
filter<br />
01000 0.1%<br />
06400 0.01 ms<br />
01000 0.1%<br />
06400 0.01 ms<br />
2)Example of using velocity feed forward<br />
This adds a value, which is obtained by multiplying a speed<br />
control command calculated on the basis of internal position<br />
command with a ratio of this parameter, to a speed command<br />
from position control process.<br />
A time constant of primary delay filter is specified for inputting to<br />
velocity feed forward.<br />
This adds a value, which is obtained by multiplying a torque<br />
command calculated on the basis of speed control command<br />
with a ratio of this parameter, to a torque command from speed<br />
control process.<br />
A time constant of primary delay filter is specified for inputting to<br />
torque feed forward.<br />
Velocity feed forward is made valid by gradually increasing velocity feed forward gain with velocity<br />
feed forward filter specified at approximately 50 (0.5 ms). Position deviation during operation at a<br />
constant speed becomes smaller as expressed by the following equation, in accordance with a value of<br />
velocity feed forward gain.<br />
Position deviation [Command unit] = Command speed [Command unit/s]/position loop gain<br />
[1/s] (100 - velocity feed forward gain [%]) / 100<br />
Motor speed<br />
Command speed<br />
Position deviation<br />
0[%]<br />
50[%]<br />
80[%]<br />
Speed FF gain<br />
Position deviation at a constant speed becomes smaller as a value of speed feed forward gain is increased.<br />
If a gain is specified as 100 [%], position deviation theoretically becomes “0.” However, this causes significant<br />
overshoot in acceleration and deceleration.<br />
If an updating cycle of position command input is longer than a control cycle of drive, or if pulse frequencies<br />
are uneven, operating noise may be louder when velocity feed forward is valid. In that case,<br />
use position command filter (Primary delay/FIR smoothing) of specify a higher value for velocity feed<br />
forward filter.<br />
3)Example of using torque feed forward<br />
To use torque feed forward, inertia ratio must be specified correctly. Use an estimated value used for operation of<br />
real-time auto tuning again, or specify an inertia ratio calculated on the basis of machine specifications for Pr0.04 “Inertia<br />
ratio.”<br />
Torque feed forward is made valid by gradually increasing torque feed forward gain with torque feed forward filter<br />
Time<br />
Motor Business Unit, Appliances Company, Panasonic Corporation
specified at approximately 50 (0.5 ms).<br />
№SR-ZSV00039 - 45 -<br />
Increasing torque feed forward gain can make position deviation closer to “0” under a constant acceleration/deceleration.<br />
Therefore, under ideal conditions with no influence from disturbance torque, position<br />
deviation can be almost “0” for all operating ranges in operations of a trapezoid speed pattern.<br />
Position deviation<br />
Motor speed<br />
Command speed<br />
Torque FF gain<br />
0[%]<br />
50[%]<br />
100[%]<br />
Fix Speed FF gain = 100%<br />
Torque feed forward can be reduced the position deviation in constant acceleration.<br />
However, under actual conditions, position deviation does not become completely “0” because there is<br />
always disturbance torque<br />
Just as the case with velocity feed forward, specifying a larger time constant for torque feed forward<br />
filter reduces operating noises. However, it makes position deviation larger at a changing point of<br />
acceleration.<br />
Motor Business Unit, Appliances Company, Panasonic Corporation<br />
Time
5-2-6 3rd Gain Switching<br />
№SR-ZSV00039 - 46 -<br />
In addition to normal Gain switching function described in Section 5-2-5, specifying 3 rd gain is allowed to<br />
switch gain just before stopping. By specifying a higher gain for a specified period of time just before<br />
stopping, settling time for positioning can be shorter.<br />
(1) Scope of application<br />
□This function is applicable only when the following conditions are satisfied:<br />
Conditions for operating 3 rd Gain switching function<br />
Action state In Servo On status.<br />
Factors other than control parameters such as the deviation counter clear and command<br />
pulse inhibition inputs and the torque limit are appropriately configured and do<br />
not cause any problem in normal motor rotation.<br />
(2) Related parameters<br />
Category No. Parameter Setup range Unit Function<br />
6 05<br />
Position 3 rd gain valid<br />
time<br />
010000 0.1 ms Time when 3rd gain is made valid is specified.<br />
6 06<br />
Position 3 rd gain scale<br />
factor<br />
501000 %<br />
3 rd gain is specified by magnification against 1 st gain.<br />
3 rd gain=1 st gainPr6.06/100<br />
(3) Usage<br />
Specify time of applying 3 rd gain in Pr6.05 “Position 3 rd gain valid time” under conditions that gain switching<br />
function operates normally. Then specify magnification of 3 rd gain against 1 st gain, in Pr6.06 “Position 3 rd gain<br />
scale factor”.<br />
If 3 rd gain is not used, specify Pr6.05=0 and Pr6.06=100.<br />
3 rd gain is valid only under position control/full-closed control.<br />
In 3 rd gain area, 3 rd gain is used for position loop gain/speed proportional gain only, and 1 st gain setting is used for other<br />
areas.<br />
If 2 nd gain switching conditions are satisfied in the 3 rd gain area, it switches to 2 nd gain.<br />
Upon switching from 2 nd gain to 3 rd gain, Pr1.19 “Position gain switching time” is applied.<br />
Note that switching from 2 nd gain to 1 st gain by parameter change also makes a 3 rd gain area.<br />
Example)In the case of Pr1.15 “Mode of position control switching”=7, switching conditions: with position<br />
command<br />
Poistion command speed<br />
[r/min]<br />
2nd gain<br />
Pr1.05~1.09<br />
Pr6.050.1 ms<br />
3rd gain<br />
1st gain<br />
[3rd gain area]<br />
Position loop gain=Pr1.00Pr6.06/100<br />
Speed ratio gain=Pr1.01Pr6.06/100<br />
1 st Pr1.00~1.04<br />
gain value is used for speed integral constant,<br />
speed detection filter and torque filter as it is.<br />
Motor Business Unit, Appliances Company, Panasonic Corporation
5-2-7 Friction Torque Compensation<br />
№SR-ZSV00039 - 47 -<br />
Two types of friction torque compensation functions are available for reducing influences from frictions<br />
exists in mechanical system: Biased load compensation that compensates offset torque at constant degree,<br />
and dynamic friction compensation that changes direction in accordance with operating directions.<br />
(1) Scope of application<br />
□This function is applicable only when the following conditions are satisfied<br />
Conditions for operating friction torque compensation<br />
Action state In Servo On status.<br />
Factors other than control parameters such as the deviation counter clear and command<br />
pulse inhibition inputs and the torque limit are appropriately configured and<br />
do not cause any problem in normal motor rotation.<br />
(2) Related parameters<br />
Settings of friction torque compensation are specified in combination of the following 3 parameters:<br />
Category No. Parameter Setup range Unit Function<br />
6 07<br />
6 08<br />
6 09<br />
Torque command<br />
additional value<br />
Positive direction<br />
torque compensation<br />
value<br />
Negative direction<br />
torque compensation<br />
value<br />
-100100 %<br />
-100100 %<br />
-100100 %<br />
Specify a biased load compensation value, which is always added to<br />
torque command in other control modes than torque control.<br />
Specify a dynamic friction compensation value, which is added to<br />
torque command when normal direction position command is input<br />
under position control and full-closed control.<br />
Specify a dynamic friction compensation value, which is added to<br />
torque command when reverse direction position command is input<br />
under position control and full-closed control.<br />
Motor Business Unit, Appliances Company, Panasonic Corporation
(3) Usage<br />
№SR-ZSV00039 - 48 -<br />
Friction torque compensation is added in accordance with input position command direction, as show in<br />
the following figure:<br />
Pr6.07<br />
"Torque command additional<br />
value"<br />
Without power to<br />
Command speed<br />
Pr6.08<br />
[Normal direction]<br />
"Positive direction torque compensation value"<br />
[Reverse direction]<br />
the motor With power to the motor<br />
Pr6.09<br />
"Negative direction torque compensation value"<br />
Biased load compensation value which is specified by torque command addition value that is constantly added and dynamic friction<br />
compensation value which is specified by normal direction torque compensation value or reverse direction torque compensation value that is<br />
added according to the last command speed direction total to friction torque compensation.<br />
Command speed direction is reset when the power supply is turned on and the motor is not supplied power.<br />
Motor Business Unit, Appliances Company, Panasonic Corporation<br />
Time<br />
Without power to<br />
the motor<br />
Pr6.07 “Torque command additional value” reduces variations of positioning operations, by specifying a<br />
torque command value that may be added as a constant biased load torque applied to a motor due to<br />
gravity on vertical axis.<br />
Pr6.08 “Positive direction torque compensation value” and Pr6.09 “Negative direction torque<br />
compensation value” prevents prolonging and variations of positioning settling time due to dynamic<br />
friction, by specifying friction torques for each rotating direction on parameters, for the loads requiring<br />
larger dynamic friction torques due to radial loads, such as belt drive axis.<br />
servo-on status: Current values for biased load compensation and dynamic friction compensation are<br />
retained until the first position command is input. At the point of changing from status without position<br />
command to status with position command, biased load compensation is updated in accordance with<br />
Pr6.07. Also, in accordance with command direction, and in accordance with parameter Pr6.08 or Pr6.09,<br />
dynamic friction compensation value is updated.
№SR-ZSV00039 - 49 -<br />
6.Applied Functions<br />
6-1 Torque Limit Switching<br />
The parameters below have functions to switch torque limit values per the operation direction or with the input of<br />
the torque limit switch (TL-SEL).<br />
(1) Scope of application<br />
□This function is applicable only when the following conditions are satisfied:<br />
Conditions for operating torque limit switching function<br />
Action state In Servo On status.<br />
Factors other than control parameters such as the deviation counter clear and command<br />
pulse inhibition inputs and the torque limit are appropriately configured and<br />
do not cause any problem in normal motor rotation.<br />
(2) Related parameters<br />
Category No. Parameter Setup range Unit Function<br />
0 13 1 st torque limit 0500 % To set the 1 st limit value of the motor output torque.<br />
To set up the selecting mode of the torque limit.<br />
5 21<br />
Selection of torque<br />
limit<br />
1~3 -<br />
1: Normal direction/Reverse direction Pr0.13<br />
2: Normal direction Pr0.13, Reverse direction Pr5.22<br />
3: TL-SEL off →Pr0.13, TL-SEL on →Pr5.22<br />
5 22 2 nd torque limit 0500 % To set the 2 nd limit value of the motor output torque.<br />
(3) Description<br />
The following table shows the torque limit switch modes.<br />
Pr5.21<br />
Torque limit switch<br />
input (TL-SEL)<br />
Positive torque<br />
limit<br />
1 - Pr0.13<br />
Negative torque<br />
limit<br />
2 - Pr0.13 Pr5.22<br />
3<br />
OFF Pr0.13<br />
ON Pr5.22<br />
Motor Business Unit, Appliances Company, Panasonic Corporation
№SR-ZSV00039 - 50 -<br />
6-2 Motor Movement Range Setting<br />
If the motor travels exceeding the motor working range which is set with Pr5.14 “Motor working range setup”<br />
in addition to the position command input range, the software limit protection will make an alarm stop.<br />
The use of this function will prevent collision with the machine end caused by motor oscillation.<br />
(1) Scope of application<br />
□This function is applicable only when the following conditions are satisfied:<br />
Conditions for operating motor working range function<br />
Action state In Servo On status.<br />
Factors other than control parameters such as the deviation counter clear and command<br />
pulse inhibition inputs and the torque limit are appropriately configured and do<br />
not cause any problem in normal motor rotation.<br />
(2) Cautions<br />
Note that this function does not provide protection against abnormal position commands<br />
If software limit protection works, the device slows down and halts in accordance with Pr5.10 “Sequence<br />
at alarm”.<br />
Some loads may contact an edge of device and cause damage. Specify a range for Pr5.14 in consideration of<br />
slowing down operations.<br />
The software limit protection is invalid during the trial run performed via the front monitor and when the<br />
frequency characteristics function is used through the communication.<br />
(3) Related parameters<br />
Category No. Parameter Setup range Unit Function<br />
5 14<br />
Motor working range<br />
setup<br />
0~1000<br />
0.1 revolution<br />
To set the motor working range in addition to the position command<br />
input range.<br />
Exceeding the value set with this parameter will prompt the software<br />
limit protection.<br />
Motor Business Unit, Appliances Company, Panasonic Corporation
№SR-ZSV00039 - 51 -<br />
(4) Example of movement:<br />
1) When no position command is entered (with the servo control on)<br />
The motor movable range will be set only by Pr5.14 at both sides of the motor because there is no position<br />
command entered. If the load enters the error occurrence range (the lightly shaded area in the figure below) due to<br />
vibration and other reasons, the motor movable range protection will be activated.<br />
Motor<br />
Motor<br />
Motor<br />
Error occurrence range<br />
Error occurrenc e range<br />
Load<br />
Load<br />
Pr5.14 Pr5.14<br />
Motor movable range<br />
Error occurrence rang<br />
Error occ urrence range<br />
2) When the load moves to the right<br />
(with the servo control on)<br />
Entering a position command to the right will extend the motor movable range accordingly: the total<br />
movable range will be the position command input range together with the number of rotations set by<br />
Pr5.14 added to the both sides.<br />
Position command input<br />
range<br />
Pr5.14 Pr5.14<br />
Motor movable range<br />
3) When the load moves to the left (with the servo control on)<br />
Load<br />
Pr5.14 Position command input range Pr5.14<br />
Motor movable range<br />
Error occurrenc e range<br />
Entering a position command to the left will further extend the position command input range.<br />
エ Error occurrence range<br />
Conditions to clear the position command input range<br />
The following conditions will clear the position command input range to 0:<br />
The power is turned on<br />
While a position deviation is being cleared (with the deviation counter clear being valid, and the input of the<br />
overtravel limit being valid with Pr5.05 “Sequence at over-travel inhibit” = 2)<br />
At the start and end of the trial run performed by communication<br />
Motor Business Unit, Appliances Company, Panasonic Corporation
6-3 Electronic Gear Switching<br />
№SR-ZSV00039 - 52 -<br />
With the following parameters, it is possible to switch between maximum of 4 numerators of the command<br />
scaling by using DIV1 and DIV2.<br />
For the command scaling function, please refer to 4-2-2 “Command Scaling (Electronic Gear).”<br />
(1) Scope of application<br />
□This function is applicable only when the following conditions are satisfied:<br />
perating conditions for specified frequency division multiplication switching function<br />
Action state In Servo On status.<br />
Factors other than control parameters such as the deviation counter clear and command<br />
pulse inhibition inputs and the torque limit are appropriately configured and do<br />
not cause any problem in normal motor rotation.<br />
(2) Related parameters<br />
Category No. Parameter Setup range Unit Function<br />
0 08<br />
0 09<br />
0 10<br />
5 00<br />
5 01<br />
5 02<br />
Command pulse counts<br />
per one motor<br />
revolution<br />
1 st numerator of<br />
electronic gear<br />
Denominator of<br />
electronic gear<br />
2 nd numerator of<br />
electronic gear<br />
3 rd numerator of<br />
electronic gear<br />
4 th numerator of<br />
electronic gear<br />
0<br />
1048576<br />
0~<br />
1073741824<br />
1~<br />
1073741824<br />
0~<br />
1073741824<br />
0~<br />
1073741824<br />
0~<br />
1073741824<br />
Pulse<br />
-<br />
-<br />
-<br />
-<br />
-<br />
Specifies the command pulse count corresponding to one revolution of the<br />
motor.<br />
If this setting value is “0” or in full-closed control, Pr0.09 “1 st numerator of<br />
electronic gear,” Pr0.10 “Denominator of electronic gear,” Pr5.00 “2 nd<br />
numerator of electronic gear”, Pr5.01 “3 rd numerator of electronic gear”, and<br />
Pr5.02 “4 th numerator of electronic gear”, are made valid.<br />
To set the numerator used for the command scaling performed for the<br />
command pulse input.<br />
Is valid when Pr0.08 “Command pulse counts per one motor revolution “ is<br />
0.<br />
For position control, when the value is set to 0, the encoder resolution is set<br />
to the numerator. For full-closed control, when the value is set to 0, the<br />
command scaling ratio forcibly becomes 1:1.<br />
Specifies the denominator for scaling for a command pulse input.<br />
Is valid when Pr0.08 “Command pulse counts per one motor revolution “ is<br />
0.<br />
To set the 2 nd numerator used for the command scaling performed for the<br />
command pulse input.<br />
Is valid when Pr0.08 “Command pulse counts per one motor revolution”is 0.<br />
For position control, when the value is set to 0, the encoder resolution is set<br />
to the numerator. For full-closed control, when the value is set to 0, the<br />
command scaling ratio forcibly becomes 1:1.<br />
To set the 3 rd numerator used for the command scaling performed for the<br />
command pulse input.<br />
Is valid when Pr0.08 “Command pulse counts per one motor revolution” is<br />
0.<br />
For position control, when the value is set to 0, the encoder resolution is set<br />
to the numerator. For full-closed control, when the value is set to 0, the<br />
command scaling ratio forcibly becomes 1:1.<br />
To set the 4 th numerator used for the command scaling performed for the<br />
command pulse input.<br />
Is valid when Pr0.08 “Command pulse counts per one motor revolution” is<br />
0.<br />
For position control, when the value is set to 0, the encoder resolution is set<br />
to the numerator. For full-closed control, when the value is set to 0, the<br />
command scaling ratio forcibly becomes 1:1.<br />
• The following table shows DIV1 and DIV2, and their corresponding numerators and denominators used for the<br />
command scaling.<br />
DIV1 DIV2<br />
Numerator<br />
Command scaling<br />
Denominator<br />
OFF OFF Pr0.09 Pr0.10<br />
ON OFF Pr5.00 Pr0.10<br />
OFF ON Pr5.01 Pr0.10<br />
ON ON Pr5.02 Pr0.10<br />
Motor Business Unit, Appliances Company, Panasonic Corporation
6-4 Setting of Sequence Movements<br />
A series of actions can be defined for various operation states.<br />
6-4-1 Drive prohibition input (POT , NOT ) sequence<br />
№SR-ZSV00039 - 53 -<br />
The following shows how to prescribe actions taken after an overtravel limit (POT or NOT) is entered.<br />
(1) Related parameters<br />
Category No. Parameter Setup range Unit Function<br />
5 04<br />
5 05<br />
5 11<br />
Over-travel inhibit<br />
input setup<br />
Sequence at over-travel<br />
inhibit<br />
Torque setup for<br />
emergency stop<br />
0~2 -<br />
0~2 -<br />
0~500 %<br />
(2) Item<br />
• Details of Pr5.05 “Sequence at over-travel inhibit”<br />
Pr5.04 Pr5.05 During deceleration *6 After stop<br />
0<br />
0<br />
1<br />
Dynamic brake<br />
applied<br />
For the overtravel<br />
direction, torque<br />
command =0<br />
2 Immediate stop *5<br />
Specify drive prohibition input (POT, NOT) input operations.<br />
0: POT Normal direction drive prohibited, NOT Functions as<br />
reverse direction drive prohibition. If POT is input during<br />
normal direction operation, the system halts in accordance with<br />
Pr5.05 “Sequence at over-travel inhibit”. For Reverse direction,<br />
the system performs the same operation when NOT is input.<br />
1: POT , NOT is invalid and has no effect on operations.<br />
2: Inputting either POT or NOT activates Err38.0 “Over-travel<br />
inhibit input protection”.<br />
If Pr5.04 “Over-travel inhibit input setup”= 0, specify status during<br />
slowdown and after halting after inputting drive prohibition input<br />
(POT, NOT).<br />
To set a torque limit for the immediate stop.<br />
For the overtravel<br />
direction, torque<br />
command =0<br />
For the overtravel<br />
direction, torque<br />
command =0<br />
For the overtravel<br />
direction, command<br />
=0 *1<br />
Position deviation/extern<br />
al scale deviation<br />
Retained *2<br />
Retained *2<br />
Cleared before and after<br />
the deceleration *3<br />
*1 the position command = 0 is srv-lock<br />
*2 If commands keep coming for the overtravel direction with the overtravel limit on, the position deviations may<br />
accumulate to result in Err24.0 “Position deviation excess protection”. In case an overtravel limit is turned on, stop<br />
commands for the overtravel direction.<br />
*3 Position deviations/external scale deviations are cleared twice at the start and end of the deceleration; therefore, it is necessary<br />
to execute an homing operation to return to origin if the position is being controlled.<br />
*4 f a setting value for Pr5.04 “Over-travel inhibit input setup” is “2,” Err38.0 “Over-travel inhibit input protection” is<br />
activates when either POT or NOT is turned on. Therefore, the system operates in accordance with<br />
Pr5.10”Sequence<br />
at alarm”, not with this setting value. If other types of errors occur also, Pr5.10 “Sequence at alarm” takes<br />
precedence.<br />
*5 “Immediate stop” refers to the control to stop immediately with the servo control on.<br />
Torque command values for that case are restricted by Pr5.11 “Torque setup for emergency stop”.<br />
Because instantaneous stopping slows down a motor suddenly, position deviation of position control becomes larger<br />
instantaneously, and it may cause Err24.0 “Position deviation excess protection” or Err34.0 “Software limit<br />
protection”. In that case, specify appropriate values for Pr0.14 “Position deviation excess setup” and Pr5.14 “Motor<br />
working range setup”.<br />
*6 “During deceleration” refers to the section from the state where the motor is operating until the speed is reduced to 30<br />
r/min or below. Once the speed reduction achieves 30 r/min and thus it transfers to the “After stop” state, the<br />
post-stop actions will be performed regardless of the motor speed.<br />
Motor Business Unit, Appliances Company, Panasonic Corporation
№SR-ZSV00039 - 54 -<br />
6-4-2 Sequence at Servo Off<br />
This section shows how to define actions taken while the servo control is off.<br />
(1) Related parameters<br />
Category No. Parameter Setup range Unit Function<br />
To set the states during the deceleration and after the stop when the<br />
5 06 Sequence at Servo-Off 09 servo control is turned off.<br />
5 07 Main power off action 0~9 -<br />
5 11<br />
Torque setup for<br />
emergency stop<br />
(2) Item<br />
• Details of Pr5.06 “Sequence at Servo-Off”<br />
Pr5.06<br />
0500 <br />
During deceleration<br />
*4<br />
To define the states during the deceleration and after the stop when<br />
the main power is turned off.<br />
To set a torque limit for the immediate stop.<br />
After stop<br />
Position deviation/<br />
external scale<br />
deviation<br />
0、1<br />
Dynamic brake (DB)<br />
applied<br />
Dynamic brake (DB)<br />
applied<br />
Clear<br />
2、3<br />
Dynamic brake (DB)<br />
applied<br />
Free (DB OFF)) Clear<br />
4、5<br />
Dynamic brake (DB)<br />
applied<br />
Dynamic brake (DB)<br />
applied<br />
Retained *2<br />
6、7<br />
Dynamic brake (DB)<br />
applied<br />
Free (DB OFF) Retained *2<br />
8 Immediate stop *1<br />
Dynamic brake (DB)<br />
applied<br />
Clear *5<br />
9 Immediate stop *1 Free (DB OFF) Clear*5<br />
• Details of Pr5.07 “Sequence at main power OFF”<br />
Pr5.07 After stop<br />
0~3、8、9<br />
4~7<br />
Dynamic brake (DB)<br />
applied<br />
Dynamic brake (DB)<br />
applied<br />
Position deviation/ex<br />
ternal scale deviatio<br />
n<br />
Clear<br />
Retained *2<br />
*1 “Immediate stop” refers to the control to stop immediately with the servo control on.<br />
Torque command values for that case are restricted by Pr5.11 “Torque setup for emergency stop”.<br />
*2 If position commands keep coming or the motor stays running with the main power off, the position deviations may<br />
accumulate to result in Err24.0 “Position deviation excess protection”. Also if the servo control is turned on with a<br />
significant level of position deviations/external scale deviations, the motor may make an abrupt start in order to<br />
perform the control to set the deviations to 0. Use due care when using the system with the position<br />
deviations/external scale deviations retained.<br />
*3 If an error occurred with main power supply turned off, the system operates in accordance with Pr5.10 “Sequence<br />
at alarm”.<br />
*4 “During deceleration” refers to the section from the state where the motor is operating until the speed is reduced to<br />
30 r/min or below. Once the speed reduction achieves 30 r/min and thus it transfers to the “After stop” state, the<br />
post-stop actions will be performed regardless of the motor speed.<br />
*5 Position deviation/External scale deviation is cleared before and after slowing down. They are always cleared to<br />
zero after shifting to off-status of main power supply.<br />
*6 Pr5.07「Torque command additional value」 set the offset toque to be added to the torque command.。Please take notice of that dynamic<br />
brake cann’t be appointed as decelerating or stoping.<br />
Motor Business Unit, Appliances Company, Panasonic Corporation
№SR-ZSV00039 - 55 -<br />
6-4-3 Emergency Stop at Alarm<br />
If an alarm occurs that requires an immediate stop, setting the following parameters will control the motor to<br />
immediately stop it.<br />
(1) Related parameters<br />
Category No. Parameter Setup range Unit Function<br />
To set up the states during the deceleration and after the stop when<br />
5 10 Sequence at alarm 07 <br />
an alarm occurs.<br />
The immediate stop is valid when the parameter is set to either 4, 5,<br />
6 or 7.<br />
(2) Item<br />
• Details of Pr5.10 “Sequence at alarm”<br />
Pr5.10<br />
0~3<br />
4~7<br />
During deceleration<br />
*3<br />
Dynamic brake (DB)<br />
applied<br />
Operation A:<br />
Instantaneous stopping<br />
Operation B:<br />
DB operation *2<br />
After stop<br />
Dynamic brake (DB)<br />
applied<br />
Dynamic brake (DB)<br />
applied<br />
Position deviation/<br />
external scale<br />
deviation<br />
Cleared *1<br />
Cleared *1<br />
*1 Position deviations/external scale deviations at the time when an alarm occurs will be retained while the alarm is still<br />
there, and they will be cleared when the alarm is cleared.<br />
*2 The selection of the operation A or B shows whether an immediate stop is executed. An alarm that necessitates an<br />
immediate stop will prompt the operation A, an immediate stop, if the setting value is 4, 5, 6 or 7. An alarm that<br />
does not require an immediate stop will result in the actions specified with the operation B; i.e. either application of<br />
the dynamic brake (DB) or free-run. (Refer to section 6-5-5.)<br />
Hold the main circuit power until deceleration stop is completed.<br />
Refer to 7-1 “List of Protective Functions” for alarms that require an immediate st<br />
*3 “During deceleration” refers to the section from the state where the motor is operating until the speed is reduced to 30<br />
r/min or below. Once the speed reduction achieves 30 r/min and thus it transfers to the “After stop” state, the<br />
post-stop actions will be performed regardless of the motor speed.<br />
Motor Business Unit, Appliances Company, Panasonic Corporation
№SR-ZSV00039 - 56 -<br />
6-4-4 Emergency Stop at Alarm<br />
If an alarm occurs that requires an immediate stop, setting the following parameters will control the motor to<br />
immediately stop it.<br />
(1) Related parameters<br />
Category No. Parameter Setup range Unit Function<br />
To set up the states during the deceleration and after the stop when<br />
5 10 Sequence at alarm 07 <br />
an alarm occurs.<br />
The immediate stop is valid when the parameter is set to either 4, 5,<br />
6 or 7.<br />
5 11<br />
Torque setup for<br />
emergency stop<br />
0500 %<br />
5 13 Overspeed level 020000 r/min<br />
6 14<br />
6 15<br />
Emergency stop time at<br />
alarm<br />
2 nd over-speed level<br />
setup<br />
01000 ms<br />
020000 r/min<br />
To set a torque limit for the immediate stop.<br />
If the motor speed exceeds the value set with this parameter, Err26.0<br />
“Over-speed protection” occurs.<br />
If the value is set to 0, the overspeed level will be set at the<br />
maximum number of motor revolution multiplied by 1.2.<br />
To set the allowable time for the immediate stop to complete when<br />
there is an alarm. The time exceeding the value set for this<br />
parameter will force a state of alarm.<br />
If 0 is set for this parameter, the immediate stop doesn’t do, and<br />
become an alarm state immediately.<br />
(2) Item<br />
Immediate stop operation when an alarm requiring an immediate stop occurs<br />
Speed<br />
[r/mn]<br />
Speed criteria<br />
to stop<br />
(30r/min<br />
Alarm<br />
Torque limit<br />
No alarm has occured<br />
For normal operation<br />
Normal operation<br />
(per commands from the controller)<br />
Pr5.11<br />
If the motor speed exceeds the value set for this parameter during an<br />
immediate stop which has been caused by an alarm, Err26.1 “2 nd<br />
over-speed protection” will occur.<br />
If the value is set to 0, the overspeed level will be set at the<br />
maximum number of motor revolution multiplied by 1.2.<br />
Motor speed<br />
Alarm requiring immediate stop has occured<br />
For normal operation<br />
(Note) To protect against runaway upon instantaneous stopping, specify an allowable excessive speed level in<br />
Pr6.15 “2 nd over-speed level setup”. If 2 nd excessive speed protection, which is an error not applicable to<br />
instantaneous stopping, is activated, it immediately leads to error tripping. However, if set lower than<br />
Pr5.13 “Over-speed level setup”, a fast shutdown will not be executed due to Err26.1 “2 nd over-speed<br />
protection” that occurs before Err26.0 “Over-speed protection”.<br />
If Err26.0 and Err26.1 are detected at the same time, Err26.0 will be displayed but a fast shutdown will<br />
not be executed due to Err26.1 that is internally occurring.<br />
Time<br />
**Pr5.11 “Torque setup for emergency stop” to alleviate shock caused<br />
by immediate stop<br />
Immediate stop Alarm state (operation after stop: DB/free-run)<br />
operation<br />
Immediate stop time<br />
If the time specified by Pr6.14 “Emergency stop time at alarm” has passed since an<br />
alarm requiring an immediate stop had occurred and if the actual speed is over 30<br />
r/min, then an alarm state will be prompted immediately. An alarm not applicable<br />
to instantaneous stopping in the drive during a fast shutdown immediately leads to<br />
alarm state.<br />
Motor Business Unit, Appliances Company, Panasonic Corporation
№SR-ZSV00039 - 57 -<br />
7. Protective/Warning Functions<br />
7-1 List of Protective Functions<br />
This servo drive has various integrated protective functions. If any of these functions is activated, the driver<br />
will turn off the alarm output signal (ALM) and go into a trip state, showing the error code number in the<br />
7-segment LED at the front panel.<br />
Err code Alarm<br />
Attribute<br />
Main Main<br />
History History Immediate<br />
stop *5<br />
11 0 Control power supply undervoltage protection ○<br />
12 0 Over-voltage protection ○ ○<br />
13 0 Main power supply undervoltage protection (between P to N) ○<br />
14 0 Over-current protection ○<br />
1 IPM error protection ○<br />
15 0 Over-heat protection ○ ○<br />
16 0 Over-load protection ○ ○*1<br />
18 0 Over-regeneration load protection ○ ○<br />
21 0 Encoder communication disconnect error protection ○<br />
1 Encoder communication error protection ○<br />
23 0 Encoder communication data error protection ○<br />
24 0 Position deviation excess protection ○ ○ ○<br />
1 Velocity deviation excess protection ○ ○ ○<br />
26 0 Over-speed protection ○ ○ ○<br />
1 2 nd over-speed protection ○ ○<br />
27 0 Command pulse input frequency error protection ○ ○ ○<br />
2 Command pulse multiplier error protection ○ ○ ○<br />
28 0 Limit of pulse replay error protection ○ ○ ○<br />
29 0 Deviation counter overflow protection ○ ○<br />
33 0 IF overlaps allocation error 1 protection ○<br />
1 IF overlaps allocation error 2 protection ○<br />
2 IF input function number error 1 protection ○<br />
3 IF input function number error 2 protection ○<br />
4 IF output function number error 1 protection ○<br />
6 CL fitting error protection ○<br />
7 INH fitting error protection ○<br />
34 0 Motor action range limit protection ○ ○<br />
36 0~2 EEPROM parameter error protection<br />
37 0~2 EEPROM check code error protection<br />
38 0 Over-travel inhibit input protection ○<br />
44 0 Absolute single turn counter error protection<br />
/ Incremental signal turn counter error protection<br />
○<br />
45 0 Absolute multi-turn counter error protection<br />
/ Incremental multi-turn counter error protection<br />
○<br />
48 0 Incremental Encoder Z-phase error protection ○<br />
49 0 Incremental Encoder CS signal error protection ○<br />
87 0 Compulsory alarm input protection ○<br />
95 0~4 Motor automatic recognition error protection<br />
Other numbers Other error ○<br />
*1: If Err16.0 “Over-load protection” started to work, it can be canceled about 10 seconds after the occurrence.<br />
*2:If Err40.0 “Absolute system down error protection” and Err42.0 “Absolute over-speed error protection”<br />
occurred, these errors cannot be cleared unless the absolute encoder is cleared.<br />
*3:If an alarm that can be cleared occurred, you can clear it through the alarm clear input (A-CLR), front<br />
panel operation or communication interface. Please execute the alarm clear while stopping without fail<br />
after confirming safety.<br />
Motor Business Unit, Appliances Company, Panasonic Corporation
№SR-ZSV00039 - 58 -<br />
*4:If the control circuit within the servo drive has malfunctioned due to reasons such as excessive noise, the following may be<br />
displayed.<br />
In such a case, immediately turn off the power.<br />
*5:A fast shutdown refers to an alarm that causes an immediate stop when Pr5.10 “Sequence at alarm” is<br />
set to the value between 4 and 7. Please refer to 6-5-4 “Sequence at Alarm” for details.<br />
Motor Business Unit, Appliances Company, Panasonic Corporation
7-2 Details of Protective Functions<br />
Protective<br />
function<br />
Name Cause Action<br />
Main Sub<br />
11 0<br />
12 0<br />
13 0<br />
14<br />
0<br />
1<br />
(Continued)<br />
Control power<br />
supply<br />
undervoltage<br />
protection<br />
Over-voltage<br />
protection<br />
Main power<br />
supply<br />
undervoltage<br />
protection<br />
(between P to N)<br />
Over-current<br />
protection<br />
IPM error<br />
protection<br />
The PN voltage at the converter of the control power has<br />
reduced to the specified value or less.<br />
① The supply voltage is too low. An instantaneous<br />
power failure has occurred.<br />
② The power supply capacity is too small: the supply<br />
voltage has reduced due to rush current when the main<br />
power was turned on.<br />
③ The servo drive has failed (circuit failure).<br />
The supply voltage has exceeded the allowable input voltage<br />
range. → The PN voltage at the converter has increased to<br />
the specified value or more. The supply voltage is too<br />
high. A sudden voltage increase due to a phase advance<br />
capacitor and/or UPS (uninterruptible power supply system).<br />
① The regenerative resistor has disconnected wires.<br />
② The external regenerative resistor is inappropriate, not<br />
absorbing regenerative energy.<br />
③ The servo drive has failed (circuit failure).<br />
④ Burnout of the motor<br />
⑤ Contact failure of the motor wires<br />
⑥ The dynamic brake relay has adhered because the servo<br />
control has been turned on and off frequently.<br />
⑦ The motor is not suitable for the servo drive.<br />
⑧ Timing of the pulse input is either the same as or earlier<br />
than that of the servo turning on.<br />
№SR-ZSV00039 - 59 -<br />
Measure the line voltage of L1C-L2C at the connector and<br />
terminal block.<br />
① Increase the supply voltage capacity. Change the power<br />
supply.<br />
② Increase the power supply capacity.<br />
③ Replace with a new servo drive.<br />
Measure the line voltage of the connectors (L1, L2, and L3).<br />
Enter the correct voltage. Remove the phase advance<br />
capacitors.<br />
① By using a tester, measure the resistance of the resistor<br />
externally attached between the terminals B1-B2 of the servo<br />
drive. If ∞, there is disconnected wiring.<br />
② Change the regenerative resistance and wattage to the<br />
specified values.<br />
③ Replace with a new servo drive.<br />
When Pr5.08 “LV trip selection at main power OFF” is set Measure the line voltage of connectors (L1, L2, and L3).<br />
to 1, instantaneous power failure between L1 and L3<br />
occurred for a longer time than specified in Pr5.09<br />
“Detection time of main power off”, or the P-N voltage of<br />
the main power converter decreased below the defined value<br />
at servo-on.<br />
① Increase the supply voltage capacity. Change the power<br />
① The supply voltage is too low. An instantaneous supply. Remove the cause for the electromagnetic<br />
power failure has occurred.<br />
contactor to have failed, and turn on the power again.<br />
② Check the setting of Pr5.09 “Detection time of main power<br />
off”.<br />
② An instantaneous power failure has occurred.<br />
Provide the correct setting for each phase of the power<br />
supply.<br />
③ The power supply capacity is too small: the supply ③ Increase the power supply capacity. Refer to “List of<br />
voltage has reduced due to rush current when the main peripheral devices applicable to the servo drive” for the<br />
power was turned on.<br />
capacity of the power supply.<br />
④ Open phase: The servo drive specified with a 3-phase ④ Make the correct connection for each phase of the power<br />
input was operated with a single phase power supply. supply (L1, L2, and L3). Use L1 and L3 for single phase<br />
⑤ The servo drive has failed (circuit failure).<br />
100 V and single phase 200 V.<br />
⑤ Replace with a new servo drive.<br />
Current flowing in the converter has exceeded the specified<br />
value.<br />
① Turn on the servo control with the motor wires<br />
① The servo drive has failed (such as component failure in disconnected. If the failure occurs immediately, replace<br />
circuit and IGBT)<br />
the servo drive with a new (operating) one.<br />
② Check for whiskers of the connector lead wires to make<br />
② Short circuit of the motor wires U, V, and W<br />
sure the motor wire connections U, V, and W are not short<br />
circuited. Make the correct connection of the motor wires.<br />
③ Check the insulation resistance between the motor wires U,<br />
③ Ground fault of the motor wires<br />
V, and W and the motor ground wires. If the insulation is<br />
insufficient, replace the motor.<br />
④ Check the resistance between the motor wires for balance.<br />
If the balance is poor, replace the motor.<br />
⑤ Check for any lost connector pin at the motor connections<br />
U, V, and W. Fix any loose or lost pins properly.<br />
⑥ Change the servo drive. Stop starting and stopping the<br />
operation by turning the servo control on and off.<br />
⑦ Check the name plates of the motor and servo drive for their<br />
part numbers (for the capacity). Replace the motor to fit<br />
the servo drive.<br />
⑧ Wait for 100 ms at the minimum after the servo control is<br />
turned on before entering any pulse.<br />
Motor Business Unit, Appliances Company, Panasonic Corporation
Protective<br />
function<br />
Main Sub<br />
15 0<br />
16 0<br />
Name Cause Action<br />
Over-heat<br />
protection<br />
Over-load<br />
protection<br />
18 0 Over-regeneratio<br />
n load protection<br />
(Continued)<br />
№SR-ZSV00039 - 60 -<br />
The temperature of the servo drive heat sink and<br />
power devices has increased to the specified value<br />
or more.<br />
① Improve the ambient temperature and cooling<br />
① The ambient temperature of the servo drive has conditions for the servo drive.<br />
exceeded the specified value.<br />
② Increase the capacity of the servo drive and motor.<br />
② Overload<br />
Specify a longer acceleration time.<br />
Reduce load.<br />
Torque command value has exceeded the over-load Check the torque (current) curve for oscillation and<br />
level specified in Pr5.12 “Over-load level excessive amplitude by using the analog output or the<br />
setup“ and resulted in overload protection according communication. See the front panel or communication to<br />
to the time characteristics.<br />
check for an overload warning indication and load factor.<br />
① The load is too heavy, the effective torque has<br />
exceeded the rated torque, and the operation<br />
continued for too many hours.<br />
② Oscillation and hunting due to poor gain<br />
tuning. The motor is showing vibration and<br />
abnormal noise. The set value specified in<br />
Pr0.04 “Inertia ratio” is abnormal.<br />
③ The motor wiring is wrong or disconnected<br />
④ The machine has collided or suddenly got<br />
heavy. The machine has been distorted.<br />
⑤ The electromagnetic brake was kept applied.<br />
⑥ While making multiple connections, the motor<br />
wire was connected to some other axes,<br />
resulting in incorrect wiring.<br />
Regenerative energy has exceeded the capacity of<br />
the regenerative resistor.<br />
① Regenerative energy generated during the<br />
deceleration due to large load inertia has<br />
increased voltage at the converter, causing less<br />
regenerative resistor energy to be absorbed,<br />
resulting in further voltage increase.<br />
② Due to high motor revolution, regenerative<br />
energy cannot be fully absorbed during the<br />
specified deceleration time.<br />
③ The operating limit of the external resistor is<br />
restricted to 10 % duty.<br />
① Increase the capacity of the servo drive and motor.<br />
Specify a longer acceleration time. Reduce load.<br />
② Redo the gain tuning.<br />
③ Connect the motor wires to the wiring diagram.<br />
Change the cables.<br />
④ Remove the distortion of the machine. Reduce load.<br />
⑤ Measure the brake terminal voltage. Release the<br />
brake.<br />
⑥ Make the correct connection for the motor wires,<br />
encoder wires and their axes.<br />
Please find the overload time characteristics at the end of this section.<br />
Check the load factor of the regenerative resistor either<br />
with the front panel or by communication. The<br />
regenerative resistor should not be used for continuous<br />
regenerative braking.<br />
① Check the operation patterns (velocity monitor).<br />
Check the display for the indication of regenerative<br />
resistor load factor and a regeneration over warning.<br />
Increase the capacity of the motor and servo drive.<br />
Make the deceleration time more gradual. Use an<br />
external regenerative resistor.<br />
② Check the operation patterns (velocity monitor).<br />
Check the display for the indication of regenerative<br />
resistor load factor and a regeneration over warning.<br />
Increase the capacity of the motor and servo drive.<br />
Make the deceleration time more gradual. Decrease<br />
the motor revolution. Use an external regenerative<br />
resistor.<br />
③ Set Pr0.16 to 2.<br />
Important: When specifying 2 for Pr0.16, always provide the external protection such as a thermal<br />
fuse, as it will loose the protection for the regenerative resistor, resulting in its possible overheat and<br />
burnout.<br />
Motor Business Unit, Appliances Company, Panasonic Corporation
Protective<br />
function<br />
Main Sub<br />
21<br />
0<br />
1<br />
23 0<br />
24<br />
26<br />
27<br />
0<br />
1<br />
0<br />
1<br />
0<br />
2<br />
28 0<br />
(Continued)<br />
Name Cause Action<br />
Encoder<br />
communication<br />
disconnect error<br />
protection<br />
Encoder<br />
communication<br />
error protection<br />
Encoder commu<br />
nication data err<br />
or protection<br />
Position deviation<br />
excess protection<br />
Velocity deviation<br />
excess protection<br />
Over-speed<br />
protection<br />
2 nd over-speed<br />
protection<br />
Command pulse<br />
input frequency<br />
error protection<br />
Command pulse<br />
multiplier error<br />
protection<br />
Limit of pulse<br />
replay error<br />
protection<br />
The communication between the encoder and the<br />
servo drive was interrupted a certain number of times,<br />
and the disconnection detection function started to<br />
work.<br />
The data communication from the encoder is<br />
erroneous. The data error is mainly due to noise.<br />
The encode wires are connected but there is a<br />
communication data error.<br />
The data communication from the encoder is not<br />
erroneous, but the data itself is erroneous. The data<br />
error is mainly due to noise. The encode wires are<br />
connected but there is a communication data error.<br />
Position deviation pulses have exceeded the setup of<br />
Pr0.14 “Position deviation excess setup”<br />
① The motor operation is not following the<br />
command.<br />
№SR-ZSV00039 - 61 -<br />
Make the correct connection of the encoder wires.<br />
Correct any wrong connections of the connector pin.<br />
・ Make sure the encoder supply voltage is DC 5 V +/-<br />
5% (4.75- 5.25 V). Bear this in mind especially<br />
when the encoder wires are long.<br />
・ Separate the encoder wires from the motor wires if<br />
they are bundled together.<br />
Connect the shield to FG.<br />
・ Make sure the encoder supply voltage is DC 5 V +/-<br />
5% (4.75- 5.25 V). Bear this in mind especially<br />
when the encoder wires are long.<br />
・ Separate the encoder wires from the motor wires if<br />
they are bundled together.<br />
Connect the shield to FG.<br />
1) Check if the motor rotates according to the position<br />
command pulse input. Check the torque monitor to<br />
see if the output torque has saturated. Perform a<br />
gain tuning. Set the upper limit in Pr0.13 “1 st<br />
torque limit” and Pr5.24 “Second torque limit<br />
setting.” Make the encoder wiring connections to the<br />
wiring diagram. Extend the acceleration time.<br />
Reduce the load and lower the velocity.<br />
2) Set a greater value in Pr0.14.<br />
② The set value specified in Pr0.14 “Position<br />
deviation excess setup” is too small.<br />
The difference (speed deviation) between ・ Increase the Pr6.02 setting value.<br />
in-position preset velocity and actual speed ex- ・ Make longer the acceleration and deceleration duraceeded<br />
the Pr6.02 “Velocity deviation excess tion of the in-position preset velocity, or improve the<br />
setup”.<br />
following capability with the gain adjustment.<br />
Note: When in-position preset velocity becomes zero ・ Disallow the velocity deviation excess detection.<br />
by force, such as the immediate stop because of the (Pr6.02=0)<br />
command pulse inhibition (INH) and the positive/<br />
negative overtravel limit, the speed deviation increases<br />
in that moment. Also, the speed deviation increases<br />
during startup of in-position preset velocity, so apply a<br />
fully flexible setting.<br />
The motor rotational speed has exceeded the set value<br />
specified in Pr5.13 “Over-speed level setup”.<br />
The motor rotational speed has exceeded the set value<br />
specified in Pr6.15 “2 nd ・ Stop giving excessive speed command.<br />
・ Check the input frequency and scaling ratio for the<br />
command pulse.<br />
・ If there is an overshoot because the gain tuning is<br />
poor, redo it.<br />
over-speed level setup”. ・ Connect the encoder wires to the wiring diagram.<br />
The command pulse input frequency has exceeded 1.2<br />
times the value specified in Pr5.32 “Command pulse<br />
input maximum setup”.<br />
The scaling ratios used to set the Command pulse<br />
counts per one motor revolution, the command<br />
scaling numerators 1-4, and the denominator of<br />
electronic gear are not appropriate.<br />
The output frequency for pulse regeneration has<br />
exceeded the limit value.<br />
・ Check the command pulse input.<br />
・ Check the setting values for the command scaling.<br />
・ Check the set value specified in Pr0.11<br />
“Output pulse counts per one motor revolution” and<br />
Pr5.03 “Denominator of pulse output division.”<br />
・ To disable the detection, set Pr5.33 “Pulse<br />
regenerative output limit setup” to 0.<br />
Motor Business Unit, Appliances Company, Panasonic Corporation
Protective<br />
function<br />
Main Sub<br />
29 0<br />
33<br />
0<br />
1<br />
2<br />
3<br />
4<br />
6<br />
7<br />
34 0<br />
36<br />
37<br />
0<br />
1<br />
2<br />
0<br />
1<br />
2<br />
38 0<br />
(Continued)<br />
Name Cause Action<br />
Deviation<br />
counter overflow<br />
protection<br />
IF overlaps<br />
allocation error<br />
1 protection<br />
IF overlaps<br />
allocation error<br />
2 protection<br />
The position deviation value based on the encoder<br />
pulse has exceeded 2 29 (536870912).<br />
Duplicate assignment of a function to the input signals (SI1,<br />
SI2, SI3, SI4, and SI5).<br />
№SR-ZSV00039 - 62 -<br />
・ Check if the motor runs according to the position<br />
command.<br />
・ Check the torque monitor to see if the output torque<br />
has saturated.<br />
・ Perform a gain tuning.<br />
・ Set the upper limit in Pr0.13 “1 st torque limit” and<br />
Pr5.24 “2 nd torque limit”.<br />
・ Make the encoder wiring connections to the wiring<br />
diagram.<br />
・ Correct the function assignment to the connector pins.<br />
Duplicate assignment of a function to the input signals (SI6, ・ Correct the function assignment to the connector pins.<br />
SI7, SI8, SI9, and SI10).<br />
IF input Undefined numbers are used for the function assignment of ・ Correct the function assignment to the connector pins.<br />
function number the input signals (SI1, SI2, SI3, SI4, and SI5).<br />
error 1<br />
protection<br />
IF input Undefined numbers are used for the function assignment of ・ Correct the function assignment to the connector pins.<br />
function number the input signals (SI6, SI7, SI8, SI9, and SI10).<br />
error 2<br />
protection<br />
IF output Undefined numbers are used for the function assignment of ・ Correct the function assignment to the connector pins.<br />
function number the output signals (SO1, SO2, and SO3).<br />
error 1<br />
protection<br />
CL fitting error<br />
protection<br />
INH fitting error<br />
protection<br />
Software limit<br />
protection<br />
EEPROM<br />
parameter error<br />
protection<br />
EEPROM check<br />
code error<br />
protection<br />
Over-travel<br />
inhibit input<br />
protection<br />
The deviation counter clear function is assigned to an input<br />
signal other than SI7.<br />
The command pulse inhibition input enable function is<br />
assigned to an input signal other than SI10.<br />
The motor has exceeded the allowable motor operation<br />
range specified in Pr5.14 “Motor working range setup”<br />
against the position command input range.<br />
1) The gain is not appropriate.<br />
2) The set value specified in Pr5.14 is too small.<br />
When the EEPROM was read out when the power was<br />
turned on, the data in the parameter storage area was<br />
destroyed.<br />
When the EEPROM was read out when the power was<br />
turned on, the data that has been confirmed for writing was<br />
destroyed.<br />
When Pr5.04 “Over-travel inhibit input setup” is set to 0,<br />
both of the positive/negative-direction drive prohibition<br />
inputs (POT /NOT) were turned on.<br />
When Pr5.04 is set to 2, either of the<br />
positive/negative-direction drive prohibition inputs was<br />
turned on.<br />
・ Correct the function assignment to the connector pins.<br />
・ Correct the function assignment to the connector pins.<br />
① Verify the gain (the balance between the position loop gain<br />
and velocity loop gain) and the inertial ratio.<br />
② Set a greater value in Pr5.14. Or, set Pr5.14 to 0 to disable<br />
the protection function.<br />
・ Redo the entire parameter setting.<br />
・ If the problem persists, there may be a failure. Replace the<br />
servo drive with a new one and return the old one to the<br />
dealer of the product for investigation (repair).<br />
There may be a failure. Change the servo drive. Return<br />
them to the dealer for investigation (and repair).<br />
・ Check for malfunctions of switches, wires and power<br />
supplies connected to the positive/negative overtravel limits.<br />
Pay special attention to the power supply (DC 12 - 24 V) to<br />
see if it is taking too much time to start.<br />
Motor Business Unit, Appliances Company, Panasonic Corporation
Protective<br />
function<br />
Main Sub<br />
44 0<br />
45 0<br />
48 0<br />
49 0<br />
87 0<br />
95 0~4<br />
Other<br />
numbers<br />
Name Cause Action<br />
Absolute single<br />
The absolute encoder has detected a malfunction of<br />
turn counter error<br />
the single turn counter.<br />
protection<br />
Absolute multi-turn<br />
counter error<br />
protection<br />
The absolute encoder has detected a malfunction of<br />
the multi turn counter.<br />
Incremental<br />
Missing pulse of Z-phase of the serial incremental<br />
Encoder Z-phase<br />
encoder was detected. The encoder has failed.<br />
error protection<br />
Incremental<br />
Encoder CS<br />
signal error<br />
protection<br />
Compulsory<br />
alarm input<br />
protection<br />
Motor automatic<br />
recognition err<br />
or protection<br />
Other error<br />
CS signal logic error of the serial incremental<br />
encoder was detected. The encoder has failed.<br />
Replace the motor.<br />
Replace the motor.<br />
Replace the motor.<br />
Replace the motor.<br />
№SR-ZSV00039 - 63 -<br />
Forced alarm input (E-STOP) has been input. Check the wiring of forced alarm input (E-STOP).<br />
The motor is not appropriate for the servo drive. Replace the motor to suit the servo drive.<br />
The control circuit has malfunctioned due to reasons<br />
such as excessive noise.<br />
The servo drive’s self diagnosis function was<br />
performed and something has gone wrong inside the<br />
driver.<br />
Turn off the power and turn it on again.<br />
If the error still occurs, you may have a failure.<br />
Stop the operation, and replace the motor and/or servo<br />
drive.<br />
Return them to the dealer for investigation (and<br />
repair).<br />
Note: Use it so that the effective torque stays within the continuous operating range described in “S-T characteristic”<br />
of each motor.<br />
For information on “S-T characteristic”, refer to the motor specifications.<br />
Motor Business Unit, Appliances Company, Panasonic Corporation
№SR-ZSV00039 - 64 -<br />
7-3 Warning Functions<br />
A warning is generated before the protective function is activated. This allows you to check the status such as an<br />
overload in advance.<br />
In principle, a warning will automatically return to the state where it is not issued if the faulty state is<br />
corrected. However, the warning state will be kept during latch duration as shown in the following figure.<br />
To clear a latched warning before the latch time expires, perform the procedure taken to execute an alarm<br />
clear.<br />
(1)Related parameters<br />
Category No. Parameter Setup range Unit Function<br />
4 40<br />
4 41<br />
Selection of alarm<br />
output 1<br />
Selection of alarm<br />
output 2<br />
011 <br />
0~11 -<br />
6 27 Alarm latch time selection 0~10 -<br />
6 38 Alarm mask setup -32768~32767 -<br />
Warning<br />
number<br />
A0 Overload<br />
(2) Warning type<br />
Warning<br />
A1 Regeneration over<br />
A4<br />
A6<br />
Encoder<br />
communication<br />
Oscillation<br />
detection warning<br />
AA Over heat warning<br />
Item<br />
The load factor has exceeded 85%<br />
of the protection level.<br />
The regeneration load factor has<br />
exceeded 85% of the protection<br />
level.<br />
The count of consecutive encoder<br />
communication errors has<br />
exceeded the protection level.<br />
Oscillation state was detected.<br />
When the temperature of Amp<br />
over the over heat label<br />
Selects the warning output by the Warning output 1(WARN1).<br />
Set value 0: OR output of all warnings<br />
1 and after: See the following table.<br />
Select the warning output by the Warning output 2(WARN2).<br />
Set value 0: OR output of all warnings<br />
1 and after: See the following table.<br />
Sets the warning latch time.<br />
0: Infinite latch time<br />
1 to 10: Latch time 1 to 10[s]<br />
Performs the mask setting for warning detection. If the corresponding bit is<br />
set to 1, the corresponding warning detection is disabled.<br />
Pr6.27 *1<br />
Pr4.40/Pr4.41<br />
Motor Business Unit, Appliances Company, Panasonic Corporation<br />
*2<br />
Pr6.38-compatible<br />
bit *3<br />
○ 1 bit7<br />
○ 2 bit5<br />
○ 5 bit4<br />
○ 7 bit9<br />
○ 11 bit11<br />
*1 For “”, you can set a value between 1 and 10s in Pr6.27 “Alarm latch time selection”, or set no ti<br />
me limit. Battery warnings and life warnings are set with “no time limit.”<br />
*2 Select the warning output by the Warning output signal 1 (WARN1) and Warning output signal 2 (W<br />
ARN2) using Pr4.40 “Selection of alarm output 1” and Pr4.41 “Selection of alarm output 2”. If set to<br />
0, OR output of all warnings will be output. Also, do not set a value other than the set values liste<br />
d in the above table.<br />
*3 Each warning detection can be masked using Pr6.38 “Alarm mask setup”. The supported bits are listed in the<br />
table. Bit=1 masks the warning detection.<br />
*4 The encoder overheat is effective only during using the 20 bit incremental serial encoder . It becomes invalid for other<br />
encoders.
7-4 Protection Function Setting before Gain Adjustment<br />
№SR-ZSV00039 - 65 -<br />
When carrying out the gain adjustment, you can enjoy the comfortable usage of it by properly setting the parameters<br />
below according to the operating condition.<br />
1) Overtravel limit setting<br />
Allows you to proactively avoid a collision at the end by entering the limit sensor signal into the amplifier.<br />
Refer to positive/ negative overtravel limit (POT/ NOT) in the interface specification. Also, set up<br />
the following parameters related to overtravel limits:<br />
Pr5.04 “Over-travel inhibit input setup”<br />
Pr5.05 “Sequence at over-travel inhibit”<br />
2) Torque limit<br />
The damage can be reduced when a problem, such as equipment’s bite and collision, occurs by restricting<br />
the motor’s maximum torque. To uniformly restrict the torque with parameter, set up Pr0.13 “1 st torque<br />
limit”.<br />
However, when restricted to less than practically necessary torque, be careful that the position deviation<br />
excess protection can occur because a overspeed protection due to overshooting or a command delay occurs.<br />
Also, the limited torque state can be externally detected by allocating the torque limited output (TLC) as<br />
the interface specification to the output signal.<br />
3) Overspeed protection<br />
When the motor runs at unusual high-speed, Err26.0 “Over-speed protection” is generated.<br />
By default, it is automatically set to 1.2 times of maximum speed [r/min] of the motor used.<br />
When the maximum speed under customer’s operating condition is less than the motor’s maximum<br />
speed, set up Pr5.13 “Over-speed level setup” according to the expression below:<br />
Pr5.13 “Over-speed level setup” = Vmax (1.2 to 1.5)<br />
Vmax: Motor’s maximum speed [r/min] under the operating condition<br />
The coefficient enclosed in parentheses is a margin for avoiding the frequent occurrence of<br />
overspeed protections.<br />
In addition, when making the motor speed slow at initial adjustment, by establishing a value by multiplying<br />
the speed by the margin, you can use the value as a protection just in case it turns into an oscillation<br />
state.<br />
Motor Business Unit, Appliances Company, Panasonic Corporation
№SR-ZSV00039 - 66 -<br />
4) Position deviation excess protection<br />
Err24.0 “Position deviation excess protection” is generated by detecting the excessive deviation between<br />
position command and motor position during the position or full closed control.<br />
The excessive position deviation level can be set up in Pr0.14 “Position deviation excess setup”. Also,<br />
the detection position can be selected from the command position deviation [pulse (per command basis)]<br />
and the encoder position deviation [pulse (per encoder basis)] in Pr5.20 “Position setup unit select”. (Refer<br />
to control block diagram)<br />
By default, 100000 [pulse (command unit)] is established.<br />
Because the position deviation in normal operation can change according to working speed and gain setting,<br />
set Pr0.14 to the value calculated from the expression below based on the customer’s operating condition.<br />
(ア) Pr5.20=0 (detected by command position deviation)<br />
Note 1: To change the position loop gain Kp, calculate the gain by using the minimum value.<br />
Pr0.14 "Position deviation excess setup" = Vc/Kp (1.2 to 2.0)<br />
Vc : aximum frequency [pulse (command unit)/s] of the position command pulse<br />
Kp : Position loop gain [1/s]<br />
The coefficient enclosed in parentheses is a margin for avoiding the frequent occurrence of position deviation<br />
excess protection.<br />
Note 2: To use a position command filter or a damping control, add the value below.<br />
Position command smoothing filter: Vc filtering constant [s]<br />
Position command FIR filter: Vc filtering constant [s] / 2<br />
damping control: Vc / (π damping frequency [Hz])<br />
■ Pr5.20=1 (detected by encoder and full closed position deviations ):<br />
Pr0.14 "Position deviation excess setup" = Ve/Kp (1.2 to 2.0)<br />
Ve : aximum operating frequency [pulse/s] per encoder or full closed basis<br />
Kp :Position loop gain [1/s]<br />
Note 3: To change the position loop gain Kp, calculate the gain by using the minimum value.<br />
Note 4: When Pr5.20=1, the position command filter or damping control setting does not impact<br />
on it.<br />
5) Motor working range<br />
During the position or full closed control, Err34.0 “Software limit protection” is generated by detecting<br />
that the motor exceeded the preset position range by more than the rotation amount established in Pr5.14<br />
“Motor working range setup”.<br />
For more information, refer to 6-3 “Motor Movement Range Setting.”<br />
Motor Business Unit, Appliances Company, Panasonic Corporation
8.Others<br />
8-1 List of parameters<br />
Category 0: Base configuration<br />
№SR-ZSV00039 - 67 -<br />
Category No. Parameter Unit Setup range Function/description Attribute<br />
0 00<br />
02<br />
03<br />
Rotational direction<br />
setup<br />
Real-time auto-gain<br />
tuning setup<br />
Selection of machine<br />
stiffness at realtime<br />
auto-gain tuning<br />
- 01<br />
To set the relationship between the command direction<br />
and the motor rotation direction.<br />
0: CW as positive direction, 1: CCW as positive<br />
direction<br />
Power reset<br />
- 06 To select an action mode for the real-time auto tuning. Always valid<br />
- 031<br />
To set the machine stiffness when the real-time auto tuning<br />
is executed.<br />
Always valid<br />
04 Inertia ratio<br />
Command pulse<br />
% 010000 To set the load inertia ratio to the motor’s rotor inertia. Always valid<br />
06 rotational direction<br />
setup<br />
- 01 To set the counting direction of the command pulse. Power reset<br />
07<br />
08<br />
09<br />
10<br />
11<br />
12<br />
Command pulse<br />
input mode setup<br />
Command pulse<br />
counts per one motor<br />
revolution<br />
1 st numerator of<br />
electronic gear<br />
Denominator of<br />
electronic gear<br />
Output pulse counts<br />
per one motor<br />
revolution<br />
Reversal of pulse<br />
output logic<br />
- 03<br />
pulse 02 20<br />
- 02 30<br />
- 12 30<br />
P/r 1262144<br />
- 03<br />
13 1 st torque limit % 0500<br />
14<br />
16<br />
Position deviation<br />
excess setup<br />
External regenerative<br />
resistor setup<br />
Command<br />
unit<br />
02 27<br />
To specify the command pulse counting mode.<br />
0,2: 90-degree phase difference two-phase pulse<br />
1: Positive direction pulse string+negative direction<br />
pulse string<br />
3: Pulse string+symbol<br />
To define the command pulse counts per one motor<br />
revolution .<br />
Power reset<br />
Power reset<br />
To set a numerator in case the command scaling<br />
function is set with numerator/denominator.<br />
Always valid<br />
To set a denominator in case the command scaling<br />
function is set with numerator/denominator.<br />
To set the output pulse count per motor revolution for<br />
Always valid<br />
phases A and B. Power reset<br />
To select the phase B logic of pulse regeneration and<br />
the output source.<br />
To set the 1 st torque limit for the motor output torque.<br />
Also, parameter value is limited by the maximum torque of the<br />
applicable motor.<br />
To set the maximum position deviation.<br />
If set to 0, detection of Err24.0 “Position deviation<br />
excess protection” is disabled.<br />
The unit is as per Pr5.20 “Position setup unit select “.<br />
Power reset<br />
Always valid<br />
Always valid<br />
- 03 To define the setting for the regenerative resistor. Power reset<br />
Motor Business Unit, Appliances Company, Panasonic Corporation
Category 1: Gain Tuning<br />
№SR-ZSV00039 - 68 -<br />
Category No. Parameter Unit Setup range Function/description Attribute<br />
1 00<br />
1 st gain of position<br />
loop<br />
0.1/s 030000 To set the gain for the 1 st position loop. Always valid<br />
01<br />
1 st gain of velocity<br />
loop<br />
0.1Hz 132767 To set the velocity loop proportional gain 1. Always valid<br />
02<br />
1 st time constant of<br />
velocity loop<br />
integration<br />
0.1ms 110000<br />
To set the velocity loop integral time constant 1.<br />
Becomes invalid if setting value is 10000.<br />
Always valid<br />
03<br />
1 st filter of speed<br />
detection<br />
- 05<br />
To select the velocity detection filter 1 out of 6 preset<br />
steps.<br />
Always valid<br />
04<br />
1 st time constant of<br />
torque filter<br />
0.01ms 02500 To set the time constant for the torque filter 1. Always valid<br />
05<br />
2 nd gain of position<br />
loop<br />
0.1Hz 030000 To set the second speed proportional gain. Always valid<br />
06<br />
2 nd gain of velocity<br />
loop<br />
0.1Hz 132767 To set the velocity loop proportional gain 2. Always valid<br />
07<br />
2 nd time constant of<br />
velocity loop<br />
integration<br />
0.1ms 110000<br />
To set the velocity loop integral time constant 2.<br />
Becomes invalid if setting value is 10000.<br />
Always valid<br />
08<br />
2 nd filter of speed<br />
detection<br />
- 05<br />
To select the velocity detection filter 2 out of 6 preset<br />
steps.<br />
Always valid<br />
09<br />
2 nd time constant of<br />
torque filter<br />
0.01ms 02500 To set the time constant for the torque filter 2. Always valid<br />
10<br />
Velocity feed<br />
forward gain<br />
0.1% 01000 To set the velocity feed forward gain. Always valid<br />
11<br />
12<br />
13<br />
Velocity feed<br />
forward filter<br />
Torque feed forward<br />
gain<br />
Torque feed forward<br />
filter<br />
0.01ms 06400<br />
14 2 nd gain setup - 01<br />
15<br />
16<br />
17<br />
18<br />
19<br />
Mode of position<br />
control switching<br />
Delay time of<br />
position control<br />
switching<br />
Level of position<br />
control switching<br />
Hysteresis at position<br />
control switching<br />
Position gain<br />
switching time<br />
To set the time constant of the velocity feed forward<br />
filter.<br />
Always valid<br />
0.1% 01000 To set the torque feed forward gain. Always valid<br />
0.01ms 06400 To set the torque feed forward filter. Always valid<br />
- 010<br />
0.1ms 010000<br />
To set this parameter to carry out an optimum tuning by<br />
using the function to switch gains.<br />
To select the gain switching condition for the position<br />
control.<br />
To set the delay time when switching from the second<br />
gain to the first gain.<br />
Always valid<br />
Always valid<br />
Always valid<br />
- 020000 To set the gain switching level. Always valid<br />
- 020000 To set the gain switching hysteresis. Always valid<br />
0.1ms 010000 To set the gain switching time of the position loop gain. Always valid<br />
Motor Business Unit, Appliances Company, Panasonic Corporation
Category 2: Damping filter<br />
№SR-ZSV00039 - 69 -<br />
Category No. Parameter Unit Setup range Function/description Attribute<br />
2 00<br />
Adaptive filter mode<br />
setup - 04 Set the adaptive filter mode. Always valid<br />
01 1 st To set the notch frequency for the 1<br />
notch frequency Hz 505000<br />
st resonance suppressing<br />
notch filter.<br />
Match it to the machine’s resonance frequency.<br />
Always valid<br />
02<br />
1 st 03<br />
notch width<br />
selection<br />
1<br />
- 020 Sets the notch width for the first resonance prevention notch filter. Always valid<br />
st notch depth<br />
selection - 099 To set the notch depth for the 1 st 04 2<br />
resonance suppressing notch filter. Always valid<br />
nd notch frequency Hz 505000<br />
To set the notch frequency for the 2 nd 05<br />
2<br />
resonance suppressing notch<br />
filter.<br />
Match it to the machine’s resonance frequency.<br />
Always valid<br />
nd notch width<br />
selection - 020 To set the notch width for the 2 nd resonance suppressing notch filter. Always valid<br />
06<br />
2 nd notch depth<br />
selection - 099 To set the notch depth for the 2 nd resonance suppressing notch filter. Always valid<br />
07 3 rd To set the notch frequency for the 3<br />
notch frequency Hz 505000<br />
rd resonance suppressing notch filter.<br />
Match it to the machine’s resonance frequency.<br />
This will be set automatically when the adaptive notch is valid.<br />
Always valid<br />
08<br />
3 rd notch width<br />
selection - 020<br />
To set the notch width for the 3 rd 09<br />
3<br />
resonance suppressing notch filter.<br />
This will be set automatically when the adaptive notch is valid.<br />
Always valid<br />
rd notch depth<br />
selection - 099<br />
To set the notch depth for the 3 rd resonance suppressing notch filter.<br />
This will be set automatically when the adaptive notch is valid.<br />
Always valid<br />
10 4 th To set the notch frequency for the 4<br />
notch frequency Hz 505000<br />
th resonance<br />
suppressing notch filter.<br />
Match it to the machine’s resonance frequency.<br />
This will be set automatically when the adaptive notch is valid.<br />
Always valid<br />
11<br />
4 th notch width<br />
selection - 020<br />
To set the notch width for the 4 th 12<br />
4<br />
resonance suppressing notch filter.<br />
This will be set automatically when the adaptive notch is valid.<br />
Always valid<br />
th notch depth<br />
selection - 099<br />
To set the notch depth for the 4 th resonance suppressing notch filter.<br />
This will be set automatically when the adaptive notch is valid.<br />
Always valid<br />
13<br />
14<br />
Selection of damping<br />
filter switching<br />
1<br />
- 03<br />
To select the switching method in case damping filters are<br />
switched.<br />
Always valid<br />
st damping frequency 0.1Hz 02000<br />
To set the 1 st 15<br />
1<br />
damping frequency to be used for the damping<br />
control to suppress vibration at the end of the load.<br />
This will be valid with the setting value at 10 (= 1 Hz) or greater.<br />
Always valid<br />
st damping filter<br />
setup 0.1Hz 01000<br />
To fine-tune the 1 st 16 2<br />
damping control function.<br />
Use a small setting value if a torque saturation is generated; a large<br />
setting value if response needs to be raised.<br />
Always valid<br />
nd damping frequency 0.1Hz 02000<br />
To set the 2 nd 17<br />
2<br />
damping frequency to be used for the damping<br />
control to suppress vibration at the end of the load. This will be<br />
valid with the setting value at 10 (= 1 Hz) or greater.<br />
Always valid<br />
nd damping filter<br />
setup 0.1Hz 01000<br />
To fine-tune the 2 nd 18<br />
3<br />
damping control function.<br />
Use a small setting value if a torque saturation is generated; a large<br />
setting value if response needs to be raised.<br />
Always valid<br />
rd damping filter<br />
setup 0.1Hz 02000<br />
To set the 3 rd 19<br />
3<br />
damping frequency to be used for the damping<br />
control to suppress vibration at the end of the load. This will be<br />
valid with the setting value at 10 (= 1 Hz) or greater.<br />
Always valid<br />
rd damping f ilter<br />
setup 0.1Hz 01000<br />
To fine-tune the 3 rd 20 4<br />
damping control function.<br />
Use a small setting value if a torque saturation is generated; a large<br />
setting value if response needs to be raised.<br />
Always valid<br />
th damping frequency 0.1Hz 02000<br />
To set the 4 th 21<br />
4<br />
damping frequency to be used for the damping<br />
control to suppress vibration at the end of the load. This will be<br />
valid with the setting value at 10 (= 1 Hz) or greater.<br />
Always valid<br />
th damping filter<br />
setup 0.1Hz 01000<br />
To fine-tune the 4 th damping control function.<br />
Use a small setting value if torque is saturated; a large setting value if<br />
response needs to be raised.<br />
Always valid<br />
22<br />
Positional command<br />
smoothing filter 0.1ms 010000<br />
To set the time constant of the 1 st order filter for the position<br />
command.<br />
Always valid<br />
23<br />
Positional command<br />
FIR filter 0.1ms 010000 To set the time constant of the FIR filter for the position control. Always valid<br />
Motor Business Unit, Appliances Company, Panasonic Corporation
Category 3:(none)<br />
Category 4: I/O & Monitor<br />
№SR-ZSV00039 - 70 -<br />
Category No. Parameter Unit Setup range Function/description Attribute<br />
4 00 SI1 input selection - 000FFFFFFh To set the function and logic of SI1. Power reset<br />
01 SI2 input selection - 000FFFFFFh To set the function and logic of SI2. Power reset<br />
02 SI3 input selection - 000FFFFFFh To set the function and logic of SI3. Power reset<br />
03 SI4 input selection - 000FFFFFFh To set the function and logic of SI4. Power reset<br />
04 SI5 input selection - 000FFFFFFh To set the function and logic of SI5. Power reset<br />
05 SI6 input selection - 000FFFFFFh To set the function and logic of SI6. Power reset<br />
10 SO1 output selection -<br />
000FFFFF<br />
Fh<br />
To assign a function to the SO1.<br />
Power reset<br />
11 SO2 output selection -<br />
000FFFFF<br />
Fh<br />
To assign a function to the SO2.<br />
Power reset<br />
12 SO3 output selection -<br />
000FFFFF<br />
Fh<br />
To assign a function to the SO3.<br />
Power reset<br />
31<br />
Positioning complete<br />
(In-position) range<br />
Positioning complete<br />
Comman<br />
d unit<br />
0262144<br />
To set the allowable number of pulses in the positioning<br />
complete signal (INP).<br />
The unit is as per Pr5.20 “Position setup unit select “.<br />
Always valid<br />
32 (In-position) output<br />
setup<br />
- 03 To select the criteria for the in-position output. Always valid<br />
33 INP hold time ms 030000 To set the INP hold time. Always valid<br />
34 Zero-speed R/min 1020000 To set the threshold to detect the zero speed (ZSP). Always valid<br />
36<br />
37<br />
38<br />
39<br />
40<br />
41<br />
42<br />
At-speed (Speed<br />
arrival)<br />
Mechanical brake<br />
action at stalling<br />
setup<br />
Mechanical brake<br />
action at running<br />
setup<br />
Brake release speed<br />
setup<br />
Selection of alarm<br />
output 1<br />
Selection of alarm<br />
output 2<br />
2 nd Positioning com-<br />
plete (In-position)<br />
range<br />
r/min 1020000<br />
ms 010000<br />
ms 010000<br />
r/min 303000<br />
- 010<br />
- 010<br />
Comman<br />
d unit<br />
0262144<br />
To set the threshold to detect the at-speed<br />
(AT-SPEED).<br />
To set the stop time mechanical brake operation setting.<br />
The established resolution is 2ms. For example, if the<br />
setting value = 11, it will be 12ms.<br />
To set the run time mechanical brake operation setting.<br />
The established resolution is 2ms. For example, if the<br />
setting value = 11, it will be 12ms.<br />
To set the speed threshold for run time mechanical<br />
brake output determination.<br />
To select the warning type for the warning 2 to output.<br />
To select the warning type for the warning 2 to output.<br />
Sets the allowable number of pulses in the positioning<br />
complete signal 2(INP2).<br />
The unit is as per Pr5.20 “Position setup unit select “.<br />
Always valid<br />
Always valid<br />
Always valid<br />
Always valid<br />
Always valid<br />
Always valid<br />
Always valid<br />
Motor Business Unit, Appliances Company, Panasonic Corporation
Category 5: Extended configuration<br />
№SR-ZSV00039 - 71 -<br />
Category No. Parameter Unit Setup range Function/description Attribute<br />
5 00<br />
2 nd numerator of<br />
electronic gear - 02 30 Sets the numerator of the second command division.<br />
Always<br />
valid<br />
01<br />
3 rd numerator of<br />
electronic gear - 02 30 Sets the numerator of the third command division.<br />
Always<br />
valid<br />
02<br />
4 th numerator of<br />
electronic gear<br />
- 02 30 Sets the numerator of the the fourth command division.<br />
Always<br />
valid<br />
03<br />
04<br />
05<br />
06<br />
07<br />
Denominator of<br />
pulse output division - 0262144<br />
Set this when the output pulse counts per one motor revolution should be determined<br />
based on the ratio of the numerator to the denominator of the division.<br />
Over-travel inhibit<br />
input setup - 02 Sets the operation of the positive/negative drive prohibition inputs.<br />
Sequence at<br />
over-travel inhibit - 02 Sets the sequence during drive prohibition input.<br />
Sequence at<br />
Servo-Off - 09 Sets the sequence at servo-off.<br />
Sequence at main<br />
power OFF - 09 Sets the sequence at main power OFF<br />
10 Sequence at alarm - 07 To set the sequence at alarm .<br />
11<br />
12<br />
13<br />
Torque setup for<br />
emergency stop % 0500<br />
Over-load level<br />
setup<br />
% 0500<br />
Over-speed level<br />
setup r/min 020000<br />
To set the torque limit at the immediate stop.<br />
When the setting value = 0, the torque limit during normal operation is applied.<br />
Sets the overload level. If set to 0, the value is 115%.<br />
Also, the internal values are limited by 115%.<br />
Sets the detection level for Err26.0 “Over-speed protection”. If set to 0, the value is<br />
the maximum number of motor rotation multiplied by 1.2.<br />
Also, the internal values are limited by the maximum number of motor rotation<br />
multiplied by 1.2.<br />
14<br />
Motor working range<br />
setup<br />
0.1 revolution<br />
01000 To set the maximum travel distance of the motor in addition to the position command.<br />
Selects the signal read cycle for control input.<br />
15 I/F reading filter - 03<br />
0:0.166ms,1:0.333ms,2:1ms,3:1.666ms<br />
However, the deviation counter clear input (CL) and command pulse prohibition input<br />
(INH) are excluded.<br />
16<br />
17<br />
18<br />
19<br />
20<br />
21<br />
Alarm clear input<br />
setup - 01<br />
Counter clear input<br />
mode - 04<br />
Invalidation of<br />
command pulse<br />
inhibit input<br />
Command pulse<br />
inhibit input reading<br />
setup<br />
- 01<br />
- 04<br />
Position setup unit<br />
select - 01<br />
Selects the recognition time for the alarm clear input (A-CLR).<br />
0:120ms<br />
1: As per Pr5.15 “I/F reading filter”.<br />
Selects the reception condition for the counter clear input signal.<br />
0: Disabled<br />
1: Clear by level (without reading filter)<br />
2: Clear by level (with reading filter)<br />
3: Clear by edge (without reading filter)<br />
4: Clear by edge (with reading filter)<br />
Enables/disables the command pulse prohibition input (INH).<br />
0: Enabled 1: Disabled<br />
Selects the signal read cycle for the command pulse prohibition input (INH).<br />
0:0.166ms,1:0.333ms,2:1ms,3:1.666ms,<br />
4: No read filter<br />
To define the unit for the in-position range and the Position deviation excess<br />
protection .<br />
0: Per command 1: Per encoder<br />
Selection of torque<br />
limit - 06 To define the mode to select positive/negative torque limits.<br />
22 2 nd torque limit % 0500<br />
32<br />
33<br />
Command pulse<br />
input maximum<br />
setup<br />
Kpulse/s 2504000<br />
Pulse regenerative<br />
output limit setup - 01<br />
To set the 2 nd torque limit for the motor output torque.<br />
Also, parameter value is limited by the maximum torque of the motor used.<br />
Set the maximum number of command pulse inputs to be used. If the command<br />
pulse input frequency exceeds this range, Err27.0 “Command pulse input frequency<br />
error protection” will occur.<br />
Note) Detection of the command pulse input frequency error is performed against the<br />
pulses received by the drive. If the pulse frequency input significantly exceeds this<br />
set value, detection may not work correctly.<br />
Enables/disables the detection of Err28.0 “Limit of pulse replay error protection”.<br />
0: Invalid 1: Valid<br />
Power<br />
reset<br />
Power<br />
reset<br />
Power<br />
reset<br />
Always<br />
valid<br />
Always<br />
valid<br />
Always<br />
valid<br />
Always<br />
valid<br />
Always<br />
valid<br />
Always<br />
valid<br />
Always<br />
valid<br />
Power<br />
reset<br />
Power<br />
reset<br />
Always<br />
valid<br />
Always<br />
valid<br />
Power<br />
reset<br />
Power<br />
reset<br />
Always<br />
valid<br />
Always<br />
valid<br />
Power<br />
reset<br />
Power<br />
reset<br />
Motor Business Unit, Appliances Company, Panasonic Corporation
Category 6: Specific Configuration<br />
№SR-ZSV00039 - 72 -<br />
Category No. Parameter Unit Setup range Function/description Attribute<br />
6 02<br />
05<br />
06<br />
07<br />
08<br />
09<br />
14<br />
15<br />
Velocity deviation<br />
excess setup r/min 020000<br />
Position 3 rd gain<br />
valid time 0.1ms 010000<br />
Position 3 rd gain<br />
scale factor % 501000<br />
Torque command<br />
additional value<br />
Positive direction<br />
% -100100<br />
torque compensation<br />
value<br />
Negative direction<br />
% -100100<br />
torque compensation<br />
value<br />
% -100100<br />
Emergency stop time<br />
at alarm ms 01000<br />
2 nd over-speed level<br />
setup r/min 020000<br />
18 Power-up wait time 0.1s 0100<br />
27<br />
31<br />
37<br />
Alarm latch time<br />
selection<br />
Real time auto tuning<br />
estimation speed<br />
Oscillation detection<br />
level<br />
38 Alarm mask setup -<br />
s 010<br />
- 03<br />
0.1% 01000<br />
-32768<br />
32767<br />
Set up the threshold in Err24.1 “Velocity deviation<br />
excess protection”.<br />
When the setting value = 0, the detection of velocity<br />
deviation excess protection will be invalid.<br />
To set the valid time for the 3 rd gain of the 3 gain<br />
switching steps.<br />
To set the scaling factor for the 3 rd gain with the factor<br />
used for the 1 st gain.<br />
To set the offset toque to be added to the torque<br />
command.<br />
To set the value added to the torque command during<br />
the operation in the positive direction.<br />
To set the value added to the torque command during<br />
the operation in the negative direction.<br />
To set the allowable time for the immediate stop to<br />
complete when there is an alarm.<br />
The established resolution is 2ms. For example, if<br />
the setting value = 11, it will be 12ms.<br />
If the motor speed exceeds the value set for this<br />
parameter during an immediate stop caused by an<br />
alarm, it will bring the 2 nd over-speed protection<br />
state.<br />
To set the initialization time when the power is<br />
turned on by adding time to the standard 1.5 s+α.<br />
Sets the warning latch time.<br />
0: Infinite latch time<br />
1 to 10: Latch time 1 to 10[s]<br />
To set the estimated speed of load characteristics<br />
when the real time auto-gain tuning is valid.<br />
Sets the threshold for oscillation detection.<br />
If detecting the torque vibration exceeding this<br />
setting, an oscillation detection warning will occur.<br />
Performs the mask setting for warning detection.<br />
If the corresponding bit is set to 1, the<br />
corresponding warning detection is disabled.<br />
Always valid<br />
Always valid<br />
Always valid<br />
Always valid<br />
Always valid<br />
Always valid<br />
Always valid<br />
Always valid<br />
Power reset<br />
Power reset<br />
Always valid<br />
Always valid<br />
Power reset<br />
Motor Business Unit, Appliances Company, Panasonic Corporation
8-2 Timing Chart<br />
8-2-1 Timing Chart of Operations After Turning Power On<br />
Control power<br />
(L1C, L2C)<br />
Internal control<br />
power<br />
OFF ON<br />
OFF Established<br />
Approx 1.5s *1<br />
Micro computer<br />
operation<br />
Reset Initialization<br />
Alarm output<br />
(ALM)<br />
Main power<br />
(L1,L2,L3)<br />
Servo ready<br />
output(S-RDY)<br />
Servo on input<br />
(SRV-ON)<br />
Dynamic brake<br />
*4<br />
Power to the<br />
motor<br />
Brake release<br />
output(BRK-OFF)<br />
Position/velocit<br />
y/torque command<br />
Approx 100-300 ms<br />
Approx 2s *2<br />
Error<br />
check start<br />
Normal operation<br />
Output Tr OFF Output Tr ON<br />
0s upwards<br />
OFF ON<br />
Output Tr OFF Output Tr ON<br />
Input Couple OFF Input Couple ON<br />
Operation (Pr5.07) (Pr5.06) Released<br />
*3<br />
*5<br />
№SR-ZSV00039 - 73 -<br />
No power Power to the motor<br />
Output Tr OFF<br />
(brake applied)<br />
Approx 100ms upwards<br />
0s upwards<br />
Approx 2ms<br />
Approx 60ms<br />
Approx 4ms<br />
Out put Tr ON<br />
(brak e released)<br />
No command<br />
Approx 100ms<br />
upwards *6 There is command<br />
• The above chart shows the timing of actions from the time when the control power is turned on until a command<br />
is entered.<br />
Enter the servo-on signal and the position/velocity/torque commands according to the above chart.<br />
*1. When the internal control power has been established, the protective functions get activated approximately<br />
1.5 s after the start of the micro computer initialization. To design your system, keep in mind that all the<br />
input/output signals connected to the driver should be established before the protective functions start getting<br />
activated; use special care for signals that can trigger the protective functions such as positive/negative<br />
overtravel limits and external scale input. Also, this time can be extended using Pr6.18 “Power-up wait<br />
time”<br />
*2. After microcomputer initializing,and no errer,the output of ALM is on.<br />
*3. S-RDY output is turned on only when the two conditions are met: initialization of the microcomputer has been<br />
complete, and the main power has been established.<br />
*4. As SRV-OFF,until initialize ending,dynamic brake action is according to Pr5.07” Sequence at main power<br />
OFF”,after main power establish,according to Pr5.06”SRV-OFF sequence”.<br />
*5. After the output of SRV-READY is affirmed,please start the input of SRV-ON。<br />
*6. The signal of SRV-ON from on to the fact of position instruction,the waiting time please<br />
set about 100ms at least.Because from SRV-ON to the fact of power to motor need to consume some time,It is<br />
possibility the position command cann’t be accepted.<br />
Motor Business Unit, Appliances Company, Panasonic Corporation
8-2-2 Timing Chart of Servo On/Off When Monitor is Turned Off<br />
(For normal operations, stop the motor before turning the servo control on and off)<br />
Input coupler OFF<br />
Dynamic brake<br />
(SRV-ON)<br />
Dynamic brake<br />
Power to the motor<br />
Brake release output<br />
(BRK-OFF)<br />
*3<br />
Applied<br />
No power<br />
Approx 60ms<br />
Output Tr OFF<br />
(brake applied)<br />
Approx 2ms<br />
Input coupler ON<br />
Released<br />
Power to the motor<br />
Ap pro x 4 ms<br />
Output Tr ON<br />
(brake released)<br />
1~6ms<br />
t1 *1<br />
№SR-ZSV00039 - 74 -<br />
Input c oupler OFF<br />
*2<br />
Applied<br />
No power<br />
O utput Tr OFF<br />
(brake applied)<br />
*1. t1 depends on the set value specified in Pr4.37 “Mechanical brake action at stalling setup”.<br />
*2. The dynamic brake operation at servo-off depends on the set value specified in Pr5.06 “Sequence at<br />
servo-off”<br />
*3. The servo control is not turned on until the motor speed is approximately 30 r/min or less<br />
8-2-3 Timing Chart of Servo On/Off When Motor is Operating<br />
(This chart shows the timing for the emergency stop and trip. It is not intended for repeated use.)<br />
Servo on input<br />
(SRV-ON)<br />
Dynamic brake<br />
Power to the motor<br />
Brake release output<br />
(BRK-OFF)<br />
Motor rotation speed<br />
Input c oupler<br />
OFF<br />
Applied *3<br />
No power<br />
*4<br />
Output Tr OFF<br />
(brake applied)<br />
Motor speed<br />
Input coupler ON<br />
Ap pro x6<br />
0m s<br />
Released<br />
App rox 30 r/ min<br />
Servo effective<br />
The se rvo control is not turned on until<br />
the motor speed is approx. 30 r/min or<br />
less.<br />
Power to the motor<br />
Ap pro x4m s<br />
Output Tr ON<br />
(brake released)<br />
Setting value for P r4.39<br />
for the motor spee d<br />
Output Tr ON<br />
(brake re leased)<br />
Setting value for<br />
Pr4.39 for the motor<br />
speed<br />
Input coupler OFF<br />
Approx1~5ms<br />
Applied<br />
Setting value for<br />
Pr4.38<br />
t1 *1<br />
*3<br />
No power*5<br />
Setting value for<br />
Pr4.38<br />
t1 *1<br />
Output Tr OFF<br />
(brake applied)<br />
Output Tr OFF<br />
(brake applied)<br />
In case the setting value<br />
for Pr4.38 is reached<br />
first<br />
In case the setting value for<br />
Pr4.39 is reached first<br />
*1. The time t1 will be either the value used to set Pr4.38 “Mechanical brake action at running setup” or when<br />
the motor speed is reduced to the setting for Pr4.39 “Brake release speed setup” or less, whichever comes<br />
first.<br />
*2. If the SRV-ON signal is turned on again during the deceleration of the motor, the servo control does not transfer to the<br />
servo-on state until the motor stops.<br />
*3. The operation of the dynamic brake during the servo-off is according to the setting value for Pr5.06<br />
“Sequence at servo-off”.<br />
*4. The servo control is not turned on until the motor speed is approximately 30 r/min or less.<br />
*5. Whether electricity is turned on to the motor during the servo-off deceleration depends on the value<br />
used to set Pr5.06 “Sequence at servo-off”<br />
Motor Business Unit, Appliances Company, Panasonic Corporation
8-2-4 Timing Chart of Operations When Alarm is Issued (Servo-On Command Status)<br />
Whether there is a fault<br />
Dynamic brake<br />
Power to the motor<br />
Servo ready ou tput<br />
(S-RDY)<br />
Servo alarm output<br />
(ALM)<br />
Brake release output<br />
(BRK-OFF)<br />
Normal Abnormal<br />
Released<br />
Power to the<br />
motor<br />
Output Tr ON<br />
(Ready)<br />
Output Tr ON<br />
(Not alarm)<br />
Output Tr ON<br />
(Break Released)<br />
Setting value for<br />
Pr4.39 for the motor<br />
speed<br />
Output Tr ON<br />
(Break Releas ed)<br />
Setting value for P r4.39<br />
for the motor spee d<br />
0. 5~5ms<br />
Applied<br />
Setting value for<br />
t1 *1<br />
*2<br />
No power<br />
Setting value for Pn4.38<br />
t1 *1<br />
Output Tr OFF<br />
(Not ready)<br />
Output Tr OFF<br />
(Alarm)<br />
Output Tr OFF (Break Applied)<br />
In case the setting<br />
value for Pr4.38 is<br />
reached first<br />
Output Tr OFF (Break Applied)<br />
In case the setting value for<br />
Pr4.39 is reach ed first<br />
№SR-ZSV00039 - 75 -<br />
*1. The time t1 will be either the value used to set Pr4.38 “Mechanical brake action at running setup” or when the<br />
motor speed is reduced to the setting for Pr4.39 “Brake release speed setup” or less, whichever comes first.<br />
*2. The operation of the dynamic brake when an alarm has occurred is according to the setting value for Pr5.10<br />
“Sequence at alarm”.<br />
Motor Business Unit, Appliances Company, Panasonic Corporation
8-2-5 Timing Chart of Operations When Alarm is Cleared (Servo-On Command Status)<br />
Alarm clear input<br />
(A-CLR)<br />
Dynamic brake<br />
Power to the motor<br />
Brake release ou tput<br />
(BRK-OFF)<br />
Servo ready ou tput<br />
(S-RDY)<br />
Servo alarm output (ALM)<br />
Position/velo city/<br />
torque command<br />
App lied<br />
No power<br />
Output Tr OFF<br />
(Break Applied)<br />
120 ms or greater *1<br />
Input coupler<br />
OFF Input c oupler ON<br />
Output Tr OFF<br />
(Not ready)<br />
Output Tr OFF<br />
(Alarm)<br />
No input<br />
Approx 2ms<br />
Released<br />
Approx 60ms<br />
Power to the motor<br />
Ou tput Tr ON<br />
(Break Released)<br />
Approx 4ms<br />
Output Tr ON<br />
(Ready)<br />
Output Tr ON<br />
(Not alarm)<br />
100 ms or greater<br />
Input is p ossible<br />
№SR-ZSV00039 - 76 -<br />
*1. The time to recognize the alarm clear input can be changed with Pr5.16 “Alarm clear input setup”.<br />
(The default setting is 120 ms.)<br />
Motor Business Unit, Appliances Company, Panasonic Corporation