Speed Dome Camera Controller Operation Manual
Speed Dome Camera Controller Operation Manual
Speed Dome Camera Controller Operation Manual

Create successful ePaper yourself
Turn your PDF publications into a flip-book with our unique Google optimized e-Paper software.
VOOK PROFESSIONAL MONITORING<br />
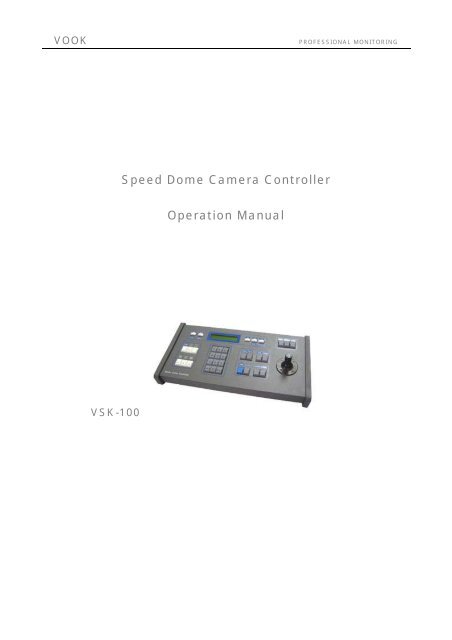
VSK-100<br />
<strong>Speed</strong> <strong>Dome</strong> <strong>Camera</strong> <strong>Controller</strong><br />
<strong>Operation</strong> <strong>Manual</strong>
VOOK PROFESSIONAL MONITORING<br />
I. Brief introduction<br />
The keyboard controller is used for terminal receivers such as the intelligent <strong>Speed</strong> <strong>Dome</strong> and the decoder etc.<br />
Taking the EIA/RS-485 electrical interface between the keyboard and the receiver, one keyboard can control as<br />
much as 32 speed dome and decoders without driving the bus and the maximum communication distance between<br />
the keyboard and the receiver is up to 1.2 km. It’s very easy for operating and setting the <strong>Speed</strong> <strong>Dome</strong> <strong>Camera</strong>.<br />
The controller is also to control the terminal receiver to achieve the function of controlling pan/tilt, lens and ect.<br />
Main Functions:<br />
Set the address range of the dome camera and the decoder:0~255.<br />
Control all functions of the dome camera such as Power ON/OFF.<br />
To operate the pan/tilt of <strong>Speed</strong> <strong>Dome</strong> <strong>Camera</strong> moving in different speed lever<br />
Set or call the set points and cruise tracks of the dome camera. Altogether 128 preset points and 6 cruise<br />
tracks can be set. Each track involves 16 preset position and the dwelling time and call speed upon each<br />
point can be set as well.<br />
<strong>Manual</strong>ly or automatically control the dome camera, and change the leaving settings of particular camera<br />
by call the menu of the camera. .<br />
<strong>Manual</strong>ly control the focus, zoom and iris of the camera.<br />
II. Introduction of Functions:<br />
Select <strong>Camera</strong>(0~255)<br />
Joystick Control Control pan/tilt direction and speed of the holder.<br />
Lens Control Control the focus, zoom and iris of the camera<br />
<strong>Operation</strong> of Preset Position (1~128)<br />
Set Preset Position<br />
Call Preset Position<br />
<strong>Operation</strong> of Cruise Track(1~6)<br />
Set Cruise Track<br />
Run Cruise Track<br />
Automatic Horizontal Scan Control of dome (including speed and direction of scan)<br />
Self-Learning Track of Intelligent <strong>Speed</strong> <strong>Dome</strong><br />
Function Setting of Menu of <strong>Speed</strong> <strong>Dome</strong><br />
Control of Multiplexer<br />
Direct Control on Decoder Control front devices such as the decoder etc.<br />
III. Introduction of the keyboard Panel<br />
1. The Sketch of the Front Panel and Description of Buttons (Figure 1)
VOOK PROFESSIONAL MONITORING<br />
There are speed joystick, buttons and LCD on the front panel of the control keyboard. The display is used to show<br />
the status of the system as well as operation information. The joystick controls the upward, downward, leftward<br />
and right ward speed motion of the speed dome. The description of buttons is as follows:<br />
(Figure 1)<br />
Func(1 cam):Set special function of the system together with other buttons.<br />
Zoom(Full screen):Show picture of the camera in full screen.<br />
PIP(up arrow):Show picture of the camera in PIP mode (Picture-in-Picture).<br />
2×2(down arrow):Show picture of the camera in 4-frame.<br />
3×3(left arrow):Show picture of the camera in 9-frame.<br />
4×4(right arrow):Show picture of the camera in 16-frame.<br />
Live:Show live picture of the camera at current mode.<br />
Tape:Playback pictures; Function + Tape: Playback video information of VCR.<br />
CAM: Select address of the intelligent <strong>Speed</strong> <strong>Dome</strong> or multiplexer.<br />
CALL: To call the preset position.<br />
PRESET:To set the preset position.<br />
SHOT: To set up or call cruising track.<br />
TIME: Set time for special function.<br />
AUTO:To control auto-horizontal rotation for pan/tilt.<br />
WIDE:To a wide angle.<br />
TELE:To turn to a telescopic range.<br />
FAR:To make focus far manually.<br />
NEAR:To make focus near manually.<br />
OPEN:To open iris.<br />
CLOSE:To close iris.<br />
ON:Switch on the setting of function.<br />
OFF:Switch off the setting of function.<br />
F1/F2:Auxiliary control buttons.<br />
F3:Switching control between intelligent <strong>Speed</strong> <strong>Dome</strong> and Multiplexer.
VOOK PROFESSIONAL MONITORING<br />
0-9: Number key<br />
CLEAR:To clear inputted data<br />
ENTER:To confirm<br />
2. Rear Panel (Figure 2)<br />
(Figure 2)<br />
A. Power input connector: input DC12V power.<br />
B. ID-Code switch: Used to set the protocol in use and the baud rate of communications.<br />
C. Communication connector RS485: The controller is connected to adapter box by specific cable.<br />
IV. Setting of the Keyboard<br />
a) The protocol in use and the baud rate of communication of the keyboard are set by the<br />
ID-Code in Figure 2. DIP1-DIP4 are used to select type of the communication protocol as<br />
per following table (●means the protocol is available):<br />
Type of Protocols<br />
DIP1<br />
Selection of Protocols<br />
DIP2 DIP3 DIP4<br />
Normal Baud<br />
Rate<br />
DIP5 DIP6<br />
Integrated<br />
Protocol<br />
Minking-VOOK A01 OFF OFF OFF OFF ON OFF ●<br />
Minking-VOOK B01 ON OFF OFF OFF OFF ON ●<br />
Santachi OFF ON OFF OFF OFF ON ●<br />
PELCO-D ON ON OFF OFF OFF OFF ●<br />
PELCO-P/4800Bps ON OFF ●<br />
OFF OFF ON OFF<br />
PELCO-P/9600Bps<br />
OFF ON ●<br />
PANASONIC ON OFF ON OFF OFF ON ●<br />
Longcomity OFF ON ON OFF OFF ON 〇<br />
HUNDA600 ON ON ON OFF OFF ON ●<br />
LILIN OFF OFF OFF ON OFF ON ●<br />
VICON ON OFF OFF ON ON OFF ●<br />
MOLYNX OFF ON OFF ON OFF ON 〇<br />
KALATEL ON ON OFF ON ON OFF ●<br />
VCL OFF OFF ON ON OFF ON 〇<br />
Reserved ON OFF ON ON OFF ON 〇<br />
ALEC OFF ON ON ON OFF ON ●<br />
Ultrak ON ON ON ON OFF ON ●<br />
b) DIP5 and DIP6 are used to select the baud rate, shown as following table(DIP7 and DIP8<br />
are not used):
VOOK PROFESSIONAL MONITORING<br />
Status of ID-Code<br />
Baud Rate<br />
DIP1 DIP2 DIP3 DIP4 DIP5 DIP6 DIP7 DIP8<br />
2400bps OFF OFF<br />
4800bps ON OFF<br />
9600bps OFF ON<br />
19200bps ON ON<br />
c) Some of the ID-Code of the protocols are set as follows:<br />
Mi nKi ng B01/ 9600Bps<br />
Mi nKi ng A01/ 4800Bps<br />
PELCO- D/ 2400Bps<br />
PELCO- P/ 4800Bps<br />
PELCO- P/ 9600Bps<br />
PANASONI C/ 9600Bps<br />
Ul t r ak/ 9600Bps<br />
ON 1 2 3 4 5 6 7 8<br />
ON 1 2 3 4 5 6 7 8<br />
ON 1 2 3 4 5 6 7 8<br />
ON 1 2 3 4 5 6 7 8<br />
ON 1 2 3 4 5 6 7 8<br />
ON 1 2 3 4 5 6 7 8<br />
ON 1 2 3 4 5 6 7 8<br />
d) Switching control between intelligent decoder and multiplexer.:The keyboard can be operated<br />
in two modes: Intelligent Decoder and Multiplexer. When power supply is on it is operated on the<br />
default mode of Intelligent Decoder. Press [F3] down until the LCD disply“CONTROLLING MULX” ,<br />
then control the processor by the RS-232 output of the keyboard. Attention! If the LCD is not the right<br />
state, the Multiplexer can not be under of control.<br />
V. <strong>Operation</strong> of the Keyboard<br />
1. Select Address of <strong>Speed</strong> <strong>Dome</strong> <strong>Camera</strong> /Decoder:[CAM]+[N]+[Enter]<br />
Display: Current CamID:001<br />
Description:N –– No. of camera from 0 to 255<br />
Function:Select the address of the camera to be controlled. When the value N is in conformity with the<br />
address of the speed dome, it will be under control.<br />
2. To set preset position:[PRESET]+[N]+[ Enter]<br />
Display:Preset No:001<br />
Description:N –– No. of preset position from 1 to 128.<br />
Function:Store current position and refer it as No. N position.
VOOK PROFESSIONAL MONITORING<br />
3. Call the Preset position:[CALL]+[N]+[ Enter]<br />
Display:Call Number:001<br />
Description::N –– No. of preset position from 1 to 128.<br />
Function: Transfer the camera to the position of No. N preset position.<br />
4. Cancel the Preset position:[PRESET]+[N]+[OFF]<br />
Display:Preset No:001<br />
Description:N –– No. of preset position from 1 to 128.<br />
Function:Delete the No. N Preset position stored.<br />
5. Set the cruise track (Minking A01/B01、PELCO-P、PELCO-D、ALEC、Ultrak Available)<br />
Enter the status of track setting:[SHOT]+[N]+ [ON] (N:No. of track from 1 to 6).<br />
Display:Track = 01 Sum = 06<br />
Description:Track No1 is currently set, in which there are 6 preset points.<br />
Edit Track:Press [TELE] to edit afterward and press [WIDE] to edit return. Each track involves 16<br />
preset points and the running speed and the dwelling time of each preset position.<br />
Display:No.:01 Point:001 → Description:The 1st preset position in the track is 01.<br />
Display:No.:01 <strong>Speed</strong>:001 → Description:The speed of the 1st preset point in the track is<br />
the 1st class.<br />
Display:No.:01 Time: 004 → Description:The dwelling time of the 1st preset point in the<br />
track is 4 seconds<br />
<strong>Speed</strong> Range:1 to 8 from the fastest to the lowest. Any speed outside the range well be referred as<br />
the 1st class; the range of the dwelling time is:1 to 99.<br />
When the No. N preset point is set as No. 0, then all preset points before the No. N preset point in<br />
the track will be valid however all numbers of preset points afterward and their speed and dwelling<br />
time shall be set as 0 automatically.<br />
After tracks are edited, press OFF to store and exit while push the joystick to exit without storage.<br />
6. Tour the Track:[SHOT]+[N]+ [Enter]<br />
Display:Input Tour No:01<br />
Description:N –– No. of the track from 1 to 6.<br />
Function:Tour the No. N track and stop tour by pushing the joystick.<br />
7. Stop the Track: [SHOT]+[N]+ [OFF]<br />
Display:Input Tour No:01<br />
Description:N –– No. of the track from 1 to 6.<br />
Function:Stop the No. N track or stop tour by pushing the joystick.<br />
8. Cancel Cruise Track: [SHOT]+[N]+ [OFF] (Pressing [OFF] down until “ Clear Tour OK ”appears)<br />
Display:Input Tour No:01<br />
Description:N –– No. of the track from 1 to 6.<br />
Function:Delete the No. N track<br />
9. To turn on Auto Pan (<strong>Operation</strong> of NEON、SAMSUNG Protocol):[AUTO]+[P1]+[ON]+[P2]+[OFF]<br />
Display:Input 1st No:001<br />
Description:P1 –– the starting scan No. of preset point from 1 to 128, which should be set already.<br />
Display:Input 2nd No:002<br />
Description:P2 – the ending scan No. of preset point from 1 to 128, which should be set already. If P1 =<br />
P2 or P1 and P2 are coincided, the speed dome will make scan in range of 360°.<br />
Note:① For PELCO-D、PELCO-P Protocol the way of operation is as follows:<br />
Set the starting scan position: Transfer the <strong>Speed</strong> <strong>Dome</strong> to the starting scan position, operation<br />
[AUTO]+[ON]
VOOK PROFESSIONAL MONITORING<br />
Set the ending scan position: Transfer the <strong>Speed</strong> <strong>Dome</strong> to the ending scan position,operation<br />
[AUTO]+[OFF]<br />
Run Auto Pan:[AUTO]+[ENTER]<br />
②Auto Pan operation takes the following parameters. You must set these parameters before using a<br />
Auto Pan command to begin the scan operation. You can use the scan stop command ot PT scan stop<br />
command to stop the scan. Setting scan condition.<br />
Auto Pan Position(First specify position, second specify position)<br />
Auto Pan <strong>Speed</strong> and Direction<br />
10. Stop Auto Pan:[AUTO]+[OFF]( Only Minking A01、B01 Available) or push the joystick to stop scan<br />
11. Control the zoom of the <strong>Camera</strong>:[WIDE]/[TELE]<br />
12. Control the Focus of the <strong>Camera</strong>:[FAR]/[NEAR]<br />
13. Control the Iris of the <strong>Camera</strong>:[OPEN]/[CLOSE]<br />
14. Auxiliary Control of the <strong>Camera</strong>:By combination of [F1] and [ON], [OFF] buttons, you can set some<br />
data of the camera, and functions are listed as follows(operations of NEON Protocol):<br />
No. of<br />
Value N<br />
Control Object<br />
Definition of Keyboard <strong>Operation</strong><br />
[F1]+N+[ON] [F1]+N+[OFF]<br />
0 <strong>Camera</strong> power supply/reset control<br />
Power ON/OFF<br />
Switching<br />
Recover Initial<br />
Values of <strong>Camera</strong><br />
1 Back Light Compensation ON OFF<br />
2<br />
3<br />
Zero Illumination (refer to function of<br />
camera)<br />
Menu/Display (refer to function of<br />
camera)<br />
ON OFF<br />
ON OFF<br />
4 Digital Zoom ON OFF<br />
5 Back Light of Keyboard Screen ON OFF<br />
6 Focus Automatic <strong>Manual</strong><br />
7 Iris Automatic <strong>Manual</strong><br />
8 Automatic <strong>Manual</strong><br />
9 White Balance Mode(WB)<br />
Indoor Mode Outdoor Mode<br />
10<br />
ATW Mode One Push WB<br />
11 Black & White/Color Switching Color Black & White<br />
12 Set Auto Pan (Only conditions for scan. If < 180°, low speed > 180°, low speed<br />
13 start scan, operate as Item 6 in this < 180°, middle speed > 180°, middle speed<br />
14 paragraph) < 180°, high speed > 180°, high speed<br />
15 Reserved<br />
16 Reserved<br />
17 Reserved<br />
18 Reserved<br />
For different camera, control functions in the list could be different.<br />
For the camera with the menu, switch ON/OFF the menu by “[F1]+[3]+[ON]”, and switch<br />
ON/OFF the OSD by “[F1]+[3]+[OFF]”. In case the camera has the menu and the menu is ON:<br />
1. Select the item on the menu by buttons [WIDE]/[TELE] to scroll the cursor up or down;<br />
2. Chang the status of the selected item on the menu by buttons [FAR]/[NEAR];<br />
3. Switch OFF the menu as per operations in the list after the menu is set.<br />
Take care of differences between the Menu of <strong>Speed</strong> <strong>Dome</strong> and the Menu of <strong>Camera</strong>. For the<br />
speed dome with the menu, enter the menu by “[CALL]+[64]+[Enter]” and basic operations are
VOOK PROFESSIONAL MONITORING<br />
as follows:<br />
1. Call No.64 preset point to open the main menu by the control keyboard.<br />
2. When the menu appears on the screen, move the cursor to the item you need to set by “TILT<br />
UP” and “TILT DOWN”, and enter the<br />
settings of the item to make change by “PAN<br />
LEFT” and “PAN RIGHT”;<br />
上<br />
3. <strong>Speed</strong> up operation of the joystick after<br />
keeping it for one second in one direction.<br />
左<br />
右<br />
右<br />
4. All settings of the menu could not be lost<br />
even power failure occurred;<br />
上<br />
5. <strong>Operation</strong>s under special case can be referred<br />
下<br />
on the description of the menu of the ball<br />
低速度<br />
下<br />
machine.<br />
15. Use the Joystick to Control the <strong>Speed</strong> <strong>Dome</strong> <strong>Camera</strong>:<br />
高速度<br />
You can use the speed joystick to control the Pan/Tilt<br />
direction and speed of the dome of the camera randomly.<br />
Figure3<br />
The speed of pan/tilt is decided by the angle of the joystick you operated (Figure 3). Change the tilting<br />
angle of the joystick you can adjust the speed evenly and the camera can be focused automatically in the<br />
course of scan to keep images being distinct.<br />
16. In case error operation occurs, normal display will be recovered after “Error <strong>Operation</strong>” appears for 1<br />
second.<br />
VI. Installation and Connection:<br />
Attention: Please read the operation manual of the keyboard and the speed<br />
dome carefully before connecting wires. Any incorrect connections can cause<br />
permanent damage of the device. When connecting wires, first switch off the<br />
power supply of all devices. The communication wires between devices should<br />
be shielded twisted cable. When installing cables they should be far away from<br />
high voltage lines or other possible interference circuits as can as possible.<br />
1. The marking of wires of the transfer box(Figure 4)<br />
2. Connections of the keyboard controller controlling multiple speed dome<br />
cameras(figure5)<br />
Figure5<br />
RED<br />
BLACK<br />
GREEN<br />
YELLOW<br />
REDŁşRS485+<br />
BLACKŁşRS485-<br />
GREENŁşGND<br />
YELLOWŁşRS232 OUT<br />
Figure 4<br />
1<br />
2<br />
3<br />
4<br />
5<br />
6<br />
7<br />
8<br />
1<br />
2<br />
3<br />
4<br />
5<br />
6<br />
7<br />
8<br />
ALM<br />
ALM<br />
DC IN<br />
GND<br />
R+<br />
R-<br />
VIDEO-<br />
VIDEO+<br />
DOME SPEED 1<br />
ALM<br />
ALM<br />
DC IN<br />
GND<br />
R+<br />
R-<br />
VIDEO-<br />
VIDEO+<br />
DOME SPEED N<br />
Figure6<br />
左
VOOK PROFESSIONAL MONITORING<br />
3. Connections between the keyboard and the speed dome camera(Figure6)<br />
4. The keyboard controls the Multiplexer directly(Figure7)<br />
VII. Technical Specifications:<br />
Figure7<br />
Communication between <strong>Speed</strong> <strong>Dome</strong> <strong>Camera</strong> and <strong>Controller</strong>:Port to multi-port and half duplex<br />
function.<br />
Communication connector: RS-485.<br />
Baud Rate of Communication:Four baud rates i.e. 2400Bps, 4800Bps, 9600Bps and 19200Bps.<br />
Distance of Communication:1200 M in maximum<br />
Power Supply:DC12V/800 mA<br />
Size: 380 × 165 × 80(mm)<br />
Weight:2 Kg<br />
Number of Controlled <strong>Speed</strong> <strong>Dome</strong> <strong>Camera</strong> up to 32.<br />
VIII. Points for Attention:<br />
Please read the operation manual of the keyboard carefully before using it.<br />
The operation manual is mainly focused on all functions of B01 Protocol. For other different<br />
protocols, operations could be something difference and those different parts will be listed on<br />
“Supplementary Description of the Keyboard <strong>Controller</strong>” in details.<br />
The keyboard takes 12V DC power supply. Please confirm the voltage and polarity before the power<br />
supply is switched on.<br />
Do not place the keyboard under the rain or on wet place so as to avoid short circuit or electrical shock.<br />
As the keyboard is a sophisticated electronic device, you should never open the case so as to avoid the<br />
occurrence of trouble.<br />
The keyboard has integrated multiple protocols, and you are pleased to select correct protocol and the<br />
baud rate. When switching on power supply, take care of the selected protocol and the baud rate on the<br />
first screen.
VOOK PROFESSIONAL MONITORING<br />
In case the keyboard controls the Multiplexer, the operation of combination buttons is as follows:<br />
Press one button first, and press the other button after release the first one.<br />
For example:When enter/exit setting of the menu (Function + Zoom), press Function button first, and<br />
press Zoom button after Function button is released.<br />
In case the keyboard controls the multiplexer, the operation of combination buttons is as follows:<br />
Press one button first,and press the other button after release the first one. While use Function alone,<br />
please put it down, until“Motion Detect OK”appears.<br />
When the keyboard controls the Multiplexer, please refer to concerned operation manual of Multiplexer