Configuring DataStage PX to use ssh instead of rsh - IBM
Configuring DataStage PX to use ssh instead of rsh - IBM
Configuring DataStage PX to use ssh instead of rsh - IBM
Create successful ePaper yourself
Turn your PDF publications into a flip-book with our unique Google optimized e-Paper software.
Information Server <strong>DataStage</strong><br />
<strong>Configuring</strong> <strong>DataStage</strong> <strong>PX</strong> <strong>to</strong> <strong>use</strong> <strong>ssh</strong><br />
<strong>instead</strong> <strong>of</strong> <strong>rsh</strong><br />
© 2011 <strong>IBM</strong> Corporation<br />
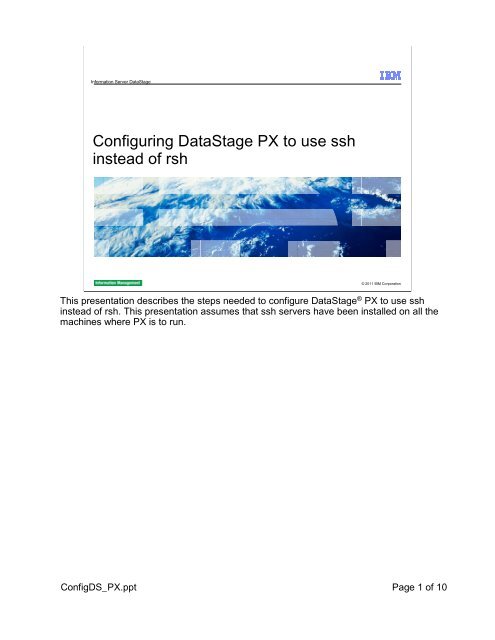
This presentation describes the steps needed <strong>to</strong> configure <strong>DataStage</strong> ® <strong>PX</strong> <strong>to</strong> <strong>use</strong> <strong>ssh</strong><br />
<strong>instead</strong> <strong>of</strong> <strong>rsh</strong>. This presentation assumes that <strong>ssh</strong> servers have been installed on all the<br />
machines where <strong>PX</strong> is <strong>to</strong> run.<br />
ConfigDS_<strong>PX</strong>.ppt Page 1 <strong>of</strong> 10
Objectives<br />
System requirements<br />
Generating public and private RSA or DSA key pair<br />
Sending public key <strong>to</strong> remote node<br />
Adding public key <strong>to</strong> list <strong>of</strong> authorized keys<br />
Creating remsh file<br />
2 <strong>Configuring</strong> <strong>DataStage</strong> <strong>PX</strong> <strong>to</strong> <strong>use</strong> <strong>ssh</strong> <strong>instead</strong> <strong>of</strong> <strong>rsh</strong> © 2011 <strong>IBM</strong> Corporation<br />
The objective <strong>of</strong> this presentation is <strong>to</strong> describe how <strong>to</strong> generate the required public and<br />
private RSA or DSA key pair and how <strong>to</strong> send the generated keys <strong>to</strong> the remote node. You<br />
will also learn how <strong>to</strong> add the generated keys <strong>to</strong> the list <strong>of</strong> authorized keys, and how <strong>to</strong><br />
create the remsh file.<br />
ConfigDS_<strong>PX</strong>.ppt Page 2 <strong>of</strong> 10
System requirements<br />
<strong>PX</strong> already installed on remote nodes<br />
Configure <strong>ssh</strong> <strong>to</strong> run on conduc<strong>to</strong>r node<br />
Uses RSA or DSA public key encryption<br />
Tasks must be completed for each <strong>DataStage</strong> <strong>PX</strong> <strong>use</strong>r<br />
3 <strong>Configuring</strong> <strong>DataStage</strong> <strong>PX</strong> <strong>to</strong> <strong>use</strong> <strong>ssh</strong> <strong>instead</strong> <strong>of</strong> <strong>rsh</strong> © 2011 <strong>IBM</strong> Corporation<br />
This presentation assumes that you have already successfully installed the <strong>PX</strong> engine on<br />
all <strong>of</strong> your remote nodes. In order for <strong>DataStage</strong> <strong>PX</strong> <strong>to</strong> <strong>use</strong> <strong>ssh</strong>, <strong>ssh</strong> must be configured so<br />
that a command can be launched from the conduc<strong>to</strong>r node <strong>to</strong> all other nodes without a<br />
password; authenticating only by way <strong>of</strong> public key encryption. When you configure <strong>ssh</strong> <strong>to</strong><br />
work with the parallel engine, the engine connects from the primary computer <strong>to</strong> all <strong>of</strong> the<br />
other computers, using RSA or DSA public key encryption for authentication. This task<br />
must be completed for each <strong>use</strong>r that runs parallel jobs. In the next steps, the primary<br />
computer, or the Conduc<strong>to</strong>r Node, is the computer that contains the <strong>IBM</strong> Information<br />
Server engine. The secondary computers, or Remote Nodes, are the other computers that<br />
contain parallel engines.<br />
ConfigDS_<strong>PX</strong>.ppt Page 3 <strong>of</strong> 10
RSA versus DSA pairs<br />
RSA or DSA pairs generated depending on pro<strong>to</strong>col version <strong>ssh</strong> is supporting<br />
RSA – <strong>ssh</strong> set <strong>to</strong> <strong>use</strong> Pro<strong>to</strong>col 1<br />
DSA – <strong>ssh</strong> set <strong>to</strong> <strong>use</strong> Pro<strong>to</strong>col 2<br />
Default settings<br />
– /etc/<strong>ssh</strong>/<strong>ssh</strong>_config<br />
– $HOME/.<strong>ssh</strong>/config<br />
Pro<strong>to</strong>col 2,1<br />
4 <strong>Configuring</strong> <strong>DataStage</strong> <strong>PX</strong> <strong>to</strong> <strong>use</strong> <strong>ssh</strong> <strong>instead</strong> <strong>of</strong> <strong>rsh</strong> © 2011 <strong>IBM</strong> Corporation<br />
The next step is <strong>to</strong> generate an RSA or DSA key pair. Which one you will generate<br />
depends on the pro<strong>to</strong>col version <strong>ssh</strong> is using on your nodes. If you are using pro<strong>to</strong>col 1<br />
then you will want <strong>to</strong> generate an RSA key pair. If you are using pro<strong>to</strong>col 2, then generate<br />
a DSA key pair. Your system will have the default settings in /etc/<strong>ssh</strong>/<strong>ssh</strong>_config. The <strong>use</strong>r<br />
can also have this set in $HOME/.<strong>ssh</strong>/config. Look in these files for the line with “Pro<strong>to</strong>col”<br />
<strong>to</strong> see what the default setting is. If the default is ''2,1'‘, for example, <strong>ssh</strong> will try version 2<br />
and falls back <strong>to</strong> version 1 if version 2 is not available.<br />
If you are unsure which pro<strong>to</strong>col you are using, you can generate both the RSA and DSA<br />
keys for each remote machine.<br />
ConfigDS_<strong>PX</strong>.ppt Page 4 <strong>of</strong> 10
Generating RSA key pair<br />
Generate public and privateprivate RSA key pair on conduc<strong>to</strong>r<br />
– <strong>ssh</strong>-keygen –b 1024 -t rsa -f $HOME/.<strong>ssh</strong>/id_rsa<br />
Command Output:<br />
Generating public/private rsa key pair.<br />
Enter file in which <strong>to</strong> save the key ($HOME/.<strong>ssh</strong>/id_rsa):<br />
Enter passphrase (empty for no passphrase):<br />
Enter same passphrase again:<br />
Your identification has been saved in $HOME/.<strong>ssh</strong>/id_rsa.<br />
Your public key has been saved in $HOME/.<strong>ssh</strong>/id_rsa.pub.<br />
The key fingerprint is:<br />
f6:61:a8:27:35:cf:4c:6d:13:22:70:cf:4c:c8:a0:23 dsadm@conduc<strong>to</strong>rnode<br />
Send public key <strong>to</strong> each remote node<br />
– scp id_rsa.pub <strong>use</strong>r@remotenode:$HOME/.<strong>ssh</strong><br />
5 <strong>Configuring</strong> <strong>DataStage</strong> <strong>PX</strong> <strong>to</strong> <strong>use</strong> <strong>ssh</strong> <strong>instead</strong> <strong>of</strong> <strong>rsh</strong> © 2011 <strong>IBM</strong> Corporation<br />
Login <strong>to</strong> the conduc<strong>to</strong>r node as the <strong>use</strong>r that you will be running <strong>DataStage</strong> <strong>PX</strong> jobs as.<br />
Generate the public and private RSA key pair on the conduc<strong>to</strong>r node using the <strong>ssh</strong>-keygen<br />
command where $HOME is your <strong>use</strong>r’s home direc<strong>to</strong>ry: <strong>ssh</strong>-keygen –b 1024 -t rsa -f<br />
$HOME/.<strong>ssh</strong>/id_rsa.<br />
Press enter twice <strong>to</strong> set a null pass-phrase. The identification keys will have been saved in<br />
$HOME/.<strong>ssh</strong>/id_rsa. Next, ensure that you are in $HOME/.<strong>ssh</strong>. Send the public key <strong>to</strong><br />
each <strong>of</strong> the remote nodes using the scp command, scp id_rsa.pub<br />
<strong>use</strong>r@remotenode:$HOME/.<strong>ssh</strong><br />
where remotenode is the name <strong>of</strong> your remote <strong>PX</strong> node. You must do this step for every<br />
remote node that you are configuring.<br />
ConfigDS_<strong>PX</strong>.ppt Page 5 <strong>of</strong> 10
Generating DSA key pair<br />
Generate public and privateprivate DSA key pair on conduc<strong>to</strong>r<br />
– <strong>ssh</strong>-keygen –b 1024 -t dsa -f $HOME/.<strong>ssh</strong>/id_dsa<br />
Command Output:<br />
Generating public/private dsa key pair.<br />
Enter file in which <strong>to</strong> save the key ($HOME/.<strong>ssh</strong>/id_dsa):<br />
Enter passphrase (empty for no passphrase):<br />
Enter same passphrase again:<br />
Your identification has been saved in $HOME/.<strong>ssh</strong>/id_dsa.<br />
Your public key has been saved in $HOME/.<strong>ssh</strong>/id_dsa.pub.<br />
The key fingerprint is:<br />
f6:61:a8:27:35:cf:4c:6d:13:22:70:cf:4c:c8:a0:23 dsadm@conduc<strong>to</strong>rnode<br />
Send public key <strong>to</strong> remote node<br />
– scp id_dsa.pub <strong>use</strong>r@remotenode:$HOME/.<strong>ssh</strong><br />
6 <strong>Configuring</strong> <strong>DataStage</strong> <strong>PX</strong> <strong>to</strong> <strong>use</strong> <strong>ssh</strong> <strong>instead</strong> <strong>of</strong> <strong>rsh</strong> © 2011 <strong>IBM</strong> Corporation<br />
Login <strong>to</strong> the conduc<strong>to</strong>r node as the <strong>use</strong>r that you will be running <strong>DataStage</strong> <strong>PX</strong> jobs as.<br />
Generate the public and private DSA key pair on the conduc<strong>to</strong>r node using the <strong>ssh</strong>-keygen<br />
command where $HOME is your <strong>use</strong>r’s home direc<strong>to</strong>ry:<br />
<strong>ssh</strong>-keygen –b 1024 -t dsa -f $HOME/.<strong>ssh</strong>/id_dsa.<br />
Press enter twice <strong>to</strong> set a null pass-phrase. The identification keys will have been saved in<br />
$HOME/.<strong>ssh</strong>/id_dsa. Next, ensure that you are in $HOME/.<strong>ssh</strong>. Send the public key <strong>to</strong> the<br />
remote node using the scp command c where remotenode is the name <strong>of</strong> your remote <strong>PX</strong><br />
node. You must do this step for every remote node that you are configuring.<br />
ConfigDS_<strong>PX</strong>.ppt Page 6 <strong>of</strong> 10
Adding key pair <strong>to</strong> authorized keys<br />
Logon <strong>to</strong> remote nodes<br />
– sh remotenode<br />
Add public key <strong>to</strong> list <strong>of</strong> authorized keys<br />
– Execute on remote node<br />
• cd $HOME/.<strong>ssh</strong><br />
cat id_rsa.pub id_dsa.pub >> authorized_keys2<br />
chmod 640 authorized_keys2<br />
rm -f id_rsa.pub id_dsa.pub<br />
Test connection (From conduc<strong>to</strong>r node)<br />
– <strong>ssh</strong> dbnode ls<br />
7 <strong>Configuring</strong> <strong>DataStage</strong> <strong>PX</strong> <strong>to</strong> <strong>use</strong> <strong>ssh</strong> <strong>instead</strong> <strong>of</strong> <strong>rsh</strong> © 2011 <strong>IBM</strong> Corporation<br />
Next, log in <strong>to</strong> the remote node and add the public key <strong>to</strong> the list <strong>of</strong> authorized keys.<br />
Change direc<strong>to</strong>ries in<strong>to</strong> the .<strong>ssh</strong> direc<strong>to</strong>ry under the <strong>use</strong>r’s home direc<strong>to</strong>ry. In there you<br />
should find the key pair you created in the last step. You want <strong>to</strong> append the key pair <strong>to</strong><br />
the authorized_keys file. If you created both the RSA and DSA key pairs, you want <strong>to</strong><br />
append both <strong>to</strong> the file. In the example displayed on this slide, you <strong>use</strong>d both the RSA and<br />
DSA key pairs. Be aware the file containing the authorized keys file can either be named<br />
authorized_keys or authorized_keys2, depending on the version <strong>of</strong> <strong>ssh</strong> you have installed<br />
on your systems.<br />
Test the connection by trying <strong>to</strong> <strong>ssh</strong> from the conduc<strong>to</strong>r node <strong>to</strong> the remote node. If<br />
successful, you should be able <strong>to</strong> log in <strong>to</strong> the remote shell without providing a password.<br />
An example command <strong>to</strong> <strong>use</strong> as a test is <strong>ssh</strong> dbnode ls where dbnode is the name <strong>of</strong> the<br />
remote node you are testing.<br />
ConfigDS_<strong>PX</strong>.ppt Page 7 <strong>of</strong> 10
Creating remsh file on conduc<strong>to</strong>r node<br />
Navigate <strong>to</strong><br />
<strong>IBM</strong>/InformationServer/Server/<strong>PX</strong>Engine/etc<br />
Create file called remsh which contains<br />
– #!/bin/sh<br />
– exec /usr/bin/<strong>ssh</strong> "$@“<br />
Give file execute permissions<br />
– chmod 755 remsh<br />
8 <strong>Configuring</strong> <strong>DataStage</strong> <strong>PX</strong> <strong>to</strong> <strong>use</strong> <strong>ssh</strong> <strong>instead</strong> <strong>of</strong> <strong>rsh</strong> © 2011 <strong>IBM</strong> Corporation<br />
Next, on the conduc<strong>to</strong>r node, navigate <strong>to</strong> the <strong>IBM</strong>/InformationServer/Server/<strong>PX</strong>Engine/etc<br />
direc<strong>to</strong>ry. Create a file called remsh which contains:<br />
#!/bin/sh<br />
exec /usr/bin/<strong>ssh</strong> "$@“<br />
An example remsh file which <strong>use</strong>s <strong>rsh</strong> can be found at <strong>PX</strong>Engine/etc/remsh.example. Give<br />
the file execute permissions by running: chmod 755 remsh.<br />
ConfigDS_<strong>PX</strong>.ppt Page 8 <strong>of</strong> 10
Feedback<br />
Your feedback is valuable<br />
You can help improve the quality <strong>of</strong> <strong>IBM</strong> Education Assistant content <strong>to</strong> better meet<br />
your needs by providing feedback.<br />
Did you find this module <strong>use</strong>ful?<br />
Did it help you solve a problem or answer a question?<br />
Do you have suggestions for improvements?<br />
Click <strong>to</strong> send email feedback:<br />
mail<strong>to</strong>:iea@us.ibm.com?subject=Feedback_about_Relocating the Xmeta Resposi<strong>to</strong>ry.ppt<br />
This module is also available in PDF format at: ../Relocating the Xmeta Resposi<strong>to</strong>ry.pdf<br />
9 <strong>Configuring</strong> <strong>DataStage</strong> <strong>PX</strong> <strong>to</strong> <strong>use</strong> <strong>ssh</strong> <strong>instead</strong> <strong>of</strong> <strong>rsh</strong> © 2011 <strong>IBM</strong> Corporation<br />
You can help improve the quality <strong>of</strong> <strong>IBM</strong> Education Assistant content by providing<br />
feedback.<br />
ConfigDS_<strong>PX</strong>.ppt Page 9 <strong>of</strong> 10
Trademarks, disclaimer, and copyright information<br />
<strong>IBM</strong>, the <strong>IBM</strong> logo, ibm.com, and <strong>DataStage</strong> are trademarks or registered trademarks <strong>of</strong> International Business Machines Corp., registered in many<br />
jurisdictions worldwide. Other product and service names might be trademarks <strong>of</strong> <strong>IBM</strong> or other companies. A current list <strong>of</strong> other <strong>IBM</strong> trademarks is<br />
available on the web at "Copyright and trademark information" at http://www.ibm.com/legal/copytrade.shtml<br />
THE INFORMATION CONTAINED IN THIS PRESENTATION IS PROVIDED FOR INFORMATIONAL PURPOSES ONLY. WHILE EFFORTS WERE<br />
MADE TO VERIFY THE COMPLETENESS AND ACCURACY OF THE INFORMATION CONTAINED IN THIS PRESENTATION, IT IS PROVIDED<br />
"AS IS" WITHOUT WARRANTY OF ANY KIND, EXPRESS OR IMPLIED. IN ADDITION, THIS INFORMATION IS BASED ON <strong>IBM</strong>’S CURRENT<br />
PRODUCT PLANS AND STRATEGY, WHICH ARE SUBJECT TO CHANGE BY <strong>IBM</strong> WITHOUT NOTICE. <strong>IBM</strong> SHALL NOT BE RESPONSIBLE FOR<br />
ANY DAMAGES ARISING OUT OF THE USE OF, OR OTHERWISE RELATED TO, THIS PRESENTATION OR ANY OTHER DOCUMENTATION.<br />
NOTHING CONTAINED IN THIS PRESENTATION IS INTENDED TO, NOR SHALL HAVE THE EFFECT OF, CREATING ANY WARRANTIES OR<br />
REPRESENTATIONS FROM <strong>IBM</strong> (OR ITS SUPPLIERS OR LICENSORS), OR ALTERING THE TERMS AND CONDITIONS OF ANY AGREEMENT<br />
OR LICENSE GOVERNING THE USE OF <strong>IBM</strong> PRODUCTS OR SOFTWARE.<br />
© Copyright International Business Machines Corporation 2011. All rights reserved.<br />
10 © 2011 <strong>IBM</strong> Corporation<br />
ConfigDS_<strong>PX</strong>.ppt Page 10 <strong>of</strong> 10


