Computer Gaming World Issue 54 - TextFiles.com
Computer Gaming World Issue 54 - TextFiles.com
Computer Gaming World Issue 54 - TextFiles.com

Create successful ePaper yourself
Turn your PDF publications into a flip-book with our unique Google optimized e-Paper software.
Features<br />
Don't Tread on Me! 8<br />
Accolade's "Steel Thunder" Reviewed / Wyatt Lee<br />
The Emperor's New Clones 12<br />
Tips from a Designer of "Empire" / Mark Baldwin<br />
"Stealth Mission" 14<br />
Sublogic's Flight Simulator Reviewed / Brad Bombardiere<br />
Roses and Thorns for Rosella 19<br />
Scorpia Reviews "King's Quest IV"<br />
Interview with Roberta Williams 21<br />
The Force Behind "King's Quest"<br />
"Manhunter: New York" 24<br />
Scorpion's Tale Offers Hints<br />
Point / Counterpoint on "Pool of Radiance" 28<br />
SSI's Adventure Reviewed<br />
Tracie Forman Hines / Ken St. Andre<br />
"Starglider II" 31<br />
Rainbird's Action Game / Frank Eva<br />
Banzai Strike Line 32<br />
SSI's "Typhoon of Steel" / Evan Brooks<br />
The Color of Magic 36<br />
EA's "Sentinel <strong>World</strong>s I: Future Magic" / Scorpia<br />
"Battles In Normandy" 42<br />
Strategic Notes on the SSG Game / Joe Sherfy<br />
Leadership in the American Civil War 44<br />
Notes on the SSI Games / Major David S. Stevens<br />
"Decisive Battles of the ACW: II" 49<br />
SSG's Second ACW Game Reviewed / Jay Selover<br />
"Dragonlance" Invades The <strong>Computer</strong> <strong>54</strong><br />
SSI's "Heroes of the Lance" / David M. Wilson<br />
50th <strong>Issue</strong> Contest Winners 69<br />
The Master Scavenger Hunters Revealed<br />
Departments<br />
Taking a Peek 4<br />
Letters 6<br />
Video <strong>Gaming</strong> <strong>World</strong> (Katz, Kunkel, Worley) 64<br />
Reader Input Device 71<br />
CGW Hall of Fame 71<br />
Game Ratings 72<br />
December 1988 Number <strong>54</strong>
Taking A Peek<br />
Access<br />
<strong>54</strong>5 W. 550 South<br />
Suite 130<br />
Bountiful, Utah 84010<br />
HEAVY METAL: This is not a rock<br />
music drum simulator. Instead, players<br />
advance in rank while <strong>com</strong>manding one<br />
of three weapon systems in this modern<br />
land <strong>com</strong>bat action game. The player<br />
plots strategy on the battle map screen,<br />
then undergoes the test of fire in a<br />
M1A1 Abrams, a XR311 Fast Attack<br />
Vehicle, or an ADATS Air Defense Anti-<br />
Tank System. Anyone for Officers Training<br />
School? C-64/128 ($39.95). Circle<br />
Reader Service #1.<br />
Accolade<br />
550 S. Winchester Blvd<br />
Suite 200<br />
San Jose, CA 95128<br />
RACK'EM: Players can "Hustle" up<br />
some action anytime of day or night<br />
with this billiard simulator. The game<br />
plays snooker or four different variations<br />
of pool. Control the strength, aim and<br />
english on each shot against a live opponent<br />
or the <strong>com</strong>puter, while learning<br />
the real color of felt. IBM/Tandy ($39.95)<br />
C-64/128 ($29.95). Circle Reader Service<br />
#2.<br />
GRAND PRIX CIRCUIT: Players <strong>com</strong>pete<br />
against world class drivers, each<br />
with his own characteristics, on a variety<br />
of tracks around the world. After selecting<br />
a driving team and car, players must<br />
qualify before venturing onto the tarmac.<br />
Then it's "Gentlemen, start your en-<br />
gines." IBM/Tandy ($39.95) C-64/128<br />
($29.95). Circle Reader Service #3.<br />
JACK NICKLAUS GREATEST 18<br />
HOLES: You don't have to leave the<br />
19th hole to play Jack's greatest 18 in<br />
this challenging golf simulator. Players<br />
select the appropriate club, allow for<br />
wind conditions, slice or hook, and control<br />
club speed while trying to stay in<br />
bounds and out of traps. Putting must<br />
allow for breaks in the green. One to<br />
four can play and Jack will join your<br />
group if you like. IBM/Tandy, Apple IIGS,<br />
Amiga ($49.95) C-64/128 ($29.95).<br />
Circle Reader Service #4.<br />
CEED<br />
13221 Edina Way<br />
Poway, CA 92064<br />
CROSSWORD PUZZLE GENER-<br />
ATOR: You'll never be at a loss for<br />
(Continued on page 66)
Letters<br />
Stellar Rebuttal<br />
As the designer of SSI's Stellar<br />
Crusade, I would like to respond to<br />
recent criticisms of the game. I will<br />
begin with a bit of general gaming<br />
philosophy, then move on to address a<br />
few specific questions.<br />
This was<br />
my first<br />
attempt at<br />
a "professional"<br />
game<br />
program.<br />
Over the<br />
years, I<br />
have<br />
played<br />
many of<br />
the<br />
popular<br />
game<br />
programs<br />
available<br />
for home<br />
<strong>com</strong>puters.<br />
Some of these games have been very<br />
good, but almost all have been "thin."<br />
Like many of my age (31), my introduction<br />
to the world of gaming was through<br />
the vehicle of board wargames. All of my<br />
personal favorites in that genre have<br />
rules documents which make the<br />
average person not familiar with those<br />
types of games recoil in horror. As one<br />
of my friends once put it, such games<br />
are "too much like work." I realize that<br />
not everyone out there in <strong>com</strong>puter land<br />
has my taste for <strong>com</strong>plete immersion in<br />
detail, but some of us (and apparently<br />
most of those who have reviewed the<br />
game) enjoy <strong>com</strong>plexity.<br />
If there is any major failing in Stellar<br />
Crusade, it may well be in the packaging<br />
and not in the rules. One reviewer<br />
has stated that "Stellar Crusade's <strong>com</strong>plexity<br />
level demands a warning label . .<br />
. ." Perhaps this is true, in a way. But<br />
part of the problem here is that most of<br />
the games which in the past have been<br />
touted by sales/packaging people as<br />
being rich in detail have, in fact, been<br />
less than detailed in execution. This is to<br />
be expected from programs written for<br />
64K machines, but we, as garners, have<br />
be<strong>com</strong>e jaded by unfulfilled promises.<br />
. . . [Stellar Crusade] is as close to<br />
my idea of a "perfect" wargame as I<br />
could <strong>com</strong>e to at the time. In effect, I<br />
created the game I had always wanted<br />
to play. The immersion in detail that I associate<br />
with the best of the board wargames<br />
is <strong>com</strong>ing to the <strong>com</strong>puter world.<br />
In the August '88 issue of CGW, Stellar<br />
Crusade was reviewed by Hosea Battles.<br />
I have to admit that your reviewer's <strong>com</strong>ments<br />
on the lack of documentation of<br />
the research function in the game were<br />
essentially correct. We should have<br />
caught this in our review of the rules<br />
manual. All copies of the game<br />
produced after the appearance of your<br />
review include an expanded README<br />
file on disk which describes research, as<br />
well as some additional documentation<br />
on other game functions. I am a bit confused<br />
about the <strong>com</strong>ment in that same<br />
review that "[the manual] never clearly<br />
explains the economic principles of the<br />
game . . . ." The manual does state the<br />
basic operations of raw materials and industrial<br />
production. This is reinforced by<br />
prompts, cautions, and notes on the<br />
economic function screens. Players will<br />
find that assimilating and integrating all<br />
of this information will require that they<br />
be<strong>com</strong>e very involved in the game. Experimenting<br />
with different colonization<br />
and industrial strategies in an attempt to<br />
exploit the rather <strong>com</strong>plicated "economic<br />
principles" of the game is part of the fun<br />
for those of us who like games that<br />
others feel are "too much like work." All<br />
of the information needed for this is, in<br />
fact, given in the manual and on the<br />
screen. For those who don't mind taking<br />
a bit of advice, the program gives concrete,<br />
dynamically calculated suggestions<br />
which will help in acquiring an understanding<br />
of the economic side of the<br />
game.<br />
The original rules manual for the game<br />
was, in fact, much longer than that<br />
which was originally published. Some<br />
have suggested that the game would be<br />
much easier to learn using the original<br />
manual. This might not be the case.<br />
The primary difference between the<br />
original and published manuals was a<br />
rather tiresome list of menu trees and examples<br />
in the original. While it might<br />
have been useful in some ways, most of<br />
the information deleted from the final<br />
version of the manual is easily available<br />
on the screen. Twenty minutes of random<br />
fiddling with the menus will teach<br />
players all there is to know about them.<br />
If the information were not available on<br />
screen, it would have remained in the<br />
manual. The decision to shorten the<br />
manual was taken in order to avoid<br />
obscuring the basic principles of the<br />
game with masses of information on<br />
program mechanics. The program<br />
mechanics are well detailed within the<br />
program itself.<br />
Finally, I would like to reassure those<br />
who have expressed concerns about my<br />
use of the term "aborigines" to describe<br />
the indigenous populations of some star<br />
systems. Please consult your dictionaries.<br />
I did. The term does not, in<br />
general, apply to any specific racial<br />
group. Within the context of the game,<br />
aboriginal populations are assumed to<br />
be exploited. This may not be the way<br />
we'd like things to be in the future, but<br />
history and current trends suggest that<br />
those without the strength to resist subjugation<br />
will continue to be exploited.<br />
Believable futures cannot exist in a historical<br />
vacuum. For what it's worth to<br />
the people who worry about my "racist<br />
attitudes," one of my greatgrandmothers<br />
was named "Shining<br />
Meadow" (American Indian). My ethnic<br />
heritage is quite mixed and I am offended<br />
by accusations of racism. From<br />
my association with the folks at SSI, I<br />
suspect that they aren't very pleased<br />
about the "neo-Nazi" label, either.<br />
Norman C. Koger, Jr.<br />
Huntsville, TX<br />
Ed: We pointed out the dictionary<br />
definition of the word, "aborigine," in<br />
our original answer to Mark Brown's<br />
letter (CGW #52). Be it hereby resolved<br />
that all further references to indigenous<br />
native populations use the term "autochthonous."<br />
No Fooling<br />
I just read the<br />
review of The<br />
Fool's Errand<br />
by Alan<br />
Roberts in the<br />
October '88<br />
issue, and I<br />
was dismayed<br />
by his putdown<br />
of what<br />
he calls the<br />
"button pushing"<br />
puzzles.<br />
Those puzzles were among the best and<br />
most original puzzles in the game!<br />
Roberts implies that the only solution to<br />
them is trying every possible <strong>com</strong>bination<br />
by trial and error. In fact, each button<br />
affects the starting word or phrase<br />
according to a hidden rule, such as<br />
"Remove all A's" or "Replace any T with<br />
an E followed by a space." The player<br />
must deduce those rules and then use<br />
(Continued on page 59)
Review<br />
T<br />
he very mention of the<br />
M-1A1 tank conjures<br />
up images of cost over-<br />
runs, technical failures, inefficiency<br />
(four gallons of fuel<br />
to the mile), and a vulnerability<br />
to Soviet anti-tank<br />
shells. The General<br />
Dynamics M1A1 tank has<br />
had one of the most checkered<br />
pasts in the procurement<br />
process and has<br />
probably received more bad<br />
press and congressional opposition<br />
than any other<br />
military vehicle.<br />
Steel Thunder is an intriguing<br />
simulation of<br />
modern armored <strong>com</strong>bat<br />
from Accolade. The<br />
quality of this program<br />
suggests that modern<br />
tanks are getting a bad<br />
reputation and the<br />
scenarios invite the<br />
player to decide the<br />
issue for himself. In fact,<br />
the technical accuracy of<br />
this program will surprise<br />
those who think of Accolade<br />
as simply a<br />
publisher of action<br />
games. Until Steel<br />
Thunder's release, Apollo<br />
18: Mission to the<br />
Moon has probably been<br />
the <strong>com</strong>pany's most<br />
reality-based product.<br />
The care taken with<br />
Steel Thunder may be illustrated<br />
by the length of<br />
the manual. It is 43 full<br />
pages (as opposed to<br />
the 22 in Apollo 18) and<br />
contains enough facts,<br />
figures, diagrams, and<br />
hints to move the player<br />
well on his way to promotion and success. In addition,<br />
the product includes a keyboard overlay to<br />
simplify play.<br />
Profiles in Tonnage<br />
The Soviet forces are well-represented, with a good<br />
mix from those old T-55s and T-62s to the modern vehicles with<br />
125mm guns, BMP-2s (the most modern armored personnel carriers<br />
with their 30mm autocannons), BTR-70s (light-armored infantry<br />
carriers—no BTR-80s, but they are still deployed in limited<br />
numbers), Shilkas (self-propelled anti-aircraft vehicles), Gaskins<br />
(reconnaissance vehicles with SAM launchers), and SAU 152s<br />
(self-propelled 152mm guns). The omission of the 2S7 selfpropelled<br />
203mm gun or 2S4 self-propelled mortar might be<br />
something of a disappointment to modern armored warfare enthusiasts,<br />
however.<br />
United States forces include the: M1A1 Abrams tanks, M60A3<br />
updates of the Patton series, M3 Bradley fighting vehicles, and<br />
M48A5 Patton medium tanks. The control panels of each of<br />
Don't Tread<br />
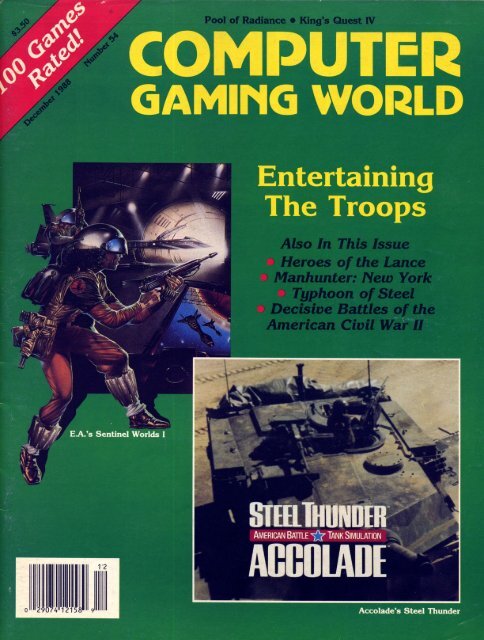
On Me!<br />
Accolade's "Steel<br />
Thunder" Modern Armor<br />
by Wyatt Lee<br />
TITLE: Steel Thunder<br />
SYSTEMS: C-64/128<br />
# PLAYERS: 1<br />
PRICE: $29.95<br />
DESIGNER: Tom Lough!),<br />
PUBLISHER: Accolade<br />
San Jose, CA<br />
' these vehicles have been<br />
meticulously modelled and<br />
offer a distinctive look with<br />
operational gauges, dynamic<br />
toggle switches, and functional<br />
indicator lights in the appropriate<br />
places. Perhaps of<br />
greatest significance, is the<br />
modelling of the effect of<br />
gun stabilization systems on<br />
all but the M48A5 Patton.<br />
This system has been part of<br />
the U.S. edge in armored<br />
vehicles up until the Soviets<br />
started including it on newer<br />
T72s and T80s.<br />
Even better than the<br />
mix of vehicles, however,<br />
is the way that Loughry<br />
has graphically implemented<br />
the various<br />
tanks. When the player<br />
first sees another vehicle,<br />
it appears as a miniscule<br />
black square. As the<br />
player's tank closes on<br />
the other vehicle, it appears<br />
as an identifiable<br />
silhouette. These silhouettes<br />
are not only important<br />
for identification<br />
of friends and foes, but<br />
also provide important information<br />
on target<br />
facing and direction of<br />
movement. As the player<br />
be<strong>com</strong>es more proficient<br />
in recognizing these silhouettes,<br />
he gains an advantage<br />
in being able to<br />
load the most efficient<br />
type of ammunition<br />
against that particular target<br />
as early as possible.<br />
Loughry programmed<br />
this feature by taking the<br />
time to study lead miniature<br />
tanks used in table-top battles. By examining<br />
these miniatures from several different angles, he was<br />
able to provide these recognizable silhouettes.<br />
Devil Coaches and Hell Wagons<br />
In Steel Thunder, players take the viewpoint of <strong>com</strong>mander<br />
of a modern tank. Although the simulation's design allows<br />
the player to view the landscape and action from three<br />
angles (driver, gunner, and <strong>com</strong>mander), the perspective of play<br />
is definitely that of <strong>com</strong>mand. The <strong>com</strong>mander is given the mission<br />
briefing at headquarters, selects his equipment and ammunition<br />
with regard to the mission and expected opposition,<br />
and selects a three-man crew (driver, gunner, and loader). Available<br />
crew members are selected from a roster that offers a letter<br />
grade from A (best) to D (worst) in three different facets of their<br />
assignment. Drivers are graded in driving speed, maneuver<br />
speed, and evasion speed; gunners are rated on day accuracy,<br />
night accuracy, and aim speed; and loaders are rated on reload<br />
speed, switch (types of ammo) speed, and fatigue. Crew selec-
tion is not simply chrome, but offers significant impact in the<br />
game.<br />
Tanks have had a tremendous shock value in land warfare ever<br />
since their first major impact on a battle at Cambrai (in <strong>World</strong><br />
War I). At Cambrai, demoralized infantry called the tanks, "devil<br />
coaches." In modern <strong>com</strong>bat, the propensity for tanks to catch<br />
fire and metamorphose into smoldering rubble may merit the<br />
term, "hell wagon." The scenarios included in the game have a<br />
tendency to emphasize shock value and suicide missions as opposed<br />
to highly coordinated <strong>com</strong>bat team missions. This is<br />
probably the weakest part of the reality being simulated. Many of<br />
the missions would seem better suited to infantry. For example,<br />
ambushing a light armor convoy of trucks, BTR-70s, and a BMP-<br />
2 would be ac<strong>com</strong>plished more effectively with infantry. Once<br />
the enemy is in the center of the ambush, there needs to be<br />
someone to close<br />
the trap. How can<br />
you do that with<br />
one tank? Another<br />
scenario involves<br />
destroying an<br />
enemy mortar post.<br />
Wouldn't it be better<br />
to use artillery<br />
against that position?<br />
In fact, the<br />
only armored<br />
vehicle in the<br />
simulation that<br />
would be likely to<br />
get an assignment<br />
like these would be the M3 Bradley, not technically a tank.<br />
Rumbling "Rambo" Raiders<br />
Nevertheless, if one is willing to accept the questionable<br />
military doctrine in the scenarios, the missions can be thrilling<br />
and exciting. In this way, the missions be<strong>com</strong>e more Rambo<br />
than reality, but still have plenty to <strong>com</strong>mend them. The missions<br />
take place in three different theaters of operation: Cuba,<br />
Syria, and West Germany. The graphics do a good job of portraying<br />
the different terrain styles (although the West German<br />
scenarios may allow the ranges to be too long for those broken<br />
landscapes) and the landscapes scroll by realistically, depending<br />
on tank speed, direction, slew rate (how fast the turret or miniturret<br />
turns) and viewpoint. The <strong>com</strong>mander's viewpoint offers<br />
the farthest range of view and this is logical, since his position<br />
on the turret is physically the highest. Also, the sound effects for<br />
the in<strong>com</strong>ing and outgoing shells are continuous, effective, and<br />
useful (noise indicates proximity). Particularly satisfying is the<br />
graphic depiction of explosions and the reduction of enemy targets<br />
to rubble. Once they are reduced to rubble, the "rubble"<br />
stays at that location. This helps in identifying one's position on<br />
the battlefield and direction of enemy movement.<br />
Each mission has a primary target which is circled on the briefing<br />
map (accessed by pressing the "9" key). The <strong>com</strong>mander<br />
chooses the best route to the objective by placing "X"s on the<br />
map as checkpoints and ordering the driver to proceed to those<br />
checkpoints. The briefing map can be accessed at any time and<br />
will show the present position of the player's tank. This is extremely<br />
helpful. On missions that require a deep penetration behind<br />
enemy lines, it is usually possible to skirt the edges of the<br />
map and avoid enemy contact until one is in proximity of the objective.<br />
Simply order the driver to go straight and switch to the<br />
<strong>com</strong>mander's viewpoint (farthest range) in order to stay out of<br />
contact until it is necessary to close on the enemy. This is<br />
cautious and ultimately effective, but consumes a significant<br />
amount of time and fuel, so many players will eschew this in<br />
favor of direct advances.<br />
Once the player has determined to engage the enemy, it is<br />
best to switch to the gunner's viewpoint and utilize the thermal<br />
site (which allows the gunner to see the targets through smoke,<br />
fog, or darkness) to zero in on the target. At this point, it is extremely<br />
important to have the right ammunition loaded. This is<br />
where the loader's reload and switch speed is vital. Reload speed<br />
is significant because there is a lag time after one fires a shell<br />
before one is able to fire the next shell. The lag time is proportional<br />
to the loader's reload speed. The loader's switch speed<br />
determines how long it takes to switch types of ammo. For example,<br />
one doesn't want to waste armor piercing (APFSDS)<br />
shells on BTR-70s or BMP-2s, so it may be necessary to switch<br />
to high-explosive anti-tank (HEAT) shells. Players are advised to<br />
pay particular attention to the ammunition effectiveness chart<br />
provided on page 33 of the manual. This information may<br />
provide the difference<br />
between a<br />
successful mission<br />
and a failure.<br />
Depending on<br />
range, there is a<br />
lag time between<br />
firing the shell and<br />
observing the explosion.<br />
The<br />
simulation has<br />
taken care to<br />
model authentic effectiveness<br />
ranges<br />
and realistic angles<br />
of trajectory. This means that players will need to learn to "lead"<br />
the targets in order to be effective, not simply center the sights<br />
and fire. This offers both realism and challenge. In 1973, Israeli<br />
forces avoided this problem and extended their maximum effective<br />
range by deducing the narrow passes and gaps which Arab<br />
forces would have to move through. By night, Israeli infantry<br />
would place sticks in these areas and Israeli armor would aim<br />
their main guns until they could hit those sticks regularly. In this<br />
way, they were able to extend their range to ca. 4,800 yards.<br />
Steel Thunder <strong>com</strong>manders have to zero in the old fashioned<br />
way, so the gunner's.<br />
If the situation gets tough, U.S. armor has an ace in the hole.<br />
The thermal site enables the gunner to make target acquisition<br />
in spite of smoke, while there is no certain knowledge of a<br />
Soviet counterpart to this technology. This means that the U.S.<br />
vehicles can put up a smoke screen and get away. This is a useful<br />
strategy in the game, if the <strong>com</strong>mander doesn't wait until his<br />
smoke mortars are hit (usually the first damage taken) to utilize<br />
them.<br />
Thundering Heard<br />
Steel Thunder is the first of an expected barrage of armored<br />
<strong>com</strong>bat simulations to reach the market (Avalon Hill is expected<br />
to release M-1 next year and don't be surprised if Spectrum<br />
Holobyte and Digital Illusions release a tank simulation in<br />
1989). There is much to enjoy about the game: fast-moving<br />
graphics with features that assist game play, effective sound effects<br />
that enhance play, and a potential for fast-paced action. It<br />
is to be expected that future simulations will take standard<br />
military doctrine more into account and offer more precise<br />
mechanisms for aiming, loading, driving, etc. However, Accolade<br />
has: 1) paved the way for future tank simulations, 2)<br />
proven that the <strong>com</strong>pany is serious about developing more than<br />
action games, and 3) published a challenging game all in one<br />
bold stroke. As the <strong>com</strong>manding officer tells the player after a<br />
successful mission, "Congratulations! They never knew what hit<br />
them."
Strategy Tips<br />
Everything<br />
You've<br />
Always<br />
Wanted to<br />
Know About<br />
Empire<br />
'Wargame of<br />
the Century"*<br />
M ark Baldwin is the co-designer<br />
of Empire: Wargame of the Century.<br />
He took Walter Bright's<br />
VAX-based game and enhanced it for<br />
use on personal <strong>com</strong>puters in three different<br />
formats. The result: Empire has<br />
be<strong>com</strong>e CGW's highest rated strategy<br />
game and has won CGW's 1988 overall<br />
Game of the Year Award.<br />
In this article, Mark shares some<br />
strategic principles which may be of interest<br />
to would-be conquerors.<br />
This was getting too easy! In order to<br />
stop the Krellan conquest of the planet,<br />
you and your team had landed three<br />
dekals earlier on Spion Kop, the capital<br />
city of Sassania. Your small team of<br />
specialists were placed there to do what<br />
the Alliance, with its overextended resources,<br />
could not do directly. That is, unite<br />
the independent city-states of the planet<br />
before a similar team of Krellans ac<strong>com</strong>plished<br />
the same. Now, three dekals<br />
have passed and everything is still going<br />
by "The Book." Over 35% of the planet<br />
is under your control and you haven't<br />
met anything except local resistance.<br />
Something is wrong. It is too blasted<br />
easy!<br />
You think back to the initial days of the<br />
invasion. Sassania was already established<br />
as a beachhead when you arrived.<br />
"The Book" was specific about your initial<br />
steps . . .<br />
On establishing your beachhead, it is<br />
vitally important that one reconnoiter<br />
the continent and surrounding waters.<br />
For security reasons, as well as delivering<br />
the team quickly and quietly, normal<br />
geological scans of the planet will<br />
not be available. Make up for this discrepancy<br />
immediately! To that end, it is<br />
re<strong>com</strong>mended that initial production be<br />
that of a fighter unit. Use this fighter<br />
unit for your initial quick reconnaissance.<br />
As soon as your first fighter unit is<br />
<strong>com</strong>pleted, change your production to<br />
armies. These are your bread and butter.<br />
You cannot conquer anything<br />
without your armies. Further, although<br />
that first fighter is infinitely valuable,<br />
the second is virtually useless until you<br />
have expanded the united territories a<br />
great deal.<br />
That was the easy part. Quickly, you<br />
had explored the large island you had<br />
found, discovering two more city-states.<br />
It was, then, an easy matter to send<br />
your armies to include them in your Empire.<br />
That was just the start, "The Book"<br />
said more . . .<br />
The unification of a planet can be<br />
broken up into three phases. The first<br />
phase, known as the "Growth Phase,"<br />
occurs from the initial establishment of<br />
the beachhead until contact with<br />
enemy forces occurs. The second<br />
phase, "Contact Phase," occurs while<br />
you and your enemy are establishing<br />
the lines of battle. The third and final<br />
phase of unification, the "War Phase,"<br />
occurs when one force decides to <strong>com</strong>mit<br />
most of its resources to the destruction<br />
of the other.<br />
Ah, the three so-called phases. Don't<br />
those dunderheads at Star Fleet HQ realize<br />
that war is never so simple? They<br />
probably never held a M-23473 blaster<br />
in their hands in their lives. If they did,<br />
the cost of synthetic feet would probably<br />
skyrocket!<br />
Your primary task during the "Growth<br />
Phase" is to build your industrial base<br />
as large and as quickly as possible. If<br />
*but were afraid<br />
to blast!<br />
by Mark Lewis Baldwin<br />
you have a stronger industrial base<br />
than your enemy when you enter the<br />
"War Phase," his defeat is assured. Most<br />
planets you will encounter in your star<br />
sector are mostly water with small continents/large<br />
islands scattered<br />
throughout. As such, your principal<br />
means of transportation is water. Get<br />
transport ships under construction as<br />
soon as possible. It takes time to build<br />
them and you will want them available<br />
as soon as your local land mass has<br />
been unified. So, get the construction<br />
started. While waiting for your<br />
transports, use your fighters to explore<br />
the waters near you. Find targets for<br />
your transports before they are finished<br />
so that they will not be wasted on exploration<br />
of their own.<br />
Two strategies have been developed<br />
on usage of the transports during the<br />
"Growth Phase." The first strategy suggests<br />
that the transport be sent to the<br />
next independent land mass and its entire<br />
<strong>com</strong>plement of armies to be unloaded.<br />
This frees the transport to immediately<br />
return for more armies.<br />
Meanwhile, the armies left behind can<br />
explore the new land mass, meeting<br />
and defeating all adversaries while supporting<br />
each other. The second strategy<br />
is more risky, requires a higher<br />
transport/army ratio of production, but<br />
can achieve much more spectacular<br />
growth. What one does under this<br />
strategy is to keep all armies on board<br />
the transport until an independent city<br />
is found on the coast. Then, you invade<br />
the city using just enough armies to<br />
capture the city. Once captured, the city<br />
should be used to produce new armies<br />
that will be used to subjugate the rest<br />
of the island/continent. Meanwhile, the<br />
transport is continuing to a new island<br />
and repeating the process with its<br />
remaining armies. This strategy allows
you to expand faster than the first, but<br />
places you in a much more spread out,<br />
hence weaker defensive position until<br />
all the cities in-between your capital<br />
and the frontier have been unified.<br />
You had outsmarted "The Book" this<br />
time by <strong>com</strong>bining the two strategies,<br />
but your rush to unification seems silly.<br />
There has been no enemy to worry<br />
about. In fact, there has been no contact<br />
with Krellan controlled forces at all!<br />
It is assumed that you have been<br />
directed to unify the planet because the<br />
Krellans, under the <strong>com</strong>mand of Henri<br />
Zae IV, have already started an "Operation<br />
Big Brother" on the planet. This is<br />
your actual opponent. Depending on<br />
the actual rank of the Krellan <strong>com</strong>mander,<br />
he may or may not have control<br />
over his/her own forces. Lowerranked<br />
Krellans are subject to control of<br />
special <strong>com</strong>puters designed for just the<br />
task you are involved with. Two<br />
programs are known to be used,<br />
labeled by Star Fleet Intelligence (Ha!)<br />
as "Standard" and "Expert." There are<br />
rumors that a new and more sophisticated<br />
program is under development.<br />
While both are sophisticated, their tactical<br />
abilities are much stronger than<br />
their strategic abilities. They are also<br />
predictable. Star Fleet Intelligence<br />
(Double Ha!) has managed to extract<br />
copies of the programs and have made<br />
them available in trainers. Study their<br />
actions well on the trainers. You will<br />
not only learn how they execute a conquest,<br />
but you may also learn a few<br />
unification tricks.<br />
Some known advantages of the "Expert"<br />
versus the "Standard" program<br />
are: 1) more intelligent control over industrial<br />
production, 2) more aggressive<br />
use of transports, 3) more efficient use<br />
of aircraft carriers, along with their assigned<br />
aircraft, 4) more active use of<br />
capital ships, 5) coordination of ships<br />
into fleets, and 6) better utilization and<br />
allocation of armies. Since Krellan<br />
programming techniques are different<br />
than those in the Alliance, it has been<br />
difficult to extract and analyze the differences.<br />
Therefore, this is only a partial<br />
list.<br />
Your most serious problem will exist if<br />
the Krellan <strong>com</strong>mander has authority<br />
to make his/her own decisions. In that<br />
instant, all bets are off. You will be<br />
working against a <strong>com</strong>plete unknown<br />
(unless you have met the Krellan<br />
<strong>com</strong>-mander in <strong>com</strong>bat before) and must<br />
use the utmost of your skills to defeat<br />
him/her.<br />
That part of the answer you knew.<br />
Kadma Pztlam was on the planet somewhere.<br />
And you had tangled with her<br />
before. She was brilliant in the game<br />
that the two of you had previously<br />
fought. That was what was bothering<br />
you. Where was she?! In trying to find<br />
her, both you and "The Book" concur.<br />
Information is your second highest<br />
priority during the "Growth Phase." It is<br />
critical to find all you can about the<br />
planet and your enemies as soon as<br />
possible so that you may plan accordingly.<br />
Fighters are good for local reconnaissance,<br />
as well as acting as an<br />
early warning system. To explore<br />
beyond your locally controlled territory,<br />
however, destroyers are the answer.<br />
They are cheap to build and move<br />
faster than any other vessel. Start construction<br />
of them as soon as you are<br />
able and send them out to explore.<br />
What is the layout of the planet? Where<br />
are its cities? Where is the enemy?<br />
These are the vital questions they must<br />
answer for you?<br />
Contact reports are starting to <strong>com</strong>e<br />
in. You have finally found Kadma to the<br />
west. One of your destroyers found the<br />
city of Isandlhwana in enemy hands. Unfortunately,<br />
it was immediately sunk by<br />
enemy fighters. Fortunately, one of your<br />
newly <strong>com</strong>pleted cruisers and a<br />
transport happen to be nearby. Won't<br />
Kadma be surprised when you return<br />
with your transport flanked by a task<br />
force to protect it.<br />
Once contact has been made with<br />
enemy forces, the "Contact Phase" has<br />
been initiated. During the contact<br />
phase, it is re<strong>com</strong>mended that minimum<br />
forces be used against the enemy<br />
unless a major weakness is seen in<br />
his/her defenses. Most of your resources<br />
should still be expended in capturing independent<br />
cities. Although an enemy<br />
city is worth twice what an independent<br />
city is worth (because its capture<br />
reduces the enemy's production at<br />
the same time it increases yours), the<br />
cost of capturing such a city is normally<br />
a magnitude greater than capturing<br />
an independent city.<br />
Although you wish to invest minimal<br />
forces in contact with the enemy, you<br />
also desire the enemy to invest as<br />
much as possible in trying to hit you.<br />
So, utilize quick tease strikes and feints<br />
to cause your enemy to invest large<br />
resources in defense and ineffective offense.<br />
Hairy Neubats' Guano! A report has<br />
just <strong>com</strong>e in from the transport Jervis<br />
Bay. Hundreds of Kilobids east of our<br />
first contact with the Krellans, she has<br />
just been attacked by an enemy<br />
destroyer and is now sinking, taking all<br />
five armies aboard down with all hands.<br />
How did they slip that destroyer so far behind<br />
our lines? Now, just to stop that<br />
one destroyer, I have to change the orders<br />
to half a dozen ships and aircraft.<br />
What a waste of resources!<br />
At least, we got our own licks in. The<br />
invasion at Isandlhwana turned out better<br />
than expected. One enemy cruiser<br />
was destroyed while it was in port and<br />
the cruiser Siano Maru was effective in<br />
giving our land forces additional protection.<br />
It will certainly cost Kadma a great<br />
deal to get that city back!<br />
Be aware that once contact has been<br />
made, it is highly likely that enemy<br />
ships have infiltrated your own lines. It<br />
is now necessary to sanitize your<br />
unified areas of enemy forces and insure<br />
that no new forces sneak in. Such<br />
forces are not only dangerous to unescorted<br />
transports, but they force you to<br />
drain a much larger force to track them<br />
down. A pattern of fighters and<br />
destroyers on patrol duty can effectively<br />
defend large open areas of water and<br />
thus, prevent enemy intrusions. Be<br />
aware that your fighters will normally<br />
be unable to detect enemy submarines.<br />
This is why you need destroyers in<br />
coordination with the fighters.<br />
This is also the time you should be infiltrating<br />
your own destroyers and submarines<br />
into enemy waters. Knocking<br />
out enemy transports can bring your<br />
enemy down to its knees faster than<br />
any other technique. If he cannot invade<br />
you or cannot support his own infrastructure<br />
when you hit him/her, the<br />
war is all but won.<br />
At this time, you should also be<br />
preparing for the final "War Phase." Bat<br />
tleships and carriers can take a great<br />
deal of time to construct, hence they<br />
should be started long before they are<br />
needed. So, plan and balance out your<br />
city production accordingly. Also, since<br />
you are going to start losing transports<br />
more frequently to enemy attacks,<br />
match transport production, as well.<br />
In addition, this is the time to start to<br />
reorganize your city production. Those<br />
cities well-protected and far away from<br />
the front lines should be used to build<br />
fighters and large ships. The rationale<br />
for building fighters is that they can be<br />
moved up quickly to the front lines. The<br />
rationale for building large ships behind<br />
the lines is that you will not be forced<br />
to retool in order to build other kinds of<br />
forces because enemy forces just appeared<br />
nearby.<br />
Things are settling down to a slugfest,<br />
now. Your beachhead at Isandlhwana<br />
has been able to hold out while you've<br />
been taking a task force past the island<br />
for an end run to hit the continent behind<br />
it. If you can cut them off, the Krel-<br />
(Continued on page 63)
Review<br />
Stealth Mission<br />
Sublogic Unveils Their<br />
"Stealth" Simulator<br />
TITLE: Stealth Mission<br />
SYSTEM: C-641128<br />
# PLAYERS: 1<br />
PRICE: $39.95<br />
DESIGNER: Steve Setzler<br />
PUBLISHER: Sublogic Corporation<br />
Champaign, IL<br />
by Brad Bombardiere<br />
This one's for all of us who "feel the need . . ." the<br />
need for speed! Mach 2 with our hair on fire,<br />
that's how we'd like to spend our weekends. Unfortunately<br />
(or perhaps, fortunately), the military doesn't<br />
rent out fighters for the<br />
weekend. Of course, it's<br />
doubtful that most of us<br />
could afford the rental<br />
charge (much less the<br />
damage waiver) on a $20<br />
million aircraft. So, to fulfil<br />
our fantasy of flight, we<br />
turn to flight simulators.<br />
Well, strap yourselves in<br />
and fire up your <strong>com</strong>puter<br />
for another Mach 2<br />
fantasy, because there is<br />
a new kid on the block.<br />
Sublogic, those guys<br />
who wrote the book on<br />
<strong>com</strong>puterized flight have<br />
released Stealth Mission,<br />
a simulation that allows<br />
would-be pilots to fly one<br />
of three different aircraft:<br />
the F-19 Stealth Fighter,<br />
the X-29 Swept Wing,<br />
and the F-14 Tomcat.<br />
Each offers different flight<br />
characteristics and the<br />
missions have been<br />
designed to emphasize<br />
the strategic aspects of the game more<br />
than anything else.<br />
Each pilot expecting to fly the vicarious<br />
skies of Stealth Mission should begin with<br />
the documentation. Unfortunately, this<br />
material lacks the technical support one<br />
would expect from a game that seems to<br />
be so sophisticated. The data provided for each of the<br />
aircraft was sparse, at best. It is obvious that these are<br />
top secret weapons systems, but the average public<br />
library lends itself to providing more information than<br />
the manual contains. In fact, the manual vaguely<br />
describes weapons and their characteristics in a sum<br />
total of only two pages (plus diagrams) and there is almost<br />
no information on what type of weapons you are<br />
up against. For example, there is really no pertinent<br />
data on types of anti-aircraft missiles a pilot might have<br />
to face. All of this type of information would have made<br />
the game both more interesting and easier to play. Fortunately,<br />
the information on navigation and other<br />
characteristics of flight was helpful.<br />
After the start-up screen, players have the option of<br />
choosing the type of mission preferred from various<br />
types. These types include objectives located in the<br />
mountains, around ancient ruins, or at sea. There is<br />
even a mission that is essentially a marathon bomber<br />
run. The problem is that these missions are virtually<br />
generic. Sublogic does not specifically mention either a<br />
theatre of war or a possible war. In fact, the only mention<br />
of enemy strength in the manual involves some<br />
general notes about MIGs. In other words, the manual<br />
leaves players strictly on their own to figure out the<br />
best strategy to use in the different scenarios.<br />
Next, the game asks players to choose the jet and<br />
weapons to be used. This reviewer re<strong>com</strong>mends that<br />
no matter which plane is selected, players load each<br />
given aircraft with as many Mavericks as possible. The<br />
F-19 is the least maneuverable, but it is, of course, almost<br />
invisible to radar. The X-29 is extremely<br />
maneuverable, but has the least amount of weapons it<br />
can carry. The F-14 is not only fast, but it has medium<br />
maneuverability, great range, and carries a tremendous<br />
amount of weapons. Matching the type of aircraft to<br />
the type of mission is an extremely important consideration<br />
with regard to success in this game.<br />
At this point, players can throttle up and take off. The<br />
difficulty is that the controls are sluggish, at best, and a<br />
lag time of nearly half a second is so annoying that it<br />
makes dogfighting almost impossible. If, however, the<br />
lag time in Flight Simulator II was not perceived by<br />
players as annoying, this one will not either. It is essentially<br />
the same. This reviewer is bothered by the fact<br />
that the lag time leads to a severe oversteering<br />
problem. There are two ways to get around this<br />
problem. One way is to hit Control-F. This eliminates<br />
all of the scenery and allows the <strong>com</strong>puter to speed up<br />
(Continued on page 16)
Stealth Mission<br />
(Continued from page 14)<br />
the animation. This, in turn, makes the controls more<br />
responsive. The other way of getting around the sluggish<br />
controls is to achieve<br />
lock-on, then, hit Shift-G.<br />
This automatically levels<br />
and centers the aircraft. It<br />
is also a great way to get<br />
out of those suicidal<br />
maneuvers that we all<br />
simply must try from time<br />
to time.<br />
The game's graphics display<br />
is a mixed bag. The<br />
cockpit graphics lack the<br />
attention to detail that<br />
many of us have be<strong>com</strong>e<br />
accustomed to in other<br />
flight simulations. The instruments were somewhat confusing<br />
in their placement on the control panels and this<br />
made taking a quick scan of vital information somewhat<br />
difficult.<br />
Outside the cockpit, however, the scenery graphics<br />
are fantastic! Instead of the usual 3-D stick figures,<br />
mountains and other scenery are filled in. One of the<br />
most exciting aspects to this is flying through the<br />
canyon in the ancient ruins campaign. Additional visual<br />
effects involve the different views available. Pressing the<br />
right key gives pilots the ability to see their aircraft from<br />
any angle. Pressing Function-7 allows a given pilot to<br />
see a "missile's eye view" as it homes in on its target.<br />
Another amazing viewpoint is observing the aircraft<br />
from one side or the other as the pilot ejects, his<br />
parachute opens, and he gently drifts to earth. In addition,<br />
Sublogic has made Stealth Mission <strong>com</strong>patible<br />
with its full line of scenery disks. Of course, there is a<br />
price to pay for such quality, especially on a machine<br />
with limited memory like the C-64/128, and that price is<br />
paid in the lag time.<br />
Since Sublogic wrote the book on flight simulators,<br />
consumers expect quality graphics, attention to detail,<br />
and interesting situations from those products. Therefore,<br />
even though this game doesn't really offer the intensity<br />
that one could expect from other recent flight<br />
simulations, the potential buyer must weigh the<br />
abstract nature of the scenarios and somewhat slower<br />
pace against the graphic excellence and technical<br />
quality of the Sublogic line.
When you first open the package of this game,<br />
you may feel a little startled and possibly<br />
hesitant: it <strong>com</strong>es on nine 5.25" disks or four<br />
3.5" disks. Further, if you install the game on a hard<br />
drive (highly re<strong>com</strong>mended), it will eat up about 3 meg<br />
worth of space (make sure you have room!). So, you<br />
might think that this is some incredible epic adventure<br />
that will take months of playing time.<br />
Actually, most of that space is used for graphics. They<br />
are very pretty, full-screen and beautifully detailed.<br />
Many of the screens also have animation, which has<br />
both good points and bad ones. The animation adds a<br />
nice touch, but slows Rosella's movements by a large<br />
factor whenever she's in an animated screen.<br />
The game begins, in fact, with a very long animated<br />
sequence (you can skip this later on) explaining just<br />
how Rosella came to be in a strange land dressed as a<br />
simple peasant girl. Boiled down to essentials, King<br />
Graham is dying and Rosella can cure him by obtaining<br />
a special fruit. However, she also has to help the good<br />
fairy Genesta, the only person who can send her back<br />
to her own land. Genesta herself is dying and only a<br />
special talisman, stolen by the evil witch Lolotte, can restore<br />
her. Thus, Rosella must find the magic fruit and<br />
get the talisman from Lolotte before she can return<br />
home to save her father.<br />
Rosella starts on the seashore, where she is left pretty<br />
much to her own devices. Genesta doesn't tell her very<br />
much about the land or indeed, anything else. Rosella<br />
must find out everything for herself. The first thing to<br />
do is walk around the area, which is only about 30 loca<br />
lions or so, to see what's there (the area wraps around<br />
at the edges in most places to the north and south).<br />
Movement is done with the arrow keys. One touch on<br />
any key sends Rosella in that direction and another<br />
touch on the same key stops her. Rosella will, therefore,<br />
continue to walk automatically unless she <strong>com</strong>es<br />
to an obstacle or reaches the next screen. Beyond this,<br />
keyboard input is used to ac<strong>com</strong>plish actions, such as<br />
"get lamp." There is also a set of function keys for often<br />
repeated <strong>com</strong>mands, especially save and restore.<br />
Walk-thru On The Mild Side<br />
Warning: This section of the review contains<br />
specific hints related to "King's Quest IV" and<br />
should be avoided by readers who would prefer to<br />
<strong>com</strong>plete the game without assistance.<br />
Watch out for the weird trees and the ogre hut. If you<br />
walk into a screen with strange trees, leave immediately<br />
or that will be the end of Rosella. The ogre hut and surroundings<br />
should also be avoided for now or Rosella<br />
will end up as dinner. It's a good idea to save periodically,<br />
in case you run into trouble.<br />
You should visit Lolotte early on in the game. She<br />
doesn't especially trust you, but for her son Edgar's<br />
sake, is willing to give you the benefit of the doubt by<br />
sending you on little quests to bring her certain items,<br />
one at a time. Therefore, much of the game is taken<br />
up in solving puzzles to obtain these items.<br />
Many of the puzzles are based on old fairy tales (a<br />
Roberta Williams "trademark"). So, if you're up on<br />
those, you may have a little easier time of it in some<br />
situations. Most people know about kissing frogs, but<br />
that's just one of several in the adventure.<br />
King's<br />
Quest IV<br />
Hints and Harangues for<br />
"Rosella"<br />
by Scorpia<br />
Some of them<br />
are also not too<br />
fair. For instance,<br />
one object<br />
Rosella<br />
needs is a bridle.<br />
Finding this can<br />
be a frustrating<br />
experience,<br />
since it is not<br />
visible on the<br />
screen, and you<br />
would never<br />
know it was<br />
there unless you<br />
had Rosella<br />
search every possible<br />
spot on the<br />
screen. There<br />
are no clues at<br />
all to this, therefore<br />
you might<br />
not even search<br />
very long, if at<br />
all. And as the<br />
location itself is<br />
not easy to<br />
reach (you have<br />
to so some swimming,<br />
among other things) it makes the<br />
situation that much more exasperating.<br />
Another irritation is all the climbing<br />
around that has to be done. Early on,<br />
you'll probably find the secret door that<br />
leads to a winding staircase. As you<br />
might expect, one wrong step and Rosella<br />
falls to her death. That's bad enough,<br />
but what you don't know at the lime is that there's no<br />
need to climb the stairs until after evening has <strong>com</strong>e<br />
(and you've done some other things as well), meaning<br />
many people will make the tedious trip at least twice, if<br />
not more.<br />
There are other staircases to climb (also winding), as<br />
well as a whale's tongue (probably the hardest climbing<br />
sequence in the game). Saving often is the best thing<br />
when you're in one of these situations. That's especially<br />
important inside the whale, as you have only a limited<br />
number of moves before Rosella is over<strong>com</strong>e by<br />
noxious fumes.<br />
Review
Review<br />
You will also have to sit<br />
through some tedious<br />
animation in the dwarfs<br />
house. This is a puzzle in<br />
the game, the solution to<br />
which is rather sexist, although<br />
obvious. When<br />
the dwarfs <strong>com</strong>e in (after<br />
you're done), Rosella<br />
stands there as a dwarf<br />
enters, walks to the<br />
fireplace, gets a bowl of<br />
soup, walks to the table,<br />
and sits down. The next<br />
dwarf enters, walks to the<br />
fireplace, gets a bowl of<br />
soup, walks to the table,<br />
etc. This happens seven<br />
times and there is no way<br />
around it. Save the game<br />
when this is finished so<br />
you don't have to go<br />
through it again.<br />
After nightfall, you'll find<br />
ghosts in the old house in<br />
the graveyard. They appear<br />
one at a time and<br />
each has to be satisfied<br />
with something before the<br />
next one shows up. Once<br />
you've figured out what<br />
do to for the first one,<br />
you know pretty much<br />
what needs to be done<br />
for the rest of them, so<br />
solving this puzzle be<strong>com</strong>es<br />
pretty much a matter<br />
of boring repetition.<br />
Getting back to Lolotte,<br />
the first thing she wants is<br />
a unicorn. There's one roaming around the meadow,<br />
but it's rather shy, so you'll have to make friends with it.<br />
Then you need the infamous bridle so you can ride the<br />
unicorn. Among other things, it will be necessary to get<br />
the pole from the fisherman, as well as taking a long<br />
swim, before this task can be ac<strong>com</strong>plished.<br />
Still not entirely satisfied, Lolotte will send you to get<br />
a hen that lays golden eggs from the ogre. You'll need<br />
to have found the troll cave (which is hidden)<br />
beforehand. It also helps to snoop carefully around the<br />
house once you're inside, but save first in case you<br />
walk into the wrong room. This is probably the simplest<br />
sequence in the game.<br />
Speaking of the troll cave, it's a dangerous place.<br />
Even with light, you don't see very much. The graphic<br />
effect is very nice, but if you're not extremely careful in<br />
there, Rosella could fall into a chasm. The best thing to<br />
do is watch the edges of the light and move slowly. If<br />
there's a troll around (his appearance is random), get<br />
out and try again later. Save often.<br />
Somewhere in all this you need to take some time<br />
out to find the fruit that will restore King Graham.<br />
There are a number of things you must do before you<br />
can obtain the fruit, among them dealing with the frog.<br />
What you need is in plain sight in another screen, although<br />
easy to miss if you don't look carefully. You'll<br />
also have to solve the Pan riddle as well; the minstrel<br />
can be helpful with that one.<br />
Now Lolotte sends you out after Pandora's box. This<br />
is a tough one. You'll have to make it past the weird<br />
trees (if you've mapped, you probably know the spot)<br />
to the weird sisters. You shouldn't have too much<br />
trouble avoiding their clutches if you move carefully<br />
and don't get too close. They have something you<br />
need later on, so you'll have to work out a trade of<br />
some kind. Just don't be too nice to them (they are<br />
evil, after all).<br />
You will also have to get into the mysterious crypt in<br />
the graveyard (you've been wanting to do that for<br />
awhile, I'll bet). There's a key somewhere, although obtaining<br />
it will take awhile; there are a few things you'll<br />
have to do (more than once) before you find it.<br />
Unfortunately, after you give Lolotte the box, she<br />
doesn't quite keep her word to let you go (you didn't<br />
really expect her to, did you?). Instead, she locks you<br />
into a room in the castle. Luckily, you have a friend<br />
who provides you with a means of escape, but that isn't<br />
quite enough. After all, Lolotte might <strong>com</strong>e after you,<br />
and she might not be too charitable the next time. Besides,<br />
you still have to get the talisman so you can help<br />
Genesta and get back to save your King Graham.<br />
Once out of the room, you <strong>com</strong>e to (did you guess?)<br />
a winding stone staircase. Negotiate this carefully, and<br />
also be careful what rooms you walk through. Lolotte<br />
had all your items taken away, and you'll need to find<br />
them before going further.<br />
What to do about Lolotte when you finally reach her<br />
is not very hard to figure out; there aren't many things<br />
that would work in this situation, after all. Her big death<br />
scene is a trip to watch, and rather funny (if you can imagine<br />
a funny death scene).<br />
However, Rosella isn't done yet. She still has to get<br />
the talisman back to Genesta, and she'll have to take<br />
the long way to do it. There's also a couple of other<br />
things she might want to do on the way back to make<br />
things tidy, as well as pick up a perfect score.<br />
The actual ending, like the introduction, is all<br />
automatic; you just sit back and watch. Rosella is<br />
returned home, King Graham is saved to rule many<br />
more years, and all's well that ends well.<br />
Tell-tale Part<br />
King's Quest IV is not your typical adventure game.<br />
Some puzzles are clever, others merely tedious. The<br />
storyline is wrapped and connected with cinematic<br />
touches which utilize sparkling graphics and surprisingly<br />
good music (I'm told this is especially true with one<br />
of the new sound boards from Ad Lib, Roland, or IBM!).<br />
Garners who demand constant interactivity will probably<br />
be<strong>com</strong>e impatient with these cute cameos, but many<br />
will be pleased.<br />
Bottom line: Excellent graphics, good music, uneven<br />
puzzles, and deliberate pace. The overall impression of<br />
the game is more gentle and non-violent than most adventure<br />
games. So, the bottom line is that it's a matter<br />
of personal taste.<br />
Copyright 1988 by Scorpia, all rights reserved.
CGW met with Roberta on a<br />
recent public relations tour. She<br />
was travelling throughout the<br />
country demonstrating King's Quest IV:<br />
The Perils of Rosetta and autographing<br />
copies of the game and photographs.<br />
CGW: Was the original Adventure the<br />
first <strong>com</strong>puter game you ever played?<br />
Roberta: Right, I mean, if you don't<br />
count Pong. We had a Pong machine<br />
before we bought our Apple. In fact, I<br />
played the original Adventure before we<br />
had our Apple. Ken brought a terminal<br />
home from work and would use a<br />
modem to hook into an IBM mainframe<br />
down in L.A. somewhere. We would play<br />
it and our moves would be printed out<br />
on hard copy. That was a long time ago.<br />
I usually just say that I played the<br />
original Adventure on the Apple because<br />
it is so difficult to explain.<br />
CGW: As both a female designer and<br />
a female game player, we wonder what<br />
the original attraction of Adventure was<br />
and why you liked playing it.<br />
Roberta: I've always been a book<br />
reader. I love books more than anything,<br />
almost, especially in the fantasy area.<br />
When I played Adventure, it was words<br />
and it was like reading a book. You<br />
would get these paragraphs about what<br />
you had done, but I could talk to it and<br />
it could talk back to me. I felt like I<br />
could manipulate the story and that was<br />
better than a book.<br />
CGW: Why there aren't more women<br />
involved in the hobby?<br />
Roberta: The only answer I can really<br />
give, and I see it all the time with kids, is<br />
that you put a <strong>com</strong>puter in front of a<br />
boy and they automatically go toward it<br />
and get <strong>com</strong>fortable with it. Girls need a<br />
little extra push. Even today, you have to<br />
say, "Don't be afraid. It's okay." They're<br />
better than women, though, but I still<br />
think girls are mostly un<strong>com</strong>fortable with<br />
technical things. Even if you go into a<br />
stereo store, what do you see? Mostly<br />
men and boys looking at them and the<br />
women standing back saying, "Can we<br />
get help?" Don't you think that's true,<br />
kinda'?<br />
CGW: That brings up a related question.<br />
You've set up a situation in the<br />
"King's Quest" series where two characters,<br />
one male and the other female,<br />
seem to have an equal chance to inherit<br />
the throne. In fact, you've veritably set<br />
up the sequel to follow the boy in King's<br />
Quest V, but you chose to follow the girl<br />
in King's Quest IV. Is your intent to involve<br />
more women, even as Mixed-Up<br />
Mother Goose was an attempt to involve<br />
young children in <strong>com</strong>puter gaming?<br />
Roberta: Yes, I designed King's Quest<br />
IV with that in mind. I figured that men<br />
and boys would accept a female heroine<br />
and think it was okay. Then, possibly the<br />
women and girls would notice it and be<strong>com</strong>e<br />
attracted to it.<br />
Yes, with the children, too. However,<br />
this was also true with Mixed-Up Mother<br />
Goose. In Mixed-Up Mother Goose, you<br />
have a choice as to whether you are a<br />
girl or a boy. Originally, I designed the<br />
game where you were going to be a<br />
boy, but I said, "I can't have that!" So,<br />
now it asks if you're going to be a boy<br />
or a girl. Then, all of a sudden I realized<br />
that if you were going to be a boy or a<br />
girl that it ought to look like them. Now,<br />
they can choose color of hair or even<br />
color of skin.<br />
Interview with Roberta<br />
Williams<br />
Designer of the "King's Quest"<br />
Series<br />
CGW: Besides the fact of a female<br />
protagonist, what do you think will bring<br />
the women and girls to the game? The<br />
music? Animation?<br />
Roberta: Hopefully, all of it. The game<br />
is certainly more colorful and prettier<br />
than games that I'm used to. The animation<br />
is more like what you would see in<br />
an animated cartoon series. It should<br />
feel more <strong>com</strong>fortable to them because<br />
the music is more interesting.<br />
CGW: What about violence? Is there<br />
going to be any violence that would put<br />
them off?<br />
Roberta: Not really. The only violence<br />
in the game is at the very end and then,<br />
it's unintentional. You don't mean to<br />
<strong>com</strong>mit violence, but you do.<br />
CGW: Besides the obvious differences<br />
of improved graphics, sound, and<br />
memory capabilities, what would you say<br />
is the biggest difference between your<br />
recent designs and your earliest design,<br />
Mystery House?<br />
Roberta: The storyline. I'm really trying<br />
to develop a sophisticated storyline.<br />
Even in King's Quest I, there wasn't<br />
much of a storyline. I'm trying to<br />
develop the plot more and be more sensitive<br />
to characterization and why characters<br />
do what they do. Also, I'm trying to<br />
do better in understanding what people<br />
type in and why. With this game, I<br />
watched a person sit down and play it<br />
for an hour without ever typing in something<br />
that the game didn't understand.<br />
They had never seen it before and the<br />
parser understood everything they typed<br />
in. I'm very pleased with that. Beyond<br />
that, they're getting a little bigger, which<br />
I've got to stop.<br />
CGW: Is it true that Mystery House,<br />
your first design, was inspired by Agatha<br />
Christie's Ten Little Indians?<br />
Roberta: Yes, as well as the game,<br />
Clue.<br />
CGW: Is there was any direct literary inspiration<br />
for the King's Quest series?.<br />
Roberta: Well, as a kid, my all-time<br />
favorite<br />
reading<br />
was fairy tales, literally, fairy tales. I don't<br />
know why but I read every fairy tale I<br />
could get my hands on. I read them and<br />
re-read them.<br />
CGW: So that's why there's, at least, a<br />
cameo by fairy tale characters in each<br />
game?<br />
Roberta: Apparently.<br />
CGW: Besides the introductory and<br />
final wrap, what cinematic effects have<br />
been added to King's Quest IV?<br />
Roberta: The way we change screens.<br />
We have a dissolve, wipes, iris in, and<br />
iris out. Those are all cinematic approaches.<br />
Of course, the use of music<br />
to create an atmosphere and the use of<br />
more dialogue to have conversations<br />
with characters. Dialogue may not be<br />
cinematic, but I think it is.<br />
CGW: As the author, what is the most<br />
satisfying aspect of the King's Quest IV<br />
story to you?<br />
Roberta: I like the heroine, Rosella. I<br />
guess because she's a part of me that's<br />
<strong>com</strong>ing out. I really identified with her.<br />
Sometimes she's delicate, but she's<br />
strong, knows what she wants, she's not<br />
afraid to do what she has to do. She's<br />
courageous. It was fun for me to do a<br />
female character.<br />
CGW: Is there a love interest for Rosella?<br />
Roberta: Well, let's just say that the<br />
possibility exists for a love interest that<br />
could be developed in a future game.
Game Hints<br />
Warning: Although "The Scorpion's<br />
Tale" is a warm and <strong>com</strong>fortable<br />
tavern of the mind with a nice cozy<br />
fire of vibrant images, our resident<br />
storyteller conjures up<br />
illuminating hints<br />
about games. If the<br />
gentle reader eschews<br />
hints, let him beware.<br />
Ah, it's Christmas time<br />
again! Fred has his<br />
shrunken head garland<br />
on the wall, snow is drifting<br />
past the windows, a<br />
cheery blaze burns in the<br />
fireplace, the Christmas<br />
Tree Monster blinks its<br />
lights in the corner, and<br />
all's right with the world.<br />
Then again, maybe all's<br />
not right with the world,<br />
if the date happens to<br />
be 2004 AD.<br />
Manhunter: New York,<br />
from Sierra, is a wickedly<br />
humorous and bizarre game set in<br />
the near future. Strange aliens that<br />
look like flying eyeballs (called orbs),<br />
have invaded and taken over the<br />
city of New York. The resident<br />
population, or what's left of it, is<br />
restricted to Manhattan and a small<br />
part of Brooklyn. In addition, by<br />
order of the orbs, all humans must<br />
wear only brown robes as clothing.<br />
For secret reasons of their own,<br />
the orbs choose certain human individuals<br />
to be<strong>com</strong>e manhunters.<br />
Guess who's just been chosen to be<br />
a manhunter? Right! Of course, you<br />
haven't the faintest idea of what<br />
being a manhunter is all about or<br />
why they picked you. Maybe it's better<br />
that you don't know (ask too<br />
many questions, and you might be<br />
sent to Chicago . . .)<br />
In any case, you get a neat little<br />
<strong>com</strong>puter called MAD (Manhunter<br />
Assignment Device) to help you,<br />
and then, you're off on your first assignment.<br />
They all begin the same<br />
way, with an orb floating into your<br />
apartment to tell you what it wants<br />
you to investigate (by the way, keep<br />
the manual handy; you have to<br />
enter a word from it each time you<br />
play).<br />
As Told by Scorpia<br />
Then, you get out MAD and do some<br />
tracking. The <strong>com</strong>puter shows you the<br />
vicinity, plus a little revolving square with<br />
a T in the middle. This is the person<br />
whose movements are being tracked.<br />
You watch where they go and what they<br />
do until the tracking ends for one<br />
reason or another.<br />
This is very important, since the number<br />
of locations you can travel to are<br />
rather limited. In most cases, for example,<br />
you can't go to a location until<br />
you have already learned something<br />
about it, usually (although not always)<br />
through MAD tracking.<br />
Travel, by the way, is extremely fast.<br />
Whenever you want to move from one<br />
place to another, a map of Manhattan<br />
(and part of Brooklyn) <strong>com</strong>es up on the<br />
screen. A small blue and red sphere is<br />
moved around the map with arrow keys<br />
or a joystick until it's over the area you<br />
want to go to (available areas show as<br />
blinking yellow squares). Hitting the<br />
"Enter" key takes you there immediately.<br />
The first day, you track a mysterious<br />
person who sets off an explosion at Bellevue<br />
Hospital. Trekking<br />
(tracking?) on over there,<br />
you discover a rather<br />
gruesome corpse. There<br />
will be several other unpleasant<br />
bodies to view<br />
as the game progresses,<br />
so get used to it now.<br />
There's nothing like<br />
protruding tongues and<br />
upturned eyes to make<br />
your day Having seen all<br />
there is to see at Bellevue,<br />
you continue tracing<br />
the path of the unknown<br />
bomber, which<br />
takes you to a bar in the<br />
Flatbush section of<br />
Brooklyn. Before you<br />
can do anything else in<br />
this bar, you'll have to indulge<br />
in a little knife throwing.<br />
Most of you know by now how I<br />
feel about arcade stuff in adventure<br />
games (boo! hiss! bah! humbug!),<br />
and, unfortunately, there is a fair<br />
amount of it here. On the other<br />
hand, the authors have added a feature<br />
to the game, for which I can forgive<br />
the arcade sequences.<br />
In the knife throwing, you try to get<br />
four knives safely between the<br />
fingers of an outstretched hand. A<br />
small knife appears on the screen,<br />
moving slowly back and forth. At the<br />
right moment, you hit return, and<br />
hope the knife hits the table and not<br />
a finger. Should you make a mistake<br />
and allow the knife to draw blood,<br />
you will undoubtedly lose your head<br />
(the authors are really into blood<br />
and gore).<br />
However, there's no need to reach<br />
for the restore key. After you watch<br />
your demise, the authors appear on<br />
the screen, dressed in regulation<br />
brown robes. Sometimes, they have<br />
a snide remark to make, sometimes<br />
they will give you a clue. Either way,<br />
they back you up to just before<br />
whatever it was that killed you, as<br />
many times as you need it. If there<br />
has to be arcade sequences in an adventure<br />
game, this is a good way to handle<br />
them. Once you manage to throw the<br />
knives properly, you can play the video<br />
game in the corner (I re<strong>com</strong>mend using<br />
the arrow keys to manipulate the little<br />
figure rather than a joystick.).<br />
Now, you'll be able to visit Coney Island.<br />
Sorry to say, though, you won't be<br />
able to ride the Ferris wheel or the<br />
parachute jump. All that's available are
three (oh no!) arcade games: break the<br />
balloons with darts, knock the kewpie<br />
dolls off the shelf, and toss a ring<br />
around a bottle.<br />
What's it all about? Well, that's where<br />
watching the screen carefully <strong>com</strong>es in.<br />
This game is extremely visually oriented;<br />
clues and parts of clues can be<br />
anywhere, and it's up to you to make<br />
the necessary associations. There is, for<br />
instance, a subtle connection between<br />
the video game and Coney Island which<br />
is not readily apparent. Remember, practically<br />
everything you <strong>com</strong>e across is important<br />
in some way.<br />
Two other locations to visit today are<br />
Trinity Church and a public restroom in<br />
Prospect Park. You can look around the<br />
church, although there isn't much you<br />
can do there right now. As for the<br />
restrooms, well, what does one do in<br />
them (aside from scrawling graffiti on<br />
the walls?).<br />
You'll know when you're finished for<br />
the day when the orbs send an override<br />
to MAD, and request one or more<br />
names from you (this is how each of the<br />
first three days end). Let's hope you<br />
have all the names they want. If you've<br />
been messing around a long while and<br />
the orbs don't contact you, this is a hint<br />
that you haven't done everything that<br />
needed doing. Travel around to the<br />
various locations and see if you can<br />
figure out what you may have missed.<br />
Day two begins with the orbs wanting<br />
you to investigate a break-in at Grand<br />
Central Station (now, of course, closed).<br />
There are three people to track, and it's<br />
vital that you follow all of them. It can<br />
be a little tricky to get the tracker on the<br />
right people, but it can be done.<br />
Of the several places to visit today, the<br />
worst by far is Central Park. The park is<br />
now a minefield, and travelling through<br />
it is, well, dangerous. You have the MAD<br />
tracker to help you, but even so, you will<br />
probably end up as manhunter mush<br />
several times if not more. The tracker<br />
can give you the general direction in<br />
which to go, but figuring out the precise<br />
direction from several close together is<br />
not easy (this part of the game I could<br />
have done without; it was on the tedious<br />
side). There's no trick to this, just careful<br />
observation along with trial and error.<br />
The night club is only slightly better.<br />
You can't get in the front door, but<br />
there's a convenient alleyway you can<br />
sneak into. Unfortunately, you aren't<br />
alone. There are four nasty punks you<br />
have to get past, one at a time. The first<br />
two throw knives, the third hurls Molotov<br />
cocktails, and the fourth has some sort<br />
of weird gun (he's the fastest and the<br />
hardest to over<strong>com</strong>e). The process of<br />
getting past them is the same for all<br />
four: jump the low ones, duck the high<br />
ones, and get close enough so you can<br />
knock out the punks (pow!). They get<br />
harder as you go along, but if you are<br />
killed along the way, you only have to<br />
start again with the current opponent.<br />
You aren't forced to start over.<br />
Once inside the nightclub, save the<br />
game. So, if you get tossed out before<br />
obtaining what you need, you won't<br />
have to do the alley again. Remember,<br />
you didn't kill those punks, just knocked<br />
them out.<br />
There's not much to do at the Deli .. .<br />
you can't get anything from the<br />
machines, and given the menu tacked<br />
to the bulletin board, that's probably just<br />
as well. Still, like all the other locations,<br />
this one too is important.<br />
I see I forgot to mention the apartment.<br />
This is one place you have to<br />
figure out on your own; you don't track<br />
anyone to it. Mainly this requires a name<br />
(a full name). MAD's other ability (aside<br />
from tracking) is to give you addresses<br />
of people's homes. The catch is that you<br />
have to know the full name first.<br />
Now, improve your cultural background<br />
with a trip to the Museum of<br />
Natural History. Hmmm . . . well, maybe<br />
not, since all the exhibits were removed<br />
awhile back. Oh, well, at least, you know<br />
the route to take from MAD . . . make<br />
sure you take it exactly, because your<br />
supply of door openers is extremely<br />
limited. One mistake and it's time to restore.<br />
Day three gets off to a cheery start at<br />
Greenwood Cemetery, where you can admire<br />
the view of an orb impaled on a<br />
spear stuck into a grave. After you've<br />
had your fill of that, you might want to<br />
visit the theater, where the wall safe is<br />
easily found, but not so easily opened.<br />
Guess you're missing something, huh?<br />
Maybe it's at the pawnshop. All you<br />
have to do is pick the right badges from<br />
the display. Simple, eh? Do be careful<br />
that you don't end up losing your head<br />
again, though. It looks much better attached<br />
to your shoulders.<br />
Once you've done that, there are a few<br />
puzzles to solve. Don't worry, if you get<br />
crunched, the designers will pop in with<br />
a helpful clue for you (I waited the whole<br />
game for them to pop up one time<br />
saying "No one expects the Spanish Inquisition",<br />
but they never did).<br />
There's another apartment to find, by<br />
the way. You've seen (or should have)<br />
both halves of the name this day, so it<br />
shouldn't be hard to locate the place.<br />
What you need to do there is another<br />
matter; just don't be taken in by the obvious.<br />
Now, it seems you're at rather a loose<br />
end, since there's nowhere else to go (at<br />
least it looks that way). Of course, looks<br />
can be deceiving. What you need, of<br />
course, is a name. One might even say<br />
the name. You got half of it a long time<br />
ago and most of the rest of it, too, for<br />
that matter.<br />
This leads you to the final area, <strong>com</strong>plete<br />
with <strong>com</strong>puter monitor. Go ahead,<br />
log in . . . you won't learn anything if<br />
you don't! Most important here is to<br />
note the locations of the four sites .. .<br />
you should know what all of them are.<br />
Also note that you have a certain<br />
amount of control over them. Not<br />
much, but enough.
The final day begins with you tracking<br />
. . . yourself. Hmmmm. Not too good.<br />
What are you going to do about this?<br />
Well, now is the time for a nostalgic revisit<br />
to some places you've been to<br />
before, particularly to any places where<br />
not much went on before.<br />
Don't worry about roaming the corridors<br />
(what corridors? That's for you to<br />
figure out! grin), you're supposed to be<br />
caught. This leads to the last (well, kinda<br />
sorta) of the arcade sequences in the<br />
game, something along the lines of<br />
Jumpman. There's lots of climbing and<br />
hopping around, so save often.<br />
Before long, you should find yourself<br />
<strong>com</strong>fortably ensconced in an orb<br />
spacecraft. Why not save the game and<br />
fiddle with the controls to find out what<br />
they do? Then, in no time at all, you're<br />
on your way. Where? Well, there is a<br />
rather tedious maze to negotiate first.<br />
After that, you should know where to<br />
go and what to do. I re<strong>com</strong>mend starting<br />
with the one place you haven't been<br />
to, since after that you're going to have<br />
someone on your tail, thereby making<br />
your life difficult (or short, if you aren't<br />
careful). As you have no weapons, all<br />
you can do is avoid the pursuing ship<br />
while you get on with the business at<br />
hand.<br />
Success! Ummm . . . maybe yes,<br />
maybe no. The ending is in tune with<br />
rest of the game, namely twisted (heh).<br />
You'll just have to experience it for yourself.<br />
In spite of the arcade sequences, this<br />
is a clever game that requires you to really<br />
look at the screen and remember<br />
what you see. Note-taking is helpful, in<br />
case you forget later on what you saw<br />
where (or even that you saw it). Nothing<br />
is pointed out to you directly, and there<br />
is no "look" <strong>com</strong>mand. Everything that's<br />
there is there in front of you on the<br />
screen. You just have to be sharp<br />
enough to see it and make the mental<br />
connections where necessary.<br />
Well, I see by the old invisible clock it's<br />
about that time again. Remember, if you<br />
need help with an adventure game, you<br />
can reach me in the following ways:<br />
On Delphi: Visit the GameSIG (under<br />
the Groups and Clubs menu). On<br />
GEnie: Stop by the Games RoundTable<br />
(type: Scorpia to reach the Games RT).<br />
On The Source: Send SMail to ST1030.<br />
By US Mail (Enclose a self-addressed,<br />
stamped envelope if you live in the<br />
United States): Scorpia, PO Box 338,<br />
Gracie Station, New York, NY 10028.<br />
Until next time, happy adventuring!<br />
Copyright 1988 by Scorpia, all rights<br />
reserved.
Review: Point & Counterpoint<br />
TITLE: Pool of Radiance<br />
SYSTEMS: C-64/128, IBM<br />
# PLAYERS: 1<br />
PRICE: $39.95<br />
DESIGNER: Keith Brors<br />
PUBLISHER: Strategic Simulations, Inc.<br />
Mountain View, CA<br />
Two expert adventurers have differing<br />
perceptions of SSI's Pool of Radiance.<br />
Point<br />
Mirror Images in a<br />
"Pool of Radiance"<br />
It's Only D & D,<br />
But I Like It!<br />
by Ken St. Andre<br />
K<br />
en St. Andre is the designer of Tunnels & Trolls, the pen<br />
and paper adventure game (soon to be a <strong>com</strong>puter<br />
game), and was one of the designers of Wasteland. In<br />
this article, he tells us what he likes about another designer's<br />
game, Pool of Radiance, the first "Advanced Dungeons and<br />
Dragons" scenario from SSI.<br />
You're going to be outnumbered . . . all the time! You're going<br />
to face incredible odds, but you'll get to like it, even if those<br />
monsters fight hard and show no mercy! I've been spending<br />
every spare moment trying to clear the monster-infested slums<br />
of Phlan, somewhere in the "Forgotten Realms." It was hack and<br />
slash <strong>com</strong>puter fantasy role-playing at its finest. I am beginning<br />
to see how the system works and I'd like to talk about the game<br />
from a design perspective. It may be predominantly one man's<br />
opinion, but it is, at least, an experienced opinion.<br />
In 1975, I started<br />
the "revolt" against<br />
Dungeons and<br />
Dragons with my<br />
game, Tunnels<br />
and Trolls. My<br />
opinion, then and<br />
now, is that D &<br />
D is too <strong>com</strong>plicated.<br />
With a<br />
simpler system,<br />
one can get to<br />
the essence of the<br />
fantasy role-playing<br />
experience<br />
more quickly and<br />
experience more<br />
adventures. In the<br />
years since 1975,<br />
D & D has<br />
metamorphosed<br />
into Advanced<br />
Dungeons and<br />
Dragons and a<br />
merely <strong>com</strong>plex<br />
rules system has<br />
grown into a<br />
labyrinth of truly<br />
Byzantine<br />
perplexity. With<br />
my "less is more"<br />
fetish, you might<br />
think I'd hate<br />
SSI's A D & D<br />
product, but you'd<br />
be wrong.<br />
As far as I can<br />
tell, George Mac-<br />
Donald insisted<br />
that SSI faithfully<br />
incorporate an<br />
authentic A D &<br />
D system into<br />
Pool of Radiance<br />
(actually, I think<br />
they've fudged the system a bit in the player's favor, but it<br />
needed it). It's okay with me, though, for one simple reason.<br />
That is, the <strong>com</strong>puter keeps track of all the rules and the player<br />
interface is beautifully transparent. That gives one the real feel of<br />
playing Advanced Dungeons and Dragons without needing to<br />
have all of the rulebooks close at hand. Frankly, this has proven<br />
irresistible to me.<br />
Regardless of what rules system may be used, however, any<br />
game rises or falls on other factors. First of all, the game world<br />
must have internal consistency. Phlan, the environment where<br />
the game is played, has that. Of all the other CRPGs on the<br />
market, Pool of Radiance has about the best excuse for groups<br />
of people wandering around and killing monsters—They are<br />
reclaiming a city that had been lost to the forces of darkness centuries<br />
before. There is no world-threatening wizard to over<strong>com</strong>e—<br />
just a simple case of us against them.<br />
Secondly, the game has to have repeatable elements that will<br />
keep the gamer's interest. Pool manages this with personally<br />
designed character icons that move during the <strong>com</strong>bat scenes.<br />
Because I was able to choose what my little fighters, clerics, and<br />
wizards look like, I never get tired of seeing them on the screen.<br />
(Continued on page 60)
A<br />
s sequels go, they generally lose some of the flavor and<br />
excitement that was generated by their predecessors.<br />
Fortunately, this is not always the case in the software<br />
world. In the continuing evolution of three dimensional modelled<br />
graphics, Rainbird Software has continued to build upon the<br />
experience gained from Starglider<br />
I and its wire-framed vector objects<br />
by keeping pace with the<br />
present industry benchmark of Starglider II<br />
color-filled vector generated<br />
objects.<br />
The historical background of<br />
Starglider II takes up where its<br />
predecessor left off. It is your basic Star Wars<br />
premise, in which you, as the last hope of<br />
free civilization, must do battle with the overwhelming<br />
odds against you. You must attempt<br />
to push back the evil Egron empire<br />
and save Novenia and all other free worlds.<br />
The Egron war machine has devoured planet<br />
after planet in their quest for absolute<br />
domination. They must be stopped!<br />
In Starglider I, the player was confined to<br />
the vicinity of the planet Novenia, his vehicle<br />
lacking the ability to leave the planet's atmosphere.<br />
In the sequel, it's possible, with the<br />
newly perfected "star drive", to leave Novenia<br />
and travel to other worlds. Possible,<br />
nay.... necessary; for the Egrons are constructing<br />
powerful beam projectors on the seven<br />
moons of Millway, which will be used to<br />
protect a vast space station during its construction.<br />
It is this space station that will be<br />
turned against Novenia, unless it can be<br />
destroyed first. (Shades of the Death Star in<br />
The Empire Strikes Back!).<br />
As previously mentioned, Starglider II features<br />
three dimensional modelled graphics. It also has a<br />
patterned, full perspective, scrolling landscape.<br />
This is also an enhancement of Starglider I, since<br />
the original provided no real landscape, whatsoever;<br />
merely objects scattered over a dark and dismal plain.<br />
However, should you find the patchwork landscape a distraction,<br />
there is a key function to disable it.<br />
Has the use of three dimensional modelling been improved,<br />
over previous releases? Undeniably, yes! As an example, I point<br />
to the "walkers", reminiscent of those in the opening scenes of<br />
Star Wars: The Empire Strikes Back. They move with a fluidity<br />
that has been heretofore unseen in <strong>com</strong>puter games. Also, the<br />
use of color renders these animations more real and life-like<br />
than ever before.<br />
New to Starglider graphics are the energy bolts that you can<br />
fire at your opponents; they are no longer mere lines drawn on<br />
the screen, and then erased. They are now actual objects, resembling<br />
elongated two dimensional diamonds.<br />
The feeling of actual flight has also been improved. The land<br />
and space stapes are redrawn with such precision and speed,<br />
that Starglider could very easily be referred to as a "mini-flight<br />
simulator".<br />
An ST with a single sided drive will not be able to access the excellent<br />
soundtrack and the digitized sound effects. Instead, <strong>com</strong>puter<br />
generated sounds replace the very real crashes of stereo<br />
digitized thunderclaps, and explosions, etc. A nice addition to the<br />
by Frank Eva<br />
TITLE: Starglider II<br />
SYSTEM: Amiga, AU,, S r<br />
# PLAYERS: 1<br />
PRICE: $44.95<br />
PUBLISHER: Rainbird Software<br />
Menlo Park, C A 94025<br />
Review<br />
Starglider package, specifically for ST single sided drive owners,<br />
is an audio cassette containing the musical score.<br />
As is the case with most titles issuing from the United<br />
Kingdom, the documentation, <strong>com</strong>plete as it may be, lacks the<br />
most important information: How to succeed at game play, the<br />
▪ philosophy being that the player is<br />
expected to learn by trial and<br />
error. Other than the fact that no<br />
real hints are given on succeed-<br />
ing at Starglider II, the game has<br />
no real weak points! However, a<br />
few suggestions are in order, that<br />
- may facilitate a more ideal<br />
method of play. First of all, even<br />
though there is optional joystick control, the<br />
use of the mouse is preferred. The basic<br />
problem here is the fact that most joysticks<br />
<strong>com</strong>e with only one trigger button, or a <strong>com</strong>bination<br />
of buttons that ac<strong>com</strong>plish only one<br />
task. With new joysticks entering the game<br />
play market, perhaps we will someday see<br />
<strong>com</strong>puter programs that remove the major<br />
drawback to the use of a joystick: the number<br />
of available functions is just too limited. Both<br />
joystick modes can be equally frustrating. The<br />
"one hand" mode forces the player to issue<br />
acceleration and deceleration <strong>com</strong>mands in a<br />
method similar to firing weapons systems,<br />
and this can actually be damaging to game<br />
play. Whereas a quick tap of the fire button<br />
causes the current weapon to be fired, the<br />
player must remember to hold down the button<br />
and push the stick forward to increase<br />
speed, or backward to reduce speed. You<br />
may find yourself holding the button down<br />
too long when trying to fire your weapons<br />
and instead reducing or increasing your<br />
speed.<br />
The other joystick mode forces the player to use<br />
the SPACEBAR to fire weapons! Now, if you happen<br />
to own a joystick that attaches to your work<br />
surface with suction cups, and provides a fire button<br />
on the control stick, this method will be a valuable<br />
option. However, if you don't, you will find the weapon<br />
firing sequence very awkward.<br />
The best alternative is to use the mouse. Since this is already a<br />
one hand device, your other hand can be used to issue specialized<br />
<strong>com</strong>mands from the keyboard. The mouse, with its standard<br />
two button configuration, is the perfect tool for flying the Icarus.<br />
You can bank left or right simply by moving the mouse in that<br />
direction. (A "mouse pad" will help to limit the desk space required).<br />
Also, changing altitude is ac<strong>com</strong>plished by moving the<br />
mouse forward or back. And finally, changing speed is ac<strong>com</strong>plished<br />
by holding down the right button, while simultaneously<br />
moving the mouse forward or back. The left mouse<br />
button fires the currently selected weapon.<br />
In Starglider II, you must learn to control your speed. New attack<br />
patterns your enemies have devised will frequently leave<br />
you flying in circles, since some of them like to get you from the<br />
rear. So, slow down and analyze these patterns, thus saving<br />
energy.<br />
Who will like Starglider II? Certainly the arcade fan, for the realistic<br />
air and space <strong>com</strong>bat, but also the ardent adventurer, for the<br />
exploration of some sixteen planets and moons making up the<br />
Solice System, the closest star cluster to the Novenian system.<br />
Since this includes most <strong>com</strong>puter game players, I would imagine<br />
that the only person who would not enjoy Starglider II is<br />
one who likes only text adventures! Starglider II is a good buy!
Review<br />
Banzai<br />
Strike Line<br />
NAME:<br />
Pacific Theater Combat in<br />
"Typhoon of Steel"<br />
by M. Evan Brooks<br />
Typhoon of Steel is SSI's Pacific Theater sequel to<br />
Panzer Strike (cf. CGW, May 1988, No. 47, p. 22).<br />
While Typhoon of Steel is a stand-alone simulation, its<br />
mechanics and options are such that it is the Pacific mirror<br />
of Panzer<br />
Strike that so<br />
many garners<br />
have wanted.<br />
Here, one may<br />
utilize the<br />
Americans, the<br />
Japanese, and<br />
of course, the<br />
British and the<br />
Germans.<br />
Climates of<br />
conflict<br />
include the<br />
Pacific<br />
Theater, Asia<br />
and Europe.<br />
While the<br />
author of the<br />
Panzer Strike<br />
review (see<br />
above) noted<br />
that the system<br />
had be<strong>com</strong>e<br />
his<br />
favorite <strong>World</strong><br />
War II tactical<br />
simulation, this<br />
"curmudgeonly<br />
critic" will note<br />
some other<br />
considerations.<br />
Typhoon of Steel<br />
SYSTEM: C-641128, Apple<br />
# PLAYERS: 1-2<br />
PRICE: $49.95<br />
DESIGNER: Gary Grigsby<br />
PUBLISHER: Strategic Simulations, Inc.<br />
Mountain View, CA<br />
The Philosophy<br />
of the<br />
Tactical Wargame<br />
As each unit represents a<br />
squad or an individual vehicle,<br />
abstraction, as such, is no longer a valid consideration.<br />
Generally, military simulations are accurate insofar as they<br />
reflect the mass, i.e. one can predict what 10,000 men will<br />
do in the aggregate (a division). It is much more difficult to<br />
predict what 10 men (a squad) will do.<br />
However, tactical games have always been popular, e.g.<br />
the boardgame, Squad Leader and its descendants, advanced<br />
squad leader (no longer a game, but rather a way of<br />
life). As long as the consumer realizes the inherent difficulty<br />
of predicting actions on so detailed a level, there is nothing<br />
wrong with such simulations.<br />
Typhoon of Steel:<br />
The Advantages<br />
(1) Design-Your-Own Scenarios. This feature is easily utilized;<br />
in fact, the map maker and unit designations are<br />
among the easiest available on the market (although one is<br />
restricted to the unit mix and terrain types included in the<br />
program data [which are<br />
numerous and varied]), cf. Tables 1 and 2.<br />
(2) Command Emphasis. One may play with limited or full<br />
<strong>com</strong>munications. The<br />
former emphasizes the reality of <strong>World</strong> War II <strong>com</strong>bat<br />
operations and the limitations of the chain of <strong>com</strong>mand.<br />
Such usage may prove frustrating, but it does give a more<br />
accurate understanding of the difficulties of conflict at the<br />
lower levels of <strong>com</strong>mand.<br />
(3) The Campaign Game. One may take a battalion-sized<br />
or smaller force through <strong>World</strong> War II. Updating weapons, efficiencies<br />
and morale will show the effects as early losses<br />
can escalate into brittle units suffering from "<strong>com</strong>bat<br />
fatigue" (or "malingering", as General Patton would say).<br />
Typhoon of Steel:<br />
The Disadvantages<br />
(1) TIME! The game is not a quick play. In a battalionsized<br />
engagement (c. 32 squads per side), to play one hour<br />
of "<strong>com</strong>bat" time takes around 15 hours with the <strong>com</strong>puter<br />
playing both sides. If a human is playing against the<br />
machine, time can easily stretch to 30-45 hours. The pulses<br />
are simply too slow in their execution for a tactical simulation.<br />
Scenarios can be designed for play in 15 minutes.<br />
However, they would have to be of a skirmish at <strong>com</strong>panylevel.<br />
The program mandates a game-length of 30 or 60<br />
turns. Therefore, only a lower unit density scenario would<br />
allow play to be <strong>com</strong>pleted within a short time period (as<br />
soon as the crisis point has been reached, one can choose<br />
to end the game and the <strong>com</strong>puter will declare the victor).<br />
This reviewer can conceptualize operational goals in a<br />
simulation over a long period. However, with a product<br />
simulating a one-hour maximum, it be<strong>com</strong>es quite difficult
to remember after a number of saves as to which ridge line<br />
or pillbox was the prime objective.<br />
(2) Terrain Types. A plethora of terrain types exist for one's<br />
usage. However, nowhere in the documentation is there<br />
any pictorial representation of such types. The documentation<br />
strongly urges the user to go through the design<br />
parameters in order to be<strong>com</strong>e familiar with the terrain<br />
types, but this reviewer does not think that a pictorial representation<br />
of such types would have required an inordinate<br />
effort. Even more confusing is that certain terrain types are<br />
the same!—e.g. Pacific wheat (level 3) and high grass {level<br />
1), Pacific clear terrain (levels 1 or 3) or stone buildings<br />
(levels 1 or 3). While a map recon may well serve to<br />
delineate the type of objective, it be<strong>com</strong>es difficult to remember<br />
them in the aggregate.<br />
(3) Order of Battle. Nowhere in the scenario explanation is<br />
an order of battle given. While this may have been done in<br />
order to have one experience the in<strong>com</strong>plete intelligence as<br />
to the enemy, this reviewer would have preferred to have an<br />
order of battle. It would have greatly assisted in deciding<br />
how to tailor one's forces in order to maximize <strong>com</strong>mand<br />
emphasis.<br />
(4) The Military Misconceptions. One may choose to advance<br />
his units, e.g. across an open area to a building.<br />
However, once the units are spotted or fired upon, they immediately<br />
slow to a cautious advance and are often<br />
rendered hors de <strong>com</strong>bat. While this may occasionally be<br />
true in actual <strong>com</strong>bat, it is idiocy to seek cover in an open<br />
area instead of rushing into a region offering both cover<br />
and concealment.<br />
Terrain is defined in terms of "cover." In military parlance,<br />
terrain offers "cover" and/or "concealment." Concealment<br />
simply reduces one's visibility; cover offers protection from<br />
enemy fire. Since even wheat fields offer "cover" in Typhoon<br />
of Steel, this apparently represents concealment rather than<br />
cover and should be noted as such.<br />
(5) Non-Interchangeability: Typhoon of Steel may not be<br />
readily mixed with Panzer Strike. Thus, one cannot mix Russians<br />
with Japanese in a replay of Khalkin-Gol (the 1937<br />
divisional-level battles wherein the Japanese were<br />
repulsed by General Zhukov's Far Eastern Command).<br />
Random Observations .<br />
(1) HISTORICITY: SSI has done an admirable job of detailing<br />
unit weapons and vehicles down to squad level.<br />
Typhoon of Steel utilizes 50 yards per hex with 20-second<br />
phases and 1 minute turns at the squad level. By <strong>com</strong>parison,<br />
Kampfgruppe utilized 200 yards per hex with 30second<br />
phases and 2 minute turns at the platoon level.<br />
Weapon ranges from both games are generally <strong>com</strong>parable<br />
(e.g. Typhoon/Kampfgruppe rifle, 500/400; SMG, 300/200;<br />
HMG, 900/1000; PZIV-G, 2500/2400 yards). As ranges increase,<br />
lethality decreases in an algorithm available in the<br />
documentation for the true grognard.<br />
On a higher level, however, historicity does not appear to<br />
be totally accurate. For example, the Omaha Beach<br />
scenario postulates a landing by the 116th infantry assault<br />
regiment. The scenario postulates a landing by 8 Sherman<br />
DD tanks. Historically, by H +5, there were 16 tanks available.<br />
On Dog White Beach, only 8 got ashore. Thus, if one<br />
utilizes an Order of Battle for H +60, the scenario would<br />
reflect Company G. Yet, the number of squads available in<br />
the game does not correlate with Company G's historically<br />
available manpower (cf. Omaha Beachhead, Center of<br />
Military History, 1984, pp. 44-57). Granted that liberties may<br />
be taken with the OB, it would have been nice to have a little<br />
more explanation as to the who, what, where and how of<br />
the scenarios.<br />
(2) Map Recon: a detailed map walk-through is a must in<br />
order to succeed at Typhoon of Steel. It would have been<br />
nice to have a hard copy option available. At the squad<br />
levels herein, it is incumbent on the <strong>com</strong>manders to establish<br />
"kill zones" and for squad positions to establish "fields of<br />
fire" and interlocking firepower schematas. In order to do<br />
this, a hard copy map would have been of inestimable<br />
value. Also, it would assist in the playing of a scenario, since<br />
one could note the axis of advance and the intermediate objectives<br />
and phase lines on the offensive. This would<br />
prevent the user from be<strong>com</strong>ing bogged down in a visual information<br />
overload.
(3) Command Control. Command control is essential. As<br />
the senior <strong>com</strong>mander, one must insure survival and <strong>com</strong>munications<br />
(remember, Move-Shoot-Communicate—the<br />
elements of sucess).<br />
If a<br />
subordinate <strong>com</strong>mander<br />
is killed,<br />
he <strong>com</strong>puter<br />
tikes over such<br />
formation. If<br />
he senior level<br />
propriate precautions and stay alive!<br />
filled (e.g. unit<br />
bereft of the<br />
user's input. He<br />
has been killed!<br />
So, take ap-<br />
(4) Firepower: Determining the optimum tactics can be a<br />
frustrating experience. This reviewer has reservations concerning<br />
certain gun ratings, e.g. a 16" gun has a penetration<br />
rating of zero. Well, a direct hit by a naval 16" gun on<br />
even a heavily armored vehicle would ruin the crew's whole<br />
day.<br />
Combined arms tactics are essential. Therefore, one<br />
should practice using artillery and naval gunfire in order to<br />
optimize such usage. Given the pulse system, it is difficult to<br />
get the armor and infantry to move in tandem; but judicious<br />
use of indirect fires should yield effective results.<br />
In the latest issue of Inside SSI (Vol. II, No. 2), a game<br />
replay is offered. Lessons learned include: protection of<br />
leaders and MG sections, unit cohesion and durability of<br />
American Marine squads vis-a-vis their Japanese counterparts.<br />
In fact, the Japanese offer an interesting study. Rather<br />
than suffer rout, they "banzai" when faced with heavy losses<br />
and extreme suppression <strong>com</strong>mander is (similar to the "Mad Russian"<br />
syndrome so familiar to the Squad Leader aficionado). This<br />
"tactic" makes them A0)), simulathe<br />
ideal for the novice gamer. Of course,<br />
the American should seek to use massive indirect fires to effect<br />
this state and then destroy them with small arms fire<br />
from squads taking advantage of both cover and concealment.<br />
Conclusions<br />
For the casual user, Typhoon of Steel may well offer only<br />
a "Storm of Indecision." However, for the dedicated gamer,<br />
Typhoon of Steel offers an engaging, albeit time-consuming,<br />
study of small unit actions during <strong>World</strong> War II in the<br />
South Pacific. This should not be surprising, given the<br />
game's roots in the Panzer Strike system which was<br />
awarded Strategy Game of the Year (see last issue).<br />
tion is now
Review<br />
Deep in the dark<br />
reaches of space lies<br />
the Caldorre system.<br />
Ordinarily peaceful, it is now<br />
wracked with horrendous difficulties.<br />
As though from<br />
nowhere, mysterious raider<br />
ships appear and attack cargo<br />
vessels. They ask no quarter<br />
and they give none. They<br />
<strong>com</strong>e not to steal, but to<br />
destroy; and they destroy very<br />
well indeed. To <strong>com</strong>bat the<br />
menace, the Federation dispatches<br />
a squadron of interceptor<br />
ships to seek out the<br />
raiders and protect shipping. Yet, there is more<br />
here than mere raiding, much more .. .<br />
Sentinel <strong>World</strong>s I: Future<br />
Magic is built around the efforts<br />
of an Interceptor team to discover<br />
who or what is behind the<br />
transport raids. Aside from finding<br />
that out, the team must<br />
also end a dispute between two<br />
native cultures on Caldorre, as<br />
well as stop a raging fight between<br />
the farmers and the<br />
ranchers on Norjaenn. In between,<br />
they have to earn money<br />
to keep their ship in fuel and<br />
themselves supplied with ammunition<br />
and training funds.<br />
Recruitment<br />
All in all, a lot to do, although<br />
it's taken one step at a time.<br />
The first order of business is to<br />
create the Interceptor team of<br />
five. Each member of the team<br />
has a specific function: Medic<br />
(heals people), Navigator (plots<br />
ship courses), <strong>Computer</strong> Officer<br />
(works on ship programming),<br />
Engineer (repairs any damage<br />
the ship takes), and Pilot<br />
(moves the ship and operates<br />
the weaponry in ship <strong>com</strong>bat).<br />
If any of these should die, they<br />
must be replaced as no one<br />
else can do their job.<br />
There is a pre-set team that<br />
<strong>com</strong>es with the game. You can<br />
use those or "reroll" if you<br />
prefer. Actually, there is no "rolling."<br />
Instead, you get 70 points to distribute among 5 attributes,<br />
with a minimum of 10 and a maximum of 20 per attribute at the<br />
start.<br />
At first glance, you might think the pre-created team seems<br />
well-balanced. However, this turns out not to be the case. One<br />
thing (among several) that the manual doesn't tell you is just<br />
how important it is to have a high rating in Comprehend (think<br />
of that as intelligence). Each time a character receives a promotion<br />
to a new rank, he or she gets a number of skill points to<br />
put into a variety of skills (there are 14 in all).<br />
Naturally, putting points into a skill makes the character better<br />
Magical,<br />
Mystery Future<br />
Electronic Arts Conjures<br />
"Future Magic"<br />
by Scorpia<br />
TITLE: Sentinel <strong>World</strong>s I:<br />
Future Magic<br />
SYSTEM: IBM<br />
# PLAYERS: 1<br />
PRICE: $49.95<br />
DESIGNERS: Karl Buiter<br />
PUBLISHER: Electronic Arts<br />
San Mateo, CA<br />
at that skill. Nevertheless, the<br />
number of points a character<br />
gets is governed by Comprehend.<br />
Those with low Comprehend<br />
will get only one or<br />
two points, while a Comprehend<br />
of 20 will give four<br />
points.<br />
With that in mind, it's best to<br />
scrap the entire beginning<br />
team and start over, giving<br />
everyone a 20 in Comprehend.<br />
They will advance<br />
faster in the skills that are<br />
most important. These tend to<br />
be <strong>com</strong>bat skills, such as<br />
using projectile and hand<br />
weapons. I re<strong>com</strong>mend putting<br />
the points into projectile at first,<br />
and doing edged and contact<br />
weapons later on, with blaster not<br />
being built up until late in the<br />
game.<br />
Also, put a point into Recon for<br />
each character until the cumulative<br />
score is at least 16. The<br />
sooner you do this, the better off<br />
you'll be, as recon is very helpful<br />
for finding armories and other<br />
places in the game.<br />
Dexterity is also important. How<br />
quickly a weapon can be used in<br />
<strong>com</strong>bat is governed by this attribute.<br />
Each time a weapon is<br />
used, whether an "up close"<br />
weapon such as a dagger, or a<br />
long range weapon, such as a<br />
shotgun, there is a period of time<br />
when the weapon is "not ready".<br />
The more dexterous the character<br />
is, the shorter the waiting period<br />
before the weapon is ready to use<br />
again.<br />
Stamina controls how many additional<br />
hit points a character gets when he or she<br />
advances a level. Also, in conjunction with<br />
strength, it determines the initial number of hit<br />
points a character has (the two are added<br />
together). Further, note that increasing stamina<br />
after the start of the game will also increase hit<br />
points. That is, for each point of increase in<br />
stamina, there will be a one point increase in hit<br />
points as well.<br />
Strength is a factor when using close range<br />
weapons such as daggers or energy blades; it adds to the<br />
damage the weapon does. It is also used, as mentioned<br />
above, in determining a character's starting hit points.<br />
Charisma is pretty much your looks and charm. While it's supposed<br />
to help you when talking to people, I didn't find much difference<br />
in their responses even with a character of Charisma 20.<br />
While I'm sure the authors didn't plan it that way, it seems the<br />
best approach to creating a team is to give them all the same<br />
values in all the attributes. When it seemed to me that the<br />
original team was advancing too slowly, especially those with low
Comprehend, I started over again, scrapping the originals and<br />
making my own.<br />
Everyone had a Comprehend of 20, Dexterity of 15, Stamina<br />
14, Strength 11 and Charisma 10. These worked much better<br />
than the originals. The characters went up faster in the skills that<br />
are important at the start, and as the game progressed, training<br />
raised the other attributes.<br />
Improvement<br />
I concentrated on getting everyone's Dexterity up to 20 as<br />
soon as possible, since weapon use is almost instantaneous at<br />
that level and this can be a lifesaver in<br />
some circumstances. It also allows the<br />
Medic to heal people much more quickly,<br />
which can also be a lifesaver.<br />
This training, by the way, is available in<br />
the Caldorre Towers. There are three of<br />
them and they are all pretty much alike.<br />
They all have the same facilities, only on different<br />
levels. You'll have to go through<br />
each tower to find the various spas, as<br />
they're called (there is one spa for each attribute<br />
in each tower, or five spas per<br />
tower). Training costs 1000 credits, and<br />
raises the relevant attribute by one point. A<br />
character can train once for each level he<br />
or she has attained.<br />
One thing the manual doesn't mention<br />
and you may not find out for yourself is<br />
how to set the Medic to help a specific person<br />
in the team. This person should be the<br />
team leader, since the leader is always up<br />
front, and therefore will be the target 90%<br />
of the time. By setting the Medic on the<br />
leader (or anyone else) you enable healing<br />
during <strong>com</strong>bat. Any injury sustained by the<br />
character will be restored as it happens.<br />
You won't have to wait until fighting ends<br />
to order the Medic to do healing. How fast<br />
this healing occurs depends on the dexterity<br />
of the Medic, another reason to get the Medic's dexterity up<br />
as quickly as possible. Of course, after a <strong>com</strong>bat you can have<br />
the Medic heal anyone else who was injured; just remember to<br />
set the Medic back on the leader when everyone else is fixed up.<br />
Disparagement<br />
The game does have drawbacks. The worst of these is the very<br />
slow movement when the team is indoors, and long, journeys in<br />
the ATV (All Terrain Vehicle) outdoors. The view for movement is<br />
always overhead. Indoors, your team shows up individually as<br />
dots, green for the team leader and yellow for the rest. Other<br />
people (and animals) are also dots, either blue (friendly) or red<br />
(hostile). When the team leader moves, the rest of the team<br />
moves, following behind in single file. This movement is slow.<br />
This situation is exacerbated by the necessity for making long<br />
trips on foot, such as the five levels of the volcano, the three<br />
levels of the battle station, and the towers on Caldorre, to name<br />
a few. Getting anywhere seems to take forever.<br />
Travel by ATV is not much better. It's a little faster, but on<br />
several occasions you have to follow a long, long trench to get<br />
to some special place. The need for such long journeys escapes<br />
me. There are no outdoor dangers at all. Nothing will attack you<br />
when you're tooling around in the ATV. The only use I could<br />
find for the laser turret was to blast some hapless animal out of<br />
my way so I could go on, assuming there was no other way<br />
around it.<br />
Combat also has its frustrations. The team leader is the only<br />
one you control directly; the rest of the team fires independently.<br />
This is actually a very nice feature, saving you the time and<br />
trouble of directing everyone's shooting. Where it breaks down,<br />
however, is in the fact that the team members don't ever move<br />
independently.<br />
Consider the use of doors, for instance. When the leader<br />
moves through a door, it closes automatically again. If he runs<br />
into something on the other side of the door, he has to fight it<br />
alone, since the person behind him isn't<br />
smart enough to open the door so the rest<br />
of the team can help and he may not have<br />
time to turn himself around to open the<br />
door himself. Also, in some corridors or<br />
rooms, team members may end up stuck<br />
in a corner and unable to shoot at anything,<br />
even though there would be room<br />
for them if they would just move a little bit.<br />
venture game.<br />
The manual is not one of the better ones.<br />
Aside from omitting certain information<br />
you really should know (as mentioned<br />
above), there is no table of contents,<br />
making it hard to find specific information<br />
without a lot of page flipping. Also, reading<br />
it the first time (or even second) can be<br />
confusing without having experienced<br />
some of the game first.<br />
Encouragement<br />
On the positive side, the graphics are absolutely<br />
gorgeous. The pictures of people,<br />
places, and animals are outstanding. The<br />
coordination of events on multiple screens<br />
is fantastic, especially the orbit/landing sequences,<br />
where the event is shown on<br />
three screens at once with each displaying<br />
different views. This is the most exceptional<br />
use of EGA graphics I've seen yet in an ad-<br />
Music and sound effects are also surprisingly good, but they<br />
were too loud on my speaker (oh, for a volume control!), and I<br />
played the game with them turned off. On the other hand, if<br />
you're not up in the wee hours like I am, you might want to<br />
have them on. They're pretty jazzy.<br />
Judgment<br />
Overall, Sentinel <strong>World</strong>s is a series (a second game is mentioned<br />
at the end) that shows promise, although the defects in<br />
this game need to be addressed in future adventures. Faster<br />
movement is a definite necessity. So is a better coordination of<br />
plot elements; too much of what happens in Future Magic is on<br />
a linear basis, which makes the early part slow going, particularly<br />
as the player has no idea of what's going on.<br />
Bottom line: Mixed reactions on this one; re<strong>com</strong>mended, but<br />
patience is required.<br />
Supplement<br />
Warning: This section contains specific hints for playing<br />
"Sentinel <strong>World</strong>s I" and should be avoided by readers who<br />
do not want to utilize Scorpia's clues to solve the puzzles.<br />
(Continued on page 53)
Strategy Tips<br />
[Ed: In June of 1984, the author had<br />
the pleasure of attending the fortieth anniversary<br />
of the Allied landings in Normandy.<br />
As a result, the history of that<br />
campaign has been of especial interest<br />
to Mr. Sherfy. So, when<br />
Strategic Studies Group<br />
released Battles in Normandy,<br />
he purchased a copy in<br />
order to get a "hands on" appreciation<br />
of what the <strong>com</strong>-<br />
manders of forty years ago<br />
were confronted with. These<br />
notes are the result of his<br />
successes with the Battlefront<br />
system utilized in<br />
this game and other popular<br />
SSG games.]<br />
Optimal<br />
Deployment<br />
Prior to ordering troops off their landing<br />
barges (as the Allies) or into their<br />
coastal fortifications (as the Axis), take a<br />
careful look at both the objectives and<br />
the forces available. Access the information<br />
from the "Create" submenu and<br />
look at the information for the scenario,<br />
all of which would naturally be available<br />
to a given <strong>com</strong>mander. Write down the<br />
data concerning friendly troops, including<br />
their strength, rating, and range of<br />
their primary weapons. It can be very<br />
useful, for example, to know that a<br />
specific artillery unit can hit a target five<br />
squares away. Knowing this, one can<br />
more effectively utilize the artillery included<br />
in a division's assets. If an artillery<br />
unit is too far away to assist in an attack<br />
with its current regiment, it can be<br />
reassigned to another regiment in the<br />
division for purposes of the current turn.<br />
Maximal Play Value<br />
Next, check the victory points awarded<br />
to each player for the elimination of<br />
friendly and enemy units. This helps<br />
<strong>com</strong>manders decide who has an advantage<br />
in a war of attrition. Also,<br />
though it may not be as realistic, it enhances<br />
play value to know the enemy's<br />
objectives. In some of the scenarios, the<br />
Axis and Allies have different objectives.<br />
It can be very frustrating to be next to<br />
an enemy objective hex at the conclusion<br />
of a scenario, be unaware of this<br />
objective, and end up losing the<br />
scenario by only a few points.<br />
In one playing of the Utah Beach<br />
scenario, the Allies swept <strong>com</strong>pletely<br />
around the German's right flank and<br />
took all of the objectives on the other<br />
side of the Cotentin Peninsula (Portbail,<br />
Carteret, Barnville). The Allied <strong>com</strong>mander<br />
still lost the game, however, because<br />
he did not realize that he was<br />
within a few hexes of a German objective<br />
(Briquebec), which lay well within his<br />
grasp.<br />
This does bring up a problem, though.<br />
Assume that the Allied <strong>com</strong>mander<br />
Avoiding<br />
"The Longest Day"<br />
Strategic Notes for SSG's<br />
"Battles In Normandy"<br />
by Joe Sherfy<br />
wants to take a German objective which<br />
is unoccupied. Since the Allied <strong>com</strong>mander<br />
cannot order his units into an<br />
objective not specified by the scenario,<br />
the system works against said <strong>com</strong>mander<br />
and the German gets victory<br />
points for an unoccupied town that<br />
could easily have been taken by the Allies<br />
had the game system allowed him to<br />
move into it. Therefore, it is re<strong>com</strong>mended<br />
that when a player does his pregame<br />
survey of enemy objectives, he<br />
alter the scenario so that any additional<br />
objectives are added to the list of friendly<br />
objectives. No victory points should be<br />
awarded for their capture, however, because<br />
the reward is simply keeping the<br />
enemy from gaining those points.<br />
Exceptional Management<br />
Paying close attention to the terrain is<br />
one of the keys to success. For example,<br />
the Sword Beach scenario is one<br />
of the harder ones for the Allied <strong>com</strong>manders<br />
because the Allies have so little<br />
room to move. The first concern for<br />
these forces must be to expand the<br />
beachhead in order to allow more troops<br />
ashore. Should the Allied<br />
<strong>com</strong>mander have difficulty<br />
cracking the German position<br />
on the hills by Beauville, he<br />
should assign the 4th Regiment<br />
of the 6th Airborne<br />
armor.<br />
Division to assault this position.<br />
This regiment is <strong>com</strong>prised<br />
solely of infantry.<br />
Checking the terrain chart<br />
reveals that infantry is best<br />
suited for attacking this position.<br />
It is surprising how<br />
many players use troops that<br />
are at a disadvantage to attack<br />
this position, specifically<br />
Another vital point is checking one's<br />
divisional assets each and every turn<br />
and deciding where they can be used to<br />
the greatest effect. When units have<br />
taken a lot of casualties, be certain to<br />
pull them out of the line and put them<br />
in reserve. In the Omaha Beach<br />
scenario, Allied <strong>com</strong>manders should be<br />
careful not to let their armor get chewed<br />
up by the Germans in their forts. Instead,<br />
the armor should be saved for<br />
when they break out of the beachhead<br />
and are attacking in the open. Careful<br />
<strong>com</strong>manders can reassign their<br />
divisional armor to non-attacking regiments<br />
until the "breakout" occurs or<br />
simply hold them in reserve while the<br />
"slugout" on the beaches is proceeding.<br />
"Supporting formations" are extremely<br />
crucial to success. When attacking, observe<br />
how many enemy formations the<br />
enemy has within supporting range<br />
(generally two hexes). If there are quite a<br />
few, it is usually better to "probe" his<br />
defenses prior to launching an all out assault.<br />
When attacking a battalion which<br />
does not have any supporting troops in<br />
range, however, it is usually worth gambling<br />
on an "assault" before he can<br />
bring up reinforcements.<br />
Beneficial Creativity<br />
Creating personalized scenarios gives<br />
one considerable insight on playing the<br />
game. This reviewer has developed a<br />
scenario of the United States troops<br />
landing on Sicily which has provided<br />
considerably more understanding of the<br />
game system. Those who would like to<br />
have a copy of the Invasion of Sicily<br />
scenario should send a self-addressed<br />
stamped envelope to: Joe Sherfy, 1201<br />
W. 24th #204, Austin, TX 78705. Finally,<br />
Allied <strong>com</strong>manders should not forget<br />
to order some Calvados for General<br />
Sherfy at the first cafe they liberate!
Strategy Tips<br />
The Role of<br />
Leaders<br />
in SSI's<br />
Civil War Series<br />
by Major David S. Stevens<br />
Major Stevens is currently<br />
on active duty<br />
with the United<br />
States Army. He has<br />
submitted this article<br />
based primarily on<br />
Rebel Charge at<br />
Chickamauga and<br />
Shiloh, but notes that<br />
the earlier games<br />
dealing with Antietam<br />
and Gettysburg<br />
are similar<br />
enough to be relevant<br />
to this discussion, as<br />
well.<br />
Premise<br />
During the Civil<br />
War, leaders played<br />
an extremely impor-<br />
tant role on the battle field. Their individual<br />
abilities could often make the difference<br />
between victory and defeat. A<br />
leader's presence and active involvement<br />
at a critical point in the battle<br />
could prevent a unit from fleeing in<br />
panic or inspire one to perform feats of<br />
heroism. Corps <strong>com</strong>manders were also<br />
known to have personally directed their<br />
divisions into battle. This, of course,<br />
sometimes lead to their untimely deaths.<br />
General John F. Reynolds, the senior officer<br />
on the battlefield during the first<br />
morning of fighting at Gettysburg, was<br />
killed while directing units of his I Corps.<br />
No one can predict what might have<br />
happened at Gettysburg had he not<br />
been killed. Likewise, General Winfield<br />
S. Hancock, taking over for Reynolds<br />
several hours later, had a profound and<br />
immediate effect on the morale of his<br />
previously disheartened soldiers. There<br />
are many accounts of how his presence<br />
renewed the fighting spirit in his men<br />
and restored their confidence and their<br />
belief in the Army's ability to carry the<br />
day.<br />
In SSI's Civil War series, the effect that<br />
leaders actually had on their units is<br />
simulated very effectively and realistically.<br />
However, understanding the intricacies<br />
of this <strong>com</strong>plex game feature is not<br />
easy. The documentation is not as helpful<br />
in this area as one would generally<br />
like. To obtain a victory in these games,<br />
one must effectively <strong>com</strong>mand his units.<br />
In order to ac<strong>com</strong>plish this, one must<br />
master the essential leadership concepts<br />
of the game.<br />
Unit Modifiers in Combat<br />
Before attempting to describe the role<br />
of a leader, one must understand the<br />
mechanics of <strong>com</strong>bat in this game system.<br />
There are several things that determine<br />
the <strong>com</strong>bat capability of a unit.<br />
First and simplest is a unit's "strength" in<br />
terms of men. A unit with 1,000 men<br />
would theoretically be twice as strong as<br />
a unit with 500 men. Next, representing<br />
the experience and training of a unit is<br />
the measurement termed "effectiveness."<br />
For example, a unit with 1,000 men<br />
may have an effectiveness rating of<br />
80/80 at the start of the game, which<br />
could drop to 70/80 after suffering losses<br />
during the game. In this case, the<br />
70 indicates the current effectiveness,<br />
while the 80 indicates the maximum effectiveness<br />
this unit can have. In this<br />
game, the overall strength of the unit is<br />
reduced by one percent for each two effectiveness<br />
points below 100. Thus, a<br />
unit with 1,000 men would begin the<br />
game as if it were fighting with a<br />
(Continued on page 47)
(Continued from page 44)<br />
The Role of Leaders<br />
in SSI's Civil War Series<br />
strength of only 900 (1,000 * .90, a<br />
10% reduction <strong>com</strong>puted by (100-80)/2).<br />
Fatigue also modifies the <strong>com</strong>bat effectiveness<br />
of a unit. As a unit moves and<br />
fights, it be<strong>com</strong>es tired. For every two<br />
fatigue points a unit accumulates, its<br />
strength is modified by one percentage<br />
point. Thus, if a hypothetical unit of<br />
1,000 men with an 80/80 effectiveness<br />
rating had 10 fatigue points, its <strong>com</strong>bat<br />
strength would now be equal to just 855<br />
men (1,000 * .90 * .95). Note that all<br />
modifiers are cumulative. Thus, in this<br />
example, the unit's strength of 1,000<br />
men was multiplied by .90 for being 20<br />
effectiveness points under 100 and .95<br />
for having 10 fatigue points.<br />
Other modifiers are also considered<br />
when determining the fire power of a<br />
unit. These include the type of terrain in<br />
which both the attacker and the<br />
defender are located, the density of the<br />
attacker and defender, and whether the<br />
attacker or defender is in a column<br />
mode. Terrain and column modifiers are<br />
<strong>com</strong>mon sense concepts. For example,<br />
on would like to attack on opposing<br />
force that is located in the open while<br />
one's own force is located in covered terrain,<br />
as opposed to making an assault<br />
across an open field against a fortified<br />
position in the wood line. Tables are<br />
provided in the rules which list the<br />
modifiers for the myriad of <strong>com</strong>binations<br />
possible.<br />
Command Influence<br />
in Combat<br />
As the <strong>com</strong>mander of an army, you<br />
can control the above modifiers relatively<br />
easily by simply using <strong>com</strong>mon sense.<br />
Two other modifiers also affect the unit's<br />
strength and they must be monitored<br />
just as closely, if not more so. They are<br />
the "Command and Control" rating assigned<br />
to each unit and the "Leader<br />
Bonus."<br />
In these games, a leader is assigned to<br />
each brigade, division, and corps.<br />
Brigades can be split into demi-brigades<br />
with the assumption that a brigade<br />
leader affects both units equally. Several<br />
brigades are grouped together to form a<br />
division and several divisions are<br />
grouped to form a corps. This hierarchical<br />
structure forms the chain of <strong>com</strong>mand.<br />
Each leader in this chain of <strong>com</strong>mand<br />
affects all units under him.<br />
Each leader has been assigned a<br />
bonus or proficiency rating representing<br />
his historical leadership ability. In Shiloh,<br />
this value ranges from a low of "4" to a<br />
high of "50" (the latter is the rating assigned<br />
to General Grant). The leader<br />
bonus is a direct modifier on the<br />
strength of the unit. Thus, if Grant is attached<br />
to a unit of 1,000 men, it will, in<br />
effect, assault or defend with 1,500 men<br />
(1,000 * 1.5). Of course, the other<br />
modifiers mentioned above would also<br />
affect the unit's final strength.<br />
The "Command and Control" modifier<br />
is also a direct modifier. It can assume a<br />
value between 0.5 and 1.5, which can increase<br />
or reduce a unit's strength by<br />
50%. Several factors go into determining<br />
this rating. They are: the distance a unit<br />
is from its brigade or demi-brigade, the<br />
distance the unit is from both its division<br />
and corps leader, and the state of mind<br />
value of both its division and corps<br />
leader.<br />
At the beginning of each turn, all<br />
division and corps leaders are randomly<br />
assigned a state of mind as being either<br />
confused, indecisive, cautious, or confident.<br />
Values of -0.3, -0.2, -0.1, and 0<br />
are appropriately assigned for each state<br />
of mind. The leader's bonus rating is<br />
used to increase the probability that the<br />
leader's state will be confident. Thus, the<br />
higher the bonus rating, the less chance<br />
there is that the leader will be<strong>com</strong>e confused.<br />
A "Command and Control" modifier is<br />
determined for each individual unit at<br />
the beginning of each turn. It represents<br />
the <strong>com</strong>mander's influence over a unit.<br />
This modifier is primarily based on how<br />
far away the unit is located from the<br />
leaders in its chain of <strong>com</strong>mand. In<br />
Rebel Charge at Chickamauga, for instance,<br />
five points are accumulated for<br />
every square that the unit is away from<br />
its other demi-brigade (if divided). Five<br />
points are also accumulated for each<br />
square the unit is away from its division<br />
leader. For each square a unit is away<br />
from its corps leader, two points are accumulated<br />
(Note: These values vary<br />
slightly depending on the particular<br />
game). The resulting total is divided into<br />
28. The results will be rounded up or<br />
down to insure that they are between<br />
0.5 and 1.5. This quantity is further<br />
reduced by adding in the state of mind<br />
values for both the division and corps
leader, with the lowest possible result<br />
again being limited to 0.5.<br />
What this all means is that each<br />
brigade should stay in close proximity to<br />
their respective division leader, three or<br />
four squares away at the most, and the<br />
corps leaders should be positioned near<br />
the center of the units he <strong>com</strong>mands or<br />
near key points of action. It also means<br />
that leaders with high bonus ratings<br />
should not exposed needlessly to <strong>com</strong>bat.<br />
As stated above, a leader with a<br />
high rating has less of a chance of be<strong>com</strong>ing<br />
confused and a confused leader<br />
will greatly reduce all of his subordinate<br />
units' ability to move and fight effectively.<br />
For example, a unit obtaining the<br />
maximum value of 1.5 for distance factors<br />
can still end up with a <strong>com</strong>mand<br />
and control modifier of 0.9, should both<br />
its division and corps leaders be confused.<br />
Thus, one should not casually involve<br />
division, and especially, corps<br />
leaders that have high ratings; in <strong>com</strong>bat.<br />
The loss of a highly qualified corps<br />
leader will have numerous and severe<br />
negative effects on the corps' ability to<br />
function effectively for the remainder of<br />
the game. Finally, before sending a unit<br />
into <strong>com</strong>bat, one should also consider<br />
how the "Command and Control" rating<br />
will affect the unit's strength in conjunction<br />
with other modifiers.<br />
Other Effects<br />
Related to Leadership<br />
In order to perform any operation such<br />
as moving, firing, engaging in a melee,<br />
building fortifications, or changing<br />
modes, a unit must have the appropriate<br />
number of operational points.<br />
The more operation points a unit has,<br />
the more it can ac<strong>com</strong>plish in one turn.<br />
The number of operation points a unit<br />
is allocated each turn is based on the<br />
"Command and Control" rating in conjunction<br />
with the unit's morale and a random<br />
number. Thus, the "Command and<br />
Control" rating directly affects not only<br />
the unit's <strong>com</strong>bat strength, but its ability<br />
to function effectively on the battlefield.<br />
Each time a unit engages in <strong>com</strong>bat,<br />
whether in the offensive or defensive<br />
mode, it expends one of its ammo<br />
points. At the beginning of each turn,<br />
the unit is resupplied. Again, the higher<br />
the "Command and Control" rating assigned<br />
to the unit, the higher the probability<br />
that the unit will be resupplied. A<br />
unit without ammo cannot attack and<br />
defends with a 70% reduction.<br />
A unit that is disrupted or routed cannot<br />
attack and is, in effect, useless. The<br />
ability of a unit to recover from disruption<br />
is based on the "Command and<br />
Control" rating and whether the unit is<br />
in an enemy zone of control. Rallying a<br />
routed unit is likewise based on the<br />
"Command and Control" rating, as well<br />
as its morale. In both cases, it is clear<br />
that the rating has a significant and important<br />
role toward influencing the play<br />
of the game. Here, the higher the rating<br />
is, the better the chance for that unit to<br />
return to service.<br />
Using Leaders Effectively<br />
As explained above, insuring that<br />
leaders maintain control of their units is<br />
the key to obtaining higher "Command<br />
and Control" ratings. These higher<br />
ratings, in turn, affect practically every<br />
aspect of the game and it can severely<br />
impede one's progress toward total victory<br />
if they are not taken into consideration.<br />
The added firepower, in terms of increased<br />
unit strength, which is obtained<br />
whenever division and corps leaders are<br />
included in an assault, makes including<br />
them in <strong>com</strong>bat whenever possible a<br />
tempting strategy to follow. While this<br />
tactic can sometimes cause the additional<br />
casualties needed to disrupt or rout<br />
an enemy unit, the down side of this<br />
strategy is that the leader is constantly<br />
being exposed to fire and thus, runs the<br />
risk of being killed or captured. Every<br />
time the unit to which a leader is attached<br />
takes casualties, a probability<br />
check is made to see if the leader was<br />
one of those killed or wounded. The<br />
elimination of a key corps or division<br />
leader, as stated above, can reduce the<br />
<strong>com</strong>bat effectiveness of many units for<br />
the remainder of the game.<br />
I have found that it is not wise to split<br />
up the brigade to which a division or<br />
corps leader is attached. This reduces<br />
the possibility that a key leader will be<br />
killed during <strong>com</strong>bat. I use units with<br />
division leaders assigned to attack<br />
enemy forces that are known to be<br />
weaker and where the possibility of<br />
being outflanked is small. I also try not<br />
to attack with units that have corps<br />
leaders assigned to them, unless a flank<br />
attack presents itself and I can protect<br />
that unit from a major counterattack by<br />
utilizing friendly units which are nearby.<br />
SSI has done an excellent job at<br />
simulating the effects that leaders had<br />
on their units during that era. they have<br />
also captured the feeling for the difficulty<br />
that the generals must have experienced<br />
attempting to <strong>com</strong>mand and control<br />
their units in <strong>com</strong>bat. In the final<br />
analysis, these games test one's own<br />
ability as an Army <strong>com</strong>mander to the<br />
limit.
T<br />
he period from mid-1862 through the end of<br />
1863 saw the tide slowly changing in the<br />
American Civil War. Especially in the eastern<br />
theater, Union forces began to give as well as they<br />
got. Were Union tactics improving? Were Union<br />
troops improving in quality? Or was the balance in<br />
the "on-the-field generalship" changing? SSG's<br />
latest offering, Decisive Battles of the American<br />
Civil War, Volume ll (DBACW-II) is your opportunity<br />
to explore the last question in particular. In keeping<br />
with their tradition of designs with "viewpoints," the<br />
latest puts the player onto the battlefield as the actual<br />
<strong>com</strong>manding general. It is a highly accurate and<br />
historical simulation, as well as a product which<br />
raises some interesting questions about the true role<br />
of the overall <strong>com</strong>mander in the midst of battle.<br />
Boilerplate Special<br />
DBACW-II is SSG's second offering in their series<br />
of American Civil War titles, with this game covering<br />
five battles from mid-1862 through the end of 1863.<br />
The scenarios cover the battles of Gaines Mill,<br />
Stones River, Gettysburg (scenarios for Day One<br />
and Day Two), Chickamauga, and Chattanooga.<br />
The game uses brigades as the units of maneuver,<br />
and one hour turns. The system uses an "orders<br />
phase" at the start of each turn, where players can<br />
check the status of their army and issue orders to<br />
particular units and formations. Next, the <strong>com</strong>puter<br />
resolves <strong>com</strong>bat and moves all units. As usual, SSG<br />
gets high marks for laying bare the guts of the <strong>com</strong>bat<br />
routines, so that you can get a feel for which factors<br />
have significantly greater or lesser impacts in<br />
<strong>com</strong>bat.<br />
The game system places great emphasis on the<br />
maintenance of a proper <strong>com</strong>mand perspective for<br />
the player (another signature mark of SSG games).<br />
You play each scenario as the battlefield <strong>com</strong>mander<br />
and the decisions made each turn are<br />
relevant to that position. You send orders to subordinate<br />
formations (corps and divisions), and can personally<br />
direct the actions of a limited number of actual<br />
brigades. Orders to corps and Divisional <strong>com</strong>manders<br />
will be received (or perhaps not), interpreted,<br />
and acted upon by the subordinate <strong>com</strong>manders<br />
(played by the <strong>com</strong>puter), and may or may<br />
not work out the way you planned. The possible orders<br />
which you can give to various subordinate formations<br />
(corps and divisions) and units (brigades)<br />
will vary with the individual situations. Formations<br />
receive orders to adopt offensive or defensive attitudes<br />
and map objectives. Individual units can, on<br />
the other hand, generally be given more specific<br />
directions. Command control, sighting, and <strong>com</strong>munications<br />
are all handled by the <strong>com</strong>puter; and<br />
these are what decide how many of your formations<br />
and units are able to receive orders from you each<br />
turn.<br />
While the player typically maintains contact with<br />
most of his formation leaders and directs the specific<br />
actions of a few nearby brigades, one other <strong>com</strong>mand<br />
option exists. You can move your Army HQ<br />
adjacent to a specific corps HQ and take personal<br />
<strong>com</strong>mand of that corps (sometimes you simply must<br />
do this to keep some dunderheaded <strong>com</strong>mander<br />
from <strong>com</strong>pletely messing up the battle). Of course,<br />
Decisive Battles<br />
of the<br />
American Civil War<br />
Volume Two: Gaines Mill<br />
to Chattanooga<br />
by Jay C. Selover<br />
while you are so engaged, you<br />
can usually watch as things go<br />
<strong>com</strong>pletely off course all over<br />
the rest of the battlefield! All in<br />
all, the frustration and exasperation<br />
level is quite high as you<br />
begin to realize how much of<br />
your Army's potential remains<br />
underutilized because you can't<br />
assume the classic gamer's<br />
perspective and move all the<br />
brigades together in a concerted<br />
effort.<br />
Aye, There's<br />
The Rub!<br />
Review<br />
So, the game effectively transmits<br />
the frustration of true <strong>com</strong>mand—isn't<br />
that the whole<br />
idea of a game designed with a<br />
"<strong>com</strong>mand perspective?" Right,<br />
well I guess my basic problem<br />
with the game then is that it<br />
was basically no fun being a<br />
Civil War battlefield <strong>com</strong>mander, so it's no<br />
1 Decisive Battles of the<br />
fun playing the role of one! Every scenario<br />
starts out with starting units in position<br />
and with initial orders given (more on this<br />
SYSTEMS:<br />
# PLAYERS:<br />
American Civil War—Vol. Il:<br />
Gaines Mill to Chattanooga<br />
Apple. II, C-64/ 128<br />
1-2<br />
crucial point anon). You plop down out of<br />
the sky into Meade's boots and spend the<br />
DESIGNERS:<br />
$40.00<br />
Roger Keating,<br />
Malcolm Power,<br />
whole game trying like hell to make your<br />
and<br />
presence have an impact on the battle.<br />
The boys already know what to do, and<br />
PUBLISHER: Strategic Studies Group<br />
Wald CA<br />
there are just too many of them for you to run your<br />
personal headquarters around giving them all orders.<br />
The scenarios all tend to evolve along historical<br />
out<strong>com</strong>es; not that this is necessarily bad—perhaps<br />
it teaches us that these battles were all destined<br />
to turn out the way they did regardless of the<br />
presence of the individual <strong>com</strong>manding generals. If<br />
that's the lesson, thanks very much but I would have<br />
rather read it in a book. If that's not the lesson, then<br />
I'm at a loss to explain my inability to achieve a<br />
gratifying level of involvement in the battles. Maybe<br />
I've missed some "trick" to successful utilization of<br />
"the <strong>com</strong>mander" or maybe I'm just a poor leader,<br />
but I've played a lot of games (including quite a few<br />
excellent "<strong>com</strong>mand perspective" simulations) and I<br />
just don't get it. I feel the same involvement playing<br />
the game or just watching the <strong>com</strong>puter play both<br />
sides.
Any Bodies Left Breathing?<br />
Actually, there is one missing design feature which<br />
I'm sure would have raised my excitement level for<br />
DBACW-II considerably—a pre-battle briefing to<br />
determine "rules of<br />
engagement" a la the Sim-<br />
Can games. In those<br />
games, the <strong>com</strong>mander establishes<br />
a guiding set of<br />
principles or battle<br />
doctrine establishing<br />
proper procedures and<br />
priorities when the enemy<br />
is encountered. The biggest<br />
problem in DBACW-II<br />
is that the scenarios all<br />
start with the battle just<br />
about to be joined and all<br />
of your forces have already been given their "standing<br />
orders" as to posture and objectives. A critical<br />
element of being the <strong>com</strong>mander is what you tell<br />
your subordinates to do before a battle actually<br />
begins. That way, when <strong>com</strong>munications be<strong>com</strong>e a<br />
shambles during the battle, you have some hope<br />
that your minions will continue to pursue your overall<br />
objectives. Now, in all fairness, you can do this<br />
with DBACWII; it's just a pain. Thanks to the excellent<br />
scenario modification and design kit included<br />
with the game (have I forgotten to laud this standard<br />
element of all of SSG's designs? As usual, their<br />
games are basically worth the price if only for the<br />
tremendous scenario design capabilities in these<br />
marvelous utilities!), you can take any standard<br />
scenario and create a modified version. In this<br />
modification, you can go in and play around with<br />
the standing orders of all subordinates. By doing<br />
this, that key division that starts the game way at the<br />
other end of the map can immediately make the<br />
flanking attack which you would have ordered the<br />
night before the battle, had you been the actual<br />
<strong>com</strong>mander. Get the idea?<br />
Turn Your Radio On<br />
Wait just a minute now, some will say. The game<br />
does include a perfect mechanism to raise your involvement<br />
as <strong>com</strong>mander, a "radio flag". Yes, it is true,<br />
the start up menu includes a couple of options—<br />
one places all units visible on the screen whether<br />
"sighted" of not, and another toggles on a radio for<br />
you. Playing a game with the radio allows you to<br />
send orders to all of your subordinates at all times,<br />
regardless of the actual <strong>com</strong>munications situation.<br />
First of all, the fact that SSG included the radio option<br />
in DBACWII tells me that they realized that playing<br />
without it would not give the gamer the same<br />
satisfaction one is accustomed to from SSG designs<br />
(after all, this series is the first of their designs to<br />
allow anything other than a strict "<strong>com</strong>mand<br />
perspective" playing) Ed: Objection! This is calling<br />
for assumption on the part of the reviewer and<br />
does not take into consideration the rationale expressed<br />
by SSG; to wit, that the radio option is<br />
provided as a tutorial mode to get players accustomed<br />
to the mechanics of the game.]. Second,<br />
DBACWII with the radio on is now like any of the<br />
other "God's-eye-view" classic-boardgame-style <strong>com</strong>puter<br />
games. It is all right, but not noticeably improved<br />
over them. No, SSG games are "<strong>com</strong>mand<br />
perspective" games in my book. The radio is a nice<br />
touch and that's the way it plays most effectively, but<br />
for this design to make a statement it needed to<br />
work as intended; as a classic study simulating Civil<br />
War battlefield <strong>com</strong>mand.<br />
Final Verdict<br />
Few games have ever been as difficult for me to<br />
review as this one. I have dragged myself back to<br />
the <strong>com</strong>puter time and again, fought more than thirty<br />
battles (mostly solitaire, but a couple against live<br />
foes), and can now enjoy the relief of being able to<br />
put the game up onto the top shelf of my "hallowed<br />
archives" for awhile. Why does a game which starts<br />
out with so much going for it ultimately leave me disappointed?<br />
Perhaps, because it destroys our illusions<br />
about the impact of ACW <strong>com</strong>manders or perhaps,<br />
because it isn't actually realistic simulations that<br />
garners are looking for. Anyway, then, there you<br />
have it. This game is an excellent simulation of Civil<br />
War <strong>com</strong>bat. brigades and larger formations all tend<br />
to behave in realistic ways. <strong>Computer</strong>ized subordinate<br />
<strong>com</strong>manders adopt historical strategies and<br />
objectives. The results are realistic; both on the<br />
smaller scale of the individual brigade <strong>com</strong>bats, and<br />
on the larger scale of the typical flow of the battles.<br />
Yet ultimately, I found no joy in the task of trying to<br />
move my men to glory.
(Continued from page 37)<br />
Magical,<br />
Mystery Future<br />
Once your team is created and their ship named, the game<br />
begins. It's a pretty frenetic beginning, as your transport ship<br />
<strong>com</strong>es under attack by raiders immediately upon arrival in the<br />
Caldorre system. Be certain you understand how to move the<br />
ship, raise or lower speed, target, and fire lasers, because there<br />
won't be much time to learn in the middle of battle.<br />
I his brings up an important point: never go into battle against<br />
raiders alone. Always make sure your fellow Interceptors are<br />
there with you or you could find your team dead very quickly.<br />
Carefully check the Federation display and observe where the<br />
rest of the squadron is before rushing off to fight.<br />
For awhile, most of the team's experience points will <strong>com</strong>e<br />
from shooting down raiders. This nets you 25 experience per person,<br />
plus 100 credits from the Federation. When nothing is happening<br />
in space (the raiders aren't always out there), you can<br />
make some quick cash by dropping off science missions. It's dull<br />
work, but it's safe and you get 700 per science packet dropped.<br />
Mining isn't really worth the effort. Rambling around in hilly<br />
areas in your ATV to pick up the three types of ores is not only<br />
time consuming, but doesn't bring much money, either. If you<br />
do decide to mine, always sell your ores on the other planet,<br />
where you'll get a little bit more for them.<br />
After awhile, you'll be up to where you can board raider ships.<br />
This is where you can experience some up close <strong>com</strong>bat, for<br />
which projectile weapons are re<strong>com</strong>mended. The only reason to<br />
board these ships, aside from the experience gained in fighting,<br />
is to raid the armories. These are always in the same place and<br />
always have the same items. Grab as much as you can, the tesselator<br />
if nothing else, as this will bring you 600 credits when<br />
you sell it. A few raider boardings, and you'll have a fair amount<br />
of cash for training and ammunition, as well as replenishing fuel<br />
supplies.<br />
By the way, all those odd items, such as arisian lens and<br />
holophones and everything else, have no purpose (that I could<br />
discern) aside from being sold for cash. Don't buy any in the<br />
general store, just sell what you have there. In fact, you can sell<br />
almost anything even to the weapons stores; they'll buy your<br />
trinoculors and tesselators, too. The only things no one will purchase<br />
are the proscribed weapons, such as long range lasers<br />
and AK-4700's. However, you can buy and sell ammunition for illegal<br />
weapons anywhere.<br />
In between blowing up raider ships and training up attributes,<br />
your team can pay a visit or two to the one town on Norjaenn.<br />
Here you'll learn about the feud between the farmers and the<br />
ranchers. Most of them have pretty much the same thing to say.<br />
The really important people are the ones who show up (in EGA)<br />
as pale blue dots; make sure you speak to all of them.<br />
Speaking of blue, be on the lookout in space for blue ships,<br />
and hail each one you meet. One of them is Grager's space<br />
yacht and you really want to talk to him. For one thing, he'll do<br />
some nice things for your vessel (only once, though, so there's<br />
no point in going back again later).<br />
The people in the towers are, for the most part, rather un<strong>com</strong>municative,<br />
and you won't learn very much from them. Caldorrians<br />
in particular will tell you nothing and most of the people in<br />
the bars are the same way. After awhile, this be<strong>com</strong>es rather<br />
frustrating.<br />
Sooner or later, you will be called upon to settle a dispute between<br />
two races on Caldorre, the Warhaka and the Koshol. This<br />
is actually a simple mission, involving little more on your part<br />
than visiting the two races. The Koshol bear an uncanny<br />
resemblance to, well, Aliens, but they are quite peaceful and<br />
generally non-aggressive. Be sure to look around in the rooms,<br />
you might find a few useful things.<br />
Some time after this, you'll hear about a distress signal from<br />
Borkin on Ceyjavik (an Icelandic-sounding planet where you<br />
make most of your science drops). You won't be able to find<br />
Borkin before you get this message on the Fed channel (it's a<br />
good idea to look at the Fed channels every so often, so you<br />
don't miss something important).<br />
Be prepared for this mission, as Borkin is deserted except for<br />
rampaging ice tigers. They are very nasty customers and can do<br />
a great deal of damage. Come well-armed and well-armored for<br />
this one. To save you some time, the most important building to<br />
explore is the control center. The rest have little in them besides<br />
the tigers. However, fighting tigers is a good way of building up<br />
experience, if you're looking to do that.<br />
Eventually you will find your way to an underground lab that<br />
leads in turn to an undersea volcano with five levels. Be<br />
prepared, since green dragons with acid breath are lurking down<br />
here (really!). They are most prevalent on the fifth level, but they<br />
also wander around in the upper levels.<br />
At the end of this trip, you'll find the first part of the explanation<br />
for the raids on the transport ships and some idea of what<br />
you have to do next, although what is not entirely obvious. Fortunately,<br />
you do not have to go through the volcano to get back<br />
out again.<br />
Actually, this is the time to pay a return visit to Norjaenn; you'll<br />
notice that some people who were there before aren't there now.<br />
Talking to the ranchers and farmers will provide the information<br />
you need to find the missing people. This, in turn, will bring you<br />
to the next major stepping-stone in the game, reaching the Sentinels.<br />
One of the things you'll learn about from them is the battle station<br />
from which the raider ships are launched. This battle station<br />
can be a tough place, although it will also provide you with<br />
some neat armor and weapons. You'll probably make several<br />
trips to the station (once you find out where it is and how to get<br />
there) before you're ready for your actual tasks there. Note that<br />
the battle station armories are restocked between visits, so each<br />
time you arrive, there is a fresh set of weapons, ammunition,<br />
and treasure items to take.<br />
Now, we <strong>com</strong>e to the ending. Unfortunately, the final showdown<br />
with the chief bad guy (yes, there's one of those here)<br />
lacks any excitement. However, the worst is yet to <strong>com</strong>e. Having<br />
dispatched the villain, you loot his chest of goodies (and there<br />
are some nice goodies in there) and hurry back to your ship.<br />
As soon as your team is in the ship, it leaves the battle station.<br />
You get a brief "Congrats, you did a good job" message, followed<br />
by your team being put automatically into cold sleep. The<br />
game is saved at this very point to one of your two save positions.<br />
That's it, game over.<br />
You don't get a chance to turn anything into cash or train<br />
anyone who might have gained levels while in the station. Just<br />
ZAP! it's all over until next time. This is one of the crudest endings<br />
since the days of the old two-word adventure games and<br />
considering the effort that was put into the rest of this game,<br />
you'd expect the authors to <strong>com</strong>e up with something a little<br />
more elegant than that.<br />
Copyright 1988 by Scorpia, all rights reserved.
Review<br />
he dragon's fiery breath burned across Goldmoon's<br />
Tarms. The young cleric held aloft her blue crystal staff,<br />
source of her powerful magic, and began summoning<br />
forth the spell to deflect the dragon's breath away from her.<br />
Before she could finish the spell, her lover, Riverwind, darted<br />
swiftly between the black dragon and herself. Without a spell<br />
to protect him, he was literally<br />
roasted alive. It was left to<br />
Sturm Brightblade to dispatch<br />
the dragon with a vicious<br />
slash of his mighty<br />
broadsword.<br />
Goldmoon knelt by her<br />
lover's scorched and blackened<br />
body. As tears glistened<br />
on her cheekbones, she raised her clerical<br />
staff and summoned forth its most powerful<br />
spell. In just a moment, Riverwind began to<br />
stir! Working feverishly, Goldmoon called<br />
forth healing spell after healing spell until<br />
the young warrior was <strong>com</strong>pletely whole.<br />
"I thought I'd lost you," she said in a<br />
hushed tone.<br />
After a brief healing session (faster than<br />
you can say Oral Roberts) the party continued<br />
their quest through the musty ruins of<br />
Xak Tsaroth.<br />
—Roll Credits<br />
Scouting Locations<br />
Sound like one of your own scenarios?<br />
Heroes of the Lance is based on TSR's<br />
DragonLance game world, Krynn.(More<br />
specifically, it is based on the DragonLance<br />
game module: DL1 Dragons of Despair)<br />
These modules have already inspired a series<br />
of fantasy novels and a "DC" <strong>com</strong>ic book<br />
based on the fantasy world. Now, courtesy of<br />
SSI and U. S. Gold, the fantasy moves onto<br />
<strong>com</strong>puter disk. The player controls eight heroes<br />
in his search for the disks of Mishakal.<br />
It seems appropros for the goal in a <strong>com</strong>puter<br />
game to be recovering disks. This time it is not<br />
floppy disks, but the disks of Mishakal. These circular<br />
plates of platinum contain all that our<br />
heroes will need to restore the knowledge of the old gods to the<br />
people and help fight the Queen of Darkness. Once the people's<br />
faith is restored, the old gods will be able to intervene on behalf<br />
of their followers and the balance between good and evil will be<br />
restored. However, the Queen of Darkness has surrounded the<br />
ruins of Xak Tsaroth with mercenaries and monsters, so the<br />
party of heroes has no choice but to fight their way through the<br />
ancient temple until they get to the disks. When they find the<br />
disks, they face the biggest challenge of their warrior careers, a<br />
behemoth black dragon named Khisanth who guards the disks.<br />
Cast of Characters<br />
The characters will be well-known to followers of the Dragon-<br />
Lance saga. They are a well-mixed crowd. Tanis is the halfhuman,<br />
half-elven warrior whose skill with a sword is surpassed<br />
only by his excellent marksmanship with a bow. Caramon and<br />
Raistlin Majere are twin brothers who seem to be the opposites<br />
in this party. Raistlin is a young mage who recently <strong>com</strong>pleted<br />
"the test" which gave him his powers, but ruined his physical attributes.<br />
Because his brother was constantly endangering him-<br />
Heroes and Heavies<br />
of the Lance<br />
by David M. Wilson<br />
self, Caramon became his brother's protector and this has given<br />
Caramon a much needed honing of his battle skills. Sturm<br />
Brightblade's father, a knight of Solamnia, sent Sturm away for<br />
his own safety when enemies sought to destroy the family.<br />
Sturm was never again reunited with his father, but swore that<br />
all ideals of knighthood would forever govern his life. His skill<br />
with the two-handed sword<br />
marks him as the best fighter<br />
in the party and a logical<br />
choice for point man.<br />
Goldmoon and Riverwind are<br />
two young lovers who have left<br />
their tribe and are now looking<br />
for a group called the seekers.<br />
The lovers hope the seekers<br />
can explain the strange powers of<br />
Goldmoon's staff. Riverwind was sentenced to<br />
death when he brought the staff home from a<br />
quest, but could not make it work for<br />
Goldmoon's father, the tribal chief. With the<br />
aid of the Blue Crystal staff, Goldmoon magically<br />
spirited Riverwind away from the danger.<br />
Tasselhoff Burrfoot is a kender, a member of<br />
that race of small people who have earned a<br />
reputation for "appropriating" anything that is<br />
not nailed down. Tasselhoff has explained to<br />
the group that the kender don't steal for<br />
stealing's sake, but because of their overly<br />
developed sense of curiosity. (They probably<br />
still closely watch the little man, anyway.) His<br />
main weapons are a <strong>com</strong>bination staff and<br />
slingshot. The last individual in the party is<br />
also a little man. He carries a huge battleaxe<br />
and villains and monsters don't seem to enjoy<br />
meeting him at axe-throwing range.<br />
Each time this game is booted, players are<br />
greeted with a portrait of each character.<br />
Before play begins, the program checks to<br />
see if players have read the manual, utilizing<br />
a pop quiz (copy protection) with questions<br />
like: What is the strength for the character Riverwind?<br />
Stage Directions<br />
Players must select a marching order for their<br />
eight people. It is imperative to keep the mage<br />
and cleric id the front line. Raistlin and Goldmoon<br />
are free to work their magic only if they are one of the first four<br />
characters in line. Although your magic users should be in the<br />
front ranks, great pains must be taken to protect them from<br />
harm, especially Goldmoon. Her clerical staff is of no use to any<br />
other characters. Since she is the group medic, keep her alive at<br />
all costs.<br />
Personally, I like the following marching order: 1) Sturm, 2)<br />
Flint, 3) Raistlin, 4) Goldmoon, 5) Tanis, 6) Riverwind, 7)<br />
Caramon and 8) Tasselhoff. This order can be changed at any<br />
time throughout the game. The player controls the marching<br />
order, except when a hero is killed or Goldmoon is badly hurt. At<br />
any point that Goldmoon is in serious danger, Riverwind<br />
automatically races to the front to defend her.<br />
Combat is handled via joystick. Only the hero in the very front<br />
can fight. He gets all the glory and most of the wounds.<br />
However, players may also use magic during a <strong>com</strong>bat round.<br />
Don't be afraid to stop a battle round and utilize a magic spell<br />
because to survive it will take everything that the party has.<br />
The attributes in the manual play more of a part in the game<br />
(Continued on page 56)
(Continued from page <strong>54</strong>)<br />
than is easily discerned. For instance, Raistlin is extremely weak<br />
and is easily defeated in any type of a physical battle. He moves<br />
slowly, almost walking with a limp. He doesn't jump, he levitates<br />
(you've got to see this). Other attributes also impact the game's<br />
play, since this is "hack and slash" role-playing without the paper<br />
and dice. No one will win this game solely because he knew how<br />
to handle a joystick. Each character is programmed in and it's<br />
up to the player to make the most effective decision in utilizing<br />
each character.<br />
The enemies are: mercenaries, Baaz Draconians (gargoyle type<br />
creatures) who turn to dust when destroyed; Giant spiders,<br />
(remember to swing that sword down); Trolls who are almost impossible<br />
to kill in a pitched battle unless a magic spell is used<br />
(either charm or hold person) to freeze them while the heroes<br />
slash away; Gully dwarfs who are scummy little nuisances and do<br />
little or no damage, but will remove character's deserted bodies;<br />
Wraiths who drain away your lifeforce (charm and slay these<br />
quickly); Hatchling Black Dragons (these are easily killed once a<br />
character who is protected by a "Deflect Dragon Breath" spell<br />
pursues them into a corner and swings for their legs and lower<br />
body); and the BIG MAMA dragon herself, Khisanth.<br />
The game manual advises strategic withdrawals when an opponent<br />
is overpowering a party. These strategic retreats provide<br />
the party with a time for healing. Also, it is good to keep in mind<br />
that the further a party progresses, the more monsters it will encounter.<br />
Players will eventually find their way into a room that is a <strong>com</strong>plicated<br />
maze full of chasms and pitfalls. Remember that when a<br />
group turns, they are not moving in that direction only spinning<br />
on their heels. The maze is a bit <strong>com</strong>plex for the average player<br />
and may prove to be a serious drawback to some (Hint: Don't<br />
turn your back on the South or you might not rise again!).<br />
The graphics on the ST version are extremely satisfying and<br />
visually appealing. Rarely does a program lend so much attention<br />
to detail outside of the title screens. Each character is<br />
presented in a manner consistent with the illustrations of the<br />
DragonLance game modules, <strong>com</strong>ic books and fantasy novels.<br />
The sound effects are above average with appropriate grunting<br />
and groaning in battle sequences. The sound of sizzling<br />
dragon's breath sounds like a blazing campfire. Repeatedly<br />
wounding an enemy may produce a series of quick groans<br />
which is similar to someone tossing their cookies. The sounds<br />
really add to the flavor of the game. The theme music is the only<br />
exception, it just didn't seem to fit the tone of the game.<br />
Press Clippings<br />
Heroes of the Lance is a quality product that will leave most<br />
players with the strong conviction that TSR selected the right<br />
<strong>com</strong>pany to produce the <strong>com</strong>puter versions of AD & D<br />
products. DragonLance fans are not the only group that will be<br />
impressed. If you like an action/strategy blend in a fantasy game,<br />
this product is for you.
(Continued from page 6)<br />
them to create a new readable phrase.<br />
I'd hate to see any sequel to The Fool's<br />
Errand which didn't include such a unique<br />
and fun type of puzzle.<br />
Steve Meretzky<br />
Cambridge, MA<br />
Ed: We presume that, as Info<strong>com</strong>'s<br />
gregarious guru of goofiness and a<br />
prominent game designer yourself<br />
("Leather Goddesses of Phobos," "Zork<br />
Zero," "Planetfall," and "Stationfall,"<br />
among others), your observation will<br />
bear enough weight to send Cliff<br />
Johnson (designer of "The Fool's Errand")<br />
happily back to include a new<br />
puzzle in his sequel and to offer Alan<br />
Roberts (our reviewer) a new perspective<br />
on the previous puzzle.<br />
Fly The Scenic Skies<br />
We have been swamped with phone<br />
calls from owners of Microsoft Flight<br />
Simulator version 3 concerned that the<br />
product will not support SubLOGIC<br />
Scenery Disks.<br />
The following information is crucial for<br />
loading and operating Scenery Disks<br />
with Flight Simulator and applies to<br />
Europe Scenery Disk as well as Scenery<br />
Disks #1-#7, Japan and San Francisco.<br />
Although Flight Simulator's manual<br />
does not include any reference to<br />
Scenery Disk support outside a mention<br />
on page 75, a "readme.doc" file on the<br />
disk itself does explain the procedure for<br />
converting a Scenery Disk to a scenery<br />
file and loading the file to a hard disk.<br />
You can load a Scenery Disk in either<br />
of two ways: as a copy protected disk<br />
from drive A or as a scenery file loaded<br />
into the same hard disk subdirectory as<br />
Flight Simulator. To load the scenery<br />
disk from drive A, you first need to load<br />
Flight Simulator from the hard drive or a<br />
floppy drive (preferably on drive B but<br />
you can operate both from drive A in a<br />
pinch).<br />
When you're positioned for take-off,<br />
press shift-E to bring up the Scenery<br />
Library menu. Choose option 1 (Floppy<br />
disk in Drive A) or the number associated<br />
with the scenery file you wish to<br />
use. Then invoke the NAV/COM menu<br />
and choose selection A to set your position<br />
within the scenery area.<br />
This should have Flight Simulator soaring<br />
through the scenery in no time. Of<br />
course, if further assistance is required,<br />
the SubLOGIC customer support department<br />
can be reached, toll free outside Illinois<br />
at (800) 637-4983 or (217) 359-<br />
8482 within the state.<br />
Thanks for helping to get the word out.<br />
Sincerely,<br />
Deb Israel<br />
SubLOGIC
(Continued from page 28)<br />
Mirror Images<br />
The game is personalized for me and keeps my interest.<br />
By allowing the player to mix and match character heads<br />
and torsos to create portraits of our player characters,<br />
I was even able to make one that looks something<br />
like the real weasel-faced me. I like that!<br />
In fact, while I'm talking about art, SSI has put together some<br />
of the best art to be seen in any fantasy role-playing game. The<br />
colors are well-chosen for the C-64/128: bright green, yellow,<br />
blue, black, maroon, orange, red, and white. There is a variety of<br />
different walls, doors, shop entrances, buildings, etc.—more<br />
variety than I have seen in any other crpg, including The Bard's<br />
Tale series (which used to be my standard of excellence). The 3-<br />
D perspective is very effective and the portraits of the monsters<br />
are brilliantly realized. Some, like lizard-men, have spot animation<br />
and some don't, but when they do, it is cleverly done. Nice<br />
job!<br />
The third important factor in game design is that the game<br />
must seem winnable and be worth doing. Every CRPG currently<br />
on the market seems too tough on the players. This is probably<br />
a holdover from the days of arcade gaming when the idea was to<br />
separate customers from their quarters. Killing a never-ending<br />
stream of monsters to build up hit points and other attributes<br />
gets boring after a while, no matter how good the art is. Mixing<br />
the monsters with puzzles to solve and tasks to ac<strong>com</strong>plish<br />
keeps the game fresh for a longer period of time. In spite of always<br />
being outnumbered in this game, most of the <strong>com</strong>bats<br />
seem winnable. Beyond this, a very nice touch in the <strong>com</strong>bat algorithm<br />
is that NPCs in the game have morale and must succeed<br />
at a morale check or be forced to run or surrender. My<br />
fighters may be on their last legs, but we know we're home free<br />
when the foes begin to run or surrender. I love it!<br />
Fourth, the world of the game must hold surprises. Pool is holding<br />
up nicely. It blew me away the first time I went to a tavern in<br />
town. It seemed to be a one-trick place where you could play a<br />
simple even-money gambling game. Suddenly, I was jostled by a<br />
thief. When I chose to react violently, I found myself in a noholds<br />
barred tavern brawl . . . to the death! Even better, half the<br />
fighters in there turned out to be on my side. It was a real<br />
brouhaha, but we won. Then, when it was over, the watch<br />
showed up. One of these times, I'm going to stay and see what<br />
happens if we don't run away when the "cops" arrive.<br />
There are several other surprises that I've encountered in the<br />
city of Phlan. The scenario designers fairly dare the players to let<br />
their antisocial impulses go by challenging you to break into<br />
shops or the town hall at night when they are closed. The watch<br />
wanders around in huge gangs of mid-level fighters (much<br />
tougher than my beginning-level fighters) and practically dares<br />
you to make trouble. In addition, the training halls will allow you<br />
to recruit NPCs for your party, but they'll also cut you off if you<br />
go through too many choices. I'm still at the beginning of the<br />
Pool of Radiance adventure and I look forward to surprises to<br />
<strong>com</strong>e.<br />
In a more critical vein, Pool of Radiance is not a perfect game<br />
design. Several parts of it leave me unimpressed. Even with the<br />
<strong>com</strong>puter handling the <strong>com</strong>plexity of the A D & D rules, some<br />
parts of the game are too cumbersome. I have wasted hours<br />
having my characters memorize the same spells over and over<br />
again. The automap function is also a big waste of time. It only<br />
shows you where the walls in the vicinity are, whether you've<br />
been there or not. This is illogical. How would you know? Part of<br />
the fun of this kind of game is doing the mapping involved<br />
(even if it scrolls up on the screen step-by-step as you explore).<br />
Finally, even though the programming is done well (except for<br />
the introduction, the program is in assembly language), the disk<br />
access time required on the Commodore forces a slower than<br />
optimal pace.<br />
Still, no matter how many quibbles I throw into this article, they<br />
are only quibbles. Overall, I like this game and think the entire<br />
SSI design team has done a very good job. Take it from a "rival"<br />
designer, Pool of Radiance has my re<strong>com</strong>mendation for every<br />
<strong>com</strong>puter fantasy role-playing gamer.<br />
Counterpoint<br />
It's D D<br />
and I Don't!<br />
by Trade Forman Hines<br />
Trade Forman Hines is an experienced adventure gamer.<br />
CGW was surprised to hear that she was not impressed with<br />
"Pool of Radiance," so we asked her to share her reasons in<br />
this article.<br />
The best thing you can say about Pool of Radiance is that it is<br />
real, by-the-book, Dungeons and Dragons ... the rules . . . the<br />
play . . . the original role-playing adventure. Of course, that is<br />
similar to saying that the best thing about an 8K, build-it-yourself<br />
Apple <strong>com</strong>puter is that it was the first.<br />
In the last few years, <strong>com</strong>puter dungeonmasters like Lord<br />
British, Andrew Greenberg, Robert Woodhead, and Brian Fargo's<br />
Interplay team have helped to evolve <strong>com</strong>puter role-playing<br />
into absorbing, innovative worlds you can get lost in. Pool of<br />
Radiance does not ac<strong>com</strong>plish this for me.<br />
The box says Pool of Radiance is based on the Advanced Dungeons<br />
& Dragons system. Funny—it looks a lot like Basic, or<br />
non-Advanced D&D to me. This battle-scarred ex-dungeonmaster<br />
noticed a number of "advanced" enhancements missing.<br />
Notice that the more exotic character classes like Ranger,<br />
Paladin, and Druid are not included. Further, the choice of<br />
characters is limited to the standard Fighter, Mage, and Cleric<br />
classes . . . just like the "basic" game.<br />
Moreover, advancements and spellcasting are severely curtailed,<br />
leaving players with only first, second, and third level<br />
spells. So, no matter how much experience a cleric might earn,<br />
he or she will never be able to cast the most valuable incantation<br />
of all, "Raise Dead." "Magic Missile" spells are the best a<br />
mage can aspire to, albeit, they are a bit more potent than<br />
similar spells in other games since they strike multiple enemies<br />
(and sometimes, friends) within a large radius.<br />
One area of the game is truly innovative for CRPGs: the<br />
player's ability to customize his or her own character icon. In<br />
Pool of Radiance, players not only choose their race, class, and<br />
sex, but also pick what they look like. When new characters are<br />
created, one can pick from a large assortment of character faces<br />
and body types to illustrate the new arrival in close-up mode. Battle<br />
icons can also be customized according to the type of armor<br />
and weaponry the new character wears. This feature is especially<br />
nice because it enables each character to be differentiated at a<br />
glance during battle sequences.<br />
Customizing characters is a great idea inspired by face-to-face<br />
role-playing with miniature figures. It would be nice to see this<br />
feature incorporated into other <strong>com</strong>puter RPGs. Alas, however,<br />
(Continued on page 62)
(Continued from page 60)<br />
Mirror Images<br />
even this feature has its murky points in Pool of Radiance. When<br />
you customize your icon, you are presented with a choice of a<br />
large or small icon. Good luck trying to figure out the difference,<br />
though. As many times as we selected first one option, then the<br />
other, we never did find a difference. The rule book was no help<br />
on this point.<br />
Another oddity about the character creation sequence is its apparent<br />
sexism in one area and its <strong>com</strong>plete disregard for gender<br />
in another. Any female character automatically begins the game<br />
with less strength. It may be realistic, but since there is no corresponding<br />
increase in charisma (as in Basic Dungeons &<br />
Dragons), having female characters be<strong>com</strong>es a poor strategic<br />
choice.<br />
Players who go ahead and create female characters anyway will<br />
be surprised to be offered a number of bearded faces when they<br />
customize their character pictures. This after the rule book states<br />
so emphatically that the choice of illustrations is based on the<br />
type of character chosen.<br />
The documentation is excellent, but I take exception to the<br />
rune-wheel copy-protection. Although code-wheels are certainly<br />
a <strong>com</strong>mon form of copy-protection, this one consists of dozens<br />
of tiny, squiggly runes that can strain eyes to distraction.<br />
The game consists of a series of mini-quests which grow<br />
progressively more difficult. If you prefer puzzles and strategy to<br />
hacking your way through armies of orcs, however, you will<br />
probably be disappointed. Most of the early mini-quests consist<br />
of such strategic missives as "Clear out the bad section of town"<br />
or "Go to the woods and kill everything in there." I never heard a<br />
word about secret messages or people, fantastic objects or<br />
wandering mages.<br />
As time passes in the game, the world be<strong>com</strong>es more populated<br />
with fiendish creeps. Rather than run into a few more lethal<br />
creatures, however, players are apt to find groups of 20, 30, or<br />
even more orcs. Needless to say, the ensuing battle can be<br />
mind-numbingly long.<br />
During battle, you have to wait for each and every monster to<br />
move, even if all they are doing is guarding something. With a<br />
big group, a melee round can take upwards of half an hour.<br />
It is not even safe to stop into a tavern for some beer and a<br />
chat. While our party was visiting, a brawl broke out and we<br />
were literally trapped in the middle of the melee, a sequence that<br />
lasted 40 minutes—too long for a sideline event.<br />
Dungeonmasters (DMs) have always been the heart and soul<br />
of RPGs. Personally, I always found the best DMs were those<br />
who didn't stick by every single rule. Pool seems to have a DM<br />
problem—the rules and restrictions often seem more important<br />
than the game. Don't get me wrong—Pool of Radiance is not all<br />
bad. However, with so many truly outstanding adventures on the<br />
market, Pool of Radiance does not make my "A" list.
(Continued from page 13)<br />
Everything You've Always<br />
Wanted to Know About<br />
"Empire"<br />
Ian forces should be easy to stop and<br />
mop up. To the northwest, however,<br />
things are not moving as smoothly.<br />
Kadma has hit your protecting fleet hard<br />
with battleships and a carrier. Once you<br />
lose control of the seas in that region,<br />
your land forces will not be able to hold<br />
out. Nevertheless, you are, even now, assembling<br />
your own invasion forces. 'The<br />
Book" does have some good advice in<br />
invading enemy-held territory, though . .<br />
The time will <strong>com</strong>e when you will be<br />
required to invade a strongly held island/continent<br />
of the enemy. This is no<br />
small matter. You will need to build a<br />
large armada for the operation. Assemble<br />
as many transports as are available<br />
for the core of your fleet. The more<br />
armies you can deploy in the initial<br />
strike, the better chance you will have<br />
of overwhelming the enemy. Provide<br />
several heavy ships (battleships and<br />
cruisers), not only to protect the<br />
transports, but to provide shore bombardment<br />
for your invading armies. If<br />
the invasion is to occur outside the<br />
range of land-based fighters, an aircraft<br />
carrier is a must. Its fighters are important<br />
for scouting for the fleet, softening<br />
up the invasion area, and stopping<br />
enemy counterattacks. Destroyers<br />
should be used to scout around your<br />
fleet, acting as both an early warning<br />
system and protection from enemy submarines<br />
just waiting for a juicy<br />
transport or carrier to sink.<br />
Upon landing your armies, send your<br />
transports back immediately to carry<br />
additional armies to support the invasion.<br />
Be sure to escort these returning<br />
transports so they don't fall prey to<br />
enemy submarines. Keep the pressure<br />
on the enemy and soon he/she will be<br />
falling back on all fronts. Once this has<br />
happened, his/her doom is sealed and<br />
the war be<strong>com</strong>es a simple mop-up action.<br />
Things are going better, but at what a<br />
cost. The incursion to the northwest has<br />
been turned back and, all along the<br />
front, Krellan supported forces are in<br />
retreat. Kadma Pztlam will be working in<br />
the pleasure houses after the Krellan<br />
Command gets done with her. They do<br />
not appreciate <strong>com</strong>manders who fail!<br />
What! New <strong>com</strong>bat reports are <strong>com</strong>ing<br />
in from the east! Invasion fleets are<br />
reported outside the cities of Dupplin<br />
Moor, Shijo Nawate, Ypres, and Blenheim.<br />
What is happening? These cannot<br />
be Krellan-controlled forces! They aren't.<br />
Those foul-smelling Zaldrons have<br />
decided to initiate their own Operation<br />
Big Brother. More enemy fleets are<br />
being reported and all your forces are<br />
tied up fighting Krellan half a world<br />
away!<br />
New reports! Zaldron transports are<br />
now outside your home city of Spion<br />
Kop. You have no forces to stop them.<br />
Explosions can now be heard in the distance<br />
and the sky is lit with the macabre<br />
beauty of multi-colored power rays. As<br />
you destroy "The Book" to prevent it<br />
from falling into enemy hands, you<br />
wonder if the Krellan pleasure houses<br />
may have room for one more employee.
Video <strong>Gaming</strong> <strong>World</strong><br />
by Bill Kunkel, Joyce<br />
Worley, & Arnie Katz<br />
Video<br />
<strong>Gaming</strong><br />
<strong>World</strong>'s<br />
Newswire<br />
-Compiled by Joyce Worley<br />
Sega is going head-to-head<br />
with Nintendo this Christmas,<br />
with their own version of the arcade<br />
hit Double Dragon. The<br />
Sega version has a two-person<br />
cooperative play option and 64color<br />
arcade translated graphics<br />
... The "Atari Advantage Collector<br />
Promotion" is a bonus for frequent<br />
buyers. The gamer picks<br />
up a free poster and catalog<br />
from a videogame retailer, then<br />
attaches a proof of purchase<br />
seal from each game pack he<br />
buys. When enough are accumulated<br />
to earn a prize, the poster<br />
goes back to Atari for redemption.<br />
Five games gets you a free<br />
"Atari Advantage" T-shirt and fifteen<br />
games nets a free game<br />
cartridge (for any Atari system).<br />
Twenty-five games gives the consumer<br />
a special reduced price<br />
on Atari hardware (the 7800 system<br />
for $25 or choice of either<br />
an XE system or disk drive for<br />
$50), plus a chance to win a<br />
seven day expense paid trip for<br />
two to the Atari headquarters in<br />
California . . . Mickey<br />
Mousecapade (Cap<strong>com</strong> USA,<br />
for NES) sends Mickey and Minnie<br />
through a fun house, across<br />
the ocean, into a forest, onto a<br />
pirate ship, and into a<br />
mysterious castle, as they seek a<br />
missing friend. Obstacles include:<br />
falling spiders, wizards,<br />
scorpions, and pirates (who<br />
heave skulls at the pair of mystified<br />
mice). The game is<br />
designed for younger players in<br />
particular, but is suitable for<br />
adults, as well .....More than 50<br />
million Othello games have been<br />
sold world-wide," says Robert<br />
Holmes, Senior Vice-President of<br />
Acclaim. Rob went on to explain<br />
that people in 106 countries<br />
flipped their wigs over the classic<br />
"Reversi" game and now, it's<br />
<strong>com</strong>ing for Nintendo ... WWF<br />
Wrestlemania, (Acclaim), featuring<br />
Hulk Hogan, Randy Savage,<br />
Andre the Giant, and other WWF<br />
Video <strong>Gaming</strong> <strong>World</strong><br />
fighters, lets Nintendo players<br />
use bodyslams, headlocks, dropkicks,<br />
and other maneuvers to<br />
recreate WWF battles ... Tengen<br />
Inc. (a subsidiary of Atari)<br />
has signed a licensing deal with<br />
Mirrorsoft of England for Tetris.<br />
The license covers all video<br />
home formats, including the<br />
NES. Players rotate and flip<br />
moving blocks as they fall down<br />
an on-screen shaft, to form unbroken<br />
rows. Developed by two<br />
Soviet programmers, the mental<br />
skill game intrigued <strong>com</strong>puter<br />
games in both Europe and<br />
America, as well as copping<br />
numerous "Best of the Year"<br />
awards . Sega's Shinobi is a<br />
19-round martial arts war<br />
against street thugs, <strong>com</strong>mandos,<br />
and Ninjas, fought against<br />
realistic backgrounds. The<br />
landscapes include: warehouse<br />
districts, mountainsides with underground<br />
fortresses, and an<br />
oriental palace. The attackers<br />
have swords, bombs, guns, and<br />
steel boomerangs, but the<br />
Shinobi hero wins secret Ninjutsu<br />
powers as the game progresses.<br />
This "Ninja magic" can<br />
freeze the enemy in his tracks,<br />
make the gamer's on-screen surrogate<br />
fly through the air, or<br />
cause lightning to strike the<br />
enemy. Still more ominous is the<br />
magic that <strong>com</strong>mands eight miniature<br />
Ninjas to burst from your<br />
(on-screen) body to fight and<br />
subdue your foes . . . Business<br />
Week magazine chose Nintendo<br />
of America as one of the<br />
best <strong>com</strong>panies in the world. In<br />
an article called, "The Global<br />
1000—The Leaders," the journal<br />
of business news ranked the<br />
entertainment <strong>com</strong>pany as<br />
#321. The <strong>com</strong>panies were<br />
rated on price/earnings ratio,<br />
return on equity, sales growth,<br />
profits, and total assets over a<br />
12 month period ... The Nintendo<br />
Power Set, available at<br />
most retail outlets, is a <strong>com</strong>plete<br />
system for high-energy players.<br />
It <strong>com</strong>es with everything to get<br />
started, including the Nintendo<br />
Control Deck, two game controllers,<br />
the Zapper light gun,<br />
and the Nintendo Power Pad.<br />
The two-sided vinyl pad<br />
measures 38" by 37" and plugs<br />
into the #2 controller socket,<br />
where it affects on-screen game<br />
action by the player standing or<br />
pressing on the red and blue<br />
colored circles. The Power Set<br />
<strong>com</strong>es with a three-game<br />
cartridge including: Super Mario<br />
Bros. (played with the regular<br />
controllers), Duck Hunt (for use<br />
with the Zapper light gun), and<br />
<strong>World</strong> Class Track Meet (controlled<br />
by the Power Pad). Track<br />
Meet includes a 100 Meter Dash,<br />
Long Jump, 110 Meter Hurdles,<br />
and Triple Jump. The events are<br />
<strong>com</strong>bined in a special Olympics<br />
format for multiple players. Victory<br />
depends on the ability to<br />
control pace, as well as coordinate<br />
speed, and timing. Other<br />
games available for the Power<br />
Pad are Dance Aerobics and<br />
Super Team Games. The Power<br />
Pad's smoking hot play<br />
mechanics <strong>com</strong>e with a warning:<br />
It may be hazardous for persons<br />
with heart, respiratory,<br />
back and joint problems, high<br />
blood pressure, or pregnant<br />
women.<br />
Batter Up!<br />
For some reason, sports<br />
games have been among the<br />
weakest entries on both the<br />
Sega and Nintendo systems.<br />
Bases Loaded is a distinct improvement<br />
on most of the team<br />
sports videogames we've seen<br />
so far (including Nintendo's<br />
own Baseball cartridge), but it is<br />
still far from the ideal simulation<br />
of the national pastime.<br />
Bases Loaded resembles<br />
Hardball (Accolade) with its emphasis<br />
on the pitcher vs. batter<br />
confrontation. The problem is<br />
that it is not nearly as successful<br />
in realistically depicting that interaction.<br />
The brute fact is that it is too<br />
hard to hit the ball. The perspective<br />
employed for pitching/hitting<br />
(either a shortstop or second
aseman's viewpoint, depending<br />
on whether the pitcher is left or<br />
right-handed) simply does not<br />
allow the player at bat to easily<br />
gauge the ball's position vis a<br />
vis the plate. The ball is easy to<br />
track as it leaves the pitcher's<br />
hand, but about halfway to the<br />
plate, the depth of field collapses<br />
and the ball seems to hang brief<br />
ly in mid-air before appearing<br />
suddenly in the<br />
catcher's glove.<br />
The scene is further<br />
confused by<br />
the fact that the<br />
on-screen umpire<br />
calls strikes by<br />
punching his<br />
right fist into the<br />
air. However,<br />
since the umpire<br />
wears a dark blue<br />
suit and stands<br />
against a similarly<br />
colored background,<br />
all that's<br />
visible is his<br />
pumping white<br />
fist, which, of<br />
course, looks just<br />
like the ball. As a<br />
result, when the<br />
ball would be called a strike, the<br />
ball (which is actually the<br />
umpire's hand) seems to leap<br />
into the air at the last second.<br />
It isn't just mere mortals that<br />
find the batting tough, however,<br />
even the <strong>com</strong>puter-controlled<br />
team can be struck out almost<br />
at will. During one inning, ;this<br />
reviewer struck out the side on<br />
nine pitches—all of them<br />
thrown at slow speed right<br />
down the middle of the plate.<br />
Moreover, no pitch was faster<br />
than 72 mph (the speed of each<br />
pitch is displayed on screen).<br />
This boils down to games that<br />
take far too long to play (one<br />
nine inning contest took almost<br />
75 minutes) with way too many<br />
pitches thrown. This is unfortunate<br />
because it destroys much<br />
of the game's excitement and,<br />
even more disappointing since<br />
Bases Loaded portrays<br />
on-the-field action, especially infield<br />
play, quite well. Again, there are<br />
exceptions, but once the ball is<br />
hit, this game's excitement level<br />
rises dramatically.<br />
Bases Loaded uses a multipleviewpoint<br />
play mechanic. So,<br />
when the ball is hit, the perspective<br />
shifts to an angled overhead<br />
view of the relevant portion of<br />
the field. The graphics are attrac<br />
five in both modes, but the onfield<br />
view is superior from a<br />
gameplay point of view. The individual<br />
player animation is very<br />
nice.<br />
When a ball is hit into the cavernous<br />
outfield (they could hold<br />
a rock festival in right center<br />
without greatly disturbing play),<br />
an overview diagram of the<br />
diamond is displayed so that the<br />
user can track and, if desired, ad<br />
vance his/her baserunners.<br />
There are several annoying<br />
flaws in Bases Loaded that almost<br />
ruin the game. On balls hit<br />
to outfield, the field scrolls from<br />
the infield back. The problem is,<br />
TITLE: Bases Loaded<br />
SYSTEM: Nintendo<br />
# PLAYERS: 1-2<br />
PRICE: $44.95<br />
PUBLISHER: JaIeco<br />
the defensive player has no idea<br />
where his outfielders are so can<br />
only guess which one is under<br />
his/her control.<br />
There's a tendency for fielders<br />
to begin running in random patterns<br />
once the ball is hit. This is<br />
especially annoying when, for example,<br />
the shortstop breaks<br />
toward third base on a ball hit<br />
up the middle. There is also a<br />
pick-off play, but no real reason<br />
for one since there's no stealing.<br />
In fact, the player at bat can't<br />
even set the length of his/her<br />
baserunners' lead.<br />
Most annoying, however, is the<br />
game's pretense at offering<br />
strategic options. Twelve teams<br />
are available, each containing<br />
non-existent players, most of<br />
whom have no statistics or<br />
ratings in any skill areas. So,<br />
there isn't a dime's worth of difference<br />
between them. The sole<br />
statistic offered to the user is the<br />
pitcher's ERA, but this is meaningless.<br />
The only thing that really<br />
matters is how fast and accurately<br />
the pitcher throws.<br />
This game is a mixed bag. It<br />
has attractive animation and<br />
good graphics <strong>com</strong>bined with a<br />
very intensive hitter-pitcher<br />
simulation. However, the frustrations<br />
frequently threaten to overwhelm<br />
its virtues.—Bill Kunkel<br />
Start Your<br />
Engines<br />
R.C. (radio controlled) Pro-Am<br />
is a <strong>com</strong>pelling, innovating approach<br />
to car racing<br />
videogames. Because the player<br />
isn't pretending to be inside the<br />
car, the designers were able to<br />
TITLE: R.C. Pro-Am<br />
SYSTEM: Nintendo<br />
# PLAYERS: 1<br />
PRICE: $29.95<br />
DESIGNER: Rare, Ltd.<br />
PUBLISHER: Nintendo<br />
do away with the over-used<br />
pseudo-first-person perspective<br />
seen in games like Enduro<br />
(Sega), Mach Rider (Nintendo),<br />
and Pole Position (Atari). Instead<br />
of watching the action<br />
from behind the wheel of their<br />
vehicle, the user views an idealized<br />
version of what the radiocontrol<br />
racing fan sees: a<br />
smoothly scrolling, angled overhead<br />
perspective of the four-lane<br />
track.<br />
The result is an enormously<br />
satisfying contest in which the<br />
player guides his/her remote control<br />
pick-up truck (<strong>com</strong>plete with<br />
antenna receiver) against a trio<br />
of <strong>com</strong>puter-guided drones over<br />
32 different courses. In fact, the<br />
game's major weakness is the<br />
lack of a two-player mode.<br />
Its strengths, however, are<br />
legion. The player's driving skills<br />
are really put to the test as<br />
he/she maneuvers around puddles,<br />
oil slicks, squalls, pop-up<br />
metal barriers, deadly skulls, and<br />
other vehicles. Meanwhile, the<br />
player must attempt to pick up<br />
the various bonus objects: roll<br />
cages, zippers, missiles, bombs,<br />
and ammo.<br />
The flimsy instruction booklet<br />
fails to mention what these items<br />
actually do, but some are obvious.<br />
Missiles are fired from the<br />
front of the vehicle while bombs<br />
are dropped from the rear.<br />
Others are less clear in their purpose.<br />
After countless play sessions,<br />
it's still unclear what a "zipper"<br />
is or how a roll cage is useful<br />
to a radio-controlled car.<br />
There is no such problem in<br />
figuring out how the weapons<br />
work: if you can't outrace 'em,<br />
you blow 'em up. Demolished<br />
vehicles<br />
reconstruct themselves<br />
quickly, but<br />
precious time is<br />
lost in the<br />
regeneration. The<br />
missiles are more<br />
valuable than<br />
bombs, of course,<br />
since you must be<br />
in front of the targeted<br />
vehicle in<br />
order to employ<br />
the bombs, while<br />
missiles can be<br />
fired at the drones<br />
up ahead.<br />
The major<br />
bonus items are<br />
the Turbos (which<br />
increase acceleration<br />
around turns), Engines<br />
(boost top speed), and Sticky<br />
Tires (provide superior traction).<br />
Also crucial are the bonus letters.<br />
If a player spells out "Nintendo,"<br />
the pick-up is replaced by a<br />
faster four-wheeler. A second<br />
spelling of the <strong>com</strong>pany monicker<br />
allows the user to trade up to<br />
an even faster off-road vehicle.<br />
The play system used is<br />
delightfully simple and very<br />
reminiscent of the control<br />
mechanic employed in real radiocontrolled<br />
racing. The "B" action<br />
button serves as the accelerator<br />
and the control pad steers the<br />
vehicle while the "A" button fires<br />
any weapons (or, if no weapon is<br />
available, beeps a horn).<br />
R-C Pro-An-is sounds and<br />
graphics are just fantastic and<br />
help make this the best game of<br />
its kind ever produced in any<br />
electronic game format. Even<br />
the scoreboard is gorgeous.<br />
Each win, place, or show is represented<br />
by an on-screen trophy of<br />
some sort (including golden<br />
wrenches, loving cups, and<br />
statuettes).<br />
Players who put a great<br />
premium on realism and are<br />
bothered by the idea of "picking<br />
up" things like engines and tires<br />
on the fly must take warning.<br />
There are many such surreal<br />
touches in this game. For<br />
players in search of a super<br />
racing simulation, R-C Pro-Am<br />
fills the bill perfectly.<br />
—Bill Kunkel
Taking A Peek<br />
words with this interesting puzzle generator.<br />
The player can design his own puzzles,<br />
modify an existing one, or try to<br />
solve one of the 40 that are provided on<br />
disk. Devise a puzzle based solely on<br />
politics or some other equally "virtuous"<br />
activity. IBM with graphic adaptor Circle<br />
Reader Service #5.<br />
CRL<br />
Scorpion<br />
19 Harbor Drive<br />
Lake Hopatcong, NJ 07849<br />
ALIEN DESTRUCTION SET: Players<br />
choose from four different missions in<br />
this group of action games. The<br />
documentation consists of an audio cassette<br />
that sets the background for each<br />
game and gives tips on how to succeed.<br />
Ready, set, die. C-64/128 ($29.95) Circle<br />
Reader Service #6<br />
BLACK SHADOW: Attractive<br />
graphics enhance this action game in<br />
which the player must destroy the "death<br />
asteroid". Top down view and smooth<br />
scrolling add to the impressive feel of<br />
the product. Documentation <strong>com</strong>es on<br />
an audio cassette. Amiga ($34.95).<br />
Circle Reader Service #7.<br />
DESERT RATS: The only thing you<br />
can't change in this historical simulation<br />
of WWII desert warfare is the "gerbil" insignia<br />
of the "desert rats". Players<br />
choose from one or two player option,<br />
scrolling maps, and six scenarios to<br />
recreate all or a portion of the desert<br />
campaign. IBM ($39.95). Circle Reader<br />
Service #8.<br />
Interplay Productions<br />
1575 Corporate Drive<br />
Costa Mesa, CA 92626<br />
NEUROMANCER: Based on William<br />
Gibson's cyberpunk novel, this role-playing<br />
adventure game <strong>com</strong>bines great<br />
graphics with a soundtrack by DEVO.<br />
Players use a variety of skills to break<br />
into government and corporate <strong>com</strong>puter<br />
systems. That could never happen<br />
in real life, though. Apple II ($44.95), C-<br />
64/128 ($39.95). Circle Reader Service<br />
#9.<br />
Lyric Software, Inc.<br />
6 Beach Plum Drive<br />
Northport, N.Y. 11768<br />
UNDER THE ICE: Players control<br />
either NATO or Soviet subs in this<br />
detailed, submarine <strong>com</strong>bat simulation.<br />
Multi-scenarios; radar; infra red detection;<br />
active and passive sonar; tor-<br />
pedoes; cruise missiles; jammers; they're<br />
all in this future WWII! game. Time can<br />
be <strong>com</strong>pressed or speeded up depending<br />
on the situation. You'll really feel the<br />
chills of future warfare down under the<br />
ice. Atari ST, IBM ($39.95). Circle<br />
Reader Service #10.<br />
Maxis Software<br />
953 Mountain View Drive<br />
Suite 113<br />
Lafayette, CA 94<strong>54</strong>9<br />
SKYCHASE: Full stereo sound and<br />
smooth wire-frame animation highlight<br />
this joystick driven, jet simulator. Players<br />
choose from six different jets, or fly a<br />
lightening fast paper airplane against<br />
human or <strong>com</strong>puter opponents.<br />
Fighters can be customized as can the<br />
<strong>com</strong>puter. Side by side view screens and<br />
joysticks keep both players locked on<br />
the screen, not the keyboard. Amiga,<br />
Atari 520 ST ($39.95). Circle Reader Service<br />
#11.<br />
Mindscape<br />
3444 Dundee Rd.<br />
Northbrook, IL 60062<br />
VISIONS OF AFTERMATH: THE<br />
BOOMTOWN: One to sixteen can play<br />
this post-holocaust, survival simulation<br />
which allows the player to customize the<br />
world and tailor the environment.<br />
Rebuild civilization, conquer society, or<br />
just survive; you'll find new meaning for<br />
the words "Home, Sweet Home."<br />
IBM/Tandy ($39.95) Circle Reader Service<br />
#12<br />
Psygnosis Ltd.<br />
1st Floor, Port of Liverpool<br />
Building
Pier Head, Liverpool<br />
Merseyside, U.K. L3 1BY<br />
CHRONO QUEST: The player must<br />
find a time machine, hidden in a<br />
chateau, then travel forward and back in<br />
time to track down his father's murderer<br />
in this graphic adventure game. Beautiful<br />
graphics and icon-controlled play<br />
make this interesting product worth a<br />
second look. Time travel, anyone? Atari<br />
ST, Amiga ($44.95). Circle Reader Service<br />
#13.<br />
Titus Software<br />
20432 Corisco St.<br />
Chatsworth, CA 91311<br />
OFF SHORE WARRIOR: Players battle<br />
opponents and the elements in<br />
futuristic, missile-armed speedboats.<br />
Maneuver between rocks and hard<br />
places while attempting to overtake and<br />
vaporize the other boats. Weekend water<br />
skiers, watch out! Amiga, Atari ST, IBM<br />
($39.95). Circle Reader Service #14.<br />
Wesson International<br />
1439 Circle Ridge<br />
Austin, TX 78746<br />
TRACON: An incredibly detailed, air<br />
traffic control simulation that will keep<br />
you glued to your screen. Created by a<br />
FAA manager and professional controllers,<br />
this program plays like an ATC<br />
trainer. "Players" adjust traffic loads,<br />
weather and pilot ratings as they run<br />
any of five different cities. You win by<br />
not losing! IBM ($49.95). Circle Reader<br />
Service #15.
Scavengers of<br />
Significa!<br />
Contest Results<br />
The 50th <strong>Issue</strong> Trivia Contest Results<br />
The entries for CGW's Scavenger Hunt were so excellent, they<br />
even surprised us. Since we received two perfect responses and<br />
a couple of near-perfect responses, it seemed ludicrous to try for<br />
a tie-breaker. Our philanthropic playboy publisher has decided to<br />
dig deep in his wallet and pay a $100.00 first prize to both:<br />
William N. Moes of Defiance, Ohio and Alan Mandell of DeSoto,<br />
Texas.<br />
In addition, the second prize (a two year <strong>com</strong>plimentary subscription<br />
to CGW) goes to Kenneth Helms of Fort Wayne, Indiana.<br />
Unfortunately, Ken missed question #41 and that was an<br />
extremely difficult question. The question asked, "What is the current<br />
name of the game reviewed on page 12 of CGW #30?"<br />
When the game was reviewed, its name was American Dream,<br />
but the name was later changed to Managing for Success.<br />
Third prize (a one-year <strong>com</strong>plimentary subscription to CGW)<br />
goes to Steve Wadsten of Livonia, Michigan who only missed<br />
two questions.<br />
One surprising response was in regard to question #1: "What<br />
is the score of the Dodger baseball game in issue 5.3?" The expected<br />
answer was Brooklyn Dodgers 2, New York Yankees 0.<br />
However, several readers correctly pointed out that the SSI advertisement<br />
on page 6 had the Yankees ahead by a score of 2-1.<br />
Alan Mandell suggested that the screen was difficult to read, " . .<br />
. but with the pitchers involved [Ed: Don New<strong>com</strong>be is listed on<br />
the screen], it had to be the Dodgers leading the Yanks by a<br />
score of 2-0."<br />
Question #4 was one of the hardest to answer. Vince<br />
DeNardo's first issue as Art Director was technically CGW 5.5.<br />
However, he was not listed as such during the next four issues<br />
(#25-29). He was listed as "Graphics Coordinator" during that<br />
period and not referred to again as "Art Director" until #30. Congratulations<br />
to those who discovered the first time he was listed<br />
in 5.5 and apologies to those who were tricked into thinking it<br />
was #30.<br />
Question #9 had two correct answers. Respondents could<br />
have answered either CGW 3.3 or 3.5 as the debut of<br />
Electronic Arts. 3.3 mentioned the formation of the new <strong>com</strong>pany<br />
in Hobby and Industry News and 3.5 had a feature article<br />
on "Trip Hawkins' Dream Comes True."<br />
We liked Robert Thurman's perceptive answer to Question<br />
#16, "What do Douglas Adams, Isaac Asimov, Jerry Pournelle,<br />
and Roger Zelazny have in <strong>com</strong>mon?" We were merely looking<br />
for the observation that all of these famous science-fiction<br />
authors contributed to the article on the future of <strong>com</strong>puter<br />
games in CGW #45. Thurman observed a more technical<br />
relationship: "All are sci-fi writers who have had their work transferred<br />
to <strong>com</strong>puters. Doug Adams co-wrote Info<strong>com</strong>'s<br />
Bureaucracy and had his Hitchhiker's book turned into a game.<br />
Roger Zelazny's Nine Princes in Amber is a <strong>com</strong>puter game.<br />
Jerry Pournelle writes <strong>com</strong>puter books. Isaac Asimov was one of<br />
the first sci-fi writers to convert to word processing (It did not increase<br />
his productivity, but his editors loved his spelling checker).<br />
His Robots of Dawn is a <strong>com</strong>puter game."<br />
Those of us at CGW offer our sincere thanks to all of those<br />
who participated in this scavenger hunt and our congratulations<br />
to those who won prizes. We also offer our respectful congratulations<br />
to those who offered us more than we asked for.
Hall of Fame / R.I.D.<br />
Be it known to all gentle persons that the above named games have been<br />
well spoken of by our readers over a goodly period of time. Therefore they<br />
have been enshrined in the CGW Hall of Fame as<br />
games of renown and worthy of play by all.
Game Ratings Chart<br />
"Empire," CGW's overall Game of the Year, continued<br />
to conquer all opposition on the Strategy list, but has<br />
found a stellar opponent in "Reach for the Stars - 3rd<br />
Edition." Both games of imperialistic space <strong>com</strong>bat offer<br />
multi-player capability and ease of play. "Panzer Strike,"<br />
winner of Strategy Game of the Year, improved its position<br />
to a solid 7.00 rating.<br />
"Wasteland," Adventure Game of the Year, continued to<br />
irradiate all opposition on the Action/Adventure list.<br />
"Pirates" keelhauled "Ultima V" to take third place in this<br />
rating period and "Stealth Fighter" confused the bard's<br />
"Detect Competition" spell to overtake "Bard's Tale Ill"<br />
and land in fifth place.