EF1000A Owner's Manual - Electric Generators
EF1000A Owner's Manual - Electric Generators
EF1000A Owner's Manual - Electric Generators

Create successful ePaper yourself
Turn your PDF publications into a flip-book with our unique Google optimized e-Paper software.
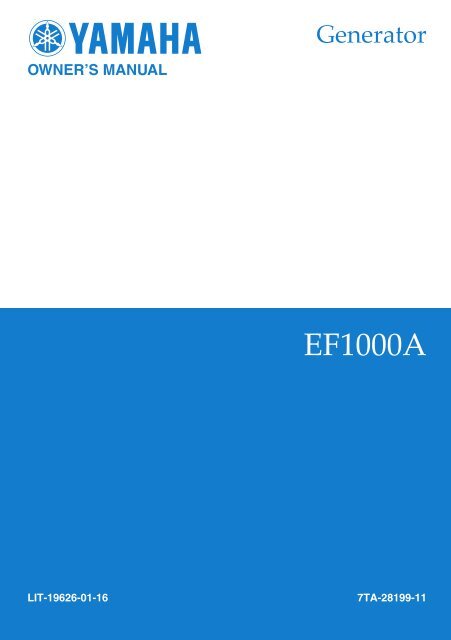
OWNER’S MANUAL<br />
Generator<br />
<strong>EF1000A</strong><br />
LIT-19626-01-16 7TA-28199-11
AE00002<br />
INTRODUCTION<br />
Congratulations on your purchase of your new Yamaha.<br />
This manual will provide you with a good basic understanding of the operation and<br />
maintenance of this machine.<br />
If you have any questions regarding the operation or maintenance of your machine,<br />
please consult a Yamaha dealer.<br />
PRI-I.D. NUMBER<br />
MODEL<br />
PRI-I.D.<br />
CODE SERIAL No.<br />
AE00022<br />
790-062<br />
790-044<br />
AE00012<br />
IDENTIFICATION NUMBER RECORDS<br />
Record your Primary I.D., and serial numbers<br />
in the spaces provided, to assist you<br />
in ordering spare parts from a Yamaha<br />
dealer.<br />
Also record and keep these I.D. numbers<br />
in a separate place in case your machine<br />
is stolen.<br />
AE00011<br />
MACHINE IDENTIFICATION<br />
The machine serial number is stamped in<br />
the location as shown.<br />
NOTE:<br />
The first three digits of these numbers are<br />
for model identification; the remaining digits<br />
are the unit production number. Keep<br />
a record of these numbers for reference<br />
when ordering parts from a Yamaha dealer.<br />
<strong>EF1000A</strong><br />
OWNER’S MANUAL<br />
© 2003 by Yamaha Motor Corporation, U.S.A.<br />
1st Edition, August 2003<br />
All rights reserved.<br />
Any reprinting or unauthorized use<br />
without the written permission of<br />
Yamaha Motor Corporation, U.S.A.<br />
is expressly prohibited.<br />
Printed in Japan.<br />
P/N LIT-19626-01-16
851-005<br />
NOTE:<br />
9 Yamaha continually seeks advancements<br />
in product design and quality.<br />
Therefore, while this manual contains<br />
the most current product information<br />
available at the time of printing, there<br />
may be minor discrepancies between<br />
your engine and this manual. If there<br />
is any question concerning this manual,<br />
please consult your Yamaha<br />
dealer.<br />
9 This manual should be considered a<br />
permanent part of this engine and<br />
should remain with this engine when<br />
resold.<br />
AE00032<br />
w<br />
PLEASE READ AND UNDERSTAND<br />
THIS MANUAL COMPLETELY BEFORE<br />
OPERATING THE MACHINE.<br />
Particularly important information is distinguished<br />
in this manual by the following<br />
notations.<br />
-<br />
The Safety Alert Symbol means ATTEN-<br />
TION! BECOME ALERT! YOUR SAFETY<br />
IS INVOLVED!<br />
w<br />
Failure to follow WARNING instructions<br />
could result in severe injury or death to<br />
the engine operator, a bystander, or a<br />
person inspecting or repairing the engine.<br />
cC<br />
A CAUTION indicates special precautions<br />
that must be taken to avoid damage to<br />
the engine.<br />
NOTE:<br />
A NOTE provides key information to<br />
make procedures easier or clearer.
AE00041<br />
CONTENTS<br />
LIMITED WARRANTY (EF- AND<br />
EDL-SERIES) ........................................1<br />
LOCATION OF IMPORTANT<br />
LABELS.................................................3<br />
SAFETY INFORMATION.......................4<br />
EXHAUST FUMES ARE<br />
POISONOUS ......................................4<br />
FUEL IS HIGHLY FLAMMABLE AND<br />
POISONOUS ......................................4<br />
ENGINE AND MUFFLER MAY<br />
BE HOT ..............................................4<br />
ELECTRIC SHOCK PREVENTION....5<br />
CONNECTION NOTES ......................6<br />
CONNECTION....................................6<br />
EXTENSION CORD NOTES ..............7<br />
CONTROL FUNCTION..........................8<br />
DESCRIPTION ...................................8<br />
OIL WARNING SYSTEM....................9<br />
ENGINE SWITCH...............................9<br />
A.C. PROTECTOR .............................9<br />
PRE-OPERATION CHECK .................10<br />
FUEL.................................................10<br />
ENGINE OIL .....................................11<br />
GROUND (Earth)..............................11<br />
OPERATION........................................12<br />
STARTING THE ENGINE.................12<br />
APPLICATION RANGE ....................13<br />
CONNECTION..................................14<br />
STOPPING THE ENGINE ................15<br />
PERIODIC MAINTENANCE ................16<br />
MAINTENANCE CHART ..................16<br />
SPARK PLUG INSPECTION............18<br />
CARBURETOR ADJUSTMENT .......18<br />
ENGINE OIL REPLACEMENT .........19<br />
AIR FILTER ......................................20<br />
FUEL COCK .....................................21<br />
FUEL TANK FILTER.........................21<br />
MUFFLER (SPARK ARRESTER).....22<br />
TROUBLESHOOTING......................23<br />
STORAGE ...........................................25<br />
DRAIN THE FUEL ............................25<br />
ENGINE ............................................25<br />
EXHAUST EMISSION CONTROL<br />
SYSTEM AND COMPONENTS...........26<br />
SPECIFICATIONS ...............................27<br />
DIMENSIONS ...................................27<br />
ENGINE ............................................27<br />
GENERATOR ...................................27<br />
WIRING DIAGRAM..............................28<br />
CARRYING HANDLE<br />
INSTALATION .....................................29
AE01120<br />
YAMAHA MOTOR CORPORATION U.S.A.<br />
EF- AND EDL-SERIES GENERATOR LIMITED WARRANTY<br />
Yamaha Motor Corporation, U.S.A. hereby warrants<br />
that new Yamaha consumer generators<br />
purchased from an authorized Yamaha consumer<br />
generator dealer in the continental United<br />
States will be free from defects in material and<br />
workmanship for the period of time stated herein,<br />
subject to certain stated limitations.<br />
THE PERIOD OF WARRANTY Any new EFseries<br />
or EDL-series Yamaha Generator purchased<br />
for private, non-commercial use from an<br />
authorized Yamaha consumer generator dealer<br />
in the continental United States will<br />
be warranted against defects in material or workmanship<br />
for a period two (2) years from date of<br />
purchase, subject to exclusions noted herein.<br />
Any Yamaha non-commercial<br />
generator purchased and utilized for commercial<br />
or rental applications will be warranted for a period<br />
one (1) year from the date of purchase, subject<br />
to exclusions noted herein.<br />
DURING THE PERIOD OF WARRANTY any<br />
authorized Yamaha consumer generator dealer<br />
will, free of charge, repair or replace, at<br />
Yamaha’s option, any part adjudged defective by<br />
Yamaha due to faulty workmanship or material<br />
from the factory. Parts used in warranty repairs<br />
will be warranted for the balance of the product’s<br />
warranty period. All parts replaced under warranty<br />
become property of Yamaha Motor<br />
Corporation U.S.A.<br />
GENERAL EXCLUSIONS from this warranty<br />
shall include any failures caused by:<br />
a. Installation of parts or accessories that are<br />
not qualitatively equivalent to genuine<br />
Yamaha parts.<br />
b. Abnormal strain, neglect, or abuse.<br />
c. Lack of proper maintenance.<br />
d. Accident or collision damage.<br />
SPECIFIC EXCLUSIONS from this warranty<br />
shall include parts replaced due to normal wear<br />
or routine maintenance.<br />
THE CUSTOMER’S RESPONSIBILITY under<br />
this warranty shall be to:<br />
1. Operate and maintain the generator as specified<br />
in the appropriate Owner’s <strong>Manual</strong>;<br />
– 1 –<br />
2. Give notice to an authorized Yamaha consumer<br />
generator dealer of any and all apparent<br />
defects within ten (10) days after discovery,<br />
and make the unit available at that time<br />
for inspection and repairs at such dealer’s<br />
place of business.<br />
WARRANTY TRANSFER: To transfer the warranty<br />
from the original purchaser to any subsequent<br />
purchaser(s), it is imperative that the unit<br />
be inspected and registered for warranty by an<br />
authorized Yamaha consumer generator dealer.<br />
In order for this warranty to remain in effect, this<br />
inspection and registration must take place within<br />
ten (10) days after transfer. An inspection and<br />
registration fee will be charged for this service.<br />
In no case will the warranty be extended beyond<br />
the original period.<br />
YAMAHA MOTOR CORPORATION, U.S.A.<br />
MAKES NO OTHER WARRANTY OF ANY KIND,<br />
EXPRESSED OR IMPLIED. ALL IMPLIED WAR-<br />
RANTIES OF MERCHANTABILITY AND FITNESS<br />
FOR A PARTICULAR PURPOSE WHICH EXCEED<br />
THE OBLIGATIONS AND TIME LIMITS STATED<br />
IN THIS WARRANTY ARE HEREBY DISCLAIMED<br />
BY YAMAHA MOTOR CORPORATION, U.S.A.<br />
AND EXCLUDED FROM THIS WARRANTY.<br />
SOME STATES DO NOT ALLOW LIMITATIONS<br />
ON HOW LONG AN IMPLIED WARRANTY<br />
LASTS, SO THE ABOVE LIMITATION MAY NOT<br />
APPLY TO YOU. ALSO EXCLUDED FROM THIS<br />
WARRANTY ARE ANY INCIDENTAL OR CONSE-<br />
QUENTIAL DAMAGES INCLUDING LOSS OF<br />
USE. SOME STATES DO NOT ALLOW THE<br />
EXCLUSION OR LIMITATION OF INCIDENTAL<br />
OR CONSEQUENTIAL DAMAGES, SO THE<br />
ABOVE EXCLUSION MAY NOT APPLY TO YOU.<br />
THIS WARRANTY GIVES YOU SPECIFIC LEGAL<br />
RIGHTS, AND YOU MAY ALSO HAVE OTHER<br />
RIGHTS WHICH VARY FROM STATE TO STATE.<br />
YAMAHA MOTOR CORPORATION, U.S.A.<br />
Post Office Box 6555<br />
Cypress, California 90630
Q. What costs are my responsibility during the<br />
warranty period?<br />
A. The customer’s responsibility includes all<br />
costs of normal maintenance service, nonwarranty<br />
repairs, accident damages, as well<br />
as oil and spark plugs.<br />
Q. What are some examples of “abnormal”<br />
strain, neglect, or abuse?<br />
A. These terms are general and overlap each<br />
other in areas. Specific examples include:<br />
Running the machine out of oil; lack of proper<br />
maintenance; operating the machine with<br />
a broken or damaged part which causes<br />
another part to fail; and so on. If you have<br />
any specific questions on operation or maintenance,<br />
please contact your dealer for<br />
advice.<br />
Q. Does the warranty cover incidental costs<br />
such as transportation due to a failure?<br />
A. No. The warranty is limited to repair of the<br />
machine itself.<br />
Q. May I perform any or all of the recommended<br />
maintenance shown in the Owner’s <strong>Manual</strong><br />
instead of having the dealer do them?<br />
A. Yes, if you are a qualified mechanic and follow<br />
the procedures specified in the Owner’s<br />
and Service <strong>Manual</strong>. We do recommend,<br />
however, that items requiring special tools or<br />
equipment be done by a Yamaha generator<br />
dealer.<br />
Q. Will the warranty be void or cancelled if I do<br />
not operate or maintain my new Yamaha<br />
exactly as specified in the Owner’s <strong>Manual</strong>?<br />
A. No. The warranty on a new Yamaha cannot<br />
be “voided” or “cancelled.”<br />
However, if a particular failure is caused<br />
by operation or maintenance other than<br />
as shown in the Owner’s <strong>Manual</strong>, that failure<br />
may not be covered under warranty.<br />
Q. What responsibility does my dealer have<br />
under this warranty?<br />
A. Each Yamaha generator dealer is expected<br />
to:<br />
1. Check the operation of the generator<br />
before sale.<br />
2. Explain the operation, maintenance, and<br />
warranty requirements to your satisfaction<br />
at the time of sale, and upon your<br />
request at any later date.<br />
In addition, each Yamaha generator dealer is<br />
held responsible for his setup, service and<br />
warranty repair work.<br />
WARRANTY QUESTIONS AND ANSWERS<br />
– 2 –<br />
Q. Is the warranty transferable to second owners?<br />
A. Yes. The remainder of the existing warranty<br />
can be transfered upon request.<br />
The unit has to be inspected and reregistered<br />
by an authorized Yamaha generator<br />
dealer for the policy to remain effective.<br />
CUSTOMER SERVICE<br />
If your machine requires warranty service, you<br />
must take it to any authorized Yamaha generator<br />
dealer within the continental United States. Be<br />
sure to bring your warranty registration identification<br />
or other valid proof of the original date of<br />
purchase. If a question or problem arises regarding<br />
warranty, first contact the owner of the dealership.<br />
Since all warranty matters are handled at<br />
the dealer level, this person is in the best position<br />
to help you. If you are still not satisfied and<br />
require additional assistance, please write:<br />
YAMAHA MOTOR CORPORATION U.S.A.<br />
CUSTOMER RELATIONS DEPARTMENT<br />
P.O. BOX 6555<br />
Cypress, California 90630<br />
CHANGE OF ADDRESS<br />
The federal government requires each manufacturer<br />
to maintain a complete, up-to-date list of all<br />
first purchasers against the possibility of a safety-related<br />
defect and recall. This list is compiled<br />
from the purchase registrations sent to Yamaha<br />
Motor Corporation, U.S.A. by the selling dealer<br />
at the time of your purchase. If you should move<br />
after you have purchased your new generator,<br />
please advise us of your new address by sending<br />
a postcard listing your Yamaha model name,<br />
engine number, dealer number (or dealer’s<br />
name) as it is shown on your warranty identification,<br />
your name and new mailing address. Mail<br />
to:<br />
YAMAHA MOTOR CORPORATION, U.S.A.<br />
WARRANTY DEPARTMENT<br />
P.O. Box 6555<br />
Cypress, California 90630<br />
This will ensure that Yamaha Motor Corporation,<br />
U.S.A. has an up-to-date registration record in<br />
accordance with federal law.
3<br />
4<br />
5<br />
r<br />
t<br />
792-005<br />
w<br />
e<br />
q<br />
792-006<br />
AE00062<br />
LOCATION OF IMPORTANT LABELS<br />
Please read the following labels carefully before operating<br />
this machine.<br />
NOTE:<br />
Maintain or replace safety and instruction labels, as<br />
necessary.<br />
1<br />
2<br />
q WARNING qAVERTISSEMENT<br />
8 READ THE OWNER‘S MANUAL AND ALL LABELS BEFORE OPERATING.<br />
8 ONLY OPERATE IN WELL-VENTILATED AREA.<br />
EXHAUST GAS CONTAINS POISONOUS CARBON MONOXIDE.<br />
8 CHECK FOR SPILLED FUEL OR FUEL LEAKS.<br />
8 STOP ENGINE BEFORE REFUELING.<br />
8 DO NOT OPERATE NEAR FLAMMABLE MATERIALS.<br />
8 ELECTROCUTION CAN OCCUR IF GENERATOR IS USED IN RAIN,<br />
SNOW, OR NEAR WATER. KEEP THIS UNIT DRY AT ALL TIMES.<br />
IMPORTANT ENGINE INFORMATION<br />
ENGINE FAMILY : zzzzzzzzzzzz<br />
E M<br />
REFER TO OWNER'S MANUAL FOR MAINTENANCE SPECIFICATIONS AND ADJUSTMENTS.<br />
THIS ENGINE MEETS zzzz-zzzz CALIFORNIA EMISSION REGULATIONS FOR SMALL OFF-ROAD ENGINES.<br />
THIS ENGINE CONFORMS TO PHASE 2 U.S.EPA REGULATIONS FOR SMALL NONROAD ENGINES.<br />
EMISSIONS COMPLIANCE PERIOD:CATEGORY A (EPA)<br />
YAMAHA MOTOR CO. LTD zzz-2179R-zz<br />
ENGINE AIR INDEX ( California only )<br />
0 2 4 6 8 10<br />
MOST CLEAN<br />
LEAST CLEAN<br />
NOTE : THE LOWER THE AIR INDEX, THE LESS THE POLLUTION<br />
THIS ENGINE IS CERTIFIED TO BE EMISSION COMPLIANT<br />
FOR THE FOLLOWING USE:<br />
MODERATE INTERMEDIATE EXTENDED<br />
CHECK OWNERS MANUAL FOR FURTHER DETAILS<br />
THIS LABEL TO BE REMOVED BY T H E ULTIMATE PURCHASER ONLY!<br />
WARNING<br />
Electrocution Or property damage<br />
can occur: Do not connect this<br />
generator to any building ’s electrical<br />
system unless an isolation switch<br />
has been installed by a licensed electrician.<br />
Refer to the owner’s manual.<br />
HOT EXHAUST<br />
8<br />
8<br />
8<br />
8<br />
8<br />
LISEZ LE MODE D‘EMPLOI ET TOUTES LES ETIQUETTES AVANT DE<br />
FAIRE FONCTIONNER LA MACHINE.<br />
FAITES FONCTIONNER UNIQUEMENT DANS DES LIEUX BIEN AERES.<br />
LES GAZ D‘ECHAPPEMENT CONTIENNENT DU MONOXYDE DE CARBONE.<br />
VERIFIEZ SI DU CARBURANT A ETE RENVERSE DU S‘IL FUIT.<br />
ARRETEZ LE MOTEUR AVANT DE FAIRE LE PLEIN DE CARBURANT.<br />
N‘UTILISEZ PAS A PROXIMITE DE MATERIAUX INFLAMMABLES.<br />
IL Y A RISQUE D‘ELECTROCUTION SI LE GENERATEUR FONCTIONNE<br />
SOUS LA PLUIE, DANS LA NEIGE, OU PRES DE L‘EAU. GARDEZ LA<br />
MACHINE AU SEC EN TOUTES CIRCONSTANCES.<br />
7TA-24162-10<br />
– 3 –<br />
DISPLACEMENT: zzz J VALVE LASH (A) IN: z.zz~z.zz EX: z.zz~z.zz<br />
IGNITION TIMING & IDLE MIXTURE<br />
IDLE SPEED:<br />
ENGINE OIL:<br />
zzzz~zzzz rpm AT NO LOAD<br />
NO OTHER ADJUSTMENTS NEEDED.<br />
FUEL: THIS ENGINE IS CERTIFIED TO OPERATE ON UNLEADED GASOLINE.<br />
SAE 10W-30<br />
TYPE<br />
SE
742-001<br />
742-011<br />
742-003<br />
742-014<br />
742-015<br />
742-012<br />
AE00071<br />
SAFETY INFORMATION<br />
AE00072<br />
EXHAUST FUMES ARE POISONOUS<br />
9 Never operate the engine in a closed area or it<br />
may cause unconsciousness and death within a<br />
short time. Operate the engine in a well ventilated<br />
area.<br />
AE00075<br />
FUEL IS HIGHLY FLAMMABLE AND POISONOUS<br />
9 Always turn off the engine when refuelling.<br />
9 Never refuel while smoking or in the vicinity of an<br />
open flame.<br />
9 Take care not to spill any fuel on the engine or<br />
muffler when refuelling.<br />
9 If you swallow any fuel, inhale fuel vapor, or allow<br />
any to get in your eye(s), see your doctor immediately.<br />
If any fuel spills on your skin or clothing,<br />
immediately wash with soap and water and<br />
change your clothes.<br />
9 When operating or transporting the machine, be<br />
sure it is kept upright. If it tilts, fuel may leak from<br />
the carburetor or fuel tank.<br />
AE00862<br />
ENGINE AND MUFFLER MAY BE HOT<br />
9 Place the machine in a place where pedestrians<br />
or children are not likely to touch the machine.<br />
9 Avoid placing any flammable materials near the<br />
exhaust outlet during operation.<br />
– 4 –
a<br />
q<br />
742-020a<br />
742-016<br />
741-044<br />
741-038<br />
742-002<br />
9 Keep the machine at least 1 m (3 ft) from buildings<br />
or other equipment, or the engine may overheat.<br />
a 1 m (3ft)<br />
9 Avoid operating the engine with a dust cover.<br />
9 Be sure the carrying handle is securely installed<br />
before picking up the generator.<br />
9 Be sure to carry the generator only by its carrying<br />
handle(s).<br />
1 Carrying handle<br />
AE00083<br />
ELECTRIC SHOCK PREVENTION<br />
9 Never operate the engine in rain or snow.<br />
9 Never touch the machine with wet hands or electrical<br />
shock will occur.<br />
– 5 –
q<br />
w<br />
q<br />
w<br />
q<br />
741-045<br />
742-025<br />
9 Be sure to ground (earth) the generator.<br />
NOTE:<br />
Use ground (earth) lead of sufficient current capacity.<br />
1 Lead diameter<br />
Ground (earth) Lead<br />
Diameter:<br />
0.12 mm (0.005 in)/ampere<br />
EX;<br />
10 Ampere → 1.2mm<br />
(0.05 in)<br />
AE00088<br />
CONNECTION NOTES<br />
9 Avoid connecting the generator to commercial<br />
power outlet.<br />
9 Avoid connecting the generator in parallel with any<br />
other generator.<br />
1 Correct<br />
2 Incorrect<br />
AE00091<br />
CONNECTION<br />
w<br />
Before the generator can be connected to a building’s<br />
electrical system, a licensed electrician must<br />
install an isolation (transfer) switch in the building’s<br />
main fuse box. The switch is the connection<br />
point for generator power and allows selection of<br />
generator or main line power to the building. This<br />
will prevent the generator from charging the main<br />
power line (backfeeding) when the main power<br />
supply has failed or has been turned off for line<br />
repair. Backfeeding can electrocute or injure line<br />
maintenance personnel. Also, generator and building<br />
electrical system damage can occur when normal<br />
operating power returns if unit is used without<br />
an isolation switch.<br />
– 6 –
AE00868<br />
EXTENSION CORD NOTES<br />
9 When using an extension cord, its total length<br />
should not exceed<br />
⎧ 60 meters for cross section of 1.5 mm square<br />
⎪ and<br />
⎨<br />
⎪ 100 meters for cross section of 2.5 mm square<br />
⎩<br />
or more.<br />
9 This extension cord should be protected by a<br />
tough flexible rubber sheath (IEC 245) or the<br />
equivalent to withstand mechanical stresses.<br />
– 7 –
w<br />
!2<br />
i<br />
!0<br />
u<br />
o!5<br />
!3<br />
q<br />
!4<br />
r<br />
e<br />
!1<br />
793-021<br />
t<br />
y<br />
793-022<br />
AE00101<br />
CONTROL FUNCTION<br />
AE00102<br />
DESCRIPTION<br />
1 Fuel tank<br />
2 Fuel tank cap<br />
3 Fuel cock<br />
4 Air filter cover<br />
5 Spark plug<br />
6 Muffler<br />
7 Choke lever<br />
8 AC receptacle<br />
9 Engine switch<br />
0 Ground (Earth) terminal<br />
q Recoil starter<br />
w AC protector<br />
e Carrying handle<br />
r Fuel level gauge<br />
t Oil filler cap<br />
– 8 –<br />
i<br />
!2<br />
!0 793-023
q<br />
w<br />
w<br />
q<br />
700-096<br />
763-164<br />
763-165<br />
763-006a<br />
AE00112<br />
OIL WARNING SYSTEM<br />
When the oil level falls below the lower level, the<br />
engine stops automatically. Unless you refill with oil,<br />
the engine will not start again.<br />
NOTE:<br />
If the engine stalls or does not start, check the oil<br />
level. If the oil is insufficient, add oil and restart.<br />
AE00122<br />
ENGINE SWITCH<br />
The engine switch controls the ignition system.<br />
1 I 7 : “ON”<br />
Ignition circuit is switched on.<br />
The engine can be started.<br />
2 35: “STOP”<br />
Ignition circuit is switched off.<br />
The engine will not run.<br />
AE00134<br />
AC PROTECTOR<br />
The AC protector turns off automatically when the load<br />
exceeds the generator rated output.<br />
cC<br />
Reduce the load to within specified generator<br />
rated output if the AC protector turns off. If it turns<br />
off again, consult your Yamaha dealer.<br />
1 I “ON”<br />
2 3 “OFF”<br />
NOTE:<br />
Press to reset the AC protector.<br />
– 9 –
q<br />
742-019<br />
707-033b<br />
707-069<br />
707-037<br />
707-070<br />
AE00202<br />
PRE-OPERATION CHECK<br />
NOTE:<br />
Pre-operation checks should be made each time the<br />
generator is used.<br />
Carrying Handle: Before picking up generator, make<br />
sure the carrying handle is securely installed.<br />
w<br />
The engine and muffler will be very hot after the<br />
engine has been run. Avoid touching the engine<br />
and muffler while they are still hot with any part of<br />
your body or clothing during inspection or repair.<br />
AE00856<br />
FUEL<br />
Make sure there is sufficient fuel in the tank.<br />
Recommended fuel: Unleaded gasoline<br />
Fuel tank capacity:<br />
Total: 3.8 L (0.84 Imp gal, 1.0 US gal)<br />
Your Yamaha engine has been designed to use regular<br />
unleaded gasoline with a pump octane number ((R<br />
+ M)/2) of 86 or higher, or research octane number of<br />
91 or higher.<br />
1 Fuel level gauge<br />
w<br />
9 Fuel is highly flammable and poisonous.<br />
Check “SAFETY INFORMATION” (See page 4)<br />
carefully before refueling.<br />
9 Do not fill above the top of the fuel filter or it<br />
may overflow when the fuel heats up later and<br />
expands.<br />
9 Wipe up any spilled fuel immediately.<br />
9 After refueling, make sure the tank cap is tightened<br />
securely.<br />
– 10 –<br />
“F” Full<br />
“E” Empty
0°C 25°C<br />
A YAMALUBE 4(10W-30)<br />
32°F<br />
80°F<br />
q<br />
700-071b<br />
D SAE 10W C SAE #20 B SAE #30<br />
700-065<br />
700-072<br />
741-046<br />
AE00222<br />
ENGINE OIL<br />
Make sure the engine oil is at the upper level of the oil<br />
filler hole.<br />
Add oil as necessary.<br />
1 Upper level<br />
Recommended oil:<br />
å YAMALUBE 4 (10W-30) or SAE 10W-30<br />
type SE motor oil<br />
∫ SAE #30<br />
ç SAE #20<br />
∂ SAE 10W<br />
Engine oil quantity:<br />
0.43 L (0.38 lmp qt, 0.45 US qt)<br />
NOTE:<br />
Recommended engine oil classification:<br />
API Service “SE” or “SF”.<br />
cC<br />
The generator has been shipped without engine<br />
oil. Fill with oil or it will not start.<br />
AE00241<br />
GROUND (Earth)<br />
Make sure to ground (earth) the generator.<br />
Check “SAFETY INFORMATION” on page 6.<br />
– 11 –
q<br />
q<br />
q<br />
700-072a<br />
761-054<br />
705-037<br />
763-164c<br />
q<br />
701-025c<br />
704-013<br />
AE00955<br />
OPERATION<br />
NOTE:<br />
The generator has been shipped without engine oil.<br />
Fill with oil or it will not start.<br />
1 Upper level<br />
AE00806<br />
STARTING THE ENGINE<br />
NOTE:<br />
Before starting the engine, do not connect any electric<br />
devices.<br />
1. Turn the fuel cock lever to the “ON” position.<br />
1 “ON”<br />
2. Turn the engine switch to the “I 7” position.<br />
1 I 7 “ON”<br />
3. Turn the choke lever to the “1” position.<br />
1 Choke lever<br />
NOTE:<br />
The choke is not required to start a warm engine.<br />
Turn the choke lever to the operating position.<br />
4. Pull slowly on the recoil starter until it is engaged,<br />
then pull it briskly.<br />
5. After the engine starts, warm up the engine until<br />
the engine does not stop when the choke lever is<br />
returned to the operating position.<br />
– 12 –
q<br />
AE00812<br />
APPLICATION RANGE<br />
AC<br />
701-025d<br />
6. Turn the choke lever back to the operating position.<br />
1 Operating position<br />
Power factor 1 0.8–0.95<br />
779-006a<br />
NOTE:<br />
9 “–” means below.<br />
9 Application wattage indicates when each device is<br />
used by itself.<br />
cC<br />
Be sure the total load is within generator rated output<br />
otherwise generator damage will occur.<br />
NOTE:<br />
Some precision equipment is voltage sensitive and<br />
may require a more uniform voltage supply than<br />
portable generators provide. Examples include some<br />
medical equipment, personal computers, and some<br />
inverters that sense peak and RMS voltage values.<br />
Consult the precision-equipment vendor before relying<br />
on any portable generator to provide power to such<br />
equipment.<br />
– 13 –<br />
779-006c 779-006b<br />
0.4–0.75<br />
(Efficiency 0.85)<br />
<strong>EF1000A</strong> –800W –640W –270W
761-001<br />
761-054a<br />
763-165<br />
w<br />
q<br />
763-005a<br />
AE00821<br />
CONNECTION<br />
Alternating Current (AC)<br />
cC<br />
9 Be sure all electric devices including the lines<br />
and plug connections are in good condition<br />
before connection to the generator.<br />
9 Be sure any electric devices are turned off<br />
before plugging it in.<br />
9 Be sure the total load is within generator rated<br />
output.<br />
9 Be sure the receptacle load current is within<br />
receptacle rated current.<br />
1. Wind the power lead 2 or 3 turns around handle.<br />
2. Start the engine.<br />
3. Plug into AC receptacle.<br />
4. Press in the AC protector and turn on any electric<br />
devices.<br />
cC<br />
Reduce the load to the specified generator rated<br />
output if the AC protector turns off. If it turns off<br />
again, consult a Yamaha dealer.<br />
NOTE:<br />
Press to reset the AC protector.<br />
1 “ON”<br />
2 “OFF”<br />
– 14 –
q<br />
q<br />
761-054<br />
763-164d<br />
705-038<br />
AE00834<br />
STOPPING THE ENGINE<br />
NOTE:<br />
Turn off any electric devices.<br />
1. Disconnect any electric devices.<br />
2. Turn the engine switch to the “3 5” position.<br />
1 3 5 “STOP”<br />
3. Turn the fuel cock lever to “OFF”.<br />
1 “OFF”<br />
– 15 –
AE00401<br />
PERIODIC MAINTENANCE<br />
AE00403<br />
MAINTENANCE CHART<br />
Regular maintenance is most important for best performance and safe operation.<br />
w<br />
Stop the engine before starting maintenance work.<br />
No. Item Remarks<br />
Pre-Operation<br />
check<br />
(daily)<br />
– 16 –<br />
Initial Every<br />
1<br />
month<br />
or 20 Hr<br />
3<br />
months<br />
or 50 Hr<br />
6<br />
months<br />
or 100 Hr<br />
12<br />
months<br />
or 300 Hr<br />
1. ** Spark Plug<br />
Check condition.<br />
Adjust gap and<br />
clean. Replace if<br />
necessary.<br />
0<br />
2.* ** Valve Clearance<br />
Check and adjust<br />
when engine is<br />
cold.<br />
Check breather<br />
0<br />
3.*<br />
** hose for cracks or<br />
0<br />
Crankcase<br />
breather system damage. Replace<br />
if necessary.<br />
4.* ** Idle speed<br />
Check and adjust<br />
engine idle speed.<br />
Check for leakage.<br />
0<br />
Retighten or<br />
*replace gasket<br />
0<br />
5.<br />
**<br />
Exhaust System<br />
if necessary.<br />
Check muffler<br />
screen and spark<br />
arrester. Clean/<br />
replace if<br />
necessary.<br />
0<br />
6. Engine Oil<br />
Check oil level<br />
Replace<br />
0<br />
0 0<br />
7. ** Air Filter<br />
Clean.<br />
Replace if<br />
necessary.<br />
Clean fuel cock<br />
0<br />
8. Fuel Filter<br />
and fuel tank<br />
filter. Replace if<br />
necessary.<br />
0<br />
* : It is recommended that these items be serviced by a Yamaha dealer.<br />
: Related to emission control system.<br />
**
No. Item Remarks<br />
9. Fuel Line<br />
Check fuel hose<br />
for crack or damage.<br />
*Replace<br />
if necessary.<br />
10. Choke ** lever<br />
Check choke<br />
operation.<br />
11.* Cooling System<br />
Check for fan<br />
damage.<br />
12. Starting System<br />
Check recoil<br />
starter operation.<br />
13.* **<br />
Decarbonization<br />
More frequently<br />
if necessary.<br />
Check all fittings<br />
Fittings/<br />
14.*<br />
Fasteners<br />
and fasteners.<br />
Correct if<br />
necessary.<br />
* : It is recommended that these items be serviced by a Yamaha dealer.<br />
: Related to emission control system.<br />
**<br />
cC<br />
Pre-Operation<br />
check<br />
(daily)<br />
Use only Yamaha specified genuine parts for replacement. Ask an authorized<br />
Yamaha dealer for further attention.<br />
0<br />
0<br />
0<br />
– 17 –<br />
Initial Every<br />
1<br />
month<br />
or 20 Hr<br />
3<br />
months<br />
or 50 Hr<br />
6<br />
months<br />
or 100 Hr<br />
0<br />
12<br />
months<br />
or 300 Hr<br />
0<br />
0
a<br />
760-017<br />
760-001a<br />
AE00423<br />
SPARK PLUG INSPECTION<br />
You should periodically remove and inspect the spark<br />
plug.<br />
1. Check for discoloration and remove the carbon.<br />
Standard electrode color:<br />
Tan Color<br />
2. Check the spark plug type and gap.<br />
Standard Spark Plug:<br />
BPR6HS (NGK)<br />
Spark Plug Gap:<br />
0.6–0.7 mm (0.024–0.028 in)<br />
a Gap<br />
3. Install the spark plug.<br />
Spark Plug Torque:<br />
20 N•m (2 kgf•m, 14 lbf•ft)<br />
AE00431<br />
CARBURETOR ADJUSTMENT<br />
The carburetor is a vital part of the engine. Adjusting<br />
should be left to a Yamaha dealer with the professional<br />
knowledge, specialized data, and equipment to do<br />
so properly.<br />
– 18 –
q<br />
w<br />
0°C 25°C<br />
A YAMALUBE 4(10W-30)<br />
32°F<br />
80°F<br />
q<br />
700-097<br />
700-072a<br />
D SAE 10W C SAE #20 B SAE #30<br />
700-065<br />
AE00413<br />
ENGINE OIL REPLACEMENT<br />
1. Place the machine on a level surface and warm<br />
up the engine for several minutes.<br />
Then stop the engine.<br />
2. Remove the oil filler cap.<br />
3. Place an oil pan under the engine. Drain the oil<br />
completely.<br />
4. Check the oil filler cap and O-ring.<br />
If damaged, replace.<br />
1 Oil filler cap<br />
2 O-ring<br />
5. Add engine oil to the upper level.<br />
1 Upper level<br />
Recommended oil:<br />
å YAMALUBE 4 (10W-30) or SAE 10W-30<br />
type SE motor oil<br />
∫ SAE #30<br />
ç SAE #20<br />
∂ SAE 10W<br />
Engine oil quantity:<br />
0.43 L (0.38 Imp qt, 0.45 US qt)<br />
NOTE:<br />
Recommended engine oil classification:<br />
API Service “SE” or “SF”.<br />
cC<br />
Be sure no foreign material enters the crankcase.<br />
– 19 –
710-043a<br />
AE00451<br />
AIR FILTER<br />
1. Remove the air filter cover and element.<br />
2. Wash the element in solvent and dry.<br />
3. Oil the element and squeeze out excess oil.<br />
The element should be wet but not dripping.<br />
Recommended oil:<br />
Foam-air-filter oil<br />
or<br />
SAE #20 motor oil<br />
cC<br />
Do not wring out the element.<br />
This could cause it to tear.<br />
4. Insert the element into the air filter.<br />
NOTE:<br />
Be sure the element sealing surface matches the air<br />
filter so there is no air leak.<br />
cC<br />
The engine should never run without the element;<br />
excessive piston and cylinder wear may result.<br />
w<br />
Never use solvent while smoking or in the vicinity<br />
of an open flame.<br />
– 20 –
q<br />
705-066<br />
707-043b<br />
AE00461<br />
FUEL COCK<br />
w<br />
Never use or be near fuel and solvent while smoking<br />
or in the vicinity of an open flame.<br />
1. Stop the engine.<br />
2. Turn the fuel cock lever to “OFF”.<br />
3. Remove the fuel cock cup and gasket.<br />
4. Clean the cup with solvent and wipe it off.<br />
5. Check the gasket. Replace it if damaged.<br />
6. Reinstall the gasket and fuel cock cup.<br />
w<br />
Be sure the fuel cock cup is tightened securely.<br />
AE00471<br />
FUEL TANK FILTER<br />
1. Remove the fuel tank cap and filter.<br />
1 Filter<br />
2. Clean the filter with solvent. If damaged, replace.<br />
3. Wipe the filter and insert it.<br />
w<br />
Be sure the tank cap is tightened securely.<br />
– 21 –
q<br />
742-019<br />
711-039<br />
w<br />
711-040<br />
711-041<br />
AE00444<br />
MUFFLER (SPARK ARRESTER)<br />
w<br />
The engine and muffler will be very hot after the<br />
engine has been run. Avoid touching the engine<br />
and muffler while they are still hot with any part of<br />
your body or clothing during inspection or repair.<br />
1. Remove the muffler protector 1.<br />
2. Remove the plate 2.<br />
3. Tap the muffler lightly, then take out the loose carbon<br />
deposits from inside the muffler.<br />
4. Reinstall by reversing the removal procedure.<br />
– 22 –
707-069<br />
705-037a<br />
700-072<br />
763-164e<br />
760-009<br />
AE00512<br />
TROUBLESHOOTING<br />
Engine won’t start<br />
1. Fuel systems<br />
No fuel supplied to combustion chamber.<br />
2 No fuel in tank .... Supply fuel.<br />
2 Clogged fuel line .... Clean fuel line.<br />
2 Foreign matter in fuel cock .... Clean fuel cock.<br />
2 Clogged carburetor .... Clean carburetor.<br />
2. Engine oil system<br />
Insufficient<br />
2 Oil level is low .... Add engine oil.<br />
3. <strong>Electric</strong>al systems<br />
2 Engine switch to “ON”.<br />
Poor spark<br />
2 Spark plug dirty with carbon or wet .... Remove<br />
carbon or wipe spark plug dry.<br />
2 Faulty ignition system .... Consult dealer.<br />
4. Compression<br />
Insufficient<br />
2 Worn out piston and cylinder .... Consult dealer.<br />
2 Loose cylinder head nuts .... Tighten nuts properly.<br />
2 Damaged gasket .... Replace gasket.<br />
– 23 –
AE00515<br />
A ENGINE DOES NOT START<br />
H<br />
Turn the engine switch and fuel cock<br />
lever to the “ON” position and then pull<br />
the recoil starter.<br />
791-001f<br />
C Does not start D Engine starts.<br />
H Pull the recoil starter and check the<br />
spark plug for spark strength.<br />
(See “WARNING”)<br />
w<br />
791-001g<br />
791-001b<br />
9 To prevent FIRE HAZARDS be<br />
sure fuel is not present in the<br />
spark plug area.<br />
9 To prevent FIRE HAZARDS be<br />
sure to place the spark plug as<br />
far way as possible from the<br />
spark plug hole and carburetor<br />
area.<br />
9 To prevent ELECTRIC SHOCK do<br />
not hold spark plug lead with<br />
hand while testing.<br />
I Engine does not<br />
start.<br />
J<br />
N<br />
Check the following<br />
9 Fuel cock clogging<br />
9 Air cleaner element<br />
clogging.<br />
Engine starts.<br />
O Clogged<br />
P OK<br />
– 24 –<br />
E Check engine oil level.<br />
F OK G Level low<br />
Consult a<br />
Yamaha dealer.<br />
Add engine oil.<br />
K Check the spark plug.<br />
9 Type:<br />
9 Gap:<br />
L Incorrect M OK<br />
Replace or<br />
Adjust Gap.<br />
Q<br />
Clean the spark<br />
plug.<br />
Clean or Replace; Consult a<br />
Yamaha dealer.<br />
R Consult a Yamaha dealer.<br />
791-001c<br />
791-001d
q<br />
w<br />
e r<br />
a<br />
707-038<br />
712-022<br />
AE00601<br />
STORAGE<br />
Long term storage of your machine will require some<br />
preventive procedures to guard against deterioration.<br />
AE00611<br />
DRAIN THE FUEL<br />
1. Drain the fuel tank, fuel cock, and carburetor float<br />
bowl.<br />
a Carburetor drain plug<br />
2. Pour a cup of SAE 10W30 or 20W40 motor oil into<br />
the tank.<br />
3. Shake the tank to coat the inner surfaces thoroughly.<br />
4. Drain off the excess oil.<br />
AE00621<br />
ENGINE<br />
1. Remove the spark plug, pour about one tablespoon<br />
of SAE 10W30 or 20W40 motor oil into the<br />
spark plug hole and reinstall the spark plug. Recoil<br />
start the engine by turning over several times (with<br />
ignition off) to coat the cylinder walls with oil.<br />
2. Pull the recoil starter until you feel compression.<br />
Then stop pulling. (This prevents the cylinder and<br />
valves from rusting).<br />
3. Clean exterior of the generator and apply a rust<br />
inhibitor.<br />
4. Store the generator in a dry, well-ventilated place,<br />
with the cover placed over it.<br />
5. The generator must remain in a vertical position<br />
when stored, carried or operated.<br />
– 25 –
AE00789<br />
EXHAUST EMISSION CONTROL SYSTEM<br />
AND COMPONENTS<br />
Item Acronym<br />
9 CARB. ASSY., LH. & JT., ......................CARB (Carburetor)<br />
CARBURETOR2<br />
9 T.C.I. MAGNETO ASSY. & ....................EI (Electronic Ignition)<br />
PLUG, SPARK<br />
9 CRANKCASE1 & HEAD, .......................PCV (Positive Crankcase<br />
CYLINDER1 Ventilation)<br />
9 AIR FILTER ASSY. ................................ACL (Air Cleaner)<br />
9 MUFF., 2, CAP, NET, WIRE2 &<br />
ARRESTER, SPARK<br />
The above items and the corresponding acronyms are provided in accordance with U.S.<br />
EPA REGULATIONS FOR NEW NONROAD SPARK-IGNITION NONHANDHELD<br />
ENGINES and the CALIFORNIA REGULATIONS FOR 1995 AND LATER SMALL OFF-<br />
ROAD ENGINES.<br />
The acronyms conform to the latest version of the SAE’s recommended practice document<br />
J1930, “Diagnostic Acronyms, Terms, and Definitions For <strong>Electric</strong>al/Electronic<br />
System”.<br />
It is recommended that these items be serviced by a Yamaha dealer.<br />
– 26 –
AE00701<br />
SPECIFICATIONS<br />
AE00702<br />
DIMENSIONS<br />
Unit <strong>EF1000A</strong><br />
Overall Length mm (in) 399 (15.7)<br />
Overall Width mm (in) 305 (12.0)<br />
Overall Height mm (in) 410 (16.1)<br />
Dry Weight kg (lb) 23 (50.7)<br />
AE00705<br />
ENGINE<br />
Unit <strong>EF1000A</strong><br />
Type Forced air cooled 4-stroke gasoline OHV<br />
Cylinder Arrangement Inclined, 1 cylinder<br />
Displacement cm3 84<br />
Bore × Stroke mm (in) 50.0 × 43.0 (1.97 × 1.69)<br />
Rated Output kW(HP)/r/min 1.5 (2.0)/3,600<br />
Operation Hours Hr 5.5<br />
Fuel Unleaded gasoline<br />
Fuel Tank Capacity L (Imp gal, US gal) 3.8 (0.84, 1.00)<br />
Engine Oil Quantity L (Imp qt, US qt) 0.43 (0.38, 0.45)<br />
Ignition System CDI<br />
Spark Plug: Type BPR6HS (NGK)<br />
Gap mm (in) 0.6–0.7 (0.024–0.028)<br />
Noise Level* dB (A) 63<br />
* : Measured at rated operation from 7 m (23 ft) distance.<br />
AE00707<br />
GENERATOR<br />
Unit <strong>EF1000A</strong><br />
AC Output<br />
Rated Voltage V 120<br />
Rated Frequency Hz 60<br />
Rated Current A 6.7<br />
Rated Output VA 800<br />
Safty Device: Type AC Protector<br />
– 27 –
AE00751<br />
WIRING DIAGRAM<br />
o<br />
q<br />
y<br />
w<br />
1 Stator assembly<br />
2 Rotor assembly<br />
3 Condenser<br />
4 AC protector<br />
5 AC receptacle<br />
6 Oil level switch<br />
7 Engine switch<br />
8 C.D.I. unit<br />
9 C.D.I. magneto<br />
0 Ignition coil<br />
q Spark plug<br />
w Earth terminal<br />
Br<br />
W/R B W/R W/R B<br />
B Br<br />
Br<br />
!0<br />
O<br />
G<br />
G<br />
B/W<br />
Br<br />
W/R<br />
B<br />
O<br />
Br<br />
R<br />
Br<br />
R<br />
B<br />
!1 770-009<br />
– 28 –<br />
Br<br />
R<br />
G<br />
G<br />
G/Y<br />
B/W<br />
Br<br />
W/R<br />
B<br />
O<br />
i<br />
r<br />
Br<br />
R<br />
u<br />
B/W<br />
t<br />
e<br />
B<br />
G/Y<br />
Color code<br />
B Black<br />
Br Brown<br />
G Green<br />
Gy Gray<br />
R Red<br />
O Orange<br />
B/W Black/White<br />
Y Yellow<br />
W/R White/Red<br />
Y/R Yellow/Red<br />
G/Y<br />
!2
AE00765<br />
CARRYING HANDLE INSTALLATION<br />
– 29 –<br />
794-002
PRINTED ON RECYCLED PAPER<br />
PRINTED IN JAPAN<br />
03 9 08 – 0.5 × 1 !