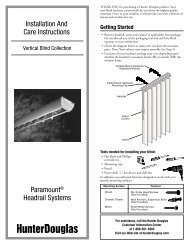
Owner's Guide Standard EasyRise™ Rectangular ... - Hunter Douglas
Owner's Guide Standard EasyRise™ Rectangular ... - Hunter Douglas
Owner's Guide Standard EasyRise™ Rectangular ... - Hunter Douglas

Create successful ePaper yourself
Turn your PDF publications into a flip-book with our unique Google optimized e-Paper software.
Install tHe Hold-doWn Brackets (oPtIonal)<br />
Hold-down brackets may be used with outside-mount shadings only. Hold-down<br />
brackets are not available with two-on-one headrail shadings.<br />
■ With the shading fully lowered, insert the pin<br />
on the hold-down bracket into the hole on the<br />
bottom rail end cap.<br />
■ Mark the mounting hole locations on the<br />
mounting surface.<br />
■ Center the hold-down brackets over the<br />
mounting hole locations and check their<br />
alignment. Attach using two screws.<br />
■<br />
Note: Disconnect the bottom rail from the hold-down brackets to raise<br />
the shading.<br />
Note: Hold-down brackets and pre-drilled endcaps will be provided only<br />
when pre-ordered.<br />
Lower the shading approximately 1".<br />
reMoVe tHe sHadInG<br />
■ While holding the front of the headrail for<br />
support, use a standard flatblade screwdriver<br />
and insert it between the bottom of the<br />
bracket and the back of the headrail, as shown.<br />
Twist the screwdriver to release the back edge<br />
of the headrail.<br />
■ After releasing the back edge, pull the<br />
shading forward and down to release it<br />
from the bracket.<br />
■ If the bracket is stiff, the headrail may be<br />
difficult to remove. Gently push up on the<br />
back rail while twisting the screwdriver.<br />
CautioN: Use care while handling the fabric-covered headrail during<br />
this procedure.<br />
9