

Download this ebook as PDF - E-Book Library
Download this ebook as PDF - E-Book Library
Download this ebook as PDF - E-Book Library

You also want an ePaper? Increase the reach of your titles
YUMPU automatically turns print PDFs into web optimized ePapers that Google loves.
S&T Test Report<br />
AstroFX Software<br />
One of the most attractive features of<br />
Nightscape, especially for those relatively<br />
new to processing <strong>as</strong>tronomical images,<br />
is the included AstroFX software. It<br />
transforms the work of making exposures<br />
and, more importantly, the tedious<br />
<strong>as</strong>pects of processing images, to a few<br />
mouse clicks.<br />
I ran the software on a recent-model Dell desktop<br />
machine with an AMD Athlon II 2X processor, 4 gigabytes<br />
of RAM, and Windows 7. It installed with no problems<br />
and the software acquired the Nightscape camera the fi rst<br />
time I started the program. Launching AstroFX brings<br />
up an unconventional-looking screen for those who are<br />
familiar with many camera-control and image-processing<br />
programs. The screen does, however, remind you that it’s<br />
This stack of 25 fi ve-minute exposures of NGC 1977, informally known <strong>as</strong> the<br />
Running Man Nebula, north of the Orion Nebula, w<strong>as</strong> made with the 12½-inch<br />
f/4 refl ector and the Nightscape’s pixels binned 2x2.<br />
66 May 2012 sky & telescope<br />
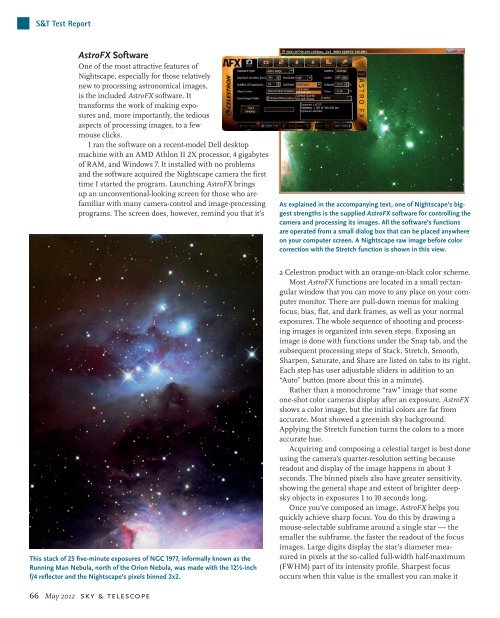
As explained in the accompanying text, one of Nightscape’s biggest<br />
strengths is the supplied AstroFX software for controlling the<br />
camera and processing its images. All the software’s functions<br />
are operated from a small dialog box that can be placed anywhere<br />
on your computer screen. A Nightscape raw image before color<br />
correction with the Stretch function is shown in <strong>this</strong> view.<br />
a Celestron product with an orange-on-black color scheme.<br />
Most AstroFX functions are located in a small rectangular<br />
window that you can move to any place on your computer<br />
monitor. There are pull-down menus for making<br />
focus, bi<strong>as</strong>, fl at, and dark frames, <strong>as</strong> well <strong>as</strong> your normal<br />
exposures. The whole sequence of shooting and processing<br />
images is organized into seven steps. Exposing an<br />
image is done with functions under the Snap tab, and the<br />
subsequent processing steps of Stack, Stretch, Smooth,<br />
Sharpen, Saturate, and Share are listed on tabs to its right.<br />
Each step h<strong>as</strong> user adjustable sliders in addition to an<br />
“Auto” button (more about <strong>this</strong> in a minute).<br />
Rather than a monochrome “raw” image that some<br />
one-shot color camer<strong>as</strong> display after an exposure, AstroFX<br />
shows a color image, but the initial colors are far from<br />
accurate. Most showed a greenish sky background.<br />
Applying the Stretch function turns the colors to a more<br />
accurate hue.<br />
Acquiring and composing a celestial target is best done<br />
using the camera’s quarter-resolution setting because<br />
readout and display of the image happens in about 3<br />
seconds. The binned pixels also have greater sensitivity,<br />
showing the general shape and extent of brighter deepsky<br />
objects in exposures 1 to 10 seconds long.<br />
Once you’ve composed an image, AstroFX helps you<br />
quickly achieve sharp focus. You do <strong>this</strong> by drawing a<br />
mouse-selectable subframe around a single star — the<br />
smaller the subframe, the f<strong>as</strong>ter the readout of the focus<br />
images. Large digits display the star’s diameter me<strong>as</strong>ured<br />
in pixels at the so-called full-width half-maximum<br />
(FWHM) part of its intensity profi le. Sharpest focus<br />
occurs when <strong>this</strong> value is the smallest you can make it