Saturn® 2000 GC/MS Hardware Operation Manual
Saturn® 2000 GC/MS Hardware Operation Manual
Saturn® 2000 GC/MS Hardware Operation Manual

Create successful ePaper yourself
Turn your PDF publications into a flip-book with our unique Google optimized e-Paper software.
Varian, Inc.<br />
2700 Mitchell Drive<br />
Walnut Creek, CA 94598-1675/usa<br />
<strong>Saturn®</strong> <strong>2000</strong> <strong>GC</strong>/<strong>MS</strong><br />
<strong>Hardware</strong> <strong>Operation</strong> <strong>Manual</strong><br />
©Varian, Inc. 2004-2007 Printed in U.S.A. 03-914978-00:Rev. 4
All rights reserved including the right of reproduction in whole or in<br />
part in any form. This document may be electronically reproduced,<br />
distributed, or printed in its entirety provided this copyright and<br />
statement are attached. Any modification or any other reproduction,<br />
distribution, or use of this document or portions hereof is strictly<br />
prohibited without the express written permission of Varian, Inc.<br />
COPYRIGHT 2007. All rights reserved.
Declaration of Conformity<br />
We hereby Declare that the equipment listed below complies with the requirements of:<br />
LVD EN 61010<br />
The Low Voltage Directive 73/23/EEC (93/68/EEC)<br />
The EMC Directive 89/336/EEC (92/31/EEC and 93/68/EEC)<br />
EMC EN 50082-1<br />
EN 55011<br />
Applicable Standards<br />
TUV File Number(s): E9672056 P9672055<br />
Type of Equipment: Mass Spectrometer Model: Saturn <strong>2000</strong> Series<br />
Print Name: G. A. Wassink<br />
Signed:<br />
Position: Quality Manager<br />
Date: January 16, 2006<br />
Print Name: Seamus Flanagan<br />
Signed:<br />
Position: General Manager<br />
Date: January 16, 2006<br />
03-914535-12:8<br />
SPEC. 03-914411-00 1:2:3:4n<br />
Authorized Representative in the EU<br />
Company Name:<br />
Address:<br />
Telephone:<br />
Fax:<br />
Manufacturer<br />
Company Name:<br />
Address:<br />
Telephone:<br />
Fax:<br />
Varian B.V.<br />
Herculesweg 8<br />
P.O. Box 8033<br />
4330 EA Middelburg<br />
The Netherlands<br />
+31(0) 118 671 000<br />
+31(0) 118 633 118<br />
Varian, Inc.<br />
2700 Mitchell Drive<br />
Walnut Creek, California 94598<br />
USA<br />
925-939-2400<br />
925-945-2168
Quality Systems At Varian, Inc.<br />
The ISO 9000 series standards were created in Geneva in 1987 to cut through a morass of conflicting<br />
quality definitions. These standards define a model for quality assurance systems in product design,<br />
development, manufacturing, installation, service, and customer support. They are now the worldwide quality<br />
assurance benchmark used to gauge the strength of a company's commitment to quality, and the value of its<br />
quality systems.<br />
Various organizations around the world, such as the British Standards Institution (BSI), provide<br />
certified, objective auditors to scrutinize quality procedures, product development, manufacturing processes,<br />
and customer satisfaction programs. No company can claim ISO 9000 series registration unless it receives a<br />
stamp of approval from the demanding quality assessors of BSI or similar accredited examining body. ISO<br />
9000 series registration constitutes an objective third-party report to determine the level of a supplier's<br />
commitment to quality.<br />
In 1992, Varian, Inc., Analytical Instruments became registered to the most comprehensive of the ISO<br />
9000 series standards — ISO 9001. ISO 9001 registration means that every stage of our quality system,<br />
including product development, manufacturing, final test, shipping, and parts and supplies has been<br />
rigorously examined against the most exacting set of internationally recognized standards. It means we live<br />
up to a standard of quality that you can count on today, and into the future. Our Quality System has received<br />
ISO 9001 certification number FM21797.<br />
The quality systems that earned us ISO 9001 registration have direct benefits for our customers:<br />
♦ We can speed instruments to you faster than ever before. Emergency orders can<br />
be processed even faster.<br />
♦ We fill your orders promptly and completely.<br />
♦ We have implemented a system of continuous feedback from our customers —<br />
we are aware of your needs today and tomorrow.<br />
♦ We have improved your productivity by cutting systems failure rates in half and<br />
speeding service response time.<br />
♦ We have embedded continuous improvement into the fabric of our organization<br />
so that we can achieve even higher levels of quality in the future.<br />
♦ We are embedding GLP requirements into our products and services to help you<br />
meet your regulatory compliance requirements.<br />
ISO 9001 registration is not enough. For us, quality is defined by our customers. We are not satisfied<br />
unless you are satisfied. We are striving to understand customer needs, using independent surveys, user<br />
groups, customer advisory boards, and our “Hallmark of Quality” response program, in addition to individual<br />
face-to-face customer contact. Our products and our processes are configured to meet those needs.<br />
We know that you are seeking more than the most advanced processes and top-notch applications expertise.<br />
You want to join forces with a partner committed to delivering world-class quality, reliability, and value —<br />
on time, every time.<br />
Our overriding aim is to be that partner.<br />
03-914451-00:4 1 of 1
Varian, Inc. Analytical Instrument Warranty<br />
<strong>Hardware</strong> Products<br />
All analytical instruments sold by Varian, Inc. are<br />
warranted to be free from defects in material and<br />
workmanship for the periods specified and in<br />
accordance with the terms on the face of Varian's<br />
quotation or as otherwise agreed upon in writing<br />
between Varian and the Customer. The warranty<br />
period begins on the date of shipment from Varian to<br />
the original Customer. However, where installation is<br />
paid for by the Customer or included in the purchase<br />
price, the warranty period begins upon completion of<br />
installation. If the Customer schedules installation to<br />
start later than 30 days after delivery or if such delay<br />
is caused through the Customer's inability to provide<br />
adequate facilities or utilities or through failure to<br />
comply with Varian's reasonable pre-installation<br />
instructions or through other omissions by Customer,<br />
then the warranty period starts on the 31st day from<br />
date of shipment. Moreover Varian will charge the<br />
Customer for labor and other expenses involved in<br />
making multiple or follow-up installation service calls.<br />
Software Products<br />
Where software is provided within the frame of a<br />
license agreement concluded between the Customer<br />
and Varian, any warranty shall be strictly in<br />
accordance with the terms of such agreement.<br />
In the absence of a license agreement and unless an<br />
alternate warranty period is agreed upon in writing<br />
between Varian and the Customer, the warranty<br />
period is as specified on the face of Varian's<br />
quotation. Varian warrants such software products, if<br />
used with and properly installed on Varian hardware<br />
or other hardware as specified by Varian to perform<br />
as described in the accompanying Operator's <strong>Manual</strong><br />
and to be substantially free of those defects which<br />
cause failure to execute respective programming<br />
instructions; however, Varian does not warrant<br />
uninterrupted or error-free operation.<br />
Remedies<br />
The sole and exclusive remedy under hardware<br />
warranty shall be repair of instrument malfunctions<br />
which in Varian's opinion are due or traceable to<br />
defects in original materials or workmanship or, at<br />
Varian's option, replacement of the respective<br />
defective parts, provided that Varian may as an<br />
alternative elect to refund an equitable portion of the<br />
purchase price of the instrument or accessory.<br />
Repair or replacement under warranty does not<br />
extend the original warranty period.<br />
Repair or replacement under warranty claims shall be<br />
made in Varian's sole discretion either by sending a<br />
Customer Support Representative to the site or by<br />
authorizing the Customer to return the defective<br />
accessory or instrument to Varian or to send it to a<br />
designated service facility. The Customer shall be<br />
responsible for loss or damage in transit and shall<br />
prepay shipping cost. Varian will return the accessory<br />
or instrument to the Customer prepaid and insured.<br />
Claims for loss or damage in transit shall be filed by<br />
the Customer. To correct software operation<br />
anomalies, Varian will issue software revisions where<br />
such revisions exist and where, in Varian's opinion,<br />
this is the most efficient remedy.<br />
Limitation of Warranty<br />
This warranty does not cover software supplied by<br />
the Customer, equipment and software warranted by<br />
another manufacturer or replacement of expendable<br />
items and those of limited life, such as but not limited<br />
to: Filters, glassware, instrument status lamps, source<br />
lamps, septa, columns, fuses, chart paper and ink,<br />
nebulizers, flow cells, pistons, seals, fittings, valves,<br />
burners, sample tubes, probe inserts, print heads,<br />
glass lined tubing, pipe and tube fittings, variable<br />
temperature dewars, transfer lines, flexible discs,<br />
magnetic tape cassettes, electron multipliers,<br />
filaments, vacuum gaskets, seats and all parts<br />
exposed to samples and mobile phases.<br />
This warranty shall be void in the event of accident,<br />
abuse, alteration, misuse, neglect, breakage,<br />
improper operation or maintenance, unauthorized or<br />
improper modifications or tampering, use in an<br />
unsuitable physical environment, use with a marginal<br />
power supply or use with other inadequate facilities or<br />
utilities. Reasonable care must be used to avoid<br />
hazards.<br />
This warranty is expressly in lieu of and excludes<br />
all other express or implied warranties, including<br />
but not limited to warranties of merchantability<br />
and of fitness for particular purpose, use or<br />
application, and all other obligations or liabilities<br />
on the part of Varian, unless such other<br />
warranties, obligations or liabilities are expressly<br />
agreed to in writing by Varian.<br />
Limitation of Remedies and Liability<br />
The remedies provided herein are the sole and<br />
exclusive remedies of the Customer. In no case<br />
will Varian be liable for incidental or<br />
consequential damages, loss of use, loss of<br />
production or any other loss incurred.<br />
03-914412-00:2 1 of 1
Qualitätssysteme bei Varian, Inc.<br />
Die Standards der ISO 9000 Serien wurden 1987 in Genf mit dem Ziel geschaffen, das Durcheinander<br />
gegensätzlicher Qualitätsbestimmungen zu entwirren. Diese Standards legen ein Modell für<br />
Qualitätssicherungssysteme hinsichtlich Produktdesign, Entwicklung, Herstellung, Installation, Service<br />
und Kundenbetreuung fest. Sie sind nun die weltweiten Maßstäbe der Qualitätssicherung, die die Anstrengungen<br />
eines Unternehmens bezüglich der Qualität und der Bedeutung seiner Qualitätssysteme messen.<br />
Verschiedene Organisationen in der ganzen Welt, wie die British Standards Institution (BSI), stellen<br />
ausgebildete, objektive Prüfer zur Begutachtung von Qualitätsmaßnahmen, Produktentwicklung, Herstellungsprozessen<br />
und von Programmen zur Erforschung der Kundenzufriedenheit zur Verfügung. Kein<br />
Unternehmen kann die ISO 9000 Registrierung beantragen, ohne die Genehmigung von den beauftragten<br />
Qualitätsgutachtern der BSI oder einer ähnlichen akkreditierten Stelle erhalten zu haben. Die ISO 9000<br />
Registrierung bildet einen objektiven Bericht von dritter Seite, um den Grad der Qualitätsanstrengung<br />
eines Lieferanten zu bestimmen.<br />
1992 wurden die Varian, Inc., Analytical Instruments nach den umfassendsten Standards der ISO<br />
9000 Serie registriert — ISO 9001. Die ISO 9001 Registrierung bedeutet, daß jedes Stadium unseres<br />
Qualitätssystems, einschließlich Produktentwicklung, Herstellung, Endkontrolle, Versand, sowie Teile<br />
und Zubehör rigoros gegen die anspruchsvollste Serie international anerkannter Standards geprüft worden<br />
ist. Das bedeutet, daß wir einen Qualitätsstandard bieten, auf den Sie heute und in Zukunft rechnen können.<br />
Unser Qualitätssystem hat die ISO 9001 Zertifikatnummer FM21797 erhalten.<br />
Die Qualitätssysteme der ISO 9001 Registrierung haben für unsere Kunden direkte Vorteile:<br />
♦ Wir können Instrumente schneller denn je zu Ihnen schicken. Eilbestellungen werden<br />
noch schneller durchgeführt.<br />
♦ Wir erfüllen Ihre Bestellungen pünktlich und vollständig.<br />
♦ Wir haben ein System kontinuierlichen Informationsrückflusses von unseren Kunden aufgebaut—wir<br />
kennen Ihre Anforderungen von heute und von morgen.<br />
♦ Wir haben Ihre Produktivität durch Halbierung der Systemfehlerraten und durch Verkürzung<br />
unserer Reaktionszeit im Service verbessert.<br />
♦ Wir haben kontinuierliche Verbesserungen in unserer Organisationsstruktur verankert, so<br />
daß wir künftig eine noch höhere Qualität erreichen können.<br />
♦ Wir haben die GLP Anforderungen in unsere Produkte und Dienstleistungen eingeführt,<br />
um Ihnen bei der Erfüllung Ihres behördlichen Abnahmeprotokolls zu helfen.<br />
Die ISO 9001 Registrierung ist nicht genug. Für uns wird Qualität durch unsere Kunden definiert.<br />
Wir sind nicht zufrieden, wenn Sie es nicht auch sind. Wir bemühen uns, die Anforderungen unserer<br />
Kunden durch unabhängige Untersuchungen, Anwendergruppen, Kundenberatungsgremien und unser<br />
Antwortprogramm “Gütesiegel der Qualität” zu verstehen, zusätzlich zu persönlichen Kundenkontakten.<br />
Unsere Produkte und unsere Prozesse sind so gestaltet, daß sie diese Anforderungen erfüllen.<br />
Wir wissen, daß Sie mehr als fortschrittliche Prozesse und ausgezeichnetes Anwendungswissen<br />
suchen. Sie suchen einen Partner, der Qualität von Weltklasse, Verläßlichkeit und Nutzen für Sie<br />
liefert— pünktlich und jederzeit.<br />
Unser oberstes Ziel ist, für Sie dieser Partner zu sein.<br />
03-914451-81:4 1 von 1
Varian, Inc. Analytical Instrument Garantie<br />
<strong>Hardware</strong>produkte<br />
Es wird garantiert, daß alle von Varian, Inc. verkauften<br />
analytischen Instrumente für die angegebene Zeitdauer<br />
und in Übereinstimmung mit den „Allgemeinen Lieferbedingungen“<br />
oder anderen schriftlichen Zusagen<br />
zwischen Varian und dem Kunden frei von Material- und<br />
Herstellungsfehlern sind. Die Garantiezeit beginnt mit<br />
dem Versanddatum von Varian zum Originalkunden.<br />
Wenn die Installation vom Kunden bezahlt oder im Verkaufspreis<br />
eingeschlossen ist, beginnt die Garantiezeit<br />
nach der abgeschlossenen Installation. Wenn der<br />
Kunde den Installationsbeginn später als 30 Tage<br />
nach erfolgter Lieferung ansetzt, oder wenn die<br />
Verzögerung dadurch verursacht wird, daß der Kunde<br />
nicht den ausreichenden Platz oder die Versorgungseinrichtungen<br />
beschafft oder Varian's<br />
berechtigte Anweisungen zur Installationsvorbereitung<br />
nicht einhält oder andere Versäumnisse des Kunden<br />
vorliegen, dann beginnt die Garantiezeit am 31. Tag<br />
nach dem Versanddatum. Darüber hinaus wird Varian<br />
dem Kunden den Arbeitsaufwand und andere Unkosten<br />
durch mehrfache oder fortgesetzte Installationsanforderungen<br />
berechnen.<br />
Softwareprodukte<br />
Wo Software innerhalb des Rahmens eines Lizenzabkommens<br />
zwischen dem Kunden und Varian geliefert<br />
wird, wird die Garantie genau entsprechend der<br />
zeitlichen Abmachung eingehalten.<br />
Besteht kein Lizenzabkommen und ist keine alternative<br />
Garantiezeit schriftlich zwischen Varian und dem Kunden<br />
festgelegt, gilt die Garantiezeit der „Allgemei-nen<br />
Lieferbedingungen“. Varian garantiert für solche Softwareprodukte,<br />
die mit Varian’s <strong>Hardware</strong> benutzt und<br />
richtig installiert sind oder zur Ausführung mit anderer<br />
von Varian angegebener <strong>Hardware</strong>, wie sie in der beigefügten<br />
Bedienungsanleitung beschrieben ist, daß sie im<br />
wesentlichen frei von solchen Defekten sind, die Fehler<br />
bei der Ausführung der jeweiligen Programmieranweisungen<br />
verursachen; Varian garantiert jedoch keine<br />
ununterbrochene oder fehlerfreie Arbeitsweise.<br />
Abhilfen<br />
Die einzige und ausschließliche Abhilfe in der <strong>Hardware</strong>garantie<br />
wird die Reparatur der Instrumentstörungen<br />
sein, die sich nach Varian's Ansicht auf Defekte in den<br />
Originalteilen oder bei der Herstellung zurückführen läßt<br />
oder, nach Varian's Wahl, der Austausch der entsprechenden<br />
defekten Teile oder die Erstattung eines fairen<br />
Teils des Kaufpreises des Instruments oder Zubehörs,<br />
vorausgesetzt, daß sich Varian alternativ dafür entscheidet.<br />
Reparatur oder Austausch unter Garantie verlängert<br />
nicht die ursprüngliche Garantiezeit.<br />
Reparatur oder Austausch unter Garantieansprüchen<br />
soll in Varian's ausschließlichem Ermessen entweder<br />
durch einen Serviceingenieur beim Kunden oder durch<br />
Ermächtigung des Kunden zum Einschicken des defekten<br />
Zubehörs oder Instruments an Varian oder einen<br />
Servicestützpunkt erfolgen. Der Kunde übernimmt die<br />
Verantwortung für Verlust oder Beschädigung im Transit<br />
und hat die Versandkosten im voraus zu bezahlen. Varian<br />
wird das Zubehör oder Instrument vorausbezahlt und<br />
versichert zum Kunden zurückschicken. Ansprüche für<br />
Verlust oder Beschädigung im Transit hat der Kunde zu<br />
erheben. Zur Korrektur von Anomalien des Softwarebetriebs<br />
wird Varian Software-Neuausgaben ausgeben,<br />
sofern Revisionen existieren und dies die beste<br />
Abhilfe ist.<br />
Garantieeinschränkungen<br />
Diese Garantie erfaßt nicht vom Kunden bereitgestellte<br />
Software, Ausrüstungen und Software, die von anderen<br />
Herstellern garantiert werden oder den Austausch entbehrlicher<br />
Teile und solcher von begrenzter Lebensdauer<br />
wie diese, aber nicht darauf beschränkt: Filter,<br />
Glaswaren, Instrument Statuslampen, Lampenquellen,<br />
Septen, Säulen, Sicherungen, Schreiberpapier und<br />
Tinte, Zerstäuber, Flußzellen, Kolben, Dichtungen, Fittings,<br />
Ventile, Brenner, Probenröhrchen, Sondeneinsätze,<br />
Druckköpfe, glasausgekleidetes Rohr, Leitungs-<br />
und Rohrfittings, Dewars für variable Temperaturen,<br />
Transferleitungen, flexible Disketten, Magnetbandkassetten,<br />
elektronische Vervielfacher, Hitzdrähte, Vakuum<br />
Gaskets, Sitzflächen und alle Teile, die den Proben und<br />
mobilen Phasen ausgesetzt sind.<br />
Diese Garantie erlischt bei eingetretenem Unfall, falscher<br />
Benutzung, Umbau, Mißbrauch, Vernachlässigung,<br />
Bruch, falscher Benutzung oder falscher Wartung,<br />
unbefugten oder falschen Modifikationen oder<br />
Basteleien, Benutzung in ungeeigneter physikalischer<br />
Umgebung, Benutzung mit marginaler Stromversorgung<br />
oder Benutzung mit anderen ungenügenden Einrichtungen<br />
oder Versorgungen. Mit vernünftiger Sorgfalt<br />
müssen Gefahren vermieden werden.<br />
Diese Garantie steht ausdrücklich anstelle von allen<br />
anderen angedeuteten Garantien und schließt sie<br />
aus, einschließlich, aber nicht beschränkt auf Garantien<br />
der Verkäuflichkeit und Eignung für einen besonderen<br />
Zweck, Gebrauch oder Anwendung und<br />
allen anderen Verpflichtungen oder Haftungen von<br />
Varian’s Seite, wenn nicht solche Garantien,<br />
Verpflichtungen oder Haftungen ausdrücklich<br />
schriftlich mit Varian vereinbart wurden.<br />
Beschränkung der Hilfen und Haftung<br />
Die hier gegebenen Hilfen sind einzig und allein Sache<br />
des Kunden. In keinem Fall wird Varian für<br />
versehentliche oder sich ergebende Schäden wie<br />
Nutzungsverlust, Produktionsverlust oder jeden anderen<br />
Verlust haften.<br />
03-914412-81:2 1 von 1
Systèmes de qualité chez Varian, Inc.<br />
Les normes ISO série 9000 ont été créées à Genève, en 1987, pour remédier à la confusion dans la<br />
définition des normes de qualité. Ces normes définissent un modèle de contrôle de qualité dans le domaine de<br />
la conception produit, du développement, de la production, des installations, des services et du support client.<br />
Elles constituent à présent la référence mondiale en matière de contrôle de qualité utilisée aux fins d'évaluation<br />
du niveau d'engagement d'une entreprise dans ce domaine et la valeur de ses systèmes de qualité.<br />
Plusieurs organisations de par le monde, telle la British Standards Institution (BSI) offrent les services<br />
d'auditeurs qualifiés et objectifs, chargés d'examiner les procédures de qualité, le développement de produit,<br />
les procédés de fabrication et les programmes de satisfaction du client.<br />
Aucune société ne peut se prévaloir de l'homologation ISO 9000, sans avoir reçu l'approbation des<br />
évaluateurs rigoureux de la BSI ou d'un organisme accréditif similaire. L'homologation ISO 9000 constitue<br />
une évaluation objective d'un tiers afin de déterminer le niveau d'engagement d'un fournisseur dans le domaine<br />
de la qualité.<br />
En 1992, Varian, Analytical Instruments a reçu l'homologation ISO 9001, normes des plus complètes<br />
de la série IS0 9000. En d'autres termes, chaque étape du processus de qualité, notamment le développement<br />
produit, la fabrication, le test final, l'expédition et les fournitures de pièces a étés oumis à un contrôle<br />
rigoureux par rapport à des normes extrêmement strictes, reconnues au niveau international. Nous sommes<br />
donc à même de vous garantir et de maintenir un niveau de qualité. Lesdites procédures ont reçu<br />
l'homologation ISO 9001 numéro FM21797.<br />
Les systèmes de qualité qui ont reçu l'homologation ISO 9001 présentent des avantages directs pour<br />
nos clients :<br />
♦ Nous sommes en mesure de vous livrer les instruments et de traiter les commandes en urgence<br />
dans des délais record.<br />
♦ Nous répondons pleinement et de manière rapide à vos commandes.<br />
♦ Nous avons mis en place un système de feedback continu de la part de nos clients et sommes<br />
conscients de vos attentes présentes et futures.<br />
♦ Nous avons amélioré votre productivité en réduisant de moitié les Temps de panne et en accélérant<br />
les temps de réponse.<br />
♦ Nous avons apporté des améliorations constantes au sein de notre structure, afin d'atteindre des<br />
niveaux de qualité optima, à l'avenir.<br />
♦ Nos produits et services reflètent les exigences BPL pour vous permettre de répondre aux<br />
impératifs de respect de la règlementation.<br />
Toutefois, nous ne nous contentons pas de l'homologation ISO 9001. Pour nous, la qualité est définie<br />
par nos clients. Nous ne sommes satisfaits que lorsque nos clients le sont. Nous nous efforçons de comprendre<br />
vos besoins, à l'aide d'évaluations externes, de groupes d'utilisateurs, de comités de conseil clients, et de notre<br />
programme “Hallmark of Quality”, outre les contacts directs que nous établissons avec chacun de nos clients.<br />
Nos produits et nos procédés sont conçus pour répondre à vos attentes.<br />
Nous n'ignorons pas que vous recherchez plus que des processus évolués et un savoir-faire d'exception<br />
dans le domaine des applications. Vous souhaitez conjuguer vos forces avec un partenaire s'étant engagé à<br />
offrir une qualité, une fiabilité et une valeur optimales, au moment où il faut et quand il faut.<br />
Notre principal objectif : devenir votre partenaire !<br />
03-914451-82:4 1 of 1
Garantie des instruments d'analyse Varian, Inc.<br />
Matériel<br />
Les instruments d'analyse vendus par Varian, Inc. sont<br />
garantis exempts de défauts de matière et de<br />
fabrication, pour les périodes spécifiées et<br />
conformément aux conditions mentionnées sur le recto<br />
du devis ou aux termes de tout autre accord écrit<br />
intervenu entre Varian et le client. La période de<br />
garantie commence à compter de la date de livraison<br />
de Varian au client d'origine. Cependant, lorsque le<br />
client a acquitté les frais d'installation ou que celle-ci est<br />
inclue dans le prix d'achat, la période de garantie<br />
commence à compter de l'achèvement de l'installation.<br />
Si le client prévoit le début de l'installation au-delà de<br />
30 jours après la livraison ou si ledit retard est dû à<br />
l'inaptitude du client à mettre à disposition les<br />
installations ou services ou au non respect des<br />
instructions de pré-installation de Varian ou à la suite<br />
desdites négligences du client, la période de garantie<br />
commence le 31ème jour à compter de la date de<br />
livraison. De plus, Varian fera supporter au client tout<br />
frais de main d'oeuvre et autres coûts résultant de<br />
multiples appels téléphoniques aux fins de suivi de<br />
l'installation.<br />
Logiciel<br />
Pour tout logiciel faisant l'objet d'un accord de licence<br />
conclu entre le client et Varian, la garantie sera<br />
strictement limitée aux termes dudit accord.<br />
En l'absence d'accord de licence et sauf accord écrit<br />
sur tout autre période de garantie entre Varian et le<br />
client, la période de garantie est telle que spécifiée sur<br />
le recto du devis de Varian. Sous réserve de leur<br />
installation et de leur utilisation correcte sur le matériel<br />
Varian ou tout autre matériel, tel que spécifié, Varian<br />
garantie le fonctionnement tel que décrit dans le manuel<br />
d'utilisation fourni avec le matériel et l'absence de<br />
défauts entraînant l'impossibilité d'exécuter des<br />
instructions de programmation respectives. Toutefois,<br />
Varian ne garantit pas un fonctionnement sans<br />
interruption et sans erreurs.<br />
Recours<br />
Le seul et unique recours relatif à la garantie du<br />
matériel se limite à la réparation suite à un mauvais<br />
fonctionnement de l'instrument, qui, de l'avis de Varian,<br />
est dû à des défauts des pièces d'origine ou de la<br />
fabrication, ou, à la discrétion de Varian, au<br />
remplacement des pièces défectueuses en question,<br />
sous réserve du choix de Varian de rembourser une<br />
part raisonnable du prix d'achat de l'instrument ou de<br />
l'accessoire.<br />
La répaation ou le remplacement sous garantie n'étend<br />
pas la période de garantie originale.<br />
La réparation ou le remplacement, aux termes d'un<br />
recours, est laissé à l'entière discrétion de Varian, soit<br />
par l'envoi d'un technicien de maintenance sur le site du<br />
client, soit en autorisant le client à retourner l'accessoire<br />
ou l'instrument défectueux à Varian, voire à l'envoyer à<br />
un service de maintenance désigné.<br />
Le client assumera la responsabilité de toute perte ou<br />
sinistre lors du transport et règlera à l'avance les frais<br />
de transport. Varian renverra l'accessoire ou<br />
l'instrument au client en port payé et assuré. Toute<br />
réclamation résultant d'une perte ou d'un sinistre<br />
intervenu lors du transport devra être faite par le client.<br />
Aux fins de correction des anomalies de fonctionnement<br />
du logiciel, Varian diffusera des mises à jour des<br />
logiciels, le cas échéant, et si de l'avis de Varian, elles<br />
constituent la mesure corrective la plus appropriée en la<br />
matière.<br />
Limitation de garantie<br />
Cette garantie ne couvre pas le logiciel fourni par le<br />
Client, les équipements ou logiciels garantis par un<br />
autre fabricant ni le remplacement des pièces<br />
consommables ou présentant une durée de vie limitée,<br />
notamment : filtres, verres, indicateurs d'état de<br />
l'instrument, lampes source, septa, colonnes, fusibles,<br />
papier graphique et encre, nébuliseurs cellules, pistons,<br />
joints, raccords, vannes, brûleurs, tubes<br />
d'échantillonnage, inserts de sonde, têtes d'impression,<br />
tubes à garniture de verre, dewars, lignes de transfert,<br />
disquettes, cassettes magnétiques, multiplicateurs<br />
d'électron, filaments, joints hermétiques, isolant et<br />
toutes les pièces en contact avec des échantillons et<br />
des phases mobiles.<br />
Ladite garantie est nulle en cas d'accident, de<br />
mauvaise utilisation,d'altération, de négligence, de bris,<br />
d'utilisation, maintenance voire de modifications<br />
inappropriées, d'utilisation dans un environnement<br />
inadapté, d'utilisation avec une alimentation marginale<br />
ou d'autres installations ou services inappropriés. Un<br />
certain nombre de précautions doivent être prises pour<br />
éviter tout accident.<br />
Ladite garantie se substitue et exclue expressément<br />
toute garantie expresse ou tacite, y compris mais<br />
ne se limitant pas aux garanties relatives à la<br />
qualité marchande du programme et la garantie de<br />
son aptitude à une utilisation ou une application<br />
particulière, ainsi que toutes les autres obligations<br />
ou engagements de la part de Varian, à moins que<br />
lesdites garanties,obligations ou engagements<br />
aient fait expressément l'objet d'un accord écrit<br />
deVarian.<br />
Limitations de garantie et de la<br />
responsabilité :<br />
Les recours exclusifs du client sont expressément<br />
énoncés aux présentes. En aucun cas, Varian ne<br />
sera tenu pour responsable de tout dommage<br />
provenant de l'utilisation ou en découlant, de toute<br />
impossibilité d'utilisation ou de déficit de<br />
production ou de tout autre perte y afférent.<br />
03-914412-82:2 1 of 1
I sistemi di qualità della Varian, Inc.<br />
La serie degli standard ISO 9000 è stata presentata nel 1987 a Ginevra con lo scopo di mettere ordine<br />
in un groviglio di definizioni contrastanti sulla qualità. Tali standard definiscono un modello che assicura la<br />
qualità nella progettazione, nello sviluppo, nella fabbricazione, nell'installazione e nella manutenzione dei<br />
prodotti nonché nel servizio assistenza clienti. Oggi come oggi essi costituiscono il punto di riferimento, a<br />
livello mondiale, ai fini della valutazione dell'impegno delle diverse aziende sul fronte della qualità e della<br />
validità dei sistemi di qualità da esse adottati.<br />
Diverse organizzazioni internazionali, come la British Standard Institution (BSI), dispongono<br />
d'ispettori certificati e imparziali per la valutazione delle procedure di qualità, dello sviluppo dei prodotti, dei<br />
processi di fabbricazione e dei programmi di soddisfazione del cliente. Nessuna azienda può asserire d'essere<br />
in possesso della certificazione ISO 9000 finché non dispone del marchio d'approvazione concesso dai<br />
rigorosi ispettori di qualità della BSI o di altri enti di controllo riconosciuti. La certificazione di conformità<br />
agli standard ISO 9000 costituisce un'attestazione imparziale di terzi del grado d'impegno di una determinata<br />
azienda nei confronti della qualità.<br />
Nel 1992 la Varian, Inc., Analytical Instruments ha ottenuto l'omologazione allo standard più<br />
completo della serie ISO 9000, l'ISO 9001. L'omologazione ISO 9001 significa che ogni singola fase del<br />
nostro sistema di qualità - compresi lo sviluppo del prodotto, la fabbricazione, le prove finali, la spedizione, i<br />
componenti e le forniture - è stata rigorosamente esaminata a fronte della serie più esigente di standard<br />
riconosciuti a livello mondiale, il che significa che rispondiamo pienamente ad uno standard qualitativo sul<br />
quale il cliente può contare oggi come nel futuro. Il nostro Sistema di Qualità ha ottenuto la certificazione ISO<br />
9001 col numero FM21797.<br />
I sistemi di qualità per i quali abbiamo ottenuto l'omologazione ISO 9001 comportano dei vantaggi<br />
diretti per i nostri clienti, ovvero:<br />
♦ Siamo in grado di consegnare gli strumenti più rapidamente rispetto al passato, con la possibilità<br />
di evadere le richieste d'emergenza con una rapidità ancora maggiore.<br />
♦ Gli ordini vengono evasi tempestivamente ed in modo completo.<br />
♦ Abbiamo messo a punto un sistema di riscontro costante con la clientela, in modo da poter essere<br />
sempre perfettamente informati sulle esigenze attuali e future del cliente.<br />
♦ Abbiamo migliorato la produttività del cliente riducendo della metà il tasso di guasti dei sistemi e<br />
velocizzando i tempi d'intervento della manutenzione.<br />
♦ Abbiamo introdotto un costante miglioramento nella nostra struttura organizzativa in modo da<br />
poter conseguire in futuro livelli qualitativi ancor più elevati.<br />
♦ Stiamo adeguando i nostri prodotti e servizi agli standard GLP per poter aiutare i clienti a<br />
soddisfare i requisiti di conformità posti loro dagli enti normativi.<br />
Ma l'omologazione ISO 9001 non è tutto. Per quanto ci riguarda, la qualità viene definita dai nostri<br />
clienti: noi siamo soddisfatti solo se lo è il cliente. Ci adoperiamo al massimo per comprendere le esigenze del<br />
cliente, ricorrendo ad indagini di società private, gruppi di utenti, associazioni di consumatori e con il nostro<br />
programma di risposta Hallmark of Quality - il marchio di garanzia di qualità - oltre che col contatto diretto<br />
coi singoli clienti. I nostri prodotti ed i nostri processi sono configurati per rispondere a tali esigenze.<br />
Sappiamo che a Voi i processi più avanzati e l'esperienza delle applicazioni di prim'ordine non<br />
bastano. Sappiamo che intendete unire le vostre forze con quelle d'un partner impegnato a fornire livelli<br />
qualitativi internazionali, affidabilità e valore, in modo tempestivo e costante.<br />
Quel partner vogliamo essere noi.<br />
03-914451-83:4 1 of 1
Garanzia sugli strumenti analitici Varian, Inc.<br />
Prodotti hardware<br />
Tutti gli strumenti analitici commercializzati dalla Varian,<br />
Inc. sono garantiti da eventuali difetti di materiali e di<br />
costruzione per i periodi ed alle condizioni indicati<br />
sull'offerta Varian o comunque concordati per iscritto tra<br />
la Varian ed il Cliente. Il periodo di garanzia decorre<br />
dalla data di spedizione dalla Varian al Cliente. Se<br />
l'installazione è a carico del Cliente o compresa nel<br />
prezzo d'acquisto, il periodo di garanzia decorre dalla<br />
fine dell'installazione. Se il Cliente prevede di procedere<br />
all'installazione oltre i 30 giorni dalla consegna o se tale<br />
ritardo è imputabile alla mancata messa a disposizione,<br />
da parte del Cliente, di locali o strumenti idonei o al<br />
mancato rispetto delle ragionevoli istruzioni di<br />
preinstallazione della Varian o comunque a fatti<br />
imputabili al Cliente, il periodo di garanzia decorre dal<br />
31° giorno dalla data di spedizione. Inoltre, la Varian<br />
addebiterà al Cliente le spese di manodopera e d'altro<br />
tipo sostenute per interventi d'installazione multipli o di<br />
verifica.<br />
Prodotti software<br />
Se il software viene fornito nell'ambito d'un contratto di<br />
licenza stipulato tra la Varian e il Cliente, trovano<br />
applicazione in via esclusiva le garanzie previste dal<br />
contratto.<br />
In assenza d'un contratto di licenza e salvo diverso<br />
accordo scritto tra la Varian e il Cliente, vale il periodo di<br />
garanzia indicato nell'offerta della Varian. La Varian<br />
garantisce che i prodotti software, purché regolarmente<br />
utilizzati ed installati su hardware Varian o d'altre<br />
marche da essa indicate, hanno le prestazioni descritte<br />
nel <strong>Manual</strong>e d'uso fornito a corredo del software e che<br />
sono sostanzialmente esenti da difetti che impediscano<br />
l'esecuzione delle rispettive istruzioni di programma. La<br />
Varian non garantisce alcun funzionamento ininterrotto<br />
o senza errori.<br />
Interventi Tecnici<br />
Gli unici interventi previsti dalla garanzia sull'hardware<br />
sono o la riparazione dei malfunzionamenti dello<br />
strumento che, a giudizio della Varian, siano dovuti o<br />
riconducibili a difetti di costruzione dei materiali originali<br />
o, a discrezione della Varian, la sostituzione dei<br />
componenti difettosi, fermo restando che la Varian<br />
potrà, in alternativa, optare per il rimborso di una<br />
congrua parte del prezzo d'acquisto dello strumento o<br />
dell'accessorio difettosi.<br />
La riparazione o la sostituzione in garanzia non valgono<br />
a prorogare in alcun modo il periodo di garanzia<br />
originariamente previsto.<br />
Le riparazioni o le sostituzioni in garanzia verranno<br />
effettuate, ad esclusiva discrezione della Varian,<br />
inviando sul posto un tecnico o autorizzando la resa<br />
dello strumento o dell'accessorio difettoso alla Varian o<br />
al centro d'assistenza indicato dalla Varian. Il Cliente<br />
sarà responsabile di eventuali danni o perdite subiti<br />
durante il trasporto dallo strumento o dall'accessorio<br />
reso e dovrà pagare le spese di spedizione in via<br />
anticipata. La Varian restituirà al Cliente lo strumento o<br />
l'accessorio in porto franco con assicurazione a proprio<br />
carico. Sono a cura del Cliente gli eventuali reclami per<br />
perdite o danni di trasporto. Per eliminare eventuali<br />
anomalie di funzionamento del software, la Varian<br />
fornirà le eventuali revisioni del software disponibili<br />
qualora a suo giudizio siano il rimedio migliore.<br />
Limitazioni della garanzia<br />
La presente garanzia non copre il software fornito dal<br />
Cliente, le attrezzature e il software garantiti da altre<br />
case né la sostituzione del materiale di consumo o di<br />
durata limitata, quali, senza intento limitativo, filtri,<br />
provette, spie di stato dello strumento, voltmetri, setti,<br />
colonne, fusibili, carta ed inchiosto , nebulizzatori, celle<br />
a flusso, pistoni, guarnizioni, pezzi speciali, valvole,<br />
bruciatori, tubi di campionamento, inserti per sonde,<br />
testine di stampa, tubazioni rivestite in vetro, raccordi<br />
per tubi, dewars a temperatura variabile, linee di<br />
trasferimento, dischi flessibili, cassette a nastro<br />
magnetico, fotomoltiplicatori, filamenti, guarnizioni per<br />
vuoto, e tutte le parti esposte all'azione dei campioni o<br />
delle fasi mobili.<br />
La presente garanzia decade in caso d'incidente, abuso,<br />
modifica, uso improprio, incuria, rottura, funzionamento<br />
o manutenzione impropri, modifiche non autorizzate od<br />
improprie o manomissioni, impiego in ambiente fisico<br />
non idoneo, impiego con alimentazione ai limiti o con<br />
altri mezzi o dispositivi inadeguati. Devono inoltre<br />
essere adottate tutte le misure ragionevoli atte ad<br />
evitare ogni e qualsiasi rischio.<br />
La presente garanzia sostituisce ed esclude<br />
espressamente ogni altra garanzia espressa o<br />
implicita, comprese - senz'intento limitativo - le<br />
garanzie di commerciabilità ed idoneità a scopi,<br />
impieghi od applicazioni specifici nonché tutti gli<br />
altri obblighi o responsabilità della Varian, a meno<br />
che le altre garanzie, obblighi o responsabilità in<br />
parola non siano stati accettati per iscritto dalla<br />
Varian.<br />
Limitazione degli interventi e delle<br />
responsabilità<br />
Quelli qui contemplati sono gli unici ed esclusivi<br />
interventi cui ha diritto il Cliente. In nessun caso la<br />
Varian sarà responsabile per danni indiretti o<br />
consequenziali, mancata disponibilità, perdita di<br />
produzione o altre perdite subite.<br />
03-914412-83:2 1 of 1
Sistemas de calidad en Varian, Inc.<br />
Las normas ISO 9000 fueron creadas en Ginebra en 1987 para acabar con una multitud de<br />
definiciones de calidad contradictorias. Estas normas constituyen un modelo de sistemas de garantía de<br />
calidad en el diseño, desarrollo, fabricación, instalación, mantenimiento y asistencia técnica de productos. Se<br />
han convertido en el banco de pruebas de garantía de calidad a nivel mundial y miden el grado de<br />
compromiso de una empresa con la calidad, así como el alcance de sus sistemas de calidad.<br />
Diversas organizaciones mundiales, como la British Standards Institution (BSI), proporcionan<br />
expertos titulados de probada objetividad para investigar procedimientos de calidad, desarrollo de productos,<br />
procesos de fabricación y programas de servicio al cliente.<br />
Varian, Inc., Analytical Instruments fue registrada en 1992 con la norma más exhaustiva de la serie<br />
ISO 9000: la ISO 9001. La certificación por la norma ISO 9001 significa que todas las etapas de nuestro<br />
sistema de calidad, como el desarrollo del producto, la fabricación, las pruebas finales, la expedición, así<br />
como los suministros y recambios, han sido examinados rigurosamente respecto a las normas más exigentes<br />
reconocidas internacionalmente. Significa que nos comprometemos a mantener un nivel de calidad con el que<br />
podrá siempre contar, hoy y en el futuro. Il nostro Sistema di Qualità ha ottenuto la certificazione ISO 9001<br />
col numero FM21797.<br />
Los sistemas de calidad que nos valieron la certificación ISO 9001 representan beneficios directos<br />
para nuestros clientes:<br />
♦ haremos llegar nuestros aparatos más rápidamente que nunca. Podemos cumplir con pedidos<br />
urgentes aún más deprisa.<br />
♦ Atenderemos sus pedidos de forma rápida y completa.<br />
♦ Aplicamos un sistema de retorno de información permanente con nuestros clientes: siempre<br />
somos conscientes de sus necesidades, actuales o futuras.<br />
♦ Hemos mejorado la productividad de nuestros clientes, disminuyendo el índice de defectos a la<br />
mitad y acortando el tiempo de respuesta del servicio de mantenimiento.<br />
♦ Hemos integrado sistemas de mejora continuada en nuestra organización, de forma que podremos<br />
obtener niveles de calidad aún superiores en un futuro.<br />
♦ Estamos integrando los requerimientos GLP en nuestros productos y servicios para ayudarle a<br />
cumplir con requerimientos de conformidad obligatorios.<br />
La conformidad con ISO 9001 no nos basta. Para nosotros, los criterios de calidad los definen<br />
nuestros clientes. No estaremos satisfechos hasta que usted lo esté. Intentamos comprender las necesidades de<br />
nuestros clientes, a través de entidades independientes, grupos de usuarios, oficinas de asesoramiento a<br />
usuarios y nuestro programa de respuesta “Hallmark of Quality”, además de los contactos directos con<br />
nuestros clientes. Nuestros productos y procedimientos están diseñados para poder corresponder a sus<br />
necesidades.<br />
Sabemos que nuestros clientes buscan más que experiencia en procesos avanzados y aplicaciones<br />
punteras. Se trata de unir fuerzas con un socio que se compromete a entregar calidad reconocida a nivel<br />
mundial, fiabilidad y valor, a tiempo, siempre.<br />
Nuestra meta principal es ser ese socio.<br />
03-914451-84:4 1 of 1
Instrumentos analíticos Varian, Inc. Garantía<br />
Productos hardware<br />
Todos los instrumentos analíticos vendidos por Varian,<br />
Inc. están garantizados contra defectos de materiales y<br />
de fabricación por la duración especificada y de acuerdo<br />
con los términos establecidos en las ofertas de Varian, o<br />
según lo especificado en el acuerdo escrito entre Varian<br />
y el cliente. El plazo de garantía comienza a partir de la<br />
fecha de envío del material de Varian al cliente original.<br />
Sin embargo, si la instalación ha sido pagada por el<br />
cliente o incluida en el precio de compra, el plazo de<br />
garantía comenzará a partir de la fecha de conclusión de<br />
la instalación. Si el cliente especifica que la instalación<br />
comenzará 30 días después de la entrega, o si este plazo<br />
se genera por la imposibilidad por parte del cliente de<br />
proveer los medios necesarios o la falta de cumplimiento<br />
de las directrices de preinstalación de Varian, o cualquier<br />
otra omisión por parte del cliente, el plazo de garantía<br />
comenzará el trigésimoprimer día a partir del envío.<br />
Además, Varian cobrará al cliente por trabajos y otros<br />
gastos relacionados con intervenciones de servicio de<br />
instalación múltiples o tardías.<br />
Productos de software<br />
Cuando el software se suministra dentro del marco de<br />
una licencia de utilización acordada entre Varian y el<br />
cliente, cualquier garantía estará estrictamente limitada a<br />
los términos del citado acuerdo. En ausencia de una<br />
licencia de utilización y a no ser que exista un acuerdo de<br />
período de garantía por escrito entre Varian y el cliente,<br />
el período de garantía será el fijado de acuerdo con los<br />
términos de Varian que se citan. Varian garantiza estos<br />
productos de software si se instalan y usan con hardware<br />
Varian, u otro tipo de hardware en el que Varian certifique<br />
que funcionan según lo descrito en <strong>Manual</strong> de<br />
instrucciones, y que esté libre de defectos que impidan la<br />
ejecución de instrucciones de programación. Sin<br />
embargo, Varian no garantiza la utilización ininterrumpida<br />
o libre de errores.<br />
Recursos<br />
El único y exclusivo recurso en cuanto a hardware bajo<br />
garantía será reparar los defectos del aparato, que, en<br />
opinión de Varian, sean claramente imputables a<br />
defectos de los materiales originales o de fabricación, o<br />
sustituir los componentes defectuosos, pudiendo Varian<br />
optar por reembolsar una parte equitativa del precio de<br />
compra del aparato o componente.<br />
Las reparaciones o sustituciones en período de garantía<br />
no prolongan el período de garantía original.<br />
Las reparaciones o sustituciones en período de garantía<br />
se efectuarán, a criterio exclusivo de Varian, enviando un<br />
representante de servicio posventa a la instalación, o<br />
autorizando al cliente a reexpedir el componente o<br />
aparato defectuoso a Varian o a un servicio de<br />
reparación designado. El cliente será responsable sobre<br />
pérdidas o daños de transporte, y pagará los costes de<br />
dicho transporte. Varian reexpedirá el componente o<br />
aparato a portes pagados y con seguro de transporte.<br />
Las demandas por daños o pérdidas deberán ser<br />
gestionadas por el cliente. Para corregir anomalías de<br />
funcionamiento de software, Varian editará revisiones de<br />
software, siempre y cuando éstas estén disponibles, y<br />
cuando, en opinión de Varian, este sea el remedio mas<br />
eficaz.<br />
Limitación de garantía<br />
Esta garantía no cubre software provisto por el cliente,<br />
equipos y software garantizados por otros fabricantes,<br />
consumibles o artículos de duración de vida limitada,<br />
como son, entre otros: filtros, elementos de vidrio, pilotos,<br />
lámparas, diafragmas, columnas, fusibles, papel y tinta<br />
de gráficos, nebulizadores, células de flujo, pistones,<br />
cierres, juntas, válvulas, quemadores, tubos de muestras,<br />
inserciones de sondas, cabezales de impresión, tubos de<br />
vidrio, juntas de tubo, dispositivos de temperatura<br />
variable, líneas de transferencia, disquetes, cintas<br />
magnéticas, multiplicadores de electrones, filamentos,<br />
juntas de vacío, soportes y todos los componentes en<br />
contacto con muestras y partes móviles.<br />
Esta garantía no tendrá efecto en los casos de accidente,<br />
abuso, alteración, utilización incorrecta, negligencia,<br />
rotura, mantenimiento o uso inadecuados, modificaciones<br />
inadecuadas o no autorizadas, uso de la fuerza, uso en<br />
un entorno inadecuado, funcionamiento con una<br />
alimentación defectuosa o el uso con medios<br />
inadecuados. Es necesario tomar las precauciones<br />
adecuadas para evitar riesgos.<br />
Las garantías de los productos de software de Varian<br />
sustituyen y excluyen cualquier otra garantía,<br />
implícita o explícita, incluidas pero sin limitación, las<br />
garantías de comerciabilidad, adecuación a un fin,<br />
uso o aplicación en particular, y todas las demás<br />
obligaciones y responsabilidades por parte de<br />
Varian, a no ser que estas garantías, obligaciones y<br />
responsabilidades sean otorgadas expresamente y<br />
por escrito por Varian.<br />
Limitaciones de recursos y<br />
responsabilidades<br />
Los recursos provistos en lo citado son única y<br />
exclusivamente los del cliente. Varian no podrá ser<br />
responsable en ningún caso por daños imprevistos o<br />
consecuencias, pérdida de uso, pérdida de<br />
producción o cualquier otra pérdida incurrida.<br />
03-914412-84:2 1 of 1
Safety<br />
Information<br />
Operating Instructions<br />
This instruction manual is provided to help you establish operating conditions which will permit safe and efficient use<br />
of your equipment. Special considerations and precautions are also described in the manual, which appear in the form<br />
of NOTES, CAUTIONS, and WARNINGS as described below. It is important that you operate your equipment in<br />
accordance with this instruction manual and any additional information which may be provided by Varian. Address<br />
any questions regarding the safe and proper use of your equipment to your local Varian office.<br />
NOTE<br />
Information to aid you in obtaining<br />
optimal performance from your<br />
instrument.<br />
Alerts you to situations that may<br />
cause moderate injury and/or<br />
equipment damage, and how to<br />
avoid these situations.<br />
Warning Symbol Warning Description<br />
Alerts you to potentially hazardous<br />
situations that could result in<br />
serious injury, and how to avoid<br />
these situations.<br />
Hazardous voltages are present inside instrument. Disconnect from<br />
main power before removing screw-attached panels.<br />
Hazardous chemicals may be present. Avoid contact, especially<br />
when replenishing reservoirs. Use proper eye and skin protection.<br />
Very hot or cryogenically cold surfaces may be exposed. Use proper<br />
skin protection.<br />
Eye damage could occur either from flying particles, chemicals, or<br />
UV radiation. Use proper eye and face protection.<br />
The potential for fire may be present. Follow manual instructions for<br />
safe operation.<br />
The potential for explosion may exist because of type of gas or<br />
liquid used.<br />
Ionizing radiation source is present. Follow manual instructions for<br />
safe operation.<br />
Keep hands and fingers away.<br />
03-914603-00:11 1 of 4
General Safety Precautions<br />
Follow these safety practices to ensure safe equipment operation.<br />
Perform periodic leak checks on all supply lines and pneumatic plumbing.<br />
Do not allow gas lines to become kinked or punctured. Place lines away from foot traffic<br />
and extreme heat or cold.<br />
Store organic solvents in fireproof, vented and clearly labeled cabinets so they are easily<br />
identified as toxic and/or flammable materials.<br />
Do not accumulate waste solvents. Dispose of such materials through a regulated disposal<br />
program and not through municipal sewage lines.<br />
NOTICE: This instrument has been tested per applicable requirements of EMC Directive as required to<br />
carry the European Union CE Mark. As such, this equipment may be susceptible to<br />
radiation/interference levels or frequencies which are not within the tested limits.<br />
Electrical Hazards<br />
This instrument is designed for chromatographic analysis of appropriately prepared samples. It<br />
must be operated using appropriate gases and/or solvents and within specified maximum<br />
ranges for pressure, flows, and temperatures as described in this manual. If the equipment is<br />
used in a manner not specified by the manufacturer, the protection provided by the equipment<br />
may be impaired.<br />
It is the responsibility of the Customer to inform Varian Customer Support Representatives if<br />
the instrument has been used for the analysis of hazardous biological, radioactive, or toxic<br />
samples, prior to any instrument service being performed or when an instrument is being<br />
returned to the Service Center for repair.<br />
Disconnect the instrument from all power sources before removing protective panels to avoid<br />
exposure to potentially dangerous voltages.<br />
When it is necessary to use a non-original power cord plug, make sure the replacement cord adheres<br />
to the color coding and polarity described in the manual and all local building safety codes.<br />
Replace blown fuses with fuses of the size and rating stipulated on the fuse panel or in the manual.<br />
Replace faulty or frayed power cords immediately with the same type and rating.<br />
Make sure that voltage sources and line voltage match the value for which the instrument is wired.<br />
Compressed Gas Cylinders<br />
Store and handle compressed gases carefully and in strict adherence to safety codes.<br />
Secure cylinders to an immovable structure or wall.<br />
Store and move cylinders in an upright, vertical position. Before transport, remove regulators<br />
and install cylinder cap.<br />
Store cylinders in a well-ventilated area away from heat, direct sunshine, freezing<br />
temperatures, and ignition sources.<br />
Mark cylinders clearly so there is no doubt as to their contents.<br />
Use only approved regulators and connections.<br />
Use only connector tubing that is chromatographically clean (Varian Part Number 03-918326-00)<br />
and has a pressure rating significantly greater than the highest outlet pressure from the regulator.<br />
2 of 4 03-914603-00:11
<strong>GC</strong> Safety Practices<br />
Exhaust System<br />
No special exhaust ducting is necessary for <strong>GC</strong><br />
detectors installed in a well-ventilated room except<br />
when the detectors are used to test hazardous<br />
chemicals. If you do install ducting:<br />
Use only fireproof ducting.<br />
Install a blower at the duct outlet.<br />
Locate duct intakes such that their vibration or air<br />
movement does not effect detector operation.<br />
Check periodically for proper operation of the duct.<br />
Ensure proper ventilation in lab area.<br />
Radioactive Source Detectors<br />
Read carefully and comply with all NOTES,<br />
CAUTIONS, and WARNINGS in the Ni 63 ECD<br />
manual.<br />
Perform the tests for removable radioactive<br />
contamination described in the Ni 63 ECD manual.<br />
Comply with leak test schedules and procedures.<br />
Burn Hazard<br />
Heated or cryogenically cooled zones of gas<br />
chromatographs can remain hot or cold for a<br />
considerable time after instrument power is turned off.<br />
To prevent painful burns, ensure that all heated or<br />
cooled areas have returned to room temperature or wear<br />
adequate hand protection before you touch potentially<br />
hot or cold surfaces.<br />
LC Safety Practices<br />
High Pressure Hazard<br />
• If a line ruptures, a relief device opens, or a<br />
valve opens accidentally under pressure,<br />
potentially hazardous high liquid pressures can<br />
be generated by the pump causing a high<br />
velocity stream of volatile and/or toxic liquids.<br />
Wear face protection when you inject samples or<br />
perform routine maintenance.<br />
Never open a solvent line or valve under pressure.<br />
Stop the pump first and let the pressure drop to<br />
zero.<br />
Use shatter-proof reservoirs capable of operating at<br />
50-60 psi.<br />
Keep the reservoir enclosure closed when the<br />
reservoir is under pressure.<br />
Read and adhere to all NOTES, CAUTIONS, and<br />
WARNINGS in the manual.<br />
Flash Chromatography<br />
The operator should be familiar with the physicochemical<br />
properties of the components of the mobile<br />
phase.<br />
Keep solvents from direct contact with the<br />
polyurethane supply tubing as certain solvents will<br />
cause weakening and leaks with possible bursting.<br />
All components of the system should be connected to a<br />
common power supply and common ground. This<br />
ground must be a true ground rather than a floating<br />
ground.<br />
Non-polar solvents can develop a static charge when<br />
pumped through the system. All vessels that contain<br />
mobile phase (including tubing and collection vessels)<br />
must be grounded to dissipate static electricity.<br />
Employ static measuring and static discharge devices<br />
(e.g., air ionizers) to safeguard against the buildup of<br />
static electricity.<br />
Ultraviolet Radiation<br />
Liquid chromatograph detectors that use an ultraviolet<br />
light source have shielding to prevent radiation<br />
exposure to personnel.<br />
For continued protection:<br />
Ensure that protective lamp covers of variable and<br />
fixed wavelength detectors are in place during<br />
operation.<br />
Do not look directly into detector fluid cells or at<br />
the UV light source. When inspecting the light<br />
source or fluid cell, always use protective eye<br />
covering such as borosilicate glass or polystyrene.<br />
The following is a Federal Communications<br />
Commission advisory: This equipment has been<br />
tested and found to comply with the limits of a Class A<br />
computing device, pursuant to part 15 of the FCC<br />
Rules. These limits are designed to provide reasonable<br />
protection against harmful interference when the<br />
equipment is operated in a commercial environment.<br />
This equipment generates, uses, and can radiate radio<br />
frequency energy and, if not installed and used in<br />
accordance with the instruction manual, may cause<br />
harmful interference to radio communications.<br />
<strong>Operation</strong> of this equipment in a residential area is<br />
likely to cause harmful interference in which case the<br />
user will be required to correct the interference at his<br />
own expense.<br />
03-914603-00:11 3 of 4
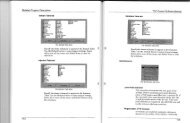
Spare Parts Availability<br />
It is the policy of Varian to provide operational spare parts for any<br />
instrument and major accessory for a period of five (5) years after<br />
shipment of the final production run of that instrument. Spare parts will<br />
be available after this five (5) year period but on an as available basis.<br />
<strong>Operation</strong>al spare parts are defined as those individual electrical or<br />
mechanical parts that are susceptible to failure during their normal<br />
operation. Examples include relays, lamps, temperature probes, detector<br />
elements, motors, etc. Sheet metal parts, structural members or<br />
assemblies and castings, printed circuit boards, and functional modules<br />
are normally capable of being rebuilt to like-new condition throughout<br />
their useful life and therefore will be supplied only on an as available<br />
basis after the final production run of the instrument.<br />
Varian, Inc. Analytical Instruments Sales Offices<br />
Service Availability<br />
Varian provides a variety of services<br />
to support its customers after<br />
warranty expiration. Repair service<br />
can be provided by attractively priced<br />
service contracts or on a time and<br />
material basis. Technical support and<br />
training can be provided by qualified<br />
personnel on both a contractual or asneeded<br />
basis.<br />
For Sales or Service assistance and to order Parts and Supplies, contact your local Varian office.<br />
Argentina<br />
Buenos Aires<br />
Tel. +54.11.4.783.5306<br />
Australia<br />
Mulgrave, Victoria<br />
Tel. +61.3.9566.1134<br />
Austria<br />
Vösendorf bei Wien<br />
Tel. +43.1.699.9669<br />
Benelux<br />
Bergen Op Zoom<br />
Tel. +31.164.282.800<br />
Brazil and Latin America (S)<br />
São Paulo<br />
Tel. +55.11.820.0444<br />
Canada<br />
Mississauga, Ontario<br />
Tel. 800.387.2216<br />
China<br />
Beijing<br />
Tel. +86.106209.1727<br />
Europe<br />
Middelburg, The Netherlands<br />
Tel. +31.118.671.000<br />
France<br />
Les Ulis Cédex<br />
Tel. +33.1.6986.3838<br />
Germany<br />
Darmstadt<br />
Tel. +49.6151.7030<br />
India<br />
Mumbai<br />
Tel. +91.22.857.0787/88/89<br />
Italy<br />
Torino<br />
Tel. +39.011.997.9111<br />
Japan<br />
Tokyo<br />
Tel. +81.3.5232.1211<br />
Korea<br />
Seoul<br />
Tel. +82.2.345.22452<br />
Mexico and Latin America (N)<br />
Mexico City<br />
Tel. +52.5.523.9465<br />
Russian Federation<br />
Moscow<br />
Tel. +7.095.937.4280<br />
Spain<br />
Madrid<br />
Tel. +34.91.472.7612<br />
Sweden<br />
Solna<br />
Tel. +46.8.445.1620<br />
Switzerland<br />
Varian AG<br />
Tel. +41.848.803.800<br />
Taiwan<br />
Taipei Hsien<br />
Tel. +886.2.698.9555<br />
United Kingdom and<br />
Ireland<br />
Walton-on-Thames<br />
Tel. +44.1932.898000<br />
Venezuela<br />
Valencia<br />
Tel. +58.41.257.608<br />
United States<br />
Walnut Creek, California, USA<br />
Tel. +1.800.926.3000<br />
(<strong>GC</strong> and <strong>GC</strong>/<strong>MS</strong>)<br />
Tel. +1.800.367.4752<br />
(LC)<br />
www.varianinc.com<br />
4 of 4 03-914603-00:11
Sicherheitsinformationen<br />
Arbeitsanleitungen<br />
Diese Arbeitsanleitung will Ihnen bei der Aufstellung solcher Arbeitsbedingungen helfen, die einen sicheren und<br />
wirkungsvollen Gebrauch Ihrer Geräte ermöglichen. Besondere Überlegungen und Vorsichtsmaßnahmen erscheinen<br />
in diesem Handbuch in Form von HINWEIS, ACHTUNG und WARNUNG, wie unten beschrieben. Es ist wichtig, daß<br />
Sie Ihr Gerät in Übereinstimmung mit dieser Arbeitsanleitung und allen möglichen zusätzlichen Informationen von<br />
Varian betreiben. Alle Fragen bezüglich Sicherheit und Handhabung Ihres Gerätes richten Sie an Ihr Varian Büro.<br />
HINWEIS<br />
Eine Information, um einen optimalen<br />
Wirkungsgrad Ihres Instruments zu<br />
erzielen.<br />
ACHTUNG<br />
Weist auf Situationen, die zu mäßiger<br />
Beeinträchtigung und/oder zu<br />
Geräteschäden führen und auf die<br />
Vermeidung dieser Situationen hin.<br />
Warnungssymbol Warnungsbeschreibung<br />
WARNUNG<br />
ELEKTRISCHER<br />
SCHLAG<br />
WARNUNG<br />
VERBRENNUNGSGEFAHR<br />
WARNUNG<br />
FEUERGEFAHR<br />
WARNUNG<br />
EXPLOSIONSGEFAHR<br />
WARNUNG<br />
STRAHLUNGSQUELLE<br />
WARNUNG<br />
BEWEGTE TEILE<br />
WARNUNG<br />
Weist auf mögliche Gefahrensituationen,<br />
die zu ernsthaften Verletzungen führen<br />
können und auf die Vermeidung dieser<br />
Situationen hin.<br />
Gefährliche Spannungen bestehen innerhalb des Instruments. Trennen Sie das<br />
Gerät vom Netz, bevor Sie abschraubbare Paneele entfernen.<br />
Gefährliche Chemikalien können vorhanden sein. Vermeiden Sie jeden Kontakt,<br />
besonders beim Auffüllen der Reservoirs. Benutzen Sie wirksamen<br />
Augen und Hautschutz.<br />
Sehr heiße oder tiefstgekühlte Oberflächen können freigelegt sein. Benutzen<br />
Sie einen wirksamen Hautschutz.<br />
Herumfliegende Partikel, Chemikalien oder UV-Strahlung können<br />
Augenschäden verursachen. Tragen Sie deshalb einen geeigneten Schutz für<br />
Augen und Gesicht.<br />
Es besteht eine mögliche Feuergefahr. Beachten Sie die Vorschriften im<br />
Handbuch für eine gefahrlose Benutzung.<br />
Eine mögliche Explosionsgefahr besteht infolge der benutzten Gas- oder<br />
Flüssigkeitsart.<br />
Es besteht eine ionisierende Strahlungsquelle. Beachten Sie die Vorschriften<br />
im Handbuch für eine gefahrlose Benutzung.<br />
Bleiben Sie mit Ihren Händen und Fingern weg.<br />
03-914603-81:11 1 of 4
Allgemeine Sicherheitsmaßnahmen<br />
Befolgen Sie diese Sicherheitspraktiken für eine gefahrlose Gerätebenutzung.<br />
Prüfen Sie regelmäßig alle Versorgungs und Pneumatikleitungen auf Lecks.<br />
Gasleitungen dürfen nicht geknickt oder angestochen werden. Verlegen Sie die Leitungen außerhalb<br />
von Laufwegen und abseits von extremer Hitze oder Kälte.<br />
Lagern Sie organische Lösungsmittel in feuerfesten, belüfteten und eindeutig bezeichneten<br />
Schränken, damit sie leicht als toxische und/oder brennbare Materialien erkannt werden.<br />
Sammeln Sie keine Lösungsmittelabfälle. Entsorgen Sie solche Materialien über ein geregeltes Entsorgungsprogramm<br />
und nicht über die öffentlichen Abwasserleitungen.<br />
HINWEIS: Dies Instrument wurde nach den zutreffenden Vorschriften der EMC Direktive getestet, die<br />
zum Führen des CE Zeichens der Europäischen Union berechtigen. Dieses Gerät kann an sich<br />
auf Strahlungs-/Störpegel oder Frequenzen außerhalb der getesteten Grenzen reagieren.<br />
WARNUNG<br />
WARNUNG<br />
Elektrische Gefahren<br />
Dies Instrument ist für chromatographische Analysen entsprechend präparierter Proben gedacht.<br />
Es muß mit geeigneten Gasen und/oder Lösungsmitteln und innerhalb der im Handbuch<br />
spezifizierten maximalen Werte für Druck, Flüsse und Temperaturen betrieben werden.<br />
Der Kunde ist vor der Durchführung irgendeines Geräteservices verpflichtet den Varian<br />
Kundendienstvertreter zu informieren, wenn das Instrument für Analysen gefährlicher<br />
biologischer, radioaktiver oder toxischer Proben benutzt worden ist.<br />
Lösen Sie das Instrument von allen Stromquellen, bevor Sie Schutzpaneele entfernen, damit Sie nicht mit potentiell<br />
gefährlichen Spannungen in Berührung kommen.<br />
Wenn ein Nicht-Original Netzkabelstecker benutzt werden muß, muß das Austauschkabel die im Handbuch<br />
beschriebene Farbcodierung und Polarität beibehalten und alle örtlichen Sicherheitsvorschriften erfüllen.<br />
Ersetzen Sie durchgebrannte Sicherungen nur mit Sicherungen der Werte, die am Sicherungspaneel oder im<br />
Handbuch angegeben sind.<br />
Ersetzen Sie fehlerhafte oder durchgescheuerte Netzkabel sofort durch Kabel gleicher Art.<br />
Sorgen Sie dafür, daß Spannungsquellen und die Netzspannung den gleichen Wert haben, für den das Instrument<br />
verdrahtet ist.<br />
Gasdruckflaschen<br />
Lagern und handhaben Sie komprimierte Gase vorsichtig und in strikter Einhaltung der<br />
Sicherheitsvorschriften.<br />
Befestigen Sie die Gasflaschen an feststehenden Aufbauten oder an Wänden.<br />
Lagern und transportieren Sie Gasflaschen in aufrechter Stellung. Druckregler zuvor abnehmen.<br />
Lagern Sie Gasflaschen in gut durchlüfteten Räumen, weit genug weg von Heizungen, direktem<br />
Sonnenschein, Frosttemperaturen und Entzündungszonen.<br />
Kennzeichnen Sie die Flaschen so eindeutig, daß kein Zweifel über deren Inhalt bestehen kann.<br />
Benutzen Sie nur geprüfte Druckminderer und Verbindungsstücke.<br />
Benutzen Sie nur chromatographisch reines Verbindungsrohr (Varian Part Number 03-918326-00), das<br />
wesentlich höheren Druck als den höchsten Ausgangsdruck des Druckminderers aushält.<br />
2 of 4 03-914603-81:11
<strong>GC</strong> Sicherheitspraktiken<br />
Abgassystem<br />
Für <strong>GC</strong> Detektoren, die in einem gut durchlüfteten<br />
Raum installiert sind, ist keine spezielle Abgasführung<br />
erforderlich, außer wenn die Detektoren zum Testen<br />
gefährlicher Chemikalien benutzt werden. Wenn Sie<br />
eine Abgasführung installieren:<br />
Benutzen Sie nur feuerfeste Führungen.<br />
Installieren Sie ein Gebläse am Ausgang.<br />
Ordnen Sie die Ansaugöffnung so an, daß ihre Erschütterungen<br />
oder Luftströmungen nicht die Detektorfunktion<br />
beeinträchtigen.<br />
Prüfen Sie regelmäßig die einwandfreie Arbeitsweise<br />
der Abgasführung.<br />
Sorgen Sie für gute Entlüftung im Laborbereich.<br />
Radioaktive Detektoren<br />
Lesen Sie sorgfältig und befolgen Sie alle<br />
HINWEISE, ACHTUNGEN und WARNUNGEN im<br />
Ni 63 ECD Handbuch.<br />
Führen Sie die Tests für zu beseitigende radioaktive<br />
Kontamination durch, die im Ni 63 ECD Handbuch<br />
beschrieben sind.<br />
Erfüllen Sie die Zeitpläne und Verfahren zur Dichtigkeitsprüfung.<br />
Verbrennungsgefahr<br />
Beheizte oder tieftemperaturgekühlte Zonen des Gaschromatographen<br />
können beträchtlich lange heiß oder<br />
kalt bleiben, nachdem das Instrument bereits abgeschaltet<br />
ist. Zur Vermeidung schmerzhafter Verbrennungen<br />
müssen Sie darauf achten, daß alle beheizten oder<br />
gekühlten Zonen auf Raumtemperatur zurückgegangen<br />
sind oder Sie müssen ausreichenden Handschutz benutzen,<br />
bevor Sie möglicherweise heiße oder kalte<br />
Oberflächen berühren.<br />
LC Sicherheitspraktiken<br />
Gefahr durch hohen Druck<br />
Wenn eine Leitung bricht, eine Entlüftungseinheit sich<br />
öffnet oder ein Ventil sich unbeabsichtigt unter Druck<br />
öffnet, kann durch die Pumpe möglicherweise ein gefährlich<br />
hoher Flüssigkeitsdruck entstehen, der einen<br />
Strahl flüchtiger und/oder toxischer Flüssigkeiten von<br />
hoher Stömungsgeschwindigkeit verursacht.<br />
Tragen Sie einen Gesichtsschutz, wenn Sie Proben<br />
injizieren oder Routinewartungen durchführen.<br />
Öffnen Sie niemals eine unter Druck stehende<br />
Lösungsmittelleitung oder ein Ventil. Halten Sie<br />
zuerst die Pumpe an und lassen Sie den Druck auf<br />
Null abfallen.<br />
Benutzen Sie splittersichere Reservoirs, die für<br />
einen Druck von 3,4 bis 4,1 bar ausgelegt sind.<br />
Halten Sie die Reservoirverkleidung geschlossen,<br />
wenn die Reservoirs unter Druck stehen.<br />
Lesen Sie und befolgen Sie alle HINWEISE,<br />
ACHTUNGEN und WARNUNGEN im Handbuch.<br />
Blitzlicht-Chromatographie<br />
Der Bediener sollte mit den physikalisch-chemischen<br />
Eigenschaften der Komponenten vertraut sein, aus<br />
denen sich die mobile Phase zusammensetzt.<br />
Vermeiden Sie direkten Kontakt der Lösungsmittel mit<br />
den Zuführungsleitungen aus Polyurethan, da einige<br />
Lösungsmittel das Material der Leitungen schwächen<br />
und damit Undichtigkeiten oder Brüche hervorrufen<br />
können.<br />
Alle Systemkomponenten sollten an der gleichen<br />
Netzstromquelle und einer gemeinsamen Erdung<br />
angeschlossen sein. Dabei muss es sich um eine echte,<br />
nicht um eine schwebende Erdung handeln.<br />
Nicht-polare Lösungsmittel können sich beim Pumpen<br />
durch das System statisch aufladen. Alle Gefäße, die<br />
mobile Phase enthalten (einschließlich Leitungen und<br />
Sammelgefäße), müssen zur Ableitung elektrostatischer<br />
Aufladungen geerdet sein.<br />
Setzen Sie Geräte zur Messung und Ableitung<br />
elektrostatischer Aufladungen (z.B. Geräte zur<br />
Luftionisierung) als Maßnahmen gegen den Aufbau<br />
statischer Elektrizität ein.<br />
Ultraviolette Strahlung<br />
Detektoren in Liquidchromatographen, die eine<br />
ultraviolette Lichtquelle benutzen, besitzen eine<br />
Abschirmung, die das Bedienungspersonal gegen<br />
Abstrahlungen schützt. Zum ständigen Schutz:<br />
Achten Sie darauf, daß die schützende Lampenabdeckung<br />
der Detektoren mit variablen und festen<br />
Wellenlängen während des Betriebs an ihrem Platz<br />
ist.<br />
Schauen Sie nicht direkt in die Flüssigkeitszellen<br />
im Detektor oder in die UV Lampe. Zum Inspizieren<br />
der Lichtquelle oder der Flüssigkeitszelle<br />
benutzen Sie immer einen wirksamen Augenschutz,<br />
wie er durch Borsilikatglas oder Polystyrol gewährleistet<br />
wird.<br />
03-914603-81:11 3 of 4
Verfügbarkeit von Ersatzteilen<br />
Es ist Varian’s Grundsatz, Ersatzteile für alle Instrumente und die wichtigsten<br />
Zubehöre für einen Zeitraum von fünf (5) Jahren nach dem Fertigungsauslauf<br />
dieser Geräteserie verfügbar zu haben. Nach diesem Zeitraum von<br />
fünf (5) Jahren können Ersatzteile auf der Basis solange vorhanden bezogen<br />
werden. Als Ersatzteil werden hier solche elektrischen und mechanischen<br />
Einzelteile verstanden, die unter normalen Bedingungen ausfallen<br />
können. Beispiele sind Relais, Lampen, Temperaturfühler, Detektorelemente,<br />
Motore usw. Metallbleche, Formteile oder Baugruppen und<br />
Gußteile, PC Boards und Funktionsmodule können normalerweise neuwertähnlich<br />
für eine brauchbare Lebensdauer instandgesetzt werden und<br />
werden deshalb nur auf der Basis solange vorhanden nach dem Produktionsauslauf<br />
des Instruments geliefert werden.<br />
Serviceverfügbarkeit<br />
Varian bietet seinen Kunden auch<br />
nach dem Auslaufen der Garantie<br />
eine Vielfalt von Serviceleistungen<br />
an. Reparaturservice kann zu attraktiven<br />
Preisen über eine Wartungsvereinbarung<br />
oder nach Zeit- und<br />
Materialaufwand zur Verfügung<br />
gestellt werden. Technische Unterstützung<br />
und Training bieten wir<br />
Ihnen durch qualifizierte Chemiker<br />
sowohl auf einer Kontraktbasis als<br />
auch nach Ihren Erfordernissen an.<br />
Varian Analytical Instruments Verkaufsbüros<br />
Für Verkaufs oder Servicehilfe und zum Bestellen von Teilen und Zubehören setzen Sie sich bitte mit Ihrem<br />
Varian Büro in Verbindung.<br />
Argentina<br />
Buenos Aires<br />
Tel. +54.11.4.783.5306<br />
Australia<br />
Mulgrave, Victoria<br />
Tel. +61.3.9566.1134<br />
Austria<br />
Vösendorf bei Wien<br />
Tel. +43.1.699.9669<br />
Benelux<br />
Bergen Op Zoom<br />
Tel. +31.164.282.800<br />
Brazil and Latin America (S)<br />
São Paulo<br />
Tel. +55.11.820.0444<br />
Canada<br />
Mississauga, Ontario<br />
Tel. 800.387.2216<br />
China<br />
Beijing<br />
Tel. +86.106209.1727<br />
Europe<br />
Middelburg, The Netherlands<br />
Tel. +31.118.671.000<br />
France<br />
Les Ulis Cédex<br />
Tel. +33.1.6986.3838<br />
Germany<br />
Darmstadt<br />
Tel. +49.6151.7030<br />
India<br />
Mumbai<br />
Tel. +91.22.857.0787/88/89<br />
Italy<br />
Torino<br />
Tel. +39.011.997.9111<br />
Japan<br />
Tokyo<br />
Tel. +81.3.5232.1211<br />
Korea<br />
Seoul<br />
Tel. +82.2.345.22452<br />
Mexico and Latin America (N)<br />
Mexico City<br />
Tel. +52.5.523.9465<br />
Russian Federation<br />
Moscow<br />
Tel. +7.095.937.4280<br />
Spain<br />
Madrid<br />
Tel. +34.91.472.7612<br />
Sweden<br />
Solna<br />
Tel. +46.8.445.1620<br />
Switzerland<br />
Varian AG<br />
Tel. +41.848.803.800<br />
Taiwan<br />
Taipei Hsien<br />
Tel. +886.2.698.9555<br />
United Kingdom and<br />
Ireland<br />
Walton-on-Thames<br />
Tel. +44.1932.898000<br />
Venezuela<br />
Valencia<br />
Tel. +58.41.257.608<br />
United States<br />
Walnut Creek, California, USA<br />
Tel. +1.800.926.3000<br />
(<strong>GC</strong> and <strong>GC</strong>/<strong>MS</strong>)<br />
Tel. +1.800.367.4752<br />
(LC)<br />
www.varianinc.com<br />
4 of 4 03-914603-81:11
Informations et mesures de sécurité<br />
Instructions de fonctionnement<br />
Ce manuel d’instruction est conçu pour aider l’utilisateur à créer des conditions opératoires lui permettant de faire<br />
fonctionner le matériel efficacement et en toute sécurité. Il contient entre autres certaines observations spéciales<br />
présentées sous forme de NOTES, MISES EN GARDE et AVERTISSEMENTS. Il est important de faire fonctionner ce<br />
matériel conformément aux instructions du présent manuel et à toute autre information émanant de Varian. S’adresser<br />
au bureau régional Varian pour toute question relative à la sécurité ou à l’utilisation correcte du matériel.<br />
NOTE<br />
Information destinée à tirer le<br />
meilleur parti du matériel sur le plan<br />
des performances<br />
Symboles d’avertissement Description<br />
ATTENTION<br />
RISQUE<br />
D'ELECTROCUTION<br />
ATTENTION<br />
RISQUE DE BRÛLURES<br />
ATTENTION<br />
RISQUE D'INCENDIE<br />
ATTENTION<br />
RISQUE D'EXPLOSION<br />
ATTENTION<br />
SOURCE DE RADIATION<br />
Attire l’attention sur une situation<br />
pouvant occasionner des dommages<br />
corporels légers et/ou des dégâts<br />
mineurs à l’appareil et indique<br />
comment remédier à cette situation<br />
Attire l’attention sur une situation<br />
potentiellement dangereuse pouvant<br />
occasionner des dommages corporels<br />
importants et indique comment<br />
remédier à cette situation<br />
Exposition à des tensions dangereuses. Débrancher le matériel du secteur avant de<br />
dévisser les panneaux protecteurs.<br />
Présence éventuelle de substances chimiques dangereuses. Eviter tout contact, en<br />
particulier lors du remplissage des réservoirs. Prendre les mesures de protection<br />
adéquates pour les yeux et la peau.<br />
Exposition à des surfaces chaudes ou traitées cryogéniquement. Prendre les<br />
mesures de protection adéquates pour la peau.<br />
Les dommages causées aux yeux sont de deux natures différentes : jet de<br />
particules et de produits chimiques ou radiations UV. Utiliser des protections du<br />
visage et des yeux appropriées.<br />
Risque potentiel d’incendie. Se conformer aux instructions du manuel pour faire<br />
fonctionner le matériel en toute sécurité.<br />
Risque potentiel d’explosion en raison du type de gaz ou de liquide utilisé.<br />
Présence d’une source de radiation ionisante. Se conformer aux instructions du<br />
manuel pour faire fonctionner le matériel en toute sécurité.<br />
ATTENTION<br />
PIECES EN MOUVEMENT Garder les mains et les doigts hors de portée.<br />
03-914603-82:11 1 of 4
Précautions générales en matière de sécurité<br />
Les pratiques suivantes garantissent une utilisation sans risques du matériel:<br />
Effectuer régulièrement des essais d’étanchéité de tous les conduits d’alimentation et de tous les tuyaux du<br />
système pneumatique.<br />
Ne pas travailler avec des conduits de gaz déformés ou percés. Installer les conduits de gaz à l’écart des allées<br />
et venues et à l’abri du chaud ou du froid.<br />
Conserver les solvants organiques dans des récipients à l’épreuve du feu, bien ventilés et portant mention de la<br />
nature de leur contenu, en particulier lorsque lesdits solvants sont toxiques et/ou inflammables.<br />
Ne pas accumuler les solvants de rebut. Les éliminer conformément à un programme agréé d’élimination des<br />
déchets et non via les égouts municipaux.<br />
NOTE: Ce matériel a été testé conformément aux dispositions de la directive CME afin de<br />
pouvoir porter le sigle CE de l’Union européenne. Il en résulte qu’il peut être sensible à<br />
des niveaux de radiation/d’interférence ou à des fréquences se situant hors des limites<br />
testées.<br />
ATTENTION<br />
ATTENTION<br />
Risques de chocs électriques<br />
Ce matériel est conçu pour effectuer des analyses chromatographiques d’échantillons<br />
préparés selon des méthodes appropriées. Il convient de le faire fonctionner avec les gaz<br />
et/ou les solvants adéquats et dans les limites des pressions, des débits et des températures<br />
maximales spécifiées dans le présent manuel.<br />
Le client est tenu d’informer le service Varian d’assistance à la clientèle que son matériel<br />
a été utilisé pour l’analyse d’échantillons biologiques dangereux, radioactifs ou toxiques<br />
avant que n’en soit effectué la maintenance.<br />
Déconnecter le matériel de toute source d’alimentation avant d’en démonter les panneaux de protection, sous<br />
peine de s’exposer à des tensions dangereuses.<br />
En cas d’utilisation d’un cordon d’alimentation n’étant pas d’origine, s’assurer que celui-ci soit conforme à la<br />
polarité et au codage des couleurs décrits dans le manuel d’utilisation ainsi qu’à toutes les normes régionales<br />
de sécurité régissant le secteur de la construction.<br />
Remplacer les fusibles sautés par des fusibles de même type que ceux stipulés sur le panneau des fusibles ou<br />
dans le manuel d’utilisation.<br />
Remplacer les cordons d’alimentation défectueux ou dénudés par des cordons d’alimentation de même type.<br />
S’assurer que les sources de tension et la tension de secteur correspondent à la tension de fonctionnement du<br />
matériel.<br />
Bouteilles à gaz comprimé<br />
Ranger et manipuler les bouteilles à gaz comprimé avec précaution et conformément aux normes de sécurité.<br />
Fixer les bouteilles à gaz comprimé à un mur ou à une structure inamovible.<br />
Ranger et déplacer les bouteilles à gaz comprimé en position verticale. Avant de transporter les bouteilles à<br />
gaz comprimé, retirer leur régulateur.<br />
Ranger les bouteilles dans un endroit bien ventilé et à l’abri de la chaleur, des rayons directs du soleil, du gel<br />
ou des sources d’allumage.<br />
Marquer les bouteilles de manière à n’avoir aucun doute quant à leur contenu.<br />
N’utiliser que des connexions et régulateurs agréés.<br />
N’utiliser que des tuyaux de raccordement propres sur le plan chromatographique (Varian P/N 03-918326-00) et<br />
pouvant supporter des pressions sensiblement plus élevées que la plus haute pression de sortie du régulateur.<br />
2 of 4 03-914603-82:11
Mesures de sécurité en CPG<br />
Système d’échappement<br />
Les détecteurs CPG installés dans une pièce bien<br />
ventilée ne nécessitent pas de conduits spéciaux<br />
d’échappement excepté lorsqu’ils sont destinés à<br />
analyser des substances chimiques dangereuses. Lors<br />
de l’installation de tels conduits:<br />
N’utiliser que des conduits à l’épreuve du feu<br />
Installer un ventilateur à la sortie du conduit.<br />
Placer les orifices d’aspiration de manière à ce que<br />
les vibrations ou les mouvements d’air n’affectent<br />
pas le fonctionnement du détecteur.<br />
Vérifier périodiquement l’état du conduit.<br />
S’assurer que le laboratoire est correctement<br />
ventilé.<br />
Détecteurs à source radioactive<br />
Se conformer au manuel d’utilisation de l’ECD<br />
Ni 63 , en particulier à ses NOTES, MISES EN<br />
GARDE ET AVERTISSEMENTS.<br />
Effectuer les tests de décontamination radioactive<br />
décrits dans le manuel d’utilisation de l’ECD Ni 63 .<br />
Se conformer aux procédures et au calendrier des<br />
essais d’étanchéité.<br />
Risque de brûlures<br />
Les zones des chromatographes à gaz chauffées ou<br />
traitées cryogéniquement peuvent rester très chaudes ou<br />
très froides durant une période plus ou moins longue<br />
après la mise hors tension du matériel. Pour éviter les<br />
brûlures, s’assurer que ces zones sont revenues à<br />
température ambiante ou utiliser un dispositif adéquat<br />
de protection des mains avant de les toucher.<br />
Mesures de sécurité en CPL<br />
Risques liés aux hautes pressions<br />
En cas de rupture d’un tuyau ou en cas d’ouverture<br />
accidentelle d’une vanne alors que le système est sous<br />
pression, la pompe peut occasionner des dommages en<br />
expulsant à grande vitesse des jets de liquides volatiles<br />
et/ou toxiques.<br />
Mettre un masque de protection lors de l’injection<br />
des échantillons ou en effectuant les opérations de<br />
maintenance de routine.<br />
Ne jamais déconnecter un conduit de solvant ou<br />
une vanne sous pression. Arrêter préalablement la<br />
pompe et laisser la pression descendre à zéro.<br />
Utiliser des réservoirs incassables à 50-60 psi.<br />
Laisser l’enceinte du réservoir fermée lorsque le<br />
réservoir est sous pression.<br />
Se conformer aux NOTES, MISES EN GARDE ET<br />
AVERTISSEMENTS du manuel d’utilisation.<br />
Chromatographie Flash<br />
L’utilisateur aura la connaissance des propriétés<br />
physico-chimiques des constituants de la phase mobile.<br />
Eviter le contact direct des solvants avec les tuyaux en<br />
polyuréthane : certains solvants sont susceptibles de<br />
provoquer des faiblesses et des fuites avec risques<br />
d’explosion.<br />
Tous les constituants du système devront être connectés<br />
à une source de courant commune et à une prise de<br />
terre commune. Cette prise de terre devra être fixe et<br />
non mobile.<br />
Les solvants non-polaires peuvent produire de<br />
l’électricité statique lorsqu’ils passent au travers du<br />
système. Les bouteilles qui contiennent la phase mobile<br />
(incluant les tuyaux et les flacons de collecte de<br />
fractions) doivent être mises à la terre pour éliminer<br />
l’électricité statique.<br />
Utiliser des appareils de mesure et de décharge<br />
d’électricité statique (par exemple des ionisateurs d’air)<br />
pour combattre la formation d’électricité statique.<br />
Radiations ultraviolettes<br />
Les détecteurs CPL utilisant une source lumineuse<br />
ultraviolette comportent un écran destiné à se prémunir<br />
contre les expositions aux rayonnements.<br />
Pour s’assurer une protection permanente:<br />
Vérifier que le couvercle de protection de la lampe<br />
des détecteurs opérant à des longueurs d’onde<br />
variables et fixes soit bien en place durant le<br />
fonctionnement du matériel.<br />
Ne pas regarder directement les cellules du<br />
détecteur ou la source d’UV. Se protéger<br />
systématiquement les yeux lors du contrôle de la<br />
source lumineuse ou des cellules, par exemple au<br />
moyen de verres borosilicatés ou en polystyrène.<br />
03-914603-82:11 3 of 4
Disponibilité des pièces de rechange<br />
La politique de Varian consiste à fournir des pièces de rechange pour<br />
tous les appareils et accessoires majeurs durant une période de cinq (5)<br />
ans après livraison de leur production finale. Les pièces de rechange ne<br />
sont fournies au terme de cette période de cinq (5) ans que suivant les<br />
disponibilités. Il faut entendre par pièces de rechange les pièces<br />
individuelles électriques ou mécaniques susceptibles de défaillance au<br />
cours de leur utilisation normale. Par exemple, les relais, les lampes, les<br />
sondes thermiques, les éléments de détecteur, les moteurs, etc. Les<br />
parties en tôles, les éléments ou assemblages structurels et les pièces de<br />
fonderie, les cartes à circuits imprimés et les modules fonctionnels sont<br />
normalement susceptibles d’être remis à l’état neuf pendant toute la<br />
durée de leur vie utile et ne sont dès lors fournies, au terme de la<br />
production finale des appareils, que suivant les disponibilités.<br />
Service d’assistance à<br />
la clientèle<br />
Varian fournit divers services<br />
destinés à aider sa clientèle après<br />
expiration de la garantie: service de<br />
réparation sur base de contrats de<br />
maintenance à prix attractifs ou sur<br />
base d’accords à durée limitée<br />
portant sur du matériel spécifique;<br />
support technique et service de<br />
formation assurés par des chimistes<br />
qualifiés sur base contractuelle ou<br />
en fonction des besoins spécifiques.<br />
Points de vente des instruments analytiques Varian<br />
Contactez votre point de vente régional Varian pour toute question commerciale ou de service d’assistance à<br />
la clientèle ou pour passer commande de pièces et de fournitures.<br />
Argentina<br />
Buenos Aires<br />
Tel. +54.11.4.783.5306<br />
Australia<br />
Mulgrave, Victoria<br />
Tel. +61.3.9566.1134<br />
Austria<br />
Vösendorf bei Wien<br />
Tel. +43.1.699.9669<br />
Benelux<br />
Bergen Op Zoom<br />
Tel. +31.164.282.800<br />
Brazil and Latin America (S)<br />
São Paulo<br />
Tel. +55.11.820.0444<br />
Canada<br />
Mississauga, Ontario<br />
Tel. 800.387.2216<br />
China<br />
Beijing<br />
Tel. +86.106209.1727<br />
Europe<br />
Middelburg, The Netherlands<br />
Tel. +31.118.671.000<br />
France<br />
Les Ulis Cédex<br />
Tel. +33.1.6986.3838<br />
Germany<br />
Darmstadt<br />
Tel. +49.6151.7030<br />
India<br />
Mumbai<br />
Tel. +91.22.857.0787/88/89<br />
Italy<br />
Torino<br />
Tel. +39.011.997.9111<br />
Japan<br />
Tokyo<br />
Tel. +81.3.5232.1211<br />
Korea<br />
Seoul<br />
Tel. +82.2.345.22452<br />
Mexico and Latin America (N)<br />
Mexico City<br />
Tel. +52.5.523.9465<br />
Russian Federation<br />
Moscow<br />
Tel. +7.095.937.4280<br />
Spain<br />
Madrid<br />
Tel. +34.91.472.7612<br />
Sweden<br />
Solna<br />
Tel. +46.8.445.1620<br />
Switzerland<br />
Varian AG<br />
Tel. +41.848.803.800<br />
Taiwan<br />
Taipei Hsien<br />
Tel. +886.2.698.9555<br />
United Kingdom and<br />
Ireland<br />
Walton-on-Thames<br />
Tel. +44.1932.898000<br />
Venezuela<br />
Valencia<br />
Tel. +58.41.257.608<br />
United States<br />
Walnut Creek, California, USA<br />
Tel. +1.800.926.3000<br />
(<strong>GC</strong> and <strong>GC</strong>/<strong>MS</strong>)<br />
Tel. +1.800.367.4752<br />
(LC)<br />
www.varianinc.com<br />
4 of 4 03-914603-82:11
Informazioni sulla Sicurezza<br />
Instruzioni per l’Uso<br />
Questo manuale ha lo scopo di aiutare l’operatore ad utilizzare lo strumento in modo sicuro ed efficiente. Le<br />
considerazioni e le precauzioni speciali vengono presentate in questo manuale sotto forma di avvisi di NOTA,<br />
CAUTELA e ATTENZIONE. E’ importante che lo strumento venga utilizzato rispettando le istruzioni fornite in questo<br />
manuale o che verranno fornite successivamente dalla Varian. Per ogni eventuale chiarimento sull’uso o sulla<br />
sicurezza, si prega di contattare la Varian di Leinì (TO).<br />
NOTA<br />
Sono informazioni utili ad ottenere<br />
le prestazioni migliori da parte<br />
dello strumento.<br />
ATTENZIONE<br />
Allerta l’operatore su situazioni che<br />
potrebbero causare ferite leggere e<br />
danni limitati allo strumento ed il<br />
modo di evitarle.<br />
Segnali di ATTENZIONE Descrizione del Pericolo<br />
ATTENZIONE<br />
Pericolo di folgorazioni<br />
ATTENZIONE<br />
Pericolo di scottature<br />
ATTENZIONE<br />
Pericolo di incendio<br />
ATTENZIONE<br />
Pericolo di esplosioni<br />
ATTENZIONE<br />
Pericolo di radiazioni<br />
ATTENZIONE<br />
Parti in movimento<br />
ATTENZIONE<br />
Allerta l’operatore su situazioni<br />
potenzialmente pericolose che<br />
possono causare danni molto seri ed<br />
il modo di evitarle.<br />
Nello strumento sono presenti tensioni pericolose. Scollegare il cavo<br />
di alimentazione prima di togliere il pannello fissato con le viti.<br />
Possono essere presenti composti chimici pericolosi. Evitare il<br />
contatto, specialmente quando si riempiono i contenitori. Usare<br />
protezioni opportune per la pelle e per gli occhi.<br />
Pericolo di esposizione a superfici molto calde o raffreddate<br />
criogenicamente. Usare protezioni opportune per la pelle.<br />
Particelle volanti, agenti chimici o radiazioni UV possono<br />
danneggiare gli occhi. Vanno quindi utilizzate le opportune<br />
protezioni per gli occhi e per il volto.<br />
Pericolo potenziale di incendio. Seguire le istruzioni del manuale per<br />
lavorare con una maggiore sicurezza.<br />
C’è pericolo di esplosioni a causa del tipo di gas o liquido utilizzato.<br />
E’ presente una radiazione ionizzante. Seguire le istruzioni del<br />
manuale per lavorare con una maggiore sicurezza.<br />
Non tenere le mani o le dita vicino.<br />
03-914603-83:11 1 of 4
Norme di Sicurezza<br />
Per lavorare in modo sicuro sullo strumento, Vi consigliamo si adottare le seguenti procedure.<br />
Verificare periodicamente che non ci siano perdite sulle linee e sui raccordi pneumatici.<br />
Evitare che le linee dei gas vengano piegate o forate. Le linee vanno posizionate in modo tale<br />
da non essere calpestate e lontane da sorgenti o troppo calde o troppo fredde.<br />
I solventi organici vanno conservati in armadi speciali antiincendio, ventilati e con indicazioni<br />
chiare sul contenuto di materiali tossici e/o infiammabili.<br />
Non accumulare i solventi utilizzati. Adottare un programma regolare di smaltimento, ma mai<br />
nelle acque di scarico.<br />
AVVERTENZA:<br />
ATTENZIONE<br />
ATTENZIONE<br />
Pericoli Elettrici<br />
Questo strumento è stato testato secondo le Direttive EMC allo scopo di poter utilizzare il<br />
Marchio CE della Comunità Europea. Questo strumento può essere suscettibile a<br />
radiazioni/interferenze o frequenze che non sono entro i limiti collaudati.<br />
Questo strumento è progettato per l’analisi cromatografica di campioni opportunamente<br />
preparati. Deve essere utilizzato usando gas e solventi adatti a questo scopo ed entro i limiti<br />
massimi di pressione, flusso e temperatura riportati in questo manuale. Se lo strumento non<br />
viene utilizzato secondo le modalità specificate dal costruttore, le condizioni di sicurezza<br />
previste potranno non essere sufficienti.<br />
E’ responsabilità del Cliente informare il Servizio Tecnico Varian, prima di qualsiasi<br />
intervento di riparazione, se lo strumento è stato utilizzato per l’analisi di campioni<br />
biologicamente pericolosi, radioattivi o tossici.<br />
Prima di togliere i pannelli di protezione, scollegare lo strumento da tutte le alimentazioni<br />
elettriche in modo da evitare l’esposizione a voltaggi potenzialmente pericolosi.<br />
Quando si rende necessario sostituire il cavo di alimentazione, assicurarsi che il nuovo cavo<br />
rispetti sia le codifiche di colore e di polarità riportate nel manuale di istruzioni che quelle<br />
stabilite dalle norme di sicurezza del laboratorio.<br />
Sostituire i fusibili bruciati solo con fusibili che abbiano le stesse caratteristiche; queste ultime sono<br />
riportate sul pannello dei fusibili e/o nel manuale di istruzioni.<br />
Sostituire immediatamente i cavi di alimentazione difettosi o consumati con cavi dello stesso<br />
tipo e con le stesse caratteristiche.<br />
Assicurarsi che il voltaggio del pannello di alimentazione corrisponda a quello dello<br />
strumento da collegare.<br />
Bombole dei Gas<br />
Occorre prestare molta attenzione quando si spostano bombole di gas compressi. Rispettare tutte le<br />
norme di sicurezza.<br />
Assicurare le bombole ad una parete o ad una struttura fissa.<br />
Spostare e conservare le bombole sempre in posizione verticale. Togliere i manometri prima di<br />
spostare le bombole.<br />
Conservare le bombole in un’area ben ventilata, non infiammabile, lontana da sorgenti di calore,<br />
non esposta a temperature troppo fredde o alla luce diretta del sole.<br />
Evidenziare in modo chiaro e che non lasci dubbi il contenuto di ogni bombola.<br />
Usare solo manometri e raccordi di qualità.<br />
Usare solo tubazioni cromatograficamente pulite (Numero di Parte Varian 03-918326-00) e calibrate<br />
per pressioni superiori a quella massima di uscita dal manometro.<br />
2 of 4 03-914603-83:11
Procedure di Sicurezza in <strong>GC</strong><br />
Scarico dei Gas<br />
Per i rivelatori <strong>GC</strong> non è richiesto alcun sistema<br />
particolare di scarico dei gas, se lo strumento è<br />
installato in una stanza ben ventilata e se non viene<br />
utilizzato per l’analisi di sostanze chimiche pericolose.<br />
Se si deve installare un sistema di scarico dei gas:<br />
Usare condutture non infiammabili<br />
Installare un aspiratore in uscita<br />
Posizionare la presa d’aria in modo che le<br />
vibrazioni e il movimento dell’aria non disturbino<br />
il rivelatore.<br />
Eseguire verifiche periodiche per garantire un<br />
funzionamento corretto.<br />
Garantire una buona ventilazione nel laboratorio.<br />
Rivelatori a Sorgente Radioattiva<br />
Leggere e rispettare tutte gli avvisi di NOTA,<br />
CAUTELA e ATTENZIONE riportati nel manuale<br />
del rivelatore ECD al Ni 63 .<br />
Eseguire tutti i test di contaminazione radioattiva<br />
rimovibile descritti nel manuale dell’ECD al Ni 63 .<br />
Rispettare tutte le procedure e le scadenze di<br />
verifica per eventuali perdite.<br />
Pericolo di Scottature<br />
Le zone calde o raffreddate criogenicamente del<br />
gascromatografo possono mantenere la loro<br />
temperatura per parecchio tempo, dopo aver spento lo<br />
strumento. Per evitare scottature, assicurarsi che le<br />
zone riscaldate o raffreddate siano a temperatura<br />
ambiente oppure indossare delle protezioni adeguate<br />
prima di toccare tali superfici.<br />
Procedure di Sicurezza in LC<br />
Pericolo di Alte Pressioni<br />
In caso di rottura di una linea o di apertura accidentale<br />
di una valvola, quando il sistema è sotto pressione, la<br />
pompa può liberare liquidi tossici e/o volatili molto<br />
pericolosi.<br />
E’ opportuno adottare un sistema di protezione del<br />
viso quando si inietta il campione o si esegue una<br />
manutenzione routinaria del sistema.<br />
Non smontare mai una linea del solvente od una<br />
valvola quando il sistema è sotto pressione.<br />
Fermare prima la pompa ed aspettare che la<br />
pressione scenda a zero.<br />
Usare dei contenitori per solventi infrangibili ed in<br />
grado di lavorare a 50-60 psi.<br />
Quando i contenitori sono sotto pressione, usare<br />
una protezione esterna.<br />
Leggere e rispettare tutti gli avvisi di NOTA,<br />
CAUTELA e ATTENZIONE.<br />
Cromatografia Flash<br />
L’operatore deve conoscere le proprietà fisico-chimiche<br />
delle componenti della fase mobile.<br />
I solventi non vanno messi in contatto diretto con il<br />
tubo di erogazione in poliuretano, dal momento che<br />
alcuni solventi possono causare indebolimento e perdite<br />
con possibili scoppi.<br />
Tutte le componenti del sistema vanno collegate ad una<br />
fonte di alimentazione e ad una messa a terra comuni.<br />
E’ meglio che per quest’ultima venga utilizzata una<br />
spina con polo di terra.<br />
I solventi non-polari possono sviluppare una carica<br />
statica quando vengono pompati attraverso il sistema.<br />
Tutti i recipienti che contengono la fase mobile (inclusi<br />
i tubi e i recipienti di raccolta) devono avere una messa<br />
a terra per disperdere l’elettricità statica.<br />
Vanno utilizzati dispositivi di misurazione e scarico (ad<br />
esempio ionizzatori d’aria) per evitare l’aumento di<br />
elettricità statica.<br />
Radiazioni Ultraviolette<br />
I rivelatori di cromatografia liquida che usano sorgenti<br />
a luce ultravioletta montano degli schermi di protezione<br />
per evitare che gli operatori siano esposti a radiazioni<br />
pericolose.<br />
Per una protezione sicura:<br />
Assicurarsi che i coperchi delle lampade dei<br />
rivelatori a lunghezza fissa e variabile siano sempre<br />
al loro posto, quando si lavora.<br />
Non guardare mai direttamente dentro le celle o<br />
alla sorgente di luce UV. Quando si vuole<br />
ispezionare la lampada o le celle, usare sempre<br />
delle protezioni adatte per gli occhi, quali vetro in<br />
borosilicato e polistirolo.<br />
03-914603-83:11 3 of 4
Disponibilità delle Parti di Ricambio<br />
E’ politica della Varian il fornire le parti di ricambio per lo strumento ed<br />
i suoi accessori per un periodo di cinque (5) anni a partire dalla data di<br />
produzione dell’ultima unità della serie. Le parti di ricambio saranno<br />
disponibili anche dopo questo periodo di cinque (5) anni ma solo in base<br />
alla disponibilità delle stesse. Per parti di ricambio si intendono i<br />
componenti elettrici e meccanici soggetti ad usura durante l’uso, in<br />
condizioni normali, dello strumento. Come esempio, citiamo i relay, le<br />
lampade, i probe di temperatura , i componenti del rivelatore, i motorini,<br />
ecc. Le parti strutturali o da fusione, le schede elettroniche ed i moduli<br />
funzionali possono essere ricostruiti e rimessi a nuovo durante tutto il<br />
loro periodo di vita e perciò sarà possibile acquistarli, dopo la<br />
produzione dell’ultima unità delle serie, solo in base alla loro<br />
disponibilità.<br />
Servizi Tecnico<br />
La Varian, alla scadenza del periodo<br />
di garanzia, è in grado di fornire ai<br />
suoi clienti un’ampia scelta di<br />
opzioni. Le riparazioni possono<br />
essere effettuate sulla base di<br />
contratti di manutenzione particolarmente<br />
vantaggiosi od in base ad una<br />
tariffa oraria piu’ il costo delle parti.<br />
A richiesta, si possono avere corsi<br />
per operatori sia sotto forma di<br />
contratto che a tariffe da concordare.<br />
Uffici Vendite della Divisione Strumenti Analitici della Varian<br />
Per informazioni relative alla Vendita, al Servizio Tecnico o all’acquisto di Parti di ricambio, si prega di<br />
contattare l’ufficio Varian piu’ vicino.<br />
Argentina<br />
Buenos Aires<br />
Tel. +54.11.4.783.5306<br />
Australia<br />
Mulgrave, Victoria<br />
Tel. +61.3.9566.1134<br />
Austria<br />
Vösendorf bei Wien<br />
Tel. +43.1.699.9669<br />
Benelux<br />
Bergen Op Zoom<br />
Tel. +31.164.282.800<br />
Brazil and Latin America (S)<br />
São Paulo<br />
Tel. +55.11.820.0444<br />
Canada<br />
Mississauga, Ontario<br />
Tel. 800.387.2216<br />
China<br />
Beijing<br />
Tel. +86.106209.1727<br />
Europe<br />
Middelburg, The Netherlands<br />
Tel. +31.118.671.000<br />
France<br />
Les Ulis Cédex<br />
Tel. +33.1.6986.3838<br />
Germany<br />
Darmstadt<br />
Tel. +49.6151.7030<br />
India<br />
Mumbai<br />
Tel. +91.22.857.0787/88/89<br />
Italy<br />
Torino<br />
Tel. +39.011.997.9111<br />
Japan<br />
Tokyo<br />
Tel. +81.3.5232.1211<br />
Korea<br />
Seoul<br />
Tel. +82.2.345.22452<br />
Mexico and Latin America (N)<br />
Mexico City<br />
Tel. +52.5.523.9465<br />
Russian Federation<br />
Moscow<br />
Tel. +7.095.937.4280<br />
Spain<br />
Madrid<br />
Tel. +34.91.472.7612<br />
Sweden<br />
Solna<br />
Tel. +46.8.445.1620<br />
Switzerland<br />
Varian AG<br />
Tel. +41.848.803.800<br />
Taiwan<br />
Taipei Hsien<br />
Tel. +886.2.698.9555<br />
United Kingdom and<br />
Ireland<br />
Walton-on-Thames<br />
Tel. +44.1932.898000<br />
Venezuela<br />
Valencia<br />
Tel. +58.41.257.608<br />
United States<br />
Walnut Creek, California, USA<br />
Tel. +1.800.926.3000<br />
(<strong>GC</strong> and <strong>GC</strong>/<strong>MS</strong>)<br />
Tel. +1.800.367.4752<br />
(LC)<br />
www.varianinc.com<br />
4 of 4 03-914603-83:11
Instrucciones de<br />
Seguridad<br />
Instrucciones de Operación<br />
Este <strong>Manual</strong> de Instrucciones está diseñado para ayudarle a establecer las condiciones de operación que le permitan<br />
operar su instrumento de forma segura y eficaz. Así mismo, se describen consideraciones especiales ó precauciones,<br />
que aparecen en forma de NOTA, PRECAUCION, y ATENCION como se indica más abajo.Es importante que utilice el<br />
instrumento de acuerdo con este <strong>Manual</strong> de Operación y cualquier otra información que le proporcione Varian.<br />
Remita a la Oficina Local de Varian cualquier cuestión que tenga respecto al correcto uso de su equipo.<br />
NOTA<br />
Información para ayudarle a<br />
obtener unas prestaciones óptimas<br />
de su instrumento.<br />
Símbolo Descripción<br />
ATENCIÓN<br />
PELIGRO DE<br />
DESCARGA ELÉCTRICA<br />
ATENCIÓN<br />
PELIGRO DE<br />
QUEMADURAS<br />
ATENCIÓN<br />
PELIGRO DE FUEGO<br />
ATENCIÓN<br />
PELIGRO DE EXPLOSIÓN<br />
ATENCIÓN<br />
PELIGRO DE RADIACIÓN<br />
ATENCIÓN<br />
PARTES EN MOVIMIENTO<br />
¡PRECAUCION!<br />
Le alerta de situaciónes que pueden<br />
causar daños moderados a la salud<br />
ó al equipo, y cóm evitar esas<br />
situaciones.<br />
ATENCI Ó N<br />
Le alerta de potenciales situaciones<br />
peligrosas que pueden causar serios<br />
daños, y cómo evitar esas<br />
situaciones.<br />
El instrumento utiliza voltages peligrosos. Desconecte el interruptor<br />
general antes de retirar los paneles atornillados.<br />
Peligro de productos químicos. Evite el contacto, especialmente cuando<br />
rellene los depósitos. utilice protección de ojos y piel.<br />
Superficies posiblemente calientes ó frías (criogénico). Utilice<br />
protección para la piel.<br />
Las partículas volátiles, productos químicos o radiación UV pueden<br />
causar daños en los ojos. Usar las debidas protecciones para la cara y los<br />
ojos.<br />
Peligro potencial de fuego. Siga las instrucciones del <strong>Manual</strong> de<br />
Operación para su seguro funcionamiento.<br />
Peligro potencial de explosión debido al tipo de gas ó líquido empleado.<br />
Peligro por Fuente de radiación. Siga las instrucciones del <strong>Manual</strong> de<br />
Operación para su seguro funcionamiento.<br />
Mantenga alejados los dedos y las manos.<br />
03-914603-84:11 1 of 4
Precauciones Generales de Seguridad<br />
Siga estas indicaciones de seguridad para una correcta operación del equipo.<br />
Realice verificaciones periódicas de fugas en todas las líneas de suministro y tuberías.<br />
No permita que las líneas de gas se doblen ó pinchen. Manténgalas alejadas de zonas de<br />
paso y del calor ó frío excesivo.<br />
Guarde los disolventes orgánicos en cabinas ventiladas, a prueba de fuego, y etiquetadas<br />
para que puedan ser fácilmente identificadas como material tóxico y/ó inflamable.<br />
No acumule disolventes inservibles. Deseche todo el material inservible a través de un<br />
programa especial de desechos y no a través del sistema convencional.<br />
NOTA: Este instrumento ha sido testado bajo las normas de la Directiva EMC según requerimientos<br />
de la Marca CE de la Unión Europea. Por lo tanto, este equipo puede ser sensible a niveles de<br />
radiaciones / interferencias ó frecuencias que no estén incluidas dentro de los límites<br />
testados.<br />
ATENCI Ó N<br />
ATENCI Ó N<br />
Peligros Eléctricos<br />
Este instrumento está diseñado para análisis cromatográfico de muestras preparadas<br />
apropiadamente. Debe ser operado usando gases y/ó disolventes apropiados y con unos<br />
niveles máximos de presión, flujos y temperaturas, según se describe en este manual.<br />
El Usuario tiene la obligación de informar al Servicio Técnico de Varian cuando el<br />
instrumento vaya a ser empleado para análisis de muestras peligrosas de origen biológico,<br />
radioactivo ó tóxico, antes de comenzar a realizar cualquier análisis.<br />
Desconecte el instrumento de todos las conexiones eléctricas a la red antes de retirar los<br />
paneles para evitar la posible exposición a peligrosos voltages.<br />
Cuando sea necesario emplear una clavija eléctrica no original, asegurese de colocar los<br />
cables de acuerdo con el código de colores y polaridades descritos en el manual y los<br />
códigos de seguridad de la red eléctrica.<br />
Sustituya los fusibles fundidos con fusibles del tipo y tamaño estipulados en el panel de fusibles<br />
ó en el manual.<br />
Sustituya los cables deteriorados inmediatamente con cables del mismo tipo y<br />
graduación.<br />
Asegureses de que los valores de las líneas de electricidad se ajustan a los valores para<br />
los que el Instrumento ha sido preparado.<br />
Botellas de Gas Comprimido<br />
Guarde y maneje las botellas de gas con cuidado y de acuerdo con las normas de seguridad.<br />
Asegure las botellas a una estructura inmovil ó a la pared.<br />
Guarde y mueva las botellas en posición vertical. Retire los reguladores antes de<br />
transportarlas.<br />
Guarde las botellas en un área ventilada, lejos de fuentes de calor, de luz solar directa y de<br />
temperaturas extremadamente bajas.<br />
Identifique las botellas claramente para evitar cualquier duda sobre su contenido.<br />
Utilice sólamente reguladores y conexiones aprobadas.<br />
Utilice sólo tubos de conexión cromatográficamente límpios (Varian p/n 03-918326-00) y que<br />
tengan una graduación de presión significativamente mayor que la mayor presión del regulador.<br />
2 of 4 03-914603-84:11
<strong>GC</strong> Prácticas de Seguridad<br />
Sistema de Extracción<br />
No se necesita un sistema de extracción para los<br />
detectores <strong>GC</strong> instalados en un laboratorio bien<br />
ventilado, excepto cuando se analicen muestras<br />
químicas peligrosas. Si instala un sistema de<br />
extracción:<br />
Utilice conductos a prueba de fuego.<br />
Instale un ventilador al final del sistema.<br />
Instale entradas de aire cuya vibración no afecte al<br />
trabajo del detector.<br />
Compruebe periódicamente el correcto<br />
funcionamiento del sistema.<br />
Asegurese de una correcta ventilación del<br />
laboratorio.<br />
Detectores con fuentes radioctivas<br />
Lea con cuidado y cumpla todas las NOTAS,<br />
PRECAUCION, y ATENCION del <strong>Manual</strong> del<br />
Detector Ni 63 ECD.<br />
Realice los test de contaminación radioactiva<br />
descritos en el <strong>Manual</strong> del Detector Ni 63 ECD.<br />
Cumpla con los plazos y procedimientos de test de<br />
fugas.<br />
Peligro de Quemaduras<br />
Las zonas de calor ó frío (criogénicas) del<br />
Cromatógrafo de Gases pueden permanecer calientes ó<br />
frías durante bastante tiempo después de apagar el<br />
instrumento. Para evitar quemaduras asegureses de que<br />
todas las áreas que se calienten ó enfríen han vuelto a la<br />
temperatura ambiente, ó protejase adecuadamente las<br />
manos, antes de tocar las superficies potencialmente<br />
calientes ó frías.<br />
LC Prácticas de Seguridad<br />
Peligro de Alta Presión<br />
Si se rompe una línea de presión, ó se abre una válvula<br />
de seguridad accidentalmente bajo presión, la bomba<br />
puede generar líquidos a alta presión potencialmente<br />
peligrosos, produciendo un chorro a alta velocidad de<br />
líquidos volátiles y/ó tóxicos.<br />
Lleve protección facial cuando inyecte muestras ó<br />
realice mantenimiento de rutina.<br />
Nunca abra una línea ó una válvula bajo presión.<br />
Apague la bomba antes y deje que la presión baje a<br />
cero.<br />
Utilice depósitos irrompibles que sean capaces de<br />
operar a 50-60 psi.<br />
Mantenga cerrada la junta del depósito cuando se<br />
haye bajo presión.<br />
Lea y cumpla todas las NOTA, PRECAUCION, y<br />
ATENCION del manual.<br />
Cromatografía Flash<br />
El operador debe familiarizarse con las propiedades<br />
físico-químicas de los componentes de la fase móvil.<br />
Alejar los disolventes del contacto directo con los tubos<br />
de poliuretano ya que ciertos disolventes pueden causar<br />
reblandecimiento de los tubos o posibles fugas con<br />
riesgo de explosión.<br />
Todos los componentes del sistema deben estar<br />
conectados a un enchufe común con toma de tierra<br />
común. Esta toma de tierra debe ser una toma de tierra<br />
verdadera en lugar de flotante.<br />
Los disolventes no-polares pueden originar carga<br />
estática cuando son bombeados por el sistema. Todos<br />
los recipientes que contienen fase móvil (incluyendo<br />
los tubos y los recipientes de recogida) deben estar<br />
conectados a tierra para disipar la electricidad estática.<br />
Utilizar medidores de carga estática y los debidos<br />
dispositivos de descarga (por Ej., ionizadores de aire)<br />
para salvaguardarse contra la creación de electricidad<br />
estática.<br />
Radiación Ultravioleta<br />
Los detectores del Cromatógrafo de Líquidos que<br />
utilizan una fuente de luz ultravioleta disponen de<br />
protección para prevenir exposiciones radioactivas al<br />
personal.<br />
Para una correcta protección:<br />
Asegurese de que las cubiertas de protección de la<br />
lámpara de los detectores está correctamente<br />
situada durante su funcionamiento.<br />
No mire directamente a las celdas del detector ó a<br />
la fuente de luz UV. Cuando inspeccione la fuente<br />
de luz ó la celda, utilice siempre una protección<br />
para los ojos como gafas de borosilicato ó<br />
poliestireno.<br />
03-914603-84:11 3 of 4
Disponibilidad de Recambios<br />
Es Política de Varian disponer de Recambios para cualquier instrumento y<br />
la mayoría de los accesorios por un periodo de cinco (5) años después del<br />
último instrumento fabricado. Los recambios durante esos cinco años<br />
estarán disponibles, pero siempre bajo el sistema “Según disponibilidad”.<br />
Los Recambios están definidos como todas aquellas partes individuales<br />
mecánicas ó eléctricas que son susceptibles de fallo durante su normal<br />
proceso de operación. Por ejemplo, relés, lámparas, sondas de temperatura,<br />
elementos del detector, motores, etc. Las planchas de metal, partes de la<br />
estructura, placas de circuitos integrados, y otros módulos funcionales son<br />
normalmente susceptibles de reparación y por lo tanto sólo estarán<br />
disponibles bajos el sistema “Según disponibilidad” después del último<br />
instrumento fabricado.<br />
Disponibilidad de<br />
Servicio<br />
Varian ofrece una gran variedad de<br />
sistemas de Servicio para mantener<br />
el soporte a sus usuarios tras el<br />
periodo de garantía. El Soporte de<br />
Servicio se ofrece a través de<br />
atractivos Contratos de Servicio ó<br />
bajo un sistema de facturación de<br />
mano de obra y materiales. El<br />
mantenimiento y el entrenamiento<br />
se realiza por ingenieros<br />
cualificados bajo Contrato ó<br />
petición.<br />
Oficinas de Instrumentación Analítica Varian<br />
Para cualquier consulta sobre Instrumentación Analítica, Servicio Técnico ó Recambios y Accesorios,<br />
contacte con su oficina local:<br />
Argentina<br />
Buenos Aires<br />
Tel. +54.11.4.783.5306<br />
Australia<br />
Mulgrave, Victoria<br />
Tel. +61.3.9566.1134<br />
Austria<br />
Vösendorf bei Wien<br />
Tel. +43.1.699.9669<br />
Benelux<br />
Bergen Op Zoom<br />
Tel. +31.164.282.800<br />
Brazil and Latin America (S)<br />
São Paulo<br />
Tel. +55.11.820.0444<br />
Canada<br />
Mississauga, Ontario<br />
Tel. 800.387.2216<br />
China<br />
Beijing<br />
Tel. +86.106209.1727<br />
Europe<br />
Middelburg, The Netherlands<br />
Tel. +31.118.671.000<br />
France<br />
Les Ulis Cédex<br />
Tel. +33.1.6986.3838<br />
Germany<br />
Darmstadt<br />
Tel. +49.6151.7030<br />
India<br />
Mumbai<br />
Tel. +91.22.857.0787/88/89<br />
Italy<br />
Torino<br />
Tel. +39.011.997.9111<br />
Japan<br />
Tokyo<br />
Tel. +81.3.5232.1211<br />
Korea<br />
Seoul<br />
Tel. +82.2.345.22452<br />
Mexico and Latin America (N)<br />
Mexico City<br />
Tel. +52.5.523.9465<br />
Russian Federation<br />
Moscow<br />
Tel. +7.095.937.4280<br />
Spain<br />
Madrid<br />
Tel. +34.91.472.7612<br />
Sweden<br />
Solna<br />
Tel. +46.8.445.1620<br />
Switzerland<br />
Varian AG<br />
Tel. +41.848.803.800<br />
Taiwan<br />
Taipei Hsien<br />
Tel. +886.2.698.9555<br />
United Kingdom and<br />
Ireland<br />
Walton-on-Thames<br />
Tel. +44.1932.898000<br />
Venezuela<br />
Valencia<br />
Tel. +58.41.257.608<br />
United States<br />
Walnut Creek, California, USA<br />
Tel. +1.800.926.3000<br />
(<strong>GC</strong> and <strong>GC</strong>/<strong>MS</strong>)<br />
Tel. +1.800.367.4752<br />
(LC)<br />
www.varianinc.com<br />
4 of 4 03-914603-84:11
Contents<br />
Functional Description.............................................................................................................7<br />
Introduction .................................................................................................................................................................7<br />
Technical Specifications .............................................................................................................................................9<br />
Saturn <strong>2000</strong> <strong>GC</strong>/<strong>MS</strong> System Performance Specifications...................................................................................9<br />
Physical Specifications.........................................................................................................................................9<br />
The Gas Chromatograph............................................................................................................................................9<br />
The Mass Spectrometer ...........................................................................................................................................10<br />
Mechanical Assemblies ............................................................................................................................................10<br />
Controls and Indicators ......................................................................................................................................10<br />
Cooling Fans ......................................................................................................................................................11<br />
Turbomolecular Pump Vacuum System ............................................................................................................13<br />
Turbomolecular Pump Vacuum Manifold...........................................................................................................14<br />
Diffusion Pump Vacuum System .......................................................................................................................15<br />
The Pneumatics Manifold...................................................................................................................................19<br />
The Transfer Line...............................................................................................................................................19<br />
Ion Trap Assembly .............................................................................................................................................21<br />
Ion Gauge...........................................................................................................................................................25<br />
Foreline Pump ..........................................................................................................................................................26<br />
Electronic Assemblies ..............................................................................................................................................26<br />
The Power Input Subsystem and Turbomolecular Pump Controller .................................................................28<br />
Main Power Circuit .............................................................................................................................................28<br />
Power Board ......................................................................................................................................................29<br />
The RF Generator Assembly .............................................................................................................................30<br />
The Manifold Electronics Assembly ...................................................................................................................31<br />
The Data System......................................................................................................................................................33<br />
Computer/Instrument Interface.................................................................................................................................33<br />
The Computer...........................................................................................................................................................34<br />
The AutoSampler......................................................................................................................................................34<br />
Chemical Ionization Options .................................................................................................35<br />
Introduction ...............................................................................................................................................................35<br />
Installing CI Reagent Gas.........................................................................................................................................35<br />
CI Reagent Gas Requirements..........................................................................................................................36<br />
Setting up the CI Reagent Gas Supply ..............................................................................................................36<br />
Checking the Reagent Gas Plumbing for Leaks................................................................................................39<br />
Setting Flows of CI Reagents ...................................................................................................................................39<br />
Default Parameters for Gaseous CI Reagents ..................................................................................................40<br />
Default Parameters for Liquid CI Reagents .......................................................................................................40<br />
Ion Intensities for Standard CI Reagents ...........................................................................................................41<br />
Setting CI Gas Pressure in a Diffusion Pump System.......................................................................................41<br />
The Liquid CI Inlet Option.........................................................................................................................................42<br />
Installation of the Liquid CI Inlet.........................................................................................................................42<br />
Filling/Refilling the Liquid CI Reservoir Bulb......................................................................................................45<br />
Use Polypropylene Caps to Preserve Liquids in Reservoirs .............................................................................45<br />
1 of 177
Setting Flows of Vapor from Liquid CI Reagents...............................................................................................46<br />
Returning to Gaseous CI Reagent <strong>Operation</strong>....................................................................................................47<br />
Installing and Using the Multiple CI Module .............................................................................................................47<br />
Pre-Installation Checklist....................................................................................................................................48<br />
Installing the Multiple CI Assembly ....................................................................................................................49<br />
Cable Connections to the <strong>GC</strong> External Events Board .......................................................................................54<br />
Adding Liquid CI Reagents to the MCI Module..................................................................................................54<br />
Adding Gaseous Reagents to the MCI Module .................................................................................................55<br />
Adjusting Flows of CI Reagents.........................................................................................................................55<br />
Setting CI/<strong>MS</strong> Parameters in the <strong>MS</strong> Method Editor .........................................................................................59<br />
Adjusting Reagent Flow for Each CI Reagent ...................................................................................................61<br />
Building <strong>GC</strong>/<strong>MS</strong> Methods to Use Different CI Reagents ...................................................................................63<br />
Preparing a Standard <strong>GC</strong>/EI/<strong>MS</strong> Method...........................................................................................................63<br />
Methods for Single CI Reagents ........................................................................................................................65<br />
<strong>GC</strong>/<strong>MS</strong> SampleList for Alternating EI/<strong>MS</strong> and CI/<strong>MS</strong> Acquisitions....................................................................66<br />
Multiple CI Reagents in Consecutive Runs........................................................................................................69<br />
Multiple CI Reagents in the Same Run..............................................................................................................70<br />
MCI Module Maintenance.........................................................................................................................................72<br />
Handling and Storage of CI Liquids in Reservoir Bulbs.....................................................................................73<br />
Cleaning Reservoir Bulbs...................................................................................................................................73<br />
Changing a Channel from Liquid to Gas <strong>Operation</strong>...........................................................................................73<br />
Changing a Channel from Gas to Liquid <strong>Operation</strong>...........................................................................................75<br />
Leak Checking ...................................................................................................................................................76<br />
Cross-Contamination Effects .............................................................................................................................76<br />
Hints for Successful <strong>Operation</strong> of the MCI Module............................................................................................77<br />
System Start-up and Shutdown ............................................................................................79<br />
Diffusion Pump Shutdown ........................................................................................................................................79<br />
Diffusion Pump Startup.............................................................................................................................................81<br />
Mass Spectrometer Maintenance..........................................................................................83<br />
Periodic Maintenance ...............................................................................................................................................83<br />
Checking Foreline Pump Oil Level and Condition....................................................................................................83<br />
Purging Foreline Pump Oil .......................................................................................................................................85<br />
Changing Foreline Pump Oil ....................................................................................................................................85<br />
Flushing..............................................................................................................................................................86<br />
Changing the Oil Mist Cartridge ...............................................................................................................................87<br />
Check Cooling Fans Turbomolecular Pump System................................................................................................88<br />
How to Replace the Turbomolecular Pump..............................................................................................................90<br />
Check Cooling Fans Diffusion Pump System...........................................................................................................92<br />
Checking the Diffusion Pump Fluid Level and Condition .........................................................................................93<br />
Turning Off the Diffusion Pumped Mass Spectrometer............................................................................................94<br />
Replacing the Diffusion Pump Thermocouple Gauge ..............................................................................................95<br />
Replacing the Diffusion Pump Peltier Baffle.............................................................................................................96<br />
Cleaning the Diffusion Pump Peltier Baffle ..............................................................................................................97<br />
Removing the Diffusion Pump ..................................................................................................................................98<br />
Topping Off the Diffusion Pump Fluid Level...........................................................................................................100<br />
Cleaning the Diffusion Pump ..................................................................................................................................100<br />
Changing the Diffusion Pump Heater.....................................................................................................................103<br />
Reinstalling the Diffusion Pump..............................................................................................................................104<br />
Turning on the Mass Spectrometer ........................................................................................................................105<br />
How to Service the Ion Trap ...................................................................................................................................106<br />
Retract/Remove the Transfer Line .........................................................................................................................108<br />
Remove the Analyzer Assembly.............................................................................................................................110<br />
2 of 177
Replace the Electron Multiplier...............................................................................................................................111<br />
Replace the Filament(s) .........................................................................................................................................112<br />
Remove the Ion Trap Oven ....................................................................................................................................113<br />
Cleaning the Trap Components..............................................................................................................................113<br />
Disassemble the Trap Components.................................................................................................................113<br />
Clean the Trap Components............................................................................................................................114<br />
Clean SilChrom Ion Trap Electrodes ...............................................................................................................116<br />
Clean the Two Quartz or Silica Coated Spacers .............................................................................................116<br />
Reassemble the Trap.......................................................................................................................................117<br />
Re-install the Trap Oven.........................................................................................................................................117<br />
Reposition the Electron Multiplier ...........................................................................................................................118<br />
Re-install the Analyzer Assembly ...........................................................................................................................118<br />
Install the Transfer Line ..........................................................................................................................................119<br />
Close the Vent ........................................................................................................................................................119<br />
Turn on the Mass Spectrometer .............................................................................................................................119<br />
Bake Out the Trap ..................................................................................................................................................119<br />
Check Ion Trap <strong>Operation</strong> ......................................................................................................................................120<br />
Fill the Calibration Compound Vial .........................................................................................................................120<br />
<strong>GC</strong> Maintenance ...................................................................................................................123<br />
Overview.................................................................................................................................................................123<br />
General <strong>GC</strong> Maintenance.......................................................................................................................................124<br />
Check and Renew Gas Supplies .....................................................................................................................124<br />
Leak Check ......................................................................................................................................................124<br />
Gas Purifier Replacement................................................................................................................................125<br />
Injector Maintenance........................................................................................................................................127<br />
1079 Injector ...........................................................................................................................................................129<br />
Remove the Glass Insert..................................................................................................................................130<br />
Replace the Glass Insert..................................................................................................................................131<br />
Clean the Glass Insert......................................................................................................................................131<br />
Deactivate the Glass Insert..............................................................................................................................132<br />
How to Remove the Capillary Column from the System ........................................................................................133<br />
How to Install a New Capillary Column in the System ...........................................................................................135<br />
Troubleshooting ...................................................................................................................137<br />
How to Isolate a <strong>GC</strong> or Mass Spectrometer Problem ............................................................................................137<br />
Checking the Data System .....................................................................................................................................137<br />
Checking the <strong>GC</strong> ....................................................................................................................................................137<br />
Checking the Mass Spectrometer ..........................................................................................................................137<br />
How to Troubleshoot Problems with Spectra .........................................................................................................138<br />
What To Do If No Spectrum Appears ..............................................................................................................138<br />
Check for an Open Filament ............................................................................................................................139<br />
Check the Turbomolecular Pump ....................................................................................................................139<br />
Check the RF Adjustment ................................................................................................................................139<br />
Check the Parameter Settings .........................................................................................................................139<br />
Check the Assembly of the Trap......................................................................................................................140<br />
Check the Electronics ......................................................................................................................................140<br />
What To Do If You Experience a Loss of High Mass Peaks ..................................................................................141<br />
What To Do If Part of the Spectrum is Missing ......................................................................................................141<br />
Check the RF Adjustment ................................................................................................................................141<br />
Check the RF Storage Level............................................................................................................................142<br />
Check the Trap Temperature...........................................................................................................................142<br />
What to Do If the Resolution is Poor But the Air and Water Levels are Acceptable ..............................................142<br />
Check the Ion Content of the Trap...................................................................................................................142<br />
3 of 177
Check the Axial Modulation Setting .................................................................................................................143<br />
What To Do If There is a High Baseline at High Masses .......................................................................................143<br />
What to Do If the Trap Function Calibration Fails After the Calibration Ions Have Been Correctly Identified .......144<br />
Check the Electron Multiplier Voltage ..............................................................................................................144<br />
Check the Cal Gas Pressure............................................................................................................................144<br />
How to Check for Leaks .........................................................................................................................................144<br />
How to Establish the Conditions Required to Check for Leaks .......................................................................144<br />
How to Fix High Water Levels ................................................................................................................................149<br />
Using a Leak Detection Gas to Troubleshoot for Air Leaks ...................................................................................150<br />
How to Fix a Large Air Leak ...................................................................................................................................151<br />
How to Fix a Small-To-Moderate Air Leak..............................................................................................................151<br />
Check <strong>GC</strong> Connections:...................................................................................................................................151<br />
How to Troubleshoot the <strong>GC</strong> ..................................................................................................................................152<br />
How to Run the COLTEST Sample ........................................................................................................................152<br />
Set Up the Injector Conditions .........................................................................................................................152<br />
Set Up the Column...........................................................................................................................................153<br />
Set Up the Transfer-Line and Trap-Temperature Conditions ..........................................................................153<br />
Set Up the Mass Spectrometer Acquisition Method ........................................................................................153<br />
How to Troubleshoot Common Chromatographic Problems ...........................................................................155<br />
Correction of Solvent Tailing or Broadening Problems....................................................................................155<br />
Correction of Tailing Sample Peaks for Particularly Active Components ........................................................155<br />
Correction of Low Response and Severe Tailing with High Boiling Point Compounds...................................155<br />
Correction of Leading Sample Peaks (Reverse Tailing)..................................................................................156<br />
Correction of Poor Resolution 1 .........................................................................................................................156<br />
Lack of Reproducibility of Peak Size................................................................................................................156<br />
Correction of Peak Splitting (Particularly for Low Boilers) ...............................................................................157<br />
Correction of Extra, Unexpected Peaks in the Chromatogram........................................................................157<br />
Correction of Retention Time Differences Between Runs ...............................................................................158<br />
Troubleshooting the Diffusion Pump System....................................................................159<br />
Overview.................................................................................................................................................................159<br />
Problems during Startup.........................................................................................................................................159<br />
Problems During Routine <strong>Operation</strong>.......................................................................................................................161<br />
Miscellaneous Procedures and Instructions......................................................................165<br />
Other Documents....................................................................................................................................................165<br />
Site Requirements ..................................................................................................................................................165<br />
Site Preparation ...............................................................................................................................................165<br />
Power ...............................................................................................................................................................165<br />
Quality of Power...............................................................................................................................................167<br />
Operating Environment...........................................................................................................................................168<br />
Temperature.....................................................................................................................................................168<br />
Humidity ...........................................................................................................................................................168<br />
Exhaust System ...............................................................................................................................................169<br />
Gas Requirements..................................................................................................................................................169<br />
Helium - <strong>GC</strong> Carrier Gas..................................................................................................................................169<br />
Methane, Isobutane - CI Reagent Gases (with CI option only) .......................................................................169<br />
Ammonia - CI Reagent Gas (with CI option only)............................................................................................169<br />
Cryogenics .......................................................................................................................................................170<br />
Other Gases.....................................................................................................................................................170<br />
How to Install the Saturn <strong>GC</strong>/<strong>MS</strong>............................................................................................................................170<br />
How to Move the Saturn <strong>GC</strong>/<strong>MS</strong> ............................................................................................................................171<br />
Parts and Supplies..................................................................................................................................................171<br />
Kits, Assemblies, Boards, and Cables .............................................................................................................171<br />
4 of 177
Trap Components ............................................................................................................................................172<br />
Pump Spares, Pumps, Pump Conversion Parts..............................................................................................172<br />
Diffusion Pump Spares ....................................................................................................................................173<br />
<strong>GC</strong> Spares........................................................................................................................................................174<br />
Tools, Test Samples, etc..................................................................................................................................174<br />
Additional Saturn Spares .................................................................................................................................175<br />
CI Parts/Spares................................................................................................................................................175<br />
Multiple CI Module Parts Lists..........................................................................................................................175<br />
MCI Module Accessory Kit...............................................................................................................................176<br />
Open Split Interface .........................................................................................................................................176<br />
Calling Varian Service ............................................................................................................................................177<br />
5 of 177
6 of 177
Functional Description<br />
Introduction<br />
The <strong>Saturn®</strong> <strong>2000</strong> <strong>GC</strong>/<strong>MS</strong> has four principal components:<br />
• Gas chromatograph (<strong>GC</strong>)<br />
• Mass spectrometer (<strong>MS</strong>)<br />
• Data system (DS)<br />
• AutoSampler (optional)<br />
The following figure is a functional block diagram of the Saturn <strong>GC</strong>/<strong>MS</strong>. A short,<br />
line-of-sight transfer line connects the <strong>GC</strong> and mass spectrometer. The<br />
AutoSampler sits on top of the <strong>GC</strong>.<br />
A fused silica capillary column in the <strong>GC</strong> passes through the transfer line directly<br />
into the ion trap assembly (see Principal Components of the Saturn <strong>GC</strong>/<strong>MS</strong> on<br />
page 2). Samples are injected either manually or via the AutoSampler onto the<br />
capillary column through the <strong>GC</strong> injection port.<br />
The gas chromatograph then separates the sample molecules. Effluent from the<br />
<strong>GC</strong> passes through the transfer line and into the ion trap. The sample molecules<br />
next undergo electron or chemical ionization before being analyzed according to<br />
their mass-to-charge ratios.<br />
The ions are detected by an electron multiplier, which produces a signal<br />
proportional to the number of ions detected. The electron multiplier passes the<br />
ion current signal to the system electronics, which in turn amplify the signal,<br />
digitize the result, and pass it on to the data system for further processing and<br />
display. Refer to the following Functional Block Diagram.<br />
7 of 177
A Foreline Pump B Transfer Line C <strong>GC</strong> Oven D Capillary Column<br />
E Turbomolecular Pump F Ion Trap Assembly<br />
Principal Components of Saturn <strong>GC</strong>/<strong>MS</strong> (Top View)<br />
8 of 177
Technical Specifications<br />
The Gas Chromatograph<br />
NOTE: Specifications are identical for turbomolecular pump and diffusion pump<br />
<strong>GC</strong>/<strong>MS</strong> systems unless specified.<br />
Saturn <strong>2000</strong> <strong>GC</strong>/<strong>MS</strong> System Performance<br />
Specifications<br />
Ionization Mode: Electron Ionization standard, Chemical Ionization optional.<br />
<strong>MS</strong>/<strong>MS</strong>: Patented Modulated Resonant dissociation provides chromatographic spectral<br />
consistency and wide dynamic range. Patented non-Resonant dissociation provides<br />
spectral consistency and wide dynamic range, as well as additional spectral information<br />
via cascading.<br />
Mass Range: 10 to 650 u. Scan range time programmable throughout the analysis.<br />
Full Spectrum Scan Rate: Up to 10 Hz, depending upon mass range selected.<br />
Physical Specifications<br />
Saturn <strong>GC</strong>/<strong>MS</strong>:<br />
Height 21 inches (51 cm)<br />
Depth 24 inches (61 cm)<br />
Width 38 inches (81 cm)<br />
Weight 170 pounds (73 Kg)<br />
Installation Requirements:<br />
Supplied by Customer<br />
Power: Two dedicated Fourplexes, each<br />
rated at 115 Vac ±15%, 60 Hz, 20A or<br />
230 Vac ±15%,<br />
50 Hz, 10-16 A.<br />
GASES:<br />
Carrier Gas: Ultra high purity helium;<br />
purity 99.998% with less than one ppm<br />
each of water, oxygen, and total<br />
hydrocarbons.<br />
CI Reagent Gases: Methane, isobutane,<br />
ammonia - purity 99.99%.<br />
Environment: Combined <strong>GC</strong>/<strong>MS</strong>/DS will<br />
average 15,000 Btu/h-1 output when<br />
considering air conditioning needs.<br />
Combined <strong>GC</strong>/<strong>MS</strong>/DS requires 6-12 inches<br />
distance from walls.<br />
Indoor Use<br />
Altitude up to 2500 m<br />
Temperatures:<br />
Turbomolecular Pump: 59-80 °F (15-27 °C)<br />
Diffusion Pump: 59-95 °F (15-35 °C).<br />
Relative Humidity: 40-80% with no<br />
condensation.<br />
Installation Category II<br />
Pollution Degree: 2<br />
The Saturn <strong>GC</strong>/<strong>MS</strong> uses the high performance Varian Model 3800 or 3900 Gas<br />
Chromatograph. The gas chromatograph comes with a 1079 or 1177 Universal<br />
Capillary Injector which provides five modes of injection - isothermal split and<br />
splitless, temperature-ramped splitless, on-column and large volume. For further<br />
details about the <strong>GC</strong>, please see the Varian 3800 Gas Chromatograph Getting<br />
Started <strong>Manual</strong> (03-914647-00) and the 3800 <strong>GC</strong> Operator's <strong>Manual</strong> (03-<br />
914648-00).<br />
9 of 177
The Mass Spectrometer<br />
The Saturn <strong>GC</strong>/<strong>MS</strong> employs an ultra trace ion trap mass spectrometer. The<br />
mass spectrometer consists of the mechanical and electronic assemblies. The<br />
following sections describe these assemblies.<br />
The instrument is separated into the electronics and analyzer compartments.<br />
The electronics compartment includes the<br />
• Scan acquisition processor/waveform board (SAP/Wave board)<br />
• Power board<br />
• The analyzer compartment includes the<br />
• Transfer line<br />
Mechanical Assemblies<br />
• Vacuum manifold (including the ion trap)<br />
• Vacuum pump and controller<br />
• RF coil and generator<br />
• Pneumatics manifold<br />
The Saturn mechanical assemblies include the following:<br />
• Controls and indicators<br />
• Cooling fans<br />
• Vacuum system<br />
• Transfer line<br />
• Ion trap assembly<br />
Controls and Indicators<br />
The main power switch for the Saturn <strong>GC</strong>/<strong>MS</strong>, located on the rear panel, controls<br />
power to the vacuum system and to the electronics.<br />
When the main power switch is turned on, the light-emitting diode (LED) on the<br />
Saturn <strong>GC</strong>/<strong>MS</strong> front panel is illuminated.<br />
In the event of an emergency, shut off all power to the Saturn <strong>GC</strong>/<strong>MS</strong> by placing<br />
the main power switch in the OFF position and unplugging the instrument.<br />
10 of 177
A Main Power Switch (rear<br />
panel)<br />
J Cal Gas Vial<br />
B Service Switch K Vent Valve<br />
C Transfer Line Heater L RF Coil<br />
D Trap Heater M RF Coil Adjustment Screw<br />
E Manifold Heater N Transfer Line<br />
F LED O Turbomolecular Pump<br />
G Pneumatics Manifold P Cooling Fans<br />
H CI Cal Gas Adjust Q CI Shut-off Valve<br />
I Cal Gas Adjust<br />
Saturn <strong>2000</strong> <strong>GC</strong>/<strong>MS</strong> Mass Spectrometer<br />
Cooling Fans<br />
To prevent overheating, do not block air intakes.<br />
Turbomolecular Pump System<br />
Two fans mounted on the rear of the spectrometer cool the unit. The analyzer<br />
compartment fan draws air from the back, blowing it directly on the bearing end<br />
of the turbomolecular pump in the analyzer compartment. The air then flows past<br />
the manifold electronics and out the front of the instrument. The turbomolecular<br />
pump controller supplies power to the analyzer compartment fan.<br />
11 of 177
The electronics section fan draws air from the back, and blows it across the<br />
SAP/WAVE and power boards in the electronics compartment. Hot air from the<br />
<strong>GC</strong> oven does not affect the <strong>MS</strong> as long as the system is at least six inches from<br />
a wall. The power board supplies power to the electronics compartment fan.<br />
Diffusion Pump System<br />
The <strong>GC</strong>/<strong>MS</strong> Diffusion pump system has three cooling zones, each with its own<br />
fan mounted in the rear of the instrument.<br />
Cooling Zones<br />
Zone 1 is the upper part of the analyzer compartment. Its purpose is to provide<br />
forced air-cooling for the Peltier baffle’s heat sink. It also provides cooling for the<br />
manifold electronics. The upper fan on the rear panel pulls air in through the<br />
front of the instrument. The air is drawn over the manifold electronics, ducted<br />
over the Peltier baffle heat sink, and expelled through the rear of the instrument.<br />
The diffusion pump controller monitors operation of this fan. Fan failure will<br />
trigger a system shutdown.<br />
The Peltier Baffle ducting must be left in position at all times, or the Peltier<br />
baffle will overheat allowing back streaming pump vapor to contaminate the<br />
analyzer.<br />
Zone 2 is the electronics compartment, diffusion pump controller, and RF<br />
generator board. Its purpose is to cool the majority of the instrument’s printed<br />
circuit boards. The mid level fan on the rear panel pulls air in from two directions.<br />
The primary cooling air supply is pulled in through the front of the instrument,<br />
over the power board and SAP/Wave board, and expelled through the rear of the<br />
instrument. A secondary air supply enters through the left side panel, is ducted<br />
over the RF generator board, the diffusion pump controller, and then merges with<br />
the primary airflow.<br />
12 of 177
Zone 3 is the diffusion pump compartment. The lower fan on the rear panel pulls<br />
air in through carefully positioned vents in the left side panel. Airflow is ducted<br />
around the diffusion pump’s cooling fins, and expelled through the rear of the<br />
instrument.<br />
The left side cover must remain in place whenever the instrument is on. Failure<br />
to do so will cause the airflow to bypass the pump, which will overheat and<br />
trigger a system shutdown. Fan failure will have the same result. <strong>GC</strong> side<br />
cover must also be in place.<br />
Turbomolecular Pump Vacuum System<br />
The turbomolecular vacuum system evacuates excess water vapor, air, and<br />
carrier gas from the mass spectrometer ion trap assembly. Principal<br />
turbomolecular vacuum system components include<br />
• Vacuum manifold<br />
• Turbomolecular pump<br />
• Foreline pump<br />
• Vent valve<br />
• Calibration gas valve<br />
• CI reagent gas valves<br />
Below is a diagram of the vacuum system.<br />
The Saturn Turbomolecular Vacuum System<br />
13 of 177
Turbomolecular Pump Vacuum Manifold<br />
The vacuum manifold, which can be heated for bake out, encloses the ion trap<br />
assembly. The vacuum manifold is a stainless-steel tube, which houses the<br />
analyzer. The turbomolecular vacuum pump, which evacuates the manifold,<br />
discharges into a foreline pump. (Also see Diffusion Pump Vacuum System<br />
section for additional vacuum manifold information for the diffusion pump<br />
system.)<br />
The vacuum manifold sits atop the RF coil housing. The turbomolecular pump<br />
makes an airtight seal with the manifold, to which it is mounted horizontally with a<br />
Viton® O-ring. The ion trap assembly suspends from the analyzer flange, and<br />
extends into the body of the manifold. The manifold makes an airtight seal with<br />
the analyzer flange, also via a Viton® O-ring. Quick release tabs permit easy<br />
removal of the trap in the absence of vacuum.<br />
Eight electrical feed throughs pass through the analyzer flange, i.e.<br />
• One for the electron gate<br />
• Three for the filament assembly<br />
• Two for the axial modulation voltages applied to the filament and<br />
multiplier end cap electrodes of the ion trap assembly<br />
• One for the high voltage to the electron multiplier cathode<br />
• One for the ion current signal from the electron multiplier anode<br />
Another feed through passes through the underside of the manifold to provide<br />
radio frequency (RF) voltage to the ring electrode.<br />
An ion gauge monitors the pressure inside the manifold by generating and<br />
collecting ions from any gas present. The ion gauge also passes through the<br />
analyzer flange.<br />
14 of 177
Four additional inlets introduce material into the vacuum manifold. These inlets<br />
include<br />
• One for the transfer line<br />
• One for the CI reagent gas<br />
• One for introduction of the calibration gas<br />
• One for venting<br />
Turbomolecular Vacuum Pump<br />
A turbomolecular vacuum pump provides the high vacuum for the Saturn <strong>GC</strong>/<strong>MS</strong>.<br />
Under normal operating conditions, this pump supplies a vacuum of<br />
approximately 10 -5 Torr (1.33x10 -3 Pa) in the manifold region outside the ion trap<br />
assembly. The pump is rated at 70 liters/second and operates at 60<br />
liters/second; it is air cooled and thermostatically protected. If the temperature of<br />
the pump housing near the bearing exceeds 60 °C, the pump speed will<br />
automatically shut down.<br />
A turbomolecular-pump controller regulates and supplies power to the pump.<br />
The controller sits below the pump in the analyzer compartment of the<br />
spectrometer. Turning off the main power switch on the rear panel of the mass<br />
spectrometer shuts off power to the turbomolecular-pump controller and thus to<br />
the pump.<br />
NOTE: The electronics service switch does not control the vacuum pumps.<br />
The turbomolecular-pump controller monitors the pump’s rotational speed. The<br />
controller sends a signal proportional to the pump speed to the SAP/Wave board<br />
via the power board. You can monitor the turbomolecular pump speed from the<br />
Instrument Control Page.<br />
If the speed of the pump is 92% or more of the maximum operating speed, the<br />
signal from the controller prompts the power control board to send a<br />
TURBOMOLECULAR SPEED OK signal to the SAP/Wave board. The<br />
SAP/Wave board uses the signal to enable or disable the filament, electron<br />
multiplier voltage, RF generator, CI reagent gas valve, and calibration gas valve<br />
by means of an electronic interlock.<br />
If the pump speed falls below 92% of its maximum operating speed, the<br />
TURBOMOLECULAR SPEED OK signal to the SAP/Wave board turns off. The<br />
filament, electron multiplier, RF generator, CI reagent gas valve, and calibration<br />
gas valve turns off automatically. This condition probably indicates a major air<br />
leak in the system or that the pump is too warm. If this is the case, you will have<br />
to locate and fix the leak to make your system fully operational.<br />
Diffusion Pump Vacuum System<br />
The diffusion pump is an alternative vacuum pump to the turbomolecular pump.<br />
It is less costly to replace, has a longer life span, and can be operated in ambient<br />
temperatures up to 35 °C. However, servicing the instrument does take slightly<br />
longer because the diffusion pump must be fully cooled and the Peltier baffle<br />
warmed up to room temperature before breaking vacuum.<br />
15 of 177
The diffusion pump vacuum system removes air, carrier gas, adsorbed water<br />
vapor, and analytes from the mass spectrometer ion trap assembly. Principal<br />
diffusion pump components are shown, and include:<br />
• Vacuum manifold<br />
• Peltier baffle<br />
• Diffusion pump<br />
• Thermocouple gauge<br />
• Foreline pump<br />
• Vent valve<br />
• Calibration gas valve<br />
• CI reagent gas valves (optional)<br />
Saturn Diffusion Pump Vacuum System<br />
Diffusion Pump Vacuum Manifold<br />
The vacuum manifold is a stainless steel tube that maintains the ion trap<br />
assembly in a vacuum. Carrier gas is fed into the ion trap via the transfer line,<br />
and calibration gas and Chemical Ionization gases are fed into the ion trap via<br />
the pneumatics assembly. The vacuum manifold is evacuated and maintained at<br />
vacuum of approximately 1 x 10 -5 Torr (1.3 x 10 -3 Pa) by a diffusion pump. A<br />
Peltier baffle is incorporated in the manifold to minimize background<br />
contamination caused by the back streaming of pump vapors.<br />
The vacuum manifold, analyzer assembly, pneumatics assembly, Peltier baffle,<br />
and diffusion pump, are shown.<br />
16 of 177
A Manifold B Peltier Baffle C Diffusion Pump D Inlet Seal E Inlet Clamp<br />
F Analyzer Assembly G Pneumatics Manifold H RF Coil<br />
Cross Section of the Diffusion Pump Vacuum System<br />
Peltier Baffle<br />
The Peltier baffle is a cooled line of sight baffle that reduces back streaming of<br />
vacuum pump vapors into the vacuum manifold. The design consists of a onepiece<br />
baffle that is cooled by a thermoelectric cooling element (TEC). The TEC<br />
is essentially an electronic heat pump based on the Peltier effect. A voltage is<br />
applied to the TEC, causing heat to be pumped from the cold side of the TEC to<br />
the hot side. The cold side of the TEC draws heat from the baffle, thereby<br />
cooling it, and the hot side of the TEC pushes heat into the heat sink. The heat<br />
sink is cooled by forced air convection.<br />
The TEC is activated when the system is started, and remains on until it is<br />
switched off during the shutdown procedure.<br />
Diffusion Pump<br />
The ion trap assembly requires a vacuum of approximately 1 x 10 -5 Torr (1.3 x<br />
10 -3 Pa) for the generation and detection of ions. The Varian AX65 air-cooled<br />
diffusion pump with a pumping speed of 30 l/s for air and 65 l/s for helium<br />
provides this.<br />
The pump features two safety devices. The first is an over temperature switch<br />
that prevents catastrophic pump failure and subsequent ion trap contamination<br />
from over heating problems, such as a cooling fan failure or a blocked air inlet.<br />
The second feature is a sight glass that allows inspection of the fluid level of the<br />
diffusion pump and condition of the fluid without breaking vacuum. This reduces<br />
periodic maintenance time, and helps prevent the pump being run without fluid.<br />
17 of 177
Diffusion Pump Controller<br />
The diffusion pump controller controls and provides power to the following<br />
vacuum components:<br />
• TEC in the Peltier Baffle<br />
• Peltier baffle fan<br />
• Diffusion pump<br />
• Diffusion pump fan<br />
• Thermocouple gauge<br />
The diffusion pump controller is activated when the system’s main power switch<br />
is in the ON position. It will remain activated until the system is switched OFF.<br />
Upon activation, the controller will provide power to the TEC, Peltier baffle fan,<br />
and diffusion pump fan. It will also check the foreline pressure reading from the<br />
thermocouple gauge. If the foreline pressure has reached the diffusion pump’s<br />
required operational pressure after fifteen minutes, the controller will provide<br />
power to the diffusion pump. After another fifteen minutes (thirty minutes total),<br />
the diffusion pump will reach operational temperature, and the controller will<br />
issue a “DIFFUSION PUMP NORMAL” signal to the SAP/Wave board, which in<br />
turn provides power to the ion trap.<br />
During normal running conditions, the diffusion pump controller will continue to<br />
monitor the TEC, Peltier baffle fan, diffusion pump, and thermocouple gauge.<br />
The controller will initiate a system shutdown and send a fault signal to the<br />
SAP/Wave board if a power failure is detected on any of these components, or a<br />
pump over temperature is detected. The SAP/Wave board will shut off power to<br />
the ion trap. The controller will also discontinue power to the diffusion pump, and<br />
send a fault signal to the SAP/Wave board if a foreline overpressure is detected.<br />
Power to the diffusion pump will be restored, and the fault signal canceled when<br />
the overpressure problem no longer exists.<br />
The diffusion pump controller also ensures a safe shutdown when the instrument<br />
must be switched off for maintenance, repair, or relocation. The controller<br />
receives a shut down command from the SAP/Wave board, and immediately<br />
discontinues power to the diffusion pump. The controller will wait fifteen minutes<br />
before discontinuing power to the TEC. After another fifteen minutes (thirty<br />
minutes total), the controller issues a DIFFUSION PUMP OFF signal to the<br />
SAP/Wave board, and the shut down procedure may be completed.<br />
The diffusion pump may be restarted at any time during the shutdown procedure<br />
providing no fault condition exists. The controller will restore power to the<br />
diffusion pump if it receives a restart command during the first fifteen minutes of<br />
the shut down procedure. The diffusion pump will reach operational temperature,<br />
and the controller will issue a “DIFFUSION PUMP NORMAL” signal to the<br />
SAP/Wave board after fifteen minutes. A full thirty-minute start up will be initiated<br />
if the controller receives a restart command during the second fifteen minutes of<br />
the shut down procedure.<br />
Thermocouple Gauge<br />
A thermocouple gauge is a simple, rugged, vacuum gauge that is used to<br />
measure vacuum pressures in the 2 Torr (267 Pa) to 1 x 10 -3 Torr (1.3 x 10 -1 Pa)<br />
range. The gauge’s main purpose is to enable the diffusion pump controller to<br />
detect gross leaks and foreline pump failure.<br />
18 of 177
The thermocouple gauge is active whenever the diffusion pump controller is<br />
active. It is monitored during start up to ensure the vacuum system has been<br />
pumped down to the diffusion pump’s required operational pressure. Once the<br />
diffusion pump is operational, the thermocouple gauge is monitored to ensure the<br />
operational pressure is maintained.<br />
The Pneumatics Manifold<br />
The pneumatics manifold is an aluminum block mounted to the front of the<br />
vacuum manifold. It is equipped with two solenoid and needle valves for the cal<br />
gas and CI, the glass cal gas vial, and vent valve.<br />
The vent valve is a manually operated valve that connects to atmosphere via the<br />
pneumatics manifold. You open and close the vent valve via a toggle arm, which<br />
is accessible from the front of the instrument.<br />
The calibration-gas-valve assembly consists of a metering needle valve, an<br />
ON/OFF solenoid-operated valve, and a glass vial containing the calibration<br />
liquid. The assembly sits directly behind the instrument’s door. The needle valve<br />
controls calibration gas flow into the vacuum manifold through the solenoid valve.<br />
The calibration compound is perfluorotributylamine (PFTBA) or C12F27N, also<br />
known as fluorocarbon-43 (FC-43). A small glass vial attached to the valve<br />
assembly holds the compound. You set the flow of calibration gas into the<br />
manifold manually via a needle valve. The data system controls the opening and<br />
closing of the solenoid-operated valve.<br />
Two solenoid valves control the flow of CI reagent gas into the manifold. First,<br />
the shutoff valve near the rear panel opens to permit reagent gas flow into the<br />
instrument through a fitting. When this valve is open, the foreline pump removes<br />
a portion of the CI gas to prevent CI gas surges (pressure pulses) in the ion trap.<br />
The gas then flows through the shutoff valve through metering and solenoidoperated<br />
valves before entering the vacuum manifold. With the CI gas solenoid<br />
open, the CI needle valve determines the split ratio of the reagent flow between<br />
the manifold and foreline pump.<br />
You turn the CI reagent gas valve on and off via the data system from the<br />
Instrument Control Page or Acquisition, you adjust the flow rate of the reagent<br />
gas into the manifold by means of a metering valve.<br />
The Transfer Line<br />
A stainless-steel-tube transfer line directly couples the <strong>GC</strong> to the mass<br />
spectrometer. The transfer line keeps the <strong>GC</strong> column warm as the column<br />
enters the mass spectrometer. The transfer line is 12 cm (5 in.) long, and has a<br />
diameter of 4.1 cm (1.6 in.). One end enters a hole in the right side of the <strong>GC</strong><br />
before passing into the <strong>GC</strong> oven. The other end enters the vacuum manifold<br />
with the transfer-line tip inserted into the ion trap.<br />
The body of the transfer line consists of a stainless-steel weldment fitted with a<br />
center tube, a heat exchanger, and a boot. The heat exchanger is an aluminum<br />
cylinder that contains a cartridge heater and a thermocouple as the temperature<br />
sensor. The temperature sensor measures the temperature of the tube. The<br />
cartridge heater heats the cylinder, which in turn distributes heat evenly<br />
throughout the length of the transfer line tube. The boot of the transfer line,<br />
which mates to the <strong>GC</strong>, prevents hot air leakage from the <strong>GC</strong> Oven.<br />
19 of 177
Transfer Line<br />
A Spring B Boot C Tie Wrap D Washer E Transfer Line Tip<br />
F O-Ring G Heat Exchanger H Nose I E-Ring J Ferrule K Nut<br />
A bayonet mount feature secures the transfer line. Before you remove the trap,<br />
push gently on the bayonet mount as you twist it counterclockwise and pull the<br />
mount out. Make sure the transfer line extends out from the trap.<br />
NOTE: Failing to remove the transfer line before removing the trap may damage<br />
the trap heater post.<br />
The power board supplies power to the cartridge heater via a transfer line heater<br />
cable. The heater cable projects out from one end of the transfer line. It then<br />
plugs into a soft-shell connector on the top of the power board panel.<br />
You set the transfer line temperature from the Instrument Control Page. The<br />
maximum temperature that the transfer line can sustain is 350 °C; the minimum<br />
temperature depends on the <strong>GC</strong> oven and trap temperatures. In general, you can<br />
set the transfer line temperature as much as 30 °C below the maximum column<br />
operating temperature and not observe adverse chromatographic effects (e.g.,<br />
retention time shifts or peak broadening).<br />
20 of 177
A Heating Cable H O-ring<br />
B Boot I Transfer Line Tip<br />
C Nut J Heating Cable Slot<br />
D Ferrule K Nose Clip<br />
E Transfer Line/Alignment<br />
Tool<br />
L Bayonet Mount<br />
F Nose M Analyzer Assembly Tongue<br />
G Nose Hole N Analyzer Assembly Lock-Down Tabs<br />
Transfer Line Exploded View<br />
Ion Trap Assembly<br />
The ion trap assembly consists of<br />
• Trap oven<br />
• Filament assembly<br />
• Electron gate<br />
• Ion trap electrodes (3)<br />
• Quartz rings<br />
• Electron multiplier assembly<br />
The figure below shows the ion trap assembly along with its three electrodes,<br />
electron gate, and filament lens.<br />
NOTE: The Silica Coated Spacers have a shiny, mirror like finish on the inside<br />
surface.<br />
21 of 177
A Screw, 6/32, 4 places H Wave Washer<br />
B Clamping Plate I Gate Conductor<br />
C Exit End Cap J Trap Oven, “T” is located this side.<br />
D Quartz or Silica Coated Spacer, 2 places K Filament Assembly<br />
E RF Ring Electrode L Filament Clip<br />
F Filament End Cap M Screw<br />
G Electron Gate<br />
Ion Trap Assembly<br />
Trap Oven<br />
The trap oven is a heated anodized aluminum block that maintains a uniform<br />
temperature for the trap electrodes. A heater post on the manifold flange<br />
generates the heat. A thermal well measures the oven temperature. In addition,<br />
the oven holds the ionization filaments, and acts as a lens for focusing the<br />
ionizing electrons before they enter the trap.<br />
Filament Assembly<br />
The filament assembly sits in the trap oven. It is connected to three feed<br />
throughs on the manifold flange.<br />
The filament assembly consists of two filaments and a repeller plate. The two<br />
filaments are mounted side-by-side, with each filament approximately equidistant<br />
from the entrance hole of the oven’s electron focusing lens. Note that the Saturn<br />
<strong>GC</strong>/<strong>MS</strong> only uses one filament at any given time; the extra filament is provided<br />
as a back up in case the first one burns out.<br />
22 of 177
Filament Assembly Shown with Ion Trap<br />
Each filament is a rhenium wire. When sufficiently heated by electric current, the<br />
filament produces electrons by thermionic emission. The filament emission<br />
current refers to the flow of emitted electrons from the filament. The magnitude<br />
of the filament emission current is set in the Instrument Control Page. Emission<br />
current settings range from 5 to 100 μA.<br />
NOTE: It is unlikely that two filaments will have the same net flow of electrons<br />
into the ion trap. Thus, the signal amplitudes from two different filaments will<br />
probably not be the same. A typical difference is 2:1, but it may be as high as<br />
5:1.<br />
Electron Gate<br />
The electron gate is a cylindrical electrode that controls the entry of electrons into<br />
the ion trap cavity. When electrons emitted from the heated filament are not<br />
needed for ionization, the electron gate is held at a -150 Vdc potential. The<br />
electron gate sits inside the trap oven, in front of the lens and behind the end cap<br />
electrode. An anodization layer insulates it from the filament end cap.<br />
When the ion trap requires electrons, the electron gate potential changes from -<br />
150 to +150 Vdc. The gate potential remains positive for a variable length of<br />
time, e.g., from 10 μsec to 65 ms. During this interval, the electrons are focused<br />
into the ion trap cavity with sufficient energy, usually, 50 to 80 eV, to achieve<br />
electron ionization of the sample molecules (or of the reagent gas molecules in<br />
the case of chemical ionization).<br />
23 of 177
Ion Trap Electrodes<br />
The ion trap assembly contains three stainless steel electrodes:<br />
• Filament end cap electrode<br />
• Exit end cap electrode<br />
• RF ring electrode<br />
The filament end cap, exit end cap, and RF-ring electrodes have hyperbolic inner<br />
surfaces. Together, these electrodes form a cavity in which ionization,<br />
fragmentation, storage, and mass analysis take place.<br />
Energetic electrons enter the ion trap cavity through the filament end cap via the<br />
electron gate.<br />
There are seven holes in the center of the exit end cap electrode. Sample ions<br />
produced in the ion trap are ejected through these holes into the electron<br />
multiplier.<br />
Two identical quartz or silica-coated spacers separate the central ring electrode<br />
from the filament and exit end cap. The trap oven and its clamping plate hold the<br />
electrodes and spacers in place. A cutout is provided in the quartz spacers and<br />
in the exit end cap to allow the transfer line to enter the ion trap.<br />
The RF generator assembly provides high voltage RF that is applied to the RF<br />
ring electrode.<br />
Under the proper RF voltage, the ion trap electrodes create a three-dimensional,<br />
hyperbolic electric field. This field is capable of trapping the ions in stable,<br />
aperiodic orbits. As the RF voltage increases, however, the ion trajectories<br />
become unstable in increasing order of mass per charge. The ion trap ejects the<br />
ions and sends them to an electron multiplier for detection.<br />
During mass analysis, a supplementary RF voltage of 485 kHz is applied to the<br />
filament and exit end caps. This voltage, termed the axial modulation voltage,<br />
improves spectral mass resolution and analytical sensitivity. Other voltages may<br />
be applied between the end caps to implement such options as SECI and<br />
<strong>MS</strong>/<strong>MS</strong>. For further details, see the Saturn Method Editor for description of scan<br />
functions.<br />
Electron Multiplier<br />
The electron multiplier is positioned at the exit end cap electrode. It mounts in a<br />
pre-aligned position on a protective metal clip that you can easily remove to<br />
replace the multiplier. The multiplier detects positive ions as the ion trap ejects<br />
them through the holes in the exit end cap electrode. The continuous-dynode<br />
electron multiplier consists of a lead-oxide/glass, funnel-like resistor. A negative<br />
voltage of between -800 and -3000V is applied to the front end of the electron<br />
multiplier, referred to as the cathode. The back end of the cathode is held at<br />
ground potential, and is referred to as the anode.<br />
24 of 177
A Exit End Cap F Multiplier Contacts<br />
B Electron Multiplier Track G Multiplier High Voltage Pin<br />
C Multiplier Signal Pin H Transfer Line Alignment<br />
D EM Grid I Transfer Line Entrance Hole<br />
E Electron Multiplier Mount<br />
Position of the Electron Multiplier Relative to the Ion Trap<br />
The negative voltage applied to the cathode attracts the positive ions ejected<br />
from the ion trap cavity. These ions strike the cathode with sufficient velocity to<br />
dislodge electrons from the inner curving surface of the cathode. The<br />
increasingly positive potential gradient draws the ejected electrons into the<br />
electron multiplier, further accelerating them in the process. Because the<br />
electron multiplier is curved, the ejected electrons do not travel far before they<br />
again strike the inner surface of the multiplier, resulting in the emission of more<br />
electrons. This configuration produces a cascade of electrons that are<br />
accelerated toward ground potential at the exit end of the cathode.<br />
The anode collects the electrons, and passes the resulting ion current signal on<br />
to the integrator circuit on the lower manifold board. The ion current signal is<br />
proportional to the total number of electrons that the ion trap ejects. Typically,<br />
you will adjust the voltage that is applied to the electron multiplier until the gain is<br />
about 10 5 , i.e., until each ion that enters the electron multiplier generates<br />
approximately 10 5 electrons.<br />
Ion Gauge<br />
The optional Saturn <strong>GC</strong>/<strong>MS</strong> ion gauge design is based on the Bayard-Alpert<br />
gauge tube. The specifications for the gauge are similar to those of commercially<br />
available gauges. Fixed pressure readings with nominally identical gauges may<br />
exhibit variations of ±15%. An accuracy of ±25% in mid-range for any one gauge<br />
is considered typical.<br />
25 of 177
Foreline Pump<br />
Electronic Assemblies<br />
In general, the ion gauge exhibits good repeatability. However, the ion gauge<br />
response depends on gas composition. A certain pressure of air and water will<br />
give a different reading than that of Helium. The Ion Gauge is meant to be a<br />
rough indicator of vacuum conditions. It is not a precise quantitative tool.<br />
The gauge uses thoria-coated iridium (ThO-Ir) filaments. These filaments are<br />
burnout resistant, and therefore exhibit high tolerance to air and water in the<br />
vacuum manifold. There is a time delay associated with heating the filament.<br />
This delay translates to a delay in determining whether a filament is open. From<br />
15 to 20 seconds are usually required after you turn the filament on to obtain a<br />
stable reading.<br />
The ion gauge will measure pressures between 10 -6 and 10 -2 Torr. A logarithmic<br />
amplifier amplifies the collector current, and the data system interprets this<br />
current as measured vacuum.<br />
A foreline pump has two purposes. The first is reducing the vacuum system<br />
pressure to a level that will allow the operation of high vacuum pumps such as<br />
turbomolecular pumps and diffusion pumps. The second is maintaining the<br />
vacuum system pressure by removing the high vacuum pump’s exhaust gases.<br />
The foreline pump is connected to the high vacuum pump by a 2.1m (84 in.)<br />
length of 1.9 cm (0.75 in.) ID vacuum tubing. The pump plugs into the rear panel<br />
outlet labeled “J2 - LINE VOLTAGE - PUMP ONLY” on the rear of the <strong>MS</strong>.<br />
Power is supplied through this outlet and is controlled by the power switch on the<br />
rear panel.<br />
The foreline pump used on the Saturn <strong>GC</strong>/<strong>MS</strong> is a two-stage rotary vane pump<br />
with a pumping speed of 90 μL/min and a vacuum potential of 1.5 x 10 -3 Torr (2 x<br />
10 -1 Pa).<br />
If you use the Saturn <strong>GC</strong>/<strong>MS</strong> to analyze hazardous materials, be sure to affix<br />
the foreline pump exhaust to an exhaust system that complies with applicable<br />
safety regulations.<br />
The electronic assemblies consist of the following:<br />
• Power input subsystem and turbomolecular (or diffusion) pump controller<br />
(See Diffusion Pump Controller).<br />
• Power board<br />
• Scan acquisition processor/waveform (SAP/Wave) board<br />
• Manifold electronics assembly<br />
• RF generator board<br />
26 of 177
The electronics functions have been distributed throughout the spectrometer to<br />
minimize cable lengths between critical components. The SAP/Wave and power<br />
boards reside in an electronics enclosure that is separated from the analyzer<br />
section by a sheet metal bulkhead. The manifold electronics are enclosed<br />
directly above the analyzer. The RF generator attaches to the rear of the RF coil<br />
assembly.<br />
Below are diagrams of the electronic assemblies used in the Turbomolecular and<br />
Diffusion Pump Saturn <strong>2000</strong> <strong>GC</strong>/<strong>MS</strong>.<br />
The Saturn <strong>2000</strong> <strong>GC</strong>/<strong>MS</strong> Turbomolecular Pump Electronic Assemblies<br />
27 of 177
The Saturn <strong>2000</strong> <strong>GC</strong>/<strong>MS</strong> Diffusion Pump Electronic Assemblies<br />
The Power Input Subsystem and Turbomolecular<br />
Pump Controller<br />
The power input subsystem contains the following circuits and switches:<br />
• Main power switch<br />
• SERVICE switch<br />
• Line voltage switches<br />
Main Power Circuit<br />
Line power of 115 Vac ±15%, 60 Hz ±3 Hz (or 230 ±15 Vac, 50 Hz ±3 Hz) first<br />
enters the rear panel of the mass spectrometer, through J1, and then passes<br />
through the line filter and the circuit breaker. After the circuit breaker, power is<br />
split in two directions. One path supplies the turbomolecular pump controller and<br />
foreline pump via J2. The second path goes to the electronics service switch,<br />
which controls power going to the power board and the rest of the electronics.<br />
28 of 177
The electronics service switch allows the vacuum to the maintained in the event<br />
that the electronics need to be serviced.<br />
The line voltage switches are located on the power board and the turbomolecular<br />
controller. These switches are set at the factory.<br />
The turbo controller regulates the speed of the turbo pump. The controller<br />
provides turbo speed and startup power to the power board.<br />
WARNING:<br />
SHOCK HAZARD<br />
In the event of an emergency, shut off all power to the Saturn <strong>GC</strong>/<strong>MS</strong> by placing<br />
the main power switch in the OFF position.<br />
Power Board<br />
The power control board supplies power to all electronics components except the<br />
turbomolecular controller. It controls the heaters, ion trap and ion gauge<br />
filaments and solenoid valves.<br />
NOTE: The switching power supply is protected by a 5A, Non-Time-Delay fuse.<br />
The following switching power supplies reside on the board:<br />
• The +5V dc power supply, which supplies +5V dc voltage to all digital<br />
circuits.<br />
• The -15V and +15V dc power supplies, which supply the voltages to the<br />
analog circuits on the power board and the manifold electronics<br />
assembly.<br />
• The +20V and -20V dc power supplies, which supply the voltages to the<br />
SAP/Wave and RF generator board’s analog circuitry.<br />
• The +24 Vdc power supply supplies power for the solenoid valves,<br />
electronics compartment fan and the electron multiplier power supply.<br />
• The +55 Vdc power supply, which supplies unregulated +55 Vdc voltage<br />
to the RF generator board.<br />
• The 180-volt power supply that supplies voltage to the ion trap electron<br />
gate circuit and the ion gauge.<br />
The following circuits also reside on the board:<br />
• The trap and ion gauge filament control circuits, which provide current to<br />
heat the filament and regulate the emission current from the filament.<br />
You set the trap filament emission current between 5 and 100 μA via the<br />
data system.<br />
• Three heater control circuits that provide feedback control for the<br />
manifold, trap, and transfer line heaters. The trap heater uses a<br />
proportional integral (PI) control circuit. Because there is an integrator<br />
component in this controller, removing power from the circuit will produce<br />
a lengthy stabilization time, e.g., up to two hours (dependent on the<br />
temperature set point).<br />
• Three solenoid control circuits, which turn the calibration gas, CI reagent<br />
gas, and CI shutoff valve solenoids on and off.<br />
29 of 177
• The electron energy control circuits, which controls the dc bias on both<br />
the ion trap and ion gauge filaments.<br />
• The diagnostic multiplexer circuit, which routes the voltage output of<br />
various components, and circuits on the power control board to the<br />
SAP/Wave board. You can access these voltage outputs through the<br />
diagnostic pages.<br />
• Mounted on the top edge of the power board are 15 monitor LEDs.<br />
When illuminated, these lights indicate that the voltages of the various<br />
circuits on the power board are at their proper levels, and that there are<br />
no faults. During normal operation, all LEDs except the ±180 volts<br />
should be on. The ±180 volts only turns on when the filaments are on.<br />
The RF Generator Assembly<br />
The RF generator assembly consists of an RF generator circuit board, an RF<br />
detector circuit board, and the RF coil. A shielded housing beneath the vacuum<br />
manifold encloses the coil and RF detector circuit board. The RF generator<br />
circuit board is attached to the back of the shielded housing.<br />
The RF generator circuit board receives an analog signal from the SAP/Wave<br />
circuit board that is proportional to the current mass position in the scan, which is<br />
in turn proportional to the desired RF voltage applied to the ion trap. The RF<br />
detector circuit board sends a signal proportional to the actual amount of RF<br />
voltage applied to the ion trap to the RF generator board. The RF generator<br />
board compares the desired and actual amount of the RF voltage and adjusts the<br />
gain of an RF amplifier to cause the actual RF voltage to equal the desired RF<br />
voltage. Since the high voltage required at the ion trap exceeds the capabilities<br />
of conventional electronic amplifiers, a resonant LC circuit consisting of the RF<br />
coil and the ion trap capacitance is used. At resonance, the RF voltage at the ion<br />
trap end of the coil is about 100 times that at the RF generator circuit end of the<br />
coil.<br />
30 of 177
The Ion Trap Assembly<br />
The Manifold Electronics Assembly<br />
Two boards reside in the enclosure directly atop the Analyzer flange. The<br />
following circuitry, which is critical to the functioning of the ion trap or must be in<br />
close proximity to the trap, resides on these boards.<br />
• The electron multiplier power supply, which supplies high voltage (-800<br />
to -3000 Vdc) to the cathode of the electron multiplier.<br />
• The integrator circuit, which receives the amplified ion current from the<br />
anode of the electron multiplier, converts the current into voltage, e.g.,<br />
10 -7 A into 1.0V, and passes the voltage on to the SAP/Waveboard.<br />
• The trap filament selection relay.<br />
• The electron gate control that controls the gate polarity.<br />
• The axial-modulation low and high frequency transformers.<br />
31 of 177
• The ion gauge support circuitry, which includes filament On/Off and<br />
selection relays and a log amplifier for gauge read-back signal<br />
conditioning.<br />
• The Scan Acquisition Processor/Waveform Generator Board<br />
• The scan acquisition processor/waveform generator (SAP/Wave) board<br />
is a real-time control and acquisition microcomputer that makes use of<br />
an 80C186 microprocessor. The SAP/Wave board communicates with<br />
the data system via an IEEE-488 interface board installed in the data<br />
system computer bus. The SAP/ Waveboard performs the following<br />
functions:<br />
• Interprets instrument commands from the data system and produces a<br />
sequence of analog and digital signals that control operation of circuits<br />
on other Saturn <strong>GC</strong>/<strong>MS</strong> boards.<br />
• Collects analog and digital diagnostic data from other subsystems and<br />
transmits that information to the data system.<br />
• Filters, integrates and digitizes the ion current signal and transmits the<br />
spectra to the data system.<br />
• Generates axial modulation waveforms, including waveforms used by<br />
SECI, <strong>MS</strong>/<strong>MS</strong> and SIS options.<br />
Upon power-up, the 80C186 processor runs a ROM resident program that<br />
initializes the board. The program permits the processor to receive information<br />
through the IEEE-488 interface. When you start up the Saturn data system,<br />
operating information is downloaded to the SAP/Wave board’s RAM memory.<br />
The SAP/Wave board then performs its operations in response to the commands<br />
sent through the IEEE-488 interface.<br />
NOTE: The SAP/Wave board is accessed through two connectors on the rear<br />
panel of the instrument. J42 is an IEEE connection used for interconnection to<br />
the Data System. J43 is a D-shell connector labeled ‘Remote Option’ and is<br />
used for special research applications and the <strong>GC</strong> start signal.<br />
When a mass spectrum is acquired, the data system downloads parameters<br />
such as electron multiplier voltage, scan range and time, ionization mode, etc.<br />
The SAP/Wave board uses this information to create a scan over the desired<br />
mass range. During the scan, ion current data is accumulated and, at the end of<br />
the desired scan time, sent to the data system for further processing and display.<br />
The waveform generator is capable of generating waveforms over a wide range<br />
of frequencies and amplitudes. The data system produces a digital version of the<br />
desired time domain waveform, and downloads the resulting binary file RAM. At<br />
the appropriate time, the data is clocked out of the RAM into a waveform<br />
reconstruction DAC. The DAC output is then filtered to remove undesirable<br />
frequencies. The Saturn <strong>GC</strong>/<strong>MS</strong> uses the waveform generator in chemicalionization<br />
(SECI), <strong>MS</strong>/<strong>MS</strong>, or SIS applications; as well as in normal axial<br />
modulation.<br />
32 of 177
The Data System<br />
Computer/Instrument Interface<br />
Characteristics of the waveform generator include the following:<br />
• Dual-port RAM (256 Kbytes) to provide memory for single or multiple<br />
digitized waveforms<br />
• A selectable frequency generation clock (625 KHz, 1.25 MHz, or 2.5<br />
MHz and a 15-bit variable length counter to control timing<br />
• A 12-bit DAC, low pass filter and amplifier to reconstruct waveforms<br />
• A variable operational frequency range that depends on whether you are<br />
using the high frequency transformer (12 to 500 KHz) or low frequency<br />
transformer (200 Hz to 1.25 KHz)<br />
• Application of the waveform output to the end cap electrodes of the ion<br />
trap is done via the two transformers located in the manifold electronics<br />
assembly.<br />
NOTE: Before you can use any of the waveform options, i.e., SECI, <strong>MS</strong>/<strong>MS</strong>, or<br />
SIS, the waveform key(s) must be inserted into sockets U5, U6 and/or U7. The<br />
key(s) should be installed by the factory, or by a Varian Customer Support<br />
Representative.<br />
The data system (DS) has both hardware and software components. The<br />
hardware includes a computer/instrument interface, personal computer, video<br />
display monitor, and optionally, a printer.<br />
The software stored on the fixed disk drive includes programs to control the<br />
Saturn <strong>GC</strong>/<strong>MS</strong>, to set automatically Saturn system parameters, and to oversee<br />
scan-control, data-acquisition, and data-processing programs. For a complete<br />
description of Saturn software, refer to the Saturn Software Reference <strong>Manual</strong>.<br />
The computer/instrument interface for the Saturn <strong>GC</strong>/<strong>MS</strong> is an IOtech IEEE-488<br />
Interface Board. This board is installed in the computer. The IEEE-488 is a<br />
standard computer/instrument communications link for all types of computers.<br />
For a complete description of the IEEE-488 Interface Board and its functions,<br />
please refer to the documentation provided by the manufacturer.<br />
33 of 177
The Computer<br />
The AutoSampler<br />
Please refer to your owner's guide for any information about your computer.<br />
Also, see the Release Notes, which lists compatible computer hardware and<br />
software.<br />
The optional AutoSamplers available are the Varian 8200, 8400 and 8410<br />
AutoSamplers. For complete installation and operating instructions, please refer<br />
to your AutoSampler Operator's <strong>Manual</strong>.<br />
34 of 177
Chemical Ionization Options<br />
Introduction<br />
Installing CI Reagent Gas<br />
Chemical ionization (CI) provides mass spectral data that complement electron<br />
ionization (EI) data for the analysis of complex compounds. In the standard CI<br />
mode of operation, a CI reagent gas is introduced into the ion trap analyzer from<br />
an external gas supply cylinder. The reagent gas is ionized by EI to form reagent<br />
ions. These reagent ions then ionize sample molecules entering the ion trap with<br />
He carrier gas from the capillary column. The operation and adjustment of<br />
reagent gases for the standard CI option are described in the first part of this<br />
section.<br />
NOTE: The CI mode is an option on the Saturn <strong>GC</strong>/<strong>MS</strong>. If your system does not<br />
have this option, you will not be able to perform CI analyses.<br />
Two additional options allow the selection of certain liquids as sources for CI<br />
reagent. These are the Liquid CI Inlet (or LCI Inlet) and the Multiple CI Module<br />
(or MCI Module). The installation and operation of these options is described<br />
later in this section.<br />
Before evacuation, new gas lines will contain a significant amount of adsorbed<br />
water vapor. The longer the gas line, the more adsorbed water and the longer<br />
pumping time required to evacuate water from the line. To minimize the pumping<br />
time required to evacuate the gas line, we recommend that the line be as short<br />
as possible. Make sure, however, that the gas line is long enough to run to the<br />
rear of the Saturn <strong>GC</strong>/<strong>MS</strong> and to accommodate the movement of the mass<br />
spectrometer 9 inches (23 cm) to the right (for access to the transfer line and<br />
turbomolecular pump).<br />
Gas cylinders or lecture bottles should not be stored where they can damage<br />
cables or gas lines, and they should be secured in accordance with standard<br />
safety practices. Lecture bottles have rounded ends and will require some<br />
means of support (e.g., Matheson Model 505 Non-Tip Stand).<br />
Before installing the CI reagent gas supply, you should complete the following<br />
procedures:<br />
• Tune the instrument in EI mode<br />
• Check the Saturn <strong>GC</strong>/<strong>MS</strong> system for leaks<br />
35 of 177
CI Reagent Gas Requirements<br />
These paragraphs give the requirements for the reagent gases used for CI<br />
operation with Saturn <strong>GC</strong>/<strong>MS</strong>. The following reagent gases are recommended:<br />
methane, isobutane, and ammonia. Other reagent gases can also be used<br />
successfully with the Saturn <strong>GC</strong>/<strong>MS</strong>.<br />
We recommend that you use a high-purity reagent gas for maximum sensitivity<br />
and good spectral quality. Impurities in the reagent gas may limit the number of<br />
sample ions that can be formed, thus reducing spectral sensitivity. In addition,<br />
impurities may react with sample ions, thereby creating confusing mass spectral<br />
data.<br />
The amount of reagent gas consumed during CI operation is very low (typically 1<br />
to 2 mL/minute). We recommend that you use a K size gas cylinder of the<br />
selected reagent gas.<br />
The requirements for the recommended gases are as follows:<br />
Methane Methane should have a purity of 99.99% or better. Use a<br />
gas cylinder with a two-stage pressure regulator that has a<br />
stainless steel diaphragm and maximum inlet pressure of<br />
15 psi (1 bar).<br />
Isobutane Isobutane should have a purity of 99.99% or better. Use a<br />
gas cylinder with a two-stage pressure regulator that has a<br />
stainless steel diaphragm and maximum inlet pressure of<br />
15 psi (1 bar).<br />
Ammonia Ammonia should have a purity of at least 99.99% and be<br />
anhydrous grade. Use a gas cylinder with a two-stage<br />
pressure regulator that has a stainless steel diaphragm and<br />
maximum inlet pressure of 15 psi (1 bar).<br />
NOTE: Gases other than methane, isobutane, or ammonia can be used<br />
successfully as CI reagent gases with the Saturn <strong>GC</strong>/<strong>MS</strong>. For assistance in<br />
selecting and using other reagent gases, please contact your Varian Customer<br />
Support Representative.<br />
The CI reagent gas should contain less than 1 ppm of water. Water in the CI<br />
reagent gas may interfere with CI operation.<br />
Copper or stainless steel gas lines should be used for methane or isobutane.<br />
Stainless steel lines should be used for ammonia. All gas lines should be free of<br />
oil (and other contaminants) and preferably flame dried. If possible, use the precleaned<br />
copper tubing from the <strong>GC</strong> Start-Up Kit.<br />
DO NOT flame dry the reagent gas lines with CI reagent gas present.<br />
Setting up the CI Reagent Gas Supply<br />
Use the following procedure to set up the CI reagent gas supply.<br />
36 of 177
CI reagent gases may be hazardous. Use proper protection when installing the<br />
reagent gas.<br />
1. Enter the System Control and select the <strong>Manual</strong> Control tab dialog.<br />
2. Make sure that the electron multiplier, filament, and RF voltage are all off.<br />
The Multiplier, Filament, and RF text should be red or black - not green.<br />
NOTE: Two solenoid-operated valves control the flow of CI reagent gas into the<br />
manifold. The valves are opened and closed by clicking on the CI button on the<br />
Instrument Control display. A needle valve controls the amount of reagent gas<br />
flowing into the manifold. The needle valve is mounted directly behind the door<br />
of the mass spectrometer. The needle valve is adjusted manually by using the<br />
knob labeled CI GAS. Turning the knob clockwise increases the flow of reagent<br />
gas into the manifold. See Functional Block Diagrams in the Turbomolecular<br />
Vacuum Pump or Diffusion Pump Vacuum System.<br />
3. Verify that the CI gas solenoid valves are closed. When these valves are<br />
closed, the CI Gas icon to the left of the ion trap symbol is not green. (If the<br />
CI icon is green, click on the icon so that it turns to red or black.)<br />
4. Install a two-stage pressure regulator on the reagent gas cylinder or lecture<br />
bottle. Tighten the connection securely.<br />
NOTE: A two-stage pressure regulator typically consists of the following<br />
components: Secondary valve, Pressure adjustment valve, Supply pressure<br />
gauge, and Delivery pressure gauge<br />
5. Reagent gas is turned on and off with the Main valve on the cylinder or<br />
lecture bottle. The secondary valve on the pressure regulator is next in line.<br />
This valve is used for coarse control of the flow of gas from the gas cylinder<br />
up to the pressure adjustment valve. The supply pressure gauge is used to<br />
monitor the gas pressure in the bottle. The pressure adjustment valve is used<br />
to set the head pressure of the gas delivered to the mass spectrometer.<br />
6. Connect one end of the 1/8" OD gas supply line to the pressure regulator.<br />
37 of 177
7. On the back of the Saturn <strong>GC</strong>/<strong>MS</strong> instrument, loosen the two screws that<br />
hold the plug in the CI Shutoff Manifold 2 to 3 turns. Remove the plug by<br />
pulling straight out and twisting.<br />
A Power Switch B Shutoff Manifold C Plug D 6/32" Screws (2 each) E Vacuum Hose F Fans<br />
Connecting CI Gas Supply<br />
8. Use 1/8" OD tubing for the supply line between the gas cylinder and the CI<br />
shutoff manifold. No ferrule is required on the mass spectrometer end of this<br />
tube. The seal is made with an elastomer O-ring. Inspect the end of the<br />
tubing and assure that the surface finish is smooth. If there are scratches,<br />
either cut off the damaged part or use 200-600 grit abrasive paper to refinish<br />
the sealing end of the tube.<br />
9. Carefully insert the tube into the CI shutoff manifold hole (the one the plug<br />
came out of) until it is firmly seated. Be careful not to scratch the tube.<br />
Tighten the two screws.<br />
10. Ensure that the secondary valve on the regulator on the gas cylinder is<br />
closed.<br />
11. Open the main control valve on the lecture bottle. Next, open the secondary<br />
valve and adjust the pressure adjustment valve to approximately 5 psi so that<br />
reagent gas flows at a moderate rate through the gas line.<br />
12. Open the mass spectrometer door. Verify that the CI GAS needle valve is<br />
turned fully counterclockwise.<br />
13. Next, flush the gas line of air and water vapor as follows.<br />
a. If using a diffusion pumped system, monitor the foreline pressure on the<br />
diagnostics screen. Do not allow the foreline pressure to exceed 500<br />
mTorr for more than 20 seconds.<br />
b. Turn the adjustment valve clockwise to reduce the pressure.<br />
c. Open the CI gas solenoid valves by clicking on the CI icon in the Control<br />
and Status field of the <strong>Manual</strong> Control tab dialog in System Control.<br />
When the valves are opened, the CI button is green.<br />
d. Evacuate the CI reagent supply line for about 30 minutes.<br />
38 of 177
Setting Flows of CI Reagents<br />
Checking the Reagent Gas Plumbing for Leaks<br />
To check for air leaks in the reagent gas line connections and the presence of<br />
water vapor in the gas line, follow the procedure using a Leak Detection Gas to<br />
Troubleshoot for Air Leaks in the Troubleshooting Section. Depending upon the<br />
results you obtain, you may need to modify the procedure as follows:<br />
If a large air leak exists, check the CI GAS fitting on the rear of the instrument<br />
and the fitting on the pressure regulator for tightness. Then recheck the air/water<br />
spectrum; or<br />
If excess water vapor is indicated by a high 19/18 ratio, there may be water in the<br />
gas line and/or an atmospheric air leak in the reagent gas plumbing. Proceed as<br />
follows:<br />
1. Shut off the flow of reagent gas into the manifold by closing the CI solenoid<br />
valves. If necessary, click on the CI icon in the Control and Status field of the<br />
<strong>Manual</strong> Control tab dialog in System Control. When the valves are closed,<br />
the CI button is black or red - not green.<br />
2. Recheck the air/water spectrum. If the peak at mass 19 (for water)<br />
decreases, then water is present in the gas line. In this case, go to step 3. If<br />
the peak at mass 19 does not decrease significantly, little water is present in<br />
the gas line. In this case, the <strong>MS</strong> system probably has an air leak. You will<br />
need to fix the leak as described in the Troubleshooting Section. Be sure to<br />
check for leaks around:<br />
• The CI GAS port on the rear of the mass spectrometer<br />
• The fitting that connects the reagent gas line to the pressure regulator<br />
3. To flush excess water from the gas line proceed as follows:<br />
a. Ensure that the electron multiplier, filament, and RF voltage are off.<br />
b. Open the main valve on the lecture bottle. (The secondary valve on the<br />
pressure regulator is already open.)<br />
c. Turn the CI needle valve fully counterclockwise.<br />
d. Open the CI gas solenoid valves and allow the system to pump down for<br />
about 1 hour.<br />
e. Close the main valve on the gas cylinder but keep the CI GAS solenoid<br />
valves open. Allow the system to pump down for about 15 minutes.<br />
f. Recheck the air/water spectrum. If excess water is not present, go to<br />
paragraph: Setting Delivery Pressure of the CI Reagent Gas.<br />
After any leaks have been located and fixed, set the delivery pressure of the CI<br />
reagent gas as follows:<br />
1. Ensure that the CI gas solenoid valves are closed. If necessary, click on the<br />
CI icon in the Control and Status field of the <strong>Manual</strong> Control tab dialog in<br />
System Control. When the valves are closed, the CI button is black or red -<br />
not green.<br />
2. Open the main valve on the lecture bottle. Using the pressure adjustment<br />
valve on the regulator set the head pressure to about 5 psi (34 kPa).<br />
39 of 177
You are now ready to operate the system in the CI mode. If you are a new user,<br />
we recommend that you perform the introductory example of CI operation in<br />
tuning the Saturn for Chemical Ionization in the Tutorial <strong>Manual</strong>.<br />
Default Parameters for Gaseous CI Reagents<br />
Reagent Gas Methane Isobutane Ammonia<br />
CI Storage Level (m/z) 13 19 13<br />
Ejection Amplitude (v) 9 15 9<br />
Background Mass (m/z) 45 65 45<br />
Target TIC 5000 5000 5000<br />
Maximum Ionization Time (μsec) <strong>2000</strong> <strong>2000</strong> <strong>2000</strong><br />
Maximum Reaction Time (μsec) 60 60 60<br />
Prescan Ion Time (μsec) 100 100 100<br />
If you have installed the Liquid CI Inlet or the Multiple CI Module, the following<br />
parameters may be used for standard liquid CI reagents.<br />
Default Parameters for Liquid CI Reagents<br />
Reagent Liquid Acetonitrile d3-Acetonitrile Methanol<br />
CI Storage Level (m/z) 19 19 19<br />
Ejection Amplitude (v) 15 15 15<br />
Background Mass (m/z) 65 65 55<br />
Target TIC 5000 5000 5000<br />
Maximum Ionization<br />
Time (μsec)<br />
<strong>2000</strong> <strong>2000</strong> <strong>2000</strong><br />
Maximum Reaction<br />
Time (μsec)<br />
40 20* 40<br />
Prescan Ion Time<br />
(μsec)<br />
100 100 100<br />
* Use short reaction times for deuterated reagents. Longer reaction times allow<br />
more H/D exchange with background water and the resulting spectrum will show<br />
more [M+H] + and less [M+D] + .<br />
40 of 177
Ion Intensities for Standard CI Reagents<br />
The CI Adjust function gives recommendations of an acceptable level of CI<br />
reagent ions for each of the five standard CI reagents. The general principles<br />
used in implementing these tests are:<br />
Methane Adjust the reagent gas pressure so that the peak heights<br />
at m/z 17 (CH5 + ) and 29 (C2H5 + ) are about equal. The<br />
ratio of the ions at m/z 17 to m/z 16 should be about<br />
10:1. The ion at m/z 41 (C3H5 + ) should be visible.<br />
Isobutane Adjust the reagent gas pressure so that the peak heights<br />
at m/z 57 [(CH3)3C + ] and m/z 43 [(CH3)2CH + ] are about<br />
equal. There may also be an intense reagent ion at m/z<br />
41 (C3H5 + ).<br />
Ammonia Adjust the gas pressure so that the ratio of the peak<br />
heights at m/z 18 [(NH3)H + ] to m/z 17 (NH3 + ) is about<br />
10:1.<br />
Acetonitrile Adjust the reagent gas pressure so that the ion at m/z<br />
42 [CH3CNH + ] is about 10 times higher than at m/z 41.<br />
The valley between the 41/42 ions should reach a<br />
minimum at less than half the height of the m/z 41 ion.<br />
The m/z 54 ion [CH3CHCNH + ] will be present at 10 -<br />
15% the height of m/z 42. Too much acetonitrile in the<br />
trap can cause early filament failures.<br />
d3-Acetonitrile Adjust the reagent gas pressure so that the ion at m/z<br />
46 [CD3CND + ] is about 10 times higher than at m/z 44.<br />
The m/z 58 ion [CD3CDCND + ] will be present at 10 -<br />
15% the height of m/z 46.<br />
Methanol The ion at m/z 33 [(CH3OH)H + ] will dominate the<br />
spectrum. No ion is observed at m/z 32, but a small<br />
peak is observed at m/z 31 and m/z 47.<br />
In each case, by following these guidelines, the reagent gas pressure in the ion<br />
trap will be approximately 1 to 2 x 10 -5 Torr (about 1.3 to 2.6 x 10 -3 Pa). The CI<br />
reagent molecules comprise about 1% of the gas pressure in the ion trap. He<br />
atoms from column flow are present at 100 times this pressure.<br />
Setting CI Gas Pressure in a Diffusion Pump System<br />
For the diffusion pump system, the CI Reagent Gas delivery pressure should be<br />
set to only 5 psi as indicated on the pressure regulator. The foreline pressure<br />
should then be checked:<br />
• Start System Control and click on the Diagnostics tab.<br />
41 of 177
The Liquid CI Inlet Option<br />
• Note the Diffusion Pump Foreline Pressure reading under the Vacuum<br />
System field. The reading should be less than 100 mTorr. Higher<br />
readings may indicate problems (i.e., leaks) and the user should refer to<br />
the Troubleshooting section for additional information. Click on the<br />
<strong>Manual</strong> Control button, and then click the CI icon to the left of the ion trap<br />
symbol (it will turn green when On). Wait one minute for the flow to<br />
equilibrate. Click on Diagnostics and note the Diffusion Pump Foreline<br />
Pressure reading. The value should be less than 350 mTorr. If<br />
necessary, adjust the delivery pressure of the CI reagent gas (using the<br />
valve on the pressure regulator) to give a reading below 350 mTorr. If<br />
the value exceeds 500 mTorr the diffusion pump will shut down. It will<br />
restart when the pressure drops below 500 mTorr.<br />
You may review the installation and use of the Liquid CI Inlet on the Saturn <strong>2000</strong><br />
Maintenance Tutorial CD. Alternatively, you may read the instructions that follow<br />
in this section.<br />
Installation of the Liquid CI Inlet<br />
1. Before beginning, shut down and vent the Saturn system. If you are not<br />
disassembling the trap, it is not necessary to wait for the trap electrodes to<br />
cool down before installing the Liquid CI Inlet assembly.<br />
2. Remove the top cover. Attach the Liquid CI Inlet assembly to the back of the<br />
instrument using the following instructions. Refer to the drawings below to<br />
more easily identify the parts discussed.<br />
a. From the back of the instrument, remove one of the two screws that hold<br />
the CI shutoff block intact. Replace it, loosely, with a long screw<br />
supplied with the kit (12-222006-25).<br />
b. Remove the remaining screw.<br />
42 of 177
c. Gently pull the free end of the liquid CI restrictor tube (03-930024-01)<br />
from the L-bracket where it attaches to the back of the instrument, while<br />
leaving the other end of the restrictor tube attached to the Liquid CI Inlet<br />
block.<br />
d. Loosely attach the Liquid CI Inlet assembly to the back of the instrument<br />
via the L-bracket with the screw that was removed.<br />
e. Rotate the Liquid CI Inlet assembly out of the way to remove the<br />
remaining screw.<br />
f. Rotate the Liquid CI Inlet assembly back into position and loosely attach<br />
the liquid CI inlet assembly with the remaining long screw (12-222006-<br />
25).<br />
g. Re-insert the liquid CI restrictor tube through the L-bracket into the back<br />
of the instrument. The restrictor tube must be inserted far enough to<br />
engage the O-ring in the CI shutoff block.<br />
A Inlet Block (03-930023-01) E Reservoir Cover (03-930026-<br />
01)<br />
B Viton O-ring (03-930109-07) F Restrictor (03-930024-01)<br />
C O-ring Retainer (03-930025-01) G L-Bracket (03-930027-01)<br />
D Reservoir Bulb, same as Cal<br />
Gas Chamber (03-920270-00)<br />
H Viton O-Ring (03-930109-04)<br />
3. Replace long restrictor (03-930597-01) with 1/8" OD PEEK tubing (03-<br />
930037-01).<br />
a. With the liquid CI inlet mounting screws still loose, pull out the long<br />
restrictor tube from the CI shutoff block.<br />
b. Loosen the 4 screws on the top of the pneumatics manifold (at the front<br />
of the instrument).<br />
43 of 177
c. Pull out the long restrictor tube from the bottom of the pneumatics<br />
manifold. Carefully pull the tube out of the front of the instrument. Save<br />
this long restrictor for use with pressurized gases such as methane.<br />
d. Feed the PEEK tube (03-930037-01) into position, starting from the front<br />
of the instrument (occupies roughly the same space as the long restrictor<br />
tube).<br />
e. Gently install the PEEK tube end into the pneumatics manifold, being<br />
careful not to let the retaining plate scratch the tube.<br />
f. Do not retighten the 4 screws on the pneumatics manifold yet.<br />
g. Insert the other end of the PEEK tube into the CI shut-off block and<br />
tighten the 2 screws from the rear of the instrument.<br />
4. Replace the front restrictor.<br />
a. Remove the existing short gas restrictor<br />
b. (03-930596-01) from the bottom of the pneumatics manifold.<br />
c. Install the front liquid CI restrictor<br />
d. (03-930596-02) into the same location in the pneumatics manifold. Be<br />
careful not to let the retaining plate scratch the restrictor tube ends.<br />
e. Now retighten the 4 screws on the pneumatics manifold.<br />
5. Replace the top cover.<br />
6. Restart the Saturn system.<br />
44 of 177
Filling/Refilling the Liquid CI Reservoir Bulb<br />
1. Be sure the CI valves are closed. Disengage the 4 screws that retain the<br />
liquid CI reservoir cover. They may remain in the block.<br />
2. Remove the reservoir cover.<br />
3. Gently pull the bulb down to remove it from the block. The O-ring and O-ring<br />
retainer may stay attached to the bulb.<br />
4. Use the reservoir cover as a stand for filling; place the bulb into the reservoir<br />
cover. Place O-ring retainer over the bulb stem. Place the O-ring over the<br />
bulb stem.<br />
5. Use a pipette or syringe to fill the bulb halfway with liquid CI reagent. This<br />
requires about 3 mL of reagent.<br />
6. Pick up the reservoir cover with the bulb, retainer and O-ring, and insert the<br />
bulb stem into the block.<br />
7. Orient the cover so that the 4 screws can engage the cover. Tighten the 4<br />
screws, being careful not to strip the threads in the plastic cover.<br />
8. After installing liquid CI, and each time the reservoir bulb is refilled with liquid,<br />
always use care when first opening the CI valves. Do not turn on the<br />
filament or multiplier for about 2-3 minutes after opening the CI valves from<br />
the Instrument Page. A convenient way to verify that air and water have<br />
been removed sufficiently is to check the ion gauge pressure with the CI<br />
valves open. Verify that the pressure has returned to less than 35 x 10 -6 Torr<br />
before turning on the Filament and Multiplier. For diffusion pumped systems<br />
monitor the foreline pressure. Adjust the CI valve to prevent the foreline<br />
pressure from exceeding 500 mTorr. Turn the valve clockwise to reduce the<br />
pressure.<br />
Use Polypropylene Caps to Preserve Liquids in<br />
Reservoirs<br />
Yellow polypropylene caps have been provided to seal reservoirs containing<br />
liquid CI reagents when they are not installed on the instrument.<br />
Never force the cap onto the reservoir stem – it is glass and can break.<br />
Use safety glasses and protective gloves, especially when attempting to<br />
remove a cap from a filled reservoir.<br />
• Use a gentle, twisting/pushing motion to install the plastic cap onto the<br />
reservoir stem.<br />
• Use a gentle twisting/pulling motion to remove the plastic cap from<br />
reservoir stem.<br />
45 of 177
Be careful not to spill any liquid, especially the few drops which may be in the<br />
neck of the bulb.<br />
Setting Flows of Vapor from Liquid CI Reagents<br />
1. Connect a liquid reagent reservoir containing the chosen liquid to the liquid<br />
reagent inlet block.<br />
2. Open the CI needle valve 6-7 turns counterclockwise.<br />
3. Open the CI solenoids by clicking on the CI button on the <strong>Manual</strong> Control<br />
page and allow the vapor flow from the reservoir to equilibrate. If, after<br />
several minutes, there is not enough CI gas entering the trap, increase the<br />
flow by turning the needle valve clockwise.<br />
4. While observing the spectrum using Adjust CI Gas, turn the CI needle valve<br />
to increase or decrease the amount of reagent entering the trap until the<br />
resolution between M and M+1 just starts to degrade. For best results when<br />
using acetonitrile, use a filament emission current of at least 20 μA and<br />
maintain at least 50% valley between m/z 41 and m/z 42. A convenient way<br />
to examine the valley is to click on the top of the m/z 41 peak and drag it to<br />
the top of the display using the cursor. See below for a properly adjusted<br />
acetonitrile spectrum and for a properly adjusted methanol spectrum.<br />
Properly Adjusted Acetonitrile Reagent Spectrum<br />
Properly Adjusted Methanol Reagent<br />
46 of 177
Returning to Gaseous CI Reagent <strong>Operation</strong><br />
To switch from the Liquid CI Inlet back to a pressurized CI gas (such as<br />
methane), the CI gas line may be re-installed without removing the liquid CI inlet<br />
assembly.<br />
1. Loosen the 2 screws that attach the liquid CI inlet L-bracket to the back of the<br />
instrument. Also, loosen the 2 screws that attach the L-bracket to the liquid<br />
CI inlet block.<br />
2. Remove the liquid CI restrictor end that inserts into the back of the<br />
instrument; rotate the restrictor out of the way.<br />
3. Install the long CI gas restrictor (03-930597-01) between the gas supply and<br />
the CI shutoff block, through the L-bracket.<br />
4. Tighten all screws.<br />
5. It is not necessary to replace the front liquid CI restrictor (03-930024-01) with<br />
the short gas restrictor (03-930596-01). Reduce the gas pressure to 5 psi at<br />
the supply to return to normal gas CI operating conditions.<br />
Installing and Using the Multiple CI Module<br />
The MCI Module operates essentially as a triplicate of the Standard CI option in<br />
the Saturn ® <strong>2000</strong>. Examine the Channel A section of the following schematic<br />
diagram of the module. A liquid (or optional gas) sample is chosen for Channel A.<br />
Two solenoid valves intervene between the liquid sample and the main gas line<br />
to the Saturn <strong>MS</strong> on the right of the diagram. These valves are always controlled<br />
together — both ON or both OFF. The control of the Valve States is from the<br />
External Events (Valve States) section of the <strong>GC</strong>. The valves may be turned ON<br />
and OFF either from the <strong>GC</strong> front panel or from the <strong>GC</strong> section of the <strong>GC</strong>/<strong>MS</strong><br />
Method. The restrictors between the two solenoid valves for each Channel have<br />
been chosen to provide an adequate and adjustable flow of acetonitrile,<br />
methanol, methane, or isobutane flow when the MCI Module is set up according<br />
to instructions. A third, adjustable, restrictor is the Needle Valve in the line<br />
connected to the foreline Pump.<br />
The guiding principle in the design of CI flow is to provide an adequate flow of<br />
reagent vapor, which is adjustably split toward the foreline pump and the ion trap.<br />
Closing the 15-turn needle valve clockwise (CW) directs more flow to the ion<br />
trap; counterclockwise adjustment sends a higher proportion of the flow to the<br />
foreline pump. This two-directional flow pattern allows the foreline pump to<br />
rapidly clear residual CI reagent from the MCI Module when the Main CI Solenoid<br />
in the Saturn <strong>2000</strong> (lower right of the schematic) is turned off in <strong>Manual</strong> Control.<br />
It also allows rapid changeover of flows from one Channel to another.<br />
47 of 177
Schematic Diagram of the MCI Module<br />
Multiple CI Module (shown with and without cover)<br />
Pre-Installation Checklist<br />
1. Preparing the Mass Spec<br />
a. The Saturn <strong>MS</strong> should be shut down, vented, and unplugged.<br />
2. Tools Required<br />
a. #2 Philips screw driver<br />
b. Small tipped straight screw driver<br />
c. 5/32 in or 4 mm drill bit<br />
d. Electric drill<br />
e. Side cutters to cut Tygon® tubing<br />
48 of 177
Installing the Multiple CI Assembly<br />
1. Run the Saturn Software.<br />
2. Select Shutdown and wait for the system to shut down.<br />
3. Vent the mass spec.<br />
4. Unplug the power cord from the back of the mass spec.<br />
5. Unpack the Multiple CI kit and place the parts on a table.<br />
6. Open the front door on the mass spec until it presses against the right side<br />
panel.<br />
7. Find the register plate (03-930072-01) in the CI kit.<br />
8. Peel off the adhesive strip.<br />
9. Position the register plate 0.25 inches (0.6 cm) from the open front door and<br />
5.25 inches (13.3 cm) from the bottom. Be sure to position the plate parallel<br />
to the open front door. Press firmly to adhere the plate to the right side<br />
panel.<br />
10. Close the front door and remove the right side panel.<br />
11. Use a 5/32-inch (4 mm) drill bit to drill four holes through the side panel using<br />
the register plate as a template.<br />
49 of 177
12. There are two more holes in the register plate. Guide the metal tube through<br />
the upper hole and the Tygon® tube through the lower hole.<br />
13. Use two #6 x 0.50 inch long screws to attach the multiple CI manifold to the<br />
register plate and side panel.<br />
14. Stand the side panel next to the right side of the mass spec.<br />
15. Guide the two tubes past the power board and through the opening in the<br />
chassis halfway up the middle bulkhead, behind the front panel. Leave the<br />
tubes protruding out the opening for the mass spec pneumatics.<br />
16. Reattach the side panel with the #8 screws.<br />
50 of 177
17. Loosen the four screws on top of the pneumatics block.<br />
18. Remove the U-shaped tube from the pneumatics block.<br />
19. Remove the single metal tube from the pneumatics block.<br />
20. There are now three openings in the pneumatics block.<br />
21. Connect the metal tube from the multiple CI assembly to the opening on the<br />
left.<br />
22. Connect the previously removed U-shaped tube, to the two right openings in<br />
the pneumatics block.<br />
23. Tighten the four screws on top of the pneumatics block. Do not over tighten<br />
them.<br />
51 of 177
24. Cut the Tygon ® tubing, which is running from the pneumatics block to the<br />
elbow about 4 inches (10 cm) from the pneumatics block.<br />
25. Install the tee and connect the extra fitting to the Tygon tube from the<br />
Multiple CI assembly.<br />
26. Connect the cable to the External Events on your <strong>GC</strong>.<br />
3800 <strong>GC</strong><br />
If you are installing the MCI Module on a 3400 or 3600 <strong>GC</strong>, skip to the installation<br />
instructions following this section.<br />
1. The Multiple CI solenoid cable plugs into the External Events on the 3800<br />
<strong>GC</strong>.<br />
2. Remove the <strong>GC</strong> left side, top cover, and the detector cover.<br />
3. Locate the External Events connector J42.<br />
4. Connect the "A" wires to "1", the "B" wires to "2", and the "C" wires to "3".<br />
Hold each wire in the connector, and turn the screw clockwise to lock the<br />
wire into place.<br />
5. The 3800 <strong>GC</strong> must have the External Events configured, or the Workstation<br />
software will not be able to activate them.<br />
6. On the <strong>GC</strong> front panel, press the SETUP button.<br />
7. Press 2 to EDIT Instrument Setup.<br />
8. Press 5 to Edit the Valves.<br />
9. The cursor should be on Valve type number 1. Press the DECR key until<br />
"Event A" is displayed. Press the down arrow cursor key.<br />
10. The cursor should be on Valve type number 2. Press the DECR key until<br />
"Event B" is displayed. Press the down arrow cursor key.<br />
11. The cursor should be on Valve type number 3. Press the DECR key until<br />
"Event C" is displayed. Press the down arrow cursor key.<br />
12. Press the blue key below the display menu box entitled "Save and Exit".<br />
52 of 177
3400/3600 <strong>GC</strong><br />
C B A<br />
13. Connect the wires as shown to pins 1 and 2 on the Rectifier PWA 03-<br />
930346-00.<br />
14. Connect the wires as shown to pins 3 and 4 on the Rectifier PWA.<br />
15. Connect the wires as shown to pins 5 and 6 on the Rectifier PWA.<br />
16. Turn off the <strong>GC</strong>.<br />
Dangerous Voltages Exposed When High Voltage Cover is Removed. Unplug<br />
Power Cord. No operator serviceable parts under cover. Refer any questions<br />
to high voltage cover to qualified service personnel.<br />
17. Unplug the power cord.<br />
18. Remove the top covers.<br />
19. Remove the high voltage cover.<br />
20. Connect the Rectifier PWA to pins 3 - 8 on the External Events board in the<br />
<strong>GC</strong>.<br />
21. Tighten all six of the connector screws to ensure good electrical contact.<br />
53 of 177
If there are other electrical devices connected to the <strong>GC</strong> External Events 2, 3, or<br />
4, they will have to be disconnected while Multiple CI is connected.<br />
1. Install the high voltage cover and top covers.<br />
2. Plug in the <strong>GC</strong> and turn on power.<br />
After installation, verify that the MCI Module is leak-tight by performing Air/Water<br />
and available pressure checks (depending upon the configuration of your<br />
instrument) on the Saturn system.<br />
This section describes setup, acquisitions with, and maintenance of the MCI<br />
Module.<br />
Cable Connections to the <strong>GC</strong> External Events Board<br />
A cable to the External Events board of the <strong>GC</strong> connects each Channel of the<br />
MCI Module. Upon installation of the MCI Module, make these connections and<br />
identify the External Events connected to each Channel of the MCI Module. For<br />
3800 <strong>GC</strong>s which have seven External Events, the most likely scenario is that<br />
External Events 1, 2, and 3 will be connected to Channels A, B, and C on the<br />
MCI Module. For 3400/3600 <strong>GC</strong>s, which have four External Events, the most<br />
likely scenario is that External Event 1 will be used to control split and splitless<br />
modes in a 1078 injector. Then Events 2, 3, and 4 will be connected to Channels<br />
A, B, and C on the MCI Module. Assure that you are aware of the connection<br />
pattern for your system.<br />
For easiest reference in the future, we suggest that you use an erasable marking<br />
pen to write the number of the External Event along with the installed reagent on<br />
the label for each Channel of the MCI Module.<br />
Adding Liquid CI Reagents to the MCI Module<br />
The addition of liquid reagents to the MCI Module is accomplished in much the<br />
same manner as addition of liquid reagent to the single Liquid CI option (LCI).<br />
The LCI liquid filling process is shown in detail on the Saturn Maintenance<br />
Tutorial CD under the heading <strong>MS</strong> Maintenance … CI Installation.<br />
In the MCI Module, this sequence is followed:<br />
1. Turn off all relays related to the MCI module.<br />
2. If you have a turbo pump system, skip this step. If you have a diffusion<br />
pump system: For each channel that will be worked on, close the<br />
associated needle valve by turning the knob clockwise. This will reduce the<br />
inrush of air into the vacuum system when channels are reactivated.<br />
3. Remove the MCI cover by loosening the thumbscrew on the front cover.<br />
4. Loosen (but do not remove) the four screws located between the solenoid<br />
valves on top of the MCI Manifold. Any of the liquid CI reservoirs may now be<br />
removed by rotating the bulb and pulling down, away from the manifold. Be<br />
careful not to break the fragile necks of the bulbs. Be sure to keep bulbs<br />
installed in all positions of the MCI Manifold, whether they contain a liquid<br />
reagent or are empty.<br />
54 of 177
Hazardous chemicals may be present. Avoid contact, especially when<br />
replenishing reservoirs. Use proper eye and skin protection.<br />
5. Use the 5 mL syringe supplied in the Accessory Kit to fill the bulb halfway<br />
with 3 mL of the chosen CI reagent liquid.<br />
6. Carefully reinsert the bulb in the ¼ inch inlet port of the channel.<br />
7. Retighten the screws on top of the module. The bulbs will be held firmly by<br />
the O-ring seals after the screws are tight.<br />
8. Replace the MCI cover and tighten the thumbscrew to hold it in place.<br />
9. After installing CI reagent liquids, and each time a reagent liquid or gas is<br />
installed, always use care when first opening the CI valves.<br />
10. If you have a turbo pump system, skip this step. If you have a diffusion<br />
pump system, first turn on the relays, then open the needle valves slowly by<br />
turning the knobs fully counterclockwise, to clear out the air in the reservoir<br />
bulbs. After a few seconds, monitor the foreline pressure. Do not allow the<br />
pressure to exceed 500 mTorr for more than twenty seconds or the diffusion<br />
pump will shut down. Return the valve settings to ½ open or their previous<br />
setting (approximately 7 turns).<br />
11. Do not turn on the filament or multiplier for 2-3 minutes after opening the CI<br />
valves. A convenient way to verify that air and water have been removed<br />
sufficiently is to check the ion gauge pressure with the CI valves open. Verify<br />
that the pressure has returned to less than 35 x 10 -6 Torr before turning on<br />
the filament and multiplier.<br />
Adding Gaseous Reagents to the MCI Module<br />
To change a channel from liquid operation mode to gaseous, follow the<br />
procedure given in the MCI Module Maintenance section.<br />
Adjusting Flows of CI Reagents<br />
There are two ways to turn Channels of the MCI Module On and Off. The<br />
simplest way, which you may want to use when you are adjusting CI flows, is<br />
from the keyboard of the <strong>GC</strong>. The second way is to program a <strong>GC</strong>/<strong>MS</strong> Method in<br />
the Saturn <strong>GC</strong><strong>MS</strong> Workstation software and download the method to the <strong>GC</strong>. To<br />
select reagent Channels, first identify which External Event is connected to<br />
Channel A, B, or C. If you have a 3800 <strong>GC</strong>, make sure that these External<br />
Events are configured from the <strong>GC</strong> keyboard.<br />
Selecting Reagent Channels from the 3400/3600 <strong>GC</strong> Keyboard<br />
To program reagent Channels from the 3400/3600 <strong>GC</strong> keyboard, select the<br />
External Event (or Relay) for the chosen Channel by using the command<br />
Program…Relays from the keyboard. If no relays are currently active, the<br />
display will read, “Initial Relays -1-2-3-4”. If you are activating Channel A<br />
connected to External Event 2, press 2 and Enter on the numeric keyboard. The<br />
display will change to reflect that Relay 2 is On. You may check the status of the<br />
relays at any time from the <strong>GC</strong> keyboard by pressing Status … Relays. In this<br />
example, you would then see the display “Relays On: 2”. You can adjust each of<br />
55 of 177
the CI reagents installed in the MCI Module by turning on the appropriate relay<br />
from the <strong>GC</strong> keyboard, then using the procedures in Setting CI/<strong>MS</strong> Parameters<br />
in the <strong>MS</strong> Method Editor and in Adjusting Reagent Flow for Each CI Reagent<br />
to adjust CI reagent flows.<br />
Selecting Reagent Channels from the 3800 <strong>GC</strong> Keyboard<br />
To program reagent Channels from the <strong>GC</strong> keyboard, select the External Event<br />
(or Valve) for the chosen Channel by using the command Sample<br />
Delivery…Valve States from the keyboard. If no relays are currently active, the<br />
display will show all Valves in the - State (Off). If you are activating Channel A<br />
connected to Valve 1, use the arrow keys to highlight Valve 1 and the Inc. or<br />
Dec. key to toggle the State to +. The display will change to reflect that Valve 1 is<br />
On (+). You may check the status of the relays at any time from the <strong>GC</strong> keyboard<br />
by pressing Sample Delivery…Valve States. You can adjust each of the CI<br />
reagents installed in the MCI Module by turning on the appropriate Valve from<br />
the <strong>GC</strong> keyboard, then using the procedures in Setting CI/<strong>MS</strong> Parameters in<br />
the <strong>MS</strong> Method Editor and in Adjusting Reagent Flow for Each CI Reagent to<br />
adjust CI reagent flows.<br />
Setting up the Method for 3400/3600 <strong>GC</strong>s<br />
You may adjust the flows of CI reagents from the <strong>Manual</strong> Control screen of the<br />
Saturn System Control Module. However, for the correct Channel of the MCI<br />
Module to be selected for adjustments, the <strong>GC</strong>/<strong>MS</strong> method should have the<br />
correct Channel selected in the <strong>GC</strong> Relays section of the Method.<br />
Using the Star Toolbar or the Start…Programs…Saturn <strong>GC</strong><strong>MS</strong> Workstation<br />
menu, open the Method Builder application. The Method Directory is shown on<br />
the left side of the window, as shown below. Only the relevant sections for 3400<br />
<strong>GC</strong> and Saturn <strong>2000</strong> control are shown in this example. (Relays in 3600 <strong>GC</strong><br />
Control are adjusted in the same way as in the 3400 <strong>GC</strong>).<br />
Select the section <strong>GC</strong> Relays under 3400 or 3600 <strong>GC</strong> Control. You will see the<br />
following screen:<br />
56 of 177
If you wish to adjust flows of all three CI reagents in the MCI Module, you will<br />
want to save three Methods with Relays turned on for each specific reagent. If<br />
Channel A is connected to External Event 1 in the <strong>GC</strong>, click in the box for<br />
Relay 1.<br />
Now use the menu command File…Save As to save the method with a name<br />
such as ChannelA. Check the box for either Relay 2 (Channel B) or Relay 3<br />
(Channel C) and save these methods as ChannelB and ChannelC.<br />
You may now open Channels A, B, or C by using the menu command<br />
File…Activate… (CHANNELx) from the System Control window.<br />
57 of 177
Setting Valve States for 3800 <strong>GC</strong>s<br />
You may adjust the flows of CI reagents from the <strong>Manual</strong> Control screen of the<br />
Saturn System Control Module. However, for the correct Channel of the MCI<br />
Module to be selected for adjustments, the <strong>GC</strong>/<strong>MS</strong> method should have the<br />
correct Channel selected in the <strong>GC</strong> Sample Delivery section of the Method.<br />
Using the Star Toolbar or the Start…Programs…Saturn <strong>GC</strong>/<strong>MS</strong> Workstation<br />
menu, open the Method Builder application. The Method Directory is shown on<br />
the left side of the window, as shown in the following Figure. Only the relevant<br />
sections for 3800 <strong>GC</strong> and Saturn <strong>2000</strong> control are shown in this example.<br />
Select the section Sample Delivery under 3800 <strong>GC</strong> Control.<br />
You will see the screen below:<br />
If you have Channel A connected to Valve 1, click in Row 1 under the Valve 1<br />
column. Click on the down-arrow in the combo box and scroll down to find the<br />
External Events options for the Valve 1:<br />
Highlight External Event A and release the mouse button. You will see the<br />
following display:<br />
58 of 177
Now, if Channels B and C are connected to Valves 2 and 3, enter the appropriate<br />
state by highlighting the first row under Valve 2 and Valve 3. Otherwise, enter<br />
External Events A through C under the appropriate Valve column. The display<br />
will now show all three External Events with the correct Valve position, but all<br />
Valve States are off. In Row 2 under Valve 1, double-click on the Off symbol or<br />
use the arrow key on the right side of the cell to toggle the Valve State to On:<br />
Now use the menu command File…Save As to save the method with a name<br />
such as ChannelA. Change the Valve States to be On for either External Event B<br />
(Valve 2) or External Event C (Valve 3) and save these methods as ChannelB<br />
and ChannelC.<br />
You may now open Channels A, B, or C by using the menu command<br />
File…Activate… (CHANNELx) from the System Control window.<br />
Setting CI/<strong>MS</strong> Parameters in the <strong>MS</strong> Method Editor<br />
To adjust CI reagent flows for a given CI gas and to use the appropriate<br />
parameters in a CI/<strong>MS</strong> acquisition, you will need to modify the <strong>GC</strong>/<strong>MS</strong> Method for<br />
each reagent Channel so that CI/<strong>MS</strong> parameters for each reagent are<br />
appropriate. Open the Method ChannelA (or its equivalent) that you created in<br />
the Selecting Reagent Channels in the <strong>GC</strong>/<strong>MS</strong> Method. From the Method<br />
Directory select the entry <strong>MS</strong> Method Editor under <strong>2000</strong> Mass Spec Control. The<br />
<strong>MS</strong> Method Editor dialog will appear.<br />
59 of 177
Modify the method to create a single-segment method for CI/Auto acquisition.<br />
You may later use this method as a default method for CI acquisition with the<br />
MCI Module, so you may wish to adjust method parameters such as Start and<br />
End Times and Low and High Mass appropriately for your samples.<br />
NOTE: If you do want to use the method for <strong>GC</strong>/<strong>MS</strong> acquisitions, remember to<br />
assure that there is a Filament/Multiplier delay segment with ionization method =<br />
None.<br />
Click on the tab dialog Ionization Mode - CI Auto to choose CI parameters for this<br />
MCI Channel. Parameters for the default CI reagent Methane will be shown.<br />
Click on the selection arrow in the Reagent Gas field and choose the CI reagent<br />
you have selected for Channel A of the MCI Module. In this example we have<br />
chosen acetonitrile for Channel A:<br />
60 of 177
The values of each parameter for acetonitrile CI are identified in the table Default<br />
Parameters for Liquid CI Reagents and already entered into the fields on the<br />
right side of the table. (If we were setting up for any of the standard gaseous or<br />
liquid reagents, their parameters can be entered automatically by clicking on the<br />
appropriate Reagent Gas selection. Parameters for other CI reagents may be<br />
entered by clicking on the User-Defined selection and entering user-selected<br />
parameters.)<br />
Once the CI parameters are chosen, click on the Segment Setpoints tab dialog<br />
and choose values for other parameters. The default for ARC Target count is<br />
5000 count for all reagents. Values up to 20,000 are commonly used. You may<br />
also want to select an Emission Current specific to the Tune File. Generally an<br />
emission current of 10-20 μA is used in CI acquisitions.<br />
When you have finished these steps save the Method for Channel A with the<br />
menu command File…Save As ChannelA.mth.<br />
Modify this method for the CI reagents in Channels B and C and save the new<br />
methods with the menu command File…Save As ChannelB.mth or<br />
ChannelC.mth. You may then activate the files from System Control with the<br />
menu command File…Activate.<br />
Adjusting Reagent Flow for Each CI Reagent<br />
1. Connect a liquid reagent reservoir containing the chosen liquid or connect a<br />
selected gas supply to Channel A, B, or C in the MCI Module inlet block. Use<br />
the procedures in Adding Liquid CI Reagents to the MCI Module or<br />
Adding Gaseous Reagents to the MCI Module.<br />
2. Open the CI needle valve for the chosen Channel 6-7 turns<br />
counterclockwise.<br />
3. Open the CI solenoids for the chosen Channel either from the <strong>GC</strong> keyboard<br />
or by activating a method for that reagent (ChannelA.mth, ChannelB.mth, or<br />
ChannelC.mth with the System Control menu command File…Activate<br />
Method. In this case, the method ChannelA.mth is activated.<br />
4. Enter the <strong>Manual</strong> Control dialog of Saturn System Control. Click on the CI<br />
button in the Saturn icon on the upper left of the screen and allow a few<br />
seconds for the vapor flow from the reservoir to equilibrate. The set of tab<br />
61 of 177
dialogs in the center of the <strong>Manual</strong> Control comes up with the Method tab<br />
displayed. Note that the method Name, Mode, and Scan Range are<br />
displayed.<br />
5. Click on the Adjustments tab dialog and then choose Acetonitrile as the gas<br />
and click on Adjust.<br />
6. The adjustment process will begin, as shown.<br />
7. If, after a couple of minutes, there is not enough CI gas entering the trap,<br />
increase the flow by turning the needle valve for the chosen Channel on the<br />
MCI Module clockwise.<br />
62 of 177
8. While observing the spectrum using Adjust CI Gas, turn the CI needle valve<br />
for the selected channel on the MCI Module clockwise to increase (or<br />
counterclockwise to decrease) the amount of reagent until the reagent ions<br />
abundances meet the requirements outlined for the chosen reagent in the<br />
table shown in Ion Intensities for Standard CI Reagents.<br />
Building <strong>GC</strong>/<strong>MS</strong> Methods to Use Different CI<br />
Reagents<br />
The MCI Module may be used in several different ways to acquire data on a<br />
sample for qualitative identification. In general it is advisable to develop a<br />
standard <strong>GC</strong> and EI Method for data acquisition; then to modify the existing<br />
method to acquire data in each selected CI mode.<br />
NOTE: Acquisition with each CI reagent using the MCI Module requires a unique<br />
<strong>GC</strong>/<strong>MS</strong> method. The <strong>GC</strong> section of the method MUST contain External Events<br />
programming to select the CI reagent in Channel A, B, or C. The <strong>MS</strong> section of<br />
the method MUST have CI mode selected with the appropriate CI Tune File.<br />
Preparing a Standard <strong>GC</strong>/EI/<strong>MS</strong> Method<br />
Whether you are going to run methods development on single samples or on a<br />
series of samples, it is generally advisable to prepare <strong>GC</strong> and <strong>MS</strong> methods for<br />
EI/<strong>MS</strong> acquisitions first.<br />
This example shows <strong>GC</strong> method development for the 3800 <strong>GC</strong>. The<br />
development of the method for 3400/3600 <strong>GC</strong>s is similar. In the Saturn Windows<br />
Workstation, open a <strong>GC</strong>/<strong>MS</strong> method for editing and save it as EI_<strong>GC</strong>.mth. In the<br />
Methods Directory, choose the item <strong>GC</strong> Injector. Enter 260 as an isothermal<br />
injector temperature. (It is assumed that you are using a 1079 injector.)<br />
Next, choose the Method Directory item Flow/Pressure and verify that the<br />
parameters are acceptable. The following method uses a Type 1 EFC and<br />
constant pressure programming at 10 psi:<br />
63 of 177
Now choose the Method Directory item Column Oven and set an appropriate<br />
column oven program. The following program requires a 30-minute run:<br />
Choose the Method Directory item Sample Delivery and create a Sample<br />
Delivery method with all External Events Off:<br />
Click on the <strong>MS</strong> Method Editor item under <strong>2000</strong> Mass Spec Control and create a<br />
standard EI/<strong>MS</strong> section with a run time matching that of your EI_<strong>GC</strong> section.<br />
64 of 177
Save the <strong>GC</strong>/<strong>MS</strong> Method.<br />
Methods for Single CI Reagents<br />
Open the standard <strong>GC</strong>/<strong>MS</strong> Method you have created and saved (e.g.,<br />
EI_<strong>GC</strong>.mth) in the Saturn <strong>GC</strong>/<strong>MS</strong> Workstation. Before proceeding use the<br />
Method Editor menu command File… Save As to save the file with a name<br />
specific to the first CI reagent you want to use (e.g. ACN_CI for acetonitrile CI).<br />
Then choose the Method Directory item Sample Delivery to turn on the External<br />
Event for that CI gas:<br />
Click on the Add button on the right of the window to add another segment and<br />
enter 30 under Time so that External Event A will be turned Off again at the end<br />
of the run. In the following example, it is assumed that acetonitrile is in Channel A<br />
of the MCI Module, which is activated from Valve 1.<br />
NOTE: It is always a good idea to close the chosen Channel of the MCI Module<br />
at the end of a run so that the foreline pump is isolated from the CI reagent.<br />
Otherwise, the reagent will be pumped continuously from the Channel until it is<br />
exhausted.<br />
65 of 177
If you are planning to use a different CI reagent in each Channel of the MCI<br />
Module, save a unique <strong>GC</strong>/<strong>MS</strong> Method specific to each Channel of the MCI,<br />
each with External Events programming of the correct Event.<br />
Under Saturn <strong>2000</strong> Mass Spec Control choose the Method Directory item <strong>MS</strong><br />
Method Editor to prepare a CI/<strong>MS</strong> section of the Method.<br />
Several parameters must be examined or selected for an appropriate acquisition<br />
with a given CI reagent.<br />
In this example, note that the low mass limit for acquisition is 70 and the<br />
Background Mass is set to 65 for the acetonitrile CI method. Collecting data<br />
below this limit might result in significant interferences from acetonitrile reagent<br />
ions. Similar parameters for isobutane CI are advised. Acquisitions with<br />
methanol, ammonia, and methane reagents can generally be accomplished<br />
effectively with lower starting ranges and background masses. See the tables<br />
Default Parameters for Liquid CI Reagents or Default Parameters for<br />
Gaseous CI Reagents for suggested background masses. Low mass for<br />
acquisition should never be lower than the suggested background mass for a<br />
given reagent.<br />
Also note that the mode for acquisition must be changed from EI Auto to CI Auto.<br />
Save the <strong>GC</strong>/<strong>MS</strong> Method with a name indicating the CI reagent chosen - in this<br />
case we save the method as ACN_CI.mth If you are planning to use a different<br />
CI reagent in each Channel of the MCI Module, save a unique <strong>GC</strong>/<strong>MS</strong> Method<br />
specific to each Channel of the MCI, each with External Events programming of<br />
the correct Event.<br />
<strong>GC</strong>/<strong>MS</strong> SampleList for Alternating EI/<strong>MS</strong> and CI/<strong>MS</strong><br />
Acquisitions<br />
In this example, a set of three samples has been placed in the 8200<br />
AutoSampler in positions 1, 2, and 3 of the sample carousel. When the<br />
AutoSampler run is started, each sample will first be run in EI mode using the<br />
method EI_<strong>GC</strong>.mth, then in CI mode with acetonitrile as the CI reagent using the<br />
method ACN_CI.mth. Note that care must be taken to use the correct <strong>GC</strong>/<strong>MS</strong><br />
method for each entry in the table. The data can now be acquired in automation<br />
by preparing appropriate SampleList for the 8200 AutoSampler, the 3800 <strong>GC</strong> and<br />
the Saturn <strong>MS</strong>.<br />
66 of 177
To prepare the Sample List for alternating EI/CI acquisitions, click on the Edit<br />
Automation Files button on the Star Toolbar or choose the option<br />
Start…Programs…Saturn <strong>GC</strong><strong>MS</strong> Workstation…Automation File Editor. The<br />
Automation File Editor Dialog Box will open. Click on the option<br />
File…New…SampleList.<br />
Select the name EI_CI for the new Sample List and click on Save.<br />
You will see a dialog to Select SampleList Section Type. Select the 8200<br />
AutoSampler and click OK.<br />
67 of 177
You will now see the new EI_CI SampleList ready for entries.<br />
Since EI and CI analyses are to be performed on three samples in succession,<br />
enter the appropriate names for the data files in each row of the SampleList.<br />
Use the scroll bar at the bottom of the dialog to display fields farther to the right in<br />
the SampleList. This will allow you to enter the Method and the 8200<br />
AutoSampler Rack/Vial positions to use for each sample. For this example enter<br />
Vial 1 for the first pair of runs and Vials 2 and 3 for the succeeding pairs.<br />
68 of 177
Finally, you need to enter the <strong>GC</strong>/<strong>MS</strong> method to be used for each sample. This<br />
may be done in the AutoLink section of the SampleList. Click on the AutoLink<br />
button in Row 1 of the SampleList. Enter the proposed method for EI/<strong>MS</strong><br />
acquisition in the Command field and click OK. In this example the method is<br />
EI_<strong>GC</strong>.mth.<br />
Since the same EI_<strong>GC</strong> method will be used later in the list highlight the AutoLink<br />
button in the list and click on Fill Down.<br />
The EI_<strong>GC</strong> method is now selected for all entries in the SampleList. The final<br />
step in the process is to click on the AutoLink field for each acetonitrile CI sample<br />
and substitute the method ACN_CI. After this has been done, the correct <strong>GC</strong>/<strong>MS</strong><br />
methods are specified for all entries in the SampleList.<br />
Multiple CI Reagents in Consecutive Runs<br />
If unique <strong>GC</strong> and <strong>MS</strong> methods for all three reagents have been set up, it is<br />
possible to acquire data either in EI mode or with any of the CI reagents by<br />
simply selecting the right <strong>GC</strong>/<strong>MS</strong> method for each run. In the following example,<br />
a single sample in Rack 1, Vial 1 of the 8200 AutoSampler is used to acquire<br />
data in EI, acetonitrile CI, methanol CI, and methane CI modes. Use the<br />
procedure outlined above for <strong>GC</strong>/<strong>MS</strong> SampleList for Alternating EI/<strong>MS</strong> and<br />
CI/<strong>MS</strong> Acquisitions to create a SampleList as shown.<br />
69 of 177
Use the AutoLink field to activate the appropriate method for the EI or particular<br />
CI reagent required.<br />
Multiple CI Reagents in the Same Run<br />
In some demanding applications, it may be desirable to change CI reagents<br />
within a single chromatographic acquisition. This is done by time programming<br />
the <strong>GC</strong>/<strong>MS</strong> Method so that the correct External Events are opened during the<br />
corresponding <strong>MS</strong> acquisition time for each CI reagent. In this example, a<br />
<strong>GC</strong>/<strong>MS</strong> method named TRI_CI is created to use acetonitrile CI (Event A,<br />
Channel A) for the first ten minutes of the run, then methanol CI (Event B,<br />
Channel B) and methane CI (Event C, Channel C) in the succeeding ten-minute<br />
segments. To develop this method, open the Method Builder and choose to edit<br />
ACN_CI.mth. After opening the method use the menu command File…Save As<br />
to save the method as TRI_CI.mth.<br />
3800 <strong>GC</strong> Method Section<br />
Create an External Events program in the <strong>GC</strong> Sample Delivery section to open<br />
different channels of the MCI Module as desired during the <strong>GC</strong>/<strong>MS</strong> run:<br />
Saturn <strong>MS</strong> Analysis<br />
Similarly, in the Method Directory item <strong>2000</strong> Mass Spec Control…<strong>MS</strong> Method<br />
Editor, the <strong>MS</strong> Method is split into time segments. The method is set up first for a<br />
30 minute run using the ACN_CI tune file. Segment 1 is a Filament/Multiplier<br />
delay until solvent front elutes from the <strong>GC</strong> column. Segment 2 is for acetonitrile<br />
CI acquisition.<br />
70 of 177
Then, while Segment 2 is highlighted, click the Add twice to create two additional<br />
Segments. Segment 2 is left as an acetonitrile CI segment ending at 10 minutes.<br />
Segment 3 parameters are changed in the Ionization Mode tab dialog to those for<br />
methanol CI and the end time is set for 20 minutes.<br />
Segment 4 is now set up for methane CI acquisition:<br />
71 of 177
In a complex method such as this, it is always advisable to review the <strong>MS</strong><br />
Method to assure that the segment times and acquisition parameters have been<br />
entered correctly.<br />
Switching Times Between Reagents<br />
If one is interested in switching CI reagents on consecutive runs, the foreline<br />
pump clears residual reagent from the MCI Module lines effectively between<br />
runs. However, switching reagents within a single run requires some knowledge<br />
of switching times. In the following example chromatogram we show the results<br />
of an experiment to switch between several hard and soft CI reagents during a<br />
single run. The data have been acquired over a mass range to allow acquisition<br />
of the reagent ions for each species. (Acquiring reagent ions also requires<br />
lowering the Background Mass in the <strong>MS</strong> Method to an m/z value less than that<br />
of the lowest reagent ion.)<br />
As shown in the chromatogram, the ions for soft CI reagents such as isobutane<br />
or acetonitrile first show a high-level spike, and then rapidly equilibrate after a<br />
changeover from a harder CI reagent such as methane or methanol spike.<br />
Changing from a soft reagent to a hard reagent takes a longer time as the softer<br />
reagent (which has a higher proton affinity) will continue to preferentially attract<br />
protons in spite of its diminishing pressure.<br />
k C o u n t s<br />
2 . 0<br />
1 . 5<br />
1 . 0<br />
0 . 5<br />
0 . 0<br />
k C o u n t s<br />
2 . 0<br />
1 . 5<br />
1 . 0<br />
0 . 5<br />
0 . 0<br />
C o u n t s<br />
5 0 0<br />
MCI Module Maintenance<br />
4 0 0<br />
3 0 0<br />
2 0 0<br />
1 0 0<br />
0<br />
M e t h a n o l- m / z 3 3<br />
A c e to n itrile - m /z 4 2<br />
M e t h a n e - m / z 1 7 + 2 9<br />
5 1 0 1 5 2 0 2 5 m i n u t e s<br />
It is recommended that all liquid CI reagents be purchased as Reagent Grade<br />
solvents. Specialized solvents such as d3-acetonitrile should be 99+%<br />
deuterated. This solvent may be purchased from Sigma in quantities of 25 or<br />
50g. A 50g vial will provide enough reagent for 16 fillings of the reservoir to a<br />
3 mL level.<br />
72 of 177
Handling and Storage of CI Liquids in Reservoir<br />
Bulbs<br />
Use the procedure<br />
Filling/Refilling the Liquid CI Reservoir Bulb to fill the reservoir bulbs (03-920270-<br />
00) with liquid. If you wish to replace a liquid reagent with a different liquid, you<br />
may use a vial cap (03-949870-04) from the MCI Module Accessory Kit to cap<br />
the reservoir and store it in the laboratory refrigerator in the Reservoir Stand (03-<br />
930073-01) supplied with the Kit. It is a good practice to use a single CI liquid in<br />
each channel of the MCI Module. Vapor from the liquid will be absorbed to some<br />
extent in the O-rings sealing the vial, restrictors, and solenoids for each channel.<br />
Cleaning Reservoir Bulbs<br />
Withdraw the solvent from the reservoir with the 5 mL Luer syringe supplied in<br />
the Accessory Kit (89-988956-00 and 03-930129-01). Rinse the vial with a 3 mL<br />
aliquot of the same solvent. Withdraw the wash solvent with the syringe. Dispose<br />
of the liquid samples properly. Dry the bulb in a hood or a laboratory oven.<br />
Changing a Channel from Liquid to Gas <strong>Operation</strong><br />
To change a channel from liquid operation mode to gaseous, the lower restrictor<br />
(03-930596-02) must be replaced by a lower flow rate restrictor (03-930596-01)<br />
that was removed from the pneumatics manifold when the MCI module was<br />
installed. In addition, the liquid reagent reservoir must be replaced with the gas<br />
73 of 177
adapter fitting and the long restrictor (03-930597-01). The long restrictor was<br />
connected between the pneumatics manifold and the gas shut off valve before<br />
the MCI module was installed. Protect the ends of the restrictors to prevent<br />
contamination and plugging, when working on the assembly. The MCI Module<br />
must have all of its ports connected for proper operation. If fewer than three<br />
reagents are installed, then empty reagent bulbs must be installed in the unused<br />
positions. Also, if the restrictors are removed for any reason, their ports must be<br />
plugged with the pin plugs (17-783512-00) supplied.<br />
1. Turn off all relays related to the MCI module.<br />
2. If you have a turbo pump system, skip this step. If you have a diffusion<br />
pump system: For each channel that will be worked on, close the<br />
associated needle valve by turning the knob clockwise. Monitor the foreline<br />
pressure. Do not allow it to exceed 500 mTorr for more than 20 seconds.<br />
This will reduce the inrush of air into the vacuum system when the channels<br />
are reactivated.<br />
3. Remove the MCI cover by loosening the thumbscrew on the front cover.<br />
4. Loosen (but do not remove) the four screws located between the solenoid<br />
valves on top of the module.<br />
5. Remove the liquid reagent reservoir by gently rotating and pulling the bulb<br />
down and out of the manifold. If there is unused liquid reagent remaining in<br />
the bulb, and you wish to save it, cap the bulb with one of the vial caps (03-<br />
949870-04) supplied in the accessory kit. You can use the reservoir stand<br />
(03-930073-01), also found in the accessory kit, for storage.<br />
6. Remove the lower restrictor (03-930596-02) installed in the two 1/8 inch ports<br />
underneath the manifold block. Save the restrictor in a clean, particle free<br />
bag, to prevent contamination and plugging.<br />
7. Insert the short lower restrictor (03-930596-01) in these ports.<br />
8. Attach the gas adapter (28-695138-00) to one end of the long restrictor (03-<br />
930597-01) with the Teflon ® ferrules. The gas adapters and Teflon ferrules<br />
are found in the accessory kit. Teflon ferrules are used so that the gas<br />
adapter fitting can be removed from the long restrictor, so that you may reuse<br />
it in its original configuration. Ensure that the connection is tight to prevent<br />
leaks.<br />
9. Fully insert the gas adapter into the ¼ inch inlet port of the channel and route<br />
the long restrictor down and back so that it will clear the cover, when it is<br />
reinstalled.<br />
10. Tighten the 4 screws on top of the module. The gas adapters and restrictor<br />
lines will be held firmly by the O-ring seal after the screws are tight.<br />
11. Replace the MCI cover and tighten the thumbscrew to hold it in place. Make<br />
sure that all of the lines are free and clear of the cover before tightening the<br />
thumbscrew.<br />
12. Attach the free end of the long restrictor (03-930597-01) to your pressure<br />
regulated gaseous reagent supply, set to 5 psi.<br />
13. After installing CI reagent liquids, and each time a reagent liquid or gas is<br />
installed, always use care when first opening the CI needle valves.<br />
14. If you have a turbo pump system, skip this step. If you have a diffusion<br />
pump system, first turn on the relays. For each channel worked on, open<br />
the needle valve slowly by turning the knob fully counterclockwise to clear<br />
74 of 177
out the air in the lines. After a few seconds, return the valve setting to ½<br />
open or their previous setting (approximately 7 turns).<br />
15. Do not turn on the filament or multiplier for about 2-3 minutes after opening<br />
the CI valves. A convenient way to verify that air and water have been<br />
removed sufficiently is to check the ion gauge pressure with the CI valves<br />
open. Verify that the pressure has returned to less than 35 x 10 -6 Torr before<br />
turning on the Filament and Multiplier.<br />
Changing a Channel from Gas to Liquid <strong>Operation</strong><br />
To change a channel from gas to liquid operation, the lower restrictor (03-<br />
930596-01) must be replaced by a higher flow rate restrictor (03-930596-02), and<br />
a reservoir bulb must replace the inlet plumbing. The free ends of all restrictors<br />
and tubes should be capped to prevent contamination and plugging during<br />
storage. When finished with the switchover, all ports of the MCI Module must be<br />
connected or plugged.<br />
1. Turn off all relays to the MCI Module.<br />
2. If you have a turbo pump system, skip this step. If you have a diffusion<br />
pump system: For each channel that will be worked on, close the<br />
associated needle valve by turning the knob clockwise. Monitor the foreline<br />
pressure. Do not allow it to exceed 500 mTorr for more than 20 seconds.<br />
This will reduce the inrush of air into the vacuum system when the channels<br />
are reactivated.<br />
3. Remove the MCI cover by loosening the thumbscrew on the front cover.<br />
4. Using a Phillips-head screwdriver, loosen (but do not remove) the four<br />
screws located between the solenoid valves on top of the module.<br />
5. Remove the gas adapter fitting with the long gas line restrictor (28-695138-<br />
00 and 03-930597-00, respectively) from the ¼ inch port. Gently twist and<br />
pull the adapter out, from under the manifold.<br />
6. Remove the lower restrictor (03-930596-01) installed in the two 1/8-inch<br />
ports underneath the manifold block and save it in the MCI Module<br />
Accessory Kit.<br />
7. Insert the short lower restrictor (03-930596-02) in these ports.<br />
Hazardous chemicals may be present. Avoid contact, especially when<br />
replenishing reservoirs. Use proper eye and skin protection.<br />
8. Using the 5 mL syringe supplied in the Accessory Kit, fill a liquid CI reagent<br />
reservoir halfway with 3 mL of the chosen CI reagent liquid.<br />
9. Insert the reservoir neck into the ¼ inch inlet port of the channel.<br />
10. Tighten the 4 screws on top of the module. The liquid CI reagent reservoir<br />
and restrictor lines will be held firmly by the O-ring seal after the screws are<br />
tight.<br />
11. Replace the MCI cover and tighten the thumbscrew to hold it in place. Make<br />
sure that all of the lines are free and clear of the cover before tightening the<br />
thumbscrew.<br />
12. After installing CI reagent liquids, and each time a reagent liquid or gas is<br />
installed, always use care when first opening the CI needle valves.<br />
75 of 177
13. If you have a turbo pump system, skip this step. If you have a diffusion<br />
pump system, first turn on the relays. For each channel worked on, open<br />
the needle valve slowly by turning the knob fully counterclockwise to clear<br />
out the air in the lines. Monitor the foreline pressure. Do not allow it to<br />
exceed 500 mTorr for more than 20 seconds. After a few seconds, return the<br />
valve setting to ½ open or their previous setting (approximately 7 turns).<br />
14. Do not turn on the filament or multiplier for about 2-3 minutes after opening<br />
the CI valves. A convenient way to verify that air and water have been<br />
removed sufficiently is to check the ion gauge pressure with the CI valves<br />
open. Verify that the pressure has returned to less than 35 x 10 -6 Torr before<br />
turning on the filament and multiplier.<br />
Leak Checking<br />
If a leak in the CI plumbing is suspected, use the general leak-checking<br />
procedures found in the Saturn Maintenance and Troubleshooting manual under<br />
the heading How to check for leaks. To isolate suspected leaks within the MCI<br />
module, replace the liquid vials or gas lines with empty CI reagent vials as<br />
outlined in this manual titled Adding Liquid CI Reagents to the MCI Module.<br />
After carefully opening the needle valves and relays according to the procedure,<br />
allow the air to be pumped from the vials and tubing. Now each Channel can be<br />
tested individually by selecting it using the <strong>GC</strong> relays and with the CI valve open,<br />
carefully spraying compressed argon around the fittings while monitoring the<br />
spectrum for m/z 40, or you may use tetra-fluoroethane (Dust-Off ® ) and monitor<br />
the spectrum for m/z 69. A leak at one of the O-ring seals may be fixed by<br />
cleaning the tubing and O-ring, but usually a new O-ring is required. Extras are<br />
provided with the MCI module and also in the accessory kit.<br />
Cross-Contamination Effects<br />
Vapor from liquid CI reagents is absorbed to some extent in the O-ring seals of<br />
each Channel used for liquid CI. If the liquid or gas chosen for the Channel is<br />
changed, the residual vapor from the previous reagent may create artifact CI<br />
reagent ions observable when adjusting the CI gas flow. If these artifact ions<br />
comprise more than 10-20% of the total reagent ions observed during CI flow<br />
adjustment, they may affect the CI spectra of the analytes. For example, residual<br />
soft reagent ions from acetonitrile at m/z 42 and 54 may be observed if one<br />
switches the reagent to methanol in a given Channel. These softer reagent ions<br />
may lead to an increased proportion of M+1 ions in the methanol CI spectrum<br />
compared to the ratios observed without the artifact acetonitrile reagent ions<br />
present.<br />
Absorbed solvent in Channel seals may be reduced by prolonged vacuum<br />
pumping of the Channel:<br />
1. Replace the liquid CI vial or gas line in the Channel with an empty CI reagent<br />
vial.<br />
2. Open the Channel from the <strong>GC</strong> keyboard. See the instructions in Selecting<br />
Reagent Channels from the 3800 <strong>GC</strong> Keyboard.<br />
3. Do not turn on the CI icon in the Saturn software.<br />
4. Open the Needle Valve for the Channel full counterclockwise so that all flow<br />
from the Channel is directed to the Foreline Pump.<br />
5. Leave the Channel open overnight or over a weekend.<br />
76 of 177
6. Replace the desired reagent in the Channel position and observe reagent<br />
ions during CI gas adjustment.<br />
Hints for Successful <strong>Operation</strong> of the MCI Module<br />
1. Acquisition with each CI reagent using the MCI Module requires a unique<br />
<strong>GC</strong>/<strong>MS</strong> method. The <strong>GC</strong> section method MUST contain External Events<br />
programming (done in the Sample Delivery section) to select the CI reagent<br />
in Channel A, B, or C. The <strong>MS</strong> method MUST have CI mode selected with<br />
the appropriate CI parameters designated.<br />
2. It is always a good idea to close the chosen Channel of the MCI Module at<br />
the end of a run so that the foreline pump is isolated from the CI reagent.<br />
Otherwise, the reagent will be pumped continuously from the Channel<br />
until it is exhausted.<br />
3. The MCI Module may be used in several different ways to acquire data on a<br />
sample for qualitative identification. Using deuterated reagents can provide<br />
extra information when the data are compared with data from non-deuterated<br />
reagents. Short reaction times will maximize the number of [M+D] + ions<br />
compared to the number of [M+H] + ions.<br />
4. With the relays off, unused reagent may be stored in a bulb attached to the<br />
MCI Module for extended periods of time.<br />
5. Fewer than three reagents may be connected to the MCI Module at any time.<br />
However, the ports on the MCI Module must always be connected, either to<br />
the restrictors and reagent vials/gas lines or plugged with the pin plugs<br />
supplied with the module and accessory kit. The easiest way to keep all<br />
passages closed and clean is to attach empty CI reagent bulbs in any<br />
Channels that are not currently needed.<br />
77 of 177
78 of 177
System Start-up and Shutdown<br />
Diffusion Pump Shutdown<br />
NOTE: During the SHUTDOWN procedure, the <strong>GC</strong> and <strong>MS</strong> temperature zones<br />
are reduced (
This represents a group of error messages indicating that the diffusion pump has<br />
been shut down. To precisely identify the problem, the USER should go to the<br />
Diagnostics tab, check “System Test and Run to Completion.”. Fault messages<br />
may appear on startup or during operation.<br />
• Turn OFF main power by placing switch at rear of system to OFF (down)<br />
position. <strong>Manual</strong>ly vent the system for at least 5 minutes using the lever<br />
on the front panel.<br />
DO NOT ATTEMPT to VENT SYSTEM by any other method (via transfer line,<br />
foreline vacuum clamps, etc.). Rapid, improper venting of the system will<br />
cause diffusion pump fluid to back stream into the manifold and ion trap.<br />
Maintenance procedures should NOT be attempted until shutdown program<br />
has completed!<br />
80 of 177
Diffusion Pump Startup<br />
NOTE: The Diffusion Pump System Startup sequence takes at least 30 minutes<br />
and cannot be bypassed. Even if the instrument is off only for a brief power<br />
interruption. Pressing the reset button will send the instrument into the shutdown<br />
sequence and cause the 30 minute timer to restart.<br />
First, the Peltier Baffle cooler is turned on while the pump heater is left off. This<br />
step lasts 15 minutes and allows the cooler to drop in temperature before any<br />
pump vapors are created. When the foreline pressure reaches proper vacuum<br />
(~500 mTorr), the pump heater is turned on. When the heater has reached<br />
temperature, approximately 15 minutes, the ion trap electronics can be turned<br />
on.<br />
If a diffusion pump fault occurs the system will go to the shutdown sequence.<br />
The user may check for faults on Startup by going to the Diagnostics page and<br />
check Vacuum Status for Fault. Run Tests to Completion and check diagnostics<br />
report for messages.<br />
Diagnostics Page to Determine Diffusion Pump Status<br />
NOTE: The Vacuum System status should be periodically checked during<br />
Startup for foreline pressure. The pressure should read below 500 mTorr in 5<br />
minutes and < 100 mTorr after 45 minutes. Higher values may indicate a leak.<br />
Refer to Troubleshooting.<br />
81 of 177
82 of 177
Mass Spectrometer Maintenance<br />
Periodic Maintenance<br />
To ensure the Saturn <strong>GC</strong>/<strong>MS</strong> peak-performance, you will have to perform<br />
periodic maintenance on the vacuum and cooling systems. The following table<br />
identifies relevant maintenance intervals.<br />
Procedure Interval<br />
Check the foreline pump oil level and condition Weekly<br />
Purge foreline pump oil Weekly<br />
Check cooling fans Weekly<br />
Check diffusion pump fluid and condition Monthly<br />
Change foreline pump oil Every 6 months<br />
Clean diffusion pump Every 6 months<br />
Checking Foreline Pump Oil Level and Condition<br />
NOTE: The Saturn <strong>2000</strong> Maintenance Tutorial on CD-ROM provides viewing<br />
maintenance procedures on computer screen. Refer to Pump Maintenance<br />
Section.<br />
The oil level and condition should be checked with the pump switched off, but still<br />
warm every 2 to 3 months.<br />
1. The oil level should be between the maximum and minimum levels on the<br />
sight glass. If the oil level falls below the minimum level, gradually add more<br />
oil (88-299517-00) through the filler port until the oil level is centered<br />
between the maximum and minimum levels. A funnel may be helpful.<br />
NOTE: Some Saturn <strong>2000</strong> systems use similar but different models of foreline<br />
pumps. The maintenance procedures are similar but the location and<br />
appearance of some components are different. Refer to the pump manual for<br />
details.<br />
2. The pump oil should be clear and light amber in color.<br />
• If the oil becomes cloudy, purge it as described in Purging Foreline<br />
Pump Oil.<br />
83 of 177
• If the oil becomes thick, dark in color and has a burnt smell, change it as<br />
described in Changing Foreline Pump Oil.<br />
A Foreline<br />
B Clamping Ring<br />
C Seal<br />
D Inlet<br />
E Gas Ballast Valve<br />
F Drain Plug<br />
G Oil Level Sight Glass<br />
H Filler Plug<br />
I Exhaust<br />
Foreline Pump<br />
84 of 177
Purging Foreline Pump Oil<br />
Changing Foreline Pump Oil<br />
Note: If your system has an oil mist filter, you do not need to purge the oil. The oil<br />
mist filter does this function.<br />
Condensable vapors accumulate in the foreline pump oil during routine<br />
operation. These condensates will reduce pump efficiency and shorten the life of<br />
the oil. However, the pump oil may be rejuvenated with a weekly purge.<br />
Purging can be done without interrupting system operation. However, this should<br />
not be done while the Saturn is acquiring data, when the filament is on, or the<br />
electron multiplier is on.<br />
To purge:<br />
1. Place an exhaust vent over the open exhaust port.<br />
2. With the foreline pump running, turn the gas ballast valve counterclockwise<br />
to the open position. The pump will become noisy and emit oil vapor.<br />
3. After 10 minutes, turn the gas ballast valve back to the closed position.<br />
4. Remove the exhaust vent.<br />
To ensure peak performance and maximum pump lifetime, change the pump oil<br />
and the oil mist filter cartridge whenever the oil becomes thick, dark in color and<br />
has a burnt smell; or at least every year months. The oil change must be<br />
performed while the oil is warm.<br />
To change the pump oil:<br />
1. Turn off and vent the <strong>MS</strong>.<br />
2. Disconnect the pump’s power cord from the rear of the Saturn <strong>GC</strong>/<strong>MS</strong>.<br />
3. Disconnect the vacuum hose from the foreline pump by removing the<br />
clamping ring.<br />
4. Pull the hose free, and place the seal on a clean lint free surface for later<br />
use.<br />
5. Carefully place the foreline pump on a raised surface. The surface should be<br />
high enough to allow a 1.0-liter (1 US qt) or larger container to be placed<br />
under the drain port when the pump is tilted forward. A container with an<br />
opening diameter of at least six inches will make this task easier.<br />
Pump weighs 25 kg (55 lb.). Use proper lifting techniques.<br />
6. Place an oil pan beneath the drain port to catch any spillage.<br />
85 of 177
Hazardous chemicals may be present. Avoid contact with skin.<br />
Use proper eye and skin protection.<br />
7. Remove the plastic cover and the filler plug on top of the pump.<br />
8. With the container in place to catch the oil, slowly remove the drain plug in<br />
the front of the pump.<br />
Toxic residues from mass spectrometer samples will build up in used pump oil.<br />
Dispose of all used pump oil in accordance with applicable regulations. Place<br />
a hazards warning label on the container, if appropriate.<br />
9. Tilt the pump forward and hold until oil flow ceases.<br />
10. Return the pump to the horizontal and refit the plug.<br />
11. Run the pump for approximately ten seconds with the intake port open. This<br />
will remove any residual oil from the pumping block.<br />
Avoid breathing oil mist coming from the exhaust port during this operation.<br />
12. Remove the plug, tilt the pump, and drain the oil.<br />
13. Return the pump to the horizontal.<br />
14. Wipe the oil residue from the drainage port, and refit the drain plug.<br />
15. Fill the pump with fresh oil (88-299517-00) through the filler port until the oil<br />
level reaches the maximum level in the sight glass. A funnel may be helpful.<br />
Flushing<br />
The pump should be flushed if the pump oil is particularly dirty. After draining the<br />
pump (previous steps 1-13):<br />
1. Remove the inlet filter by removing the inlet port’s locking screw with a 4 mm<br />
Allen wrench; unscrewing the inlet port with a 30 mm open ended wrench;<br />
and pulling the filter up with a pair of tweezers or long nose pliers.<br />
2. Clean the filter in warm soapy water. Rinse and blow-dry with air or nitrogen.<br />
3. Refit the filter.<br />
4. Screw the inlet port back into the pump housing and lock in place with the<br />
locking screw.<br />
5. Pour 0.33-Liter l (0.35 US qt) of fresh pump oil in through the inlet port then<br />
run the pump.<br />
Avoid breathing oil mist coming from the exhaust port during this operation.<br />
6. Stop the pump, drain the flushing oil, and replace as described previously.<br />
86 of 177
Changing the Oil Mist Cartridge<br />
Replace the cartridge of the oil mist eliminator on the exhaust port of the pump<br />
when you change the oil. The part number for a package of cartridges is<br />
2710100200. There are two in a package.<br />
Note: When the cartridge is saturated, excessive mist or oil sprays out, and the<br />
cartridge must be replaced.<br />
Disassembling the oil mist eliminator<br />
1. Remove assembly screws A.<br />
2. Remove Upper housing B<br />
3. Remove Spring C<br />
4. Remove Valve D<br />
5. Remove Cartridge E<br />
6. Remove O-ring F.<br />
7. Clean the parts with a dry cloth.<br />
8. Degrease with a water soap solution.<br />
9. Rinse with clean water and dry.<br />
87 of 177
Reassembling the oil mist eliminator<br />
1. Install a new cartridge in lower housing B.<br />
2. Press gently to check that it is firmly seated.<br />
3. Install valve D with polished side toward cartridge.<br />
4. Center the spring C over the valve, fit gasket, F in the groove.<br />
5. Cover entire assembly with the second casing B.<br />
6. Tighten the two casings B, using screws A.<br />
Note: After changing the cartridge several times, it may be necessary to replace<br />
the gasket part number OR 3212 and the centering ring gasket.<br />
Check Cooling Fans Turbomolecular Pump System<br />
To prevent overheating, do not block air intakes.<br />
The cooling fans maintain an optimal temperature for the turbomolecular pump<br />
and the other electronics modules. Without the cooling fans, the lifetime of the<br />
turbomolecular pump and temperature-sensitive PC-board components would be<br />
shortened. To ensure proper operation of the cooling system, operate the Saturn<br />
<strong>GC</strong>/<strong>MS</strong> with its covers in place. In addition, be sure to check the fans at least<br />
once each week.<br />
The Saturn <strong>GC</strong>/<strong>MS</strong> is equipped with two fans on its rear panel. The function of<br />
these fans is to pull air into the instrument. To check fan operation, proceed as<br />
follows:<br />
1. Make sure that the Saturn main switch and service switch are turned ON.<br />
2. Place a large sheet of paper over one of the fan guards.<br />
• If the paper is sucked toward the fan guard, the fan is working.<br />
• If it is not, the fan is broken. Contact your Varian Customer Support<br />
Representative to arrange for a replacement.<br />
3. Check the second fan in the same manner.<br />
88 of 177
Saturn <strong>2000</strong> <strong>GC</strong>/<strong>MS</strong>, Front View<br />
A Main Power Switch (rear<br />
panel)<br />
J Cal Gas Vial<br />
B Service Switch K Vent Valve<br />
C Transfer Line Heater L RF Coil<br />
D Trap Heater M RF Coil Adjustment Screw<br />
E Manifold Heater N Transfer Line<br />
F LED O Turbomolecular Pump<br />
G Pneumatics Manifold P Cooling Fans<br />
H CI Cal Gas Adjust Q CI Shutoff Valve<br />
I Cal Gas Adjust<br />
If the fans are excessively noisy, i.e., if they whine or whir, one of the fans may<br />
be about to fail and it should be replaced.<br />
To identify which of the two fans is about to fail, proceed as follows:<br />
1. Remove the top cover from the Saturn <strong>GC</strong>/<strong>MS</strong>.<br />
• If the noise continues, proceed to step 3.<br />
• If the noise stops, proceed to step 2.<br />
2. Turn off the electronics compartment fan via the service switch, and replace<br />
the top cover.<br />
• If the noise returns, it is coming from the turbomolecular pump cooling<br />
fan. Proceed to step 4.<br />
• If the noise does not return, remove the cover and proceed to step 3.<br />
89 of 177
3. Turn off the electronics compartment fan via the service isolation switch.<br />
• If the noise continues, it is coming from the turbomolecular pump-cooling<br />
fan.<br />
• If the noise stops, it is coming from the electronics compartment fan.<br />
4. Contact a Varian Customer Support Representative to arrange for<br />
replacement of the broken fan.<br />
How to Replace the Turbomolecular Pump<br />
To replace the turbomolecular pump, proceed as follows:<br />
1. Turn off the Saturn <strong>GC</strong>/<strong>MS</strong> using the shutdown procedure.<br />
2. Confirm that the main power switch is turned OFF and that the vacuum<br />
system has been vented.<br />
3. Taking care not to break the <strong>GC</strong> column, slide the Saturn <strong>GC</strong>/<strong>MS</strong> about 12<br />
to 18 inches apart from the <strong>GC</strong>.<br />
4. Remove the Saturn <strong>GC</strong>/<strong>MS</strong> cover by grasping both sides and lifting up.<br />
5. Remove the lower side panel with a Phillips screwdriver.<br />
6. Disconnect the 1/8-in. pneumatics exhaust tube from the vacuum hose<br />
elbow.<br />
7. Disconnect the vacuum hose elbow from the turbomolecular pump by<br />
removing the clamping ring and pulling the elbow away from the pump.<br />
8. Pull the vacuum hose as far as you can toward the rear of the instrument.<br />
9. Remove the turbomolecular exhaust-port seal and place it on a clean, lintfree<br />
surface for later use.<br />
10. Unplug the turbomolecular cable from the turbomolecular pump by rotating<br />
the ring on the connector in the counterclockwise direction. Continue rotating<br />
until you can pull the connector free.<br />
Turbomolecular Pump Connections<br />
A Pneumatics Exhaust Tube D Turbomolecular Cable<br />
B Transfer Line E Vacuum Hose<br />
C Clamping Screws (4 places) F Vacuum Hose Elbow<br />
90 of 177
11. Loosen each of the four clamping screws about 2 turns with a 3/16-in. hex<br />
driver.<br />
• Take care not to completely unscrew the two inner clamping screws. (If<br />
you should unscrew them, restart the screws after you have removed the<br />
turbomolecular pump from the instrument.)<br />
12. Remove the outside bottom clamping screw.<br />
13. Remove the bottom clamp as you hold the turbomolecular pump in place.<br />
14. Remove the outside top clamping screw (closest to the transfer line).<br />
15. Remove the top clamp as you hold the turbomolecular pump in place.<br />
16. Pull the turbomolecular pump to the rear and lift it clear of the instrument.<br />
17. Remove the large seal from the turbomolecular inlet, and place it on the inlet<br />
of the new turbomolecular pump (03-920542-00). The orientation of the seal<br />
is not important.<br />
• On the new turbomolecular pump, leave the red cap over the<br />
turbomolecular exhaust port.<br />
18. Carefully slide the new turbomolecular pump and seal into position on the<br />
end of the manifold.<br />
• Make sure the electrical connection (turbomolecular cable) is tilted<br />
towards the bulkhead, i.e., toward the left as viewed from the rear of the<br />
instrument.<br />
• Take care not to scratch the sealing surface on the manifold in front of<br />
the turbomolecular pump.<br />
19. Insert the top clamp and loosely fasten it into place.<br />
20. Insert the bottom clamp and loosely fasten it into place.<br />
21. Tighten all four clamping screws until snug.<br />
22. Reconnect the turbomolecular cable. Rotate the retaining ring clockwise with<br />
downward pressure to lock the cable into position.<br />
23. Remove the red cap over the turbomolecular exhaust port.<br />
24. Place the seal on the turbomolecular pump exhaust port.<br />
25. Reconnect the vacuum hose elbow and clamp.<br />
26. Reconnect the pneumatics exhaust tube.<br />
27. Make sure that the vent valve is closed.<br />
28. Turn on the rear-panel main power switch.<br />
29. Snug up the top and bottom clamp screws.<br />
30. Monitor the turbomolecular pump speed using Diagnostics under Vacuum<br />
System Status.<br />
31. Once the pump is running satisfactorily, replace the side panel, top cover,<br />
and slide the <strong>GC</strong> and Saturn <strong>GC</strong>/<strong>MS</strong> back together.<br />
32. Discard the old turbomolecular pump. Be sure to comply with all applicable<br />
health and safety regulations.<br />
91 of 177
Check Cooling Fans Diffusion Pump System<br />
To prevent electronics overheating and diffusion pump failure, do not block air<br />
intakes or remove covers.<br />
Cooling fans perform two important functions in the Saturn <strong>GC</strong>/<strong>MS</strong>. They<br />
prolong the lifetime of temperature sensitive electronic components by<br />
maintaining optimal temperatures within the electronics compartments and they<br />
provide the airflow required by the air cooled diffusion pump and Peltier baffle.<br />
Cooling is divided into three zones. Zone one is the upper part of the analyzer<br />
compartment. Its purpose is to provide forced air-cooling for the Peltier baffle,<br />
and the manifold electronics. Zone two is the electronics compartment, diffusion<br />
pump controller, and RF generator board. Its purpose is to cool the majority of<br />
the instrument’s printed circuit boards. Zone three is the diffusion pump<br />
compartment. Its purpose is to cool the diffusion pump.<br />
The Saturn <strong>GC</strong>/<strong>MS</strong> is equipped with three fans on its rear panel, one for each<br />
zone. Each fan pulls air in through the front and/or side of the instrument and<br />
expels it through the rear panel. To inspect the cooling system, ensure the<br />
Saturn main power switch and service switch are turned ON (refer to the figure<br />
showing these zones). Proceed as follows:<br />
1. Zone 1: Upper analyzer compartment. The Zone 1 fan is located in the top<br />
left of the rear panel (as viewed from the front of the instrument). Failure of<br />
this fan will be detected by the diffusion pump controller, which will initiate a<br />
system shutdown. The only components of zone one requiring checking are<br />
the Peltier baffle duct and the top cover. To check:<br />
2. Check the front of the instrument is not obstructed.<br />
3. Check the rear of the instrument has at least 250 mm (10") of clearance.<br />
4. Remove the top cover and check the Peltier baffle ducting is in place.<br />
5. Refit the top cover.<br />
6. Zone 2: Electronics compartment, diffusion pump controller, and RF<br />
generator board. The Zone 2 fan is located in the middle right hand portion<br />
of the rear panel. Zone two may be checked as follows:<br />
a. Check the front of the instrument is not obstructed.<br />
b. Check the rear of the instrument has at least 250 mm (10") of clearance.<br />
c. Check the left side cover is in place and not obstructed (fallen paper,<br />
tissues, etc.)<br />
d. Check that the right side cover is in place.<br />
Hazardous voltages are present under right side cover. This cover should not<br />
be removed.<br />
7. Check the <strong>GC</strong> and <strong>MS</strong> are separated by approximately 19 mm (3/4") using<br />
the standoffs installed on the <strong>MS</strong>.<br />
92 of 177
8. Place your finger approximately ½" away from the fan finger guard to feel if<br />
air is coming out of the fan.<br />
• If not, the fan is broken and should be replaced. Contact your Varian<br />
Customer Support Representative to arrange for a replacement.<br />
9. Zone 3: Diffusion pump compartment. The Zone 3 fan is located in the<br />
lower left corner of the rear panel. Failure of this fan will cause the diffusion<br />
pump to overheat. This will be detected by the diffusion pump controller,<br />
which will initiate a system shutdown. The only components of zone three<br />
requiring checking are the air intake and exhaust. To check:<br />
a. Check the left side cover is in place and not obstructed.<br />
b. Check the rear of the instrument has at least 250 mm (10") of clearance.<br />
c. Check the <strong>GC</strong> and <strong>MS</strong> are separated by approximately 19 mm (3/4")<br />
using the standoffs installed on the <strong>MS</strong>.<br />
Checking the Diffusion Pump Fluid Level and Condition<br />
Optimum performance of the diffusion pump depends on the pump’s fluid level<br />
and condition, which should be checked monthly. The fluid can only be checked<br />
by removing the left side cover.<br />
NOTE: If the cover is off for more than five minutes the pump will overheat and<br />
the diffusion pump controller will initiate a system shutdown.<br />
However, if performed quickly this procedure can be done with the pump running.<br />
To check the fluid:<br />
1. Carefully separate the <strong>MS</strong> from the <strong>GC</strong> by approximately 250 mm (10").<br />
NOTE: Be careful not to break the <strong>GC</strong> column.<br />
2. Remove the four screws holding the left side cover in place, and quickly<br />
remove the cover.<br />
3. Check the fluid in the diffusion pump’s sight glass.<br />
• The fluid level should be within the “FULL HOT” zone.<br />
• If the level is at or below the lower limit of the zone the pump fluid<br />
should be topped off.<br />
• The fluid should be clear.<br />
• If the fluid is dark in color and opaque, the pump should be cleaned.<br />
4. Refit the left side cover and fasten in place with the four screws and two<br />
spacers.<br />
• If the fluid is to be topped off or changed, the cover must still be refitted<br />
during shutdown.<br />
5. Carefully slide the <strong>MS</strong> to the <strong>GC</strong>.<br />
93 of 177
Diffusion Pump Compartment<br />
A Thermocouple Gauge E Exhaust Clamp<br />
B Elbow F Diffusion Pump Controller<br />
(behind cover)<br />
C Pneumatics Exhaust<br />
Tube<br />
G Inlet Clamp<br />
D Diffusion Pump H Fan<br />
Turning Off the Diffusion Pumped Mass Spectrometer<br />
Allow diffusion pump and other heated zones to cool before disassembly.<br />
To turn off the <strong>MS</strong>:<br />
1. Invoke Saturn shutdown tab from System Control and click on shutdown.<br />
See section on system Start-up and Shutdown.<br />
Do not attempt to vent the <strong>MS</strong> by any other means. Venting through the<br />
foreline connections or transfer line will cause a rapid pressure increase that<br />
will coat the ion trap and internal surfaces of the manifold with diffusion pump<br />
fluid. A transfer line venting will also cause high mass noise in the trap.<br />
2. Maintenance work may begin once the vacuum system has vented to<br />
atmospheric pressure. This takes approximately five minutes.<br />
• This may be checked by placing a finger over the vent port to feel for<br />
suction.<br />
94 of 177
Replacing the Diffusion Pump Thermocouple Gauge<br />
The thermocouple gauge will need replacing if its filament has burned out or its<br />
thermocouple has become detached. This will be indicated in the Diagnostics<br />
report. To replace the thermocouple gauge:<br />
1. Turn off the <strong>MS</strong> as described in the Start-up and Shutdown section.<br />
2. Carefully separate the <strong>MS</strong> from the <strong>GC</strong> by approximately 250 mm (10").<br />
NOTE: Be careful not to break the <strong>GC</strong> column.<br />
3. Remove the top cover.<br />
4. Remove the transfer line.<br />
5. Rotate the <strong>MS</strong> to give full accessibility to the left side.<br />
6. Remove the four screws holding the left side cover in place, and remove the<br />
cover.<br />
7. Disconnect the manifold and trap heater cables and move out of the way.<br />
8. Remove the Peltier baffle ducting by pulling up at the front and sliding<br />
forward.<br />
9. Disconnect the Peltier baffle power leads (orange and yellow wires) from the<br />
Peltier baffle and slide out of the way.<br />
10. Remove the two screws holding the Peltier baffle duct base to the rear panel,<br />
and remove base by pulling up and forward over the Peltier baffle heat sink.<br />
11. Disconnect the thermocouple gauge cable from the thermocouple gauge.<br />
12. Unscrew the plastic nut and slide it up the 1/8" pneumatics exhaust tube.<br />
Withdraw the tube from the elbow, using a twisting motion.<br />
13. At the rear of the instrument, loosen the clamp holding the vacuum tubing<br />
onto the stainless steel elbow, and withdraw the tubing. Slightly twisting the<br />
tube while withdrawing may help.<br />
14. Remove the small clamp from the diffusion pump’s exhaust port by<br />
unscrewing the red wing nut, removing the screw, turning the clamp so the<br />
open end faces the diffusion pump, and pulling the clamp toward you.<br />
15. Lift the elbow up and wiggle it free of the rear panel.<br />
16. Clamp the elbow in a vice fitted with jaw protectors.<br />
17. Unscrew the thermocouple gauge using a 9/16" open-ended wrench.<br />
18. Wrap three to four turns of Teflon® tape clockwise around the threads of the<br />
new gauge (27-229907-00).<br />
19. Check and remove residual Teflon tape from thermocouple gauge port.<br />
20. Screw the thermocouple gauge into the threaded port on the elbow until<br />
snug.<br />
21. Remove and inspect the seal on the diffusion pump exhaust port<br />
(27-402536-00). Replace if it is worn or damaged.<br />
22. Wipe the seal clean with a lint free cloth, and refit to the exhaust port.<br />
95 of 177
23. Guide the tube end of the elbow through the hole in the rear panel, and<br />
wriggle it into position on the diffusion pump exhaust port. Take care not to<br />
dislodge the seal.<br />
24. Reinstall the clamp by pushing it onto the joined exhaust flanges.<br />
25. Rotate the clamp 180° and install the screw from the left side.<br />
26. Thread the wing nut onto the screw.<br />
27. Rotate the clamp as far to the left as possible, while still allowing room to turn<br />
the wing nut. Otherwise, the wing nut will prevent reinstallation of the side<br />
panel.<br />
28. Tighten the wing nut.<br />
29. Refit the vacuum tubing to the elbow and tighten the clamp.<br />
30. Insert the pneumatics exhaust tube into the elbow until the O-ring seats.<br />
Screw plastic nut in place using fingers.<br />
31. Reconnect the thermocouple gauge cable to the thermocouple gauge.<br />
32. Push the Peltier baffle duct base over the heat sink and onto the rear panel.<br />
Fasten in place using the two screws through the rear panel.<br />
33. Reconnect the Peltier baffle leads to the Peltier baffle. The pins and<br />
sockets are differentiated by size.<br />
34. Refit the Peltier baffle ducting by inserting the tabs into the rear panel and<br />
pushing the front of the duct down onto the front post.<br />
35. Refit the left side cover and fasten in place with the four screws and two<br />
spacers.<br />
36. Bring the <strong>MS</strong> alongside the <strong>GC</strong> and refit the transfer line.<br />
37. Reconnect the manifold and trap heater cables.<br />
38. Refit the top cover.<br />
39. Carefully slide the <strong>MS</strong> up to the <strong>GC</strong>.<br />
40. Close the vent valve by lowering the vent valve lever.<br />
41. Turn on the <strong>MS</strong>.<br />
Replacing the Diffusion Pump Peltier Baffle<br />
The Peltier baffle is a sealed unit that must not be taken apart for cleaning or<br />
repair. If the thermoelectric cooling element fails, the whole baffle assembly<br />
must be replaced. A failed TEC will be detected by the diffusion pump controller<br />
and a system shutdown will be initiated. To replace the Peltier baffle:<br />
1. Turn off the <strong>MS</strong>, if it has not already been shutdown.<br />
2. Carefully separate the <strong>MS</strong> from the <strong>GC</strong> by approximately 250 mm (10"). Be<br />
careful not to break the <strong>GC</strong> column.<br />
3. Remove the top cover.<br />
4. Disconnect and remove the transfer line, manifold, and trap heater cables.<br />
5. Remove the Peltier baffle ducting by pulling up at the front and sliding<br />
forward.<br />
96 of 177
6. Disconnect the Peltier baffle power leads (orange and yellow wires) from the<br />
Peltier baffle and slide out of the way.<br />
7. Unscrew the front pillar and use a 5/16" socket to remove the rear retaining<br />
nuts holding the Peltier baffle in place.<br />
8. Lift and remove the Peltier baffle.<br />
9. Ensure the new seal and sealing surfaces are clean and free of particles and<br />
fibers.<br />
10. Fit the new seal to the Peltier baffle and lower the baffle into position on the<br />
manifold. Do not allow the seal to twist.<br />
11. Reconnect the Peltier baffle leads to the Peltier baffle. The pin and sockets<br />
are differentiated by size.<br />
12. Close the vent valve by lowering the vent valve lever.<br />
13. Plug in the Saturn power cable.<br />
14. Turn on the <strong>MS</strong> by switching ON the main power switch on the rear panel.<br />
This allows the vacuum to correctly seat and seal the baffle assembly.<br />
15. Refit the retaining nuts and front pillar. These should be snug.<br />
16. Refit the Peltier baffle ducting by inserting the tabs into the rear panel and<br />
pushing the front of the duct down onto the front post.<br />
17. Turn the service switch to the OFF position.<br />
18. Reconnect the transfer line, manifold, and trap heater cables.<br />
19. Turn the service switch to the ON position.<br />
20. Refit the top cover.<br />
21. Carefully slide the <strong>MS</strong> up to the <strong>GC</strong>.<br />
22. Bring up System Control to download the mass spectrometer software.<br />
23. Bring up the diagnostics page by clicking on the “Diagnostics” tab.<br />
24. Check the Vacuum Status. This will display a snap shot of the vacuum<br />
system status, including any faults.<br />
NOTE: The pressure should read below 500 mTorr within the first five minutes,<br />
and ≤100 mTorr within 45 minutes. Higher values may indicate a leak. Refer to<br />
Troubleshooting.<br />
Cleaning the Diffusion Pump Peltier Baffle<br />
To clean the Peltier baffle:<br />
1. Remove the Peltier baffle.<br />
2. Remove the seal to prevent solvent damage during cleaning.<br />
3. Wipe the surfaces of the baffle with a clean, lint free cloth that has been<br />
dampened with reagent grade acetone.<br />
97 of 177
Removing the Diffusion Pump<br />
Do not immerse the assembly in acetone as it will contaminate porous<br />
components, and damage seals.<br />
4. Rinse with isopropyl alcohol.<br />
5. Allow cleaned surfaces to air dry, or bake in the <strong>GC</strong> oven for 10 min at<br />
100 °C.<br />
6. Install the Peltier baffle, using the original seal.<br />
1. Turn off the <strong>MS</strong>.<br />
2. Carefully separate the <strong>MS</strong> from the <strong>GC</strong> by approximately 250 mm (10"). Be<br />
careful not to break the <strong>GC</strong> column.<br />
3. Remove the top cover.<br />
4. Remove the transfer line.<br />
5. Rotate the <strong>MS</strong> to give full accessibility to the left side.<br />
6. Remove the four screws holding the left side cover in place, and remove the<br />
cover.<br />
7. Remove the small clamp from the diffusion pump’s exhaust port by<br />
unscrewing the red wing nut, removing the screw, turning the clamp so the<br />
open end faces the diffusion pump, and pulling the clamp toward you.<br />
8. Lift the elbow up and secure it to the manifold lugs with a rubber band or tie<br />
wrap.<br />
98 of 177
Be careful not to scratch or damage sealing surfaces.<br />
A Elbow<br />
B Rubber Band<br />
C Inlet Seal<br />
D Diffusion Pump<br />
Elbow Positioning for Diffusion Pump Removal<br />
9. Unscrew the wing nut on the diffusion pump’s inlet clamp approximately ten<br />
turns.<br />
10. Grip the inlet clamp with both hands and push the wing nut into the clamp<br />
until the clamp loosens.<br />
11. Hold pump with left hand and remove inlet clamp by moving the wing nut<br />
screw to the left, opening clamp and pulling around the flanges and out.<br />
12. Lower the pump onto the base pan.<br />
13. Remove the inlet seal and place on a clean lint free surface for later use.<br />
14. Grip the pump with your right hand, tilt towards you until the inlet flange<br />
clears the manifold flange.<br />
Be careful not to scratch or damage sealing surfaces.<br />
15. Pull the pump out to the full extent of its cable.<br />
16. Disconnect the cable from the diffusion pump controller.<br />
17. Remove the pump and set it on its base.<br />
99 of 177
Topping Off the Diffusion Pump Fluid Level<br />
Cleaning the Diffusion Pump<br />
1. Remove the pump.<br />
2. Slowly pour a little diffusion pump fluid (03-930639-01) through one of the<br />
holes in the diffusion pump’s inlet baffle.<br />
• The fluid is highly viscous and takes a minute or two to reach the<br />
reservoir and show in the sight glass.<br />
3. Add fluid until the level is between the mid and maximum mark on the cold<br />
arrow.<br />
4. Wipe any spillage from the inlet baffle using a clean lint free cloth.<br />
5. Refit the diffusion pump.<br />
Diffusion Pump<br />
A Circlip J Heater Assembly<br />
B Inlet Baffle K Harness Clamp<br />
C Centering Plate & Spring L Insulation Disk<br />
D Jet Assembly M Insulation<br />
E Exhaust Baffle & Circlip N Over temperature Switch<br />
F Sight Glass Assembly O Inlet Port<br />
G Body P Exhaust Port<br />
H Retaining Plate Q Ejector Stage<br />
I Base Plate<br />
100 of 177
Hazardous chemicals may be present. Avoid contact with skin. Use proper<br />
eye and skin protection.<br />
Toxic residues from mass spectrometer samples will build up in used pump<br />
fluid. Dispose of all used pump fluid in accordance with applicable regulations.<br />
Place a hazards warning label on the container, if appropriate.<br />
To clean the diffusion pump:<br />
1. Layer a number of clean lint free cloths or paper towels on the work surface.<br />
2. Provide a 3" deep x 3" wide x 7" long container filled with acetone to a depth<br />
of 2".<br />
3. Remove the pump.<br />
4. Using a pair of circlip pliers, remove the circlip that holds the exhaust baffle in<br />
the exhaust port. Place the circlip on the towels.<br />
Be careful not to scratch or damage sealing surfaces.<br />
5. Withdraw the baffle and place it on the towels.<br />
6. Using a pair of pliers, remove the circlip that holds the inlet baffle in place.<br />
Place the circlip on the towels.<br />
Be careful not to scratch or damage sealing surfaces.<br />
7. Withdraw the baffle, centering plate, and spring. Place these items on the<br />
towels.<br />
8. Use a towel to wipe excess fluid from the circlip, baffle, centering ring, and<br />
spring. Place these items into the container of acetone.<br />
9. Withdraw the jet assembly and place it vertically on the towels.<br />
10. After allowing the excess fluid to drain, wipe down jet assembly and lay it<br />
down in the container of acetone.<br />
11. Drain the diffusion pump fluid into a suitable container.<br />
12. Clean the interior of the pump body with acetone and rinse with isopropyl<br />
alcohol. Allow to air dry.<br />
101 of 177
Do not submerge the pump body as the solvents will be absorbed into the<br />
diffusion pump’s insulation, creating a fire risk.<br />
13. Rinse all the other parts washed in acetone with isopropyl alcohol, and air<br />
dry.<br />
14. Drop the exhaust baffle into the exhaust port, ensuring the shortest end of<br />
the central post is uppermost.<br />
15. Using a pair of circlip pliers, refit the circlip that holds the exhaust baffle in<br />
place. Orient the circlip to provide the maximum opening between the baffle<br />
and exhaust port wall.<br />
Be careful not to scratch or damage sealing surfaces.<br />
16. Place the jet assembly inside the pump body, ensuring the ejector stage lines<br />
up with the exhaust port. When correctly positioned, the jet assembly will<br />
locate on a pin in the base of the body.<br />
17. Insert the spring into the counterbore of the jet cap.<br />
18. Place the centering plate on the spring.<br />
19. Lower the baffle onto the centering ring.<br />
20. Using a pair of pliers, refit the circlip that holds the inlet baffle in place.<br />
Be careful not to scratch or damage sealing surfaces.<br />
21. Pour the diffusion pump fluid (03-930639-01) through one of the holes in the<br />
diffusion pump’s inlet baffle. Part Number 03-930639-01 contains 40 cm 3 .<br />
This is a full charge, plus an allowance for fluid that remains on the walls of<br />
the container.<br />
NOTE: The fluid is highly viscous and takes five minutes for a full charge to<br />
reach the reservoir and show in the sight glass.<br />
22. Add fluid until the level is midway in the “Full Cold” zone.<br />
23. Wipe any spillage from the inlet baffle using a clean lint free cloth.<br />
24. Refit the diffusion pump.<br />
102 of 177
Changing the Diffusion Pump Heater<br />
The cartridge heater is factory coated with an anti-seize lubricant to facilitate<br />
easy removal of the heater. To change the diffusion pump heater:<br />
1. Remove the pump.<br />
2. Turn the pump upside down and drain the fluid into a suitable container.<br />
Hazardous chemicals may be present. Avoid contact with skin. Use proper<br />
eye and skin protection.<br />
Toxic residues from mass spectrometer samples will build up in used pump<br />
fluid. Dispose of all used pump fluid in accordance with applicable regulations.<br />
Place a hazards warning label on the container, if appropriate.<br />
3. Remove the two screws holding the over temperature switch in position.<br />
4. Remove the two retaining screws and the base plate.<br />
5. Use an 11/32 socket to unscrew the two nuts.<br />
6. Remove the ground wire, harness clamp, retaining plate and insulating pad.<br />
7. Pull the heater out by its leads, twisting if necessary.<br />
8. If the heater does not come out:<br />
a. Apply penetrating oil around the cartridge heater and let it stand for 10<br />
minutes.<br />
b. Drive a ¼ inch wide flat blade screwdriver approximately 1/8 deep into<br />
the center of the heater between the electrical leads.<br />
c. Gently turn the screwdriver to break the heater free.<br />
d. Pull the heater out by its leads, twisting if necessary.<br />
e. If the heater does not pull out freely, a second application of penetrating<br />
oil may be necessary.<br />
9. Apply the anti-seize compound to the new heater and install it in the base.<br />
10. Refit the insulating pad, retaining plate, harness clamp, ground wire, nuts,<br />
base plate, and retaining screws.<br />
11. Install over temperature switch.<br />
12. Pour the diffusion pump fluid (P/N 03-930639-01) through one of the holes in<br />
the diffusion pump’s inlet baffle. P/N 03-930639-01 contains 40cm 3 . This is<br />
a full charge, plus an allowance for fluid that remains on the walls of the<br />
container.<br />
NOTE: Fluid is highly viscous and takes five minutes for a full charge to reach<br />
the reservoir and show in the sight glass.<br />
13. Add fluid until the level is midway in the “Full Cold” zone.<br />
103 of 177
Reinstalling the Diffusion Pump<br />
14. Wipe any spillage from the inlet baffle using a clean lint free cloth.<br />
15. Install the diffusion pump in the <strong>MS</strong>.<br />
IMPORTANT NOTE: The new heater will give off an odor during the first thirty<br />
minutes of operation. The odor results from the baking of the anti-seize lubricant,<br />
and certain compounds used in the manufacture of heaters. This is normal.<br />
1. Reconnect the diffusion pump cable to the diffusion pump controller.<br />
2. Place the pump, base first into the diffusion pump compartment and tilt<br />
upright.<br />
Be careful not to scratch or damage sealing surfaces.<br />
• The exhaust elbow should be on the right side of the pump.<br />
3. Inspect the inlet seal. Replace if it is worn or damaged<br />
(27-402294-00).<br />
4. Wipe the inlet seal clean with a lint free cloth, rub a thin layer of diffusion<br />
pump fluid onto the O-ring, and place the seal onto the inlet port.<br />
5. Lift the pump into position on the manifold flange and hold.<br />
6. From the left side of the pump, feed the inlet clamp plain end first around the<br />
inlet flange.<br />
7. Close the clamp and loosely fasten the wing nut.<br />
8. Rotate the pump so the exhaust port is visible through the cut out in the<br />
sheet metal.<br />
9. Let go of the pump.<br />
10. Inspect the exhaust seal.<br />
Replace if it is worn or damaged (27-402536-00).<br />
11. Wipe the exhaust seal clean with a lint free cloth, and refit to the exhaust<br />
port.<br />
12. Lower the elbow onto the diffusion pump exhaust port.<br />
Take care not to dislodge the seal.<br />
13. Reinstall the exhaust clamp by pushing it onto the joined exhaust flanges.<br />
14. Rotate the clamp 180° and install the screw from the left side.<br />
15. Thread the wing nut onto the screw.<br />
104 of 177
16. Rotate the clamp as far to the left as possible, while still allowing room to turn<br />
the wing nut.<br />
17. Rotate the diffusion pump so the elbow lies as close to the manifold as<br />
possible.<br />
18. Tighten the wing nut on the exhaust clamp.<br />
19. Rotate the inlet clamp as far inboard as possible.<br />
20. Tighten the wing nut on the inlet clamp.<br />
21. Refit the left side cover and fasten in place with the four screws and two<br />
spacers. If the elbow or inlet clamp interfere with the side cover, reposition<br />
and refit the side cover.<br />
22. Bring the <strong>MS</strong> alongside the <strong>GC</strong> and refit the transfer line.<br />
23. Reconnect the manifold and trap heater cables.<br />
24. Refit the top cover.<br />
25. Carefully slide the <strong>MS</strong> up to the <strong>GC</strong>.<br />
26. Close the vent valve by lowering the vent valve lever.<br />
27. Turn on the <strong>MS</strong>.<br />
A Inlet Clamp D Exhaust Clamp<br />
B Manifold E Elbow<br />
C Exhaust F Diffusion Pump<br />
Relative positions of the manifold, diffusion pump, elbow and clamps as viewed from<br />
above.<br />
NOTE: The manifold and elbow are shown as outlines for clarity.<br />
Turning on the Mass Spectrometer<br />
1. Make sure the power switch on the rear panel is in its OFF position.<br />
2. Check that all the heater cables are plugged in.<br />
3. Check that all the Saturn covers are in place, especially the left side cover<br />
and the Peltier baffle ducting.<br />
105 of 177
How to Service the Ion Trap<br />
4. Plug in the Saturn power cable.<br />
5. Turn the power switch on the rear panel to its ON position.<br />
6. Bring up the System Control page.<br />
7. Monitor the foreline pressure on the shutdown page until the diffusion pump<br />
is ready.<br />
NOTE: The pressure should read below 500 mTorr within the first five minutes,<br />
and ≤100 mTorr within 45 minutes. Higher values may indicate a leak. Refer to<br />
the Troubleshooting section.<br />
NOTE: The Saturn <strong>2000</strong> Maintenance Tutorial on CD-ROM provides viewing<br />
maintenance procedures on computer screen. Refer to <strong>MS</strong> Maintenance<br />
Section.<br />
You will need to service the ion trap if it needs to be cleaned or requires<br />
replacement of the filaments or multiplier. The following flow chart illustrates the<br />
general sequence of ion trap maintenance operations. Each step is then<br />
described in detail.<br />
106 of 177
Flow Chart for Servicing the Ion Trap<br />
107 of 177
Turn off the Mass Spectrometer<br />
Allow heated zones to cool before disassembly.<br />
Turn off the mass spectrometer by invoking the Shutdown procedure. Refer to<br />
chapter on system Start-up and Shutdown.<br />
1. Shut off the turbomolecular pump, foreline pump, and all electronics by<br />
turning off the main power switch on the back panel.<br />
2. Disconnect the Saturn power cord.<br />
3. Open the front-panel door and lift the toggle vent valve for 1 sec to slow the<br />
turbomolecular pump down.<br />
4. Once the pump has finished spinning down, open the vent valve. Leave it<br />
open until the system is fully vented, i.e., about 5-10 minutes.<br />
Retract/Remove the Transfer Line<br />
NOTE: Fully vent the analyzer assembly before attempting to retract or remove<br />
the transfer line. Vacuum makes retraction of the transfer line difficult.<br />
To retract the transfer line, proceed as follows:<br />
1. Unplug the transfer line heater cable.<br />
2. Take hold of the transfer line nose.<br />
3. Simultaneously push and rotate the nose counterclockwise.<br />
4. Pull the transfer line away from the analyzer.<br />
• Under most conditions, the transfer line needs only to be retracted in<br />
order to remove the analyzer. If it is necessary to remove the transfer<br />
line (i.e., to inspect or change the O-ring), perform steps 5 and 6.<br />
5. Remove the nose clip by pulling both sides away from the boot.<br />
• Take care not to apply excessive force.<br />
6. Pull the nose away from the analyzer until the entire assembly is free of the<br />
transfer-line shell.<br />
• Exercise particular care if the column is still connected to the transfer<br />
line.<br />
108 of 177
A Heating Cable H O-ring<br />
B Boot I Transfer Line Tip<br />
C Nut J Heating Cable Slot<br />
D Ferrule K Nose Clip<br />
E Tool L Bayonet Mount<br />
F Nose M Analyzer Assembly Tongue<br />
G Nose Hole N Analyzer Assembly Lock-Down<br />
Tabs<br />
Transfer Line Assembly<br />
109 of 177
Remove the Analyzer Assembly<br />
Retract transfer line before removing analyzer assembly.<br />
NOTE: Be sure the transfer line is retracted. Otherwise, you will not be able to<br />
remove the analyzer assembly without damaging the analyzer.<br />
To remove the analyzer assembly, proceed as follows:<br />
1. Remove the top cover of the Saturn <strong>GC</strong>/<strong>MS</strong> by grasping both sides and lifting<br />
up.<br />
2. Unplug the trap heater harness located near the top of the instrument.<br />
3. On the side of the analyzer assembly (near the transfer line), push out the<br />
locking tabs on the power ribbon cable. This releases the cable.<br />
4. Pull the ribbon cable out and move it away from the analyzer.<br />
5. Push down and spread the two analyzer release tabs.<br />
NOTE: Some Saturn systems have a transfer line removal flap warning that will<br />
block the locking tabs. If such a flap is present, tip it out of the way during the<br />
procedure and return it to its original position once the analyzer is replaced.<br />
6. Tilt the rear end up carefully to remove the analyzer.<br />
7. Move the analyzer assembly toward the rear to free the front tab.<br />
8. Place the analyzer upside down on a flat surface.<br />
NOTE: To prevent contamination when touching parts of the trap or the electron<br />
multiplier, wear gloves.<br />
110 of 177
Replace the Electron Multiplier<br />
When positioned to collect ions, the electron multiplier sits as close as possible to<br />
the ion trap. The electron multiplier grid should never be in contact with the trap.<br />
To remove the electron multiplier, proceed as follows:<br />
1. Slide the electron multiplier back along its track until it clicks into place.<br />
2. Continue sliding the electron multiplier, but with slightly less force, until the<br />
multiplier bracket comes free of the track.<br />
3. To protect the electron multiplier, place it with one of its sides facing down on<br />
a flat surface. The glass multiplier grid should not be touching anything.<br />
To install the new electron multiplier, proceed as follows:<br />
1. Slide the electron multiplier forward along its track.<br />
2. Push the multiplier bracket forward until it is as close as possible to the ion<br />
trap. The assembly should snap into place.<br />
3. Make sure the high voltage and signal contacts are in good contact with the<br />
feed-through pins.<br />
A Exit End Cap F Multiplier Contacts<br />
B Electron Multiplier Track G Multiplier High Voltage Pin<br />
C Multiplier Signal Pin H Transfer Line Alignment<br />
D EM Grid I Transfer Line Entrance Hole<br />
E Electron Multiplier Mount<br />
Electron Multiplier<br />
111 of 177
Replace the Filament(s)<br />
To replace the filament(s), proceed as follows:<br />
1. Orient the trap so the filament assembly is facing you.<br />
2. Disconnect the filament connectors from the flange-feed through pins by<br />
gently pulling each pin connector up until the wires are free from the pins.<br />
3. Using a Phillips screwdriver, loosen the screw on the filament retainer.<br />
4. Slide the filament clip down off the ceramic filament disk.<br />
5. Remove the filament assembly.<br />
NOTE: Inspect the area around the filament entrance hole for carbon deposits.<br />
Carbon buildup in this area can lead to lower sensitivity and/or shorter filament<br />
lifetime. Area should be cleaned before replacing filament assembly.<br />
6. Place the new filament assembly in the trap oven, and align the posts in the<br />
1, 2, and C positions.<br />
7. Slide the filament clip onto the filament disk and tighten the screws. Be sure<br />
that the clip is not touching any of the filament connectors.<br />
8. Connect the filament connectors to the flange post connectors.<br />
A Belleville Washer F Filament Retainer<br />
B Ceramic Filament Assembly G Analyzer Flange<br />
C Filament Connectors H Transfer Line Alignment Tool<br />
D Post Connectors for Filament I Center Disk<br />
E Screw J Feeler Disk<br />
Filament Assembly<br />
112 of 177
Remove the Ion Trap Oven<br />
Cleaning the Trap Components<br />
Using gloves to remove the ion trap oven, proceed as follows:<br />
1. Remove the electron multiplier and place it on its side.<br />
2. Disconnect the filament wires from the flange feed-through pins (labeled 1, 2,<br />
C) by gently pulling each pin connector up until all wires are free of the<br />
flange.<br />
3. Remove the nut using the 11/32-in. nut driver (supplied).<br />
4. Gently lift the trap oven assembly off the heater post and thermo well.<br />
Do not rotate the assembly more than 2 degrees. Otherwise, you may damage<br />
the contact springs.<br />
• Turn the analyzer assembly over to remove the Belleville washer.<br />
To clean the trap components you will<br />
• Disassemble the trap components<br />
• Clean the trap components<br />
• Reassemble the trap<br />
Disassemble the Trap Components<br />
1. Place the oven filament-side-down on its feet or if it has no feet, on the<br />
workstand (supplied). This will protect the filament wires from becoming<br />
damaged.<br />
2. Loosen the two screws with slotted holes by 3 to 4 turns. Do not remove the<br />
screws.<br />
3. Completely remove the two screws in the non-slotted holes.<br />
4. Slide the clamping plate off of the trap oven.<br />
5. Lift out the entire electrode stack, or remove each piece singly.<br />
• Be very careful not to damage the quartz spacers.<br />
6. If you only intend to clean the electrodes, leave the gate parts in the oven.<br />
Otherwise, remove the gate, wavy spring washer, and gate conductor by<br />
turning the oven upside down.<br />
NOTE: The Silica Coated Spacers have a shiny, mirror like finish on the inside<br />
surface.<br />
113 of 177
A Screw, 6/32, 4 places H Wave Washer<br />
B Clamping Plate I Gate Conductor<br />
C Exit End Cap J Trap Oven, “T” is located this side.<br />
D Quartz or Silica Coated Spacer, 2 places K Filament Assembly<br />
E RF Ring Electrode L Filament Clip<br />
F Filament End Cap M Screw<br />
G Electron Gate<br />
Ion Trap Assembly<br />
Clean the Trap Components<br />
To clean the ion trap parts, you will<br />
• Clean the stainless steel parts or clean the SilChrom-coated parts<br />
• Clean the quartz spacers<br />
NOTE: For SilChrom-coated electrodes, Do Not use Aluminum Oxide.<br />
Clean Stainless Steel Parts<br />
To clean the filament end cap, RF voltage ring electrode, and exit end cap,<br />
proceed as follows:<br />
1. Using a slurry of number 600 aluminum oxide in water (or glycerol) and a<br />
cotton-tipped applicator, remove all contaminants from the stainless steel ion<br />
trap parts.<br />
• Use the wooden end of a cotton swab, cut at an angle, to clean the<br />
inside corners, i.e., the holes in the end caps.<br />
• Contaminants sometimes appear as dark or colored areas, but they may<br />
also be invisible. Clean each part thoroughly, even if there is no<br />
apparent contamination.<br />
114 of 177
2. After you clean a part, hold it under running water and use a clean applicator<br />
to remove the last visible traces of aluminum oxide.<br />
3. Immediately place the clean part in a beaker containing a solution of<br />
detergent and warm water.<br />
NOTE: Do not let the slurry dry on the metal. Dried aluminum oxide is difficult to<br />
remove.<br />
4. When you have finished cleaning all of the parts, place the beaker in an<br />
ultrasonic cleaner, and subject the beaker and its contents to ultrasound for<br />
about 1 minute.<br />
5. Rinse each part with fresh water.<br />
6. Using clean tools, place the parts in a beaker containing de-ionized water,<br />
then subject the beaker and its contents to ultrasound for about 1 minute.<br />
• If the water is cloudy afterwards, replace the deionized water and repeat.<br />
7. Rinse the parts with methanol.<br />
8. Place the parts in a beaker of fresh methanol. Subject the beaker and its<br />
contents to ultrasound for about 1 minute.<br />
NOTE: Once the ion trap parts are clean, wear clean, lint-free gloves in<br />
subsequent handling of the parts to prevent contamination. Do not wear vinyl<br />
gloves.<br />
9. Remove the ion trap parts from the beaker, and place them on a clean, lintfree<br />
surface.<br />
• Allow the parts to dry in air.<br />
10. Inspect each part to make sure that all spots and particles have been<br />
removed.<br />
• If you observe any contamination, clean the part again using the<br />
procedure described above.<br />
NOTE: You can clean any small stainless steel parts, e.g., the electron gate<br />
conductor, the gate, and wavy washer spring, by placing them along with the<br />
other stainless steel parts in methanol and subjecting them to ultrasound for 1<br />
minute.<br />
NOTE: Check the oven trap near the filament entrance hole for carbon deposits.<br />
Carbon buildup may result in lower sensitivity and/or shorter filament lifetime.<br />
The carbon stains should be removed only with a cotton swab and methanol.<br />
After cleaning, check filament entrance hole for particles and fibers. Area must<br />
be cleaned before reassembly.<br />
115 of 177
Clean SilChrom Ion Trap Electrodes<br />
The silica top surface of the SilChrom Ion Trap Electrode is a very thin (only<br />
about 1 μm), but durable layer which is strongly bonded. However, abrasives<br />
such as alumina powder must not be used to clean the trap parts because this<br />
will definitely destroy the silica layer! Strongly acidic or strongly basic<br />
laboratory cleaners must not be used to clean the trap parts because they will<br />
also remove the silica layer!<br />
1. For routine cleaning of the SilChrom electrodes, ultrasonicate the ion trap<br />
electrodes for 10 minutes in methylene chloride or methanol. Use separate<br />
beakers for each electrode to avoid scratching trap surfaces. Trap<br />
disassembly and reassembly is otherwise identical to the recommendations<br />
Maintenance Section.<br />
2. If heavy matrix (dirty) samples are routinely run on the instrument and the<br />
electrodes are visibly discolored where the column enters the trap at the<br />
multiplier end cap, one may use a toothbrush and liquid hand soap or dish<br />
detergent (pH between 6 and 7.5) to gently scrub the trap parts. The trap is<br />
rinsed and then sonicated in water followed by two sonications in methylene<br />
chloride or methanol.<br />
DO NOT use Aluminum Oxide or other abrasives because this will remove the<br />
silica layer on the trap!<br />
DO NOT use harsh laboratory cleaners because this will remove the silica layer<br />
on the trap! Use only mild detergent (pH between 6 and 7.5).<br />
NOTE: You will notice that the initial hydrocarbon background is higher than on<br />
the standard ion trap. To speed up the bakeout, you may want to bake out the<br />
ion trap overnight at 220 °C. In the bakeout mode, the manifold is set to 120 °C.<br />
Clean the Two Quartz or Silica Coated Spacers<br />
NOTE: The Silica Coated Spacers have a shiny, mirror like finish on the inside<br />
surface.<br />
1. Wipe all surfaces of the quartz spacers with a clean, soft, lint-free cloth that<br />
has been dampened with reagent-grade acetone.<br />
2. Subject the quartz spacers to ultrasound in acetone for 5 minutes.<br />
3. Rinse each of the quartz spacers with de-ionized water.<br />
4. Subject the quartz spacers to ultrasound in methanol for 5 minutes.<br />
5. Dry the spacers in air, or in an oven set to approximately 120 °C for 30<br />
minutes.<br />
116 of 177
Re-install the Trap Oven<br />
Reassemble the Trap<br />
To reassemble the trap assembly, proceed as follows, referring to the Ion Trap<br />
Assembly figure:<br />
NOTE: The orientation of the trap components is important. Make sure that all<br />
parts are free of particles, lint, etc.<br />
1. Replace the gate conductor, tab-down into position.<br />
2. Replace the wavy washer on the gate conductor. The washer orientation is<br />
not important.<br />
3. Replace the gate so that the flat, shiny surface faces the washer.<br />
4. Replace the filament (single-hole) electrode in the oven.<br />
5. Replace one of the quartz spacers so that the notch faces the filament<br />
(single-hole) electrode.<br />
6. Replace the RF electrode, followed by a quartz spacer. The notch in the<br />
quartz spacer should face up towards the exit (seven-hole) electrode.<br />
NOTE: Make sure that the notch in the quartz spacer and the notch in the exit<br />
end cap are aligned.<br />
7. Replace the exit (seven-hole) electrode so that the notch on this electrode<br />
faces the side of the trap labeled with the side-ways T.<br />
8. Slide the clamping plate under the screws on the top of the trap oven<br />
assembly.<br />
9. Visually check the transfer line hole, making sure that notches in the quartz<br />
spacer and exit end cap electrode are aligned and centered in the trap oven.<br />
10. Tighten the screws.<br />
To replace the trap oven assembly, proceed as follows:<br />
1. Gently slide the trap assembly onto the heater post and thermo well, taking<br />
care not to bend the end cap contact springs.<br />
Do not rotate the assembly more than 2 degrees; otherwise, you may damage<br />
the contact springs.<br />
2. To set transfer line hole height to the analyzer flange, place the nub of the<br />
center disk into the hole created by the notches in the quartz spacer and the<br />
exit (seven-hole) electrode, then<br />
3. Rotate the alignment tool so that the feeler disk touches or almost touches<br />
the analyzer flange. Proper alignment is achieved when the feeler disk<br />
touches the analyzer flange and the alignment tool is perpendicular to the<br />
flange.<br />
4. Replace the Belleville washer so that the crown side is facing upwards.<br />
117 of 177
NOTE: When re-installing the trap assembly, make sure that you orient the<br />
Belleville washer crownside up. Tighten the nut until the Belleville washer is flat,<br />
i.e., until the nut bottoms out.<br />
5. Replace and tighten the nut until it is snug.<br />
6. Attach filament wires 1, 2, and C to the flange feed-through pins.<br />
Reposition the Electron Multiplier<br />
Re-install the Analyzer Assembly<br />
To install the electron multiplier, proceed as follows:<br />
1. Slide the electron multiplier forward along its track.<br />
2. Push the multiplier bracket forward until it is as close as possible to the ion<br />
trap. The assembly should snap into place.<br />
3. Make sure the high voltage and signal contacts are in good contact with the<br />
feed-through pins.<br />
To re-install the analyzer assembly, proceed as follows:<br />
NOTE: Make sure that the manifold O-ring is clean and free of particles and<br />
fibers.<br />
1. Make sure the transfer line is retracted or removed.<br />
• Align the analyzer with the release tabs toward the rear of the<br />
instrument.<br />
NOTE: Take care not to scrape or bang the analyzer parts (e.g., the trap oven<br />
assembly, electron multiplier, filament wires, etc.) against the stainless steel<br />
manifold flange.<br />
2. With a slight forward downward tilt, check that all cables and hoses are out of<br />
the way. Slowly insert the front tongue into the slot.<br />
3. Lower the rear of the analyzer by spreading the release tabs and pushing<br />
down gently.<br />
• You should be able to install the analyzer assembly into the manifold<br />
without applying force.<br />
4. Engage the release tabs and make sure that the release tabs are secure in<br />
their notches.<br />
5. Connect the trap heater cable.<br />
6. Connect the power ribbon cable and lock it into place. Ensure that the cable<br />
is firmly connected and that the locking tabs are fully engaged.<br />
118 of 177
Install the Transfer Line<br />
Close the Vent<br />
Turn on the Mass Spectrometer<br />
Bake Out the Trap<br />
If the transfer line has been removed, re-install the transfer line as follows. If the<br />
transfer line has only been retracted, proceed to steps 6 and 7 only.<br />
1. Make sure the O-ring is free of lint, particles, etc.<br />
2. Insert the assembly into the transfer-line shell.<br />
3. Orient the assembly so that the heating cable fits inside the shell slot.<br />
4. Rotate the nose so that the nose holes line up with the small slots in the<br />
shell. These holes will be found at the 4:00 and 10:00 positions.<br />
5. Install the nose clip.<br />
6. Push the nose in, rotating it clockwise to lock it in place.<br />
7. Connect the transfer line heater cable.<br />
To close the vent, or to check that it is closed, the vent valve lever should be<br />
facing down.<br />
To turn on the mass spectrometer, proceed as follows:<br />
1. Make sure that the power switch on the back of the mass spectrometer is in<br />
the OFF position.<br />
2. Check that all heater cables are plugged in.<br />
3. Plug in Saturn power cable.<br />
4. Turn ON Saturn power switch at the rear of the instrument.<br />
5. Bring up System Control on the computer.<br />
• The most recently set instrument parameters will be loaded into the<br />
mass spectrometer.<br />
• The software will stay on the shutdown page until the mass spectrometer<br />
is fully restarted.<br />
6. Briefly press down on the analyzer assembly to ensure a good vacuum seal.<br />
7. Replace the Saturn system cover.<br />
To bake out the trap, proceed as follows:<br />
1. Open the System Control and click on Temperatures.<br />
2. Select Bakeout and enter a bakeout time of 2 to 6 hours at 220 °C or higher.<br />
3. Click on Start Bakeout.<br />
119 of 177
Check Ion Trap <strong>Operation</strong><br />
To check the ion trap operation, proceed as follows:<br />
1. Once bake out is finished, re-establish the analysis temperature in the trap<br />
for at least 2 hours to achieve thermal equilibrium.<br />
• The manifold temperature should be below 50 °C.<br />
2. Run Diagnostics.<br />
3. Run Auto Tune or manually tune spectrometer.<br />
Fill the Calibration Compound Vial<br />
The calibration compound used with the Saturn <strong>GC</strong>/<strong>MS</strong> is perfluorotributylamine<br />
(PFTBA; C12F27N). This compound is also known as fluorocarbon-43 (FC-43).<br />
NOTE: There is no need to vent the vacuum system before you fill the cal gas<br />
vial with calibration compound, provided the cal gas needle valve is closed. To<br />
close the cal gas needle valve, turn it clockwise.<br />
To fill the cal gas vial, proceed as follows:<br />
1. Loosen each of the four retaining screws about 3 turns with a Phillips<br />
screwdriver. The four screws are located on the top of the pneumatics<br />
manifold.<br />
2. Pull the cal gas vial down gently with a slight twisting motion until it clears the<br />
pneumatics manifold.<br />
3. Refill the vial using a Pasteur pipette until the vial is filled about 1/3 full with<br />
PFTBA compound (03-920353-00).<br />
4. Remove any liquid that remains in the neck of the vial with a lint-free paper<br />
tissue.<br />
5. While holding the vial vertically, carefully push the vial into the cal gas port on<br />
the manifold with a slight twisting motion.<br />
6. After you have pushed the vial in as far as it will go, tighten the four retaining<br />
screws.<br />
7. Open the cal gas needle valve 10 counterclockwise turns. Leave the needle<br />
valve open for at least 30 minutes. Any excess cal gas and water vapor will<br />
be pumped away.<br />
120 of 177
8. Bring up System Control, and select Adjust Cal Gas Pressure under<br />
Adjustments in the menu bar.<br />
9. Adjust the cal gal pressure, according to the instructions on the screen.<br />
121 of 177
122 of 177
<strong>GC</strong> Maintenance<br />
Overview<br />
NOTE: The Saturn <strong>2000</strong> Maintenance Tutorial on CD-ROM provides viewing<br />
maintenance procedures on computer screen. Refer to <strong>GC</strong> Maintenance<br />
Section.<br />
It is important for the <strong>GC</strong> user to learn general maintenance techniques and carry<br />
these procedures out on a regular basis. Some common <strong>GC</strong> maintenance<br />
procedures are changing septa and injector inserts, checking for leaks,<br />
conditioning columns and changing filters. In this section maintenance<br />
information is presented under four headings: general <strong>GC</strong> maintenance, injector<br />
maintenance, and column maintenance.<br />
Note that many maintenance procedures, such as repair or replacement of<br />
electronic components, should be performed by a qualified Varian service<br />
representative. For maintenance problems where mechanical or electrical<br />
assemblies need to be repaired or replaced please call your local Varian service<br />
center.<br />
There are certain maintenance tasks that should be carried out on a routine<br />
basis. These regular procedures are done to ensure that the 3800/3900 Gas<br />
Chromatograph will continue to operate at optimum performance. The following<br />
is a brief summary of some common maintenance tasks and their typical<br />
frequency. Additional information on the 3800/3900 <strong>GC</strong> can be found in the<br />
Getting Started and Operator’s manuals:<br />
Maintenance Task Frequency<br />
Change septa Typically 50 - 100 injections<br />
Check column nuts are tight Daily<br />
Condition column Daily or as required<br />
Change injector inserts, if<br />
necessary<br />
Weekly<br />
Check gas supplies Weekly<br />
Leak check Monthly<br />
Change gas cylinders Quarterly or as required<br />
Condition system Semiannually<br />
Replace gas purifiers Annually or as required<br />
123 of 177
General <strong>GC</strong> Maintenance<br />
The common general <strong>GC</strong> maintenance tasks are checking and changing gas<br />
supply cylinders, leak checking, and changing gas purifier filters. These should<br />
be performed at the frequency suggested above. The following procedures are<br />
critical to the successful long-term operation of a Gas Chromatograph. It is very<br />
important to leak check the system on a routine basis and to ensure the quality of<br />
gas supplies, particularly the carrier gas.<br />
Check and Renew Gas Supplies<br />
The pressure of the various <strong>GC</strong> gas supplies should be checked on a weekly<br />
basis and the following guidelines used for frequency of renewing supplies:<br />
Carrier gas: The carrier gas supply cylinder should be changed when its<br />
pressure drops below 200 psi. This ensures that high purity carrier gas is always<br />
supplied to the instrument. With typical usage on one Gas Chromatograph an Asize<br />
cylinder of carrier gas should last for three to six months. Note that this<br />
usage includes also using the carrier gas as the supply of make-up to the<br />
detectors. When a new cylinder is installed the regulator and tubing should be<br />
purged with carrier gas before connecting to the <strong>GC</strong>. This will avoid introducing<br />
a large amount of air into the <strong>GC</strong>.<br />
Leak Check<br />
Leak checking is one of the most important maintenance tasks that is carried out<br />
on a Gas Chromatograph. The following information refers to general leak<br />
checking procedures for the 3800 Gas Chromatograph. Specific information<br />
regarding individual 3800 components will be presented in the relevant part of<br />
this maintenance section.<br />
Leaks in the <strong>GC</strong> system can lead to poor chromatographic performance or<br />
damage components such as the analytical column. The presence of oxygen in<br />
the <strong>GC</strong> carrier gas at elevated temperatures can lead to permanent column<br />
phase degradation. While the use of an oxygen filter on the carrier supply to the<br />
instrument can help, leaks downstream of the filter are generally more likely to be<br />
the problem.<br />
The use of soap-based leak detection fluids is not recommended for a high<br />
performance capillary Gas Chromatograph due to the danger of introducing<br />
contaminants into the system. If leak detection fluids are being used they should<br />
only be used outside the Gas Chromatograph, i.e., to verify there are no leaks in<br />
the plumbing to the Gas Chromatograph. If a leak detection fluid is being used<br />
inside the Gas Chromatograph, an alcohol such as isopropanol or a 50:50<br />
mixture of isopropanol and water should be used. Use a dropper or syringe to<br />
place a few drops of leak detection fluid on the desired fitting and monitor the<br />
area for bubble formation.<br />
The most important step in leak checking is to verify that the <strong>GC</strong> system can hold<br />
pressure. This is done by removing the column from the injector, sealing all exits<br />
from the injector and pressurizing the system. Use the following procedure to<br />
leak check 3800 injectors:<br />
124 of 177
NOTE: When conducting leak check procedures it is important to completely<br />
seal all carrier gas exits, including septum purge and split vent outlets. If more<br />
than one injector is present, then the outlets of all the injectors must be sealed.<br />
The following procedure refers to one injector but should be duplicated for every<br />
injector on the 3800.<br />
1. Set the column oven and the injector zone temperatures to 50 °C and allow<br />
them reach this temperature. This allows safe handling of injector surfaces.<br />
2. Remove injector septum nut and install a new septum. An older septum can<br />
often be the source of a substantial leak.<br />
3. Remove the column from the injector. Use the appropriate nut and ferrules to<br />
seal the base of the injector. For packed column systems use a 1/4″<br />
Swagelok® blank off plug (16-000154-00). For capillary systems use a<br />
capillary nut (03-949551-00) with a no hole ferrule (28-694590-01).<br />
4. If the injector is a 1079, then the septum purge and split vent outlets must be<br />
sealed. The septum purge outlets are located on the top frame surrounding<br />
the column oven, behind the column oven door. The split vent outlets are<br />
located on the left side panel of the 3800 with manual pneumatics or inside<br />
the pneumatics compartment with EFC. Seal the septum purge by removing<br />
the outlet fitting from the septum purge valve and replacing it with a blank off<br />
plug (16-000154-00). Seal the split vent outlet by installing a Swagelok union<br />
on the outlet tube and sealing it with a blank off plug.<br />
5. With all outlet ports plugged, pressurize the system to 20 - 30 psi. This can<br />
be accomplished by adjustment of manual pneumatic controls or Electronic<br />
Flow Control. For information on setting carrier gas pressure see the Basic<br />
<strong>Operation</strong> section of the 3800 Getting Started manual.<br />
6. Shut off the carrier supply at the source and monitor the displayed pressure<br />
at the <strong>GC</strong> for 15 minutes. The pressure should not drop more than 0.5 psi in<br />
15 minutes.<br />
Leak checking ensures that there are no leaks in the <strong>GC</strong> system up to and<br />
including the injector assembly. If the indicated pressure on the <strong>GC</strong> drops by<br />
more than 0.5 psi during the 15-minute test period, this indicates that there is a<br />
positive leak in the system. Finding such a leak, particularly if it is a small leak,<br />
can be very difficult. In general the best approach is to systematically go through<br />
the pneumatic system from the source and tighten each fitting until the leak is<br />
eliminated. It is important to note that leaks are often found in the carrier gas<br />
supply to the <strong>GC</strong>.<br />
Locate leaks with an electronic leak detector or leak detection fluid. An electronic<br />
helium leak detector is available from Varian (01-900153-01). This device can<br />
detect helium concentration in the air as low as 2 ppm and is very effective at<br />
identifying the precise location of a helium leak from a <strong>GC</strong> system.<br />
Gas Purifier Replacement<br />
The most common gas purifiers used in gas chromatography are moisture traps<br />
for removing water vapor, hydrocarbon traps for removing low levels of<br />
hydrocarbon contaminants and oxygen traps for removing low levels of oxygen.<br />
In general the choice of filter depends on the application and detector used.<br />
Carrier gas should contain less than 1-ppm oxygen, moisture and trace<br />
hydrocarbon contaminants. A combined moisture / hydrocarbon filter is<br />
recommended for general applications to maintain detector background levels at<br />
125 of 177
their lowest possible level. For the <strong>MS</strong> detector an oxygen filter should be<br />
employed as well<br />
Varian supplies several types of carrier gas purifiers. These include a combined<br />
moisture / hydrocarbon trap, indicating moisture trap, indicating or non-indicating<br />
oxygen traps and a combined moisture / hydrocarbon / oxygen trap. While the<br />
choice of purifier depends on the individual configuration and performance<br />
expectations, the following configuration is recommended for maximum carrier<br />
gas purity and protection.<br />
The carrier gas should first pass through a hydrocarbon trap, then an indicating<br />
moisture filter, then a high capacity oxygen trap and finally through an indicating<br />
oxygen trap. As moisture reduces the effectiveness of an oxygen trap, a moisture<br />
trap should always be placed in front of an oxygen trap. When the indicating<br />
oxygen trap begins to change color, the high capacity oxygen trap should be<br />
changed immediately. The moisture trap should also be changed immediately<br />
when it changes color to prevent breakthrough of moisture to the oxygen trap.<br />
The filters supplies by Varian are mounted either on the rear panel of the<br />
instrument or on a filter stand, depending on when the instrument was<br />
purchased. Follow one of the two procedures below to replace the filter.<br />
If Filters are Mounted on the Rear of the <strong>GC</strong>:<br />
Gas purifiers supplied by Varian and most other chromatography suppliers are<br />
equipped with 1/8″ Swagelok fittings. This facilitates easy removal and<br />
replacement of purifiers. In addition gas purifiers are sealed at both ends for<br />
protection. Purifiers should only be uncapped when you are about to install them.<br />
1. Turn off the carrier gas supply at the input regulator. Note the operating<br />
pressure to allow resetting to this value after the purifier is installed.<br />
2. Carefully open the carrier gas fitting at the inlet bulkhead to the <strong>GC</strong> or the<br />
existing carrier gas purifier. Wait for the release of carrier gas pressure<br />
before removing the fitting.<br />
3. Identify the recommended direction of carrier gas flow on the purifier. This is<br />
normally indicated by an arrow on the side of the purifier. Remove the inlet<br />
cap from the purifier and immediately connect the carrier gas inlet line to the<br />
purifier inlet.<br />
4. Remove the outlet cap from the purifier, turn the carrier supply back on and<br />
allow the carrier gas to purge through the purifier for 0.5 - 1 minutes.<br />
5. Connect the outlet of the gas purifier to the inlet of the <strong>GC</strong> or the inlet of the<br />
next purifier, if used. If a new connection is being made, use chromatography<br />
grade copper tubing and new Swagelok fittings.<br />
The following are the rear mounted gas purifiers available from Varian.<br />
Purifier Part Number<br />
High capacity oxygen trap 03-949770-02<br />
Indicating oxygen trap 88-501019-00<br />
Combined hydrocarbon and moisture trap 03-949862-00<br />
Indicating moisture trap 01-900007-00<br />
126 of 177
If Filters are Mounted on a Separate Stand:<br />
Filters have been supplied in either a single combined<br />
moisture/hydrocarbon/oxygen filter arrangement or as two filters (a<br />
moisture/hydrocarbon filter and oxygen filter). Two valves automatically take care<br />
of stopping and starting the gas flow. Each filter is replaced using the following<br />
procedure:<br />
1. Remove the saturated filter by unscrewing the knurled nut. The system<br />
remains under pressure.<br />
2. Check the O-rings for hairline cracks. Cracked rings may cause leakage. If<br />
cracks are found replace all rings.<br />
3. Remove the filter from the packaging and remove the self-adhesive foil from<br />
the bottom of the filter. Place the filter onto the connecting unit.<br />
4. Place the knurled ring nut over the filter and screw it on, while pressing the<br />
filter down. Some force may be necessary if the system is under high<br />
pressure.<br />
5. Carefully check the connection for leakage. This is important as oxygen and<br />
moisture from the air enter the system through the tiniest leaks.<br />
6. Mark the date of installation on the calendar in the filter label with a felt tip<br />
pen.<br />
NOTE: Review the instructions supplied with the replacement filters.<br />
The following are the stand-alone gas purifiers available from Varian.<br />
Purifier Part Number<br />
Indicating oxygen trap CP17970<br />
Indicating moisture trap CP17971<br />
Combined hydrocarbon/moisture/oxygen trap CP17973<br />
Injector Maintenance<br />
The injector is the component of the Gas Chromatograph that requires the most<br />
frequent maintenance. This is due to the fact that the sample is deposited in the<br />
injector, thus leading to potential contamination and build up of non-volatile<br />
deposits. The most frequent injector maintenance is septum replacement. In<br />
addition insert replacement and injector cleaning are very common. As septum<br />
replacement is common to all liquid injectors on the 3800 this procedure is<br />
presented first, followed by specific maintenance procedures for the individual<br />
injectors.<br />
Septum Replacement<br />
The injector septum is an expendable part and must be replaced on a routine<br />
basis. The frequency of replacement depends on the number of injections and<br />
whether the injections are by hand or with an autosampler. In general the septum<br />
should be replaced every 50 - 100 injections or when symptoms of a septum leak<br />
are seen. These symptoms include changing retention times, reduced detector<br />
response or a drop in column head pressure. The latter symptom is not always<br />
valid as some injectors, such as the 1079, are pressure controlled. With a<br />
127 of 177
pressure-controlled injector, the column head pressure will remain constant even<br />
if a leak is present.<br />
Use the following procedure to change a septum on any Varian injector:<br />
1. Cool the column oven and injector oven to 50 °C. This ensures safe handling<br />
of injector parts and protects the column from elevated temperatures while it<br />
is exposed to air.<br />
2. Turn off the carrier gas supply to the injector.<br />
3. Remove the injector nut by turning it counterclockwise.<br />
4. Remove the old septum using tweezers or a septum pick (72-000084-00). It<br />
is best not to handle any internal parts of the injector.<br />
5. Install the new septum, again using tweezers to avoid contaminating the<br />
injector.<br />
6. Replace the injector nut and tighten it finger-tight until you feel resistance<br />
from the septum, then tighten an extra 1/4 turn. Turn on the carrier gas<br />
supply.<br />
On occasion to save time you may want to change a septum while the injector is<br />
hot. Use an injector wrench (03-908423-00) to remove and reinstall the injector<br />
nut. In all instances the column oven should be cool before removing the injector<br />
nut.<br />
128 of 177
1079 Injector<br />
The 1079 is a universal capillary injector that can be operated in several modes.<br />
These modes include split, splitless, on-column and large volume injection.<br />
Typically, to change from one mode of operation to another involves changing<br />
the injector insert. The insert should also be cleaned or replaced on a routine<br />
basis. This is especially important when dirty samples are being analyzed.<br />
After prolonged use, the 1079 Universal Capillary Injector glass insert may need<br />
to be removed either:<br />
• To clean the current glass insert for reinstallation in the 1079 Injector, or<br />
• To replace the current glass insert with a new insert.<br />
Refer to the figure below when removing and/or replacing the glass insert.<br />
1 Injector Nut<br />
2 Septum<br />
3 Septum Purge<br />
4 Septum Support<br />
5 Graphite Ferrule<br />
6 Carrier Gas Inlet<br />
7 Split Vent<br />
8 Glass Insert<br />
9 Fused Silica Column<br />
10 Capillary Column Nut<br />
11 Vespel® Ferrule<br />
12 Point of Injection<br />
Tools Required<br />
Tweezers or septum pick<br />
(72-000084-00)<br />
Injector nut wrench (03-908423-00)<br />
Flat-blade screwdriver (short handle)<br />
Clean laboratory tissue<br />
Graphite ferrules (03-925342-02)<br />
Insert/ferrule positioning tool<br />
(03-925385-00)<br />
1079 Injector - Cross-Sectional View<br />
129 of 177
Remove the Glass Insert<br />
Follow these steps to remove the glass insert from the 1079 Injector:<br />
1. Use the injector nut wrench to remove the injector nut (Item 1). Place the nut<br />
on a clean surface (e.g., clean tissue).<br />
The injector nut may be hot. Lower the injector temperature to 50 °C and permit<br />
the injector nut to cool before proceeding.<br />
NOTE: If the <strong>GC</strong> is equipped with an 8200 AutoSampler, to access the injector<br />
nut, push the carrousel release button (back left) and swing the carrousel out.<br />
2. With tweezers or septum pick, lift the edge of the septum (Item 2). Remove<br />
the septum.<br />
NOTE: Replace the injector septum each time the glass insert is replaced.<br />
3. Use a clean flat-blade screwdriver to unscrew the septum support nut (Item<br />
4) until it is loose.<br />
4. Remove the septum support with the tweezers or septum pick.<br />
NOTE: Typically, when the septum support is removed, the insert and ferrule<br />
remain in the septum support. If the ferrule and insert are in the injector body<br />
after the septum support nut is removed, use the tweezers to grasp the top of the<br />
insert and lift it from the injector body.<br />
5. Use a laboratory tissue to grasp the glass insert and remove it from the<br />
septum support nut.<br />
6. To remove the graphite ferrule from the glass insert, use clean lab tissues to<br />
hold the graphite ferrule (Item 5) and the glass insert. Gently turn the glass<br />
insert while you pull off the graphite ferrule.<br />
NOTE: The glass inserts can be cleaned and reused. Unless the graphite ferrule<br />
is obviously damaged, it can be reused as well. However, replace the 5 mm<br />
graphite ferrule after the glass insert has been changed three or four times.<br />
Septum Support<br />
Insert Ferrule<br />
Glass Insert<br />
Insert/ferrule<br />
positioning tool<br />
130 of 177<br />
Insert/ferrule<br />
positioning tool
Replace the Glass Insert<br />
Follow these steps to replace the glass insert in the 1079 Injector.<br />
1. Use the insert/ferrule-positioning tool supplied in the 1079 accessory kit to<br />
set the 5 mm graphite ferrule on the insert and in the septum support. See<br />
the above pictures for an exploded view of the tool with septum support,<br />
insert ferrule, glass insert and tool as well as the correct position of the tool<br />
when setting the ferrule. The objective is to have the ferrule set with the<br />
bottom of the insert, flush with the bottom of the tool.<br />
2. Position the tool as shown above on a flat, clean surface. Use clean<br />
laboratory tissue on the surface. Tighten the septum support finger-tight.<br />
Holding the tool with a 5/8″ wrench, give the septum support an extra 1/3 to<br />
1/2 turn past finger-tight. Now unscrew the septum support, which now has<br />
the ferrule and insert seated in it. If there is any graphite extruded past<br />
bottom of the septum support, cut it off with a blade or sharp knife. Carefully<br />
wipe off any graphite flakes, which may adhere to the insert or septum<br />
support. Gripping the septum support unit with a piece of laboratory tissue,<br />
carefully put this unit in the 1079 injector and tighten the septum support 1/6turn<br />
past finger-tight.<br />
3. Use tweezers to place a new septum over the septum support.<br />
NOTE: If the septum has a Teflon® face, place the Teflon face toward the<br />
column (down).<br />
4. Place the injector nut on the injector and tighten by hand until you feel some<br />
resistance, then tighten an extra 1/4 turn using the injector nut wrench.<br />
NOTE: After the injector nut has been replaced, check the split vent and septum<br />
purge flow rates to ensure these values have not changed.<br />
5. Condition the insert by setting the 1079 Injector to the split mode and purging<br />
with carrier gas for 30 min at 300 °C.<br />
Clean the Glass Insert<br />
Glass inserts must be clean and free from sample residue and particulate matter<br />
(such as bits of septum rubber or graphite). Follow these steps to clean the glass<br />
insert in the 1079 Injector.<br />
1. Remove the glass insert. It is safest to cool the injector and column ovens to<br />
50 °C before removing the insert.<br />
Use care when removing inserts from the injector. Inserts can be at high<br />
temperatures and are likely hot. Place hot inserts on a clean glass or metal<br />
surface only.<br />
2. To clean glass inserts, use one of the following procedures (the choice of<br />
cleaning procedure depends upon the nature of samples injected):<br />
3. Rinse the inserts with solvent or soak the inserts in hot acid.<br />
4. Heat them in a glass-annealing oven (to 500 °C) or pass the inserts through<br />
the flame of a Bunsen burner.<br />
131 of 177
5. Wash in a 1:1:1 mixture of methanol:methylene chloride:hexane in an<br />
ultrasonic cleaner for 30-60 min, then dry the inserts in an oven.<br />
NOTE: For the 2 mm glass wool packed glass insert, remove the glass wool by<br />
blowing compressed gas in the end of the insert. Clean the insert following one of<br />
the procedures listed above. Repack the insert with deactivated glass wool<br />
(10-20 mg). Leave ∼1.5 cm of the bottom of the glass insert unpacked. The<br />
capillary column will be inserted in this empty space when re-installed in the<br />
injector body.<br />
NOTE: Rinsing the glass inserts with strong acids or bases or heating to a high<br />
temperature will remove the deactivation coating on the glass inserts. Rinsing the<br />
glass inserts with solvents or mixed solvents will not remove the deactivation<br />
coating.<br />
Deactivate the Glass Insert<br />
Follow these steps to deactivate the glass insert in the 1079 Injector.<br />
NOTE: This procedure can be used on all glass inserts except inserts packed<br />
with 10% OV-101 on Chromosorb W-HP (03-918956-00). Up to three inserts can<br />
be deactivated at a time using this procedure.<br />
1. In a 10 mL glass graduated cylinder, add 0.5-1 mL of dimethyldichlorosilane.<br />
Fill to 10 mL with isooctane, hexane or toluene.<br />
2. Cover the top of the graduated cylinder with aluminum foil and place the<br />
cylinder in an ultrasonic bath. Sonicate for 30 sec to mix the solution.<br />
3. Add up to 3 inserts to the solution.<br />
NOTE: Deactivate glass inserts only after they have been thoroughly cleaned<br />
using the above procedure.<br />
4. Sonicate the inserts in the cylinder for 10 min. Rinse the inserts 3 times with<br />
10 mL isooctane, hexane or toluene. Each rinse should include 2-3 min of<br />
sonication.<br />
5. Add 10 mL of methanol and sonicate for 2-3 min. Decant the methanol and<br />
repeat the methanol rinse step.<br />
6. Decant the methanol. Transfer the deactivated inserts to a small clean glass<br />
beaker. Cover the beaker with aluminum foil and bake at 200 °C for 1 hour.<br />
7. After the inserts cool to room temperature, store them in a clean screw cap<br />
glass vial or the original packaging.<br />
To clean the injector body, proceed as follows:<br />
1. Set the column oven temperature to 45 °C and the 1079 injector temperature<br />
to 50 °C. Wait for the zones to reach their set temperatures and then turn<br />
the column oven off by pressing the “TURN OVEN OFF” softkey located in<br />
the Column Oven section of the method.<br />
2. Use the 5/16" open-end wrench to loosen the capillary column nut.<br />
3. By hand, carefully withdraw the fused silica column and nut from the injector<br />
assembly. Set the column nut and column end on the floor of the <strong>GC</strong> oven.<br />
132 of 177
Use proper eye and skin protection. Methanol and acetone are toxic and<br />
flammable chemicals. Exercise appropriate precautions when these chemicals<br />
are used.<br />
4. Remove the injector nut, septum, and septum support, with ferrule and insert<br />
attached.<br />
5. Moisten a cotton swab and a stick with methanol and gently swab center of<br />
the injector body.<br />
6. Moisten a cotton swab on a stick with iso-octane and gently swab the center<br />
of the injector body.<br />
7. Examine the end of the fused silica column to ensure that it has not been<br />
damaged. Slide the end of the fused silica column into the opening of the<br />
injector.<br />
8. Gently twist the column nut in the opposite direction used to tighten the nut.<br />
Place the column nut on the end of the injector and tighten the nut. This<br />
procedure minimizes twisting the column.<br />
9. Use the 5/16″ open-end wrench and tighten with 1/6-turn to secure the<br />
column in place.<br />
10. Replace the septum support, insert, ferrule, septum, and injector nut.<br />
11. To check whether the injector is leak-tight, connect a flow meter to the split<br />
vent. Set the Relay to the split mode. If the flow meter indicates a flow less<br />
than previously measured, the injector has a leak.<br />
12. Turn the column oven back on by pressing the “TURN OVEN ON” softkey in<br />
the column oven section of the method.<br />
How to Remove the Capillary Column from the System<br />
To remove the capillary from the system, proceed as follows:<br />
1. Turn off the <strong>GC</strong> column oven and heater. Shutdown and vent the mass<br />
spectrometer.<br />
2. Open the inside of the <strong>GC</strong> oven. Make sure that about 30 cm (12 in.) of the<br />
mass-spectrometer end of the capillary column is hanging freely, so that you<br />
can move the mass spectrometer away from the <strong>GC</strong> without breaking the<br />
column.<br />
3. Keep an eye on the capillary column in the <strong>GC</strong> oven as you gently slide the<br />
mass spectrometer away from the <strong>GC</strong>.<br />
• As you slide the mass spectrometer away, take care not to allow the<br />
column to bind or kink. When you have fully withdrawn the mass<br />
spectrometer from the <strong>GC</strong>, the distance separating them should be ≥23<br />
cm (9 in.). The transfer line should be fully removed from the <strong>GC</strong> oven.<br />
133 of 177
NOTE: Avoid contamination of the transfer line, injector, and capillary column by<br />
using clean tools and wearing clean lint-free Nylon® gloves. As you remove<br />
parts, place them on a clean, lint-free, unpainted surface.<br />
4. Use the alignment tool and a 5/16-in. wrench to loosen the brass nut on the<br />
end of the transfer line.<br />
5. Remove the capillary column from the transfer line.<br />
6. Remove the brass nut, along with the ferrule, from the column.<br />
7. Remove the ferrule from the nut. Discard the ferrule.<br />
8. From inside the <strong>GC</strong> oven, pull the transfer line end of the column back into<br />
the hole in the side of the <strong>GC</strong>.<br />
• Leave the free end of the column on the floor of the oven.<br />
To withdraw the transfer line from the vacuum manifold, proceed as follows:<br />
1. Unplug the transfer line heating cable.<br />
2. Grasp the nose of the transfer line, then rotate counterclockwise as you<br />
press lightly toward the manifold. Gently slide the transfer line away from the<br />
manifold.<br />
3. Remove the nose clip, and then pull the transfer line away from the analyzer.<br />
4. Wrap the transfer line in clean aluminum foil and place it on a clean, dry<br />
surface.<br />
5. Cover the analyzer opening with aluminum foil.<br />
To remove the capillary column from the <strong>GC</strong> injector, proceed as follows:<br />
1. Use a 5/16-in. wrench to loosen the capillary column nut that secures the<br />
column to the injector.<br />
2. Carefully remove the nut, ferrule, and column from the injector.<br />
3. Slide the column nut, along with the ferrule, off the end of the column.<br />
4. Remove the ferrule from the column nut. Discard the ferrule.<br />
5. Carefully lift the column support cage, along with the column, from the<br />
column hanger. Then, remove the support cage and column from the oven.<br />
6. Seal the end of the column or insert the ends of the column into a septum.<br />
7. Store the column and the support cage.<br />
134 of 177
How to Install a New Capillary Column in the System<br />
To install a new capillary column in the mass spectrometer, proceed as follows:<br />
1. Unwind about 60 cm (24 in.) of the mass spectrometer end of the column<br />
from the support cage.<br />
2. Insert this end of the column through the transfer line hole in the right side of<br />
the <strong>GC</strong>.<br />
3. Insert the column end through the brass nut (to be installed on the <strong>GC</strong> end of<br />
the transfer line). Then slide the nut several inches down the column.<br />
• The wide, threaded opening of the nut should face the end of the<br />
column.<br />
4. Place a new graphite/Vespel ferrule on the column, with the taper facing the<br />
nut. Slide the ferrule, along with the nut, about 30 cm (12 in.) down the<br />
column.<br />
5. Carefully insert the tip of the column into the nose end of the transfer line.<br />
6. Slide the column all the way through the transfer line until the tip of the<br />
column projects a few inches beyond the transfer line tip.<br />
7. Using a sapphire-, or carbide-tipped scribing tool or ceramic scoring wafer,<br />
score the column once lightly about 2 cm (1 in.) from its end.<br />
8. Bend the column slightly to break it at the mark. The column should break<br />
cleanly.<br />
9. Using a Kimwipe® tissue dipped in methanol, carefully wipe the last 15 cm<br />
(6.0 in.) of the column.<br />
10. Be sure to wipe toward the end of the column so that the Kimwipe® tissue<br />
fibers do not enter the opening at the column end.<br />
11. Position the column in the transfer line as follows.<br />
12. To position the column in the transfer line, proceed as follows:<br />
13. Install the brass nut on the end of the transfer line, but do not tighten the nut<br />
completely.<br />
14. Keep an eye on the tip of the column and position it so that about 1 mm (1/32<br />
in.) of the column projects from the transfer line tip.<br />
NOTE: As you tighten the nut, the position of the column in the transfer line may<br />
change. If this happens, loosen the nut and readjust the column until about 1<br />
mm (1/32 in.) of the column projects from the transfer line tip.<br />
15. Grasping the transfer line securely with the alignment tool, use a 5/16-in.<br />
wrench to tighten the brass nut. Tighten the nut until snug, but do not over<br />
tighten.<br />
16. Rotate the transfer line so that the heater cable projects downward.<br />
17. To install the transfer line in the manifold, proceed as follows referring to the<br />
Transfer Line Exploded View.<br />
18. Position the transfer line in the manifold, and install the clip into the holes and<br />
slots.<br />
135 of 177
19. Gently push the transfer line toward the manifold, and rotate the collar in the<br />
clockwise direction until the bayonet lock engages.<br />
20. Reconnect the transfer line heating cable to the mass spectrometer.<br />
21. Gently push the mass spectrometer toward the <strong>GC</strong>, until the transfer line<br />
boot fits snugly over the collar on the side of the <strong>GC</strong> oven.<br />
• The capillary column nut should be visible inside the <strong>GC</strong> column oven.<br />
22. The <strong>MS</strong> is properly engaged when the bumpers on the left side of the<br />
spectrometer achieve full contact with the right side of the <strong>GC</strong>.<br />
23. Replace the cover on the mass spectrometer.<br />
136 of 177
Troubleshooting<br />
How to Isolate a <strong>GC</strong> or Mass Spectrometer Problem<br />
In general, whenever you attempt to isolate a Saturn <strong>GC</strong>/<strong>MS</strong> problem, you will<br />
check the system in the following order:<br />
• Data System<br />
• Gas Chromatograph (<strong>GC</strong>)<br />
• Mass Spectrometer<br />
Checking the Data System<br />
Checking the <strong>GC</strong><br />
Please refer to the Saturn <strong>GC</strong>/<strong>MS</strong> software release notes for relevant software<br />
troubleshooting procedures.<br />
The simplest and most effective way of isolating a <strong>GC</strong> problem is to run a test<br />
sample. Running a sample will allow you to check several operational and<br />
performance factors, including the carrier gas supply, chromatographic<br />
characteristics, and sample-related problems.<br />
The test sample that is most frequently run is the COLTEST mixture. This<br />
multicomponent mixture is very well suited to troubleshooting injector and column<br />
problems. Please see How to Run the COLTEST Sample for a description of<br />
the use of this test mixture.<br />
To identify the source of a <strong>GC</strong> electronics problem, press the STATUS key and a<br />
CONTROL key (i.e., injector, column oven, etc.) to determine if a fault is present.<br />
If a fault is present the message FAULTED appears. You should also consult the<br />
3800 <strong>GC</strong> manuals for information about fixing <strong>GC</strong> faults. Make sure that you are<br />
thoroughly familiar with all safety issues before you attempt to repair any<br />
electronics component.<br />
Checking the Mass Spectrometer<br />
If your data system and <strong>GC</strong> are operating normally, the problem could be caused<br />
by the mass spectrometer or by the communication channel between it and the<br />
data system. Typical problems with the ion trap include lack of response (no<br />
spectra), low response, poor resolution, and mass misassignment.<br />
137 of 177
There are two procedures for isolating problems associated with the Mass<br />
Spectrometer. Running the Auto Tune routine from System Control will provide<br />
you with information about system performance. Running the diagnostics<br />
program will initiate a hardware test. These tests may be used to isolate simple<br />
ion trap problems, e.g., air leaks, burned-out filaments, high contamination levels,<br />
etc.<br />
NOTE: If diagnostics fail, once the problem is corrected, the Reset button must<br />
be clicked before further testing.<br />
In certain cases, you may need to physically separate the <strong>GC</strong> and <strong>MS</strong> to isolate<br />
an ion-trap problem. In these cases, remove the column from the injector, and<br />
plug its end with a septum. This will minimize the input of air. Maintain the<br />
column and transfer line at ambient temperature to prevent degradation of the<br />
stationary phase. You do not need to vent the <strong>MS</strong> vacuum system to complete<br />
this procedure.<br />
If you wish to further isolate the mass spectrometer, you must remove the<br />
column from the ion trap by shutting down the system and capping the transfer<br />
line with a no-hole ferrule.<br />
How to Troubleshoot Problems with Spectra<br />
The following describes the common problems a user may encounter with an Ion<br />
Trap Mass Spectrometer.<br />
What To Do If No Spectrum Appears<br />
If a spectrum fails to appear on the screen when you click on the ion trap icon in<br />
the Instrument Control Page, regardless of mass range, you should investigate<br />
the following potential causes:<br />
• The method segment is a FIL/MUL Delay and ionization is EI (AUTO or<br />
FIXED) mode. During FIL/MUL Delay the trap icon is red.<br />
• The filament is open.<br />
• The turbomolecular or diffusion pump has stopped.<br />
• An RF adjustment is required.<br />
• The instrument parameters are inappropriate.<br />
• The trap has been incorrectly assembled.<br />
• There is a problem with the electronics.<br />
• The system has not finished baking out.<br />
Before you begin troubleshooting, however, be sure that you have baked out<br />
Saturn for at least 2 hours. Run Diagnostics to determine if any hardware<br />
problems are present. If you have done this, and the missing-spectrum problem<br />
persists, continue as follows. These steps apply if either air/water or cal gas<br />
peaks are missing.<br />
138 of 177
Check for an Open Filament<br />
Diagnostics will determine is one or both filaments are open. If only one filament<br />
is open, enter System Control. Click on Set Points. Under Filament Selection,<br />
select the other filament.<br />
If both filaments are open, shut down the instrument. Then check the filament<br />
continuity and wire connections after you have removed the ion trap assembly<br />
from the manifold.<br />
• If necessary, replace the filaments.<br />
Check the Turbomolecular Pump<br />
Diagnostics Vacuum test will determine if the Turbomolecular pump speed<br />
reading is at least 100 ±2%, or if the Diffusion pump has a fault present<br />
Make sure the pump speed reading is at least 100 ±2%.<br />
• If it is not, inspect cooling fans for proper operation.<br />
Check the RF Adjustment<br />
Check whether an RF adjustment is needed (particularly after you have changed<br />
the ion trap temperature), proceeding as follows:<br />
1. Open System Control.<br />
2. Click on Adjustments, and select Adjust RF Ramp.<br />
3. Adjust the RF ramp by turning the RF tuning screw.<br />
4. Adjust the RF ramp until the highest value is minimized.<br />
Check the Parameter Settings<br />
Check whether you have set inappropriate method parameters, proceeding as<br />
follows:<br />
1. Enter System Control. Click on Auto Tune and select Electron Multiplier<br />
Tune. Click on Start Auto Tune.<br />
2. Click on Air/Water Check and Start Auto Tune. If air and/or water levels are<br />
out of range, go to section on Air/Water leaks to troubleshoot these<br />
problems. If a spectrum is present, enter Method Editor and check if<br />
• You specified the EI ionization mode.<br />
• Make sure that the ionization storage level permits storage in the trap of<br />
the ions selected in the scan range.<br />
3. If you are unsure of appropriate levels, then reset parameters by clicking on<br />
the Defaults button in each section.<br />
• Save your method file as Default.<br />
• Activate Default file, turn on trap and Cal gas. Check for cal gas<br />
spectrum.<br />
4. If the spectrum returns, note which parameter(s) were causing the problem. If<br />
no spectrum is present, and the trap was recently disassembled, the<br />
assembly of the trap must be checked.<br />
139 of 177
Check the Assembly of the Trap<br />
Check whether you have incorrectly installed the oven components, proceeding<br />
as follows:<br />
1. Display the axial modulation readback by selecting Diagnostics and checking<br />
Axial Modulation under the Waveform System box.<br />
2. If the axial modulation readback is near zero, there maybe a scratch on the<br />
trap oven, which is shorting out one of the end caps. Shutdown the system,<br />
remove the trap oven, and use an ohm meter to check for continuity between<br />
the electrodes and ground. Use the screws holding the clamping plate as<br />
ground. If this test is done without removing the trap from the electronics<br />
assembly, there will be continuity to ground.<br />
3. Check whether there is a problem with the electron multiplier, proceeding as<br />
follows:<br />
a. Under Monitor States, click on Multiplier. Under Acquisition System<br />
check that the electron multiplier voltage is the same or close to the<br />
value displayed in the SetPoints box in the Auto Tune section.<br />
b. If the electron multiplier voltage in the Diagnostics is only a few volts, the<br />
multiplier is shorted to ground. Shut down the system, and replace the<br />
electron multiplier or call a Varian Customer Support Representative.<br />
Check the Electronics<br />
Check whether there is an electronics problem, proceeding as follows:<br />
1. From the <strong>Manual</strong> Control, click on Diagnostics.<br />
2. Click on Run Tests to Completion to isolate the cause of the problem. Note<br />
which of the tests fail.<br />
140 of 177
NOTE: If, after performing these tests, you are still unable to isolate the cause of<br />
the problem, contact your Varian Customer Support Representative.<br />
What To Do If You Experience a Loss of High Mass Peaks<br />
The loss of high mass peaks maybe due to:<br />
• RF ramp needs Adjustment<br />
• Too many low mass ions (i.e., air or water leak)<br />
• Improper Ionization storage levels (i.e., settings are too low)<br />
• High Trap temperatures may cause loss of high mass Cal Gas peaks<br />
Before you begin troubleshooting, however, be sure that Saturn has baked out<br />
for at least 2 hours, and that the manifold temperature is at or below 50 °C. If<br />
you have done this, and the problem persists, continue as follows.<br />
1. Check for an air leak in Auto Tune Section.<br />
2. Check RF ramp Adjustment<br />
3. Reduce trap temperature to 150 °C.<br />
4. Enter Method editor, check method contains EI A<strong>GC</strong> ionization mode, and<br />
Default values for other parameters.<br />
NOTE: If, after performing these tests, you are still unable to isolate the cause of<br />
the problem, contact your Varian Customer Support Representative.<br />
What To Do If Part of the Spectrum is Missing<br />
If you do not observe high- or low-mass ions in System Control but the ions in the<br />
mid-range of the spectrum appear normal, you should investigate the following<br />
possibilities:<br />
• An RF adjustment may be required, particularly if you have just changed<br />
the ion trap temperature.<br />
• The ionization RF level may be incompatible with the scan range.<br />
• The trap temperature may be too high to allow you to observe all of the<br />
cal gas ions. Reduce trap oven temperature to 150 °C, and wait 2 hours<br />
for thermal equilibration.<br />
Before you begin troubleshooting, however, be sure that Saturn has baked out<br />
for at least 2 hours. If you have done this, and the problem persists, continue as<br />
follows.<br />
Check the RF Adjustment<br />
Check whether an RF ramp adjustment is needed, proceeding as follows:<br />
1. Enter System Control.<br />
2. Select Adjustments, and click on Adjust RF Ramp<br />
141 of 177
3. Adjust the RF ramp by turning the RF tuning screw on the front panel. Adjust<br />
to minimize the highest reading.<br />
Check the RF Storage Level<br />
Check whether the RF storage level is incompatible with the scan range,<br />
proceeding as follows:<br />
1. Open the Method Editor.<br />
2. Select EI-A<strong>GC</strong> segment, and click on Ionization Mode. Note Ionization<br />
Storage Level. Confirm values are appropriate for mass range. Refer to<br />
Method Editor manual or help for details on appropriate rf storage values.<br />
Check the Trap Temperature<br />
Check whether the trap temperature is too high to permit you to observe all cal<br />
gas ions, proceeding as follows:<br />
If the trap temperature is too high, the height of the mass 614 peak may be<br />
reduced, and the mass 502 peak may disappear entirely (above 200 °C).<br />
Reduce trap oven temperature to 150 °C and wait 2 hours for thermal<br />
equilibration.<br />
NOTE: If, after performing these tests, you are still unable to isolate the cause of<br />
the problem, contact your Varian Customer Support Representative.<br />
What to Do If the Resolution is Poor But the Air and Water<br />
Levels are Acceptable<br />
If the peaks are broader than you would have expected, you should investigate<br />
the following possible causes:<br />
• There are too many ions in the trap (i.e., contamination or high column<br />
bleed).<br />
• The axial modulation value is too high or too low.<br />
• Axial modulation is not functioning properly.<br />
Before you begin troubleshooting, however, be sure that Saturn has baked out<br />
for at least 2 hours. If you have done this, and the problem persists, continue as<br />
follows.<br />
Check the Ion Content of the Trap<br />
With the trap turned on, note the TIC (total ion current) value. If the TIC value<br />
exceeds 20,000 counts in full-scan mode, or a few thousand counts in <strong>MS</strong>/<strong>MS</strong>,<br />
reduce the number of stored ions.<br />
To reduce the number of ions in the trap, do one or more of the following:<br />
1. Make sure that the electron multiplier is set for a gain of 10 5 . In the Method<br />
Editor, check that the Multiplier Offset is equal to 0 in the Method. Reduce<br />
the trap filament current and/or ion time settings (A<strong>GC</strong> OFF).<br />
2. Reduce the A<strong>GC</strong> target value to 10,000 (A<strong>GC</strong> ON).<br />
142 of 177
Check the Axial Modulation Setting<br />
Check whether the axial modulation is set too high or too low, proceeding as<br />
follows:<br />
1. Click on Set Points from <strong>Manual</strong> Control. Make sure the axial modulation is<br />
set between 2.5 and 5 volts. If you adjust the axial modulation, check several<br />
cal gas ions for resolution (e.g., m/z = 131 and 414).<br />
2. Check whether axial modulation is working properly, proceeding as follows:<br />
3. Enter System Control, turn trap and cal gas ON. Click near m/z 131, to<br />
expand the mass range + 5 about m/z 131. Click on Set Points. Change the<br />
Axial Modulation by several volts and click on Apply. Confirm the shift of<br />
mass 131. Return axial modulation to initial value.<br />
4. Enter Diagnostics and run tests to completion. Confirm the axial modulation<br />
is working properly.<br />
5. Make sure that the axial modulation readback is within 20% of the set point.<br />
If the axial modulation readback is out of this range, it will usually result from<br />
improper installation of the trap oven causing a shorted end cap.<br />
6. If oven is properly assembled and axial modulation is out of range, contact<br />
your Varian Customer Support Representative.<br />
What To Do If There is a High Baseline at High Masses<br />
If the baseline on the instrument page increases sharply between masses 400<br />
and 650, you should investigate whether there are particles on the electrode<br />
surface.<br />
Check whether there are particles on the trap electrode surfaces, proceeding as<br />
follows:<br />
1. Develop method for EI/A<strong>GC</strong> ON for mass range 400 to 650. Enter System<br />
Control and activate this method.<br />
2. Turn on RF and the electron multiplier (Filament is OFF).<br />
3. Examine the spectrum, and notice whether the baseline increases<br />
exponentially at high masses.<br />
• If the baseline ramps up, shut down Saturn, then carefully clean the<br />
electrode surfaces with a lint-free cloth.<br />
143 of 177
What to Do If the Trap Function Calibration Fails After the<br />
Calibration Ions Have Been Correctly Identified<br />
How to Check for Leaks<br />
If the trap function calibration fails after the calibration ions have been correctly<br />
identified, you should investigate the following possible causes:<br />
• The electron multiplier voltage is too low.<br />
• The cal gas pressure is too low.<br />
Check the Electron Multiplier Voltage<br />
Enter System Control. Select AutoTune and click on Electron Multiplier Test.<br />
Click on Start AutoTune.<br />
Check the Cal Gas Pressure<br />
Enter System Control. Select <strong>Manual</strong> and click on Adjustments. Click on Adjust<br />
Cal Gas. Set the cal gas pressure to a value at the mid to high end of the scale.<br />
A major problem in mass spectrometry is keeping the system as leak-tight as<br />
possible. Air leaks may result in reduced sensitivity, tuning problems, and<br />
decreased resolution; in addition, they may reduce the lifetimes of the capillary<br />
column, filaments, and the electron multiplier. Check the system each day for air<br />
and water leaks before you begin running acquisitions.<br />
As you use this guide, pay particular attention to any examples in which air and<br />
water backgrounds appear in the spectra. Familiarity with these examples will<br />
help you to rapidly troubleshoot the system.<br />
How to Establish the Conditions Required to Check<br />
for Leaks<br />
To establish the conditions required to check for leaks, proceed as follows:<br />
1. Verify that the carrier gas pressure on the gauge in the front panel of the <strong>GC</strong><br />
is set correctly.<br />
• With a 30m x 0.25 mm, DB-5 fused silica capillary column, the carrier<br />
gas pressure should be about 10-12 psi (83 kPa).<br />
2. Set the trap temperatures:<br />
• Trap heater temperature to 150 °C.<br />
• Transfer line temperature to 270 °C.<br />
• Manifold temperature to 35 °C.<br />
3. Set the column-oven and injector temperatures to 100 °C.<br />
144 of 177
Often, major air leaks are accompanied by a hissing sound. These leaks may<br />
be due to extremely loose fittings, improperly seated O-rings, or open valves.<br />
If you suspect a major leak, do not turn on the electron multiplier, RF voltage,<br />
or filament. Using the Diagnostics section, confirm that the turbomolecular<br />
pump is operating at 100% speed or diffusion pump is ready. If it is not, you<br />
may be sure there is a major air leak.<br />
4. Enter System Control:<br />
• Click on Auto Tune Box<br />
• Click on Air/Water Check<br />
• Click on Start Auto Tune<br />
5. Compare your air/water spectra to the following:<br />
Air/water spectrum from an instrument with a gross air leak<br />
• If the peaks at masses 32 (O2+), 28 (N2+), and 18 (H2O+) are severely<br />
broadened or undifferentiated, your system has a large air leak.<br />
Immediately turn off Air/Water Check.<br />
145 of 177
Air/water Spectrum from a System with a Very High Water Vapor Background<br />
146 of 177
Air/water Spectrum from a System with Excess Water Vapor and a Relatively Small<br />
Air Leak<br />
• If the ratio of the height of the peak of mass 18 (H2O + ) to mass 19 (H3O + )<br />
is about 10:1, there is little water vapor in your system.<br />
• If the ratio of peak height of mass 18 to mass 19 is less than 10:1 but<br />
greater than 5:1, additional bakeout maybe necessary. Be aware,<br />
however, that if you do not eliminate the water vapor, your system’s<br />
sensitivity and performance may be less than optimal.<br />
• If the ratio of the peak height of mass 18 to mass 19 is much less than<br />
10:1, your system contains excess water vapor.<br />
An Air/Water Spectrum Obtained from a System with No<br />
Significant Air Leaks and Little Water Vapor as Indicated by:<br />
• The peak at mass 18 (H2O + ) may be the base (highest) peak. This is<br />
dependent on the level of water vapor.<br />
• The ratio of the peak height at mass 18 (H2O + ) to that at mass 19 (H3O + )<br />
is greater than or equal to 10:1.<br />
• The 100% counts value is significantly lower than 500.<br />
• The ratio of the peak height at mass 28 to that at mass 32 (O2 + ) is about<br />
4:1.<br />
6. If there are no air or water leaks in your system, you should obtain the<br />
following approximate values. Please note that these values are only typical,<br />
so the actual values may vary from system to system.<br />
147 of 177
100% value TIC 18:28 ratio 19:18 ratio 28 width<br />
How to Fix High Water Levels<br />
An Air/Water Spectrum Obtained from a System with a Large Air Leak and Little<br />
Water Vapor as Indicated by:<br />
• The peak at mass 32 is the base (highest) peak.<br />
• The peaks at masses 18, 19, and 28 are broadened. As a leak<br />
increases, all peaks broaden and eventually become undifferentiated.<br />
The presence of excess water vapor may be due to<br />
• Failure to pump down for a sufficient length of time (i.e., at least two<br />
hours, when you vent the system).<br />
• Introduction of water vapor when you clean the ion trap.<br />
• Introduction of water vapor when you replace the capillary column.<br />
• Water vapor in the carrier gas tank.<br />
• An atmospheric air leak in the system. This problem most often occurs<br />
under conditions of high relative humidity.<br />
You will often observe high water backgrounds after venting the system, and<br />
especially after cleaning the trap. Several hours of bakeout may be required for<br />
the water vapor to desorb from surfaces in the vacuum system, and for the water<br />
level to drop to a stable level. Never operate your Saturn if the mass 18 and 19<br />
peaks are the same height (or if the air/water check shows NO). After the system<br />
has baked out sufficiently (i.e. overnight), the presence of excess water is due to<br />
contamination in the carrier gas tank or an air leak.<br />
Saturated filters on the <strong>GC</strong> may produce an increase in the air/water background.<br />
Replace the filters at regular intervals, and whenever moisture or other<br />
background from the <strong>GC</strong> becomes a problem.<br />
149 of 177
Using a Leak Detection Gas to Troubleshoot for Air Leaks<br />
You may use a leak detection gas such as Freon or argon to locate leaks. A leak<br />
at the transfer line (the high vacuum side) should produce an immediate<br />
response. If, on the other hand, the leak is coming from the <strong>GC</strong> injector, it will<br />
take about 90 sec to register a response. (It takes about that length of time for<br />
the gas molecules to travel through the capillary column.) If you discover a leak<br />
at the injector, you can correct the problem without venting the system; however,<br />
be sure to wait until all <strong>GC</strong> zones are cool before beginning. If the leak is coming<br />
from the transfer line connection, you will have to shutdown the <strong>GC</strong>/<strong>MS</strong> system<br />
and vent the system before fixing it.<br />
NOTE: Set the mass range from 35 to 50 if you will be using an argon leakdetection<br />
gas, or from 80 to 110 if you will be using a Freon leak-detection gas.<br />
Troubleshoot leaks using argon gas as a leak detecting gas. The mass peak of<br />
interest for argon is at Mass 40.<br />
To reduce the risk of damaging the filaments or multiplier, develop a method file<br />
with the following parameters:<br />
• Set the electron multiplier 100 V below the 10 5 setting.<br />
• Turn off A<strong>GC</strong> and set the ion time to 100 μsec.<br />
• Set the filament emission current to 10 μA.<br />
• Set scan range from m/z of 35 to 50 (or 80 to 110)<br />
Enter system control, activate the argon method for troubleshooting and turn the<br />
trap ON.<br />
NOTE: Do not spray argon indiscriminately around the fittings. Argon diffuses<br />
very rapidly from the fitting you are testing toward a true leak. This could lead<br />
you to mistakenly identify the fitting that you are testing as the leak source.<br />
Check for leaks:<br />
• Spray a fine stream of argon on the transfer line closest to the analyzer.<br />
• Examine the monitor for a response. If a peak at mass 40 does not<br />
appear, there is no leak.<br />
• If a peak appears at mass 40, there is a leak. The transfer line O-ring<br />
may have particles on its surface. Shut down the system and check the<br />
O-ring.<br />
Check the following gaskets and fittings for leaks, one item at a time and in the<br />
following order. (Tighten the fittings and/or flanges as needed. Wait a few<br />
seconds between subsequent applications of argon.)<br />
• Calibration gas tube fitting on the pneumatics manifold<br />
• Vent valve fitting on the manifold<br />
• Top vacuum manifold flange<br />
150 of 177
How to Fix a Large Air Leak<br />
Typical sources of large air leaks in Saturn are<br />
• lint or damage on the manifold flange O-ring seal<br />
• Lint or damage on the transfer line O-ring seal<br />
• The transfer line brass nut<br />
• The O-Ring seal between the turbomolecular pump and the manifold<br />
The release tabs of the analyzer are not locked into position.<br />
The brass nut on the transfer line is not tight enough, recheck the system. Do not<br />
over tighten the fittings. Otherwise, you may generate an even larger leak.<br />
If you cannot eliminate the leak, vent the system, and check the O-ring on the<br />
manifold and transfer line for particles. Wipe off both O-rings with lint-free paper.<br />
The turbomolecular pump will probably fail to achieve its 100% speed if there is a<br />
leak or poor seal at the turbo/manifold interface. Never attempt to operate the<br />
system under these conditions.<br />
How to Fix a Small-To-Moderate Air Leak<br />
You may have more trouble finding and correcting a small-to-moderate air leak<br />
than a large one. Symptoms associated with small-to-moderate air leaks include<br />
the following:<br />
• The peak at mass 28 will have increased, becoming significantly larger<br />
than the mass 18 peak.<br />
• The air leak will probably increase the water background, particularly in<br />
humid environments. An increase in water vapor content will be<br />
accompanied by a 20% or greater increase in the 19:18 mass ratio.<br />
Check <strong>GC</strong> Connections:<br />
NOTE: Check the <strong>GC</strong> Maintenance Section for additional information for trouble<br />
shooting leaks.<br />
To identify and correct a leak at the connections between the capillary column<br />
and the injector or transfer line, proceed as follows:<br />
• Make sure that you are using ferrules of the correct size, i.e., 0.4 mm for<br />
0.25-mm ID columns, and 0.5 mm for 0.32-mm ID columns.<br />
• Make sure that the ferrule on the transfer line is a graphite/Vespel<br />
mixture. Most transfer line connection leaks occur on the high vacuum<br />
side (e.g., around the transfer line O-ring).<br />
In the case of a graphite/Vespel ferrule, tighten each ferrule one-half turn beyond<br />
finger tightness. In the case of a graphite ferrule, tighten each ferrule threequarters<br />
of a turn beyond finger tight.<br />
• Leaks at the septum may arise from loose injector nuts or overuse of the<br />
septum. Regularly change the septum as part of your routine <strong>GC</strong><br />
151 of 177
How to Troubleshoot the <strong>GC</strong><br />
preventive maintenance program. To reduce the level of air bleeding<br />
into the system and any background from the septum material, use good<br />
quality, low bleed septa.<br />
• Air leaks in the <strong>GC</strong> pneumatics are the most difficult leaks to detect and<br />
eliminate because detection gases are not particularly effective for this<br />
purpose. In general, you should tighten all fittings, and then check for<br />
such a leak using a solvent such as methanol.<br />
• Saturated filters on the <strong>GC</strong> may produce an increase in the air/water<br />
background. Replace the filters at regular intervals and whenever<br />
moisture or other background from the <strong>GC</strong> becomes a problem.<br />
NOTE: Please refer to the <strong>GC</strong> Operator’s <strong>Manual</strong> for information about <strong>GC</strong><br />
troubleshooting and diagnostics procedures not described in this section.<br />
This section describes chromatographic troubleshooting, with particular<br />
emphasis on <strong>GC</strong>/<strong>MS</strong> applications. You will be able to see most of the problems<br />
addressed in this section by running the COLTEST mixture (03-920273-00).<br />
The following procedure describes the chromatographic conditions and the<br />
expected results when running the COLTEST sample with a 30-m DB-5 column<br />
(0.25 mm ID, 0.25 μm film thickness).<br />
How to Run the COLTEST Sample<br />
A coltest method can be found in the :\SaturnWS\Service directory of the<br />
software.<br />
Set Up the Injector Conditions<br />
If you are using SPI/1079 programmable injection, proceed as follows:<br />
• Hold an initial temperature of 40 °C for 0.1 min, then ramp the<br />
temperature to 280 °C at a rate of 200 °C/min.<br />
If you are using Split/Splitless injection, proceed as follows:<br />
1. Use an isothermal temperature of 260 °C.<br />
2. Set up the following external event program conditions:<br />
NOTE: “Gas saver event”, if present, must be ON.<br />
Time Event 1 Injector Mode<br />
0.00 On Splitless<br />
0.50 Off Split<br />
3. Set the splitter flow rate to 100 mL/min.<br />
152 of 177
Set Up the Column<br />
Develop programmable column temperature program with:<br />
1. An initial column temperature to 40 °C.<br />
2. Hold at 40 °C for 2 min.<br />
3. Ramp the temperature, at an initial rate of 10 °C/min to 140 °C, then at a rate<br />
of 20 °C/min to 280 °C.<br />
• Do not hold the temperature at 140 °C.<br />
4. Adjust the total run time to 21 min by adjusting the hold time of the last<br />
segment.<br />
Set Up the Transfer-Line and Trap-Temperature<br />
Conditions<br />
1. Set the transfer line temperature to 260 °C.<br />
2. Set the trap temperature to 150 °C.<br />
3. Set the manifold temperature to 35 °C.<br />
Set Up the Mass Spectrometer Acquisition Method<br />
To set up the mass spectrometer acquisition method with:<br />
1. Set the mass range to 40 to 350 at a scan rate of 1 scan/sec.<br />
2. Set the background mass to 39.<br />
3. Set a filament/multiplier delay of 180 sec.<br />
4. Set a peak threshold of 1 count.<br />
5. Set a mass defect value of 0.<br />
6. Specify electron ionization (EI Auto).<br />
7. Turn cal gas OFF.<br />
The COLTEST test mixture contains the following compounds at levels of 1 to<br />
5 ng/μL.<br />
No. Compound Formula Integer<br />
Weight<br />
1 decane C10H22 142 57<br />
2 1-octanol C8H18O 130 69<br />
3 undecane C11H24 156 71<br />
4 nonanal C9H18O 142 67<br />
5 2,6-dimethylphenol C8H10O 122 107<br />
6 2-ethylhexanoic acid C8H16O2 144 73<br />
7 2,6-dimethylaniline C8H11N 121 106<br />
8 decanoic acid, methyl ester C11H22O2 186 74<br />
9 undecanoic acid, methyl<br />
ester<br />
C12H24O2 200 87<br />
153 of 177<br />
Quantitation<br />
Mass
No. Compound Formula Integer<br />
Weight<br />
10 dicyclohexylamine C12H23N 181 138<br />
11 dodecanoic acid, methyl<br />
ester<br />
C13H26O2 214 143<br />
12 hexachlorobenzene C6Cl6 282 284<br />
Quantitation<br />
Mass<br />
The following is a typical chromatogram for this test mixture. Note that 2,6dimethylphenol<br />
and 2-ethylhexanoic acid coelute normally on a DB-5 column,<br />
depending on column and injector.<br />
Typical Chromatogram of COLTEST Text Mixture<br />
The following figure demonstrates the resolving power of Saturn for coeluting<br />
compounds.<br />
Resolution of Saturn for Coeluting Compounds<br />
You can also effectively separate the individual components in the mixture for<br />
subsequent data manipulation, e.g., library searches and quantitation. For<br />
details about plotting single ion chromatograms for ions specific to a single<br />
compound, please refer to the SaturnView help or section in the Software<br />
Reference manual.<br />
154 of 177
How to Troubleshoot Common Chromatographic<br />
Problems<br />
The COLTEST mixture includes polar or active compounds such as 1-octanol,<br />
2,6-dimethylphenol, and 2,6-dimethylaniline. Also present are some nonpolar or<br />
inactive compounds such as decane and dodecane at approximate levels of 1<br />
ppm in hexane. Analysis of the mixture yields information about solvent tailing,<br />
column efficiency, dead volume, active sites in the injector/column, etc. You can<br />
use the analysis to troubleshoot common chromatographic problems. The<br />
following table identifies many of the problems, and proposes solutions.<br />
Correction of Solvent Tailing or Broadening Problems<br />
Symptom Solution<br />
Poor column installation<br />
resulting in dead volume<br />
in the injector<br />
Solvent flashing in hot<br />
injector (usually 1077,<br />
1078 or 1079)<br />
Incorrect temperature<br />
control using<br />
programmable SPI or<br />
1079.<br />
Septum purge line is<br />
plugged<br />
Injector is not purged<br />
properly following<br />
splitless injection<br />
Reinstall the column in the injector. Check the column seal<br />
with the insert in the SPI/1079 (on-column). Make sure you<br />
have a good cut on the column by examining the column<br />
under magnification. Check the 1077/1078/1079 injector for<br />
insertion depth.<br />
Reduce the injection speed for the hot injectors. If possible,<br />
reduce the injector temperature. If you are using sandwich<br />
injection, reduce the solvent plug to 0.5 μL.<br />
A typical setting for the SPI is 20 °C below the solvent boiling<br />
point. The column temperature is set at the solvent boiling<br />
point. Hold the column at this temperature until SPI has<br />
finished heating (usually about 2 min).<br />
Check that the septum purge flow is 0.5 mL/min for a SPI<br />
with a 10-psi head pressure, 2 mL/min for a 1077 or 1078<br />
and 3.5-4.5 mL/min for 1079 with a 10-psi head pressure. If<br />
necessary, change the septum purge frit or adjust the valve<br />
setting (depending on your injector configuration).<br />
For a splitless injection, the vent flow should be at least 70<br />
mL/min. The injector should be switched to the split mode 30<br />
to 90 sec after the injection.<br />
Correction of Tailing Sample Peaks for Particularly<br />
Active Components<br />
Symptom Solution<br />
Active sites in the<br />
injector insert or liner<br />
Active sites or degraded<br />
phase present in the<br />
column<br />
Change or clean the injector insert. If necessary, silanize it.<br />
Remove the front 15 cm of the column and reinstall it. If the<br />
retention times are changing, or if cutting the column does<br />
not fix the problem, replace the column.<br />
Correction of Low Response and Severe Tailing with<br />
High Boiling Point Compounds<br />
Symptom Solution<br />
Injector not hot enough<br />
to vaporize high boilers<br />
155 of 177<br />
Increase the temperature of the injector
Symptom Solution<br />
High levels of column<br />
bleed masking<br />
component peaks<br />
High levels of silicone or<br />
other contamination are<br />
coated on the ion trap<br />
surfaces<br />
Insufficient vaporization<br />
of the higher boiling point<br />
components<br />
Trap temperature is too<br />
low<br />
Condition the column at 30 °C below its maximum operating<br />
temperature (320 °C for DB-5). Switch to a high temperature<br />
column, (e.g., the SGE HT5), if conditioning does not help.<br />
Clean the ion trap as outlined in Maintenance Section.<br />
Check Contamination Table for listing of potential<br />
contamination.<br />
Lower the injector temperature and the injection speed.<br />
Check that the graphite ferrule in the 1077 or 1078 is free of<br />
cracks, and that the septum support is tight.<br />
Increase the trap temperature in increments of 20 °C.<br />
Correction of Leading Sample Peaks (Reverse<br />
Tailing)<br />
Symptom Solution<br />
Column overhead due to injection of<br />
excessive amounts of a component<br />
Dilute the sample, or perform a split injection.<br />
Degradation of the stationary phase Change the column.<br />
Carrier gas velocity is too low Increase the carrier flow rate.<br />
Correction of Poor Resolution 1<br />
Symptom Solution<br />
Column temperature or program is<br />
not optimized<br />
Modify the method (e.g., slow the column ramp<br />
rate) to improve the separation<br />
Carrier gas flow is not optimized Decrease the carrier gas linear velocity to<br />
improve the resolution.<br />
Column cannot separate certain Use a more polar column.<br />
species, (e.g., those with similar<br />
boiling points)<br />
Column stationary phase is<br />
Replace the column.<br />
degraded, resulting in poor efficiency<br />
1<br />
Peaks are not well separated, e.g., 2,6-dimethylphenol and 2-ethylhexanoic acid<br />
in the COLTEST mixture.<br />
Lack of Reproducibility of Peak Size<br />
Symptom Solution<br />
Leaking or partially<br />
plugged syringe<br />
Visually check that the syringe is pulling up the sample.<br />
Check that the nut is tight. Flush the syringe with solvent.<br />
Heating the solvent in a hot injector may help if the syringe<br />
is plugged; otherwise, replace the syringe.<br />
Leak at the septum Replace the septum regularly and ensure that the septum<br />
nut is tight.<br />
156 of 177
Symptom Solution<br />
Improper installation of<br />
column in the injector, or a<br />
leak at the column inlet<br />
Sample is being absorbed<br />
by active surfaces in the<br />
injector or column<br />
Incomplete vaporization of<br />
sample in the injector<br />
1077,1078 or 1079 splits<br />
too soon<br />
Correction of Peak Splitting<br />
(Particularly for Low Boilers)<br />
Symptom Solution<br />
Sample flashing in injector (1077, 1078<br />
or 1079), simulating two injections<br />
Column temperature programming<br />
starts before SPI has finished<br />
programming<br />
Check the installation of the column in the injector. Tighten<br />
the capillary column nut.<br />
Change the injector insert. Remove the front 15 cm of the<br />
column, or replace the column.<br />
Increase the injector temperature (1077,1078 or 1079). Or<br />
increase the maximum temperature to which the injector is<br />
programmed (SPI or 1079).<br />
Confirm that the switch time is chromatographically<br />
optimized.<br />
Lower the injection temperature, or use a<br />
SPI/1079 programmed injection.<br />
Increase the initial column hold time until<br />
SPI/1079 reaches its maximum temperature,<br />
(i.e., typically at 2 min.).<br />
Column is cracked Re-cut and install the column.<br />
A piece of septum is stuck in the<br />
injector insert.<br />
Replace the insert and septum.<br />
Correction of Extra, Unexpected Peaks in the<br />
Chromatogram<br />
Symptom Solution<br />
Septum bleed, particularly during<br />
temperature programming<br />
Impurities from the sample vials (e.g.,<br />
plasticizers present)<br />
Use high-temperature, low-bleed septa. Make<br />
sure that the septum purge flow is set to 0.5<br />
mL/min for a SPI injector with a 10-psi head<br />
pressure, or 2 mL/min for a 1077 or 1078<br />
injector with a 10-psi head pressure.<br />
Confirm that this is indeed the case by running<br />
a solvent blank with a new syringe. Use<br />
certified sample vials, and keep the samples<br />
refrigerated. Check contamination table.<br />
Impurities from the carrier gas present Install or replace the carrier gas filters.<br />
Injector or <strong>GC</strong> pneumatics<br />
contaminated<br />
Remove the column from the injector and<br />
bake it out at elevated temperature, (e.g., 350<br />
°C) using a purge of at least 20 mL/min.<br />
Impurities present in the sample Confirm that this is indeed the case by running<br />
a blank or standard.<br />
Solvents are extracting impurities from<br />
the septum.<br />
157 of 177<br />
Switch to a new septum type, lower the<br />
injection temperature, or reduce the injection<br />
volume.
Symptom Solution<br />
Impurities present in syringe wash<br />
solvent<br />
Use high purity grade solvents.<br />
Correction of Retention Time Differences Between<br />
Runs<br />
Symptom Solution<br />
Unstable carrier gas flow<br />
controller/regulator<br />
Column contamination or<br />
degradation<br />
Check the pneumatics for leaks. If necessary, replace the<br />
flow controller/ regulator.<br />
Condition or replace the column.<br />
Injector leaks Replace the septum at regular intervals. Check that the<br />
septum nut and capillary column nut are tight.<br />
158 of 177
Troubleshooting the Diffusion<br />
Pump System<br />
Overview<br />
Problems during Startup<br />
This section describes symptoms that the user may observe during startup and<br />
routine operation.<br />
The user should check for faults during Startup by monitoring the foreline<br />
pressure on the shutdown page.<br />
Shutdown Page<br />
1. Foreline pressure exceeds 5000 mTorr (Large Air Leak)<br />
a. Check the <strong>GC</strong> column is not broken.<br />
b. Check the foreline hose between the diffusion pump and foreline pump<br />
for cracks or collapsed sections.<br />
c. Check all the vacuum seals: diffusion pump, elbow, foreline pump, etc.<br />
d. Check for large air leaks. Refer to troubleshooting sections on leaks.<br />
e. Check the level and condition of the foreline pump oil.<br />
f. Contact Varian Customer Support Representative.<br />
2. Foreline pressure exceeds 500 mTorr (Moderate Air Leak)<br />
a. Check the <strong>GC</strong> column is not broken.<br />
b. Check the CI valve is OFF using the Instrument Control Page.<br />
159 of 177
c. Check for air leaks. Refer to How to Check for Leaks.<br />
d. Check the fluid level in the diffusion pump.<br />
e. Check the level and condition of foreline pump oil.<br />
f. Check the foreline hose between the diffusion pump and foreline pump<br />
for cracks or collapsed sections.<br />
g. Check all the vacuum seals: diffusion pump, elbow, foreline pump, etc.<br />
h. If a foreline trap is used, replace the pellets.<br />
i. Replace the thermocouple gauge.<br />
j. Contact Varian Customer Support Representative.<br />
k. TEC Failure<br />
l. Check cable connections. Connectors and pins are differentiated by<br />
size.<br />
m. Contact Varian Customer Support Representative.<br />
3. Peltier Baffle Fan Failure<br />
a. Check the fan on the rear panel.<br />
b. Contact your Varian Customer Support Representative.<br />
4. Thermocouple Gauge Failure<br />
c. Check the cable connections.<br />
d. Open filament. Gauge must be replaced.<br />
e. Contact Varian Customer Support Representative.<br />
5. Diffusion Pump Overheated<br />
a. Check the pump is plugged into the diffusion pump controller.<br />
b. Ensure left side cover is in place. Side panel of <strong>GC</strong> is in place.<br />
c. Check the fan.<br />
d. Contact Varian Customer Support Representative.<br />
6. Diffusion Pump Heater Failure<br />
a. Check pump is plugged into diffusion pump controller.<br />
b. Replace heaters to diffusion pump.<br />
c. Contact Varian Customer Support Representative.<br />
160 of 177
Problems During Routine <strong>Operation</strong><br />
The USER should check for faults by going to the Diagnostics page and checking<br />
the Pump Status under Vacuum System.1. Foreline Pressure Readings.<br />
1. At typical column flows (0.3-1.0 mL/minute) the foreline pressure will be<br />
approximately 0-100 mTorr. If the foreline pressure is significantly above<br />
100 mTorr:<br />
a. Ensure column flow rate does not exceed 1.0 mL/minute.<br />
b. Check for air leaks. Refer to How to Check for Leaks.<br />
c. Check the level and condition of the diffusion pump fluid.<br />
d. Check the fluid level and condition of the foreline pump, if it’s time for<br />
maintenance, change the oil.<br />
e. If a foreline trap is used, replace the pellets.<br />
f. Check all the vacuum seals: diffusion pump, elbow, foreline pump, etc.<br />
The diffusion pump seals may leak if the clamp is not tight or because<br />
the seals are worn or damage. Worn or damaged seals must be<br />
replaced.<br />
g. Contact your Varian Customer Support Representative.<br />
2. CI Gas Settings (must be checked in Diagnostics)<br />
a. Pressure Readings should not exceed 350 mTorr. Confirm CI reagent<br />
gas head pressure at gas cylinder is set at 5 psi.<br />
3. Diffusion Pump Overheated<br />
a. Overheating causes the diffusion pump to turn OFF. Switch the power<br />
OFF for 15 minutes. then, switch it ON to reset the diffusion pump.<br />
b. Check the ambient temperature of the laboratory does not exceed 35 °C.<br />
c. Check fluid in the diffusion pump.<br />
d. Ensure all baffling is in place.<br />
e. Check the fan.<br />
f. Check to make sure left side cover is in place.<br />
g. Contact Varian Customer Support Representative.<br />
4. High background levels (low ionization time) in the mass spectra may be the<br />
result of contamination in the ion trap, <strong>GC</strong> and/or the diffusion pump. If<br />
numerous samples have been analyzed, the high background maybe the<br />
result of trap contamination, and the trap components must be cleaned. If the<br />
ion trap components have been cleaned and the system has been baked out,<br />
the high background levels in the mass spectra maybe the result of<br />
contamination in the <strong>GC</strong> and/or the diffusion pump. Comparison of mass<br />
spectra at high and low <strong>GC</strong> column and injector temperatures may help to<br />
identify source.<br />
a. Reduce <strong>GC</strong> column and injector temperature to 100 °C or lower and<br />
acquire a 2-minute mass spectral data file.<br />
b. Increase <strong>GC</strong> column and injector temperature (~250 °C) and acquire 2minute<br />
mass spectral data file.<br />
161 of 177
c. Identify the most intense mass peaks for both runs, and/or subtract<br />
spectra.<br />
d. Use the following table to identify the most likely source(s) of<br />
contamination.<br />
e. Call your Varian Customer Support Representative.<br />
162 of 177
Common Contaminant<br />
Ions (m/z)<br />
Compound Possible Source<br />
18, 28, 32, 44 H2O, N2, O2, CO2 Air Leak<br />
69, 131, 219, 264, 414, 464,<br />
502, 614<br />
PFTBA Leaking Calibration Valve<br />
31, 32 Methanol Cleaning Solvent<br />
43, 58 Acetone Cleaning Solvent<br />
73, 147, 207, 221, 281, 355, Dimethylpolysiloxane Septum or methyl silicone<br />
429<br />
column coating<br />
77, 92, 115,128,141,<br />
168,184, 223, 233, 260,<br />
354, 446<br />
Diffusion Pump Fluid Diffusion Pump Fluid<br />
149 Plasticizer<br />
Vacuum seals damaged by high<br />
(Phthalates)<br />
temperature.<br />
Solvent Bottle Contamination<br />
Groups of peaks spaced 14 Hydrocarbons Foreline pump oil, fingerprints,<br />
u apart<br />
saturated trap pellets<br />
77, 141, 169, 204 1-chloro-3-<br />
Pump oil degassing<br />
phenoxybenzene contamination<br />
146, 148, 111 Dichlorobenzene Pump oil degassing<br />
contamination<br />
NOTE: Numbers in bold denote masses more useful for identifying<br />
contaminants.<br />
163 of 177
164 of 177
Miscellaneous Procedures and<br />
Instructions<br />
Other Documents<br />
Site Requirements<br />
Other documents that you may wish to consult regarding Saturn operation<br />
include the following:<br />
• Software Reference, 03-914979-00<br />
• Saturn <strong>GC</strong>/<strong>MS</strong> Workstation Tutorials, 03-914988-00<br />
• Pre-Installation Instructions, 03-914629-00<br />
• Release Notes, 03-914767-00<br />
• Upgrade Notes, 03-914768-00<br />
Site Preparation<br />
The Saturn <strong>GC</strong>/<strong>MS</strong> has been designed to operate reliably under carefully<br />
controlled environmental conditions. It is the responsibility of the purchaser to<br />
provide a suitable location, a power source of acceptable quality, and a suitable<br />
operating environment. Operating a system or maintaining it in operational<br />
condition outside of the power and operating environment limits listed below<br />
could cause failures of many types. The repair of such failures is specifically<br />
excluded from the standard warranty and service contract coverage.<br />
For additional information, please request specific pre-installation support directly<br />
through your local Varian Sales/Service Center.<br />
Power<br />
You are responsible for providing two dedicated fourplex single-phase power<br />
sources with earth grounds hard-wired to the main power panel ground. Within<br />
North America these power sources must be 20A, 100-130 Vac, 60 Hz ±3 Hz,<br />
and outside North America they must be 10A, 200-260 Vac, 50 Hz ±3 Hz. One<br />
of these fourplex power sources is for the mass spectrometer, computer, monitor;<br />
and printer the other fourplex power source is for the gas chromatograph and<br />
(optional) AutoSampler. If you have additional sample preparation devices or test<br />
165 of 177
equipment, we recommend a separate dedicated power source for their<br />
operation.<br />
NOTE: Do not use the free outlet for equipment that draws more than 2 amps.<br />
Interconnect Diagram for the Saturn <strong>GC</strong>/<strong>MS</strong><br />
NOTE: Avoid using power supplies from sources that may be subject to RF<br />
interference, such as electric motors and elevators.<br />
Care must be taken to ensure that sources of radio frequency interference (RFI)<br />
and electromagnetic interference (EMI) are not placed on the same power line, or<br />
share the same ground plane, since this can degrade the performance of the <strong>GC</strong>.<br />
Equipment such as motors, solenoids, fluorescent light fixtures, and radio<br />
communication transmitters should be isolated from the instrument and<br />
connecting cables as much as possible.<br />
The power cable from the <strong>GC</strong> is approximately 2m (6 ft) long and fitted with<br />
National Electronics Manufacturers Association (NEMA) 5-20P power plugs. The<br />
NEMA 5-20P power plug and corresponding outlet are shown in Figure (a).<br />
NEMA 5-20P plugs are rated at 20A and 120 Vac.<br />
The power cable from the mass spectrometer is approximately 2.5m (8 ft) long<br />
and fitted with US Standard National Electronics Manufacturers Association<br />
(NEMA) 5-15P power plugs. The NEMA 5-15P power plug and corresponding<br />
outlet are shown in Figure (b). NEMA 5-15P plugs are rated at 15A and 120 Vac.<br />
Systems shipped outside the United States and Canada are fitted with CEE 7/7<br />
plugs; these are rated at 16A and 230 Vac. The CEE 7/7 plug and outlet are<br />
shown in Figure (c).<br />
The power cables for the computer, monitor, and printer are approximately 2m<br />
(6 ft) long. They are fitted with NEMA 5-15P plugs. The power cable from the<br />
8200 AutoSampler is about 2m (6 ft) long, and is fitted with a NEMA 5-15P plug<br />
rated at 120V.<br />
166 of 177
NEMA 5-20P, NEMA 5-15P, and CEE 7/7 Power Plugs and Outlets<br />
With a 120V power source, the maximum amperage requirements for each of the<br />
Saturn <strong>GC</strong>/<strong>MS</strong> components are as follows:<br />
Component Amperes<br />
Mass Spectrometer 12<br />
Gas Chromatograph 20<br />
Varian 8200 AutoSampler 0.5<br />
Computer 3<br />
Monitor 2<br />
Laser Printer 3-4<br />
NOTE: With a 230V power source, the maximum amperage requirement of each<br />
of the above components is one-half of the amperage given above.<br />
Never plug the mass spectrometer and the gas chromatograph into the same<br />
power source; otherwise, you may overload the fourplex power source. The<br />
Interconnect Diagram for Saturn is a diagram for the six power cables from<br />
Saturn. Never use the free outlet on each of the power sources for equipment<br />
that draws more than 2A.<br />
Quality of Power<br />
The quality of the power supplied to your Saturn is very important. The power<br />
must be 100-130 Vac, 60 Hz ±3 Hz (200-260 Vac, 50 Hz ±3 Hz), and it must be<br />
stable. It must be free of fluctuations due to slow changes in the average voltage<br />
or to changes resulting from surges, sags, or transients.<br />
• Slow average changes are gradual, long-term changes in the average<br />
root mean square (R<strong>MS</strong>) voltage level, with typical durations greater than<br />
2 seconds.<br />
• Sags and surges are sudden changes in average R<strong>MS</strong> voltage level,<br />
with typical durations between 50 μsec and 2 seconds.<br />
167 of 177
Operating Environment<br />
• Transients (or impulses) are brief voltage excursions of up to several<br />
thousand volts with durations of less than 50 μsec.<br />
Constant high line voltage or surges in voltage can produce overheating and<br />
component failures. Constant low line voltage or sags in voltage may cause the<br />
system to function erratically or to even cease functioning. Transients, even of a<br />
few microseconds duration, may cause electronic devices to fail catastrophically<br />
or degrade sufficiently to significantly shorten their lives. Therefore, it is<br />
important to establish the quality of the line power in your laboratory before you<br />
install your Saturn.<br />
It is your responsibility to provide an acceptable operating environment.<br />
Attention paid to the operating environment will ensure continued high<br />
performance of your Saturn <strong>GC</strong>/<strong>MS</strong>. Expenditures for air conditioning will be<br />
more than offset by good sample throughput and a reduction in repair costs.<br />
Temperature<br />
The laboratory temperature must be held between 15 and 30 °C (59 and 86 °F)<br />
for the turbomolecular pump system and 15 to 35 °C for the diffusion pump<br />
system. The optimum operating temperature is between 18 and 21 °C (65 and<br />
70 °F).<br />
NOTE: As the laboratory temperature increases, system reliability decreases.<br />
All electronic components generate heat while operating. This heat must be<br />
dissipated to the surrounding air if the components are to operate reliably.<br />
The turbomolecular pump’s temperature cutoff protects the bearing and prolongs<br />
its lifetime. If the laboratory temperature is significantly above 30 °C (86 °C), the<br />
pump cutoff temperature could be reached, and this would result in the pump<br />
being shutdown.<br />
There must be a good flow of air around the system, and the air conditioning<br />
must be capable of maintaining a constant temperature (within operational limits)<br />
in the immediate vicinity of the system. The average steady-state heat load of<br />
the Saturn <strong>GC</strong>/<strong>MS</strong> is 6000 BTUs, with a possible short-term heat dissipation of<br />
15000 BTUs during startup. If a 3600 <strong>GC</strong> is used, heat dissipation increases by<br />
about 1200 BTUs.<br />
Humidity<br />
The relative humidity of the operating environment must be between 40 and<br />
80%, with no condensation. Operating a Saturn <strong>GC</strong>/<strong>MS</strong> at very low humidity will<br />
result in the accumulation and discharge of static electricity; this will shorten the<br />
life of electronic components. Operating the system at high humidity will produce<br />
condensation and result in short circuits. High humidity will also block the filters<br />
on cooling fans and accelerate wear of the heads in the diskette drives.<br />
Varian recommends that your laboratory be equipped with a<br />
temperature/humidity monitor. This will ensure that your laboratory is always in<br />
conformance with temperature and humidity specifications.<br />
168 of 177
Gas Requirements<br />
Exhaust System<br />
It is your responsibility to provide an adequate exhaust system. Much of what is<br />
introduced into the mass spectrometer will eventually be exhausted from the<br />
mechanical pump, along with the small amounts of oil vapor that these pumps<br />
characteristically emit. Therefore, the pump outlets should be connected to a<br />
fume exhaust system. Consult local regulations for the proper method of<br />
exhausting the fumes from your system.<br />
Helium - <strong>GC</strong> Carrier Gas<br />
Minimum 99.998% ultra-high purity, with less than 1.0 ppm each of water,<br />
oxygen, and total hydrocarbons. One 257-ft3 tank with Matheson regulator<br />
#3104-580, or equivalent tank and regulator.<br />
NOTE: The presence of >1 ppm oxygen or water in the carrier gas supply may<br />
significantly affect the performance of Saturn, and it damage such components<br />
as the capillary column, filaments, and multiplier. Varian recommends that its<br />
customers verify that their gas suppliers use controlled tanks; this will ensure that<br />
purity standards are maintained. If you purchase pure gases in contaminated<br />
tanks, you may end up with a contaminated system requiring costly and time<br />
consuming repair.<br />
Methane, Isobutane - CI Reagent Gases (with CI<br />
option only)<br />
99.99% purity. One gas cylinder with a two-stage pressure regulator, which has<br />
a stainless steel diaphragm and maximum inlet pressure of 15 psi (1 bar).<br />
Ammonia - CI Reagent Gas (with CI option only)<br />
99.99%, anhydrous grade. One gas cylinder with a two-stage pressure regulator,<br />
which has a stainless steel diaphragm and maximum inlet pressure of 15 psi<br />
(1 bar).<br />
Gas lines for helium, nitrogen, methane, and isobutane should be made of<br />
copper or stainless steel. Gas lines for ammonia should be made of stainless<br />
steel. All gas lines should be free of oil; they will have preferably been flame<br />
dried. The gas lines should be fitted to within 2m of Saturn. Do not store gas<br />
tanks or lecture bottles where they can damage cables or gas lines; always<br />
secure them in accordance with standard safety practices. Gas supply lines<br />
should terminate with 1/8-in., Swagelok® nuts and ferrules.<br />
169 of 177
Cryogenics<br />
Systems equipped with SPI/1079 injectors or column oven cryogenics require<br />
one of the following:<br />
• Liquid CO2 at 850-1000 psig<br />
• Liquid N2 at 20-50 psig<br />
If you are not sure which one of these cryogenic options you ordered, check your<br />
purchase order.<br />
Other Gases<br />
How to Install the Saturn <strong>GC</strong>/<strong>MS</strong><br />
If you ordered an 8200 AutoSampler or automated valves, an independent<br />
supply of air or N2 at 40-60 psig may be required.<br />
To install the Saturn <strong>GC</strong>/<strong>MS</strong>, proceed as follows:<br />
1. Connect the <strong>GC</strong> to a helium source, and then purge the system filters, and<br />
columns for 15 minutes.<br />
2. Feed the capillary column and nut through the side of the <strong>GC</strong>. Connect the<br />
column to the transfer line.<br />
3. Slide the Saturn <strong>GC</strong>/<strong>MS</strong> toward the <strong>GC</strong> until the transfer line is protruding<br />
into the <strong>GC</strong> oven.<br />
4. Connect vacuum tubing from the rear of the Saturn <strong>MS</strong> to the foreline pump<br />
with a clamping ring.<br />
5. Connect the power cord from the foreline pump to the rear of Saturn. (J2<br />
label pump power only)<br />
6. Connect the <strong>GC</strong> serial cable to the COM1 port on the computer if using a<br />
3400/3600 <strong>GC</strong>.<br />
7. Connect the <strong>GC</strong> ethernet cable to the ethernet port on the computer if using<br />
a 3800 <strong>GC</strong>. There should be a tee connector and a terminator at each end<br />
of the 50-ohm coax cable.<br />
8. Connect the IEEE cable to the Saturn <strong>GC</strong>/<strong>MS</strong> and the computer.<br />
9. Plug in the <strong>GC</strong>, ms-spectrometer, and data-system power cords.<br />
10. Switch on the power to the Saturn <strong>GC</strong>/<strong>MS</strong>, the <strong>GC</strong>, and the computer.<br />
11. Bring up Saturn System Control on the computer.<br />
12. Select Diagnostics.<br />
13. Check the turbomolecular pump speed. The pump speed should reach the<br />
100% value within 30 min of turning on the power to the mass spectrometer.<br />
The diffusion pump should reach READY state in 30 min.<br />
14. Bake-out the trap (220 °C) and manifold (120 °C) for at least 2 hours before<br />
you tune it.<br />
170 of 177
How to Move the Saturn <strong>GC</strong>/<strong>MS</strong><br />
Parts and Supplies<br />
To move the Saturn <strong>GC</strong>/<strong>MS</strong>, proceed as follows:<br />
1. Using the shutdown procedure shut down the <strong>GC</strong> and mass spectrometer.<br />
2. Turn off the <strong>GC</strong> and computer. Then unplug the <strong>GC</strong>, mass spectrometer,<br />
and data system power cords.<br />
3. Open the vent valve lever on the front of the mass spectrometer for ten<br />
minutes.<br />
4. Keep an eye on the capillary column inside the <strong>GC</strong> as you gently slide the<br />
mass spectrometer away from the <strong>GC</strong>. Be sure not to bend or kink the<br />
capillary column.<br />
5. Use the alignment tool to prevent the transfer line from turning while you<br />
loosen the brass capillary nut connecting the column to the transfer line.<br />
6. Cap the transfer line with a capillary nut and no-hole ferrule.<br />
7. Place the capillary column and nut inside the <strong>GC</strong> oven. This will protect<br />
them from damage.<br />
8. Turn off the carrier gas, then disconnect the helium gas line that is connected<br />
to the <strong>GC</strong> filter.<br />
9. Cap the filters with Swagelok plugs or caps.<br />
10. Move the Saturn <strong>GC</strong>/<strong>MS</strong> to its new location. Be sure the new location<br />
satisfies the power and environmental requirements.<br />
Listed below are part numbers and descriptions for the available Saturn Field<br />
Service Parts. Items are in quantities of one (1) each unless otherwise specified.<br />
Kits, Assemblies, Boards, and Cables<br />
Part Number Description<br />
03-926082-20 PWA, IEEE INTERFACE, PCI<br />
03-930326-01 IEEE Cable<br />
03-930210-02 PWA, POWER BOARD<br />
03-930250-01 PWA, RF GENERATOR<br />
03-930300-01 Cable, SAP to PWR 26 pins (Ribbon)<br />
03-930301-01 Cable, SAP to PWR 64 pins (Ribbon)<br />
03-930113-91 Replacement Spares Kit<br />
03-930010-01 Assembly, Analyzer Flange<br />
03-930005-91 Assembly, Transfer Line (115V)<br />
03-930005-92 Assembly, Transfer Line (230V)<br />
03-930334-01 Cable, Transfer Line heater (115V)<br />
03-930334-02 Cable, Transfer Line heater (230V)<br />
171 of 177
03-930008-91<br />
03-930008-92<br />
Assembly, Vacuum Manifold (115V)<br />
Assembly, Vacuum Manifold (230V)<br />
03-930558-01 Assembly, Ion Gauge<br />
03-930313-01 Cable, Trap Heater (115V)<br />
03-930313-92 Cable, Trap Heater (230V)<br />
Trap Components<br />
NOTE: The Silica Coated Spacers have a shiny, mirror like finish on the inside<br />
surface.<br />
Part Number Description<br />
03-930552-01 Gate Conductor<br />
03-930551-01 Gate<br />
14-9<strong>2000</strong>9-00 Wavy Washer<br />
03-930315-01 Assembly, Multiplier<br />
03-930535-01 Spacer, Quartz<br />
03-930108-01 Transfer Line Wrench/Analyzer Alignment Tool<br />
03-930601-91 Assembly, Filament disk with wires<br />
14-998238-00 Belleville Washer, Small<br />
03-930657-01 Screw, Long<br />
03-930657-02 Screw, Short<br />
03-936549-01 Filament Clip<br />
03-930591-91 Tip. Transfer Line (Ultra Clean)<br />
03-930500-01 Trap Oven<br />
03-930524-01 Clamping Plate<br />
03-930535-02 Quartz Spacer, Silica Coated<br />
13-122008-00 Nut, 11/32"<br />
14-998228-00 Belleville Washer, Large<br />
03-930539-01 Thermo Well<br />
03-930109-04 Thermo Well O-ring<br />
12-222006-06 Trap Oven screw 6-32 X 3/8<br />
03-930109-03 O-ring, 1.112 ID Transfer Line<br />
03-930109-14 Quad-ring, Viton® Manifold<br />
03-930109-18 Quad-ring, Viton Transfer Line<br />
Pump Spares, Pumps, Pump Conversion Parts<br />
Part Number Description<br />
03-930650-01 Mechanical Pump, 90 L/min, 115/230V, Varian<br />
03-920358-00 Screen, Turbo Pump (V-70)<br />
03-930316-01 Cable, Turbo Controller to turbo<br />
03-930317-91 Turbo Controller<br />
172 of 177
03-920518-00 7’ Length Tygon® Tubing<br />
03-920542-00 Turbo Molecular Pump (V-70)<br />
88-299517-00 Mechanical Vacuum Pump Oil<br />
27-101002-00 Oil Mist Cartridges, Pack of 2<br />
28-200438-00 O-ring, Turbo Pump to Manifold<br />
Diffusion Pump Spares<br />
Part Number Description<br />
03-930053-01 Chassis Fan, Electronics Side<br />
03-930645-01 Chassis Fan, Pump Side<br />
03-920510-00 Plastic Nut<br />
03-930109-02 O-ring, Elbow<br />
27-402294-00 O-ring, Diffusion Pump Inlet<br />
27-402536-00 O-ring, Diffusion Pump Exhaust<br />
03-930109-16 O-ring, Peltier Baffle<br />
03-930288-01 PWA Diffusion Pump Controller<br />
27-229907-00 Thermocouple Gauge<br />
03-930640-91 Diffusion Pump AX65 (90V 250W) Includes 40 cc Fluid<br />
03-930640-92 Diffusion Pump AX65 (165V 250W) Includes 40 cc Fluid<br />
03-930640-94 Diffusion Pump Heater (90V 250W) Includes 40 cc Fluid<br />
03-930640-95 Diffusion Pump Heater (165V 250W) Includes 40 cc<br />
Fluid<br />
03-930639-01 Diffusion Pump Fluid - 40cc - Santovac 5<br />
03-930038-01 Peltier Baffle Assembly<br />
03-930048-91 Assembly, Vacuum Manifold DP (120V)<br />
03-930048-92 Assembly, Vacuum Manifold DP (230V)<br />
173 of 177
<strong>GC</strong> Spares<br />
Part Number Description<br />
03-917742-00 Serial I/O PWA<br />
03-925367-31 PWA, CPU, IBDH, 3400 SOC<br />
03-925367-33 PWA, CPU, IBDH, 3600 SOC<br />
03-918332-01 Insert, SPI, High Performance, Glass<br />
03-949551-00 Nut, Capillary Injector<br />
28-694580-01 Ferrule, 0.4 mm ID X 1/16, pkg. 10<br />
28-694581-01 Ferrule, 0.5 mm ID X 1/16, pkg. 10<br />
03-920357-02 Septa, HT, ThermoGreen 11.5 mm (50/can)<br />
03-925342-02 1078/1079 5 mm Glass Insert Ferrule<br />
03-925350-00 1078/1079 2 mm ID Packed Insert<br />
03-918466-00 1078/1079 2 mm ID Open Insert<br />
03-925331-00 1078/1079 0.5 mm ID Open Insert<br />
03-918464-00 1078/1079 3.4 mm ID Open Insert<br />
03-926119-27 1177 4 mm ID Unpacked Single Gooseneck Insert (5/pk)<br />
03-926119-37 1177 4 mm ID Wool Plug Open Insert (5/pk)<br />
03-926119-25 1177 4 mm ID Unpacked Open Glass Insert (5/pk)<br />
03-926119-38 1177 2 mm ID Wool Plug Open Glass Insert (5/pk)<br />
03-926119-24 1177 2 mm ID Unpacked Open Glass Insert (5/pk)<br />
03-926116-82 1177 High Temperature Septa (100/pk)<br />
03-925989-02 1177 Thermogreen Septa (5/pk)<br />
03-926117-64 1177 Viton® O-ring Seal (100/pk)<br />
03-926119-30 1177 Graphite Seal (100/pk)<br />
Tools, Test Samples, etc.<br />
Part Number Description<br />
03-920270-00 FC-43, Reservoir (Cal Gas Bulb)<br />
03-920273-00 Col Test Sample<br />
03-920275-00 HCB Sample, 100 pg/μL<br />
03-920471-00 Sensitivity Sample EI/CI HCB, Benzophenone,<br />
Tetrachlorobenzene 2,10,500<br />
03-920276-00 Aluminum Oxide, 600 Grit<br />
03-920305-00 Benzophenone Test Sample (50 pg)<br />
03-920353-00 <strong>GC</strong>/<strong>MS</strong> Calibration Compound, FC-43<br />
55-500346-00 Fuse, 5 x 20 mm, 0.5A<br />
88-999990-00 Applicator, Cotton Tipped, pkg. 100<br />
174 of 177
Additional Saturn Spares<br />
Part Number Description<br />
03-914763-00 Saturn <strong>GC</strong>/<strong>MS</strong> Workstation <strong>Hardware</strong> Maintenance <strong>Manual</strong><br />
03-914764-00 Saturn <strong>GC</strong>/<strong>MS</strong> Workstation Software Reference <strong>Manual</strong><br />
03-914765-00 Saturn <strong>GC</strong>/<strong>MS</strong> Workstation Tutorials <strong>Manual</strong><br />
03-930107-02 Solenoid, 3-way, Cal Gas<br />
03-930100-01 Needle Valve, Cal Gas<br />
27-350005-00 Oil Mist Eliminator<br />
03-925677-91 ChromatoProbe Kit<br />
CI Parts/Spares<br />
Part Number Description<br />
03-930102-02 Solenoid, 2-way, CI<br />
03-930597-01 Restrictor, long, CI<br />
03-930596-01 Restrictor, short, CI<br />
03-930101-01 Needle Valve, CI Gas<br />
03-930022-91 Liquid CI Inlet Kit<br />
03-930-106-01 CI Solenoid, 2-way, Chemrez<br />
Multiple CI Module Parts Lists<br />
Part Number Description<br />
03-930061-01 Manifold, Multi, CI Inlet<br />
03-930102-02 Valve, Solenoid, 2 Way, Buna-N<br />
03-930101-01 Valve, Needle<br />
03-930062-01 Plate, Clamping, Bottom, Multi CI<br />
03-930063-01 Plate, Clamping, Top, Multi CI<br />
28-849792-00 Fitting. Plug<br />
28-849793-00 Fitting. Tube, Barb<br />
28-849066-00 Beswick Fitting, Elbow<br />
28-849067-00 Beswick Fitting, 1/8 inch, Viton®<br />
03-917142-00 Ferrule, Viton<br />
03-930064-01 Enclosure, Multi CI (cover)<br />
03-930065-01 View Plate, Enclosure, Multi CI<br />
23-620763-00 Screw, Captive, 6-32<br />
03-920270-00 Reservoir, Bulb<br />
03-930069-01 Restrictor, Tube, Top<br />
03-930596-02 Restrictor, Tube, Bottom<br />
12-222006-22 Screw, 6-32 x 1 1/4, SS<br />
12-222006-08 Screw, 6-32 x 1/2, SS<br />
12-222006-05 Screw, 6-32 x 5/16<br />
28-158923-00 Tubing, Vacuum<br />
175 of 177
Part Number Description<br />
28-849918-00 Fitting, Tee, Barb<br />
03-930870-02 Cap, Polypro, 1/8 inch<br />
03-930109-10 O-ring, 2-104<br />
03-930109-17 O-ring, 2-108<br />
03-930071-00 Cover, Connector, Harness<br />
03-930068-01 Assembly, Harness, Solenoids, Multi CI<br />
03-930076-01 Label<br />
MCI Module Accessory Kit<br />
Part Number Description<br />
17-783512-00 Plug, Pin<br />
For plugging 1/8 inch ports on MCI when channel not<br />
connected to liquid or gas.<br />
03-930109-10 O-ring, 2-104, Buna-N<br />
Replacement O-rings for 1/8-inch ports.<br />
03-930109-17 O-ring, 2-108, Buna-N<br />
Replacement O-rings for ¼ inch ports.<br />
28-694638-00 Ferrule, Teflon, rear<br />
Replacement ferrules for gas adapter.<br />
28-694639-00 Ferrule, Teflon, front<br />
28-695138-00 Gas Tube Adapters<br />
To connect gases to MCI module through 1/8-inch ports.<br />
03-920270-00 Reservoir, Bulb<br />
Liquid reagent vials<br />
03-949870-04 Cap, Plug<br />
Vial caps for storage of reagent vials.<br />
89-988956-00 Syringe, 5 mL, Luer<br />
Syringe for adding reagent liquids to reagent vials.<br />
03-930129-01 Assembly, Luer<br />
Teflon “needle” for syringe<br />
03-930073-01 Stand, Reservoir<br />
For storage, filling of reservoir bulbs.<br />
Open Split Interface<br />
Part Number Description<br />
03-920324-00 OSI Restrictor<br />
03-920325-00 Assembly, OSI, Subassembly<br />
03-920326-90 Kit, OSI Parts, Field Service<br />
28-211522-00 Nut, OSI, <strong>GC</strong> 1/16 X 1.2 mm<br />
176 of 177
Calling Varian Service<br />
If you have a problem with your Saturn <strong>GC</strong>/<strong>MS</strong> that you are unable to resolve<br />
using the procedures described, you may want to call a Varian Customer Support<br />
Representative. When you call, please be prepared to provide the following<br />
information:<br />
• Saturn serial number (located on the rear panel)<br />
• Installed options.<br />
• Diagnostics test results<br />
If you are having problems with the gas chromatograph, please be prepared to<br />
provide the following information:<br />
• <strong>GC</strong> model<br />
• AutoSampler model, if any<br />
• Type of injector you are using<br />
• Cryogenics<br />
• Information about your <strong>GC</strong> column, (i.e., the manufacturer, bonded<br />
phase, film thickness, and ID and length)<br />
If you are having problems with your computer and/or software, please be<br />
prepared to provide the following information:<br />
• Computer manufacturer and model<br />
• Windows version<br />
• Mouse driver version<br />
• Printer manufacturer and model<br />
• Network configuration<br />
• Printouts of your Autoexec.bat and Config.sys files<br />
• Saturn software version<br />
In addition, you should observe the following guidelines when describing the<br />
problem to the Customer Support Representative:<br />
• Tell the service representative which part of the software, (e.g., System<br />
Control, <strong>Manual</strong> or Acquisition, you were using when the problem<br />
occurred).<br />
• Tell the service representative which troubleshooting routines you have<br />
used.<br />
177 of 177