

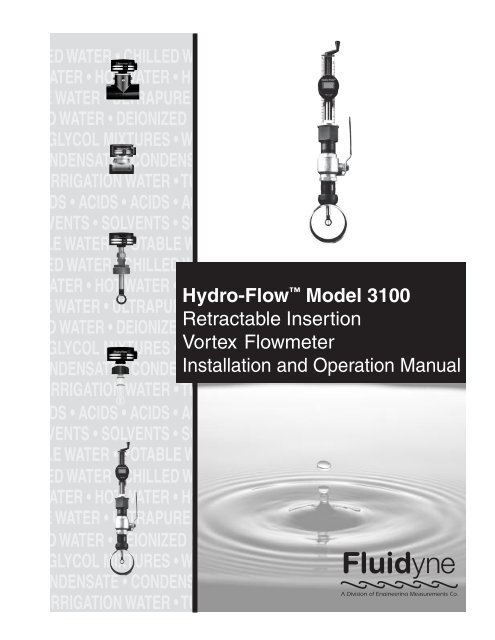
Hydro-Flow? Model 3100 Retractable Insertion Vortex Flowmeter ...
Hydro-Flow? Model 3100 Retractable Insertion Vortex Flowmeter ...
Hydro-Flow? Model 3100 Retractable Insertion Vortex Flowmeter ...

You also want an ePaper? Increase the reach of your titles
YUMPU automatically turns print PDFs into web optimized ePapers that Google loves.
<strong>Hydro</strong>-<strong>Flow</strong> <strong>Model</strong> <strong>3100</strong><br />
<strong>Retractable</strong> <strong>Insertion</strong><br />
<strong>Vortex</strong> <strong>Flow</strong>meter<br />
Installation and Operation Manual
Table of Contents<br />
2<br />
MODEL AND<br />
SUFFIX<br />
CODES<br />
<strong>Model</strong> and Suffix Codes........................................................................................... 2<br />
Theory and Identification......................................................................................... 3<br />
Installation Guidelines ............................................................................................. 4<br />
Mechanical Drawing: <strong>Model</strong> <strong>3100</strong> .......................................................................... 5<br />
Dimensional Drawing: Condulet ............................................................................ 5<br />
Mechanical Installation ........................................................................................ 5–6<br />
Electrical Installation................................................................................................ 7<br />
Technical Data .......................................................................................................... 8<br />
Category Description Suffix<br />
Codes<br />
Type <strong>Retractable</strong><br />
<strong>Insertion</strong><br />
L ine<br />
Size<br />
3 thru<br />
20<br />
in.<br />
( 80<br />
- 500mm)<br />
Mounting Thread-o-let<br />
Saddle<br />
for<br />
Steel<br />
Pipe<br />
Output Pulse<br />
Current,<br />
4-20<br />
mA<br />
No<br />
Output<br />
For<br />
Use<br />
With<br />
Solar<br />
Power<br />
Supply<br />
( Low<br />
power<br />
consumption<br />
- 2 mA)<br />
Display No<br />
Display<br />
Rate/<br />
Total<br />
Display<br />
Measuring Units<br />
English<br />
Metric<br />
Example: <strong>Hydro</strong>-<strong>Flow</strong><br />
<strong>3100</strong>-12-1-2-2-2<br />
<strong>3100</strong><br />
A 12" retractable insertion flowmeter with thread-o-let mounting, 4-20 mA analog output and a<br />
rate/total display with Metric measuring units.<br />
Notes:<br />
1. Standard English measuring units are gallons per minute (gpm) and gallons. Standard metric<br />
measuring units are cubic meters per hour (m 3 /hr) and cubic meters (m 3 ). Please specify other<br />
desired measuring units for which the flowmeter should be configured. Other units, such as acres,<br />
cubic feet, barrels and liters are available and can be set by the factory.<br />
2. Please specify pipe size, material and schedule OR outside and inside diameter of pipe.<br />
600 Diagonal Highway, Longmont, CO 80501<br />
Tel: (303) 651-0352 • Fax: (303) 678-1754 • e-mail: fluidyne@emcoflow.com<br />
. . .<br />
. . .<br />
. . .<br />
. . .<br />
. . .<br />
. . .<br />
. . .<br />
. . .<br />
. . .<br />
. . .<br />
. . .<br />
. . .<br />
. . .<br />
. . .<br />
03<br />
thru<br />
20<br />
. . .<br />
. . .<br />
. . .<br />
. . .<br />
. . .<br />
. . .<br />
. . .<br />
. . .<br />
. . .<br />
. . .<br />
. . .<br />
. . .<br />
. . .<br />
. . .<br />
1<br />
2<br />
. . .<br />
. . .<br />
. . .<br />
. . .<br />
. . .<br />
. . .<br />
. . .<br />
. . .<br />
. . .<br />
. . .<br />
. . .<br />
. . .<br />
. . .<br />
. . .<br />
1<br />
2<br />
3<br />
4<br />
. . .<br />
. . .<br />
. . .<br />
. . .<br />
. . .<br />
. . .<br />
. . .<br />
. . .<br />
. . .<br />
. . .<br />
. . .<br />
. . .<br />
. . .<br />
. . .<br />
1<br />
2<br />
. . .<br />
. . .<br />
. . .<br />
. . .<br />
. . .<br />
. . .<br />
. . .<br />
. . .<br />
. . .<br />
. . .<br />
. . .<br />
. . .<br />
. . .<br />
. . .<br />
1<br />
2
Theory and Identification<br />
What is a <strong>Vortex</strong> <strong>Flow</strong>meter?<br />
<strong>Vortex</strong> shedding flowmeters measure flow by detecting the frequency at which vortices are<br />
alternately shed from a bluff body. The vortices create low and high pressure zones behind the<br />
bluff body which are detected as a force acting on the sensor wing. This force is transmitted<br />
through the sensor wing to the <strong>Hydro</strong>-<strong>Flow</strong> piezo-resistive sensor mounted inside the flow<br />
line. <strong>Hydro</strong>-<strong>Flow</strong>'s unique and proprietary microprocessor based piezo-resistive sensor<br />
can accurately and reliably process vortex signals 25 times smaller than permitted by other<br />
technologies.<br />
According to well proven physical laws, the shedding frequency is directly proportional to the<br />
average flow velocity. This effect can be observed in the fluttering of a flag.<br />
<strong>Vortex</strong> flowmeters are preferred for many applications requiring wide flow range, accuracy,<br />
and reliability (no moving parts).<br />
When You Receive the <strong>Flow</strong>meter<br />
Upon receiving your Fluidyne equipment, verify that all materials on the packing list are<br />
present. Check for possible shipping damage and notify the freight carrier or your Fluidyne<br />
representative if there is any damage.<br />
A permanent identification plate (ID) is attached to your flowmeter; verify the model is<br />
consistent with your requirements. (See <strong>Model</strong> & Suffix Code Table, p. 2.)<br />
<strong>Model</strong><br />
S/N<br />
600 Diagonal Hwy<br />
Longmont, CO 80501<br />
<strong>3100</strong>-04-1-2-2-1<br />
Fluidyne<br />
Output<br />
600 Diagonal Highway, Longmont, CO 80501<br />
Tel: (303) 651-0352 • Fax: (303) 678-1754 • e-mail: fluidyne@emcoflow.com 3<br />
Tag<br />
Patent Pending<br />
460214<br />
Made in the U.S.A.<br />
For example, if you ordered a 4" <strong>Hydro</strong>-<strong>Flow</strong> <strong>3100</strong> flowmeter<br />
with a thread-o-let fitting, 4-20 mA analog output and a Rate/<br />
Total display with English measuring units, the model number<br />
should read <strong>3100</strong>-04-1-2-2-1, as in the above ID.<br />
Common Sense / Meter Handling Issues<br />
You are in receipt of a precision, world-class instrument. Even though the flowmeter is one of<br />
the most rugged in the industry, exercise reasonable care with the flowmeter.<br />
1. When not installed, store the flowmeter with the installation manual in its shipping<br />
container.<br />
2. Do not ram or poke objects into the meter bore or onto the sensor wing/shedder.<br />
<strong>Hydro</strong>-<strong>Flow</strong> is a no moving parts flowmeter. If you push hard enough to see a part<br />
move, the flowmeter is probably damaged.<br />
3. Pay particular attention to the direction of flow. The flow must impact the surface<br />
of the stainless steel shedder. The direction of the flow is clearly indicated on the<br />
flowmeter electronics. The flowmeter will not work if you install it backwards.<br />
4. The flowmeter's installation location is important for optimum performance accuracy;<br />
a quick review of Installation Guidelines, p. 4, will be helpful.
Installation Guidelines<br />
4<br />
FLOW<br />
FLOW<br />
FLOW<br />
h h>0<br />
Good<br />
Selecting the Best <strong>Flow</strong>meter Location<br />
Not all plumbing is laid out with flowmetering in mind. For optimum performance, you<br />
must consider straight run requirements and the flowmeter's installation location relative to<br />
flow direction. Figures 1 and 2 illustrate useful examples of both proper and improper<br />
flowmeter installations. If you have special requirements, PLEASE consult the factory.<br />
<strong>Flow</strong>meter Location<br />
Figure 1 illustrates possible flowmeter locations. The good flowmeter locations are recommended<br />
to ensure that the pipe and the flowmeter will always be filled with fluid.<br />
Straight Run Requirements<br />
Figure 2 illustrates the minimum requirements for straight run piping. Note: The straight run<br />
of the pipe must have the same nominal diameter (D) as the flow-meter body.<br />
Figure 1. <strong>Flow</strong>meter Location Figure 2. Straight Run Requirements<br />
Good Metering<br />
Metering<br />
FLOW<br />
Bad<br />
Point<br />
Point<br />
Good<br />
Metering<br />
Point<br />
FLOW<br />
FLOW<br />
Bad<br />
Good Good<br />
Metering<br />
Point<br />
Metering<br />
Point<br />
Metering<br />
Point<br />
Metering<br />
Point<br />
Bad<br />
FLOW<br />
Metering<br />
Point<br />
FLOW<br />
h h>0<br />
Metering<br />
Point<br />
600 Diagonal Highway, Longmont, CO 80501<br />
Tel: (303) 651-0352 • Fax: (303) 678-1754 • e-mail: fluidyne@emcoflow.com
Mechanical Drawing: <strong>Model</strong> <strong>3100</strong><br />
Sensor-Wing<br />
Stainless Steel<br />
Shedder<br />
18.625"<br />
(473.1mm)<br />
8.0"<br />
(203.2mm)<br />
Dimensional Drawing: Condulet (shown with display)<br />
Mechanical Installation<br />
0<br />
1<br />
2<br />
3<br />
4<br />
5<br />
6<br />
7<br />
8<br />
9<br />
10<br />
11<br />
12<br />
13<br />
0<br />
1<br />
2<br />
3<br />
4<br />
5<br />
6<br />
7<br />
8<br />
9<br />
10<br />
11<br />
Crank<br />
Electronics Enclosure<br />
Wire Entry<br />
Scale<br />
(inches)<br />
Ball Valve<br />
(400 psi rated)<br />
Thread-o-let<br />
(saddle optional)<br />
<strong>Vortex</strong> Sensor<br />
Pipe<br />
General Mechanical Installation Information<br />
The <strong>Hydro</strong>-<strong>Flow</strong> <strong>Model</strong> <strong>3100</strong> retractable insertion flowmeter allows for installation without<br />
the need to depressurize the pipeline. The retractor serves to position the vortex flow sensor in<br />
the pipe and when used with an isolation valve is "wet tap" compatible.<br />
The retractor is a non-rising stem type, thus providing maximum installation ease and<br />
operator safety (manual force to PUSH the flow sensor into the pipe is not required).<br />
600 Diagonal Highway, Longmont, CO 80501<br />
Tel: (303) 651-0352 • Fax: (303) 678-1754 • e-mail: fluidyne@emcoflow.com 5
Mechanical Installation (continued)<br />
Figure 3. Thread-o-let<br />
Installation<br />
6<br />
Welding<br />
Rod<br />
Figure 4. Scale Depth<br />
A = Scale Reading<br />
(pipe sizes<br />
6" & smaller)<br />
A<br />
1<br />
2<br />
3<br />
4<br />
5<br />
6<br />
7<br />
8<br />
9<br />
10<br />
11<br />
12<br />
13<br />
0<br />
1<br />
2<br />
3<br />
4<br />
5<br />
6<br />
7<br />
8<br />
9<br />
10<br />
11<br />
12<br />
2" Threadolet<br />
Pipe<br />
Crank<br />
A = Scale Reading<br />
(pipe sizes<br />
8" & larger)<br />
Electronics<br />
Enclosure<br />
Pipe<br />
Figure 5. Scale Indicator<br />
1<br />
2<br />
3<br />
4<br />
5<br />
Sensor C L<br />
Indicator<br />
0<br />
1<br />
2<br />
3<br />
4<br />
5<br />
Wet Tapping<br />
<strong>Flow</strong>meter is supplied with a 2" thread-o-let. A 1.875" hole opening is required.<br />
Caution: Local State regulation often require a wet tap permit. The manufacturers of the<br />
wet tap equipment and/or the contractors performing the contract are responsible for providing<br />
the proof of such a permit.<br />
Thread-o-let Installation<br />
Caution: Line must be depressurized if wet tap is not performed.<br />
1. Drill or bore and de-burr a 1.875" diameter hole in pipe. Use a 1 7 /8" hole saw.<br />
Caution: Flame cutting is discouraged.<br />
2. The hole should not be blocked. Center the 2" thread-o-let over hole (See Figure 3).<br />
3. Weld the thread-o-let onto the pipe using standard trade practices. Trade practices may<br />
vary by locality. Welding should be done by an experienced certified welder.<br />
4. Attach flowmeter to isolation valve.<br />
5. Fully open isolation valve.<br />
Note: Failure to fully open valve prior to installation will cause irreparable damage the flow<br />
sensor -- A bold, very visible warning sign is recommended to alert operator.<br />
6. Turn crank clockwise to insert the flow sensor into the pipe. Do so until the "calculated"<br />
scale reading lines up with the arrow on the retractor bar assembly.<br />
Caution: Do not force sensor into pipe if the mechanical resistance suddenly increases - this<br />
condition generally indicates the pipe tap is too small.<br />
Calculating the Proper Scale Reading<br />
For all pipe sizes, the proper scale reading is equal to the distance from the top of the pipe<br />
to the bottom of the aluminum plate at the bottom of the scale. (See Figure 4.) This<br />
measurement equals "A." IMPORTANT: Use the scale on the left for pipe sizes 6" and<br />
smaller. Use the scale on the right for pipe sizes 8" and larger.<br />
The scale on the retractor indicates the position of the flow sensor axis to within 0.05<br />
inches with respect to the reference surface. (See Figure 5.) Reference surface is marked<br />
on retractor.<br />
Saddle Clamp Installation<br />
Caution: Line must be depressurized if wet tap is not performed.<br />
1. Drill or bore and de-burr a 1.875" diameter hole in pipe. Use a 1 7 /8" hole saw.<br />
Caution: Flame cutting is discouraged.<br />
2. Clean pipe surface thoroughly -- particularly in the area where the gasket will sit. Check<br />
saddle gasket for proper positioning in saddle body. (See Figure 6 below.)<br />
3. Lubricate pipe and face of gasket with soap and water. Add antifreeze in freezing<br />
weather. Mount saddle body with gasket in place on pipe.<br />
4. Install bales and washers on open lug side.<br />
5. Tighten nuts evenly until saddle body conforms snugly to the pipe.<br />
6. Turn crank clockwise to insert the flow sensor into the pipe. Do so until the "calculated"<br />
scale reading lines up with the arrow on the retractor bar assembly.<br />
Caution: Do not force sensor into pipe if the mechanical resistance suddenly increases - this<br />
condition generally indicates the pipe tap is too small.<br />
Figure 6. Steps 2 thru 5 for Saddle Clamp Installation<br />
600 Diagonal Highway, Longmont, CO 80501<br />
Tel: (303) 651-0352 • Fax: (303) 678-1754 • e-mail: fluidyne@emcoflow.com
Electrical Installation<br />
TABLE 1.<br />
CURRENT<br />
LIMITING<br />
RESISTOR<br />
FOR<br />
PULSE<br />
OUTPUT<br />
S u p p l y<br />
V o l t a g e<br />
( D C )<br />
Current<br />
Limiting<br />
Resistor<br />
Values<br />
( ohms)<br />
Min Max<br />
10 400 400<br />
12 480 800<br />
14 560 1200<br />
16 640 1600<br />
18 720 2000<br />
20 800 2400<br />
22 880 2800<br />
24 960 3200<br />
26 1040 3600<br />
28 1120 4000<br />
30 1200 4400<br />
32 1280 4800<br />
Graph 1. Maximum Load<br />
Resistance for 4-20 mA Ouput<br />
CAUTION<br />
The pulse output of the <strong>Hydro</strong>-<strong>Flow</strong> flowmeter functions by momentarily shorting the +<br />
terminal to the – terminal. If the flowmeter is connected directly to a DC power source<br />
without the series resistor, both the flowmeter and the power source may be damaged. The<br />
wiring polarity must be observed for proper operation of the flowmeter. If the flowmeter<br />
is wired backwards to the current-limited power source, the flowmeter will not be damaged<br />
but it will not function properly.<br />
Pulse Output Electrical Installation<br />
The <strong>Hydro</strong>-<strong>Flow</strong> pulse output flowmeter may be used with a 10 to 32 volt DC power<br />
supply and series current limiting resistor. The voltage at the flowmeter terminals is internally<br />
limited to 8.0 ±1.0 volts DC under no-flow conditions, dropping to less than 1.0 volt for<br />
the 2.5 to 5 millisecond duration of the output pulse. Figure 4 below illustrates a typical<br />
installation. Note: The totalizer or flow computer input must be rated for an 8-volt pulse input.<br />
Figure 7. Wiring Diagram - Pulse Ouput<br />
The cable may be up to 2000 feet of #20 AWG or larger shielded two-conductor cable. The<br />
shield lead from the meter may be connected to an earth ground, such as a copper cold water<br />
pipe. The shield improves noise immunity and provides a return path for electrical surges. Its<br />
use is optional in installations in which electrical transients and noise are not a problem.<br />
The current limiting resistor is required to limit the normal operating current in the flowmeter<br />
to a value between 5 and 20 mA with a meter voltage of 8 volts, and less than 25 mA with<br />
the meter terminals short-circuited. The value of the resistor is determined from the power<br />
supply voltage, the operating meter current and the cable resistance. Table 1 lists standard<br />
1/2 watt 5% resistor values which will work in most installations. For power supply voltages<br />
between those in the table, use the lower value of resistor.<br />
4-20 mA Current Output or No Output (Display Only) Electrical Installation<br />
The flowmeter may be connected with up to 2000 feet of #22 AWG or larger cable. Shielded<br />
cable may be necessary in some environments to reduce electrical noise; if used, the shield<br />
should be connected at one end only to an earth ground point, such as a copper cold water<br />
pipe.<br />
Figure 8. Wiring Diagram - 4-20 mA Current Loop<br />
600 Diagonal Highway, Longmont, CO 80501<br />
Tel: (303) 651-0352 • Fax: (303) 678-1754 • e-mail: fluidyne@emcoflow.com 7
Technical Data<br />
Mechanical Specifications<br />
8<br />
Type<br />
<strong>Retractable</strong> <strong>Insertion</strong><br />
Measurable Fluids<br />
Water; Water/Glycol Mixtures; Condensate<br />
Pipe Sizes<br />
3" to 20" (80 to 500 mm)<br />
Fluid Temperature<br />
32° to 212° F (0° to 100° C) for all connections<br />
Fluid Pressure<br />
400 psi (27.5 bar) maximum for thread-o-let connection<br />
300 psi (20.7 bar) maximum for saddle connection<br />
Ambient Temperature<br />
- 20 to 140 °F (- 29 to 60 °C)<br />
<strong>Flow</strong> Range<br />
0.5 feet, or 0.15 meters, per second minimum<br />
15 feet, or 4.5 meters, per second maximum<br />
Measuring Units<br />
English....................Gallons<br />
Metric.....................Cubic Meters<br />
Other measuring units available upon request or measuring<br />
units can be reconfigured using Fluidyne's Field-Pro , PC compatible<br />
configuration software.<br />
Accuracy (Combined Linearity and Repeatability)<br />
±1.0% of full scale<br />
<strong>Insertion</strong> Assembly<br />
Valve.......................Ball Type, 400 psi (27.5 bar)<br />
Retractor.................Non-Rising Stem<br />
Position Indication .Permanent Scale<br />
Materials of Construction<br />
Retractor.................Aluminum, Nickel Plated Steel<br />
Wetted Parts<br />
<strong>Vortex</strong> Sensor .........Ultem ® (Plastic)<br />
Shedder Bar ............316 Stainless Steel<br />
Stem .......................316 Stainless Steel<br />
O-rings ...................EPDM<br />
Mounting Options<br />
Carbon steel saddle for steel pipes<br />
Carbon steel thread-o-let<br />
Pipe Connection<br />
2" NPT<br />
Straight Run Piping<br />
Typical 10 diameters upstream, 5 diameters downstream.<br />
(See Figure 2, p.4.)<br />
Electrical Specifications<br />
Enclosure<br />
Reinforced Polycarbonate, NEMA 6<br />
European CE Mark<br />
Approved<br />
Output Signal Options<br />
Pulse Output .........Frequency proportional to flow rate. Power<br />
Supply: 10-32 VDC power supply with current limited by<br />
series resistance to between 5 and 20 mA. Maximum pulse<br />
width is 5 ms. See Table 2 for standard output scaling.<br />
Other pulse output setting can be configured by the factory<br />
or reconfigured in the field using Fluidyne's Field-Pro .<br />
Analog Output ......4-20 mA analog current loop, current proportional<br />
to flow rate. Power Supply: 10-32 VDC compliance.<br />
4 mA = zero flow; 20 mA = maximum flow listed<br />
in Table 2. Other 20 mA setting can be configured by the<br />
factory or reconfigured in the field using Fluidyne's Field-<br />
Pro .<br />
No Output.............Display only. Power Supply: 8-32 VDC,<br />
4 mA maximum.<br />
Display Option<br />
LCD display alternately shows 4-digit rate and 8-digit total flow.<br />
TABLE<br />
2.<br />
Line<br />
Size<br />
in.<br />
( mm)<br />
Min.<br />
<strong>Flow</strong><br />
Max.<br />
<strong>Flow</strong><br />
( gpm)<br />
Min.<br />
<strong>Flow</strong><br />
Max.<br />
<strong>Flow</strong><br />
3 ( m / h)<br />
P ulses/<br />
gal<br />
P ulses/<br />
m<br />
Line<br />
Size<br />
in.<br />
( mm)<br />
Min.<br />
<strong>Flow</strong><br />
Max.<br />
<strong>Flow</strong><br />
( gpm)<br />
Min.<br />
<strong>Flow</strong><br />
Max.<br />
<strong>Flow</strong><br />
3 ( m / h)<br />
MINIMUM<br />
AND<br />
MAXIMUM<br />
FLOW<br />
RANGES<br />
600 Diagonal Highway, Longmont, CO 80501<br />
Tel: (303) 651-0352 • Fax: (303) 678-1754 • e-mail: fluidyne@emcoflow.com<br />
3<br />
( 80)<br />
13.<br />
3<br />
( 400)<br />
3.<br />
0<br />
( 90.<br />
8)<br />
1) 5<br />
3 1)<br />
, 000<br />
4<br />
( 100)<br />
20.<br />
0<br />
( 600)<br />
4.<br />
5<br />
( 136.<br />
3)<br />
6<br />
( 150)<br />
50.<br />
0<br />
( 1500)<br />
11.<br />
4<br />
( 340.<br />
7)<br />
8<br />
( 200)<br />
83.<br />
3<br />
( 2500)<br />
18.<br />
9<br />
( 567.<br />
8)<br />
10<br />
( 250)<br />
133.<br />
3<br />
( 4000)<br />
30.<br />
3<br />
( 908.<br />
5)<br />
2 15 6 4 2<br />
5 5, 000<br />
2, 000<br />
1, 000<br />
500<br />
12<br />
( 300)<br />
18.<br />
3<br />
( 5,<br />
500)<br />
41.<br />
6<br />
( 1,<br />
249.<br />
2)<br />
14<br />
( 350)<br />
208.<br />
3<br />
( 6,<br />
250)<br />
47.<br />
3<br />
( 1,<br />
419.<br />
5)<br />
16<br />
( 400)<br />
283.<br />
3<br />
( 8,<br />
500)<br />
64.<br />
4<br />
( 1,<br />
930.<br />
6)<br />
18<br />
( 450)<br />
366.<br />
7<br />
( 11,<br />
000)<br />
83.<br />
3<br />
( 2,<br />
498.<br />
4)<br />
20<br />
( 500)<br />
466.<br />
7<br />
( 14,<br />
000)<br />
106.<br />
0<br />
( 3,<br />
179.<br />
7)<br />
1) P ulses/<br />
gal<br />
2 1 1 1 0.<br />
5<br />
P ulses/<br />
m<br />
1.<br />
When<br />
3 1)<br />
00<br />
flowmete<br />
5 500 200 200 200<br />
r is<br />
configured<br />
for<br />
pulse<br />
output.<br />
P/N 990604 Rev. F (3/00)


