

the Smart Oven™ - Breville
the Smart Oven™ - Breville
the Smart Oven™ - Breville

You also want an ePaper? Increase the reach of your titles
YUMPU automatically turns print PDFs into web optimized ePapers that Google loves.
OPERATING yOUR BREVILLE SMART OVEN - BAKE<br />
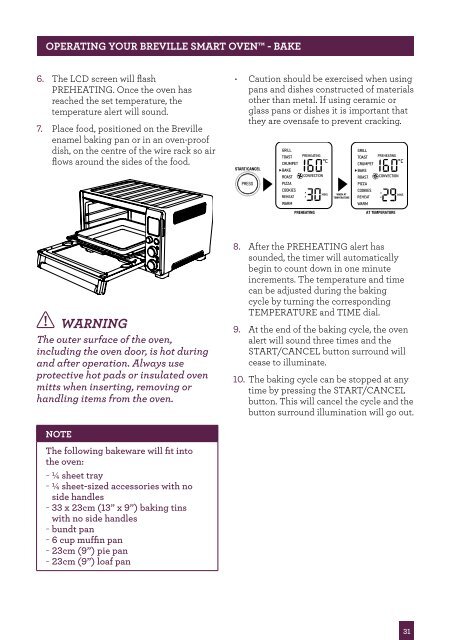
6. The LCD screen will flash<br />
PREHEATING. Once <strong>the</strong> oven has<br />
reached <strong>the</strong> set temperature, <strong>the</strong><br />
temperature alert will sound.<br />
7. Place food, positioned on <strong>the</strong> <strong>Breville</strong><br />
enamel baking pan or in an oven-proof<br />
dish, on <strong>the</strong> centre of <strong>the</strong> wire rack so air<br />
flows around <strong>the</strong> sides of <strong>the</strong> food.<br />
WARNING<br />
The outer surface of <strong>the</strong> oven,<br />
including <strong>the</strong> oven door, is hot during<br />
and after operation. Always use<br />
protective hot pads or insulated oven<br />
mitts when inserting, removing or<br />
handling items from <strong>the</strong> oven.<br />
NOTE<br />
The following bakeware will fit into<br />
<strong>the</strong> oven:<br />
− ¼ sheet tray<br />
− ¼ sheet-sized accessories with no<br />
side handles<br />
− 33 x 23cm (13” x 9”) baking tins<br />
with no side handles<br />
− bundt pan<br />
− 6 cup muffin pan<br />
− 23cm (9”) pie pan<br />
− 23cm (9”) loaf pan<br />
• Caution should be exercised when using<br />
pans and dishes constructed of materials<br />
o<strong>the</strong>r than metal. If using ceramic or<br />
glass pans or dishes it is important that<br />
<strong>the</strong>y are ovensafe to prevent cracking.<br />
START/CANCEL<br />
PRESS<br />
PREHEATING<br />
WHEN AT<br />
TEMPERATURE<br />
AT TEMPERATURE<br />
8. After <strong>the</strong> PREHEATING alert has<br />
sounded, <strong>the</strong> timer will automatically<br />
begin to count down in one minute<br />
increments. The temperature and time<br />
can be adjusted during <strong>the</strong> baking<br />
cycle by turning <strong>the</strong> corresponding<br />
TEMPERATURE and TIME dial.<br />
9. At <strong>the</strong> end of <strong>the</strong> baking cycle, <strong>the</strong> oven<br />
alert will sound three times and <strong>the</strong><br />
START/CANCEL button surround will<br />
cease to illuminate.<br />
10. The baking cycle can be stopped at any<br />
time by pressing <strong>the</strong> START/CANCEL<br />
button. This will cancel <strong>the</strong> cycle and <strong>the</strong><br />
button surround illumination will go out.<br />
31


