
Create successful ePaper yourself
Turn your PDF publications into a flip-book with our unique Google optimized e-Paper software.
8211-0223-10<br />
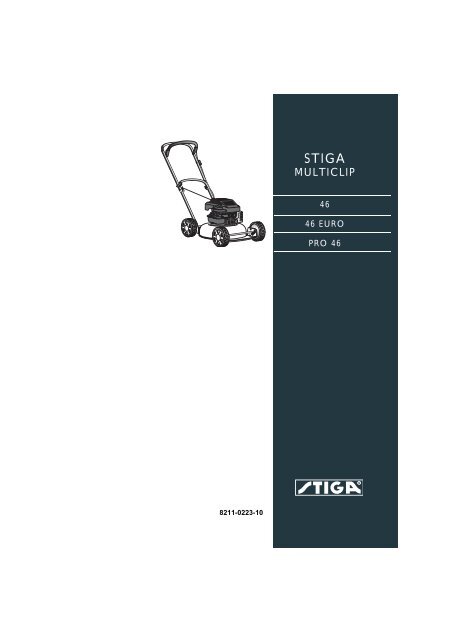
STIGA<br />
<strong>MULTICLIP</strong><br />
46<br />
46 EURO<br />
PRO 46
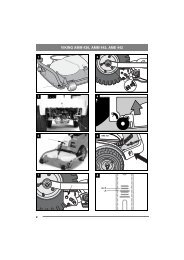
1.<br />
S<br />
SVENSKA<br />
3. PRO 46 4. PRO 46<br />
5.<br />
7. Honda<br />
2.<br />
8.<br />
1 2<br />
3 4<br />
ADD FULL<br />
G<br />
STOP<br />
B*<br />
FULL<br />
ADD<br />
6. Briggs & Stratton<br />
G<br />
EURO
SVENSKA S<br />
3x<br />
9. Briggs & Stratton 10. Honda<br />
11. Front, 46 12. 46 EURO, PRO 46 + Rear, 46.<br />
13. Briggs & Stratton<br />
0,7-0,8 mm<br />
15. 16.<br />
14. Honda
S<br />
SVENSKA<br />
40 Nm<br />
40 Nm<br />
17. Regular blade holder 18. Friction blade holder<br />
I
SYMBOLS<br />
The following symbols can be found on the<br />
machine to remind you of the care and attention<br />
that are required during use.<br />
The symbols mean:<br />
Warning! Read the Instruction Book and<br />
Safety Manual before using the machine.<br />
Warning! Keep onlookers away. Beware<br />
of objects being flung out.<br />
Warning! Keep hands and feet clear of the<br />
cutting deck when the machine is running.<br />
Warning! Before starting any repair work,<br />
remove the spark plug cable from the<br />
spark plugs.<br />
Warning! Always tilt the<br />
lawnmower backwards when<br />
cleaning the underside. Petrol and<br />
oil can run out if the lawnmower is<br />
tilted in the other direction.<br />
IMPORTANT<br />
Certain models do not have a throttle control. The<br />
engine speed is set for optimal function and<br />
minimal exhaust emissions.<br />
INSTALLATION<br />
HANDLE<br />
Fold up the lower part of the handle.<br />
Then attach the upper part of the handle. This is<br />
attached with screws, washers and locking wheels<br />
(fig. 1).<br />
The handle has four different positions. Release<br />
the catch with your foot and set the handle in<br />
desired position (fig. 2).<br />
1. For normal mowing.<br />
2. For mowing under trees, bushes, etc.<br />
3. Parking position.<br />
ENGLISH GB<br />
4. Delivery and storage position. The handle takes<br />
up less space if the knobs are released and the<br />
handle folded up.<br />
PRO 46<br />
Raise the upper part of the handle and place it<br />
behind the machine. Fold up the lower part of the<br />
handle and tighten the locking wheels A (fig. 3).<br />
Then attach the upper part of the handle. There is<br />
also a lug on the right hand side for the starter<br />
handle (fig. 1).<br />
Storage position: Release the locking wheels on<br />
the lower part of the handle and fold it forwards.<br />
Then release the locking wheels on the upper part<br />
of the handle and fold it backwards (fig. 4).<br />
NOTE! Check that the wires are not caught or<br />
broken when the handle is unfolded or folded.<br />
CABLE HOLDER<br />
Attach the wires to the cable holder (fig. 5).<br />
USING THE MOWER<br />
BEFORE STARTING<br />
FILL THE CRANKCASE WITH OIL<br />
The lawnmower is delivered without<br />
any oil in the engine crankcase. The<br />
crankcase must be filled with oil before<br />
the engine is started for the first time.<br />
Remove the oil dipstick (fig. 6, 7).<br />
Fill the engine’s crankcase with 0.55 litres of good<br />
quality oil (service class SE, SF or SG). Use SAE<br />
30 or SAE 10W-30 oil.<br />
Slowly fill to ‘FULL/MAX’. Do not overfill.<br />
CHECK THE OIL LEVEL<br />
Check before using the machine that the oil level is<br />
between ‘FULL/MAX’ and ‘ADD/MIN’ on the<br />
dipstick (fig. 6, 7). The mower should stand level.<br />
Briggs Stratton:<br />
Remove and wipe off the dipstick (fig. 6). Slide it<br />
down completely and tighten it. Unscrew and pull it<br />
up again. Read off the oil level. If the oil level is low,<br />
fill with oil up to the ‘FULL/MAX’ mark.<br />
Honda:<br />
Remove and wipe off the dipstick (fig. 7). Insert the<br />
dipstick fully, but do not screw it into the thread.<br />
Pull it up again. Read off the oil level. If the oil level<br />
is low, fill with oil up to the ‘FULL/MAX’ mark.
GB<br />
FILL UP THE PETROL TANK<br />
Fill with petrol before starting the<br />
motor. Never remove the filler cap or fill<br />
with petrol while the motor is running<br />
or still warm.<br />
Never completely fill the fuel tank. Allow a little<br />
room for the petrol to expand if necessary.<br />
Some engines have an extra safety cover under the<br />
regular fuel cap. This must not be reinstalled.<br />
Preferably use environmentally friendly petrol, i.e.<br />
alkylate petrol. This type of petrol has a<br />
composition that is less harmful to people and<br />
nature. It has e.g. no lead additives, no oxygenators<br />
(alcohols and ethers), no alkenes and no benzene.<br />
NOTE! If you change to environmentally friendly<br />
petrol in a motor previously run on ordinary leadfree<br />
petrol (95), the petrol manufacturer’s<br />
recommendations must be followed carefully.<br />
Ordinary lead-free 95 octane petrol can also be<br />
used. You must never use 2-stroke petrol mixed<br />
with oil. NOTE! Bear in mind that lead-free petrol<br />
is a perishable; do not purchase more petrol than<br />
can be used within thirty days.<br />
STARTING THE ENGINE<br />
(Briggs & Stratton)<br />
1. Place the lawn mower on flat, firm ground. Do<br />
not start in long grass.<br />
2. Make sure the spark plug cable is connected to<br />
the spark plug.<br />
3. If the lawnmower is equipped with throttle<br />
control, set the throttle control B to full throttle<br />
(fig. 8).<br />
4. When starting a cold engine: Press down the<br />
primer fully 6 times (fig. 9).<br />
When starting a warm engine, the primer does<br />
not need to be used. If the engine stops due to a<br />
lack of fuel, refill and press down the primer 3<br />
times.<br />
5. Press in the Start/Stop loop G towards the<br />
handle. NOTE! The Start/Stop loop G must be<br />
kept pressed in to prevent the engine stopping<br />
(fig. 8).<br />
6. Grasp the starter handle and start the engine by<br />
pulling briskly on the starter cord.<br />
7. For the best cutting results the engine should<br />
always be driven at full throttle.<br />
Keep hands and feet away from the<br />
rotating blade. Never put your hand or<br />
foot under the blade casing or in the<br />
grass ejector while the engine is<br />
running.<br />
ENGLISH<br />
STARTING THE ENGINE (Honda)<br />
1. Place the lawnmower on flat, firm ground. Do<br />
not start in long grass.<br />
2. Make sure the spark plug cable is connected to<br />
the spark plug.<br />
3. Open the fuel tap (fig. 10).<br />
4. Set the throttle control B in the choke<br />
position . NOTE! It is not necessary to use the<br />
choke position when the engine is warm (fig. 8).<br />
5. Press in the Start/Stop loop G towards the<br />
handle. NOTE! The Start/Stop loop G must be<br />
kept pressed in to prevent the engine stopping<br />
(fig. 8).<br />
6. Grasp the starter handle and start the engine by<br />
pulling briskly on the starter cord.<br />
7. When the engine starts, move the throttle<br />
control backwards until max. revs are obtained.<br />
NOTE! The engine should always be run at<br />
maximum revs to avoid abnormal machine<br />
vibrations.<br />
Keep hands and feet away from the<br />
rotating blade. Never put your hand or<br />
foot under the blade casing or in the<br />
grass ejector while the engine is<br />
running.<br />
STOPPING THE ENGINE<br />
The engine may be very warm<br />
immediately after it is shut off. Do not<br />
touch the silencer, cylinder or cooling<br />
flanges. This can cause burn injuries.<br />
1. Release the Start/Stop-loop G to stop the<br />
engine. This loop must not be disengaged (e.g.<br />
by setting it in the depressed position against<br />
the handle), as it will not be possible to stop the<br />
engine.<br />
Honda: Close the fuel tap.<br />
2. If the lawnmower is left unattended, remove the<br />
spark plug cable from the spark plug.<br />
If the start/stop loop ceases to work, stop<br />
the engine by removing the spark plug<br />
cable from the spark plug. Immediately<br />
take the lawn mower to an authorised<br />
workshop for repair.
MOWING TIPS<br />
Before mowing the lawn, take care to remove any<br />
stones, toys and other hard objects.<br />
A machine with the <strong>MULTICLIP</strong> system cuts the<br />
grass, chops it finely and then blows it down into the<br />
lawn. The grass clippings need not be collected.<br />
The following rules should be observed to give the<br />
best <strong>MULTICLIP</strong> effect:<br />
1. Use a high engine speed (full throttle).<br />
2. Do not mow when the grass is wet.<br />
3. Do not cut the grass too short. Not more than<br />
1/3rd of the length should be cut off.<br />
4. Ensure that the area under the mower casing is<br />
always kept clean.<br />
5. Always use a well-sharpened blade.<br />
CUTTING HEIGHT<br />
Shut off the engine before adjusting the<br />
cutting height.<br />
Do not set the cutting height so low that<br />
the blade/blades come into contact with<br />
uneven ground.<br />
It is possible to vary the cutting height by moving<br />
the wheel axles through four positions (fig. 11, 12).<br />
MAINTENANCE<br />
No servicing is to be carried out on the<br />
engine or mower unit without first<br />
switching off the engine and removing<br />
the spark plug cable from the spark<br />
plug.<br />
Stop the engine and remove the spark<br />
plug cable if the mower is to be lifted,<br />
e.g. during transportation.<br />
If the machine needs to be tilted, the fuel<br />
tank must be emptied and the engine’s<br />
spark plug kept upright.<br />
CLEANING<br />
After each use the mower should be cleaned. This<br />
is particularly important on the underside of the<br />
mower casing. Rinse with the garden hose. The<br />
mower will then last longer and function better.<br />
The paint on the underside of the deck will, in<br />
time, be worn away by the mowing process. To<br />
prevent corrosion, paint the underside with<br />
anticorrosive paint.<br />
ENGLISH GB<br />
Clean the silencer and the surrounding<br />
area regularly to remove grass, dirt and<br />
flammable waste products.<br />
COOLING SYSTEM<br />
Before each use, the engine’s cooling system must<br />
be cleaned. Clean the cylinder’s cooling flanges<br />
and air intake of grass remains, dirt, etc.<br />
OIL CHANGE<br />
Replace the oil when the engine is warm<br />
and the fuel tank is empty. Warm oil<br />
runs out of the engine more easily. In<br />
order to prevent burns, take care while<br />
draining as the oil is hot.<br />
Change the oil the first time after 5 hours of<br />
operation, and subsequently every 50 hours of<br />
operation or once a season. Remove the dipstick,<br />
tilt the mower and let the oil run out into a<br />
container. Be careful not to let any oil run onto the<br />
grass.<br />
Fill with new oil: Use SAE 30 or SAE 10W-30 oil.<br />
The crankcase holds approx. 0.55 litre. Fill until<br />
the oil reaches the ‘FULL/MAX’ mark on the<br />
dipstick. Do not overfill.<br />
AIR FILTER<br />
A dirty and blocked air filter reduces the engine<br />
output and increases engine wear.<br />
Briggs & Stratton: Carefully remove the air cleaner<br />
so that no dirt falls down into the carburettor (fig.<br />
12). Remove the foam filter and wash it in liquid<br />
detergent and water. Dry the filter. Pour a little oil on<br />
the filter and squeeze it in. Reassemble the air<br />
cleaner.<br />
Wash the filter every three months or after every<br />
25 hours of use, whichever occurs first. More<br />
frequently if the engine is used on dusty ground.<br />
Honda: Remove the cover and take out the filter.<br />
(fig. 13). Carefully check the filter for holes or<br />
other damage. A broken or damaged filter must be<br />
replaced.<br />
To remove dirt, carefully knock the filter several<br />
times against a hard surface or use compressed air<br />
from the back of the filter to blow-clean. Do not try<br />
to brush the filter clean as this forces dirt down into<br />
the fibres. A very dirty filter should be replaced.<br />
Clean the air filter after every 25 hours of use or<br />
once a season. More frequently if the engine is<br />
used on dusty ground.
GB<br />
SPARK PLUG<br />
Never remove the spark plug or spark<br />
plug cable when checking to see if there<br />
is a spark. Always use an approved test<br />
instrument.<br />
Clean the spark plug regularly (every 100 hours of<br />
operation). Use a wire brush for cleaning. Set the<br />
correct spark gap (fig. 14).<br />
Change the spark plug if the electrodes are<br />
excessively burnt or if the plug is damaged. The<br />
engine manufacturers’ recommendations are as<br />
follows:<br />
Briggs & Stratton: Champion J19LM (RJ19LM),<br />
spark gap 0.7-0.8 mm.<br />
Honda: BPR6ES (NGK).<br />
Spark gap 0.7-0.8 mm.<br />
SHOCK-ABSORBER<br />
Fig. 16. Check the shock-absorber and the<br />
insulating sleeves twice per season. Replace in the<br />
event of damage or wear.<br />
CHANGING BLADES<br />
Use protective gloves when changing<br />
blades to avoid cutting yourself.<br />
Blunt and damaged blades tear up the grass<br />
and make the lawn unsightly after mowing. New<br />
well-sharpened blades cut off the grass. This gives<br />
a green and fresh appearance after mowing.<br />
Always check the blades after a collision. First<br />
disconnect the spark plug cable. If the blade<br />
system has been damaged, defective parts should<br />
be replaced. Always use genuine spare parts.<br />
To replace the blade, slacken the screw. Fit the<br />
new blade so that the stamped STIGA logo is<br />
turned up facing the blade holder (not facing the<br />
grass). Reinstall as illustrated. Tighten the screw<br />
properly. Tightening torque 40 Nm (fig. 15).<br />
When replacing the blade, the blade screw should<br />
also be replaced.<br />
The guarantee does not cover damage to the blade,<br />
blade holder or engine caused by running into<br />
obstacles.<br />
When replacing the blade, blade holder and blade<br />
screw, always use genuine spare parts. Nongenuine<br />
spare parts can entail a risk of injury or<br />
damage, even if they fit the machine.<br />
ENGLISH<br />
SHARPENING OF THE BLADES<br />
Sharpening of the blades must be done by wet<br />
method grinding, using a whetstone or a<br />
grindstone.<br />
For safety reasons, the blades should not be<br />
sharpened on an emery wheel. Too high<br />
temperature could cause the blade to become<br />
brittle.<br />
Once the blade has been sharpened, it<br />
must then be balanced to avoid<br />
vibration damage.<br />
STORAGE<br />
WINTER STORAGE<br />
Empty the fuel tank. Start the engine and let it run<br />
until it stops. The same petrol must not remain in<br />
the tank for more than one month.<br />
Tip up the mower and unscrew the spark plug.<br />
Pour a tablespoon of engine oil into the spark plug<br />
hole. Pull out the starter handle slowly so that the<br />
oil is distributed in the cylinder. Screw in the spark<br />
plug.<br />
Thoroughly clean the mower and store it indoors in<br />
a dry place.<br />
SERVICING<br />
Genuine spare parts are supplied by service<br />
workshops and by many dealers.<br />
A list of these can be found on STIGA’s Internet<br />
website at: www.stiga.com.
EG-försäkran om överensstämmelse<br />
EY-vaatimustenmukaisuusvakuutus<br />
EU-overensstemmelseserklæring<br />
EU-forsikring om overensstemmelse<br />
EG-Konformitätsbescheinigung<br />
1.Kategori<br />
Luokka<br />
Kategori<br />
Kategori<br />
Kategorie<br />
Category<br />
Catégorie<br />
Categorie<br />
Categoria<br />
Categoría<br />
Categoria<br />
Kategoria<br />
Категория<br />
Kategorie<br />
Kategória<br />
Kategorija<br />
2.Typ<br />
Tyyppi<br />
Type<br />
Type<br />
Typ<br />
Type<br />
3.Art.nr.<br />
Tuotenumero<br />
Art.nr.<br />
Art.nr.<br />
Art.-Nr.<br />
Item no<br />
4.Tillverkare<br />
Valmistaja<br />
Producent<br />
Produsent<br />
Hersteller<br />
Manufacturer<br />
5.Vibration<br />
Tärinä<br />
Vibration<br />
Vibrasjon<br />
Vibration<br />
Vibration<br />
Vibration<br />
Vibratie<br />
Vibrazioni<br />
Vibración<br />
Type<br />
Type<br />
Tipo<br />
Tipo<br />
Tipo<br />
Typ<br />
N° d'article<br />
Itemnr.<br />
Articolo n.<br />
Nº de<br />
referencia<br />
Item nº<br />
Fabricant<br />
Fabrikant<br />
Produttore<br />
Fabricante<br />
Fabricante<br />
Producent<br />
Vibração<br />
Wibracje<br />
Вибрация<br />
Vibrace<br />
Vibráció<br />
Tresljaji<br />
EC conformity declaration<br />
Déclaration de conformité CE<br />
EU-gelijkvormigheidsverklaring<br />
Dichiarazione di conformità CE<br />
Declaración de conformidad CE<br />
Gräsklippare med bensinmotor<br />
Bensiinimoottorikäyttöinen ruohonleikkuri<br />
Plæneklipper med benzinmotor<br />
Gressklipper med bensinmotor<br />
Rasenmäher mit Benzinmotor<br />
Lawnmowers with petrol engines<br />
Tondeuses à moteur à explosion<br />
Grasmaaiers met benzinemotor<br />
Tosaerba con motori a benzina<br />
Cortacéspedes con motor de gasolina<br />
Máquinas de cortar relva com motores a gasolina<br />
Kosiarki do trawy z silnikiem benzynowym<br />
Газонокосилки с бензиновым двигателем<br />
Sekačky trávy s benzinovým motorem<br />
Benzinmotoros fűnyíró<br />
Kosilnice z bencinskimi motorji<br />
Тип<br />
Typ<br />
Típus<br />
Tip<br />
Pozycja nr<br />
Арт. изд.<br />
Císlo položky<br />
Tételszám<br />
Izdelek, št.<br />
Изготовитель<br />
Výrobce<br />
Gyártó<br />
Proizvajalec<br />
6A.Garanterad ljudeffektnivå<br />
Taattu äänitehotaso<br />
Garanteret lydeffektniveau<br />
Garantert lydeffektnivå<br />
Garantierter Geräuschpegel<br />
Guaranteed sound power level<br />
Niveau de puissance acoustique garanti<br />
Gegarandeerd geluidsniveau<br />
Livello di potenza sonora garantito<br />
Nivel de potencia de sonido garantizado<br />
Nível de ruído garantido<br />
Nieprzekraczalny poziom hałasu<br />
Гарантированный предельный уровень шума<br />
Zaručená úroveň hluku<br />
Garantált hangteljesítményszint<br />
Zajamčena raven zvočne jakosti<br />
6B.Uppmätt ljudeffektnivå<br />
Mitattu äänitehotaso<br />
Målt lydeffektniveau<br />
Målt lydeffektnivå<br />
Gemessener geräuschpegel<br />
Measured sound power level<br />
Niveau de puissance acoustique mesuré<br />
Gemeten geluidsniveau<br />
Livello di potenza sonora misurato<br />
Nivel de potencia de sonido medido<br />
Nível de potência sonora medido<br />
Nieprzekraczalny poziom hałasu<br />
Замеренный уровень шума<br />
Naměřená úroveň hluku<br />
Mért hangteljesítményszint<br />
Izmerjena raven zvočne jakosti<br />
STOP<br />
(LWA)<br />
S461<br />
1. 11-3203-38<br />
2. 11-3203-48<br />
3. 11-3281<br />
GGP Sweden AB<br />
P.O. Box 1006<br />
SE-573 28 Tranås<br />
Sweden<br />
1. 6.0 m/s 2 (Σ)<br />
2. 2.0 m/s 2 (Σ)<br />
3. 7.0 m/s 2 (Σ)<br />
1. 92 dB(A)<br />
2. 92 dB(A)<br />
3. 94 dB(A)<br />
1. 89 dB(A)<br />
2. 90 dB(A)<br />
3. 92 dB(A)<br />
Declaração de conformidade da CE<br />
Deklaracja zgodności EC<br />
Декларация EC о соответствии<br />
Deklarace shody s EU<br />
EK megfelelőségi nyilatkozat<br />
8.Fabrikat<br />
Valmiste<br />
Fabrikat<br />
Fabrikat<br />
Fabrikat<br />
Make<br />
9.Klippbredd<br />
Leikkuuleveys<br />
Klippebredde<br />
Klippebredde<br />
Schnittbreite<br />
Cutting width<br />
Largeur de coupe<br />
Snijwijdte<br />
Larghezza di taglio<br />
10.Serienr<br />
Valmistenumero<br />
Serienr.<br />
Serienr.<br />
Seriennummer<br />
Serial number<br />
Numéro de série<br />
Serienummer<br />
Numero di serie<br />
Número de serie<br />
Número de série<br />
Numer seryjny<br />
Заводской номер<br />
Číslo série<br />
Sorozatszám<br />
Serijska številka<br />
Marque<br />
Fabricage<br />
Marca<br />
Marca<br />
Marca<br />
Marka<br />
Izjava ES o skladnosti<br />
Торговая марка<br />
Značka<br />
Gyártmány<br />
Znamka<br />
Ancho de corte<br />
Largura de corte<br />
Szerokość koszenia<br />
Рабочий захват<br />
Šířka sekání<br />
Vágási szélesség<br />
Širina košnje<br />
STIGA<br />
46 cm<br />
Se dekal på chassit<br />
Katso tarra rungossa<br />
Se mærkat på chassis<br />
Se etikett på chassiset<br />
Siehe Schild am Chassis<br />
See label on chassis<br />
Voir la plaque sur le châssis<br />
Zie label op chassis<br />
Vedi etichetta sul telaio<br />
Véase la etiqueta en el chasis<br />
Ver etiqueta no chassis<br />
Patrz etykieta na podwoziu<br />
См. табличку на шасси<br />
Viz štítek na podvozku<br />
Lásd az alvázon lévő adattáblát!<br />
Glej nalepko na šasiji<br />
11.Motor / Moottori / Motor / Motor / Motor / Engine / Moteur / Motor /<br />
Motore / Motor / Motor / Silnik / Двигатель / Motor / Motor / Motor<br />
Fabrikat<br />
Valmiste<br />
Fabrikat<br />
Fabrikat<br />
Fabrikat<br />
Make<br />
Modell<br />
Malli<br />
Model<br />
Modell<br />
Modell<br />
Model<br />
Marque<br />
Fabricage<br />
Marca<br />
Marca<br />
Marca<br />
Marka<br />
Modèle<br />
Model<br />
Modello<br />
Modelo<br />
Modelo<br />
Model<br />
12.Rotationshastighet<br />
Pyörimisnopeus<br />
Rotationshastighed<br />
Rotasjonshastighet<br />
Umdrehungsgeschwindigkeit<br />
Rotation speed<br />
Vitesse de rotation<br />
Rotatiesnelheid<br />
Velocità di rotazione<br />
Régimen<br />
Velocidade de rotação<br />
Prędkość obrotów<br />
Частота вращения<br />
Rychlost otáčení<br />
Rotációs sebesség<br />
Hitrost vrtenja<br />
7.Anmält organ<br />
Ilmoitettu laitos<br />
Bemyndiget organ<br />
Underrettet organ<br />
Anmeldeorganisation<br />
Notified body<br />
Organisme notifié<br />
Keuringsinstantie<br />
Organismo notificato<br />
Organismo notificado<br />
Organismo notificado<br />
Urząd zatwierdzający<br />
Уполномоченная организация<br />
Oprávnený orgán<br />
Az értesítés címzettje<br />
Obveščeni organ<br />
Марка<br />
Značka<br />
Gyártmány<br />
Znamka<br />
Модель<br />
Model<br />
Modell<br />
Model<br />
1-2. Honda<br />
3. Briggs & Stratton<br />
1-2. GCV 135<br />
3. 10D902<br />
1-2. 2900 rpm<br />
3. 3000 rpm<br />
ITS Testing &<br />
Certification Ltd<br />
Notified Body representative<br />
0359
EG-försäkran om överensstämmelse<br />
EY-vaatimustenmukaisuusvakuutus<br />
EU-overensstemmelseserklæring<br />
EU-forsikring om overensstemmelse<br />
EG-Konformitätsbescheinigung<br />
EC conformity declaration<br />
Déclaration de conformité CE<br />
EU-gelijkvormigheidsverklaring<br />
Dichiarazione di conformità<br />
Declaración de conformidad CE<br />
Denna produkt är i överensstämmelse med<br />
- direktiv 89/336/EEG om elektromagnetisk kompatibilitet<br />
- maskindirektiv 98/37/EEG med särskilda hänvisningar till direktivets bilaga 1<br />
om väsentliga hälso- och säkerhetskrav i samband med tillverkning<br />
- ljuddirektiv 2000/14/EG<br />
Maskinen är utvecklad och tillverkad enligt följande standard:<br />
- EN 836, EN 292-2, EN 1033, EN ISO 3767, EN ISO 14982<br />
Tämä tuote täyttää seuraavien direktiivien vaatimukset<br />
- sähkömagneettista yhteensopivuutta koskeva direktiivi 89/336/ETY<br />
- konedirektiivi 98/37/ETY viitaten erityisesti direktiivin liitteeseen 1, joka<br />
käsittelee olennaisia terveys- ja turvallisuusvaatimuksia valmistuksen<br />
yhteydessä<br />
- meludirektiivi 2000/14/EG<br />
Tuote on kehitetty ja valmistettu seuraavien normien mukaisesti:<br />
- EN 836, EN 292-2, EN 1033, EN ISO 3767, EN ISO 14982<br />
Dette produkt er i overensstemmelse med<br />
- direktiv 89/336/EØF om elektromagnetisk kompatibilitet<br />
- direktiv 98/37/EØF om indbyrdes tilnærmelse af medlemsstaternes<br />
lovgivning om maskiner med særlig henvisning til direktivets bilag 1 om<br />
væsentlige sikkerheds- og sundhedskrav i forbindelse med konstruktion og<br />
fremstilling<br />
- direktiv 2000/14/EF om støjemission<br />
Produktet er udviklet og fremstillet i overensstemmelse med følgende normer:<br />
- EN 836, EN 292-2, EN 1033, EN ISO 3767, EN ISO 14982<br />
Dette produktet er i overensstemmelse med<br />
- direktiv 89/336/EØF om elektromagnetisk kompatibilitet<br />
- maskindirektiv 98/37/EØF med særskilte henvisninger til direktivets bilag 1<br />
om vesentlige helse- og sikkerhetskrav i forbindelse med produksjon<br />
- lyddirektiv 2000/14/EF<br />
Produktet en utviklet og produsert i overensstemmelse med følgende normer:<br />
- EN 836, EN 292-2, EN 1033, EN ISO 3767, EN ISO 14982<br />
Dieses Produkt ist in Übereinstimmung mit<br />
- Direktive 89/336/EEG zur elektromagnetischen Kompatibilität<br />
- Maschinendirektive 98/37/EEG mit besonderem Hinweis auf Anlage 1 der<br />
Direktive über wichtige Gesundheits- und Sicherheitsanforderungen im<br />
Zusammenhang mit der Herstellung<br />
- Schallschutzdirektive 2000/14/EG<br />
Das Erzeugnis ist in Übereinstimmung mit folgenden Normen entwickelt und<br />
gefertig worden:<br />
- EN 836, EN 292-2, EN 1033, EN ISO 3767, EN ISO 14982<br />
This product conforms to<br />
- Electromagnetic Compatibility Directive 89/336/EEC<br />
- Machinery Directive 98/37/EEC with special reference to appendix 1 of the<br />
directive regarding essential health and safety requirements in conjunction<br />
with manufacturing<br />
- Noise Emission Directive 2000/14/EC<br />
This product has been developed and manufactured in conformance with the<br />
following standards:<br />
- EN 836, EN 292-2, EN 1033, EN ISO 3767, EN ISO 14982<br />
Ce produit est conforme à<br />
- La Directive compatibilité électromagnétique 89/336/EEC<br />
- La Directive machines 98/37/EEC, avec une référence particulière à<br />
l'annexe 1 de la directive concernant les exigences essentielles en matière de<br />
santé et de sécurité dans le cadre de la fabrication<br />
- La Directive émissions de bruit 2000/14/EC<br />
Le produit en question a été mis au point et fabriqué conformément aux<br />
normes suivantes:<br />
- EN 836, EN 292-2, EN 1033, EN ISO 3767, EN ISO 14982<br />
Dit product voldoet aan<br />
- Richtlijn voor elektromagnetische compatibiliteit 89/336/EEC<br />
- Richtlijn voor machines 98/37/EEC met speciale verwijzing naar aanhangsel<br />
1van de richtlijn voor essentiële gezondheids-en veiligheidsvereisten i.v.m.<br />
fabricage<br />
- Richtlijn voor geluidsproductie 2000/14/EC<br />
Het product is in overeenstemming met volgende normen ontwikkeld en<br />
vervaardigd:<br />
- EN 836, EN 292-2, EN 1033, EN ISO 3767, EN ISO 14982<br />
Questo prodotto è conforme alla<br />
- Direttiva sulla compatibilità elettromagnetica 89/336/EEC<br />
- Direttiva Macchine 98/37/EEC con particolare riferimento all'appendice 1<br />
della direttiva riguardante i requisiti essenziali in materia di salute e sicurezza<br />
relativi alla fabbricazione<br />
- Direttiva sulle emissioni sonore 2000/14/EC<br />
Riferimento alle norme armonizzate:<br />
- EN 836, EN 292-2, EN 1033, EN ISO 3767, EN ISO 14982<br />
Utfärdat i Tranås<br />
Annettu Tranåsissa<br />
Udfærdiget i Tranås<br />
Utstedt i Tranås<br />
Ausgefertigt in Tranås,<br />
Schweden<br />
Issued in Tranås<br />
Fait à Tranås<br />
Gepubliceerd in Tranås<br />
Rilasciata a Tranås<br />
Emitido en Tranås<br />
Publicado em Tranås<br />
Wydano w Tranås<br />
Выдано в Траносе<br />
Vydáno v Tranåsu<br />
Kibocsátva Tranåsban<br />
Izdano v Tranås<br />
Declaração de conformidade da CE<br />
Deklaracja zgodności EC<br />
Декларация EC о соответствии<br />
Deklarace shody s EU<br />
EK megfelelőségi nyilatkozat<br />
2003-10-29<br />
Izjava ES o skladnosti<br />
Este producto respeta las siguientes normas:<br />
- Directiva 89/336/CEE sobre compatibilidad electromagnética<br />
- Directiva 98/37/CEE sobre máquinas, especialmente su anexo 1 sobre los<br />
requisitos esenciales de seguridad y de salud relativos a la fabricación de las<br />
máquinas<br />
- Directiva 2000/14/CE relativa a las emisiones sonoras<br />
Referente a standards armonizados:<br />
- EN 836, EN 292-2, EN 1033, EN ISO 3767, EN ISO 14982<br />
Este produto está em conformidade com<br />
- Directiva sobre Compatibilidade Electromagnética 89/336/CEE<br />
- Directiva relativa às Máquinas 98/37/CEE com referência especial ao<br />
apêndice 1 da directiva referente aos requisitos essenciais de saúde e<br />
segurança em conjunto com os de fabrico.<br />
- Directiva sobre Emissão de Ruído 2000/14/CE<br />
Referencias à normas harmonizadas:<br />
- EN 836, EN 292-2, EN 1033, EN ISO 3767, EN ISO 14982<br />
Ten produkt odpowiada następującym normom:<br />
- Kompatybilność elektromagnetyczna - dyrektywa 89/336/EEC<br />
- Maszyny - dyrektywa 98/37/EEC, a szczególnie dodatkiem 1 dyrektywy,<br />
dotyczącym podstawowych wymogów w zakresie zdrowia i<br />
bezpieczeństwa w związku z produkcją.<br />
-Emisja hałasu - dyrektywa 2000/14/EC<br />
W odniesieniu do norm harmonizujących:<br />
- EN 836, EN 292-2, EN 1033, EN ISO 3767, EN ISO 14982<br />
Tento výrobek vyhovuje<br />
- Smernici o elektromagnetické kompatibilite 89/336/EEC<br />
- Smernici o strojních zarízeních 98/37/EEC se speciálním odkazem na<br />
prílohu 1 uvedené smernice týkající se duležitých požadavku na ochranu<br />
zdraví a bezpecnost v souvislosti s výrobou<br />
- Smernici o emisích hluku 2000/14/EC<br />
Použité harmonizované normy:<br />
- EN 836, EN 292-2, EN 1033, EN ISO 3767, EN ISO 14982<br />
Ta izdelek je v skladu z<br />
- Direktivo 89/336/EGS o elektromagnetni zdru_ljivosti<br />
- Direktivo 98/37/EGS o strojih, s posebnim sklicevanjem na njen Dodatek<br />
1 v zvezi z osnovnimi zdravstvenimi in varnostnimi zahtevami, skupaj s<br />
proizvodnjo<br />
- Direktivo 2000/14/ES o emisijah hrupa<br />
Hivatkozás a harmonizált szabványokra:<br />
- EN 836, EN 292-2, EN 1033, EN ISO 3767, EN ISO 14982<br />
Mats Antonsson<br />
Certifieringsansvarig<br />
Sertifioinnista vastaava<br />
Certificeringsansvarlig<br />
Sertifiseringsansvarlig<br />
Für die Zertifizierung<br />
verantwortlich<br />
Certification Manager<br />
Directeur de Certification<br />
Certification Manager<br />
Direttore Certificazione<br />
Responsable de<br />
certificación<br />
Director de Certificação<br />
Kierownik ds. legalizacji<br />
Начальник службы<br />
сертификации<br />
Vedoucí pro certifikaci<br />
A tanúsításért felelős igazgató<br />
Poslovodja za izdajo<br />
certifikatov
www.stiga.com<br />
GGP Sweden AB · Box 1006 · SE-573 28 TRANÅS