User guide dcx3400 high-definition dvr - Cox Communications
User guide dcx3400 high-definition dvr - Cox Communications
User guide dcx3400 high-definition dvr - Cox Communications
Create successful ePaper yourself
Turn your PDF publications into a flip-book with our unique Google optimized e-Paper software.
USER GUIDE<br />
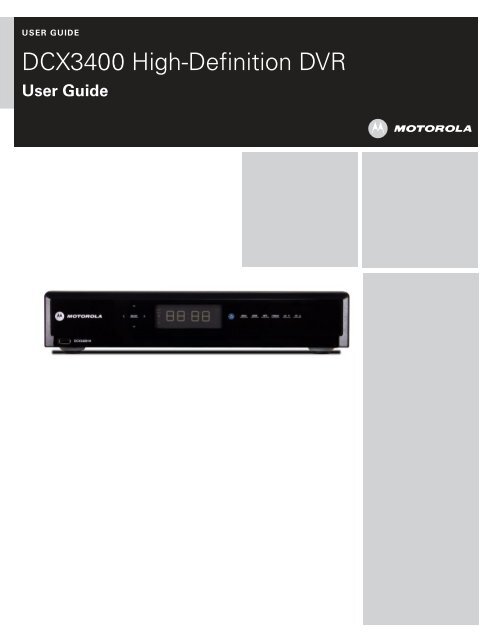
DCX3400 High-Definition DVR<br />
<strong>User</strong> Guide
IMPORTANT SAFETY INSTRUCTIONS<br />
• Read these instructions.<br />
• Keep these instructions.<br />
• Heed all warnings.<br />
• Follow all instructions.<br />
• Do not use this apparatus near water.<br />
• Clean only with dry cloth.<br />
• Do not block any ventilation openings. Install in accordance with the manufacturers instructions.<br />
• Do not install near any heat sources such as radiators, heat registers, stoves, or other apparatus<br />
(including amplifiers) that produce heat.<br />
• Do not defeat the safety purpose of the polarized or grounding-type plug. A polarized plug has two<br />
blades with one wider than the other. A grounding type plug has two blades and a third grounding<br />
prong. The wide blade or the third prong is provided for your safety. If the provided plug does not fit<br />
into your outlet, consult an electrician for replacement of the obsolete outlet.<br />
• Protect the power cord from being walked on or pinched particularly at plugs, convenience receptacles,<br />
and the point where they exit from the apparatus.<br />
• Only use attachments/accessories specified by the manufacturer.<br />
• Unplug this apparatus during lightning storms or when unused for long periods of time.<br />
• Refer all servicing to qualified service personnel. Servicing is required when the apparatus has been<br />
damaged in any way, such as the power-supply cord or plug is damaged, liquid has been spilled or<br />
objects have fallen into the apparatus, the apparatus has been exposed to rain or moisture, does not<br />
operate normally, or has been dropped.<br />
IMPORTANT SAFETY CONSIDERATIONS<br />
The DCX3400 set-top requires careful handling to avoid potential damage to its internal hard disk drive or<br />
the loss of recorded data. Be sure to follow these requirements during transportation and installation.<br />
The plug is the main disconnect device. It shall remain readily accessible and operable.<br />
The apparatus shall not be exposed to dripping or splashing and no objects filled with liquids, such as vases,<br />
shall be placed on the apparatus.<br />
During Transportation to the Subscriber Home<br />
Transport the cable terminal in its shipping box or an equally padded container.<br />
Do not expose the terminal to rain or moisture.<br />
i
During Installation<br />
• Do not place the terminal in an enclosed area where the cooling vents are blocked or impede the flow<br />
of air through the ventilation openings.<br />
• Install the terminal so that its position does not interfere with its proper ventilation. For example, do not<br />
place the terminal on a bed, sofa, rug, or similar surface that could block the ventilation openings.<br />
• Install the terminal away from heat sources such as radiators, heat registers and stoves. Installation of<br />
the terminal near consumer electronics devices, such as stereo receiver/amplifiers and televisions, is<br />
permitted as long as the air surrounding the terminal does not exceed 40º C (104º F).<br />
• Place the terminal on a flat surface not prone to vibration or impact.<br />
• Do not install the terminal in an area where condensation occurs.<br />
• To prevent the temporary loss of <strong>guide</strong> data and cause a temporarily non-responding terminal, do not<br />
plug the AC power cord into a switched power outlet.<br />
• To avoid shock and vibration damage to the internal hard drive, do not move the terminal while it is<br />
plugged in.<br />
• To allow the hard drive to spin down and park its heads, wait at least 10 seconds after disconnecting<br />
power before moving the terminal.<br />
FCC COMPLIANCE<br />
Note: This equipment has been tested and found to comply with the limits for a Class B digital device,<br />
pursuant to part 15 of the FCC Rules. These limits are designed to provide reasonable protection against<br />
harmful interference in a residential installation. This equipment uses and can radiate radio frequency<br />
energy and, if not installed and used in accordance with the instructions, may cause harmful interference to<br />
radio communications. However, there is no guarantee that interference will not occur in a particular<br />
installation. If this equipment does cause harmful interference to radio or television reception, which can be<br />
determined by turning the equipment off and on, the user is encouraged to try to correct the interference<br />
by one or more of the following measures:<br />
• Reorient or relocate the receiving antenna.<br />
• Increase the separation between the equipment and set-top.<br />
• Connect the equipment into an outlet on a circuit different from that to which the set-top is connected.<br />
• Consult the dealer or an experienced radio/TV technician for help.<br />
Caution: Changes or modifications not expressly approved by Motorola for compliance could void the<br />
user’s authority to operate the equipment.<br />
This device complies with part 15 of the FCC Rules. Operation is subject to the following two conditions: (1)<br />
This device may not cause harmful interference, and (2) this device must accept any interference received,<br />
including interference that may cause undesired operation.<br />
ii
FCC DECLARATION OF CONFORMITY<br />
Motorola Inc., Home & Network Mobility, 101 Tournament Drive, Horsham, PA 19044, 1-215-323-1000,<br />
declares that the DCX 3400 set-top complies with 47 CFR Parts 2 and 15 of the FCC rules as a Class B<br />
digital device.<br />
Canada Industry Canada (IC)<br />
This Class B digital device complies with Canadian ICES-003.<br />
Cet appareil numérique de la classe B est conforme à la norme NMB-003 du Canada.<br />
CARING FOR THE ENVIRONMENT BY RECYCLING<br />
When you see this symbol on a Motorola product, do not dispose of the product<br />
with residential or commercial waste.<br />
Recycling your Motorola Equipment<br />
Please do not dispose of this product with your residential or commercial waste.<br />
Some countries or regions, such as the European Union, have set up systems to<br />
collect and recycle electrical and electronic waste items. Contact your local<br />
authorities for information about practices established for your region. If<br />
collection systems are not available, call Motorola Customer Service for<br />
assistance.<br />
iii
SOFTWARE LICENSE<br />
IMPORTANT: PLEASE READ THIS SOFTWARE LICENSE (“LICENSE”) CAREFULLY BEFORE YOU USE<br />
ANY SOFTWARE, FIRMWARE AND RELATED DOCUMENTATION (“SOFTWARE”) PROVIDED WITH<br />
MOTOROLA’S DIGITAL CABLE RECEIVER OR HOME THEATER SYSTEM (EACH SHALL BE REFERRED<br />
TO IN THIS LICENSE AS A “RECEIVER”). BY USING THE RECEIVER AND/OR USING ANY OF THE<br />
SOFTWARE, YOU INDICATE YOUR ACCEPTANCE OF EACH OF THE TERMS OF THIS LICENSE. UPON<br />
ACCEPTANCE, THIS LICENSE WILL BE A LEGALLY BINDING AGREEMENT BETWEEN YOU AND<br />
MOTOROLA. THE TERMS OF THIS LICENSE APPLY TO YOU AND TO ANY SUBSEQUENT USER OF THIS<br />
SOFTWARE.<br />
IF YOU DO NOT AGREE TO ALL OF THE TERMS OF THIS LICENSE (I) DO NOT USE THE SOFTWARE<br />
AND (II) RETURN THE RECEIVER AND THE SOFTWARE (COLLECTIVELY, “PRODUCT”), INCLUDING ALL<br />
COMPONENTS, DOCUMENTATION AND ANY OTHER MATERIALS PROVIDED WITH THE PRODUCT, TO<br />
YOUR POINT OF PURCHASE OR SERVICE PROVIDER, AS THE CASE MAY BE, FOR A FULL REFUND.<br />
The Software includes associated media, any printed materials, and any “on-line” or electronic<br />
documentation. Software provided by third parties may be subject to separate end-user license agreements<br />
from the manufacturers of such Software. The Software is never sold. Motorola licenses the Software to<br />
the original customer and to any subsequent licensee for personal use only on the terms of this License.<br />
Motorola and its third party licensors retain the ownership of the Software.<br />
You may:<br />
USE the Software only in connection with the operation of the Product.<br />
TRANSFER the Software (including all component parts and printed materials) permanently to another<br />
person, but only if the person agrees to accept all of the terms of this License. If you transfer the Software,<br />
you must at the same time transfer the Product and all copies of the Software (if applicable) to the same<br />
person or destroy any copies not transferred.<br />
TERMINATE this License by destroying the original and all copies of the Software (if applicable) in whatever<br />
form.<br />
You may not:<br />
(1) Loan, distribute, rent, lease, give, sublicense or otherwise transfer the Software, in whole or in part, to<br />
any other person, except as permitted under the TRANSFER paragraph above. (2) Copy or translate the<br />
<strong>User</strong> Guide included with the Software, other than for personal use. (3) Copy, alter, translate, decompile,<br />
disassemble or reverse engineer the Software, including but not limited to, modifying the Software to make<br />
it operate on non-compatible hardware. (4) Remove, alter or cause not to be displayed, any copyright<br />
notices or startup message contained in the Software programs or documentation. (5) Export the Software<br />
or the Product components in violation of any United States export laws.<br />
The Product is not designed or intended for use in on-line control of aircraft, air traffic, aircraft navigation or<br />
aircraft communications; or in design, construction, operation or maintenance of any nuclear facility.<br />
MOTOROLA AND ITS THIRD PARTY LICENSORS DISCLAIM ANY EXPRESS OR IMPLIED WARRANTY OF<br />
FITNESS FOR SUCH USES. YOU REPRESENT AND WARRANT THAT YOU SHALL NOT USE THE<br />
PRODUCT FOR SUCH PURPOSES.<br />
Title to this Software, including the ownership of all copyrights, mask work rights, patents, trademarks and<br />
all other intellectual property rights subsisting in the foregoing, and all adaptations to and modifications of<br />
the foregoing shall at all times remain with Motorola and its third party licensors. Motorola retains all rights<br />
not expressly licensed under this License. The Software, including any images, graphics, photographs,<br />
animation, video, audio, music and text incorporated therein is owned by Motorola or its third party<br />
licensors and is protected by United States copyright laws and international treaty provisions. Except as<br />
otherwise expressly provided in this License, the copying, reproduction, distribution or preparation of<br />
derivative works of the Software, any portion of the Product or the documentation is strictly prohibited by<br />
such laws and treaty provisions. Nothing in this License constitutes a waiver of Motorola’s rights under<br />
United States copyright law.<br />
iv
This License and your rights regarding any matter it addresses are governed by the laws of the<br />
Commonwealth of Pennsylvania, without reference to conflict of laws principles. THIS LICENSE SHALL<br />
TERMINATE AUTOMATICALLY if you fail to comply with the terms of this License.<br />
Motorola is not responsible for any third party software that is provided as a bundled application, or<br />
otherwise, with the Software or that is downloaded to, or otherwise installed on, the Product.<br />
U.S. GOVERNMENT RESTRICTED RIGHTS<br />
The Product and documentation is provided with RESTRICTED RIGHTS. The use, duplication or disclosure<br />
by the Government is subject to restrictions as set forth in subdivision (c)(1)(ii) of The Rights in Technical<br />
Data and Computer Software clause at 52.227-7013. The contractor/manufacturer is Motorola, Inc., Home<br />
& Network Mobility, 101 Tournament Drive, Horsham, PA 19044.<br />
© 2008 Motorola, Inc. All rights reserved. No part of this publication may be reproduced in any form or by<br />
any means or used to make any derivative work (such as translation, transformation, or adaptation) without<br />
written permission from Motorola, Inc.<br />
MOTOROLA and the Stylized M logo are registered in the US Patent and Trademark Office. CableCARD TM ,<br />
M-Card TM , and DOCSIS ® are trademarks or registered trademarks of Cable Television Laboratories, Inc.<br />
HDMI, the HDMI Logo and High-Definition Multimedia Interface are trademarks or registered trademarks of<br />
JDMI Licensing LLC. Manufactured under license from Dolby Laboratories. “Dolby,” “Pro Logic,” and the<br />
double-D symbol are trademarks of Dolby Laboratories. Dolby is a trademark of Dolby Laboratories.<br />
Macrovison is a registered trademark of Macrovision Corporation. All other product or service names are<br />
the property of their respective owners. All rights reserved.<br />
© Copyright 2008 Multimedia over Coax Alliance. All Rights Reserved. MoCA and the MoCA logo is a<br />
trademark of Multimedia over Coax Alliance. The Multimedia over Coax Alliance (MoCA),<br />
www.mocalliance.org, is an open, standard body promoting networking of digital video and entertainment<br />
through existing coaxial cable in the home.<br />
Motorola reserves the right to revise this publication and to make changes in content from time to time<br />
without obligation on the part of Motorola to provide notification of such revision or change. Motorola<br />
provides this <strong>guide</strong> without warranty of any kind, implied or expressed, including, but not limited to, the<br />
implied warranties of merchantability and fitness for a particular purpose. Motorola may make<br />
improvements or changes in the product(s) described in this manual at any time.<br />
v
CONTENTS<br />
1 Introduction .................................................................................................................................................................. 1<br />
Front Panel................................................................................................................................................................ 2<br />
Rear Panel ................................................................................................................................................................ 3<br />
2 Operation....................................................................................................................................................................... 5<br />
Turning Power On and Off ...................................................................................................................................... 5<br />
Changing Channels ................................................................................................................................................. 5<br />
Adjusting the Volume .............................................................................................................................................. 5<br />
Interactive Program Guide..................................................................................................................................... 5<br />
Front Panel Format Button ..................................................................................................................................... 6<br />
Operation........................................................................................................................................................... 6<br />
Video Format Indicators (Front Panel Display)............................................................................................ 6<br />
M-Card................................................................................................................................................................... 7<br />
3 Digital Video Recorder (DVR)..................................................................................................................................... 9<br />
The DVR..................................................................................................................................................................... 9<br />
4 Connecting Your DCX Set-top .................................................................................................................................. 11<br />
Video Connection Options.................................................................................................................................... 12<br />
Connecting HDTV — Single Connection for Video/Audio............................................................................... 13<br />
Cable In............................................................................................................................................................ 13<br />
HDMI ................................................................................................................................................................ 13<br />
IEEE-1394 ......................................................................................................................................................... 13<br />
Connecting Your DCX Set-top to an HDTV — Single Connection for Video/Audio..................................... 14<br />
Connecting HDTV — Separate Video/Audio Connections ............................................................................. 15<br />
Cable In............................................................................................................................................................ 15<br />
DVI .................................................................................................................................................................... 15<br />
Component Video (YPbPr)............................................................................................................................. 15<br />
Audio ................................................................................................................................................................ 15<br />
Connecting Your DCX Set-top to an HDTV — Separate Video/Audio ........................................................... 16<br />
Connecting Your DCX Set-top to an HDTV — Alternate Audio ...................................................................... 17<br />
Connecting an A/V Receiver — Audio............................................................................................................... 18<br />
Connecting Your DCX Set-top to an A/V Receiver — Audio........................................................................... 19<br />
Connecting an SDTV ............................................................................................................................................. 20<br />
Connecting Your DCX Set-top to an SDTV......................................................................................................... 21<br />
Connecting an SDTV and VCR/DVD Recorder .................................................................................................. 22<br />
Connecting Your DCX Set-top to an SDTV and VCR/DVD Recorder.............................................................. 23<br />
Connecting an A/V Receiver, SDTV, and VCR/DVD Recorder......................................................................... 24<br />
Connecting Your DCX Set-top to an A/V Receiver, SDTV, and VCR/DVD Recorder ...................................... 25<br />
5 Recording Your Connections.................................................................................................................................... 26<br />
vii
CONTENTS<br />
Data Devices .......................................................................................................................................................... 27<br />
Data Features......................................................................................................................................................... 27<br />
6 On-Screen Graphics.................................................................................................................................................. 28<br />
7 Configuring the Audio, Video, and Closed Caption Settings ............................................................................... 29<br />
8 Troubleshooting.......................................................................................................................................................... 39<br />
viii
1 INTRODUCTION<br />
Congratulations on receiving a Motorola DCX3400 Series High-Definition All-Digital Dual<br />
Tuner Cable Set-top, one of the most advanced interactive digital cable set-tops available<br />
today. Motorola has merged the extraordinary features of digital cable — the seemingly<br />
endless programming options, interactive program <strong>guide</strong>s, Video on Demand (VOD), and<br />
commercial-free, CD quality music — with the flexibility of a dual tuner-digital video<br />
recorder (DVR) and the incredible picture quality and sound of High-Definition TV (HDTV).<br />
This set-top includes an “Entertainment Package” that enables a direct digital<br />
connection to consumer audio and video devices through IEEE-1394 and HDMI <br />
interfaces. The set-top is fully equipped with a factory-installed hard drive for hours of<br />
DVR functionality, which includes the capability of recording two <strong>high</strong>-<strong>definition</strong> (HD)<br />
programs, or watching one while recording another.<br />
This <strong>User</strong> Guide introduces you to the basic features, outlines important safeguards, and<br />
provides several options for integrating this component into your current entertainment<br />
system. Please take a few moments to read through this <strong>User</strong> Guide; the configuration<br />
diagrams, on-screen menu description, and troubleshooting section will help you make<br />
the most of your home entertainment experience.<br />
To determine which features of digital cable are provided in your service area, please<br />
check with your local cable operator. They will be happy to provide instructions for these<br />
optional services.<br />
Features<br />
• All-Digital Dual-Tuner High Definition DVR M-Card Host<br />
o Dual tuners support watch and record mode<br />
• Dual Advanced A/V High-Definition decode<br />
• Integrated MoCA networking (Only available with the DCX3400-M model)<br />
• HDMI, Component, IEEE-1394, S-Video, Composite, RF remod, Digital Audio<br />
(S/PDIF), Audio L/R, Ethernet, USB, eSATA<br />
• 1080p 24/30 video decode & output support<br />
1
1 INTRODUCTION<br />
Front Panel<br />
1 USB 2.0 High-Speed connector<br />
2 Cursor — Menu navigation<br />
Select — Selects menu options<br />
3 Power — Turns the set-top on and off (standby)<br />
4 Menu — Displays the menu<br />
5 Guide — Displays the program <strong>guide</strong><br />
6 Info — Displays current channel and program information<br />
7 Format * — Change the video output format<br />
8 Channel — Changes channel up or down<br />
* Availability of certain features is dependent upon application support.<br />
2
1 INTRODUCTION<br />
Rear Panel<br />
1 Cable In — Connects to cable signal from your service provider<br />
2 RF Out — Ch 3/4 modulated audio/video (SDTV) to TV or VCR<br />
3 IEEE-1394 — Audio and video device connection<br />
4 Video outputs / YPbPr — Component video output (HDTV)<br />
5 Audio Out — L/R audio (SDTV)<br />
6 Audio Out — Variable L/R audio (SDTV)<br />
7 Digital Audio (Coaxial S/PDIF) — Provides Dolby ® Digital Plus or PCM output<br />
Digital Audio (Optical S/PDIF) — Provides Dolby ® Digital Plus or PCM output<br />
8 Video Out — Composite Video (SDTV)<br />
9 S-Video — Connects to S-Video (SDTV) input of TV or VCR<br />
10 M-Card — Inserted M-Card<br />
11 HDMI — High-Definition TV (HDTV) connector<br />
12 eSATA* — External Serial ATA disk interface<br />
13 USB* 2.0 — High-Speed peripheral device connection<br />
14 External IR Input — Connects to a remote control set-top accessory cable<br />
Data test connector (service personnel only)<br />
15 Ethernet* — Network connection<br />
16 Power connector<br />
* Availability of certain features is dependent upon application support.<br />
3
2 OPERATION<br />
Turning Power On and Off<br />
Press POWER on the front panel or remote control to turn the DCX set-top on or off<br />
(standby). When using the remote control, be sure it is in cable mode by pressing CABLE<br />
before pressing POWER. When using the front panel please note that the front panel<br />
buttons are touch-sensitive, so simply touch the POWER icon to turn on the set-top.<br />
Changing Channels<br />
You can change channels in three ways:<br />
• Press CHANNEL + or – on the front panel of the DCX set-top or the remote control to<br />
step through the channel selection.<br />
• Enter the number of the channel you wish to view using the number keys on the<br />
remote control.<br />
• Select the channel in the Interactive Program Guide.<br />
Adjusting the Volume<br />
Press VOLUME + or – on the remote control to adjust the volume. When you adjust the<br />
volume, the volume scale is displayed on the screen. Press MUTE on the remote control<br />
to toggle the sound on and off.<br />
For best audio quality when using the analog L/R (var.) volume controlled audio outputs,<br />
use the remote control to set the DCX set-top to approximately three quarters of the<br />
maximum volume level and then adjust the audio levels on external devices such as your<br />
TV or A/V receiver.<br />
When using the analog L/R (fixed) audio outputs or any of the digital audio outputs<br />
(HDMI, IEEE-1394, optical or coaxial digital audio) adjust the audio levels on your<br />
external device such as your TV or A/V receiver. You may also be able to program your<br />
remote to control the volume of your TV or A/V receiver directly (refer to the remote<br />
control instruction manual).<br />
Interactive Program Guide<br />
The Interactive Program Guide displays information about TV programs and enables you<br />
to access features such as Parental Control or Pay-Per-View. Interactive program <strong>guide</strong>s<br />
can vary with each cable service provider. Refer to the Interactive Program Guide’s<br />
instruction manual for detailed instructions.<br />
5
2 OPERATION<br />
Front Panel Format Button<br />
The Format button located on the front panel of the DCX3400 set-top allows you to<br />
quickly change the video output format used by the Component Video (YPbPr) and<br />
HDMI outputs. The DCX3400 set-top is capable of providing the following video formats<br />
on the YPbPr and HDMI video outputs:<br />
• High Definition 1080i (1920 x 1080 pixels)<br />
• High Definition 720p (1280 x 720 pixels)<br />
• Enhanced Definition 480p (720 x 480 pixels)<br />
• Standard Definition 480i (720 x 480 pixels)<br />
The DCX3400 set-top is also capable of passing through High-Definition 1080p 24/30<br />
(1920 x 1080 pixels) source content over the HDMI video output.<br />
The Format button is intended to allow you to select a video output format that is<br />
compatible with a connected display device. Some televisions may not support all four<br />
video formats listed above. The Format button provides an easy method for selecting an<br />
output format that is compatible with your television.<br />
Operation<br />
The Format button is intended to complement the <strong>User</strong> Settings Menu (see<br />
CONFIGURING THE AUDIO, VIDEO, AND CLOSED CAPTION SETTINGS). It is not intended to<br />
replace the <strong>User</strong> Settings Menu. The <strong>User</strong> Settings Menu is the preferred method of<br />
optimizing the DCX set-top to operate with your specific television.<br />
If you cannot get a video display when the DCX set-top is connected to your television<br />
via component video or standard HDMI cables, use the Format button to select a video<br />
output format that results in a viewable picture on the display screen. Once a viewable<br />
picture is available, please use the <strong>User</strong> Settings Menu to optimize the DCX3400 set-top<br />
display settings for your specific television.<br />
Video Format Indicators (Front Panel Display)<br />
The front panel display of the DCX3400 set-top is equipped with indicators to the right<br />
hand side of the display that are used to indicate the currently-selected video output<br />
format on the component video (YPbPr) and HDMI outputs. As the Format button is<br />
depressed, the front panel format indicators will change to illuminate the currently<br />
selected video output format in use by the DCX set-top.<br />
Note: There are some scenarios where the DCX set-top does not change the video<br />
output format if the Format button is depressed. In these scenarios, the DCX3400 settop<br />
will flash the currently illuminated video format indicator on the front panel display. If<br />
this should occur, please use the <strong>User</strong> Settings Menu to make further changes to the<br />
video output settings of the DCX3400 set-top.<br />
Note: Availability of certain features is dependent upon application support.<br />
6
2 OPERATION<br />
M-Card<br />
The M-Card is required to view cable television programs, previously recorded programs<br />
on the DVR, or interactive on-demand programs. The M-Card should not be removed.<br />
7
3 DIGITAL VIDEO RECORDER (DVR)<br />
The DVR<br />
The DCX3400 set-top is equipped with an internal hard drive for DVR (Digital Video<br />
Recorder) functionality, which provides the ability to record both Standard-Definition TV<br />
(SDTV) and High-Definition TV (HDTV) programs. Storage time varies based on the video<br />
format and specific channel.<br />
DVR offers the ability to control your viewing experience by pausing (time shifting) live<br />
TV and providing trick playback modes (pause, fast forward, slow forward, fast rewind,<br />
slow rewind). You may experience a slight delay when switching between time-shifted<br />
and live TV.<br />
The DCX3400-M model also includes integrated MoCA networking which supports<br />
whole-home DVR capabilities. This feature extends the DVR experience to DCX3200-M<br />
or other compatible non-DVR set-tops with integrated MoCA, when enabled by<br />
application software. On your non-DVR set-top you can now view your DVR recordings,<br />
playback content, and set future recordings all from another room in your home.<br />
With the DCX3400 set-top, you can:<br />
Record Programming. The total hours of recorded content will vary based on the<br />
storage capacity of your specific DCX model and type of content (digital SD or HD) being<br />
recorded.<br />
Model Drive Size*<br />
DCX3400<br />
Standard Digital<br />
Channels<br />
Estimated Recording Hours<br />
160 GB 55 to 100 14 to 21<br />
250 GB 80 to 150 20 to 30<br />
320 GB 110 to 210 30 to 45<br />
HDTV Channels<br />
*These capacities are based on recording digital MPEG-2 video. A recording of a video<br />
program that is broadcast in digital MPEG-4 format requires approximately half the disk<br />
space.<br />
Maintain a Personal Program Library. Accessed by using the Interactive Program<br />
Guide (IPG).<br />
Control Live TV. Pause, rewind, and fast-forward live TV.<br />
Simultaneously Watch Two Programs. Watch two programs and easily switch<br />
between them using the swap key on your remote control. (Dependent upon program<br />
<strong>guide</strong> support and provided remote control.)<br />
Simultaneous Watch and Record. Record one program in the background while<br />
viewing another live broadcast at the same time.<br />
Simultaneously Record Two Shows. Record two programs from two different<br />
channels at the same time.<br />
9
3 DIGITAL VIDEO RECORDER (DVR)<br />
Simultaneously Record Two Shows and Watch a Recorded Program. Watch a<br />
program recorded on your DVR while recording up to two other programs at the same<br />
time. You can also easily switch from viewing the pre-recorded program and either of the<br />
programs you’re recording.<br />
Play Recorded Programming On Networked Set-Tops In Your Home. Using<br />
integrated MoCA networking, DCX3400-M recorded entertainment can be accessed by<br />
other compatible non-DVR set-tops with integrated MoCA, when enabled by application<br />
software.<br />
10
4 CONNECTING YOUR DCX SET-TOP<br />
Instructions and diagrams are included for the following connections:<br />
• High-Definition Television (HDTV)<br />
• A/V receiver — Audio<br />
• Standard-Definition TV (SDTV)<br />
• Standard-Definition TV (SDTV) and VCR/DVD Recorder<br />
• A/V receiver, Standard-Definition TV (SDTV), and VCR/DVD Recorder<br />
Before you move or change components on your entertainment system, review the<br />
following:<br />
• For basic cable connections, use 75-ohm coaxial cables equipped with F-type<br />
connectors.<br />
• Disconnect power from your equipment before connecting or changing cable<br />
connections.<br />
For information on connecting to an HDTV, see Video Connection Options on the next<br />
page.<br />
CAUTION!<br />
Do not place anything on top of your DCX set-top, especially other home entertainment<br />
components. Be sure to provide adequate ventilation to prevent overheating.<br />
11
4 CONNECTING YOUR DCX SET-TOP<br />
Video Connection Options<br />
The DCX set-top offers several different video connection options. Component video,<br />
HDMI, and IEEE-1394 allow you to view both High-Definition and Standard-Definition TV<br />
programming. Composite video, S-Video, and RF coaxial connections allow you to view<br />
only Standard-Definition TV programming. HD programming will be down-converted to<br />
SD format for SD outputs.<br />
To determine whether your TV features component video, HDMI, IEEE-1394, S-Video, or<br />
composite video, check the manual supplied with your TV.<br />
Use the <strong>guide</strong>lines below to determine the best video connection for your home<br />
entertainment system.<br />
Note: Only (1) video connection to the TV is required. HD video can only be viewed with<br />
HDMI, IEEE-1394, or component video connections.<br />
• HDMI or IEEE-1394 — HDTV and SDTV<br />
HDMI and IEEE-1394 offer <strong>high</strong>er quality HD video than component video.<br />
If your TV has an HDMI input, this is for both audio and video. Connect a Standard<br />
HDMI cable to the TV and to the HDMI connector on your DCX set-top.<br />
HDMI and IEEE-1394 outputs provide video and audio, so no separate audio<br />
connections are required if you plan to use your TV’s speakers as the primary audio<br />
source.<br />
On screen graphics will not be displayed when you are using the IEEE-1394<br />
connection on the rear panel of the DCX set-top. Refer to Section 6 for more<br />
information.<br />
If your TV has a DVI input, connect a HDMI-to-DVI adapter or cable to the HDMI out<br />
connector on the DCX set-top and the DVI-HDTV connector on your TV.<br />
Note: DVI does not provide audio. A separate audio connection must be made.<br />
• Component video (YPbPr) — HDTV and SDTV<br />
The YPbPr connectors on your DCX set-top provide HDTV and SDTV component<br />
video.<br />
Note: Component video does not provide audio. A separate audio connection must<br />
be made.<br />
• S-Video — SDTV<br />
If a component video input is not available on your TV, use the S-Video connection.<br />
Note: S-Video does not provide audio. A separate audio connection must be made.<br />
12
4 CONNECTING YOUR DCX SET-TOP<br />
• Composite video (also referred to as Video) — SDTV<br />
If an S-Video input is not available on your TV, use the composite video (video)<br />
connection.<br />
Note: Composite video does not provide audio. A separate audio connection must<br />
be made.<br />
• RF Output — SDTV<br />
If no other input is available on your TV, the RF Output of the DCX3400 set-top can<br />
be connected to the Antenna or Cable Input on your TV. The RF Output carries both<br />
video and audio. Set your TV to channel 3 or 4.<br />
Connecting HDTV — Single Connection for Video/Audio<br />
Cable In<br />
Connect an RF coaxial cable to the cable wall outlet and the CABLE IN connector on the<br />
DCX set-top.<br />
HDMI<br />
If your TV has an HDMI input, this is for both audio and video if you are using the TV<br />
speakers. Connect a Standard HDMI cable to the TV and to the HDMI connector on your<br />
DCX set-top.<br />
IEEE-1394<br />
If your HDTV has an IEEE-1394 connector, you can use the IEEE-1394 for both your<br />
video and audio connection. Connect an IEEE-1394 cable to the IEEE-1394 connector on<br />
your HDTV and DCX set-top.<br />
Note: On-screen graphics will not be displayed when you are using the IEEE-1394<br />
connection on the rear panel of the DCX set-top. Refer to Section 6 for more<br />
information.<br />
If you have an audio/video receiver and are not using your TV’s speakers, go to<br />
Connecting Your DCX Set-top to an A/V Receiver – Audio.<br />
13
4 CONNECTING YOUR DCX SET-TOP<br />
Connecting Your DCX Set-top to an HDTV — Single Connection for Video/Audio<br />
Note: Only (1) HDTV video/audio connection needs to be made to an HDTV.<br />
Note: On-screen graphics will not be displayed when using IEEE-1394 connection. Refer<br />
to Section 6 for more information.<br />
Note: Solid lines indicate optimum connections.<br />
Note: Optional HDMI connection to A/V Receiver shown but not required.<br />
14
4 CONNECTING YOUR DCX SET-TOP<br />
Connecting HDTV — Separate Video/Audio Connections<br />
Cable In<br />
DVI<br />
Connect an RF coaxial cable to the cable wall outlet and the CABLE IN connector on the<br />
DCX set-top.<br />
If your TV has a DVI input, use the DVI connection for your video, connect a HDMI-to-DVI<br />
adapter or cable to the HDMI out connector on the DCX set-top and the DVI-HDTV<br />
connector on your TV.<br />
Note: A DVI connection supports only the video connection between the DCX set-top<br />
and the HDTV.<br />
To connect your audio connections with your TV speakers, go to Audio section below.<br />
To connect your audio connections for an A/V receiver, go to Connecting Your DCX Set-top<br />
to an A/V Receiver — Audio.<br />
Component Video (YPbPr)<br />
Connect the component video cables to the Y, Pb, and Pr connectors on your HDTV and<br />
DCX set-top.<br />
Audio<br />
Note: This connection supports only the <strong>high</strong>-<strong>definition</strong> video connection between the<br />
DCX set-top and the HDTV.<br />
Note: Be sure to match up each signal to the same connection on the TV, otherwise the<br />
colors will not appear correctly on your TV.<br />
To connect your audio connections with your TV speakers, go to Audio section below.<br />
To connect your audio connections for an A/V receiver, go to Connecting Your DCX Set-top<br />
to an A/V Receiver — Audio.<br />
If your TV does not have digital audio inputs, connect the stereo audio cable to the<br />
AUDIO L/R connectors on the DCX3400 set-top and the AUDIO L/R connectors on the<br />
HDTV.<br />
If your TV supports a digital audio inputs, use the digital audio OPTICAL S/PDIF or<br />
COAXIAL S/PDIF outputs instead of the AUDIO L/R outputs. In most cases, S/PDIF offers<br />
better audio quality, including support for Dolby ® Digital Plus audio.<br />
For information on configuring your DCX set-top settings, go to Configuring the Audio,<br />
Video, and Closed Caption Settings.<br />
15
4 CONNECTING YOUR DCX SET-TOP<br />
Connecting Your DCX Set-top to an HDTV — Separate Video/Audio<br />
Note: Only (1) video connection and (1) audio connection needs to be made to an HDTV.<br />
Note: HDMI-to-DVI adapter is not included with the set-top.<br />
Note: Solid lines indicate optimum connections.<br />
16
4 CONNECTING YOUR DCX SET-TOP<br />
Connecting Your DCX Set-top to an HDTV — Alternate Audio<br />
Note: Only (1) audio connection needs to be made to an HDTV.<br />
Note: Solid lines indicate optimum connections.<br />
17
4 CONNECTING YOUR DCX SET-TOP<br />
Connecting an A/V Receiver — Audio<br />
There are several options available for audio connections to your A/V receiver:<br />
• Digital audio (OPTICAL S/PDIF)<br />
• Digital audio (COAXIAL S/PDIF)<br />
• Stereo audio (AUDIO L/R)<br />
If your A/V receiver supports it, the optical (S/PDIF) or coaxial (S/PDIF) digital audio<br />
outputs may be used in place of the stereo audio outputs (AUDIO L/R). In most cases<br />
these outputs offer a <strong>high</strong>er level of audio quality, including support for Dolby Digital Plus<br />
audio.<br />
• Digital audio optical (S/PDIF) — Connect the optical cable to the digital audio<br />
optical connector on the DCX set-top and the optical connector on the A/V receiver.<br />
• Digital audio coaxial (S/PDIF) — Connect the digital audio cable to the digital audio<br />
coaxial connector on the DCX set-top and the DIGITAL INPUT COAX connector on<br />
the A/V receiver.<br />
• Stereo audio — Connect the stereo audio cable to the AUDIO L/R connectors on<br />
the DCX set-top and the AUDIO L/R connectors on the A/V receiver.<br />
For information on configuring your DCX set-top settings, see Configuring the Audio, Video,<br />
and Closed Caption Settings.<br />
18
4 CONNECTING YOUR DCX SET-TOP<br />
Connecting Your DCX Set-top to an A/V Receiver — Audio<br />
Note: Only (1) audio connection needs to be made to an A/V Receiver.<br />
Note: Solid lines indicate optimum connections.<br />
19
4 CONNECTING YOUR DCX SET-TOP<br />
Connecting an SDTV<br />
1. Connect the stereo audio cable to the AUDIO L/R connectors on the DCX set-top and<br />
the AUDIO L/R connectors on the Standard-Definition TV (SDTV).<br />
2. Connect an S-Video cable to the S-VIDEO OUT connector on the DCX set-top and<br />
the INPUT S-VIDEO on the TV.<br />
Note: If the TV does not support S-Video connections, composite video connections may<br />
be used in place of S-Video connection.<br />
Note: If the TV does not support S-Video or composite video connections, use the RF<br />
out connector on the DCX set-top. The RF connection carries video and audio.<br />
These video connection methods do not support HD video. If you have an HDTV, see<br />
Connecting HDTV — Single Connection for Video/Audio.<br />
20
4 CONNECTING YOUR DCX SET-TOP<br />
Connecting Your DCX Set-top to an SDTV<br />
Note: S-Video and Composite video require separate audio connections.<br />
Note: Only (1) video connection and (1) audio connection is required.<br />
Note: Solid lines indicate optimum connections.<br />
21
4 CONNECTING YOUR DCX SET-TOP<br />
Connecting an SDTV and VCR/DVD Recorder<br />
1. Connect a stereo audio cable to the AUDIO OUT L/R connectors on the DCX3400<br />
set-top and the INPUT AUDIO L/R connectors on the stereo VCR.<br />
2. Connect a composite video cable to the VIDEO OUT connector on the DCX3400 settop<br />
and the INPUT VIDEO connector on the stereo VCR.<br />
3. Connect a stereo audio cable to the OUTPUT AUDIO L/R connectors on the Stereo<br />
VCR and the INPUT AUDIO L/R connectors on the Standard-Definition TV (SDTV).<br />
4. Connect a composite video cable to the output video connector on the stereo VCR<br />
and the input video connector on the Standard-Definition TV (SDTV).<br />
Note: You can also connect using the S-Video connectors if supported by your VCR/DVD<br />
recorder and SDTV.<br />
These video connection methods do not support HD video. If you have an HDTV, see<br />
Connecting HDTV — Single Connection for Video/Audio.<br />
22
4 CONNECTING YOUR DCX SET-TOP<br />
Connecting Your DCX Set-top to an SDTV and VCR/DVD Recorder<br />
23
4 CONNECTING YOUR DCX SET-TOP<br />
Connecting an A/V Receiver, SDTV, and VCR/DVD Recorder<br />
1. Connect a stereo audio cable to the AUDIO OUT L/R connectors on the DCX set-top<br />
and the INPUT L/R connectors on the A/V receiver.<br />
2. Connect an S-Video cable to the S-Video out connector on the DCX set-top and the<br />
S-Video connector on the A/V receiver.<br />
Note: If your A/V Receiver does not support S-Video connections, Composite video<br />
connections may be used in place of the S-Video connection.<br />
3. Connect a stereo audio cable to the VCR AUDIO OUT L/R connectors on the A/V<br />
receiver and the INPUT AUDIO L/R connectors on the stereo VCR.<br />
4. Connect a stereo audio cable to the OUTPUT AUDIO OUT L/R connectors on the<br />
stereo VCR and the VCR AUDIO IN L/R connectors on the A/V receiver.<br />
5. Connect a composite video cable to the input video connector on the stereo VCR<br />
and the video VCR OUT connector on the A/V receiver.<br />
6. Connect a composite video cable to the output video connector on the stereo VCR<br />
and the video VCR IN connector on the A/V receiver.<br />
7. Connect an S-Video cable to the input S-Video connector on the Standard-Definition<br />
TV (SDTV) and the TV/monitor output S-Video connector on the A/V receiver.<br />
Note: If your TV or A/V receiver does not support S-Video connections, Composite<br />
connections may be used in place of the S-Video connections.<br />
Note: The digital audio optical (OPTICAL S/PDIF) or digital audio (COAXIAL S/PDIF) audio<br />
outputs may be used in place of the stereo audio outputs (AUDIO L/R). In most cases<br />
these outputs offer a <strong>high</strong>er level of audio quality, including support for Dolby Digital Plus<br />
audio.<br />
These video connection methods do not support HD video. If you have an HDTV, see<br />
Connecting HDTV — Single Connection for Video/Audio.<br />
24
4 CONNECTING YOUR DCX SET-TOP<br />
Connecting Your DCX Set-top to an A/V Receiver, SDTV, and VCR/DVD Recorder<br />
Note: Solid lines indicate optimum connections.<br />
Note: Consult your A/V receiver manual for additional wiring options or constraints when<br />
including a VCR/DVD Recorder in your configuration.<br />
25
5 RECORDING YOUR CONNECTIONS<br />
Use this diagram to record connections between your home entertainment<br />
components. You can use this diagram to reconnect your system if you move the<br />
equipment or add new equipment.<br />
Disconnect the power from the DCX set-top before connecting or changing cable<br />
connections. Do not place another component or object on top of the DCX set-top.<br />
26
5 RECORDING YOUR CONNECTIONS<br />
Data Devices<br />
Do not attempt to connect data devices without contacting your service provider.<br />
Advanced data features require the proper application and network infrastructure<br />
to operate.<br />
Data Features<br />
In addition to <strong>high</strong>-quality audio and video, the DCX set-top has the capability to deliver<br />
<strong>high</strong>-speed data services such as Internet access, e-mail, IP telephony, e-commerce,<br />
and home banking.<br />
Note: Your DCX set-top may be equipped with the interface connections illustrated, but<br />
their functionality depends on the services offered by your service provider.<br />
27
6 ON-SCREEN GRAPHICS<br />
Your DCX set-top can generate graphics that overlay the video programming or fill the<br />
entire television screen. Common examples include on-screen menus (such as the <strong>User</strong><br />
Setting menu), closed captions, and interactive program <strong>guide</strong>s. The DCX set-top<br />
overlays these graphics whenever you open a menu, enable closed captions, or scroll<br />
through a program grid.<br />
• On-screen graphics are not available on all video output combinations.<br />
• On-screen graphics will not be displayed when you are using the IEEE-1394<br />
connection on the rear panel of the DCX set-top.<br />
28
7 CONFIGURING THE AUDIO, VIDEO, AND CLOSED CAPTION SETTINGS<br />
The following describes how to configure the audio (for HDMI connections), SD and HD<br />
video settings, and closed caption settings for the DCX3400.<br />
Before you adjust the output settings:<br />
• Connect the DCX3400 to the TV and other home entertainment devices<br />
• Plug the DCX3400 into an AC power outlet<br />
• Initialize the DCX3400 and authorize it for services<br />
• Turn the TV on<br />
When using an HDMI connection between the DCX3400 and the television, be sure to<br />
have the cable connected and the TV powered on before adjusting the video settings.<br />
Motorola recommends using HDMI cables less than 20 meters long.<br />
To configure the DCX3400 settings on the main <strong>User</strong> Settings menu screen:<br />
1. Power off the DCX3400 and then immediately press the MENU key on the front<br />
panel. If the TV is on, the on-screen <strong>User</strong> Settings menu lists the DCX3400 settings<br />
that can be adjusted:<br />
An example of the <strong>User</strong> Settings menu when the HDMI output is connected.<br />
Note: The <strong>User</strong> Settings Menu indicates whenever an HDMI connection is in place<br />
between the DCX3400 and another device.<br />
29
7 CONFIGURING THE AUDIO, VIDEO, AND CLOSED CAPTION SETTINGS<br />
When the HDMI connection is not being used the <strong>User</strong> Settings Menu will update to<br />
reflect this:<br />
An example of the <strong>User</strong> Settings menu when the HDMI output is not connected.<br />
2. Use the remote control or the cursor keys on the front panel to navigate the onscreen<br />
menus:<br />
• Press the ▲ and ▼ keys to <strong>high</strong>light the setting you wish to change.<br />
• Press the ► key to select an option.<br />
• To exit the setting and move to another setting, press the ▲ or ▼ key.<br />
• To exit the menu and save your settings, press the POWER or MENU key.<br />
If the <strong>User</strong> Settings menu does not display on the HDTV screen, the TV may not support<br />
the default video output setting. Use the Format button on the front panel to select a<br />
video output format that can be displayed by the TV as described in “There is no video<br />
on the TV screen” in the Troubleshooting section.<br />
30
7 CONFIGURING THE AUDIO, VIDEO, AND CLOSED CAPTION SETTINGS<br />
The <strong>User</strong> Settings settings options:<br />
Setting Description<br />
TV Type The TV Type allows you to specify the style of television connected to the DCX3400.<br />
Options include 16:9, 4:3 LETTERBOX, and 4:3 PAN SCAN. By default, the 16:9<br />
option is selected. The options are used as follows:<br />
HDMI/YPbPr<br />
Output<br />
• 16:9 designates that a widescreen television is connected to the DCX3400.<br />
• 4:3 LETTERBOX designates that a standard-screen television is connected to<br />
the DCX3400 and that widescreen programs should be scaled to fit the<br />
screen with black bars above and below the picture.<br />
• 4:3 PAN SCAN designates that a standard screen television is connected to<br />
the DCX3400 and that widescreen programs should be cropped so that the<br />
picture fills the entire screen.<br />
The HDMI/YPbPr Output setting allows you to specify the video output format of the<br />
DCX3400 for all programs (when the 4:3 Override setting is set Off or Stretch) or for<br />
all widescreen programs (when the 4:3 Override is set to 480i or 480p). Options<br />
include 1080i, 720p, 480p, 480i, and Native. By default, the 1080i option is selected.<br />
The options are used as follows:<br />
• 1080i — The DCX3400 will present programs in the High-Definition 1080i<br />
format (1920 x 1080 pixels with interlaced scanning at 30 frames per<br />
second).<br />
• 720p — The DCX3400 will present programs in the High-Definition 720p<br />
format (1280 x 720 pixels with progressive scanning at 60 frames per<br />
second).<br />
• 480p — The DCX3400 will present programs in the Enhanced-Definition<br />
480p format (720 x 480 pixels with progressive scanning at 60 frames per<br />
second).<br />
• 480i — The DCX3400 will present programs in the Standard-Definition 480i<br />
format (720 x 480 pixels with interlaced scanning at 30 frames per second).<br />
• Native — The DCX3400 will present programs in the format that most<br />
closely matches their native format according to the compatible formats<br />
selected from the “My TV Supports The Following Formats” list (see below).<br />
1080p 24/30 will be presented natively.<br />
Note 1: Some televisions may only support certain video formats. Please consult the<br />
television’s user manual for more information on video format compatibility.<br />
Note 2: The DCX3400 can detect when the HDMI connection is in use. If you are not<br />
using the HDMI connection on the DCX3400, the “HDMI/YPbPr Output” setting will<br />
display as ”YPbPr Output” in the <strong>User</strong> Settings Menu.<br />
31
7 CONFIGURING THE AUDIO, VIDEO, AND CLOSED CAPTION SETTINGS<br />
Setting Description<br />
4:3 Override The 4:3 Override setting allows you to specify the video output format of the<br />
DCX3400 when it is tuned to a Standard-Definition program or playing back a<br />
Standard- Definition program from the DVR. Options include 480i, 480p, Stretch, and<br />
Off. By default, the 480i option is selected.<br />
The options are used as follows:<br />
• 480i — The DCX3400 will present Standard-Definition programs in the<br />
Standard-Definition 480i format (720 x 480 pixels).<br />
• 480p — The DCX3400 will present Standard-Definition programs in the<br />
Enhanced-Definition 480p format (720 x 480 pixels).<br />
• Stretch — The DCX3400 will automatically stretch all Standard-Definition<br />
programs to a widescreen aspect ratio and present the video in the format<br />
designated by the HDMI/YPbPr Output setting. Note that the Stretch option<br />
is only available when the TV Type setting is 16:9.<br />
• Off — The DCX3400 will create a widescreen version of a Standard-Definition<br />
program by adding black bars to the left and the right of the picture and<br />
present the video in the format designated by the HDMI/YPbPr Output setting.<br />
Note 1: Some televisions may only support certain video formats. Please consult your<br />
television’s user manual for more information on format compatibility.<br />
Note 2: If the HDMI/YPbPr Output setting is set to either 480i or Native, the 4:3<br />
Override feature is disabled and is no longer selectable in the menu. The 4:3 Override<br />
feature is available when the HDMI/YPbPr Output setting is 1080i, 720p, or 480p.<br />
32
7 CONFIGURING THE AUDIO, VIDEO, AND CLOSED CAPTION SETTINGS<br />
Setting Description<br />
My TV Supports<br />
The Following<br />
Formats<br />
The My TV Supports The Following Formats checklist allows you to configure the<br />
Native mode operation of the DCX3400. The checklist becomes accessible only when<br />
the HDMI/YPbPr Output setting is set to Native. The DCX3400 is capable of delivering<br />
all of the video formats listed in this checklist depending upon the type of video<br />
connection (HDMI or YPbPr) being used. By default, the 1080i and 480i formats are<br />
checked in this checklist.<br />
The options are used as follows:<br />
• 1080p30 — The DCX3400 will present programs broadcast in the High<br />
Definition 1080p30 format (1920 x 1080 pixels with progressive scanning at<br />
30 frames per second) using the HDMI connection only. The DCX3400<br />
cannot convert any other broadcast format to the 1080p30 format.<br />
• 1080p24 — The DCX3400 will present programs broadcast in the High<br />
Definition 1080p24 format (1920 x 1080 pixels with progressive scanning at<br />
24 frames per second) using the HDMI connection only. The DCX3400<br />
cannot convert any other broadcast format to the 1080p24 format.<br />
• 1080i — The DCX3400 will present programs broadcast in the High<br />
Definition 1080i format using both the HDMI and YPbPr connections. The<br />
DCX3400 can also convert any other broadcast format to the 1080i format.<br />
• 720p — The DCX3400 will present programs broadcast in the High Definition<br />
720p format using both the HDMI and YPbPr connections. The DCX3400<br />
can also convert any other broadcast format to the 720p format.<br />
• 480p — The DCX3400 will present programs broadcast in the Enhanced<br />
Definition 480p format using both the HDMI and YPbPr connections. The<br />
DCX3400 can also convert any other broadcast format to the 480p format.<br />
• 480i — The DCX3400 will present programs broadcast in the Standard<br />
Definition 480i format using both the HDMI and YPbPr connections. The<br />
DCX3400 can also convert any other broadcast format to the 480i format.<br />
Note 1: The DCX3400 cannot provide 1080p30 or 1080p24 video using the YPbPr<br />
output. When using the DCX3400 in Native mode, these two formats are disabled and<br />
inaccessible if there is no HDMI connection in place.<br />
Note 2: When connecting the DCX3400 to an HDMI (or DVI) TV, the TV provides the<br />
DCX3400 with its list of supported video formats. The DCX3400 will automatically<br />
place a check next to the formats in the checklist that it can verify are supported by<br />
the TV. The checklist may be modified manually after the DCX3400 performs the<br />
automatic configuration.<br />
Note 3: While this checklist provides the ability to customize the Native mode<br />
experience when using the DCX3400, it can also result in a loss of video if the<br />
checklist is modified without a clear understanding of the video formats supported by<br />
the TV. These settings should only be modified by a professional installer or someone<br />
with a good working knowledge of the video formats supported by the TV.<br />
Note 4: When using the DCX3400 in Native mode, at least one of the following<br />
formats (1080i, 720p, 480p, 480i) MUST be checked even if one or both of the 1080p<br />
formats has been checked. The DCX3400 cannot be configured to provide video only<br />
in the 1080p30 and/or 1080p24 formats. The DCX3400 also does not support the<br />
1080p60 video format.<br />
Note 5: The DCX3400 will provide 480i format video on the YPbPr output whenever<br />
1080p30 or 1080p24 format video is being provided on the HDMI output.<br />
33
7 CONFIGURING THE AUDIO, VIDEO, AND CLOSED CAPTION SETTINGS<br />
Setting<br />
Video<br />
Sharpness<br />
Additional<br />
HDMI Settings<br />
The Video Sharpness setting allows you to adjust the picture sharpness when viewing<br />
a standard <strong>definition</strong> (SD) program on the DCX3400. The Video Sharpness setting<br />
affects all of the video outputs. By default, the sharpness level of 3 is selected.<br />
The DCX3400 supports five distinct levels of video picture sharpness. A value of 1<br />
corresponds to a “softer” picture while a value of 5 corresponds to a “sharper”<br />
picture. The best sharpness setting depends upon the video connection being used,<br />
the display quality of the TV, and the viewer’s personal preference.<br />
The Additional HDMI Settings option is available whenever an HDMI connection is in<br />
place. Selecting this option will present a new menu screen with settings specific to<br />
the HDMI connection. These settings are discussed in more detail on the following<br />
pages.<br />
Closed Caption The Closed Caption setting turns closed captions off or on. When this option is set to<br />
Disabled, the DCX3400 does not render (draws) closed captions on any video output.<br />
When this option is set to Enabled, the DCX3400 renders (draws) closed captions on<br />
all video outputs. By default, the Disabled option is selected.<br />
Additional<br />
Closed Caption<br />
Settings<br />
Restore All<br />
Defaults<br />
The Additional Closed Caption Settings option is available whenever the Closed<br />
Caption setting is set to Enabled. Selecting this option will present a new menu<br />
screen with settings specific to closed captions. These settings are discussed in more<br />
detail on the following pages.<br />
To reset all <strong>User</strong> Settings to their default values, move the cursor to this option and<br />
press the ► key.<br />
An example of the <strong>User</strong> Settings menu when configured for Native mode operation.<br />
34
7 CONFIGURING THE AUDIO, VIDEO, AND CLOSED CAPTION SETTINGS<br />
To configure the DCX3400 settings on the Additional HDMI Settings menu screen:<br />
1. With an HDMI connection in place, power off the DCX3400 and then immediately<br />
press the MENU key on the front panel.<br />
2. This will display the main <strong>User</strong> Settings menu.<br />
3. Move the cursor next to the “Additional HDMI Settings” option and press the ► key.<br />
An example of the Additional HDMI Settings menu.<br />
35
7 CONFIGURING THE AUDIO, VIDEO, AND CLOSED CAPTION SETTINGS<br />
The Additional HDMI Settings menu options are:<br />
Setting Description<br />
HDMI/DVI Mode The HDMI/DVI mode settings allow you to optimize the HDMI output to work with<br />
both DVI-equipped televisions and HDMI equipped televisions. By default, this option<br />
is set to HDMI. The options are used as follows:<br />
• HDMI designates that an HDMI television is connected to the DCX3400<br />
• DVI designates that a DVI television is connected to the DCX3400 (via an<br />
HDMI-to-DVI adapter)<br />
Color Space The Color Space setting allows you to adjust the color space used by the DCX3400<br />
to generate the video signals on the HDMI output. By default, this option is set to<br />
YCC 4:4:4. The options are used as follows:<br />
• YCC 4:4:4 designates that the DCX3400 will generate video signals within<br />
the YCC color space.<br />
• RGB designates that the DCX3400 will generate video signals within the<br />
RGB color space.<br />
Note 1: Adjusting these settings could result in a loss of video. Only a professional<br />
installer or someone with a good working knowledge of the color spaces supported<br />
by the TV should change this setting.<br />
Audio Output The Audio Output setting allows you to specify the digital audio format delivered<br />
over the HDMI connection by the DCX3400. Options include Auto, L-PCM, and Pass<br />
Through. By default, the Auto option is selected. The options are used as follows:<br />
• Auto designates that the DCX3400 will provide the digital audio format<br />
specified by the connected device (TV or home theater receiver) when that<br />
device was first connected to the DCX3400.<br />
• L-PCM designates that the DCX3400 will provide all audio in the Linear<br />
Pulse Code Modulation digital audio format. The L-PCM format is widely<br />
supported by most HDMI televisions and home theater receivers.<br />
• Pass Through designates that the DCX3400 will provide the same digital<br />
audio format on the HDMI output as is provided with the program being<br />
viewed at that time. For example, if the program has a Dolby Digital<br />
soundtrack, the DCX3400 will pass the Dolby Digital audio to the HDMI<br />
output. This option is most useful when connecting the DCX3400 to a<br />
home theater receiver that has HDMI switching capability.<br />
Note 1: Adjusting these settings could result in a loss of audio. Only a professional<br />
installer or someone with a good working knowledge of the digital audio formats<br />
supported by the TV and/or home theater receiver should change this setting<br />
Return To Main<br />
Page<br />
Restore<br />
Automatic<br />
Settings<br />
Selecting this option will return you to the main <strong>User</strong> Settings menu screen.<br />
Selecting this option will restore all of the settings on this screen (HDMI/DVI Mode,<br />
Color Space, and Audio Output) to their default value. Use this option if audio and/or<br />
video has been lost after adjusting these settings from their default values.<br />
36
7 CONFIGURING THE AUDIO, VIDEO, AND CLOSED CAPTION SETTINGS<br />
To configure the DCX3400 settings on the Additional Closed Caption Settings menu<br />
screen:<br />
1. Power off the DCX3400 and then immediately press the MENU key on the front<br />
panel. This will display the main <strong>User</strong> Settings menu.<br />
2. Move the cursor next to the “Closed Caption” option and adjust this setting to<br />
“Enabled.”<br />
3. The option to enter the Additional Closed Caption Settings menu is now available.<br />
An example of the Additional Closed Caption Settings menu.<br />
37
7 CONFIGURING THE AUDIO, VIDEO, AND CLOSED CAPTION SETTINGS<br />
The Additional Closed Caption Settings menu options are:<br />
Setting Description<br />
Service<br />
Selection<br />
Sets the service used by the DCX3400 to render (draw) the closed captions:<br />
Analog: CC1, CC2, CC3, CC4, T1, T2, T3, or T4. The default is CC1.<br />
Digital: PRIMARY LANGUAGE, SECONDARY LANGUAGE, 3, 4, 5, or 6. The default<br />
is PRIMARY LANGUAGE.<br />
Font Size Sets the font size for closed captions. Defaults to AUTO. Options are AUTO,<br />
STANDARD, LARGE, or SMALL.<br />
Font Style Sets the font style for closed captions. Defaults to AUTO. Options are AUTO, MONO<br />
SERIF, PROPORTION SERIF, MONO NO SERIF, PROPORTION NO SERIF, CASUAL,<br />
CURSIVE, or SMALL.<br />
Font Color Sets the font color. Defaults to AUTO. Options are AUTO, WHITE, BLACK, RED,<br />
GREEN, BLUE, YELLOW, MAGENTA, or CYAN.<br />
Font Opacity Sets the opacity. Defaults to AUTO. Options are AUTO, TRANSPARENT,<br />
TRANSLUCENT, SOLID, or FLASHING.<br />
Font Edge Type Sets the edge appearance. Defaults to AUTO. Options are AUTO NONE, RAISED,<br />
DEPRESSED, UNIFORM, LEFT SHADOWED, or RIGHT SHADOWED.<br />
Font Edge Color Sets the edge color. Default to AUTO. Options are AUTO, WHITE, BLACK, RED,<br />
GREEN, BLUE, YELLOW, MAGENTA, or CYAN.<br />
Background<br />
Color<br />
Background<br />
Opacity<br />
Sets the background color for closed captions. Defaults to AUTO. Options are AUTO,<br />
WHITE, BLACK, RED, GREEN, BLUE, YELLOW, MAGENTA, or CYAN.<br />
Sets the background opacity for closed captions. Defaults to AUTO. Options are<br />
AUTO, TRANSPARENT, TRANSLUCENT, SOLID, or FLASHING.<br />
Settings Sets the default settings for closed captions (AUTO) or the settings you have<br />
configured (USER). Defaults to AUTO. Options are AUTO or USER.<br />
Return To Main<br />
Page<br />
Restore Closed<br />
Caption Defaults<br />
Selecting this option will return you to the main <strong>User</strong> Settings menu screen.<br />
To reset all of the Additional Closed Caption settings to their default values, select<br />
this option and press the ► key.<br />
38
8 TROUBLESHOOTING<br />
Before calling your service provider, review this troubleshooting <strong>guide</strong>. This information<br />
is to help you quickly solve a problem. If your problem still exists, contact your service<br />
provider.<br />
Problem Possible Solution<br />
The DCX set-top will<br />
not power on<br />
The remote control<br />
does not work<br />
There is no audio<br />
when viewing cable<br />
channels<br />
There is no audio<br />
from the center<br />
and/or surround<br />
speakers of a home<br />
theater receiver<br />
connected to the<br />
DCX set-top<br />
The DCX set-top may have received a software update and may not power on while the<br />
new software is being installed. Try again in a few minutes.<br />
• Verify that the AC power cord of the external power supply is connected<br />
to the DCX set-top and an AC outlet. Unplug the DCX set-top from the<br />
AC outlet, plug it back in, and then press the POWER button.<br />
• If the DCX set-top is connected to a switched outlet on another unit,<br />
verify that that unit is powered on. Unplug the power cord from the DCX<br />
set-top’s AC outlet, plug it back it in, and then press the POWER button.<br />
It is recommended to use an unswitched outlet, if possible.<br />
• Press the POWER button on the DCX set-top front panel instead of the<br />
remote control. The batteries in the remote control may be depleted.<br />
Verify that the remote control is in “Cable” mode.<br />
Verify that there are no obstructions between the remote control and the DCX<br />
set-top. Aim the remote control directly at the DCX set-top front panel, not the<br />
TV or VCR.<br />
The angle between the remote control and the DCX set-top may be too large.<br />
Stand in front of the DCX set-top and not too far to either side.<br />
• Press and release operation keys one at a time, firmly and deliberately.<br />
• Try changing channels using the buttons on the DCX set-top front panel.<br />
• Check the batteries in the remote control. Install new batteries if<br />
needed.<br />
Verify that the mute button on the DCX set-top or the remote control has not<br />
been pressed. Press mute on the remote control to restore sound.<br />
• If the DCX set-top audio output is connected to the TV, verify that the<br />
mute button on the TV has not been pressed.<br />
• If the DCX set-top audio output is connected to a home theater receiver,<br />
verify that the receiver is set to the appropriate input source and the<br />
mute button on the receiver has not been pressed.<br />
• Verify that you have the correct cables for the audio connections.<br />
• Verify that the audio cables are firmly connected between the DCX settop<br />
and the audio playback device (TV, receiver, DVD player, etc.).<br />
Not all Dolby Digital ® programs feature full 5.1 or 7.1 surround sound. In some<br />
cases, the programs may only contain left and right stereo audio.<br />
• Verify that the S/PDIF cable (coaxial or optical) is firmly connected to the<br />
DCX set-top and the home theater receiver.<br />
• Verify that the home theater receiver is set to a surround sound audio<br />
mod (Dolby Digital, Dolby Pro Logic II ® , Dolby Pro Logic ® , Dolby Digital<br />
Plus ® ).<br />
• Verify that the receiver is properly configured to work with all connected<br />
speakers.<br />
39
8 TROUBLESHOOTING<br />
Problem Possible Solution<br />
There is no video on<br />
the TV screen<br />
No graphics or<br />
program <strong>guide</strong>s<br />
appear on the TV<br />
screen<br />
No closed captions<br />
display<br />
There are black bars<br />
to the right and left<br />
of the picture<br />
Verify that the TV is powered on and set to the appropriate input source for the<br />
DCX set-top.<br />
Verify that the DCX set-top is powered on and tuned to an authorized cable<br />
channel.<br />
Verify that all video cables between the DCX set-top and the TV are firmly<br />
connected.<br />
Verify that the coaxial cable feed is firmly connected to the DCX set-top and the<br />
wall jack.<br />
• If the DCX set-top video output is connected to a home theater unit,<br />
verify that the home theater unit is powered on and set to the<br />
appropriate input source.<br />
• If the DCX set-top video output is connected to a TV through an HDMI<br />
connection, power off the TV and then power off the DCX set-top. Wait<br />
one second and then power on the devices.<br />
Not all HDTVs can display every output format (1080i, 720p, 480p, or 480i)<br />
available on the DCX set-top. To select a different format:<br />
1. Ensure that your DCX set-top is plugged into a power outlet and is<br />
turned off.<br />
2. Press the MENU key on the front panel. Your settings are displayed on<br />
the DCX set-top front panel display.<br />
3. Press the ▲ and ▼ keys to display the HDMI/YPbPr OUTPUT setting.<br />
4. Press the ► key to cycle through the available output formats until a<br />
picture displays on the TV.<br />
If you use the IEEE-1394 connection, on-screen graphics, including closed<br />
captions and program <strong>guide</strong>s, are not displayed by the DCX set-top. On-screen<br />
graphics and captions may still be overlaid by your TV, if enabled. Alternatively,<br />
use HDMI or component video instead.<br />
Verify on the <strong>User</strong> Settings menu that closed captions are enabled on the DCX<br />
set-top.<br />
Verify that closed captions are enabled on the TV.<br />
Note: Closed captioning may not be available on the current program.<br />
Wide screen TVs display 4:3 programs in this format unless set to Stretch. Turn<br />
on the 4:3 OVERRIDE feature in the <strong>User</strong> Settings menu. This enables most<br />
wide screen TVs to stretch the video to fill the screen (see your TV manual for<br />
information about stretching 4:3 video).<br />
• If the DCX set-top is connected to a wide screen TV, verify that the TV<br />
TYPE is set to 16:9 in the <strong>User</strong> Settings menu.<br />
Many HD programs are broadcast in pillar-box format with black bars to the left<br />
and right of the picture. These programs are broadcast in 16:9 HD formats even<br />
though the video is not 16:9.<br />
40
8 TROUBLESHOOTING<br />
Problem Possible Solution<br />
There are black bars<br />
above and below the<br />
picture<br />
There are black bars<br />
on all four sides of<br />
the picture<br />
Colors do not appear<br />
correctly<br />
The DCX set-top is<br />
making a humming<br />
noise.<br />
All 4:3 HDTVs display HD programs in letterbox format (black bars above and<br />
below the picture) because of the shape of the display screen.<br />
• Turn on the 4:3 OVERRIDE feature in the <strong>User</strong> Settings menu. This<br />
enables most standard screen TVs to display a full screen picture when<br />
the DCX set-top is tuned to a 4:3 program.<br />
• Set the TV TYPE to 4:3 Pan-Scan. This enables the DCX set-top to<br />
remove the black bars above and below the picture when possible.<br />
Some SD programs are broadcast in the letterbox format with black bars above<br />
and below the picture. Some widescreen TVs offer a zoom feature that may be<br />
able to remove the black bars (see your TV manual for information about zooming<br />
4:3 video).<br />
This may occur on a 4:3 TV if the 4:3 OVERRIDE setting is OFF. To set 4:3 SD<br />
programming to fill the screen, depending on the capabilities of the TV, set<br />
4:3 OVERRIDE to 480i or 480p.<br />
This may occur on a 16:9 TV if the active video for an SD broadcast is in letterbox<br />
format. To confirm, wait for a commercial or look for a graphic, such as a network<br />
logo. If the commercial fills the screen from top to bottom, or the graphic<br />
appears below the active video, the program is being letterboxed by the<br />
broadcaster. You can minimize this by activating the zoom feature on the TV.<br />
A broadcaster may include black bars on either side of a wide screen broadcast.<br />
This is called a “hybrid” aspect ratio and results in a black border surrounding the<br />
video on a 4:3 TV. Because this is part of the broadcast, the DCX set-top cannot<br />
correct the video. You may be able to minimize the border using the zoom<br />
feature on the TV.<br />
Be sure to match up each signal to the same YPbPr connection on the TV,<br />
otherwise the colors will not appear correctly on your TV.<br />
The DCX set-top includes an integrated hard drive and a fan for cooling. During<br />
normal operation, the DCX set-top emits a low humming noise, similar to a<br />
personal computer. The noise varies in volume occasionally when the speed of<br />
the internal fan adjusts to changes in the temperature around the DCX set-top.<br />
Please note the hard drive will stay on even when the DCX set-top is turned off<br />
(standby).<br />
41
Motorola, Inc.<br />
101 Tournament Drive<br />
Horsham, PA 19044 U.S.A.<br />
http://www.motorola.com<br />
547049-001-b<br />
05/08


