FANTOM_OM.pdf - Roland
FANTOM_OM.pdf - Roland
FANTOM_OM.pdf - Roland
Create successful ePaper yourself
Turn your PDF publications into a flip-book with our unique Google optimized e-Paper software.
Recording Songs<br />
Inputting a Chord<br />
Press the chord. A chord will be input when you release all keys<br />
simultaneously. The chord will not be input as long as even one key<br />
remains pressed, so you can change the keys being pressed to correct<br />
the chord.<br />
Inputting a Tie<br />
After specifying the Step Time parameter for the note that you want<br />
to tie, press [7 (Tie)]. For example, if you want to tie a quarter note<br />
after a half note, input the half note, and then set the Step Time<br />
parameter to “ ” and press [7 (Tie)].<br />
Inputting a Rest<br />
Set the Step Time parameter to the length of the desired rest, and<br />
press [8 (Rest)].<br />
Assigning a Pattern to a Phrase<br />
Track<br />
You can create a song by combining previously recorded patterns.<br />
This is done using step recording to assign patterns to a phrase track.<br />
However, please be aware that the patterns themselves are not<br />
placed in the phrase track. Rather, Pattern Call messages are<br />
placed in the phrase track to specify which pattern should be played<br />
back. This means that if you later modify the contents of a pattern,<br />
the song playback will also be affected.<br />
When you assign a pattern to a phrase track, its pattern beat will<br />
be ignored, and the pattern will use the time signature of the<br />
beat track. If the pattern beat and the beat track have different<br />
settings, the length of the measures will not match, and the<br />
playback may become incorrectly aligned. If this occurs, respecify<br />
the time signature of the beat track (p. 128).<br />
1. Follow the procedure for “Inputting Notes and Rests” (p.<br />
132) up through step 5.<br />
2. Press [4 (Pattern)].<br />
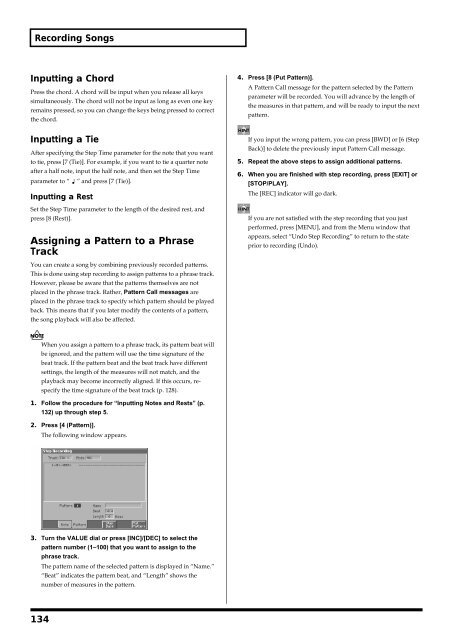
The following window appears.<br />
fig.10-12_50<br />
3. Turn the VALUE dial or press [INC]/[DEC] to select the<br />
pattern number (1–100) that you want to assign to the<br />
phrase track.<br />
The pattern name of the selected pattern is displayed in “Name.”<br />
“Beat” indicates the pattern beat, and “Length” shows the<br />
number of measures in the pattern.<br />
134<br />
4. Press [8 (Put Pattern)].<br />
A Pattern Call message for the pattern selected by the Pattern<br />
parameter will be recorded. You will advance by the length of<br />
the measures in that pattern, and will be ready to input the next<br />
pattern.<br />
If you input the wrong pattern, you can press [BWD] or [6 (Step<br />
Back)] to delete the previously input Pattern Call message.<br />
5. Repeat the above steps to assign additional patterns.<br />
6. When you are finished with step recording, press [EXIT] or<br />
[STOP/PLAY].<br />
The [REC] indicator will go dark.<br />
If you are not satisfied with the step recording that you just<br />
performed, press [MENU], and from the Menu window that<br />
appears, select “Undo Step Recording” to return to the state<br />
prior to recording (Undo).


