Micca Slim-HD User's Manual - Micca Store!
Micca Slim-HD User's Manual - Micca Store!
Micca Slim-HD User's Manual - Micca Store!

You also want an ePaper? Increase the reach of your titles
YUMPU automatically turns print PDFs into web optimized ePapers that Google loves.
Copyright © 2009-2012 <strong>Micca</strong>, LTD. All rights reserved.<br />
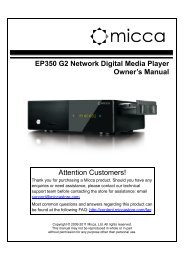
<strong>Micca</strong> <strong>Slim</strong>-<strong>HD</strong> User’s <strong>Manual</strong><br />
Thank you for purchasing a <strong>Micca</strong> product. Should you need any<br />
assistance, please contact our technical support before returning the<br />
product to the retailer. Email support@miccastore.com<br />
Product information, firmware updates, and common questions and<br />
answers can be found at: http://content.miccastore.com/<br />
Copyright © 2009-2012 <strong>Micca</strong>, Ltd. All rights reserved.<br />
This manual may not be reproduced in whole or in part without<br />
permission for any purpose other than personal use.
IMPORTANT!<br />
For your personal safety, please read the following instructions carefully.<br />
To reduce the risk of fire, electrical shock or damage to the player, do not expose<br />
this device to humidity, rain, sand or excessive heat (caused by heating equipment<br />
or direct sunlight).<br />
Use the player in a well-ventilated environment to ensure proper cooling.<br />
Do not open the player beyond which is required to install the internal hard disk drive,<br />
as there is risk of electric shock. Contact a professional for repair.<br />
Please follow the instructions enclosed with the player for key operation and<br />
maintenance.<br />
Usage Notice<br />
Before plugging in this device, make sure your power supply voltage matches the<br />
product. The working voltage of this player is marked on the AC power adapter.<br />
Only use the AC power adapter that is supplied with this device.<br />
Do not touch the socket with a wet hand.<br />
Turn off the power when the device will not be used.<br />
Do not place heavy objects on top of the player.<br />
Do not use strong solvents to clean the surface of the player such as alcohol,<br />
benzene, or thinner.<br />
Copyright © 2009-2012 <strong>Micca</strong>, LTD. All rights reserved.
I. General Introduction<br />
Thank you for purchasing a <strong>Micca</strong> product.<br />
The <strong>Micca</strong> <strong>Slim</strong>-<strong>HD</strong> is a portable 1080p Full-<strong>HD</strong> digital media player. It is capable of<br />
playing digital videos, music and pictures stored on an internal hard drive or from<br />
SD/SDHC flash cards and USB 2.0 compliant storage devices such as USB drives and<br />
portable hard disk drives. The <strong>Micca</strong> <strong>Slim</strong>-<strong>HD</strong> supports a wide range of media file<br />
formats, allowing its users to enjoy digital contents on the go or in the comfort of his or<br />
her living room.<br />
One Device to <strong>Store</strong> All Your Media Files<br />
The <strong>Micca</strong> <strong>Slim</strong>-<strong>HD</strong> is ideal as the central storage for your media files. With playback<br />
quality as good as that of a computer, you will never need to spend time copying large<br />
files back and forth between computers. Just take the <strong>Micca</strong> <strong>Slim</strong>-<strong>HD</strong> to wherever you<br />
may have a TV or monitor and enjoy!<br />
Perfect For Travel<br />
The <strong>Micca</strong> <strong>Slim</strong>-<strong>HD</strong> is your perfect travel companion. Take your media files with you on<br />
a business trip and playback wherever you can find a TV or computer monitor, from<br />
showing customers a product showcase video, to catching up on missed shows the<br />
comfort of your hotel room. Take the <strong>Slim</strong> along on a road trip and you’ll never run out<br />
of videos to play back to the kids.<br />
Maximum Versatility<br />
The <strong>Micca</strong> <strong>Slim</strong>-<strong>HD</strong> is also a portable hard disk drive enclosure. Simply install any<br />
SATA 2.5-inch <strong>HD</strong>D and connect it to your computer’s USB port and read/write to it as<br />
you please. Choose your own storage space, whether it’s a 40GB drive left over from<br />
an upgrade, or a new 1TB drive. The <strong>Slim</strong> is only slightly larger than a regular portable<br />
hard drive – so if you are going to carry a portable hard drive, why not carry one that<br />
can also play back the media files stored on it.<br />
NOTE: For best compatibility, use 5400RPM drives by Western Digital, Toshiba,<br />
Hitachi, or Samsung.<br />
Copyright © 2009-2012 <strong>Micca</strong>, LTD. All rights reserved.
II. Features and Specifications<br />
The <strong>Micca</strong> <strong>Slim</strong>-<strong>HD</strong> is a powerful digital media player, with the ability to decode high bit<br />
rate 1080p Full-<strong>HD</strong> videos. While actual performance can vary depending on the media<br />
file, this table of specifications is a summary of the <strong>Micca</strong> <strong>Slim</strong>-<strong>HD</strong>’s capabilities.<br />
Video<br />
Music<br />
Codec Max resolution Max stream Max frames<br />
MPEG1<br />
DIVX 1920x1080 100mbps<br />
Copyright © 2009-2012 <strong>Micca</strong>, LTD. All rights reserved.<br />
100mbps<br />
MPEG2 100mbps<br />
MPEG4-XVID 100mbps<br />
H.264 70mbps<br />
H.263 100mbps<br />
WMV9/VC1 100mbps<br />
RMVB 1280x720 30mbps<br />
30fps<br />
Files: MKV, AVI, TS/TP, MP4/M4V, MOV, VOB, PMP, RM/RMVB, MPG,<br />
M2TS, WMV<br />
Bit rate: 32kbps – 320kbps<br />
Formats: MP3, WMA, OGG, FLAC, APE, AAC, AC3, ATRA, DTS<br />
Photo Formats: JPG, JPEG, BMP, GIF, PNG<br />
Video<br />
Output<br />
Audio<br />
Output<br />
Internal<br />
Drive<br />
External<br />
Storage<br />
Product<br />
Size<br />
Analog AV: 720x576 (PAL), 720x480 (NTSC)<br />
<strong>HD</strong>MI: 480p, 720p (50Hz/60Hz), 1080i (50Hz/60Hz), 1080p (50Hz/60Hz)<br />
Analog Stereo audio output level: 2.0V ± 0.2Vp<br />
Frequency Range: 20Hz-20KHz ≤2dB<br />
SNR: >80dB (1kHz 0dB)<br />
Dynamic range: >80dB (1kHz 0dB)<br />
T<strong>HD</strong>: ≤0.04%<br />
<strong>HD</strong>MI PCM Digital Stereo<br />
Supports all 2.5” SATA hard disk drives. 9.5mm max drive height.<br />
Supports all USB drives with NTFS or FAT32 file system, including USB hard<br />
drives, USB flash drives.<br />
Supports all SD and SDHC flash memory cards with NTFS or FAT32 file<br />
system<br />
3.15”(W) x 5.35”(L) x 0.79”(H)<br />
Weight Player without drive: 4 ounce<br />
Power AC 90-230V, 50/60Hz, DC 5.2V 2A<br />
Packing List AC Power Adapter, Remote Control, AV Cable, USB Cable, User’s <strong>Manual</strong>
III. Hard Disk Drive Installation<br />
The <strong>Micca</strong> <strong>Slim</strong>-<strong>HD</strong> has an integrated Serial ATA hard disk drive interface that is<br />
compatible with SATA 2.5-inch internal hard disk drives up to 9.5mm in height. Proper<br />
hard disk drive installation is critical the player’s proper and reliable function. For best<br />
compatibility, use 5400RPM drives by Western Digital, Toshiba, Hitachi, or Samsung.<br />
Without a hard disk drive installed, the <strong>Micca</strong> <strong>Slim</strong>-<strong>HD</strong> can still be used<br />
to play media files from the card reader or USB devices.<br />
Step 1: Remove the four case screws if present and carefully pry open the bottom cover.<br />
Step 2: Lay the 2.5-inch SATA hard drive down flat in the drive bay and slide it towards<br />
the SATA connector to make the connection.<br />
Step 3: Secure the 2.5-inch SATA hard drive with the two silver drive screws. Ensure<br />
that the hard drive is centered and not pulled to either side by the screws.<br />
Step 4: Replace the bottom cover and install the four black case screws.<br />
Copyright © 2009-2012 <strong>Micca</strong>, LTD. All rights reserved.
IV. Product Layout and Connections<br />
Copyright © 2009-2012 <strong>Micca</strong>, LTD. All rights reserved.
A. Power<br />
Only use the supplied AC power adapter to provide 5.0-5.2VDC power to the <strong>Micca</strong><br />
<strong>Slim</strong>-<strong>HD</strong>. Using a different power adapter may damage the player. Do not cut off power<br />
to the device while the unit is turned on as this may cause serious damage to the hard<br />
drive and result in data loss. Make sure that the player is in standby mode before<br />
disconnecting power. The player consumes a small amount of power in standby and<br />
should be disconnected from power to conserve energy if not planned to use for a while.<br />
The blue light on the player will always be on when power is<br />
connected. It does not indicate whether the player is on or off.<br />
B. USB to Computer<br />
The supplied USB cable can be used to connect the <strong>Micca</strong> <strong>Slim</strong>-<strong>HD</strong> to a computer and<br />
function as an external hard disk drive. No additional software or drivers are needed for<br />
the <strong>Micca</strong> <strong>Slim</strong>-<strong>HD</strong> to be recognized by the computer. Once connected, files can be<br />
copied to and from the <strong>Micca</strong> <strong>Slim</strong>-<strong>HD</strong> as desired using the standard file management<br />
functions of the computer’s operating system.<br />
The <strong>Micca</strong> <strong>Slim</strong>-<strong>HD</strong> will draw power through the USB cable when<br />
connected to the computer and does not need 5.2VDC power.<br />
If the hard disk drive is new, it will need to be partitioned and formatted before it can be<br />
recognized and used by the computer. For directions on how to partition and format a<br />
new hard disk drive within Windows XP/2000, please refer to the following Microsoft<br />
tutorial: http://support.microsoft.com/kb/309000<br />
The process is very similar for Windows Vista/7. The <strong>Micca</strong> <strong>Slim</strong>-<strong>HD</strong> is able to<br />
recognize up to 4 FAT32/NTFS partitions on the hard drive. NTFS partitions are<br />
strongly recommended for maximum efficiency, performance, and compatibility with<br />
large media files.<br />
To prevent data loss and potential hard disk drive damage, do not disconnect the <strong>Micca</strong><br />
<strong>Slim</strong>-<strong>HD</strong> from the computer until all file copy/move/delete activities have completed and<br />
the blue status light is solid and not blinking.<br />
Copyright © 2009-2012 <strong>Micca</strong>, LTD. All rights reserved.
C. Analog AV Output<br />
The <strong>Micca</strong> <strong>Slim</strong>-<strong>HD</strong> can be connected to analog TVs and display devices through its AV<br />
Out connector. Only use the supplied 3.5mm-to-RCA cable to ensure correct signal<br />
polarity and avoid damage to the player and TV/display. The RCA cable connectors are<br />
color coded to match the AV input on TVs and display devices as follows:<br />
Red Right Audio Channel<br />
White Left Audio Channel<br />
Yellow Composite Video<br />
The <strong>Micca</strong> <strong>Slim</strong>-<strong>HD</strong> must be set to NTSC or PAL Composite mode for the analog AV<br />
output to function. If there is no picture or the picture is distorted after connecting the<br />
AV Output, press the button on the remote to toggle between NTSC and PAL.<br />
D. <strong>HD</strong>MI Output<br />
The <strong>Micca</strong> <strong>Slim</strong>-<strong>HD</strong> can be connected to <strong>HD</strong>TVs and digital display devices through its<br />
<strong>HD</strong>MI connector, sending both audio and video signals over one cable. Only use <strong>HD</strong>MI<br />
cables that have been certified to be v1.3a or higher to ensure signal quality. The <strong>Micca</strong><br />
<strong>Slim</strong>-<strong>HD</strong>’s <strong>HD</strong>MI output resolution can be set to 720p (50/60Hz) and 1080i/p (50/60Hz).<br />
Do not plug/unplug the <strong>HD</strong>MI output with the power connected to the<br />
player. Doing so may damage the player.<br />
The <strong>Micca</strong> <strong>Slim</strong>-<strong>HD</strong> must be set to a valid <strong>HD</strong>MI output mode for the <strong>HD</strong>MI connection<br />
to output a correct signal. By default, the <strong>Slim</strong>-<strong>HD</strong> will set itself to <strong>HD</strong>MI output when<br />
powered on if a <strong>HD</strong>MI cable is detected. If there is no picture or the picture is distorted,<br />
press the button on the remote to set the player’s output mode to 720p. Other<br />
<strong>HD</strong>MI display modes can then be set through the Setting menu.<br />
Note: The player cannot use both the <strong>HD</strong>MI and AV output at the same time and<br />
will automatically use <strong>HD</strong>MI if an <strong>HD</strong>MI connection is detected on power up. Turn<br />
the “Auto Detect <strong>HD</strong>MI” setting off in the settings menu to disable this feature.<br />
Copyright © 2009-2012 <strong>Micca</strong>, LTD. All rights reserved.
V. <strong>Micca</strong> <strong>Slim</strong>-<strong>HD</strong> Startup<br />
After powering on, the <strong>Micca</strong> <strong>Slim</strong>-<strong>HD</strong> displays the Home screen. The Home screen<br />
presents five icons for access to different types of media files or settings:<br />
Files Browse and play all compatible file types.<br />
Music Browse and playback compatible audio files.<br />
Movies Browse and playback compatible video files.<br />
Photos Browse and display compatible image files.<br />
Setting System settings.<br />
Use the and buttons on the remote to highlight the desired media type and<br />
press the button to select it. Refer to sections for individual media types for<br />
additional information.<br />
Use the , , , and buttons on the<br />
remote to quickly select a browsing method from the home screen.<br />
Copyright © 2009-2012 <strong>Micca</strong>, LTD. All rights reserved.
VI. Playing Movies and Videos<br />
To browse and view movies and videos:<br />
1. From the main menu, select the Movies icon and press on the remote to<br />
begin browsing for movies.<br />
2. Select which storage device to browse for movies in: Internal <strong>HD</strong>D, USB Drive,<br />
Memory Card, and Optical Drive. Highlight the desired device and press .<br />
3. Select which partition of the drive to browse for movies in. Most drives have only<br />
one partition. Highlight the appropriate partition and press .<br />
4. All folders and compatible movie files found will be displayed. If no folders or<br />
compatible movie files are found, a message will pop up indicating “No<br />
Compatible Files Found!”<br />
5. To browse thin a folder, highlight the folder and press . To back out of a<br />
folder, press the on the remote.<br />
6. To play a movie, highlight the movie and press .<br />
NOTE: Only files with compatible video file extensions MKV, AVI, TS/TP, MP4/M4V,<br />
MOV, VOB, PMP, RM/RMVB, MPG, M2TS, and WMV are visible in the file/folder<br />
Copyright © 2009-2012 <strong>Micca</strong>, LTD. All rights reserved.
directory. Video files with incompatible file extensions will not be visible. Video files with<br />
compatible file extensions but incompatible codec will generate an error when played.<br />
During playback of a movie, the following remote control operations are available:<br />
Button Description<br />
MUTE Mute all sound output.<br />
OSD Bring up the on screen display menu.<br />
Rewind - Available speeds are 1x, 2x, 4x, 8x.<br />
Fast Forward - Available speeds are 1x, 2x, 4x, 8x.<br />
Previous File - Play the previous file.<br />
Next File - Play the next file.<br />
Play/Pause - Pause or resume the current file.<br />
Stop - Stop playing the current file.<br />
OK Play/Pause - Pause or resume the current file.<br />
MENU Go back to the main menu.<br />
EXIT Stop playing the current file.<br />
16:09/4:3 Aspect Ratio - Available modes are Default, 4:3, 16:9, Fit View, Video Full<br />
Screen, Screen Full Screen.<br />
GOTO Jump to a specific time in the video; use the arrow buttons to enter the<br />
time and press to jump to the entered time.<br />
REPEAT Changes video playback sequence between Repeat All, Repeat One,<br />
Random.<br />
AUDIO Change the audio track, if multiple audio tracks are available.<br />
SUBTITLE Turns subtitles on or off. Use the OSD menu to change subtitle track.<br />
VOLUME Adjust the audio volume.<br />
Copyright © 2009-2012 <strong>Micca</strong>, LTD. All rights reserved.
A. OSD Menu<br />
During playback of a movie, the On Screen Display (OSD) menu offers a convenient<br />
way to access many frequently used playback settings. To use the OSD menu, press<br />
the button on the remote while a movie is playing.<br />
To change a playback setting, use the and buttons on the remote to<br />
highlight the setting; use the up and down buttons to change the settings value and<br />
press to save the present setting. When finished, press the button to exit<br />
out of the OSD menu.<br />
Setting Description<br />
Mode Change the playback sequence between Repeat One, Repeat All,<br />
Sequential, Random, Only Once.<br />
Sub<br />
Enable<br />
Enable or disable subtitle display.<br />
Subtitle Change the subtitle track being displayed.<br />
Color Change the subtitle text color between White, Gray, Red, Green, Cyan,<br />
Magenta, Yellow.<br />
Copyright © 2009-2012 <strong>Micca</strong>, LTD. All rights reserved.
Size Change the subtitle text size.<br />
Text<br />
Encoding<br />
Change the subtitle text encoding between S-Chinese (GBK), T-Chinese<br />
(BIG5), UTF-8, UTF-16BE, UTF-16LE, Japanese (S-JIS), Western, SE<br />
European, Turkish, Central European, Cyrillic, Hebrew, Greek, CP1252,<br />
Arabic (CP1256), ISO 8859-6, Korean (EUC-KR), Thai.<br />
Time Sync Change the time sync between the subtitle and the video.<br />
B. Aspect Ratio<br />
For a video to be displayed correctly, it must be played back at with the appropriate<br />
aspect ratio. An incorrect aspect ratio will result in a distorted image. The aspect ratio<br />
can be changed while a video is playing by pressing the button on the<br />
remote or through the OSD menu. The following aspect ratio settings are available.<br />
Setting Description<br />
Default The video will be played as-is without any change. If a video’s resolution is<br />
less than the display resolution, it will only occupy the small center portion<br />
of the screen.<br />
4:3 The video will be forced to play at a 4:3 aspect ratio.<br />
16:9 The video will be forced to play at a 16:9 aspect ratio.<br />
Fit View The video will be played slightly zoomed out. This is useful for use with<br />
TVs that apply over-scan.<br />
Video Full<br />
Screen<br />
Screen<br />
Full<br />
Screen<br />
The video will be played full screen at the video’s native aspect ratio.<br />
The video will be played full screen at the display screen aspect ratio.<br />
C. Subtitles<br />
The <strong>Slim</strong>-<strong>HD</strong> supports subtitle tracks embedded in video files or as external subtitle files.<br />
When a video has both embedded and external subtitle files, the external subtitles will<br />
take precedence. When using external subtitle files, be sure to place the subtitle file in<br />
Copyright © 2009-2012 <strong>Micca</strong>, LTD. All rights reserved.
the same folder and has the same name as the video file. Multiple subtitle files for the<br />
same video can be named as in the following example, where there are two subtitle files<br />
containing English and Spanish:<br />
My.Awesome.Movie.mkv<br />
My.Awesome.Movie.eng.srt<br />
My.Awesome.Movie.es.srt<br />
To toggle subtitles on or off, press the button while a video is playing. The<br />
first subtitle track available will be displayed. To change to a different subtitle track,<br />
open the OSD menu and change the Subtitle field to the desired track and press .<br />
If the subtitle language file uses special character encoding, such as GBK for Chinese<br />
subtitles, the subtitle may appear as symbols using the default UTF8 encoding. To<br />
change to a different encoding, open the OSD menu and change the Subtitle codec field<br />
to the desired value and press .<br />
Copyright © 2009-2012 <strong>Micca</strong>, LTD. All rights reserved.
VII. Playing Music<br />
To browse and play music:<br />
1. From the main menu, select the Music icon and press on the remote to<br />
begin browsing for movies.<br />
2. Select which storage device to browse for music in: Internal <strong>HD</strong>D, USB Drive,<br />
Memory Card, and Optical Drive. Highlight the desired device and press .<br />
3. Select which partition of the drive to browse for music in. Most drives have only<br />
one partition. Highlight the appropriate partition and press .<br />
4. All folders and compatible music files found will be displayed. If no folders or<br />
compatible music files are found, a message will pop up indicating “No<br />
Compatible Files Found!”<br />
5. To browse thin a folder, highlight the folder and press . To back out of a<br />
folder, press the on the remote.<br />
6. To play a music file, highlight the file and press .<br />
Copyright © 2009-2012 <strong>Micca</strong>, LTD. All rights reserved.
During playback of a music file, the following remote control operations are available:<br />
Button Description<br />
MUTE Mute all sound output.<br />
OSD Bring up the on screen display menu.<br />
Rewind - Available speeds are 1x, 2x, 4x, 8x.<br />
Fast Forward - Available speeds are 1x, 2x, 4x, 8x.<br />
Previous File - Play the previous file.<br />
Next File - Play the next file.<br />
Play/Pause - Pause or resume the current file.<br />
Stop - Stop playing the current file.<br />
OK Play/Pause - Pause or resume the current file.<br />
MENU Go back to the main menu.<br />
EXIT Stop playing the current file.<br />
REPEAT Changes music playback sequence between Repeat All, Repeat One,<br />
Sequential, Random, Only Once.<br />
VOLUME Adjust the audio volume.<br />
NOTE: Only files with compatible audio file extensions MP3, WMA, OGG, FLAC, and<br />
APE are visible in the file/folder directory. Audio files with incompatible file extensions<br />
will not be visible. Audio files with compatible file extensions but incompatible codec will<br />
generate an error when full screen playback is attempted.<br />
Copyright © 2009-2012 <strong>Micca</strong>, LTD. All rights reserved.
A. OSD Menu<br />
During playback of music, the On Screen Display (OSD) menu offers a convenient way<br />
to access many frequently used playback settings. To use the OSD menu, press the<br />
button on the remote while a music file is playing.<br />
To change a playback setting, use the and buttons on the remote to<br />
highlight the setting; use the up and down buttons to change the settings value; press<br />
the button to save the present setting. When finished, press the button to<br />
exit out of the OSD menu.<br />
Setting Description<br />
Mode Change the playback sequence between Repeat One, Repeat All,<br />
Sequential, Random, Only Once.<br />
EQ Mode Change the equalizer preset for music playback. Various presets are<br />
available for different sound effects.<br />
Lyric<br />
Focus<br />
Color<br />
Change the color of the lyrics currently sung.<br />
Copyright © 2009-2012 <strong>Micca</strong>, LTD. All rights reserved.
Lyrics<br />
Unfocus<br />
Color<br />
Lyric Play<br />
Mode<br />
Change the color of the lyrics not currently sung.<br />
Change the lyric display stile between Karaoke, or Line Roll.<br />
Copyright © 2009-2012 <strong>Micca</strong>, LTD. All rights reserved.
VIII. Viewing Photos<br />
To browse and view photos:<br />
1. From the main menu, select the Photo icon and press on the remote to<br />
begin browsing for photos.<br />
2. Select which storage device to browse for photos in: Internal <strong>HD</strong>D, USB Drive,<br />
Memory Card, and Optical Drive. Highlight the desired device and press .<br />
3. Select which partition of the drive to browse for photos in. Most drives have only<br />
one partition. Highlight the appropriate partition and press .<br />
4. All folders and compatible photos found will be displayed. If no folders or<br />
compatible photos are found, a message will pop up indicating “No Compatible<br />
Files Found!”<br />
5. To browse thin a folder, highlight the folder and press . To back out of a<br />
folder, press the on the remote.<br />
6. To view a photo full screen, highlight the file and press .<br />
Copyright © 2009-2012 <strong>Micca</strong>, LTD. All rights reserved.
While viewing a photo full screen, the following remote control operations are available:<br />
Button Description<br />
OSD Bring up the on screen display menu.<br />
Play/Pause - Start slideshow.<br />
Previous File - Previous photo.<br />
Next File - Next photo.<br />
Stop - Stop the slideshow.<br />
OK Play/Pause - Start slideshow.<br />
MENU Go back to the main menu.<br />
EXIT Stop viewing the current photo and show the file list.<br />
ZOOM Zoom in and out for the current photo.<br />
ROTATE Rotate the current photo.<br />
NOTE: Only files with compatible photo extensions JPG, BMP, GIF, and PNG are visible<br />
in the file/folder directory. Photos with incompatible file extensions will not be visible.<br />
Copyright © 2009-2012 <strong>Micca</strong>, LTD. All rights reserved.
A. OSD Menu<br />
During playback of a photo slideshow, the On Screen Display (OSD) menu offers a<br />
convenient way to access many frequently used playback settings. To use the OSD<br />
menu, press the button on the remote while a photo is displayed.<br />
To change a setting, use the and buttons on the remote to highlight the<br />
setting; use the up and down buttons to change the settings value; press the <br />
button to save the present setting. When finished, press the button on the<br />
remote.<br />
Setting Description<br />
Switch<br />
Mode<br />
Play<br />
Interval<br />
Background<br />
Music<br />
Change the transition effect when going from one photo to the next<br />
Change the time delay between photos.<br />
Turn background music playback on or off.<br />
Copyright © 2009-2012 <strong>Micca</strong>, LTD. All rights reserved.
IX. Settings<br />
The setting menu contains numerous configuration parameters that control the behavior<br />
of the <strong>Micca</strong> <strong>Slim</strong>-<strong>HD</strong> during use. Press the button on the remote to access<br />
the Settings at any time.<br />
[Language]<br />
Sets the operating language.<br />
Available values: English, Simplified Chinese, Traditional Chinese, Japanese, Korean,<br />
German, Spanish, French, Italian, Portuguese, Dutch, Russian, Polish, Turkish, Czech.<br />
[Screen Saver]<br />
Sets the idle time after which the screen saver will be displayed.<br />
Available values: 1 / 2 / 3 / 10 / 30 Minutes, 1 / 2 Hours, Off.<br />
[Video Output Mode]<br />
Sets the video output mode<br />
Available values: NTSC, PAL, 720p (50/60Hz), 1080i/p (50/60Hz)<br />
[Audio Output Mode]<br />
Copyright © 2009-2012 <strong>Micca</strong>, LTD. All rights reserved.
Sets the audio output mode<br />
Available values: Normal, SPDIF LPCM, SPDIF RAWDATA<br />
[Auto Play]<br />
Automatically play media files found on the root directory of the external USB or<br />
Memory Card. Auto play from internal <strong>HD</strong>D is not supported.<br />
Available values: Off, Movie, Music, Photo.<br />
[Auto Play DVD]<br />
Automatically play DVD disc detected in an attached optical drive. Commercial DVDs<br />
are not supported by the player due to encryption.<br />
Available values: On, Off.<br />
[Auto Detect <strong>HD</strong>MI]<br />
Automatically detect if a <strong>HD</strong>MI connection is present when powering on. If detected the<br />
player will automatically switch to <strong>HD</strong>MI output mode instead of AV output.<br />
Available values: On, Off.<br />
[Restore Default Setting]<br />
When selected, resets all settings back to factory default<br />
[System Information]<br />
When selected, displays the current firmware version<br />
**Firmware Updates – When available, firmware updates will be posted at<br />
http://content.miccastore.com and will include installation instructions.<br />
Copyright © 2009-2012 <strong>Micca</strong>, LTD. All rights reserved.
X. Troubleshooting<br />
The following are some common questions and answers. If the following does not<br />
provide the answer you are looking for, please check the FAQ section on<br />
http://content.miccastore.com to see if any updated answers have been posted. You<br />
may also send an email to support@miccastore.com for personalized help.<br />
No video output, or distorted video on screen.<br />
Most likely, the player has not been set to the correct output mode. If connected using<br />
the AV Red/White/Yellow cable to the TV, press the button on the remote to<br />
toggle the output mode. If connected using the <strong>HD</strong>MI output to the TV, press the <br />
button on the remote to switch the player to <strong>HD</strong>MI output mode.<br />
Not detected by computer when connected via USB cable.<br />
Do not connect the power to the player when it is connected to a computer. Ensure that<br />
an internal hard drive is installed in the player. If the internal hard drive is new, it must<br />
be initialized/formatted before it will be detected by the computer (See chapter IV<br />
section B of this manual for instructions). Try connecting the player directly to a USB<br />
port on the computer, instead of through any USB Hubs.<br />
If the drive beeps, it may not be getting enough power from the USB port. It is<br />
recommended to use newer 5400RPM drives made by Western Digital, Toshiba, Hitachi,<br />
or Samsung for best compatibility.<br />
Player will not recognize internal hard drive when playing media files.<br />
If the internal hard drive is new, it must be initialized/formatted before it will be detected<br />
by the computer (See chapter IV section B of this manual for instructions). Be sure that<br />
the drive is initialized using MBR partition table and uses NTFS file system. It is<br />
recommended to use newer 5400RPM drives made by Western Digital, Toshiba, Hitachi,<br />
or Samsung for best compatibility.<br />
Copyright © 2009-2012 <strong>Micca</strong>, LTD. All rights reserved.
Information in this manual is believed to be accurate and reliable but <strong>Micca</strong> Ltd assumes no responsibility for its use<br />
nor for any infringement of patents or other rights of third parties which may result from the use of this manual or the<br />
product. <strong>Micca</strong> reserves the right to change product specifications at any time without notice.<br />
<strong>Micca</strong>, <strong>Slim</strong>-<strong>HD</strong>, and the <strong>Micca</strong> logo are trademarks of <strong>Micca</strong> Ltd. Other trademarks referenced in this manual are the<br />
properties of their respective owners.<br />
© 2012 <strong>Micca</strong> Ltd. All rights reserved.<br />
Copyright © 2009-2012 <strong>Micca</strong>, LTD. All rights reserved.