Laboratory Glass-Working for Scientists - Sciencemadness Dot Org
Laboratory Glass-Working for Scientists - Sciencemadness Dot Org
Laboratory Glass-Working for Scientists - Sciencemadness Dot Org

Create successful ePaper yourself
Turn your PDF publications into a flip-book with our unique Google optimized e-Paper software.
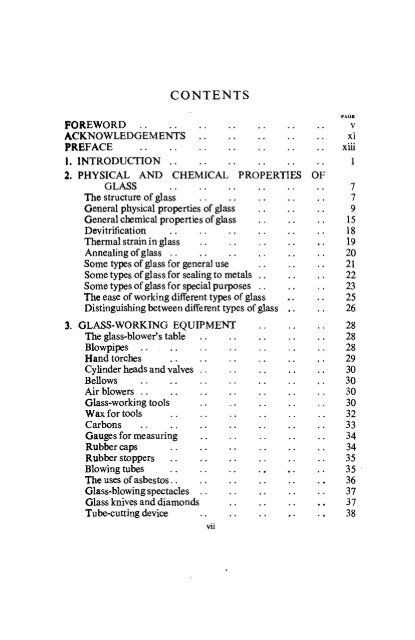
FOREWORD<br />
ACKNOWLEDGEM ENTS<br />
PREFACE<br />
1. INTRODUCTION ..<br />
CONTENTS<br />
2. PHYSICAL AND CHEMICAL PROPERTIES<br />
3.<br />
* #<br />
+ *<br />
* * * 4 *<br />
The structure of glass<br />
General physical properties of glass<br />
General chemical properties of glass<br />
Devitrification<br />
Thermal strain in glass<br />
Annealing of glass<br />
Some types of glass <strong>for</strong> general use<br />
Some types of glass <strong>for</strong> sealing to metals ..<br />
Some types of glass <strong>for</strong> special purposes ..<br />
The ease of working different types of glass<br />
Distinguishing between different types of glass<br />
GLASS-WORKING EQUIPMENT<br />
The glass-blower's table<br />
Blowpipes<br />
Hand torches<br />
Cylinder heads and valves<br />
Bellows<br />
Air blowers ..<br />
<strong>Glass</strong>-working tools<br />
Wax <strong>for</strong> tools<br />
Carbons<br />
Gauges <strong>for</strong> measuring<br />
Rubber caps<br />
Rubber stoppers<br />
Blowing tubes<br />
The uses of asbestos..<br />
<strong>Glass</strong>-blowing spectacles<br />
<strong>Glass</strong> knives and diamonds<br />
Tube-cutting device<br />
Vll<br />
-I<br />
# *<br />
+ +<br />
* • 4<br />
4<br />
« fr<br />
# *
Clamps<br />
Abrasives<br />
<strong>Glass</strong> holders<br />
Large tube supports<br />
Adjustable rollers<br />
<strong>Glass</strong>-blower's swivel<br />
Polarized light strain-viewer<br />
<strong>Glass</strong>-cutting wheels<br />
Lapping wheel<br />
CONTENTS<br />
Carborundum grinding wheel<br />
Annealing oven<br />
Treatment of slight burns<br />
The amount of equipment required <strong>for</strong> different purposes<br />
4. BASIC GLASS-WORKING OPERATIONS<br />
The preliminary preparation of materials<br />
The cleaning of glass tubes ..<br />
Breaking glass tubes<br />
Knocking off small bits of tubing<br />
Holding and rotating tubes in the bench flame<br />
Bends and spirals<br />
Putting a handle on the end of a tube<br />
Drawing tubes off to spindles<br />
Round-bottomed closures of tubes<br />
Fabrication of thin glass rod<br />
Blowing holes in glass tubes<br />
Joining tubes of similar sizes<br />
Joining tubes of different sizes<br />
T-joints<br />
Y-joints<br />
4- and 5-way junctions<br />
<strong>Working</strong> capillary tubes<br />
Blowing bulbs in the middle of a tube<br />
Blowing bulbs at the end of a tube<br />
Multiple per<strong>for</strong>ations in bulbs<br />
Flanging, flaring or bordering tubing<br />
Internal seals<br />
Thin glass windows<br />
Spinning out feet<br />
Tapering glass tubes<br />
Sealing-in sintered glass discs<br />
Mending cracks<br />
Detection and removal of leaks and holes<br />
+ * *<br />
vin<br />
* 4<br />
* *<br />
PAGS<br />
39<br />
39<br />
40<br />
41<br />
42<br />
42<br />
43<br />
44<br />
44<br />
45<br />
45<br />
46<br />
46<br />
48<br />
48<br />
48<br />
49<br />
51<br />
52<br />
53<br />
55<br />
56<br />
57<br />
58<br />
59<br />
60<br />
64<br />
65<br />
68<br />
68<br />
68<br />
70<br />
71<br />
72<br />
72<br />
73<br />
77<br />
78<br />
79<br />
79<br />
80<br />
81
CONTENTS<br />
Grinding glass<br />
Releasing frozen glass surfaces<br />
Polishing glass<br />
Drilling holes in glass<br />
Cementing glass<br />
Silvering of glass<br />
Depositing copper on glass<br />
Metallizing preparations <strong>for</strong> the firing on of metal<br />
on glass<br />
3. THE MANIPULATION OF LARGE TUBING<br />
General observations<br />
Bending big tubing ..<br />
Drawing off large tubes<br />
Closing large flasks ..<br />
Joining big tubes<br />
Big T-joints<br />
Big internal seals<br />
Mending cracks in large tubing<br />
Mending cracks near complex and large seals<br />
ayers<br />
6. SOME OPERATIONS WITH A GLASS-WORKING<br />
MACHINE ..<br />
7. METAL-TO-GLASS SEALS<br />
Matched and mismatched seals<br />
Sealing tungsten into Pyrex<br />
Sealing tungsten into special glasses<br />
Multiple wire seals ..<br />
Prepared copper-tungsten-nickel wires<br />
Sealing platinum into soda or lead glass<br />
Sealing platinum into Pyrex<br />
Special alloys <strong>for</strong> sealing to glass ..<br />
Copper-to-glass seals<br />
8. THE CONSTRUCTION OF SOME TYPICAL SINGLE<br />
PIECES OF EQUIPMENT<br />
Ampoules<br />
Sealed tubes <strong>for</strong> reactions<br />
Break-tip seals<br />
Distillation flasks ..<br />
Distillation splash heads<br />
Dewar seals<br />
Dewar vessels<br />
Cold finger refrigerant traps<br />
IX<br />
PAGE<br />
82<br />
82<br />
83<br />
83<br />
84<br />
85<br />
87<br />
87<br />
90<br />
90<br />
90<br />
91<br />
92<br />
93<br />
94<br />
95<br />
96<br />
96<br />
97<br />
102<br />
102<br />
103<br />
105<br />
105<br />
107<br />
108<br />
109<br />
110<br />
113<br />
117<br />
117<br />
118<br />
119<br />
120<br />
121<br />
121<br />
123<br />
125
Filter pumps<br />
Phosphorus pentoxide traps<br />
Condensers<br />
CONTENTS<br />
* # # * J *<br />
Fractional distillation condensers<br />
Fractionating columns<br />
A fractional distillation receiver<br />
Double surface condensers<br />
Mercury cut-offs<br />
McLeod gauges<br />
Traps to catch mercury displaced in apparatus<br />
Valves<br />
Soxhlet extraction apparatus<br />
Mercury vapour pumps<br />
Electrolytic gas generator .<br />
Thermostat regulators<br />
Gas flow meters<br />
Spectrum tubes<br />
Discharge tube lamps<br />
Apparatus containing many electrodes<br />
Leaks <strong>for</strong> molecular flow of gases ..<br />
Bourdon gauges and glass spiral gauges<br />
Circulating pumps<br />
Apparatus <strong>for</strong> semi-micro qualitative analysis<br />
Gas analysis apparatus<br />
9, THE ASSEMBLY OF COMPLEX APPARATUS<br />
General observations<br />
Joining closed systems<br />
Making more than one joint at once<br />
Removal of strain and clamping of apparatus<br />
Annealing by flame<br />
Use of a bent blowpipe and double tipping device<br />
Danger of flame cracks<br />
10. THE MANIPULATION OF SILICA ..<br />
The properties of fused silica and general remarks<br />
General technique <strong>for</strong> working fused silica<br />
Silica torsion fibres ,.<br />
* #<br />
AUTHOR INDEX<br />
SUBJECT INDEX<br />
4 *<br />
+ #<br />
# +<br />
* t<br />
x<br />
* *<br />
* #<br />
* *<br />
* *<br />
V *<br />
+ *<br />
* # # *<br />
PAGE<br />
126<br />
127<br />
128<br />
131<br />
132<br />
132<br />
133<br />
135<br />
136<br />
140<br />
140<br />
142<br />
144<br />
149<br />
150<br />
152<br />
153<br />
154<br />
156<br />
158<br />
159<br />
160<br />
162<br />
163<br />
166<br />
166<br />
167<br />
168<br />
169<br />
170<br />
170<br />
171<br />
173<br />
173.<br />
174<br />
175<br />
179<br />
181
ACKNOWLEDGEMENTS<br />
We thank the following Companies and individuals:<br />
Aero Research Ltd., Dux<strong>for</strong>d, Cambridge, <strong>for</strong> in<strong>for</strong>mation on cements<br />
<strong>for</strong> glass<br />
Tlie British Heat-Resisting <strong>Glass</strong> Company Ltd., Phoenix Works,<br />
Bilston, Staffs., <strong>for</strong> in<strong>for</strong>mation about Phoenix glass<br />
Tile British Thomson-Houston Company Ltd., Rugby, <strong>for</strong> in<strong>for</strong>mation<br />
about glasses manufactured by them<br />
Edwards High Vacuum Ltd., Manor Royal, Crawley, Sussex, <strong>for</strong><br />
in<strong>for</strong>mation about their glass-working machine and <strong>for</strong> permission<br />
to reproduce FIGURES 34 and 35<br />
A. Gallenkamp & Company Ltd., 17-29 Sun Street, Finsbury Square,<br />
London, E.C.2., <strong>for</strong> in<strong>for</strong>mation about the Davies double surface<br />
condenser, and <strong>for</strong> permission to reproduce FIGURE 4<br />
The General Electric Company Ltd., Osram <strong>Glass</strong> Works, East Lane,<br />
Wembley, Middlesex, <strong>for</strong> in<strong>for</strong>mation about glasses manufactured<br />
by them<br />
lames A. Jobling & Company Ltd., Wear <strong>Glass</strong> Works, Sunderland,<br />
<strong>for</strong> in<strong>for</strong>mation about Pyrex glass<br />
Johnson, Matthey & Company Ltd., 73-83 Hatton Garden, London,<br />
E.C.I., <strong>for</strong> in<strong>for</strong>mation about preparations manufactured by them<br />
<strong>for</strong> the production of fired-on metallized layers on glass<br />
John Moncrieff Ltd., North British <strong>Glass</strong> Works, Perth, Scotland,<br />
<strong>for</strong> in<strong>for</strong>mation about Monax glass<br />
Plowden & Thompson Ltd., Dial <strong>Glass</strong> Works, Stourbridge, Worcs.,<br />
<strong>for</strong> in<strong>for</strong>mation about glasses manufactured by them<br />
Stone-Chance Ltd., 28 St. James's Square, London, S.W.I., <strong>for</strong> in<strong>for</strong>mation<br />
about glass-working burners manufactured by them<br />
The Thermal Syndicate Ltd., Wallsend, Northumberland, <strong>for</strong> in<strong>for</strong>mation<br />
about Vitreosil<br />
Wood Brothers <strong>Glass</strong> Company Ltd., Borough Flint <strong>Glass</strong> Works,<br />
Barnsley, Yorkshire, <strong>for</strong> in<strong>for</strong>mation about Firmasil glass<br />
D. W. Bassett and J. A. Stone of King's College, London, <strong>for</strong> reading<br />
the original manuscript and making many suggestions<br />
V. J. Clancey <strong>for</strong> in<strong>for</strong>mation on the method used by him <strong>for</strong> making<br />
fused silica fibres.<br />
XI
PREFACE<br />
A MBO <strong>for</strong> working glass is frequently encountered in scientific<br />
UIMrch and teaching, particularly in the field of physical chemistry.<br />
h many laboratories this problem is solved by the employment of<br />
professional glass-blowers, and the research worker requires little or<br />
10 skill in the manipulation of glass. Or it may be that a laboratory<br />
hiS no glass-blower and the scientist has to rely on his own resources,<br />
•Ombined perhaps with the services of some outside specialist. In<br />
Other laboratories the scientist may find the available services to be<br />
ilfltient in various respects, or overloaded, so that more satisfactory<br />
progress is made when he himself becomes an amateur glass-worker.<br />
Tllli possibility was emphasized by W. A. Shenstone in 1889, when<br />
itt wrote that the amateur with practice can make almost all the<br />
^apparatus he needs <strong>for</strong> lecture or other experiments with a considerrlole<br />
saving in expense 'and, which very often is more important,<br />
out the delay that occurs when one depends upon the proonal<br />
glass-worker.' This latter advantage is, he writes, <strong>for</strong><br />
If a very weighty one.<br />
We became interested in working glass ourselves when engaged in<br />
ous researches in the Chemical Laboratories at King's College,<br />
don, and over the last few years we have become increasingly<br />
vinced that the scientific glass-worker can use methods which<br />
'er from those of the professional. The scientist is primarily<br />
ted in apparatus which gives him the results he seeks <strong>for</strong>, and<br />
this apparatus lacks elegance in appearance and is made by<br />
ods which are looked upon unfavourably by the professional<br />
blower, it by no means follows that the apparatus is defective<br />
t * in<br />
a scientific point of view.<br />
We have there<strong>for</strong>e compiled this work in the hope that it will be<br />
to scientists faced with problems of glass-working. By avoidthe<br />
more difficult manipulations involved in professional glassking,<br />
it seems possible <strong>for</strong> a scientist to assemble quite complex<br />
atus, including, <strong>for</strong> example, his own mercury diffusion pumps,<br />
spectrometer tubes, molecular beam generators and silica<br />
; the preliminary practice required, which depends upon inc<br />
ability, may take some hours a week <strong>for</strong> a period of two or<br />
months. We have also endeavoured to bring together data<br />
xin<br />
J-
PREFACE<br />
scattered in the literature, and to give an account<br />
more difficult methods of manipulating glass.<br />
The researches which led to our interest in glass-working were<br />
supported by grants from the Research Fund of the University of<br />
London, from the Institute of Petroleum and from the Department<br />
of Scientific and Industrial Research (maintenance grants to A. J. C<br />
and J. D.).<br />
A. J. B. R.<br />
D. J. F.<br />
December, 1956<br />
xiv<br />
J.D.
Chapter 1<br />
INTRODUCTION<br />
GLASS has been known to mankind <strong>for</strong> some thousands of years. The<br />
manufacture and working of glass became a stable industry in Egypt<br />
it the beginning of the 18th dynasty. W. M. Flinders Petrie (1909)<br />
hfti described how, about 1370 B.C. in the time of Amenhotep IV, in<br />
Die works at Tell-el-Amarna, a lump of glass was patted into a<br />
Cylinder and then rolled into a rod which was drawn into cane about<br />
| In, thick. This cane was wound on a mandrel to produce hollow<br />
Later the art of pressing glass into open moulds was dis-<br />
OOvered. The blowpipe—an iron tube 4-5 feet long with a mouthpteoe<br />
at one end—was probably discovered about the beginning of<br />
Christian era, and, according to G. W. MOREY (1938), caused an<br />
Industrial revolution. The use of tongs <strong>for</strong> manipulating glass was<br />
known to the Romans in A.D. 300. By this time, there<strong>for</strong>e, several<br />
Of the basic methods which are now useful in constructing complex<br />
islentific apparatus had been developed. The glass in those early<br />
was similar in many respects to a modern soda-lime-silica<br />
g)tM. Scientific method does not seem to have influenced glass proigttCtion<br />
very much be<strong>for</strong>e the present century, although of important<br />
iarly investigations we may mention those of K. W. Scheele and<br />
A. L. Lavoisier on the durability of glass exposed to water and weak<br />
•dds, and those of W. V. Harcourt and M. Faraday on the production<br />
Alld properties of glass.<br />
The value of glass as a laboratory material is very great. A<br />
oderately skilled worker can fabricate complex glass equipment<br />
Ming simple tools; and perhaps of even greater value in research is<br />
the ease with which complex glass apparatus can be modified and<br />
idded to with little or no dismantling. <strong>Glass</strong> is sufficiently chemically<br />
inert <strong>for</strong> most purposes, and vitreous silica may be used when extra-<br />
Ordinary inertness is required. The transparency of glass is often<br />
Valuable. <strong>Glass</strong> is a good electrical insulator, and metal electrodes in<br />
ft glass envelope can be raised to incandescence by eddy-currents<br />
induced by a coil, outside the envelope, carrying high-frequency<br />
Current. In vacuum researches glass is valuable because of the ease<br />
With which leaks are found with a Tesla coil, and on account of its<br />
1
INTRODUCTION<br />
ready outgassing on baking. For nearly all practical purposes glass<br />
is vacuum-tight. <strong>Glass</strong>-to-metal seals of various kinds may be made,<br />
and different types of glass can be sealed together with appropriate<br />
intermediate glasses.<br />
The manipulation of glass is a craft and has been handed down<br />
over the centuries largely by personal example and traditioa Venice<br />
was the most important centre of glass-working <strong>for</strong> the four centuries<br />
following its rapid development in the eleventh century to a<br />
dominating position; in 1279 a system of apprenticeship needing<br />
eight years was introduced there, and the closed and somewhat secretive<br />
nature of the craft was rein<strong>for</strong>ced by the employment of assassins<br />
to remove glass-blowers who seemed likely to give away valuable<br />
secrets to other centres of the industry. Perhaps the aura of mystery<br />
which still to some extent surrounds scientific glass-working can be<br />
traced back to these times.<br />
The basic techniques developed <strong>for</strong> scientific glass-working involve<br />
the manipulation of glass in the <strong>for</strong>m of tubing or rod, using a flame<br />
as a source of heat. The article to be fashioned is held by the operator<br />
in both hands, and the part to be worked becomes a semi-molten<br />
mass in the flame and is shaped principally by blowing. Generally it<br />
is necessary to rotate the article in the flame, and this often requires<br />
a very high degree of muscular co-ordination, which can be developed<br />
by professional workers to a remarkable extent. This rotation operation<br />
is not easy; M. FARADAY (1842) stated the outstanding difficulty<br />
in the following words: 'But when the heat has brought the glass<br />
into a soft state, it is by no means easy so exactly to turn the tube at<br />
both ends alike, and so lightly yet equally to hold them, that the soft<br />
part shall retain its cylindrical shape; being neither twisted, nor bent,<br />
nor elongated, nor thrust up.' R. E. THRELFALL (1946) considers that<br />
one third of the art of glass-blowing consists essentially in being able<br />
to move both hands about, rotating a tube with each finger and<br />
thumb, and keeping constant both the distance between the hands<br />
and the speed of rotation. Considerable practice is necessary to gain<br />
great mastery of this technique, which we can call the bench-flame<br />
method of work, since the flame is in a fixed position on the bench.<br />
The problem facing the scientist who has to engage in his own glassworking<br />
is that of simplifying or modifying those operations which<br />
depend on extremely good muscular co-ordination. We consider this<br />
problem to be soluble when elegance can be sacrificed to utility.<br />
The requirements of a scientist differ from those of a professional<br />
glass-worker. The starting point of a new research is new ideas, and<br />
when these require subsequent experimental investigation the apparatus<br />
used need be only good enough to give results which are<br />
2
M-N -<br />
INTRODUCTION<br />
satisfactory from a scientific point of view. A glass apparatus must, in<br />
fact, hold together and work, but it may have an unsightly appearance.<br />
However, we must also note that experimental skill in itself is<br />
of great value to the scientist in pursuing his ideas, <strong>for</strong> as Faraday<br />
(1842) wrote: The person who could devise only, without knowing<br />
how to per<strong>for</strong>m, would not be able to extend his knowledge far, or<br />
make it useful; and where the doubts or questions that arise in the<br />
mind are best answered by the results of an experiment, whatever<br />
enables the philosopher to per<strong>for</strong>m the experiment in the simplest,<br />
quickest, and most correct manner cannot but be esteemed by him as<br />
of the utmost value.' In addition to these considerations, experimental<br />
skill is of particular value in developing new techniques; and<br />
may lead to many unexpected developments. H. E. ARMSTRONG<br />
(1924) tells how the introduction in 1865 of the Sprengel pum;<br />
fairly simple piece of glass-working—revolutionized the English<br />
water supply. Again we may note the important practical consequences<br />
following on the early work of H. L. CALLENDAR (1892) on<br />
Vitreous silica tubes, and that of C. V. Boys and R. Threlfall on<br />
vitreous silica fibres.<br />
In view of the difference in objective between the scientist and<br />
professional glass-worker, we consider that glass-working <strong>for</strong> the<br />
icientist should develop as its own craft, and indeed this has happened<br />
to a certain extent. An early systematic account is that of J. J.<br />
BERZELIUS (1833), which describes some of the basic operations.<br />
Faraday's Chemical Manipulation is a masterly treatment, referred to<br />
frequently in R. THRELFALL'S notable work On <strong>Laboratory</strong> Arts<br />
(1898), which devotes 107 pages to glass-blowing and manipulation<br />
of glass. Threlfall seems to have been one of the first to describe<br />
what is now often called 1n-place' glass-blowing, in which the glass<br />
pieces are kept stationary by clamps, and the flame is moved. Joints<br />
are made with thin glass rod, now often called welding rod, by a<br />
method very similar to that used in 1370 B.C. in the Tell-el~Amarna<br />
factory. The difficulty of holding and rotating the glass is avoided,<br />
and thus, as Threlfali says, the method is most useful to the experimenter<br />
who wants to get on to otter things be<strong>for</strong>e sufficient skill is<br />
acquired <strong>for</strong> the rotation method. The tradition of the craft of glassworking<br />
<strong>for</strong> scientists is continued, we think, by the works of W. A.<br />
SHBNSTONB (1889), T. BOLAS (1898), B. D. BOLAS (1921), F. C.<br />
FlUltY, C. S, TAYLOR and J. D. EDWARDS (1928), R. H. WRIGHT<br />
(1943), and J. D. HELDMAN (1946). Amongst eminent scientists who<br />
have carried on the glass-working craft with their own hands we may<br />
mention R. W. Bunsen, whose skill at the oil-fed blowpipe and whose<br />
plary patience when one of his pupils rapidly and several times<br />
3
INTRODUCTION<br />
in succession broke the apparatus glass-blown by the master himself<br />
are described by H. E. ROSCOE (1901); J. Dewar, whose vacuumjacketed<br />
glass vessels marked a new era in low temperature research;<br />
M. Bodenstein and W. Ramsay, both of whom are described by E.<br />
K. RIDEAL (1951) as uncannily skilled in the art of glass-blowing; and<br />
F. W. Aston, whose glass bulb discharge tubes and cooled charcoalin-glass<br />
pumping systems first gave those exact mass relations of<br />
isotopic chemistry which contributed decisively to the opening of the<br />
atomic age. In modern times the old tradition that the masters of<br />
science should also be themselves masters of the practical craft of<br />
science has failed to persist, and the more eminent scientists are now<br />
usually not to be found at the working bench in the research laboratory.<br />
There is, we think, a consequent weakening of the craft basis<br />
of practical scientific work, and some retreat from the view expressed<br />
by I. Langmuir that work in the laboratory can be fun.<br />
The increasing use in scientific research of borosilicate glasses over<br />
the last thirty years has not, on the whole, been accompanied by<br />
much departure from the traditional methods of glass-working.<br />
Generally it is much easier to rotate the flame about a stationary<br />
clamped article than to rotate the article in a stationary flame.<br />
Quite complex apparatus can be constructed by working with a hand<br />
torch—giving a movable flame held in the hand—on clamped apparatus.<br />
This method of work is specially suitable <strong>for</strong> the borosilicate<br />
glasses of low thermal expansion, which can be worked into quite<br />
knobby apparatus without there being much danger of cracking on<br />
cooling—in contrast to soda-lime-silica glass. The joining of two<br />
clamped tubes with a movable flame has been described by SHEN-<br />
STONE (1889), THRELFALL (1898) and TRAVERS (1901). A X. REIMANN<br />
(1952) has described some further uses of this general method, but<br />
the great number of complex operations which can be carried out<br />
with facility using a hand torch in place of a bench torch does not<br />
seem on the whole to have been realized; indeed, HELDMAN writes:<br />
'End-seals with both tubes of approximately the same diameter and<br />
T-seals are, with practically no exceptions, the whole repertory of<br />
in-place glass blowing. 5 We are by no means in agreement with this<br />
statement. Many operations can be carried out with a hand torch<br />
on completely fixed glass, or on a fixed piece of glass to which some<br />
other part of glass can be joined by holding it in one hand whilst the<br />
other hand manipulates the hand torch. The results are usually not<br />
as elegant as those obtained by a skilled worker using rotation in a<br />
bench torch, but less skill and practice are required <strong>for</strong> the hand torch<br />
method. It has the further great advantage that the complexity of the<br />
apparatus being constructed can be steadily increased without<br />
4
INTRODUCTION<br />
fTMtly increasing the glass-working difficulty. Furthermore, the<br />
lOtatist will probably only work glass from time to time, depending<br />
tpon the requirements of the research or other work, and the hand<br />
torch method is far more suitable than the bench torch method <strong>for</strong><br />
the operator who does not want to spend time on preliminary<br />
practice; it is also far more suitable <strong>for</strong> the scientist working in<br />
iwkward positions on complex apparatus. We find that very compttft<br />
apparatus may be assembled with a hand torch.<br />
A clear account of professional methods of glass-working has been<br />
gfvtn by W. E. BARR and V. J. ANHORN (1949). Valuable in<strong>for</strong>mation<br />
•©me glass-working problems is also found in the works of J.<br />
FfftONG (1940), M. C. NOKES (1948), A. J. ANSUEY (1950), A. ELLIOTT<br />
Md J. HOME DICKSON (1951), and H. J. J. BRADDICK (1954).<br />
ounts of the simpler operations have been given by W. E.<br />
•AUK-WINDER (1947) and E. H. MORGAN (1953).<br />
REFERENCES<br />
ttUY, A. J., 1950, An Introduction to <strong>Laboratory</strong> Technique, 2nd<br />
Edn; London, Macmillan.<br />
IM»TltONG( H. E., 1924, Chemistry in the Twentieth Century, edited<br />
by E. F. Armstrong; London, Benn.<br />
pi, W, E. and ANHORN, V. J., 1949, Scientific and Industrial <strong>Glass</strong><br />
* Blowing and <strong>Laboratory</strong> Techniques', Pittsburgh, Instruments<br />
Publishing Co.<br />
i, J, J.» 1833, Traite de Chimie, (Trans. Esslinger) Vol. 8;<br />
Paris, Firmin Didot Freres.<br />
B. D.» 1921, A Handbook of <strong>Laboratory</strong> <strong>Glass</strong>-Blowing;<br />
London, Routledge.<br />
T.» 1898, <strong>Glass</strong> Blowing and <strong>Working</strong>; London, Dawbarn and<br />
Ward.<br />
«CK, H. J. J., 1954, The Physics of Experimental Method;<br />
London, Chapman & Hall.<br />
>AR, H. L., 1892, /. Iron St. Inst., 1,164.<br />
; A. and HOME DICKSON, J., 1951, <strong>Laboratory</strong> Instruments;<br />
London, Chapman & Hall.<br />
V, M.t 1842, Chemical Manipulation, 3rd Edn; London,<br />
Murray.<br />
PBTRIE, W. M., 1909, The Arts and Crafts of Ancient Egypt;<br />
Edinburgh and London, Foulis.<br />
fcAIY, F. C, TAYLOR, C. S. and EDWARDS, J. D., 1928, <strong>Laboratory</strong><br />
1 Class Blowing, 2nd Edn; New York, McGraw-Hill.<br />
hLDMAN, J. D., 1946, Techniques of <strong>Glass</strong> Manipulation in Scientific<br />
I Btstarch; New York, Prentice-Hall.<br />
5
INTRODUCTION<br />
MOREY, G. W., 1938, The Properties of <strong>Glass</strong>; New York, Reinhold.<br />
MORGAN, E. H., 1953, Newnes Practiced Mechanics; issues of October,<br />
November and December.<br />
NOKES, M. C, 1948, Modem <strong>Glass</strong> <strong>Working</strong> and <strong>Laboratory</strong> Technique,<br />
3rd Edn; London, Heinemann.<br />
PARK-WINDER, W. E., 1947, Simple <strong>Glass</strong>-blowing <strong>for</strong> Laboratories<br />
and Schools; London, Crosby Lockwood.<br />
REIMANN, A, L., 1952, Vacuum Technique; London, Chapman &<br />
Hall.<br />
RIDEAL, E. K„ 1951, /. Chem. Soc, 1640.<br />
ROSCOE, H. E., 1901, Chemical Society Memorial Lectures 1893-<br />
1900; London, Gurney & Jackson.<br />
SHENSTONE, W. A., 1889, Hie Methods of <strong>Glass</strong> Blowing, 2nd Edn;<br />
London, Rivingtons.<br />
STRONG, J., 1940, Modern Physical <strong>Laboratory</strong> Practice; London and<br />
Glasgow, Blackie.<br />
THRELFALL, R., 1898, On <strong>Laboratory</strong> Arts; London, Macmillan.<br />
THRELFALL, R. E., 1946, <strong>Glass</strong> Tubing; London, British Association<br />
of Chemists.<br />
TRAVERS, M. W., 1901, The Experimental Study of Gases; London,<br />
Macmillan.<br />
WRIGHT, R. H., 1943, Manual of <strong>Laboratory</strong> <strong>Glass</strong>-Blowing; Brooklyn,<br />
N.Y., Chemical Publishing Co.<br />
6
Chapter 2<br />
PHYSICAL AND CHEMICAL<br />
PROPERTIES OF GLASS<br />
The Structure of <strong>Glass</strong><br />
A OLAS5 is a product of fusion which has cooled to a rigid condition<br />
Without crystallizing. This definition includes a large number of<br />
<strong>Org</strong>anic glasses, and does not restrict the term 'glass* to inorganic<br />
gubltances, which is a frequent practice in the U.S.A. This restriction<br />
ntnu somewhat arbitrary, particularly when we consider how G.<br />
immann established the general principles of the glass-like state by<br />
•larch on organic glasses, and how the devitrification of technica<br />
hues is paralleled by that of organic glasses. Tammann concluded<br />
|tt a glass could be regarded as a supercooled liquid in which the<br />
National movements of the molecules had been frozen (see W. E.<br />
,, 1952). In fact, as R. Boyle described it about 1660, 'the<br />
of the glass agitated by the heat, were surpriz'd by the cold<br />
they could make an end of those motions which were requisite<br />
| their disposing themselves into the most durable texture.' In<br />
pdarn terminology, a glass is thermodynamically unstable with<br />
to the corresponding crystal.<br />
lalline silica (quartz, tridymite or cristobalite) in its various<br />
lions is built up of Si04 tetrahedra linked together in a<br />
manner so that every oxygen is between two silicons. The<br />
ra there<strong>for</strong>e share corners. The arrangement in space of the<br />
'a is different in the various crystalline <strong>for</strong>ms, but is always<br />
regular. A silica glass, in contrast, again contains Si04 tetrawith<br />
every corner shared; but by slight distortions of the valency<br />
compared with the crystal, a continuous and irregular threeional<br />
network is built up. The orientation about the Si-O-Si<br />
of one Si04 tetrahedron with respect to another can be practirandom.<br />
Thus a two-dimensional picture of a silica glass would<br />
a series of irregular rings, with an average number of about six<br />
ra in each ring, but with the number of tetrahedra in indirings<br />
varying from three to ten or more. The silica glass<br />
Ultflw the condition <strong>for</strong> glass <strong>for</strong>mation proposed by W. H.<br />
7
PHYSICAL AND CHEMICAL PROPERTIES OF GLASS<br />
ZACHARIASEN (1932), namely that the substance can <strong>for</strong>m extended<br />
three-dimensional networks lacking periodicity, with an energy<br />
content comparable with that of the corresponding crystal network.<br />
A glass does not, there<strong>for</strong>e, produce a regular diffraction pattern<br />
with x-rays; but a monochromatic x-ray beam incident on a glass is<br />
scattered, and a radial distribution curve may be constructed. The<br />
space average of the distribution of atoms round a given one can be<br />
deduced (see J. T. RANDALL, 1938), Much work of this kind has been<br />
carried out by B. E. Warren and his colleagues.<br />
A soda-silica glass results from the fusion of Na30 with SiOa. The<br />
number of oxygens is more than twice the number of silicons, and<br />
some of the oxygens are bonded to only one silicon, A silicon bonded<br />
to one of these oxygens is at the centre of a tetrahedron which shares<br />
only three corners with other tetrahedra. With each singly bonded<br />
oxygen there is associated one negative charge. The sodium ions are<br />
found in the holes in the three-dimensional silicon-oxygen network.<br />
On the average, each sodium is surrounded by about six oxygens, and<br />
each silicon by four oxygens. In a soda-boric oxide glass of low soda<br />
content the extra oxygen is bonded between two borons, and there<br />
are no singly bonded oxygens. This can happen because in a boric<br />
oxide glass the co-ordination of boron by oxygen is triangular, and in<br />
the mixed glass some of the boron atoms become tetrahedrally coordinated<br />
by oxygen. When there is more than about 13-16 per cent<br />
of Na20 in the glass, the boron atoms cease to change their coordination,<br />
and some singly bonded oxygens exist (B. E. WARREN,<br />
1942).<br />
Soda-silica glasses are not <strong>for</strong>med when the soda content exceeds<br />
that given by the <strong>for</strong>mula Na2Si03. For this <strong>for</strong>mula, if every silicon<br />
atom is surrounded tetrahedrally by four oxygen atoms, then on the<br />
average two oxygens round every silicon are singly bonded, and a<br />
continuous network is just possible. With still more oxygen it is not<br />
possible. In a soda-silica glass with much less soda, there are many<br />
Si04 tetrahedra sharing every corner, and a number sharing only<br />
three corners. The way in which these different tetrahedra are distributed<br />
is not yet quite clear. There may be small regions where all<br />
the tetrahedra share four corners, and such regions are composed of<br />
pure silica; they may alternate with regions of, <strong>for</strong> example,<br />
Na20 2Si02. The composition may vary through the glass when<br />
sufficiently small regions are considered.<br />
The general picture of a glass as a negatively charged irregular<br />
framework containing holes with positive ions in them enables a<br />
distinction to be made between the network-<strong>for</strong>ming ions, which<br />
comprise the framework, and the network-modifying ions which go<br />
8
GENERAL PHYSICAL PROPERTIES OF GLASS<br />
n the holes. Silicon, boron and phosphorus are important networkbrming<br />
ions. Sodium and potassium are important networknodifying<br />
ions. Other ions can act in both capacities. This is<br />
probably true of aluminium, beryllium, zinc, iron and titanium. In a<br />
•ad-si lie a glass it seems that lead atoms can take part in the network<br />
ind link Si04 tetrahedra together. Cobalt ions in network-modifying<br />
positions tend on heating to move into the network, and this can<br />
MUM a colour change from pink to blue.<br />
Most commercial glasses are based on silicates or borosilicates. A<br />
typical hard borosilicate glass <strong>for</strong> chemical work may contain 80 per<br />
Wit Si02f 12 per cent B2Os and 4 per cent NaaO. A soft soda-limelllica<br />
glass (usually referred to as soda glass) may contain 70 per<br />
3tnt St08,17 per cent NaaO and 5-4 per cent CaO. Lead glasses, used<br />
<strong>for</strong> lamp and valve stems, may contain 30 per cent PbO, 57 per cent<br />
WOt, 5 per cent NasO and 7 per cent K26. These glasses have high<br />
ritctrical resistance. <strong>Glass</strong>es with exceptionally high softening temperatures<br />
contain 20-25 per cent of A1203. Borate glasses, sub-<br />
Htntially free from silica (8 per cent Si02) are used <strong>for</strong> sodium<br />
Uncharge lamps.<br />
General accounts of the structure of glass have been given by J. E.<br />
ITANWORTH (1950), B. E. WARREN (1940) and C. J. PHILLIPS (1948).<br />
General Physical Properties of <strong>Glass</strong><br />
[ht physical properties of a given specimen of glass may depend<br />
ipon the previous history of the specimen. This is particularly the<br />
<strong>for</strong> the mechanical strength under tension, when the surface preiMtment<br />
of the specimen is of decisive importance. The thermal<br />
nsion and viscosity of glass also depend to some extent on the<br />
iiy of the specimen. The importance of this factor has been<br />
phasized by A. E. DALE and J, E. STANWORTH (1945). R, W.<br />
LAS (1945) has given a valuable review of the physical proof<br />
glass.<br />
f 0Chanical Strength<br />
important property <strong>for</strong> the practical worker is the strength of<br />
|m under tension. The surface of glass very probably contains<br />
lUMrous extremely small cracks extending into the glass, and when<br />
tensile stress is applied there is a concentration of stress at the ends<br />
)f time cracks, which causes them to grow further into the glass,<br />
Bttil at some crack breakage occurs and is propagated through the<br />
•toiinen. <strong>Glass</strong> usually breaks in a direction at right angles to the<br />
~"~n of maximum<br />
from<br />
9
PHYSICAL AND CHEMICAL PROPERTIES OF GLASS<br />
fibre; but touching a new fibre, even with the fingers, greatly weakens<br />
it. An old fibre is actually strengthened by removing the surface<br />
layer with hydrofluoric acid, even though the cross-section is reduced.<br />
The strength of a glass under tension varies from one specimen to<br />
another. A further complication is the variation of the tensile<br />
strength with the time <strong>for</strong> which the stress is applied. A tensile stress<br />
which does not cause fracture after a short time of application may<br />
do so after a lone time. There is in fact a delaved fracture of glass.<br />
j><br />
.1<br />
0-007<br />
i'<br />
Breaking stress kg/nun:<br />
FIGURE 1. Nature of the relation between time of loading<br />
and breaking stress <strong>for</strong> glass. This property is of a<br />
statistical nature, and the particular curve shown can<br />
only be taken as representative<br />
The nature of the relation between time of loading and breaking<br />
stress <strong>for</strong> a borosilicate or soda-lime-silica glass is shown in FIGURE<br />
1. The curve given must be taken as representative only. A typical<br />
figure <strong>for</strong> the safe tensile strength <strong>for</strong> prolonged loading times is<br />
0-7 kg/mm 2 (1000 lb/in. 2 ). Similar results <strong>for</strong> the relation between<br />
bending stress and time to fracture are found when a tensile stress is<br />
produced by bending a glass rod into an arc of a circle. From<br />
FIGURE 1 we note that an increase of stress by a factor of 4 reduces<br />
the time required <strong>for</strong> fracture by over 10 6 times. If a certain load is<br />
supported <strong>for</strong> one hour by a certain piece of glass, one quarter of the<br />
load should be supported <strong>for</strong> a million hours. This can be made use<br />
10
GENERAL PHYSICAL PROPERTIES OF GLASS<br />
Of in testing the extent to which stress can be applied to a glass<br />
ipparatus. Four times the stress the glass must support can be<br />
applied <strong>for</strong> a short time.<br />
The delayed fracture of glass, shown in FIGURE 1, must be borne in<br />
mind in assembling apparatus. If, <strong>for</strong> example, an apparatus is<br />
damped so that bending stress is introduced, the apparatus may<br />
break after a long interval. Chemical reactions at the surface of the<br />
glass may be partially responsible <strong>for</strong> delayed fracture: C GURNEY<br />
ami S. PEARSON (1952) found a soda-lime-silica glass to be stronger<br />
in vacuum, and to be weakened by carbon dioxide and water in the<br />
surrounding atmosphere.<br />
Thermal Expansion<br />
The coefficient of linear thermal expansion is almost constant, <strong>for</strong><br />
most types of glass, <strong>for</strong> temperatures up to 400~-600°C. The actual<br />
value depends on the chemical constitution of the glass. It then<br />
Increases rapidly above a certain temperature, often called the<br />
too £00 300<br />
Temperature<br />
m SCO<br />
FIQVEM 2. A typical expansion curve <strong>for</strong> a hard borosilicate glass<br />
(Phoenix)<br />
•trans<strong>for</strong>mation point'. This is not, however, a characteristic temperature,<br />
since it depends on the thermal history of the specimen and<br />
the rate of heating. At a higher temperature the glass softens and<br />
Mases to expand. This is sometimes called the 'softening temperature*<br />
or the 'Mg point'. Confusion may result from another definition<br />
of softening temperature, depending upon the rate of extension<br />
a fibre by viscous flow. This latter softening temperature, which<br />
s to a viscosity of 10 7 * 8 poises, is very much higher than<br />
ii .<br />
Mg point. A typical linear expansion curve <strong>for</strong> a borosilicate<br />
glass (Phoenix) is shown in FIGURE 2. A is the trans<strong>for</strong>mation point<br />
d B the Mg point. The temperature corresponding to A is often<br />
Oalled the iower annealing temperature', and corresponds to a<br />
Viscosity of about 10 14 poises; that corresponding to B is often called<br />
the *upper annealing temperature', and corresponds to a viscosity of<br />
11<br />
V
PHYSICAL AND CHEMICAL PROPERTIES OF GLASS<br />
about 1G 12 poises. Another definition in common use, especially in<br />
the U.S.A., is to call the 'annealing temperature' that at which the<br />
viscosity is 10 13 * 4 poises. This is then between A a,n&B on the thermal<br />
expansion curve. It is useful to bear in mind the confused state of<br />
terminology and definitions when using tabulated data on the<br />
thermal properties of glass. The viscosities mentioned above are,<br />
perhaps, not established with certainty. At the lower annealing<br />
temperature, annealing is actually extremely slow. This temperature<br />
is not used <strong>for</strong> the practical annealing of laboratory apparatus.<br />
Thermal Endurance<br />
This measures the ability of the glass to stand sudden changes of<br />
temperature without fracture. When a specimen of glass is suddenly<br />
heated uni<strong>for</strong>mly over all its surface, the heat penetrates slowly into<br />
the interior. The outside layers are heated first, and being unable to<br />
expand fully they become subject to a compressive stress, whilst the<br />
inner layers become subject to a tensile stress. When the specimen at<br />
a uni<strong>for</strong>m temperature is suddenly cooled over all its surface, the<br />
surface layers are subject to tensile stress. Since the mechanism of<br />
fracture usually involves surface cracks, glass is more likely to break<br />
on sudden cooling than on sudden heating. The magnitude of the<br />
stress produced on sudden cooling depends on the modulus of<br />
elasticity and the coefficient of linear thermal expansion, and, in a<br />
way not important in practice, on Poisson's ratio. Thermal endurance<br />
is measured by somewhat empirical methods, and is again a<br />
statistical quantity. A heat-resisting glass is one having a high<br />
thermal endurance; a hard glass has a high softening temperature.<br />
A 1-mm thick beaker of a hard borosilicate glass, such as Pyrex,<br />
Phoenix or Firmasil, will require a thermal shock, by sudden cooling,<br />
of about 325°C to give appreciable probability of fracture. For a<br />
soda-lime-silica beaker the corresponding figure is about 120°C.<br />
Beakers of Monax glass stand a much greater thermal shock than<br />
the soda-lime-silica beaker; the beakers of standard thickness can<br />
usually survive a thermal shock of 24O~250°C. Thick glass fractures<br />
with less thermal shock than thin glass.<br />
The glass-worker subjects tubing to thermal shock by suddenly<br />
placing it in a hot flame. The inner surface of the glass tube is then not<br />
heated directly, and is very quickly subjected to tensile stress. The hard<br />
borosilicate glasses as tubes can usually be placed immediately in an<br />
oxy-coal gas flame without fracture, but complex apparatus, especially<br />
when internal seals are present, requires more gentle heating.<br />
Soda-4ime-silica glass tubes need gentle warming at first, particularly<br />
when the end of a tube which has not been fire-polished is put in the<br />
12
GENERAL PHYSICAL PROPERTIES OF GLASS<br />
Bamc. The end of a tube is fire-polished by fusing it in a flame, and<br />
this process closes up surface cracks. Vitreous silica has very great<br />
thermal endurance: small red-hot articles can be quenched in water<br />
without cracking.<br />
Thermal Conductivity<br />
For the hard borosilicate glasses and the soda-lime-silica glasses this<br />
ft around 0-0025 cal °C" 1 cm -1 sec 1 . For vitreous silica ( Vitreosil) in<br />
the transparent <strong>for</strong>m it is 0-0025 up to 500°C, and 0-0035 from 500<br />
to 1000°C; <strong>for</strong> the translucent <strong>for</strong>m it is 0-0033.<br />
Viscosity and Softening Temperatures<br />
These properties have already been mentioned in connection with<br />
thermal expansion. The viscosity decreases rapidly with increasing<br />
temperature. A linear relation is found between the logarithm of the<br />
viscosity and the reciprocal of the absolute temperature. This is<br />
Convenient <strong>for</strong> extrapolation. When the viscosity has the value 10 7 " 6<br />
poises the glass is mobile enough to be drawn into threads, and the<br />
temperature is sometimes called the softening temperature (see p. 11).<br />
At temperatures between the lower and upper annealing temperatures<br />
(A and B in FIGURE 2) the viscosity can change with time-<br />
When the glass is suddenly cooled the viscosity slowly increases to an<br />
•quilibrium value and when the glass is heated the viscosity slowly<br />
decreases to an equilibrium value—in fact time is required <strong>for</strong> the<br />
•quilibrium viscosity values to be attained. <strong>Glass</strong> is often worked<br />
When its viscosity is about 10 4 poises; <strong>for</strong> a hard borosilicate glass<br />
this corresponds to a temperature of about 1200°C.<br />
Elastic Properties<br />
fyrex Chemical Resistance <strong>Glass</strong> has a Young's modulus of 6-1 x 10 n<br />
iynes/cm 2 , a modulus of rigidity of 2-5 x 10 11 dynes/cm 2 and a<br />
Poisson's ratio of 0-22. Similar values are found <strong>for</strong> other glasses.<br />
The extension of an amorphous material under a tensile <strong>for</strong>ce can<br />
be resolved into three parts; first, an immediate elastic extension,<br />
Which is immediately recoverable on removing the tensile <strong>for</strong>ce;<br />
lecondly, a delayed elastic extension which is recoverable slowly; and<br />
thirdly, a plastic extension, viscous flow, or creep, which cannot be<br />
recovered. With glass at ordinary temperatures, this plastic extentlon<br />
is practically absent. A very slow delayed elastic extension<br />
occurs. This effect can be troublesome in work with torsion fibres.<br />
The delayed elastic effect in vitreous silica fibres is 100 times less than<br />
to Other glass fibres, and visa) us flow of silica is negligible below<br />
100*C (N. J. TIGHE, 1956). For exact work vitreous silica torsion<br />
fbres are there<strong>for</strong>e used.<br />
13
PHYSICAL AND CHEMICAL PROPERTIES OF GLASS<br />
Thermal Capacity<br />
therm al<br />
250°C is given by C (calgm- 10 C) =0-174 + 0-00036t where t is the<br />
temperature in °C.<br />
Electrical Resistance<br />
The resistance of vitreous silica (Vitreosil) in the translucent <strong>for</strong>m at<br />
room temperature exceeds 2 x 10 14 ohm cm. <strong>Glass</strong>es containing<br />
metal ions in network-modifying positions are ionic conductors. In<br />
a soda-lime-silica glass, <strong>for</strong> example, the current is carried by sodium<br />
ions and the resistance at 150°C may be around 10 8 ohm cm.<br />
Lemington W.L, a hard borosilicate glass, has a resistance of about<br />
10 10 ohm cm at 200°C. A typical lead glass, Wembley L.I., has a very<br />
much greater resistance both at room temperature and normal lampoperating<br />
temperatures than a soda~4ime~silica glass, and is there<strong>for</strong>e<br />
valuable <strong>for</strong> lamp and valve pinches. The resistance of LJ. at 150°C<br />
is 10 12 ohm cm. Generally the volume resistance due to ionic conduction<br />
decreases rapidly with temperature. The logarithm of the<br />
conductivity is a linear function of the reciprocal of the absolute<br />
temperature. The surface of most glasses is very hydrophilic, and<br />
there is a surface conductivity which depends upon the relative<br />
humidity. For Phoenix glass, <strong>for</strong> example, the volume resistance of a<br />
centimetre cube at room temperature is about 3 x 10 14 ohm, but the<br />
surface resistance at 60 per cent relative humidity is 7 x 10 11 ohm, and<br />
at 81 per cent relative humidity it is 5-4 x 10 9 ohm. In very humid<br />
atmospheres it is possible to have an electrical shock by touching the<br />
surface of a soda glass apparatus containing electrodes at high<br />
potential. The water layer on the glass becomes slightly alkaline<br />
after a time by reaction with sodium from the glass; the apparatus<br />
should be wiped from time to time with a cotton cloth. It is best in<br />
these cases to use a borosilicate glass. The surface conductivity of<br />
glass was discovered by M. FARADAY (1830).<br />
Density<br />
For the soda-lime-silica glasses this is about 2-5 gm/em 3 ; <strong>for</strong> the<br />
borosilicate glasses it is very nearly 2*25 gm/cm 3 and hardly changes<br />
with slight variations in composition. Wembley LJ. lead glass has a<br />
density of 3-08. A very dense lead glass has a density of 5-2.<br />
Hardness<br />
Generally glasses with a high silica content are more resistant to<br />
abrasion than low silica content glasses. The hardness there<strong>for</strong>e<br />
increases with increase of softening temperature. Lead glasses can<br />
be scratched quite easily.<br />
14
©ENERAL PHYSICAL PROPERTIES OF GLASS<br />
Transmission of Light<br />
A 1-mm thick sheet of Phoenix glass will transmit 90 per cent or more<br />
Of the light incident on it, <strong>for</strong> wavelengths of 350 millimicrons to<br />
Almost 2 microns. In the infra-red region a strong absorption occurs<br />
at 3 microns and little transmission beyond 4 microns. In the ultraviolet<br />
region increasing absorption occurs as the wavelength falls<br />
below 350 millimicrons and very little transmission occurs below 270<br />
millimicrons. The transparent variety of vitreous silica (fused quartz)<br />
has very superior optical properties, and is widely used in photochemical<br />
and optical researches. In the ultra-violet region it transmits<br />
at high efficiency down to 1850 Angstrom units (185 millimicrons).<br />
'Quality O.H. VitreosiV of The Thermal Syndicate Ltd is<br />
A special optical quality in which the absorption band at 2400<br />
Angstrdrns has been eliminated. A special quality of fused quartz is<br />
also available which transmits infra-red up to 3*5 microns approximately<br />
('I.R. quality VitreosiV of The Thermal Syndicate Ltd). In this<br />
Vitreosil the absorption band at 2*7 microns has been much reduced.<br />
The Stress-Optical Coefficient<br />
It IS not usual to take quantitative measurements of the strain in glass<br />
apparatus made <strong>for</strong> research; when a strain-viewer is used (p. 43)<br />
qualitative observations are normally made. Quantitative measure-<br />
Kits can be made when the stress-optical coefficient is known. The<br />
M -- i<br />
j^'t<br />
involved requires a knowledge of the optical behaviour of<br />
doubly refracting materials and depends on the fact that a ray of<br />
p!ane»polarized light entering strained glass is broken into two rays—<br />
the 'ordinary ray' and the 'extraordinary ray'—vibrating at right<br />
•llgles to each other. For glass subject to simple axial tension or<br />
Compression, the extraordinary ray vibrates in the plane which<br />
includes the axis of the stress. The birefringence of strained glass is<br />
proportional to the strain, and thus to the stress. The stress-optical<br />
OOefficient is the maximum double refraction or birefringence obgerved<br />
in polarized sodium light <strong>for</strong> 1 cm path length when there is a<br />
Uni<strong>for</strong>m stress of 1 kg/cm 2 . It is expressed either in wavelengths of<br />
•Odium light or in millimicrons. This coefficient varies from one<br />
glass to another; it is around 3*5 millimicrons, or 0*006 wavelengths<br />
of sodium light A. JOHANNSEN (1918) has given an account of<br />
methods <strong>for</strong> determining double refraction, and very valuable data<br />
<strong>for</strong> practical work are given by J. H. PARTRIDGE (1949).<br />
Resistance to Chemical Actions<br />
General Chemical Properties of <strong>Glass</strong><br />
Vittoous silica is the most chemically inert glass <strong>for</strong> most purposes.<br />
15
PHYSICAL AND CHEMICAL PROPERTIES OF GLASS<br />
It is not affected by halogens or acids, except <strong>for</strong> phosphoric and<br />
hydrofluoric acids. Phosphoric acid attacks fused silica at temperatures<br />
of 300-400°C, and hydrofluoric acid attacks it at room temperature,<br />
<strong>for</strong>ming silicon tetrafluoride and water. At high temperatures<br />
silica reacts with caustic alkalis, certain metallic oxides, and some<br />
basic salts, and cannot be used <strong>for</strong> incinerating these materials. Over<br />
1600°C, fused silica is reduced to silicon by carbon. It can also be<br />
reduced at high temperature by hydrogen. It is unaffected by water<br />
under normal conditions but is attacked by strong solutions of<br />
alkalis.<br />
The hard borosilicate glasses are highly resistant to attack by<br />
water; but just as the sodium ions in the glass are slightly mobile<br />
under the influence of an electric field (p. 14), so also they can be<br />
mobile by thermal agitation and escape from the glass into water in<br />
contact with it and be replaced by hydrogen ions. This effect is<br />
slight: <strong>for</strong> example, a Firmasil beaker in an autoclave containing<br />
water at 150°C loses about 0-00015 gm of sodium per dm 2 in four<br />
hours. A soda-lime-silica glass loses sodium to water at a much<br />
greater rate. The resistance of borosilicate glass to most acids is very<br />
good, but strong aqueous alkalis produce visible attack. The network<br />
of triangles and tetrahedra is attacked, so the glass tends to<br />
dissolve as a whole. Soda-lime-silica glass usually has less chemical<br />
resistance than a borosilicate glass. Alkaline attack, however, becomes<br />
much greater on glasses with high silica content. Alkalis can<br />
also leach out boric oxide from a borosilicate glass. Hydrofluoric<br />
acid dissolves glass, and glacial phosphoric acid attacks most kinds<br />
of glass.<br />
The Weathering of <strong>Glass</strong><br />
A reaction between sodium from the glass and atmospheric water and<br />
carbon dioxide can lead to the <strong>for</strong>mation of sodium carbonate, which<br />
crystallizes in fine needles. A potash glass <strong>for</strong>ms potassium carbonate,<br />
which is too deliquescent to crystallize out. A lead glass can<br />
react with hydrogen sulphide, and to a smaller extent with carbon<br />
dioxide, sulphur dioxide, and acid vapours.<br />
Phenomena Arising from the Heating of <strong>Glass</strong><br />
A rapid evolution of adsorbed water first occurs on heating glass;<br />
this is followed by a persistent evolution, due to gas (mostly water)<br />
diffusing from the interior. Above 300°C the two processes are fairly<br />
clearly separated. The adsorbed water is rapidly and completely<br />
removed, and the quantity of gas evolved by the persistent evolution
GENERAL CHEMICAL PROPERTIES OF GLASS<br />
is proportional to the square root of time. The process has an<br />
activation energy. For a soda~lime~silica glass over 98 per cent of<br />
the evolved gas is water. B. J. TODD (1955) has studied these effects<br />
in detail. The adsorbed water on glass can be troublesome in gaseous<br />
manipulation, as R. W. Bunsen first appreciated.<br />
At high temperatures glass loses its more volatile components. The<br />
loss of silica, lime, magnesia and alumina is negligible, but boric<br />
oxide, lead oxide, sodium oxide and potassium oxide can also be lost.<br />
When the glass is heated in a flame, reaction may occur with some of<br />
the flame gases; sulphur dioxide can react with soda glass and lead<br />
glass to <strong>for</strong>m sodium sulphate and lead sulphate respectively, and of<br />
these only the <strong>for</strong>mer can be washed off. An account of these effects<br />
is given by W. E. S. TURNER (1945). The loss of weight of vitreous<br />
silica on ignition is negligible; crucibles can be heated to 1050°C, and<br />
precipitates can be ignited at 100G°C in crucibles with a porous base<br />
of vitreous silica.<br />
Diffusion through <strong>Glass</strong><br />
The mobility of the sodium ions in a soda-lime-silica glass at elevated<br />
temperatures is fairly high; if an evacuated bulb of such a glass<br />
is dipped into molten sodium nitrate and electrolysis is brought about<br />
by bombarding the inside of the bulb with electrons, the circuit being<br />
completed with an electrode in the sodium nitrate, then metallic<br />
sodium appears in the bulb. By immersing the bulb in other molten<br />
salts the sodium ions can be replaced by ions of silver, copper,<br />
thallium and vanadium. These ions also diffuse into glass from their<br />
molten salts in the absence of an electric field. When potassium is<br />
distilled in a borosilicate glass vessel it becomes slightly contaminated<br />
with sodium which diffuses from the glass and is replaced by potassium<br />
(D. K. C. MACDONALD and J. E. STANWORTH, 1950). Vitreous<br />
silica allows helium, hydrogen, neon, nitrogen, oxygen and argon to<br />
diffuse through it, with the permeability decreasing in the order given.<br />
The permeability of silica becomes greater if the glass devitrifies. The<br />
permeability to helium of soda-lime-silica glass is 10 5 (or more)<br />
times less than that of vitreous silica. For practical vacuum purposes<br />
soda and borosilicate glasses can be regarded as impermeable to<br />
gases at ordinary temperatures, except in work at extremely low<br />
pressures when the diffusion of atmospheric helium through the glass<br />
may become significant.<br />
The permeability of glass at high temperatures seems to have been<br />
discovered by R. Boyle. In his collected works published in 1744<br />
there is a paper in Volume III 'A discovery of the perviousness of<br />
glass to ponderable parts of flame' in which he writes \ .. it is plain<br />
17
PHYSICAL AND CHEMICAL PROPERTIES OF GLASS<br />
that igneous particles were trajected through the glass, which agrees<br />
with the Epicureans...'<br />
Some Surface Properties<br />
The chemical properties of glass are largely determined by its surface,<br />
because the metal ions present in most types of glass are in fact reactive<br />
enough, but only those at the surface can react. The very slow<br />
rates of diffusion in glass at ordinary temperatures limit its reactivity,<br />
so that, as M. FARADAY (1830) wrote '<strong>Glass</strong> may be considered<br />
rather as a solution of different substances one in another, than as a<br />
strong chemical compound; and it owes its power of resisting agents<br />
generally to its perfectly compact state, and the existence of an<br />
insoluble and unchangeable film of silica or highly silicated matter<br />
upon its surface.* The surface composition of glass may be very<br />
different from the bulk composition, <strong>for</strong> volatilization occurs during<br />
the <strong>for</strong>ming process, and weathering occurs subsequently; both<br />
processes produce a surface resembling vitreous silica. It is possible<br />
that the Si04 tetrahedra on the surface terminate in OH groups to<br />
which adsorbed water is normally bound. The glass surface can be<br />
made hydrophobic instead of hydrophilic by allowing adsorbed water<br />
and surface hydroxyls to react with various monoalkyldichloro-<br />
silanes (RHSiCl2), when hydrogen chloride is <strong>for</strong>med by eliminatioa<br />
The surface properties of glass are of great importance in many<br />
reaction kinetic studies, particularly those involving the termination<br />
of reaction chains on the walls of the vessel. When a glass reaction<br />
vessel is used in such cases, it is usually found that it must be<br />
matured, by carrying out a number of reactions in it, be<strong>for</strong>e reproducible<br />
results can be obtained. In many cases, reproducible results<br />
are only obtained when the vessel is kept continuously at the reaction<br />
temperature, and exposed only to the reaction mixtures; if the<br />
apparatus is cooled, and air let in to make an alteration or repair,<br />
different results may be obtained subsequently. This is particularly<br />
the case in oxidation reactions.<br />
Devitrification<br />
This is the process of the crystallization of one or more of the constituents<br />
of glass. Generally a glass is thermodynamically unstable<br />
with respect to these crystals, but at ordinary temperatures the<br />
crystallization rate is quite negligible. Crystallization may occur<br />
when the glass is worked at high temperature. The crystals which<br />
appear in a supercooled melt are not necessarily those of the stable<br />
solid phase at the temperature concerned: <strong>for</strong> example, cristobalite can<br />
appear at temperatures <strong>for</strong> which tridymite is the stable crystalline<br />
18
I<br />
DEVITRIFICATION<br />
of silica. The crystals which are most likely to separate<br />
soda-lime-silica glass are those of calcium silicate, tridymite<br />
id cristobalite. Calcium silicate occurs usually as the monoclinic<br />
inn wollastonite, but sometimes in a hexagonal <strong>for</strong>m. The monoic<br />
<strong>for</strong>m tends to appear as very long, thin crystals bunched tolgBther<br />
to give a brush-like appearance. The hexagonal <strong>for</strong>m is not<br />
pcicular. Tridymite is hexagonal, and <strong>for</strong>ms hexagonal stars, like<br />
mow, by twinning at 60°. The cristobalite <strong>for</strong>ms twins at 90°. Devitrification<br />
on the surface of glass seems to depend upon loss of alkaloxides,<br />
and may be assisted by dust particles.<br />
Transparent vitreous silica (transparent Vitreosil) is liable to devitrify<br />
if potassium or sodium compounds are present. The surface<br />
of the material must be thoroughly cleaned, and the part to be<br />
worked should then not be touched with the fingers.<br />
When devitrification is observed in the soda and borosilicate types<br />
of glass, the crystals may sometimes be removed by fusion of the<br />
glass in the flame; alternatively the semi-molten devitrified portion<br />
may be removed with tongs, and replaced by fresh glass added as thin<br />
rod. If there is a large extent of devitrification the portion of glass<br />
should be completely cut out and replaced. Old soda glass apparatus<br />
is very liable to devitrify when repaired: F. C. FRARY, C. S. TAYLOR<br />
and J. D. EDWARDS (1928) advise, in such cases, a preliminary washing<br />
of the glass with dilute hydrofluoric acid to remove the surface<br />
layer.<br />
Thermal Strain in <strong>Glass</strong><br />
When a block of glass is suddenly heated on all its faces, the outer<br />
layers are under compression and the inner layers are under tension,<br />
as explained on p. 12. This strain is temporary, however, since it<br />
vanishes as soon as the temperature gradient vanishes. Temporary<br />
strain is similarly produced when the surface of a block of rigid hot<br />
glass is cooled. Above the upper annealing temperature (p. 11) a<br />
stress can only exist in glass <strong>for</strong> a short time, because the glass flows<br />
to relieve the stress. Stress is relieved only very slowly at the lower<br />
annealing temperature. Thus over a certain temperature range glass<br />
changes from a viscous to a rigid body. Consider a block of glass to<br />
be rapidly cooled through this temperature range, so that there is<br />
always a temperature gradient. In the viscous region the glass is<br />
strain-free, and thus when it first becomes rigid it is also strain-free.<br />
Thus there is a rigid block of glass containing a temperature gradient<br />
but free from strain. When this temperature gradient is removed, the<br />
inner layers of the glass are in tension and the outer layers in compression.<br />
There is then a permanent strain in the glass. Clearly, when<br />
c 19
PHYSICAL AND CHEMICAL PROPERTIES OF GLASS<br />
a complex glass object is cooled rapidly there will finally be a complex<br />
distribution of permanent strain, and this can be great enough to<br />
cause fracture of the glass.<br />
The drops of glass produced by Prince Rupert of Bavaria by<br />
dropping molten glass into oil become rigid when there is a great<br />
temperature gradient and the surface is consequently in strong compression.<br />
This makes the drops very strong, but they disintegrate<br />
violently as soon as the tail of the drop is cut off, when the internal<br />
stresses are no longer balanced.<br />
Annealing of <strong>Glass</strong><br />
The object of this process is to prevent permanent strain arising from<br />
the cooling of glass. The glass must be cooled slowly through the<br />
critical temperature range in which it becomes rigid and ceases to<br />
relieve internal stresses by viscous flow. The rate at which these<br />
stresses are relieved in the annealing range of temperatures (A to B in<br />
FIGURE 2) depends on temperature; when this is such that the<br />
viscosity is 10 13 * 4 poises, the glass will become practically stress-free<br />
in 15 minutes (A. E. DALE and J. E. STANWORTH, 1945). Below the<br />
lower annealing temperature the glass can be cooled quickly without<br />
introduction of permanent strain, but the temporary strain could<br />
become great enough to fracture the article.<br />
Annealing is carried out most satisfactorily in an oven (p. 45).<br />
Complex articles of Pyrex glass can be annealed at 560°C <strong>for</strong> 30<br />
minutes, followed by slow cooling with the oven door shut. Articles<br />
of Firmasil glass should be annealed at 575°C, but even at 475°C<br />
strain is very slowly removed. For Phoenix, the upper annealing<br />
temperature is 600°C and the lower annealing temperature is 520°C.<br />
Annealing at 560-5 80°C is there<strong>for</strong>e satisfactory <strong>for</strong> this glass. The<br />
annealing temperatures of these borosilicate glasses are not at all<br />
critical. The article must not, of course, be made too hot, or it will<br />
de<strong>for</strong>m. Annealing is of great importance <strong>for</strong> articles made of a<br />
soda-lime-silica glass. Wembley X.8. soda glass should be annealed<br />
in the range 520-400°C, and the General Electric Company, which<br />
makes this glass, recommends annealing at a high temperature of<br />
520°C <strong>for</strong> 5-10 minutes, followed by cooling to an intermediate<br />
temperature of 460°C at a rate dependent upon the glass tubing<br />
thickness. These rates are:—<br />
3°C per minute <strong>for</strong> J mm wall thickness<br />
2°C per minute <strong>for</strong> 1 mm wall thickness<br />
1°C per minute <strong>for</strong> 3 mm wall thickness.<br />
The glass should be cooled from the intermediate temperature of<br />
460°C tc a low temperature of 400°C at double the above rates. The<br />
20
ANNEALING OF GLASS<br />
Article can then be cooled to room temperature at any rate possible<br />
Without cracking it by temporary thermal strain. The corresponding<br />
hl|ht intermediate and low temperatures <strong>for</strong> Wembley L.L lead glass<br />
Iff 430°Ct 390°C, and 340°C. The same annealing schedule can be<br />
mid. For Wembley M.6. 'white neutral' glass the temperature range<br />
|| $I0"45O O C. Again the same schedule should be used.<br />
Complex apparatus assembled on the bench must be annealed by<br />
lame, and this method must also be used when no oven is available<br />
(Mt p. 170). In our experience, very complex apparatus of Pyrex glass<br />
tail be flame-annealed satisfactorily. Usually with Pyrex the apparatus<br />
either cracks in a day or two after making, or else not at all.<br />
Complex apparatus of soda-Kme-silica glass can be annealed by<br />
flame, but we do not find this satisfactory. For research apparatus it<br />
Ift beet to avoid this kind of glass. With a complex vacuum apparatus<br />
Of boroiilicate glass a fracture can often lead to un<strong>for</strong>tunate consequancet,<br />
especially when there are many mercury cut-offs present;<br />
iDd in such cases it is well, be<strong>for</strong>e evacuating, to wait <strong>for</strong> a few days<br />
altar a repair or alteration has been made in a position where flame<br />
a&nealing is difficult.<br />
•J-BI<br />
IS<br />
Some Types of <strong>Glass</strong> <strong>for</strong> General Use<br />
Many different kinds of glass are made. In this Section and the<br />
Mowing Sections we mention only a few of these which are useful<br />
|S the laboratory.<br />
Wmbley X.8.<br />
fllis is a soda-Hme-silica glass, containing magnesia and boric oxide<br />
than 1 per cent), made by the General Electric Co. It is often<br />
bed as GEC X.8. or simply as X.8. The linear coefficient of<br />
al expansion between 20 and 350°C is 9-65 ±0-10 x 10~ 6 . This<br />
is available as tubing and rod in a wide range of sizes.<br />
&£<<br />
•irir.<br />
by the British Thomson-Houston Co., this is a soda-lime<br />
Jass. The linear expansion coefficient is 9*5 x 10 8 f50~400°C*.<br />
alass<br />
fiftaox<br />
Ibis is a borosilicate glass, free from arsenic, antimony and lead,<br />
lada by John MoncriefF Ltd. The coefficient of linear expansion is<br />
M *I(H/°C The glass is available as tubing and rod of various<br />
pin; in addition many standard pieces of laboratory glass-ware<br />
iBBStructed in Monax are available.<br />
L\".<br />
21
Pyrex<br />
PHYSICAL AND CHEMICAL PROPERTIES OF GLASS<br />
Pyrex is a borosilicate glass free from alkaline earth metals, zinc and<br />
heavy metals, made by James A. Jobling & Co., and in the U.S.A.<br />
at the Corning <strong>Glass</strong> Works, where Pyrex was developed. The linear<br />
expansion coefficient (20-400°C) is 3-2 x 10~ 6 . Pyrex tubing is<br />
supplied in a wide range of sizes, with standard wall, heavy wall,<br />
as extra heavy tubing. Capillary tubing and rod is supplied in a range<br />
of sizes. Precision-bore tubing with very accurate inside dimensions<br />
is also made. A very wide range of laboratory apparatus is manufactured<br />
in Pyrex glass.<br />
-*<br />
Phoenix<br />
Phoenix, also, is a borosilicate glass made by the British Heat<br />
Resisting <strong>Glass</strong> Co. The linear expansion coefficient (50-450°C) is<br />
3-24 x 10^ 6 . Tubing and rod are supplied in a wide range of sizes.<br />
The tubing is made with either standard wall or heavy wall.<br />
Firmasil<br />
<strong>Laboratory</strong> glassware made from this glass is available. It is a<br />
borosilicate glass manufactured by Wood Bros. <strong>Glass</strong> Co. The<br />
linear expansion coefficient (0-400°C) is 3-2 x 10 6 .<br />
Some Types of <strong>Glass</strong> <strong>for</strong> Sealing to Metals<br />
Again we mention only a selection from the many sealing glasses<br />
which are made.<br />
Lemington W.L<br />
This is another borosilicate glass, and was developed to make strainfree<br />
seals with tungsten. It is made by the General Electric Co., and<br />
often described as GEC W.L or simply as W.L The linear expansion<br />
coefficient (20-350°C) is 3-75 x 10~ 8 .<br />
BTH No. 9<br />
A borosilicate glass <strong>for</strong> sealing to tungsten, and is made by the British<br />
Thomson-Houston Co. It is often described as BTH C.9 or as C.9.<br />
The linear expansion coefficient (50-430°C) is 3-65 x 10 8 .<br />
Dial 36<br />
Made by Plowden & Thompson Ltd .Dial 36 is a borosilicate glass<br />
<strong>for</strong> sealing to tungsten. The linear expansion coefficient (20-300°Q<br />
is3-6xl0- 8 .<br />
22
s<br />
10MB TYPES OF GLASS FOR SEALING TO METALS<br />
Coming No. 7720 (Nonex)<br />
Gining No. 7720, known commercially as Nonex, is a borosilicate<br />
^Mt containing lead and made at the Corning <strong>Glass</strong> Works. It is<br />
<strong>for</strong> sealing to tungsten metal. The coefficient of linear expaniOtt<br />
©f Nonex is 3-6 x 10 6 /°C. This is relatively low, although<br />
rilgfeUy higher than that of Pyrex brand glass (Corning No. 7740),<br />
•Ml matches sufficiently with that of tungsten, 4-5 x 10~~ 6 /°C, to cause<br />
the glass to make satisfactory seals to this metal.<br />
Nonex begins to soften, and can be worked, at temperatures a<br />
Ifttle below those required <strong>for</strong> Pyrex. Care must be taken when<br />
<strong>Working</strong> it to avoid reducing the lead and causing the glass to blacken.<br />
The tip of an oxidizing flame must there<strong>for</strong>e be used. Nonex will seal<br />
Hill to Pyrex, though sometimes uranium glass is used between the<br />
two*<br />
9TH No. 40<br />
A borosilicate glass <strong>for</strong> sealing to alloys of the Kovartype (p. Ill);<br />
|| Alio seals to some electrical porcelains. It is made by the British<br />
n-Houston Co., and is often referred to as BTH C.40 or as<br />
The linear expansion coefficient is 4-85 x 10~ 6 from 50 to<br />
ton FCN<br />
by the General Electric Co. and often called GEC FCN or<br />
, this is a borosilicate glass <strong>for</strong> sealing to Kovar-type alloys. The<br />
expansion coefficient (20~350°C) is 4-75 x 10~ 6 .<br />
Kovar-sealing borosilicate glass made by Plowden & Thompson<br />
# this has a linear expansion coefficient (20-300°Q of 4-9 x lfr-«.<br />
&al 444<br />
is a soda glass <strong>for</strong> sealing to platinum, and is made by Plowden<br />
Thompson Ltd. The linear expansion coefficient (20-~300°C) is<br />
I x 10-«.<br />
Some Types of <strong>Glass</strong> <strong>for</strong> Special Purposes<br />
Here we mention only a few of the glasses which are made <strong>for</strong> special<br />
5r -<br />
Wembley L J. Lead<br />
Made by the General Electric Co., this glass was developed primarily<br />
fbr pinches and exhaust tubes in lamps and valves. It seals directly<br />
23
PHYSICAL AND CHEMICAL PROPERTIES OF GLASS<br />
to platinum and to copper-clad wire (p. 111), The coefficient of linear<br />
expansion is 9-05 x 10" 6 from 20 to 320°C. A lead glass, such as L.L,<br />
is useful as an intermediate glass <strong>for</strong> joining soda glasses of different<br />
thermal expansions.<br />
BTH No. 12<br />
BTH No. 12 is a lead glass <strong>for</strong> lamp and valve manufacture, made by<br />
the British Thomson-Houston Co. The linear expansion coefficient<br />
(50-400°Qis9-lxlO- 6 .<br />
Wembley Af.6, "White Neutral*<br />
This is made by the General Electric Co., and is used <strong>for</strong> medical<br />
ampoules. It loses very little alkali to aqueous solutions. The linear<br />
expansion coefficient is 7-3 x 10~ 6 from 20 to 350°C This is intermediate<br />
between the soft and hard glasses, and M.6. is sometimes<br />
used in graded seals.<br />
Wembley *Amber Neutral*<br />
This glass, made by the General Electric Co., is similar to white<br />
neutral above, but is coloured amber by addition of iron and manganese.<br />
The linear expansion coefficient is 7-5 x 10~ 6 from 20 to<br />
350°C. It is useful <strong>for</strong> ampoules when the contents need protection<br />
from ultra-violet radiation.<br />
Lemington H.26X.<br />
Lemington H.26X,, made by the General Electric Co., is a very hard<br />
borosilicate glass of high softening temperature. The Mg point is<br />
780°C. It is used in high pressure mercury vapour lamps. The linear<br />
expansion coefficient is 4-6 x 10~ 6 from 20 to 580°C. Sodium and<br />
potassium are absent and alumina is present in quantity in this glass.<br />
Sodium Resistant, NA.10<br />
This type, made by the General Electric Co., is resistant to sodium<br />
vapour and is used in sodium vapour discharge lamps. It has a very<br />
high boric oxide content, a low softening temperature, and a low<br />
electrical resistance. It is used as an internal layer in soda glass<br />
tubing (X£.).<br />
Dial 43<br />
A borosilicate glass with an expansion coefficient intermediate between<br />
that of the tungsten-sealing and Kovar-sealing glasses. It is a<br />
useful sandwich glass <strong>for</strong> joining between these glasses. The linear<br />
expansion coefficient (2G~300°C) is 4-2 x lO" 8 . It is made by<br />
Plowden & Thompson Ltd.<br />
24
SOME TYPES OF GLASS FOR SPECIAL PURPOSES<br />
Fused Silica<br />
The Thermal Syndicate Ltd make fused silica (Vitreosil) tubes of<br />
Several kinds. Translucent and transparent Vitreosil are manufactured;<br />
the <strong>for</strong>mer is supplied with 'sand', 'satin' or 'glazed' surface,<br />
and the latter usually has a glazed surface. A glazed surface<br />
Should be used in vacuum work; the transparent tubing is best.<br />
Vitreosil tubing is available with a wide range of sizes and with<br />
leveral wall thicknesses. Rods, bars and capillary tubes are available.<br />
Many items of laboratory equipment are manufactured in Vitreosil.<br />
They are specially valuable when high temperatures and high thermal<br />
endurance are needed. The linear expansion coefficient is 0-54 x 10~* 6 .<br />
Graded Seal <strong>Glass</strong>es<br />
The General Electric Co. makes a range of sealing glasses. For<br />
joining silica to hard glass, and hard glass to soft glass, the sealing<br />
glasses given below can be used. The coefficients of linear expansion<br />
are also given.<br />
Sealing glass type<br />
WQ.31<br />
WQ.34<br />
HA28<br />
G.S.1<br />
G.S.2<br />
G.S3<br />
G.S.4<br />
G*S*5<br />
G.S.6<br />
Expansion<br />
coefficient<br />
l«0xl0-«<br />
2-1 xlO-*<br />
3-2 x 10 6<br />
5-2 x 10~ 6<br />
5-8 x 10-*<br />
6-6 x 10- 8<br />
7-2 x 10-*<br />
7-8 x 10~ 6<br />
8-4 x 10~ 6<br />
Purpose<br />
<strong>for</strong> silica<br />
to hard glass<br />
<strong>for</strong> hard to<br />
soft glass<br />
The G.S.1 can be joined to a hard borosilicate glass using as intermediates<br />
a Kovar-sealing glass, a sandwich glass such as Dial 43,<br />
and a tungsten-sealing glass.<br />
Hie Ease of <strong>Working</strong> Different Types of <strong>Glass</strong><br />
The working of fused silica is described in Chapter 10. Pyrex,<br />
Phoenix and Firmasil require either a gas-oxygen flame or a gas-airoxygen<br />
flame. All the operations we describe <strong>for</strong> Pyrex can also be<br />
carried out with Phoenix. These two glasses are very easy to work,<br />
and very suitable <strong>for</strong> research work. They join together well. Monax<br />
can be worked without oxygen, and is a most valuable glass <strong>for</strong><br />
25
PHYSICAL AND CHEMICAL PROPERTIES OF GLASS<br />
laboratories, such as those in schools, where oxygen is not available.<br />
The methods we describe <strong>for</strong> Pyrex can be used <strong>for</strong> Monax. When a<br />
hand torch is used <strong>for</strong> working Monax, it should give a flame with a<br />
definite inner blue cone, and it may be necessary to work the Monax<br />
with the hand torch in small portions at a time, especially if the air<br />
pressure is low and the tubing is large. Finished articles in Monax,<br />
even when badly made, do not usually crack after a flame annealing.<br />
Soda glass is very easy to work in a gas-air flame, but skill is necessary<br />
to make apparatus which does not crack on cooling. Complex<br />
apparatus of soda glass cannot be made satisfactorily with a hand<br />
torch by many of the methods we describe <strong>for</strong> Pyrex; the bench torch<br />
methods are far better <strong>for</strong> soda glass, but they are far more difficult.<br />
We do not recommend soda glass <strong>for</strong> research apparatus unless this<br />
is of very simple construction.<br />
The working characteristics of the other glasses mentioned can<br />
usually be deduced from their expansion coefficients. A glass of<br />
lower expansion than Monax needs an oxygenated flame, and one<br />
with higher expansion needs only a gas-air flame.<br />
Distinguishing between Different Types of <strong>Glass</strong><br />
In a bunsen flame, soda glasses give a yellow flame and are softened,<br />
borosilicate glasses keep their hard edges, and a lead glass is blackened.<br />
When a joint is made between two glasses of different composition<br />
and pulled out, the softer glass will pull out further. The<br />
softer glass has the lower softening temperature.<br />
REFERENCES<br />
BOYLE, R., 1744, The Works of the Honourable Robert Boyle; London,<br />
Millar,<br />
DALE, A. E. and STANWORTH, J. E., 1945, /. Soc. <strong>Glass</strong> Tech., 29,77.<br />
DOUGLAS, R. W., 1945, /. sci. Instrum., 22,81.<br />
FARADAY, M., 1830, Phil Trans., 120,1.<br />
FRARY, F. C, TAYLOR, C. S. and EDWARDS, J. D., 1928, <strong>Laboratory</strong><br />
<strong>Glass</strong> Blowing, 2nd Edn; New York, McGraw-Hill.<br />
GARNER, W. E., 1952, J. chem. Soc, 1961.<br />
GURNEY, C. and PEARSON, S., 1952, Report No. 10, Selected Government<br />
Research Reports, Vol. 10, Ceramics and <strong>Glass</strong>; London,<br />
H.M. Stationery Office.<br />
JOHANNSEN, A., 1918, Manual of Petrographic Methods, 2nd Edn;<br />
New York, McGraw-Hill.<br />
MACDONALD, D. K. C. and STANWORTH, J. E., 1950, Proc.phys. Soc.<br />
Lond., 63B, 455,<br />
26
REFERENCES<br />
PARTRIDGE, J. H.s 1949, <strong>Glass</strong>-To-Metal Seals; Sheffield, Society of<br />
<strong>Glass</strong> Technology.<br />
PHILUPS, C. J., 1948, <strong>Glass</strong>; The Miracle Maker, 2nd Edn; London,<br />
Pitmaa<br />
RANDALL, J. T., 1938, Annual Reports on the Progress of Chemistry<br />
<strong>for</strong> 1937; London, Chemical Society.<br />
STANWORTH, J. E., 1950, Physical Properties of <strong>Glass</strong>; Ox<strong>for</strong>d,<br />
Clarendon Press.<br />
TlOHE, N. J., 1956, National Bureau of Standards Circular 569;<br />
Washington, U.S. Government Printing Office.<br />
TODD, B. J., 1955, /. appL Phys.9 26,1238.<br />
TURNER, W. E. S., 1945, The Elements of <strong>Glass</strong> Technology <strong>for</strong><br />
Scientific <strong>Glass</strong> Blowers (Lampworkers), 3rd Edn; Sheffield, The<br />
<strong>Glass</strong> Delegacy of the University.<br />
WARREN, B. E., 1940, Chem. Rev., 26,237.<br />
WARREN, B. E,, 1942, J. appL Phys., 13,602.<br />
ZACHARIASEN, W. H., 1932, J. Amer. chem. Soc, 54,3841.<br />
27
GLASS-WORKING EQUIPMENT<br />
3<br />
The <strong>Glass</strong>-Blower's Table<br />
THE usual practice is to have a special table <strong>for</strong> the bench blowpipe.<br />
This laboratory blowpipe table can be 2-3 feet square <strong>for</strong> most purposes;<br />
but <strong>for</strong> the construction of large apparatus a good size is<br />
6 feet long and 3 feet wide. This size will permit the use of rollers <strong>for</strong><br />
large tubes. The table should be placed so that long pieces of glass<br />
can extend beyond the ends. The top of the table should be of heatresisting<br />
material. The blowpipe is placed near one edge, which<br />
should be fiat. The other three edges should have a raised rim to<br />
prevent articles rolling off the table. Gas, oxygen and compressed air<br />
must be available; the latter is often obtained from bellows fixed under<br />
the table. Drawers <strong>for</strong> tools are desirable. A rack of some sort should<br />
be available in which hot glass objects can cool; a large block of wood<br />
bored with holes of different sizes to hold the ends of the objects is<br />
very useful <strong>for</strong> this purpose. A small flame should be present on<br />
the table <strong>for</strong> relighting the blowpipe if it is extinguished during work.<br />
The table should be placed so that direct sunlight does not fall on<br />
the blowpipe flame. If this can happen, there should be a blind to cut<br />
out the sunlight. It is difficult to work glass in a flame in sunlight<br />
because the flame is then so difficult to see and the temperature of the<br />
glass cannot be judged properly.<br />
The height of the table and the accompanying stool should be such<br />
that the glass-worker can rest his elbows on the table. A stool of<br />
adjustable height (like a music stool) is very convenient, and was<br />
advised by R. THRELFAIX (1898). Both he and W. E. BARR and V. J.<br />
ANHORN (1949) advise a table of height 38 inches. A table of slightly<br />
less height is also satisfactory.<br />
Blowpipes<br />
The term 'blowpipe* is used <strong>for</strong> both the flame generator employed in<br />
glass-working and the iron tube used in blowing glass (p. 1). In the<br />
glass trade the term 'glass-blower' describes a person who uses glass<br />
melted in a pot, and the worker of tube or rod in a flame is a 'lampworker',<br />
who uses a blowlamp; but in the laboratory this usage is not<br />
28
BLOWPIPES<br />
customary. There a 'glass-blower' is a person who works tubing in a<br />
blowpipe flame.<br />
Satisfactory blowpipes or bench burners are available from laboratory<br />
furnishers. They usually have a range of jets to f^vc different<br />
flame sizes. The changing of jets during work is avoided in a burner<br />
with a turret head. The burners normally burn coal gas with either<br />
compressed air or oxygen, or air-oxygen mixtures. Crossfire burners<br />
produce a number of small flames which heat both sides of a tube at<br />
once, as shown in FIGURE 3. They are very useful <strong>for</strong> large tubing.<br />
Special burners producing a long thin flame ('ribbon burners') can be<br />
FIGURE 3. Two crossfire burners<br />
used <strong>for</strong> glass tube bending; they are made giving lengths of flame of<br />
50,100,200 and 300 mm. A eracking-off burner giving a thin line of<br />
intense heat is also made. All these special burners can be obtained<br />
from Stone-Chance Limited.<br />
I. C, P. SMITH (1947a) has given an account of the construction of<br />
burners <strong>for</strong> the glass-worker. The adjustment of the flame size and<br />
temperature with a given burner is best found by experience.<br />
Hand Torches<br />
A hand torch is a moderately light blowpipe designed to be held in<br />
the hand and moved around the apparatus. Various hand torches<br />
are available. We find the Flamemaster hand torch, made by Stone-<br />
Chance Limited, to be very useful. This can be fitted with a number<br />
of different jets. One gives a wide range of flame sizes with air-coal<br />
gas mixtures. Three jets give different flame sizes of oxygen-coal gas<br />
flames. With the largest of these, 4-cm diameter Pyrex tubing can be<br />
worked with a single hand torch; with two hand torches as a crossfire,<br />
6-cm bore tubing can be worked. A double-tipping device can<br />
also be put on the torch in place of the usual nozzle; this gives two<br />
small flames at an angle to each other of about 120°. This is useful<br />
in ampoule sealing. Controls are provided on the hand torch <strong>for</strong><br />
29
GLASS-WORKING EQUIPMENT<br />
regulating the flow of gas and air or oxygen. The Flamemaster can<br />
also be clamped to the bench and used as a bench torch.<br />
Cylinder Heads and Valves<br />
The working of glass such as Pyrex and Phoenix requires either an<br />
oxygen-coal gas flame, or an oxygen-air-coal gas flame. The oxygen<br />
is obtained from cylinders. For glass-working it is desirable to use a<br />
cylinder head which has both a regulator <strong>for</strong> controlling the pressure<br />
of the oxygen and keeping it at a steady value, and a fine adjustment<br />
valve <strong>for</strong> regulating and turning off the gas flow. In operating a<br />
blowpipe or hand torch, the oxygen is frequently turned off at the<br />
blowpipe or hand torch. The regulator then automatically stops the<br />
flow of oxygen from the cylinder. If only a valve is used the oxygen<br />
continues to come out of the cylinder, and the pressure in the rubber<br />
tubing to the blowpipe becomes so great that the tubing is <strong>for</strong>ced off<br />
the blowpipe or the cylinder head; this can be very inconvenient when<br />
one is working in an awkward position with a hand torch on a<br />
complex apparatus.<br />
Cylinder heads are liable to be damaged when they are attached to<br />
cylinders left free to roll about on the floor, and to avoid this a<br />
cylinder stand should be used.<br />
Bellows<br />
Foot-operated bellows fitted with a rubber disc enclosed in a string<br />
net, to provide an air reservoir, give a steady pressure of about<br />
20 oz/in, 2 They are suitable <strong>for</strong> air-gas flames of moderate size.<br />
Bellows with a spring-controlled reservoir can also be used, but they<br />
do not give such a steady pressure.<br />
Air Blowers<br />
A compressor driven by a J h.p. electric motor and giving a pressure<br />
above atmospheric of 10 lb/in. 2 is adequate <strong>for</strong> all normal glassworking<br />
operations, including those with a small lathe (Chapter 6).<br />
A filter should be fitted on the suction side of the compressor.<br />
A filter pump discharging into an aspirator, fitted with an outlet<br />
at the top <strong>for</strong> air and an outlet at the bottom <strong>for</strong> water, will give<br />
enough air <strong>for</strong> small-scale operations of glass-working. W. A.<br />
SHENSTONE (1889) described this device.<br />
<strong>Glass</strong>-<strong>Working</strong> Tools<br />
The tools necessary <strong>for</strong> most glass-working operations are simple and<br />
can best be described in relation to their uses. Probably the most<br />
useful general-purpose tool is an iron or steel spike about 1| inches<br />
30
GLASS-WORKING TOOLS<br />
long set in a wooden handle (FIGURE 4). This spike can be used <strong>for</strong><br />
manipulating the hot glass into the required place and in many<br />
instances can also be used in the same operations as the more<br />
specialized tools described below, although it may not be so convenient.<br />
Throughout the book this tool will be referred to as a spike.<br />
Tools designed <strong>for</strong> various operations are marketed by a number of<br />
companies dealing in laboratory supplies. FIGURE 4 shows a selection<br />
of such tools. Triangular flaring tools are intended <strong>for</strong> flaring out the<br />
FIGURE 4. Some tools used in the working of glass<br />
ends of tubes. They are usually made of brass sheet or of thin carbon<br />
plates, as are the other tools <strong>for</strong> shaping glass by means of pressure<br />
of the flat surface of the tool applied to the glass as it is rotated. The<br />
metal tools should be lubricated to prevent the glass sticking to the<br />
tool. Carbon tools require no such lubrication but achieve the same<br />
effect by wearing away in use. Hexagonal tapered reamers are used<br />
<strong>for</strong> working tubes to standard tapers <strong>for</strong> the purpose of making<br />
stopcocks or ground joints. These reamers may either be made of<br />
carbon or of metal—usually aluminium alloy. Similar tools with a<br />
much sharper taper and mounted on a handle may be found more<br />
convenient than the normal flaring tool <strong>for</strong> opening out the ends of<br />
tubes. We have found that the mounted needles from a set of dissecting<br />
instruments are useful in some cases with capillary tubing<br />
since they are fine enough to be inserted into the bore of the tube.<br />
31<br />
• ^ < Wvi
GLASS-WORKING EQUIPMENT<br />
These needles have the disadvantage that, owing to their fineness,<br />
they tend to oxidize away readily and may also be melted if held in a<br />
hot flame <strong>for</strong> any appreciable length of time.<br />
Forceps will be found useful in many circumstances. These are<br />
usually made of steel and should be designed so that there is no<br />
tendency <strong>for</strong> the soft glass to slip out easily. This will be avoided if<br />
the points are bent inwards so that they meet at an angle of about<br />
25°. The <strong>for</strong>ceps should either be long enough not to get too hot in use<br />
(about 10 inches long) or else they should be insulated in some way.<br />
Flask clamps are made to fit a wide range of sizes of flask. These<br />
are devices <strong>for</strong> holding flasks while the necks are being worked and<br />
enable the whole flask to be rotated easily. They usually consist of a<br />
handle with three or four sprung prongs which hold the body of the<br />
flask. Some clamps are made so that they can be adjusted to fit a<br />
range of flask sizes.<br />
Many operations require only a very modest set of tools, and too<br />
great a stress can be laid on the variety of tools required <strong>for</strong> any<br />
operation. As an example, <strong>for</strong>ceps are useful <strong>for</strong> drawing off small<br />
pieces of glass or <strong>for</strong> pulling out excessively thick parts of the wall of<br />
a joint, but both these operations can be carried out by fusing a<br />
length of glass rod to the part to be drawn off and using this as a<br />
handle <strong>for</strong> the drawing operation. As in many other fields of craftsmanship,<br />
a skilful operator can work wonders with inadequate and<br />
makeshift tools, but his job would be much easier if he had all the<br />
equipment he needed, although <strong>for</strong> much of the time he may only use<br />
a very few of the tools at his disposal. There are times when the less<br />
commonly used tools will be useful, but on the other hand the glassworker<br />
should not allow himself to be deterred by the fact that he<br />
does not have a vast array of tools.<br />
I. C. P. SMITH (1947b) has reviewed some uses of tools in lampworking.<br />
Wax <strong>for</strong> Tools<br />
Tools can be used without lubrication, but care is necessary in this<br />
case to prevent the tool oxidizing and the oxide entering the glass,<br />
which is then liable to crack on cooling. A lubricated tool slides<br />
more easily over the hot glass. Beeswax and paraffin wax have been<br />
used as lubricants; a thin film only is used. A better lubricant,<br />
advised by I. C. P. Smith (1947b), is paraffin wax mixed with some colloidal<br />
graphite. The colloidal graphite is not rapidly burnt off the tool,<br />
and it retains its lubricating properties up to 600 Q C. An over-heated<br />
tool can also be dipped into distilled water (5 oz) containing colloidal<br />
graphite (| oz of Aquadag). The tool picks up a layer of graphite.<br />
32
WAX FOR TOOLS<br />
When soft asbestos is used on the bench, waxed tools are likely to<br />
pick up shreds of asbestos which can cause trouble. It is best to avoid<br />
soft asbestos in this case.<br />
When constructing high vacuum apparatus, waxed tools should<br />
only be used when the apparatus under construction can be<br />
thoroughly cleaned afterwards. Otherwise wax may be present in<br />
the vacuum system, and will be removed by pumping only with<br />
extreme slowness.<br />
Carbon Plates<br />
Carbons<br />
A few thin, rectangular plates of carbon can be very useful on the<br />
glass-working bench. The faces of these plates are of use in flattening<br />
the ends of tubing, in blowing flat-bottomed bulbs, and in shaping<br />
\J<br />
FIGURE 5. A carbon plate and a<br />
carbon rod. Both are attached to<br />
a handle<br />
pieces of molten glass as, <strong>for</strong> example, in making the paddle <strong>for</strong> a<br />
glass stirrer. For shaping purposes it is sometimes preferable to have<br />
a handle attached (FIGURE 5). Plates ranging from i to f inch in<br />
thickness and of the order 3 by 6 inches are convenient sizes.<br />
Carbon Rods<br />
Carbon rods with one end filed to a conical shape make very good<br />
33
GLASS-WORKING EQUIPMENT<br />
flaring tools. It is useful to have a few of these handy, ranging from<br />
J to | inch diameter. <strong>Glass</strong> handles <strong>for</strong> these rods can easily be made<br />
by shrinking the end of a piece of glass tubing into a groove filed near<br />
to one end of the carbon rod (FIGURE 5). When working silica,<br />
carbon rods become a necessity as flaring tools, etc., because no metal<br />
will withstand the working temperature of this glass <strong>for</strong> long enough<br />
<strong>for</strong> much tooling to be done.<br />
Gauges <strong>for</strong> Measuring<br />
Some apparatus must be made to a definite size. The external diameter<br />
can be measured by an ordinary calliper gauge (FIGURE 6, /).<br />
The internal diameter can be measured either bv the Drones at the<br />
M m<br />
FIGURE 6. Gauges useful in measuring glass, and <strong>for</strong> working glass<br />
to fixed dimensions<br />
back of the calliper gauge, or, <strong>for</strong> greater distances inside a tube, by<br />
an internal pair of callipers (FIGURE 6, II); the separation of the feet<br />
of this gauge is measured after it is withdrawn from the tube. The<br />
internal diameter at the end of a tube can be measured accurately<br />
with a cone or taper gauge (FIGURE 6, IV), which also reveals deviations<br />
from a circular cross-section. A pair of callipers of the type<br />
shown in FIGURE 6, Zi7, is also useful in measuring the outside of a<br />
tube. The gauges in FIGURE 6, I9 Hand IIIcan be used on hot glass;<br />
in working glass to fixed dimensions it is convenient to set a gauge at<br />
the required dimension and use it to measure the glass when it is hot.<br />
Rubber Caps<br />
A very convenient way of closing the ends of glass tubes <strong>for</strong> blowing,<br />
particularly with very small bore tubing into which it is difficult to fit<br />
34<br />
JV
RUBBER CAPS<br />
a cork or stopper, is to employ rubber caps. These are made in a<br />
variety of sizes to fit different diameter tubing, ranging up to about<br />
30 mm, and when of good quality rubber can easily be slipped over<br />
the open end. They create a compression rather than a tensile strain<br />
in the glass tube and are there<strong>for</strong>e useful <strong>for</strong> closing tubing with<br />
ragged ends when it is desirable to avoid fire polishing. These caps<br />
are usually supplied made from rubber approximately 1 mm thick.<br />
Thin Rubber Sheet<br />
Pieces of wry thin sheet rubber, of the order of 0-1 mm thick and of<br />
very elastic quality, as, <strong>for</strong> example, pieces cut from toy rubber<br />
balloons, can be very useful in closing ragged ends of large tubing.<br />
They are of particular use with tubing larger than 20 mm diameter.<br />
A small piece, of about the same diameter as the glass tube itself, can<br />
be stretched over a ragged end of the tube and will be found readily<br />
to stay in place by means of its own tension—provided excessive<br />
pressure is not built up when glass blowing. For detailed use of<br />
rubber caps and pieces of sheet rubber see Chapter 9.<br />
Rubber Stoppers<br />
Rubber stoppers are used extensively <strong>for</strong> making a closed system <strong>for</strong><br />
blowing out. A complete overlapping range is a necessity to the glassworker.<br />
The rubber should be of good elastic quality since poor<br />
quality stoppers often will not *give' sufficiently to be squeezed easily<br />
into the ends of glass tubing. The stress on the glass is less and an airtight<br />
seal is more easily obtained when good rubber is employed.<br />
Two sets of stoppers are very useful, one set unbored and a second<br />
set with a single hole bored in them to carry blowing-tube connectors.<br />
A longer piece of glass tubing inserted into the hole will also <strong>for</strong>m a<br />
very adequate handle when working small pieces of apparatus.<br />
An assortment of small corks <strong>for</strong> closing small bore tubing can, in<br />
addition, be very useful. If the flame is to come near to a cork or a<br />
rubber stopper it is best to wrap either in thin asbestos paper be<strong>for</strong>e<br />
inserting into the tube. When pyrolysis of the cork or rubber<br />
stopper seems probable it is best to use a cork and not a rubber<br />
stopper, because the pyrolysis products from a cork can be cleaned<br />
off more easily than those from rubber. Sometimes a plug made from<br />
damp asbestos paper is adequate <strong>for</strong> closing a tube of small bore, and<br />
this plug can be heated quite strongly.<br />
Blowing Tubes<br />
Rubber tubing is necessary <strong>for</strong> blowing when the piece being worked<br />
cannot be brought to the mouth. A length of about 80 cm is convenient<br />
n 35
GLASS-WORKING EQUIPMENT<br />
and the size most useful is that of normal condenser tubing, or<br />
approximately 5 mm bore with 1 mm wall thickness. Lightweight<br />
rubber is advisable since weighty tubing tends to drag. It is occasionally<br />
helpful to have a finer blowing tube, and <strong>for</strong> this a length of<br />
bicycle valve tubing, about 2 mm bore, is quite satisfactory.<br />
Mouthpieces<br />
Mouthpieces <strong>for</strong> these blowing tubes vary with individual inclination.<br />
Some workers dispense with a mouthpiece and use the bare end of the<br />
rubber tubing. By gripping this in the teeth the flow of air can be<br />
controlled. Others desire a firmer mouth piece and use a short piece<br />
of glass tubing which must, of course, be fire polished at the end. It is<br />
perhaps also safer to strengthen the tube by thickening the end. A<br />
short piece of rubber tube, about 2 cm long, attached to the glass<br />
mouthpiece, is another modification desired by some. It combines<br />
the features of a firm mouthpiece with one where the air flow can be<br />
controlled with the teeth. A glass tube inside a rubber tube can also<br />
be used as a mouthpiece.<br />
An assortment of glass connectors <strong>for</strong> joining blowing tubes and<br />
<strong>for</strong> connecting blowing tubes to rubber stoppers is desirable. For<br />
blocking holes in stoppers short pieces of rod or closed tubing are<br />
useful.<br />
A holder <strong>for</strong> a blowing tube can be made out of wire. This fits<br />
round the operator's neck, and holds the mouthpiece near the mouth.<br />
It is useful when engaged in complex operations which require the<br />
use of both hands <strong>for</strong> a long time.<br />
The Uses of Asbestos<br />
<strong>for</strong>m<br />
working operations. Asbestos paper or tape is very useful <strong>for</strong> blocking<br />
the ends of tubes which are so placed that they get too hot to<br />
allow the use of corks or rubber stoppers. A satisfactory blocker can<br />
be made by winding asbestos tape round a length of glass rod until it<br />
fits the tube. It may be found necessary to moisten the asbestos to<br />
make it adhere to itself. Wound round a length of tubing in a<br />
similar way, asbestos tape provides a convenient method of inserting<br />
a blowing tube into a system. Asbestos paper may be pulped with<br />
water to <strong>for</strong>m a pulp which can be used <strong>for</strong> blocking irregularly<br />
shaped holes while glass-blowing is carried out on some other part of<br />
the system; but if it is used in this way care must be taken to prevent<br />
shreds of asbestos faEing inside the apparatus, and one must not<br />
leave any shreds adhering to the glass when it is subsequently worked.<br />
When it is necessary to work glass under cramped conditions and<br />
36
THE USES OF ASBESTOS<br />
there is a likelihood of the flame being played on to other parts of the<br />
apparatus, it is advisable to screen these parts with sheets of asbestos<br />
board or by binding them with asbestos cord or paper. The bench is<br />
also liable to suffer from the effects of hot glass and hot tools being<br />
laid down unless it is protected by a sheet of asbestos board or similar<br />
material. Hard asbestos board is better <strong>for</strong> this purpose than the soft<br />
type as the latter has a tendency to contaminate the tools with loose<br />
fibres which may be transferred to the glass being worked.<br />
Asbestos gloves protect the hands both from glassware which<br />
would otherwise be too hot to hold and from the effects of radiant<br />
energy. But they suffer from the disadvantage that, owing to the<br />
nature of the material, they tend to be clumsy and do not allow small<br />
objects to be picked up easily. Unless large sizes of tubing are to be<br />
worked there seems to be little advantage in the use of these gloves.<br />
But with operations with a hand torch on large Pyrex tubing,<br />
asbestos gloves are often essential—after a time the torch becomes<br />
too hot to hold, because it is heated by radiation and convection from<br />
the hot glass. The gauntlet type of asbestos glove is desirable <strong>for</strong><br />
these operations.<br />
When new asbestos paper and tape is used on apparatus, it may be<br />
desirable first to heat it in a gas-air flame to remove the binder.<br />
<strong>Glass</strong>-Blowing Spectacles<br />
It may be found that in operations in which it is necessary to observe<br />
the glass de<strong>for</strong>ming or flowing whilst it is in the flame, vision is<br />
obscured by the sodium glare from the glass. Special glasses are<br />
made to filter off this yellow light and also much of the infra-red<br />
radiation. Spectacles or goggles made from such glasses are available<br />
commercially. The glass itself resembles the cobalt glass used in<br />
qualitative analysis flame tests, and may also contain rare earth<br />
oxides. Didymium goggles contain neodymium and praseodymium,<br />
and selectively absorb light in the sodium D region. The effect of the<br />
radiant heat from the glass is tiring to the eyes and may be reduced<br />
considerably by wearing ordinary sun glasses made with Crookes<br />
glass. These glasses reduce the light and heat intensity but do not<br />
significantly cut out the sodium glare. If ordinary sun glasses are<br />
used, care must be taken to see that the frames are not easily inflammable<br />
in view of the possibility of accidents.<br />
<strong>Glass</strong> Knives and Diamonds<br />
<strong>Glass</strong> knives are of two main kinds. The inexpensive ones are made<br />
of hardened carbon steel, and the more expensive ones are made of a<br />
very hard alloy. The latter kind keep their edge <strong>for</strong> a long time, but<br />
37
GLASS-WORKING EQUIPMENT<br />
the <strong>for</strong>mer soon lose their edge. Both kinds can be sharpened on a<br />
carborundum hone. For the expensive type a fine hone is desirable;<br />
<strong>for</strong> the other kind a coarse hone may be used and a scythe stone is<br />
satisfactory.<br />
A glazier's diamond is very satisfactory <strong>for</strong> cutting sheet glass. It<br />
is not satisfactory <strong>for</strong> cutting the outside of glass tubing; the inside of<br />
glass tubing can be cut with a diamond by the device described below.<br />
A triangular file can often be used instead of a glass knife.<br />
Tube Cutting Device<br />
A very useful device <strong>for</strong> cutting tubing too large to break by hand is<br />
shown in FIGURE 7.* It can verv easilv be made in the machine shoo.<br />
fin.<br />
FIGURE 7. Tube cutting device<br />
The bush A is hinged at B and carries a rod C whose position with<br />
respect to B can be adjusted. At one end of C is set a tiny diamond Z>.<br />
The tubing to be cut is placed over C so that the diamond is in contact<br />
with the inside of the glass wall and the tube is lowered on to the<br />
rollers E. It is then rotated through 360° while upward pressure is<br />
exerted at F causing the diamond to scratch the glass. A very clean<br />
break is obtained either right away, or on local heating of the glass<br />
(p. 50). The rollers are reduced in diameter over a short length at G<br />
to take a tube whose end is flared, as, <strong>for</strong> example, a test tube.<br />
Notches in the end-plates H and I, in which the ends of the rollers sit<br />
as shown, are cut at equal intervals on either side of the central point,<br />
* We are grateful to Mr A. J.Hawkins, glass-blower at the University of British<br />
Columbia, whose design we have shown here.<br />
38
GLASS KNIVES AND DIAMONDS<br />
so that the distance between the rollers can be varied according to the<br />
size of the tubing to be cut.<br />
Clamps<br />
Good clamps <strong>for</strong> holding glass apparatus in position are essential to<br />
the scientist. Also, in many of the operations described in this book<br />
the glass-working scientist will need to hold the glass tubes in<br />
position with clamps.<br />
The best <strong>for</strong>m of clamp has both arms of the claw independently<br />
movable with a screw to tighten up each (FIGURE 8,J). Many standard<br />
<strong>for</strong>ms have only one tightening screw, and one movable arm is<br />
/ n<br />
FIGURE 8. Two types of clamp<br />
drawn towards the other whose position remains fixed (FIGURE 8, IT).<br />
These are less convenient. Two prongs in each arm of the claw are<br />
desirable and lead to more stability than a two-and-one prong<br />
arrangement. A claw lining of asbestos or cork is preferable to<br />
rubber, and a machined boss makes <strong>for</strong> ease of manipulation and<br />
uni<strong>for</strong>mity of pressure.<br />
Abrasives<br />
Class may be ground to shape by using one of five abrasives. These<br />
are (/) grinding sand, (2) emery, (5) carborundum, (4) pure alumina<br />
or corundum, and (5) diamond powder. Each abrasive has its own<br />
particular property. Grinding sand is used <strong>for</strong> very rough grinding.<br />
It is mixed with water and the glass is ground to shape against a<br />
suitable surface. Grinding sand is very coarse and unsuitable <strong>for</strong><br />
refined work, <strong>for</strong> which emery, carborundum or corundum are used.<br />
Emery is graded from coarsest to finest as 1, 0, 00, (XX), 0000. The<br />
39
GLASS-WORKING EQUIPMENT<br />
grading is done by shaking the emery with water and leaving the<br />
suspension to stand. After a specified time the liquid suspension is<br />
removed and dried, so the longer the standing time the finer the<br />
emery. Emery can also be graded by particle size, by giving the size<br />
of a mesh which will just retain the particles. A 100-mesh sieve, <strong>for</strong><br />
example, has 100 square holes per linear inch. (Often in a sieve only<br />
about 25 per cent of the area consists of holes; the remainder is the<br />
wire network. The wire size is equal to the aperture size when 25 per<br />
cent of the sieve area is holes.) When grinding glass with increasingly<br />
fine grades of emery it is essential to clean it so as to remove the<br />
coarser emery be<strong>for</strong>e using the finer. The glass is ground with emery<br />
in water either on a metal <strong>for</strong>mer or, when flat surfaces are required,<br />
on another flat piece of glass, with the emery between the two glass<br />
surfaces.<br />
Carborundum is used mainly <strong>for</strong> fast work when much glass needs<br />
to be removed, and <strong>for</strong> grinding quartz. It is cheaper and harder than<br />
emery. It can be graded by particle size; the coarsest normally used<br />
is 90 mesh. The medium size is about 180 mesh, and the fine about<br />
300 mesh, with very fine of 600 and 900 mesh; this last is usually<br />
unnecessary since better results can be obtained with jeweller's rouge.<br />
Carborundum is also often graded in F numbers: F consists of 240<br />
mesh and finer; 2F of 280 and finer; and 3F of 320 mesh and finer.<br />
Carborundum is used in the same way as emery, and has the advantage<br />
that carborundum wheels and blocks can be obtained.<br />
Corundum or alumina is again faster than emery, but it is much<br />
more expensive. Finally, diamond powder can be used, and is very<br />
fast but by far the most expensive. Once the glass has been ground it<br />
can be polished with jeweller's rouge or Cerirouge (see p. 83). With<br />
these polishes an optical finish may be obtained.<br />
<strong>Glass</strong> Holders<br />
One often needs to manipulate a piece of tubing so short that the<br />
normal method cannot be employed because the glass becomes too<br />
hot to hold. Various types of holder can be used. A rubber bung,<br />
covered with asbestos paper and bored with one hole containing a<br />
glass rod or tube, can be inserted into the tube as in FIGURE 9, /.<br />
Asbestos paper can be wrapped round a small tube until it fits into<br />
the tube to be worked (FIGURE 9, //). The smaller tube may now be<br />
manipulated with com<strong>for</strong>t and hence any desired operation can be<br />
per<strong>for</strong>med on the larger tube. A variation of these methods is to<br />
employ a glass holder of the type shown in FIGURE 9, //I. The holder<br />
is made by joining a small tube to a large tube; the two tubes must be<br />
coaxial. The large tubing is then cut about 2 inches from the joint<br />
40
GLASS HOLDERS<br />
In use, the tube to be worked is wound with asbestos paper and fitted<br />
into the large tube of the holder; a rubber bung can often be used<br />
instead of the paper.<br />
Holders <strong>for</strong> spherical glass bulbs are mentioned on p. 32. BARK.<br />
and ANHORN (1949) give many examples of the use of holders of the<br />
type of FIGURE 9, ///; in many laboratories, however, they are rarely<br />
or never used.<br />
r<br />
Asbestos paper<br />
Asbestos paper<br />
m<br />
n<br />
FIGURE 9. Some ways of holding glass tubes<br />
Large Tube Supports<br />
Large tubing is often too heavy to rotate as well as support with the<br />
left hand, so a support is used to take some of the weight. The very<br />
simple device shown in FIGURE 10 consists of a piece of wood with a<br />
*V cut in the top, and a slit to let a thumb-screw slide up and down.<br />
FIGURE 10. A support<br />
<strong>for</strong> large tubing<br />
It is fixed to the stand by the thumb-screw so that the height can be<br />
varied. A few freely rotating wooden balls (e.g. small atom models)<br />
can be fixed along the *V* to increase the ease of rotation. A clamp<br />
41<br />
n
GLASS-WORKING EQUIPMENT<br />
and stand is often useful; the glass can be rested on the rod of the<br />
clamp, between it and the boss.<br />
Adjustable Rollers<br />
The ef<strong>for</strong>t required to work long heavy pieces of tubing, even with<br />
supports as described in the previous section, is tiring and may prevent<br />
adequate rotation of the glass in the flame. This ef<strong>for</strong>t may be<br />
reduced by the use of adjustable rollers (FIGURE 11), which may be<br />
in the <strong>for</strong>m of two pairs of rollers on one stand or two sets of single<br />
rollers. This latter arrangement is rather more versatile, since they<br />
can be placed far apart to support long tubes, whereas the two pairs<br />
GLASS-BLOWER'S SWIVEL<br />
inner tube can rotate. It can be machined in metal or can be made<br />
quite satisfactorily from glass (FIGURE 12, II). The inner tube has<br />
holes around its perimeter directly in line with the union T-piece. If<br />
made from glass these holes can be <strong>for</strong>med by puncturing molten<br />
glass with a tungsten needle, or by drawing out tiny spindles and<br />
breaking these off. The inner tube must fit closely into the tube in<br />
which it rotates, to minimize air leakage.<br />
To blowing tube<br />
I<br />
To apparatus<br />
c<br />
O<br />
To blowing tubs<br />
5W<br />
n<br />
P^ ^^^l|bHH|Mt<br />
To apparatus<br />
FIGURE 12, Two designs of glass-blower's swivel. / is of metal<br />
7/is of glass<br />
Polarized Light Strain-Viewer<br />
When intricate pieces of apparatus have been constructed it can be<br />
useful to observe the presence or absence of strain with a polarized<br />
light viewer. A. L. REIMANN (1952) gives descriptions of various<br />
systems and explains the optics of these systems.<br />
The most sensitive <strong>for</strong>m has a diffused white light shining through<br />
a polaroid screen, then a mica tint plate and a second polaroid screen<br />
crossed with respect to the first. The piece of glass apparatus under<br />
examination is held between the first polaroid screen and the tint<br />
plate. Unstrained glass appears coloured violet-red, and the presence<br />
of strain is indicated by change of colour in the strained portions<br />
through red or blue-green to yellow, depending on the nature and<br />
amount of strain. The orientation of the work must be varied to give<br />
maximum colour change, otherwise quite a large strain can be<br />
missed. This can happen because glass subject to simple axial<br />
tension or compression behaves as a uniaxial crystal with optic axis<br />
along the direction of stress. Along this direction, there<strong>for</strong>e, no<br />
double refraction occurs.<br />
The tint plate produces a retardation of about 570 millimicrons, so<br />
that the yellow components of white light vanish. The resulting<br />
colour of violet-red (or 'sensitive violet') is changed when an extra<br />
retardation is introduced by the strained glass. The eye is very<br />
43
GLASS-WORKING EQUIPMENT<br />
sensitive to colour changes in this region. J. H. PARTRIDGE (1949) has<br />
given a table of colours observed in a strain-viewer without and with<br />
a tint plate.<br />
<strong>Glass</strong>-Cutting Wheels<br />
Large glass-working laboratories may be equipped with a glasscutting<br />
machine. This usually consists of a high-speed, powerdriven,<br />
fine abrasive wheel, or, better, a steel wheel in whose<br />
perimeter are embedded fine diamond particles. A lubricant—water,<br />
or water and cutting oil emulsion—is played on to the faces of the<br />
wheel from jets on either side. The glass to be cut is held on a movable<br />
steel table mounted on rollers.<br />
FIGURE 13. Cutting through<br />
a glass tube with a high<br />
speed wheel<br />
For an oblique cut the glass can be clamped in position. When a<br />
straight cut across the length of the tubing is required the tube is<br />
carefully rotated during the last stages of the cut, in the direction<br />
shown by the arrow in FIGURE 13; this keeps the wall of the tubing,<br />
at the point of cutting, perpendicular to the cutting blade and<br />
prevents a portion of the wall from breaking away at the completion<br />
of the cut. By varying the manipulations the ends of tubing can be<br />
slotted and small holes or slots can be cut in the walls. A small hole,<br />
<strong>for</strong> example, is produced when the cutting operation is stopped just<br />
as the wheel breaks through the wall.<br />
Lapping Wheel<br />
For many grinding operations a lapping wheel can be most useful. A<br />
horizontal metal table rotating at about 30 r.p.m., sprinkled with<br />
carborundum powder and moistened with water or cutting oilwater<br />
emulsion, <strong>for</strong>ms a very satisfactory grinding table. A raised<br />
rim (see FIGURE 14) prevents the grindii<br />
from the circumference of the table while an inclined baffle<br />
44
LAPPING WHEEL<br />
made of wood with a lower strip of leather, keeps the paste from<br />
piling up on the outside.<br />
In most cases the glass being ground can be held by hand, but <strong>for</strong><br />
making accurately parallel faces, <strong>for</strong> instance, some <strong>for</strong>m of adjustable<br />
mounting is useful. This can usually be built to suit the particular<br />
operation.<br />
FIGURE 14, A lapping wheel<br />
Carborundum Grinding Wheel<br />
A very fine, high-speed, carborundum wheel—of the sort employed<br />
<strong>for</strong> grinding very hard metals—can be used <strong>for</strong> grinding glass. A<br />
delicate pressure must be used, particularly with tubing, to avoid<br />
shattering the glass. The wheel must be continuously moistened<br />
either with a jet of water or by holding a wet cloth against a portion<br />
of its face.<br />
The method gives a very coarse finish but enables a large piece of<br />
glass to be ground down quickly. The work must be finished with<br />
carborundum powder by hand or using a lapping wheel.<br />
Annealing Oven<br />
<strong>Glass</strong>-working shops that are called upon to make large or intricate<br />
apparatus should be equipped with an annealing oven. With some<br />
ingenuity a home-made one can be built using Nichrome wire and<br />
fire-brick.<br />
The glassware should be transferred to the oven as soon as possible<br />
and the temperature slowly raised to the annealing point of the glass<br />
used. This temperature must be held <strong>for</strong> from five to ten minutes or<br />
more and the oven then allowed to cool slowly. The maximum<br />
cooling rate depends on the glass and wall thickness, and data can<br />
usually be obtained from the manufacturer. For Pyrex brand glass,<br />
Corning No. 7740> and wall thickness not greater than 2 mm, the<br />
maximum cooling rate allowed should be 56°C/min. For a wall<br />
thickness of 5 mm the cooling rate should not exceed 9°C/min.<br />
Annealing schedules <strong>for</strong> some glasses are given on p. 20.<br />
45
GLASS-WORKING EQUIPMENT<br />
Sometimes it is possible to transfer the article straight into a hot<br />
oven. This depends upon the particular piece of apparatus. With a<br />
diffusion pump, <strong>for</strong> instance, where most of the joints have been<br />
allowed to cool completely be<strong>for</strong>e the final parts are assembled, the<br />
whole article is placed in a cool oven which must slowly be raised to<br />
the annealing temperature. On the other hand, it may be desirable<br />
to transfer a complicated part, a multiple glass~to-metal pinch seal,<br />
<strong>for</strong> example, directly from the glass-working flame to a hot oven<br />
already at, or near to, the annealing temperature. This is the case<br />
when cooling without careful annealing can set up large strains.<br />
Treatment of Slight Burns<br />
Trivial burns are sometimes produced by the accidental handling of<br />
hot glass. These may be smeared with vaseline or skin cream and<br />
covered with clean or preferably sterile linen. Blisters should not be<br />
broken. Tannic acid jelly is not recommended.<br />
Amount of Equipment required <strong>for</strong> Different Purposes<br />
The various items of equipment we have described are all useful in a<br />
laboratory where a great deal of difficult glass-working is carried out.<br />
Much difficult work can be done without a tube-cutting device, glass<br />
holders, large tube supports, adjustable rollers, a glass-blower's<br />
swivel, strain viewer, cutting wheel, lapping wheel, grinding wheel<br />
and an annealing oven. These items, however, together with a glassworking<br />
machine (Chapter 6), are desirable in a laboratory where all<br />
kinds of difficult jobs are tackled. In school laboratories only simple<br />
jobs will normally be done. The necessary equipment <strong>for</strong> such jobs<br />
consists only of a hand torch, an air blower or bellows of some kind,<br />
a glass knife, a spike, a flaring tool and <strong>for</strong>ceps, and a set of rubber<br />
stoppers with a blowing tube. Stands and clamps will be available as<br />
ordinary laboratory equipment. An asbestos board is useful to<br />
protect an ordinary bench used <strong>for</strong> glass-working.<br />
In research work a lack of the proper facilities may lead to a considerable<br />
loss of time because jobs are done far more slowly when the<br />
proper equipment is not available. For example, much time is lost<br />
when a complex apparatus cracks because an annealing oven is not<br />
available, and when large tubing is manipulated without a glassworking<br />
machine. We think that R. THKELFALL'S (1898) remarks are<br />
still worthy of note. He wrote Though, no doubt, a great deal can<br />
be done with inferior appliances where great economy of money and<br />
none of time is an object, the writer has long felt very strongly that<br />
English physical laboratory practice has gone too far in the direction<br />
of starving the workshop, and he does not wish, even indirectly, to<br />
46
AMOUNT OF EQUIPMENT REQUIRED<br />
give any countenance to such a mistaken policy. Physical research<br />
is too difficult in itself, and students' time is too valuable <strong>for</strong> it to be<br />
remunerative to work with insufficient appliances.'<br />
H<br />
H<br />
REFERENCES<br />
BARR, W. E. and ANHORN, V. J., 1949, Scientific and Industrial <strong>Glass</strong><br />
Blowing and <strong>Laboratory</strong> Techniques', Pittsburgh, Instruments<br />
Publishing Co.<br />
PARTRIDGE, J. H,, 1949, <strong>Glass</strong>-to-Metal Seals; Sheffield, Society of<br />
<strong>Glass</strong> Technology.<br />
REIMANN, A. L., 1952, Vacuum Technique; London, Chapman &<br />
Hall.<br />
SHENSTONE, W. A., 1889, The Methods of <strong>Glass</strong> Blowing, 2nd Edn;<br />
London, Rivingtons.<br />
SMITH, I. C. P., 1947a, Chem. Age, Lond., 165.<br />
SMITH, I. C. P., 1947b, Chem. Age, Lord., 571.<br />
THRELFALL, R., 1898, On <strong>Laboratory</strong> Arts; Macmillan, London.<br />
47
Chapter 4<br />
BASIC GLASS-WORKING OPERATIONS<br />
The Preliminary Preparation of Materials<br />
BEFORE any glass-blowing is started it is highly desirable that the<br />
tools and all pieces of glass rod, tubing, etc., should be collected<br />
together and laid out systematically. At times this may seem unnecessary<br />
and a waste of time, but it will be found to be worth-while<br />
in the long run. When deciding what will be required, the complexity<br />
of the job in hand must be borne in mind: the more complex the job<br />
the more care required in preparing the materials and in working out<br />
mentally the way in which it is to be done. If this is not done, sooner<br />
or later it will be found that some tool is missing when it it required<br />
and that the work cools and cracks while the tool is being sought. B.<br />
D. BOLAS (1921) wrote 'A large amount of glass-blowing is spoiled<br />
through carelessness in arranging the work be<strong>for</strong>ehand'.<br />
The need <strong>for</strong> system and order in all practical work has been<br />
stressed by M. FARADAY (1842), who wrote, in giving general rules<br />
<strong>for</strong> young experimenters, "They all relate to method, that great source<br />
of facility and readiness which is equally influential in the per<strong>for</strong>mance<br />
of the most common and the most difficult processes.' His<br />
remarks are as pertinent today as when they were made, particularly<br />
as the tradition of the handing on of practical knowledge is not as<br />
strongly maintained as it was in the latter part of the nineteenth<br />
century. (R. W. Bunsen used to teach his students glass-blowing and<br />
other practical arts and even went so far as to make the more difficult<br />
pieces of apparatus himself.)<br />
There seems to be a general psychological tendency in doing<br />
practical work with glass (and other things) to try and take short cuts<br />
and save time by using improper and hazardous methods, and in our<br />
experience this tendency in the end leads to more waste than saving<br />
of time. One must also avoid the temptation, in any given case, to<br />
think that just <strong>for</strong> once a risk can be taken.<br />
The Cleaning of <strong>Glass</strong> Tubes<br />
Be<strong>for</strong>e any glass-working is started care should be taken to make sure<br />
that the glass is thoroughly cleaned. This cleaning is necessary <strong>for</strong><br />
48
THE CLEANING OF GLASS TUBES<br />
two main reasons. One is that if inorganic material is left on the glass<br />
it will not burn off in the flame and will become embedded in the<br />
glass. This can, under some circumstances, lead to local strain in the<br />
joint and may also prevent the two pieces of glass fusing together<br />
properly, leaving a pinhole in the joint. The second reason why<br />
thorough cleaning is important is that it is essential, if the apparatus<br />
is to be used <strong>for</strong> high vacuum work, <strong>for</strong> the inner surfaces to be<br />
grease-free. It is much easier to do this cleaning be<strong>for</strong>e a complex<br />
piece of apparatus is assembled.<br />
Normal chemical cleaning procedures are satisfactory <strong>for</strong> cleaning<br />
glass tubing <strong>for</strong> glass-blowing. Much of the dirt can be removed by<br />
the use of water, a detergent and a long brush such as a burette brush. It<br />
is desirable not to scratch the inside of the tube with the wire of the<br />
brush. The use of a brush can be avoided by pushing or pulling a piece<br />
of soft cloth through the tube. Chromic acid is satisfactory <strong>for</strong> cleaning<br />
glass, after removal of the gross dirt, provided care is taken to see that<br />
the glass is free from mercury. The usual laboratory cleaning solution,<br />
known colloquially as 'chromic acid' contains about 50 ml of<br />
saturated aqueous sodium dichromate in a hire of concentrated sulphuric<br />
acid. If mercury is present a residue is precipitated which is<br />
difficult to remove. Thorough washing with water is necessary after<br />
cleaning in chromic acid. <strong>Org</strong>anic solvents are adequate <strong>for</strong> removing<br />
grease from the inner surfaces of tubes where no other dirt is<br />
present; while acetone or alcohol may be useful <strong>for</strong> drying glassware,<br />
care should be taken that liquid or vapour from these solvents does<br />
not remain inside the glass when glass-blowing is commenced, because<br />
of the risk of explosion. When glass which has been in contact<br />
with mercury is worked, great care should be taken to clean the<br />
mercury from all parts of the system likely to become hot, since mercury<br />
vapour is toxic.<br />
It is very difficult to remove the last traces of chromium from glass<br />
cleaned with the usual chromic acid mixture. The remaining traces<br />
may cause error in oxidation studies. R. A. WILKINSON (1955) found<br />
serious errors from this cause in fat oxidation studies, and he cleaned<br />
greasy pipettes in a boiling, J per cent aqueous solution of "Teepol"<br />
(sodium secondary alkyl sulphate). <strong>Glass</strong> can also be cleaned in<br />
boiling aqua regia.<br />
Breaking <strong>Glass</strong> Tubes<br />
Tubing up to about 15 mm diameter can be broken by scratching the<br />
surface in one place with a file or glass knife, making the scratch at<br />
right angles to the axis of the tube and then placing the thumbs on the<br />
side of the tubing opposite to the scratch; the thumbs are pressed<br />
49
BASIC GLASS-WORKING OPERATIONS<br />
<strong>for</strong>ward and the rest of the hands are slightly pulled apart (FIGURE<br />
15). This is a gentle process and not a test of strength. The scratch<br />
on the tubing can, with practice, be made with one stroke of the glass<br />
knife; it is not necessary to try and exit through the wall of the tubing,<br />
and the knife is soon blunted when it is used like a saw. Most glassworkers<br />
have the impression that wetting the initial cut makes the<br />
glass break more easily. Soda glass is easier to scratch with the knife<br />
than the borosilicate glasses.<br />
We find that tubing in the range of 15-30 mm diameter (approximately)<br />
can be broken by a variation of the above method: The tubing<br />
is scratched fairly strongly, and placed, with the scratch uppermost,<br />
so that it rests on a copper wire, about 3 mm diameter, which is<br />
opposite to the scratch and parallel to it. The scratch is moistened,<br />
FIGURE 15. Breaking a small glass tube<br />
and the ends of the glass tube are <strong>for</strong>ced down strongly while the tube<br />
is balanced on the copper wire: a square break is then usually<br />
obtained. This method works best with moderately thin-walled<br />
tubing.<br />
Tubes exceeding 15 mm diameter (and smaller) can be broken by<br />
the 'hot-spot' technique: A fairly deep scratch is made in the glass in<br />
one place, and wetted. The point of a piece of glass rod is then heated<br />
white hot, to give a hot spot a few mm in diameter, and this is placed<br />
on the end of the scratch. The glass may crack right away, or it may<br />
crack when the hot spot is removed and damp cotton wool is applied<br />
to the hot glass. Usually, with borosilicate glass, the crack goes only<br />
part of the way round the tube; a soda tube often cracks completely.<br />
The crack can be continued by placing another hot-spot against its<br />
end. This is continued until, with luck, the ends of the crack meet<br />
With borosilicate glass the crack usually wanders, and a square end is<br />
not obtained. A cracking-off burner (p. 29) can be used in place of a<br />
hot spot.<br />
A square end is more easily obtained by the hot wire method. The<br />
tubing is first scratched all the way round. This may be done by<br />
50
BREAKING GLASS TUBES<br />
hand, a line being first drawn round the glass with a wax pencil—the<br />
line can be checked to see that it is perpendicular to the tube axis—<br />
and the scratch made along the pencil mark. Without the pencil<br />
mark, the scratch may deviate from the perpendicular, A peripheral<br />
outside scratch may also be made by rotating the tube against a<br />
rotating steel wheel. An internal scratch may be made with a diamond<br />
by the method described on p. 38.<br />
After scratching, 26 s.w.g. (or thicker) Nichrome wire is wrapped<br />
once round the scratch, which is wetted. The wire is heated to redness<br />
electrically, and kept taut round the glass—<strong>for</strong> this purpose it is<br />
convenient to have insulated handles on the wire. The tubing may<br />
then crack smoothly; if not, it may be induced to crack by touching<br />
the scratch with wetted asbestos when the wire has been hot <strong>for</strong> about<br />
half a minute. An internally scratched Pyrex tube may not crack<br />
until it is put in a flame.<br />
Sometimes a large bottle is cut to make a heavy beaker or a bell<br />
jar. Big bottles are generally of soda glass, and can be cracked with a<br />
flame. The bottle is first fairly heavily scratched all the way round,<br />
and then a very small flame is directed on to the scratch. A crack<br />
should start, and it can be led round by the flame. A cracking-ofT<br />
burner (p. 29) is specially useful here. This operation is quite difficult<br />
<strong>for</strong> beginners, because the glass often just shatters; but with practice<br />
it can be mastered. Increased safety is obtained by wrapping strips of<br />
wet blotting paper or asbestos paper round both sides of the crack,<br />
leaving a gap, about J-J inch wide, containing the crack. An alternative<br />
method <strong>for</strong> large bottles, etc., is to spin them on a turn-table<br />
and to have a fine pin-point flame playing at the level of a small initial<br />
scratch; after a few minutes the flame is removed and a piece of wet<br />
cotton wool pressed on the scratch.<br />
I. C. P. SMITH (1947) has described a simple method of grinding<br />
through glass tubing with a hacksaw: the blade is replaced by soft<br />
wire (such as iron, copper, or Nichrome) of 24 to 18 gauge, and this is<br />
ground through the glass, using 180-mesh carborundum powder and<br />
water and an ordinary sawing action, A glass-cutting wheel is<br />
described on p. 44.<br />
Knocking off Small Bits of Tubing<br />
Sometimes there is not enough tubing left beyond the scratch to hold<br />
in the hand, so that the normal method <strong>for</strong> small tubing (p. 49) cannot<br />
be used. The easiest method to use in this case is to scratch the<br />
tube and then place it on the top of a triangular file, with the scratch<br />
opposite to and above the edge of the file (FIGURE 16). The end of the<br />
lube is then knocked of! by giving it a sharp blow with a heavy object.<br />
i 51
BASIC GLASS-WORKING OPERATIONS<br />
Often the end of a broken tube is not quite square. This can be<br />
somewhat corrected, especially in larger tubes, by using a piece of<br />
wire gauze: The gauze is stroked against the end of the tubing, when<br />
small pieces of glass are broken off the protruding edges until the end<br />
assumes a roughly square shape. Another method is to heat the end<br />
of the tube strongly and cut off the protruding parts with scissors.<br />
, Scratch<br />
f ZZI><br />
THangaiar f//e<br />
FIGURE 16. Knocking the end off a small piece of tubing<br />
Holding and Rotating Tubes in the Bench Flame<br />
Holding and rotating tubing in the flame is a most important part<br />
of glass-blowing with small tubing. Usually the weight of the glass is<br />
supported by the left hand, which is held over the tubing, and the<br />
right hand, under the tubing, maintains only a light grip. Although<br />
this may feel odd to the beginner, it will be found satisfactory because<br />
the right hand is free to do the manipulations and to bring the tube to<br />
the mouth <strong>for</strong> blowing. However, the right hand may also hold the<br />
weight with an overhand grip while the left hand has the underhand<br />
grip. In research work it is convenient to be able to use both<br />
methods.<br />
The more usual disposition of the hands is shown in FIGURE 17.<br />
FIGURE 17. Holding and rotating a tube. The<br />
disposition of the hands is as seen by the operator<br />
The tubing is rotated by the <strong>for</strong>efinger and thumb of the left hand,<br />
and rotates in the groove between the thumb and <strong>for</strong>efinger of the<br />
right hand, and can rest lightly on the middle finger of the right hand.<br />
It is easy enough to get a smooth rotation of the glass when it is rigid,<br />
but when it is soft both hands must rotate the glass without distorting<br />
52
HOLDING AND ROTATING TUBES IN BENCH FLAME<br />
It, and this is difficult (p. 2). One must get the 'feel' of the glass. Its<br />
softening is a gradual process, and its 'feel* during working is determined<br />
by viscosity, surface tension, thickness etc. Practice is necessary<br />
here.<br />
The glass should be rotated horizontally, unless it is desirable <strong>for</strong> it<br />
to flow towards one end. Usually it is rotated with the upper side<br />
moving away from the operator, but this seems a personal preference.<br />
When the glass becomes very hot and plastic, it is essential <strong>for</strong> the<br />
right hand to keep the tubing rotating at the same speed as the leftband<br />
piece, or streaks and ridges will appear. This operation is found<br />
difficult by some people, but others master it with practice.<br />
With sola glass the rotation of the article in the flame is of prime<br />
importance, since if part of the work is allowed to cool, re-heating<br />
may cause cracking and the destruction of the article; but with Pyrex<br />
and similar glass it is often possible to heat only a portion of the<br />
article at a time.<br />
When the tubing is too heavy to hold and rotate, one end can be<br />
rested on a support (p. 41), or rollers can be used (p. 42).<br />
The beginner should not be disappointed if at first these operations<br />
produce a hopeless mess; with practice the facility is gained.<br />
Bends and Spirals<br />
To bend a piece of tubing, the left-hand end is first closed. The tube<br />
is rotated in a fairly big flame with not very much air (<strong>for</strong> soda) or<br />
oxygen (<strong>for</strong> Pyrex) in it. A special flame from a ribbon burner (p. 29)<br />
is best, but not essential; an ordinary bench blowpipe gives an adequate<br />
flame. The tube is held as in FIGURE 17. When soft over the<br />
desired length it is brought, held horizontally, up to the chest. The<br />
right hand then brings its end vertical, and gentle blowing into this<br />
•nd brings the tube into shape with no kinks or flat portions. If a bad<br />
bend is made it can be corrected by heating and blowing. Many<br />
Other methods of making a bend have been described.<br />
Spirals<br />
To make spirals of uni<strong>for</strong>m size throughout is difficult; but useful<br />
Spirals can be made fairly easily by a beginner even though the product<br />
may not look too elegant: Longer sections than usual must be<br />
heated, and care must be taken not to flatten the tubing. It is easier to<br />
make spirals with smaller tubing because the ratio of wall thickness to<br />
diameter is highest.<br />
Spirals can be made either free-hand or with a mandrel or <strong>for</strong>mer.<br />
For the free-hand method a right-angle bend is made (FIGURE 18, /),<br />
With a length of tube (between A and B) of about 6 inches left to act<br />
53
BASIC GLASS-WORKING OPERATIONS<br />
as a handle. The tube is next bent into a right angle at C (FIGURE 18,<br />
II) so that the length BC is equal to the desired radius of the spiral.<br />
It is then heated near C, both by rotation and lengthways, over a<br />
fairly large area—the major part of the heating being on the outside.<br />
When the glass is soft enough, the length AB is held horizontally in<br />
the left hand and the length CD is slowly bent to <strong>for</strong>m the first arc of<br />
the spiral (FIGURE 18, J/7). The tube is next heated adjacent to the<br />
first arc, and, when sufficiently soft, is bent to continue the arc<br />
previously made. The bending is continued until a complete turn is<br />
made. The next step is to ensure that the tubing AB is axial. This is<br />
D<br />
A B<br />
C<br />
I<br />
FIGURE 18. The production of a spiral<br />
D<br />
Flame<br />
done by heating at B and bending AB into the correct position. All<br />
the bending should be done outside the flame and it is advantageous<br />
to look at the spiral from various angles to check the uni<strong>for</strong>mity of<br />
the coils. The spiral is completed by continuing as be<strong>for</strong>e.<br />
To make an elegant-looking product it is necessary to pay attention<br />
to the uni<strong>for</strong>m diameter of the coils and to keep the spacing between<br />
them constant. The final product (FIGURE 18, IV) usually has to have<br />
the two ends aligned. To do this, the last turn is heated at a distance<br />
from the end of the last arc approximately equal to the spiral radius,<br />
and a right-angle bend is made. The end of the last arc is then<br />
heated, and this right angle is pushed inwards. Final adjustments can<br />
be made after rotating the spiral to check alignment. The spiral<br />
should appear as in FIGURE 18, V.<br />
It is often easier to wind a spiral on a mandrel or <strong>for</strong>mer of carbon,<br />
metal tubing or glass tubing wrapped with asbestos paper. A rightangle<br />
bend is made in the tube to give a short portion at the end which<br />
54<br />
V<br />
m
BENDS AND SPIRALS<br />
is strapped to the mandrel. The tubing is heated in sections of about<br />
1 inch and wrapped round the mandrel. The asbestos can be used as<br />
a guide to ensure that even turns are made—one way is to wrap<br />
Asbestos<br />
FIGURE 19. Production of a spiral with a<br />
mandrel<br />
asbestos tape round the mandrel in a spiral path (FIGURE 19).<br />
Finally the asbestos is softened in water and the spiral is removed<br />
from the <strong>for</strong>mer.<br />
A flat circular spiral can be made by the free-hand method: a<br />
right-angle bend is made, and the glass near the bend is bent round<br />
Ihe short section used as a handle. By repeated heating and bending<br />
a flat coil is produced.<br />
Putting a Handle on the End of a Tnbe<br />
When it is necessary to work comparatively near to the end of a piece<br />
of tubing it usually becomes too hot to hold. It may be inconvenient<br />
to support the whole weight of the glass in one hand, and the unsupported<br />
end will almost certainly drop under its weight when the<br />
tube is hot. A handle on the end of the tube is there<strong>for</strong>e useful.<br />
First let us consider the case of a tube which is to be drawn off near<br />
the end. In this case the end need not be airtight. The tube to have<br />
the handle attached is held in one hand and the piece of rod or tubing<br />
to be used as a handle in the other. The end of the tube is rotated in<br />
the flame until the glass is soft <strong>for</strong> a length about equal to its radius.<br />
The handle should be heated until its end is molten and then attached<br />
to a selected point on the end of the tube. The tube should be taken<br />
out of the flame and the handle pulled across until the point at which<br />
it is attached to the tube comes into contact with the far side of the<br />
tube. This should be heated so that the two sides of the tube and the<br />
handle are thoroughly fused together and the handle should then be<br />
pulled approximately central on to the axis of the tube. The whole<br />
mass of glass should be kept heated <strong>for</strong> a short while by rotating in<br />
the flame to allow the strain in the glass to be reduced. Such a handle<br />
should not crack off when the glass cools, and is very useful when the<br />
tube has to be drawn off or bent near to the end. It does, however,<br />
leave the end of the tube in such a state that it has to be either drawn<br />
off or cut off and no blowing can be carried out as it is not air-tight.<br />
55
BASIC GLASS-WORKING OPERATIONS<br />
A handle can also be fused on to the closed end of a tube to support<br />
it while glass-blowing operations are carried out: This is done by<br />
heating the end of a piece of rod <strong>for</strong> the handle, heating the centre of<br />
the closed end of the tube, and fusing them together. When the<br />
handle is to be removed after the operations are finished the point<br />
where it is fused on can be heated, the handle drawn off, and the end<br />
of the tube blown out again to its original shape.<br />
With big tube it may be convenient to prepare a handle from rod<br />
shaped at its end like a Y, so that it sticks to two points along a diameter<br />
at the end of the tube. It is then not necessary to push in the<br />
ends of the glass tube. The Y-shaped handle is specially useful <strong>for</strong><br />
very big tubes.<br />
Drawing Tubes off to Spindles<br />
Drawing a tube off to a spindle is the simplest of the basic glassworking<br />
operations. It is a convenient alternative to cutting glass<br />
tubing when short lengths are required and it is the preliminary stage<br />
to many other operations.<br />
To draw off a tube using the flame of a bench torch, one places it<br />
in the flame and rotates it, so that heating is uni<strong>for</strong>m, until the tube<br />
starts to collapse under the surface tension of the molten glass. The<br />
glass should then be removed from the flame and the two parts drawn<br />
steadily apart at a rate which gives a strong spindle as the glass cools.<br />
The spindle can then be cut by melting it in the flame and pulling the<br />
two bits apart. A more axial spindle is obtained when rotation is<br />
continued as the glass parts are drawn apart.<br />
It may be convenient (specially <strong>for</strong> big tubes) to shape the glass<br />
somewhat in the flame be<strong>for</strong>e drawing the spindle. When the glass<br />
starts to soften, the two parts of the tube can be drawn apart slightly<br />
to maintain an approximately uni<strong>for</strong>m thickness of glass as the tube<br />
is drawn down. In this way a tube may be tapered or constricted. If<br />
the two parts of the tube are drawn apart too rapidly, be<strong>for</strong>e the glass<br />
has collapsed sufficiently, thin walls are obtained, and, if they are not<br />
drawn apart enough, thick walls result. The rotation of the two parts<br />
of the tube must be the same and the tube must be kept approximately<br />
straight during this process if a symmetrical taper or constriction<br />
is to be obtained. Continuation of the process greatly<br />
reduces the size of the tube at the point of heating.<br />
The spindle makes a very useful handle <strong>for</strong> holding the tube while<br />
other glass-blowing is carried out, and owing to its much reduced<br />
diameter it does not become hot when the tubing is worked near<br />
to the end. The tip of the spindle can be cut off to attach a rubber<br />
tube <strong>for</strong> blowing. If <strong>for</strong> any reason an accurately central spindle is<br />
56
*<br />
DRAWING TUBES OFf TO SPINDLES<br />
required it may be found convenient to put in a second spindle using<br />
the first one as a handle, since short lengths of tubing are normally<br />
more easily worked than long pieces which are unevenly balanced<br />
about the point of working. The operations involved in putting a<br />
central spindle near the end of a piece of tubing are shown in FIGURE<br />
20. In many glass-blowing operations, a long spindle is extremely<br />
useful. Spindles can be closed very quickly in a flame, or opened<br />
again with a glass knife; we find it preferable to use them, when<br />
possible, instead of rubber stoppers.<br />
Experience of the feel of the molten glass as the tube is rotated and<br />
Cut<br />
FIGURE 20. Drawing tubes off to spindles<br />
drawn down will enable a happy medium, between the extremes of<br />
thin-walled spindles and spindles of glass rod, to be obtained.<br />
The operation of putting a spindle in a tube is often described as<br />
'pulling a point' or 'pulling a spear'. This is a most important operation<br />
in bench flame work. The spindle must be central, otherwise the<br />
rest of the work will not be central.<br />
Round-Bottomed Closures of Tubes<br />
When a good spindle is obtained and a rounded end is required the<br />
glass should be heated at the end of the taper (as shown in FIGURE<br />
21): the glass here should be collapsed down in a small flame and<br />
pulled out comparatively slowly so as not to leave a blob of glass on<br />
the end of the tube. The whole end of the tube should then be heated<br />
by rotating it in a fairly large flame until the glass at the end of the<br />
ttlbe has started to collapse a little. The tube should be removed from<br />
the flame at tins stage and should be blown into gently. The glass<br />
should be heated relatively strongly—most beginners tend to try to<br />
57
BASIC GLASS-WORKING OPERATIONS<br />
work the glass be<strong>for</strong>e it is hot enough which leads to an uneven finish.<br />
It is advisable in the first place to blow gently so that the end of the<br />
tube is stretched slowly. In this way the blowing can be stopped at<br />
any required stage, and this is desirable since if any part of the glass<br />
is thinner than the rest this part will start to blow out first because of<br />
its lower viscous drag but will cool faster than the thicker parts<br />
which will continue to blow out after the thinner glass has become<br />
too cool to extend much more. In this way a more even rounded end<br />
will be produced than if the glass had been blown rapidly and then<br />
allowed to cool.<br />
The most usual fault in making a rounded end is to leave a lens of<br />
thicker glass at the point where the spindle was drawn off. This may<br />
be because either insufficient alass was drawn awav with the spindle—<br />
more can be pulled off with a piece -or else<br />
FIGURE 21. Closing a tube with a<br />
round end<br />
the glass was not heated enough to allow the unevenness to even itself<br />
out by flowing under surface tension. A lens of thicker glass left in a<br />
round-bottomed closure can be removed by heating it with a small<br />
flame and blowing it into a small bulb. The whole end of the tube<br />
should be re-heated by rotation in a medium-sized flame until the<br />
glass starts to flow. The end is then blown out to a hemispherical<br />
shape and annealed.<br />
Fabrication of Thin <strong>Glass</strong> Rod<br />
In some of the following sections the use of thin 'spills* of glass rod<br />
(welding rod) is described. They are most easily made from glass rod<br />
by heating a portion and pushing the ends together until a reasonable<br />
amount of molten glass is accumulated. This is drawn out at a rate<br />
which gives a rod of 1-2 mm diameter.<br />
If no rod is available the thin glass rod can be made from tubing:<br />
thick-watted capillary tubing is the most convenient but normal 8<br />
mm tubing will do quite well. A length of tubing, about 10-15 cm <strong>for</strong><br />
58
FABRICATION OF THIN GLASS ROD<br />
thick-walled capillary or 15-20 cm <strong>for</strong> 8 mm tubing, is rotated in the<br />
flame until a part collapses down and fuses to a solid mass. This<br />
process is continued, pushing the ends inwards slightly to build up a<br />
mass of fused glass with no fine capiEary through the centre. Such a<br />
capillary is easily seen while the glass is hot. The molten glass should<br />
be drawn down in the same way as <strong>for</strong> rod, taking care that the tube<br />
next to the fused mass does not draw down to <strong>for</strong>m a length of fine<br />
capillary. This will be prevented if the initial stage of the drawing<br />
down is carried out very slowly, Straight rod is obtained by rotating<br />
during the drawing-out.<br />
Blowing Holes in <strong>Glass</strong> Tubes<br />
There are basically two sites <strong>for</strong> blowing holes in glass tubing, the<br />
first where the hole is to be made in the end of a tube which has been<br />
drawn off, and the second where the hole is required in the side of a<br />
tube. The principle is the same in both cases: the glass to be blown<br />
out is heated until it is soft enough to flow easily and is then blown<br />
out into a very thin bubble. The bubble is then removed. If the glass<br />
is too hot or it is blown too hard, the bubble will not be <strong>for</strong>med, but a<br />
small irregular hole will be blown and a cloud of very fine glass flakes<br />
produced. This is undesirable.<br />
In the case in which the end of the tube is to be blown out care<br />
should be taken to see that the tube is heated evenly over the whole<br />
end, otherwise the hole produced in it will be skew. If the hole is to<br />
be smaller than the bore of the tube only a small area of the rounded<br />
end must be heated and the blowing must not be continued too long,<br />
since once the bubble of glass is <strong>for</strong>med it is enlarged principally by<br />
drawing more glass from around the edge of the hole in the original<br />
tube, thus making the hole larger. This also applies to the blowing of<br />
holes in the side of a tube.<br />
The second case, the blowing of a hole in the side of a tube, is a<br />
necessary preliminary to making a T-joint, and there<strong>for</strong>e it is essential<br />
to be able to produce the right-sized hole in the correct place. The<br />
procedure is very similar to that <strong>for</strong> blowing out the end of a tube,<br />
except that a small area on the side of the tube is blown out. Generally<br />
speaking it is more convenient to heat a comparatively large area<br />
on the side of the tube and blow a slight bulge, and then heat the<br />
smaller area to be blown out more strongly with a rather smaller<br />
flame. This should give a hole, if blown out correctly and not <strong>for</strong> too<br />
long or too hard, which is surrounded by shoulders so that the rim of<br />
the hole stands clear of the general line of the tube walls. In many<br />
cases it is desirable to have these shoulders present (e.g. making<br />
T-joints).<br />
59
BASIC GLASS-WORKING OPERATIONS<br />
The removal of the thin glass bubble from the hole does not present<br />
any problems. It can be easily knocked off, but this scatters flakes of<br />
glass which may get inside the glass being worked. The glass bubble<br />
may be crushed in a sheet of paper, which certainly causes less mess<br />
and may be preferred in the interest of general tidiness when the work<br />
is being carried out on fixed apparatus. A solution to the problem,<br />
which does not cause flakes of glass and leaves a supply of glass <strong>for</strong><br />
further working about the hole, is to fuse the bubble down into a rim<br />
around the hole. This usually happens as a matter of course when a<br />
fairly cool flame is played on the thin glass, but if too hot a flame is<br />
used the glass is boiled which does not improve its properties (see<br />
Devitrification, p. 18).<br />
To blow a very small hole the method described <strong>for</strong> multiple<br />
per<strong>for</strong>ations in bulbs is useful (p. 72).<br />
Joining Tubes of Similar Size<br />
In this section detailed descriptions of the operations will be given <strong>for</strong><br />
the benefit of the complete novice. It is convenient to deal with the<br />
subject in three sections, (1) the case in which both tubes can be<br />
rotated in the flame of a bench torch, (2) the case of one fixed tube<br />
and the other movable, and (3) the case of two fixed tubes.<br />
(1) Joining Two Tubes in the Flame of a Bench Torch<br />
The first step in producing a satisfactory joint is the preparation of<br />
the two ends to be joined. The most satisfactory method is to draw<br />
the tubes off and to blow the ends out. If this is done correctly the<br />
ends should be square. Cutting the tube with a file scratch leaves a<br />
line of fine bubbles in the joint due to the remains of the original<br />
scratch. This spoils the appearance of the joint when finished and<br />
may also cause a weak spot at which a pinhole may develop when<br />
testing <strong>for</strong> leaks with a Tesla coil Jagged ends of tubing can be<br />
heated until the glass is quite soft and trimmed with scissors.<br />
The second step is to block the end of one of the tubes and heat the<br />
ends of the two tubes in the flame until the glass is quite soft and<br />
starts to collapse. Uni<strong>for</strong>m rotation is necessary <strong>for</strong> this, as in all the<br />
heating operations <strong>for</strong> this method, When this stage is reached the<br />
glass is removed from the flame and the ends pressed lightly together<br />
; initial contact is best made at some point by holding the two<br />
tubes at a slight angle (FIGURE 22). The ends are then brought<br />
together by bringing the two pieces of the tube into fine. A slight<br />
pressure is then applied during the heating of the join so that the<br />
glass is thickened around it. This glass is worked thoroughly by<br />
alternate heating and blowing, care being taken to see that the two<br />
60
JOINING TUBES OF SIMILAR SIZE<br />
parts of the tube are rotated at the same speed during the heating<br />
process. When the glass has been worked sufficiently, so that the<br />
original junction of the two tubes cannot be distinguished, a slight<br />
bulge is blown in the tube and it is drawn down until the walls are of<br />
uni<strong>for</strong>m thickness and the tube has a uni<strong>for</strong>m bore. The whole<br />
operation is sometimes described as 'butt sealing' or 'butt welding*<br />
and the joint as a 'butt seal'.<br />
Slight pressure<br />
FIGURE 22. Joining two tubes<br />
Heat and<br />
rotate<br />
Heat and<br />
rotate<br />
Blow<br />
Draw down<br />
to un/<strong>for</strong>m<br />
bore<br />
It will probably be found that much practice is necessary be<strong>for</strong>e<br />
good joints can be made in this way. A common difficulty is that the<br />
two halves of the tube must be rotated at the same speed, and to avoid<br />
this many novices tend to work round the joint in segments once the<br />
two pieces of tube have been pressed together. This method, while<br />
capable of producing vacuum-tight joints, leaves an irregular wall<br />
thickness which is much more liable to crack from strains induced on<br />
ooling, even though it may have been carefully annealed by cooling<br />
slowly in the flame. However, it is satisfactory <strong>for</strong> Pyrex and similar<br />
glass.<br />
(2) Joining Two Tubes, one of which is Fixed<br />
The necessity of joining a tube to another which is fixed arises<br />
frequently in the construction of laboratory apparatus where the<br />
61
BASIC GLASS-WORKING OPERATIONS<br />
main part of the apparatus is either fixed to a stand or too large and<br />
unwieldy to allow the use of a bench torch. It is very often easier <strong>for</strong><br />
a novice to produce a good joint by clamping the glass in position and<br />
working with a hand torch as described below, since it does not<br />
require the same degree of manual dexterity.<br />
The two ends to be joined should be prepared carefully. The best<br />
method is by sealing off and blowing out, but in some cases this may<br />
not be possible. If the end of one tube is jagged, resulting from a<br />
break in the apparatus, and it is not practicable to close it and blow<br />
it out, the end should be smoothed by heating and working to a flat<br />
surface with a tool. This is done by removing protuberances with<br />
<strong>for</strong>ceps or scissors, and then pushing the surface flat with the tool.<br />
The importance of working the ends of the tubes so that they are a<br />
good fit when pushed together cannot be overemphasized at this<br />
stage, since a good fit eliminates much work in the later stages, and<br />
overworking of glass leads to devitrification of the surface.<br />
The working of the joint is carried out by first clamping the movable<br />
tube loosely in position so that the ends of the two tubes to be<br />
joined are nearly touching. The clamp should be left loose so that the<br />
two tubes can be pushed together later, but it should be tight enough<br />
to support the tube and not allow it to sag. The prepared ends of the<br />
tubes are heated, gently at first, with a hand torch, taking care to heat<br />
more or less evenly from all sides. Asbestos screens may be useful in<br />
joins of this type <strong>for</strong> protection of other apparatus. When the ends of<br />
the two tubes are hot enough to flow, the loosely clamped tube is<br />
pushed gently into place so that the glass is in contact all round the<br />
joint. The clamp is then tightened to prevent further movement. The<br />
glass is worked by heating and blowing in much the same way as<br />
described in the preceding section except that blowing is carried out<br />
by a blowing tube attached to one or other of the two tubes. In<br />
making fixed joints such as this it is undesirable to overheat the glass<br />
so that it becomes very liquid, since it flows under gravity. This flow<br />
should be kept to a minimum since it leads to uneven wall thickness.<br />
The effects of this flow under gravity can be mitigated in a number<br />
of ways. If the tubing being worked is vertical it may be drawn down<br />
a little just below the join to reduce the wall thickness in this region;<br />
then, as the glass flows, this thin section will thicken so that a uni<strong>for</strong>m<br />
wall thickness is achieved. Another method which can prove very<br />
useful to the amateur glass-blower is to make use of a spike to push<br />
the glass back to its original position. If the glass is heated until it is<br />
fairly soft, the point of the spike can be used to lift the glass which has<br />
dropped down. It is best to lift this glass above the position of the<br />
joint as it has to be worked to remove the local thickening of the wall<br />
62
JOINING TUBES OF SIMILAR SIZE<br />
produced by lifting, and during this working it will tend to flow down<br />
again. This also applies to a horizontal joint where the glass tends<br />
to collect at the bottom of the tube.<br />
It is very often possible to produce a better finish to a joint if the<br />
glass is actually blown while it is in the flame, but if this is done great<br />
care must be exercised to blow very slowly and with short puffs rather<br />
than a long steady pressure. It is also virtually impossible to do this<br />
in a system which has a volume in excess of two litres since the pressure<br />
response is subject to too great a time kg and when the blowing<br />
is stopped the pressure inside the system may not drop <strong>for</strong> several<br />
seconds, which may lead to a hole being blown in the glass.<br />
An alternative procedure is to hold the movable tube in one hand<br />
while the other hand operates the hand torch: the tubes are heated<br />
and pushed together as be<strong>for</strong>e, and the movable tube is supported<br />
and manipulated with one hand. With tubing over about 1 cm diameter,<br />
the movable tube needs little or no support most of the time,<br />
as the side not being worked on is usually rigid enough to hold it.<br />
Hence it is possible to use welding rod <strong>for</strong> filling up any holes in the<br />
joint. The blowing tube should be attached to the fixed tube, to<br />
reduce the weight on the movable tube to a minimum. It is convenient<br />
to have the tubes vertical with the movable one held below. This<br />
general method is usually preferable to the method involving clamping<br />
the movable tube, unless the latter is very heavy.<br />
An elegant joint can be obtained by heating the joint strongly all<br />
round, and as it thickens moving the lower tube up; then the whole is<br />
blown out and the lower tube is moved down, so that a smooth joint<br />
is made. This procedure resembles the joining of two tubes by<br />
Method 1.<br />
(3) Joining Two Tubes both of which are Fixed<br />
This situation may arise in the repair of apparatus or in making a<br />
closed system. If the joint is a good fit no great difficulty is to be<br />
expected as the case is similar to that just described, except that the<br />
ends cannot be pushed together unless they are in fairly close contact,<br />
when they can usually be pushed together with a spike or some other<br />
tool when the glass is hot.<br />
If the tubes are so placed that there is a gap between them it is<br />
possible to close this gap by various stratagems. One of the two<br />
tubes may be drawn down slightly so that their ends are brought into<br />
closer contact. If this tube is vertical it is best to make the point of<br />
drawing just below the proposed joint and to use <strong>for</strong>ceps to hold the<br />
short end of the tube just above the point of drawing. This will provide<br />
the constriction to take up the glass which flows down under<br />
63
BASIC GLASS-WORKING OPERATIONS<br />
gravity. If the gap is not too great it may be filled in by building up a<br />
network of glass in it, using thin rod. This process is rather similar<br />
to darning the gap: a closely packed network of thin rod is built up<br />
in the gap and is then heated fairly strongly to fuse the individual rods<br />
together. The glass should not be heated too strongly while the<br />
original network is being built up, as strong heating very often leads<br />
to complete closure of the tubes. This method can be used <strong>for</strong> filling<br />
in irregularly shaped holes and finds many applications, particularly<br />
in the repair of apparatus which has been broken.<br />
If the gap between the two pieces is too large <strong>for</strong> the above method<br />
to be attempted it may be possible to fit a sleeve of wider tubing over<br />
the two tubes and fuse its ends down on to them. This method inevitably<br />
leads to a very thick-walled joint, but the excess glass can be<br />
pulled off with <strong>for</strong>ceps or by fusing a glass rod on to the thick part<br />
and pulling it out.<br />
All joints, no matter how they are made, should be annealed with a<br />
relatively cool flame (p. 170).<br />
When joints are made by the above methods, pinholes are very<br />
often left in them, particularly when they have been built up of thin<br />
glass rod. These pinholes are usually fairly easily visible when the<br />
glass is hot—at red heat they usually show up as fine orange lines<br />
running through it. They are sealed by placing a small spot of glass<br />
over their outer end using a thin glass rod <strong>for</strong> the purpose. The spot<br />
of glass is then fused in thoroughly. It is obviously more convenient<br />
to avoid such pinholes when the joint is made than to have to re-heat<br />
it later. It is desirable to wear glass-blowing spectacles when looking<br />
<strong>for</strong> pinholes.<br />
Devitrified glass should be pulled out of a joint with <strong>for</strong>ceps or a<br />
glass rod, and if this leaves a thin-walled joint extra glass can be built<br />
on using thin rod.<br />
The aim in all these operations is to produce a joint with the same<br />
bore as the tube and with uni<strong>for</strong>m wall thickness. Only practice will<br />
allow this to be achieved. However, with Pyrex, very bad-looking<br />
joints will hold together.<br />
Joining Tubes of Different Sizes<br />
There is very little basic difference in the procedures <strong>for</strong> joining tubes<br />
of different sizes and <strong>for</strong> joining tubes of the same size. The main<br />
difference lies in the preparation of the end of the larger tube: the<br />
end of this tube should be drawn down to a spindle and the spindle<br />
cut off in the flame. The closed end so produced should be heated<br />
locally so that when it is blown out the hole produced will be of the<br />
same size as the bore of the smaller tube. But it is usually better to<br />
64
JOINING TUBES OF DIFFERENT SIZES<br />
aim to produce a hole rather smaller than this, since it is a simple<br />
matter to open out the hole with a tool or to collapse the smaller tube<br />
down slightly; whereas it may be more difficult to close the hole in the<br />
drawn-down portion of the larger tube if this has relatively thin walls<br />
or uneven wall thickness. The above remarks apply equally to the<br />
use of a bench torch and to the use of a hand torch with fixed tubes.<br />
When the joint is to be made using a bench torch it will usually be<br />
found easier to work so that the glass is blown through the smaller of<br />
the two tubes, when the joint is more easily visible. If the larger tube<br />
is used <strong>for</strong> blowing, the joint may be screened from view by it. When<br />
the novice starts trying to make this type of joint with a bench torch,<br />
difficulty may be experienced in rotating the two tubes of different<br />
Thin watt<br />
Rounded<br />
profile<br />
Thick waf/<br />
Original<br />
profile<br />
FIGURE 23. The effect of wall thickness<br />
on the joint, when tubes of different size<br />
are joined<br />
bore at the same speed. The only remedy <strong>for</strong> this difficulty is practice,<br />
but it may be possible to avoid it by clamping the glass and using<br />
a hand torch. If only one tube is clamped, it should be the larger one.<br />
The wall thickness of the taper produced by drawing down the<br />
larger tube can have an effect on the profile of the finished joint<br />
(FIGURE 23). If this taper has a wall thickness about the same as the<br />
unworked tube it wiE tend to retain its profile in working, but if it is<br />
thin-walled the joint will tend to have a rounded profile. This provides<br />
a method of controlling the type of joint produced. A rounded<br />
profile can be produced by starting with a uni<strong>for</strong>mly thick rounded end.<br />
T-Joints<br />
The making of T-joints is probably the most common laboratory<br />
glass-working operation and there<strong>for</strong>e should be mastered thoroughly.<br />
65
BASIC GLASS-WORKING OPERATIONS<br />
There are two basic methods of making these joints, (i) by the use<br />
of a bench torch and holding both tubes, (2) by the use of a hand<br />
torch and clamping the tubes (or one of them).<br />
(1) The Use of a Bench Torch<br />
Once again the first step is the adequate preparation of the surfaces to<br />
be joined. First the side arm should be prepared, as <strong>for</strong> butt-sealing<br />
two tubes, by blowing out the end (p. 59)- A hole is then blown in the<br />
side of the tube at the position required (see p. 59 <strong>for</strong> details). Care<br />
should be taken not to make this hole too large. Both ends of the<br />
tube should then be blocked since it is best to blow through the side<br />
arm so that the whole joint can be seen while blowing. Some workers,<br />
however, prefer to blow through the cross-piece.<br />
\<br />
L<br />
FIGURE 24. T-joints<br />
The side arm is taken in the right hand and the cross-piece in the<br />
left and they are held in the flame so that the end of the side arm, and<br />
the area just around the hole in the cross-piece, are heated. This is<br />
done by directing the flame almost perpendicular to the side arm and<br />
swinging both pieces of glass through an angle of about 200° (FIGURE<br />
24). These motions should be synchronized in order to obtain uni<strong>for</strong>m<br />
heating. A great deal of practice is necessary be<strong>for</strong>e this can be<br />
done satisfactorily.<br />
The two tubes are pressed lightly together when the glass is fused<br />
and the 'swinging' of the glass in the flame continued until the region<br />
of the join is thoroughly fused. The joint is then blown through the<br />
side arm. This is repeated until the glass has been worked sufficiently<br />
<strong>for</strong> a good joint to be obtained and it should then be annealed.<br />
The above procedure can be simplified in two ways. First, it is not<br />
necessary to swing the cross-piece in the flame during the preliminary<br />
heating be<strong>for</strong>e joining the tubes, although this operation accustoms<br />
66
T-JOINTS<br />
the two hands to synchronous working. The side arm only is rotated<br />
in the flame, which is meanwhile directed on the hole in the crosspiece.<br />
Secondly, a T-piece can often be made by working only a portion<br />
of the joint at a time.<br />
The procedure <strong>for</strong> this type of joint is the same <strong>for</strong> all sizes of<br />
tubing. In some ways it is rather easier to carry out <strong>for</strong> relatively<br />
large sizes (about 2 cm) than <strong>for</strong> smaller sizes (less than 8 mm). In<br />
the latter case it is very easy to heat the cross-piece in such a way that<br />
it bends at the joint. This may be due to several possible causes: too<br />
large a flame; failure to hold the glass at the correct angle to the<br />
flame; or overheating of the glass in the vicinity of the join, the heat<br />
being transferred by conduction.<br />
A special technique <strong>for</strong> making T-joints, which does not distort the<br />
bore of the main tube if it is done correctly, is to make the joint by<br />
sucking: the end of the side arm, and a localized area on the main<br />
tube corresponding in size to the cross section of the side arm, are<br />
heated strongly until the glass is very soft. The end of the side arm<br />
is then placed on the heated area of the main tube and the heated area<br />
sucked up strongly into the side arm which must have a plug of cotton<br />
wool in it to catch any glass fragments. This produces a sound joint,<br />
but it requires very thorough annealing because of its very local<br />
heating.<br />
(2) The Use of a Hand Torch<br />
A casual study of any laboratory vacuum apparatus will show how<br />
commonly T-joints must be made with either one or both of the tubes<br />
clamped. Generally speaking this is a much easier technique than<br />
that previously described, as it removes the necessity <strong>for</strong> synchronized<br />
manipulation of the glass.<br />
The glass is prepared in the same way as previously described, and<br />
a blowing tube is connected to some part of the system. The tubes<br />
are clamped in position and one of them left slightly loose so that they<br />
can be pushed into close contact at a later stage. The glass is heated<br />
in the vicinity of the join by working around it with the hand torch<br />
and the two tubes are pushed together. The glass is then worked by<br />
collapsing it down and blowing out until it has fused together<br />
thoroughly. The joint is then blown out to the desired profile.<br />
If difficulty is experienced with the glass flowing under gravity the<br />
same stratagem may be used as described in the section on buttjoining<br />
two tubes (p. 62). If <strong>for</strong> any reason the tubes cannot be<br />
pushed together the two pieces should be as good a fit as possible<br />
be<strong>for</strong>e the joint is started and may be pushed into closer contact when<br />
hot with the aid of a spike, or if this fails the gap can be filled in with<br />
67
BASIC GLASS-WORKING OPERATIONS<br />
thin rod. This may leave pinholes in the joint and a careful inspection<br />
should be made while it is hot. When larger size tubing is used<br />
it may be found advantageous to blow the holes in the tubes rather<br />
smaller than their bore, since this provides a means of thickening the<br />
wall of the joint as it is blown out to a smooth profile.<br />
When making a T-joint with a hand torch it is often best to clamp<br />
the cross-piece and fix a blowing tube to it, and to manipulate the<br />
side arm with one hand. As with the joining of two tubes (p. 63), the<br />
side arm will be supported by the rigidity of the glass on one side of<br />
the joint most of the time, unless it is of small tubing. This method is<br />
usually preferable to that involving clamping both tubes.<br />
The construction of big T-oieces is described on p. 94.<br />
Y-Joints<br />
Joining two tubes in the <strong>for</strong>m of a Y is most easily effected by bending<br />
one of the tubes to the desired shape and then making a normal<br />
T-joint at the bend. If the T-joint is made first and then one of the<br />
arms is bent, the resulting Y-piece will probably not be symmetrical<br />
and the finish on the surface of the glass may not be good owing to<br />
volatilization of some of its components during the making of the<br />
joint. This causes the surface to wrinkle on bending the tube.<br />
The most convenient order of carrying out the various steps is to<br />
prepare the side arm first, bend the main tube and blow out the hole<br />
<strong>for</strong> the T-joint, and then make the joint be<strong>for</strong>e the glass has time to<br />
cool.<br />
4 and 5 Way Junctions<br />
Once the simple T-joint has been mastered the manufacture of 4 and<br />
5 way junctions presents no difficulty; the operations described <strong>for</strong><br />
making T-joints are just repeated the required number of times. The<br />
various side arms are all prepared as the first stage, and sufficient<br />
corks, or other means of blocking the tubes as they are joined on,<br />
must be at hand. The only other step which requires extra care is to<br />
see that completed joints are not overheated in making others, since<br />
if any of the side arms are unsupported they will bend under gravity.<br />
Adequate annealing is, as in all other joints, essential.<br />
<strong>Working</strong> Capillary Tubes<br />
<strong>Working</strong> capillary tubing requires a slightly different technique from<br />
the working of normal tubing. This is principally due to the small<br />
bore of the tube and the very thick walls. Generally speaking it is<br />
necessary to use a smaller, hotter flame <strong>for</strong> capillary than would be<br />
68
WORKING CAPILLARY TUBES<br />
used <strong>for</strong> normal tubing. Three types of operation will be described<br />
in this section, (i) joining capillary to wider bore tubing, (2) joining<br />
capillary to capillary, (3) capillary T-joints.<br />
(J) Joining Capillary to Wider Bore Tubing<br />
The only difference between this type of joint and a normal butt joint<br />
is in the preparation of the capillary tube: first the end of this is<br />
seated off and a small fairly thin-walled bulb blown equal in diameter<br />
to the hole in the wide tube. The end of this bulb is then blown out<br />
and the joint made by the normal method. The flame must be<br />
directed so that the capillary is not collapsed. If the capillary has a<br />
very fine bore some difficulty will be found in blowing through it.<br />
This may be overcome by connecting it to a compressed air fine white<br />
the small bulb is blown; the end of the bulb can then be pulled out<br />
with a rod and cut off to give the prepared end.<br />
If <strong>for</strong> any reason it is found to be impossible to blow out the end of<br />
the tube, tie cut end of a capillary can very often be opened out by<br />
using a mounted needle from a set of dissecting instruments as a tool;<br />
but this is not recommended if the tube can be blown.<br />
(2) Joining Two Capillary Tubes<br />
Owing to the fact that capillary tubing is used in many systems to cut<br />
down the gas space it is often desirable <strong>for</strong> the finished joint to have<br />
the same bore as the tubes. There<strong>for</strong>e it is undesirable to prepare the<br />
ends by blowing out; it is much better to join the ends of tubes cut at<br />
a file mark. They should be heated until the glass is soft, and the<br />
tubes then held at an angle to one another. The two tubes are<br />
brought into contact by touching their edges together, and then<br />
brought into line ensuring that the bores of the tubes are coaxial.<br />
The joint is then finished by heating as small a length of the tube as<br />
possible, collapsing the bore down to about half its size and blowing<br />
it out to about twice its size. This operation should be repeated until<br />
a good joint is obtained. These joints require careful annealing<br />
because of the heavy wall thickness.<br />
(S) Capillary T- Joints<br />
The side arm <strong>for</strong> the T-piece should be prepared by blowing the end<br />
Out of a piece of capillary as described above <strong>for</strong> joining capillary to<br />
wider bore tubing. The cross-piece is prepared by heating a short<br />
length of the capillary in the flame and blowing a slight symmetrical<br />
bulb. This should not be more than twice the original bore of the<br />
lube. A very small hot flame is used to heat one side of this small<br />
bulb, which is then bbwn out as <strong>for</strong> a normal T-joint If difficulty is<br />
69
BASIC GLASS-WORKING OPERATIONS<br />
experienced here, it may be found advantageous to attach a glass rod to<br />
the point heated on the side of the small bulb and pull this out into a<br />
cone. The rod should next be cut away with the flame at the point of<br />
the cone, which can then be blown out much more easily. Lastly the<br />
joint is completed in the normal way and annealed thoroughly.<br />
Fine capillary tubes may become blocked with water when blown<br />
into from the mouth; it may be desirable to put a drying tube in the<br />
blowing tube or to blow with a rubber bulb.<br />
^<br />
Blowing Bulbs in the Middle of a Tube<br />
To ensure that the centre of the bulb lies on the axis of the tube from<br />
which it is made, the tubing, when in the flame, must be rotated<br />
continuously as described on p. 52; otherwise the glass will sag to one<br />
*"*-"*,<br />
/ n<br />
M IV<br />
FIGURE 25. Blowing a bulb in the middle of a tube<br />
side. Bulbs can be blown in the middle or at the end of a tube; the<br />
<strong>for</strong>mer operation is probably easier at first. A fairly large and<br />
relatively cool flame is used to heat a large portion of the tube, and as<br />
the tube is rotated in the flame the ends are pushed in to <strong>for</strong>m a concentration<br />
of glass (FIGURE 25, /). The tube is taken from the flame<br />
and gently blown so that a slight bulge is <strong>for</strong>med (FIGURE 25, II),<br />
The danger of distortion of the glass is much reduced when the<br />
blowing is done with a glassblower's swivel (p. 43): In this case the<br />
blowing tube is attached to the end of the tube—usually the left—<br />
which is held in an overhand grip. The process of accumulating glass<br />
is continued after the bulge has been re-heated, and the bulge is reblown<br />
a number of times until enough glass has been accumulated<br />
<strong>for</strong> a final sphere to be blown. This may be blown by a series of<br />
puffs; the thinner parts blow out first, but they also cool first, and by<br />
blowing at the right moments a spherical bulb may be obtained. The<br />
70
BLOWING BULBS IN THE MIDDLE OF A TUBE<br />
tubing should be rotated when it is being blown into; this is facilitated<br />
if the lips are moistened be<strong>for</strong>e blowing.<br />
Instead of accumulating the glass in one bulge, an alternative<br />
method is to make three bulges by pushing the glass together (FIGURE<br />
25, III) and then reduce these to a single bulge by repeated blowing<br />
and shrinking. This reduces the time required to collect enough glass<br />
<strong>for</strong> the final bulb to be blown.<br />
If the bulb to be blown is of radius much greater than that of the<br />
tube, a large tube should be joined into the small tube, as in FIGURE<br />
25, IV. The three portions of tube should be coaxial The large one<br />
is then shrunk and blown a number of times, and finally blown to the<br />
required bulb. It should be longer than the required radius of the<br />
bulb, as its length will decrease with heating and blowing.<br />
To blow an elegant large bulb is very difficult. It is much simpler<br />
<strong>for</strong> the scientist to join a round-bottomed flask into the tube.<br />
Blowing Bulbs at the End of a Tube<br />
Blowing bulbs on the end of tubing may be found difficult because<br />
there is no portion of tubing to help to keep the bulb central whilst it<br />
is being blown. A round end is first made on the tube, which is<br />
/ H<br />
FIGURE 26. Blowing a bulb at the end of a tube<br />
rotated continuously so that the glass thickens (FIGURE 26,1). The<br />
tube is taken from the flame, held near the vertical, and, with continual<br />
rotation, blown into until a slight bulb is <strong>for</strong>med (FIGURE 26,<br />
II), This is returned to the flame and collapsed and blown a number<br />
of times until enough glass has collected <strong>for</strong> the final bulb. When<br />
blowing this it is essential to rotate the tubing all the time, and to<br />
have a gradual air pressure, or a series of puffs, rather than a sudden<br />
pressure. The bulb must be watched as it is blown; if it is becomin;<br />
off-centre it may be best to shrink it down and blow again. Beyond a<br />
certain size, however, a bulb cannot be shrunk, specially if it is thin.<br />
Another method of blowing a bulb at the end of a tube is first to<br />
put 8 central spindle in it, and then accumulate glass just beyond the<br />
shoulder of the spindle by pushing the glass together with the spindle,<br />
tnd occasionally blowing through it. When enough glass has been<br />
71
BASIC GLASS-WORKING OPERATIONS<br />
collected, the spindle is drawn off in a very small flame, and the bulb<br />
is blown as described above.<br />
To blow a big bulb a larger tube must be joined to the end of the<br />
tube and shrunk to give the necessary accumulation of glass. The<br />
beginner should be able to make useful small bulbs which will become<br />
quite elegant with practice. For research, however, it is best to fuse a<br />
round-bottomed flask to the tube.<br />
Multiple Per<strong>for</strong>ations in Bulbs<br />
A bulb with a number of small holes in it is useful in bubbling a gas<br />
through a liquid. These holes are easily made: a small bulb is<br />
blown; a very small area of the bulb is heated strongly, and the glass<br />
is pulled out by touching it with the fine point of a glass rod, and then<br />
i r \ n m<br />
FIGURE 27. Making a number of holes in a bulb<br />
drawing out the molten glass into a thin thread. This is repeated in a<br />
number of places, to give the result shown in FIGURE 27, L The<br />
threads are then broken off near the bulb, and each hole so made is<br />
heated and rounded to give the finished per<strong>for</strong>ated bulb shown in<br />
FIGURE 27, IL<br />
An alternative method is to use a very small flame on the original<br />
bulb, and to blow a thin-walled bubble, as in FIGURE 27, ///. A<br />
number of these bubbles are blown, then they are all broken off and<br />
each hole is smoothed off. If a bubble is broken accidentally, the<br />
hole can be blocked with damp asbestos paper so that more bubbles<br />
can be blown.<br />
Flanging, Flaring or Bordering Tubing<br />
A number of tools are useful in putting flanges of different kinds on<br />
the end of a glass tube. The operations are purely manipulative and<br />
require no blowing. Various tools which can be used in flanging are<br />
shown in FIGURE 4; perhaps the triangular-shaped tool is one of the<br />
most useful. Carbon rods are also useful (p. 33), and they have the<br />
advantage that they do not mark the glass; an overheated metal tool<br />
72
FLANGING, FLARING OR BORDERING TUBING<br />
sometimes leaves a small deposit of metal or oxide on the glass. The<br />
general method used in flaring is to heat the end of the glass tube over<br />
a length of 2-3 times its diameter, and when the glass has become soft<br />
and thickened (FIGURE 28,1) the tool is inserted and the tube rotated.<br />
The glass should be rotated fairly quickly backwards and <strong>for</strong>wards<br />
by rolling it between the <strong>for</strong>efinger and thumb of the left hand; or<br />
normal rotation may be used (p. 52). The glass should be rested on<br />
the tool, and the action should be gentle. The spinning, as this action<br />
is called, should be done with the flame impinging on the base of the<br />
cone <strong>for</strong>med (FIGURE 28, II). For a standard taper, a hexagonal<br />
reamer is used (f<br />
becoming twistec<br />
shown in FIGURE<br />
/ M<br />
JV V<br />
methods used <strong>for</strong><br />
bordering tubing<br />
Internal Seals<br />
Internal seals can be made by a variety of methods, which will be<br />
described; some indication will be given of situations in which they<br />
might be useful. Internal seals are also called ring seals.<br />
Method I<br />
In this method a single piece of tubing is sealed into the larger tube.<br />
The first step is to <strong>for</strong>m a slight ridge around the inner tube, at the<br />
point where it is to be sealed, by rotating it in a small hot flame and<br />
pushing its ends inwards slightly. If this is done correctly a symmetrical<br />
ridge should be <strong>for</strong>med.<br />
The outer tube is then closed to a round end and a hole blown<br />
73
BASIC GLASS-WORKING OPERATIONS<br />
centrally in this, large enough <strong>for</strong> the internal tube to be inserted but<br />
small enough to prevent the ridge on this tube passing through. The<br />
outer tube should be longer than the inner so that the open end may<br />
be closed by a cork or rubber stopper (FIGURE 29,1); the blowing is<br />
carried out by blowing through the projecting inner tube. It may be<br />
more convenient to close the other end of the outer tube with a<br />
spindle. This gives a useful handle.<br />
/ E<br />
Vtt Vffl<br />
FIGURE 29. Various methods <strong>for</strong> making an internal seal<br />
The glass is then heated by rotation in the flame so that the outer<br />
tube is fused to the ridge <strong>for</strong>med on the inner, and finally the joint is<br />
blown until a good-shaped joint is obtained. To get a good-shaped<br />
shoulder it is necessary to direct the flame mostly against the smaller<br />
tubing. The heating and blowing should be repeated until good fusion<br />
of the two tubes is achieved. Any pinholes present can be sealed<br />
as be<strong>for</strong>e by the application of a small spot of glass from a piece of<br />
rod. These spots of glass should be fused in thoroughly.<br />
The unsupported internal tube will sag under gravity during the<br />
above operations, but if the rotation of the work is sufficiently<br />
uni<strong>for</strong>m it can be centralized as the glass cools by allowing it to drop
INTERNAL SEALS<br />
to its central position and keeping it there by rotation. Alternatively<br />
it can be supported on a rod held by the cork blocking the end of the<br />
outer tube. If this latter method is used care should be taken to see<br />
that the flow of air from the inner to the outer tube is not hindered<br />
since it is essential <strong>for</strong> the air pressure to be equal in the two tubes at<br />
all times.<br />
Internal seals require more thorough annealing than the more<br />
simple joints, and if any pinholes require subsequent repair great care<br />
should be taken in reheating the joint.<br />
Method 2<br />
In this method the internal tube is in two pieces and there is less<br />
likelihood of making a joint with pinholes in it. The first step is the<br />
preparation of the internal tube: a length of tubing is drawn off, the<br />
end blown out and polished smooth in the flame. The projecting part<br />
of the internal tube should be prepared in the same way. The outer<br />
tube should be prepared by closing one end to a round end.<br />
The joint can be made most easily if the internal tube is supported<br />
almost in its final place by pads of asbestos paper or by a glass holder,<br />
but whatever support is used it must allow the air pressure to be the<br />
same on both sides of the internal tube. The inner tube is put in place<br />
and the rounded end heated. When this is starting to collapse inwards<br />
the internal tube is pushed <strong>for</strong>ward slightly so that its prepared<br />
end comes into contact with the heated end of the outer tube. This<br />
glass is worked thoroughly by heating and blowing until a good fusion<br />
between the two parts is achieved (FIGURE 29, II). The end of the<br />
tube is allowed to cool slightly and then, with a fairly small flame, the<br />
area of glass covering the internal tube is heated and blown out. The<br />
Other end of the outer tube is then blocked with a stopper (FIGURE<br />
29, III) and the remaining part of the inner tube joined on as in a<br />
simple butt joint (FIGURE 29, IV). Once again it is important that the<br />
air pressure should be the same in both inner and outer tube and that<br />
the tube should be rotated uni<strong>for</strong>mly. Finally the joint should be<br />
annealed.<br />
These joints can be made with the internal tube unsupported by<br />
inserting the inner tube only after the outer tube is hot enough <strong>for</strong> it<br />
to stick firmly and then proceeding as above. This is rather more<br />
difficult and is seldom as satisfactory as wedging the inner tube,<br />
although at times one is tempted to avoid this added step.<br />
This method is not on the whole satisfactory: with soda glass, the<br />
cold inner tube will probably shatter, and if a borosilicate glass is<br />
used to avoid this, the difficulty of getting the inner tube central still<br />
remains. A better method is the following: the outer tube is<br />
75
BASIC GLASS-WORKING OPERATIONS<br />
rounded off and pulled to a slight taper. The inner tube is flared<br />
slightly so that it fits into the taper at the desired point and is thereby<br />
centralized. The tubes are fitted together when cold, and the operation<br />
is continued as be<strong>for</strong>e.<br />
Method 3<br />
The third method of making internal seals is not so widely applicable<br />
as the previous two, but it is very useful <strong>for</strong> certain joints. It is best<br />
described in terms of one of its uses—in the manufacture of a Liebig<br />
condenser.<br />
Let us assume that the condenser is in the state shown in FIGURE<br />
29, V: the first internal seal has been made by one of the two<br />
methods described above, and a side arm has been put into the water<br />
jacket. A connection should be made with rubber tubing, so that the<br />
water jacket of the condenser is connected to the inner tube, and then<br />
the outer tube is heated with a hot narrow flame to collapse it down<br />
on to the inner tube <strong>for</strong> the internal seal. When the tube has collapsed<br />
on to the second tube the heating is continued and both tubes<br />
drawn off together (FIGURE 29, FT). The system is then blown<br />
slightly to give a good round profile to the end of the outer tube;<br />
when this has been done the end of the inner tube is blown out and<br />
the joint finished as in Method 2. Another method of per<strong>for</strong>ming this<br />
operation is described on p. 130.<br />
Method 4<br />
This method involves the fusing of a flared-out narrow tube into a<br />
wider one. This type of seal has its uses in pieces of apparatus such as<br />
McLeod gauges. The first step is to flare out the end of the inner<br />
tube, using a flaring tool, until it will only just pass inside the wider<br />
tube. This is done by rotating the tube in a flame and using the<br />
flaring tool as shown in FIGURE 29, VII9 or as described on p. 73. If a<br />
very large flare is required it will probably be necessary to fuse a<br />
wider tube to the narrow one as the initial stage in flaring. When the<br />
flare has been made to fit it is packed in place with asbestos paper or<br />
held with a rod, and the outer tube is collapsed down on to it<br />
(FIGURE 29, VIII). The outer tube is blown out again and the process<br />
repeated until a good fusion of the two pieces is achieved. This type<br />
of seal requires particularly careful annealing.<br />
Use of the Hand Torch<br />
Generally speaking it is best to make internal seals using a bench<br />
torch and rotating the glass in the flame. If this is not practicable it is<br />
possible to work with a hand torch with the glass clamped if Method<br />
76
INTERNAL SEALS<br />
1 is used: in this case a rim of glass, left by the blowing of the hole in<br />
the outer tube through which the other tube passes, can be heated<br />
with a hand torch and pushed in against the walls of the inner tube<br />
with a spike. This can be done also in cases where the <strong>for</strong>mation of a<br />
ridge of glass on the inner tube has been impracticable. Once an airtight<br />
joint has been made by pushing the glass into place, the hand<br />
torch can be used to fuse the two tubes together by working round<br />
the joint As be<strong>for</strong>e it is essential to have the blowing tube connected<br />
to both inner and outer tubes.<br />
One great difficulty with this type of work is the <strong>for</strong>ce of gravity<br />
acting on the inner tube: If this is unsupported it is very difficult to<br />
obtain a good-looking joint, and even if it is supported the results are<br />
not always satisfactory, owing to non-uni<strong>for</strong>mity of heating. It is<br />
best to clamp the tubes vertically. The inner tube may be held in one<br />
hand. Difficulties may possibly arise if the outer tube has thin walls,<br />
because any holes will enlarge as the glass is worked. In this case they<br />
may be filled with rod as in the other cases described. Care should be<br />
taken in inspecting these joints <strong>for</strong> pinholes and annealing the work<br />
when completed.<br />
Thin <strong>Glass</strong> Windows<br />
In recent years the need has arisen <strong>for</strong> very thin glass windows capable<br />
of withstanding a vacuum yet thin enough to transmit a and j3<br />
particles. S. ROSENBLUM and R. WAUEN (1945) have described the<br />
following method <strong>for</strong> putting very thin windows into capillary tubing<br />
of up to 2 mm bore. The process is very simple but may req uire some<br />
practice be<strong>for</strong>e the precise conditions necessary <strong>for</strong> a satisfactory<br />
window are achieved.<br />
The end of the capillary tube is heated until the glass is soft, then<br />
be<strong>for</strong>e it has time to cool it is touched on to the surface of a thin<br />
bubble of glass and a slight suction applied. This <strong>for</strong>ms the window<br />
into a concave shape and draws it slightly down into the capillary,<br />
whose ends then protect it from damage. The bubble of thin glass<br />
should be thin enough to show interference colours. These windows<br />
will stand a vacuum provided atmospheric pressure is on the concave<br />
fide of the window. If they are subjected to a pressure difference in<br />
the other direction, failure occurs due to the reversal of curvature.<br />
A method <strong>for</strong> making larger thin windows has been described by<br />
J. T. LLOYD (1949). For windows in the end of a tube he advocates the<br />
blowing of a thin-walled bulb at that end and then drawing it into the<br />
tube to <strong>for</strong>m the window by the following method: the thin-walled<br />
bulb is blown at the end, the wall of the tube is then heated all round<br />
at a short distance from the end until the glass is fused, and then the<br />
77
BASIC GLASS-WORKING OPERATIONS<br />
bulb is immediately re-heated and sucked inwards. The bubble is<br />
drawn into the tube and is fused to the walls in the region where the<br />
tube was heated. This gives a relatively robust window capable of<br />
withstanding a vacuum and protected by the projecting ends of the<br />
tube.<br />
Lloyd also gives details of a similar method <strong>for</strong> the <strong>for</strong>mation of<br />
windows in the sides of tubes. The bulb is blown on the side of the<br />
tube in the same way as it would be in the first stage of making a<br />
T-joint; it is then heated and sucked in. Lloyd's method requires<br />
more practice than the other method be<strong>for</strong>e satisfactory results can<br />
be obtained, but it has the merit of being more versatile.<br />
unnin<br />
The stands on measuring cylinders, wine glasses, etc., are called 'feet'<br />
by the glass-blower. They are made by an operation similar to<br />
flanging: the glass must be thick enough <strong>for</strong> spinning out A piece<br />
of 3-cm diameter tubing about 10 cm long, with spindles (spears) at<br />
D<br />
/<br />
IT<br />
\<br />
FIGURE 30. The production of *feet* <strong>for</strong> vessels<br />
each end, is prepared. One end is then heated in a large, relatively cool<br />
(soft) flame until it thickens, and, by pushing with the spindle and by<br />
blowing, the shape shown in FIGURE 30,1 is produced. The spindle at<br />
A is removed and the end closed. This closed end is then joined to the<br />
closed and rounded end of the tube <strong>for</strong> which the feet are required.<br />
The two ends are simply brought together (FIGURE 30, IT), and, by<br />
blowing through both D and E and slightly pulling, a good joint is<br />
made. The tubing is next cut at C; and the feet are worked to shape<br />
with a rounded tool (FIGURE 4, G), using the same operations employed<br />
in flanging (p. 72). It is important, however, to get the glass<br />
very hot and soft, so that the feet can be spun out in one operation,<br />
and not to push too hard with the tool, to avoid producing buckled<br />
78<br />
£
SPINNING OUT FEET<br />
feet. As the hot glass is rotated horizontally, the tool should be<br />
slowly brought from the horizontal to the vertical. The spinning out<br />
should be done along the whole width of the glass to produce the shape<br />
in FIGURE 30, III; if only the outside is spun out the shape in FIGURE<br />
30, IV is produced.<br />
Tapering <strong>Glass</strong> Tubes<br />
<strong>Glass</strong> tubing may be tapered by two methods, depending upon the<br />
wall thickness required. For a thin-walled taper, a central spindle is<br />
first put in the tube, and the shoulder is heated in a large soft flame.<br />
The tubing is rotated and slightly collapsed, and then taken from the<br />
flame and pulled out to the required taper, with constant rotation.<br />
This will give a fairly thin-walled taper, conical in shape; but by<br />
slightly pushing in the ends while heating the shoulder a thicker wall<br />
can be obtained.<br />
For a thick-walled taper the operations are the same except that<br />
the tubing at the shoulder is shrunk down and blown out a number<br />
of times to accumulate glass. When enough glass is present, the<br />
shoulder is made hot, slightly blown out, and then drawn down out of<br />
the flame.<br />
To taper a tube from one size to another, two tubes of the desired<br />
sizes are joined and worked to a taper at the joint.<br />
When making tapers to fixed dimensions it is convenient to draw<br />
the required taper on asbestos paper and work the glass to match the<br />
drawing.<br />
Sealing-in Sintered <strong>Glass</strong> Discs<br />
The glass disc to be sealed into a tube must be made of glass having<br />
the same thermal expansion coefficient as the tube. Discs of different<br />
porosities can be obtained; they consist of a large number of particles<br />
of glass sintered together so that numerous channels remain. When<br />
FIGURE 31. Sealing a sintered disc into a tube<br />
working with a disc it should be warmed up carefully. One end of the<br />
tube into which the disc is to be seated is closed with a rubber stopper<br />
carrying a tube A (FIGURE 31). The disc is rested against this tube,<br />
and should just fit into the outer tube. If that is too big, a constriction<br />
must be put in,<br />
79<br />
B
BASIC GLASS-WORKING OPERATIONS<br />
The tube and disc are carefully warmed until the flame is yellow;<br />
one side of the tube is then heated strongly and attached to the disc.<br />
The disc is next made perpendicular to the tube by pushing with a rod<br />
through the end B, and manipulation with A if necessary. The tube<br />
is allowed to cool slightly so that the disc is firm, and this is then<br />
attached again to the tube by strong local heating opposite the first<br />
point of joining. The whole tube is then shrunk down on to the disc.<br />
It will probably be necessary to blow the tubing out a few times,<br />
blowing through both ends. The tubing can finally be pulled down<br />
to a uni<strong>for</strong>m diameter. The joint should be annealed with extreme<br />
care, preferably in an oven.<br />
Mending Cracks<br />
Un<strong>for</strong>tunately, mending cracks in laboratory glassware is one of the<br />
more common tasks. Cracks usually occur in glassware <strong>for</strong> one of<br />
two reasons—either failure to remove intrinsic strain from the glass<br />
by annealing, or else straining of the glass by careless handling of the<br />
apparatus itself. Whatever the cause of the crack the procedure <strong>for</strong><br />
repairing the damage is the same.<br />
The first stage in mending cracks and the one requiring most care is<br />
the initial heating of the glass: If this is done carelessly the crack will<br />
almost certainly spread much further. The glass should be warmed<br />
up slowly with a small flame, very little oxygen or air being mixed<br />
with the gas. This small flame should be played over the surface of<br />
the glass in such a way that it does not remain directed at any one<br />
part. The whole region surrounding the crack should be heated and<br />
not j ust the immediate area, particular care being taken if the crack is<br />
near an internal seal to see that this is heated evenly. As the glass<br />
warms up the size of the flame and the proportion of air or oxygen in<br />
it can safely be increased until the glass becomes soft and there is no<br />
danger of further cracking. For very hazardous repairs it is desirable<br />
to heat first with hot air, and then a flame with no air or oxygen until<br />
the article is covered with soot, which probably assists the uni<strong>for</strong>m<br />
distribution of heat. When the soot starts to burn off, the most<br />
dangerous part of the operation has been reached, in our experience.<br />
When the glass is soft the flame should not be made any hotter—a<br />
relatively cool flame is much more effective <strong>for</strong> sealing cracks. The<br />
flame is then played on to the crack, starting at one end, and the glass<br />
heated gently. It should be possible to see the crack sealing up under<br />
these conditions and the flame should be moved along it as it seals.<br />
If too hot a flame is used the crack will open as it is heated because<br />
the glass at its edges will become sufficiently hot to draw back under<br />
surface tension be<strong>for</strong>e the inner parts of the crack have had a chance<br />
80<br />
• #
MENDING CRACKS<br />
to fuse together: this is then a progressive process and the crack can<br />
only be sealed by filling in with glass rod or pushing the sides together<br />
with a tool.<br />
When the crack has sealed, a hotter flame can be used and the glass<br />
worked by heating and blowing until the crack has been completely<br />
sealed. It is necessary to keep the glass in the region of the original<br />
crack, and all the surrounding parts, at a dull red heat <strong>for</strong> a short<br />
while (<strong>for</strong> Pyrex) and then to cool it slowly to allow sufficient annealing<br />
time. Care must be taken with this general annealing of a fairly<br />
large area of glass if further cracks are to be prevented.<br />
Extremely unpleasant cracks can be sealed in Pyrex glass. With<br />
soda glass, however, the sealing of cracks is a hazardous undertaking,<br />
and the whole apparatus may be lost. Cracks can be sealed in Monax.<br />
Detection and Removal of Leaks and Holes<br />
Holes in awkward places are often difficult to find when one is<br />
assembling complex apparatus. If the joint in question is put in a<br />
luminous flame, or a flame put round the joint, and the apparatus<br />
blown into, the air will rush out of the holes and blow the flame away<br />
in a blue jet. The hole, when found, can then be repaired with thin<br />
glass rod (p. 58); or, if it is very big, it can often be filled in with a<br />
piece of glass. When a piece of glass falls out of an apparatus, it can<br />
be fused to a rod, to provide a handle, and put back again with the<br />
help of thin glass rod.<br />
These methods work well with Pyrex glass, but not with soda glass,<br />
which cracks too easily on re-heating. A hole which has been mended<br />
with blobs of glass from a rod needs to be fused down and blown out<br />
a few times, to make it more homogeneous. Fusing down and blowing<br />
out glass often closes a small hole—this method works better<br />
with soda than Pyrex glass.<br />
Small holes and leaks can often be found by covering the outside of<br />
the apparatus with soap solution and noting where bubbles appear<br />
when it is blown into. Very small holes can be found with a high<br />
frequency discharge: the apparatus is evacuated with a rotary pump<br />
(or a good water-pump) and the electrode of a Tesla coil is brought<br />
near it. A discharge appears inside the apparatus, and if the electrode<br />
comes near a hole or fine capillary in the glass, the discharge passes<br />
through it and a very bright spot of Eght appears at the leak. With<br />
a water-pump vacuum the method is not so sensitive, because only a<br />
poor discharge is obtained in the apparatus. When the pressure in<br />
the apparatus is about 0-1 mm, very fine leaks can be found.<br />
However, the Tesla discharge may blast a hole in the tubing, and<br />
is not useful <strong>for</strong> glass-to-metal seals, because it goes straight to the<br />
81
BASIC GLASS-WORKING OPERATIONS<br />
metal. If the seal is covered with cotton wool soaked in carbon tetrachloride<br />
or alcohol, this will pass through any leak, and should produce<br />
a greenish or bluish colour in the Tesla discharge. This method,<br />
however, is not reliable.<br />
The minute capillary leaks found with a Tesla coil should be<br />
plugged with a blob of hot glass; the whole joint then needs heating<br />
and annealing. When assembling complex apparatus, parts which<br />
will become inaccessible to the flame must be tested <strong>for</strong> leaks be<strong>for</strong>e<br />
they are put in their final positions.<br />
Grinding <strong>Glass</strong><br />
<strong>Glass</strong> surfaces which must fit closely are usually ground to shape.<br />
The most common example is the cone-and-socket joint: the surfaces<br />
are first worked to an approximate fit with fairly coarse carborundum<br />
(about 100 mesh) which is put between them and wetted.<br />
The cone is rotated by hand or in a lathe or drill chuck, or by a<br />
special machine, until the surfaces meet closely—the carborundum<br />
must be kept moist all the time. The coarse abrasive is then washed<br />
off, and the grinding continued a number of times with progressively<br />
finer abrasive. Various possible abrasives are mentioned on p. 39.<br />
Surfaces which require regrinding, such as those of stopcocks,<br />
usually fit fairly well, and a fairly fine grade of carborundum can be<br />
used <strong>for</strong> the grinding. Stopcocks must not be ground too much, or<br />
the holes in the plug will no longer meet those in the barrel.<br />
A flat surface can be put on the end of a tube by grinding. Such a<br />
surface may be required when a flat plate has to be cemented on to a<br />
tube. The flange is ground against a flat metal or glass plate using<br />
Wet carborundum as an abrasive. The flange must be kept steady and<br />
not rocked, and is ground with a rotating motion of the whole tube<br />
about a point outside it Progressively finer grades of carborundum<br />
are used. An operation of this kind is carried out very easily when a<br />
lapping wheel is available (p. 44).<br />
Releasing Frozen <strong>Glass</strong> Surfaces<br />
Ground surfaces are often found to be jammed together. If the parts<br />
are robust, a sharp tap will often release them. A glass stopper stuck<br />
in a bottle is often released by tapping with another glass stopper, or<br />
something solid. When the substance in the bottle has cemented the<br />
stopper in position, the joint may be put in a suitable solvent. Frozen<br />
surfaces are often more easily released after the joint has been immersed<br />
in a detergent solution <strong>for</strong> some time.<br />
Fragile joints which cannot be struck may often be released by<br />
82
RELEASING FROZEN GLASS SURFACES<br />
quickly warming the outer member. This may be done with hot<br />
water, or, less safely, with a flame. If the surfaces are made too hot<br />
they are melted together and the apparatus must be discarded.<br />
Polishing <strong>Glass</strong><br />
For many years, the standard method <strong>for</strong> polishing glass in the<br />
laboratory has been by rubbing the glass over a sheet of brown paper<br />
covered with a mixture of flour emery and a solution of camphor in<br />
turpentine. C. V. BOYS (1927) has stated that he can find no reason<br />
other than tradition <strong>for</strong> the use of the solution of camphor in turpentine<br />
rather than pure turpentine <strong>for</strong> lubricating grinding media.<br />
When the best possible polish has been achieved with the above<br />
mixture, rouge and water should be used <strong>for</strong> improving it. During<br />
the polishing only a fairly light pressure should be applied and the<br />
specimen should be moved fairly rapidly. If the polishing is being<br />
done manually, pressure should be applied evenly over the whole<br />
surface being polished. It is possible, however, to mount small<br />
samples in pitch and use a rotating polishing surface.<br />
Cerium oxide (Cerirouge) has teen recommended as being superior<br />
to rouge as a polishing material (J, sci. histrum* 22, 1945, 224) and<br />
special cloths are marketed impregnated with cerium oxide. These<br />
are useful <strong>for</strong> polishing glass and other materials such as fluorite. For<br />
details of the methods of polishing optical surfaces, works on that<br />
subject should be consulted.<br />
Drilling Holes in <strong>Glass</strong><br />
The problem of drilling holes in glass has occupied the attention of<br />
scientists since the days of Faraday and many methods have been<br />
described. Articles reviewing the subject have been published by C.<br />
V. BOYS (1927) and more recently by P. GRODZINSKI (1953).<br />
The method which has been used most widely is probably that<br />
involving a copper or brass tube in conjunction with a grinding mixture<br />
of carborundum and water; a slotted copper rod is also effective<br />
<strong>for</strong> small holes. To obtain the best results by this method a fairly<br />
high drill speed should be used and the copper tube drill should be<br />
raised from the cut periodically to allow a fresh supply of the grinding<br />
medium to enter the hole. It is also desirable to have some slots<br />
in the end of the tube to hold the grinding medium. The pressure on<br />
the drill should be fairly light, as too great a thrust may splinter the<br />
glass and may also slow up the cutting by preventing the grinding<br />
medium from getting between the rotating drill and the glass. Grodzinski<br />
favours the use of diamond powder in place of the carborundum,<br />
G 83
BASIC GLASS-WORKING OPERATIONS<br />
but in most laboratories this is not obtainable. It is easy with a tube<br />
to obtain holes 3 cm in diameter.<br />
Many variations of the shape of steel drills <strong>for</strong> glass have been<br />
described—from Faraday who used the ground end of a triangular<br />
file to C. V. Boys who designed a special drill of tool steel—while<br />
other workers (B. BROWN, 1927; N. G. HEATLEY, 1938) advocate the<br />
use of a normal twist drill. These drills are used in conjunction with<br />
some lubricant—usually the traditional camphor in turpentine, although<br />
pure turpentine or other mobile liquid seems to be as good,<br />
while Heatley states that dilute sulphuric acid is effective. To avoid<br />
splintering, the hole should be drilled from both sides.<br />
Grodzinski, commenting on the use of sintered carbide drills,<br />
states that high speed is necessary <strong>for</strong> their use and strongly favours<br />
diamond drills. He gives a full account of their use and gives details<br />
of the mounting of diamonds <strong>for</strong> this purpose. Probably the simplest<br />
method of preparing a diamond drill <strong>for</strong> small diameter holes was<br />
described by Heatley (1938) who broke off the end of the elongated<br />
eye of a sewing needle and soldered a small diamond chip into this.<br />
He was able to drill quite deep holes, of diameter less than 1 mm, in<br />
glass with this type of drill.<br />
Cementing <strong>Glass</strong><br />
Standard cones and sockets of metal and glass can be joined with<br />
Picien or W wax; such joints are vacuum-tight. Windows can be put<br />
on metal apparatus with these waxes. Picien is a black wax of low<br />
vapour pressure, and flows freely at about 80°C. Three useful<br />
Apiezon waxes are W, W100 and W409 which are applied at temperatures<br />
of 1G0°C, 80°C and 40-50°C respectively. When a large glass<br />
socket is waxed to a metal cone, the strain set up on cooling can<br />
easily crack W wax, but W40 is satisfactory <strong>for</strong> large joints. These<br />
waxes can also be used to seal two glass surfaces together, and a<br />
vacuum-tight joint can be obtained without ground surfaces.<br />
Aero Research Ltd make two resin cements, Araldite type 1 and<br />
Araldite 103 and Hardener 951. They are epoxy resin cements, the<br />
<strong>for</strong>mer being thermal setting and the latter cold setting, and make<br />
transparent seals. To use Araldite type 1, the surfaces are cleaned,<br />
degreased and heated to 100°C, and the cement in solid <strong>for</strong>m is<br />
applied. It melts and runs smoothly over the surface. The surfaces<br />
are pushed together and held together by a clamp while the whole is<br />
heated <strong>for</strong> a curing time dependent upon temperature, varying from<br />
10 minutes at 240°C to 7 hours at 140°C. These are minimum times,<br />
and should be increased <strong>for</strong> stronger joints.<br />
84
CEMENTING GLASS<br />
To use Araldite 103, 8-10 parts of Hardener 951 are added to 100<br />
parts of Araldite—they are both liquids. The mixture is stirred and<br />
allowed to stand be<strong>for</strong>e use <strong>for</strong> 20-30 minutes at room temperature.<br />
The pot life of the mixture is about 3 hours at 20°C, so it is made up as<br />
required. The glass is degreased and the cement applied with a<br />
spatula or brush as a thin, even coating on both surfaces. The surfaces<br />
are immediately joined and clamped lightly. The cement cures<br />
at a rate depending on temperatures. 16-24 hours are required at<br />
20°C and 10-20 minutes at 100°C. It is claimed that Araldite can be<br />
used <strong>for</strong> vacuum-tight, glass-to-glass seals.<br />
Mica windows can be fused to glass using a special powder of a<br />
lead borosilicate glass softening at 450°C (J. S. DQNAL, 1942). A<br />
suitable glass <strong>for</strong> solder seals of this kind is BTH No. 93.<br />
Silvering of <strong>Glass</strong><br />
<strong>Glass</strong> surfaces may be silvered by chemical precipitation of silver on<br />
to them. This is most conveniently done by reduction of a silver salt;<br />
the speed of precipitation depends on the reducing agent used. The<br />
glass must first be cleaned: it is degreased with benzene, washed with<br />
acetone and water, and left in 'chromic acid' (see p. 49) <strong>for</strong> an hour<br />
or more at room temperature. It is then washed with tap water,<br />
followed by distilled water. Some workers prefer to then clean again<br />
in concentrated nitric acid, followed by the water washings. The<br />
glass must on no account be allowed to dry after these washings.<br />
The speed of precipitation of silver required depends on the surface<br />
to be silvered. If the rate of precipitation is too great, the silvering<br />
agent may be spent be<strong>for</strong>e it can be removed from the surface, and a<br />
'bloom' will appear because the silver is in contact with the spent<br />
solution. This is a discolouration of the silver. Thus if a rapid silvering<br />
agent is used <strong>for</strong> Dewar flasks, it may be difficult to avoid spoiling<br />
the silvering.<br />
The silvering agent usually consists of two solutions, sometimes<br />
three, which are mixed immediately be<strong>for</strong>e use and poured on to the<br />
object to be silvered. Various recipes have been proposed (I. C.<br />
GARDNER and F. A. CASE, 1931). The following are useful <strong>for</strong> slow<br />
silvering (R. B. SCOTT, J. W. COOK and F. G. BRICKWEDDE, 1931):<br />
Solution A—50 gm silver nitrate in 21. distilled water<br />
Solution B—90 gm potassium hydroxide in 21. distilled water<br />
Solution C—(80 gm cane sugar in 800 ml. distilled water) plus<br />
(100 ml. ethanol and3*5 ml. nitric acid sp. gr. 1 -42).<br />
Solution A should be kept in the dark, and C improves with age.<br />
The solutions are used in the proportion A: B : C = 16 : 8 : 1 by<br />
volume. To use, concentrated ammonia is added to A drop by drop,<br />
85
BASIC GLASS-WORKING OPERATIONS<br />
with stirring, until the precipitate first <strong>for</strong>med is redissolved. Th<br />
requisite amount of B is next added, and a dark brown or black precipitate<br />
<strong>for</strong>ms. (But if enough ammonia has not originally been added<br />
to A, a yellowish-green precipitate will be <strong>for</strong>med; the solution<br />
should be discarded in this case). Ammonia is then added until the<br />
brown-black precipitate is almost redissolved; and to the resulting<br />
solution the correct amount of C is added to give the final, prepared<br />
solution. The intermediate solution prepared from A plus B can be<br />
used immediately, or kept up to an hour, after which it loses its<br />
activity. If allowed to stand <strong>for</strong> about half an hour it will become<br />
practically clear.<br />
To silver a mirror a bath should be used just larger than the article<br />
to be silvered. The glass should be cleaned and under no circumstances<br />
allowed to become dry. The prepared solution is poured over<br />
the glass and the bath is rocked steadily. The silvering must be<br />
stopped at the right time or the mirror will be tarnished. The endpoint<br />
is when a flocculent precipitate is <strong>for</strong>med. The time <strong>for</strong> this to<br />
happen depends on a number of factors: old silver nitrate solution<br />
deposits silver more slowly; temperature alters the rate, and a test run<br />
to find the approximate time may be desirable. To see how the silvering<br />
is proceeding one may take the mirror out of the solution, but it<br />
should never be exposed to the air <strong>for</strong> more than 1 or 2 seconds. The<br />
rocking during the silvering prevents precipitate adhering to the<br />
surface and spoiling the mirror.<br />
The mirror can be silvered a second time if a thicker coating is<br />
required. Brighter and thicker coats are obtained by using a more<br />
dilute solution twice instead of a more concentrated solution once.<br />
Front-silvered mirrors can be polished with optical rouge on a pad<br />
of chamois leather over cotton wool. Care is necessary because it is<br />
easy to polish completely through the silver. Back-silvered mirrors<br />
can be protected by first varnishing the silver and then painting the<br />
varnish. Front-silvered mirrors can be protected with a thin coat of<br />
lacquer, such as a dilute solution of cellulose nitrate in amy! acetate.<br />
The lacquer should not be too thin, or interference colours may be<br />
produced.<br />
In order to silver Dewar flasks the jacket is cleaned and filled about<br />
two thirds full with the prepared solution. The Dewar should be<br />
rolled or shaken during the silvering. The end-point is determined by<br />
occasionally pouring out a little of the solution, and when a flocculent<br />
precipitate is <strong>for</strong>med the solution should be removed from the<br />
flask as quickly as possible to prevent blooming. The flask is then<br />
cleaned and dried. If the glass is first etched with a dilute solution<br />
(about 0-7 molar) of hydrofluoric acid be<strong>for</strong>e its final cleaning, the<br />
86
SILVERING OF GLASS<br />
stability of the silvering with respect to peel-off is increased, and spots<br />
are less likely.<br />
A simple method <strong>for</strong> filling and emptying Dewar vessels is mentioned<br />
on p. 123. F. E. J. OCKENDEN (1938) has given some hints on<br />
silvering glass, and E. A. BAKER (1931) has described a method <strong>for</strong><br />
electrolytically removing silver from one face of a small mirror. P.<br />
B. G. UPTON and E. F. G. HERINGTON (1950) have described a<br />
method <strong>for</strong> depositing a heavy silver film by reduction of a silver<br />
ammonionitrate solution by hydrazine sulphate. The deposition of<br />
silver other than on the desired surface is prevented by pyridine. The<br />
effect of the pyridine is due to the presence of surface-active impurity,<br />
and the process becomes controllable by adding cetyl pyridinium<br />
bromide to 'inactive' pyridine.<br />
Depositing Copper on <strong>Glass</strong><br />
Copper can be electro-deposited on to a silvered article: the plating<br />
bath consists of 10 gm of copper sulphate in 100 gm water. The<br />
article is taken from the silvering bath, washed, and put wet in the<br />
plating bath—on to a copper cathode so that electrical contact is<br />
made to the silver. A copper anode is placed 1-2 cm above the<br />
article. The electrodes should be about the same size as the article.<br />
The current density should be about 0*05 amp/cm 2 , and in 2-4<br />
minutes a thin copper film should be made. If the current density is<br />
too high a granular deposit will be <strong>for</strong>med which will rub off, and if<br />
it is too low a non-uni<strong>for</strong>m deposit will be <strong>for</strong>med.<br />
Copper can be chemically deposited in the same way as silver,<br />
using phenylhydrazine as the reducing agent. F. D. CHATTAWAY<br />
(1908) found this to give good results with blown glass but not with<br />
glass that had been polished. For plane surfaces E. A. H. FRENCH<br />
(1924) obtained good results with hydrazine sulphate.<br />
Many metals can be deposited on glass in a vacuum, by vaporizing<br />
the metal and condensing it on the glass. J. YARWOOD (1955) has<br />
given a general account of this method.<br />
Metallizing Preparations <strong>for</strong> the firing on of Metal Layers on <strong>Glass</strong><br />
Preparations of silver, platinum, gold and palladium are available<br />
which consist of a suspension or solution of the metal, or a compound,<br />
in an organic material; adhesion-promoting materials are<br />
also present. The cleaned glass is coated with the preparation by<br />
brushing, spraying or dipping. It is then heated fairly slowly to a<br />
high temperature (the firing temperature), when the organic materials<br />
are oxidized or volatilized and the metal becomes strongly bound<br />
87
BASIC GLASS-WORKING OPERATIONS<br />
to the surface. The preparations mentioned here are all made by<br />
Johnson, Matthey & Co.; they also supply thinners <strong>for</strong> them.<br />
A glass surface to be silvered by a firing-on process should be<br />
cleaned with soap and water or detergents. For metallizing with<br />
platinum, gold and palladium, improved results are sometimes<br />
obtained with glass which has been stored when, after cleaning, it is<br />
immersed in 5 per cent acetic acid (cold) <strong>for</strong> six hours. The special<br />
preparation is then applied. If necessary it is mixed be<strong>for</strong>e use with a<br />
suitable thinner. The preparation is allowed to dry; this may be<br />
accelerated by warm air. Dust should not be allowed to settle on the<br />
surface be<strong>for</strong>e firing.<br />
After drying, the coated glass is put in a furnace below 100°C and<br />
then slowly raised to the firing temperature. The exact firing temperature<br />
is best found by experiment, but data provided by Johnson,<br />
Matthey & Co. give good guidance. A temperature 20°C below the<br />
softening point (Mg point) of the glass is often used. The furnace is<br />
kept at the firing temperature <strong>for</strong> about 20 minutes, and well ventilated<br />
so that the organic constituents burn away. With palladium,<br />
however, oxidation of the metal occurs at 400°C and the supply of air<br />
to the furnace should be restricted during the final stages of the firing<br />
operation. The furnace can be cooled at any rate which does not<br />
introduce permanent strain into the glass (p. 19). The cooling to the<br />
lower annealing temperature of the glass should there<strong>for</strong>e be at the<br />
same rate as that <strong>for</strong> annealing the glass, or at a lower rate.<br />
Some further details concerning the particular metals are given<br />
below.<br />
Silver<br />
The silver pastes give a thickness of silver of about 25-30 microns<br />
after a single application and firing. Successive applications and<br />
fixings can be made up to a certain limit. Silver Paste Y.40 gives a<br />
thick and strongly adherent silver film. One application of Silver<br />
Paste X.351 followed by one of X.353 gives a thick, matt, silver<br />
deposit. Several other silver pastes are made by Johnson, Matthey<br />
& Co. Silver Paste 0.182 is <strong>for</strong> mounting quartz crystals. Their<br />
liquid burnish silvers are much less viscous than the pastes, and with<br />
one application give a silver film about 3 microns thick.<br />
The fired-on silver films on glass can be soft-soldered. They should<br />
be 'tinned' with a solder containing some silver; ordinary soft solder<br />
can bring about complete dissolution of the silver film. Matthey<br />
Ceramic Solder No. 1 is a suitable solder <strong>for</strong> the films. A resin-type<br />
flux should be used. Tinning can be carried out by dipping into the<br />
molten solder.<br />
83
THE FIRING ON OF METAL LAYERS ON GLASS<br />
Platinum, Gold and Palladium<br />
The films of these metals are much thinner than those of silver. A<br />
single application of Liquid Bright Gold (12 per cent), followed by<br />
firing, gives a gold layer of about 0-12 microns thick; one application<br />
of Liquid Bright Platinum gives a layer of about 0-08 microns; one<br />
application of Liquid Matt Platinum a layer of about 0-35 microns;<br />
and one application of Platinum Paste gives a layer of about 2<br />
microns. These are too thin <strong>for</strong> soldering, except with considerable<br />
difficulty. Thicker films can be built up by successive applications<br />
and firings. The Liquid Bright Platinum preparations give brilliant<br />
mirror-like surfaces on glass; the films deposited by the Liquid<br />
Bright Golds are useful as optical reflectors and filters. Films of gold<br />
on glass can be prepared that reflect nearly all the infra-red radiation<br />
and transmit most of the visible spectrum.<br />
REFERENCES<br />
BAKER, E. A., 1931, /. sci. Instrum., 8,392.<br />
BOLAS, B. D., 1921, A Handbook of <strong>Laboratory</strong> <strong>Glass</strong>-Blowing;<br />
London, Routtedge.<br />
BOYS, C. V., 1927, / sci. Instrum., 4, 299.<br />
BROWN, B., 1927, J. sci. Instrum., 4,205.<br />
CHATTAWAY, F. D., 1908, Proc. roy. Soc, A80, 88.<br />
DONAL, J. S., 1942, Rev. set Instrum., 13, 266.<br />
FARADAY, M, 1842, Chemical Manipulation, 3rd Edn; London,<br />
Murray.<br />
FRENCH, E. A. H., 1924, Trans, opt. Soc, Lond., 25,229.<br />
GARDNER, I. C. and CASE, F. A., 1931, Bureau of Standards Circular<br />
389; Washington, U.S. Government Printing Office.<br />
GRODZINSKI, P., 1953, <strong>Laboratory</strong> Practice, 2,356.<br />
HEATLEY, N. G., 1938, J. set Instrum., 15,340.<br />
LLOYD, J. T., 1949, J. sci. Instrum., 26,126.<br />
OCKENDEN, F. E. J., 1938, J. sci. Instrum., 15,206.<br />
ROSENBLUM, S. and WALEN, R., 1945, J. sci Instrum., 22,196.<br />
SCOTT, R. B., COOK, J. W. and BRICKWEDDE, F. G., 1931, Bur. Stand.<br />
J, Res., Wash., 7,935.<br />
SMITH, I. C. P., 1947, Chem. Age, Lond., 298.<br />
UPTON, P. B. G. and HERINGTON, E. F. G.S 1950, Research, Lond., 3,<br />
289.<br />
WILKINSON, R. A., 1955, Chem. & Ind. (Rev.), 1426.<br />
YARWOOD, J., 1955, High Vacuum Technique; London, Chapman &<br />
89
Chapter 5<br />
THE MANIPULATION OF LARG<br />
TUBING<br />
General Observations<br />
WE apply the term large tubing to tubing with an external diameter of<br />
about 35 mm and greater. The problems encountered in working this<br />
size of tubing differ from those connected with the working of smaller<br />
tubes. These problems usually arise from either the greater weight of<br />
the tubing or from the greater heat losses from the site of working by<br />
conduction along the glass and by radiation from its surface. The<br />
weight poses no problem that practice in manipulation and the use of<br />
supports or rollers cannot overcome, but the increased heat losses<br />
cause the tube to become too hot to hold <strong>for</strong> a considerable distance<br />
along its length, and the radiation from the large mass of hot glass may<br />
prevent the tubing from being manipulated with unprotected hands.<br />
The obvious solution to the above problems is to protect the hands<br />
with asbestos gloves, but even this has its disadvantages. Asbestos<br />
gloves prevent the same degree of manipulative skill as can be<br />
attained without them, which increases the difficulty of working the<br />
heavy tubing, and if the radiation is great the air inside the glove may<br />
become unbearably hot. For the amateur glass-blower it is frequently<br />
more convenient to clamp the tubing and carry out the work with<br />
hand torches.<br />
Many operations with large tubing can be per<strong>for</strong>med easily with a<br />
ass-working machine (Chapter 6). The following pages<br />
some methods <strong>for</strong> hand-working which are applicable to hard boro<br />
silicate glass tubes, e.g. Pyrex and Phoenix.<br />
Bending Big Tubing<br />
Method <strong>for</strong> the More Skilled Worker—Shrinking down a Short Portion<br />
Bends cannot be made in tubing of greater diameter than 12 mm<br />
without blowing. Skilled workers can bend tubing up to about<br />
25-30 mm diameter by heating it with rotation over a length equal to<br />
twice<br />
90
BENDING BIG TUBING<br />
its diameter until the glass is beginning to sag, removing it from the<br />
flame, bending and blowing it out with one puff. The unskilled glassblower<br />
has, however, to rely on heating and bending a short portion<br />
at a time.<br />
Making Sharp Bends and Bending a Portion at a Time<br />
A good method of producing the desired result is that of sealing two<br />
separate pieces of glass held at the required angle, or, in effect, making<br />
a T-seal at the end of a piece of tubing. This, in fact, is the only<br />
way, <strong>for</strong> the unskilled worker, of producing good sharp bends in<br />
tubing greater than 15-20 mm diameter.<br />
The method of heating and bending a portion at a time will give a<br />
satisfactory bend whose radius, <strong>for</strong> the outside wall of the bend, is<br />
between five and six times that of the tube. The method has been<br />
used satisfactorily on tubes up to 50 mm diameter. The tube, closed<br />
at one end and with a blowing tube attached at the other, is clamped<br />
horizontally near one end, and heated, where the bend is required to<br />
start, over a length equal to about twice the tube diameter, with a<br />
large but not too hot flame from the hand torch. As the glass heats<br />
up it will begin to bend under its own weight, and the free end is<br />
supported until the glass reaches a dull red heat when it is allowed to<br />
fall a short way but prevented from sagging too far. The glass on the<br />
outside of the bend tends to flatten and it is heated fairly strongly<br />
with a hotter flame and blown out evenly. Kinks on the inside of the<br />
bend are heated even more strongly, first with a pin-point flame until<br />
they shrink in, and then with a larger flame which enables them to be<br />
blown out smoothly. The clamp is then rotated in its boss until the<br />
free md of the tube is again horizontal, and the procedure is repeated<br />
on the neighbouring portion and so on until the required bend is<br />
obtained.<br />
With tubing up to about 30 mm in diameter the whole bend can be<br />
annealed by flame at the finish, but above this diameter it is advisable<br />
to anneal each portion <strong>for</strong> a few minutes after it is bent and shaped,<br />
and be<strong>for</strong>e one moves on to the next portion. With extra large tubing<br />
it is better to have two workers, one on either side of the tube, each<br />
with a hand torch.<br />
Drawing Off Lai<br />
The need <strong>for</strong> a strong spindle is avoided if the end of the tube is to be<br />
blown out to make a joint or if it is to be drawn off by way of cutting<br />
the tube. In this case the tube may be drawn off under less well<br />
controlled conditions than if a strong spindle is required. It is<br />
possible to clamp the tube, preferably in a vertical position, and work<br />
91
THE MANIPULATION OF LARGE TUBING<br />
the glass with hand torches. It may be necessary <strong>for</strong> two persons to<br />
carry out this operation so that the lower part of the tube can be<br />
supported to prevent too rapid drawing off as it falls under gravity.<br />
The lower part of the tube will remain much cooler than if the glass<br />
were worked in a horizontal position.<br />
Drawing large diameter tubing off to spindles can be accomplished<br />
by a simple extension of the methods previously described. It is<br />
almost essential to support the tube on a stand or set of rollers since<br />
the great weight of a relatively long length of tubing will prevent<br />
accurate rotation of the two pieces. It may also be found that the<br />
normal bench torch does not produce a hot enough flame <strong>for</strong> the<br />
purpose. If this is the case it is possible to arrange two hand torches<br />
in laboratory clamps so that the tubing is rotated between them.<br />
Then, if the tubing is not drawn down too rapidly, a strong spindle<br />
will be produced. Asbestos gloves may be necessary to protect the<br />
hands from the hot glass and the radiation if the tube is to be kept in<br />
the flame <strong>for</strong> long enough to collapse down sufficiently to <strong>for</strong>m a<br />
strong spindle.<br />
Cutting a length of tubing can be a useful initial stage in putting-in<br />
a strong spindle. This reduces an unwieldy length of heavy tubing to<br />
a more manageable size which can be held in one hand while a<br />
handle is put in preparatory to drawing off the end to a strong<br />
spindle. If an uneven end has been produced by faulty cutting and it<br />
is not intended to draw the tube off, the end may be tidied up considerably<br />
by local working with a hand torch and the use of <strong>for</strong>ceps<br />
and scissors <strong>for</strong> removing excess glass. Any glass so worked should<br />
be annealed carefully to prevent cracking on cooling.<br />
Closing Large Flasks<br />
The necks of large flasks (about 5 litres capacity) are usually of thick<br />
glass, and they must be heated slowly. Be<strong>for</strong>e the top is closed a side<br />
arm must be put on the flask, and the neck is usually the best place<br />
<strong>for</strong> it. The mouth of the flask is closed with a rubber stopper wrapped<br />
in asbestos paper and carrying a blowing tube. A considerable area of<br />
the neck of the flask is slowly heated, using initially a large smoky flame<br />
and finally a hot flame. When the flame is tinged yellow a hole is<br />
blown in the side of the neck, of the right size to fit the side arm. The<br />
end of the side arm tube should previously have been thickened by<br />
heating, flanging and running down, otherwise a bad joint will be<br />
made because the thin, side arm glass runs so much more easily than<br />
the thick glass of the flask neck. The side arm is joined to the neck by<br />
the normal T-piece procedure, and the neck all round the joint is<br />
annealed carefully. The top of the neck is then heated and pushed in<br />
92
CLOSING LARGE FLASKS<br />
with a spike until a handle can be attached as in FIGURE 32, /. The<br />
neck is pulled off near the top, giving a spindle which will probably be<br />
very thin (FIGURE 32, II). This is removed and the end rounded by<br />
running down and blowing out a number of times—to blow out all at<br />
once requires a very large flame, and the end must be blown out piece<br />
by piece with all ordinary flames.<br />
/ II<br />
FIGURE 32. Closing the neck of<br />
a large flask<br />
Joining Big Tubes<br />
Once again the methods previously described <strong>for</strong> joining two tubes<br />
are applicable provided the limitations imposed by the size of the<br />
tubing are borne in mind. Joining two large diameter (say 4 cm)<br />
tubes in the flame of a bench torch follows the same course as joining<br />
smaller tubes by the same method. Care must be taken to see that the<br />
tubes are long enough not to become too hot to hold. Tubing of<br />
4 cm diameter may become too hot to hold <strong>for</strong> about ten inches on<br />
either side of the site of working, since not only is more heat conducted<br />
along the glass but also a much larger flame is necessary.<br />
<strong>Working</strong> large diameter tubing clamped is very often more convenient<br />
than attempting to work it with a bench torch. Joining two<br />
large diameter tubes by this method follows the same pattern as the<br />
joining of smaller tubes in similar circumstances: first an adequate<br />
supply of tools and thin glass rod to meet any emergency is collected.<br />
Then the two tubes should be prepared by blowing out the ends. It is<br />
best to blow holes of only about three quarters of the diameter of the<br />
tube (FIGURE 33) as the ends of the drawn-off tubes are liable to have<br />
rather thin walls and this allows them to be thickened as the joint is<br />
made. The tubes are heated and pushed together as be<strong>for</strong>e, or, if this<br />
is not possible, the flanges of glass left by blowing out the ends are<br />
heated and pushed together with a spike, or the gap is filled with glass<br />
93
THE MANIPULATION OF LARGE TUBING<br />
rod. While this is being done it is necessary to heat the joint more or<br />
less evenly and not just on one side. If this is difficult two operators,<br />
each with a hand torch, may be found an advantage.<br />
All other operations—the working of the glass by alternate collapsing<br />
and blowing, sealing pinholes, and finally blowing the joint to an<br />
acceptable shape—are the same as previously described The flow of<br />
glass under gravity will be more noticeable when large tubes are<br />
joined, principally because the time required to make the joint is<br />
greater. This flow can be combated as be<strong>for</strong>e.<br />
\ > /<br />
/ \<br />
/<br />
n<br />
FIGURE 33. Joining large tubing<br />
The final annealing of the joint and adjacent tubing is of the utmost<br />
importance with large tubes. If this is neglected there is a high<br />
probability that the joint will crack as a result of the strains induced<br />
by working and cooling the glass.<br />
Big T-Joints<br />
Large sized T-joints can be made using a bench torch and manipulating<br />
the glass in precisely the same way as previously described. This<br />
is difficult since the whole weight of the glass must be carried by the<br />
hands, because the way in which the tubing must be turned in the<br />
flame precludes the use of supports. The simplest way of making<br />
these joints is to clamp both tubes in such a way that they can be<br />
pushed together at the required time.<br />
The two parts should be prepared by blowing a hole in the end of<br />
the side arm smaller than the bore of the tube and then blowing a<br />
similar sized hole in the cross-piece. These parts should next be<br />
clamped so that the tubes are nearly touching and can readily be<br />
94
BIG T-JOINTS<br />
pushed together. The two tubes are then heated as uni<strong>for</strong>mly as<br />
possible around the join, and when the glass has become soft the two<br />
tubes are pushed together. If they do not make contact at any point<br />
it may be possible to push the glass in this region together with a<br />
spike or else to bridge the gap with thin rod. The joint is then<br />
worked, by the usual method, to fuse the two tubes together. When<br />
the joint is blown out to its final <strong>for</strong>m it is advisable to heat a fairly<br />
large segment of it at a time; and blowing the glass carefully while it is<br />
in the flame very often leads to a better finish. Mending any pinholes<br />
in the joint is much more easily accomplished at this stage and there<strong>for</strong>e<br />
a careful inspection should be made be<strong>for</strong>e the final anneaMng,<br />
which should be carried out thoroughly. For work on very large<br />
diameter tubing it may be necessary to use two hand torches <strong>for</strong> the<br />
above operations.<br />
Very often it is found more convenient to replace a right-angle<br />
bend by a T-joint made right at the end of the drawn-off cross-piece.<br />
This makes a very neat right-angle join in tubing which has too large<br />
a diameter to bend easily.<br />
Big Internal Seals<br />
Big internal seals can be made by any of the methods described in the<br />
previous chapter although by far the easiest method is to work with<br />
the glass clamped and to keep the internal tube in one piece.<br />
Preparation of the materials is one of the most important phases of<br />
the operation, since once the glass-blowing is started it is virtually<br />
impossible to leave the work until it is finished and annealed thoroughly.<br />
The inner tube should be prepared as be<strong>for</strong>e with a slight<br />
ridge round the tube at the position of the joint. The outer tube<br />
should then be closed off to a round end and the hole to take the<br />
internal tube blown. This should be left with a slight rim of glass and<br />
not flame-polished. Be<strong>for</strong>e this can cool the internal tube should be<br />
inserted and clamped in position and work started on the joint. If<br />
the glass is not in good contact initially it may be heated and pushed<br />
on to the internal tube with a spike. Care should be taken in so doinj<br />
to see that the flame is not concentrated too much on one side of the<br />
partly made joint, allowing the other side to cool and crack—one of<br />
the dangers of pushing the glass in with a tool. The attention is concentrated<br />
on the localized area being worked and the rest of the join<br />
is allowed to cool, thus straining the glass excessively. The localized<br />
working itself tends to strain the joint, but if care is taken to see that<br />
the whole joint is kept hot the strain is dissipated by a continuous<br />
annealing process.<br />
Once the two tubes have been pushed into close contact and the<br />
95
THE MANIPULATION OF LARGE TUBING<br />
joint is air-tight it can be finished as previously described. These<br />
internal seals require very thorough annealing and it is best to heat<br />
them to a dull red heat <strong>for</strong> a short while be<strong>for</strong>e cooling slowly in the<br />
flame. The use of two torches facilitates uni<strong>for</strong>m heating during the<br />
annealing process, and since no other operations are necessary one<br />
can be held in each hand if they are both prepared be<strong>for</strong>e the commencement<br />
of the glass-blowing. This use of two flames is probably<br />
unnecessary except <strong>for</strong> very large tubing.<br />
Mending Cracks in Large Tubing<br />
When large tubing has been worked and has been annealed in a flame<br />
it is usually strained to a considerable extent, which sometimes causes<br />
it to crack. Mending these cracks without spreading them is an<br />
operation requiring a considerable amount of patience. It is one of<br />
the cases in which it is necessary 'to make haste slowly'. The use of<br />
two flames is an advantage as they allow the heating up of both ends<br />
of the crack at the same time. The glass should initially be warmed<br />
uni<strong>for</strong>mly and slowly with small cool flames. When it has started<br />
to heat up, the rate of heating is increased, concentrating the flame<br />
slightly on the ends of the crack so that these parts warm up just a<br />
little faster than the rest of the glass. Once the glass has heated up<br />
sufficiently to flow slowly the crack is allowed to seal itself, using<br />
only a cool flame as previously described. Finally, when a complete<br />
repair has been effected, the glass is annealed.<br />
Mending Cracks near Complex and Large Seals<br />
The above remarks apply equally here, except that extreme care is<br />
needed to prevent the crack spreading into the complex region. If the<br />
crack spreads to an internal seal and the inner tube cracks, it will be<br />
virtually irreparable. This spreading can be prevented if the whole of<br />
the complex joint is heated at the same time and at the same rate as<br />
the glass around the crack. The heating must be slow to allow time<br />
<strong>for</strong> the inner parts of the joint to be heated adequately by conduction.<br />
96
Chapter 6<br />
SOME OPERATIONS WITH A GLASS-<br />
WORKING MACHINE<br />
WE have mentioned (p. 2) the difficulty of holding and rotating a<br />
piece of glass tube in each hand and operating on a semi-molten mass<br />
between the two pieces. A very satisfactory way of resolving this<br />
problem is to use a machine—the Edwards Model G 3 <strong>Glass</strong>- <strong>Working</strong><br />
Machine (made by Edwards High Vacuum Ltd) is of great value. The<br />
glass to be worked is held in two chucks which grip the tubing and<br />
rotate it synchronously at a speed which is variable over a considerable<br />
range (120-500 rev/min). One of the chucks can be moved towards or<br />
away from the other. The glass may also be held in only one chuck.<br />
The glass can be worked both by blowing into it as it rotates and<br />
by the use of tools which can be mounted in various ways or held in<br />
the hand. Thus operations involving the production of articles with<br />
circular symmetry can be carried out with great ease, and a skilled<br />
operator is by no means necessary. The advantages of using this<br />
machine, when possible, <strong>for</strong> work involving tubing exceeding 3-4 cm<br />
in diameter are, we think, particularly manifest. The operation of<br />
putting a spindle in a large tube, <strong>for</strong> example, is done by hand only<br />
with difficulty, whereas with the machine it can be done rapidly and<br />
effectively. In this Chapter we attempt to give merely a general idea<br />
of how such a machine can be used; the detailed manipulations involved<br />
soon become clear after a little practice. The machine is<br />
valuable either <strong>for</strong> the production of special parts in research and<br />
development work or <strong>for</strong> continuous operation on repetition work by<br />
unskilled personnel.<br />
General Description<br />
Two views of the glass-working machine are shown in FIGURES 34<br />
and 35. It consists of a substantial cast base fitted with a fixed headstock<br />
and a movable tailstock. This can be moved towards or away<br />
from the headstock by operating the tailstock traverse control.<br />
Rotating mandrels in the headstock and tailstock are synchronously<br />
driven; the tailstock mandrel drive can be disconnected and locked<br />
97
SOME OPERATIONS WITH A GLASS-WORKING MACHINE<br />
in position so that the mandrel does not rotate, and it can then be<br />
employed as a tool holder <strong>for</strong> tools used to work single lengths of<br />
tubing held in the headstock chuck. The tool can be moved towards<br />
or away from the glass using the tailstock traverse as usual.<br />
In the front of the machine there is a burner mounting bar which<br />
normally carries either a cannon burner, operating with gas and air or<br />
gas-air-oxygen mixtures, or a crossfire burner, operating with gasoxygen<br />
mixtures. Both burners can be used together and their<br />
flames directed on the same region. The burner mounting bar has a<br />
Vartabtc<br />
speed control<br />
FIGURE 34. A glass-working machine<br />
rack-and-pinion mechanism so that the burner or burners can be<br />
traversed a limited distance along the glass and be made to follow up<br />
the work.<br />
At the rear of the machine there is a tool mounting bar. A flat<br />
<strong>for</strong>ming tool can be fixed to this, as shown in FIGURE 34; and by<br />
using the operating lever (FIGURE 35), the tool is brought into contact<br />
with the lower side of the rotating tubing, which, softened in a flame,<br />
is pushed into shape. A socket <strong>for</strong> a cone-and-socket joint is easily<br />
made by setting up the flat <strong>for</strong>ming tool at the proper angle. The<br />
tool mounting bar is fitted with an adjustable mechanical stop which<br />
98
GENERAL DESCRIPTION<br />
is also an electrical contact <strong>for</strong> giving visual indication on a lamp<br />
when pre»set limits are reached. This arrangement is useful <strong>for</strong> repetition<br />
work. Generally, when constructing specialized apparatus <strong>for</strong><br />
research work, operations with tools are per<strong>for</strong>med by holding them<br />
in the tailstock chuck (not rotating), or in the hand tool holder<br />
(FIGURE 34), which is held in the hand.<br />
The mandrel bore size is 32 mm, so that tubing of this size will pass<br />
right through the headstock and tailstock. The maximum jaw opening<br />
is 63 mm with the jaws in their normal position; but they are<br />
FIGURE 35. Another view of the glass-working machine<br />
reversible, and by reversing them tubing up to 115 mm diameter may<br />
be held.<br />
There are various ways of blowing into the rotating work. If the<br />
tube, or a portion of it, is long enough and less than 32 mm diameter<br />
it may be passed right through the headstock and blown into using a<br />
glass-blower's swivel (p. 42). Otherwise spindles or rubber stoppers<br />
carrying glass tubes may be used in conjunction with a swivel. The<br />
machine itself can be used to put a short spindle in a tube, using, in<br />
principle, the method described on p. 56. A blowing fixture can also<br />
be fitted to the headstock or tailstock mandrel (see FIGURE 34); this<br />
H 99
SOME OPERATIONS WITH A GLASS-WORKING MACHINE<br />
remains stationary while the work rotates, and so it is only necessary<br />
to prepare a sufficiently air-t<br />
and the mandrel with the help of tape or rubber stoppers, or stoppers<br />
and tape together.<br />
Sketch of Some Possible Operations<br />
A tube held in the headstock chuck can be flared by any of the<br />
methods previously described (p. 72). Flares can be made very easily<br />
with a cylindrical carbon rod attached to a special holder fitting into<br />
the tailstock chuck, which is not rotated during the operation. The<br />
flare is made by pushing the carbon rod, held at the desired angle,<br />
into the end of the rotating and heated glass tube, <strong>for</strong> which purpose<br />
the tailstock traverse is used. With this method the end of the tube<br />
can be opened out until it resembles a funnel.<br />
To put a spindle in a tube (p. 57), both ends are held in the<br />
rotating chucks. It may be desirable to straighten the tube, by heating<br />
it in a gas-air flame as it rotates, if it is so bent that it is not held<br />
well in both chucks. A spindle is put into the tube by the method<br />
described on p. 56, except that the operator's hands are replaced by<br />
the two chucks. The length of the spindle which can be obtained is<br />
limited by the length of the tailstock traverse.<br />
A tube with a spindle in it can be worked to a tube with a round<br />
end by removing the spindle just beyond the shoulder (see p. 57) with<br />
a small flame, and then shrinking down and blowing out the end.<br />
The blowing can be done while the glass is in the flame. A hole can<br />
be blown in the end of the closed tube by heating the extreme end in a<br />
small flame. The hole can then be opened out with a tool, using an<br />
taring method. Two tubes with holes of the same size in<br />
their ends can be joined very easily by bringing their hot ends together<br />
as they are both rotated, one tube being in each chuck. The<br />
joint is finished as described on p. 61. To join big tubes it may be<br />
convenient to grind the two ends flat; no holes need then be blown,<br />
since the tubes will meet well enough.<br />
To blow a bulb in the middle of a tube, it is held in both chucks;<br />
glass is accumulated by pushing the tailstock to the headstock as the<br />
glass rotates, and the tube is blown into gently at the same time. The<br />
bulb is blown as the glass accumulates; an elegant bulb can be<br />
obtained very easily.<br />
An internal seal can be made by Method 1 of p. 73. The hole in the<br />
outer tube and the ridge or bulge on the inner tube are both put in on<br />
the machine. The ridge can be put in by heating a small portion of<br />
the tube as it rotates in both chucks, and quickly pushing one end<br />
towards the other with the tailstock traverse. Alternatively, a small<br />
100
SKETCH OF SOME POSSIBLE OPERATIONS<br />
bulge can be blown until it is the required size. This is conveniently<br />
done with the help of a calliper gauge. When making the final internal<br />
seal, the inner tube of the seal can be supported in the outer tube<br />
with corrugated cardboard. An internal seal can also be made by<br />
Method 4 of p. 76. The correct size flange or flare is put on the inner<br />
tube with a tool, and a calliper gauge is again used to check the size<br />
of the hot glass.<br />
A Dewar seal (p. 122) can be made without blowing by flaring the<br />
smaller tube outwards until it will nicely meet the larger tube (as in<br />
FIGURE 50, ///). The smaller tube is mounted in the larger tube with<br />
the help of corrugated cardboard, and the final joint is made by<br />
pushing the flare of the inner tube on to the outer tube with a tool as<br />
the glass rotates in the flame. If the tubes are first ground flat at the<br />
ends to be sealed, an elegant joint can be obtained very easily.<br />
Graded seals must be used <strong>for</strong> joining together glasses of such<br />
different thermal expansions that a direct seal cannot be made<br />
(p. 25). The best way of making a graded seal with the machine is to<br />
use the various intermediate glasses as rod. The first piece of glass<br />
tubing is held in the headstock chuck, and the first intermediate glass<br />
is held in the tailstock chuck; both are rotated. The end of the tube<br />
is closed with the rod, which is then drawn offjust beyond the closure.<br />
The closed tube remaining then has its end worked to a rounded<br />
shape. The next glass is attached as a globule on the extremity of the<br />
hemispherical end and is worked to another hemispherical end; the<br />
process is repeated with the next intermediate glass, and so on. The<br />
final tube is joined as a tube.<br />
A graded seal can also be made by fusing together rings of the<br />
intermediate glasses, or by fusing on each intermediate glass in the<br />
<strong>for</strong>m of tubing, then drawing a spindle, making a round end, and<br />
blowing a hole.<br />
The making of glass bellows is an operation which is very greatly<br />
facilitated by the machine. The glass is rotated in a small hot flame<br />
and blown out to give a thin protruding portion of glass. More of<br />
these thin portions are then introduced. Practice is necessary to<br />
make bellows with the required degree of flexibility. The flexibility of<br />
course increases with the number of thin portions of glass; the<br />
fragility likewise increases.<br />
Tapering can be carried out by the methods described on p. 79.<br />
When a precise angle is required the flat <strong>for</strong>ming tool on the tool<br />
mounting bar (FIGURE 34) can be used.<br />
101
Chapter 7<br />
METAL-TO-GLASS SEALS<br />
ALTHOUGH the sealing of noble metals through glass has been known<br />
<strong>for</strong> a great many years, even centuries, the extensive use of metal-toglass<br />
seals in laboratories has developed only in recent years. This<br />
recent development has, however, been extremely rapid and a great<br />
deal of detailed literature now exists. An excellent collation of much<br />
of the data has been made by J. H. PARTRIDGE (1949) in his monograph<br />
devoted entirely to glass-to-metal seals. We, in this Chapter,<br />
attempt to supply the reader with in<strong>for</strong>mation and detail sufficient<br />
to be useful to the average laboratory experimentalist.<br />
Matched and Mismatched Seals<br />
Where a direct fusion of glass-to-metal or metal oxide is obtained<br />
(sometimes termed the "wetting" of metal by glass) two types of seal<br />
can result—one matched, the other mismatched, depending on how<br />
the relative coefficients of thermal expansion of the glass and the<br />
metal compare.<br />
In a matched seal the stress is kept within safe limits by close<br />
correspondence of the two thermal expansions throughout the<br />
temperature range over which the seal has to be worked during its<br />
manufacture.<br />
A mismatched seal is one in which the glass and metal have differing<br />
coefficients of expansion. Here the resultant stress is reduced to<br />
within the limits required to avoid fracture by special shaping of the<br />
metal at the junction. In some cases relief to a small extent is<br />
obtained by the use of a ductile metal which gives slightly, so reducing<br />
the stress in the glass.<br />
When it is required to seal a metal into a glass with which its coefficient<br />
of thermal expansion is greatly mismatched, graded seals are<br />
often employed from the given glass, through one or more intermediate<br />
glasses, to a glass which will <strong>for</strong>m a matched seal with the<br />
given metal. Kovar-to-Pyrex seals (see below) are a good example<br />
of this type.<br />
A further combined characteristic that a glass and a metal must have<br />
be<strong>for</strong>e they will <strong>for</strong>m a seal, over and above that of the provision<br />
102
MATCHED AND MISMATCHED SEALS<br />
by some property or other <strong>for</strong> the relief of stress in the glass, is that<br />
the glass must wet and adhere to the metal or its oxide.<br />
Another important consideration that must be given when employing<br />
a matched seal in the laboratory is the temperature range to<br />
be encountered during use of the seal. The absence of stress relies on<br />
the matching of thermal expansions throughout the temperature<br />
range encountered when the seal is worked, and this matching must<br />
continue over the temperature range in which the seal is to be used, else<br />
fracture may result. This factor must be watched when, <strong>for</strong> instance,<br />
the metal-to-glass seal is to be immersed in, or is near to, refrigerants.<br />
Sealing Tungsten into Pyrex<br />
Pyrex {Corning No. 7740) adheres well to tungsten oxides and will<br />
give a vacuum-tight seal with this metal provided the joint is made<br />
carefully. The seal is mismatched and an upper limit to the diameter<br />
of tungsten rod that will give a satisfactory joint is 0*5-1 mm. The<br />
exact figure varies; the most important factor is probably the severity<br />
of the service requirements.<br />
For vacuum work tungsten rod is superior to wire because its<br />
method of manufacture leaves the metal with less surface cavities and<br />
less fine channels running within it. Centreless-ground tungsten rod<br />
is advised. The rod is first beaded, and <strong>for</strong> this a small length of wellfitting,<br />
thin-walled, Pyrex capillary is drawn; a piece about 1 cm long<br />
and approximately 0-5 mm wall thickness is required. The portion of<br />
the tungsten rod to be beaded is cleaned by heating to dull red heat<br />
and bringing it immediately into contact with crystalline potassium<br />
or sodium nitrite, either in the <strong>for</strong>m of a stick or as a small heap of<br />
powder balanced on a spatula. A strongly exothermic reaction<br />
occurs during which the metal continues to glow red hot and is<br />
rapidly dissolved. The reaction is allowed to proceed <strong>for</strong> a few<br />
seconds, then the rod is washed free of the nitrite and wiped dry. The<br />
surface of the metal is left clean. It is then reoxidized slightly in a<br />
just non-luminous flame until it appears coloured a second order<br />
green or blue.<br />
The piece of glass capillary is immediately slipped over the prepared<br />
portion of the rod (FIGURE 36, /) and heated progressively from<br />
one end to the other. The rod must not be allowed to cool be<strong>for</strong>e<br />
this is done or the oxide layer may break away from the surface of the<br />
metal due to differing thermal expansion coefficients. As the glass<br />
shrinks on to the metal and adheres to it the air is slowly driven out<br />
ahead of the shrinking portion (FIGURE 36, II). The metal, when in<br />
contact with the glass, appears larger in diameter and assumes a<br />
reddish colour so that the progress of the beading is easily observed.<br />
103
METAL-TO-GLASS SEALS<br />
The finished bead, shown in FIGURE 36, III, will, when made correctly,<br />
be coloured something between a straw yellow and a reddish<br />
tan. If desired, the bead may be enlarged at one end or in the middle<br />
to assist in fusing it into a small bore tube as indicated in FIGURE 36,<br />
x<br />
Prepared portion of tod<br />
Pyrex capillary<br />
I<br />
M IF<br />
FIGURE 36. Tungsten-to-Fvrex seals<br />
IV, A hole is made at the end of the tube, just large enough <strong>for</strong> the<br />
bead to fit closely, and the end of the tube is fused on to the bead with<br />
a hot pin-point flame. The resultant seal should be annealed well and<br />
is usually a shade darker in colour than the initial bead. If the<br />
tungsten wire or rodhas to be cut to length, this is best done by grinding<br />
or dissolving in molten potassium or sodium nitrite. Any attempt to<br />
cut tungsten results in the metal being torn and in the opening of fine<br />
channels which may cause leaks.<br />
Wire Holders<br />
The tungsten rod during the operations described above can, when of<br />
sufficient length, be held in the fingers; but with short pieces of rod<br />
^^T^IXl-<br />
/<br />
FIGURE 37. Wire holders<br />
some method of gripping is necessary. An ordinary pair of workshop<br />
pliers will suffice, but if the metal-to-glass seals are made frequently<br />
it is convenient to have at hand some <strong>for</strong>m of small wire holder. A<br />
useful tool is seen in FIGURE 37, /. A small metal collet head, <strong>for</strong><br />
104<br />
n
SEALING TUNGSTEN INTO PYREX<br />
gripping the wire, is set into a hollow handle—preferably of wood.<br />
Another type of holder, simpler to make, is shown in FIGURE 37, II.<br />
With wire holders such as these a very even rotation of the wire<br />
during beading is possible.<br />
Sealing Tungsten into Special <strong>Glass</strong>es<br />
With tungsten rods of diameter 0-5-1 mm it is desirable to use special<br />
sealing glasses <strong>for</strong> vacuum work, while with rods larger than 1 mm<br />
diameter this becomes a necessity. Nonex {Coming 7720), uranium<br />
glass {Corning3320), G.E.C. W.1,B.T.H. C9, Dial36a.ndB.T.H. C14,<br />
all <strong>for</strong>m a more matched seal with tungsten than does Pyrex {Corning<br />
7740), Phoenix glass, which has an expansion coefficient almost<br />
the same as that of Pyrex to which it fuses excellently, seals more<br />
/ E<br />
^V\.\1-h V*><br />
FIGURE 38. Tungsten-to-i > ^/*ex seals with sealing glasses. Phoenix can<br />
always replace Pyrex in these seals<br />
satisfactorily to tungsten than does Pyrex. It is there<strong>for</strong>e very useful<br />
as an intermediate glass <strong>for</strong> Pyrex-to-tungsten seals with rod up to<br />
about 1*25 mm diameter, and also in making pinch seals.<br />
Of the above special glasses we find that WJ9 C9 and Phoenix are<br />
easily worked and give very satisfactory seals. Very great care is<br />
necessary when using Nonex to prevent the lead in the glass from<br />
reducing with resultant blackening; the tip of an oxidizing flame<br />
must be used. The characteristics of sealing glasses are given in<br />
Chapter 2. Those mentioned above seal well to Pyrex, though with<br />
Nonex uranium glass is sometimes used as an intermediate.<br />
When making a seal the tungsten rod is first beaded as with Pyrex.<br />
The bead of the special glass may either be fused directly into Pyrex<br />
(FIGURE 38,I) or first fused into a tube of the same glass and this tube<br />
cut near to the seal and fused to a Pyrex tube (FIGURE 38, II).<br />
Multiple Wire Seals<br />
When a number of mutually insulated wires have to be carried into a<br />
piece of apparatus through one glass tube, a multiple wire seal is<br />
necessary. There are several methods <strong>for</strong> achievir<br />
one to use depends upon the particular purpose and circumstances<br />
105
METAL-TO-GLASS SEALS<br />
Multiple Wire Seals when Special Sealing <strong>Glass</strong>es are not available<br />
One way of making a multiple seal is indicated in FIGURE 39, //. This<br />
method is extremely useful when it is required to seal several tungsten<br />
rods or wires through Pyrex, and special sealing glasses are not available.<br />
Each of the wires is first beaded with Pyrex as described above.<br />
One end of the tube, into which it is desired to seal the wires, is<br />
rounded off and the smaller tubes are added one at a time. Tubing of<br />
3-5 mm bore is used <strong>for</strong> these separate sheaths. Using a hand torch,<br />
and employing a fine pin-point flame, it will be found with practice<br />
that making a number of small joints, very close together in this<br />
manner, is quite straight<strong>for</strong>ward. The central sheath should be added<br />
FIGURE 39. Multiple wire seals<br />
first and the remainder positioned around it. As each tube is sealed<br />
in position it can be truncated to the required length as shown in<br />
FIGURE 39, / and closed with a small expendable cork.<br />
When the multiple sheath is completed each cork is removed in<br />
turn and replaced by a beaded rod which is fused into place after<br />
careful scraping away of any burnt cork. The finished work should<br />
be well annealed. We find the method described here to be very<br />
serviceable and useful even when beads of a special sealing glass can<br />
be employed.<br />
Pinch Seals<br />
A higher degree of stress exists in pinch seals than when the wires are<br />
given separate sheaths. Direct Fyrex-to-tunpten pinch seals, there<strong>for</strong>e,<br />
are not satisfactory. However, serviceable multiple pinch seals<br />
can be made with most of the special glasses mentioned above. When<br />
using Phoenix glass a special sealing glass <strong>for</strong> beading the wires is not<br />
necessary.<br />
The end of the Pyrex tube that is to carry the wires is heated and<br />
shaped with tongs as shown in FIGURE 40, / or IL The desired number<br />
106
MULTIPLE WIRE 3EALS<br />
of wires, beaded with one or other sealing glass, is held in a clamp<br />
of the <strong>for</strong>m shown in FIGURE 40, III, and the latter is supported so<br />
that the wires are introduced to the prepared tube with the beads<br />
enclosed in the pinched section. The whole of the prepared portion of<br />
the tube is then heated strongly and evenly and the glass pinched hard<br />
on to the beads with a pair of tongs. The initial beads should be prepared<br />
large enough <strong>for</strong> neighbouring ones to be touching when the<br />
wires are clamped in position; this ensures that sufficient of the special<br />
sealing glass is present. During the working of the pinch seal all<br />
trapped air must be carefully squeezed out. With most glasses<br />
annealing is adequate.<br />
r E<br />
FIGURE 40. Pinch seals<br />
IV V<br />
Finished multiple seals of this type are shown in FIGURE 40, IV and<br />
F. The outer tube may be sealed directly to the apparatus <strong>for</strong> which<br />
it is required, or a Dewar seal may first be <strong>for</strong>med as shown in<br />
FIGURE 50, VII, making the multiple seal re-entrant. The re-entrant<br />
<strong>for</strong>m is very useful when, <strong>for</strong> example, the wires are directly attached<br />
to, and are supporting, electrodes (see p. 157).<br />
Prepared Copper-Tungsten-Nickel Wires<br />
Long lengths of tungsten rod beyond a metal-to-glass seal are often<br />
inconvenient because the metal is so brittle and will not give. Any<br />
lateral strain at the end of a long length of rod or wire can easily<br />
fracture the metal-to-glass seal. For this reason it is often desirable<br />
to use prepared copper-tungsten-nickel wires. These are obtainable,<br />
or can be made by butt-welding braided copper at one end of a short<br />
piece of tungsten and nickel at the other. Nickel also spot-welds well<br />
to tungsten.<br />
These prepared wires are very useful <strong>for</strong> sealing through Pyrex and<br />
Phoenix. Care must be taken to see that potassium or sodium nitrite<br />
does not come into contact with the metal junctions or the tungsten<br />
107
METAL-TO-GLASS SEALS<br />
will not be left clean. When beading the tungsten the glass capillary<br />
must be kept short, so that the glass comes only into contact with the<br />
tungsten portion and does not overlap either junction, otherwise<br />
fracture will result.<br />
Nickel Tipping of Tungsten<br />
In the prepared wires described above, the copper and nickel buttwelds<br />
at either end of the tungsten serve to seal up any fine channels<br />
that might be present in this metal and to prevent leaks. If the tungsten<br />
rod or wire is to be used alone it is sometimes desirable to seal<br />
the ends by welding or fusing a coating of nickel over the tip. A fine<br />
I JT M<br />
IF V<br />
FIGURE 41. Sealing platinum into soda<br />
channel is much more likely in tungsten wire than tungsten rod.<br />
With rod the nickel tipping is generally not required.<br />
Sealing Platinum Into Soda or Lead <strong>Glass</strong><br />
Platinum has a thermal expansion coefficient of 9 x 10- 6 /°Q and<br />
there<strong>for</strong>e seals easily into a number of soft glasses. Fine platinum wire,<br />
of diameter less than about 0-25 mm, can be fused directly into soda<br />
glass to give a vacuum-tight seal. If wire above that diameter is to be<br />
used and the apparatus is required to hold a vacuum, then an intermediate<br />
lead glass that will fuse to soft glass should be used; alternatively<br />
Dial 444 may be used as a sealing glass. Platinum oxidizes<br />
only slightly and thus no great care is needed when fusing glass to it.<br />
When a wire is to be fused into the wall of a tube without employing<br />
an intermediate glass a small tail is first pulled out (FIGURE 41, /).<br />
This is done by heating with a pin-point flame, touching the tiny hot<br />
portion with the tip of a glass rod (or with the platinum wire itself) and<br />
out a fine spindle. The spindle is broken off about 2 mm<br />
108
SEALING PLATINUM INTO SODA OR LEAD GLASS<br />
from the wall and should at this point be of diameter just sufficient to<br />
accommodate the wire (FIGURE 41, //). The wire is inserted, the fine<br />
tail is collapsed and fused on to the platinum to <strong>for</strong>m a small bead in<br />
situ, which is heated strongly so that it shrinks back into line with the<br />
walls of the tube (FIGURE 41, /// and IV). In this manner the seal is<br />
made without any appreciable thickening of the glass around the<br />
platinum. When the seal is finished the whole circumference of the<br />
tube should be heated at this point and well annealed.<br />
Use of an Intermediate <strong>Glass</strong><br />
If an intermediate lead or sealing glass is used then the wire is beaded<br />
separately and a slightly larger tail is drawn out—sufficient <strong>for</strong> the<br />
whole bead to be inserted. The tail is prepared first so that the hot<br />
bead can be inserted and fused into place without cooling. The seal is<br />
otherwise finished as above; care being taken not to <strong>for</strong>m a lump in<br />
the wall of the tube around the wire. When platinum wire of diameter<br />
greater than about 0-5 mm is used it is preferable to add to the<br />
larger tube a small T-piece as a sheath <strong>for</strong> the beaded wire (FIGURE<br />
41, F), as described above <strong>for</strong> tungsten-to-Pjwx seals.<br />
Sealing Platinum into Pyrex<br />
No satisfactory, single, intermediate glass <strong>for</strong> sealing platinum metal<br />
to Pyrex glass is readily available. Very fine platinum wire and very<br />
thin-walled platinum tubing can, however, be satisfactorily sealed<br />
directly to Pyrex, but such seals are not usually serviceable <strong>for</strong><br />
vacuum requirements.<br />
Light Platinum Tube<br />
With thin-walled platinum tubing, of wall thickness up to 015 mm,<br />
the glass is fused around the outside of the tube <strong>for</strong> a length of<br />
5-15 mm; slight blowing may be necessary. The metal in this <strong>for</strong>m<br />
will give sufficiently to take up the stress caused by differing thermal<br />
expansions. If used <strong>for</strong> current carrying, the capacity of the platinum<br />
can be increased by inserting a suitable wire and soldering it at one<br />
end.<br />
Housekeeper Seal<br />
As described by W. G. HOUSEKEEPER (1923), platinum wire of 0-05<br />
mm diameter can be successfully sealed through Pyrex if the wire is<br />
first flattened and the edges filed to a sharp V-shape as shown in<br />
FIGURE 42, /. The flattened portion of the wire is fused into a tube<br />
whose end has first been collapsed down until it will just take the<br />
broad part of the wire. Alternatively the wire may be beaded first,<br />
109<br />
4
METAL-TO-GLASS SEALS<br />
but in either case a strong heat is required and the glass is pressed into<br />
good contact with the metal with tweezers. The entire section of the<br />
apparatus around the seal must finally be well annealed. The finished<br />
seal is shown in FIGURE 42, //.<br />
Use of Mercury Cup<br />
If the platinum wire is to be used as an electrode it may be preferable<br />
not to flatten and shape it as in the Housekeeper method, but to use a<br />
mercury cup on the outside of the apparatus (FIGURE 42, 111). The<br />
fine wire is fused into a constricted part of a narrow bore tube and the<br />
I H M<br />
FIGURE 42. Sealing platinum into Pyrex<br />
exposed end, on the outside, is covered with mercury which serves to<br />
seal up any leaks that might develop by the glass drawing away from<br />
the metal. Another wire dipping into the mercury cup can serve <strong>for</strong><br />
electrical contact. Clearly this is of no avail <strong>for</strong> vacuum work, but is<br />
useful in making electrolytic cells.<br />
Use of Platinized <strong>Glass</strong> Rod<br />
A method <strong>for</strong> effecting a platinum-to-Pyrex seal by platinizing thin<br />
glass rod has been reported by G. F. TAYLOR (1929) and described in<br />
detail by C. C. COFFIN (1940). Pyrex rod of 1-2 mm diameter is<br />
coated with metallic platinum by dipping in a platinizing solution,<br />
allowing the excess to drain off, heating uni<strong>for</strong>mly in a smoky flame<br />
until a shiny black film appears and then slowly heating to redness to<br />
burn the film into the glass (see p. 87). Three to four coats are required<br />
and then the platinized rod can be sealed into a Pyrex tube<br />
directly. The platinum layer gives electrical conductivity. Coffin<br />
reports that 10-15 applications will give a layer sufficient to carry<br />
several amps.<br />
Special Alloys <strong>for</strong> Sealing to <strong>Glass</strong><br />
Tungsten and molybdenum, which have been used extensively <strong>for</strong><br />
metal~to-glass seals, suffer from the disadvantages of being expensive<br />
110
SPECIAL ALLOYS FOR SEALING TO GLASS<br />
and difficult to fabricate into rod and of being non-ductile. Platinum<br />
is not so difficult to fabricate, but it is very expensive. An attempt<br />
has been made, there<strong>for</strong>e, to replace these metals with metal alloys,<br />
and extensive research in recent years has been aimed at finding<br />
alloys whose thermal expansion characteristics match those of<br />
glasses in the range from room temperature to the upper annealing<br />
temperature of the glass The expansion coefficient of glass increases<br />
rapidly in the range between the lower and upper annealing temperatures<br />
and it has been found that magnetic Kovar-type alloys of nickel,<br />
iron and cobalt, sometimes with a little chromium, have thermal<br />
expansions which behave in this manner. With alloys of only nickel<br />
and iron the increased expansion rate sets in at too low a temperature;<br />
however, such wires coated with copper, <strong>for</strong>ming a Dumet<br />
alloy, are used extensively even to the present day in the lamp industry<br />
<strong>for</strong> sealing to soft glasses. A detailed survey of all the characteristics<br />
of the various alloys used <strong>for</strong> sealing to glass has been given by<br />
PARTRIDGE (1949).<br />
Copper-Clad Nickel-Iron Wires <strong>for</strong> Sealing to Soda <strong>Glass</strong><br />
Seals <strong>for</strong> carrying small currents through soft glass can be made<br />
using Dumet alloy wires. These are drawn from rod which consists of<br />
a core of 43 per cent nickel-iron alloy on which about 30 per cent of<br />
its weight of copper has been electrolytically deposited. Wires up to<br />
0-5 mm can be satisfactorily sealed into soft glasses. The seals are<br />
made in the normal manner but are left not fully annealed so that the<br />
glass remains in a state of compression in the longitudinal direction.<br />
The deposit of copper is sufficient to raise the total thermal expansion<br />
coefficient of the rod, in the radial direction, to the order of that of<br />
soda glass, but full annealing would result in a state of tension in the<br />
glass along the length of the seal.<br />
If the seals are to be used <strong>for</strong> vacuum work it is advisable to tip the<br />
ends of the drawn wire with nickel in order to seal up any fine<br />
channels that may open between the copper layer and the central<br />
alloy core.<br />
Nickel-lron-Cobalt Alloys <strong>for</strong> Sealing with Intermediate <strong>Glass</strong>es to<br />
Pyrex<br />
A large number of Kovar-typc alloys of iron, nickel and cobalt of<br />
slightly varying compositions are obtainable and are marketed under<br />
different manufacturers' names. Common examples are Fernico I<br />
(54 per cent Fe, 28 per cent Ni, 18 per cent Co), Fernico II (54 per<br />
cent Fe, 31 per cent Ni, 15 per cent Co), Nicosel, Telcoseal and Nilo.<br />
The last three all have a composition of the order 54 per cent Fe,<br />
111
METAL-TO-GLASS SEALS<br />
29 per cent Ni, 17 per cent Co and expansion coefficient of<br />
4*5 x 10- 6 /°C.<br />
All the above alloys seal well to several special sealing glasses of<br />
which B.T.H. C40, G.E.C. Lemington FCN, Kodial, Coming 7040,<br />
Corning 7052 and Corning 7060 are common. The choice of alloy<br />
and sealing glass depends (other than upon availability) upon the<br />
service requirements. All give very satisfactory seals <strong>for</strong> normal purposes,<br />
the residual strain being slight and negligible; while, <strong>for</strong><br />
instance, Fernico II and Nicosel (or Telcoseal) give practically completely<br />
strain-free joints with Coming 7060 and G.E.C. FCN respectively.<br />
For sealing to Pyrex glass a further intermediate glass is required<br />
in order that expansion coefficients become sufficiently matched. For<br />
example, when sealing B.T.H. C40 or G.E.C. FCN to Pyrex, C9 or<br />
W.I. can be used as intermediates. Another intermediate glass, such<br />
as Dial 43, may be desirable as a sandwich glass between the Kovarsealing<br />
glasses and the tungsten-sealing glasses. A Kovar to 7052 or<br />
7040 tubular seal can be joined to Pyrex (7740) via Nonex (7720) if<br />
the tubing is less than 1 cm diameter; while <strong>for</strong> larger tubmg 7052<br />
(or 7040) to 7050 to 7070 to 7740 is necessary.<br />
M etal-to~<strong>Glass</strong> Seals using Kovar Tubing<br />
Metal-to-glass seals with Kovar tubing up to about 8 mm<br />
can be made fairly com<strong>for</strong>tably by hand, but with tubing larger than<br />
this it becomes increasingly desirable to use a glass-working lathe so<br />
that uni<strong>for</strong>m seals are obtained. Firstly, square edges on the metal<br />
must be rounded off, and <strong>for</strong> this machining or filing is advised rather<br />
than grinding, since particles of abrasive are difficult to remove from<br />
the metal and great care must be taken. The metal is degreased and<br />
then cleaned by dipping in a solution of 10 per cent hydrochloric acid<br />
and 10 per cent nitric acid at 70°C, followed by thorough washing and<br />
drying. Touching of the cleaned portion of the metal, be<strong>for</strong>e the seal<br />
is made, should be avoided.<br />
The metal should be outgassed by heating in a stream of hydrogen<br />
<strong>for</strong> 3-4 hours at 900°C, otherwise bubbles will be <strong>for</strong>med in the glass<br />
and an unsatisfactory seal will result. With small size tubing, less<br />
than 8 mm diameter, this cleaning in hydrogen is not absolutely<br />
necessary but the resulting seal will be less strong hermetically and<br />
leaks may develop. A useful makeshift hydrogen furnace consists of<br />
a silica tube along which hydrogen is passed and which is kept glowing<br />
white hot with a bench torch. The hot hydrogen must not flow<br />
into the atmosphere and produce an explosive mixture.<br />
Tubing of the glass to be used should be chosen of diameter such<br />
112
SPECIAL ALLOYS FOR SEALING TO GLASS<br />
that the Kovar tubing just slides inside. A short length of cleaned<br />
metal tubing is mounted on a glass rod handle with asbestos tape and<br />
oxidized by heating to dull red heat. It is allowed to cool slightly and<br />
inserted inside the glass tube to a depth of 3 mm. The glass is then<br />
fused directly on to the metal starting from one end so that occluded<br />
air is driven out. The flame should be played on the glass and not on<br />
the metal. The glass tube is finally pressed lightly towards the metal<br />
tube so that it builds up slightly over the inside edge of this tube, the<br />
flame being directed at this portion during the operation (see FIGURE<br />
43,1). Slight blowing may be necessary. The resulting seal is grey m<br />
colour and is annealed in the same manner as a glass-to-glass seal.<br />
With larger tubing a small 3-mm long ring of glass can be fused on to<br />
the metal tube first (FIGURE 43, II) and the bulged end of the glass<br />
tube sealed to this (FIGURE 43, III). Much more satisfactory seals can<br />
be made employing a glass-working lathe, <strong>for</strong> then the glass can be<br />
Kovar} S f M $ kss<br />
/ ^ / 7 *****<br />
" * & *<br />
TESP<br />
I E M<br />
FIGURE 43. Sealing Kovar to a special sealing glass<br />
tooled into good contact with the metal and all air carefully squeezed<br />
out. Several types of lathe are available; the machine described in<br />
Chapter 6 is satisfactory <strong>for</strong> these seals.<br />
Copper-to-<strong>Glass</strong> Seals<br />
Most glasses adhere strongly to copper, but the coefficient of expansion<br />
of the metal (17 x 10~ 8 /°C) is much higher than that of all known<br />
technical glasses, resulting in a greatly mismatched seal. Copper is so<br />
ductile, however, that when specially shaped the metal will yield,<br />
relieving much of the stress and making the <strong>for</strong>mation of satisfactory<br />
copper-to-glass seals possible. The strong adhesion at the glassmetal<br />
interface results in a preference <strong>for</strong> the metal to give rather than<br />
to separate from the glass. A large contact surface between the glass<br />
and the metal is there<strong>for</strong>e provided. W. G. HOUSEKEEPER (1923) has<br />
reported in detail on the methods <strong>for</strong> sealing ductile metals to glass<br />
with special shaping of the metal at junctions. Oxygen-free high<br />
conductivity copper is the best type of copper <strong>for</strong> seals.<br />
Copper to soft glass seals are most easily made since the difference<br />
in expansion rates is least here, but satisfactory seals of copper to<br />
Pyrex can be <strong>for</strong>med with a little more care. A further factor with<br />
113
METAL-TO-GLASS SEALS<br />
hard glasses is that a higher working temperature is required and<br />
there<strong>for</strong>e the copper is subject to excess oxidation and the seal to a<br />
larger cooling range during which the stresses are set up.<br />
The method <strong>for</strong> sealing copper wire through any glass is the same<br />
as described <strong>for</strong> platinum through Pyrex. However, with copper the<br />
metal is very brittle after being worked and the seals are not frequently<br />
used. Copper wire can be sealed through glass if it is<br />
flattened to 0-05 mm thickness and the edges feathered. The flattened<br />
portion is cleaned, pre-oxidized by heating to red heat <strong>for</strong> a few<br />
seconds, allowed to cool, and then given a thin coating of borax.<br />
This is effected by dipping the prepared metal in borax solution and<br />
drying in the hot air above a flame. Borating of the copper prevents<br />
excess oxidation when the seal is worked and is there<strong>for</strong>e of much<br />
greater importance when employing hard glasses. With soft glasses<br />
it can be dispensed with but this is not advised if the seal is to be used<br />
in vacuum apparatus.<br />
The prepared flattened section is inserted into a glass sleeve shaped<br />
to fit, and the glass is fused on to the metal, pinched with tweezers<br />
and strongly heated. The seal must be carefully annealed. With soft<br />
glasses the copper glass interface is coloured red, while with harder<br />
glasses the colour is more of a yellowish red.<br />
Copper-to-<strong>Glass</strong> Tubular Seals<br />
Tubular seals can be made by several methods reported by HOUSE<br />
KEEPER, of which three are described here.<br />
In the first the copper tube is machined so that a cone-shaped<br />
flange is <strong>for</strong>med—30° to the axis of the tube—at the end to be sealed<br />
(FIGURE 44, /). The metal flange is oxidized and while still hot the<br />
molten end of the glass tube is pressed inside the cone and fused into<br />
contact. Care must be taken not to let any glass overlap the end of<br />
the copper tube, so that a seal is finally <strong>for</strong>med as shown in FIGURE<br />
44,//. Gentle blowing helps to shape the join. That the junction is<br />
bulky is the only disadvantage of this type of seal.<br />
In the other two kinds of seal the glass is allowed to overlap the<br />
edge of the copper tube, but this edge must be first machined to a fine<br />
5° taper. After pre-oxidizing this feathered edge by heating to red<br />
heat <strong>for</strong> a few seconds a well fitting glass tube can be fused to the<br />
outside or to the inside without allowing the oxidized metal to cool.<br />
The glass is bulged slightly over the feathered edge thus af<strong>for</strong>ding it<br />
protection. The seal to use (FIGURE 44, /// and IV) depends upon<br />
whether the seal is to undergo further heating or cooling in service,<br />
consideration being given to the fact that the copper will attempt to<br />
expand or contract much more than the glass.<br />
114
COPPER-TO-GLASS SEALS<br />
Since tubular seals can be made in this manner to both soft glass<br />
and hard glass, an intermediate copper tube can af<strong>for</strong>d a very useful<br />
method <strong>for</strong> making a soda-to-Pjrex seal. If Nonex is available a<br />
stronger join is obtained by using it between the copper and the<br />
Pyrex, because a lower working temperature is required <strong>for</strong> Nonex<br />
and thus, on cooling the worked seal, the copper has a shorter<br />
temperature range in which to contract at its greater rate.<br />
Disc Seals<br />
^<br />
Xc=<br />
I M<br />
Copper, , <strong>Glass</strong><br />
M IF<br />
FIGURE 44. Copper-to~glass seals<br />
Copper disc seals can be used <strong>for</strong> carrying a wire conductor into a<br />
glass tube: two pieces of glass tubing are flared, each at one end,<br />
and a copper disc is sealed between the two flared ends. A suitable<br />
thickness of disc <strong>for</strong> tubes of diameter 2 cm is about 0-3 mm.<br />
To make the seal one of the tubes is clamped vertically and the preoxidized<br />
disc is placed centrally upon the flare of this tube. <strong>Working</strong><br />
round the tube with a hand torch the glass is softened and the disc<br />
fused into place. With the seal still hot, the tube is removed from the<br />
clamp and, rotating by hand in a bench flame, the second glass flare<br />
A<br />
FIGURE 45. Copper-to-glass disc seals<br />
i\mvmmm^mmm^mi<br />
is fused to the disc, centrally and directly opposite the first (FIGURE 45,<br />
I)—if desired, the lower tube can be left clamped. Great care must<br />
be taken during these operations to see that no glass runs over and<br />
bridges the edge of the copper disc, otherwise fracture will result. After<br />
annealing, one of the glass tubes may be cut off near to the disc and a<br />
conductor wire may be soldered through the disc (FIGURE 45, IT).<br />
i 115
METAL-TO-GLASS SEALS<br />
<strong>Glass</strong> tubing must be sealed on either side of the disc in this manner<br />
so that stress is taken up by the disc contracting and not by it<br />
bending, which would fracture the seal. HOUSEKEEPER reports that a<br />
disc up to 2*5 mm thick has been used but the resulting seal would not<br />
stand heating or cooling.<br />
The copper disc, if thin, will distort fairly easily if there is a circular<br />
groove in it. This stratagem may be found useful if difficulty is<br />
experienced in making a disc seal.<br />
REFERENCES<br />
COFFIN, C. C, 1940, Canad. J. Res., 18B, 318.<br />
HOUSEKEEPER, W. G., 1923, /. Amer. Inst, elect. Engrs, 42,954.<br />
PARTRIDGE, J. H., 1949, <strong>Glass</strong>-to-Metal Seals; Sheffield, Society of<br />
<strong>Glass</strong> Technology.<br />
TAYLOR, G. F., 1929, /. opt. Soc. Amer., 18,138.<br />
116
Chapter 8<br />
THE CONSTRUCTION OF SOME<br />
TYPICAL SINGLE PIECES OF<br />
EQUIPMENT<br />
IN this Chapter we describe the construction of various pieces of<br />
apparatus by the methods of glass-working already described. All<br />
the apparatus mentioned below can be made by quite simple methods<br />
and without the use of the expensive items of glass-working equipment<br />
such as lathes, ovens, various wheels and so on. Many pieces<br />
of complex-looking apparatus are made merely by a succession of<br />
simple operations.<br />
Ampoules<br />
Ampoules (FIGURE 46, I) are used when a material, such as a biological<br />
fluid, has to be stored in a sealed-off glass vessel. To make an<br />
I Jf<br />
FIGURE 46. Ampoules<br />
ampoule of normal size, a tube about 4 cm long and 1 cm diameter is<br />
prepared with a spindle at each end: a uni<strong>for</strong>m taper is made at one<br />
end (FIGURE 46, IT); the tube is then heated at A and either rotated<br />
against a metal object or else sucked-in so that a shoulder is <strong>for</strong>med<br />
as in FIGURE 46, /—this shoulder is not necessary, however, and the<br />
operation may be omitted. The spindle at the other end of the tube is<br />
117<br />
A
SOME TYPICAL SINGLE PIECES OF EQUIPMENT<br />
taken off and a test-tube end (i.e. a rounded end) is made. This is run<br />
down by heating in a flame, and either pressed against a carbon plate<br />
or blown out against a carbon plate to <strong>for</strong>m a flat bottom on which<br />
the ampoule can stand.<br />
Special glasses <strong>for</strong> ampoules are mentioned on p. 24; Monax is also<br />
a good glass <strong>for</strong> ampoules.<br />
Sealed Tubes <strong>for</strong> Reactions<br />
Tubes <strong>for</strong> 'sealed tube' reactions, such as the Carius determination of<br />
halogens and sulphur, can be made from Pyrex, Monax or soda glass.<br />
The mechanical strength of the glasses is about the same, but a soda<br />
Carius tube is much more likely to crack as a result of thermal strain<br />
than a Pyrex or Monax one. The Carius tubes are usually made from<br />
tubing of approximately 20-25 mm diameter and 3 mm wall thickness—Pyrex<br />
extra heavy tubing of external diameter 22 mm has a<br />
wall thickness of 2*5-4 mm and can be used up to 600°C.<br />
To prepare a Carius tube, a length of tubing is cut off slightly<br />
longer than the furnace into which it is to go. A handle is attached<br />
to one end, which is then drawn off and rounded so that the round<br />
end has about the same thickness as the wall of the tube. The tube<br />
is cleaned, and the necessary chemical substances are introduced—<br />
<strong>for</strong> a halogen determination silver nitrate is added, using a paper<br />
cylinder so that none of the salt adheres to the walls except at the end<br />
of the tube. Nitric acid is added with a long thistle funnel, and finally<br />
the organic specimen in a small test tube is introduced. The open<br />
end of the tube has to be drawn off to a thick spindle and sealed while<br />
these substances are in the tube, so that the normal method of holding<br />
and rotating a tube horizontally cannot be used.<br />
Two methods <strong>for</strong> sealing the tube can be used: in one, the tube is<br />
held in one hand at about 45° to the vertical, a glass rod handle is<br />
attached to the open end, and a thick-walled spindle or capillary is<br />
put in, using a bench torch, in such a position that the final sealed<br />
capillary will project about 2 cm from the iron tube which will contain<br />
the Carius tube in the furnace. Following this operation, the<br />
capillary is sealed at the proper place be<strong>for</strong>e the tube has cooled.<br />
This ensures that the tube is cooling at the moment when it is finally<br />
sealed, so that as the gas inside contracts this final sealing is assisted<br />
by the atmospheric pressure which pushes the glass in. In the other<br />
method the tube is clamped vertically and a handle is attached to the<br />
top, open end. A thick-walled spindle is then put in the tube, using a<br />
hand torch flame played round the glass; if at first the spindle is too<br />
wide and too thin it is slowly thickened by shrinking in a flame which<br />
is not too hot. The end of the capillary is sealed off as be<strong>for</strong>e.<br />
118
SEALED TUBES FOR REACTIONS<br />
The external diameter of the tube and its wall thickness determine<br />
the pressure which it will stand. Failure of a tube is due to the tension<br />
at the surface becoming too great. For a cylinder of internal radius r<br />
and external radius R, and with an internal pressure in the cylinder of<br />
P, the maximum circumferential (or hoop) tension S (see A. MORLEY,<br />
1940) on the inner surface of the cylinder is<br />
Thus, if the maximum safe tension is 1000 lb/in. 2 (see p. 10), a Carius<br />
tube with 3-mm wall thickness and 2-cm external diameter is suitable<br />
<strong>for</strong> reactions at 340 lb/in. 2 . It is necessary to remember, of course,<br />
that the strength of glass under tension is a statistical quantity.<br />
Break-Tip Seals<br />
These seals separate two parts of an apparatus, and they can be<br />
broken by a slight mechanical blow. The simplest type is illustrated<br />
in FIGURE 47, //—the tip is broken off by a piece of iron, usually<br />
enclosed in glass, dropping under gravity. This weight is moved and<br />
lifted with a magnet.<br />
Flame<br />
I JT<br />
FIGURE 47. Break-tip seals<br />
The seal is made by cutting 1-cm diameter tubing to give one piece<br />
with a square end. Near the end of the other piece a spindle is drawn.<br />
The shoulder of the spindle is heated in a small hot flame so that it<br />
thickens, and then, with a fairly cool flame, the spindle beyond the<br />
shoulder is drawn out to a fine capillary about 1 mm diameter. This<br />
is heated in a very cool flame and bent first one way and then the<br />
other, as in FIGURE 47, //. The end is finally sealed off. The tip thus<br />
prepared is inserted into the square end of the other piece of tubing,<br />
as in FIGURE 47, /, and a joint is made by directing a small flame at<br />
119
SOME TYPICAL SINGLE PIECES OF EQUIPMENT<br />
the piece of tubing with the tip, and not at the square-ended piece.<br />
The joint is run down and blown out a number of times and then<br />
drawn out so that the outer tube has a constant diameter. It is<br />
essential to direct the flame only at the tube with the seal on the end<br />
of it, because if the other tube is heated strongly it will collapse on to<br />
the fine capillary.<br />
Distillation Flasks<br />
A round-bottomed flask can be made into a distillation flask simply<br />
by the addition of a side arm, which is added just as a side arm is<br />
added to a big flask (p. 92). The angle of the side arm to the neck is<br />
usually about 75° (FIGURE 48,7).<br />
FIGURE 48. Distillation flasks and<br />
Claisen flasks<br />
A Claisen flask of the type shown in FIGURE 48, 77, has a wide side<br />
arm sealed into its neck at an angle which, <strong>for</strong> convenience, is about<br />
45°. Any liquid in the side arm will then readily run back into the<br />
flask. A 45° joint of this kind can be made quite easily with a hand<br />
torch: a round end is put on the side arm, using a bench torch, and<br />
a hole is blown in this round end so that the plane in which the hole<br />
lies is at 45° to the tube axis. The wide side arm is joined to the flask<br />
neck, and the small side arm is then joined on.<br />
The small side arms are very often broken off distillation flasks,<br />
especially in teaching laboratories; the most common place of breakage<br />
is near or at the actual T-joint, and the neck of the flask is often<br />
cracked. The crack can be repaired easily if the flask is of a borosilicate<br />
glass, as described on p. 80, and with great care a similar<br />
repair is possible <strong>for</strong> soda flasks. The remaining stumpy portion of<br />
the side arm is then removed with <strong>for</strong>ceps and scissors, the hole is<br />
filled in with thin rod, and a new hole is blown <strong>for</strong> a new side arm.<br />
If the remaining part of the old side arm is long enough (over 1 cm)<br />
120
DISTILLATION FLASKS<br />
neces<br />
a new portion of tubing can be added.<br />
Distillation Splash Heads<br />
Splash heads are used in distillation to prevent the liquid in the distillation<br />
flask from splashing over into the condenser. Several types<br />
are used, but probably the simplest is the pear-shaped one shown in<br />
FIGURE 49, VI. A bulb is blown in the middle of a tube of about 1 cm<br />
diameter (FIGURE 49,I) and heated at B in a large flame, with rotation,<br />
so that, by blowing and pulling, the pear-shaped bulb of<br />
FIGURE 49, //, is produced. The tube at A is removed and the top of<br />
the bulb is rotated in the flame—this, with gentle blowing, should<br />
.IL<br />
FIGURE 49. The construction of a distillation splash head<br />
produce a fairly flat-topped bulb (FIGURE 49, III). The tube to <strong>for</strong>m<br />
the top part of the splash head is heated in a large flame and tapered.<br />
The top of the taper is next heated strongly with a small flame, and<br />
gentle pressure applied at both ends of the tube so that a ridge is<br />
<strong>for</strong>med (FIGURE 49, IV). The taper is then heated at D in a soft<br />
flame and bent round. The curved part is cut off (most easily in the<br />
flame) about 1 cm beyond the ridge, and the end is fire-polished (i.e.<br />
heated in the flame to smooth it). In the centre of the flat top of the<br />
bulb a hole is blown, just smaller than the size of the ridge; into this<br />
the curved part is inserted, and an internal seal is made either with a<br />
bench torch (Method 1, p. 73), or with a hand torch (p. 76), the<br />
<strong>for</strong>mer method is preferable. The final splash head is shown in<br />
FIGURE 49, VI.<br />
Dewar Seals<br />
The Dewar seal is important and useful, although a ring seal can<br />
sometimes be substituted in simple apparatus—as, <strong>for</strong> example, in<br />
the cold finger liquid air trap shown in FIGURE 52, ///. In the making<br />
121<br />
V<br />
vr
SOME TYPICAL SINGLE PIECES OF EQUIPMENT<br />
of a Dewar seal the preparation of the parts is of extreme importance.<br />
Basically, the inside tube is flared at one end, and the end of the outside<br />
tube is turned in so that with the two tubes coaxial the inward<br />
and outward flares meet as closely as possible.<br />
FIGURE 50, /, shows the ideal starting point <strong>for</strong> obtaining a good<br />
Dewar seal. The flare in the inside tube should be just large enough<br />
<strong>for</strong> this tube to be held up by its flared end when sitting inside the<br />
clamped outer tube. With small diameter tubing the flange on the<br />
inside tube can be made by simply blowing out the end with the glass<br />
/ \<br />
\<br />
I JT m<br />
rx on r\<br />
v vr VE<br />
FIGURE 50. Dewar seals<br />
/ \<br />
O n<br />
IF<br />
[\<br />
vm<br />
just slightly less hot than normal. To make the Dewar seal using the<br />
hand torch, the whole joint is warmed and then a portion at a time<br />
worked with a largish flame and enough oxygen to make it just nonluminous.<br />
The glass of the inside flare is pushed down with a spike or<br />
similar tool on to that of the outside tube, gradually working round<br />
the seal, and when blowing becomes possible a pin-point flame is<br />
used <strong>for</strong> blowing out and shaping a portion at a time.<br />
Welding rod is employed when necessary, but if the parts are<br />
prepared satisfactorily the flares should provide sufficient glass to<br />
alleviate the need <strong>for</strong> rod. With care it will also be unnecessary to<br />
hold the inside tube in position since only part of the joint is heated to<br />
122
DEWAR SEALS<br />
softening point at a time and, in the final annealing, if the seal is<br />
made well the inside tube will tend to hang centrally. However, the<br />
inside tube may easily be kept central with asbestos paper or corrugated<br />
cardboard or with copper wire that can be dissolved out with<br />
nitric acid. In making the seal care must be taken not to collapse the<br />
outer tube on to the inner just below the join; otherwise little difficulty<br />
should be encountered. The finished seal is shown in FIGURE 50, II<br />
If the starting parts are shaped as in FIGURE 50, III or F, the resulting<br />
seals will be bulged outwards or inwards respectively (FIGURE 50,<br />
IV and VI). These may satisfactorily serve their purpose but require<br />
extra careful annealing. If the flare of the inside tube is turned right<br />
back on itself (FIGURE 50, VII), then the final joint is most easily<br />
made.<br />
Dewar Vessels<br />
The work which led to the modern vacuum flask has been described<br />
by J. DEWAR (1896). Vacuum jacketed flasks are used extensively in<br />
scientific laboratories and can be constructed relatively easily: tubing<br />
is chosen to give a flask of the required size and, after the inside<br />
tube has been rounded off at one end, a Dewar seal to the outer tube<br />
is made at the other end (FIGURE 51, /). If a flask with a narrowed<br />
neck is required the parts must be prepared as in FIGURE 51, //, be<strong>for</strong>e<br />
the Dewar seal is made.<br />
The open end of the outer tube is then drawn off, a 1-cm tube B is<br />
attached, and a 2-mm internal diameter constriction is <strong>for</strong>med at A as<br />
shown in FIGURE 51, III. This is best done by rotation in a flame,<br />
but, if the tubing is too large <strong>for</strong> the operator to manipulate, it can be<br />
per<strong>for</strong>med with the apparatus clamped as described in Chapter 5.<br />
For efficient thermal insulation the inside walls of the jacket should be<br />
silvered, and the silvering is per<strong>for</strong>med at this stage of the construction<br />
by the methods described on p. 85 and in some detail by W. E<br />
BARR and V. J. ANHORN (1949). FIGURE 51, IV, shows a simple<br />
stratagem <strong>for</strong> filling and emptying the jacket with the cleaning and<br />
silvering solutions respectively. After cleaning and drying, the<br />
silvered vessel is ready <strong>for</strong> evacuation and sealing off.<br />
Evacuation of Dewar Vessels<br />
<strong>Glass</strong> under vacuum slowly releases gas and vapours (p. 16) and<br />
there<strong>for</strong>e, in order that a good vacuum will be retained in the closed<br />
jacket, it is necessary to outgas the evacuated jacket be<strong>for</strong>e sealing<br />
off. As shown by I. LANGMUIR (1918) and described by Barr and<br />
Anhorn, the most effective outgassing is obtained when the evacuation<br />
is carried out in two or more stages of decreasing temperature.<br />
123
SOME TYPICAL SINGLE PIECES OF EQUIPMENT<br />
The prepared flask is supported so that the tube B can be sealed<br />
to a vacuum system. If a suitable furnace is available the flask is<br />
surrounded by this, with the constriction A still within reach of the<br />
hand torch flame; otherwise the heating must be done by flame. A<br />
liquid air trap is included between the flask and diffusion pump.<br />
With a vacuum of below 10~ e mm of mercury the temperature of the<br />
flask is raised to near the softening point—the heating may be rapid<br />
n<br />
/ E<br />
**r<br />
m FIGURE 51.<br />
Construction of<br />
Dewar flasks<br />
To vacuum pump<br />
with unsilvered vessels, but must be very slow when the walls have<br />
been silvered. With Pyrex glass (Corning No. 7740) a temperature of<br />
550°C is held <strong>for</strong> about one hour; the temperature is then reduced to<br />
about 400°C and this held <strong>for</strong> a further thirty minutes with continuous<br />
pumping. With the flask still at about 400°C the glass is slowly<br />
collapsed at the constriction A, allowing four or five minutes <strong>for</strong> this<br />
process to enable the heated glass in this region to outgas thoroughly.<br />
The tip on the bottom of the flask is rounded and annealed, and the<br />
flask then allowed to cool as auicklv as possible without setting up<br />
Both commercial and home made Dewar flasks used in the laboratory<br />
should be wound along the whole of their length with adhesive<br />
124
DEWAR VESSELS<br />
tape <strong>for</strong> safety. This prevents them exploding and shattering in the<br />
event of fracture which sometimes results from strain set up during<br />
pouring refrigerants, particularly lique fied gases, into or out of the flask.<br />
Cold Finger Refrigerant Traps<br />
Cold finger refrigerant traps are often used in vacuum lines as a<br />
substitute <strong>for</strong> the more efficient total immersion traps which, however,<br />
tend to cut down the pumping speed of the system. In constructing<br />
a cold finger trap a Dewar seal is first made, then, be<strong>for</strong>e<br />
rx<br />
I E M<br />
FIGURE 52. Construction of cold finger refrigerant<br />
traps<br />
annealing, a small hole is blown out near to the seal (FIGURE 52, 7)<br />
and a prepared side arm sealed in position. Care must be taken to<br />
keep the far side of the Dewar seal tube hot while the side arm is<br />
being added, to prevent cracking; finally the whole is annealed. The<br />
finished trap is shown in FIGURE 52, 77.<br />
FIGURE 52, 777, shows how a quite satisfactory cold finger trap can<br />
be made with the Dewar seal replaced by a straight<strong>for</strong>ward internal<br />
seal. As be<strong>for</strong>e, the side arm must be added immediately the internal<br />
seal is completed and the whole annealed together.<br />
For high vacuum work, where it is desirable to shorten the pumping<br />
path to a minimum, a useful built-in cold trap is shown in<br />
FIGURE 52, F. The outer jacket is prepared from a round-bottomed<br />
flask to which the side arms are attached, as shown in FIGURE 52, IV.<br />
The inner tube is shaped with a flare at its upper end and its heated<br />
125
SOME TYPICAL SINGLE PIECES OF EQUIPMENT<br />
lower end is thickened and eollapsed as <strong>for</strong> making a bulb (p. 71).<br />
The lump of white hot molten glass is lowered through the top side<br />
arm of the outer jacket and the bulb blown steadily and firmly to the<br />
required size. Contrary to expectation it is found that the hot molten<br />
glass does not adhere to the cold outer tube when it comes into contact<br />
with it, provided the lowering operation is per<strong>for</strong>med quickly.<br />
The trap is finished by making a Dewar or ring seal at the upper end.<br />
An unskilled worker will find, with practice, that it is possible to<br />
make small, bulbular, cold finger traps of this type <strong>for</strong> pumping lines<br />
up to 25-30 mm diameter. Anything larger requires a skilled hand.<br />
With all these cold finger traps the rate of loss of refrigerant is<br />
much greater than from the Dewars whose inner surfaces are silvered<br />
to cut down radiation losses.<br />
Filter Pumps<br />
It is advisable be<strong>for</strong>e making a piece of apparatus such as a<br />
pump to prepare all the separate components, since the work, if left<br />
whilst a component is made, may crack on re-heating—in fact if soda<br />
glass is used it probably will do so. Hence <strong>for</strong> a filter pump of the<br />
type shown in FIGURE 53, F, the jet, the cup, the side arm and the<br />
tube <strong>for</strong> the jacket are first made separately.<br />
The jet is made from tubing of about 1 cm diameter: the tubing<br />
is strongly heated and a ridge put in. Another ridge is made about<br />
1-5 cm below the first, and a taper is made 4-5 cm long with the<br />
shoulder about 1 cm below this last ridge. A ridge is then made<br />
at the shoulder of the taper, and the end of the taper is cut off and<br />
fire-polished (FIGURE 53, /).<br />
The side arm is made from tubing of about 0-5 cm diameter by<br />
drawing a spindle and making a ridge just above the shoulder. The<br />
:ass is cut off 1-2 cm from this ridge (FIGURE 53, II).<br />
The jet is sealed into the jacket with an ordinary internal seal<br />
(Method 1, p. 73), and the side arm is attached at the shoulder; the<br />
jet must be perfectly central (FIGURE 53, III),<br />
The cup is then made: a piece of tubing of the same diameter as<br />
the jacket (about 1-5 cm) is joined to a tube of the same size as the jet<br />
tubing. A slight taper is made in the smaller tubing, and a ridge made<br />
at the shoulder of the taper. A bulb is blown at the end of the taper.<br />
This is not very easy since the glass is usually very thin at first—the<br />
bulb must be blown and shrunk a number of times until enough glass<br />
has been accumulated to blow a strong bulb. It should be 3-5 mm<br />
diameter (FIGURE 53, IV). The end of the bulb is blown out and<br />
spun (p. 73) to give a thistle funnel shape (B, FIGURE 53, V). The hole<br />
should be just bigger than the end of the jet.<br />
126
FILTER PUMPS<br />
The end of the jacket is rounded off so that when the cup is inserted<br />
the jet will be just inside the cup. The cup is next sealed in<br />
with an internal seal. The larger tube is then rounded off at C<br />
(FIGURE 53, F), and a side arm is put on at the bottom and bent<br />
round. Lastly, the two side arms are cut off and fire-polished to give<br />
the final pump seen in FIGURE 53, F.<br />
^VWv<br />
I M M IF<br />
FIG. 53. The construction of a filter pump<br />
Phosphorus Pentoxide Traps<br />
Water vapour and some organic vapours are readily removed from a<br />
gas stream by phosphorus pentoxide traps. A simple trap is shown<br />
in FIGURE 54, /; A is the P205 boat.<br />
In most cases a tube of 2 cm diameter will suffice <strong>for</strong> housing the<br />
boat, and to one end of such a piece of tubing is sealed a ground glass<br />
socket B. The other end is rounded off at the required length. At C<br />
and D two T-junctions are <strong>for</strong>med to tubing 8—10 mm diameter and<br />
these side tubes are bent to the desired shape. A stopper E is made<br />
from the appropriate standard cone as shown. Vacuum grease or<br />
107<br />
V
SOME TYPICAL SINGLE PIECES OF EQUIPMENT<br />
wax is used <strong>for</strong> sealing the stopper in place. In this way the P2Os boat<br />
can be easily recharged. When building the trap into an apparatus,<br />
the side arms at C and D should point upwards so that any phosphoric<br />
acid syrup spilt from the boat will not get into the system.<br />
Phosphorus Pentoxide Boats<br />
A satisfactory P2Os boat can be readily made from glass tubing: a<br />
short length of suitable diameter is cut along its length (FIGURE 54,<br />
//) either on a cutting wheel or by leading two cracks along the<br />
length of the tube on opposite sides—this latter operation is fairly<br />
easy with soda glass. Using one half, each end in turn is heated and<br />
O<br />
FIGURE 54. Phosphorus pentoxide trap<br />
\<br />
IN ^<br />
bent upwards, then finally shaped with tweezers to <strong>for</strong>m a closed end<br />
as shown. A pin-point flame is used <strong>for</strong> sealing the seams. Finally<br />
the long edges are fire-polished and the boat annealed carefully.<br />
A less elegant P205 boat can be made much more quickly by the<br />
following method: the glass tube to be used is closed at each end<br />
with a spindle so that the proper length is obtained. A hole is blown<br />
somewhere in the side of the tube, and the glass is strongly heated at<br />
one side of this hole and pulled away with <strong>for</strong>ceps. This process is<br />
continued until the glass has been removed from one whole side of<br />
the tube. The ends are then worked with <strong>for</strong>ceps and tweezers to<br />
give the final boat. This method avoids both the use of a cutting<br />
wheel, and the cracking of a tube along its length, an operation which<br />
does not always go well because the crack may wander in the wronj<br />
Condensers<br />
The construction of a water-cooled condenser is a good example of a<br />
case where all the parts must be prepared, and at hand, be<strong>for</strong>e the<br />
final assembly is begun. There are several methods commonly in<br />
practice <strong>for</strong> setting about the construction; FIGURE 55 shows one of<br />
these.<br />
Lengths of tubing are chosen of suitable diameter <strong>for</strong> the inner tube<br />
and the jacket. An internal seal (ring seal) is <strong>for</strong>med at one end and a<br />
side arm, bulged to take rubber condenser tubing, is immediately<br />
128<br />
M
CONDENSERS<br />
added near to the ring seal while the latter is still hot. Thus, after<br />
annealing, the stage shown in FIGURE 55, //, is reached. Then, at a<br />
point giving the required length of the condenser, the outer tube is<br />
collapsed on to the inner tube and the two are pulled off together<br />
xz<br />
\ :<br />
/ ff<br />
M IF<br />
V<br />
FIGURE 55. A method of making a condenser<br />
(see p. 76) to a spindle (FIGURE 55, III). Excess glass is pulled away<br />
so that a rounded end is <strong>for</strong>med. Blowing through the side arm at the<br />
far end prevents the outer tube shrinking on to the inner behind the<br />
ring seal; while blowing down the central tube allows the end of this<br />
/<br />
n<br />
in \<br />
FIGURE 56. A method of making<br />
a condenser<br />
to be thinned and finally blown out as shown. A prepared piece is<br />
then immediately added to the central tube (FIGURE 55, IV) followed<br />
by the side arm attached to the water jacket. Careful annealing of<br />
this whole end is required to relieve as much strain as possible from<br />
the apparatus. The finished condenser is shown in FIGURE 55, V. If<br />
129<br />
•<br />
•s
SOME TYPICAL SINGLE PIECES OF EQUIPMENT<br />
the outer tube has subsequently to be heated <strong>for</strong> any further glass<br />
blowing, very careful warming is required because, at either ring seal,<br />
the outer tube heats more quickly than the inner and there<strong>for</strong>e tends<br />
to draw away from the latter.<br />
A second method of construction is to <strong>for</strong>m the first ring seal and<br />
side arm from the prepared parts shown in FIGURE 56, J. Tbe inner<br />
tube is slightly flared at the far end from the ring seal. In the second<br />
stage of the construction the outer tube is drawn off so that the<br />
shoulder is very close to this flared end (FIGURE 56, II). The shoulder<br />
x:<br />
v<br />
f<br />
n<br />
m i ) n<br />
FIGURE 57. A method of FIGURE 58. A condenser with a<br />
making a condenser bulbular inner tube<br />
is shrunk on to the inside flare and, again with blowing through the<br />
far side arm, a ring seal is <strong>for</strong>med. The condenser is then finished as<br />
be<strong>for</strong>e.<br />
In the third method the outside tube is rounded off at one end and<br />
the inside tube prepared with a large flare and a small flare at opposite<br />
ends as seen in FIGURE 57, J. A butt ring seal is first <strong>for</strong>med at the<br />
closed end of the outer tube. This is blown out as shown in FIGURE<br />
55, IV, a piece added to the central tube, and a side arm added to<br />
the stage represented in FIGURE 57, //. In the last stage the outer tube<br />
is shrunk on to the inner flare <strong>for</strong>ming a large ring seal and the<br />
second side arm added. This method gives a finished condenser as<br />
shown in FIGURE 57, ///.<br />
If the internal tube is required to be of some special shape, bulbular<br />
or in the <strong>for</strong>m of a spiral <strong>for</strong> example, then the best method of<br />
approach is probably the first method described above: the inner<br />
tube is first shaped as required and the outer jacket made to fit as in<br />
FIGURE 58, /. The ring seal can be <strong>for</strong>med at one end and the side<br />
130<br />
I
CONDENSERS<br />
arm added to give the stage shown in FIGURE 58, //. Finally both tubes<br />
are drawn off at the far end to give a ring seal and the condenser is<br />
finished as in FIGURE 55, IVand F.<br />
Fractional Distillation Condensers<br />
A condenser of the type shown in FIGURE 59 is often called a fractional<br />
distillation condenser and was advocated by H. Jackson,<br />
Professor of Chemistry at King's College, London—hence the condenser<br />
is sometimes called a King's College condenser. It can be used<br />
as an ordinary condenser and as a reflux condenser. To make it, a<br />
8<br />
C<br />
FIGURE 59. A fractional<br />
distillation condenser<br />
piece of 3-cm diameter tubing is joined to 8-mm diameter tubing by a<br />
taper (Z>). 1-5-cm diameter tubing, <strong>for</strong> the water circulation, is<br />
drawn out to a taper at its end, and closed. 8-mm diameter tubing is<br />
prepared <strong>for</strong> the side arm A and 5 mm tubing <strong>for</strong> the water inlet and<br />
outlet tubes B and C. The 3 cm tubing is rounded off and a hole<br />
blown just large enough to let the 1-5 cm tube slide into it. A normal<br />
internal seal is next made, but in this case the joint must be blown<br />
from both ends. The side arm A is then added, followed by the side<br />
arm C. The larger tubing to which C is joined is then rounded off,<br />
blowing through C, and the central tube B is inserted in the usual<br />
way, but the internal seal is somewhat more difficult to make since<br />
the side arm C is already present. The whole apparatus requires<br />
careful annealing.<br />
Alternatively, the whole water-circulating part can be made separately<br />
and internally sealed into the wide tube, using a hand torch, and<br />
131
SOME TYPICAL SINGLE PIECES OF EQUIPMENT<br />
blowing from both ends. Another design employs a Dewar seal as in<br />
FIGURE 52, II, and the water-carrying tubes are inserted with a rubber<br />
Fractionating Columns<br />
These are devices <strong>for</strong> establishing contact between ascending vapour<br />
and descending liquid in a distillation. A variety of columns can be<br />
made. Perhaps the simplest (FIGURE 60, II) consists of a support in a<br />
tube on which a packing rests, made up of short glass tubes, glass<br />
rings or pieces of metal gauze. The support <strong>for</strong> this packing is made<br />
I<br />
E<br />
m ir v<br />
FIGURE 60. Two types of fractionating column<br />
by heating the tube with a small hot flame and pushing the wall in<br />
with a spike almost to the centre of the tube; this is done a number of<br />
times to give the support shown in FIGURE 60, /. A thorough annealing<br />
should be given.<br />
Another fractionating column consists of a number of pear-shaped<br />
bulbs (FIGURE 60, F). A series of bulbs is blown (FIGURE 60, III), and<br />
their ends are heated and blown and drawn so that pear-shaped bulbs<br />
are <strong>for</strong>med (FIGURE 60, IV). The ends of these bulbs are heated (at A<br />
etc.) and they are gently pushed in. The column should then be<br />
thoroughly annealed. The whole sequence of operations can be<br />
carried out very easily with a glass-working machine.<br />
A Fractional Distillation Receiver<br />
A receiver <strong>for</strong> low pressure distillations designed by G. A. R. KON<br />
(1930) is quite easy to make: the joints D and C (FIGURE 61<br />
both standard B.19 joints; the two taps at A andiJare standard designs<br />
of three-way taps. For the part G a tube of about 3 cm diameter<br />
132
A FRACTIONAL DISTILLATION RECEIVER<br />
is joined at both ends to tube of about 8 mm diameter. One of the<br />
small tubes is joined to the tap B, To prevent distortion of the<br />
barrel of this tap, the joint should be made 1-2 cm away from the<br />
An internal seal is made into the cone D and a side arm<br />
attached. The top of the internally sealed tube is then joined to the<br />
tap.B. The two tubes E and Fare joined to the tap A. The socket C is<br />
then joined to the larger tube.<br />
F<br />
£<br />
FIGURE 61. A fractional distillation receiver<br />
An advantage of this receiver is that receiving vessels connected at<br />
D can be taken off and put on without altering the low pressure in the<br />
main apparatus. When tap B is shut during the operation of changing<br />
a receiver the distillate collects in G.<br />
Double Surface Condensers<br />
A simple <strong>for</strong>m of double surface condenser that can be made ^<br />
too great difficulty by an unskilled worker is shown in FIGURE<br />
The parts seen in FIGURE 62, 7, must first be prepared.<br />
The ring seal at A is made in the early stages and is p<br />
annealed. This part of the assembly is then inserted into the pi<br />
tube B which is held clamped, and, when seated well, is itself c<br />
(FIGURE<br />
133<br />
6
SOME TYPICAL SINGLE PIECES OF EQUIPMENT<br />
up the whole area slowly and uni<strong>for</strong>mly the ring seal at D is now<br />
made by tooling, a little at a time, the glass flare of tube B on to the<br />
\ / /<br />
(<br />
I E<br />
IF<br />
c<br />
D<br />
8<br />
Wafer<br />
Wafer<br />
FIGURE 62. A simple <strong>for</strong>m of double surface condenser<br />
bulge of the inner tube. Care must be taken to keep the whole of both<br />
ring seals hot while this is being done; a large flame should there<strong>for</strong>e<br />
be used and only reduced to a sharp hot flame <strong>for</strong> the final blowing<br />
out. The water outlet tube E is added while the whole area is hot.<br />
134
DOUBLE SURFACE CONDENSERS<br />
This tube can be held by Jiand and a pin-point flame used to seal it in<br />
position. Every few seconds the flame size should be increased and the<br />
far side of the assembly re-warmed be<strong>for</strong>e continuing the sealing of E in<br />
position. Finally the whole section must be very carefully annealed.<br />
The assembly may now be clamped ready <strong>for</strong> the final large ring<br />
seal as in FIGURE 62, III. For this operation, and to a lesser extent <strong>for</strong><br />
that described in the previous paragraph, it is advisable to have a<br />
second worker, also with a hand torch, who can keep the far side of<br />
the apparatus hot while one side is being worked. Extra careful<br />
warming up is required at this stage be<strong>for</strong>e the large final ring seal can<br />
be made. The warming should be commenced with hot air <strong>for</strong> about<br />
10 minutes, then with the tips of large luminous flames and finally<br />
with slowly increasing oxygen content. It will be found with such a<br />
procedure that the initial double ring seal will survive without cracking.<br />
The large ring seal is then worked in the same manner as the seal<br />
A and, with the entire section kept hot, the side arms F and G are<br />
added. This region with three ring seals needs extremely careful annealing.<br />
We have found, however, that flame-annealing is adequate.<br />
The completion of the outer water jacket, with ring seal at H and<br />
water inlet tube J, is relatively straight<strong>for</strong>ward. The tubes G and C<br />
may be joined with a short piece of condenser tubing, though a more<br />
elegant finish to the condenser is achieved if they are bent and sealed<br />
to give a closed circuit as in FIGURE 62, IV. If this is done the upper<br />
ring seals must be very carefully protected with asbestos paper, but<br />
otherwise the procedure \$ again straight<strong>for</strong>ward.<br />
The design of this double surface condenser can be changed as<br />
desired; <strong>for</strong> example, FIGURE 62, V, shows a double surface reflux condenser<br />
which may be made by modifying the above general procedure.<br />
The type of double surface condenser most often found in laboratories<br />
is the 'Davies improved double surface condenser' which<br />
appeared in 1905, and was designed by J. Davies of A. Gallenkamp &<br />
Co. as a direct development from Thresh's modification of the Bidet<br />
condenser. All rubber bungs and tubing were eliminated in the<br />
Davies condenser, which has retained its popularity <strong>for</strong> 50 years. To<br />
make a condenser of this kind the inner water jacket is connected to<br />
the outer one by two internal seals which are made by a slight<br />
modification of Method 2 described on p. 75. The rest of the<br />
assembly is similar to that <strong>for</strong> an ordinary Liebig condenser.<br />
Mercury Cut-offs<br />
Mercury cut-offs are used in vacuum apparatus instead of taps when<br />
tap grease is undesirable. A frequently used type is shown in FIGURE<br />
63. A two-way tap is attached at the top of a reservoir <strong>for</strong> mercury.
SOME TYPICAL SINGLE PIECES OF EQUIPMENT<br />
The t<br />
down into the reservoir, but this necessitates very careful annealing.<br />
It is easier to first join the capillary to normal tubing of equal external<br />
diameter, and then to seal this normal tube into the larger tube. The<br />
top part of the cut-off consists of an internal seal at B and a side arm.<br />
This cart is connected to the reservoir bv about 70 cm of catrillarv<br />
FIGURE 63. A mercury cut-off<br />
Vacuum<br />
Atmosphere<br />
tube, which gives strength and reduces the volume of mercury required.<br />
To use the cut-off the mercury level is raised and lowered<br />
between C and D.<br />
W. E. BARR and V. J. ANHORN (1949) describe a mercury cut-off<br />
with mercury return lines which prevent mercury surging into a<br />
vacuum system.<br />
McLeod Gauges<br />
The McLeod gauge is one of the oldest instruments <strong>for</strong> the measurement<br />
of vacua and it has remained virtually unchanged since its<br />
introduction in 1874 (H. MCLEOD, 1874).<br />
A simple bench type McLeod gauge is shown in FIGURE 64, III.<br />
Be<strong>for</strong>e starting to make such a gauge an estimate should be made of<br />
136
JL<br />
MCLEOD GAUGES<br />
the volume required to give pressure readings in the required range:<br />
a gauge with a volume of 300 ml and using 0*75-mm bore capillary<br />
may be used to read pressures of 10" 5 mm of mercury with reasonable<br />
accuracy, but if relatively high pressures are to be measured it will be<br />
more satisfactory to use wider bore capillary, say 2 mm. This avoids<br />
difficulties encountered with mercury sticking in the capillary. The<br />
bore of the capillary should be determined accurately by direct<br />
measurement along its length to ensure uni<strong>for</strong>m bore—unless<br />
H I<br />
vacuum<br />
To atmospWe<br />
FIGURE 64. A McLeod gauge <strong>for</strong> bench use<br />
precision-bore tubing is used. This precision-bore tubing may be<br />
contaminated by the lubricant used to prevent it sticking to the metal<br />
mandrel used in its manufacture, and consequently great care should<br />
be taken in cleaning it. Stripping the surface with hydrofluoric acid<br />
gives a uni<strong>for</strong>m clean surface if normal cleaning methods fail.<br />
The simplest way of making a McLeod gauge is to make it in two<br />
basic sections which are finally joined together. Since the capillary<br />
on both parts of the gauge should be identical in bore and in surface<br />
properties, it is test to make use of a single length of tubing so that<br />
both capillaries are subjected to identical cleaning procedures. The<br />
capillary should be carefully inspected <strong>for</strong> particles of dirt which may<br />
137<br />
[V
SOME TYPICAL SINGLE PIECES OF EQUIPMENT<br />
not have been removed by the cleaning. FIGURE 64 shows a gauge<br />
fitted to the mercury reservoir by a standard ground joint; this is<br />
usually the easiest method of assembly.<br />
The part in FIGURE 64, //, can be made either by blowing a bulb of<br />
suitable volume or by using a round-bottomed flask. If the latter is<br />
used a slight bulge should be blown centrally in the bottom so that a<br />
sharp shoulder is avoided at the capillary seal. A 15-20 cm length of<br />
capillary is sealed to this bulge and its upper end left open. This<br />
capillary can then be used as a handle and blowing tube <strong>for</strong> the subsequent<br />
work on the neck of the flask. The neck of the flask should then<br />
be drawn down, a smaller tube joined to it and cut off short to <strong>for</strong>m<br />
the inner tube defining the cut-off volume. Alternatively, the cut-off<br />
volume can be defined by sealing a flanged tube into the neck of the<br />
flask, which then does not have to be drawn down. The standard<br />
cone is then joined to the mercury supply tube by a ring seal to the<br />
flared out end of the tube. This part is then joined to the end of the<br />
flask as shown, allowing sufficient room between the two seals <strong>for</strong> the<br />
attachment of the side arm to the vacuum system. The two side arms<br />
should be inserted while the glass is still hot from working the internal<br />
seals and the whole section annealed thoroughly.<br />
The next step is the calibration of the cut-off volume: this can be<br />
done by filling with water and weighing the volume contained in the<br />
capillary and bulb up to the cut-off point; <strong>for</strong> small volumes mercury<br />
is a better medium but becomes unmanageable <strong>for</strong> larger volumes.<br />
Once a satisfactory volume calibration has been obtained the end of<br />
the capillary is closed to a square end. This can be easily achieved by<br />
drawing down a piece of glass rod until it just fits into the bore of the<br />
capillary and cutting a short length of this rod to plug the end of the<br />
capillary be<strong>for</strong>e fusing it. If this is done carefully the capillary will be<br />
closed with a square end and the walls of the tube will not be distorted<br />
at the end of the gas column, which introduces uncertainties in<br />
reading this position. It is important to avoid lens effects here if<br />
accurate readings are to be obtained.<br />
The part of the gauge in FIGURE 64, 1, is simply constructed by<br />
lengths of normal tubing to either end of the length of<br />
capillary, bending these to a suitable angle and blowing out the ends.<br />
One end of this composite tube is then blocked with a stopper, and<br />
the other end joined to the main tube at an angle by a normal T-joint<br />
A hole is then blown in the main tube <strong>for</strong> the second T-joint and the<br />
shape of the bends in the tubing is adjusted by gentle heating and<br />
bending until the end is brought into close contact with the hole. This<br />
joint is then completed. The parts /and //(FIGURE 64) are then joined<br />
so that the two capillaries are parallel and a few millimetres apart,<br />
138
MCLEOD GAUGES<br />
A useful safety precaution is to draw the end of the tube dipping<br />
into the mercury reservoir down to a capillary to retard the rate of<br />
flow of mercury into the gauge if excessive air pressure is a<br />
accidentally. The drawing down of the air inlet on the two-way stopcock<br />
makes the gauge much easier to operate. Various other methods<br />
have been used <strong>for</strong> raising and lowering the mercury in the gauge but<br />
the most convenient and most widely used is that shown—the use of<br />
atmospheric pressure and a low vacuum which can be supplied by a<br />
normal water pump if necessary. If this method is used it is advisable<br />
to have the high vacuum connection at more than atmospheric height<br />
above the mercury reservoir.<br />
FIGURE 65. A small rotating<br />
type of McLeod gauge<br />
The range of a McLeod gauge may be extended by using various<br />
sized tubes in conjunction with a small diameter capillary and similar<br />
sized compensating tubes (L. DUNOYER, 1926). In this way comparatively<br />
high pressures may be determined on the same gauge as may<br />
low pressures. The calibration technique is more complex as the<br />
volume is not a simple fraction of the length of the compressed gas<br />
column (see FIGURE 64, IV).<br />
Small McLeod gauges have been developed <strong>for</strong> rapid pressure<br />
measurements: they avoid the tedious raising and lowering of a large<br />
volume of mercury by the gauge rotating about a ground glass joint<br />
in the high vacuum connection. A gauge of this type is shown in<br />
FIGURE 65. The volumes used are relatively small and can be made<br />
conveniently from short lengths of tubing; the reservoir bulb should<br />
be large enough to permit free passage of gas into the gauge when all<br />
the mercury is in the reservoir. The volume of mercury required is<br />
determined by the volume of the bulb and the volume of the tubing<br />
139
SOME TYPICAL SINGLE PIECES OF EQUIPMENT<br />
—the mercury level in the compensation capillary should be level<br />
with the top of the closed capillary when the gauge is in a vertical<br />
position and under vacuum. These gauges are best calibrated against<br />
a normal type of gauge.<br />
Traps to catch Mercury displaced in Apparatus<br />
When parts of an apparatus contain mercury, as in cut-offs and<br />
McLeod gauges, it very often happens that air rushing in or out of the<br />
system will displace mercury in an undesirable manner. With cut-offs<br />
across a differential pressure, bubbling of gas through mercury is<br />
unavoidable, and in tubing of internal diameter less than 3^4 mm<br />
bubbling will not occur but the gas will raise a column of mercury in<br />
front of it. It is there<strong>for</strong>e desirable to insert anti-splash traps wher-<br />
ii * S r<br />
/ m<br />
FIGURE 66. Trap <strong>for</strong> catching displaced mercury<br />
ever bubbling is likely to occur. A simple <strong>for</strong>m of trap is shown in<br />
FIGURE 66,777.<br />
In the construction a bulb of the required size is first blown and<br />
then a bulge is <strong>for</strong>med at A (FIGURE 66, I): the tip of the bulge is<br />
blown out resulting in a hole which will just take the size of tubing<br />
being used. A short piece of tubing is bulged and bent to shape<br />
(FIGURE 66, II) and a ring seal is <strong>for</strong>med at A. Care must be taken to<br />
see that the lower end of the inside tube finally slopes downwards so<br />
that drops of mercury will not lodge in it.<br />
Valves<br />
Valves are of two kinds: those meant to close a system as far as<br />
possible, and those designed to operate as check valves which reduce<br />
the flow through a system.<br />
A simple and effective check valve which impedes the flow of mercury<br />
is seen in FIGURE 67, L It consists of a small plunger floating on<br />
mercury, which is pushed into a seating when the mercury level rises.<br />
The plunger P is made by blowing an elongated bulb at the end of a<br />
140
VALVES<br />
tube and then drawing out a neck. The bulb is about half filled with<br />
mercury and the neck sealed off. The tube C is joined to the tube A<br />
and the edge of the join at B is heated in places and pushed in to <strong>for</strong>m<br />
a few spikes to hold the plunger (FIGURE 67, //). The plunger is then<br />
inserted in C; the end of C is rounded off and D is joined. This must<br />
be done with the tubing held vertically, or nearly so, to prevent the<br />
plunger coming in contact with the hot glass; the joint can be made<br />
very easily with a hand torch.<br />
Valves that are to close a system must have two surfaces which<br />
make intimate contact; this is readily effected by grinding the plunger<br />
A<br />
C<br />
B<br />
M JV n<br />
FIGURE 67. Some kinds of valves<br />
into its seating. A simple design is illustrated in FIGURE 67, ///: the<br />
plunger is made by blowing a bulb on the end of a small tube, heating<br />
the end of the bulb, touching it with a piece of hot glass, and pulling<br />
out into a conical shape. The plunger must be able to pass down the<br />
tubing to be used as C. The tubing A is joined to B by a taper with an<br />
angle equal to that of the head of the plunger, and the plunger is<br />
ground into this taper with fine carborundum until a continuous<br />
ground band 1-2 mm wide is <strong>for</strong>med on the glass. The cone is then<br />
washed and dried, and B is joined to C. The end of the plunger is<br />
tapered as shown, mercury is added, and the plunger is sealed off and<br />
put into B through C. The junction of C and B is then pushed in at a<br />
few places so that the glass spikes just allow enough freedom of<br />
movement of the plunger.<br />
Instead of a glass plunger a ball bearing may be used, as in FIGURE<br />
67, IV and V. In both of these examples a larger tube is joined to<br />
a smaller tube and the joint is ground to fit the ball bearing. The<br />
141
SOME TYPICAL SINGLE PIECES OF EQUIPMENT<br />
grinding can be carried out with the ball bearing or with a glass grinding<br />
tool of diameter equal to that of the ball bearing. This tool is a<br />
glass rod with a sphere made on the end by rotating the end in a hot<br />
flame. The glass sphere is ground into the joint, and since both surfaces<br />
are ground away a slightly tapered seating is produced which is better<br />
than that produced by direct grinding with the ball bearing. The ball<br />
bearing can float on the mercury as in FIGURE 67, F, or be kept in<br />
place by a small indentation in the glass (FIGURE 67, IV) made by<br />
pushing it in with a spike. The <strong>for</strong>mer valve is closed by the mercury<br />
rising, and the latter may be closed by mercury also, or by a great<br />
enough flow of gas or liquid pushing the ball bearing into place. In<br />
this case the bulb shown in FIGURE 67, IV9 may be replaced by a tube<br />
just bigger than the ball bearing.<br />
Another <strong>for</strong>m of valve which we find useful is shown in FIGURE 67,<br />
VI, To make the plunger a sphere is made on the end of a glass rod,<br />
and to this sphere a thin glass rod is attached, using a very small<br />
flame so that the sphere is not distorted. The sphere is then removed<br />
from the larger glass rod with a small and very hot flame, and it is<br />
rotated with the thin rod until it is spherical. The glass sphere is next<br />
ground into the end of the tube to be used as B; this can be done<br />
easily by rotating the tubing with a lathe chuck and keeping the<br />
sphere stationery. The tube B is then internally sealed into C, the<br />
plunger is put in and finally C is rounded off and D is added. The<br />
tail of the plunger should be long enough to prevent the plunger<br />
coming out from the tube B. A valve of this kind is useful <strong>for</strong> liquids<br />
and gases; it is opened by pressure of the fluid in B, but flow cannot<br />
occur from D to B.<br />
The apparently complex Soxhlet apparatus (FIGURE 68, III) is made<br />
by three simple operations: first the large tube A is joined to the lower<br />
main tube H9 then the vapour bypass is fitted, and finally the liquid<br />
siphon is put on. The main tube is usually made from 3-cm diameter<br />
tubing about 15 cm long, and this is joined to 1-5-cm diameter tubing<br />
H. There is not a continuous tube when these are joined, and hence<br />
the joint must be blown from both ends. The joint is made by touching<br />
the small tube against the rounded end of the large tube, and then<br />
directing the flame against the smaller tube, which is shrunk and<br />
blown a few times, and then straightened out. Directing the flame<br />
against the smaller tube prevents the larger tube becoming distorted.<br />
A hand torch can be used <strong>for</strong> this joint.<br />
To make the vapour bypass, 1-cm diameter tubing is bent with two<br />
right angles, and the ends are cut off so that the tube just fits at C and<br />
142
SOXHLET EXTRACTION APPARATUS<br />
D and is parallel to the larger tube. Holes are then blown at C and<br />
D. One end of the vapour tube is closed with a stopper and the joint<br />
D is made; then, after removing the stopper, the upper right angle<br />
bend of the vapour tube is heated and the tube pushed until the lower<br />
end meets the hole at C. The end of the vapour tube is then heated<br />
and pushed with a spike on to H until there are only a few small<br />
holes; the joint is finished in the usual way. The top angle is then<br />
made smooth and the whole annealed (FIGURE 68, /). It is advantageous<br />
to have a bunsen burner handy with which the top joint is<br />
kept hot while the lower joint is made.<br />
. A<br />
/<br />
S<br />
M<br />
E<br />
X9<br />
lb*<br />
/<br />
y*<br />
A<br />
6<br />
H M<br />
For the siphon tube some 2-3-mm diameter tubing has a circular<br />
bend made at one end through about 180°, and then about 8 cm from<br />
this bend the tube is bent sharply again through 180° (FIGURE 68, II).<br />
The straight end of the tube is bent about 3 cm below the end of the<br />
circular bend, into a right angle in line with the circle. The end is cut<br />
jr tubes as shown. Another<br />
piece of the small tube is bent into a right angle to make (J. This piece<br />
is internally sealed into H, and a fine hot flame is directed against the<br />
centre of the join, which is blown out to a bubble. G is made central,<br />
and the siphon tube FIE is joined to G by the appropriate internal<br />
seal procedure: E is closed with a stopper. This is removed, a hole<br />
is blown in the large tube A (<strong>for</strong> joining on E) and, with F heated, E is<br />
manoeuvred into position. The joint is then made with the help of a<br />
spike as usual. F is then made smooth and the whole annealed.<br />
143
SOME TYPICAL SINGLE PIECES OF EQUIPMENT<br />
In making the second joint E it is helpful if the ends of the tube to<br />
be pushed to a hole with a spike are thickened and slightly flanged<br />
be<strong>for</strong>e the first joint is made. This is especially the case <strong>for</strong> small<br />
diameter tubing. The holes blown <strong>for</strong> both the bypass and the siphon<br />
should be so placed that both side tubes are parallel with the main<br />
tube.<br />
Mercury Vapour Pumps<br />
Mercury diffusion pumps are standard pieces of laboratory equipment<br />
and, <strong>for</strong> most cases, quite adequate ones can be constructed<br />
from glass. In general, Pyrex glass (or similar glass) is necessary<br />
because hot mercury vapour circulates and differential strain is<br />
S \<br />
\ \ G High vacuum<br />
FIGURE 69. A simple diffusion pump<br />
rapidly set up at various, sometimes complicated, joints. Below,<br />
however, is described a very simple glass diffusion pump which is<br />
quite satisfactory <strong>for</strong> many purposes, and which can easily be constructed<br />
from soda or other glasses.<br />
Very Simple <strong>Glass</strong> Mercury Diffusion Pump<br />
This pump (FIGURE 69) is due to H. P. WARAN (1923) and is designed<br />
such that it may be constructed by the most average of experimentalists.<br />
Soda glass is satisfactory because all joints are subject to a<br />
minimum, if not a zero, temperature gradient. Pyrex glass would, of<br />
course, be an advantage but is not a necessity.<br />
The boiler A can be made from an ordinary laboratory conical<br />
flask: a side arm is added and then the top of the flask is drawn off<br />
and rounded—if a laboratory filter suction flask is available, and has<br />
sufficient thermal endurance <strong>for</strong> a boiler, the side arm already exists<br />
and need only be lengthened.<br />
144
MERCURY VAPOUR PUMPS<br />
The side arm is next bent slightly downwards to <strong>for</strong>m the nozzle B<br />
which can be tapered as shown if desired. The mouth of the nozzle<br />
should be of the order of 5-10 mm diameter, though the size is not<br />
critical provided a good rotary, oil, backing pump is to be used. The<br />
larger the nozzle the faster the pumping that can be obtained, while<br />
the higher the backing pressure employed the finer must be the nozzle<br />
and the higher the boiler pressure of mercury vapour.<br />
The ring seal at C is made not too far from the flask so that the hot<br />
mercury vapour has to travel as short a path as possible. The top of<br />
the boiler and the exposed portion of the side arm may be lagged<br />
with asbestos rope or paper to reduce loss of heat. The remainder of<br />
the pump is easily constructed. The condenser E can be any reasonable<br />
length, <strong>for</strong> the length does not affect the pump per<strong>for</strong>mance. D<br />
is a 3-5 mm bore tube <strong>for</strong> returning mercury to the boiler, and must<br />
lie below the level of the mercury in the boiler. The condenser jacket<br />
is made separately and is fixed to the inner tube with rubber stoppers<br />
or corks which are waxed to give a watertight seal. The jacket must<br />
be positioned be<strong>for</strong>e the T-junction at F is made. If Pyrex glass is<br />
employed then the condenser jacket may, if desired, be joined to the<br />
inner tube with ring seals at either end in the normal manner.<br />
The boiler can be heated with an ordinary bunsen burner but its base<br />
should be coated with a ^ in. layer of asbestos paste—this is absolutely<br />
necessary with soda glass. It may be desirable to employ an<br />
asbestos board G <strong>for</strong> deflecting radiant heat from the boiler, thereby<br />
protecting the ring seal and the waxed cork of the water jacket.<br />
Waran reports that an average pump of this design, working<br />
against a backing pressure of less than 1 mm of mercury, will pump a<br />
1 litre volume at atmospheric pressure down to 10~ 3 mm of mercury<br />
in 2-3 minutes. When a rotary backing pump is not available, a<br />
diffusion pump with a 5 mm nozzle can be operated, with less efficiency,<br />
against a backing pressure of 7 mm which can be obtained<br />
with an ordinary water vapour pump. Sufficient heat must be supplied<br />
to the boiler, in the latter case, to produce a mercury vapour<br />
pressure of 1-2 cm.<br />
<strong>Glass</strong> Mercury Diffusion Pump suitable <strong>for</strong> High Vacuum Work<br />
A useful glass diffusion pump, due to J. Pollard, is shown in FIGURE<br />
70, VIII. This pump is quite satisfactory <strong>for</strong> high vacuum work, and<br />
our measurements on pumps made by hand torch methods show that<br />
a pumping speed <strong>for</strong> air of about 10 litres/second at 10 -5 mm of<br />
mercury can be obtained at the mouth of a pump of this design.<br />
FIGURE 71 shows some results <strong>for</strong> the speed of this pump communicated<br />
to us by J. Pollard.<br />
145
SOME TYPICAL SINGLE PIECES OF EQUIPMENT<br />
This fangfh not<br />
critical 1<br />
/cm<br />
T~<br />
E<br />
Abouf<br />
38 m,<br />
1<br />
> <<br />
A<br />
#mm<br />
T<br />
x &rind to I<br />
3 mm sharp edge -* —<br />
/<br />
C<br />
Iff<br />
High vacuum<br />
Backing pamp<br />
vm<br />
3$ mm , /5mm<br />
B<br />
»?mm<br />
FIGURE 70. A mercury diffusion pump due to J. Pollard<br />
146<br />
IF<br />
x<br />
vir<br />
>
MERCURY VAPOUR PUMPS<br />
mm<br />
pump 'jets'. These tapered jets are made in the first stages of the construction.<br />
The small jet A is drawn down from 1 cm tubing by careful<br />
rotation and shrinking in a not too hot bench flame. Care is necessary<br />
to avoid thickening the glass overmuch. The angle of the taper<br />
is not critical but should be approximately that shown in FIGURE<br />
70, /. The ooen end of this iet is ground to a sharn ed^e.<br />
to<br />
CO<br />
CO<br />
1<br />
Curve A Boiler pressure 36 millibars<br />
Curve B Boi/er pressure 10 millibars<br />
10' 10 ~ 10<br />
Pressure atmoufh of pump millibars<br />
FIGURE 71. The pumping speed of a Pollard type pump<br />
The larger jet B is more easily made in two parts. The larger,<br />
25-mm diameter tube is drawn down to the required taper to give a<br />
cone-shaped end. As small a hole as possible is blown out at the apex<br />
of the cone with a pin-point flame. A 1 cm tube is similarly drawn<br />
down and its end blown out to a tiny hole. For joining these two<br />
tapers, to give the jet B, the tubes are best clamped, since extremely<br />
skilf ulhandlingis required to avoidbucklingif they are rotatedby hand.<br />
A relatively cool flame will be found adequate <strong>for</strong> this joint. The joint<br />
must be tested <strong>for</strong> leaks be<strong>for</strong>e the pump is assembled (see p. 82).<br />
The larger tubing of the jeti? is drawn off at the required length, the<br />
end enlarged by blowing a slight bulb, FIGURE 70, //, and the small<br />
jet A inserted into place by <strong>for</strong>ming a ring seal as shown. The side arm<br />
is added while the seal is still hot and this portion is then annealed.<br />
The ground end of A should be 35 mm from the constriction in B.<br />
t 147
SOME TYPICAL SINGLE PIECES OF EQUIPMENT<br />
Next the water jacket is prepared. A piece of tubing of internal<br />
diameter about 40 mm is drawn off to a spindle at both ends to give<br />
an intermediate piece of the required length. The two side tubes <strong>for</strong><br />
in-flow and out-flow of water are added at this stage. The in-flow<br />
tube takes the <strong>for</strong>m of a jet C, FIGURE 70, #7, and is inserted by<br />
means of a ring seal. At the lower end of the water jacket is blown a<br />
small hole to take the 1 cm tube. A rubber stopper carrying glass<br />
tube will <strong>for</strong>m a handle at this end <strong>for</strong> blowing the larger hole needed<br />
at the upper end of the jacket. The two jet assembly in FIGURE 70, II,<br />
is then bulged in the regions X and Y so that the water jacket fits as<br />
shown in FIGURE 70, IV. The top upper ring seal can be sealed with<br />
plasticine, or wrapped with a long strip of thin rubber sheet, so that<br />
blowing is possible <strong>for</strong> making the lower ring seal. If desired, the<br />
upper end of the jacket can be permanently plugged with asbestos<br />
paper and sealed with rubber strip or a high melting-point wax.<br />
However, by clamping the apparatus, and with careful initial warming,<br />
we have found it relatively straight<strong>for</strong>ward to make the large<br />
upper ring seal of the water jacket at this stage. We advise a proper<br />
seal here because a waxed joint is liable to spring a leak.<br />
A more skilled worker may prefer to do the operations in the order<br />
indicated by FIGURE 70, Fand VL Annealing is then only necessary<br />
at two stages; first, when the work of inserting the smaEer jet, ringsealing<br />
the upper end of the water jacket and adding the large side<br />
arm is completed; and secondly, when the work at the lower end of<br />
the water jacket is completed.<br />
When the water jacket is in place, the tubing below the jacket is<br />
bulged and the backing pump side arm D is added—far enough from<br />
the ring seal to cause no strain in the latter. The return drain tube E<br />
<strong>for</strong> mercury can now be attached.<br />
The boiler is made separately. The inner tube is chosen to fit the<br />
heater to be used, and the outer tube is of such size that the annular<br />
space has a volume of 30-40 c.c. to just above the top of the inner<br />
thimble. A boiler holding more mercury can also be used.<br />
A piece of outside tubing is first drawn off and attached to a piece<br />
of 1-8 cm tube; then the other end of the large tube can be drawn off<br />
and blown out at the required length. The inner thimble is shaped<br />
separately so that a Dewar seal can be made as shown, FIGURE 70,<br />
VII. The annular space is usually quite small and care must be taken<br />
with this Dewar seal to keep the open end of the thimble from shrinking<br />
with the result that the heater cannot be inserted. The side tube<br />
<strong>for</strong> returning mercury is added while the Dewar seal is still hot. The<br />
completion of the pump after this stage is straight<strong>for</strong>ward.<br />
The heater can be made from Nichrome wire wound in the <strong>for</strong>m of<br />
148
MERCURY VAPOUR PUMPS<br />
a fine spiral which is itself spiralled round a cylinder of fire-clay. A<br />
thin piece of sheet mica serves to separate the glowing wire from the<br />
inner glass of the thimble. A 150 watt heater is adequate. The tube<br />
from the boiler to the first jet should be lagged along the whole of its<br />
length with asbestos rope.<br />
If desired, a cold finger refrigerant trap can be built in, as shown in<br />
FIGURE 70, IX, with a draining tube <strong>for</strong> returning condensed mercury<br />
to the boiler. The point of return must be below the mercury level in<br />
the boiler so that the high vacuum is separated from the backing<br />
pressure by mercury in the draining tube. It has been found desirable<br />
to have some <strong>for</strong>m of water-cooled condenser, preferably a double<br />
surface condenser, in the backing line Z>. This condenser can be<br />
positioned conveniently alongside the pump water jacket, and in this<br />
way the tube D bends upwards so that mercury condensing in the<br />
backing line runs back into the drain tube E.<br />
Mercury used in diffusion pumps should be thoroughly cleaned by<br />
vacuum distilling. The glassware should be flushed with chromic<br />
acid, then rinsed and thoroughly dried be<strong>for</strong>e filling with mercury.<br />
Any grease left inside the glassware will have a most deleterious effect<br />
on the per<strong>for</strong>mance of the pump. If rubber tubes are used in the<br />
backing line these should be freed of sulphur by boiling in concentrated<br />
sodium hydroxide solution.<br />
Electrolytic Gas Generator<br />
A very convenient method of preparing small quantities of pure<br />
hydrogen is by the electrolysis of a 30 per cent solution of caustic<br />
soda (A FARKAS and H. W. MELVILLE, 1939). A cell <strong>for</strong> this purpose<br />
(FIGURE 72) can be made simply. The cell itself is H-shaped with the<br />
top part of the 'H* elongated. The side piece should be of tubing<br />
approximately 2-5 cm bore and about 30 cm long, and the cross piece<br />
should be of the same size tubing and about 10 cm long. A narrower<br />
tube, 1 cm bore, <strong>for</strong> filling with the electrolyte extends from the midpoint<br />
of the cross-piece, and is closed with a rubber stopper when the<br />
cell is in use.<br />
Nickel gauze or thin sheet make satisfactory electrodes, which are<br />
suspended from tungsten seals in the top of the sides of the 'H'. The gas<br />
outlet tubes should be of fairly small diameter (8 or 10 mm), and should<br />
include bulbs of about 20 ml volume to allow the gas to bubble through<br />
any electrolyte which is displaced into the outlet tubes by uneven gas<br />
pressure. Both sides of the gas generator should be connected to an<br />
overflow (see FIGURE 72) which allows excess hydrogen and the unwanted<br />
oxygen to escape by bubbling through liquid (dibutyl<br />
phthalate is convenient). The gas pressures then remain approximately<br />
149
SOME TYPICAL SINGLE PIECES OF EQUIPMENT<br />
the same on both sides of the cell. We have found that this type of<br />
generator is not satisfactory when used on a very small scale.<br />
The glass-blowing of the cell may be carried out in the order considered<br />
most convenient by the person making it, but we have found<br />
it most convenient to make the 'H' first by making one T-joint in a<br />
bench torch and then making the second T-joint with the glass<br />
clamped, since this makes it easy to get the two sides of the 'H* the<br />
same length. This means that the cell will stand firmly on the bench.<br />
FIGURE 72. An electrolytic gas generator<br />
The filler tube is next attached, followed by the gas outlet tube. The<br />
metal-to-glass seals with the electrodes are put in last.<br />
The regulating device <strong>for</strong> the heating current of a thermostat may<br />
depend on the bending of a bi-metallic strip or on the expansion of a<br />
liquid. The latter is more sensitive, and we describe some of these<br />
regulators here. An apparatus represented diagrammatically in<br />
FIGURE 73, /, constitutes the 'make and break' device. When the<br />
liquid in the regulator expands, the mercury is pushed up and completes<br />
a circuit between Et and j£2, and a relay then operates to cut off<br />
the heating current. When the circuit between Ex and E2 is broken<br />
the heating current is turned on again.<br />
150
THERMOSTAT REGULATORS<br />
For a sensitive regulator the surface area to volume ratio must be<br />
high, so that thermal equilibrium is rapidly approached. Toluene<br />
(or other convenient liquid) is used as the regulator liquid, with a<br />
mercury column <strong>for</strong> the electrical contact between E1 and Js2. Various<br />
designs giving large surface area have been proposed (see J. REOXY<br />
and W. N. RAB, 1954). A bulky design is shown in FIGURE 73, II; the<br />
tap T facilitates filling and the adjustment of the regulator <strong>for</strong> the<br />
required temperature. The apparatus is made from 15-mm diameter<br />
tubing. The construction is simple: perhaps it is easiest to make four<br />
parts separately and join them between A and B, C and D, and E and JF.<br />
I<br />
Mercury<br />
Mercury Mercury<br />
J<br />
Mercury^<br />
If in IV<br />
FIGURE 73. Some thermostat regulators<br />
The regulating head is an important part of the apparatus; only a<br />
small current should flow, otherwise arcing will occur and the mercury<br />
will oxidize. This oxidation is also reduced by keeping the<br />
surface area of mercury exposed to the air a minimum by using<br />
capillary tube. A useful <strong>for</strong>m of head is shown in FIGURE 73, III; the<br />
capillary is about 1 mm diameter, the upper bulb about 5 mm diameter,<br />
and the lower one about 1 cm diameter. An internal seal is<br />
made round the upper bulb; this avoids the thick accumulation of<br />
glass which would result from a direct internal seal to the capillary<br />
tube. The tungsten rod or wire E% of 1 mm diameter can be sealed<br />
in without a sealing glass (<strong>for</strong> a Pyrex apparatus). The electrode Ex is<br />
held by a rubber stopper.<br />
A convenient thermostat control <strong>for</strong> a beaker is simply a small bulb<br />
filled with toluene to which a U-tube full of mercury is attached<br />
(FIGURE 73, IV). This can be made with 8 mm and 15 mm tubing.<br />
The bulb may be filled by successive heating and cooling, with the<br />
head in toluene.<br />
151
SOME TYPICAL SINGLE PIECES OF EQUIPMENT<br />
To keep to a minimum the current flowing through the mercury<br />
is best to employ a valve circuit with a relay, so that the regulat<br />
current only controls the grid potential of a valve.<br />
Gas Flow Meters<br />
The usual laboratory gas flow meter is essentially a manometer which<br />
measures the pressure difference across a capillary tube through<br />
which the gas flows, as in FIGURE 74, /, showing a design described by<br />
W. BARKAS (1939). This is intended to prevent a sudden change in<br />
pressure from <strong>for</strong>cing the liquid in the manometer into the rest of the<br />
/<br />
FIGURE 74. Two gas flow meters<br />
To manomefer<br />
apparatus. The bottom tube of the manometer is slightly larger than<br />
the rest of the manometer tube, and it contains a fairly closely-fitting<br />
ball bearing which is displaced by any sudden flow of liquid and thus<br />
blocks the narrower tube. The construction of this apparatus is<br />
straight<strong>for</strong>ward. When the capillary tube is joined to the wide tube<br />
the join should be as sharp as possible (i.e. there should be a sudden<br />
change of internal diameter) if the flow rate is to be related to the<br />
pressure difference using an equation <strong>for</strong> viscous flow of the gas in<br />
question; but a direct experimental calibration can also be made,<br />
using, <strong>for</strong> example, a large Berzelius gas holder.<br />
A convenient flow meter is shown in FIGURE 74, IL The construction<br />
is simple. Splash heads or bulbs should be incorporated in both<br />
manometer limbs (as in FIGURE 74s /). The capillary tube at A may<br />
152
GAS FLOW METERS<br />
be drawn out as required, in which case calibration is necessary, or a<br />
precision-bore tube may be sealed on. With a drawn-out capillary,<br />
the correct adjustment is found by breaking off portions of capillary<br />
until the proper flow rate is reached; with the ground glass joint<br />
arrangement shown this is very simple. A broken thermometer often<br />
provides a useful capillary <strong>for</strong> small gas flows.<br />
Spectrum Tubes<br />
The spectrum excited by an electrical discharge through gas at low<br />
pressure can be studied with two simple types of spectrum tube seen<br />
in FIGURE 75. These tubes also act as weak sources of certain radiations,<br />
such as monochromatic lieht <strong>for</strong> an ootical spectrometer. The<br />
&<br />
\d<br />
i<br />
r~\<br />
Sd<br />
FIGURE 75. Two types of spectrum tube<br />
two tubes shown can be made of Pyrex with fused quartz windows<br />
sealed on with W wax or a cement (p. 84); but <strong>for</strong> many purposes<br />
these windows are not required. In both / and // the electrodes are<br />
metal cylinders (e.g. aluminium or stainless steel) joined to tungsten<br />
rods sealed into the glass. Stainless steel cylinders 1 cm diameter and<br />
3 cm long are suitable—the stainless steel is not so prone to spluttering<br />
as most metals. The cylinders are hard-soldered to the tungsten,<br />
or bolted on with a suitable connector. If the tungsten rod exceeds<br />
1 mm diameter it should be sealed in with a sealing glass. 1 mm bore<br />
capillary is suitable <strong>for</strong> the tubes.<br />
To fix on the window as shown in FIGURE 75, /, a bulb is blown in<br />
the capillary, the top of the bulb is blown out to a bubble, knocked<br />
off, and the end remaining is fire-polished and finally ground flat.<br />
The tube can be filled with gas through a side arm joined to one of the<br />
electrode chambers; the spectrum tube may be sealed off, or provided<br />
with a stopcock. The capillary tube in FIGURE 75, //, is sealed<br />
to the glass at one end only of the capillary. To do this, the capillary<br />
is joined to a wider tube, which is cut off and flared out to make the<br />
153<br />
M
SOME TYPICAL SINGLE PIECES OF EQUIPMENT<br />
necessary flare at the end of the capillary. The remaining operations<br />
are simple.<br />
Discharge Tube Lamps<br />
Discharge tube lamps <strong>for</strong> laboratory work usually consist of three<br />
basic parts: the tube to contain the discharge, the electrodes, and a<br />
water cooling system. Many different types of lamp have been<br />
designed, and while a complete review is outside the scope of this<br />
book a few of the more simple ones may be described.<br />
High voltage hydrogen discharge lamps which give continuous<br />
radiation in the ultra-violet can be constructed quite simply and<br />
elaborate designs are unnecessary <strong>for</strong> many purposes. A very simple<br />
Wafer<br />
FIGURE 76. A hydrogen discharge lamp<br />
XH<br />
Water<br />
design which should give satisfactory results is shown in FIGURE 76.<br />
The lamp consists of a straight tube with a fused quartz or fluorite<br />
window waxed to the end and side arms carrying the electrodes and<br />
connections <strong>for</strong> pumping out and filling with purified hydrogen. The<br />
lamp is immersed in a trough of water with only the window projecting<br />
through a watertight seal in the wall. The electrodes should be<br />
of aluminium or stainless steel as these metals are particularly resistant<br />
to spluttering under the conditions of the discharge. The tube<br />
containing the discharge should be lightly platinized (see p. 87) to<br />
facilitate recombination of the atomic hydrogen produced in the<br />
discharge.<br />
The chief factors to be borne in mind in the design of these discharge<br />
tube lamps are that the electrode material will splutter in the<br />
discharge and, unless it is geometrically impossible, will coat the<br />
window with a metal film, and that a large amount of energy is<br />
consumed by the lamp, much of which is dissipated as heat. This<br />
154
DISCHARGE TUBE LAMPS<br />
demands an efficient cooling system, particularly in the region of the<br />
waxed joint sealing on the fused quartz or fluorite window.<br />
W. WEST (1949) gives a survey of some discharge lamps of different<br />
types in which he provides details of the operating conditions <strong>for</strong> such<br />
* _<br />
Water<br />
B<br />
2 cm,<br />
i<br />
12 cm.<br />
1<br />
FIGURE 77.<br />
A high pressure<br />
mercury lamp<br />
Air or water cooled mercury discharge lamps find many uses, one<br />
of the more obvious of which is the study of photochemical reactions.<br />
because<br />
thermal expansion, high melting point and its transparency to ultraviolet<br />
radiation. Their operating pressure has a profound effect on<br />
the spectral distribution of the radiation produced and there<strong>for</strong>e it is<br />
important to consider the requirements in the design of such lamps.<br />
1 ce
SOME TYPICAL SINGLE PIECES OF EQUIPMENT<br />
E. W. R. STEACIE and N. W. F. PHILLIPS (1938) describe in detail<br />
an ingenious design of a low pressure mercury lamp with a rare gas<br />
carrier. This lamp was designed <strong>for</strong> the study of mercury-sensitized<br />
photochemical reactions sensitized by the 2537 A mercury line. The<br />
lamp itself in this design is of vitreous silica and Pyrex, joined by<br />
graded seals, and mounted in the centre of the reaction vessel, thus<br />
giving the maximum amount of reaction possible. Practical constructional<br />
details are given by BARR and ANHORN (1949). These<br />
authors also give details of the construction of rare gas discharge<br />
tubes and display signs.<br />
A simple, high pressure, capillary, mercury arc has been described<br />
by F. DANIELS and L. J. HEIDT (1932), which, although it has only<br />
about twenty four hours useful life, may be useful on account of its<br />
very simple construction. The lamp (FIGURE 77) is constructed from<br />
silica tubing of 1-2 mm bore and 0-7-1 mm wall thickness. The bulbs<br />
A and B confine the discharge and their spacing governs the operating<br />
voltage. The third bulb constitutes the expansion volume and is not<br />
filled completely with mercury. The tungsten electrodes are sealed<br />
in with de Khotinsky cement (shellac and pine-tar), although it is<br />
probable that other stable cements would serve equally well. The<br />
lamp is started by heating the column of mercury between the bulbs<br />
A and B with a small bunsen burner flame until the mercury is<br />
vaporized. A rapid stream of cooling water is then turned on to<br />
prevent the silica tube melting as a result of the discharge. These<br />
lamps require a ballasting resistance since they have effectively zero<br />
resistance be<strong>for</strong>e starting, and 20-500 Q resistance is generated when<br />
operating, depending on the operating pressure and other factors.<br />
W. WEST (1949) also describes the operating conditions <strong>for</strong> this type<br />
of lamp.<br />
Apparatus containing many Electrodes<br />
Hand made radio valves and other vacuum tubes containing several<br />
electrodes, as <strong>for</strong> example, mass spectrometer tubes, present special<br />
difficulties. In many cases, electrodes, plates and grids can be supported<br />
by spot-welding to nickel wires which in turn are spot-welded<br />
to tungsten rods that <strong>for</strong>m metal-to-glass seals with the vacuum<br />
envelope. Various ways <strong>for</strong> making the metal-to-glass seals are<br />
described in Chapter 7. A pinch seal is often employed, as shown in<br />
FIGURE 78, /. Careful planning of the position of the final joints, at<br />
A and B <strong>for</strong> instance, allows <strong>for</strong> the electrodes to be bent first to any<br />
required shape and position. Clearly an infinite number of particular<br />
assembly arrangements is possible. Prepared copper-tungsten-nickel<br />
wires are often very useful in preparing such electrode assemblies.<br />
156
APPARATUS CONTAINING MANY ELECTRODES<br />
The above method is not generally suitable when precise spacing of<br />
electrodes is necessary. In electron and ion guns, <strong>for</strong> example, some<br />
<strong>for</strong>m of rigid mounting with accurately ground spacers between<br />
electrodes is used. The whole mounting is supported in some way in<br />
its glass envelope and fine conducting wires make electrical contact<br />
between the various plates and their respective tungsten-to-glass<br />
seals. FIGURE 78,77, shows diagrammatically such an arrangement.<br />
Copper connecting wires are generally used and must be connected<br />
to the electrodes be<strong>for</strong>e the mounted assembly is introduced into its<br />
envelope. The connecting wires can then be drawn one at a time out<br />
FIGURE 78. Apparatus with many electrodes<br />
through the tube A. We have found that fine wires are best (provided<br />
low currents are to be passed) because these tend to work-harden,<br />
with resultant fracture, less easily than thicker wires. Pieces of thinwalled<br />
glass capillary, drawn from 1 cm tubing, make very good<br />
insulating sleeves where these are necessary. The wires can be connected<br />
with small connectors to the tungsten rods, or welded with a<br />
pin-point flame to intermediate nickel wires. This is done as near as<br />
is practicable to where the final joints is to be made.<br />
In high vacuum work all metal parts to be mounted inside the glass<br />
envelope should be thoroughly cleaned by immersion in appropriate<br />
cleaning and passivating dips. Noble metals can be polished with<br />
3/0 or 4/0 (000 or 0000) emery paper. Thorough cleaning of the<br />
metals lessens outgassing effects. Any fluxes used in hard or soft<br />
soldering must be thoroughly washed away.<br />
To prevent oxidation of electrodes in an envelope which is being<br />
glass-worked, a current of carbon dioxide can be passed through the<br />
apparatus. This is conveniently obtained from a filter flask containing<br />
157
SOME TYPICAL SINGLE PIECES OF EQUIPMENT<br />
solid carbon dioxide. A side arm is provided to allow the gas to<br />
escape when the final joint has been made in the glass envelope. The<br />
carbon dioxide can also be used to blow the final joint; to do this<br />
a rubber tube fixed to the side arm is squeezed when blowing is<br />
desired.<br />
Leaks <strong>for</strong> Molecular Flow of Gases<br />
Molecular flow occurs when a gas passes through a tube or a hole<br />
with cross-sectional dimensions which are smaller than the mean free<br />
path of the gas molecules. The molecules then flow through independently<br />
of each other. A leak consisting of a hole in a very thin<br />
diaphragm is often useful. For most purposes this can be made of<br />
metal foil, but sometimes a glass diaphragm with a hole in it is<br />
useful—<strong>for</strong> example, when free radicals are to be passed through the<br />
hole and the diaphragm material must be chemically inactive. We<br />
find that microscope cover glasses can be used to make a suitable<br />
leak. The cover glasses, about 0-1 mm thick, are first individually<br />
measured with a micrometer and sorted out so that about twenty are<br />
obtained with very nearly equal thickness. These are covered with<br />
paraffin wax on one side, and on each one an area of about 1 mm 2 of<br />
wax is scraped away. They are put in a basin, and the exposed 1 mm 2<br />
area is etched by placing on it a drop of dilute hydrofluoric acid (20<br />
per cent). All are etched simultaneously and the etching is started as<br />
nearly as possible at the same moment <strong>for</strong> each one. After a time,<br />
two or three of the cover glasses will be completely penetrated by the<br />
acid, the drop of which will be seen to pass suddenly through the<br />
glass. The cover glasses are then all swamped in water, and those<br />
which have not been penetrated will have very thin portions of glass<br />
about 1 mm square; a thin part can be punctured by a spark so that<br />
a smooth circular hole of diameter around 0-01-0-05 mm is <strong>for</strong>med.<br />
A single spark is obtained from an induction coil by giving one light<br />
tap to the trembler. Pointed electrodes are used one of which is placed<br />
very near the thin part of glass. The cover glass is held in a slot cut in<br />
a solid piece of rubber. A spark length of 1-5 cm is suitable, but this<br />
can be varied depending on the size of hole required.<br />
Precautions to be taken when using Hydrofluoric Acid<br />
Precautions are necessary when using hydrofluoric acid. It must not<br />
come into contact with the skin; the acid can cause severe burns<br />
which heal extremely slowly. A large beaker of water should always<br />
be handy so that any acid on the skin can be washed off immediately.<br />
Running water should also be available. Rubber gloves can be used,<br />
158
LEAKS FOR MOLECULAR FLOW OF GASES<br />
and they must be free from pin-holes. Barrier creams of the anti-acid<br />
type can be used to coat the hands. A paste of magnesium oxide in<br />
glycerine is an antidote <strong>for</strong> hydrofluoric burns.<br />
Bourdon Gauges and <strong>Glass</strong> Spiral Gauges<br />
Among the methods <strong>for</strong> measuring gas pressures down to 10 _1 or 10~ 2<br />
mm of mercury, one of the most convenient is the use of a gauge<br />
which depends upon the distortion of a thin glass envelope under<br />
varying pressures. These gauges can be used above room temperature,<br />
and <strong>for</strong> corrosive gases winch would attack metals.<br />
The simplest <strong>for</strong>m is shown in FIGURE 79, /: T is a thin-walled<br />
glass bulb with one side collapsed inwards. The shape alters with<br />
pressure difference across the glass, and the pointer P moves. The<br />
gauge needs calibration.<br />
The Bourdon tube (as this bulb-shaped part is called) is made by<br />
putting a spindle in tubing about 10 mm diameter and blowing a thinwalled<br />
bulb just below the shoulder. The bulb is made slightly<br />
elliptical by pulling whilst being blown into. The thinner the bulb the<br />
more sensitive is the gauge. One side of the bulb is heated by a soft<br />
flame until it collapses; the radius of the collapsed side should be<br />
slightly less than that of the other side. On gently blowing into the<br />
tube the pointer should move several millimetres. The spindle can be<br />
left on as a pointer, or be replaced by a thin glass rod. The tip of the<br />
pointer should be drawn out to a fine point. The lower internal seal<br />
of the gauge can be made with a hand torch, the internal tube being<br />
first bulged. A bench torch can also be used. The glass must be<br />
blown into from both ends, since the end of the pointer P is closed.<br />
If the method used <strong>for</strong> this internal seal involves first rounding off the<br />
wide tube and then dropping in the Bourdon tube (Method 2, p. 75),<br />
the final hole must be made by pulling away the very hot molten glass<br />
with a glass rod, since it is not possible to blow out a bubble of glass.<br />
The movement of the pointer may be observed with respect to a<br />
reference pointer which is sealed into the jacket from above. The<br />
pointer P can also be made to move a glass lever system which<br />
magnifies the movement (S. G. FOORD, 1934).<br />
Another type of gauge depends upon the movement of a thinwalled<br />
glass spiral—S. G. YORKE (1945, 1948) has given constructional<br />
details. The spiral is wound on a carbon mandrel (FIGURE 79,<br />
II), which is tapered and threaded, and has a hole in it at the top of<br />
the taper. The flame is directed against a metal shield just below the<br />
mandrel; this gives uni<strong>for</strong>m heating. The thin tubing collapses if<br />
heated directly. The thin tubing <strong>for</strong> the coil is made by drawing out,<br />
with blowing, 6-mm diameter tubing to 1*25 mm in a ribbon flame.<br />
159
SOME TYPICAL SINGLE PIECES OF EQUIPMENT<br />
The thin tube is put through the hole in the mandrel, and 7 or 8 turns<br />
are wound. The spiral is cut where it goes into the hole in the mandrel.<br />
The gauge can be used with the spiral horizontal (FIGURE 79,<br />
III) or vertical (FIGURE 79, IV). In the vertical <strong>for</strong>m shown a mirror<br />
M is fixed to the pointer with Picien. A piece of capillary tube C is<br />
also sealed into the jacket to protect the spiral against excessive<br />
movement. An optical window W is sealed in or cemented in. A<br />
gauge of this type is more sensitive than that shown in FIGURE 79, IIL<br />
Both the Bourdon and spiral gauge can be used with a compensation<br />
method or with direct observation of the movement of the<br />
P<br />
E<br />
i m<br />
FIGURE 79. Some glass gauges <strong>for</strong> pressure measurement<br />
pointer. In the compensation method a pressure is applied to the<br />
outside of the bulb or spiral until the pointer deflexion becomes zero.<br />
For maximum sensitivity it is best to control the gauge temperature<br />
by adding an outer jacket through which a liquid at constant<br />
temperature is passed.<br />
Circulating Pumps<br />
Simple pumps <strong>for</strong> circulating gas or liquid can be made using two<br />
valves with a chamber between them. One ingenious pump uses a<br />
heat engine (A. R. PEARSON and J. S. G. THOMAS, 1925). The hard<br />
glass or silica bulb A (FIGURE 80, /) contains air initially at atmospheric<br />
pressure. This is heated with tap T closed; and when the<br />
160<br />
W<br />
w
CIRCULATING PUMPS<br />
pressure is 5-8 cm above atmospheric, T is quickly opened and<br />
closed. The pressure in the bulb suddenly drops and the mercury in<br />
the U-shaped tube is set into oscillation and continues to oscillate as<br />
long as the bulb is heated. To ensure regular motion the dimensions<br />
of the bulb must be properly chosen. Another way of starting the<br />
pump is to heat the bulb (to about incipient redness), then to open T<br />
and to fix on to the outlet from T a rubber bulb. By squeezing and<br />
releasing this bulb the mercury is set into oscillation. The tap T is<br />
then closed, when the oscillations should continue. The valves Vx<br />
and V2 can be of the type shown in FIGURE 67, VI Vx opens and F2<br />
closes as the mercury rises. Another kind of valve is shown in<br />
FIGURE 80, //. The U-tube can be made of 5 mm tubing and A can<br />
be a 250 ml flask. A liquid or gas can be pumped.<br />
The pump in FIGURE 80,1, pumps at every other stroke, because<br />
one stroke is required to fill the chamber between the valves. A. H.<br />
COCKETT (1955) describes the pump shown in FIGURE 80, III, which<br />
pumps at every stroke. The piston P consists of a magnet encased in<br />
polythene—this avoids trouble which can arise from a glass piston in<br />
a glass tube <strong>for</strong>ming powdered glass so that the piston sticks. It is<br />
161
SOME TYPICAL SINGLE PIECES OF EQUIPMENT<br />
made by pouring molten polythene into a mould containing the<br />
magnet—the mould can be a piece of glass tube similar to that of the<br />
piston chamber. The piston is finally rubbed with emery paper till a<br />
good fit is obtained; it should not be too tight, nor too loose. The<br />
piston is lifted with a solenoid of 1000 turns of 22 gauge wire (about<br />
7 Q resistance). When the current is cut off the piston falls—the<br />
magnet M prevents it from breaking the apparatus. As the piston<br />
moves up, chamber A is emptied and B is filled; and as it moves<br />
down, B is emptied and A filled, so there is continuous pumping.<br />
Apparatus <strong>for</strong> Semi-Micro Qualitative Analysis<br />
Most workers develop their own particular methods of per<strong>for</strong>ming<br />
semi-micro qualitative analyses, and the number of special appara-<br />
( ! )<br />
m<br />
FIGURE 81. Some devices <strong>for</strong> semi-micro qualitative analysis<br />
tuses is considerable. Usually, however, certain simple items such as<br />
stirrers, spatulas, droppers etc. are used <strong>for</strong> most of the work. These<br />
can be made with great ease. Stirrers and spatulas are made from<br />
glass rod: thin rod about 10 cm long and 1*5 mm diameter is drawn<br />
out from ordinary rod, or from tubing (p. 58). For a stirrer, about<br />
5 mm of the rod is bent through 180° at the end (FIGURE 81, /). Some<br />
thick rod (or tube) can be left on as a handle, as shown. A spatula is<br />
made by drawing a spindle in rod, putting a blob of glass on the end<br />
and flattening the blob with tweezers. The edges can be bent up with<br />
tweezers to <strong>for</strong>m a spoon if desired.<br />
The dropper shown in FIGURE 81, 77, has a small bulb so that <strong>for</strong><br />
maximum uptake liquid does not enter the rubber teat; reagent<br />
solutions are then less likely to be contaminated. The capillary tube<br />
162
APPARATUS FOR SEMI-MICRO QUALITATIVE ANALYSIS<br />
can be drawn after the bulb is blown, and it should not have too thin<br />
walls. Some glass should be accumulated be<strong>for</strong>e the tube is drawn<br />
down.<br />
For detecting gases a tapered tube is made which fits snugly into<br />
the top of a small test tube, as in FIGURE S1, EL The hole A should<br />
be about 2 mm diameter, and the top about 5 mm diameter, so that<br />
the reagent can be put in with a dropper. This apparatus is not<br />
reliable because the<br />
of through the reagent. The two parts can be ground together to stop<br />
this; care is then necessary, if tie test tube is heated and cooled, to<br />
stop the reagent entering it. A thin tube can be prepared, as in<br />
FIGURE 81, IV, <strong>for</strong> bubbling gas through a reagent: this is again<br />
tapered to fit the test tube, and is preferably ground in; alternatively<br />
a rubber ring can be used as a gasket. The volume of the gas delivery<br />
tube should be small, so the glass tube is first worked till the walls<br />
are auite thick bv oushine it tosether while it is rotated in the flame.<br />
The art of analyzing gases by chemical means has made vast progress<br />
since the early researches of R. W. Bunsen. Most gas analysis<br />
apparatus, however, still contains a reservoir, a combustion chamber,<br />
and an absorption vessel, and <strong>for</strong>midable-looking apparatus is found<br />
on inspection to be capable of assembly by a series of moderately<br />
M<br />
FIGURE 82. A simple <strong>for</strong>m of gas analysis apparatus<br />
163<br />
E
SOME TYPICAL SINGLE PIECES OF EQUIPMENT<br />
straight<strong>for</strong>ward glass-working operations. A simple <strong>for</strong>m of apparatus<br />
is shown in FIGURE 82; B is the combustion chamber.. The<br />
apparatus can be used in different ways: <strong>for</strong> example, both C and D<br />
can be used as reservoirs or absorption vessels—C is usually the<br />
reservoir and D the absorption vessel.<br />
The best size <strong>for</strong> the capillary tubing is 1 • 5 mm bore; the rest of the<br />
tubing in the apparatus is 8 mm diameter. In making the part B, two<br />
tungsten rods Wx and W% (FIGURE 82, II) are spot-welded or handsoldered<br />
to a platinum wire coil—if spot-welding is used it is much<br />
easier if an intermediate piece of nickel is introduced. The tungsten<br />
is beaded, with a sealing glass if desired; two holes are blown in B <strong>for</strong><br />
the tungsten, which is put in, with the platinum, through the lower<br />
tube (FIGURE 82, II). It is convenient if the beaded tungsten just<br />
passes through the holes. The volume of the reservoir C from the<br />
tap Tx to the mark Mx must be measured (if it is needed) be<strong>for</strong>e this part<br />
is joined to the apparatus. Similarly, the volume between the tap T2<br />
and the mark M2 should be found be<strong>for</strong>e assembly. A rigid frame is<br />
needed <strong>for</strong> the apparatus because of the great weight of mercury in it.<br />
The mercury reservoirs Al9 A2 and As are standard equipment;<br />
they can be made by joining at each end about 8 cm of 4-cm diameter<br />
tubing to 8 mm tubing. The large portion of tubing is then blown to<br />
a bulb of about 7 cm diameter, which is worked by pulling and blowing<br />
to a pear-shape. The 8 mm tubing attached to the pointed end of<br />
the bulb is corrugated to take rubber tube, and at the other end the<br />
bulb is blown out and flanged.<br />
REFERENCES<br />
BARKAS, W., 1939, /. sci. Instrum., 16, 162.<br />
BARR, W. E. and ANHORN, V. J., 1949, Scientific and Industrial <strong>Glass</strong><br />
Blowing and <strong>Laboratory</strong> Techniques; Pittsburgh, Instruments<br />
Publishing Co.<br />
COCKETT, A. H.s 1955, Nature, Lond., 175, 768.<br />
DANIELS, F. andHEiDT, L. J., 1932, /. Amer. chem. Soc, 54,2381.<br />
DEWAR, J., 1896, Proc. Royal Instn G.B., 14,1.<br />
DUNOYER, L., 1926, Vacuum Practice; trans. J. H. Smith; London,<br />
Bell.<br />
FARKAS, A. and MELVILLE, H. W., 1939, Experimental Methods in Gas<br />
Reactions; London, Macmillan.<br />
FOORD, S. G., 1934, /. sci. Instrum., 11, 126.<br />
KON, G. A. R., 1930, /. chem. Soc, 182.<br />
LANGMUIR, I., 1918, U.S. Patent Iy 273, 629.<br />
MCLEOD, H., 1874, Phil Mag., 48,110.<br />
164
REFERENCES<br />
MORLEY, A., 1940, Strength of Materials, 9th Edn; London,<br />
Longmans.<br />
PEARSON, A. R. and THOMAS, J. S. G., 1925, /. chem. Soc, 127, 2450.<br />
REILLY, J. and RAE, W. N., 1954, Physico-Chemical Methods, 5th<br />
Edn. Vol I; London, Methuen.<br />
STEACIE, E. W. R. and PHILLIPS, N. W. F., 1938, Canad. J, Res., 16B,<br />
219.<br />
WARAN, H. P., 1923, /. scL Instrum., 1, 51.<br />
WEST, W., 1949, Technique of <strong>Org</strong>anic Chemistry, 2nd Edn. Vol. 1,<br />
Part 2, Ed. by A. Weissberger; New York, Interscience.<br />
YORKE, S. G., 1945, /. sci. Instrum., 22, 196.<br />
YORKE, S. G., 1948, /. sci. Instrum., 25,16.<br />
165
Chapter 9<br />
THE ASSEMBLY OF COMPLEX<br />
APPARATUS<br />
General Observations<br />
THE assembly of complex glass apparatus is comparatively easy provided<br />
it is done in a systematic manner. It is most important to work<br />
out the general arrangement of the various parts of the system be<strong>for</strong>e<br />
starting to assemble them, and the sequence of operations should be<br />
planned in detail.<br />
The arrangement of apparatus is usually dictated to some extent by<br />
the laboratory space available; but within this limitation careful<br />
preliminary planning can make the construction, use and maintenance<br />
of the apparatus easier. The apparatus should be designed so that<br />
all parts are easily accessible and so that its operation does not impose<br />
too great a physical strain on the worker due to awkwardly placed<br />
components. An apparatus, badly designed in this respect, will probably<br />
be broken much more often than a more carefully planned one.<br />
Assuming that the apparatus has been carefully planned and that it<br />
is to be a vacuum apparatus, it is generally more convenient to start<br />
building it at the pump end of the vacuum line. This allows the joints<br />
to be tested be<strong>for</strong>e the complete system is finished, which is an advantage<br />
if some of the joints are screened by other parts of the apparatus<br />
constructed later. Probably the most convenient method of working<br />
is to join on each section with its far end finishing in a sealed-off<br />
spindle which can easily be blown out preparatory to the joining of<br />
the next section. This technique also excludes unnecessary dust and<br />
contaminants from the system during building. If some other method<br />
of rendering the system air-tight <strong>for</strong> blowing is used, care should be<br />
taken to see that it does not contaminate the glass. Care should also<br />
be exercised to avoid introducing flakes of glass into the apparatus<br />
when holes are blown in the glass. If such flakes are carried in the air<br />
stream during evacuation and lodge in the diffusion pump, its<br />
efficiency may be seriously impaired.<br />
The cleanliness of the inside of a vacuum system is of the utmost<br />
importance, and there<strong>for</strong>e care should be taken at all stages to see<br />
166
GENERAL OBSERVATIONS<br />
that the glass is thoroughly cleaned be<strong>for</strong>e assembly and that no unnecessary<br />
dirt is introduced during assembly. The introduction of a<br />
single length of improperly cleaned tubing can render useless all the<br />
ef<strong>for</strong>t spent on cleaning the remainder of the apparatus. Open tubes<br />
on the apparatus should be blocked in some way, even if not required<br />
to be air-tight, toprevent dustfromenteringthem. Sometimes it maybe<br />
desirable to prevent excessive amounts of moisture from entering the<br />
apparatus. For this purpose a tube of drying agent can be included<br />
in the blowing tube, although very often large amounts of water<br />
vapour enter the apparatus as combustion products of the flame.<br />
When glass-blowing is carried out on a system containing greased<br />
stopcocks or ground joints they should not be overheated; if they are,<br />
grease is spread over the inside of the system. Silicone grease on<br />
ignition <strong>for</strong>ms a solid mass which cannot be burnt off.<br />
Whatever the problems and however complex the apparatus to be<br />
constructed, the sequence of operations should be carried out mentally<br />
be<strong>for</strong>e any practical work is started. The time spent in planning<br />
any piece of practical work is well spent and will probably save time<br />
eventually.<br />
Joining Closed Systems<br />
The need <strong>for</strong> joining closed systems arises quite frequently, and<br />
various methods may be used to make the final joint. Difficulty<br />
usually arises out of the necessity of blowing two holes in the system<br />
in close proximity to one another.<br />
One method of doing this has been described already in the section<br />
on McLeod gauges; it involves blocking the first hole with a stopper,<br />
blowing the second hole and then bending the glass until the holes are<br />
in a suitable position <strong>for</strong> joining. This method may be varied so that<br />
it is unnecessary to allow the glass to cool after blowing the first<br />
hole. If care is taken in blowing the first hole, a bubble of glass,<br />
sufficiently thin to be knocked off but strong enough to withstand the<br />
blowing pressure, can be produced. It is then possible to blow the<br />
second hole and remove the thin glass bubbles.<br />
The most difficult part of joining a closed system is making the two<br />
prepared tubes meet correctly. This can usually be accomplished by<br />
bending either or both of the tubes, and perhaps in addition drawing<br />
the tubes out until the desired fit is obtained. Once the joint has been<br />
made by pushing the glass together or by filling the gap with rod, the<br />
irregularities produced by bending and pulling can be evened out by<br />
judicious heating and blowing, although <strong>for</strong> many purposes they<br />
will not have any effect on the efficiency of the apparatus.<br />
Another method which may be useful in joining closed systems is<br />
167
THE ASSEMBLY OF COMPLEX APPARATUS<br />
described more fully in the next section. This involves making the<br />
two final joints simultaneously, at either end of a reasonably long<br />
length of tubing, inserted between prepared sites.<br />
Making more than one Joint at once<br />
When several tubes in a complicated piece of apparatus have been<br />
cut in order to remove a large or intricate portion <strong>for</strong> repair or alteration,<br />
difficulty is encountered, during reassembly, in obtaining a<br />
closed system <strong>for</strong> blowing. It becomes necessary to make several<br />
joints at once and we have found various techniques useful in these<br />
circumstances.<br />
Closing Tubes with Ragged Ends—Use of Rubber Caps<br />
The cutting operation when the tubes are not easily accessible usually<br />
results in slightly ragged edges. However, the two halves will fit<br />
perfectly, and it would be convenient not to have to fire-polish either<br />
edge, so that when the reassembly is undertaken the two will still be a<br />
perfect fit. If a rubber stopper is used <strong>for</strong> blocking a cut tube, firepolishing<br />
is necessary in order to make an air-tight seal and in order<br />
to reduce the somewhat large danger of splitting the ragged end when<br />
the stopper is <strong>for</strong>ced in. Rubber caps are there<strong>for</strong>e very useful here<br />
and, with large tubing, thin pieces of sheet rubber (see p. 35).<br />
<strong>Glass</strong>-Blowing Two Joints Simultaneously<br />
It is occasionally convenient, both when dealing with complex<br />
apparatus and when replacing a short section of a fixed glass tube, to<br />
be able to glass-blow two joints at once. This can successfully be<br />
undertaken when the two joints are reasonably close together and<br />
accessible, and when the tubes involved are not larger than 15 mm<br />
diameter.<br />
The interposing portion of glass is first shaped and its ends worked<br />
until it fits as closely as possible. It is then clamped in position. By<br />
using the hand torch <strong>for</strong> a few seconds at a time on each joint they<br />
can be worked simultaneously, care being taken to heat each evenly<br />
all round so that one does not crack in the few seconds that the other<br />
is being worked. By using the spike and welding rod where necessary,<br />
the two joints can be first sealed and then blown to satisfactory<br />
shape. Each joint must be separately and carefully annealed (unless<br />
they are so close in the same tube that they can be heated together to<br />
the annealing point).<br />
<strong>Glass</strong>-Blowing more than Two Joints at once<br />
The following method also applies to two joints that cannot be<br />
treated by the procedure just described; Each joint is worked in turn<br />
168
MAKING MORE THAN ONE JOINT AT ONCE<br />
without blowing and sealed up, using the hand torch, welding rod and<br />
the spike. Blowing is not possible until the last joint is reached, and<br />
so care must be taken not to collapse the tubes too far nor to apply<br />
too much rod and produce large blobs which will sag. Too hot a<br />
flame should be avoided so that the portions to be sealed do not<br />
shrink away from each other. Pin-holes will not matter in this part of<br />
the operation as long as a pressure sufficient <strong>for</strong> blowing can be built<br />
up. After each joint has been worked in this way, it must be very<br />
carefully annealed since the half-finished seal is normally very uneven<br />
in thickness and resulting strains can easily cause cracking while the<br />
next joint is worked. The joint that will give the most difficulty,<br />
either because the tubing is large or because it is inaccessible, is left<br />
to last since blowing will then be possible. Finally each joint is carefully<br />
warmed up, blown to shape, finished and annealed.<br />
Clearly, when a portion of apparatus has been removed by cutting<br />
several tubes, each of the tubes can be drawn off be<strong>for</strong>e reassembly<br />
and, in the reconstruction, short pieces of new tubing can be used <strong>for</strong><br />
joining the various pairs of cut tubes in turn. However, when the<br />
removed portion can be re-clamped in position with the cut tubes<br />
meeting well, it has been found that the above procedure is quicker<br />
and more satisfactory, particularly with tubing larger than 15 mm<br />
diameter.<br />
Use of Thin Rubber Sheet in making Several Joints at once<br />
With extra large tubing, greater than 35 or 40 mm diameter, a joint<br />
sealed with welding rod but not blown out to even thickness is unlikely<br />
not to crack on cooling, however well annealed. The procedure<br />
in the preceding paragraphs cannot there<strong>for</strong>e be used when more than<br />
one such joint is involved. Thin rubber sheet has been found very<br />
useful on such occasions. Small pieces, used to close the ragged end<br />
of a tube (see p. 35), allow the two halves of a joint, that fit perfectly,<br />
to be brought together with the rubber still between them. Then as<br />
each joint is made, the thin sheets of rubber can be removed one by<br />
one and the minute gaps can easily be closed with the welding rod.<br />
Removal of Strain and Clamping of Apparatus<br />
Strain in the glass, created during the construction of some piece of<br />
apparatus, is usually removed by annealing; however, further strain<br />
is sometimes set up when a piece of apparatus is clamped to a rigid<br />
framework at more than one point. Annealing alone may not remove<br />
strain produced in this way—the glass must be softened so that it will<br />
flow. With some pieces of equipment it is undesirable to heat anywhere<br />
after the whole has been annealed—as, <strong>for</strong> example, with a<br />
169
THE ASSEMBLY OF COMPLEX APPARATUS<br />
diffusion pump—and if clamping at more than one point is unavoidable<br />
then this clamping must be per<strong>for</strong>med with extreme care. The<br />
claws of the clamp should be well padded with cork, asbestos rope or<br />
layers of asbestos paper. If rubber is used it should be dusted with<br />
french chalk to prevent sticking which can cause fracture when unclamping<br />
at some later date. See p. 39 <strong>for</strong> remarks concerning types<br />
of clamps.<br />
Wherever possible, when a glass tube has been clamped rigidly at<br />
two points, the tube between these points should be heated to the<br />
softening temperature—so that the glass will flow and take up any<br />
inaccuracy in the clamping-—and then annealed. In this way an<br />
almost completely strain-free system can be obtained. Clearly a rigid<br />
framework is necessary if this strain-free condition is to be maintained.<br />
Annealing by Flame<br />
When an annealing oven is not available, even quite large pieces of<br />
equipment can be annealed by flame. Apparatus assembled on the<br />
bench can often only be annealed by a flame. As a general principle<br />
each joint should be annealed as it is completed, unless a further join<br />
is to be made, or another operation is to be per<strong>for</strong>med immediately<br />
in the same region or so near to it that the whole of the first joint can<br />
be kept hot—then the whole is annealed together.<br />
As large a flame as possible is used, with the oxygen adjusted so<br />
that the inner blue cone is long and a very pale transparent blue (<strong>for</strong><br />
Pyrex and similar glass). The glass is warmed slowly—with large<br />
equipment, made with tubing greater than 40 mm diameter, warming<br />
should be begun with a luminous flame or even with hot air—until<br />
the whole has been raised to a dull red heat and the glass is distilling<br />
sodium (colouring the flame yellow) freely. As much of the glass as<br />
possible is kept at this temperature <strong>for</strong> a few minutes, and then, by<br />
slowly reducing the oxygen content and, finally, the size of the flame,<br />
the glass is allowed gradually to cool. The flaming is continued until<br />
an even, black deposit of carbon is <strong>for</strong>med.<br />
Use of a Bent Blowpipe and Double Tipping Device<br />
For getting at tubes placed awkwardly in complicated apparatus a<br />
bent tubular blowpipe is very convenient. A useful design is shown<br />
in FIGURE 83, /.<br />
We think that a long thin blowpipe, as in FIGURE 83, 2, but bent at<br />
the end through a greater angle—about 150°—would be very useful<br />
<strong>for</strong> working on complex apparatus. It would enable the back of<br />
tubing to be worked from the front.<br />
170
USE OF BENT BLOWPIPE AND DOUBLE TIPPING DEVICE<br />
A double tipping device, which <strong>for</strong>ms two fine flames directed<br />
towards one another from nozzles about 2 cm apart, is shown in<br />
FIGURE 83, // (see p. 29). This blowpipe head is very handy <strong>for</strong> working<br />
small tubing in awkward positions. When joins have to be made<br />
in such tubes it is desirable to arrange things so that the ends can be<br />
pushed together whenever possible. The use of welding rod at long<br />
range, or when the operator has to assume a tedious position, requires<br />
a very steady hand.<br />
Recognition of Flame Cracks<br />
/<br />
/cm,<br />
FIGURE 83. Specially shaped blowpipe<br />
heads<br />
a<br />
Danger of Flame Cracks<br />
Care must be taken, when working on complicated apparatus, to<br />
avoid producing flame cracks. These are caused by momentary<br />
playing of a hot flame on cool glass. Cracks <strong>for</strong>med in this way may<br />
not appear <strong>for</strong> several hours, and in some cases even days, after being<br />
caused. They generally appear in the surface or bulk of the glass in<br />
one of the two <strong>for</strong>ms shown in FIGURE 84. The first is a small curling<br />
crack, usually between 5 and 10 mm diameter if circular, and is very<br />
characteristically a flame crack. The second general type has a<br />
starred appearance with small cracks radiating from a tiny curl or<br />
point. The exact mode of <strong>for</strong>mation of these patterns is uncertain,<br />
but it is clear that some <strong>for</strong>m of differential strain is the cause.<br />
Sudden heating of the surface layer makes it strain-free, and, on<br />
cooling, tensile stress develops in the surface layer because the inner<br />
layers of the glass are rigid. <strong>Glass</strong> in tension can undergo a delayed<br />
fracture (p. 10).<br />
Precautions <strong>for</strong> avoiding Flame Cracks<br />
With intricate apparatus, particularly when a hand torch is being<br />
171
THE ASSEMBLY OF COMPLEX APPARATUS<br />
used, it is sometimes impossible to avoid playing the flame on to some<br />
portion of the assembly that is not actually being worked. Such portions<br />
must be protected by wrapping with asbestos paper; this is<br />
particularly important when a joint such as an internal seal is in<br />
danger. When a hot flame has been inadvertently played on a piece<br />
of cool glass, the latter should be annealed, after the work has been<br />
completed, to avoid subsequent <strong>for</strong>mation of a flame crack.<br />
C $<br />
Removal of Flame Cracks<br />
/ M<br />
FIGURE 84. Flame cracks<br />
Flame cracks are easily removed by warming the glass, gently at first<br />
to avoid spreading the crack, and raising it to the annealing temperature.<br />
When joints are in the vicinity care must be taken to heat everything<br />
uni<strong>for</strong>mly and to anneal as a whole.<br />
172
Chapter 10<br />
THE MANIPULATION OF SILICA<br />
The Properties of Fused Silica and General Remarks<br />
VITREOUS silica, commonly known as Vitreosil, is pure homogeneous<br />
fused silica containing over 99*8 per cent Si02. This glass has many<br />
extremely useful properties—such as chemical resistance, extremely<br />
low thermal expansion with resultant constancy of volume and resistance<br />
to thermal shock, resistance to heat and transparency to ultraviolet<br />
and infra-red radiations—making it a valuable material <strong>for</strong><br />
many scientific purposes. These properties are dealt with in varying<br />
detail in Chapter 2. Resistance to heat is often of considerable<br />
importance since Viireosil has an extremely high softening range, in the<br />
region of 1500°C, and can, under normal working conditions, be safely<br />
kept at temperatures of 1100°C and as high as 1300°C <strong>for</strong> short periods.<br />
In vacuum work, <strong>for</strong> evacuated furnaces <strong>for</strong> instance, fused silica can<br />
be used at temperatures up to 1100°C; and provided no devitrification<br />
has occurred the glass remains practically impermeable to gases<br />
at these high temperatures, with the possible exception of helium.<br />
Fused silica is manufactured in both translucent and clear, transparent<br />
<strong>for</strong>ms; the particular requirements govern the <strong>for</strong>m to be used.<br />
The translucent variety can be obtained with a sandy, satin or<br />
inish. An interesting historical account of the early work on the<br />
practical manipulation of fused silica has been given by W. A.<br />
SHENSTONE (1902).<br />
Devitrification is a factor requiring particular attention. Impurities<br />
on the surface of VitreosilWHl readily cause crystallization of the<br />
surface glass when it is worked. Salts of sodium, potassium and<br />
lithium, salts of vanadic acids, fluorides, phosphates and radioactive<br />
substances, are especially active in this respect. It is there<strong>for</strong>e very<br />
important, particularly when it is required that the silica remains<br />
clear and transparent, that the glass be washed carefully, inside and<br />
out, be<strong>for</strong>e working. If it has been necessary, during preparation, to<br />
grind the fused silica, then all traces of abrasive must be removed by<br />
dipping in dilute hydrofluoric acid followed by careful rinsing. This<br />
treatment, with subsequent heating to just below the softening point<br />
173
THE MANIPULATION OF SILICA<br />
with a flame, is also effective in removing any condensed surface<br />
deposits of silica due to volatilization during working. Precautions<br />
advisable when using hydrofluoric acid are mentioned on p. 158.<br />
Any cleaned portion of the Vitreosil must not be touched with the<br />
fingers be<strong>for</strong>e being worked. When using a bench flame, if the part<br />
being handled is subsequently to be worked, the piece of equipment<br />
must be re-cleaned be<strong>for</strong>e this further work is carried out. For this,<br />
cotton-wool dipped in alcohol is very useful—after the piece has<br />
been allowed to cool.<br />
Cutting Tubing<br />
General Technique <strong>for</strong> <strong>Working</strong> Fused Silica<br />
Fused silica is slightly more brittle than borosilicate glasses and is<br />
there<strong>for</strong>e more easily fractured. Tubes up to just over 1 cm in diameter<br />
can be snapped with the fingers after scratching with a file or<br />
glass knife. Any ragged end so <strong>for</strong>med can be cleaned up with an<br />
abrasive wheel.<br />
With larger tubing a cutting wheel is necessary since the low<br />
thermal expansion renders local heating entirely ineffective in starting<br />
a crack. A silicon carbide cutting wheel, rs to A inch thick and<br />
running with a peripheral speed of 6000 feet per minute, is very suitable<br />
and quite adequate. A copious supply of water directed on the<br />
cutting edge is necessary and should be directed from either side of<br />
the cutting wheel. Copper or phosphor-bronze, bonded, diamond,<br />
cutting wheels can also be used but are much more expensive items.<br />
Fusing and <strong>Working</strong> Operations<br />
As a medium <strong>for</strong> glass-working, fused silica has the considerable<br />
advantage over the softer glasses that careful and uni<strong>for</strong>m heating<br />
and annealing are unnecessary. Slightly offsetting this advantage is<br />
the necessity <strong>for</strong> careful cleaning, as described above, and <strong>for</strong><br />
stronger heating.<br />
An ordinary oxy-coal-gas torch is only adequate <strong>for</strong> small size<br />
equipment; when working with tubing of greater diameter than 15<br />
mm, oxy-hydrogen or other very hot flames must be used. Special<br />
burners are obtainable however—as, <strong>for</strong> example, the No. 8 Thermal<br />
Syndicate torch—with which oxy-coal-gas, or, better, oxy-propane<br />
mixtures, will give a sufficiently hot flame <strong>for</strong> this larger tubing, so<br />
avoiding oxy-hydrogen mixtures which are less safe in operation<br />
unless anti-burn-back valves are employed.<br />
In all fusing operations with fused silica, protective spectacles must<br />
be worn—a glass whch absorbs at least 96 per cent of the incident<br />
174
GENERAL TECHNIQUE FOR WORKING FUSED SILICA<br />
light is necessary. The recommended glass <strong>for</strong> best protection is<br />
green Protex grade C, f inch thick (Chance Bros. Ltd).<br />
For hand work with a bench torch, tubing is rotated in the flame<br />
to secure even heating and hence even shaping; while when clamping<br />
of the various tubes is employed and the hand torch is used, all the<br />
dangers of cracking, which are present when borosilicate or soft<br />
glasses are being worked, are negligible. The Vitreosil must be blown<br />
while still in the flame; and there<strong>for</strong>e, when a bench torch is used and<br />
the apparatus is manipulated by hand, a blowing tube must be<br />
attached at one end. It is preferable then to use a glass-blower's<br />
swivel (see p. 42).<br />
For tooling of molten Vitreosil TS inch Nichrome wire may be<br />
employed; though if much tooling is required, then carbon rods or<br />
plates are necessary. In general, most of the operations described in<br />
earlier chapters can be modified <strong>for</strong> working with Vitreosil and, if a<br />
sufficiently hot flame is available, less manipulative skill is usually<br />
necessary because the material stays fairly viscous.<br />
When operating with tubes it is well to take care to prevent the<br />
flame licking the insides; the vapours can cause contamination which<br />
results in devitrification when more work is done.<br />
Large Diameter and Thick- Walled Tubing<br />
With very large silica tubing, over 4 cm bore, the walls are usually<br />
very thick. Special methods are required when the walls are 5 mm<br />
thick or more. The wall edges, at the ends to be joined, are cut or<br />
ground to sharp knife-edges, so that a V-shaped notch is left all round<br />
when the ends are butted together. The ends are fused together,<br />
using a hand torch and 3-5 mm welding rod to fill in the V-shaped<br />
notch. With very large tubes the flame must be manipulated to keep<br />
the tubes hot all round, maintaining an even heat, and the apparatus<br />
must be annealed—preferably in a furnace <strong>for</strong> one hour at 1050°C.<br />
Translucent and transparent Vitreosil rods of the proper size <strong>for</strong><br />
the above operations are obtainable.<br />
Silica Torsion Fibres<br />
These fibres can be made by drawing by hand or by simple mechanical<br />
means, and by blowing them out with a flame. Here we describe<br />
only simple methods <strong>for</strong> making fibres by drawing them out with a<br />
weight falling under gravity. With these methods fibres with a range<br />
of sizes can be made quite quickly. T. C. KEELEY (1924) fixed a small<br />
weight to a silica rod and heated this at a point until the silica<br />
softened sufficiently <strong>for</strong> the weight to fall and draw out a fibre. V. J.<br />
CLANCEY (1950), during an investigation of the evaporation and<br />
175
THE MANIPULATION OF SILICA<br />
surface mobility of naphthalene molecules, used a delicate torsion<br />
apparatus, the fibre <strong>for</strong> which was made by the gravity method. He<br />
fused a silica hook to a 1-mm diameter silica rod. The rod was<br />
clamped vertically and a weight of about 10 gm hung on the hook.<br />
The rod was heated with a flame just above the hook, and just as the<br />
weight started to fall the flame was whisked away. The weight fell on<br />
to a soft material, such as a rubber sheet, to stop it bouncing. By<br />
varying the weight and the moment the flame is taken away, fibres<br />
with different sizes can be made. Some preliminary practice is re-<br />
FIGURE 85. The production of a silica fibre<br />
by drawing out a fused rod with a weight<br />
falling under gravity<br />
quired. If the flame is kept on too long the fibre will fuse and break,<br />
and if the flame is kept on <strong>for</strong> too short a time the weight will not fall<br />
the full length.<br />
We find it more convenient to draw out fibres by the gravity<br />
method with a weight of about 500 gm which is released from a pair<br />
of electromagnets. The weight consists of an iron bar about 25 cm<br />
long, to the centre of which the silica rod of 2-5 mm diameter is<br />
attached with a socket and bolt arrangement. The bar is held at each<br />
end by a small magnet, and the two magnets are connected in series.<br />
A portion of the rod is heated with a hand torch and the top of the<br />
rod is held in one hand (FIGURE 85). A semi-molten portion of<br />
176
SILICA TORSION FIBRES<br />
desired thickness is obtained, the magnet current is turned off with a<br />
foot-operated switch, the flame is whisked away, and the weight falls<br />
into a box of sand. If all goes well a long fibre is produced. The<br />
semi-molten part of the silica rod, when initially thin, gives a thin<br />
fibre, and when thick, a thick fibre; the fibre thickness is also determined<br />
by the precise moment the flame is whisked away—<strong>for</strong> a thin<br />
fibre this should be just after the weight starts to fall. Fibres down<br />
to 5-10 microns diameter can be made in this way.<br />
N. J. TIGHE (1956) has given a comprehensive survey of the production,<br />
properties and applications of silica fibres; G. A. DOWNS-<br />
BROUGH (1937) has discussed the damping of fibres. With a rubber<br />
catapult method, introduced by R. THRELFALL (1898), fibres in the<br />
range of 2-30 microns diameter can be made. Smaller fibres can be<br />
made by the drag of the flame gases in an oxy-hydrogen flame on a<br />
tiny globule of molten silica, a method which Threlfall describes.<br />
This author also gives an account of the bow-and-arrow method of<br />
C. V. Boys.<br />
Small fibres should be manipulated against a dark—preferably<br />
black—background, and small camel's-hair brushes moistened with<br />
water are very convenient implements. Fibres, when examined under<br />
a microscope, become more easily visible if they are mounted under<br />
a cover slip and a drop of glycerine, coloured by a dye, is allowed to<br />
run in.<br />
P. L. KIRK and R. CRAIG (1948) have discussed the construction of<br />
fibre devices; L. WALDEN (1937) has given a practical account of<br />
several uses of fibres as instrument suspensions; D. R. BARBER (1930)<br />
has described a device <strong>for</strong> mounting fibres with a degree of tension;<br />
and H. V. NEHER (1940) has given a very practical account of the<br />
manipulation of silica fibres.<br />
REFERENCES<br />
BARBER, D. R.S 1930, /. sci Instrum., 7,105.<br />
CLANCEY, Y. I, 1950, Nature, Lond., 166,275.<br />
DOWNSBROUGH, G. A., 1937, Phys, Rev., 51,877.<br />
KEELEY, T. C, 1924, /. sci. Instrum., 1,369.<br />
KIRK, P. L. and CRAIG, R., 1948, Rev. sci. Instrum., 19,777.<br />
NEHER, H. V., 1940, in Modern Physical <strong>Laboratory</strong> Practice by John<br />
Strong, Chap. 5; London & Glasgow, Blackie.<br />
SHENSTONE, W. A., 1902, Proc. Royal Instn G. B., 16, 525.<br />
THRELFALL, R., 1898, On <strong>Laboratory</strong> Arts; London, Macmillan.<br />
TIGHE, N. I, 1956, National Bureau of Standards Circular 569;<br />
Washington, U.S. Government Printing Office.<br />
WALDEN, L,, 1937, J. sci. Instrum., 14,257.<br />
177
Anhorn, V. J., 5, 28, 41, 47, 123, 136,<br />
156,164<br />
Ansley, A. J., 5<br />
Armstrong, H. E., 3, 5<br />
Aston,F.W.,4<br />
Baker, E. A., 87,89<br />
Barber, D.R., 177<br />
Barkas,W., 152,164<br />
Barr,W.E.,5,28,41,47, 123, 136, 156,<br />
164<br />
Berzelius, J. J., 3, 5<br />
Bodenstein, M., 4<br />
Bolas, B. D., 3, 5,48, 89<br />
Bolas,T.,3,5<br />
Boyle, R., 7,17,26<br />
Boys, C. V., 3,83,84, 89,177<br />
Braddick, H. J. J., 5<br />
Brickwedde,F.G.,85,89<br />
Brown, B., 84,89<br />
Bunsen, R. W., 3,17,48, 163<br />
Callendar, H. L., 3, 5<br />
Case, F. A., 85, 89<br />
Chattaway,F.D.,87,89<br />
Clancey, V. J., 175, 177<br />
Cockett, A. H., 161,164<br />
Coffin, C.C., 110,116<br />
Cook, J. W., 85, 89<br />
Craig, R., 177<br />
Dale, A. E., 9,20,26<br />
Daniels, F., 156,164<br />
Davies, J., 135<br />
Dewar, J., 4,123,164<br />
Donal,J.S.,85,89<br />
Douglas, R. W., 9,26<br />
Downsbrough, G. A., 177<br />
Dunoyer,L., 139,164<br />
Edwards, J. D., 3, 5, 19,26<br />
Elliott, A., 5<br />
Faraday, M., 1, 2, 3, 5, 14, 18, 26, 48,<br />
83,84,89<br />
Farkas, A., 149, 164<br />
Flinders Petrie, W. M., 1, 5<br />
Foord,S.G., 159,164<br />
Frary, F. C.> 3, 5,19,26<br />
French, E. A. H., 87,89<br />
AUTHOR INDEX<br />
N 179<br />
Gardner, I. C, 85, 89<br />
Garner, W. E., 7,26<br />
Grodzinski, P., 84,89<br />
Gurney, C, 11,26<br />
Harcourt, W. V., 1<br />
Heatley, N. G., 84, 89<br />
Heidt,L.J., 156,164<br />
Heldman, J. D., 3,4, 5<br />
Herington, E. F. G., 87,89<br />
Home Dickson, J., 5<br />
Housekeeper, W. G., 109, 113, 114,<br />
116<br />
Jackson, H., 131<br />
Johannsen, A., 15,26<br />
Keeley,T.C, 175,177<br />
Kirk, P. L., 177<br />
Kon,G. A.R., 132,164<br />
Langmuir, I., 4,123,164<br />
Lavoisier, A. L., 1<br />
Lloyd, J. T., 77,78,89<br />
MacDonald, D. K. C, 17,26<br />
McLeod,H., 136,164<br />
Melville, H.W., 149,164<br />
Morey,G.W., 1,6<br />
Morgan, E. H.,5, 6<br />
Morley, A., 119,165<br />
Neher, H. V., 177<br />
Nokes, M. C, 5, 6<br />
Ockenden,F.E.J.,87,89<br />
Park-Winder, W. E., 5, 6<br />
Partridge, J. H., 15, 27, 44, 47,<br />
111,116<br />
Pearson, A.R., 160,165<br />
Pearson, S-, 11,26<br />
Phillips, C. J., 9,27<br />
Phillips, N. W. F., 156, 165<br />
Pollard, J., 145, 146<br />
Rae,W.N., 151, 165<br />
Ramsay, W., 4<br />
Randall, J. T., 8,27<br />
Reilly.J., 151,165<br />
102,
Reimann, A. L., 4,6,43,47<br />
Rideal, E. K., 4, 6<br />
Roscoe, H. E., 4, 6<br />
Rosenblum, S., 77,89<br />
Scheele, K. W., 1<br />
Scott, R. B., 85,89<br />
Shenstone, W. A., 3, 4, 6, 30, 47, 173,<br />
177<br />
Smith, I. C. P., 29, 32,47,51, 89<br />
Stanworth, J. E., 9,17,20,26,27<br />
Steacie, E. W. R., 156,165<br />
Strong, J., 5, 6<br />
Tammann, G., 7<br />
Taylor, C. S., 3, 5,19,26<br />
Taylor, G.F., 110,116<br />
Thomas, J. S. G.9160,165<br />
Threlfall, R„ 3, 4, 6,28,46,47,177<br />
Threlfall, R. E., 2, 6<br />
AUTHOR INDEX<br />
180<br />
Tighe,N.J„ 13,27, 177<br />
Todd, B. J., 17,27<br />
Travers, M. W., 4,6<br />
Turner, W.E.S., 17,27<br />
Upton, P. B. G., 87, 89<br />
Walden,L., 177<br />
Walen, R., 77, 89<br />
Waran,H.P., 144,145,165<br />
Warren, B. E., 8,9,27<br />
West,W., 155,156,165<br />
Wilkinson, R. A., 49, 89<br />
Wright, R. H„ 3, 6<br />
Yarwood, J., 87,89<br />
Yorke,S.G., 159,165<br />
Zachariasen, W. H., 8,27
Abrasives, 39<br />
Alkaline attack on glass, 16<br />
Alumina as abrasive, 39<br />
Ampoule sealing, 29<br />
Ampoules, 117<br />
Annealing of glass, 20,170<br />
Annealing oven, 45<br />
Annealing temperature, 12<br />
Asbestos gloves, 37, 90,92<br />
Asbestos, uses of, 36<br />
Bellows <strong>for</strong> blowing, 30<br />
Bellows, glass, 101<br />
Bench flame method of work, 2<br />
Bends, 53<br />
Bends in big tubing, 90<br />
Blowers <strong>for</strong> air, 30<br />
Blowing tubes, 35, 56<br />
Blowpipes, 28,170, 174<br />
Boats, glass, 128<br />
Borate glasses, 9<br />
Bordering, 72<br />
Boron atoms, coordination of, 8<br />
Borosilicate glass composition, 9<br />
Bottles, cutting big ones, 51<br />
Bourdon gauge, 159<br />
Breaking glass tubes, 49<br />
Breaking of glass under tension, 9<br />
Breaking of glass when heated, 12<br />
Break-tip seals, 119<br />
BTHNo. 9 glass, 22, 105,112<br />
BTHNo.12 glass, 24<br />
BTHNo. 14 g\ass, 105<br />
BTHNo. 40 glass, 23,112<br />
BTHNo. 93 glass, 85<br />
BTHNo. 94 glass, 21<br />
Bubbles, glass-blowing of, 59<br />
Bulbs at the end of a tube, 71<br />
Bulbs, holes in, 72<br />
Bulbs in a tube, 70,100<br />
Burns, treatment when slight, 46<br />
C 9 glass, 22, 105,112<br />
C. 40 glass, 23,112<br />
Capillary tube working, 68<br />
Carbon tools, 33, 72,175<br />
Carborundum, 39,44, 82,83<br />
Carborundum grinding wheel, 45<br />
Carius tubes, 118<br />
Cements <strong>for</strong> glass, 84<br />
SUBJECT INDEX<br />
181<br />
Cerirouge, 40,83<br />
Chemical properties of glass, 15<br />
'Chromic acid 1 <strong>for</strong> cleaning, 49<br />
Claisen flask, 120<br />
Clamped apparatus, delayed fracture<br />
of, 11<br />
Clamped apparatus, working on, 4,<br />
169<br />
Clamps, 39,170<br />
Cleaning glass tubes, 48<br />
Closed systems, 167<br />
Closing a large flask, 92<br />
Closing tubes with round ends, 57<br />
Closing tubes with rubber caps, 34,<br />
168<br />
Closing tubes with stoppers, 3 5<br />
Cold finger traps, 125<br />
Complex apparatus, 166<br />
Condenser, double surface, 133<br />
Condenser, fractional distillation, 131<br />
Condenser, Liebig, 76,129<br />
Condensers, 128<br />
Copper, deposition on glass, 87<br />
Copper-to-glass seals, 113<br />
Copper-tungsten-nickel wires, 107<br />
Corks, 35<br />
Corning No. 3320 glass, 105<br />
Corning Nos. 7040, 7052 and 7060<br />
IZlclSSGS 112<br />
Corning No. 7720 glass, 23,105<br />
Corning No. 7740 glass, 105<br />
Corundum, 39<br />
Crack ing-off burner, 29<br />
Cracks, flame, 171<br />
Cracks, mending, 80,96<br />
Crossfire burners, 29<br />
Crucibles, vitreous silica, 17<br />
Cut-offs, mercury, 135<br />
Cutting a tube internally, 38<br />
Cutting a tube with a flame, 56<br />
Cutting a tube with a wheel, 44<br />
Cylinder heads, 30<br />
Delayed fracture of glass, 10,11<br />
Density of glass, 14<br />
Devitrification of glass, 18<br />
Devitrification of silica, 173<br />
Dewarseal, 101,107,121<br />
Dewar vessels, 86,123<br />
Dial 36 glass, 22,105
SUBJECT<br />
Dial 43 glass, 24, 112<br />
Dial 444 glass, 23, 108<br />
Diamond powder as abrasive, 39,83<br />
Diamonds, use of, 38,84<br />
Diffusion through glass, 17<br />
Disc seals, copper, 115<br />
Discharge tube lamps, 154<br />
Distillation flasks, 120<br />
Distillation splash head, 121<br />
Distinguishing types of glass, 26<br />
Double tipping device, 171<br />
Drilling holes in glass, 83<br />
Dumet alby wire, 111<br />
Elastic properties of glass, 13 .<br />
Electrical resistance of glass, 14<br />
Electrodes in apparatus, 156<br />
Electrolytic gas generator, 149<br />
Emery, 39<br />
Equipment required <strong>for</strong> different purposes,<br />
46<br />
Extension of glass under tension, 13<br />
Extraction apparatus, Soxhlet, 142<br />
FCiV glass, 23,112<br />
Feet <strong>for</strong> vessels, 78<br />
Fernico, 111<br />
Fibres, delayed elastic effects in, 13<br />
Fibres, making silica ones, 175<br />
File, triangular, 38<br />
Filter pumps, 126<br />
Fire-polishing, 13<br />
Firmasil glass, 22<br />
Flame annealing, 170<br />
Flame cracks, 171<br />
Flame gases, reaction with glass, 17<br />
Flamemaster hand torch, 29<br />
Flanging, 72<br />
Flaring, 72, 76,100<br />
Flaring tools, 31<br />
Flask clamps, 32<br />
Flow meters <strong>for</strong> gas, 152<br />
Forceps, 32<br />
Fractional distillation condenser, 131<br />
Fractional distillation receiver, 132<br />
Fractionating column, 132<br />
Frozen surfaces, 82<br />
Gas analysis apparatus, 163<br />
Gas generator, electrolytic, 149<br />
Gas flow meters, 152<br />
Gauge, Bourdon, 159<br />
Gauge, glass spiral, 159<br />
Gauge, McLeod, 76,136<br />
Gauges <strong>for</strong> measuring glass, 34<br />
<strong>Glass</strong>, defined, 7<br />
<strong>Glass</strong> holders, 40<br />
Gloves, asbestos, 37<br />
Gold, firing on to glass, 87<br />
INDEX<br />
Graded seal, 101<br />
Graded seal glasses, 25<br />
Grinding glass, 40,45, 82, 141<br />
Grinding wheel, 45<br />
Hand torch, 29,171<br />
Hand torch, value of, 4<br />
Handle <strong>for</strong> tubing, 55<br />
Hardness of glass, 14<br />
Heating of glass, effects of, 16<br />
Helium, diffusion through glass, 17<br />
Holders <strong>for</strong> tubes, 40<br />
Holes, blowing of, 59, 72<br />
Holes, drilling of, 83<br />
Holes, filling of with rod, 64<br />
Holes, finding of, 81<br />
Hot spot <strong>for</strong> breaking tubes, 50<br />
Housekeeper seal, 109,113<br />
Hydrofluoric acid, <strong>for</strong> removing surface<br />
layer, 19<br />
Hydrofluoric acid, precautions with,<br />
158<br />
Hydrogen discharge lamps, 154<br />
Hydrophobic glass surfaces, 18<br />
'In-place' glass-blowing, 3<br />
Internal seals, 73,100<br />
Internal seals, large, 95<br />
Jeweller's rouge, 40<br />
Joints between two big tubes, 93,100<br />
Joints between two similar tubes, 60,<br />
100<br />
Joints between tubes of different size,<br />
64,100<br />
Joints, borosilicate glass to vitreous<br />
silica, 25<br />
Joints, borosilicate to soda glass, 25<br />
Joints in closed systems, 168<br />
Joints, Pyrex to Phoenix> 25<br />
Joints, tungsten-sealing to Kovar-scsding<br />
glasses, 24<br />
Joints, Vitreosil, 175<br />
Joints with capillary tube, 69<br />
Junctions, 4 and 5 way, 68<br />
King's College condenser, 131<br />
Knives, glass-cutting, 37<br />
Knocking off bits of tubing, 51<br />
AM&Z/glass, 23,112<br />
Kovar alloys, 111<br />
Kovar-to-Pyrex seals, 102, 112<br />
L.l glass, 23<br />
Lamps, discharge, 154<br />
Lampworker, 28<br />
Lapping wheel, 44<br />
Large tube supports, 41<br />
Lathe, glass-working, use of, 97,113
Lead glass, 23,108<br />
Lead glass composition, 9<br />
Leaks, finding of, 81<br />
Leaks, molecular flow, 158<br />
Lemington FC Nglass, 23, 112<br />
Lemington H.26X. glass, 24<br />
Lemington W.l. glass, 22, 105, 112<br />
Light transmission through glass, 15<br />
Liquid air traps, 125<br />
Lower annealing temperature, 11<br />
Lubrication of tools, 32<br />
M.6, glass, 24<br />
Machine <strong>for</strong> glass-work ing, 97<br />
McLeod gauge, 76,136<br />
Mercury lamps, 155<br />
Mercury, traps <strong>for</strong>, 140<br />
Mercury vapour pumps, 144<br />
Mesh size <strong>for</strong> particles, 40<br />
Metal layers on glass, 87<br />
Metal-to-glass seals, 102,156<br />
Meters <strong>for</strong> gas flow, 152<br />
Mg point, 11<br />
Mica windows fused to glass, 85<br />
Monax glass, 21,118<br />
Monax glass, ease of working, 26<br />
Mouthpieces <strong>for</strong> blowing tubes, 36<br />
Network-<strong>for</strong>ming ions, 8,9<br />
Network-modifying ions, 8,9<br />
Nicosel, 111<br />
Nib, 111<br />
iVo/H?* glass, 23, 105,112<br />
Optical properties of glass, 15<br />
Palladium, firing on to glass, 87<br />
Per<strong>for</strong>ations in bulbs, 72<br />
Phoenix glass, 22, 105,106<br />
Phosphorus pentoxide traps, 127<br />
Physical properties of glass, 9<br />
Pinch seals, 106<br />
Pinholes, 64, 74 77<br />
Platinizing glass, 87,110<br />
Platinum, sealing into glass, 108<br />
Polishing glass, 83<br />
Potassium, contamination of in glass,<br />
17<br />
Prince Rupert's drops, 20<br />
Pulling a point, 57<br />
Pulling a spear, 57<br />
Pump, filter, 126<br />
Pumps, circulating, 160<br />
Pumps, mercury vapour, 144<br />
Pyrex glass, 22, 105, 118<br />
Reaction vessels of glass, maturing of,<br />
18<br />
Reamers, 31<br />
SUBJECT INDEX<br />
183<br />
Resistance, chemical, of glass, 15<br />
Resistance, electrical, of glass, 14<br />
Ribbon burners, 29<br />
Ring seals, 73<br />
Rod, thin glass, 58,64<br />
Rollers, 42<br />
Rotation of tubes in the flame, 52<br />
Rubber caps, 34,168<br />
Rubber stoppers, 35<br />
Sand <strong>for</strong> grinding, 39<br />
Scissors <strong>for</strong> cutting hot glass, 52,92<br />
Sealed tubes <strong>for</strong> reactions, 118<br />
Sealing glasses, 22<br />
Sealing glasses <strong>for</strong> tungsten, 105<br />
Seals, multiple wire, 105<br />
Semi-micro analysis apparatus, 162<br />
Silica fibres, 13,175<br />
Silica, properties of, 25,173<br />
Silica, working of, 174<br />
Silvering glass, 85,87<br />
Sintered discs, sealing in, 79<br />
Soda-boric oxide glass, 8<br />
Soda-lime-silica glass composition, 9<br />
Soda-silica glass, 8<br />
Sod&-to-Pyrex seal with copper tube,<br />
115<br />
Sodium Resistant NA.10 glass, 24<br />
Softening temperatures, 11,13<br />
Soldering glass after silvering, 88<br />
Soxhlet extraction apparatus, 142<br />
Spectacles <strong>for</strong> glass-work ing, 37,174<br />
Spectrum tubes, 153<br />
Spike, 31<br />
Spindles, 56,91,99,100<br />
Spinning, 73,78<br />
Spiral gauge, 159<br />
Spirals, 53<br />
Splash head <strong>for</strong> distillation, 121<br />
Strain in clamped apparatus, 169<br />
Strain in glass, thermal, 19<br />
Strain-viewer, 15,43<br />
Strength of glass, 9,10<br />
Stress-optical coefficient, 15<br />
Structure of glass, 7<br />
Supports <strong>for</strong> large tubes, 41,42<br />
Surface properties of glass, 18<br />
Swivel connection, 42,70,99<br />
T-joints, 65<br />
T-joints, capillary, 69<br />
T-joints, large, 94<br />
Table <strong>for</strong> glass-blowing, 28<br />
Tapers in tubes, 56, 65,79,101<br />
Telcoseal, 111<br />
Tensile strength of glass, 10<br />
Tetrahedra of Si04, linking of, 7<br />
Thermal capacity of glass, 14<br />
Thermal conductivity of glass, 13
Thermal endurance of glass, 12<br />
Thermal expansion of glass, 11<br />
Thermal strain in glass, 19<br />
Thermostat regulators, 150<br />
Tools <strong>for</strong> glass-working, 30, 33,73<br />
Tools with glass-working machine, 98<br />
Torsion fibres, silica, 175<br />
Trans<strong>for</strong>mation point, 11<br />
Traps, liquid air, 125<br />
Traps, phosphorus pentoxide, 127<br />
Traps to catch mercury, 140<br />
Tubes, holding, 41<br />
Tungsten, nickel tipping of, 108<br />
Tungsten, sealing to Pyrex, 103<br />
Upper annealing temperature, 11<br />
Uranium glass, 105<br />
Vacuum flasks, 123<br />
Valves, 140<br />
Viscosity of glass, 11,13<br />
Wtreosilt25tm<br />
SUBJECT INDEX<br />
184<br />
JK7 glass, 22,105,112<br />
Water, evolution from glass, 16<br />
Wax <strong>for</strong> tools, 32<br />
Waxes <strong>for</strong> joining glass, 84<br />
Weathering of glass, 16,18<br />
Welding rod, 58, 64<br />
Wembley ''Amber Neutral* glass, 24<br />
Wembley L.l. Lead&ass, 23<br />
Wembley M.6.' White Neutral' glass, 24<br />
Wembley X.8. glass, 21<br />
Wheel <strong>for</strong> cutting glass, 44,51<br />
Wheel <strong>for</strong> grinding, 45<br />
Wheel <strong>for</strong> lapping, 44<br />
Windows, mica, 85<br />
Windows, thin glass, 77<br />
Wire holders, 104<br />
<strong>Working</strong> various types of glass, 105<br />
X.8. glass, 21<br />
X-rays, scattered by glass, 8<br />
Y-joints, 68