8 MP Game Camera with Preview User Manual - Explore Scientific
8 MP Game Camera with Preview User Manual - Explore Scientific
8 MP Game Camera with Preview User Manual - Explore Scientific

You also want an ePaper? Increase the reach of your titles
YUMPU automatically turns print PDFs into web optimized ePapers that Google loves.
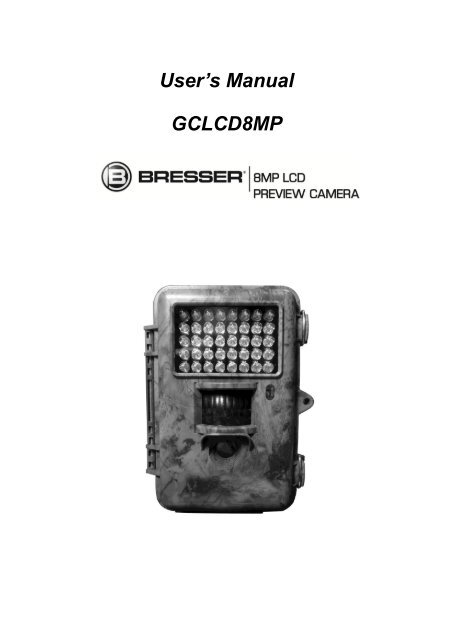
<strong>User</strong>’s <strong>Manual</strong><br />
GCLCD8<strong>MP</strong>
Content<br />
1 Instruction ......................................................................................................... 1<br />
1.1 General Description ................................................................................ 1<br />
1.2 Application.................................................................................................. 1<br />
1.3 <strong>Camera</strong> Interface ..................................................................................... 2<br />
1.4 Saving Images or Videos ....................................................................... 4<br />
2 Cautions .............................................................................................................. 6<br />
3 Easy Operations ............................................................................................... 7<br />
3.1 Power Supply ............................................................................................. 7<br />
3.2 Insert the SD-card .................................................................................... 7<br />
3.3 Power on and Entering into the ON Mode ..................................... 7<br />
3.4 Enter into the TEST Mode .................................................................... 8<br />
3.4.1 <strong>Preview</strong> .................................................................................................. 8<br />
3.4.2 Customer Settings ............................................................................. 8<br />
3.4.3 <strong>Manual</strong> Capturing ............................................................................. 8<br />
3.4.4 View Images or Videos .................................................................... 9<br />
3.4.5 Delete Images or Videos ................................................................. 9<br />
3.6 Power Off ................................................................................................... 10<br />
4 Advanced Operations .................................................................................. 11<br />
4.1 Settings Menu .......................................................................................... 11<br />
4.1.1 Set <strong>Camera</strong> Mode ............................................................................ 11<br />
4.1.2 Format SD-Card ............................................................................... 11<br />
4.1.3 Set Photo Size ................................................................................... 12<br />
4.1.4 Set Video Size.................................................................................... 13<br />
4.1.5 Set Date and Time ........................................................................... 13<br />
4.1.6 Set Photo Burst ................................................................................ 14<br />
4.1.7 Set Video Length.............................................................................. 14<br />
4.1.8 Set PIR Sensitivity .......................................................................... 15<br />
4.1.9 Set PIR Triggering Interval ......................................................... 16<br />
4.1.10 Set Timer Triggering Interval .................................................... 16<br />
4.1.11 Set Timer Switch ............................................................................. 17
4.1.12 Set Time Stamp ................................................................................ 18<br />
4.1.13 Reset to Default Settings .............................................................. 19<br />
4.2 Default Settings and Live Monitoring ........................................... 19<br />
4.3 Firmware upgrade ................................................................................. 20<br />
5 Mounting the <strong>Camera</strong> ..................................................................................... 21<br />
Appendix I: PIR Detection Zone .......................................................................... 22<br />
AppendixⅡ: Technical Specifications.......................................................... 24<br />
AppendixⅢ: Parts List ........................................................................................ 25
1 Instruction<br />
1 Instruction<br />
1.1 General Description<br />
This camera is a surveillance device that works automatically.<br />
It can be triggered by any movement of human (or animals) in<br />
a certain region of interested (ROI) monitored by a highly sensitive<br />
Passive Infra-Red motion sensor (PIR),and then take high quality<br />
pictures (up to8 mega pixels) or video clips.<br />
It also can be triggered by timer which means the camera can<br />
capture pictures or video clips at specified time intervals regardless<br />
of if there is a motion of human or animals.<br />
The device is equipped <strong>with</strong> built-in infrared LEDs, it takes<br />
clear pictures or videos (in black-white) even in the dark night,<br />
while it takes color pictures or videos under sufficient daylight.<br />
The camera consumes very little power(μA level) at<br />
surveillance mode. Powered by Eight new AA alkaline batteries,<br />
the camera stands-by about 6 months. Once a motion by human or<br />
animals is detected, the digital camera unit will be woken up at<br />
once and then automatically take pictures or videos according to<br />
previously programmed settings.<br />
The device is designed for outdoor use and is resistant against<br />
water and snow. Furthermore, the camera can be used as a<br />
portable digital camera. Pictures or videos can be taken manually<br />
by pressing on the operation panel.<br />
1.2 Application<br />
This camera can be used as automatic surveillance device for<br />
Page 1
1 Instruction<br />
guarding and recording unexpected intrusion to homes, shops,<br />
schools, depots, offices, taxies, worksites etc. It can also be used as<br />
trail camera for hunting or monitoring animals by recording the<br />
traces of wild animals. It can be left alone for weeks and months<br />
and it will save event records automatically in digital format.<br />
1.3 <strong>Camera</strong> Interface<br />
1.3.1 <strong>Camera</strong> Body Interface<br />
The camera has the following interfaces: a 2.0’’ TFT LCD<br />
display screen, operation panel, USB connector, SD-card slot, TV<br />
output and external DC power connector. Fig.1 shows the front<br />
view of the camera and its function parts. Fig.2 shows the<br />
operation panel and display screen. Fig.3 shows the bottom view of<br />
the camera and its I/O interface.<br />
Take a few moments to familiarize <strong>with</strong> the camera controls and<br />
displays. It is helpful to bookmark this section and refer to it when<br />
read through the rest of the manual.<br />
Page 2<br />
IR Flash<br />
Indication LED<br />
PIR<br />
Lens<br />
Lock
Display Screen<br />
Operation panel<br />
Power Switch<br />
DC In<br />
TV Out<br />
SD-card Slot<br />
1 Instruction<br />
Figure 1: Front view<br />
Figure 2: Operation interface<br />
USB<br />
Figure 3: Bottom view<br />
Page 3<br />
Battery Depot<br />
Lock Hole<br />
Bottom Screw DC Hole and Stopper
1.3.2 Key Notes<br />
1 Instruction<br />
“MENU” : to enter the program menu in preview mode;<br />
“▲”“▼”“◄”“►”: for parameter settings as described in the<br />
user’s manual.<br />
mode;<br />
“OK”: to save parameter settings and play videos.<br />
“ ”: to exchange between playback mode and preview<br />
“DEL”: to delete an image<br />
“ ”: to capture a photo or record a video manually.<br />
1.3.3 Shooting Information Display<br />
1.4 Saving Images or Videos<br />
The <strong>Camera</strong> uses a SD-card to save images (in .jpg format)<br />
Page 4
1 Instruction<br />
and videos (in .avi format). Before inserting the SD-card be sure<br />
that the SD card is unlocked. The camera is compatible <strong>with</strong><br />
SD-card from 8MB to 32GB.<br />
Page 5
2 Cautions<br />
2 Cautions<br />
★ The working voltage of the camera is 6V. The camera is supplied<br />
by four or eight AA batteries.<br />
★ Please install batteries according to shown polarity.<br />
★ Please unlock the write-protect before inserting the SD-card.<br />
★ Please insert the SD-card when the power switch is at OFF<br />
position before testing the camera. The camera has no internal<br />
memory for saving images or videos. If no SD-card is inserted,<br />
the camera will shut down automatically after a continuous<br />
indication sound.<br />
★ Please do not insert or take out the SD-card when the power<br />
switch is at ON position.<br />
★ It is recommended to format the SD-card by the camera when<br />
used at the first time.<br />
★ In the TEST mode, the camera will shut down automatically<br />
after 3 minutes if no operation is done. Please turn on the power<br />
again if you want to continue to work <strong>with</strong> the control.<br />
Page 6
3.1 Power Supply<br />
3 Quick Introductions<br />
3 Easy Operations<br />
Use 8 or 4 AA batteries or 6v external battery for power supply.<br />
Install the fully charged batteries into the depot according the<br />
polarities sign shown. The following batteries <strong>with</strong> 1.5V output can<br />
be used:<br />
1. High-density and high-performance alkaline batteries<br />
(Recommended)<br />
2. Rechargeable alkaline batteries<br />
3. Rechargeable NiMH batteries<br />
When in low-battery state, camera will be automatically shut<br />
down after the indication LED flashing for a while. Please change<br />
the batteries in time.<br />
3.2 Insert the SD-card<br />
The camera has no internal memory for saving images or<br />
videos. If no SD-card is inserted or SD-card is locked, the camera<br />
will shut down automatically after a continuous indication sound.<br />
3.3 Power on and Entering into the ON Mode<br />
The <strong>Camera</strong> has three basic operation modes:<br />
1. OFF mode: to turn off the camera.<br />
2. TEST mode: to set operational parameters, or to playback<br />
the photos or video clips via display screen or via TV.<br />
3. ON mode: to work under surveillance state.<br />
After switching the camera to ON position, the motion<br />
indication LED (red) will blink for about 10s. This time interval is<br />
Page 7
3 Quick Introductions<br />
for you to make the <strong>Camera</strong> ready for automatic surveillance<br />
operation, e.g., to close the bottom cover and to lock it, to fix the<br />
camera on a tree and to walk away. After entering into the ON<br />
mode, no manual controls are needed and possible. The <strong>Camera</strong><br />
will take pictures or videos automatically according to the previous<br />
programmed settings, when human or animals enter into the<br />
monitoring region.<br />
3.4 Enter into the TEST Mode<br />
There are 3 states in TEST Mode: preview state (preview the<br />
scene in the front of the camera), setting state (make customer<br />
settings), and playback state (view Photos or videos via 2.0” TFT<br />
display).<br />
3.4.1 <strong>Preview</strong><br />
After switching the camera to TEST Mode, it enters into the<br />
preview state.<br />
mode;<br />
Press to exchange between playback mode and preview<br />
3.4.2 Customer Settings<br />
Press MENU to manually customizing the camera settings<br />
which displayed on the screen or external TV monitor. The<br />
detailed operations will be described in “Advanced Operations”<br />
chapter.<br />
3.4.3 <strong>Manual</strong> Capturing<br />
Press to manually capture photos or record videos. Press<br />
Page 8
3 Quick Introductions<br />
again to stop the manual capturing of a video.<br />
3.4.4 View Images or Videos<br />
There are two ways to view the captured images or videos:<br />
1. LCD screen on the control<br />
2. TV monitor which connect to camera <strong>with</strong> TV cable<br />
Press to view images or videos, the latest image or video will<br />
be shown in the LCD screen on the control or TV monitor. Press<br />
“▲” or “▼” to view the previous or next image or video.<br />
3.4.5 Delete Images or Videos<br />
Press DEL to delete images or videos .Note the DEL button<br />
just works in Playback state. So if it’s in <strong>Preview</strong> state, you should<br />
press to enter into Playback state.<br />
3.5 Triggering modes<br />
There are 3 triggering modes of the camera: PIR triggering,<br />
Timer triggering and PIR& Timer triggering.<br />
3.5.1 PIR Triggering<br />
PIR triggering is the default setting. The camera works only<br />
when motions get detected, while, if PIR sensitivity is set as PIR<br />
OFF, the camera stops PIR triggering.<br />
3.5.2 Timer triggering<br />
The Timer interval Default setting is OFF which means the<br />
timer triggering is disabled. While changing the timer triggering<br />
interval to a non-zero value, the camera starts to work at a preset<br />
Page 9
3 Quick Introductions<br />
interval. <strong>User</strong> need to OFF the PIR triggering (choose PIR<br />
sensitivity as PIR OFF) if want the camera work only via Timer<br />
triggering.<br />
3.5.3 PIR& Timer triggering<br />
If want both PIR triggering and Timer triggering, the user need<br />
go to PIR sensitivity to set “normal, high or low” sensitivities<br />
according to the external environments, and need to set the Timer<br />
interval to a desired non-zero value. The camera will capture<br />
pictures or videos in a preset time interval even there is no motions<br />
get detected; the camera will also capture pictures and videos if<br />
motions get detected.<br />
3.6 Power Off<br />
Switch the camera to OFF position to power off the camera.<br />
Please note that even in the OFF mode, the camera still consumes<br />
certain power at μA level. Therefore, please remove the battery if<br />
the camera will not be used for a long time.<br />
Page 10
4 Advanced Operations<br />
4 Advanced Operations<br />
After you’re familiar <strong>with</strong> the basic operations of the <strong>Camera</strong>,<br />
you are now ready for advanced operations,and the options and<br />
parameters of the <strong>Camera</strong> are explained in more detail.<br />
4.1 Settings Menu<br />
To view the camera settings menu, press MENU in the TEST<br />
mode (Power switch is at TEST position). The settings menu will<br />
be shown on the LCD on the camera or the external TV monitor<br />
(only when the camera is connected to a TV).<br />
4.1.1 Set <strong>Camera</strong> Mode<br />
There are two modes: <strong>Camera</strong> or Video. There are two ways to<br />
set the camera mode: 1. Via shortcut key; 2. Via setting menu.<br />
1. Via shortcut key: You can set mode to “video” by pressing<br />
“▲” key and set mode to “camera” by pressing “▼”key in TEST<br />
mode.<br />
2. Setting menu: The following shows how to set camera mode<br />
to Video, provided that the previous option is <strong>Camera</strong>:<br />
a) Press MENU to display the setting menu.<br />
b) Press “▲” or “▼” to select Mode.<br />
c) Press “►” to select Video.<br />
d) Press OK to save the current setting and the option will be<br />
un-highlighted.<br />
Press MENU to cancel setting and return to info display.<br />
4.1.2 Format SD-Card<br />
Page 11
4 Advanced Operations<br />
The system will delete all images or videos stored in the<br />
SD-card after formatting, make sure that you have made a backup<br />
of important data.<br />
a) Press MENU to display the setting menu.<br />
b) Press “▲” or “▼” to select Format.<br />
c) Press OK to choose Enter to enter into submenu.<br />
d) Press “►” to select Yes. Yes will be highlighted.<br />
e) Press OK to start formatting the SD-card. During formatting,<br />
the display screen will show a message “Formatting…” as<br />
below.<br />
Press MENU to return to info display.<br />
4.1.3 Set Photo Size<br />
This parameter has two values: 5 mega pixels (5M Pixel or<br />
5<strong>MP</strong>) and 8 mega pixels (8M Pixel or8<strong>MP</strong>). The default value is 8<br />
mega pixels.<br />
The following shows you how to set pixel size as “8M Pixel”<br />
provided that the previous value is “5M Pixel” at MENU state:<br />
a) Press MENU to display the setting menu.<br />
b) Press “▲” or “▼” to select Photo Size.<br />
c) Press “►” to select 8<strong>MP</strong>.<br />
d) Press OK to save the current setting and the option will be<br />
un-highlighted.<br />
Page 12
4 Advanced Operations<br />
Press MENU to return to info display.<br />
4.1.4 Set Video Size<br />
This parameter also has two values: VGA (640×480)and QVGA<br />
(320×240). The default value is “640x480” (VGA).<br />
The following shows how to set video size as 320×240<br />
provided that the previous option is 640×480:<br />
e) Press MENU to display the setting menu.<br />
f) Press “▲” or “▼” to select Video Size.<br />
g) Press “►” to select 320×240.<br />
h) Press OK to save the current setting and the option will be<br />
un-highlighted.<br />
Press MENU to return to info display.<br />
4.1.5 Set Date and Time<br />
You can change the date and time of the device by setting this<br />
parameter when necessary, e.g., after every battery change. The<br />
date format is month/day/year, the time format is hour:<br />
minute: second. The valid value for year is between 2009 and<br />
2050.<br />
Provided that the date and time are needed to be set to<br />
November 15th, 2010 and half past ten, the steps are as following:<br />
a) Press MENU to display the setting menu.<br />
b) Press “▲” or “▼” to select Set Clock.<br />
c) Press OK to enter into submenu.<br />
d) Press “►” to select item, press “▲” or “▼” to change the<br />
value.<br />
Page 13
4 Advanced Operations<br />
e) Press OK to save all current setting and return to info<br />
display.<br />
Press MENU to return to info display.<br />
4.1.6 Set Photo Burst<br />
This parameter affects the number of pictures taken for each<br />
triggering in <strong>Camera</strong> mode. It has three values: “1 Photo” “2<br />
Photos” and “3 Photos”. Its default value is “1 Photo”.<br />
The following shows how to set continuous capture number to 3<br />
Photos provided that the previous option is 1 Photo:<br />
a) Press MENU to display the setting menu.<br />
b) Press “▲” or “▼” to select Capture Number.<br />
c) Press “►” to select 3 Photos.<br />
d) Press OK to save the current setting and the option will be<br />
un-highlighted.<br />
Press MENU to return to info display.<br />
4.1.7 Set Video Length<br />
This parameter is effective and can be adjusted only when the<br />
device in the video mode for the LIVE mode. Its value extends<br />
from 1 to 60 seconds <strong>with</strong> a step of one second. The default value is<br />
10 seconds. Press “◄” and “►” to decreases or increases the<br />
value by 1 second.<br />
The following shows how to set video length to 15 Seconds<br />
provided that the previous value is 1 Seconds:<br />
a) Press MENU to display the setting menu.<br />
Page 14
4 Advanced Operations<br />
b) Press “▲” or “▼” to select Video Length.<br />
c) Press “►” to increase to 15 Seconds.<br />
d) Press OK to save the current setting and the option will be<br />
un-highlighted.<br />
Press MENU to exit.<br />
4.1.8 Set PIR Sensitivity<br />
This parameter defines the sensitivity of the PIR. There are<br />
four parameters: High, Normal, Low and PIR off. The default<br />
value is “Normal”. The higher degree indicates that the <strong>Camera</strong> is<br />
more easily to be triggered by motion, taking more pictures or<br />
recording more videos. It is recommended to use high sensitivity<br />
degree in room or environment <strong>with</strong> little interference, and to use<br />
lower sensitivity for outdoor or environment <strong>with</strong> lots of<br />
interference like hot wind, smoke, near window etc. Furthermore,<br />
the sensitivity of the PIR is strongly related to the temperature.<br />
Higher temperature leads to lower sensitivity. Therefore it is<br />
suggested to set a higher sensitivity for high temperature<br />
environment.<br />
The following shows how to set PIR sensitivity as Low provided<br />
that the previous option is Normal.<br />
a) Press MENU to display the setting menu.<br />
b) Press “▲” or “▼” to select Sensitivity.<br />
c) Press “►” to select Low.<br />
d) Press OK to save the current setting and the option will be<br />
un-highlighted.<br />
Page 15
4 Advanced Operations<br />
Press MENU to return to info display.<br />
4.1.9 Set PIR Triggering Interval<br />
This parameter means that how long the PIR (Passive Infrared<br />
motion sensor) will be disabled after each triggering in ON mode.<br />
During this time the PIR of the device will not react to the motion<br />
of human (or animals). The minimum interval is 0 second, it<br />
means the PIR works all the time. The maximum interval is 1 hour,<br />
it means the PIR will be disabled for 1 hour after each triggering.<br />
The default value is 1 minute. Press “◄” and “►” to decreases or<br />
increases the value.<br />
The following shows how to set triggering interval time to 5<br />
Minutes provided that the previous value is 1 Minute.<br />
a) Press MENU to display the setting menu.<br />
b) Press “▲” or “▼” to select PIR Interval.<br />
c) Press “►” to decrease or increase to 5 Minutes.<br />
d) Press OK to save the current setting and the option will be<br />
un-highlighted.<br />
Press MENU to cancel setting and return to info display.<br />
4.1.10 Set Timer Triggering Interval<br />
This camera has a new function, timer function,which means<br />
the camera captures images or videos at a preset time intervals<br />
regardless of wether there are motions get detected. The default<br />
parameter is OFF which means the timer function is disabled.<br />
When changing this parameter to a non-zero value, it starts to take<br />
Page 16
4 Advanced Operations<br />
photos at given time interval. The value ranges from 10 seconds to<br />
8 hours. Press “◄” and “►” to decreases or increases the value.<br />
The following shows how to set timer interval to 1 hour<br />
provided that the previous value is OFF.<br />
e) Press MENU to display the setting menu.<br />
f) Press “▲” or “▼” to select Timer Interval.<br />
g) Press “►” to decrease or increase to 1 hour.<br />
h) Press OK to save the current setting and the option will be<br />
un-highlighted.<br />
Press MENU to cancel setting and return to info display.<br />
4.1.11 Set Timer Switch<br />
This parameter defines a certain time lapse in a day when the<br />
camera can be triggered, while in the rest of the time lapse the<br />
device is shut off. The effective value ranges from 00:00:00 to<br />
23:59:59.<br />
Timer Switch OFF means the camera works continuously; Timer<br />
switch ON means the camera works only during the time lapse<br />
according to the preset settings.<br />
Please note that the Timer switch functions only when the timer<br />
is set as On. Provided that the camera works from 08:00 a.m. to<br />
17:00 p.m., the steps are as following:<br />
a) Press MENU to display the setting menu.<br />
b) Press “▲” or “▼” to select Timer Switch.<br />
c) Press “►” to select On.<br />
d) Press OK to enter into submenu.<br />
Page 17
4 Advanced Operations<br />
e) Press “►” to select item, press “▲” or “▼” to change the<br />
value until the start time changes to 8 and the stop time<br />
changes to 17.<br />
f) Press OK to save all current setting and the option will be<br />
un-highlighted.<br />
Press MENU to return to previous menu.<br />
4.1.12 Set Flash Range<br />
This parameter defines the IR lights distance. The camera<br />
provides two options 22m and 14m. If choose 15m, all these 40 IR<br />
lights work to get a long IR distance, while if choose 8m, the IR<br />
range will be shorter, and only the 3 middle horizontal arrays of<br />
IR lights work, to save the power consumption.<br />
The following shows how to set flash range as 14m provided<br />
that the previous option is 22m.<br />
a) Press MENU to display the setting menu.<br />
b) Press “▲” or “▼” to select Flash Range.<br />
c) Press “►” to select 14m.<br />
d) Press OK to save the current setting and the option will be<br />
un-highlighted.<br />
Press MENU to cancel setting and return to info display.<br />
4.1.13 Set Time Stamp<br />
This parameter defines whether the date and time be stamped<br />
in the pictures and video clips or not. The following shows you how<br />
to set time stamp as “Off” provided that the previous value is “On”<br />
in MENU state.<br />
Page 18
4 Advanced Operations<br />
e) Press MENU to display the setting menu.<br />
f) Press “▲” or “▼” to select Time Stamp.<br />
g) Press “►” to select Off.<br />
h) Press OK to save the current setting and the option will be<br />
un-highlighted.<br />
Press MENU to cancel setting and return to info display.<br />
4.1.14 Reset to Default Settings<br />
To reset the setting to the default values, the steps are as<br />
follows:<br />
a) Press MENU to display the setting menu.<br />
b) Press “▲” or “▼” to select Reset.<br />
c) Press OK to reset to default settings and return to info<br />
display.<br />
Press MENU to cancel setting and return to info display.<br />
4.2 Default Settings and Live Monitoring<br />
Please refer to table 1 for the default settings:<br />
Parameter<br />
name<br />
Default Other settings<br />
<strong>Camera</strong> Mode <strong>Camera</strong> Video<br />
Photo Size 8M Pixel 5M Pixel<br />
Photo Burst 1 Photo 2 Photos, 3 Photos<br />
Video Size 640×480 320x240<br />
Video Length Avi 10 Second 1-60 seconds<br />
PIR Sensitivity Normal High, Low<br />
Page 19
PIR<br />
Interval<br />
4 Advanced Operations<br />
1 Minute 0-59 seconds, 1-60<br />
Page 20<br />
minutes<br />
Timer Interval OFF 10 seconds to 8 hours<br />
Timer Switch Off On (00:00 – 23:59)<br />
Flash Range 22M 14M<br />
Time Stamp On Off<br />
4.3 Firmware upgrade<br />
Table 1: Default settings of the <strong>Camera</strong><br />
This camera provides an upgrading function for the users.<br />
Upgrading is needed only when an improved firmware is available.
5 Mounting the <strong>Camera</strong><br />
5 Mounting the <strong>Camera</strong><br />
When the camera is used in an outdoor environment, such as<br />
hunting or monitoring the living habits of wild animals, you need<br />
to mount the device on a certain place properly. It is recommended<br />
to mount the camera on a tree <strong>with</strong> diameter about 15cm. To get<br />
the optimal picture quality, the recommended distance is 5m from<br />
the tree to the target monitoring area and recommended height<br />
from the ground is 1.5~2 meters. Adjust the viewing angel properly<br />
(view angle of this camera is 52°).<br />
There are two ways to mount the camera: using a band shaped<br />
belt, or bottom screw.<br />
Using the belt: To use the belt to fix the camera on a tree is<br />
illustrated in Fig. 4. Take the belt toes to go through the two<br />
back holes of the camera. At the end, tie the two toes to the tree<br />
to finish fixing.<br />
Using bottom screw.<br />
Figure 4: Fixing the camera <strong>with</strong> belt<br />
Page 21
Appendix I: PIR Detection Zone<br />
Appendix I: PIR Detection Zone<br />
The figure4 shows the detection range in different detection<br />
angles. When the detection angle is 35°,the detection range is 50ft.<br />
When the detection angle is 52°,the detection range is 30ft.<br />
Figure 4<br />
The PIR detection angle (α) is just barely larger than the field<br />
of view angle(β). The advantage of this design is to avoid empty<br />
pictures and get available pictures.<br />
Figure 5<br />
Page 22
Appendix I: PIR Detection Zone<br />
This camera has a new design of PIR and this new PIR is<br />
patented. The new patented PIR’s detection range can reach to<br />
25m. The figure 6 shows the compared detection zone between<br />
normal PIR and the new patented PIR.<br />
Figure 6<br />
Page 23
AppendixⅡ: Technical Specifications<br />
AppendixⅡ: Technical Specifications<br />
Image Sensor<br />
5<strong>MP</strong> Color CMOS,<br />
8<strong>MP</strong> interpolation<br />
Lens<br />
F/NO=3.1mm<br />
FOV(Field of View)=52°<br />
IR-Flash Up to 22M/73F(940nm IR LEDs)<br />
Detection Range Up to 22M/73F<br />
Display Screen 2.0” TFT<br />
Memory Card Up to 32GB<br />
Picture Resolution<br />
8<strong>MP</strong> = 3328 ×2496<br />
5<strong>MP</strong> = 2560×1920<br />
Video Resolution<br />
640×480 (16fps)<br />
320×240 (20fps)<br />
PIR Sensor Multi Zone<br />
PIR Sensitivity Adjustable (High/Normal/Low)<br />
Trigger Time 1s<br />
Weight * 0.24 kg<br />
Operation/Storage<br />
Tem.<br />
-20 - +60°C / -30 - +70°C<br />
Interval 1s – 60 min.<br />
Photo Burst 1–3<br />
Video Length 1–60s<br />
Power Supply<br />
8× AA (recommend),4×<br />
AA(urgent)<br />
Stand-by Current < 0.3 mA (
Appendix Ⅲ: Parts List<br />
AppendixⅢ: Parts List<br />
Part Name Quantity<br />
Digital <strong>Camera</strong> One<br />
TV Cable One<br />
USB Cable One<br />
Belt One<br />
<strong>User</strong> <strong>Manual</strong> One<br />
For Questions or Comments Please Contact:<br />
<strong>Explore</strong> <strong>Scientific</strong> / Bresser<br />
621 Madison Street<br />
Springdale, AR 72762<br />
866-252-3811<br />
service@explorescientific.com<br />
www.bresser.com<br />
Page 25