Pilot TNC 407, TNC 415 B, TNC 425 (280 5x0-xx) - heidenhain
Pilot TNC 407, TNC 415 B, TNC 425 (280 5x0-xx) - heidenhain
Pilot TNC 407, TNC 415 B, TNC 425 (280 5x0-xx) - heidenhain

Create successful ePaper yourself
Turn your PDF publications into a flip-book with our unique Google optimized e-Paper software.
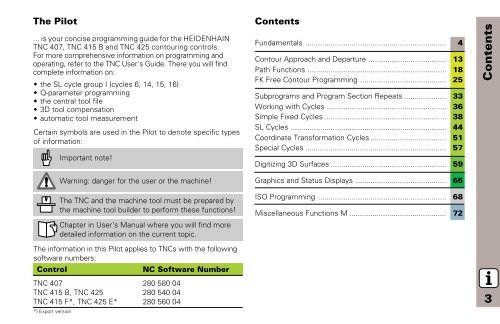
The <strong>Pilot</strong><br />
... is your concise programming guide for the HEIDENHAIN<br />
<strong>TNC</strong> <strong>407</strong>, <strong>TNC</strong> <strong>415</strong> B and <strong>TNC</strong> <strong>425</strong> contouring controls.<br />
For more comprehensive information on programming and<br />
operating, refer to the <strong>TNC</strong> User's Guide. There you will find<br />
complete information on:<br />
• the SL cycle group I (cycles 6, 14, 15, 16)<br />
• Q-parameter programming<br />
• the central tool file<br />
• 3D tool compensation<br />
• automatic tool measurement<br />
Certain symbols are used in the <strong>Pilot</strong> to denote specific types<br />
of information:<br />
Important note!<br />
Warning: danger for the user or the machine!<br />
The <strong>TNC</strong> and the machine tool must be prepared by<br />
the machine tool builder to perform these functions!<br />
Chapter in User's Manual where you will find more<br />
detailed information on the current topic.<br />
The information in this <strong>Pilot</strong> applies to <strong>TNC</strong>s with the following<br />
software numbers:<br />
Control NC Software Number<br />
<strong>TNC</strong> <strong>407</strong> <strong>280</strong> 580 04<br />
<strong>TNC</strong> <strong>415</strong> B, <strong>TNC</strong> <strong>425</strong> <strong>280</strong> 540 04<br />
<strong>TNC</strong> <strong>415</strong> F*, <strong>TNC</strong> <strong>425</strong> E* <strong>280</strong> 560 04<br />
*) Export version<br />
Contents<br />
Fundamentals ................................................................... 4<br />
Contour Approach and Departure ..................................... 13<br />
Path Functions .................................................................. 18<br />
FK Free Contour Programming ......................................... 25<br />
Subprograms and Program Section Repeats .................... 33<br />
Working with Cycles ......................................................... 36<br />
Simple Fixed Cycles .......................................................... 38<br />
SL Cycles .......................................................................... 44<br />
Coordinate Transformation Cycles .................................... 51<br />
Special Cycles ................................................................... 57<br />
Digitizing 3D Surfaces ....................................................... 59<br />
Graphics and Status Displays ........................................... 65<br />
ISO Programming ............................................................. 68<br />
Miscellaneous Functions M .............................................. 72<br />
Contents<br />
3
Fundamentals<br />
4<br />
Fundamentals<br />
Programs/ Files<br />
See “Introduction, File Management”<br />
The <strong>TNC</strong> keeps its programs, tables and texts in files.<br />
A file designation consists of two components:<br />
THREAD2.H<br />
File name File type<br />
Maximum length:<br />
8, 12 or 16 characters*<br />
see table at right<br />
Creating a New Part Program<br />
PGM<br />
NAME<br />
Select file type .H<br />
Enter a new file name<br />
Select unit of measure for dimensions (mm or inches)<br />
Define the blank form (BLK) for graphics:<br />
Enter the spindle axis<br />
Enter coordinates of the MIN point:<br />
the smallest X, Y and Z coordinates<br />
Enter coordinates of the MAX point:<br />
the greatest X, Y and Z coordinates<br />
1 BLK FORM 0.1 Z X+0 Y+0 Z-50<br />
2 BLK FORM 0.2 X+100 Y+100 Z+0<br />
*) depending on machine parameter settings<br />
Files in the <strong>TNC</strong><br />
Programs<br />
• in HEIDENHAIN format<br />
• in ISO format<br />
Tables for<br />
• Tools<br />
• Datums<br />
• Pallets<br />
• Points<br />
Texts as<br />
• ASCII files<br />
File type<br />
.H<br />
.I<br />
.T<br />
.D<br />
.P<br />
.PNT<br />
.A
Choosing the Screen Layout<br />
See “Introduction, the <strong>TNC</strong> <strong>407</strong>”<br />
Show soft keys for setting the screen layout<br />
Mode of operation Screen contents<br />
MANUAL OPERATION<br />
Positions<br />
ELECTRONIC HANDWHEEL<br />
Positions at left<br />
Status at right<br />
POSITIONING WITH<br />
Program<br />
MANUAL DATA INPUT<br />
Program at left<br />
Status at right<br />
PROGRAM RUN,<br />
Program<br />
FULL SEQUENCE<br />
PROGRAM RUN,<br />
Program at left<br />
SINGLE BLOCK<br />
Program structure at right<br />
TEST RUN<br />
Program at left<br />
Status at right<br />
Program at left<br />
Graphics at right<br />
Graphics<br />
Continued<br />
Positions at left, status at right<br />
Program at left, graphics at right<br />
Fundamentals<br />
5
Fundamentals<br />
6<br />
Mode of operation Screen contents<br />
PROGRAMMING AND EDITING<br />
Program<br />
Program at left<br />
Program structure at right<br />
Program at left<br />
Programming graphics at right<br />
Program at left, program structure at right
Absolute Cartesian Coordinates<br />
The dimensions are measured from the current datum.<br />
The tool moves to the absolute coordinates.<br />
Programmable axes in an NC block<br />
Linear motion: 3 or 5 axes (depending on machine or control)<br />
Circular motion: 2 linear axes in a plane or<br />
3 linear axes with cycle 19<br />
WORKING PLANE<br />
Incremental Cartesian Coordinates<br />
The dimensions are measured from the last programmed position of<br />
the tool.<br />
The tool moves by the incremental coordinates.<br />
Fundamentals<br />
7
Fundamentals<br />
8<br />
Circle Center and Pole: CC<br />
The circle center (CC) must be entered to program circular tool movements<br />
with the path function C (see page 21). CC is also needed to<br />
define the pole for polar coordinates.<br />
CC is entered in Cartesian coordinates*.<br />
An absolutely defined circle center or pole is always measured from<br />
the workpiece datum.<br />
An incrementally defined circle center or pole is always measured from<br />
the last programmed position of the workpiece.<br />
Angle Reference Axis<br />
Angles – such as a polar coordinate angle PA or an angle of rotation<br />
ROT – are measured from the angle reference axis.<br />
Working plane Ref. axis and 0° direction<br />
X/Y X<br />
Y/Z Y<br />
Z/X Z<br />
*Circle center in polar coordinates: See FK programming
Polar Coordinates<br />
Dimensions in polar coordinates are referenced to the pole (CC).<br />
A position in the working plane is defined by<br />
• Polar coordinate radius PR = Distance of the position from the pole<br />
• Polar coordinate angle PA = Angle from the angle reference axis to<br />
the straight line CC – PR<br />
Incremental dimensions<br />
Incremental dimensions in polar coordinates are measured from the<br />
last programmed position.<br />
Programming polar coordinates<br />
Select the path function<br />
L<br />
Press the P key<br />
Answer the dialog prompts<br />
Defining Tools<br />
Tool data<br />
Every tool is designated by a tool number between 1 and 254 or, if you<br />
are using tool tables, by a tool name.<br />
Entering tool data<br />
You can enter the tool data (length L and radius R)<br />
• in a tool table (centrally, Program TOOL.T)<br />
or<br />
• within the part program in TOOL DEF blocks (locally)<br />
Fundamentals<br />
9
Fundamentals<br />
10<br />
TOOL<br />
DEF<br />
TOOL NUMBER<br />
TOOL LENGTH L<br />
TOOL RADIUS R<br />
Program the tool length as its difference ΔL to the zero tool:<br />
ΔL>0: The tool is longer than the zero tool<br />
ΔL
Tool Compensation<br />
The <strong>TNC</strong> compensates the length L and radius R of the tool during<br />
machining.<br />
Length compensation<br />
Beginning of effect:<br />
Tool movement in the spindle axis<br />
End of effect:<br />
Tool exchange or tool with the length L=0<br />
Radius compensation<br />
Beginning of effect:<br />
Tool movement in the working plane with RR or RL<br />
End of effect:<br />
Execution of a positioning block with R0<br />
Working without radius compensation (e.g. drilling):<br />
Tool movement with R0<br />
S = Start; E = End<br />
Fundamentals<br />
11
Fundamentals<br />
12<br />
Datum Setting Without a 3D Touch Probe<br />
During datum setting you set the <strong>TNC</strong> display to the coordinates of a<br />
known position on the workpiece:<br />
Insert a zero tool with known radius<br />
Select the MANUAL OPERATION or<br />
ELECTRONIC HANDWHEEL mode<br />
Touch the reference surface in the tool axis with the tool and enter<br />
its length<br />
Touch the reference surface in the working plane with the tool and<br />
enter the position of the tool center<br />
Datum Setting with a 3D Touch Probe<br />
The fastest, simplest and most accurate way to set a datum is to use a<br />
HEIDENHAIN 3D touch probe.<br />
The following probe functions are provided by the MANUAL OPERA-<br />
TION and ELECTRONIC HANDWHEEL modes of operation:<br />
Basic rotation<br />
Datum setting in one axis<br />
Datum setting at a corner<br />
Datum setting at a circle center
Contour Approach and Departure<br />
Starting point PS P lies outside of the contour and must be approached without radius<br />
S<br />
compensation.<br />
Auxiliary point PH P lies outside of the contour and is calculated by the <strong>TNC</strong>.<br />
H<br />
The tool moves from the starting point P S to the auxiliary point<br />
P H in rapid traverse!<br />
First contour point P and last contour point P A E<br />
The first contour point P is programmed in the APPR (approach) block.<br />
A<br />
The last contour point is programmed as usual.<br />
End point PN P lies outside of the contour and results from the DEP (departure)<br />
N<br />
block. P is automatically approached with R0.<br />
N<br />
Path Functions for Approach and Departure<br />
Press the soft key with the desired path function:<br />
APPR<br />
DEP<br />
Straight line with tangential connection<br />
Straight line perpendicular to the<br />
contour point<br />
Circular arc with tangential connection<br />
Straight line segment tangentially connected<br />
to the contour through an arc<br />
• Program a radius compensation in the APPR block!<br />
• DEP blocks set the radius compensation to 0!<br />
Contour Approach and Departure<br />
13
Contour Approach and Departure<br />
14<br />
Approaching on a Straight Line with<br />
Tangential Connection<br />
COORDINATES for the first contour point PA Distance LEN (length) from P to P H A<br />
Enter a length LEN > 0<br />
TOOL RADIUS COMPENSATION RR/RL/NO COMP<br />
7 L X+40 Y+10 R0 FMAX M3<br />
8 APPR LT X+20 Y+20 LEN 15 RR F100<br />
9 L X+35 Y+35<br />
Approaching on a Straight Line Perpendicular to<br />
the First Contour Element<br />
COORDINATES for the first contour point PA Distance LEN (length) from P to P H A<br />
Enter a length LEN > 0<br />
RADIUS COMPENSATION RR/RL/NO COMP<br />
7 L X+40 Y+10 R0 FMAX M3<br />
8 APPR LN X+10 Y+20 LEN 15 RR F100<br />
9 L X+20 Y+35
Approaching Tangentially on an Arc<br />
COORDINATES for the first contour point P A<br />
RADIUS R<br />
Enter a radius R > 0<br />
CIRCLE CENTER ANGLE (CCA)<br />
Enter a CCA > 0<br />
TOOL RADIUS COMPENSATION RR/RL/NO COMP<br />
7 L X+40 Y+10 R0 FMAX M3<br />
8 APPR CT X+10 Y+20 CCA 180 R10 RR F100<br />
9 L X+20 Y+35<br />
Approaching Tangentially on an Arc<br />
and a Straight Line<br />
COORDINATES for the first contour point PA RADIUS R<br />
Enter a radius R > 0<br />
TOOL RADIUS COMPENSATION RR/RL/NO COMP<br />
7 L X+40 Y+10 R0 FMAX M3<br />
8 APPR LCT X+10 Y+20 R10 RR F100<br />
9 L X+20 Y+35<br />
Contour Approach and Departure<br />
15
Contour Approach and Departure<br />
16<br />
Departing Tangentially on a Straight Line<br />
Distance LEN (length) from P E to P N<br />
Enter a length LEN > 0<br />
23 L X+30 Y+35 RR F100<br />
24 L Y+20 RR F100<br />
25 DEP LT LEN 12.5 F100 M2<br />
Departing on a Straight Line<br />
Perpendicular to the Last Contour Element<br />
Distance LEN (length) from P E to P N<br />
Enter a length LEN > 0<br />
23 L X+30 Y+35 RR F100<br />
24 L Y+20 RR F100<br />
25 DEP LN LEN+20 F100 M2
Departing Tangentially on an Arc<br />
RADIUS R<br />
Enter a radius R > 0<br />
CENTER ANGLE (CCA)<br />
23 L X+30 Y+35 RR F100<br />
24 L Y+20 RR F10<br />
25 DEP CT CCA 180 R+8 F100 M2<br />
Departing on an Arc Tangentially Connecting<br />
the Contour and a Straight Line<br />
COORDINATES of the end point PN RADIUS R<br />
Enter a radius R > 0<br />
23 L X+30 Y+35 RR F100<br />
24 L Y+20 RR F100<br />
25 DEP LCT X+10 Y+12 R8 F100 M2<br />
Contour Approach and Departure<br />
17
Path Functions<br />
18<br />
Path Functions for Positioning Blocks<br />
See „Programming Tool Movements“.<br />
Programming the Direction of Traverse<br />
Regardless of whether the tool or the workpiece is actually moving,<br />
you always program as if the tool is moving and the workpiece is<br />
stationary.<br />
Entering the Target Positions<br />
Target positions can be entered in Cartesian or polar coordinates –<br />
either as absolute or incremental values, or with both absolute and<br />
incremental values in the same block.<br />
Entries in the Positioning Block<br />
A complete positioning block contains the following data:<br />
• Path function<br />
• Coordinates of the contour element end points (target position)<br />
• Radius compensation RR/RL/R0<br />
• Feed rate F<br />
• Miscellaneous function M<br />
Before you execute a part program, always pre-position the tool<br />
to prevent the possibility of damaging the tool or workpiece!<br />
Path functions<br />
Straight line<br />
Chamfer between two<br />
straight lines<br />
Corner rounding<br />
Circle center or pole for<br />
polar coordinates<br />
Circular path around the<br />
circle center CC<br />
Circular path with<br />
known radius<br />
Circular path with<br />
tangential connection to<br />
previous contour<br />
L<br />
CHF<br />
RND<br />
CR<br />
CT<br />
CC<br />
C<br />
Page 19<br />
Page 20<br />
Page 20<br />
Page 21<br />
Page 21<br />
Page 22<br />
Page 23
Straight Line<br />
L<br />
COORDINATES of the straight line end point<br />
TOOL RADIUS COMPENSATION RR/RL/NO COMP<br />
FEED RATE F<br />
MISCELLANEOUS FUNCTION M<br />
With Cartesian coordinates:<br />
7 L X+10 Y+40 RL F200 M3<br />
8 L IX+20 IY-15<br />
9 L X+60 IY-10<br />
With polar coordinates:<br />
12 CC X+45 Y+25<br />
13 LP PR+30 PA+0 RR F300 M3<br />
14 LP PA+60<br />
15 LP IPA+60<br />
16 LP PA+180<br />
• You must first define the pole CC before you can program<br />
polar coordinates!<br />
• Program the pole CC only in Cartesian coordinates!<br />
• The pole CC remains effective until you define a new one!<br />
Path Functions<br />
19
Path Functions<br />
20<br />
Inserting a Chamfer Between Two Straight Lines<br />
CHF<br />
Corner Rounding<br />
The beginning and end of the arc extend tangentially from the previous<br />
and subsequent contour elements.<br />
RND<br />
CHAMFER SIDE LENGTH<br />
7 L X+0 Y+30 RL F300 M3<br />
8 L X+40 IY+5<br />
9 CHF 12<br />
10 L IX+5 Y+0<br />
• You cannot start a contour with a CHF block!<br />
• The radius compensation before and after the CHF block<br />
must be the same!<br />
• An inside chamfer must be large enough to accommodate<br />
the current tool!<br />
RADIUS R of the circular arc<br />
FEED RATE F for corner rounding<br />
5 L X+10 Y+40 RL F300 M3<br />
6 L X+40 Y+25<br />
7 RND R5 F100<br />
8 L X+10 Y+5<br />
An inside arc must be large enough to accommodate the<br />
current tool!
Circular Path Around the Circle Center CC<br />
CC<br />
C<br />
COORDINATES of the circle center CC<br />
COORDINATES of the arc end point<br />
DIRECTION OF ROTATION DR<br />
C and CP enable you to program a complete circle in one block.<br />
With Cartesian coordinates:<br />
5 CC X+25 Y+25<br />
6 L X+45 Y+25 RR F200 M3<br />
7 C X+45 Y+25 DR+<br />
With polar coordinates:<br />
18 CC X+25 Y+25<br />
19 LP PR+20 PA+0 RR F250 M3<br />
20 CP PA+180 DR+<br />
• Define the pole CC before programming polar coordinates!<br />
• Program the pole CC only in Cartesian coordinates!<br />
• The pole CC remains effective until you define a new one!<br />
• The arc end point can be defined only with the polar<br />
coordinate angle (PA)!<br />
Path Functions<br />
21
Path Functions<br />
22<br />
Circular Path with Known Radius (CR)<br />
CR<br />
COORDINATES of the arc end point<br />
RADIUS R<br />
If the central angle ZW > 180, R is negative.<br />
If the central angle ZW < 180, R is positive.<br />
DIRECTION OF ROTATION DR<br />
10 L X+40 Y+40 RL F200 M3 Arc starting point<br />
11 CR X+70 Y+40 R+20 DR- Arc 1 or<br />
11 CR X+70 Y+40 R+20 DR+ Arc 2<br />
10 L X+40 Y+40 RL F200 M3 Arc starting point<br />
11 CR X+70 Y+40 R-20 DR- Arc 3 or<br />
11 CR X+70 Y+40 R-20 DR+ Arc 4<br />
Arcs 1 and 2 Arcs 3 and 4
Circular Path CT with Tangential Connection<br />
CT<br />
COORDINATES of the arc end point<br />
RADIUS COMPENSATION RR/RL/NO COMP<br />
FEED RATE F<br />
MISCELLANEOUS FUNCTION M<br />
With Cartesian coordinates:<br />
5 L X+0 Y+25 RL F250 M3<br />
6 L X+25 Y+30<br />
7 CT X+45 Y+20<br />
8 L Y+0<br />
With polar coordinates:<br />
12 CC X+40 Y+35<br />
13 L X+0 Y+35 RL F250 M3<br />
14 LP PR+25 PA+120<br />
15 CTP PR+30 PA+30<br />
16 L Y+0<br />
• Define the pole CC before programming polar coordinates!<br />
• Program the pole CC only in Cartesian coordinates!<br />
• The pole CC remains effective until you define a new one!<br />
Path Functions<br />
23
Path Functions<br />
24<br />
Helix (Only in Polar Coordinates)<br />
Calculations (upward milling direction)<br />
Path revolutions: n = Thread revolutions + overrun at start and<br />
end of thread<br />
Total height: h = Pitch P x path revolutions n<br />
Incr. coord. angle: IPA = Path revolutions n x 360°<br />
Start angle: PA = Angle at start of thread + angle for<br />
overrun<br />
Start coordinate:<br />
Shape of helix<br />
Z = Pitch P x (thread revolutions + thread<br />
overrun at start of thread)<br />
Internal thread Work direction Direction Radius comp.<br />
Right-hand Z+ DR+ RL<br />
Left-hand Z+ DR– RR<br />
Right-hand Z– DR– RR<br />
Left-hand<br />
External thread<br />
Z– DR+ RL<br />
Right-hand Z+ DR+ RR<br />
Left-hand Z+ DR– RL<br />
Right-hand Z– DR– RL<br />
Left-hand Z– DR+ RR<br />
M6 x 1 mm thread with 5 revolutions:<br />
12 CC X+40 Y+25<br />
13 L Z+0 F100 M3<br />
14 LP PR+3 PA+270 RL<br />
15 CP IPA-1800 IZ+5 DR- RL F50
FK Free Contour Programming<br />
If the end point coordinates are not given in the workpiece drawing or<br />
if the drawing gives dimensions that cannot be entered with the gray<br />
path function keys, you can still program the part by using the<br />
„FK Free Contour Programming”.<br />
Possible data on a contour element:<br />
• Known coordinates of the end point<br />
• Auxiliary points on the contour element<br />
• Auxiliary points near the contour element<br />
• A reference to another contour element<br />
• Directional data (angle) / position data<br />
• Data regarding the course of the contour<br />
To use FK programming properly:<br />
• All contour elements must lie in the working plane.<br />
• Enter all available data on each contour element.<br />
• If a program contains both FK and conventional blocks, the FK<br />
contour must be fully defined before you can return to conventional<br />
programming.<br />
These dimensions can be programmed with FK<br />
FK Free Contour Programming<br />
25
FK Free Contour Programming<br />
26<br />
Working with the Interactive Graphics<br />
Select the PGM+GRAPHICS screen layout!<br />
The interactive graphics show the contour as you are programming it.<br />
If the data you enter can apply to more than one solution, the following<br />
soft keys will appear:<br />
To show the possible solutions<br />
To enter the displayed solution in the part program<br />
To enter data for subsequent contour elements<br />
To graphically display the next programmed block<br />
Standard colors of the interactive graphics<br />
Fully defined contour element<br />
The displayed element is one of a limited number of<br />
possible solutions<br />
The element is one of an infinite number of solutions<br />
Contour element from a subprogram
Initiating the FK Dialog<br />
Straight Circular<br />
Contour element without tangential connection<br />
Contour element with tangential connection<br />
Pole for FK programming<br />
End Point Coordinates X, Y or PA, PR<br />
Cartesian coordinates X and Y<br />
Polar coordinates referenced to FPOL<br />
Incremental input<br />
7 FPOL X+20 Y+30<br />
8 FL IX+10 Y+20 RR F100<br />
9 FCT PR+15 IPA+30 DR+ R15<br />
FK Free Contour Programming<br />
27
FK Free Contour Programming<br />
28<br />
Circle Center (CC) in an FC/ FCT block<br />
Cartesian coordinates of the circle center<br />
Polar coordinates of the circle center<br />
referenced to FPOL<br />
Incremental input<br />
10 FC CCX+20 CCY+15 DR+ R15<br />
11 FPOL X+20 Y+15<br />
...<br />
13 FC DR+ R15 CCPR+35 CCPA+40<br />
Auxiliary Points<br />
... P1, P2, P3 on a contour<br />
For straight lines: up to 2 auxiliary points<br />
For circles: up to 3 auxiliary points<br />
... next to a contour<br />
Coordinates of the auxiliary points<br />
Perpendicular distance<br />
13 FC DR- R10 P1X+42.929 P1Y+60.071<br />
14 FLT AN-70 PDX+50 PDY+53 D10
Direction and Length of the Contour Element<br />
Data on a straight line<br />
Gradient angle of a straight line<br />
Length of a straight line<br />
Data on a circular path<br />
Gradient angle of the entry tangent<br />
Length of an arc chord<br />
27 FLT X+25 LEN 12.5 AN+35 RL F200<br />
28 FC DR+ R6 LEN 10 AN-45<br />
29 FCT DR- R15 LEN 15<br />
Identifying a closed contour<br />
Beginning: CLSD+<br />
End: CLSD–<br />
12 L X+5 Y+35 RL F500 M3<br />
13 FC DR- R15 CLSD+ CCX+20 CCY+35<br />
...<br />
17 FCT DR- R+15 CLSD-<br />
FK Free Contour Programming<br />
29
FK Free Contour Programming<br />
30<br />
Values Relative to Block N:<br />
Entering Coordinates<br />
Cartesian coordinates relative to block N<br />
Polar coordinates relative to block N<br />
• Relative data must be entered incrementally!<br />
• CC can also be programmed in relative values!<br />
12 FPOL X+10 Y+10<br />
13 FL PR+20 PA+20<br />
14 FL AN+45<br />
15 FCT IX+20 DR- R20 CCA+90 RX 13<br />
16 FL IPR+35 PA+0 RPR 13
Values Relative to Block N:<br />
Direction and Distance of the Contour Element<br />
Gradient angle<br />
Parallel to a straight contour element<br />
Parallel to the entry tangent of an arc<br />
Distance from a parallel element<br />
Always enter relative values incrementally!<br />
17 FL LEN 20 AN+15<br />
18 FL AN+105<br />
19 FL LEN 12.5 PAR 17 DP 12.5<br />
20 FSELECT 2<br />
21 FL LEN 20 IAN+95<br />
22 FL IAN+220 RAN 18<br />
FK Free Contour Programming<br />
31
FK Free Contour Programming<br />
32<br />
Values Relative to Block N:<br />
Circle Center CC<br />
Cartesian coordinates of a circle center relative to<br />
block N<br />
Polar coordinates of the circle center relative to<br />
block N<br />
Always enter relative data as incremental values!<br />
12 FL X+10 Y+10 RL<br />
13 FL ...<br />
14 FL X+18 Y+35<br />
15 FL ...<br />
16 FL ...<br />
17 FC DR- R10 CCA+0 ICCX+20 ICCY-15<br />
RCCX12 RCCY14
Subprograms and Program Section<br />
Repeats<br />
Subprograms and program section repeats enable you to program a<br />
machining sequence once and then run it as often as needed.<br />
Working with Subprograms<br />
1 The main program runs up to the subprogram call CALL LBL1.<br />
2 The subprogram – labeled with LBL1 – runs through to its end LBL0.<br />
3 The main program resumes.<br />
It's good practice to place subprograms after the main program<br />
end (M2).<br />
• Answer the dialog prompt REP with the NOENT key!<br />
• You cannot call LBL0!<br />
Working with Program Section Repeats<br />
1 The main program runs up to the call for a section repeat CALL<br />
LBL1 REP2/2.<br />
2 The program section between LBL1 and CALL LBL1 REP2/2 is<br />
repeated the number of times indicated with REP.<br />
3 After the last repetition the main program resumes.<br />
Altogether, the program section is run once more than the<br />
number of programmed repeats!<br />
S = Jump; R = Return jump<br />
Subprograms<br />
33
Subprograms<br />
34<br />
Subprogram Nesting:<br />
A Subprogram within a Subprogram<br />
1 The main program runs up to the first subprogram call CALL LBL1.<br />
2 Subprogram 1 runs up to the second subprogram call CALL LBL2.<br />
3 Subprogram 2 runs to its end.<br />
4 Subprogram 1 resumes and runs to its end.<br />
5 The main program resumes.<br />
• A subprogram cannot call itself!<br />
• Subprograms can be nested up to a maximum depth<br />
of 8 levels!<br />
S = Jump; R = Return jump
A Main Program as a Subprogram<br />
1 The calling program A runs up to the program call CALL PGM B.<br />
2 The called program B runs through to its end.<br />
3 The calling program A resumes.<br />
The called program must not end with M2 or M30!<br />
S = Jump; R = Return jump<br />
Subprograms<br />
35
Working with Cycles<br />
36<br />
Working with Cycles<br />
Certain frequently needed machining sequences are stored in the <strong>TNC</strong><br />
as cycles. Coordinate transformations and some special functions are<br />
also available as cycles.<br />
• In a cycle, positioning data entered in the tool axis are always<br />
incremental, even without the I key!<br />
• The algebraic sign of the cycle parameter DEPTH determines<br />
the working direction!<br />
Example<br />
6 CYCL DEF 1.0 PECKING<br />
7 CYCL DEF 1.1 SET UP +2<br />
8 CYCL DEF 1.2 DEPTH -15<br />
9 CYCL DEF 1.3 PECKG +10<br />
...<br />
Feed rates are entered in mm/min, the dwell time in seconds.<br />
Defining cycles<br />
Select the desired cycle:<br />
CYCL<br />
DEF<br />
GOTO<br />
7<br />
with the arrow keys, or<br />
press GOTO and enter the cycle number.<br />
Simple Fixed Cycles<br />
1 PECKING Page 38<br />
2 TAPPING Page 39<br />
17 RIGID TAPPING Page 40<br />
18 THREAD CUTTING Page 40<br />
3 SLOT MILLING Page 41<br />
4 POCKET MILLING Page 42<br />
5 CIRCULAR POCKET MILLING<br />
SL Cycles<br />
Page 43<br />
14 CONTOUR GEOMETRY Page 45<br />
20 CONTOUR DATA Page 46<br />
21 PILOT DRILLING Page 47<br />
22 ROUGH-OUT Page 47<br />
23 FLOOR FINISHING Page 48<br />
24 SIDE FINISHING Page 48<br />
25 CONTOUR TRAIN Page 49<br />
27 CYLINDER SURFACE Page 50<br />
Cycles for Coordinate Transformations<br />
7 DATUM SHIFT Page 51<br />
8 MIRROR IMAGE Page 52<br />
10 ROTATION Page 53<br />
19 WORKING PLANE Page 54<br />
11 SCALING FACTOR Page 55<br />
26 AXIS-SPECIFIC SCALING<br />
Special Cycles<br />
Page 56<br />
9 DWELL TIME Page 57<br />
12 PGM CALL Page 57<br />
13 ORIENTED SPINDLE STOP Page 58
Cycle call<br />
The following cycles are effective as soon as they are defined:<br />
• Cycles for coordinate transformations<br />
• DWELL TIME cycle<br />
• The SL cycles CONTOUR GEOMETRY and CONTOUR DATA<br />
All other cycles go into effect when they are called through<br />
• CYCL CALL: effective for one block<br />
• M99: effective for one block<br />
• M89: effective until canceled (depends on machine parameter<br />
settings)<br />
Working with Cycles<br />
37
Simple Fixed Cycles<br />
38<br />
Simple Fixed Cycles<br />
PECKING (1)<br />
CYCL DEF: Select cycle 1 PECKING<br />
SETUP CLEARANCE: A<br />
TOTAL HOLE DEPTH (distance from the workpiece surface to the<br />
bottom of the hole): B<br />
PECKING DEPTH: C<br />
DWELL TIME IN SECONDS<br />
FEED RATE F<br />
If TOTAL HOLE DEPTH = PECKING DEPTH, the tool drills the entire<br />
hole in one plunge.<br />
6 CYCL DEF 1.0 PECKING<br />
7 CYCL DEF 1.1 SET UP +2<br />
8 CYCL DEF 1.2 DEPTH -15<br />
9 CYCL DEF 1.3 PECKG +7.5<br />
10 CYCL DEF 1.4 DWELL 1<br />
11 CYCL DEF 1.5 F80<br />
12 L Z+100 R0 FMAX M6<br />
13 L X+30 Y+20 FMAX M3<br />
14 L Z+2 FMAX M99<br />
15 L X+80 Y+50 FMAX M99<br />
16 L Z+100 FMAX M2
TAPPING with Floating Tap Holder (2)<br />
Insert the floating tap holder<br />
CYCL DEF: Select cycle 2 TAPPING<br />
SETUP CLEARANCE: A<br />
TOTAL HOLE DEPTH (thread length = distance between the<br />
workpiece surface and the end of the thread): B<br />
DWELL TIME IN SECONDS (a value between 0 and 0.5 seconds)<br />
FEED RATE F = Spindle speed S x thread pitch P<br />
For tapping right-hand threads, actuate the spindle with M3,<br />
for left-hand threads use M4!<br />
25 CYCL DEF 2.0 TAPPING<br />
26 CYCL DEF 2.1 SET UP +3<br />
27 CYCL DEF 2.2 DEPTH -20<br />
28 CYCL DEF 2.3 DWELL 0.4<br />
29 CYCL DEF 2.4 F100<br />
30 L Z+100 R0 FMAX M6<br />
31 L X+50 Y+20 FMAX M3<br />
32 L Z+3 FMAX M99<br />
Simple Fixed Cycles<br />
39
Simple Fixed Cycles<br />
40<br />
RIGID TAPPING (17)<br />
• Machine and <strong>TNC</strong> must be prepared by the machine tool<br />
builder to perform rigid tapping!<br />
• In rigid tapping, the spindle speed is synchronized with the<br />
tool axis feed rate!<br />
CYCL DEF: Select cycle 17 RIGID TAPPING<br />
SETUP CLEARANCE: A<br />
TOTAL HOLE DEPTH (distance between workpiece surface and<br />
end of thread): B<br />
PITCH: C<br />
The algebraic sign determines the direction of the thread:<br />
• Right-hand thread: +<br />
• Left-hand thread: –<br />
THREAD CUTTING (18)<br />
• The machine and <strong>TNC</strong> must be prepared by the machine<br />
tool builder for THREAD CUTTING!<br />
• The spindle speed is synchronized with the tool axis feed<br />
rate!<br />
CYCL DEF: Select cycle 18 THREAD CUTTING<br />
DEPTH (distance between workpiece surface and end of<br />
thread): B<br />
PITCH: C<br />
The algebraic sign:<br />
• Right-hand thread: +<br />
• Left-hand thread: –
SLOT MILLING (3)<br />
• This cycle requires either a center-cut end mill (ISO 1641)<br />
or pilot drilling at the starting point!<br />
• The cutter diameter must be smaller than the slot width<br />
and larger than half the slot width!<br />
The tool must be pre-positioned over the midpoint of the slot and<br />
offset by the tool radius with tool radius compensation at R0<br />
CYCL DEF: Select cycle 3 SLOT MILLING<br />
SAFETY CLEARANCE: A<br />
MILLING DEPTH (depth of the slot): B<br />
PECKING DEPTH: C<br />
FEED RATE FOR PECKING (traverse velocity for plunging)<br />
FIRST SIDE LENGTH ? (length of the slot): D<br />
The algebraic sign determines the first cutting direction<br />
SECOND SIDE LENGTH ? (width of the slot): E<br />
FEED RATE (for milling)<br />
10 TOOL DEF 1 L+0 R+6<br />
11 TOOL CALL 1 Z S1500<br />
12 CYCL DEF 3.0 SLOT MILLING<br />
13 CYCL DEF 3.1 SET UP +2<br />
14 CYCL DEF 3.2 DEPTH -15<br />
15 CYCL DEF 3.3 PECKG +5 F80<br />
16 CYCL DEF 3.4 X+50<br />
17 CYCL DEF 3.5 Y+15<br />
18 CYCL DEF 3.6 F120<br />
19 L Z+100 R0 FMAX M6<br />
20 L X+16 Y+25 R0 FMAX M3<br />
21 L Z+2 M99<br />
Simple Fixed Cycles<br />
41
Simple Fixed Cycles<br />
42<br />
POCKET MILLING (4)<br />
This cycle requires either a center-cut end mill (ISO 1641) or<br />
pilot drilling at the pocket center!<br />
The tool begins milling in the positive axis direction of the longer side.<br />
In square pockets it moves in the positive Y direction.<br />
The tool must be pre-positioned over the center of the slot with tool<br />
radius compensation R0<br />
CYCL DEF: Select cycle 4 POCKET MILLING<br />
SET-UP CLEARANCE: A<br />
MILLING DEPTH (depth of the pocket): B<br />
PECKING DEPTH: C<br />
FEED RATE FOR PECKING<br />
FIRST SIDE LENGTH (length of the pocket, parallel to the first main<br />
axis of the working plane): D<br />
SECOND SIDE LENGTH (width of pocket, sign always positive): E<br />
FEED RATE<br />
ROTATION CLOCKWISE: DR–<br />
Climb milling with M3: DR+<br />
Up-cut milling with M3: DR–<br />
ROUNDING-OFF RADIUS R (radius for the pocket corners)<br />
12 CYCL DEF 4.0 POCKET MILLING<br />
13 CYCL DEF 4.1 SET UP+2<br />
14 CYCL DEF 4.2 DEPTH-10<br />
15 CYCL DEF 4.3 PECKG+4 F80<br />
16 CYCL DEF 4.4 X+80<br />
17 CYCL DEF 4.5 Y+40<br />
18 CYCL DEF 4.6 F100 DR+ RADIUS 10<br />
19 L Z+100 R0 FMAX M6<br />
20 L X+60 Y+35 FMAX M3<br />
21 L Z+2 FMAX M99
CIRCULAR POCKET MILLING (5)<br />
This cycle requires either a center-cut end mill (ISO 1641) or<br />
pilot drilling at pocket center!<br />
The tool must be pre-positioned over the center of the slot with tool<br />
radius compensation R0<br />
CYCL DEF: Select cycle 5<br />
SET-UP CLEARANCE: A<br />
MILLING DEPTH (depth of the pocket): B<br />
PECKING DEPTH: C<br />
FEED RATE FOR PECKING<br />
CIRCLE RADIUS R (radius of the pocket)<br />
FEED RATE<br />
ROTATION CLOCKWISE: DR–<br />
Climb milling with M3: DR+<br />
Up-cut milling with M3: DR–<br />
17 CYCL DEF 5.0 CIRCULAR POCKET<br />
18 CYCL DEF 5.1 SET UP +2<br />
19 CYCL DEF 5.2 DEPTH -12<br />
20 CYCL DEF 5.3 PECKG +6 F80<br />
21 CYCL DEF 5.4 RADIUS 35<br />
22 CYCL DEF 5.5 F100 DR+<br />
23 L Z+100 R0 FMAX M6<br />
24 L X+60 Y+50 FMAX M3<br />
25 L Z+2 FMAX M99<br />
Simple Fixed Cycles<br />
43
SL Cycles<br />
44<br />
SL Cycles<br />
General Information<br />
SL cycles are useful when you wish to machine a contour consisting of<br />
several subcontours (up to 12 islands or pockets).<br />
The subcontours are defined in subprograms.<br />
When working with subcontours, always remember:<br />
• For a pocket the tool machines an inside contour, for an<br />
island it is an outside contour!<br />
• Tool approach and departure as well as infeed in the<br />
tool axis cannot be programmed in SL cycles!<br />
• Each contour listed in Cycle 14 CONTOUR GEOMETRY<br />
must be a closed contour!<br />
• There is a limit to the amount of memory an SL cycle can<br />
occupy! A maximum of 128 straight line blocks, for example,<br />
can be programmed in an SL cycle.<br />
The contour for cycle 25 CONTOUR TRAIN must not be<br />
closed!<br />
Make a graphic test run before actually machining a part. That<br />
way you can be sure that you defined the contour correctly!
CONTOUR GEOMETRY (14)<br />
In Cycle 14 CONTOUR GEOMETRY you list the subprograms that you<br />
wish to superimpose to make a complete closed contour.<br />
CYCL DEF: Select Cycle 14 CONTOUR GEOMETRY<br />
LABEL NUMBERS FOR CONTOUR: List the LABEL numbers of<br />
the subprograms that you wish to superimpose to make a complete<br />
closed contour.<br />
Cycle 14 CONTOUR GEOMETRY is effective immediately upon<br />
definition!<br />
4 CYCL DEF 14.0 CONTOUR GEOM<br />
5 CYCL DEF 14.1 CONTOUR LABEL 1/2/3<br />
...<br />
36 L Z+200 R0 FMAX M2<br />
37 LBL1<br />
38 L X+0 Y+10 RR<br />
39 L X+20 Y+10<br />
40 CC X+50 Y+50<br />
...<br />
45 LBL0<br />
46 LBL2<br />
...<br />
58 LBL0<br />
A and B are pockets, C and D islands<br />
SL Cycles<br />
45
SL Cycles<br />
46<br />
CONTOUR DATA (20)<br />
Cycle 20 CONTOUR DATA defines the machining information for<br />
cycles 21 to 24.<br />
CYCL DEF: Select Cycle 20 CONTOUR DATA<br />
MILLING DEPTH Q1:<br />
Distance from workpiece surface to pocket floor; incremental<br />
PATH OVERLAP FACTOR Q2:<br />
Q2 x tool radius = stepover factor k<br />
ALLOWANCE FOR SIDE Q3:<br />
Finishing allowance for the walls of the pocket or island<br />
ALLOWANCE FOR FLOOR Q4:<br />
Finishing allowance for the pocket floor<br />
WORKPIECE SURFACE COORDINATE Q5:<br />
Coordinate of the workpiece surface referenced to the current<br />
datum; absolute<br />
SETUP CLEARANCE Q6:<br />
Distance from the tool to the workpiece surface; incremental<br />
CLEARANCE HEIGHT Q7:<br />
Height at which the tool cannot collide with the workpiece;<br />
absolute<br />
INSIDE CORNER RADIUS Q8:<br />
Rounding radius of the tool at inside corners<br />
DIRECTION OF ROTATION Q9:<br />
• Clockwise Q9 = –1<br />
• Counter clockwise Q9 = +1<br />
Cycle 20 CONTOUR DATA is effective immediately upon<br />
definition!
PILOT DRILLING (21)<br />
CYCL DEF: Select Cycle 21 PILOT DRILLING<br />
PECKING DEPTH Q10; incremental<br />
FEED RATE FOR PECKING Q11<br />
ROUGH-OUT TOOL NUMBER Q13: Number of the roughing tool<br />
ROUGH-OUT (22)<br />
The tool moves parallel to the contour at every pecking depth.<br />
CYCL DEF: Select Cycle 22 ROUGH-OUT<br />
PECKING DEPTH Q10; incremental<br />
FEED RATE FOR PECKING Q11<br />
FEED RATE FOR MILLING Q12<br />
SL Cycles<br />
47
SL Cycles<br />
48<br />
FLOOR FINISHING (23)<br />
During finishing, the surface is machined parallel to the contour and to<br />
the depth previously entered under ALLOWANCE FOR FLOOR.<br />
CYCL DEF: Select Cycle 23 FLOOR FINISHING<br />
FEED RATE FOR PECKING Q11<br />
FEED RATE FOR MILLING Q12<br />
SIDE FINISHING (24)<br />
Finishing the individual contour elements<br />
CYCL DEF: Select Cycle 24 SIDE FINISHING<br />
DIRECTION OF ROTATION? CLOCKWISE = –1 Q9:<br />
• Clockwise Q9 = –1<br />
• Counterclockwise Q9 = +1<br />
PECKING DEPTH Q10; incremental<br />
FEED RATE FOR PECKING Q11<br />
FEED RATE FOR MILLING Q12<br />
FINISHING ALLOWANCE FOR SIDE Q14: Allowance for finishing<br />
in several passes<br />
• The sum of Q14 + finishing mill radius must be smaller than<br />
the sums Q3 (Cycle 20) + roughing tool radius!<br />
• Call Cycle 22 ROUGH-OUT before calling Cycle 24!
CONTOUR TRAIN (25)<br />
This cycle is for entering data for machining an open contour that has<br />
been defined in a contour subprogam.<br />
CYCL DEF: Select Cycle 25 CONTOUR TRAIN<br />
MILLING DEPTH Q1; incremental<br />
ALLOWANCE FOR SIDE Q3:<br />
Finishing allowance in the working plane<br />
WORKPIECE SURFACE COORDINATE Q5:<br />
Coordinate referenced to the workpiece datum; absolute<br />
CLEARANCE HEIGHT Q7:<br />
Height at which the tool cannot collide with the workpiece; absolute<br />
PECKING DEPTH Q10; incremental<br />
FEED RATE FOR PECKING Q11<br />
FEED RATE FOR MILLING Q12<br />
CLIMB OR UP-CUT ? UP-CUT = –1 Q15<br />
• Climb milling: Q15 = +1<br />
• Up-cut milling: Q15 = –1<br />
• Alternately in reciprocating cuts: Q15 = 0<br />
• Cycle 14 CONTOUR can have only one label number.<br />
• A subprogram can hold no more than 128 line segments.<br />
SL Cycles<br />
49
SL Cycles<br />
50<br />
CYLINDER SURFACE (27)<br />
This cycle requires a center-cut end mill (ISO 1641)!<br />
Cycle 27 CYLINDER SURFACE enables you to program a cylindrical<br />
contour in only two axes, as if in a plane. The <strong>TNC</strong> then rolls it onto a<br />
cylindrical surface.<br />
Define a contour in a subprogram and list it in Cycle 14 CONTOUR<br />
GEOMETRY<br />
CYCL DEF: Select Cycle 27 CYLINDER SURFACE<br />
MILLING DEPTH Q1<br />
FINISHING ALLOWANCE FOR SIDE Q3: Enter the finishing allowance<br />
(Either Q3>0 or Q3
Cycles for Coordinate Transformation<br />
Cycles for coordinate transformation permit contours to be<br />
• Shifted Cycle 7 DATUM SHIFT<br />
• Mirrored Cycle 8 MIRROR IMAGE<br />
• Rotated (in the plane) Cycle 10 ROTATION<br />
• Tilted out of the plane Cycle 19 WORKING PLANE<br />
• Enlarged or reduced Cycle 11 SCALING<br />
Cycles for coordinate transformation are effective upon definition until<br />
they are reset or redefined. The original contour should be defined in a<br />
subprogram. Input values can be both absolute and incremental.<br />
DATUM SHIFT (7)<br />
CYCL DEF: Select Cycle 7 DATUM SHIFT<br />
Enter the coordinates of the new datum or the number of the<br />
datum from the datum table.<br />
To cancel a datum shift: Re-enter the cycle definition with the input<br />
value 0.<br />
9 CALL LBL1 Call the part subprogram<br />
10 CYCL DEF 7.0 DATUM SHIFT<br />
11 CYCL DEF 7.1 X+60<br />
12 CYCL DEF 7.2 Y+40<br />
13 CALL LBL1 Call the part subprogram<br />
When combining transformations, the datum shift must be<br />
programmed before the other transformations!<br />
Cycles for Coordinate Transformations<br />
51
Cycles for Coordinate Transformations<br />
52<br />
MIRROR IMAGE (8)<br />
CYCL DEF: Select Cycle 8 MIRROR IMAGE<br />
Enter the MIRROR IMAGE AXIS: Either X, Y, or both<br />
To reset the mirror image, re-enter the cycle definition with NO ENT.<br />
15 CALL LBL1<br />
16 CYCL DEF 7.0 DATUM SHIFT<br />
17 CYCL DEF 7.1 X+60<br />
18 CYCL DEF 7.2 Y+40<br />
19 CYCL DEF 8.0 MIRROR IMAGE<br />
20 CYCL DEF 8.1 Y<br />
21 CALL LBL1<br />
• The tool axis cannot be mirrored!<br />
• The cycle always mirrors the original contour (in this example<br />
in subprogram LBL1)!
Rotation (10)<br />
CYCL DEF: Select Cycle 10 ROTATION<br />
Enter the ROTATION ANGLE:<br />
• Input range –360° to +360°<br />
• Reference axes for the rotation angle<br />
Working plane Reference axis and 0° direction<br />
X/Y X<br />
Y/Z Y<br />
Z/X Z<br />
To reset a ROTATION, re-enter the cycle with the rotation angle 0.<br />
12 CALL LBL1<br />
13 CYCL DEF 7.0 DATUM SHIFT<br />
14 CYCL DEF 7.1 X+60<br />
15 CYCL DEF 7.2 Y+40<br />
16 CYCL DEF 10.0 ROTATION<br />
17 CYCL DEF 10.1 ROT+35<br />
18 CALL LBL1<br />
Cycles for Coordinate Transformations<br />
53
Cycles for Coordinate Transformations<br />
54<br />
WORKING PLANE (19)<br />
Cycle 19 WORKING PLANE supports machining operations with a<br />
swivel head and/or tilting table.<br />
Call the tool<br />
Retract the tool in the tool axis (to prevent collision)<br />
Position the rotary axis to the desired angle with an L-block<br />
CYCL DEF: Select Cycle 19 WORKING PLANE<br />
Enter the ROTARY AXIS AND ANGLE<br />
Activate compensation: move all the axes<br />
Program the contour as if the plane were not tilted<br />
To cancel the WORKING PLANE cycle, re-enter the cycle definition<br />
with a 0° angle.<br />
The machine and <strong>TNC</strong> must be prepared for the WORKING<br />
PLANE cycle by the machine tool builder!<br />
4 TOOL CALL 1 Z S2500<br />
5 L Z+350 R0 FMAX<br />
6 L B+10 C+90 R0 FMAX<br />
7 CYCL DEF 19.0 WORKING PLANE<br />
8 CYCL DEF 19.1 B+10 C+90<br />
9 L Z+200 R0 F1000<br />
10 L X-50 Y-50 R0
SCALING (11)<br />
CYCL DEF: Select Cycle 11 SCALING<br />
Enter the scaling FACTOR (SCL):<br />
• Input range 0.000001 to 99.999999:<br />
To reduce the contour ... SCL < 1<br />
To enlarge the contour ... SCL > 1<br />
To cancel the SCALING, re-enter the cycle definition with SCL1.<br />
11 CALL LBL1<br />
12 CYCL DEF 7.0 DATUM SHIFT<br />
13 CYCL DEF 7.1 X+60<br />
14 CYCL DEF 7.2 Y+40<br />
15 CYCL DEF 11.0 SCALING<br />
16 CYCL DEF 11.1 SCL 0.75<br />
17 CALL LBL1<br />
SCALING can be effective in the working plane only or in all<br />
three main axes (depending on machine parameter 7410)!<br />
Cycles for Coordinate Transformations<br />
55
Cycles for Coordinate Transformations<br />
56<br />
AXIS-SPECIFIC SCALING (26)<br />
CYCL DEF: Select Cycle 20 AXIS-SPEC. SCALING<br />
AXIS and FACTOR: Coordinate axes and factors for extending or<br />
compressing contour dimensions<br />
CENTERPOINT COORD. OF EXTENSION: Center of the extension<br />
or compression<br />
To cancel the AXIS-SPEC. SCALING, re-enter the cycle definition<br />
assigning the factor 1 to the affected axes.<br />
Coordinate axes sharing coordinates for arcs must be<br />
extended or compressed by the same scaling factor!<br />
25 CALL LBL1<br />
26 CYCL DEF 26.0 AXIS-SPEC. SCALING<br />
27 CYCL DEF 26.1 X 1.4 Y 0.6 CCX+15 CCY+20<br />
28 CALL LBL1
Special Cycles<br />
DWELL TIME (9)<br />
The program run is interrupted for the duration of the DWELL TIME.<br />
CYCL DEF: Select cycle 9 DWELL TIME<br />
Enter the DWELL TIME IN SECONDS.<br />
48 CYCL DEF 9.0 DWELL TIME<br />
49 CYCL DEF 9.1 DWELL 0.5<br />
PGM CALL (12)<br />
CYCL DEF: Select cycle 12 PGM CALL<br />
Enter the name of the program that you wish to call<br />
Cycle 12 PGM CALL must be called to become active!<br />
7 CYCL DEF 12.0 PGM CALL<br />
8 CYCL DEF 12.1 LOT31<br />
9 L X+37.5 Y-12 R0 FMAX M99<br />
Special-Cycles<br />
57
Special-Cycles<br />
58<br />
Spindle ORIENTATION<br />
CYCL DEF: Select cycle 13 ORIENTATION<br />
Enter the ORIENTATION ANGLE referenced to the angle reference<br />
axis of the working plane:<br />
• Input range 0 to 360°<br />
• Input resolution 0.1°<br />
Call the cycle with M19<br />
The machine and <strong>TNC</strong> must be prepared for spindle<br />
ORIENTATION by the machine tool builder!<br />
12 CYCL DEF 13.0 ORIENTATION<br />
13 CYCL DEF 13.1 ANGLE 90
Digitizing 3D Surfaces<br />
The machine and <strong>TNC</strong> must be prepared for digitizing by the<br />
machine tool builder!<br />
The <strong>TNC</strong> features the following cycles for digitizing with a measuring<br />
touch probe:<br />
• Fix the scanning range: TCH PROBE 5 RANGE<br />
TCH PROBE 15 RANGE<br />
• Digitize in reciprocating lines: TCH PROBE 16 MEANDER<br />
• Digitize level by level: TCH PROBE 17 CONTOUR LINES<br />
• Digitize in unidirectional lines: TCH PROBE 18 LINE<br />
The digitizing cycles can be programmed only in plain language dialog.<br />
They can be programmed for the main axes X, Y and Z as well as for<br />
the rotary axes A, B and C.<br />
• Digitizing is not possible while coordinate transformations<br />
or a basic rotation is active!<br />
• Digitizing cycles need not be called. They are effective<br />
immediately upon definition!<br />
Selecting digitizing cycles<br />
TOUCH<br />
PROBE<br />
Call an overview of touch probe functions<br />
GOTO<br />
5<br />
Select with the arrow keys, or<br />
Press GOTO and enter the cycle number<br />
Digitizing<br />
59
Digitizing<br />
60<br />
Digitizing Cycle RANGE (5)<br />
Define the data transmission interface<br />
TOUCH PROBE: Select Cycle 5 RANGE<br />
PGM NAME FOR DIGITIZED DATA: Enter a name for the<br />
NC program in which the digitized data should be stored.<br />
TCH PROBE AXIS: Enter the axis of the touch probe<br />
MIN. POINT OF RANGE<br />
MAX. POINT OF RANGE<br />
CLEARANCE HEIGHT: Height at which the stylus cannot collide<br />
with the model surface: Z S<br />
5 TCH PROBE 5.0 RANGE<br />
6 TCH PROBE 5.1 PGM NAME: DIGI1<br />
7 TCH PROBE 5.2 Z X+0 Y+0 Z+0<br />
8 TCH PROBE 5.3 X+100 Y+100 Z+20<br />
9 TCH PROBE 5.4 HEIGHT: +100
Digitizing Cycle RANGE (15)<br />
Define the data transmission interface<br />
TOUCH PROBE: Select Cycle 15 RANGE<br />
PGM NAME FOR DIGITIZED DATA: Enter a name for the<br />
NC program in which the digitized data should be stored.<br />
TCH PROBE AXIS: Enter the axis of the touch probe<br />
PGM NAME FOR RANGE DATA: The name of the point table in<br />
which the range is defined<br />
MIN POINT TCH PROBE AXIS: The minimum point in the touch<br />
probe axis<br />
MAX POINT TCH PROBE AXIS: The maximum point in the<br />
touch probe axis<br />
CLEARANCE HEIGHT: Height at which the stylus cannot collide<br />
with the model surface: Z S<br />
5 TCH PROBE 15.0 RANGE<br />
6 TCH PROBE 15.1 PGM DIGIT.: DATA<br />
7 TCH PROBE 15.2 Z PGM RANGE: TAB1<br />
8 TCH PROBE 15.3 MIN:+0 MAX:+35 HEIGHT:+125<br />
Digitizing<br />
61
Digitizing<br />
62<br />
Digitizing Cycle MEANDER (16)<br />
Cycle 16 MEANDER is for digitizing a 3D contour in a series of<br />
back-and-forth line movements.<br />
Define Cycle 5 RANGE or 15 RANGE<br />
TOUCH PROBE: Select Cycle 16 MEANDER<br />
LINE DIRECTION: Coordinate axis in whose positive direction the<br />
probe moves after touching the first contour point<br />
SCANNING ANGLE: Direction of touch probe traverse relative to<br />
the axis entered in LINE DIRECTION<br />
FEED RATE F: Maximum digitizing feed rate<br />
MIN. LINE SPACING: Minimum distance moved forward to start<br />
the next line at steep surfaces<br />
LINE SPACING: Max. distance moved forward to start the next line<br />
MAX. PROBE POINT INTERVAL<br />
TOLERANCE VALUE: The <strong>TNC</strong> suppresses the storage of probe<br />
points whose distance from a straight line defined by the last two<br />
stored points is less than the TOLERANCE VALUE.<br />
• The LINE SPACING and MAX. PROBE POINT INTERVAL<br />
cannot exceed 20 mm!<br />
• Set a LINE DIRECTION that is as perpendicular as possible<br />
to surface inclinations!<br />
7 TCH PROBE 16.0 MEANDER<br />
8 TCH PROBE 16.1 DIRECTN X<br />
9 TCH PROBE 16.2 F1500 MIN.L.SPAC:0.2<br />
L.SPAC:0.5 PP.INT:0.5 TOL:0.1<br />
P: PP.INT = Probe point interval<br />
L: L. SPAC = Line spacing
Digitizing Cycle CONTOUR LINES (17)<br />
Cycle 17 CONTOUR LINES enables you to digitize a 3D surface<br />
level by level.<br />
Define Cycle 5 RANGE or 15 RANGE<br />
TOUCH PROBE: Select Cycle 17 CONTOUR LINES<br />
TIME LIMIT: If the touch probe has not orbited the model and<br />
returned to the first touch point within this time, the <strong>TNC</strong> will<br />
terminate the cycle. If you do not want a time limit, enter 0.<br />
STARTING POINT: Coordinates of the starting position<br />
AXIS AND DIRECTION OF APPROACH: Coordinate axis and<br />
direction in which the probe approaches the model<br />
STARTING PROBE AXIS AND DIRECTION: Coordinate axis and<br />
direction in which the probe begins scanning the model<br />
FEED RATE F: Maximum digitizing feed rate<br />
MIN. LINE SPACING: Minimum height moved to start the next<br />
line at slightly inclined surfaces<br />
LINE SPACING AND DIRECTION: Maximum height moved to start<br />
the next contour line<br />
MAX. PROBE POINT INTERVAL<br />
TOLERANCE VALUE: The <strong>TNC</strong> suppresses the storage of probe<br />
points whose distance from a straight line defined by the last two<br />
stored points is less than the TOLERANCE VALUE.<br />
The LINE SPACING and MAX. PROBE POINT INTERVAL<br />
cannot exceed 20 mm!<br />
10 TCH PROBE 17.0 CONTOUR LINES<br />
11 TCH PROBE 17.1 TIME: 200 X+50 Y+0<br />
12 TCH PROBE 17.2 ORDER Y+/X+<br />
13 TCH PROBE 17.3 F1000 MIN.L.SPAC: 0.2<br />
L.SPAC:0.5 PP.INT:0.5 TOL:0.1<br />
P: PP. INT = Probe point interval<br />
L: L. SPAC = Line spacing<br />
Digitizing<br />
63
Digitizing<br />
64<br />
Digitizing Cycle LINE (18)<br />
Cycle 18 LINE is for digitizing a 3D surface in lines in one direction.<br />
It was developed mainly for digitizing with rotary axes.<br />
Define Cycle 5 RANGE or 15 RANGE<br />
TOUCH PROBE: Select Cycle 18 LINE<br />
LINE DIRECTION: Coordinate axis of the digitizing lines.<br />
SCANNING ANGLE: Direction of touch probe traverse relative to<br />
the axis entered in LINE DIRECTION<br />
HEIGHT FOR FEED RATE REDUCTION: Coordinate in the tool axis<br />
at which at the start of each line the <strong>TNC</strong> switches from rapid<br />
traverse to the probing feed rate.<br />
FEED RATE F: Maximum digitizing feed rate<br />
MIN. LINE SPACING: Minimum distance moved forward to start<br />
the next line at steep surfaces<br />
LINE SPACING AND DIRECTION: Maximum distance moved to<br />
start the next line<br />
MAX. PROBE POINT INTERVAL<br />
TOLERANCE VALUE: The <strong>TNC</strong> suppresses the storage of probe<br />
points whose distance from a straight line defined by the last two<br />
stored points is less than the TOLERANCE VALUE.<br />
The LINE SPACING and MAX. PROBE POINT INTERVAL cannot<br />
exceed 20 mm!<br />
10 TCH PROBE 18.0 LINE<br />
11 TCH PROBE 18.1 DIRECTN X<br />
ANGLE:+0 HEIGHT:+125<br />
12 TCH PROBE 18.2 F1000 MIN.L.SPAC:0.2<br />
L.SPAC:0.5 PP.INT:0.5 TOL:0.1
Graphics and Status Displays<br />
See “Graphics and Status Displays”<br />
Defining the Workpiece in the Graphic Window<br />
The dialog prompt for the BLK-FORM appears automatically whenever<br />
you create a new part program.<br />
Create a new program or, if you are already in a program, press the<br />
soft key BLK FORM<br />
Spindle axis<br />
MIN and MAX POINT<br />
The following is a selection of frequently needed functions.<br />
Interactive Programming Graphics<br />
Select the PGM+GRAPHICS screen layout!<br />
The <strong>TNC</strong> can generate a two-dimensional graphic of the contour while<br />
you are programming it:<br />
Generates the graphic during programming<br />
Restarts the graphic from block 1<br />
Graphics and Status Displays<br />
65
Graphics and Status Displays<br />
66<br />
Test Graphics and Program Run Graphics<br />
Select the GRAPHICS or PGM+GRAPHICS screen layout!<br />
In the TEST RUN and program run modes the <strong>TNC</strong> can graphically<br />
simulate the machining process. The following display types are<br />
available via soft key:<br />
Plan view<br />
Projection in three planes<br />
3D view
Status Displays<br />
Select the PGM+STATUS or POSITION+STATUS screen<br />
layout!<br />
In the program run modes a window in the lower part of the screen<br />
shows information on<br />
• Tool position<br />
• Feed rate<br />
• Active M functions<br />
Further status information is available via soft key for display in an<br />
additional window:<br />
Program information<br />
Tool positions<br />
Tool data<br />
Coordinate transformations<br />
Tool measurement<br />
Graphics and Status Displays<br />
67
ISO Programming<br />
68<br />
ISO Programming<br />
Programming Tool Movements with Cartesian<br />
Coordinates<br />
G00 Linear motion in rapid traverse<br />
G01 Linear motion<br />
G02 Circular motion, clockwise<br />
G03 Circular motion, counterclockwise<br />
G05 Circular motion without directional data<br />
G06 Circular movement with tangential contour connection<br />
G07* Paraxial positioning block<br />
Programming Tool Movements with Polar<br />
Coordinates<br />
G10 Linear motion in rapid traverse<br />
G11 Linear motion<br />
G12 Circular motion, clockwise<br />
G13 Circular motion, counterclockwise<br />
G15 Circular motion without directional data<br />
G16 Circular movement with tangential contour<br />
connection<br />
*) Effective blockwise<br />
Standard Fixed Cycles<br />
G83 Pecking<br />
G84 Tapping<br />
G85 Rigid tapping<br />
G86 Thread cutting<br />
G74 Slot milling<br />
G75 Rectangular pocket milling, clockwise<br />
machining direction<br />
G76 Rectangular pocket milling, counterclockwise<br />
machining direction<br />
G77 Circular pocket milling, clockwise machining<br />
direction<br />
G78 Circular pocket milling, counterclockwise<br />
machining direction<br />
SL Cycles, Group I<br />
G37 List of contour subprograms<br />
G56 <strong>Pilot</strong> drilling<br />
G57 Rough-out<br />
G58 Contour milling, clockwise<br />
G59 Contour milling, counterclockwise
SL Cycles, Group II<br />
G37 List of contour subprograms<br />
G120 Contour data<br />
G121 <strong>Pilot</strong> drilling<br />
G122 Rough-out<br />
G123 Floor finishing<br />
G124 Side finishing<br />
G125 Contour train<br />
G127 Cylinder surface<br />
Coordinate Transformations<br />
G53 Datum shift from datum tables<br />
G54 Entering datum shift directly<br />
G28 Mirror image<br />
G73 Rotating the coordinate system<br />
G72 Scaling factor: enlarging/reducing contours<br />
G80 Working plane<br />
Special Cycles<br />
G04* Dwell time<br />
G36 Oriented spindle stop<br />
G39 Designating a program as a cycle<br />
G79* Cycle call<br />
*) Effective blockwise<br />
Defining the Working Plane<br />
G17 X/Y working plane, tool axis Z<br />
G18 Z/X working plane, tool axis Y<br />
G19 Y/Z working plane, tool axis X<br />
G20 Fourth axis is tool axis<br />
Chamfer, Rounding, Approach/Departure<br />
G24* Chamfer with side length R<br />
G25* Corner rounding with radius R<br />
G26* Tangential contour approach on an arc with radius R<br />
G27* Tangential contour departure on an arc with radius R<br />
Tool Definition<br />
G99* Tool definition in the program with length L and<br />
radius R<br />
Tool Radius Compensation<br />
G40 No radius compensation<br />
G41 Radius compensation to the left of the contour<br />
G42 Radius compensation to the right of the contour<br />
G43 Paraxial radius compensation: the path is<br />
lengthened<br />
G44 Paraxial radius compensation: the path is<br />
shortened<br />
ISO Programming<br />
69
ISO Programming<br />
70<br />
Dimensional Data<br />
G90 Absolute dimensions<br />
G91 Incremental (chain) dimensions<br />
Unit of Measure (at Beginning of Program)<br />
G70 Inches<br />
G71 Millimeters<br />
Blank Form Definition for Graphics<br />
G30 Setting the working plane, MIN point coordinates<br />
G31 Dimensional data (with G90, G91),<br />
coordinates of the MAX point<br />
Other G functions<br />
G29 Define last nominal position value as pole<br />
G38 Stopping the program run<br />
G51* Calling the next tool (only with central tool file)<br />
G55* Automatic measurement with the 3D touch probe<br />
G98* Setting a label number<br />
*) Effective blockwise<br />
Q Parameter Functions<br />
D00 Assign a value directly<br />
D01 Calculate and assign the sum of two values<br />
D02 Calculate and assign the difference of two values<br />
D03 Calculate and assign the product of two values<br />
D04 Calculate and assign the quotient of two values<br />
D05 Calculate and assign the root from a value<br />
D06 Calculate and assign the sine of an angle in<br />
degrees<br />
D07 Calculate and assign the cosine of an angle in<br />
degrees<br />
D08 Calculate and assign the square root of the sum of<br />
two squares (Pythagorean theorem)<br />
D13 Find and assign an angle from the arc tangent of<br />
two sides or from the sine and cosine of an angle<br />
D09 If equal, jump to the given label<br />
D10 If not equal, jump to the given label<br />
D11 If greater than, jump to the given label<br />
D12 If less than, jump to the given label<br />
D14 Output text to screen<br />
D15 Output text or parameter contents through the<br />
data interface<br />
D19 Transfer numerical values or Q parameters<br />
to the PLC<br />
D68- Call the user cycles<br />
D99
Addresses<br />
% Program beginning<br />
A Swivelling axis around X<br />
B Swivelling axis around Y<br />
C Rotary axis around Z<br />
D Define Q-parameter functions,<br />
Call the user cycles<br />
E Tolerance for rounding arc with M112<br />
F Feed rate in mm/min in positioning blocks<br />
F Dwell time in seconds with G04<br />
F Scaling factor with G72<br />
G G functions (see list of G functions)<br />
H Polar coordinate angle<br />
H Angle of rotation with G73<br />
I X coordinate of the circle center or pole<br />
J Y coordinate of the circle center or pole<br />
K Z coordinate of the circle center or pole<br />
L Label number with G98<br />
L Jump to a label number<br />
L Tool length with G99<br />
M Miscellaneous function<br />
N Block number<br />
P Cycle parameter for fixed cycles<br />
P Value or Q parameter with Q parameter<br />
definitions<br />
Q Variable Q parameter<br />
R Polar coordinate radius with G10/G11/G12/<br />
G13/G15/G16/<br />
R Circle radius with G02/G03/G05<br />
R Corner radius with G25/G26/G27<br />
R Chamfer length with G24<br />
R Tool radius with G99<br />
S Spindle speed in rpm<br />
S Angle for spindle orientation with G36<br />
T Tool number with G99<br />
T Tool call<br />
T Call next tool with G51<br />
U Parallel axis to X<br />
V Parallel axis to Y<br />
W Parallel axis to Z<br />
X X axis<br />
Y Y axis<br />
Z Z axis<br />
* Character for end of block<br />
ISO Programming<br />
71
Miscellaneous Functions<br />
72<br />
Miscellaneous Functions M<br />
M00 Stop program run/Stop spindle/Coolant off<br />
M02 Stop program run/Stop spindle/Coolant off<br />
Jump back to block 1/Clear status display<br />
(depending on machine parameters)<br />
M03 Spindle on clockwise<br />
M04 Spindle on counterclockwise<br />
M05 Stop spindle<br />
M06 Tool change/Stop program run (depending on<br />
machine parameters) Stop spindle<br />
M08 Coolant on<br />
M09 Coolant off<br />
M13 Spindle on clockwise/Coolant on<br />
M14 Spindle on counterclockwise/Coolant on<br />
M30 Same function as M02<br />
M89 Vacant miscellaneous function or<br />
Cycle call, modally effective (depending on<br />
machine parameters)<br />
M90 Constant contour speed at corners<br />
(effective only in lag mode)<br />
M91 Within the positioning block: Coordinates are<br />
referenced to the machine datum<br />
M92 Within the positioning block: The coordinates are<br />
referenced to a position defined by the machine<br />
tool builder<br />
M93 Reserved<br />
M94 Reduce rotary axis display to a value below 360°<br />
M95 Reserved<br />
M96 Reserved<br />
M97 Machine small contour steps<br />
M98 Suspend tool path compensation<br />
M99 Cycle call, effective blockwise<br />
M101 Automatic tool change after tool lifetime expires<br />
M102 Reset M101<br />
M103 Reduce the feed rate during plunging to factor F<br />
M105 Machine with first k V factor<br />
M106 Machine with second k V factor<br />
M107 See User's Manual<br />
M108 Reset M107<br />
M109 Constant contouring speed of tool cutting edge<br />
on arcs (increasing and decreasing the feed rate)<br />
M110 Constant contouring speed of tool cutting edge<br />
on arcs (only decreasing the feed rate)<br />
M111 Reset M109/M110<br />
M112 Insert a rounding arc between two lines,<br />
with tolerance and limit angle<br />
M113 Reset M112<br />
M114 See User's Manual<br />
M115 Reset M114<br />
M116 Feed rate for rotary axes in mm/min<br />
M118 Superimpose handwheel positioning during<br />
program run
M124* Ignore points when calculating the rounding arc<br />
with M112<br />
M126 Short-path traverse of rotary axes<br />
M127 Reset M126<br />
M200* Miscellaneous function<br />
for laser cutting machines<br />
M204* See User's Manual<br />
....<br />
*) Only with conversational programming<br />
Miscellaneous Functions<br />
73