HP LaserJet M1005 MFP user guide - ENWW
HP LaserJet M1005 MFP user guide - ENWW
HP LaserJet M1005 MFP user guide - ENWW

Create successful ePaper yourself
Turn your PDF publications into a flip-book with our unique Google optimized e-Paper software.
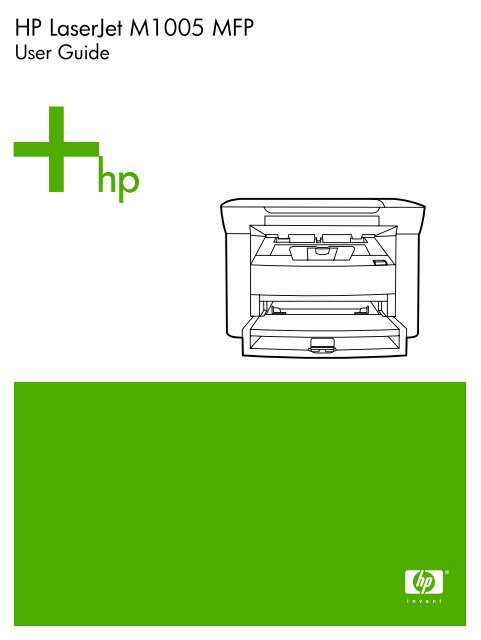
<strong>HP</strong> <strong>LaserJet</strong> <strong>M1005</strong> <strong>MFP</strong><br />
User Guide
<strong>HP</strong> <strong>LaserJet</strong> <strong>M1005</strong> <strong>MFP</strong><br />
User Guide
Copyright and License<br />
© 2006 Copyright Hewlett-Packard<br />
Development Company, LP<br />
Reproduction, adaptation, or translation<br />
without prior written permission is<br />
prohibited, except as allowed under the<br />
copyright laws.<br />
The information contained in this document<br />
is subject to change without notice.<br />
The only warranties for <strong>HP</strong> products and<br />
services are set forth in the express<br />
warranty statements accompanying such<br />
products and services. Nothing herein<br />
should be construed as constituting an<br />
additional warranty. <strong>HP</strong> shall not be liable<br />
for technical or editorial errors or omissions<br />
contained herein.<br />
Part number CB376-90911<br />
Edition 1, 8/2006<br />
Trademark Credits<br />
Adobe® and PostScript® are trademarks<br />
of Adobe Systems Incorporated.<br />
Linux is a U.S. registered trademark of<br />
Linus Torvalds.<br />
Microsoft®, Windows®, and Windows® XP<br />
are U.S. registered trademarks of Microsoft<br />
Corporation.<br />
UNIX® is a registered trademark of The<br />
Open Group.<br />
ENERGY STAR® and the ENERGY STAR<br />
mark® are U.S. registered marks of the<br />
United States Environmental Protection<br />
Agency.
Table of contents<br />
1 Device basics<br />
Device features ...................................................................................................................................... 2<br />
Device parts ........................................................................................................................................... 3<br />
Front view .............................................................................................................................. 3<br />
Back view .............................................................................................................................. 3<br />
Control panel ......................................................................................................................... 4<br />
2 Software<br />
Minimum system requirements .............................................................................................................. 6<br />
Supported operating systems ................................................................................................................ 6<br />
Software installation .............................................................................................................................. 7<br />
Printer driver .......................................................................................................................................... 8<br />
Printer-driver Help ................................................................................................................. 8<br />
Changing printer-driver settings ............................................................................................ 9<br />
Software for Windows .......................................................................................................................... 10<br />
<strong>HP</strong> <strong>LaserJet</strong> Scan software ................................................................................................ 10<br />
Installing Windows device software .................................................................................... 10<br />
Uninstalling Windows device software ............................................................................... 10<br />
Software for Macintosh ........................................................................................................................ 11<br />
Installing Macintosh device software .................................................................................. 11<br />
Uninstalling Macintosh device software .............................................................................. 11<br />
3 Media specifications<br />
General <strong>guide</strong>lines ............................................................................................................................... 14<br />
Choosing paper and other media ........................................................................................................ 14<br />
<strong>HP</strong> media ............................................................................................................................ 14<br />
Media to avoid ..................................................................................................................... 14<br />
Media that can damage the device ..................................................................................... 15<br />
Guidelines for using media .................................................................................................................. 16<br />
Paper ................................................................................................................................... 16<br />
Colored paper ..................................................................................................................... 17<br />
Custom-size media ............................................................................................................. 17<br />
Labels .................................................................................................................................. 17<br />
Label construction .............................................................................................. 17<br />
Transparencies ................................................................................................................... 17<br />
Envelopes ........................................................................................................................... 18<br />
Envelope construction ........................................................................................ 18<br />
Envelopes with double-side seams .................................................................... 18<br />
Envelopes with adhesive strips or flaps ............................................................. 19<br />
<strong>ENWW</strong> iii
Envelope storage ............................................................................................... 19<br />
Card stock and heavy media .............................................................................................. 19<br />
Card stock construction ...................................................................................... 19<br />
Card stock <strong>guide</strong>lines ......................................................................................... 19<br />
Letterhead and preprinted forms ........................................................................................ 20<br />
Supported media weights and sizes .................................................................................................... 21<br />
Printing and storage environment ....................................................................................................... 23<br />
4 Using the device<br />
Loading media ..................................................................................................................................... 26<br />
Loading documents to copy or scan ................................................................................... 26<br />
Loading input trays .............................................................................................................. 26<br />
Priority input tray ................................................................................................ 26<br />
Main input tray (tray 1) ....................................................................................... 27<br />
Controlling print jobs ............................................................................................................................ 28<br />
Print-settings priorities ........................................................................................................ 28<br />
Selecting a source .............................................................................................................. 28<br />
Selecting a type or size ....................................................................................................... 28<br />
Using the device control panel ............................................................................................................ 29<br />
Changing the control-panel display language .................................................................... 29<br />
Changing the default media size and type ......................................................................... 29<br />
To change the default media size ...................................................................... 29<br />
To change the default media type ...................................................................... 30<br />
5 Printing<br />
Using features in the Windows printer driver ...................................................................................... 32<br />
Creating and using quick sets ............................................................................................. 32<br />
Creating and using watermarks .......................................................................................... 33<br />
Resizing documents ............................................................................................................ 33<br />
Setting a custom paper size from the printer driver ............................................................ 34<br />
Using different paper and printing covers ........................................................................... 34<br />
Printing a blank first page or last page ............................................................................... 34<br />
Printing multiple pages on one sheet of paper ................................................................... 34<br />
Printing on both sides ......................................................................................................... 35<br />
Using features in the Macintosh printer driver ..................................................................................... 37<br />
Creating and using presets ................................................................................................. 37<br />
Printing a cover page (Macintosh) ...................................................................................... 38<br />
Printing multiple pages on one sheet of paper (Macintosh) ............................................... 38<br />
Printing on both sides (Macintosh) ..................................................................................... 39<br />
Printing on special media .................................................................................................................... 41<br />
Using archive print ............................................................................................................................... 41<br />
Canceling a print job ............................................................................................................................ 42<br />
6 Copy<br />
Starting a copy job ............................................................................................................................... 44<br />
Canceling a copy job ........................................................................................................................... 44<br />
Adjusting the copy quality .................................................................................................................... 44<br />
Adjusting the lighter/darker (contrast) setting ...................................................................................... 46<br />
Reducing or enlarging copies .............................................................................................................. 47<br />
iv <strong>ENWW</strong>
7 Scan<br />
Adjusting the copy size ....................................................................................................... 47<br />
Copying multiple pages on one sheet of paper .................................................................. 48<br />
Changing the number of copies .......................................................................................................... 49<br />
Copying onto media of different types and sizes ................................................................................ 50<br />
Copying two-sided documents ............................................................................................................ 52<br />
Copying photos and books .................................................................................................................. 54<br />
Viewing copy settings .......................................................................................................................... 55<br />
Understanding scanning methods ....................................................................................................... 58<br />
Scanning by using <strong>HP</strong> <strong>LaserJet</strong> Scan (Windows) ............................................................................... 59<br />
Canceling a scan job ........................................................................................................................... 59<br />
Scanning by using other software ....................................................................................................... 60<br />
Using TWAIN-compliant and WIA-compliant software ....................................................... 60<br />
Scanning from a TWAIN-enabled program ........................................................ 60<br />
To scan from a TWAIN-enabled program ......................................... 60<br />
Scanning from a WIA-enabled program (Windows XP or<br />
Windows Server 2003) ....................................................................................... 60<br />
To scan from a WIA-enabled program .............................................. 60<br />
Scanning a photo or a book ................................................................................................................. 61<br />
Scanning by using optical character recognition (OCR) software ....................................................... 62<br />
Readiris ............................................................................................................................... 62<br />
Scanner resolution and color ............................................................................................................... 63<br />
Resolution and color <strong>guide</strong>lines .......................................................................................... 64<br />
Resolution .......................................................................................................... 64<br />
Color ................................................................................................................... 64<br />
8 Managing and maintaining the device<br />
Information pages ................................................................................................................................ 66<br />
Managing supplies ............................................................................................................................... 67<br />
Checking supplies status .................................................................................................... 67<br />
Storing supplies .................................................................................................................. 67<br />
Replacing and recycling supplies ....................................................................................... 67<br />
<strong>HP</strong> policy on non-<strong>HP</strong> supplies ............................................................................................ 67<br />
<strong>HP</strong> fraud hotline .................................................................................................................. 67<br />
Cleaning the device ............................................................................................................................. 69<br />
To clean the exterior ........................................................................................................... 69<br />
To clean the scanner glass ................................................................................................. 69<br />
To clean the lid backing ...................................................................................................... 69<br />
To clean the paper path ...................................................................................................... 70<br />
Changing the print cartridge ................................................................................................................ 71<br />
9 Problem solving<br />
Problem-solving checklist .................................................................................................................... 74<br />
Clearing jams ....................................................................................................................................... 76<br />
Causes of jams ................................................................................................................... 76<br />
Tips to avoid jams ............................................................................................................... 76<br />
Where to look for jams ........................................................................................................ 77<br />
Input trays ........................................................................................................................... 78<br />
<strong>ENWW</strong> v
Output bin ........................................................................................................................... 80<br />
Print-cartridge area ............................................................................................................. 80<br />
Control-panel messages ...................................................................................................................... 82<br />
Alert and warning messages .............................................................................................. 82<br />
Alert and warning message tables ..................................................................... 82<br />
Critical error messages ....................................................................................................... 83<br />
Critical error message tables ............................................................................. 83<br />
Print problems ...................................................................................................................................... 85<br />
Print quality problems ......................................................................................................... 85<br />
Improving print quality ........................................................................................ 85<br />
Understanding print-quality settings .................................................. 85<br />
To temporarily change print-quality settings ..................... 85<br />
To change print-quality settings for all future jobs ............ 85<br />
Identifying and correcting print defects .............................................................. 86<br />
Print-quality checklist ......................................................................... 86<br />
General print-quality issues ............................................................... 86<br />
Media-handling problems ................................................................................................... 90<br />
Print-media <strong>guide</strong>lines ........................................................................................ 90<br />
Solving print-media problems ............................................................................ 91<br />
Performance problems ....................................................................................................... 92<br />
Copy problems ..................................................................................................................................... 93<br />
Preventing problems ........................................................................................................... 93<br />
Image problems .................................................................................................................. 93<br />
Media-handling problems ................................................................................................... 94<br />
Performance problems ....................................................................................................... 96<br />
Scan problems ..................................................................................................................................... 97<br />
Solving scanned-image problems ...................................................................................... 97<br />
Scan-quality problems ........................................................................................................ 98<br />
Preventing problems .......................................................................................... 98<br />
Solving scan-quality problems ........................................................................... 98<br />
Control-panel display problems ........................................................................................................... 99<br />
Solving common Macintosh problems ............................................................................................... 100<br />
Problems with Mac OS X V10.3 and Mac OS X V10.4 .................................................... 100<br />
Problem-solving tools ........................................................................................................................ 102<br />
Restoring the factory-set defaults ..................................................................................... 102<br />
Reducing paper curl .......................................................................................................... 102<br />
Appendix A Accessories and ordering information<br />
Supplies ............................................................................................................................................. 104<br />
Cable and interface accessories ....................................................................................................... 104<br />
User-replaceable parts ...................................................................................................................... 104<br />
Paper and other print media .............................................................................................................. 104<br />
Appendix B Service and support<br />
Hewlett-Packard limited warranty statement ..................................................................................... 108<br />
Print Cartridge Limited Warranty Statement ..................................................................................... 109<br />
Availability of support and service ..................................................................................................... 110<br />
<strong>HP</strong> Customer Care ............................................................................................................................ 110<br />
Hardware service ............................................................................................................................... 111<br />
Extended warranty ............................................................................................................................. 111<br />
vi <strong>ENWW</strong>
Guidelines for repacking the device .................................................................................................. 112<br />
Appendix C Device specifications<br />
Physical specifications ....................................................................................................................... 114<br />
Electrical specifications ..................................................................................................................... 114<br />
Power consumption ........................................................................................................................... 114<br />
Environmental specifications ............................................................................................................. 114<br />
Acoustic emissions ............................................................................................................................ 115<br />
Appendix D Regulatory information<br />
FCC compliance ................................................................................................................................ 118<br />
Environmental Product Stewardship program ................................................................................... 118<br />
Protecting the environment ............................................................................................... 118<br />
Ozone production .............................................................................................................. 118<br />
Power consumption .......................................................................................................... 118<br />
<strong>HP</strong> <strong>LaserJet</strong> printing supplies ........................................................................................... 120<br />
Disposal of waste equipment by <strong>user</strong>s in private household in the European Union ...... 121<br />
Material safety data sheet ................................................................................................. 121<br />
For more information ........................................................................................................ 121<br />
Declaration of conformity ................................................................................................................... 122<br />
Country-/region-specific safety statements ....................................................................................... 123<br />
Laser safety statement ..................................................................................................... 123<br />
Canadian DOC statement ................................................................................................. 123<br />
Korean EMI statement ...................................................................................................... 123<br />
Finnish laser statement ..................................................................................................... 124<br />
Glossary ............................................................................................................................................................ 125<br />
Index .................................................................................................................................................................. 127<br />
<strong>ENWW</strong> vii
viii <strong>ENWW</strong>
1 Device basics<br />
● Device features<br />
● Device parts<br />
<strong>ENWW</strong> 1
Device features<br />
Print ● Prints letter-size pages at speeds up to 15 pages per minute (ppm) and A4-size pages<br />
at speeds up to 14 ppm<br />
● Prints at 600 dots per inch (dpi) and FastRes 1200 dpi<br />
● Includes adjustable settings to optimize print quality<br />
● Average yield for the standard black print cartridge is 2000 pages in accordance with<br />
ISO/IEC 19752. Actual yield depends on specific use.<br />
Copy ● Copies at 600 dots per inch (dpi)<br />
For more information, see Copy.<br />
Memory ● Includes 32-megabyte (MB) random-access memory (RAM)<br />
Paper handling ● Priority input tray holds up to 10 pages<br />
● Tray 1 holds up to 150 sheets of print media or 10 envelopes<br />
● Output bin holds up to 100 sheets of print media<br />
Scan ● Provides 1200 pixels per inch (ppi) full-color scanning<br />
For more information, see Scan.<br />
Printer driver features ● FastRes 1200 produces 1200-dots-per-inch (dpi) print quality for fast, high-quality<br />
printing of business text and graphics<br />
Interface connections ● Includes a Hi-Speed USB 2.0 port<br />
Environmental features ● ENERGY STAR®-qualified<br />
Economical printing ● Provides N-up printing (printing more than one page on a sheet). See Printing multiple<br />
pages on one sheet of paper or Printing multiple pages on one sheet of paper<br />
(Macintosh).<br />
● Provides an EconoMode setting, which uses less toner<br />
Supplies ● Uses a print cartridge that has a no-shake design<br />
Accessibility ● Online <strong>user</strong> <strong>guide</strong> is compatible with text screen-readers.<br />
● Print cartridges can be installed and removed by using one hand.<br />
● All doors and covers can be opened by using one hand.<br />
2 Chapter 1 Device basics <strong>ENWW</strong>
Device parts<br />
Before using the <strong>HP</strong> <strong>LaserJet</strong> <strong>M1005</strong>, familiarize yourself with the parts of the device.<br />
Front view<br />
6<br />
5<br />
1 Flatbed scanner cover<br />
2 Control panel<br />
3 Cartridge-door release<br />
4 Output bin<br />
5 Priority input tray<br />
6 Tray 1<br />
Back view<br />
7<br />
7 Hi-Speed USB 2.0 port<br />
8 Power switch<br />
9 Power receptacle<br />
1 2<br />
4<br />
3<br />
8<br />
9<br />
<strong>ENWW</strong> Device parts 3
Control panel<br />
1<br />
2<br />
3<br />
4<br />
9<br />
8<br />
5<br />
6<br />
7<br />
1 Control-panel display ● Shows status information, menus, and error messages<br />
2 Left arrow button ● Navigates to the previous item in the list, or decreases the value of numeric<br />
items. With some numeric items, pressing the button once decreases the<br />
value by 1, while pressing and holding the button decreases the value by 10.<br />
3 Menu/Enter/OK button ● Activates the control-panel menus<br />
● Clears an error condition when the condition is clearable<br />
● Saves the selected value for an item<br />
● Performs the action that is associated with the item that is highlighted on the<br />
control-panel display<br />
4 Right arrow button ● Navigates to the next item in the list, or increases the value of numeric<br />
items. With some numeric items, pressing the button once increases the<br />
value by 1, while pressing and holding the button increases the value by 10.<br />
5 Cancel button ● Cancels the current print, copy, or scan job in process and expels all of the<br />
active pages from the paper path. The time that it takes to cancel the job<br />
depends on the size of the print job. (Press the button only once.) Also<br />
clears continuable errors that are associated with the canceled job.<br />
● Exits the control-panel menus<br />
6 More Copy Settings button ● Provides access to copy settings for the current copy job<br />
7 Lighter/Darker button ● Provides access to copy contrast settings for the current copy job<br />
8 # Copies button ● Provides a way to change the number of copies printed for a the current<br />
copy job<br />
9 Start Copy button ● Starts a copy job<br />
4 Chapter 1 Device basics <strong>ENWW</strong>
2 Software<br />
● Minimum system requirements<br />
● Supported operating systems<br />
● Software installation<br />
● Printer driver<br />
● Software for Windows<br />
● Software for Macintosh<br />
<strong>ENWW</strong> 5
Minimum system requirements<br />
In order to install and use the device software, your computer must meet the following minimum<br />
requirements:<br />
Windows requirements<br />
● Pentium II (233 MHz) processor<br />
● 64 MB of RAM<br />
● 35 MB of disk space<br />
● SVGA 800x600 16-bit color monitor<br />
Macintosh requirements<br />
● G3, G4, or G5 PowerPC processor<br />
● 128 MB of RAM<br />
● 30 to 50 MB of disk space<br />
Supported operating systems<br />
The device comes with software for the following operating systems:<br />
● Windows XP<br />
● Windows 2000<br />
● Windows Server 2003<br />
● Mac OS X V10.3 and later<br />
6 Chapter 2 Software <strong>ENWW</strong>
Software installation<br />
If the computer meets the recommended minimum requirements, the installation process includes<br />
the following software.<br />
● <strong>HP</strong> <strong>LaserJet</strong> Scan software program and driver<br />
● Readiris OCR (not installed with other software; separate installation is required)<br />
● Printer drivers (Windows and Mac)<br />
● TWAIN driver (Mac)<br />
<strong>ENWW</strong> Software installation 7
Printer driver<br />
The device comes with software for Windows and Macintosh that allows the computer to<br />
communicate with the device. This software is called a printer driver. Printer drivers provide access<br />
to device features, such as printing on custom-sized paper, resizing documents, and inserting<br />
watermarks.<br />
NOTE The most recent drivers are available at www.hp.com. Depending on the<br />
configuration of Windows-based computers, the installation program for the product software<br />
automatically checks the computer for Internet access in order to obtain the latest drivers.<br />
Printer-driver Help<br />
Printer-driver Help is separate from program Help. The printer-driver help provides explanations for<br />
the buttons, check boxes, and drop-down lists that are in the printer driver. It also includes<br />
instructions for performing common printing tasks, such as printing on both sides, printing multiple<br />
pages on one sheet, and printing the first page or covers on different paper.<br />
Activate the printer-driver Help screens in one of the following ways:<br />
Windows Macintosh<br />
● In the printer driver Properties dialog box, click the<br />
Help button.<br />
● Press the F1 key on the computer keyboard.<br />
● Click the question-mark symbol in the upper-right<br />
corner of the printer driver.<br />
● Right-click on any item in the driver, and then click<br />
What's This?.<br />
In the Print dialog box, click the ? button.<br />
8 Chapter 2 Software <strong>ENWW</strong>
Changing printer-driver settings<br />
Use one of the following methods to open the printer drivers from the computer in order to change<br />
settings:<br />
Operating System To change the settings for all<br />
print jobs until the software<br />
program is closed<br />
Windows 2000, XP,<br />
and Server 2003<br />
Mac OS X V10.3<br />
and<br />
Mac OS X V10.4<br />
1. On the File menu in the<br />
software program, click<br />
Print.<br />
2. Select the name of the<br />
printer, and then click<br />
Properties or<br />
Preferences.<br />
The steps can vary; this<br />
procedure is most common.<br />
1. On the File menu, click<br />
Print.<br />
2. Change the settings that<br />
you want on the various<br />
pop-up menus.<br />
To change the print job<br />
default settings (for example,<br />
select a specific media type<br />
or size by default)<br />
1. Click Start, click Settings,<br />
and then click Printers or<br />
Printers and Faxes.<br />
2. Right-click the printer icon,<br />
and then select Printing<br />
Preferences.<br />
1. On the File menu, click<br />
Print.<br />
2. Change the settings that<br />
you want on the various<br />
pop-up menus.<br />
3. On the Presets pop-up<br />
menu, click Save as and<br />
type a name for the preset.<br />
These settings are saved in the<br />
Presets menu. To use the new<br />
settings, you must select the<br />
saved preset option every time<br />
you open a program and print.<br />
To change the configuration<br />
settings (for example, enable<br />
or disable manual duplexing)<br />
1. Click Start, click Settings,<br />
and then click Printers or<br />
Printers and Faxes.<br />
2. Right-click the printer icon,<br />
and then select Properties.<br />
3. Click the Device Settings<br />
tab.<br />
1. Open Printer Setup<br />
Utility by selecting the<br />
hard drive, clicking<br />
Applications, clicking<br />
Utilities, then doubleclicking<br />
Printer Setup<br />
Utility.<br />
2. Click on the print queue.<br />
3. On the Printers menu,<br />
click Show Info.<br />
4. Click the Installable<br />
Options menu.<br />
<strong>ENWW</strong> Printer driver 9
Software for Windows<br />
See the getting started <strong>guide</strong> for installation instructions, and see the Readme file for the latest<br />
software information.<br />
<strong>HP</strong> <strong>LaserJet</strong> Scan software<br />
The software CD includes the <strong>HP</strong> <strong>LaserJet</strong> Scan software. See the Readme file that is provided on<br />
the CD for additional included software and for supported languages.<br />
Installing Windows device software<br />
Insert the software CD that came with the printer into the computer CD-ROM drive. Follow the onscreen<br />
installation instructions.<br />
NOTE If the Welcome screen does not open, click Start on the Windows task bar, click Run,<br />
type Z:\setup (where Z is your CD drive letter), and click OK.<br />
Uninstalling Windows device software<br />
1. Click Start, and then click All Programs.<br />
2. Click <strong>HP</strong>, and then click <strong>HP</strong> <strong>LaserJet</strong> <strong>M1005</strong> <strong>MFP</strong>.<br />
3. Click Uninstall <strong>HP</strong> <strong>LaserJet</strong> <strong>M1005</strong> <strong>MFP</strong>, and then follow the onscreen instructions to remove<br />
the software.<br />
10 Chapter 2 Software <strong>ENWW</strong>
Software for Macintosh<br />
This section describes how to install Macintosh printing system software.<br />
Installing Macintosh device software<br />
1. Connect a USB cable between the USB port on the printer and the USB port on the computer.<br />
Use a standard 2-meter (6.56-foot) USB cable.<br />
2. Insert the printer CD into the CD-ROM drive and run the installer.<br />
The Printer Setup Utility should automatically launch. If it does not launch, continue to the next<br />
step.<br />
3. Double-click the hard drive icon on the desktop.<br />
4. Open the Applications folder, and then open the Utilities folder.<br />
5. Double-click Printer Setup Utility, and then follow the onscreen instructions to install the<br />
software.<br />
Uninstalling Macintosh device software<br />
1. Double-click the hard drive icon on the desktop.<br />
2. Open the Applications folder, and then open the Utilities folder.<br />
3. Double-click Printer Setup Utility.<br />
4. In the Printer Setup Utility, select the device, and then click Delete on the toolbar.<br />
<strong>ENWW</strong> Software for Macintosh 11
12 Chapter 2 Software <strong>ENWW</strong>
3 Media specifications<br />
● General <strong>guide</strong>lines<br />
● Choosing paper and other media<br />
● Guidelines for using media<br />
● Supported media weights and sizes<br />
● Printing and storage environment<br />
<strong>ENWW</strong> 13
General <strong>guide</strong>lines<br />
Some media might meet all of the <strong>guide</strong>lines in this manual and still not produce satisfactory results.<br />
This problem might be the result of improper handling, unacceptable temperature and humidity<br />
levels, or other variables over which Hewlett-Packard has no control.<br />
Before purchasing large quantities of print media, always test a sample and make sure that the print<br />
media meets the requirements specified in this <strong>user</strong> <strong>guide</strong> and in the <strong>HP</strong> <strong>LaserJet</strong> Printer Family<br />
Print Media Guide, which you can view on the Web at www.hp.com/support/ljpaper<strong>guide</strong>. For<br />
ordering information, see Accessories and ordering information.<br />
CAUTION Using media that does not meet <strong>HP</strong> specifications can cause problems for the<br />
device, requiring repair. This repair is not covered by the Hewlett-Packard warranty or service<br />
agreements.<br />
The device accepts a variety of media, such as cut-sheet paper (including up to 100% recycled-fibercontent<br />
paper), envelopes, labels, transparencies, <strong>LaserJet</strong> glossy paper, <strong>HP</strong> <strong>LaserJet</strong> Tough paper,<br />
and custom-size paper. Properties such as weight, composition, grain, and moisture content are<br />
important factors that affect performance and output quality. Media that does not meet the <strong>guide</strong>lines<br />
outlined in this manual can cause the following problems:<br />
● Poor print quality<br />
● Increased jams<br />
● Premature wear on the device, requiring repair<br />
Choosing paper and other media<br />
Properties such as weight, grain, and moisture content are important factors that affect performance<br />
and quality. To achieve the best possible print quality, only use high-quality media that is designed<br />
for laser printers. See Guidelines for using media for detailed paper and media specifications.<br />
NOTE Always test a sample of the media before you purchase large quantities. Your media<br />
supplier should understand the requirements specified in the <strong>HP</strong> <strong>LaserJet</strong> Printer Family Print<br />
Media Guide (<strong>HP</strong> part number 5963-7863). See Guidelines for using media for more<br />
information.<br />
<strong>HP</strong> media<br />
<strong>HP</strong> recommends that you use <strong>HP</strong> <strong>LaserJet</strong> media in the device.<br />
Media to avoid<br />
The device can handle many types of media. Using media that is outside the specifications degrades<br />
print quality and increases the chance of jams occurring.<br />
● Do not use media that is too rough.<br />
● Do not use media that contains cutouts or perforations other than standard 3-hole punched<br />
paper.<br />
● Do not use multipart forms.<br />
● Do not use paper that contains a watermark if you are printing solid patterns.<br />
14 Chapter 3 Media specifications <strong>ENWW</strong>
Media that can damage the device<br />
In rare circumstances media can damage the device. Avoid the following types of media to prevent<br />
possible damage:<br />
● Do not use media with staples attached.<br />
● Do not use transparencies designed for inkjet printers or other low-temperature printers. Use<br />
only transparencies that are specified for use with <strong>HP</strong> <strong>LaserJet</strong> printers.<br />
● Do not use photo paper intended for inkjet printers.<br />
● Do not use paper that is embossed or coated and is not designed for the temperature of the<br />
image-f<strong>user</strong>. Select media that can tolerate temperatures of 200°C (392°F) for 0.1 second.<br />
<strong>HP</strong> manufactures a media that is designed for the device.<br />
● Do not use letterhead paper that was produced with low-temperature dyes or thermography.<br />
Preprinted forms or letterhead must use inks that can tolerate temperatures of 200°C (392°F)<br />
for 0.1 second.<br />
● Do not use any media that produces emissions, or that melts, offsets, or discolors when<br />
exposed to 200°C (392°F) for 0.1 second.<br />
To order <strong>HP</strong> <strong>LaserJet</strong> printing supplies, go to www.hp.com/go/ljsupplies in the U.S. or to www.hp.com/<br />
ghp/buyonline.html/ worldwide.<br />
<strong>ENWW</strong> Choosing paper and other media 15
Guidelines for using media<br />
The following sections provide <strong>guide</strong>lines and instructions for printing on transparencies, envelopes,<br />
and other special media. Guidelines and specifications are included to help you select media that<br />
optimizes print quality and avoid media that can cause jams or damage the device.<br />
Paper<br />
For best results, use conventional 80-g/m 2 or 20-lb paper. Make sure that the paper is of good quality<br />
and free of cuts, nicks, tears, spots, loose particles, dust, wrinkles, voids, and curled or bent edges.<br />
If you are unsure about what type of paper you are loading (such as bond or recycled), check the<br />
label on the package of paper.<br />
Some paper causes print quality problems, jamming, or damage to the device.<br />
Symptom Problem with paper Solution<br />
Poor print quality or toner adhesion<br />
Problems with feeding<br />
Too moist, too rough, too smooth, or<br />
embossed<br />
Try another kind of paper that has a<br />
smoothness rating of 100-250 Sheffield<br />
and has 4-6 % moisture content.<br />
Check the device and make sure that<br />
the appropriate media type has been<br />
selected.<br />
Dropouts, jamming, or curl Stored improperly Store paper flat in its moisture-proof<br />
wrapping.<br />
Increased gray background shading Might be too heavy Use lighter paper.<br />
Excessive curl<br />
Problems with feeding<br />
Too moist, wrong grain direction, or<br />
short-grain construction<br />
Use long-grain paper.<br />
Check the device and make sure that<br />
the appropriate media type has been<br />
selected.<br />
Jamming or damage to device Cutouts or perforations Do not use paper with cutouts or<br />
perforations.<br />
Problems with feeding Ragged edges Use good quality paper.<br />
NOTE The device uses heat and pressure to fuse toner to the paper. Make sure that any<br />
colored paper or preprinted forms use inks that are compatible with the f<strong>user</strong> temperature of<br />
200°C (392°F) for 0.1 second.<br />
Do not use letterhead that is printed with low-temperature inks, such as those used in some<br />
types of thermography.<br />
Do not use raised letterhead.<br />
Do not use transparencies that are designed for inkjet printers or other low-temperature<br />
printers. Use only transparencies that are specified for use with <strong>HP</strong> <strong>LaserJet</strong> printers.<br />
16 Chapter 3 Media specifications <strong>ENWW</strong>
Colored paper<br />
● Colored paper should be of the same high quality as white xerographic paper.<br />
● Pigments used must be able to withstand the f<strong>user</strong> temperature of 200°C (392°F) for 0.1 second<br />
without deterioration.<br />
● Do not use paper with a colored coating that was added after the paper was produced.<br />
Custom-size media<br />
Use the main input tray for multiple sheets. See Supported media weights and sizes for the<br />
supported media sizes.<br />
Labels<br />
CAUTION Make sure that the sheets are not stuck together before you load them.<br />
<strong>HP</strong> recommends that you print labels from the priority input tray. See Loading media for more<br />
information.<br />
CAUTION Do not feed a sheet of labels through the device more than once. The adhesive<br />
degrades and might damage the device.<br />
Label construction<br />
When selecting labels, consider the quality of the following components:<br />
● Adhesives: The adhesive material should be stable at 200°C (392°F), the maximum f<strong>user</strong><br />
temperature.<br />
● Arrangement: Only use labels with no exposed backing between them. Labels can peel off<br />
sheets that have spaces between the labels, causing serious jams.<br />
● Curl: Before printing, labels must lie flat with no more than 13 mm (0.5 inch) of curl in any<br />
direction.<br />
● Condition: Do not use labels with wrinkles, bubbles, or other indications of separation.<br />
Transparencies<br />
Transparencies must be able to withstand 200°C (392°F), the maximum f<strong>user</strong> temperature.<br />
CAUTION You can print transparencies from the 150-sheet tray (tray 1). However, do not<br />
load more than 75 transparencies at one time into the tray.<br />
<strong>ENWW</strong> Guidelines for using media 17
Envelopes<br />
<strong>HP</strong> recommends that you print envelopes from the priority input tray. See Loading media for more<br />
information.<br />
Envelope construction<br />
Envelope construction is critical. Envelope fold lines can vary considerably, not only between<br />
manufacturers, but also within a box from the same manufacturer. Successful printing on envelopes<br />
depends upon the quality of the envelopes. When selecting envelopes, consider the following<br />
components:<br />
● Weight: The weight of the envelope paper should not exceed 90 g/m 2 (24 lb), or jamming might<br />
result.<br />
● Construction: Before printing, envelopes should lie flat with less than 6 mm (0.25 inch) of curl,<br />
and should not contain air. Envelopes that trap air can cause problems. Do not use envelopes<br />
that contain clasps, snaps, tie strings, transparent windows, holes, perforations, cutouts,<br />
synthetic materials, stamping, or embossing. Do not use envelopes with adhesives that require<br />
pressure to seal them.<br />
● Condition: Make sure that the envelopes are not wrinkled, nicked, or otherwise damaged.<br />
Make sure that the envelopes do not have any exposed adhesive.<br />
Envelopes with double-side seams<br />
An envelope with double-side-seam construction has vertical seams at both ends of the envelope<br />
rather than diagonal seams. This style might be more likely to wrinkle. Make sure that the seam<br />
extends all the way to the corner of the envelope as shown in the following illustration:<br />
1<br />
2<br />
1 Acceptable envelope construction<br />
2 Unacceptable envelope construction<br />
18 Chapter 3 Media specifications <strong>ENWW</strong>
Envelopes with adhesive strips or flaps<br />
Envelopes with a peel-off adhesive strip or with more than one flap that folds over to seal must use<br />
adhesives compatible with the heat and pressure in the device: 200°C (392°F). The extra flaps and<br />
strips might cause wrinkling, creasing, or jams.<br />
Envelope storage<br />
Proper storage of envelopes contributes to good print quality. You should store envelopes flat. If air<br />
is trapped in an envelope, creating an air bubble, the envelope might wrinkle during printing.<br />
Card stock and heavy media<br />
You can print many types of card stock from the input tray, including index cards and postcards.<br />
Some card stock performs better than others because its construction is better suited for feeding<br />
through a laser printer.<br />
For optimum performance, do not use paper heavier than 157 g/m 2 (42 lb). Paper that is too heavy<br />
might cause misfeeds, stacking problems, jams, poor toner fusing, poor print quality, or excessive<br />
mechanical wear.<br />
NOTE You might be able to print on heavier paper if you do not fill the input tray to capacity<br />
and if you use paper with a smoothness rating of 100-180 Sheffield.<br />
In either the software program or the printer driver, select Heavy (106 g/m 2 to 163 g/m 2 ; 28- to 43-lb<br />
bond) or Cardstock (135 g/m 2 to 216 g/m 2 ; 50- to 80-lb cover) as the media type, or print from a tray<br />
that is configured for heavy paper. Because this setting affects all print jobs, it is important to return<br />
the device back to its original settings after the job has printed.<br />
Card stock construction<br />
● Smoothness: 135-157 g/m 2 (36-42 lb) card stock should have a smoothness rating of<br />
100-180 Sheffield. 60-135 g/m 2 (16-36 lb) card stock should have a smoothness rating of<br />
100-250 Sheffield.<br />
● Construction: Card stock should lie flat with less than 5 mm (0.2 inch) of curl.<br />
● Condition: Make sure that the card stock is not wrinkled, nicked, or otherwise damaged.<br />
Card stock <strong>guide</strong>lines<br />
● Set margins at least 2 mm (0.08 inch) away from the edges.<br />
● Use tray 1 for card stock (135 g/m 2 to 216 g/m 2 ; 50- to 80-lb cover).<br />
<strong>ENWW</strong> Guidelines for using media 19
Letterhead and preprinted forms<br />
Letterhead is premium paper that often has a watermark, sometimes uses cotton fiber, and is<br />
available in a wide range of colors and finishes with matching envelopes. Preprinted forms can be<br />
made of a broad spectrum of paper types ranging from recycled to premium.<br />
Many manufacturers now design these grades of paper with properties optimized for laser printing<br />
and advertise the paper as laser compatible or laser guaranteed. Some of the rougher surface<br />
finishes, such as cockle, laid, or linen, might require the special f<strong>user</strong> modes that are available on<br />
some printer models to achieve adequate toner adhesion.<br />
NOTE Some page-to-page variation is normal when printing with laser printers. This<br />
variation cannot be observed when printing on plain paper. However, this variation is obvious<br />
when printing on preprinted forms because the lines and boxes are already placed on the page.<br />
To avoid problems when using preprinted forms, embossed paper, and letterhead, observe the<br />
following <strong>guide</strong>lines:<br />
● Avoid using low-temperature inks (the kind used with some types of thermography).<br />
● Use preprinted forms and letterhead paper that have been printed by offset lithography or<br />
engraving.<br />
● Use forms that have been created with heat-resistant inks that will not melt, vaporize, or release<br />
emissions when heated to 200°C (392°F) for 0.1 second. Typically, oxidation-set or oil-based<br />
inks meet this requirement.<br />
● When the form is preprinted, be careful not to change the moisture content of the paper, and do<br />
not use materials that change the paper's electrical or handling properties. Seal the forms in<br />
moisture-proof wrap to prevent moisture changes during storage.<br />
● Avoid processing preprinted forms that have a finish or coating.<br />
● Avoid using heavily embossed or raised-letterhead papers.<br />
● Avoid papers that have heavily textured surfaces.<br />
● Avoid using offset powders or other materials that prevent printed forms from sticking together.<br />
NOTE To print a single-page cover letter on letterhead, followed by a multiple-page<br />
document, feed the letterhead face up in the priority input tray, and load the standard paper in<br />
the main input tray (tray 1). The device automatically prints from the priority input tray first.<br />
20 Chapter 3 Media specifications <strong>ENWW</strong>
Supported media weights and sizes<br />
For optimum results, use conventional 80 to 90 g/m 2 (20 to 24 lb) photocopy paper. Verify that the<br />
paper is of good quality and is free of cuts, nicks, tears, spots, loose particles, dust, wrinkles, curls,<br />
and bent edges.<br />
NOTE The device supports a wide range of standard and custom sizes of print media. The<br />
capacity of trays and bins can vary depending on media weight and thickness and on<br />
environmental conditions. Use only transparencies that are designed for use with <strong>HP</strong> <strong>LaserJet</strong><br />
printers. Inkjet and monochrome transparencies are not supported for the device.<br />
Table 3-1 Priority input tray specifications<br />
Media Dimensions 1 Weight Capacity 2<br />
Paper Minimum: 89 x 44 mm (3.5 x<br />
1.75 inches)<br />
Maximum: 216 x 356 mm (8.5<br />
x 14 inches)<br />
42 to 260 g/m 2 (11 to 69 lb) Up to 10 sheets of 80 g/m 2 or 20<br />
lb paper<br />
<strong>HP</strong> Cover paper3 Same as the preceding listed<br />
minimum and maximum sizes<br />
203 g/m2 (75 lb cover) 1 sheet<br />
Transparencies and opaque film Thickness: 0.10 to 0.13 mm<br />
(3.9 to 5.1 mils)<br />
1 transparency<br />
Labels 4 Thickness: up to 0.23 mm (up<br />
to 9 mils)<br />
1 sheet of labels<br />
Envelopes Up to 90 g/m 2 (16 to 24 lb) Up to 10<br />
1 The device supports a wide range of standard and custom sizes of print media. Check the printer driver for supported sizes.<br />
2 Capacity can vary depending on media weight and thickness, and environmental conditions.<br />
3 Hewlett-Packard does not guarantee results when printing with other types of heavy paper.<br />
4 Smoothness: 100 to 250 (Sheffield).<br />
<strong>ENWW</strong> Supported media weights and sizes 21
Table 3-2 Tray 1 specifications<br />
Media Dimensions 1 Weight Capacity 2<br />
Minimum size 76 x 127 mm (3 x 5 inches) 60 to 163 g/m 2 (16 to 43 lb) 150 sheets of 80 g/m 2 (20<br />
lb) paper<br />
Maximum size 216 x 356 mm (8.5 x 14 inches)<br />
Letter 216 x 279 mm (8.5 x 11 inches)<br />
A4 210 x 297 mm (8.3 x 11.7 inches)<br />
Legal 216 x 356 mm (8.5 x 14 inches)<br />
A5 148 x 210 mm (5.8 x 8.3 inches)<br />
B5 (ISO) 176 x 250 mm (6.9 x 9.9 inches)<br />
B5 (JIS) 182 x 257 mm (7.2 x 10 inches)<br />
Executive 191 x 267 mm (7.3 x 10.5 inches)<br />
8.5 x 13 inches 216 x 330 mm (8.5 x 13 inches)<br />
1 The device supports a wide range of standard sizes of print media. Check the printer driver for supported sizes.<br />
2 Capacity can vary depending on the media weight and thickness, and environmental conditions.<br />
22 Chapter 3 Media specifications <strong>ENWW</strong>
Printing and storage environment<br />
Ideally, the printing and media-storage environment should be at or near room temperature, and not<br />
too dry or too humid. Remember that paper absorbs and loses moisture rapidly.<br />
Heat works with humidity to damage paper. Heat causes the moisture in paper to evaporate, while<br />
cold causes it to condense on the sheets. Heating systems and air conditioners remove most of the<br />
humidity from a room. As paper is opened and used, it loses moisture, causing streaks and<br />
smudging. Humid weather or water coolers can cause the humidity to increase in a room. As paper is<br />
opened and used it absorbs any excess moisture, causing light print and dropouts. Also, as paper<br />
loses and gains moisture it can distort. This issue can cause jams.<br />
As a result, paper storage and handling are as important as the paper-making process itself. Paper<br />
storage environmental conditions directly affect the feed operation and print quality.<br />
Care should be taken not to purchase more paper than can be easily used in a short time (about<br />
three months). Paper stored for long periods can experience heat and moisture extremes, which can<br />
cause damage. Planning is important to prevent damage to a large supply of paper.<br />
Unopened paper in sealed reams can remain stable for several months before use. Opened<br />
packages of paper have more potential for environmental damage, especially if they are not wrapped<br />
with a moisture-proof barrier.<br />
The media-storage environment should be maintained to ensure optimum performance. The required<br />
condition is 20° to 24°C (68° to 75°F), with a relative humidity of 45% to 55%. The following<br />
<strong>guide</strong>lines are helpful when evaluating the storage environment:<br />
● Print media should be stored at or near room temperature.<br />
● The air should not be too dry or too humid.<br />
● The best way to store an opened ream of paper is to rewrap it tightly in its moisture-proof<br />
wrapping. If the device environment is subject to extremes, unwrap only the amount of paper to<br />
be used during the day's operation to prevent unwanted moisture changes.<br />
● Avoid storing paper and print media near heating and air conditioning vents or near windows<br />
and doors that are frequently open.<br />
<strong>ENWW</strong> Printing and storage environment 23
24 Chapter 3 Media specifications <strong>ENWW</strong>
4 Using the device<br />
● Loading media<br />
● Controlling print jobs<br />
● Using the device control panel<br />
<strong>ENWW</strong> 25
Loading media<br />
The following sections describe how to load media into the different input trays.<br />
CAUTION Printing on wrinkled, folded, or damaged media can cause jams. See Guidelines<br />
for using media for more information.<br />
Loading documents to copy or scan<br />
Use these instructions to load originals into the device for scanning.<br />
1. Lift the flatbed scanner cover.<br />
2. Place the original document face-down on the flatbed scanner with the upper-left corner of the<br />
document at the lower-right corner of the glass.<br />
3. Gently close the lid.<br />
The document is ready to be copied or scanned.<br />
Loading input trays<br />
Priority input tray<br />
The priority input tray on the <strong>HP</strong> <strong>LaserJet</strong> <strong>M1005</strong> <strong>MFP</strong> holds up to 10 sheets of media up to 80 g/m 2<br />
(20 lb) in weight or one envelope, transparency, or card. Load media with the top forward and the<br />
side to be printed facing up. To prevent jams and skewing, always adjust the side media <strong>guide</strong>s<br />
before feeding the media.<br />
26 Chapter 4 Using the device <strong>ENWW</strong>
Main input tray (tray 1)<br />
The main input tray holds up to 150 pages of 80 g/m 2 or 20 lb paper or fewer pages of heavier media<br />
(15 mm (0.6 in) or less stack height). Load media with the top forward and the side to be printed<br />
facing down. To prevent jams and skewing, always adjust the side and rear media <strong>guide</strong>s.<br />
NOTE When you add new media, make sure that you remove all of the media from the input<br />
tray and straighten the stack of new media. This helps to prevent multiple sheets of media<br />
from feeding into the device, which can cause jams.<br />
<strong>ENWW</strong> Loading media 27
Controlling print jobs<br />
This section provides basic printing instructions. When making changes to printing settings, follow<br />
the hierarchy of how changes are prioritized.<br />
NOTE The names of commands and dialog boxes might vary depending on your software<br />
program.<br />
Print-settings priorities<br />
When making changes to printing settings, follow the hierarchy of how changes are prioritized. (Note<br />
that the names of commands and dialog boxes might vary depending on your software program.)<br />
● Page Setup dialog box: This dialog box opens when you click Page Setup or a similar<br />
command on the File menu in your software program. This dialog box is part of the program in<br />
which you are working. Settings that are changed here override settings that are changed<br />
anywhere else.<br />
● Print dialog box: This dialog box opens when you click Print, Print Setup, or a similar<br />
command on the File menu in your software program. It is also part of the program, but it has a<br />
lower priority than the Page Setup dialog box. Settings that are changed in the Print dialog box<br />
do not override settings that are changed in the Page Setup dialog box. Settings that are<br />
changed here do override settings that are changed in the printer driver.<br />
● Printer driver: The printer driver opens when you click Properties in the Print dialog box.<br />
Settings that are changed here do not override settings that are changed anywhere else. (For<br />
Macintosh, the printer driver settings are integrated into the Print dialog box.)<br />
Selecting a source<br />
You can print by source (tray) or by type or size. To print by source, follow these steps. For<br />
Macintosh operating systems, types and sizes are grouped together under the Paper Source pop-up<br />
menu.<br />
● Windows: In the Print dialog box in your software program, select the Source (tray), if possible.<br />
Otherwise, select a tray from the Source is field from the Paper tab in your printer driver.<br />
● Mac OS X V10.3 and later: From the Print dialog box, select the tray or type of media on the<br />
Paper pop-up menu.<br />
Selecting a type or size<br />
You can print by source (tray) or by type or size. If you are printing on special print media, such as<br />
heavy paper, it is important to print by type to achieve good results. To print by type or size, follow<br />
these steps. For Macintosh operating systems, types and sizes are all grouped together under the<br />
Paper Source pop-up menu.<br />
● Windows: In the printer driver, select a type in the Type is field of the Paper tab. Or, select a<br />
size from the Size is field. For some paper, such as letterhead, you select both a type and size.<br />
● Mac OS X V10.3 and later: In the Print dialog box, select the tray or type of media on the Paper<br />
pop-up menu.<br />
28 Chapter 4 Using the device <strong>ENWW</strong>
Using the device control panel<br />
You can configure settings at the control panel.<br />
Changing the control-panel display language<br />
Use this procedure to print reports or to show messages on the device control-panel display in a<br />
language other than the default for your country/region.<br />
1. Press Menu/Enter.<br />
2. Use the < or the > button to select System setup, and then press Menu/Enter.<br />
3. Use the < or the > button to select Language, and then press Menu/Enter.<br />
4. Use the < or the > button to select the language that you want.<br />
5. Press Menu/Enter to save the selection.<br />
Changing the default media size and type<br />
Set the size and type of media that you usually load in the input tray. The device uses these settings<br />
for copying and printing.<br />
To change the default media size<br />
1. Press Menu/Enter.<br />
2. Use the < or the > button to select System setup, and then press Menu/Enter.<br />
3. Use the < or the > button to select Paper setup, and then press Menu/Enter.<br />
4. Use the < or the > button to select Def. paper size, and then press Menu/Enter.<br />
5. Use the < or the > button to select the size.<br />
6. Press Menu/Enter to save the selection.<br />
<strong>ENWW</strong> Using the device control panel 29
To change the default media type<br />
1. Press Menu/Enter.<br />
2. Use the < or the > button to select System setup, and then press Menu/Enter.<br />
3. Use the < or the > button to select Paper setup, and then press Menu/Enter.<br />
4. Use the < or the > button to select Def. paper type, and then press Menu/Enter.<br />
5. Use the < or the > button to select the type.<br />
6. Press Menu/Enter to save the selection.<br />
30 Chapter 4 Using the device <strong>ENWW</strong>
5 Printing<br />
This section provides information about common printing tasks.<br />
● Using features in the Windows printer driver<br />
● Using features in the Macintosh printer driver<br />
● Printing on special media<br />
● Using archive print<br />
● Canceling a print job<br />
<strong>ENWW</strong> 31
Using features in the Windows printer driver<br />
When you print from a software program, many of the product features are available from the printer<br />
driver. For complete information about the features that are available in the printer driver, see the<br />
printer-driver Help. The following features are described in this section:<br />
● Creating and using quick sets<br />
● Creating and using watermarks<br />
● Resizing documents<br />
● Setting a custom paper size from the printer driver<br />
● Using different paper and printing covers<br />
● Printing a blank first page or last page<br />
● Printing multiple pages on one sheet of paper<br />
● Printing on both sides<br />
NOTE Settings in the printer driver and software program generally override control-panel<br />
settings. Software-program settings generally override printer-driver settings.<br />
Creating and using quick sets<br />
Use quick sets to save the current driver settings for reuse. For example, you can save the pageorientation,<br />
print-on-both-sides, and paper-source settings in a quick set. Quick sets are available on<br />
most printer-driver tabs. You can save up to 10 Print Task Quick Sets.<br />
NOTE The printer driver might report that 10 Print Task Quick Sets have been defined when<br />
fewer than 10 are visible. Some predefined Print Task Quick Sets, which do not apply to your<br />
product, might be included and are counted in the total number.<br />
To create a quick set<br />
1. Open the printer driver (see Changing printer-driver settings).<br />
2. Select the print settings that you want to use.<br />
3. In the Quick Sets box, type a name for the selected settings (for example "Quarterly Report" or<br />
"My Project Status").<br />
4. Click Save.<br />
To use quick sets<br />
1. Open the printer driver (see Changing printer-driver settings).<br />
2. Select the quick set that you want to use from the Quick Sets drop-down list.<br />
3. Click OK. The product is now set to print according to the saved settings in the quick set.<br />
NOTE To restore printer-driver default settings, select Default Print Settings from the<br />
Quick Sets drop-down list.<br />
32 Chapter 5 Printing <strong>ENWW</strong>
Creating and using watermarks<br />
A watermark is a notice, such as "Confidential," that is printed in the background of each page of a<br />
document.<br />
To use an existing watermark<br />
1. Open the printer driver (see Changing printer-driver settings).<br />
2. From the Effects tab, click the Watermarks drop-down list.<br />
3. Click the watermark that you want to use.<br />
4. If you want the watermark to appear only on the first page of the document, click First Page Only.<br />
5. Click OK. The product is now set to print the watermark that you have selected.<br />
To remove the watermark, click (none) in the Watermarks drop-down list.<br />
Resizing documents<br />
Use the document resizing options to scale a document to a percentage of its normal size. You can<br />
also choose to print a document on a different size paper, with or without scaling.<br />
To reduce or enlarge a document<br />
1. Open the printer driver (see Changing printer-driver settings).<br />
2. On the Effects tab, next to % of normal size, type the percentage by which you want to reduce<br />
or enlarge your document.<br />
You can also use the scroll bar to adjust the reduce or enlarge percentage.<br />
3. Click OK. The product is now set to scale the document to the reduce or enlarge percentage<br />
that you selected.<br />
To print a document onto a different paper size<br />
1. Open the printer driver (see Changing printer-driver settings).<br />
2. On the Effects tab, click Print Document On.<br />
3. Select the target paper size to print on.<br />
4. To print the document on the target paper size without scaling it to fit, make sure that the Scale<br />
to Fit option is not selected.<br />
5. Click OK. The product is now set to print the document as you specified.<br />
<strong>ENWW</strong> Using features in the Windows printer driver 33
Setting a custom paper size from the printer driver<br />
To set a custom paper size<br />
1. Open the printer driver (see Changing printer-driver settings).<br />
2. On the Paper/Quality tab, click Custom.<br />
3. On the Custom Paper Size window, type the name of the custom paper size.<br />
4. Type the paper-size length and width. If you type a size that is too small or too large, the driver<br />
automatically adjusts the size to the minimum or maximum size that is allowed.<br />
5. If necessary, click the button to change the unit of measure between millimeters and inches.<br />
6. Click Save.<br />
7. Click Close. The product is now set to print the document on the custom-size paper that you<br />
selected. The name that you saved appears in the paper-size list for future use.<br />
Using different paper and printing covers<br />
Follow these instructions for printing a first page that is different from other pages in the print job.<br />
1. Open the printer driver (see Changing printer-driver settings).<br />
2. On the Paper/Quality tab, select the appropriate paper for the first page of the print job.<br />
3. Click Use different paper.<br />
4. In the list box, click the pages or covers that you want to print on different paper.<br />
5. To print front or back covers, you must also select Add Blank or Preprinted Cover.<br />
-or-<br />
Select the appropriate paper type or source for the other pages of the print job. The product is<br />
now set to print the document on the paper that you selected.<br />
NOTE The paper size must be the same for all pages of the print job.<br />
Printing a blank first page or last page<br />
1. Open the printer driver (see Changing printer-driver settings).<br />
2. On the Paper/Quality tab, click Use different paper.<br />
3. In the list box, click Front Cover or Back Cover.<br />
4. Click Add Blank or Preprinted Cover.<br />
Printing multiple pages on one sheet of paper<br />
You can print more than one page on a single sheet of paper. This feature is available in some<br />
drivers and provides a cost-effective way to print draft pages.<br />
34 Chapter 5 Printing <strong>ENWW</strong>
To print more than one page on a sheet of paper, look for a layout or pages-per-sheet option in the<br />
driver. (This is sometimes called 2-up, 4-up, or n-up printing.)<br />
1. Open the printer driver (see Changing printer-driver settings).<br />
2. Click the Finishing tab.<br />
3. In the section for Document Options, select the number of pages that you want to print on<br />
each sheet (1, 2, 4, 6, 9, or 16).<br />
4. If the number of pages is greater than 1, select the correct options for Print Page Borders and<br />
Page Order.<br />
● Click Print Page Borders if you want to print a border around each page on the sheet.<br />
● Click Page Order to select the order and placement of the pages on the sheet.<br />
5. Click OK. The product is now set to print the number of pages per sheet that you have selected.<br />
Printing on both sides<br />
NOTE The printer driver also contains instructions and graphics for manually duplexing.<br />
1. In the software program, open the device properties (printer driver).<br />
2. On the Finishing tab, select Print on Both Sides (Manually).<br />
NOTE If the Print on Both Sides option is dimmed or unavailable, open the device<br />
properties (printer driver). On the Device Settings tab or the Configure tab, select<br />
Allow Manual Duplexing, and then click OK. Repeat steps 1 and 2.<br />
3. Print the document.<br />
<strong>ENWW</strong> Using features in the Windows printer driver 35
4. After one side has been printed, remove the remaining media from the input tray, and set it<br />
aside until after you finish your manual duplexing job.<br />
5. Without changing the orientation, remove the printed stack from the output bin, and then<br />
straighten the stack.<br />
6. Maintaining the same orientation, place the stack of media in the input tray again. The printed<br />
side should be facing down with the top edge feeding into the device first.<br />
7. On the device control panel, click OK and wait for the second side to print.<br />
36 Chapter 5 Printing <strong>ENWW</strong>
Using features in the Macintosh printer driver<br />
When you print from a software program, many of the features are available from the printer driver.<br />
For complete information about the features that are available in the printer driver, see the printerdriver<br />
Help. The following features are described in this section:<br />
● Creating and using presets<br />
● Printing a cover page (Macintosh)<br />
● Printing multiple pages on one sheet of paper (Macintosh)<br />
● Printing on both sides (Macintosh)<br />
NOTE Settings in the printer driver and software program generally override control-panel<br />
settings. Software-program settings generally override printer-driver settings.<br />
Creating and using presets<br />
Use presets to save the current driver settings for reuse. For example, you can save the page<br />
orientation, print-on-both-sides feature, and paper-type settings in a preset.<br />
To create a preset<br />
1. Open the printer driver (see Changing printer-driver settings).<br />
2. Select the print settings that you want to use.<br />
3. In the Presets box, click Save As..., and type a name for the preset (for example "Quarterly<br />
Report" or "My Project Status").<br />
4. Click OK.<br />
To use presets<br />
1. Open the printer driver (see Changing printer-driver settings).<br />
2. In the Presets menu, select the preset that you want to use.<br />
NOTE To restore printer-driver default settings, select Standard from the Presets pop-up<br />
menu.<br />
<strong>ENWW</strong> Using features in the Macintosh printer driver 37
Printing a cover page (Macintosh)<br />
If you want to, you can print a separate cover page for your document that includes a message (such<br />
as “Confidential”).<br />
1. Open the printer driver (see Changing printer-driver settings).<br />
2. On the Cover Page pop-up menu, select whether to print the cover page Before Document or<br />
After Document.<br />
3. If you are using Mac OS X V10.3 or Mac OS X V10.4, in the Cover Page Type pop-up menu,<br />
select the message that you want to print on the cover page.<br />
NOTE To print a blank cover page, select Standard as the Cover Page Type.<br />
Printing multiple pages on one sheet of paper (Macintosh)<br />
You can print more than one page on a single sheet of paper. This feature provides a cost-effective<br />
way to print draft pages.<br />
1. Open the printer driver (see Changing printer-driver settings).<br />
2. Click the Layout pop-up menu.<br />
3. Next to Pages per Sheet, select the number of pages that you want to print on each sheet (1,<br />
2, 4, 6, 9, or 16).<br />
4. If the number of pages is greater than 1, next to Layout Direction, select the order and<br />
placement of the pages on the sheet.<br />
5. Next to Borders, select the type of border to print around each page on the sheet.<br />
38 Chapter 5 Printing <strong>ENWW</strong>
Printing on both sides (Macintosh)<br />
1. On the Print dialog, select Manual Duplex.<br />
2. In the Manual Duplex area, select Print on Both Sides (Manually).<br />
3. Print the document.<br />
4. After one side has been printed, remove the remaining media from the input tray, and set it<br />
aside until after you finish your manual duplexing job.<br />
5. Without changing the orientation, remove the printed stack from the output bin, and then<br />
straighten the stack.<br />
<strong>ENWW</strong> Using features in the Macintosh printer driver 39
6. Maintaining the same orientation, place the stack of media in the input tray again. The printed<br />
side should be facing down with the top edge feeding into the device first.<br />
7. On the device control-panel, click OK and wait for the second side to print.<br />
40 Chapter 5 Printing <strong>ENWW</strong>
Printing on special media<br />
Make sure that the paper or print media that you are using meets <strong>HP</strong> specifications. See Media<br />
specifications. Generally, smoother paper provides better results.<br />
1. Open the media input tray and remove any media.<br />
2. Load the media. Make sure that the top of the media is forward and the side to be printed on is<br />
facing up.<br />
3. Adjust the media <strong>guide</strong>s to the length and width of the media.<br />
4. For Windows printer drivers, on the Paper tab or the Paper/Quality tab, select your media type<br />
from the Type is: drop-down list.<br />
For Macintosh printer drivers, on the Paper/Quality tab or the Paper tab (the Paper Type/<br />
Quality tab for some Macintosh drivers), select your media type.<br />
CAUTION Be sure to set the correct media type in the device settings. The device<br />
adjusts the f<strong>user</strong> temperature according to the media type setting. When printing on<br />
special media such as transparencies or labels, this adjustment prevents the f<strong>user</strong> from<br />
damaging the media as it passes through the device.<br />
5. Print the document.<br />
Using archive print<br />
Archive print produces output that reduces toner smearing and dusting. Use archive print to create<br />
documents that you want to preserve.<br />
1. On the device control panel, press Menu/Enter.<br />
2. Use the < or the > button to select Service, and then press Menu/Enter.<br />
3. Use the < or the > button to select Archive print, select On or Off, and then press Menu/Enter.<br />
<strong>ENWW</strong> Printing on special media 41
Canceling a print job<br />
If a print job is currently printing, you can cancel it by pressing Cancel on the device control panel.<br />
CAUTION Pressing Cancel clears the job that the device is currently processing. If more<br />
than one process is running, pressing Cancel clears the process that currently appears on the<br />
control panel.<br />
You can also cancel a print job from a software program or a print queue.<br />
To stop the print job immediately, remove the remaining print media from the device. After printing<br />
stops, use one of the following options:<br />
● Device control panel: To cancel the print job, press and release Cancel on the control panel.<br />
● Software program: Typically, a dialog box appears briefly on the computer screen, allowing<br />
you to cancel the print job.<br />
● Windows print queue: If a print job is waiting in a print queue (computer memory) or print<br />
spooler, delete the job there.<br />
● Windows 2000: Go to the Printer dialog box. Click Start, click Settings, and then click<br />
Printers. Double-click the device icon to open the window, select your print job, and then<br />
click Delete.<br />
● Windows XP: Click Start, and then click Printers and Faxes. Double-click the icon for the<br />
device to open the window, right-click the print job that you want to cancel, and then click<br />
Cancel.<br />
● Macintosh print queue: Open the print queue by double-clicking the device icon in the dock.<br />
Then highlight the print job and click Delete.<br />
42 Chapter 5 Printing <strong>ENWW</strong>
6 Copy<br />
● Starting a copy job<br />
● Canceling a copy job<br />
● Adjusting the copy quality<br />
● Adjusting the lighter/darker (contrast) setting<br />
● Reducing or enlarging copies<br />
● Changing the number of copies<br />
● Copying onto media of different types and sizes<br />
● Copying two-sided documents<br />
● Copying photos and books<br />
● Viewing copy settings<br />
<strong>ENWW</strong> 43
Starting a copy job<br />
To make copies with the device, use the following instructions.<br />
1. Lift the scanner lid, and then load your document face-down (one page at a time) with the upperleft<br />
corner of the document located in the lower-right corner of the scanner glass.<br />
2. Press Start Copy on the device control panel to start copying.<br />
3. Repeat the process for each copy.<br />
For more detailed instructions about loading documents to copy, see Loading documents to copy or<br />
scan.<br />
Canceling a copy job<br />
To cancel a copy job, press Cancel on the device control panel. If more than one process is running,<br />
pressing Cancel clears the process that currently appears on the control-panel display.<br />
NOTE If you cancel a copy job, remove the document from the flatbed scanner.<br />
Adjusting the copy quality<br />
Five copy-quality settings are available: Draft,Text, Mixed, Film photo, and Picture.<br />
● Text: This setting is the best for items that contain mostly text. This is the default setting.<br />
● Film photo: This setting is the best for photographs.<br />
● Picture: This setting is the best for graphics.<br />
● Mixed: This setting is the best for documents that include both text and graphics.<br />
● Draft: This setting is the best for conserving toner.<br />
44 Chapter 6 Copy <strong>ENWW</strong>
To adjust the copy quality for the current job<br />
1. On the device control panel, press More Copy Settings twice to see the current quality setting<br />
for the copy.<br />
2. Use the < or the > button to scroll through the quality setting options.<br />
3. Select a setting, and then press Start Copy to save the selection and immediately start the copy<br />
job, or press Menu/Enter to save the selection without starting the job.<br />
NOTE The change in the setting remains active for about two minutes after the copy job<br />
has been completed. During this time, Settings=Custom appears on the device controlpanel<br />
display.<br />
To adjust the default copy quality<br />
1. On the device control panel, press Menu/Enter.<br />
2. Use the < or the > button to select Copy setup, and then press Menu/Enter.<br />
3. Press Menu/Enter to select Default Quality.<br />
4. Use the < or the > button to scroll through the choices.<br />
5. Press Menu/Enter to save the selection.<br />
<strong>ENWW</strong> Adjusting the copy quality 45
Adjusting the lighter/darker (contrast) setting<br />
The lighter/darker setting affects the lightness or darkness (contrast) of the copy. Use the following<br />
procedure to change the contrast for the current copy job only.<br />
To adjust the lighter/darker setting for the current job<br />
1. On the device control panel, press Lighter/Darker to see the current contrast setting.<br />
2. Use the < or the > button to adjust the setting. Move the slider to the left to make the copy<br />
lighter than the original, or move the slider to the right to make the copy darker than the original.<br />
3. Press Start Copy to save the selection and immediately start the copy job, or press Menu/Enter<br />
to save the selection without starting the job.<br />
NOTE The change in the setting remains active for about two minutes after the copy job<br />
has been completed. During this time, Settings=Custom appears on the device controlpanel<br />
display.<br />
To adjust the default lighter/darker setting<br />
NOTE The default lighter/darker setting affects all copy jobs.<br />
1. On the device control panel, press Menu/Enter.<br />
2. Use the < or the > button to select Copy setup, and then press Menu/Enter.<br />
3. Use the < or the > button to select Def. Light/dark, and then press Menu/Enter.<br />
4. Use the < or the > button to adjust the setting. Move the slider to the left to make all of the<br />
copies lighter than the original, or move the slider to the right to make all of the copies darker<br />
than the original.<br />
5. Press Menu/Enter to save the selection.<br />
46 Chapter 6 Copy <strong>ENWW</strong>
Reducing or enlarging copies<br />
The device can reduce copies to as little as 25% of the original size or enlarge copies to as much as<br />
400% of the original size.<br />
Reduction/enlargement settings<br />
● Original=100%<br />
● A4 > Ltr=94%<br />
● Ltr > A4=97%<br />
● Full page=91%<br />
● 2 pages/sheet<br />
● 4 pages/sheet<br />
● Custom: 25-400%<br />
NOTE For information about using the 2 pages/sheet or 4 pages/sheet setting, see<br />
Copying multiple pages on one sheet of paper.<br />
Adjusting the copy size<br />
To reduce or enlarge copies for the current job<br />
1. On the device control panel, press More Copy Settings.<br />
2. Use the < or the > button to select Reduce/Enlarge, and then press Menu/Enter.<br />
3. Use the < or the > button to select the size to which you would like to reduce or enlarge the<br />
copies in this job.<br />
NOTE If you select Custom: 25-400%, use the < or the > button to adjust the<br />
percentage.<br />
4. Press Start Copy to save the selection and immediately start the copy job, or press Menu/Enter<br />
to save the selection without starting the job.<br />
NOTE The change in the setting remains active for about two minutes after the copy job has<br />
been completed. During this time, Settings=Custom appears on the device control-panel<br />
display.<br />
You must change the default media size in the media input tray to match the output size, or<br />
part of your copy might be cut off.<br />
<strong>ENWW</strong> Reducing or enlarging copies 47
To adjust the default copy size<br />
NOTE The default copy size is the size to which copies are normally reduced or enlarged. If<br />
you keep the factory default size setting of Original=100%, all copies will be the same size as<br />
the original document.<br />
1. On the device control panel, press Menu/Enter.<br />
2. Use the < or the > button to select Copy setup, and then press Menu/Enter.<br />
3. Use the < or the > button to select Def. Reduce/Enlrg, and then press Menu/Enter.<br />
4. Use the < or the > button to select the option for how you normally want to reduce or enlarge<br />
copies.<br />
NOTE If you select Custom: 25-400%, type in the percentage of the original size that<br />
you normally want for copies.<br />
If you select 2 pages/sheet or 4 pages/sheet, select the orientation (portrait or<br />
landscape).<br />
5. Press Menu/Enter to save the selection.<br />
Copying multiple pages on one sheet of paper<br />
1. On the device control panel, press More Copy Settings.<br />
2. Use the < or the > button to select Reduce/Enlarge, and then press Menu/Enter.<br />
3. Use the < or the > button to select 2 pages/sheet or 4 pages/sheet, and then press Menu/Enter.<br />
4. Use the < or the > button to select Portrait or Landscape, and then press Start Copy.<br />
5. Wait for the scanner to stop scanning. The Next Page [OK] to Continue message appears.<br />
6. Remove the original from the flatbed scanner, put the next original onto the scanner, and then<br />
close the lid.<br />
7. Press OK.<br />
● If you selected 2 pages/sheet, the device prints the copy with two original pages on one<br />
page.<br />
● If you selected 4 pages/sheet, repeat steps 6 and 7 two more times. The device prints the<br />
copy with four original pages on one page<br />
NOTE The change in the setting remains active for about two minutes after the copy job has<br />
been completed. During this time, Settings=Custom appears on the device control-panel<br />
display.<br />
You must change the default media size in the media input tray to match the output size, or<br />
part of your copy might be cut off.<br />
48 Chapter 6 Copy <strong>ENWW</strong>
Changing the number of copies<br />
You can choose to have the default number of copies be any number from 1 to 99.<br />
To change the number of copies for the current job<br />
1. On the device control panel, press # Copies.<br />
2. Use the < or the > button to adjust the number of copies, and then press Menu/Enter.<br />
3. Press Start Copy.<br />
NOTE The change in the setting remains active for about two minutes after the copy job<br />
has been completed. During this time, Settings=Custom appears on the device controlpanel<br />
display.<br />
To change the default number of copies<br />
1. On the device control panel, press Menu/Enter.<br />
2. Use the < or the > button to select Copy setup, and then press Menu/Enter.<br />
3. Use the < or the > button to select Def. # of copies, and then press Menu/Enter.<br />
4. Use the < or the > button to adjust the number of copies (between 1 and 99) that you want as<br />
the default.<br />
5. Press Menu/Enter to save the selection.<br />
NOTE The factory-set default for the number of copies is 1.<br />
<strong>ENWW</strong> Changing the number of copies 49
Copying onto media of different types and sizes<br />
The device is set to copy on either letter- or A4-size paper, depending on the country/region in which<br />
it was purchased. You can change the size and type of media that you copy to for the current copy<br />
job or for all copy jobs.<br />
Media-size settings<br />
● Letter<br />
● Legal<br />
● A4<br />
Media-type settings<br />
● Plain<br />
● Preprinted<br />
● Letterhead<br />
● Transparency<br />
● Prepunched<br />
● Labels<br />
● Bond<br />
● Recycled<br />
● Color<br />
● Light<br />
● Heavy<br />
● Cardstock<br />
● Envelope<br />
● Rough Paper<br />
To change the default media-size setting<br />
1. On the device control panel, press Menu.<br />
2. Use the < or the > button to select System setup, and then press Menu/Enter.<br />
3. Use the < or the > button to select Paper setup, and then press Menu/Enter.<br />
4. Use the < or the > button to select Def. paper size, and then press Menu/Enter.<br />
5. Use the < or the > button to select a media size, and then press Menu/Enter.<br />
6. Press Menu/Enter to save the selection.<br />
50 Chapter 6 Copy <strong>ENWW</strong>
To change the default media-type setting type<br />
1. On the device control panel, press Menu.<br />
2. Use the < or the > button to select System setup, and then press Menu/Enter.<br />
3. Use the < or the > button to select Paper setup, and then press Menu/Enter.<br />
4. Use the < or the > button to select Def. paper type, and then press Menu/Enter.<br />
5. Use the < or the > button to select a media type, and then press Menu/Enter.<br />
6. Press Menu/Enter to save the selection.<br />
<strong>ENWW</strong> Copying onto media of different types and sizes 51
Copying two-sided documents<br />
Copying a two-sided original to a one-sided document<br />
Copies resulting from these procedures are printed on one side, and need to be hand-collated.<br />
1. Load the first page of the document to be copied face-down onto the flatbed scanner, and then<br />
close the scanner lid.<br />
2. Press Start Copy.<br />
3. Flip the page on the scanner to the second side, and then close the scanner lid.<br />
4. Press Start Copy.<br />
5. Repeat steps 1 through 4 for each page until all of the original document pages have been<br />
copied.<br />
Copying a two-sided original to a two-sided document<br />
1. Load the first page of the document to be copied face-down onto the flatbed scanner, and then<br />
close the scanner lid.<br />
2. Press Start Copy.<br />
3. Flip the page on the scanner to the second side, and then close the scanner lid.<br />
4. Remove the copied page from the output bin and place it face down into the priority input tray<br />
with the top edge feeding into the device first.<br />
52 Chapter 6 Copy <strong>ENWW</strong>
5. Press Start Copy.<br />
6. Remove the copied page from the output bin, and then set it aside for manual collating.<br />
7. Repeat steps 1 through 6, following the original document page order, until all pages of the<br />
original are copied.<br />
<strong>ENWW</strong> Copying two-sided documents 53
Copying photos and books<br />
To copy a photo<br />
1. Lift the lid and place the photo on the flatbed scanner with the picture-side down and the upperleft<br />
corner of the photo in the lower-right corner of the glass.<br />
2. Gently close the lid.<br />
3. Adjust the copy quality setting to Film photo. See Adjusting the copy quality.<br />
4. Press Start Copy.<br />
To copy a book<br />
1. Lift the lid and place the book on the flatbed scanner with the page that you want to copy at the<br />
lower-right corner of the glass.<br />
54 Chapter 6 Copy <strong>ENWW</strong>
2. Gently close the lid.<br />
3. Gently press down on the lid to press the book to the flatbed scanner surface.<br />
4. Press Start Copy.<br />
Viewing copy settings<br />
Use the More Copy Settings button to see the copy settings for the current copy job.<br />
1. Press More Copy Settings to see the current setting for copy contrast.<br />
2. Continue to press More Copy Settings to scroll through the copy settings for the current copy<br />
job. Settings should appear in the following order: copy contrast, copy quality, media size,<br />
media type, reduction/enlargement, and number of copies.<br />
Use the < or the > button to change the settings, and then press Menu/Enter.<br />
<strong>ENWW</strong> Viewing copy settings 55
56 Chapter 6 Copy <strong>ENWW</strong>
7 Scan<br />
● Understanding scanning methods<br />
● Scanning by using <strong>HP</strong> <strong>LaserJet</strong> Scan (Windows)<br />
● Canceling a scan job<br />
● Scanning by using other software<br />
● Scanning a photo or a book<br />
● Scanning by using optical character recognition (OCR) software<br />
● Scanner resolution and color<br />
For information about a cleaning the flatbed scanner, see To clean the scanner glass.<br />
<strong>ENWW</strong> 57
Understanding scanning methods<br />
You can scan an item in the following ways.<br />
● Scan from the computer by using <strong>HP</strong> <strong>LaserJet</strong> Scan (Windows): In the device program<br />
group, select Scan To to start <strong>HP</strong> <strong>LaserJet</strong> Scan. See Scanning by using <strong>HP</strong> <strong>LaserJet</strong> Scan<br />
(Windows).<br />
● Scan from TWAIN-compliant software: The device is TWAIN-compliant and works with<br />
Windows-based and Macintosh-based programs that support TWAIN-compliant scanning. For<br />
more information, see Scanning by using other software.<br />
● Scan from Windows Imaging Application (WIA)-compliant software: The device is WIAcompliant<br />
and works with Windows-based programs that support WIA-compliant scanning. For<br />
more information, see Scanning by using other software.<br />
NOTE To learn about and use text-recognition software, install the Readiris program from<br />
the software CD-ROM. Text-recognition software is also known as optical character<br />
recognition (OCR) software.<br />
58 Chapter 7 Scan <strong>ENWW</strong>
Scanning by using <strong>HP</strong> <strong>LaserJet</strong> Scan (Windows)<br />
For more information about tasks and settings described in this section, see the <strong>HP</strong> <strong>LaserJet</strong> Scan<br />
online Help.<br />
For more detailed instructions about loading original documents onto the flatbed scanner, see<br />
Loading documents to copy or scan.<br />
1. Click Start, click All Programs, click <strong>HP</strong>, and then click <strong>HP</strong> <strong>LaserJet</strong> <strong>M1005</strong> <strong>MFP</strong>.<br />
2. Select Scan To to start <strong>HP</strong> <strong>LaserJet</strong> Scan.<br />
3. Select a scanning destination.<br />
4. Click Scan.<br />
Canceling a scan job<br />
To cancel a scan job, use one of the following procedures.<br />
● On the device control panel, press Cancel.<br />
● Click the Cancel button in the onscreen dialog box.<br />
If you cancel a scan job, remove the original from the flatbed scanner.<br />
NOTE These procedures vary with Macintosh operating systems.<br />
<strong>ENWW</strong> Scanning by using <strong>HP</strong> <strong>LaserJet</strong> Scan (Windows) 59
Scanning by using other software<br />
The device is TWAIN-compliant and Windows Imaging Application (WIA)-compliant. The device<br />
works with Windows-based programs that support TWAIN-compliant or WIA-compliant scanning<br />
devices and with Macintosh-based programs that support TWAIN-compliant scanning devices.<br />
Using TWAIN-compliant and WIA-compliant software<br />
From a TWAIN-enabled or WIA-enabled program, you can open the scanning feature and scan an<br />
image directly into the open program. For more information, see the Help file or the documentation<br />
that came with your TWAIN-compliant or WIA-compliant software program.<br />
Scanning from a TWAIN-enabled program<br />
Generally, a software program is TWAIN-enabled if it has a command such as Acquire, File<br />
Acquire, Scan, Import New Object, Insert from, or Scanner. If you are unsure whether the<br />
program is compliant or you do not know what the command is called, see the software program<br />
Help or documentation.<br />
When scanning from a TWAIN-enabled program, the <strong>HP</strong> <strong>LaserJet</strong> Scan software program might start<br />
automatically. If the <strong>HP</strong> <strong>LaserJet</strong> Scan program starts, you can make changes while you are<br />
previewing the image. If the program does not start automatically, the image goes to the TWAINenabled<br />
program immediately.<br />
To scan from a TWAIN-enabled program<br />
Start the scan from within the TWAIN-enabled program. See the software program Help or<br />
documentation for information about the commands and steps to use.<br />
Scanning from a WIA-enabled program (Windows XP or Windows Server 2003)<br />
WIA is another way to scan an image directly into a software program, such as Microsoft Word. WIA<br />
uses Microsoft software to scan, instead of the <strong>HP</strong> <strong>LaserJet</strong> Scan software.<br />
Generally, a software program is WIA-enabled if it has a command such as Picture/From Scanner<br />
or Camera in the Insert or File menu. If you are unsure whether the program is WIA-enabled, see<br />
the software program Help or documentation.<br />
To scan from a WIA-enabled program<br />
Start the scan from within the WIA-enabled program. See the software program Help or<br />
documentation for information about the commands and steps to use.<br />
-Or-<br />
In the Cameras and Scanner folder, double-click the device icon. This opens the standard Microsoft<br />
WIA Wizard, which enables you to scan to a file.<br />
60 Chapter 7 Scan <strong>ENWW</strong>
Scanning a photo or a book<br />
Use the following procedures to scan a photo or a book.<br />
To scan a photo<br />
1. Place the photo on the flatbed scanner with the picture-side down and the upper-left corner of<br />
the photo in the lower-right corner of the glass.<br />
2. Gently close the lid.<br />
3. You are now ready to scan the photo by using one of the scanning methods. See<br />
Understanding scanning methods for more information.<br />
To scan a book<br />
1. Lift the lid and place the book on the flatbed scanner with the page that you want to copy at the<br />
lower-right corner of the glass.<br />
<strong>ENWW</strong> Scanning a photo or a book 61
2. Gently close the lid.<br />
3. Gently press down on the lid to press the book to the flatbed scanner surface.<br />
4. You are now ready to scan the book by using one of the scanning methods. See Understanding<br />
scanning methods for more information.<br />
Scanning by using optical character recognition (OCR)<br />
software<br />
You can use third-party OCR software to import scanned text into your preferred word-processing<br />
program for editing.<br />
Readiris<br />
The device software CD-ROMs include the Readiris OCR program. If you want to use the Readiris<br />
program, install it from the appropriate software CD-ROM, and then follow the instructions in the<br />
online Help.<br />
62 Chapter 7 Scan <strong>ENWW</strong>
Scanner resolution and color<br />
If you are printing a scanned image, and the quality is not what you expected, you might have<br />
selected a resolution or color setting in the scanner software that does not match your needs.<br />
Resolution and color affect the following features of scanned images:<br />
● Image clarity<br />
● Texture of gradations (smooth or rough)<br />
● Scan time<br />
● File size<br />
Scanning resolution is measured in pixels per inch (ppi).<br />
NOTE Scanning ppi levels are not interchangeable with printing dpi (dots per inch) levels.<br />
Color, grayscale, and black and white define the number of colors possible. You can adjust the<br />
scanner hardware resolution to up to 1200 ppi. The software can perform an enhanced resolution up<br />
to 19,200 ppi. You can set color and grayscale at 1 bit (black and white), or at 8 bit (256 levels of<br />
gray or color) to 24 bit (true color).<br />
The resolution and color <strong>guide</strong>lines table lists simple tips that you can follow to meet your scanning<br />
needs.<br />
NOTE Setting the resolution and color to a high value can create large files that take up a<br />
large amount of disk space and slow the scanning process. Before setting the resolution and<br />
color, determine how you are going to use the scanned image.<br />
<strong>ENWW</strong> Scanner resolution and color 63
Resolution and color <strong>guide</strong>lines<br />
The following tables describe the recommended resolution and color settings for different types of<br />
scan jobs.<br />
Resolution<br />
Intended use Recommended resolution Recommended color settings<br />
E-mail 150 ppi ● Black and White, if the image<br />
does not require smooth gradation<br />
● Grayscale, if the image requires<br />
smooth gradation<br />
● Color, if the image is in color<br />
Edit text 300 ppi ● Black and White<br />
Print (graphics or text) 600 ppi for complex graphics, or if you<br />
want to significantly enlarge the<br />
document<br />
300 ppi for normal graphics and text<br />
150 ppi for photos<br />
● Black and White for text and line art<br />
● Grayscale for shaded or colored<br />
graphics and photos<br />
● Color, if the image is in color<br />
Display on screen 75 ppi ● Black and White for text<br />
Color<br />
Setting Recommended use<br />
● Grayscale for graphics and photos<br />
● Color, if the image is in color<br />
Color Use this setting for high-quality color photos or documents in<br />
which the color is important.<br />
Black and White Use this setting for text documents.<br />
Grayscale Use this setting when file size is an issue or when you want<br />
a document or photograph to be scanned quickly.<br />
64 Chapter 7 Scan <strong>ENWW</strong>
8 Managing and maintaining the device<br />
● Information pages<br />
● Managing supplies<br />
● Cleaning the device<br />
● Changing the print cartridge<br />
<strong>ENWW</strong> 65
Information pages<br />
Information pages reside within the device memory. These pages help to diagnose and solve<br />
problems with the device.<br />
Page name Description Instructions<br />
Demo page The Demo page prints a sample page that<br />
allows you to inspect the device print quality.<br />
Menu structure The Menu structure is a “map” of the controlpanel<br />
menu commands.<br />
Configuration<br />
report<br />
The Configuration report lists the current<br />
settings and properties of the device.<br />
1. Product Information. This section<br />
contains basic information about the<br />
device, such as the product name, the<br />
serial number, and memory information.<br />
2. Product Settings. This section lists<br />
information that is gathered during<br />
software installation.<br />
3. Paper Settings. This section lists<br />
information about the media type for<br />
each tray and about the type settings for<br />
all the media that the device supports.<br />
4. Copy Settings. This section lists the<br />
device default copy settings.<br />
5. Counters. This section shows the<br />
number of print, copy, and scan jobs<br />
performed by the device.<br />
6. Status Log. This section contains<br />
information about device errors.<br />
1. On the device control panel, press Menu/Enter.<br />
2. Use the < or the > button to select Reports, and<br />
then press Menu/Enter.<br />
3. Press Menu/Enter to select Demo page.<br />
1. On the device control panel, press Menu/Enter.<br />
2. Use the < or the > button to select Reports, and<br />
then press Menu/Enter.<br />
3. Use the < or the > button to select Menu<br />
structure, and then press Menu/Enter.<br />
1. On the device control panel, press Menu/Enter.<br />
2. Use the < or the > button to select Reports, and<br />
then press Menu/Enter.<br />
3. Use the < or the > button to select Config<br />
report, and then press Menu/Enter.<br />
66 Chapter 8 Managing and maintaining the device <strong>ENWW</strong>
Managing supplies<br />
Checking supplies status<br />
If the supplies levels are low, you can order supplies through your local <strong>HP</strong> dealer, by telephone, or<br />
online. See Accessories and ordering information for part numbers. See www.hp.com/go/ljsupplies to<br />
order online.<br />
Storing supplies<br />
Follow these <strong>guide</strong>lines for storing print cartridges:<br />
● Do not remove the print cartridge from its package until you are ready to use it.<br />
CAUTION To prevent damage, do not expose the print cartridge to light for more than a<br />
few minutes.<br />
● See Environmental specifications for operating and storage temperature ranges.<br />
● Store the supply in a horizontal position.<br />
● Store the supply in a dark, dry location away from heat and magnetic sources.<br />
Replacing and recycling supplies<br />
To install a new <strong>HP</strong> print cartridge, follow the instructions that are included in the box that contains<br />
the new supply, or see the getting started <strong>guide</strong>.<br />
To recycle supplies, place the used supply in the box in which the new supply arrived. Use the<br />
enclosed return label to send the used supply to <strong>HP</strong> for recycling. For complete information, see the<br />
recycling <strong>guide</strong> that is included with each new <strong>HP</strong> supply item. See <strong>HP</strong> <strong>LaserJet</strong> printing supplies for<br />
more information about <strong>HP</strong>'s recycling program.<br />
<strong>HP</strong> policy on non-<strong>HP</strong> supplies<br />
Hewlett-Packard Company cannot recommend the use of non-<strong>HP</strong> supplies, either new or<br />
remanufactured. Because they are not <strong>HP</strong> products, <strong>HP</strong> cannot influence their design or control their<br />
quality. Service or repairs required as a result of using a non-<strong>HP</strong> supply will not be covered under the<br />
warranty.<br />
<strong>HP</strong> fraud hotline<br />
Call the <strong>HP</strong> fraud hotline if the device indicates that the print cartridge is not an <strong>HP</strong> print cartridge<br />
and you think that it is genuine. <strong>HP</strong> will help determine if the product is genuine and take steps to<br />
resolve the problem.<br />
Your print cartridge might not be a genuine <strong>HP</strong> one if you notice the following issues:<br />
● You are experiencing a large number of problems with the print cartridge.<br />
● The print cartridge does not look like it usually does (for example, the pull tab or the box is<br />
different).<br />
In the United States, call toll-free: 1-877-219-3183.<br />
<strong>ENWW</strong> Managing supplies 67
Outside the United States, you can call collect. Dial the operator and ask to place a collect call to this<br />
telephone number: 1-770-263-4745. If you do not speak English, a representative at the <strong>HP</strong> fraud<br />
hotline who speaks your language will assist you. Or, if someone who speaks your language is not<br />
available, a language line interpreter will connect approximately one minute after the beginning of the<br />
call. The language line interpreter is a service that will translate between you and the representative<br />
for the <strong>HP</strong> fraud hotline.<br />
68 Chapter 8 Managing and maintaining the device <strong>ENWW</strong>
Cleaning the device<br />
To clean the exterior<br />
Use a soft, damp, lint-free cloth to wipe dust, smudges, and stains off of the exterior of the device.<br />
To clean the scanner glass<br />
Dirty glass, from fingerprints, smudges, hair, and so on, slows down performance and affects the<br />
accuracy of special features such as fit-to-page and copy.<br />
1. Turn off the device, unplug the power cord from the electrical socket, and raise the lid.<br />
2. Clean the glass by using a soft cloth or sponge that has been moistened with nonabrasive glass<br />
cleaner.<br />
CAUTION Do not use abrasives, acetone, benzene, ammonia, ethyl alcohol, or carbon<br />
tetrachloride on any part of the device; these can damage the device. Do not place<br />
liquids directly on the glass. They might seep under it and damage the device.<br />
3. To prevent spotting, dry the glass by using a chamois or cellulose sponge.<br />
To clean the lid backing<br />
Minor debris can accumulate on the white document lid backing that is located underneath the<br />
scanner lid.<br />
1. Turn off the device, unplug the power cord from the electrical socket, and raise the lid.<br />
<strong>ENWW</strong> Cleaning the device 69
2. Clean the white document lid backing by using a soft cloth or sponge that has been moistened<br />
with a mild soap and warm water.<br />
3. Wash the backing gently to loosen debris; do not scrub the backing.<br />
4. Dry the backing by using a chamois or soft cloth.<br />
CAUTION Do not use paper-based wipes because they might scratch the backing.<br />
5. If this does not clean the backing well enough, repeat the previous steps and use isopropyl<br />
alcohol to dampen the cloth or sponge, and then wipe the backing thoroughly with a damp cloth<br />
to remove any residual alcohol.<br />
To clean the paper path<br />
The device features a special cleaning mode to clean the paper path.<br />
1. On the device control panel, press Menu/Enter.<br />
2. Use the < or the > button to select Service, and then press Menu/Enter.<br />
3. Use the < or the > button to select Cleaning Mode, and then press Menu/Enter.<br />
A page feeds through the device slowly. Discard the page when the process is completed.<br />
4. Load plain letter or A4 paper when you are prompted.<br />
5. Press Menu/Enter again to confirm and begin the cleaning process.<br />
A page feeds through the device slowly. Discard the page when the process is completed.<br />
70 Chapter 8 Managing and maintaining the device <strong>ENWW</strong>
Changing the print cartridge<br />
1. Open the print-cartridge door.<br />
2. Grasp the handle on the print cartridge and then pull the cartridge straight out to remove it. See<br />
the recycling information inside the print cartridge box.<br />
3. Remove the new print cartridge from its packaging, remove the cover from the print cartridge,<br />
and then pull the tab straight out to remove the sealing tape.<br />
<strong>ENWW</strong> Changing the print cartridge 71
4. Insert the cartridge into the device until it is firmly in place.<br />
5. Close the print-cartridge door.<br />
CAUTION If toner gets on your clothing, wipe it off with a dry cloth and wash the clothing in<br />
cold water. Hot water sets toner into the fabric.<br />
72 Chapter 8 Managing and maintaining the device <strong>ENWW</strong>
9 Problem solving<br />
● Problem-solving checklist<br />
● Clearing jams<br />
● Control-panel messages<br />
● Print problems<br />
● Copy problems<br />
● Scan problems<br />
● Control-panel display problems<br />
● Solving common Macintosh problems<br />
● Problem-solving tools<br />
<strong>ENWW</strong> 73
Problem-solving checklist<br />
Step<br />
number<br />
Follow these steps when trying to solve a problem with the device.<br />
Verification step Possible problems Solutions<br />
1 Is the power on?<br />
When the device is connected<br />
to a grounded power source<br />
and is turned on, the control<br />
panel shows Initializing...,<br />
and the main motor rotates<br />
for approximately 10 seconds.<br />
2 Does Ready appear in the<br />
device control panel?<br />
The control panel should<br />
function without error<br />
messages.<br />
3 Do information pages print?<br />
Print a Configuration report.<br />
See Information pages.<br />
4 Does the device copy?<br />
Place the Configuration report<br />
on the flatbed scanner and<br />
make a copy.<br />
No power due to failed power source,<br />
cable, switch, or fuse.<br />
1. Verify that the device is plugged in.<br />
2. Verify that the power cable is<br />
functional and that the power switch<br />
is on.<br />
3. Check the power source by plugging<br />
the device directly into the wall or into<br />
a different outlet.<br />
Motor does not rotate. 1. Verify that the print cartridge is<br />
installed correctly. See Changing the<br />
print cartridge.<br />
2. Verify that the top cover is closed.<br />
Control panel shows an error. See Control-panel messages for a list of<br />
common messages that will help you<br />
correct the error.<br />
An error message appears on the controlpanel<br />
display.<br />
Media does not move smoothly through the<br />
device paper path.<br />
If the error persists, contact <strong>HP</strong> Customer<br />
Care. See <strong>HP</strong> Customer Care or the<br />
support flyer that came in the device box.<br />
See Control-panel messages for a list of<br />
common messages that will help you<br />
correct the error.<br />
Make sure that media that meets<br />
<strong>HP</strong> specifications. See Media specifications<br />
Clean the paper path. See To clean the<br />
paper path.<br />
Poor print quality. See Print quality problems.<br />
If the error persists, contact <strong>HP</strong> Customer<br />
Care. See <strong>HP</strong> Customer Care or the<br />
support flyer that came in the device box.<br />
Poor copy quality from the flatbed. 1. Clean the flatbed glass. See To clean<br />
the scanner glass.<br />
2. If, after performing the maintenance,<br />
the problem persists, see Copy<br />
problems.<br />
If the error persists, contact <strong>HP</strong> Customer Care. See <strong>HP</strong> Customer Care or the support<br />
flyer that came in the device box.<br />
74 Chapter 9 Problem solving <strong>ENWW</strong>
Step<br />
number<br />
Verification step Possible problems Solutions<br />
5 Does the device print from<br />
the computer?<br />
Connect the USB cable to the<br />
device and the computer. Use<br />
a word-processing program to<br />
send a print job to the device.<br />
6 Does the device scan to the<br />
computer?<br />
Initiate a scan from the basic<br />
desktop software at your<br />
computer.<br />
Software is not installed correctly or an<br />
error occurred during software installation.<br />
Uninstall and then reinstall the device<br />
software. Verify that you are using the<br />
correct installation procedure and the<br />
correct port setting.<br />
The cable is not connected correctly. Reconnect the cable.<br />
An incorrect driver is selected. Select the proper driver.<br />
Other devices are connected to the USB<br />
port.<br />
There is a port driver problem in Microsoft<br />
Windows.<br />
Disconnect the other devices and try<br />
again to print.<br />
Uninstall and then reinstall the device<br />
software. Verify that you are using the<br />
correct installation procedure and the<br />
correct port setting.<br />
If the error persists, contact <strong>HP</strong> Customer Care. See <strong>HP</strong> Customer Care or the support<br />
flyer that came in the device box.<br />
The cable is not connected correctly. Reconnect the cable.<br />
Software is not installed correctly or an<br />
error occurred during software installation.<br />
Uninstall and then reinstall the device<br />
software. Verify that you are using the<br />
correct installation procedure and the<br />
correct port setting.<br />
If the error persists, turn off the device and then turn on the device.<br />
If the error still persists, contact <strong>HP</strong> Customer Care. See <strong>HP</strong> Customer Care or the<br />
support flyer that came in the device box.<br />
<strong>ENWW</strong> Problem-solving checklist 75
Clearing jams<br />
This section contains instructions for clearing jams from the device.<br />
Causes of jams<br />
Occasionally, paper or other print media can become jammed during a print job. Some causes<br />
include the following events:<br />
● The input trays are loaded improperly or overfilled, or the media <strong>guide</strong>s are not set properly.<br />
● Media is added to or removed from an input tray during a print job or an input tray is removed<br />
from the device during a print job.<br />
● The cartridge door is opened during a print job.<br />
● Too many sheets have accumulated in the output area, or sheets are blocking the output area.<br />
● The print media that is being used does not meet <strong>HP</strong> specifications. See Media specifications.<br />
● The media is damaged or has foreign objects attached to it, such as staples or paper clips.<br />
● The environment in which the print media was stored is too humid or too dry. See Printing and<br />
storage environment.<br />
Tips to avoid jams<br />
● Verify that the input tray is not overfilled. The input tray capacity varies depending on the type of<br />
print media that you are using.<br />
● Verify that the media <strong>guide</strong>s are properly adjusted.<br />
● Check that the input tray is securely in place.<br />
● Do not add print media into the input tray while the device is printing.<br />
● Use only <strong>HP</strong>-recommended media types and sizes. See Media specifications for more<br />
information about print media types.<br />
● Do not let print media stack up in the output bin. The print media type and the amount of toner<br />
used affect the output bin capacity.<br />
● Check the power connection. Make sure that the power cord is firmly connected to both the<br />
device and the power supply box. Plug the power cord into a grounded power outlet.<br />
76 Chapter 9 Problem solving <strong>ENWW</strong>
Where to look for jams<br />
Jams can occur in these locations:<br />
● Input trays<br />
● Output area<br />
● Print-cartridge area<br />
Find and remove the jam by using the instructions on the following pages. If the location of the jam is<br />
not obvious, first look inside the device.<br />
Loose toner might remain in the device after a jam. This problem typically resolves itself after a few<br />
sheets have been printed.<br />
<strong>ENWW</strong> Clearing jams 77
Input trays<br />
CAUTION Do not use sharp objects, such as tweezers or needle-nose pliers, to remove<br />
jams. Damage caused by sharp objects will not be covered by the warranty.<br />
When removing jammed media, pull the jammed media straight away from the device. Pulling<br />
jammed media out of the device at an angle can damage the device.<br />
1. Pull any visible jammed media out of the priority input tray.<br />
2. Open tray 1 and pull any visible jammed media out of the device.<br />
3. If no media is visible, open the print-cartridge door, remove the print cartridge, and then<br />
carefully pull the media up and out of the device.<br />
78 Chapter 9 Problem solving <strong>ENWW</strong>
4. Replace the print cartridge and close the print-cartridge door.<br />
5. Close tray 1.<br />
<strong>ENWW</strong> Clearing jams 79
Output bin<br />
CAUTION Do not use sharp objects, such as tweezers or needle-nose pliers, to remove<br />
jams. Damage caused by sharp objects will not be covered by the warranty.<br />
With both hands, grasp the side of the media that is most visible (this includes the middle), and<br />
carefully pull it free from the device.<br />
Print-cartridge area<br />
CAUTION Do not use sharp objects, such as tweezers or needle-nose pliers, to remove<br />
jams. Damage caused by sharp objects will not be covered by the warranty.<br />
When removing jammed media, pull the jammed media straight away from the device. Pulling<br />
jammed media out of the device at an angle can damage the device.<br />
1. Open the print-cartridge door, and remove the print cartridge.<br />
CAUTION To prevent damage to the print cartridge, minimize its exposure to direct light.<br />
80 Chapter 9 Problem solving <strong>ENWW</strong>
2. With both hands, grasp the side of the media that is most visible (this includes the middle), and<br />
carefully pull it free from the device.<br />
3. Replace the print cartridge and close the print-cartridge door.<br />
<strong>ENWW</strong> Clearing jams 81
Control-panel messages<br />
The majority of the control-panel messages are intended to <strong>guide</strong> the <strong>user</strong> through typical operation.<br />
The control-panel messages indicate the status of the current operation, and include a page count on<br />
the second line of the display, if appropriate. When the device is receiving print data or scanning<br />
commands, control-panel messages indicate this status. In addition, alert messages, warning<br />
messages, and critical error messages indicate situations that might require some action.<br />
Alert and warning messages<br />
Alert and warning messages appear temporarily and might require the <strong>user</strong> to acknowledge the<br />
message by pressing Menu/Enter to resume or by pressing Cancel to cancel the job. With certain<br />
warnings, the job might not complete or the print quality might be affected. If the alert or warning<br />
message is related to printing and the auto-continue feature is on, the device will attempt to resume<br />
the printing job after the warning has appeared for 10 seconds without acknowledgement.<br />
Alert and warning message tables<br />
Control panel message Description Recommended action<br />
Device error Press [OK] The device experienced an internal<br />
communication error.<br />
Jam in print paper path<br />
alternates with<br />
Open door and clear jam<br />
The device has detected a jam in the paper<br />
path.<br />
Page too complex Press [OK] The device could not print the current page<br />
because of its complexity.<br />
Printer jam clear paper path The device has detected a jam in the input<br />
trays.<br />
This is a warning message only. Job output<br />
might be affected.<br />
Clear the jam from the area indicated on<br />
the device control panel, and then follow<br />
the control panel instructions. See Clearing<br />
jams.<br />
Press Menu/Enter to clear the message.<br />
Allow the device to finish the job, or press<br />
Cancel to cancel the job.<br />
Clear the jam from the area indicated on<br />
the device control panel, and then follow<br />
the control panel instructions. See Clearing<br />
jams.<br />
Settings cleared The device has cleared job settings. Re-enter any appropriate job settings.<br />
82 Chapter 9 Problem solving <strong>ENWW</strong>
Critical error messages<br />
Critical error messages can indicate some kind of failure. Restarting the device might fix the problem.<br />
If a critical error persists, the device might require service.<br />
Critical error message tables<br />
Control panel message Description Recommended action<br />
50.1 F<strong>user</strong> Error Turn off then on The device has experienced an internal<br />
hardware error.<br />
50.2 F<strong>user</strong> Error Turn off then on The device has experienced an internal<br />
hardware error.<br />
50.3 F<strong>user</strong> Error Turn off then on The device has experienced an internal<br />
hardware error.<br />
50.8 F<strong>user</strong> Error Turn off then on The device has experienced an internal<br />
hardware error.<br />
1. Turn off the power by using the power<br />
switch, and then wait at least 30<br />
seconds.<br />
2. If a surge protector is being used,<br />
remove it. Plug the device directly into<br />
the wall socket.<br />
3. Turn on the power and wait for the<br />
device to initialize.<br />
If the error persists, contact <strong>HP</strong> Customer<br />
Care. See <strong>HP</strong> Customer Care or the<br />
support flyer that came in the device box.<br />
Turn off the power by using the power<br />
switch, wait at least 30 seconds, and then<br />
turn on the power and wait for the device to<br />
initialize.<br />
If a surge protector is being used, remove<br />
it. Plug the device directly into the wall<br />
socket. Use the power switch to turn the<br />
device on.<br />
<strong>ENWW</strong> Control-panel messages 83
Control panel message Description Recommended action<br />
50.9 F<strong>user</strong> Error Turn off then on The device has experienced an internal<br />
hardware error.<br />
If the error persists, contact <strong>HP</strong> Customer<br />
Care. See <strong>HP</strong> Customer Care or the<br />
support flyer that came in the device box.<br />
Turn off the power by using the power<br />
switch, wait at least 30 seconds, and then<br />
turn on the power and wait for the device to<br />
initialize.<br />
If a surge protector is being used, remove<br />
it. Plug the device directly into the wall<br />
socket. Use the power switch to turn the<br />
device on.<br />
If the error persists, contact <strong>HP</strong> Customer<br />
Care. See <strong>HP</strong> Customer Care or the<br />
support flyer that came in the device box.<br />
52 Scanner Error Turn off then on The device has experienced a scanner error. Turn off the power by using the power<br />
switch, wait at least 30 seconds, and then<br />
turn on the power and wait for the device to<br />
initialize.<br />
54.1C Error Turn off then on The device has experienced an internal<br />
hardware error.<br />
Engine comm. Error The device has experienced an internal<br />
hardware error.<br />
If a surge protector is being used, remove<br />
it. Plug the device directly into the wall<br />
socket. Use the power switch to turn the<br />
device on.<br />
If the error persists, contact <strong>HP</strong> Customer<br />
Care. See <strong>HP</strong> Customer Care or the<br />
support flyer that came in the device box.<br />
Turn off the power by using the power<br />
switch, wait at least 30 seconds, and then<br />
turn on the power and wait for the device to<br />
initialize.<br />
If a surge protector is being used, remove<br />
it. Plug the device directly into the wall<br />
socket. Use the power switch to turn the<br />
device on.<br />
If the error persists, contact <strong>HP</strong> Customer<br />
Care. See <strong>HP</strong> Customer Care or the<br />
support flyer that came in the device box.<br />
1. Turn off the power by using the power<br />
switch, and then wait at least 30<br />
seconds.<br />
2. If a surge protector is being used,<br />
remove it. Plug the device directly into<br />
the wall socket.<br />
3. Turn on the power and wait for the<br />
device to initialize.<br />
If the error persists, contact <strong>HP</strong> Customer<br />
Care. See <strong>HP</strong> Customer Care or the<br />
support flyer that came in the device box.<br />
84 Chapter 9 Problem solving <strong>ENWW</strong>
Print problems<br />
Print quality problems<br />
Occasionally, you might encounter problems with print quality. The information in the following<br />
sections helps you identify and resolve these issues.<br />
NOTE If you are having copy problems, see Copy problems.<br />
Improving print quality<br />
Use the print-quality settings to prevent print-quality problems.<br />
Understanding print-quality settings<br />
Print-quality settings affect how light or dark the print is on the page and the style in which the<br />
graphics are printed. You can also use the print-quality settings to optimize the print quality for a<br />
specific media type.<br />
You can change the settings in the device properties to accommodate the types of jobs that you are<br />
printing. The following settings are available, depending on the printer driver that you are using:<br />
● 600 dpi<br />
● FastRes 1200: This setting produces the same resolution as the default setting, but you can<br />
change the scale patterns.<br />
NOTE Changing the resolution can change the formatting of your text.<br />
To temporarily change print-quality settings<br />
To change the print-quality settings only for the current software program, open the properties<br />
through the Print Setup menu in the program that you are using to print.<br />
To change print-quality settings for all future jobs<br />
NOTE For Macintosh instructions, see Changing printer-driver settings for more information.<br />
For Windows 2000:<br />
1. In the Windows system tray, click Start, select Settings, and then click Printers.<br />
2. Right-click the device icon.<br />
3. Click Properties (in Windows 2000, you can also click Printing Preferences).<br />
4. Change the settings, and click OK.<br />
For Windows XP:<br />
1. In the Windows system tray, click Start, and then click Printers and Faxes.<br />
2. Right-click the device icon.<br />
<strong>ENWW</strong> Print problems 85
3. Click Properties, or click Printing Preferences.<br />
4. Change the settings, and click OK.<br />
Identifying and correcting print defects<br />
Use the checklist and print-quality issues charts in this section to solve print-quality problems.<br />
Print-quality checklist<br />
General print-quality problems can be solved by using the following checklist:<br />
1. Make sure that the paper or print media that you are using meets <strong>HP</strong> specifications. See Media<br />
specifications. Generally, smoother paper provides better results.<br />
2. If you are using a special print media such as labels, transparencies, glossy, or letterhead,<br />
ensure that you have printed by type. See Controlling print jobs.<br />
3. Print a Configuration report at the device control panel. See Information pages.<br />
● If the page did not print correctly, the problem is with the hardware. Contact <strong>HP</strong> Customer<br />
Care. See <strong>HP</strong> Customer Care or the flyer that came in the device box.<br />
4. Print a Demo page from the device control panel. If the page prints, the problem is with the<br />
printer driver.<br />
● Use the Add Printer Wizard in the Printers (or Printers and Faxes in Windows XP) dialog<br />
box to install the correct driver.<br />
5. Try printing from a different program. If the page prints correctly, the problem is with the<br />
program from which you were printing.<br />
6. Restart the computer and the device and try printing again. If the problem is not resolved, see<br />
General print-quality issues.<br />
General print-quality issues<br />
The following examples depict letter-size paper that has passed through the device short-edge-first.<br />
These examples illustrate problems that would affect all of the pages that you print. The topics that<br />
follow list the typical cause and solution for each of these examples.<br />
Problem Cause Solution<br />
Print is light or faded. The media might not meet<br />
<strong>HP</strong> specifications.<br />
Use media that meets<br />
<strong>HP</strong> specifications. See Media<br />
specifications.<br />
The print cartridge might be low. Replace the print cartridge. See<br />
Changing the print cartridge.<br />
If the whole page is light, the print<br />
density adjustment is too light or<br />
EconoMode might be turned on.<br />
If the print cartridge is not low or<br />
empty, inspect the toner roller to see if<br />
the roller is damaged. If it is, replace<br />
the print cartridge.<br />
Adjust the print density, and disable<br />
EconoMode in the device Properties.<br />
86 Chapter 9 Problem solving <strong>ENWW</strong>
Problem Cause Solution<br />
Toner specks appear. The media might not meet<br />
<strong>HP</strong> specifications.<br />
Dropouts appear. A single sheet of print media might be<br />
defective.<br />
Vertical streaks or bands appear on the<br />
page.<br />
The amount of background toner<br />
shading becomes unacceptable.<br />
Use media that meets<br />
<strong>HP</strong> specifications. See Media<br />
specifications.<br />
The paper path might need cleaning. Clean the paper path. See To clean the<br />
paper path.<br />
The moisture content of the paper is<br />
uneven or the paper has moist spots<br />
on its surface.<br />
The paper lot is flawed. The<br />
manufacturing processes can cause<br />
some areas to reject toner.<br />
Try reprinting the job.<br />
Try different paper, such as highquality<br />
paper that is intended for laser<br />
printers. See Media specifications.<br />
Try different paper, such as highquality<br />
paper that is intended for laser<br />
printers. See Media specifications.<br />
The print cartridge might be defective. Replace the print cartridge. See<br />
Changing the print cartridge.<br />
The print cartridge might be low or<br />
defective.<br />
The media might not meet<br />
<strong>HP</strong> specifications.<br />
The priority input tray might be installed<br />
incorrectly.<br />
Very dry (low humidity) conditions can<br />
increase the amount of background<br />
shading.<br />
If the error persists, contact<br />
<strong>HP</strong> Customer Care. See <strong>HP</strong> Customer<br />
Care or the support flyer that came in<br />
the device box.<br />
Replace the print cartridge. See<br />
Changing the print cartridge.<br />
Use a different paper with a lighter<br />
basis weight. See Media specifications.<br />
Make sure that the priority input tray is<br />
in place.<br />
Check the device environment.<br />
The print cartridge might be low. Replace the print cartridge. See<br />
Changing the print cartridge.<br />
<strong>ENWW</strong> Print problems 87
Problem Cause Solution<br />
Toner smears appear on the media. The media might not meet<br />
<strong>HP</strong> specifications.<br />
If toner smears appear on the leading<br />
edge of the paper, the media <strong>guide</strong>s<br />
are dirty, or debris has accumulated in<br />
the print path.<br />
The toner smears easily when touched. The device is not set to print on the<br />
type of media on which you want to<br />
print.<br />
Marks repeatedly appear at even<br />
intervals on the page.<br />
The printed page contains misformed<br />
characters.<br />
Use media that meets<br />
<strong>HP</strong> specifications. See Media<br />
specifications.<br />
Clean the media <strong>guide</strong>s and the paper<br />
path. See To clean the paper path.<br />
The print cartridge might be low. Replace the print cartridge. See<br />
Changing the print cartridge.<br />
The f<strong>user</strong> temperature might be too low. In the printer driver, make sure the<br />
appropriate media type is selected.<br />
The media might not meet<br />
<strong>HP</strong> specifications.<br />
In the printer driver, select the Paper<br />
tab and set Type is to match the type<br />
of media on which you are printing.<br />
Print speed might be slower if you are<br />
using heavy paper.<br />
Use media that meets<br />
<strong>HP</strong> specifications. See Media<br />
specifications.<br />
The paper path might need cleaning. Clean the device. See Cleaning the<br />
device.<br />
The power source might be defective. Plug the device directly into an AC<br />
outlet instead of into a power strip.<br />
The print cartridge might be low. Replace the print cartridge. See<br />
Changing the print cartridge.<br />
The device is not set to print on the<br />
type of media on which you want to<br />
print.<br />
In the printer driver, make sure that the<br />
appropriate media type is selected.<br />
Print speed might be slower if you are<br />
using heavy paper.<br />
Internal parts might have toner on them. The problem typically corrects itself<br />
after a few more pages.<br />
The paper path might need cleaning. Clean the device. See Cleaning the<br />
device.<br />
The print cartridge might be damaged. If a repetitive mark occurs at the same<br />
spot on the page, install a new <strong>HP</strong> print<br />
cartridge. See Changing the print<br />
cartridge.<br />
The media might not meet<br />
<strong>HP</strong> specifications.<br />
If characters are incorrectly formed so<br />
that they produce a wavy effect, the<br />
laser scanner might need service.<br />
Use a different paper, such as highquality<br />
paper that is intended for laser<br />
printers. See Media specifications.<br />
Verify that the problem also occurs on<br />
the Configuration report. If so, contact<br />
<strong>HP</strong> Customer Care. See <strong>HP</strong> Customer<br />
Care or the support flyer that came in<br />
the device box.<br />
88 Chapter 9 Problem solving <strong>ENWW</strong>
Problem Cause Solution<br />
The printed page is curled or wavy. The device is not set to print on the<br />
type of media on which you want to<br />
print.<br />
Text or graphics are skewed on the<br />
printed page.<br />
The printed page contains wrinkles or<br />
creases.<br />
The media might have been in the<br />
input tray too long.<br />
In the printer driver, make sure the<br />
appropriate media type is selected.<br />
If the problem persists, select a media<br />
type that uses a lower f<strong>user</strong><br />
temperature, such as transparencies or<br />
light media.<br />
Turn over the stack of media in the<br />
tray. Also, try rotating the media 180°<br />
in the input tray.<br />
The paper path is curling the media. Use the Less paper curl setting. See<br />
Reducing paper curl.<br />
The media might not meet<br />
<strong>HP</strong> specifications.<br />
Both high temperature and humidity<br />
can cause paper curl.<br />
The media might be loaded incorrectly<br />
or the input tray might be too full.<br />
The media might not meet<br />
<strong>HP</strong> specifications.<br />
The media might be loaded incorrectly<br />
or the input tray might be too full.<br />
The media might not meet<br />
<strong>HP</strong> specifications.<br />
Use a different paper, such as highquality<br />
paper that is intended for laser<br />
printers. See Media specifications.<br />
Check the device environment.<br />
Verify that the media is loaded<br />
correctly and that the media <strong>guide</strong>s are<br />
not too tight or too loose against the<br />
stack. See Loading media.<br />
Use a different paper, such as highquality<br />
paper that is intended for laser<br />
printers. See Media specifications.<br />
Turn over the stack of paper in the<br />
input tray, or try rotating the paper 180°<br />
in the input tray.<br />
Verify that the media is loaded<br />
correctly and that the media <strong>guide</strong>s are<br />
not too tight or too loose against the<br />
stack. See Loading media.<br />
Use a different paper, such as highquality<br />
paper that is intended for laser<br />
printers. See Media specifications.<br />
The paper path is curling the media. Use the Less paper curl setting. See<br />
Reducing paper curl.<br />
Air pockets inside envelopes can<br />
cause them to wrinkle.<br />
Remove the envelope, flatten it, and try<br />
printing again.<br />
<strong>ENWW</strong> Print problems 89
Problem Cause Solution<br />
Toner appears around the printed<br />
characters.<br />
An image that appears at the top of the<br />
page (in solid black) repeats farther<br />
down the page (in a gray field).<br />
Media-handling problems<br />
The media might be loaded incorrectly. Turn over the stack of paper in the tray.<br />
If large amounts of toner have<br />
scattered around the characters, the<br />
paper might have high resistivity.<br />
Software settings might affect image<br />
printing.<br />
The order of images printed might<br />
affect printing.<br />
A power surge might have affected the<br />
device.<br />
Use a different paper, such as highquality<br />
paper that is intended for laser<br />
printers. See Media specifications.<br />
In your software program, change the<br />
tone (darkness) of the field in which the<br />
repeated image appears.<br />
In your software program, rotate the<br />
whole page 180° to print the lighter<br />
image first.<br />
Change the order in which the images<br />
are printed. For example, have the<br />
lighter image at the top of the page,<br />
and the darker image farther down the<br />
page.<br />
If the defect occurs later in a print job,<br />
turn the device off for 10 minutes, and<br />
then turn on the device to restart the<br />
print job.<br />
Use the information in this section when the device experiences media-handling problems.<br />
Print-media <strong>guide</strong>lines<br />
● For best results, make sure that the paper is of good quality, and free of cuts, nicks, tears,<br />
spots, loose particles, dust, wrinkles, voids, staples, and curled or bent edges.<br />
● For best-quality printing, use a smooth type of paper. Generally, smoother media produces<br />
better results. For more information, see Media specifications.<br />
● If you are unsure what type of paper you are loading (such as bond or recycled), check the label<br />
on the package of paper.<br />
● Do not use media that is designed for Inkjet printers only. Use media that is designed for<br />
<strong>LaserJet</strong> printers.<br />
● Do not use letterhead paper that is printed with low-temperature inks, such as those used in<br />
some types of thermography.<br />
90 Chapter 9 Problem solving <strong>ENWW</strong>
● Do not use raised or embossed letterhead.<br />
● The device uses heat and pressure to fuse toner to the paper. Make sure that any colored<br />
paper or preprinted forms use inks that are compatible with this fusing temperature (200°C or<br />
392°F for 0.1 second).<br />
CAUTION Failure to follow these <strong>guide</strong>lines could cause jams or damage to the device.<br />
Solving print-media problems<br />
The following problems with media cause print-quality deviations, jamming, or even damage to the<br />
device.<br />
Problem Cause Solution<br />
Poor print quality or<br />
toner adhesion<br />
Dropouts, jamming, or<br />
curl<br />
The paper is too moist, too rough,<br />
too heavy or too smooth, or it is<br />
embossed or from a faulty paper lot.<br />
The paper has been stored<br />
incorrectly.<br />
The paper has variability from one<br />
side to the other.<br />
Excessive curl The paper is too moist, has the<br />
wrong grain direction, or is of shortgrain<br />
construction.<br />
Jamming, damage to<br />
device<br />
Try another kind of paper, between 100 and 250<br />
Sheffield, with 4 to 6% moisture content.<br />
Store paper flat in its moisture-proof wrapping.<br />
Turn the paper over.<br />
The paper varies from side-to-side. Turn the paper over.<br />
Use long-grain paper, or use the Less paper curl<br />
setting. See Reducing paper curl.<br />
The paper has cutouts or perforations. Use paper that is free of cutouts or perforations.<br />
Problems with feeding The paper has ragged edges. Use high-quality paper that is made for laser printers.<br />
The paper varies from side-to-side. Turn the paper over.<br />
The paper is too moist, too rough,<br />
too heavy or too smooth, has the<br />
wrong grain direction, or is of shortgrain<br />
construction or it is embossed<br />
or from a faulty paper lot.<br />
Print is skewed (crooked). The media <strong>guide</strong>s might be<br />
incorrectly adjusted.<br />
More than one sheet<br />
feeds at one time.<br />
Try another kind of paper, between 100 and 250<br />
Sheffield, 4 to 6% moisture content, or use long-grain<br />
paper.<br />
Remove all media from the input tray, straighten the<br />
stack, and then load the media in the input tray again.<br />
Adjust the media <strong>guide</strong>s to the width and length of the<br />
media that you are using and try printing again.<br />
The media tray might be overloaded. Remove some of the media from the tray. See Loading<br />
media.<br />
The media might be wrinkled, folded,<br />
or damaged.<br />
Verify that the media is not wrinkled, folded, or<br />
damaged. Try printing on media from a new or different<br />
package.<br />
<strong>ENWW</strong> Print problems 91
Problem Cause Solution<br />
The device does not pull<br />
media from the media<br />
input tray.<br />
Performance problems<br />
The device might be in manual feed<br />
mode.<br />
The pickup roller might be dirty or<br />
damaged.<br />
The paper-length adjustment control<br />
in tray 1 is set at a length that is<br />
greater than the media size.<br />
● If Manual feed appears on the device controlpanel<br />
display, press Menu/Enter to print the job.<br />
● Verify that the device is not in manual feed mode<br />
and print your job again.<br />
Contact <strong>HP</strong> Customer Care. See <strong>HP</strong> Customer Care or<br />
the support flyer that came in the device box.<br />
Adjust the paper-length adjustment control to the correct<br />
length.<br />
Try the tips in this section if pages exit the device, but have nothing printed on them, or when the<br />
device does not print any pages.<br />
Problem Cause Solution<br />
Pages print but are<br />
totally blank.<br />
The sealing tape might still be in the<br />
print cartridge.<br />
The document might contain blank<br />
pages.<br />
Verify that the sealing tape has been completely<br />
removed from the print cartridge.<br />
Check the document that you are printing to see if<br />
content appears on all of the pages.<br />
The device might be malfunctioning. To check the device, print a Configuration report. See<br />
Information pages.<br />
Pages print slowly. Certain media types can slow the<br />
print job.<br />
Pages did not print. The device might not be pulling<br />
media correctly.<br />
Print on a different type of media.<br />
See Media-handling problems.<br />
The media is jamming in the device. Clear the jam. See Clearing jams.<br />
The USB cable might be defective or<br />
incorrectly connected.<br />
Other devices are running on your<br />
computer.<br />
● Disconnect the USB cable at both ends and<br />
reconnect it.<br />
● Try printing a job that has printed in the past.<br />
● Try using a different USB cable.<br />
The device might not share a USB port. If you have an<br />
external hard drive or network switchbox that is<br />
connected to the same port as the device, the other<br />
device might be interfering. To connect and use the<br />
device, you must disconnect the other device or you<br />
must use two USB ports on the computer.<br />
92 Chapter 9 Problem solving <strong>ENWW</strong>
Copy problems<br />
Preventing problems<br />
The following are a few simple steps you can take to improve copy quality:<br />
● Use quality originals.<br />
● Load the media correctly. If the media is loaded incorrectly, it might skew, causing unclear<br />
images and problems with the OCR program. See Loading documents to copy or scan for<br />
instructions.<br />
NOTE Verify that the media meets <strong>HP</strong> specifications. If the media meets <strong>HP</strong> specifications,<br />
recurring feed problems indicate the pickup roller or separation pad is worn. Contact<br />
<strong>HP</strong> Customer Care. See <strong>HP</strong> Customer Care or the flyer that came in the device box.<br />
Image problems<br />
Problem Cause Solution<br />
Images are missing or<br />
faded.<br />
Vertical white or faded<br />
stripes appear on the<br />
copy.<br />
Unwanted lines appear<br />
on the copy.<br />
The print-cartridge toner-level might<br />
be low.<br />
Replace the print cartridge. See Changing the print<br />
cartridge.<br />
The original might be of poor quality. If your original is too light or damaged, the copy might<br />
not be able to compensate, even if you adjust the<br />
contrast. If possible, find an original document in better<br />
condition.<br />
The original might have a colored<br />
background.<br />
The media might not meet<br />
<strong>HP</strong> specifications.<br />
The print-cartridge toner-level might<br />
be low.<br />
The photosensitive drum inside the<br />
print cartridge might have been<br />
scratched.<br />
Colored backgrounds might cause images in the<br />
foreground to blend into the background, or the<br />
background might appear in a different shade. If<br />
possible, use an original document without a colored<br />
background.<br />
Use media that meets <strong>HP</strong> specifications. See Media<br />
specifications.<br />
Replace the print cartridge. See Changing the print<br />
cartridge.<br />
Install a new <strong>HP</strong> print cartridge. See Changing the print<br />
cartridge.<br />
<strong>ENWW</strong> Copy problems 93
Problem Cause Solution<br />
Black dots or streaks<br />
appear on the copy.<br />
Copies are too light or<br />
dark.<br />
Ink, glue, correction fluid, or an<br />
unwanted substance might be on the<br />
flatbed scanner.<br />
The printer driver or device settings<br />
may be incorrect.<br />
Text is unclear. The printer driver or device settings<br />
may be incorrect.<br />
Media-handling problems<br />
Problem Cause Solution<br />
Poor print quality or<br />
toner adhesion<br />
Dropouts, jamming, or<br />
curl<br />
The paper is too moist, too rough,<br />
too heavy or too smooth, or it is<br />
embossed or from a faulty paper lot.<br />
The paper has been stored<br />
incorrectly.<br />
The paper has variability from one<br />
side to the other.<br />
Excessive curl The paper is too moist, has the<br />
wrong grain direction, or is of shortgrain<br />
construction.<br />
Jamming, damage to<br />
device<br />
Clean the device. See Cleaning the device.<br />
Verify that the quality settings are correct. See Adjusting<br />
the copy quality.<br />
Verify that the quality settings are correct. See Adjusting<br />
the copy quality.<br />
Try another kind of paper, between 100 and 250<br />
Sheffield, 4 to 6% moisture content.<br />
Store paper flat in its moisture-proof wrapping.<br />
Turn the paper over.<br />
The paper varies from side-to-side. Turn the paper over.<br />
Use long-grain paper, or use the Less paper curl<br />
setting. See Reducing paper curl.<br />
The paper has cutouts or perforations. Use paper that is free of cutouts or perforations.<br />
Problems with feeding The paper has ragged edges. Use high-quality paper that is made for laser printers.<br />
The paper varies from side-to-side. Turn the paper over.<br />
The paper is too moist, too rough,<br />
too heavy or too smooth, has the<br />
wrong grain direction, or is of shortgrain<br />
construction or it is embossed<br />
or from a faulty paper lot.<br />
Print is skewed (crooked). The media <strong>guide</strong>s might be<br />
incorrectly adjusted.<br />
Try another kind of paper, between 100 and 250<br />
Sheffield, 4 to 6% moisture content, or use long-grain<br />
paper.<br />
Remove all media from the input tray, straighten the<br />
stack, and then load the media in the input tray again.<br />
Adjust the media <strong>guide</strong>s to the width and length of the<br />
media that you are using and try printing again.<br />
94 Chapter 9 Problem solving <strong>ENWW</strong>
Problem Cause Solution<br />
More than one sheet<br />
feeds at one time.<br />
The device does not pull<br />
media from the media<br />
input tray.<br />
The media tray might be overloaded. Remove some of the media from the tray. See Loading<br />
media.<br />
The media might be wrinkled, folded,<br />
or damaged.<br />
The device might be in manual feed<br />
mode.<br />
The pickup roller might be dirty or<br />
damaged.<br />
The paper-length adjustment control<br />
in tray 1 is set at a length that is<br />
greater than the media size.<br />
Verify that the media is not wrinkled, folded, or<br />
damaged. Try printing on media from a new or different<br />
package.<br />
● If Manual feed appears on the device controlpanel<br />
display, press Menu/Enter to print the job.<br />
● Verify that the device is not in manual feed mode<br />
and print your job again.<br />
Contact <strong>HP</strong> Customer Care. See <strong>HP</strong> Customer Care or<br />
the support flyer that came in the device box.<br />
Adjust the paper-length adjustment control to the correct<br />
length.<br />
<strong>ENWW</strong> Copy problems 95
Performance problems<br />
Problem Cause Solution<br />
No copy came out. The input tray might be empty. Load media in the device. See Loading media for more<br />
information.<br />
The original might have been loaded<br />
incorrectly.<br />
Copies are blank. The sealing tape might not have<br />
been removed from the print cartridge.<br />
Copies are reduced in<br />
size.<br />
The original might have been loaded<br />
incorrectly.<br />
The media might not meet<br />
<strong>HP</strong> specifications.<br />
The print-cartridge toner-level might<br />
be low.<br />
The device settings might be set to<br />
reduce the scanned image.<br />
On the flatbed scanner, place the original document<br />
face-down with the upper-left corner of the document at<br />
the lower-right corner of the glass.<br />
Remove the print cartridge from the device, pull out the<br />
sealing tape, and reinstall the print cartridge.<br />
On the flatbed scanner, make sure that the original<br />
document is placed face-down with the upper-left corner<br />
of the document at the lower-right corner of the glass.<br />
Use media that meets <strong>HP</strong> specifications. See Media<br />
specifications.<br />
Replace the print cartridge. See Changing the print<br />
cartridge.<br />
Verify that the reduction/enlargement settings are<br />
correct at the device control panel.<br />
96 Chapter 9 Problem solving <strong>ENWW</strong>
Scan problems<br />
Solving scanned-image problems<br />
Problem Cause Solution<br />
The scanned image is of<br />
poor quality.<br />
Part of the image did not<br />
scan.<br />
The original might be a secondgeneration<br />
photo or picture.<br />
The image that appears on the<br />
screen might not be an accurate<br />
representation of the quality of the<br />
scan.<br />
The original might have been loaded<br />
incorrectly.<br />
● To eliminate the patterns, try reducing the size of<br />
the image after scanning.<br />
● Print the scanned image to see if the quality is<br />
better.<br />
● Verify that your resolution and color settings are<br />
correct for the type of scan job that you are<br />
performing. See Scanner resolution and color.<br />
● Try adjusting your computer monitor settings to<br />
use more colors (or levels of gray). Typically, you<br />
make this adjustment by opening Display in<br />
Windows Control Panel.<br />
● Try adjusting the resolution and color settings in<br />
the scanner software. See Scanner resolution and<br />
color.<br />
Make sure that you have loaded the original correctly on<br />
the flatbed scanner. See Loading documents to copy or<br />
scan.<br />
The scanner might be dirty. Clean the scanner. See To clean the scanner glass.<br />
The graphics settings might not be<br />
suitable for the type of scan job that<br />
you are performing.<br />
The original might have been loaded<br />
incorrectly.<br />
A colored background might be<br />
causing images in the foreground to<br />
blend into the background.<br />
Try changing the graphics settings. See Scanner<br />
resolution and color.<br />
Make sure that the original is placed correctly on the<br />
flatbed scanner.<br />
Try adjusting the settings before you scan the original or<br />
enhancing the image after you scan the original. See<br />
Scanner resolution and color.<br />
The original is too small. The minimum size that the flatbed scanner supports is<br />
25 x 25 mm (1 x 1 inch).<br />
The media size is incorrect. In Scan settings, make sure that the input media size is<br />
large enough for the document that you are scanning.<br />
See Scanner resolution and color.<br />
The scan takes too long The resolution or color level is set<br />
too high.<br />
Change the resolution and color level settings to the<br />
correct settings for your job. See Scanner resolution<br />
and color.<br />
The software is set to scan in color. The system default is color, which takes longer to scan<br />
even when scanning a monochrome original. If you<br />
acquire an image through TWAIN or WIA, you can<br />
change the settings so that the original scans in<br />
grayscale or black-and-white. See the device software<br />
Help for details.<br />
A print job or copy job was sent<br />
before you tried to scan.<br />
If someone sent a print job or copy job before you tried<br />
to scan, the scan will start if the scanner is not busy.<br />
However, because the device and scanner share<br />
memory, the scan might be slower.<br />
<strong>ENWW</strong> Scan problems 97
Scan-quality problems<br />
Preventing problems<br />
The following are a few simple steps you can take to improve scan quality.<br />
● Use high-quality originals.<br />
● Load the media correctly. If the media is loaded incorrectly, it might skew, which causes unclear<br />
images. See Loading media for instructions.<br />
● Adjust the software settings according to how you plan to use the scanned page. See Scanner<br />
resolution and color for more information.<br />
Solving scan-quality problems<br />
Problem Cause Solution<br />
Blank pages The original might have been loaded<br />
upside down.<br />
Too light or dark The resolution and color levels may<br />
be set incorrectly.<br />
Unwanted lines Ink, glue, correction fluid, or an<br />
unwanted substance might be on the<br />
glass.<br />
Black dots or streaks Ink, glue, correction fluid, or an<br />
unwanted substance might be on the<br />
glass.<br />
Unclear text The resolution and color levels may<br />
be set incorrectly.<br />
On the flatbed scanner, place the original document<br />
face-down with the upper-left corner of the document at<br />
the lower-right corner of the glass.<br />
Verify that you have the correct resolution and color<br />
settings. See Scanner resolution and color.<br />
Clean the flatbed scanner surface. See To clean the<br />
scanner glass.<br />
Clean the flatbed scanner surface. See To clean the<br />
scanner glass.<br />
Verify that you have the correct resolution and color<br />
settings. See Scanner resolution and color.<br />
98 Chapter 9 Problem solving <strong>ENWW</strong>
Control-panel display problems<br />
CAUTION Static electricity can cause unexpected black lines, dots, or characters to appear<br />
on the device control-panel display. Do not touch the device control-panel display if there is a<br />
chance that you have collected a static electric charge (for example, by walking on carpet in a<br />
low-humidity environment).<br />
Unexpected lines, dots, or characters might appear on the device control-panel display, or the<br />
display might become blank if the device is exposed to an electric or magnetic field. To resolve this<br />
problem, perform the following procedure:<br />
1. Turn the device off.<br />
2. Remove the device from the electric or magnetic field.<br />
3. Turn the device on again.<br />
<strong>ENWW</strong> Control-panel display problems 99
Solving common Macintosh problems<br />
Problems with Mac OS X V10.3 and Mac OS X V10.4<br />
The printer driver is not listed in Print Center.<br />
Cause Solution<br />
The device software might not have been installed or was installed<br />
incorrectly.<br />
The device name does not appear in the printer list box in the print center.<br />
Cause Solution<br />
Reinstall the software. See the getting started <strong>guide</strong> for instructions.<br />
The device might not be ready. Make sure that the cables are connected correctly, the device is<br />
on, and the ready light is on. If you are connecting through a USB<br />
hub, try connecting directly to the computer or use a different port.<br />
The wrong device name is being used. Print a Configuration report. See Information pages. Verify that the<br />
name on the Configuration report matches the device name in the<br />
Print Center.<br />
The interface cable might be defective or of poor quality. Replace the interface cable. Make sure to use a high-quality cable.<br />
A print job was not sent to the printer that you wanted.<br />
Cause Solution<br />
The print queue might be stopped. Restart the print queue. Open print monitor and select Start Jobs.<br />
An encapsulated PostScript (EPS) file does not print with the correct fonts.<br />
Cause Solution<br />
This problem occurs with some programs. ● Try downloading the fonts that are contained in the EPS file to<br />
the device before printing.<br />
You are unable to print from a third-party USB card.<br />
Cause Solution<br />
● Send the file in ASCII format instead of binary encoding.<br />
This error occurs when the software for USB printers is not installed. When adding a third-party USB card, you might need the Apple<br />
USB Adapter Card Support software. The most current version of<br />
this software is available from the Apple Web site.<br />
100 Chapter 9 Problem solving <strong>ENWW</strong>
The device does not appear in the Macintosh Print Center after the driver is selected.<br />
Cause Solution<br />
This problem is caused by either a software or a hardware<br />
component.<br />
Software problem solving<br />
● Check that your Macintosh supports USB.<br />
● Verify that your Macintosh operating system is Mac OS X<br />
V10.3 or Mac OS X V10.4.<br />
● Ensure that your Macintosh has the appropriate USB software<br />
from Apple.<br />
Hardware problem solving<br />
● Check that the device is turned on.<br />
● Verify that the USB cable is connected correctly.<br />
● Check that you are using the appropriate high-speed USB<br />
cable.<br />
● Ensure that you do not have too many USB devices drawing<br />
power from the chain. Disconnect all of the devices from the<br />
chain, and connect the cable directly to the USB port on the<br />
host computer.<br />
● Check to see if more than two nonpowered USB hubs are<br />
connected in a row on the chain. Disconnect all of the devices<br />
from the chain and connect the cable directly to the USB port<br />
on the host computer.<br />
NOTE The iMac keyboard is a nonpowered USB<br />
hub.<br />
<strong>ENWW</strong> Solving common Macintosh problems 101
Problem-solving tools<br />
The section describes the tools that can help you solve problems with your device.<br />
Restoring the factory-set defaults<br />
Restoring the factory-set defaults returns all of the settings to the factory defaults.<br />
CAUTION This procedure deletes any pages that are stored in the memory. The procedure<br />
then automatically restarts the device.<br />
1. On the device control panel, press Menu/Enter.<br />
2. Use the < or the > button to select Service, and then press Menu/Enter.<br />
3. Use the < or the > button to select Restore defaults, and then press Menu/Enter.<br />
The device automatically restarts.<br />
Reducing paper curl<br />
Use the Less paper curl setting to reduce curl in printed media.<br />
1. On the device control panel, press Menu/Enter.<br />
2. Use the < or the > button to select Service, and then press Menu/Enter.<br />
3. Use the < or the > button to select Less paper curl, and then press Menu/Enter.<br />
4. Use the < or the > button to select On, and then press Menu/Enter.<br />
102 Chapter 9 Problem solving <strong>ENWW</strong>
A Accessories and ordering information<br />
● Supplies<br />
● Cable and interface accessories<br />
● User-replaceable parts<br />
● Paper and other print media<br />
The following list of accessories was current at the time of printing. Ordering information and<br />
availability of the accessories might change during the life of the device. For the most current<br />
ordering information, visit the most appropriate of the following Web sites:<br />
● North America: www.hp.com/go/ordersupplies-na<br />
● Europe and Middle East: www.hp.com/go/ordersupplies-emea<br />
● Asia Pacific countries/regions: www.hp.com/go/ordersupplies-ap<br />
● Latin America: www.hp.com/go/ordersupplies-la<br />
<strong>ENWW</strong> 103
Supplies<br />
Product name Description Part number<br />
Black print cartridge Average yield for the standard print<br />
cartridge is approximately 2,000 pages.<br />
Actual yield depends on use.<br />
Cable and interface accessories<br />
Q2612A<br />
Product name Description Part number<br />
USB cable 2-meter standard USB-compatible<br />
device connector<br />
User-replaceable parts<br />
C6518A<br />
Product name Description Part number<br />
Separation pad and pickup rollers Replace when the device is picking up<br />
multiple sheets or no sheets. Trying<br />
different paper did not resolve the<br />
problem.<br />
Paper and other print media<br />
NOTE Inkjet paper is not recommended for the device.<br />
Product name Description Part number<br />
<strong>HP</strong> <strong>LaserJet</strong> paper Premium <strong>HP</strong>-brand paper for use with<br />
<strong>HP</strong> <strong>LaserJet</strong> printers.<br />
<strong>HP</strong> Premium Choice <strong>LaserJet</strong><br />
paper<br />
<strong>HP</strong> bond paper with a weight of 120 g/m 2 (32<br />
lb).<br />
<strong>HP</strong> Cover paper <strong>HP</strong>-brand paper with a weight of 200 g/m 2 (75lb<br />
cover). Use for printing postcards and<br />
document covers.<br />
<strong>HP</strong> Printing paper <strong>HP</strong>-brand paper for use with <strong>HP</strong> <strong>LaserJet</strong><br />
printers.<br />
Contact <strong>HP</strong> Customer Care to order<br />
parts.<br />
<strong>HP</strong>J1124 (letter)<br />
<strong>HP</strong>U1132 (letter)<br />
Q2413A (letter) 100 sheets<br />
<strong>HP</strong>P1122 (letter)<br />
<strong>HP</strong> Multipurpose paper <strong>HP</strong>-brand paper for a variety of uses. <strong>HP</strong>M1120 (letter)<br />
<strong>HP</strong> <strong>LaserJet</strong> Tough paper Robust paper with a satin finish. Paper will not<br />
tear and will withstand the weather. For<br />
documents requiring durability and longevity.<br />
<strong>HP</strong> High Gloss laser paper High-gloss finish coating on both sides. Use<br />
for brochures, catalogs, photographs, and<br />
whenever a high-gloss finish is desired.<br />
Q1298A (letter)<br />
Q2419A (letter) 200 sheets<br />
104 Appendix A Accessories and ordering information <strong>ENWW</strong>
Product name Description Part number<br />
<strong>HP</strong> Soft Gloss laser paper Satin finish coating on both sides, 105 g/m 2<br />
(28 lb).<br />
<strong>HP</strong> Brochure Laser Paper,<br />
Matte<br />
<strong>HP</strong> Photo and Imaging Laser<br />
Paper, Glossy<br />
<strong>HP</strong> Photo and Imaging Laser<br />
Paper, Matte<br />
<strong>HP</strong> Presentation Laser Paper,<br />
Soft Gloss<br />
High opacity for two-sided printing with no<br />
show-through, 44 lb.<br />
Q2415A (letter) 500 sheets<br />
Q6543A (letter) 150 sheets<br />
High-contrast glossy finish, 32 lb. Q6545A (letter) 200 sheets<br />
High-contrast matte finish, 52 lb. Q6549A (letter) 100 sheets<br />
Bright white for high contrast, 32 lb. Q6541A (letter) 200 sheets<br />
<strong>HP</strong> Recycled Content Paper Matte finish on both sides, contains 30<br />
percent post-consumer content (satisfies US<br />
Executive Order 13101), 75 g/m 2 (20-lb bond).<br />
<strong>HP</strong>E1120 (letter) 500 sheets<br />
<strong>ENWW</strong> Paper and other print media 105
106 Appendix A Accessories and ordering information <strong>ENWW</strong>
B Service and support<br />
<strong>ENWW</strong> 107
Hewlett-Packard limited warranty statement<br />
<strong>HP</strong> PRODUCT DURATION OF LIMITED WARRANTY<br />
<strong>HP</strong> <strong>LaserJet</strong> <strong>M1005</strong> One year limited warranty<br />
<strong>HP</strong> warrants to you, the end-<strong>user</strong> customer, that <strong>HP</strong> hardware and accessories will be free from defects in<br />
materials and workmanship after the date of purchase, for the period specified above. If <strong>HP</strong> receives notice of<br />
such defects during the warranty period, <strong>HP</strong> will, at its option, either repair or replace products which prove to<br />
be defective. Replacement products may be either new or equivalent in performance to new.<br />
<strong>HP</strong> warrants to you that <strong>HP</strong> software will not fail to execute its programming instructions after the date of<br />
purchase, for the period specified above, due to defects in material and workmanship when properly installed<br />
and used. If <strong>HP</strong> receives notice of such defects during the warranty period, <strong>HP</strong> will replace software which does<br />
not execute its programming instructions due to such defects.<br />
<strong>HP</strong> does not warrant that the operation of <strong>HP</strong> products will be uninterrupted or error free. If <strong>HP</strong> is unable, within<br />
a reasonable time, to repair or replace any product to a condition as warranted, you will be entitled to a refund<br />
of the purchase price upon prompt return of the product.<br />
<strong>HP</strong> products may contain remanufactured parts equivalent to new in performance or may have been subject to<br />
incidental use.<br />
Warranty does not apply to defects resulting from (a) improper or inadequate maintenance or calibration, (b)<br />
software, interfacing, parts or supplies not supplied by <strong>HP</strong>, (c) unauthorized modification or misuse, (d)<br />
operation outside of the published environmental specifications for the product, or (e) improper site preparation<br />
or maintenance.<br />
TO THE EXTENT ALLOWED BY LOCAL LAW, THE ABOVE WARRANTIES ARE EXCLUSIVE AND NO<br />
OTHER WARRANTY OR CONDITION, WHETHER WRITTEN OR ORAL, IS EXPRESSED OR IMPLIED AND<br />
<strong>HP</strong> SPECIFICALLY DISCLAIMS ANY IMPLIED WARRANTIES OR CONDITIONS OF MERCHANTABILITY,<br />
SATISFACTORY QUALITY, AND FITNESS FOR A PARTICULAR PURPOSE. Some countries/regions, states<br />
or provinces do not allow limitations on the duration of an implied warranty, so the above limitation or exclusion<br />
might not apply to you. This warranty gives you specific legal rights and you might also have other rights that<br />
vary from country/region to country/region, state to state, or province to province. <strong>HP</strong>'s limited warranty is valid<br />
in any country/region or locality where <strong>HP</strong> has a support presence for this product and where <strong>HP</strong> has marketed<br />
this product. The level of warranty service you receive may vary according to local standards. <strong>HP</strong> will not alter<br />
form, fit or function of the product to make it operate in a country/region for which it was never intended to<br />
function for legal or regulatory reasons.<br />
TO THE EXTENT ALLOWED BY LOCAL LAW, THE REMEDIES IN THIS WARRANTY STATEMENT ARE<br />
YOUR SOLE AND EXCLUSIVE REMEDIES. EXCEPT AS INDICATED ABOVE, IN NO EVENT WILL <strong>HP</strong> OR<br />
ITS SUPPLIERS BE LIABLE FOR LOSS OF DATA OR FOR DIRECT, SPECIAL, INCIDENTAL,<br />
CONSEQUENTIAL (INCLUDING LOST PROFIT OR DATA), OR OTHER DAMAGE, WHETHER BASED IN<br />
CONTRACT, TORT, OR OTHERWISE. Some countries/regions, states or provinces do not allow the exclusion<br />
or limitation of incidental or consequential damages, so the above limitation or exclusion may not apply to you.<br />
THE WARRANTY TERMS CONTAINED IN THIS STATEMENT, EXCEPT TO THE EXTENT LAWFULLY<br />
PERMITTED, DO NOT EXCLUDE, RESTRICT OR MODIFY AND ARE IN ADDITION TO THE MANDATORY<br />
STATUTORY RIGHTS APPLICABLE TO THE SALE OF THIS PRODUCT TO YOU.<br />
108 Appendix B Service and support <strong>ENWW</strong>
Print Cartridge Limited Warranty Statement<br />
This <strong>HP</strong> product is warranted to be free from defects in materials and workmanship.<br />
This warranty does not apply to products that (a) have been refilled, refurbished, remanufactured, or<br />
tampered with in any way, (b) experience problems resulting from misuse, improper storage, or<br />
operation outside of the published environmental specifications for the printer product, or (c) exhibit<br />
wear from ordinary use.<br />
To obtain warranty service, please return the product to place of purchase (with a written description<br />
of the problem and print samples) or contact <strong>HP</strong> customer support. At <strong>HP</strong>’s option, <strong>HP</strong> will either<br />
replace products that prove to be defective or refund your purchase price.<br />
TO THE EXTENT ALLOWED BY LOCAL LAW, THE ABOVE WARRANT Y IS EXCLUSIVE AND NO<br />
OTHER WARRANTY OR CONDITION, WHETHER WRITTEN OR ORAL, IS EXPRESSED OR<br />
IMPLIED AND <strong>HP</strong> SPECIFICALLY DISCLAIMS ANY IMPLIED WARRANTIES OR CONDITIONS OF<br />
MERCHANTABILITY, SATISFACTORY QUALITY, AND FITNESS FOR A PARTICULAR PURPOSE.<br />
TO THE EXTENT ALLOWED BY LOCAL LAW, IN NO EVENT WILL <strong>HP</strong> OR ITS SUPPLIERS BE<br />
LIABLE FOR DIRECT, SPECIAL, INCIDENTAL, CONSEQUENTIAL (INCLUDING LOST PROFIT<br />
OR DATA), OR OTHER DAMAGE, WHETHER BASED IN CONTRACT, TORT, OR OTHERWISE.<br />
THE WARRANTY TERMS CONTAINED IN THIS STATEMENT, EXCEPT TO THE EXTENT<br />
LAWFULLY PERMITTED, DO NOT EXCLUDE, RESTRICT OR MODIFY AND ARE IN ADDITION<br />
TO THE MANDATORY STATUTORY RIGHTS APPLICABLE TO THE SALE OF THIS PRODUCT<br />
TO YOU.<br />
<strong>ENWW</strong> Print Cartridge Limited Warranty Statement 109
Availability of support and service<br />
Around the world, <strong>HP</strong> provides a variety of service and support options for purchase. Availability of<br />
these programs will vary depending upon your location. For details, see the support flyer that is<br />
included in the box with your device.<br />
<strong>HP</strong> Customer Care<br />
Online Services<br />
For 24-hour access to updated <strong>HP</strong> device-specific software, product information, and support<br />
information using an Internet connection, go to www.hp.com/support/ljm1005.<br />
Telephone support<br />
<strong>HP</strong> provides free telephone support during the warranty period. For the telephone number for your<br />
country/region, see the flyer that shipped with the device, or visit www.hp.com and click Contact <strong>HP</strong>.<br />
Before calling <strong>HP</strong>, have the following information ready: the product name and serial number, the<br />
date of purchase, and a description of the problem.<br />
<strong>HP</strong> direct ordering for accessories or supplies<br />
● North America: www.hp.com/go/ordersupplies-na<br />
● Europe and Middle East: www.hp.com/go/ordersupplies-emea<br />
● Asia Pacific countries/regions: www.hp.com/go/ordersupplies-ap<br />
● Latin America: www.hp.com/go/ordersupplies-la<br />
To order genuine <strong>HP</strong> parts or accessories, go to the <strong>HP</strong> Parts Store at www.hp.com/buy/parts (U.S.<br />
and Canada only), or call 1-800-538-8787 (U.S.) or 1-800-387-3154 (Canada).<br />
<strong>HP</strong> service information<br />
To locate <strong>HP</strong>-Authorized Dealers, call 1-800-243-9816 (U.S.) or 1-800-387-3867 (Canada).<br />
Outside the United States and Canada, call the customer support number for your country/region.<br />
See the flyer that shipped in the box with the device.<br />
<strong>HP</strong> service agreements<br />
Call 1-800-835-4747 (U.S.) or 1-800-268-1221 (Canada).<br />
<strong>HP</strong> service information<br />
<strong>HP</strong>'s customer self-repair programs offer our North American customers the fastest service under<br />
either warranty or contract. It enables <strong>HP</strong> to ship replacement parts directly to you (the end <strong>user</strong>) so<br />
that you can replace them. Using this program, you can replace parts at your own convenience.<br />
<strong>HP</strong> support and information for Macintosh computers<br />
Go to www.hp.com/go/macosx for Macintosh OS X support information and <strong>HP</strong> subscription service<br />
for driver updates.<br />
Go to www.hp.com/go/mac-connect for products that are designed specifically for the Macintosh <strong>user</strong>.<br />
110 Appendix B Service and support <strong>ENWW</strong>
Hardware service<br />
If your hardware fails during the warranty period, Hewlett-Packard offers the following support options:<br />
● Hewlett-Packard repair services: Hewlett-Packard will arrange to pick up the unit, repair it,<br />
and return it to you within 5 to 10 days, depending on your location.<br />
● Hewlett-Packard authorized service provider: You can return the unit to a local authorized<br />
service dealer.<br />
Extended warranty<br />
<strong>HP</strong> Care Pack provides coverage for the <strong>HP</strong> product and all <strong>HP</strong>-supplied internal components. The<br />
hardware maintenance covers a one to three-year period from the date of the <strong>HP</strong> product purchase.<br />
The customer may purchase an <strong>HP</strong> Care Pack up to one year from the date of purchase of the<br />
<strong>HP</strong> product. For more information, contact the <strong>HP</strong> Customer Care Service and Support group. See<br />
<strong>HP</strong> Customer Care.<br />
<strong>HP</strong> Care Pack options might be available after the standard warranty period has expired. Go to<br />
www.hpexpress-services.com/10467a/ and enter the product number to identify the <strong>HP</strong> Care Pack<br />
options that are available for your product.<br />
<strong>ENWW</strong> Hardware service 111
Guidelines for repacking the device<br />
Use the following <strong>guide</strong>lines when repacking the device:<br />
● If possible, include print samples and 5 to 10 sheets of paper or other media that did not print<br />
correctly.<br />
● Remove and keep any cables, trays, and optional accessories installed in the printer.<br />
● Remove and keep the print cartridge.<br />
CAUTION To prevent damage to the print cartridge, store the print cartridge in its<br />
original packing material, or store it so that it is not exposed to light.<br />
● If possible, use the original shipping container and packing material. Shipping damage as a<br />
result of inadequate packing is your responsibility. If you have already disposed of the device<br />
packing material, contact a local mailing service for information on repacking the device.<br />
● Hewlett-Packard recommends that you insure the equipment for shipment.<br />
112 Appendix B Service and support <strong>ENWW</strong>
C Device specifications<br />
This section contains the following information about the device:<br />
● Physical specifications<br />
● Electrical specifications<br />
● Power consumption<br />
● Environmental specifications<br />
● Acoustic emissions<br />
<strong>ENWW</strong> 113
Physical specifications<br />
Table C-1 Physical specifications<br />
Height Depth Width Weight 1<br />
308 mm (12.13 inches) 363 mm (14.3 inches) 437 mm (17.2 inches) 8.3 kg (18.4 lb)<br />
1 Weight does not include print cartridge, which weighs 0.7 kg (1.5 lb).<br />
Electrical specifications<br />
CAUTION Power requirements are based on the country/region where the device is sold. Do<br />
not convert operating voltages. This will damage the device and void the product warranty.<br />
Table C-2 Electrical specifications<br />
Item 110-volt models 220-volt models<br />
Power requirements 110 to 127 V (+/- 10%)<br />
50 / 60 Hz (+/- 2 Hz)<br />
Rated current 3.5 A 2.5 A<br />
Power consumption<br />
Table C-3 Power consumption (average, in watts) 1 , 2<br />
220 to 240 V (+/- 10%)<br />
50 / 60 Hz (+/- 2 Hz)<br />
Printing Copying Ready/Sleep 3 Off<br />
227 W 227 W 6 W 0.1 W<br />
1 Values are based on preliminary data. See www.hp.com/support/ljm1005 for current information.<br />
2 Power reported is highest values measured for monochrome printing/copying using all standard voltages.<br />
3 The default time from Ready mode to Sleep mode and the recovery time from Sleep mode to start of printing is less than<br />
10 seconds because of instant-on fusing.<br />
4 Maximum heat dissipation for all models in Ready mode = 51.2 BTU/hour.<br />
5 Print speed is 15 ppm letter-size and 14 ppm A4-size.<br />
Environmental specifications<br />
Table C-4 Environmental specifications<br />
(Device and print cartridge)<br />
Temperature<br />
Recommended 1 Operating 1 Storage 1<br />
20° to 27°C<br />
(68° to 81°F)<br />
15° to 32.5°C<br />
(59° to 90.5°F)<br />
0° to 40°C<br />
(32° to 104°F)<br />
Relative humidity 20% to 70% 10% to 80% 90% or less<br />
1 Values are subject to change. See the support Web sites listed in <strong>HP</strong> Customer Care for current information.<br />
114 Appendix C Device specifications <strong>ENWW</strong>
Acoustic emissions<br />
Table C-5 Acoustic emissions 1 , 2<br />
Sound Power Level Declared per ISO 9296<br />
Printing (15 ppm) 3 L WAd = 6.3 Bels (A) [63 dB (A)]<br />
Ready Essentially Inaudible<br />
Sound Pressure Level - Bystander Position Declared per ISO 9296<br />
Printing (15 ppm) 3 L pAm = 49 dB (A)<br />
Ready Essentially Inaudible<br />
1 Values are based on preliminary data. See www.hp.com/support/ljm1005 for current information.<br />
2 Configuration tested: <strong>HP</strong> <strong>LaserJet</strong> <strong>M1005</strong> <strong>MFP</strong>, letter.<br />
3 Print speed is 15 ppm letter-size and 14 ppm A4-size.<br />
<strong>ENWW</strong> Acoustic emissions 115
116 Appendix C Device specifications <strong>ENWW</strong>
D Regulatory information<br />
This section contains the following regulatory information:<br />
● FCC compliance<br />
● Environmental Product Stewardship program<br />
● Declaration of conformity<br />
● Country-/region-specific safety statements<br />
<strong>ENWW</strong> 117
FCC compliance<br />
This equipment has been tested and found to comply with the limits for a Class B digital device,<br />
pursuant to Part 15 of the FCC rules. These limits are designed to provide reasonable protection<br />
against harmful interference in a residential installation. This equipment generates, uses, and can<br />
radiate radio frequency energy. If it is not installed and used in accordance with the instructions, it<br />
may cause harmful interference to radio communications. However, there is no guarantee that<br />
interference will not occur in a particular installation. If this equipment does cause harmful<br />
interference to radio or television reception, which can be determined by turning the equipment off<br />
and on, the <strong>user</strong> is encouraged to try to correct the interference by one or more of the following<br />
measures:<br />
● Reorient or relocate the receiving antenna.<br />
● Increase separation between equipment and receiver.<br />
● Connect equipment to an outlet on a circuit different from that to which the receiver is located.<br />
● Consult your dealer or an experienced radio/TV technician.<br />
NOTE Any changes or modifications to the printer that are not expressly approved by<br />
Hewlett-Packard could void the <strong>user</strong>'s authority to operate this equipment.<br />
Use of a shielded interface cable is required to comply with the Class B limits of Part 15 of<br />
FCC rules.<br />
Environmental Product Stewardship program<br />
Protecting the environment<br />
Hewlett-Packard Company is committed to providing quality products in an environmentally sound<br />
manner. This product has been designed with several attributes to minimize impacts on our<br />
environment.<br />
Ozone production<br />
This product generates no appreciable ozone gas (O3).<br />
Power consumption<br />
Power usage drops significantly while in PowerSave/Sleep mode, which saves natural resources and<br />
saves money without affecting the high performance of this product. This product qualifies for<br />
ENERGY STAR® (Version 1.0), which is a voluntary program established to encourage the<br />
development of energy-efficient office products.<br />
118 Appendix D Regulatory information <strong>ENWW</strong>
ENERGY STAR is a U.S. registered service mark of the U.S. Environmental Protection Agency. As<br />
an ENERGY STAR® partner, Hewlett-Packard Company has determined that this product meets<br />
ENERGY STAR® Guidelines for energy efficiency. For more information, see www.energystar.gov.<br />
Toner consumption<br />
EconoMode uses significantly less toner, which might extend the life of the print cartridge.<br />
Paper use<br />
The device manual duplex features (two-sided printing) (see Printing on both sides for Windows and<br />
Printing on both sides (Macintosh) for Macintosh) and N-up printing capability (multiple pages printed<br />
on one sheet) (see Printing multiple pages on one sheet of paper for Windows and Printing multiple<br />
pages on one sheet of paper (Macintosh) for Macintosh) can reduce paper usage and the resulting<br />
demands on natural resources.<br />
Plastics<br />
Plastic parts over 25 grams are marked according to international standards that enhance the ability<br />
to identify plastics for recycling purposes at the end of the device's life.<br />
<strong>ENWW</strong> Environmental Product Stewardship program 119
<strong>HP</strong> <strong>LaserJet</strong> printing supplies<br />
It's easy to return and recycle your empty <strong>HP</strong> <strong>LaserJet</strong> print cartridges—free of charge—with<br />
<strong>HP</strong> Planet Partners. <strong>HP</strong> is committed to providing inventive, high-quality products and services that<br />
are environmentally sound, from product design and manufacturing to distribution, operation, and<br />
recycling processes. We ensure your returned <strong>HP</strong> <strong>LaserJet</strong> print cartridges are recycled properly,<br />
processing them to recover valuable plastics and metals for new products and diverting millions of<br />
tons of waste from landfills. Since this cartridge is being recycled and used in new materials, it will<br />
not be returned to you. Your empty <strong>HP</strong> <strong>LaserJet</strong> print cartridges are recycled responsibly when you<br />
participate in the <strong>HP</strong> Planet Partners program. Thank you for being environmentally responsible!<br />
In many countries/regions, this product's printing supplies (for example, the print cartridge, drum) can<br />
be returned to <strong>HP</strong> through the <strong>HP</strong> Printing Supplies Returns and Recycling Program. An easy-to-use<br />
and free takeback program is available in more than 35 countries/regions. Multilingual program<br />
information and instructions are included in every new <strong>HP</strong> <strong>LaserJet</strong> print cartridge and supplies<br />
package.<br />
<strong>HP</strong> Printing Supplies Returns and Recycling Program Information<br />
Since 1992, <strong>HP</strong> has offered <strong>HP</strong> <strong>LaserJet</strong> supplies return and recycling free of charge. In 2004,<br />
<strong>HP</strong> Planet Partners for <strong>LaserJet</strong> Supplies was available in 85% of the world market where<br />
<strong>HP</strong> <strong>LaserJet</strong> supplies are sold. Postage-paid and pre-addressed labels are included within the<br />
instruction <strong>guide</strong> in most <strong>HP</strong> <strong>LaserJet</strong> print cartridge boxes. Labels and bulk boxes are also available<br />
through the Web site: www.hp.com/go/recycle.<br />
Use the label to return empty, original <strong>HP</strong> <strong>LaserJet</strong> print cartridges only. Please do not use this label<br />
for non-<strong>HP</strong> cartridges, refilled or remanufactured cartridges, or warranty returns. Printing supplies or<br />
other objects inadvertently sent to the <strong>HP</strong> Planet Partners program cannot be returned.<br />
More than 10 million <strong>HP</strong> <strong>LaserJet</strong> print cartridges were recycled globally in 2004 through the<br />
<strong>HP</strong> Planet Partners supplies recycling program. This record number represents 26 million pounds of<br />
print cartridge materials diverted from landfills. Worldwide, in 2004, <strong>HP</strong> recycled an average of 59%<br />
of the print cartridge by weight consisting primarily of plastic and metals. Plastics and metals are<br />
used to make new products such as <strong>HP</strong> products, plastic trays and spools. The remaining materials<br />
are disposed of in an environmentally responsible manner.<br />
U.S. returns<br />
For a more environmentally responsible return of used cartridges and supplies, <strong>HP</strong> encourages the<br />
use of bulk returns. Simply bundle two or more cartridges together and use the single, pre-paid, preaddressed<br />
UPS label that is supplied in the package. For more information in the U.S., call<br />
1-800-340-2445 or visit the <strong>HP</strong> Web site at www.hp.com/go/recycle.<br />
Non-U.S. returns<br />
Non-U.S. customers should visit the www.hp.com/go/recycle Web site for further information<br />
regarding availability of the <strong>HP</strong> Printing Supplies Returns and Recycling Program.<br />
Paper<br />
This device is capable of using recycled papers, when the paper meets the <strong>guide</strong>lines outlined in the<br />
<strong>HP</strong> <strong>LaserJet</strong> Printer Family Print Media Guide, which you can view on the Web at www.hp.com/<br />
support/ljpaper<strong>guide</strong>. This product is suitable for the use of recycled paper according to<br />
EN12281:2002.<br />
Material restrictions<br />
This <strong>HP</strong> product does not contain added mercury. This <strong>HP</strong> product does not contain batteries.<br />
120 Appendix D Regulatory information <strong>ENWW</strong>
Disposal of waste equipment by <strong>user</strong>s in private household in the<br />
European Union<br />
This symbol on the product or on its packaging indicates that this product must not be disposed of<br />
with your other household waste. Instead, it is your responsibility to dispose of your waste equipment<br />
by handing it over to a designated collection point for the recycling of waste electrical and electronic<br />
equipment. The separate collection and recycling of your waste equipment at the time of disposal will<br />
help to conserve natural resources and ensure that it is recycled in a manner that protects human<br />
health and the environment. For more information about where you can drop off your waste<br />
equipment for recycling, please contact your local city office, your household waste disposal service<br />
or the shop where you purchased the product.<br />
Material safety data sheet<br />
Material safety data sheets (MSDS) for supplies containing chemical substances (for example, toner)<br />
can be obtained by visiting the <strong>HP</strong> Web site at: www.hp.com/go/msds or www.hp.com/hpinfo/<br />
community/environment/productinfo/safety.<br />
For more information<br />
Visit www.hp.com/go/environment or www.hp.com/hpinfo/community/environment/productinfo/safety<br />
for more information about the following environmental topics.<br />
● Product environmental profile sheet for this and many related <strong>HP</strong> products<br />
● Hewlett Packard's commitment to the environment<br />
● Hewlett Packard's environmental management system<br />
● Hewlett Packard's end-of-life product return and recycling program<br />
● MSDS<br />
<strong>ENWW</strong> Environmental Product Stewardship program 121
Declaration of conformity<br />
Declaration of Conformity<br />
according to ISO/IEC Guide 22 and EN 45014<br />
Manufacturer's Name: Hewlett-Packard Company<br />
Manufacturer's Address: 11311 Chinden Boulevard,<br />
Boise, Idaho 83714-1021, USA<br />
declares, that the product<br />
Product Names: <strong>HP</strong> <strong>LaserJet</strong> <strong>M1005</strong> <strong>MFP</strong> series<br />
Regulatory Model Number3) BOISB-0207-01<br />
Print Cartridge Q2612A<br />
Product Options: ALL<br />
conforms to the following Product Specifications:<br />
Safety: IEC 60950-1:2001 / EN60950-1: 2001 +A11<br />
IEC 60825-1:1993 +A1 +A2<br />
EN 60825-1:1994 +A1 +A2 (Class 1 Laser/LED Product)<br />
GB4943-2001<br />
EMC: CISPR22:2003 +A1 / EN55022:2005 - Class B1) EN 61000-3-2:2000<br />
EN 61000-3-3:1995 +A1<br />
EN 55024:1998 +A1 +A2<br />
FCC Title 47 CFR, Part 15 Class B2) / ICES-003, Issue 4<br />
GB9254-1998, GB17625.1-2003<br />
Supplementary Information:<br />
The product herewith complies with the requirements of the EMC Directive 89/336/EEC and the Low Voltage Directive 73/23/EEC, and<br />
carries the CE-Marking accordingly.<br />
1) The product was tested in a typical configuration with Hewlett-Packard Personal Computer Systems.<br />
2) This Device complies with Part 15 of the FCC Rules. Operation is subject to the following two Conditions: (1) this device may not cause<br />
harmful interference, and (2) this device must accept any interference received, including interference that may cause undesired operation.<br />
3) For regulatory purposes, this product is assigned a Regulatory model number. This number should not be confused with the marketing<br />
name or the product number(s).<br />
Boise, Idaho 83713, USA<br />
January 1, 2006<br />
For regulatory topics only:<br />
Australia Contact: Product Regulations Manager, Hewlett-Packard Australia Ltd., 31-41 Joseph Street, Blackburn, Victoria 3130,<br />
Australia<br />
European Contact: Your Local Hewlett-Packard Sales and Service Office or Hewlett-Packard GmbH, Department HQ-TRE /<br />
Standards Europe, Herrenberger Strasse 140, Böblingen, D-71034, Germany, (FAX: +49-7031-14-3143)<br />
USA Contact: Product Regulations Manager, Hewlett-Packard Company, PO Box 15, Mail Stop 160, Boise, Idaho 83707-0015,<br />
USA, (Phone: 208-396-6000)<br />
122 Appendix D Regulatory information <strong>ENWW</strong>
Country-/region-specific safety statements<br />
Laser safety statement<br />
The Center for Devices and Radiological Health (CDRH) of the U.S. Food and Drug Administration<br />
has implemented regulations for laser products manufactured since August 1, 1976. Compliance is<br />
mandatory for products marketed in the United States. The printer is certified as a "Class 1" laser<br />
product under the U.S. Department of Health and Human Services (DHHS) Radiation Performance<br />
Standard according to the Radiation Control for Health and Safety Act of 1968.<br />
Since radiation emitted inside the printer is completely confined within protective housings and<br />
external covers, the laser beam cannot escape during any phase of normal <strong>user</strong> operation.<br />
WARNING! Using controls, making adjustments, or performing procedures other than those<br />
specified in this <strong>user</strong> <strong>guide</strong> may result in exposure to hazardous radiation.<br />
Canadian DOC statement<br />
Complies with Canadian EMC Class B requirements.<br />
«Conforme à la classe B des normes canadiennes de compatibilité électromagnétiques (CEM).»<br />
Korean EMI statement<br />
<strong>ENWW</strong> Country-/region-specific safety statements 123
Finnish laser statement<br />
LASERTURVALLISUUS<br />
LUOKAN 1 LASERLAITE<br />
KLASS 1 LASER APPARAT<br />
<strong>HP</strong> <strong>LaserJet</strong> <strong>M1005</strong> <strong>MFP</strong> - laserkirjoitin on käyttäjän kannalta turvallinen luokan 1<br />
laserlaite. Normaalissa käytössä kirjoittimen suojakotelointi estää lasersäteen pääsyn<br />
laitteen ulkopuolelle.<br />
Laitteen turvallisuusluokka on määritetty standardin EN60825-1 (1994) mukaisesti.<br />
VAROITUS!<br />
Laitteen käyttäminen muulla kuin käyttöohjeessa mainitulla tavalla saattaa altistaa<br />
käyttäjän turvallisuusluokan 1 ylittävälle näkymättömälle lasersäteilylle.<br />
VARNING!<br />
Om apparaten används på annat sätt än i bruksanvisning specificerats, kan användaren<br />
utsättas för osynlig laserstrålning, som överskrider gränsen för laserklass 1.<br />
HUOLTO<br />
<strong>HP</strong> <strong>LaserJet</strong> <strong>M1005</strong> <strong>MFP</strong> -kirjoittimen sisällä ei ole käyttäjän huollettavissa olevia kohteita.<br />
Laitteen saa avata ja huoltaa ainoastaan sen huoltamiseen koulutettu henkilö. Tällaiseksi<br />
huoltotoimenpiteeksi ei katsota väriainekasetin vaihtamista, paperiradan puhdistusta tai<br />
muita käyttäjän käsikirjassa lueteltuja, käyttäjän tehtäväksi tarkoitettuja ylläpitotoimia, jotka<br />
voidaan suorittaa ilman erikoistyökaluja.<br />
VARO!<br />
Mikäli kirjoittimen suojakotelo avataan, olet alttiina näkymättömälle lasersäteilylle laitteen<br />
ollessa toiminnassa. Älä katso säteeseen.<br />
VARNING!<br />
Om laserprinterns skyddshölje öppnas då apparaten är i funktion, utsättas användaren för<br />
osynlig laserstrålning. Betrakta ej strålen.<br />
Tiedot laitteessa käytettävän laserdiodin säteilyominaisuuksista:<br />
Aallonpituus 770-800 nm<br />
Teho 5 mW<br />
Luokan 3B laser<br />
124 Appendix D Regulatory information <strong>ENWW</strong>
Glossary<br />
browser Short for Web browser, a software program that is used to locate and open Web pages.<br />
contrast The difference between the dark and light areas of an image. The lower the number value, the more<br />
closely the shades resemble each other. The higher the number, the more the shades appear separate from<br />
each other.<br />
dots per inch (dpi) A measurement of resolution that is used for printing. Generally, more dots per inch result<br />
in a higher resolution, more visible detail in the image, and a larger file size.<br />
e-mail (electronic mail) An abbreviation for electronic mail. Software that can be used to electronically<br />
transmit items over a communications network.<br />
file format The way the contents of a file are structured by a program or group of programs.<br />
grayscale Shades of gray that represent light and dark portions of an image when color images are<br />
converted to grayscale; colors are represented by various shades of gray.<br />
halftone An image type that simulates grayscale by varying the number of dots. Highly colored areas consist<br />
of a large number of dots, while lighter areas consist of a smaller number of dots.<br />
link A connection to a program or device that can be used to send information from the device software to<br />
other programs, such as e-mail or OCR links.<br />
optical character recognition (OCR) software OCR software converts an electronic image of text, such as<br />
a scanned document, into a form that word processor, spreadsheet, and database programs can use.<br />
pixels per inch (ppi) A measurement of resolution that is used for scanning. Generally, more pixels per inch<br />
result in a higher resolution, more visible detail in the image, and a larger file size.<br />
printer driver A printer driver is a program that software programs use to gain access to device features. A<br />
printer driver translates software program formatting commands (such as page breaks and font selection) into a<br />
printer language, and then sends the print file to the device.<br />
Readiris An optical character recognition (OCR) program that was developed by I.R.I.S. and that is included<br />
with the device software.<br />
resolution The sharpness of an image, measured in dots per inch (dpi). The higher the dpi, the greater the<br />
resolution.<br />
surge protector A device that protects a power supply and communications lines from electrical surges.<br />
TWAIN An industry standard for scanners and software. By using a TWAIN-compliant scanner with a TWAINcompliant<br />
program, a scan can be initiated from within the program.<br />
URL Uniform resource locator, the global address of documents and resources on the Internet. The first part<br />
of the address indicates what protocol to use, the second part specifies the IP address or the domain name<br />
where the resource is located.<br />
<strong>ENWW</strong> Glossary 125
USB Universal serial bus (USB) is a standard that was developed by the USB Implementers Forum, Inc., to<br />
connect computers and peripherals. USB is designed to concurrently connect a single computer USB port to<br />
multiple peripherals.<br />
watermarks A watermark adds background text to a document that is being printed. For example,<br />
“Confidential” can be printed in the background text of a document to indicate that the document is confidential.<br />
A selection can be made from a set of predefined watermarks, and the font, size, angle, and style can be<br />
changed. The printer can place the watermark on the first page only or all pages.<br />
WIA Windows Imaging Architecture (WIA) is an imaging architecture that is available in Windows Me and<br />
Windows XP. A scan can be initiated from within these operating systems by using a WIA-compliant scanner.<br />
126 Glossary <strong>ENWW</strong>
Index<br />
Symbols/Numerics<br />
600 dpi print-quality setting 85<br />
A<br />
accessibility features 2<br />
accessories<br />
ordering 110<br />
part numbers 104<br />
acoustic emissions 115<br />
alert messages 82<br />
Apple Macintosh. See Macintosh<br />
archive print 41<br />
B<br />
background, gray 87<br />
bands, troubleshooting 87<br />
battery specifications 120<br />
bin, output<br />
capacity 2<br />
jams, clearing 80<br />
locating 3<br />
black and white scanning 64<br />
blank copies, troubleshooting 96<br />
blank pages<br />
adding to printouts 34<br />
troubleshoooting 92<br />
blank scans, troubleshooting 98<br />
books<br />
copying 54<br />
scanning 61<br />
both sides, copying 52<br />
both sides, printing on<br />
Macintosh 39<br />
Windows 35<br />
buttons, control panel 4<br />
C<br />
cables<br />
part numbers 104<br />
USB, troubleshooting 92<br />
Canadian DOC statement 123<br />
canceling<br />
copy jobs 44<br />
print jobs 42<br />
scan jobs 59<br />
capacity<br />
output bin 2<br />
priority input slot 21<br />
tray 1 22<br />
trays 21<br />
card stock<br />
<strong>guide</strong>lines for using 19<br />
printing on 17<br />
priority input tray, loading 26<br />
specifications 21<br />
cartridge-door release, locating 3<br />
cartridges<br />
<strong>HP</strong> fraud hotline 67<br />
part numbers 104<br />
recycling 67, 120<br />
replacing 71<br />
status, checking 67<br />
storing 67, 114<br />
warranty 109<br />
characters, troubleshooting 88<br />
cleaning<br />
exterior 69<br />
glass 69<br />
lid backing 69<br />
cleaning page, printing 70<br />
color, scanning settings 63, 64<br />
colored paper, specifications 17<br />
Configuration report 66<br />
contrast settings, copy 46<br />
control panel<br />
buttons 4<br />
display, troubleshooting 99<br />
language, selecting 29<br />
locating 3<br />
messages, troubleshooting 82<br />
copying<br />
books 54<br />
canceling 44<br />
contrast, adjusting 46<br />
enlarging 47<br />
media settings 50<br />
media, troubleshooting 94<br />
multiple pages per sheet 48<br />
number of copies 49<br />
photos 54<br />
quality, adjusting 44<br />
quality, troubleshooting 93<br />
reducing 47<br />
size, troubleshooting 96<br />
starting a job 44<br />
troubleshooting 96<br />
two-sided documents 52<br />
viewing settings 55<br />
covers, document<br />
Macintosh 38<br />
paper specifications 21<br />
Windows settings 34<br />
creases, troubleshooting 89<br />
crooked pages 89, 91<br />
curled media 89, 102<br />
custom paper sizes<br />
driver settings 34<br />
printing on 17<br />
Customer Care 110<br />
customer support<br />
availability of 110<br />
service agreements 110<br />
telephone 110<br />
Web sites 110<br />
D<br />
dark copying 94<br />
darkness settings, copy 46<br />
declaration of conformity 122<br />
<strong>ENWW</strong> Index 127
default media size and type, setting<br />
29<br />
defaults, restoring 102<br />
Demo page, printing 66<br />
dimensions, device 114<br />
dots per inch (dpi)<br />
print settings 85<br />
specifications 2<br />
dots, troubleshooting 87<br />
double-sided copying 52<br />
double-sided printing<br />
Macintosh 39<br />
Windows 35<br />
dpi (dots per inch)<br />
print settings 85<br />
specifications 2<br />
drivers<br />
help, Windows 8<br />
Macintosh settings 37<br />
Macintosh, troubleshooting 100<br />
presets (Macintosh) 37<br />
quick sets (Windows) 32<br />
settings, changing 9<br />
supported 8<br />
system requirements 6<br />
Windows settings 32<br />
dropouts, troubleshooting 87<br />
duplexing<br />
Macintosh 39<br />
Windows 35<br />
E<br />
e-mail, resolution settings for 64<br />
electrical specifications 114<br />
energy consumption 118<br />
Energy Star compliance 2<br />
enlarging documents<br />
copying 47<br />
printing 33<br />
envelopes<br />
<strong>guide</strong>lines for using 18<br />
priority input tray, loading 26<br />
storing 19<br />
tray capacity 21<br />
Environmental Product<br />
Stewardship program 118<br />
environmental specifications<br />
device 114<br />
paper 23<br />
EPS files, troubleshooting 100<br />
error messages<br />
control panel 82<br />
critical 83<br />
European Union regulations 121<br />
extended warranty 111<br />
F<br />
factory-set defaults, restoring 102<br />
faded print 86<br />
FastRes 2<br />
FCC compliance 118<br />
features 2<br />
feeding problems, troubleshooting<br />
91<br />
Finnish laser statement 124<br />
first page<br />
blank 34<br />
Macintosh settings 38<br />
Windows settings 34<br />
flatbed scanner<br />
cleaning 69<br />
loading 26<br />
fraud hotline 67<br />
G<br />
glass, cleaning 69<br />
glossary of terms 125<br />
gray background, troubleshooting<br />
87<br />
grayscale scanning 64<br />
H<br />
hardware service 111<br />
heavy paper<br />
<strong>guide</strong>lines for using 19<br />
printing on 17<br />
priority input tray, loading 26<br />
specifications 21<br />
help, Windows printer drivers 8<br />
<strong>HP</strong> Customer Care 110<br />
<strong>HP</strong> fraud hotline 67<br />
<strong>HP</strong> <strong>LaserJet</strong> Scan (Windows) 59<br />
<strong>HP</strong> Printing Supplies Returns and<br />
Recycling Program 120<br />
humidity specifications<br />
device environment 114<br />
paper, storing 23<br />
I<br />
image quality<br />
cleaning page, printing 70<br />
copy, troubleshooting 93<br />
print, troubleshooting 85, 86<br />
scans, troubleshooting 97, 98<br />
information pages<br />
Configuration 66<br />
Demo 66<br />
language, selecting 29<br />
Menu structure 66<br />
ink cartridges. See print cartridges<br />
input trays. See trays<br />
installation, software<br />
Macintosh 11<br />
programs included 7<br />
interface ports<br />
cables, ordering 104<br />
troubleshooting Macintosh 100<br />
types included 2<br />
J<br />
jams<br />
causes of 76<br />
input tray, clearing 78<br />
locating 77<br />
output bins, clearing 80<br />
preventing 76<br />
print-cartridge area, clearing 80<br />
K<br />
keys, control panel 4<br />
Korea EMI statement 123<br />
L<br />
labels<br />
<strong>guide</strong>lines for using 17<br />
tray capacity 21<br />
language, control panel display 29<br />
laser safety statements 123<br />
<strong>LaserJet</strong> Scan (Windows) 59<br />
last page, blank 34<br />
letterhead 20<br />
lid, cleaning 69<br />
light copying 94<br />
light print, troubleshooting 86<br />
lightness, copy contrast setting 46<br />
lines, troubleshooting<br />
copies 93<br />
printed pages 87<br />
scans 98<br />
loading<br />
input trays 26<br />
originals on flatbed scanner 26<br />
128 Index <strong>ENWW</strong>
priority input tray 26<br />
tray 1 27<br />
loose toner, troubleshooting 88<br />
M<br />
Macintosh<br />
driver settings 9, 37<br />
driver supported 8<br />
drivers, troubleshooting 100<br />
installing software 11<br />
problems, solving 100<br />
scanning from TWAINcompliant<br />
software 60<br />
special media, printing on 41<br />
support Web sites 110<br />
supported operating systems 6<br />
uninstalling software 11<br />
USB card, troubleshooting 100<br />
material safety data sheet 121<br />
media<br />
colored paper 17<br />
copy settings 50<br />
curled 102<br />
curled, troubleshooting 89<br />
custom sizes, setting 34<br />
custom-sized, printing on 17<br />
default size, changing 29<br />
document size, selecting 33<br />
first page, Macintosh settings<br />
38<br />
first page, Windows settings 34<br />
<strong>HP</strong>, part numbers 104<br />
jams 76<br />
loading input trays 26<br />
pages per sheet, copying 48<br />
pages per sheet, Macintosh 38<br />
pages per sheet, Windows 34<br />
priority input tray 26<br />
recommended 14<br />
selecting 14<br />
special, Macintosh settings 41<br />
specifications 21<br />
tray selection 28<br />
troubleshooting 16, 90<br />
types to avoid 14<br />
wrinkled 89<br />
memory<br />
specifications 2<br />
Menu structure, printing 66<br />
mercury specifications 120<br />
messages<br />
control panel 82<br />
critical 83<br />
Microsoft Windows. See Windows<br />
multiple pages per sheet<br />
copying 48<br />
Macintosh 38<br />
Windows 34<br />
N<br />
n-up copying 48<br />
n-up printing<br />
Macintosh 38<br />
Windows 34<br />
noise specifications 115<br />
number of copies, changing 49<br />
O<br />
OCR software 62<br />
on/off switch, locating 3<br />
online help, Windows printer drivers<br />
8<br />
operating environment,<br />
specifications 114<br />
operating systems supported 6, 8<br />
optical character recognition<br />
software 62<br />
options. See settings<br />
ordering supplies and accessories<br />
104, 110<br />
originals, loading 26<br />
output bin<br />
capacity 2<br />
jams, clearing 80<br />
locating 3<br />
output quality<br />
cleaning page, printing 70<br />
copy, troubleshooting 93<br />
print, troubleshooting 85, 86<br />
scans, troubleshooting 97, 98<br />
ozone specifications 118<br />
P<br />
Page Setup 28<br />
pages<br />
blank 92<br />
not printing 92<br />
skewed 89, 91<br />
pages per minute 2<br />
pages per sheet<br />
Macintosh 38<br />
WIndows 34<br />
paper<br />
colored 17<br />
copy settings 50<br />
curled, troubleshooting 89, 102<br />
custom sizes, setting 34<br />
custom-sized, printing on 17<br />
default size, changing 29<br />
document size, selecting 33<br />
first page, Macintosh settings<br />
38<br />
first page, Windows settings 34<br />
<strong>HP</strong>, part numbers 104<br />
jams 76<br />
loading input trays 26<br />
pages per sheet, copying 48<br />
pages per sheet, Macintosh 38<br />
pages per sheet, Windows 34<br />
priority input tray 26<br />
recommended 14<br />
selecting 14<br />
special media, Macintosh<br />
settings 41<br />
specifications 21<br />
tray selection 28<br />
troubleshooting 16, 90<br />
types to avoid 14<br />
wrinkled 89<br />
paper path, cleaning 70<br />
part numbers<br />
cables 104<br />
media 104<br />
supplies 104<br />
<strong>user</strong>-replaceable parts 104<br />
parts, <strong>user</strong>-replaceable 104<br />
phone numbers<br />
<strong>HP</strong> fraud hotline 67<br />
<strong>HP</strong> Printing Supplies Returns<br />
and Recycling Program 120<br />
support 110<br />
photos<br />
copying 54<br />
scanning 61<br />
scanning, troubleshooting 97<br />
physical specifications 114<br />
pick-up rollers, ordering 104<br />
pixels per inch (ppi), scanning<br />
resolution 63<br />
ports<br />
cables, ordering 104<br />
<strong>ENWW</strong> Index 129
troubleshooting Macintosh 100<br />
types included 2<br />
power<br />
consumption 118<br />
requirements 114<br />
troubleshooting 74<br />
power consumption 114<br />
power switch, locating 3<br />
ppi (pixels per inch), scanning<br />
resolution 63<br />
preprinted paper 20<br />
presets (Macintosh drivers) 37<br />
print cartridge area jams, clearing<br />
80<br />
print cartridges<br />
door release, locating 3<br />
<strong>HP</strong> fraud hotline 67<br />
part numbers 104<br />
recycling 67, 120<br />
replacing 71<br />
status, checking 67<br />
storing 67, 114<br />
warranty 109<br />
Print dialog box 28<br />
Print Document On 33<br />
print jobs, canceling 42<br />
print media. See media<br />
print quality<br />
cleaning page, printing 70<br />
settings 85<br />
troubleshooting 85, 86<br />
printer drivers<br />
help, Windows 8<br />
Macintosh settings 37<br />
Macintosh, troubleshooting 100<br />
presets (Macintosh) 37<br />
quick sets (Windows) 32<br />
settings, changing 9<br />
supported 8<br />
system requirements 6<br />
Windows settings 32<br />
printing<br />
blank pages, adding 34<br />
both sides, Macintosh 39<br />
both sides, Windows 35<br />
canceling 42<br />
cover pages, Macintosh 38<br />
covers, Windows 34<br />
custom paper sizes 34<br />
custom-size media 17<br />
multiple pages per sheet,<br />
Macintosh 38<br />
multiple pages per sheet,<br />
Windows 34<br />
presets, Macintosh 37<br />
quick sets, Windows 32<br />
resizing documents 33<br />
settings, changing 28<br />
tray selection 28<br />
troubleshooting 92<br />
watermarks, Windows 33<br />
priority input slot<br />
loading 26<br />
locating 3<br />
paper specifications 21<br />
problem solving. See<br />
troubleshooting<br />
Q<br />
quality<br />
cleaning page, printing 70<br />
copy settings 44<br />
copy, troubleshooting 93<br />
print settings 85<br />
print, troubleshooting 85, 86<br />
scans, troubleshooting 97, 98<br />
quick sets (Windows drivers) 32<br />
R<br />
Readiris OCR software 62<br />
recycling supplies 67, 120<br />
reducing documents<br />
copying 47<br />
printing 33<br />
regulatory information 118<br />
repacking the device 112<br />
repair. See service<br />
repetitive defects, troubleshooting<br />
88, 90<br />
replacing print cartridges 71<br />
reports<br />
Configuration report 66<br />
Demo page 66<br />
language, selecting 29<br />
Menu structure 66<br />
resizing documents<br />
copying 47<br />
printing 33<br />
resolution<br />
features 2<br />
print settings 85<br />
scanning 63<br />
specifications 2<br />
restoring factory-set defaults 102<br />
rollers, ordering 104<br />
S<br />
saving driver settings<br />
Macintosh presets 37<br />
Windows quick sets 32<br />
scaling documents<br />
copying 47<br />
printing 33<br />
scanner glass, cleaning 69<br />
scanning<br />
black and white 64<br />
blank pages, troubleshooting<br />
98<br />
books 61<br />
canceling 59<br />
color 63<br />
grayscale 64<br />
<strong>HP</strong> <strong>LaserJet</strong> Scan (Windows)<br />
59<br />
loading originals on flatbed<br />
scanner 26<br />
methods 58<br />
OCR software 62<br />
photos 61<br />
quality, troubleshooting 97, 98<br />
resolution 63<br />
speed, troubleshooting 97<br />
TWAIN-compliant software 60<br />
WIA-compliant software 60<br />
scatter, troubleshooting 90<br />
separation pad, ordering 104<br />
serial number, product 66<br />
service<br />
critical error messages 83<br />
hardware 111<br />
part numbers 104<br />
service agreements 110<br />
settings<br />
changing 9<br />
Configuration report 66<br />
factory-set defaults, restoring<br />
102<br />
presets (Macintosh drivers) 37<br />
print jobs 28<br />
130 Index <strong>ENWW</strong>
quick sets (Windows drivers)<br />
32<br />
size, copy<br />
reducing or enlarging 47<br />
troubleshooting 96<br />
size, device 114<br />
sizes, media<br />
default, changing 29<br />
selecting trays by 28<br />
supported 21<br />
skewed pages 89, 91<br />
slow speed, troubleshooting<br />
printing 92<br />
scanning 97<br />
smeared toner, troubleshooting 88<br />
software<br />
included 7<br />
Macintosh, installing 11<br />
Readiris OCR 62<br />
scanning from TWAIN or WIA<br />
60<br />
settings, changing 9<br />
supported operating systems 6<br />
system requirements 6<br />
uninstalling on Macintosh 11<br />
uninstalling on Windows 10<br />
source, printing by 28<br />
special media<br />
Macintosh settings 41<br />
specifications 17<br />
specifications<br />
acoustic emissions 115<br />
electrical 114<br />
environmental 114<br />
features 2<br />
paper 21<br />
physical 114<br />
specks, troubleshooting 87<br />
speed<br />
print specifications 2<br />
printing, troubleshooting 92<br />
scanning, troubleshooting 97<br />
spots, troubleshooting 87<br />
status, supplies 67<br />
stopping printing 42<br />
storing<br />
device 114<br />
envelopes 19<br />
paper 23<br />
print cartridges 67<br />
streaks, troubleshooting 87<br />
supplies<br />
<strong>HP</strong> fraud hotline 67<br />
ordering 110<br />
recycling 67, 120<br />
status, checking 67<br />
storing 67<br />
support<br />
availability of 110<br />
service agreements 110<br />
telephone 110<br />
Web sites 110<br />
system requirements 6<br />
T<br />
technical support<br />
availability of 110<br />
service agreements 110<br />
telephone 110<br />
Web sites 110<br />
telephone numbers<br />
<strong>HP</strong> fraud hotline 67<br />
<strong>HP</strong> Printing Supplies Returns<br />
and Recycling Program 120<br />
support 110<br />
temperature specifications<br />
device environment 114<br />
paper, storing 23<br />
terminology 125<br />
text, troubleshooting 88<br />
toner<br />
cleaning page, printing 70<br />
loose, troubleshooting 88<br />
scatter, troubleshooting 90<br />
smeared, troubleshooting 88<br />
specks, troubleshooting 87<br />
toner cartridges. See print<br />
cartridges<br />
transparencies<br />
<strong>guide</strong>lines for using 17<br />
priority input tray, loading 26<br />
tray capacity 21<br />
tray 1<br />
loading media 27<br />
loading paper 26<br />
locating 3<br />
paper specifications 22<br />
trays<br />
capacities 2<br />
Configuration report 66<br />
feeding problems,<br />
troubleshooting 91<br />
jams, clearing 78<br />
loading 26<br />
loading paper 26<br />
locating 3<br />
paper specifications 21, 22<br />
selecting 28<br />
troubleshooting<br />
blank pages 92<br />
blank scans 98<br />
checklist 74<br />
cleaning page 70<br />
control panel display problems<br />
99<br />
control panel messages 82<br />
copy quality 93<br />
copy size 96<br />
copying 96<br />
critical error messages 83<br />
curled media 89, 102<br />
EPS files 100<br />
faded print 86<br />
feeding problems 91<br />
jams 76<br />
lines, copies 93<br />
lines, printed pages 87<br />
lines, scans 98<br />
loose toner 88<br />
Macintosh problems 100<br />
pages not printing 92<br />
paper 16, 90<br />
print quality 85<br />
repetitive defects 88, 90<br />
scan quality 97, 98<br />
skewed pages 89, 91<br />
text 88<br />
toner scatter 90<br />
toner smear 88<br />
toner specks 87<br />
USB cables 92<br />
wrinkles 89<br />
TWAIN-compliant software,<br />
scanning from 60<br />
two-sided copying 52<br />
two-sided printing<br />
Macintosh 39<br />
Windows 35<br />
types, media<br />
default, changing 29<br />
<strong>ENWW</strong> Index 131
selecting trays by 28<br />
specifications 21<br />
U<br />
uninstalling Macintosh software 11<br />
uninstalling Windows software 10<br />
USB port<br />
locating 3<br />
troubleshooting connection 92<br />
troubleshooting Macintosh 100<br />
type included 2<br />
Use Different Paper/Covers 34<br />
<strong>user</strong>-replaceable parts 104<br />
V<br />
vertical lines, troubleshooting 87<br />
vertical white or faded stripes 93<br />
voltage requirements 114<br />
W<br />
warning messages 82<br />
warranty<br />
device 108<br />
extended 111<br />
print cartridges 109<br />
waste disposal 121<br />
watermarks, Windows 33<br />
wavy paper, troubleshooting 89<br />
Web sites<br />
Energy Star 119<br />
<strong>HP</strong> Customer Care 110<br />
<strong>HP</strong> Printing Supplies Returns<br />
and Recycling Program 120<br />
Macintosh support 110<br />
material safety data sheet 121<br />
ordering supplies 103<br />
supplies, ordering 110<br />
weight<br />
device 114<br />
paper specifications 21<br />
white or faded stripes 93<br />
WIA-compliant software, scanning<br />
from 60<br />
Windows<br />
driver settings 32<br />
driver supported 8<br />
help, printer-driver 8<br />
scanning from TWAIN or WIA<br />
software 60<br />
settings, changing 9<br />
supported operating systems 6<br />
uninstalling software 10<br />
wrinkles, troubleshooting 89<br />
132 Index <strong>ENWW</strong>
© 2006 Hewlett-Packard Development Company, L.P.<br />
www.hp.com<br />
*CB376-90911*<br />
*CB376-90911*<br />
CB376-90911